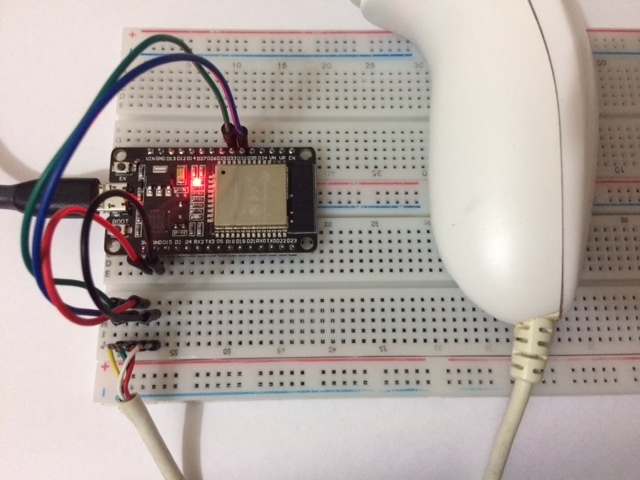
Dies ist eine Bibliothek zur Verwendung des Wii Nunchuk mit dem ESP32 über I2C. Es kann sowohl mit der Arduino IDE als auch mit Code direkt über ESP-IDF verwendet werden. Um die Bibliothek in Ihrem Arduino IDE-Sketch zu verwenden, kopieren Sie einfach die Dateien wii_i2c.c und wii_i2c.h in Ihr Sketch-Verzeichnis.
Diese Bibliothek verwendet die ESP-IDF I2C-API, da die Arduino Wire-Bibliothek im ESP32 mit Wii-Controllern nicht zuverlässig funktioniert.

Diese Bibliothek unterstützt den Wii Nunchuk und den Wii Classic Controller . Es sollte nicht schwierig sein, es mit den im Wiibrew-Projekt verfügbaren Informationen an die Arbeit mit anderen I2C-Geräten anzupassen, die an die Wiimote angeschlossen werden (wie Classic Controller Pro, Wii Motion Plus usw.), aber ich habe keines dieser Geräte also ich weiß es nicht genau.
Die Arduino Wire Library für den ESP32 (von Wire.h ) verwendet I2C-Port 0 für das Wire Objekt und Port 1 für das Wire1 -Objekt. Verwenden Sie Wire also nicht, wenn Sie I2C-Port 0 mit dieser Bibliothek verwenden, und verwenden Sie Wire1 nicht, wenn Sie I2C-Port 1 verwenden.
Hier ist ein einfaches Beispiel mit dem Wii-Nunchuk. Ein ausführlicheres Beispiel, das mehrere Controller-Typen erkennt und verarbeitet, finden Sie unter esp32-wii-nunchuk.ino .
# include " wii_i2c.h "

// pins connected to the Nunchuk:
# define PIN_SDA 32
# define PIN_SCL 33

// ESP32 I2C port (0 or 1):
# define WII_I2C_PORT 0

void setup ()
{
  Serial. begin ( 115200 );

  if ( wii_i2c_init (WII_I2C_PORT, PIN_SDA, PIN_SCL) != 0 ) {
    Serial. printf ( " Error initializing nunchuk :( " );
    return ;
  }
  wii_i2c_request_state ();
}

void loop ()
{
  const unsigned char *data = wii_i2c_read_state ();
  wii_i2c_request_state ();
  if (! data) {
    Serial. printf ( " no data available :( " )
  } else {
    wii_i2c_nunchuk_state state;
    wii_i2c_decode_nunchuk (data, &state);
    Serial. printf ( " Stick position: (%d,%d) n " , state. x , state. y );
    Serial. printf ( " C button is %s n " , (state. c ) ? " pressed " : " not pressed " );
    Serial. printf ( " Z button is %s n " , (state. z ) ? " pressed " : " not pressed " );
  }
  delay ( 1000 );
}Wenn Sie zeitkritischen Code haben, der nicht auf die Antwort des Controllers warten kann, verwenden Sie die API-Funktion, die eine Aufgabe erzeugt, die den Controller-Status in einem anderen Kern liest. Zum Beispiel:
# include " wii_i2c.h "

// pins connected to the controller:
# define PIN_SDA 32
# define PIN_SCL 33

// ESP32 I2C port (0 or 1):
# define WII_I2C_PORT 0

// CPU id where the task will run (1=the core
// where your code usually runs, 0=the other core):
# define READ_TASK_CPU 0

// delay in milliseconds between controller reads:
# define READ_DELAY 30

static unsigned int controller_type;

void setup ()
{
  Serial. begin ( 115200 );

  if ( wii_i2c_init (WII_I2C_PORT, PIN_SDA, PIN_SCL) != 0 ) {
    Serial. printf ( " Error initializing nunchuk :( " );
    return ;
  }

  // if you want to read the controller identity,
  // do it BEFORE starting the read task:
  const unsigned char *ident = wii_i2c_read_ident ();
  controller_type = wii_i2c_decode_ident (ident);

  // start the a task that reads the controller state in a different CPU:
  if ( wii_i2c_start_read_task (READ_TASK_CPU, READ_DELAY) != 0 ) {
    Serial. printf ( " Error creating task to read controller state " );
    return ;
  }
}

void loop ()
{
  // this function always returns quickly, either
  // with new data or NULL if data isn't ready:
  const unsigned char *data = wii_i2c_read_data_from_task ();
  if (data) {
     // decode data according to controller_type:
     //   wii_i2c_decode_nunchuk(data, &nunchuk_state);
     //   wii_i2c_decode_classic(data, &classic_state);
  }

  // do other timing-sensitive stuff
}