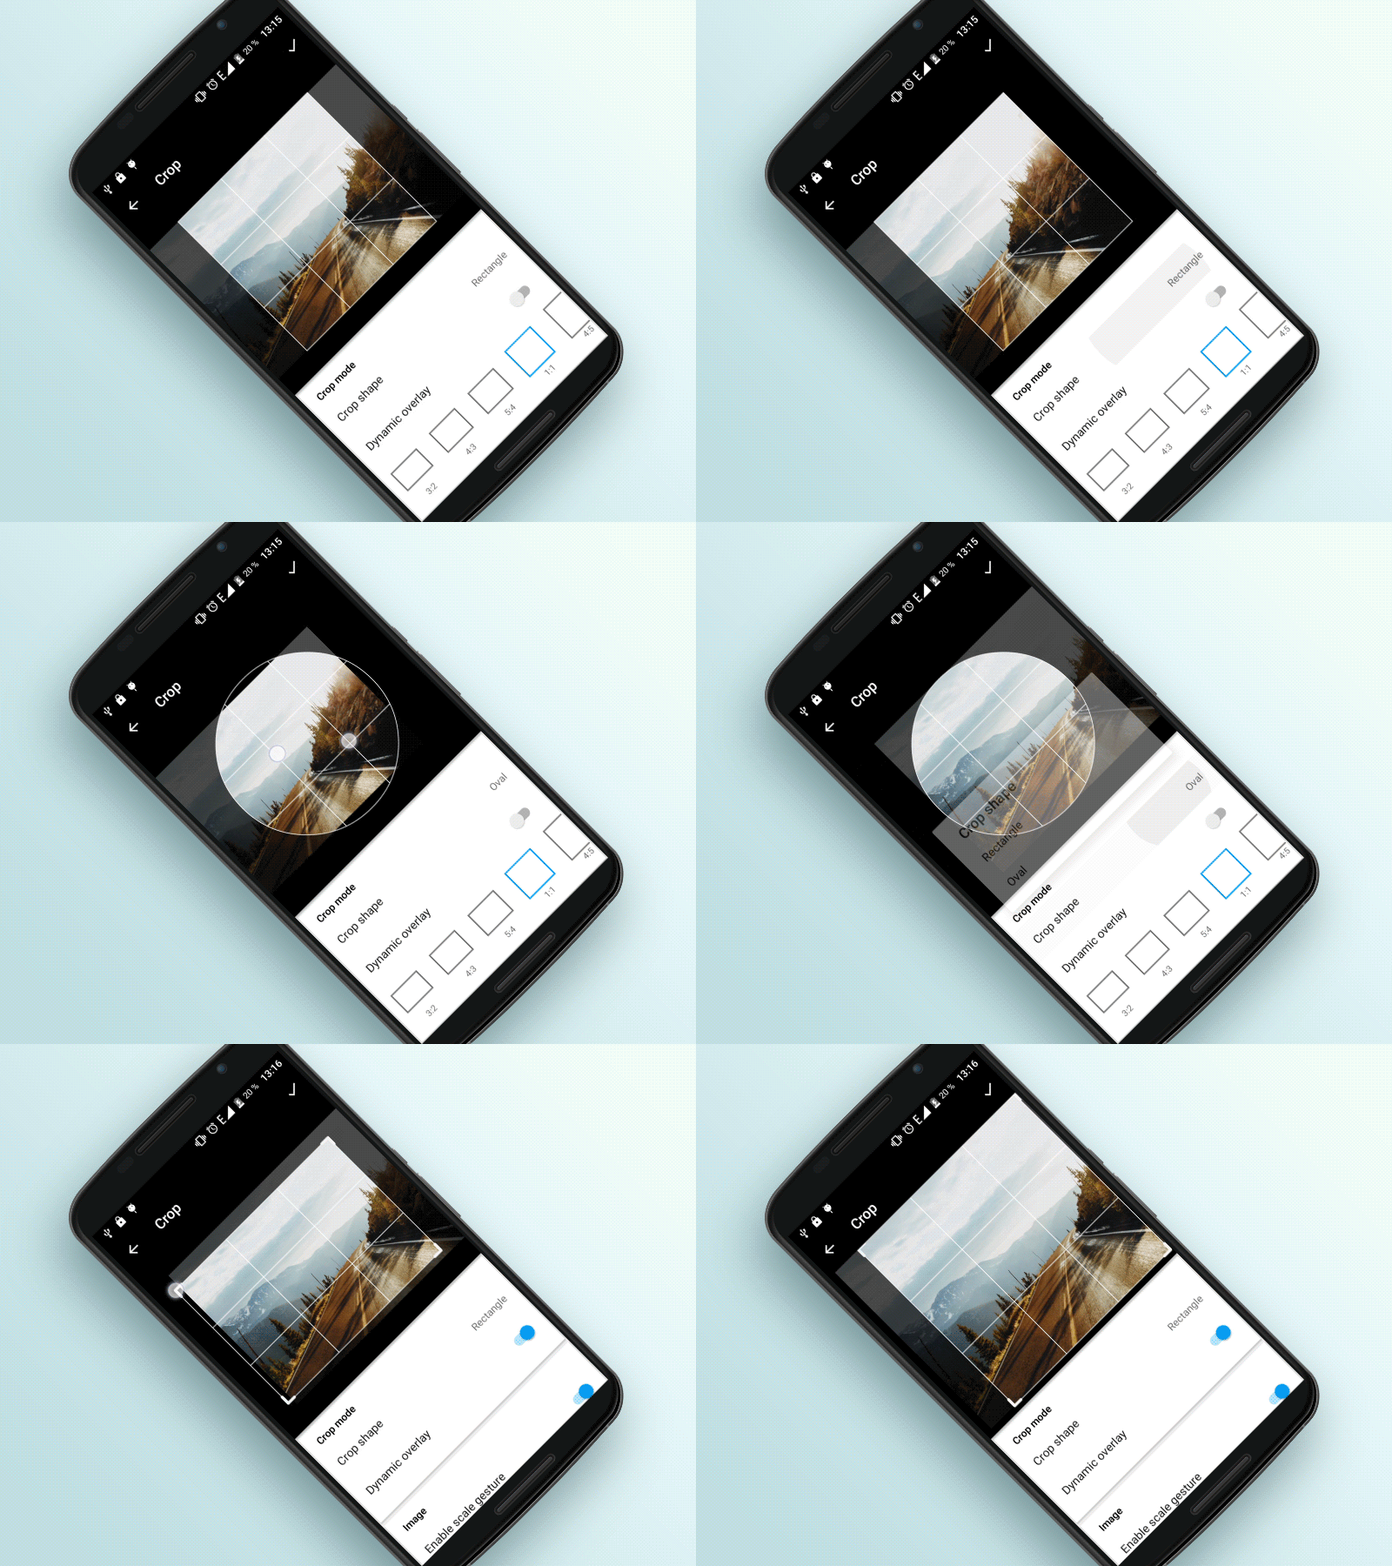
Die Bibliothek ist ein hochgradig konfigurierbares Widget zum Zuschneiden von Bildern.

Fügen Sie dies Ihrem Abhängigkeitsblock hinzu.
compile 'com.steelkiwi:cropiwa:1.0.3'
Beispiele für die Nutzung der Bibliothek finden Sie in der Beispiel-App.
Die Bibliothek verfügt über eine modulare Architektur, die sie in hohem Maße konfigurierbar macht. Informationen zur Konfiguration CropIwaView finden Sie in den folgenden Abschnitten.
Eine der nützlichen Funktionen besteht darin, dass Sie nicht auf ein Ergebnis warten müssen – nachdem die Zuschneideanfrage abgeschlossen ist, wechseln Sie einfach zu einem anderen Bildschirm und warten Sie auf das Ergebnis in Form einer Übertragung.
Fügen Sie CropIwa zu Ihrer XML hinzu:
< com .steelkiwi.cropiwa.CropIwaView
  android : id = " @+id/crop_view "
  android : layout_width = " match_parent "
android : layout_height = " match_parent " /> cropView . crop ( new CropIwaSaveConfig . Builder ( destinationUri )
. setCompressFormat ( Bitmap . CompressFormat . PNG )
. setSize ( outWidth , outHeight ) //Optional. If not specified, SRC dimensions will be used
. setQuality ( 100 ) //Hint for lossy compression formats
. build ());Rückruf zum Speichern des zugeschnittenen Bereichs. Wenn die Zuschneideanforderung abgeschlossen ist, wird eine Übertragung gesendet. Sie können es entweder mit der CropIwaView-Instanz anhören
 cropView . setCropSaveCompleteListener ( bitmapUri -> {
  //Do something
});

cropView . setErrorListener ( error -> {
  //Do something
});
oder direkt mit einem Rundfunkempfänger arbeiten. Der Vorteil besteht darin, dass es von jedem Teil der App aus verwendet werden kann, in dem Sie Zugriff auf Context haben.
 CropIwaResultReceiver resultReceiver = new CropIwaResultReceiver ();
resultReceiver . setListener ( resultListener );
resultReceiver . register ( context );

//Don't forget to unregister it when you are done
resultReceiver . unregister ( context );
Sie können Änderungen in den Konfigurationen von CropIwaView abonnieren. Zuhörer werden jedes Mal benachrichtigt, wenn .apply() aufgerufen wird.
 cropIwaView . configureOverlay (). addConfigChangeListener ( listener );
cropIwaView . configureImage (). addConfigChangeListener ( listener ) app : ci_dynamic_aspect_ratio = "true|false"
cropView . configureOverlay ()
. setDynamicCrop ( enabled )
. apply (); app : ci_draw_grid = "true|false"
cropView . configureOverlay ()
. setShouldDrawGrid ( draw )
. apply (); app : ci_aspect_ratio_w = "16"
app : ci_aspect_ratio_h = "9"
cropView . configureOverlay ()
. setAspectRatio ( new AspectRatio ( 16 , 9 ))
. setAspectRatio ( AspectRatio . IMG_SRC ) //If you want crop area to be equal to the dimensions of an image
. apply (); app : ci_initial_position = "centerCrop|centerInside"
cropView . configureImage ()
. setImageInitialPosition ( position )
. apply (); //Value is a float from 0.01f to 1
cropIwaView . configureImage ()
. setScale ( scale )
. apply (); app : ci_scale_enabled = "true|false"
cropView . configureImage ()
. setImageScaleEnabled ( enabled )
. apply (); app : ci_translation_enabled = "true|false"
cropView . configureImage ()
. setImageTranslationEnabled ( enabled )
. apply (); app : ci_crop_shape = "rectangle|oval"
cropView . configureOverlay ()
. setCropShape ( new CropIwaRectShape ( cropView . configureOverlay ()))
. setCropShape ( new CropIwaOvalShape ( cropView . configureOverlay ()))
. apply (); app : ci_max_scale = "1f"
cropView . configureImage ()
. setMinScale ( minScale )
. setMaxScale ( maxScale )
. apply (); app : ci_min_crop_width = "40dp"
app : ci_min_crop_height = "40dp"
cropView . configureOverlay ()
. setMinWidth ( dps )
. setMinHeight ( dps )
. apply (); app : ci_border_width = "1dp"
app : ci_corner_width = "1dp"
app : ci_grid_width = "1dp"
cropView . configureOverlay ()
. setBorderStrokeWidth ( dps )
. setCornerStrokeWidth ( dps )
. setGridStrokeWidth ( dps )
. apply (); app : ci_border_color = "#fff"
app : ci_corner_color = "#fff"
app : ci_grid_color = "#fff"
app : ci_overlay_color = "#fff"
cropView . configureOverlay ()
. setBorderColor ( Color . WHITE )
. setCornerColor ( Color . WHITE )
. setGridColor ( Color . WHITE )
. setOverlayColor ( Color . WHITE )
. apply (); Sie können direkt mit Paint Objekten arbeiten. Dadurch haben Sie beispielsweise die Möglichkeit, ein Raster mit gestricheltem Effekt zu zeichnen.
 Paint gridPaint = cropView . configureOverlay ()
  . getCropShape ()
  . getGridPaint ();
gridPaint . setPathEffect ( new DashPathEffect ( new float [] { interval , interval }, 0 ));
Auf die gleiche Weise können Sie auch andere Paint erhalten.
 CropIwaOverlayConfig config = cropView . configureOverlay ();
CropIwaShape shape = config . getCropShape ();
shape . getGridPaint ();
shape . getBorderPaint ();
shape . getCornerPaint ();
Sie können auch benutzerdefinierte Zuschnittbereichsformen erstellen. Erweitern Sie einfach CropIwaShape (ein Beispiel finden Sie unter CropIwaOvalShape) und legen Sie eine Instanz Ihrer Klasse fest, indem Sie Folgendes verwenden:
 cropView . configureOverlay ()
  . setCropShape ( new MyAwesomeShape ())
. apply (); Copyright © 2017 SteelKiwi, http://steelkiwi.com
Licensed under the Apache License, Version 2.0 (the "License");
you may not use this file except in compliance with the License.
You may obtain a copy of the License at
http://www.apache.org/licenses/LICENSE-2.0
Unless required by applicable law or agreed to in writing, software
distributed under the License is distributed on an "AS IS" BASIS,
WITHOUT WARRANTIES OR CONDITIONS OF ANY KIND, either express or implied.
See the License for the specific language governing permissions and
limitations under the License.