
Go to ComfyUI/custom_nodes
Clone this repo, path should be ComfyUI/custom_nodes/x-flux-comfyui/*, where * is all the files in this repo
Go to ComfyUI/custom_nodes/x-flux-comfyui/ and run python setup.py
Run ComfyUI after installing and enjoy!
After the first launch, the ComfyUI/models/xlabs/loras and ComfyUI/models/xlabs/controlnets folders will be created automatically.
So, to use lora or controlnet just put models in these folders.
After that, you may need to click "Refresh" in the user-friendly interface to use the models.
For controlnet you need install https://github.com/Fannovel16/comfyui_controlnet_aux
You can launch Flux utilizing 12GB VRAM memory usage.
Follow installation as described in repo https://github.com/city96/ComfyUI-GGUF
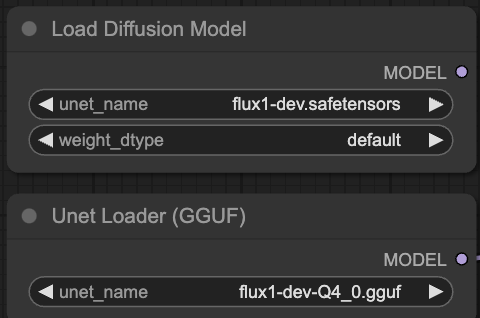
Use flux1-dev-Q4_0.gguf from repo https://github.com/city96/ComfyUI-GGUF
Launch ComfyUI with parameters:
python3 main.py --lowvram --preview-method auto --use-split-cross-attention
In our workflows, replace "Load Diffusion Model" node with "Unet Loader (GGUF)"

We trained Canny ControlNet, Depth ControlNet, HED ControlNet and LoRA checkpoints for FLUX.1 [dev]
You can download them on HuggingFace:
flux-controlnet-collections
flux-controlnet-canny
flux-RealismLora
flux-lora-collections
flux-furry-lora
flux-ip-adapter
Update x-flux-comfy with git pull or reinstall it.
Download Clip-L model.safetensors from OpenAI VIT CLIP large, and put it to ComfyUI/models/clip_vision/*.
Download our IPAdapter from huggingface, and put it to ComfyUI/models/xlabs/ipadapters/*.
Use Flux Load IPAdapter and Apply Flux IPAdapter nodes, choose right CLIP model and enjoy your genereations.
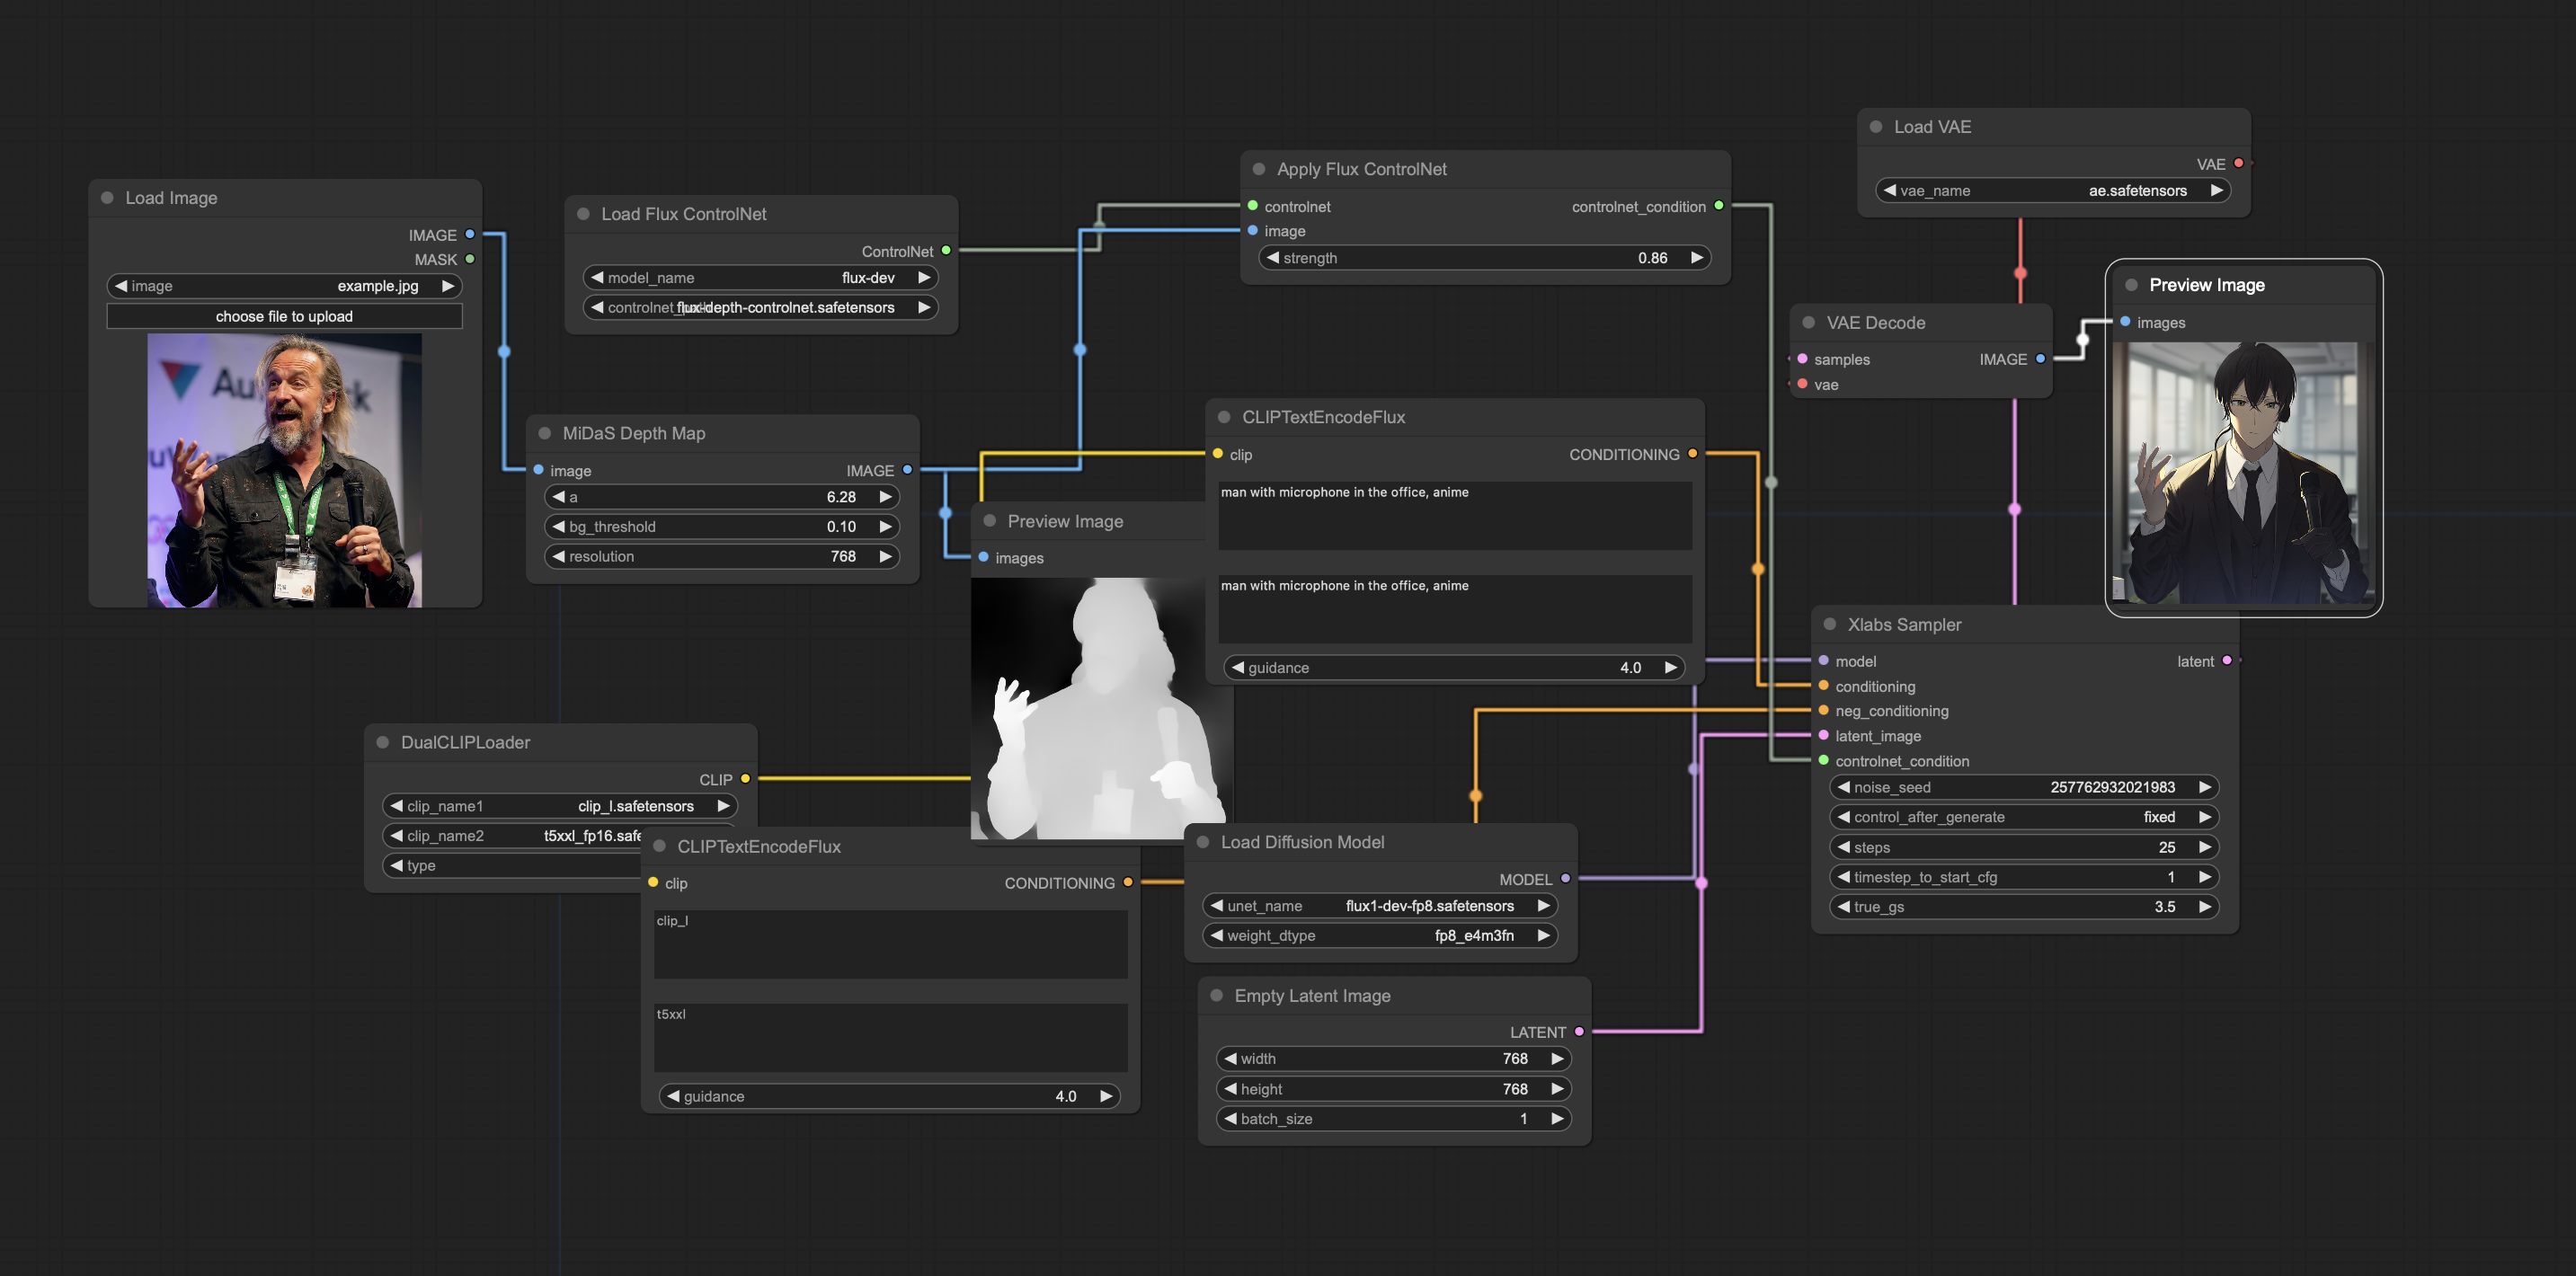
You can find example workflow in folder workflows in this repo.
The IP Adapter is currently in beta. We do not guarantee that you will get a good result right away, it may take more attempts to get a result. But we will make efforts to make this process easier and more efficient over time.