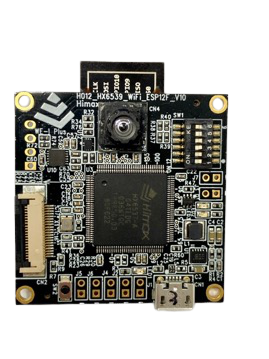
Himax-AIoT-WiFi-G1 platforms EVB includes Himax WE-I Plus MCU, image sensor and rich peripheral supports. The details are given in the following paragraph.
Hardware user guide PDF
Operating system
Development toolkit
GNU Development Toolkit
See ARC GNU Tool Chain section for more detail, current released GNU version is GNU Toolchain for ARC Processors, 2021.03. After download and extract toolkit to local space, please remember to add it to environment PATH. For example:
export PATH=[location of your ARC_GNU_ROOT]/bin:$PATH
Tools can be found in Himax-AIoT-WiFi-G1-SDK/tools/
Default building toolchain setting in makefile is Metaware Development toolkit(mw), please change it to gnu in Makefile(Himax-AIoT-WiFi-G1-SDK/makefile).
ARC_TOOLCHAIN ?= gnu
Before building, you need to change permission in Himax-AIoT-WiFi-G1-SDKtoolsimage_gen_cstmoutput directory.
chmod 777 *
Build code & generate image. The output images will be named output.img and saved under Himax-AIoT-WiFi-G1-SDKtoolsimage_gen_cstmoutput.
make clean && make && make flash
Use the following procedure to startup the Himax-AIoT-WiFi-G1 platform EVB.
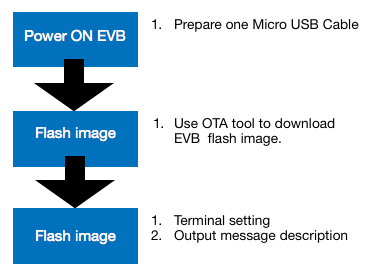
All following steps are done in Windows.
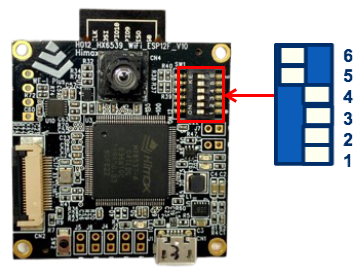
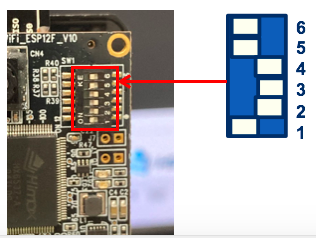
Step 1: Follow image below to switch pins on Himax-AIoT-WiFi-G1 Platform EVB.
Step 2: Connect with PC USB to power on Himax-AIoT-WiFi-G1 Platform EVB.
Step 3: Check if you can see UART Message Output. If no, refer to Boot from i2c to flash image.
Step 4: Use /tools/OTA_Tools/ota.exe to download EVB image.
Step 4.1:
Open OTA.exe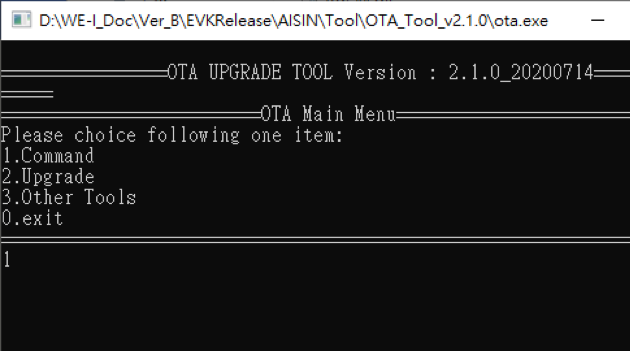
Step 4.2:
Select 1.Command->1.Intoupg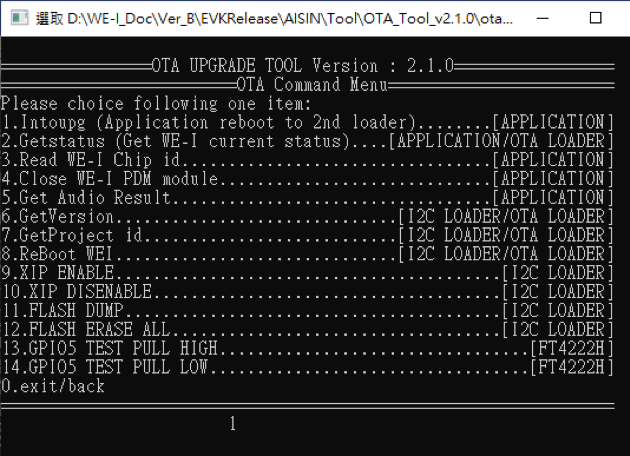
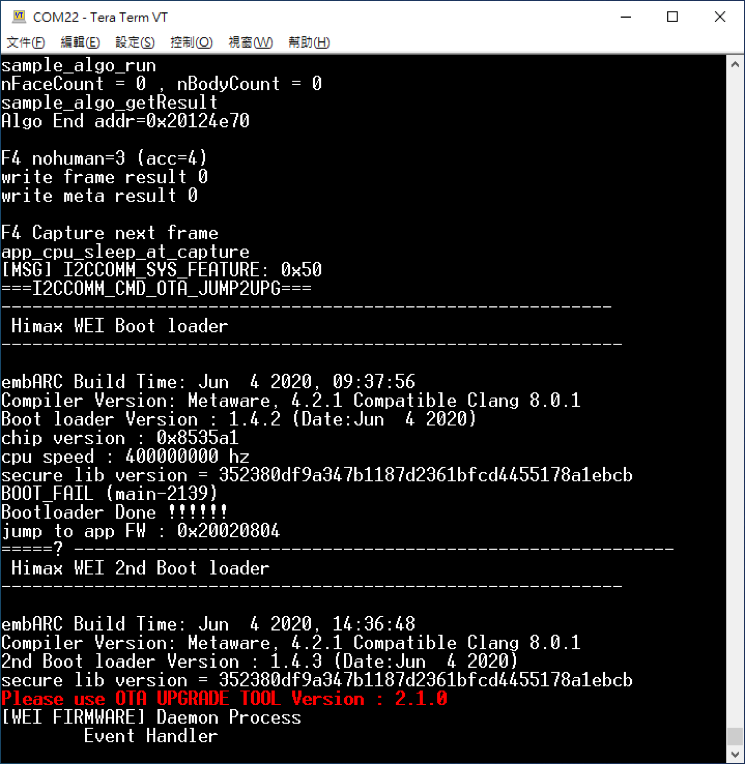
If sucessful, the highlight message "Please use OTA UPGRADE TOOL Version : x.x.x" will be shown in TeraTerm. Now the device is ready for OTA flash programming.
Step 4.3:
Switch back to OTA tool and select 2.Upgrade->1.FORCE UPGRADE to start upgrade image.
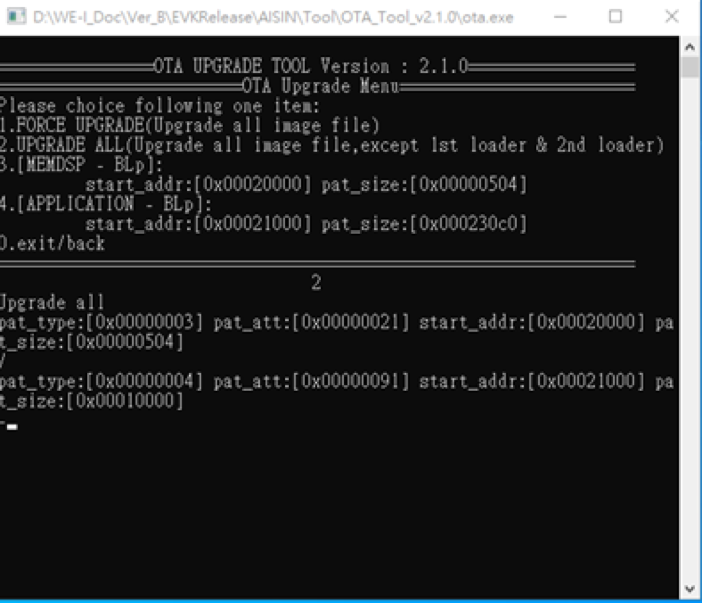
Step 4.4: Wait for a while, the device will reboot when flash process complete.
If OTA process isn't accessible, boot from i2c to reload 2nd bootloader to fix problem.
Step 1: Connect with PC USB to power on Himax-AIoT-WiFi-G1 Platform EVB.
Step 2: Turn pin #1 switch on & press Reset button to reset.
Step 3: Excute OTA.exe on /tools/OTA_Tools/ and select
3.Other Tools->1.Boot from I2C.
Step 4: Enter the input files path manually:BootUpFromI2CHX6537-A09TDIG-1111V_QFN72_Debugsign_formal_PA8530_EM9D_2nd_Bootloader.bin.
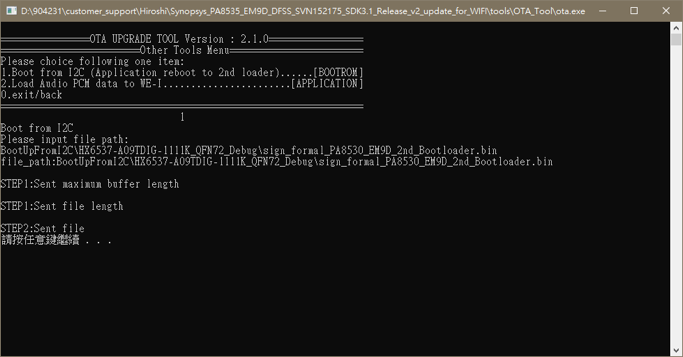
The board will reboot & enter 2nd boot loader, you will see the message "Please use OTA UPGRADE TOOL Version : x.x.x" that is the same as normal OTA process. Now, just follow normal Flash Image via OTA tool section to complete process.

Serial Terminal Emulation Application Setting
| Baud Rate | 115200 bps |
| Data | 8 bit |
| Parity | none |
| Stop | 1 bit |
| Flow control | none |
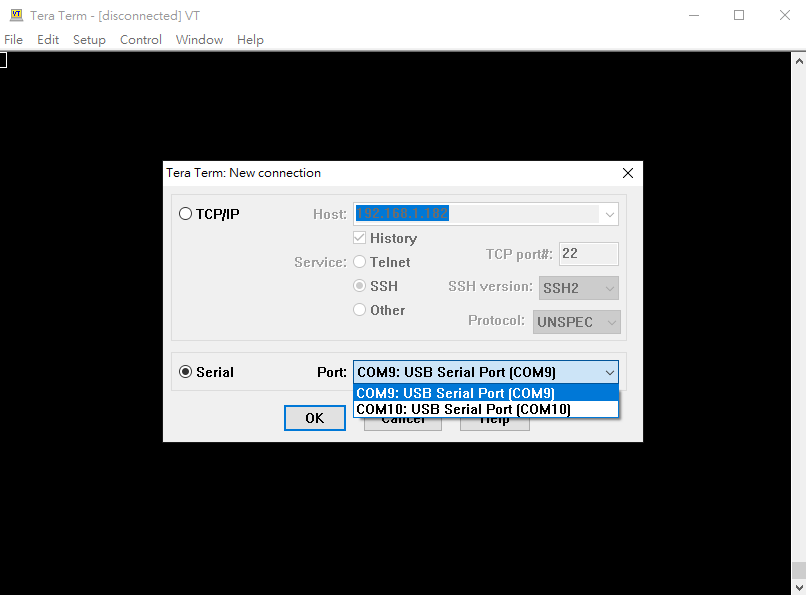
The system will output the following message to the UART console. Please setup UART terminal tool setting as (115200/8/N/1).
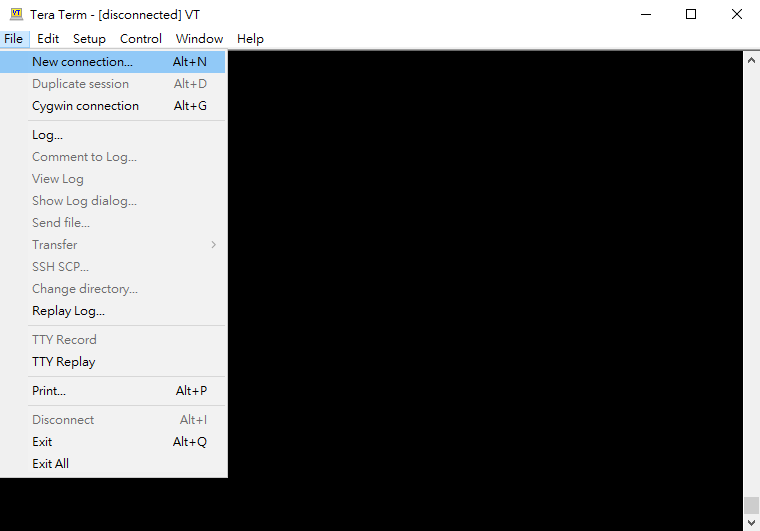
Display Log Message In the example, we use TeraTerm to see the output message.
TeraTerm New Connection
TeraTerm Select COM Port
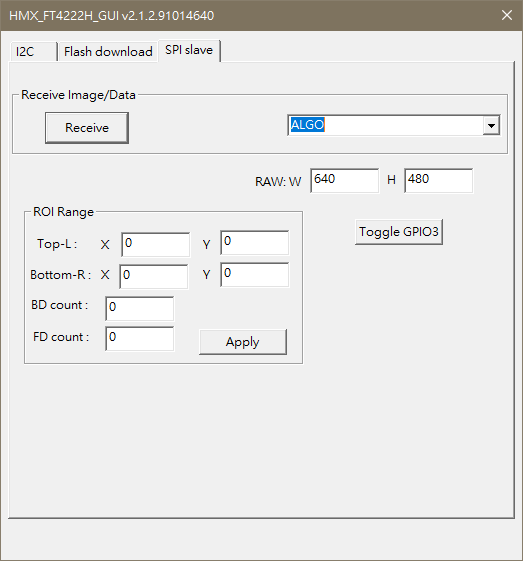
Excute GUI tool HMX_FT4222H_GUI.exe under toolsHMX_FT4222H_GUIGUI_binary.
Select 'SPI slave' tab.
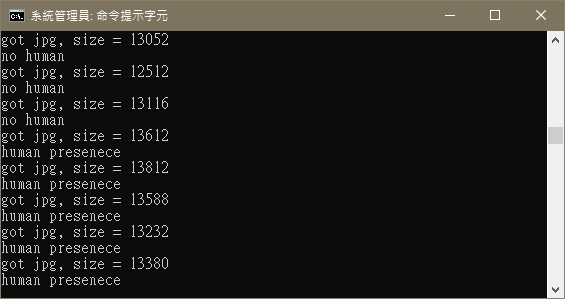
In Receive Image/Data field, select 'ALGO' then click the 'Receive' button.
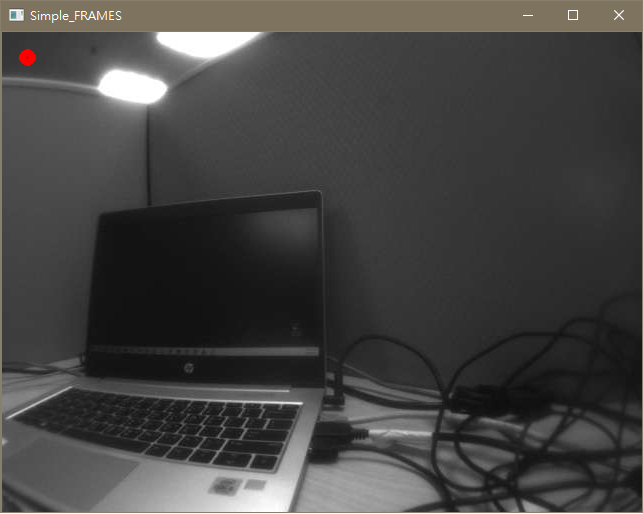
The GUI PC_Tool will pop a new window 'Simple_FRAMES' to display the captured image and the person detection result.
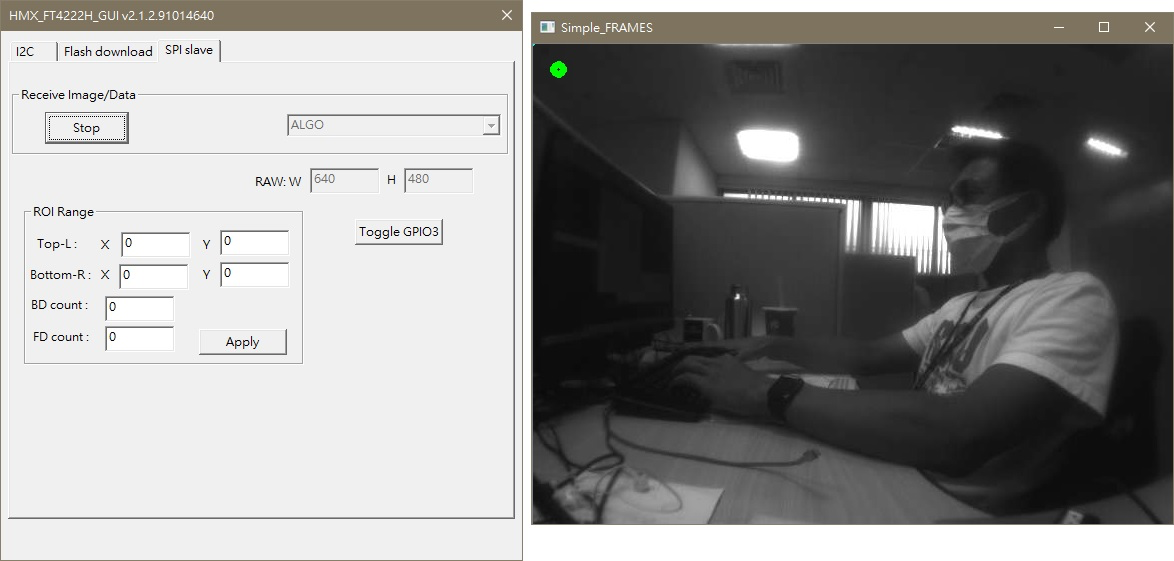
In the 'Simple_FRAMES' window, the left-top indicator disply whether human is presence or not.
Green (human detect); Red (no human detect).

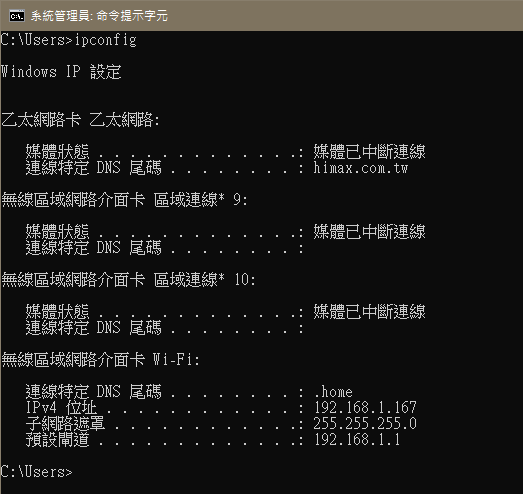
1.1. Connect your Win10 PC to WiFi AP.
1.2. Use ipconfig to get the IP Address of your PC.
1.3. Execute tcp_server_example.py on tools/tcp_server_example/
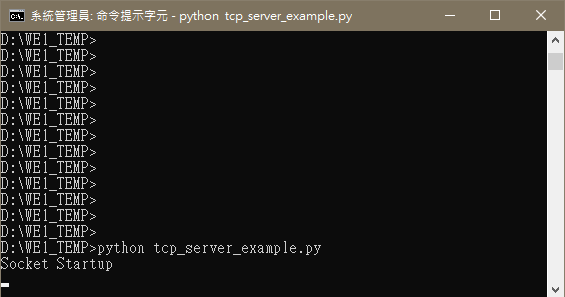
1.4. The tcp_server_example is ready to receive data.
#define SSID "your_wifi_ssid" //your wifi ssid
#define PASSWD "your_wifi_password" //you wifi password
#define SERVER_IP "192.168.1.100" //your tcp server ip