
Pinokio is a browser that lets you locally install, run, and automate any AI on your computer. Everything you can run in your command line can be automated with Pinokio script, with a user-friendly UI.
You can use Pinokio to automate anything, including:
Install AI apps and models
Manage and Run AI apps
Create workflows to orchestrate installed AI apps
Run any command to automate things on your machine
and more...
Here's what makes Pinokio special:
Local: Everything gets installed and runs locally. None of your data is stored on someone else's server.
Free: Pinokio is an open source application that is 100% free to use with no restriction. There is no one to pay for API access, since everything runs on your local machine. Play with AI as much as you want, for free forever.
Private: You don't need to worry about submitting private data just to run AI, everything runs 100% privately on your own machine.
User-friendly Interface: Pinokio provides a user-friendly GUI for running and automating anything that you would normally need to use the terminal for.
Batteries Included: Pinokio is a self-contained system. You do not need to install any other program. Pinokio can automate anything, including program/library installations. The only program you need is Pinokio.
Cross Platform: Pinokio works on ALL operating systems (Windows, Mac, Linux).
Save Storage and Resources: Pinokio has a lot of optimization features that will save you hundreds of gigabytes of disk space. Also, many other resource optimization features (such as memory) all possible with Pinokio.
Expressive Scripting Language: Pinokio script is a powerful automation scripting language with features like memory, dynamic templating, and extensible low level APIs.
Portable: Everything is stored under an isolated folder and everything exists as a file, which means you can easily back up everything or delete apps simply by deleting files.
Pinokio takes inspiration from how traditional computers work.
Just like how a computer can do all kinds of things thanks to its comprehensive architecture, Pinokio as a virtual computer is a comprehensive platform for running and automating anything you can imagine with AI.
File System: Where and how Pinokio stores files.
Processor: How pinokio runs tasks.
Memory: How pinokio implements a state machine using its built-in native memory.
Script: The programming language that operates pinokio.
UI: The UI (user interface) through which users access apps.
Windows
Mac
Linux
Make sure to follow ALL steps below!
Download for Windows
Unzip the downloaded file and you will see a .exe installer file.
Run the installer file and you will be presented with the following Windows warning:
This message shows up because the app was downloaded from the Web, and this is what Windows does for apps downloaded from the web.
To bypass this,
Click "More Info"
Then click "Run anyway"
Make sure to follow BOTH step 1 AND step 2.
Download for Apple Silicon Mac (M1/M2/M3/M4) Download for Intel Mac
After downloading the dmg files, you MUST make a patch, as shown below:
Run the downloaded DMG installer file
Drag the "Pinokio" app to the Applications folder
Run the "patch.command"
Open the Pinokio app in the applications folder
For linux, you can download and install directly from the latest release on Github (Scroll down to the bottom of the page for all the binaries):
Go to the Releases Page
To stay on top of all the new APIs and app integrations,
Follow @cocktailpeanut on X to stay updated on all the new scripts being released and feature updates.
Join the Pinokio discord to ask questions and get help.
Pinokio is a self-contained platform that lets you install apps in an isolated manner.
Isolated Environment: no need to worry about messing up your global system configurations and environments
Batteries Included: no need to manually install required programs just to install something (such as ffpeg, node.js, visual studio, conda, python, pip, etc.). Pinokio takes care of it automatically.
To achieve this, Pinokio stores everything under a single isolated folder ("pinokio home"), so it never has to rely on your system-wide configs and programs but runs everything in a self-contained manner.
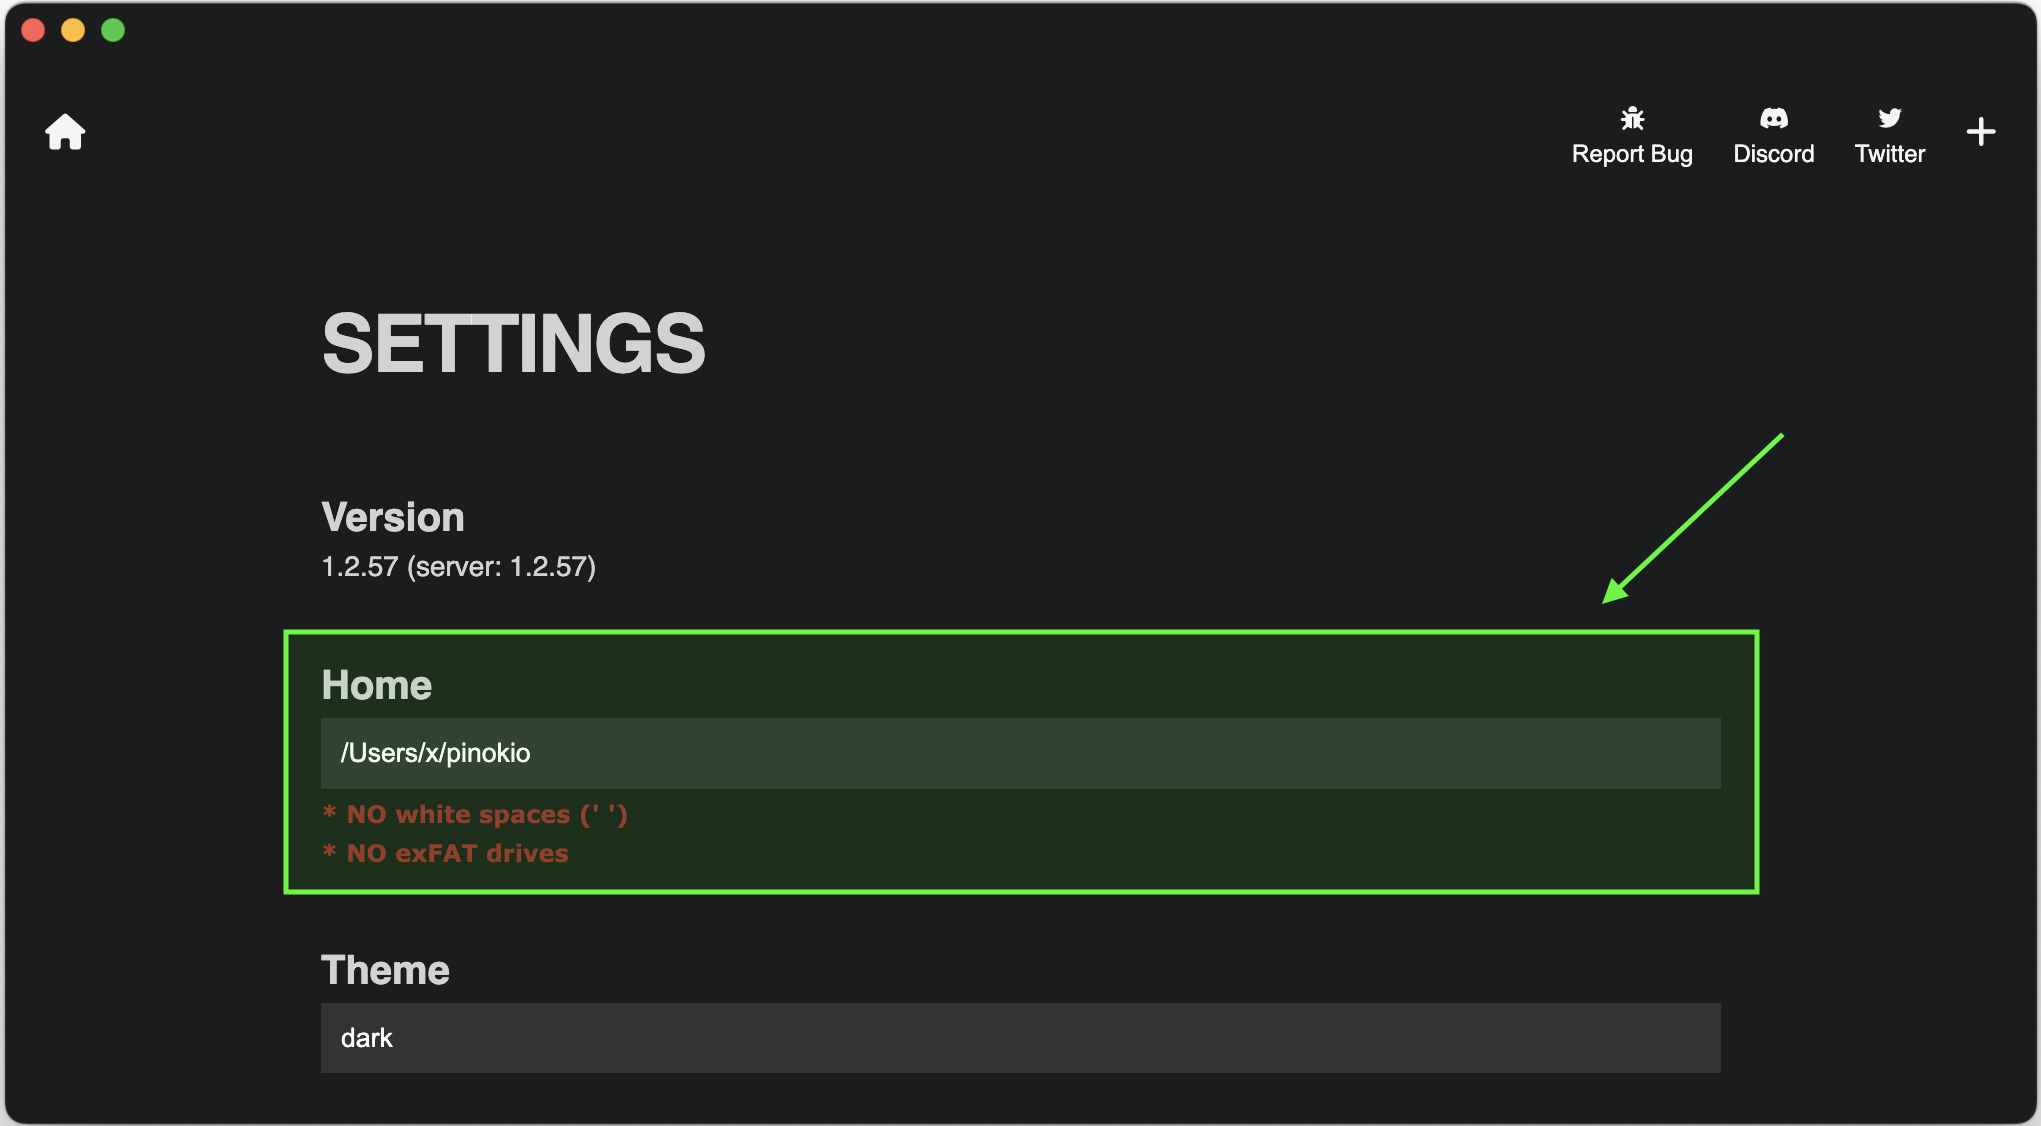
You can set the pinokio home folder when you first set up Pinokio, as well as later change it to a new location from the settings tab.
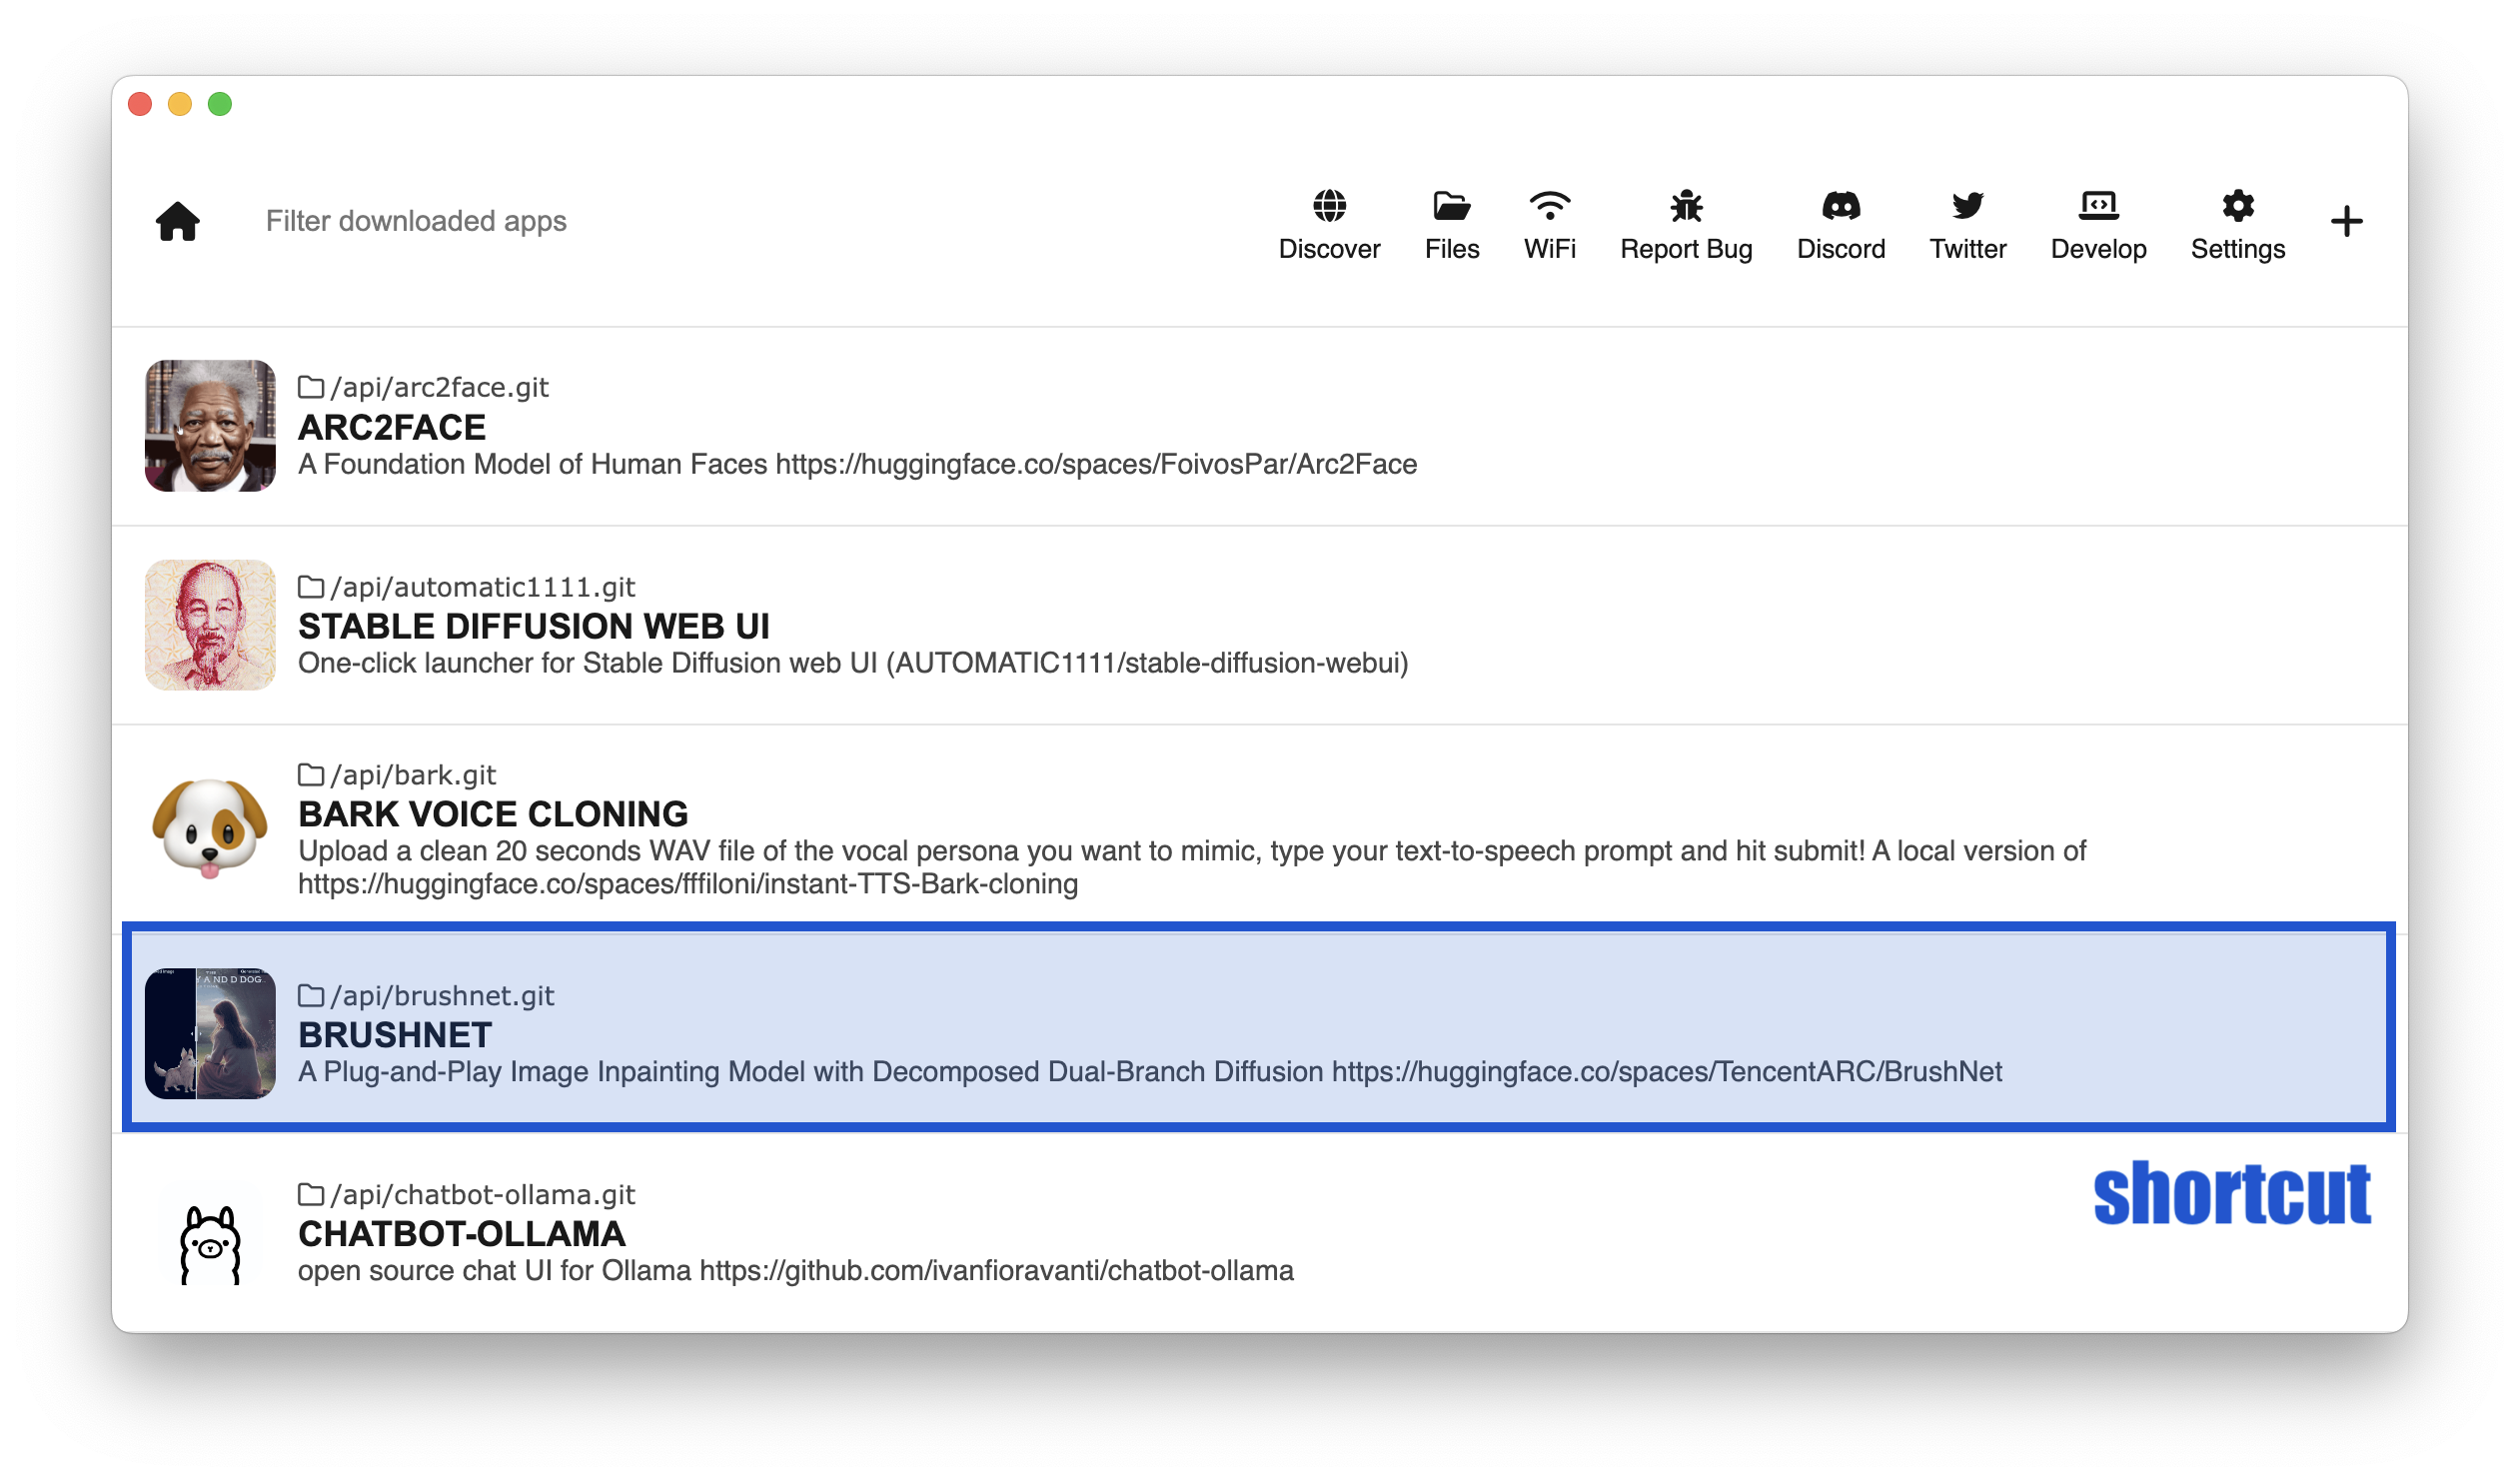
So where are the files stored? Click the "Files" button from the home page:
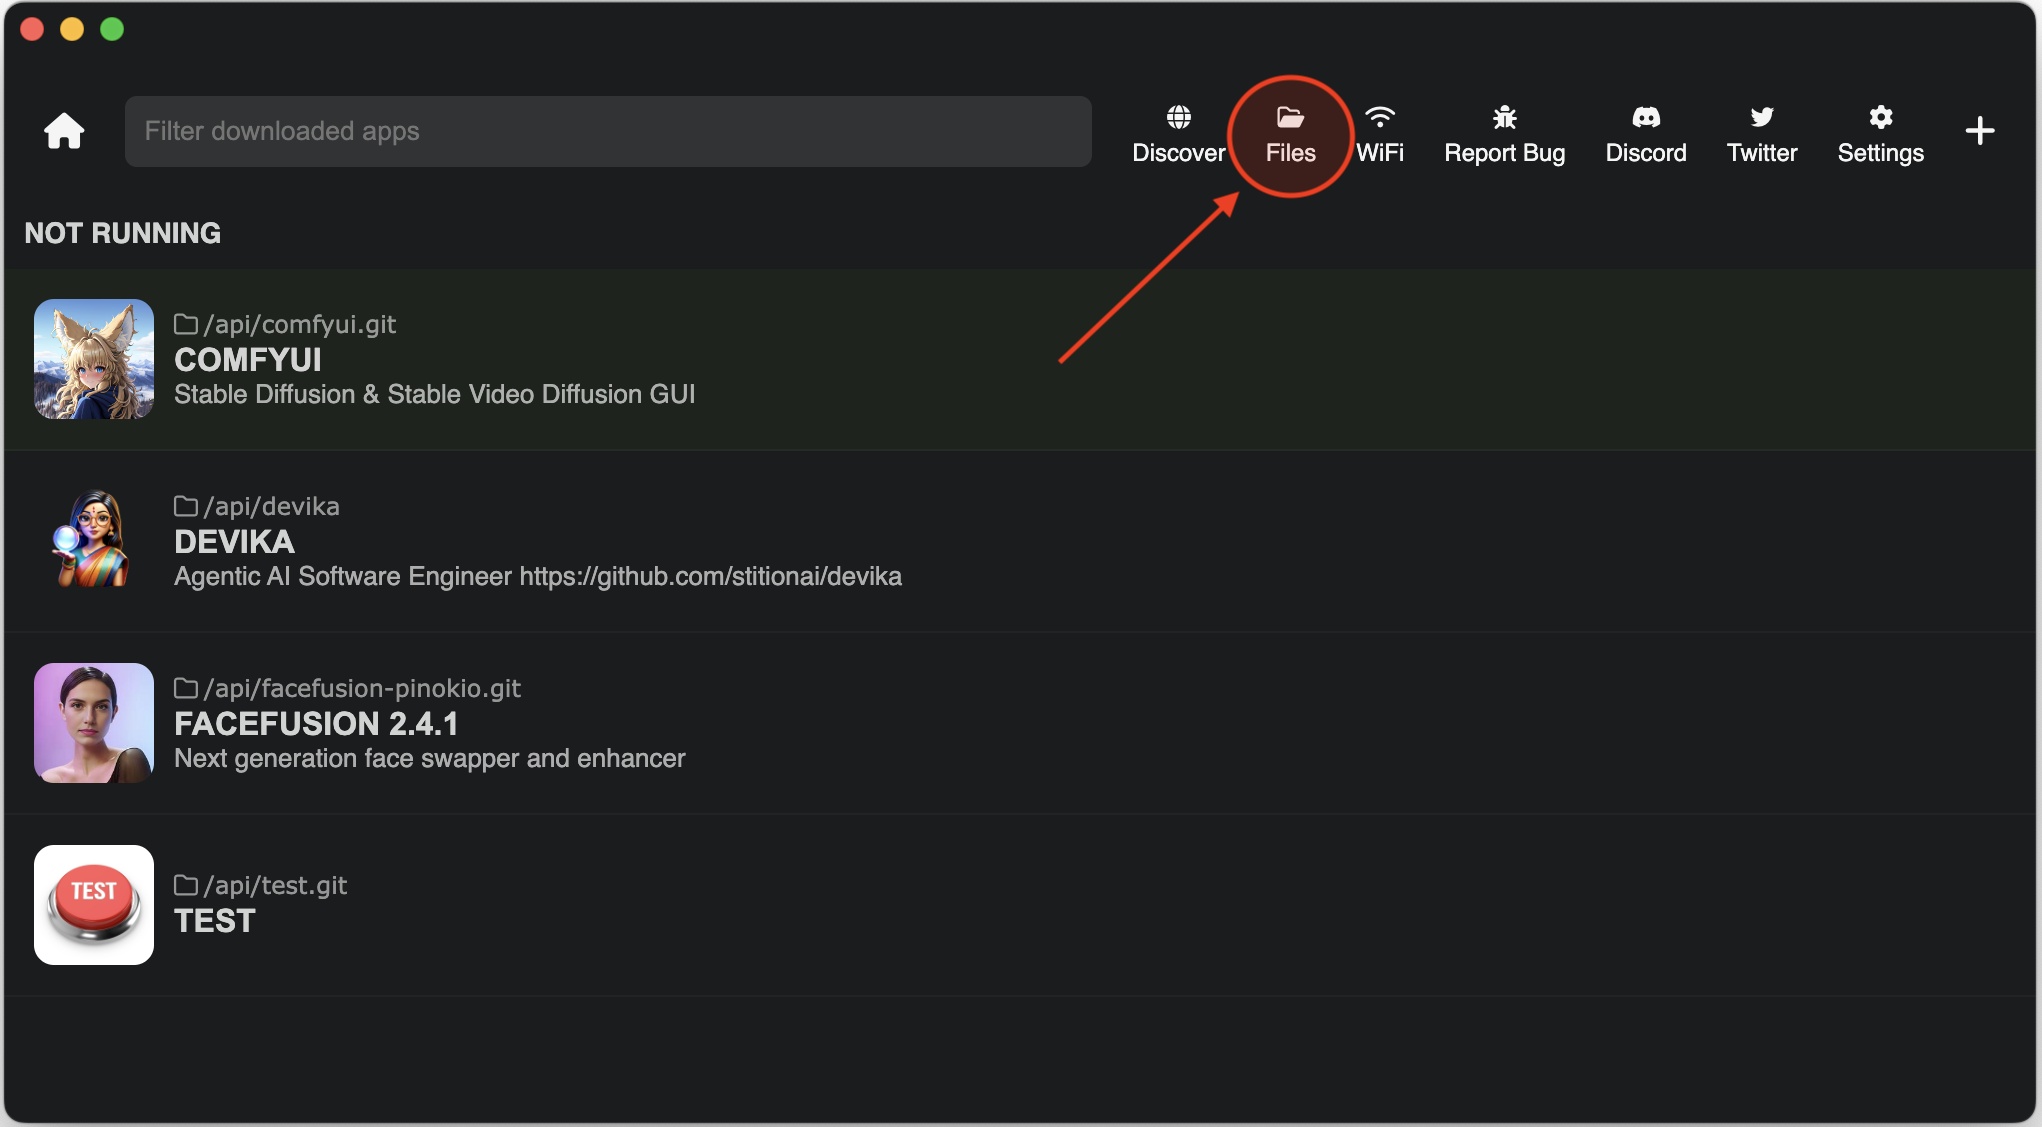
This will open Pinokio's home folder in your file explorer:
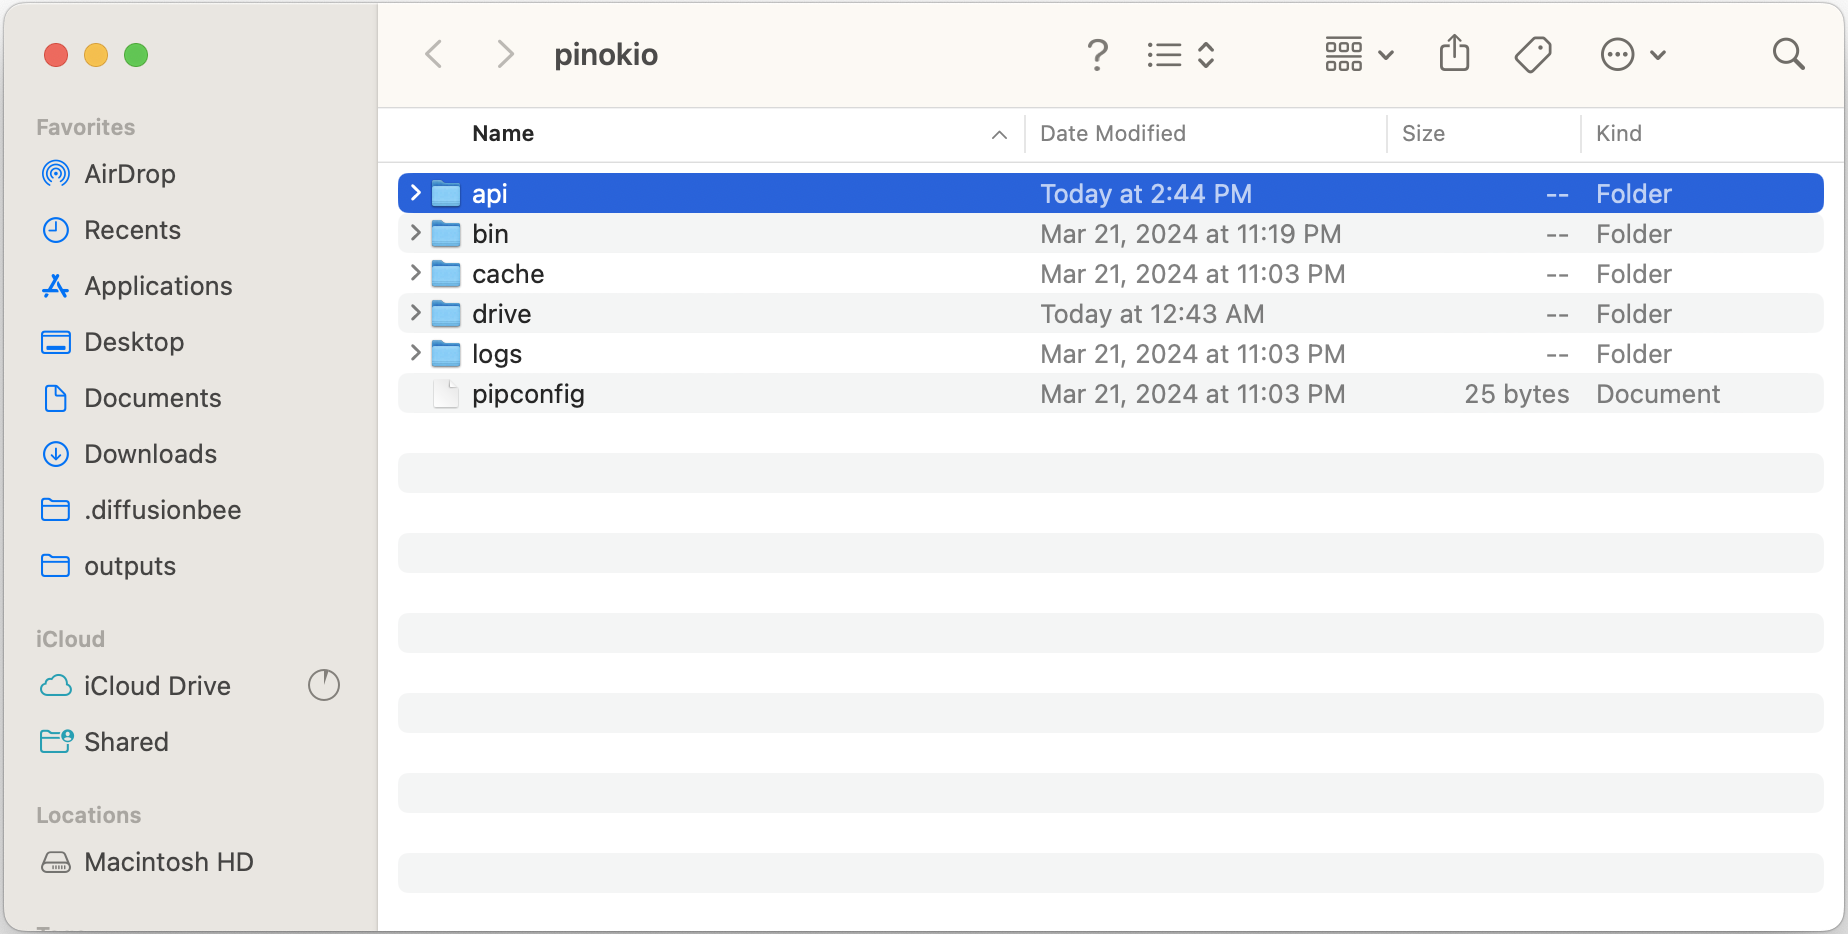
Let's quickly go through what each folder does:
api: stores all the downloaded apps (scripts).
The folders inside this folder are displayed on your Pinokio's home.
bin: stores globally installed modules shared by multiple apps so you don't need to install them redundantly.
For example, ffmpeg, nodejs, python, etc.
cache: stores all the files automatically cached by apps you run.
When something doesn't work, deleting this folder and starting fresh may fix it.
It is OK to delete the cache folder as it will be re-populated by the apps you use as you start using apps.
drive: stores all the virtual drives created by the fs.link Pinokio API
logs: stores all the log files for each app.
You can learn more about the file system here
Let's write a script that clones a git repository.
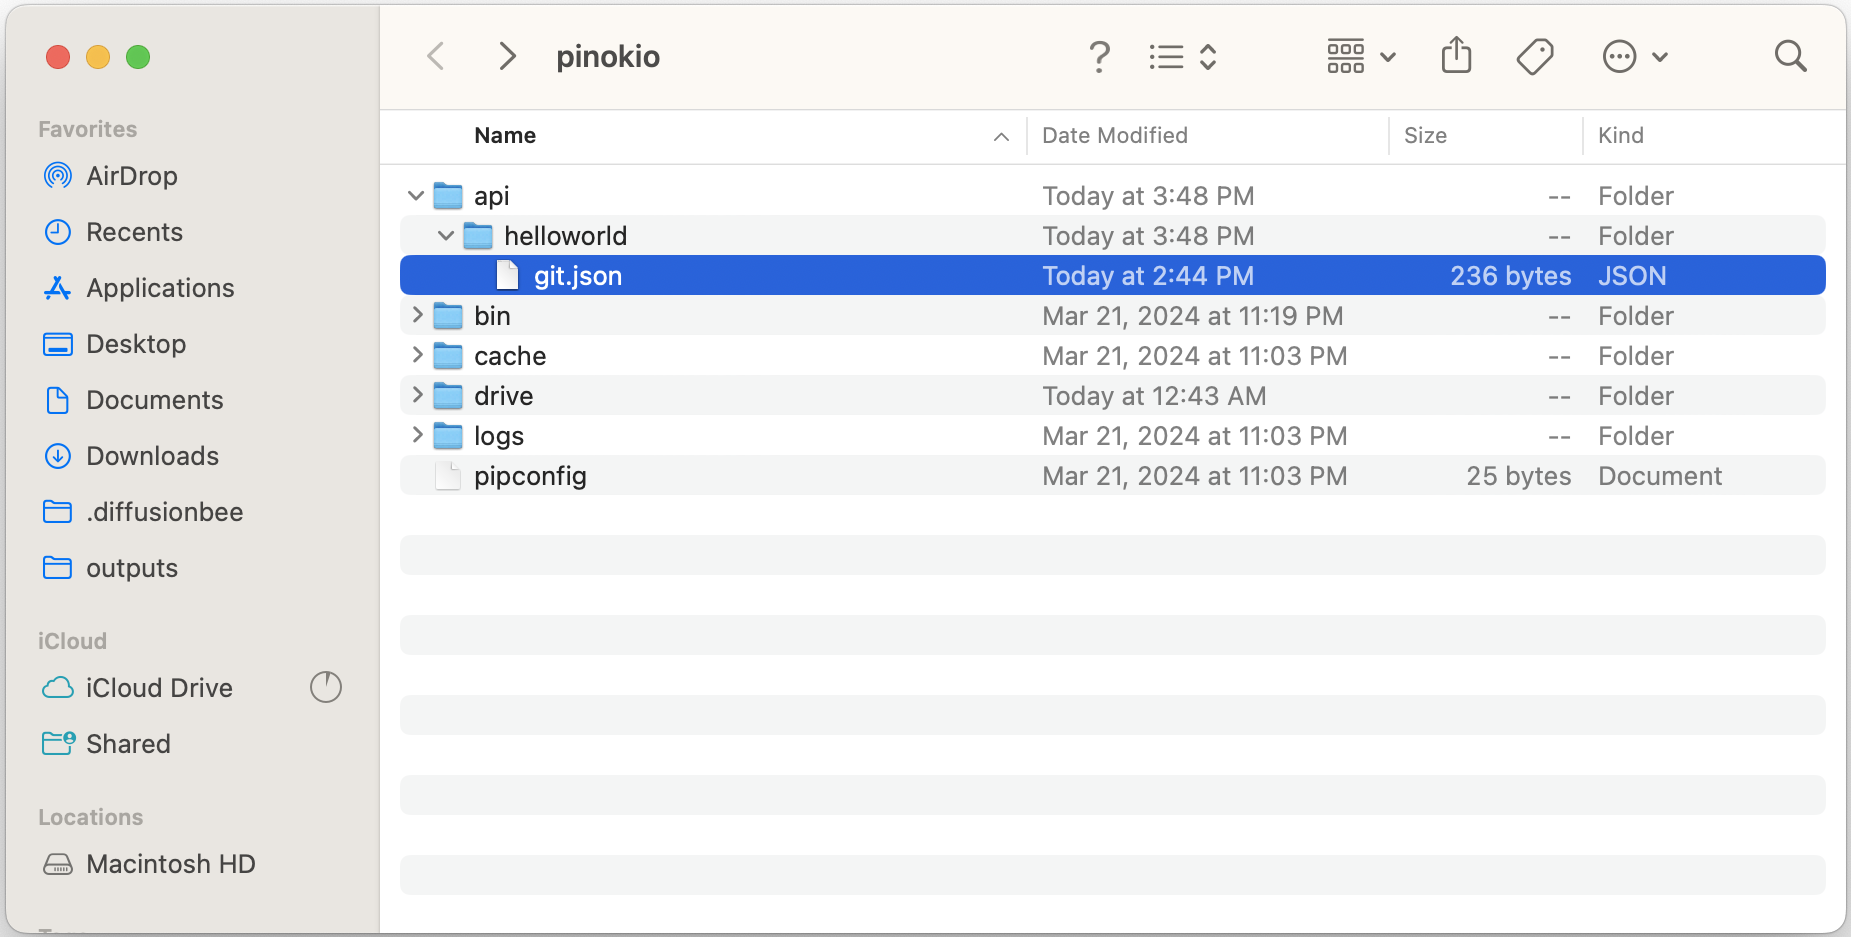
Create a folder named helloworld under the Pinokio api folder.
Create a file named git.json under the the Pinokio api/helloworld folder.
{  "run": [{"method": "shell.run","params": {      "message": "git clone https://github.com/pinokiocomputer/test"}
  }]
}
Now when you go back to Pinokio, you will see your helloworld repository show up. Navigate into it and click the git.json tab to run it:
You will see that an api/helloworld/test folder has been cloned from the https://github.com/pinokiocomputer/test repository.
We can also dynamically change what commmands to run, and how to run them, using templates.
As an example, let's write a script that runs dir on windows, and ls on linux and mac.
In your api/helloworld folder, create a file named files.json:
{  "run": [{"method": "shell.run","params": {      "message": "{{platform === 'win32' ? 'dir' : 'ls'}}"}
  }]
}
The {{ }} template expression contains a JavaScript expression
There are several variables available inside every template expression, and one of them is platform.
The value of platform is either darwin (mac), win32 (windows), or linux (linux).
This means, on Windows, the above script is equivalent to:
{  "run": [{"method": "shell.run","params": {      "message": "dir"}
  }]
}
Or if it's not windows (mac or linux), it's equivalent to:
{  "run": [{"method": "shell.run","params": {      "message": "ls"}
  }]
}
You can learn more about templates here
When a Pinokio script finishes running, every shell session that was spawned through the script gets disposed of, and all the related processes get shut down.
For example, let's try launching a local web server using http-server. Create a new folder named httpserver under the Pinokio api folder, and create a new script named index.json:
{  "run": [{"method": "shell.run","params": {      "message": "npx -y http-server"}
  }]
}
Then go back to Pinokio and you'll see this app show up on the home page. Click through and click the index.json tab on the sidebar, and it will start this script, which should launch the web server using npx http-server.
But the problem is, right after it launches the server it will immediately shut down and you won't be able to use the web server.
This is because Pinokio automatically shuts down all processes associated with the script when it finishes running all the steps in the run array.
To avoid this, you need to tell Pinokio this app should stay up even after all the steps have run. We simply need to add a daemon attribute:
{  "daemon": true,  "run": [{"method": "shell.run","params": {      "message": "npx -y http-server"}
  }]
}
Now retry starting the script, and you'll see that the web server starts running and does not shut down.
The web server will serve all the files in the current folder (in this case just index.json), like this:
You can stop the script by pressing the "stop" button at the top of the page.
Learn more about daemon mode here
You can also run multiple commands with one shell.run call.
Let's try an example. We are going to install, initialize, and launch a documentation engine in one script.
Things like this used to be not accessible for normal people (since you have to run these things in the terminal), but with Pinokio, it's as easy as one click.
Create a folder named docsify under the Pinokio api folder
Create a file named index.json under the api/docsify folder. The index.json file should look like the following:
{  "daemon": true,  "run": [{"method": "shell.run","params": {      "message": ["npx -y docsify-cli init docs","npx -y docsify-cli serve docs"  ]
    }
  }]
}
This example does 2 things:
Initialize a docsify Documentation project
Launch the docsify dev server
When you click the dev server link from the Pinokio terminal, it will open the documentation page in a web browser:

Learn more ablut the
shell.runAPI here
One of the common use cases for Pinokio is to:
Create/activate a venv
Install dependencies into the activated venv
Let's try a simple example. This example is a minimal gradio app from the official gradio tutorial
First, create a folder named gradio_demo under Pinokio's api folder.
Next, create a file named app.py in the api/gradio_demo folder.
# app.pyimport gradio as grdef greet(name, intensity):return "Hello, " + name + "!" * int(intensity)demo = gr.Interface(fn=greet,inputs=["text", "slider"],outputs=["text"],
)demo.launch()
We also need a requirements.txt file that looks like this:
# requirements.txt
gradio
Finally, we need an install.json script that will install the dependencies from the requirements.txt file:
{  "run": [{"method": "shell.run","params": {      "venv": "env",      "message": "pip install -r requirements.txt"}
  }]
}
The folder structure will look like this:
/PINOKIO_HOME
  /api
    /gradio_demo
      app.py
      requirements.txt
      install.json
Go back to Pinokio and you'll see the gradio_demo app. Click into the UI and click the install.json tab, and it will:
Create a venv folder at path env
Activate the env environment
Run pip install -r requirements.txt, which will install the gradio dependency into the env envrionment.
Here's what the installation process looks like (note that a new env folder has been created at the end):

Learn more about the venv API here
continued from the last section.
Now let's write a simple script that will launch the gradio server from the app.py from the last section. Create a file named start.json in the same folder:
{  "daemon": true,  "run": [{"method": "shell.run","params": {      "venv": "env",      "message": "python app.py"}
  }]
}
Go back to Pinokio and you'll see that the start.json file now shows up on the sidebar as well. Click to start the start.json script. This will:
activate the env environment we created from the install step
run python app.py in daemon mode (daemon: true), which will launch the gradio server and keep it running.
It will look something like this:

Learn more about the venv API here
Pinokio has a cross-platform API for downloading files easily and reliably (including automatic retries, etc.).
Let's try writing a simple script that downloads a PDF.
First create a folder named download under the Pinokio api folder, and then create a file named index.json:
{  "run": [{"method": "fs.download","params": {      "uri": "https://arxiv.org/pdf/1706.03762.pdf",      "dir": "pdf"}
  }]
}
This will download the file at https://arxiv.org/pdf/1706.03762.pdf to a folder named pdf (The fs.download API automatically creates a folder at the location if it doesn't already exist). Here's what it looks like:
Learn more about the
fs.downloadAPI here
In many cases you may want to call a script from another script. Some examples:
An orchestration script that spins up stable diffusion and then llama.
An agent that starts stable diffusion, and immediately makes a request to generate an image, and finally stops the stable diffusion server to save resources, automatically.
An agent that makes a request to a llama endpoint, and then feeds the response to a stable diffusion endpoint.
We can achieve this using the script APIs:
script.start: Start a remote script (Download first if it doesn't exist yet)
script.return: If the current script was a child process, specify the return value, which will be made available in the next step of the caller script.
Here's an example. Let's create a simple caller.json and callee.json:
caller.json:
{  "run": [{"method": "script.start","params": {      "uri": "callee.json",      "params": { "a": 1, "b": 2 }
    }
  }, {"method": "log","params": {      "json2": "{{input}}"}
  }]
}
First step, the caller.json will call callee.json with the params { "a": 1, "b": 2 }.
This params object will be passed into the callee.json as args:
callee.json:
{  "run": [{"method": "script.return","params": {      "ressponse": "{{args.a + args.b}}"}
  }]
}
The callee.json script immediately returns the value {{args.a + args.b}} with the script.return call.
Finally, the caller.json will call the last step log, which will print the value {{input}}, which is the return value from callee.json. This will print 3:

The last section explained how you can call a script from within the same repository. But what if you want to call scripts from other repositories?
The script.start API can also download and run remote scripts on the fly.
Create a folder named remotescript under Pinokio api folder and create a file named install.json under the api/remotescript:
{  "run": [{"method": "script.start","params": {      "uri": "https://github.com/cocktailpeanutlabs/moondream2.git/install.js"}
  }, {"method": "script.start","params": {      "uri": "https://github.com/cocktailpeanutlabs/moondream2.git/start.js"}
  }, {"id": "run","method": "gradio.predict","params": {      "uri": "{{kernel.script.local('https://github.com/cocktailpeanutlabs/moondream2.git/start.js').url}}",      "path": "/answer_question_1",      "params": [
        { "path": "https://media.timeout.com/images/105795964/750/422/image.jpg" },"Explain what is going on here"  ]
    }
  }, {"method": "log","params": {      "json2": "{{input}}"}
  }, {"method": "script.stop","params": {      "uri": "https://github.com/cocktailpeanutlabs/moondream2.git/start.js"}
  }]
}
The first step starts the script https://github.com/cocktailpeanutlabs/moondream2.git/install.js.
If the moondream2.git repository already exists on Pinokio, it will run the install.js script.
If it doesn't already exist, Pinokio automatically clones the https://github.com/cocktailpeanutlabs/moondream2.git repository first, and then starts the install.js script after that.
After the install has finished, it then launches the gradio app using the https://github.com/cocktailpeanutlabs/moondream2.git/start.js script. This script will return after the server has started.
Now we run gradio.predict, using the kernel.script.local() API to get the local variable object for the start.js script, and then getting its url value (which is programmatically set inside the moondream2.git/start.js script).
Basically, this step makes a request to the gradio endpoint to ask the LLM "Explain what is going on here", passing an image.
Next, the return value from the gradio.predict is logged to the terminal using the log API.
Finally, we stop the moondream2/start.js script to shut down the moondream gradio server using the script.stop API.
If we don't call the script.stop, the moondream2 app will keep running even after this script halts.
Here's what it would look like:
The ability to run
script.start, and thenscript.stopis very useful for running AI on personal computers, because most personal computers do not have unbounded memory, and your computer will quickly run out of memory if you cannot shut down these AI engines programmatically.With
script.stopyou can start a script, get its response, and immediatley shut it down once the task has finished, which will free up the system memory, which you can use for running other subsequent AI tasks.
Pinokio apps have a simple structure:
shortcut: The app shortcut that shows up on Pinokio home.
app: The main UI layout for the app
Shortcut
App
Menu: The sidebar that displays all the links you can run (as well as their running status)
Window: The viewport that displays a web page, or a terminal that runs the scripts

By default if you do not have a pinokio.js file in your project,
the shortcut displays the folder name as the title, and a default icon as the app's icon.
the menu displays all .js or .json files in your repository root.
While this is convenient for getting started, it's not flexible enough:
You can't control what gets displayed in the menu bar
You can't control how the scripts are launched (by passing params for example)
You can't control how the app is displayed
The title of the app will be your folder name
There is no description
The icon will just show a default icon.
To customize how your app itself behaves, you will want to write a UI script named pinokio.js.
Let's try writing a minimal UI:
Create a folder named downloader in the /PINOKIO_HOME/api folder
Add any icon to the /PINOKIO_HOME/api/downloader folder and name it icon.png
Create a file named /PINOKIO_HOME/api/downloader/download.json
Create a file named /PINOKIO_HOME/api/downloader/pinokio.js
/PINOKIO_HOME/api/downloader/icon.png

/PINOKIO_HOME/api/downloader/download.json
{  "run": [{"method": "shell.run","params": {      "message": "git clone {{input.url}}"}
  }]
}
/PINOKIO_HOME/api/downloader/pinokio.js
module.exports = {
  title: "Download Anything",
  description: "Download a git repository",
  icon: "icon.png",
  menu: [{text: "Start",href: "download.json",params: {  url: "https://github.com/cocktailpeanut/dalai"}
  }]}
The end result will look like this in your file explorer:

Now go back to Pinokio and refresh, and you will see your app show up:
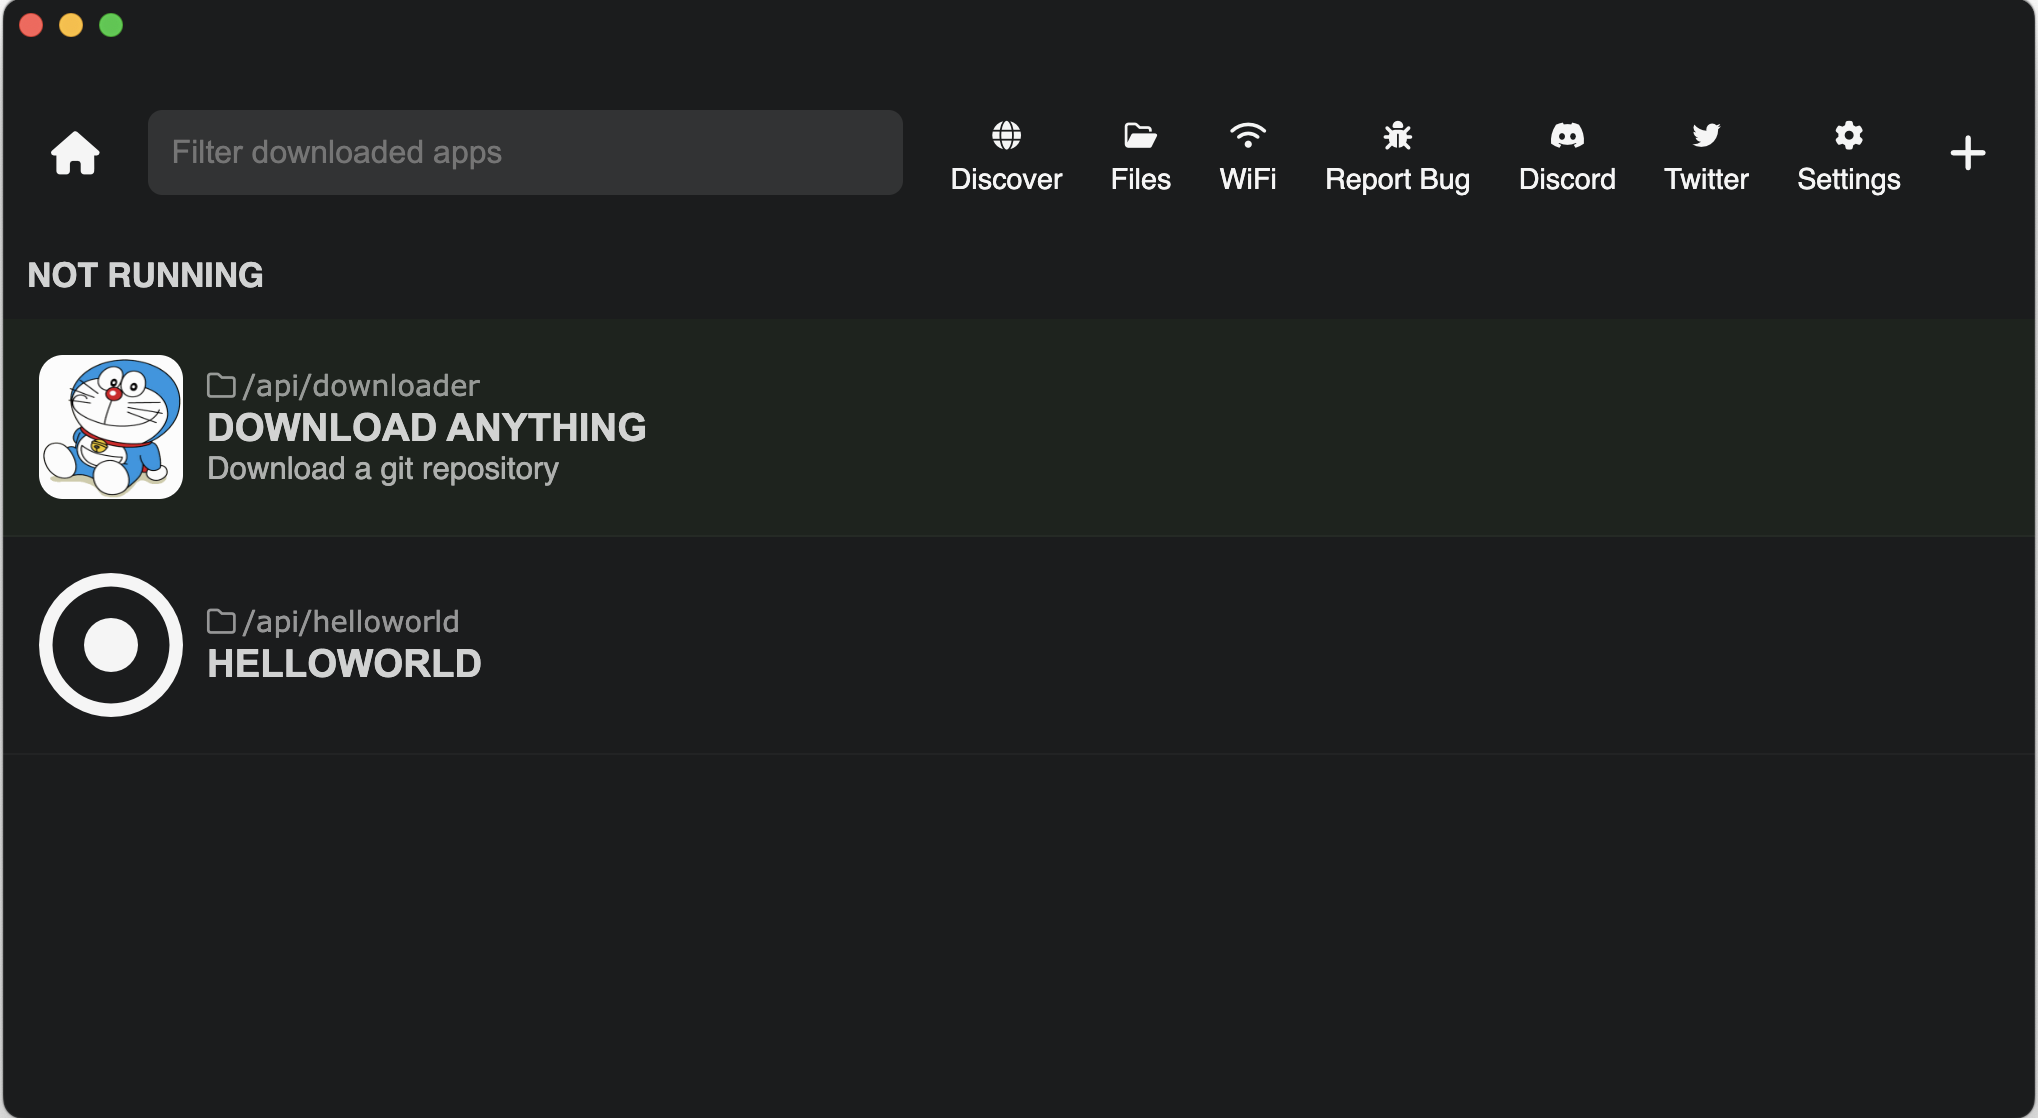
the title displays Download Anything
the description displays Download a git repository
the icon is the icon.png we've added
Now when you click into the app, you will see the following:
You will see the menu item Start.
Click this to run the download.json which is specified by the href attribute.
Also note that the script is passing the value of https://github.com/cocktailpeanut/dalai as the params.url value.
The params passed to the download.json is made available as the input variable, so the git clone {{input.url}} will be instantiated as git clone https://github.com/cocktailpeanut/dalai.
Once you have a working script repository, you can publish to any git hosting service and share the URL, and anyone will be able to install and run your script.
You can install any pinokio script repository very easily:
Click the "Download from URL" button at the top of the Discover page.
Enter the git URL (You can optionally specify the branch as well).
If you published to github, you can tag your repository with "pinokio" to make it show up in the "latest" section of the Discover page.
Now it will automatically show up on the "latest" section (at the bottom of the "Discover" page):
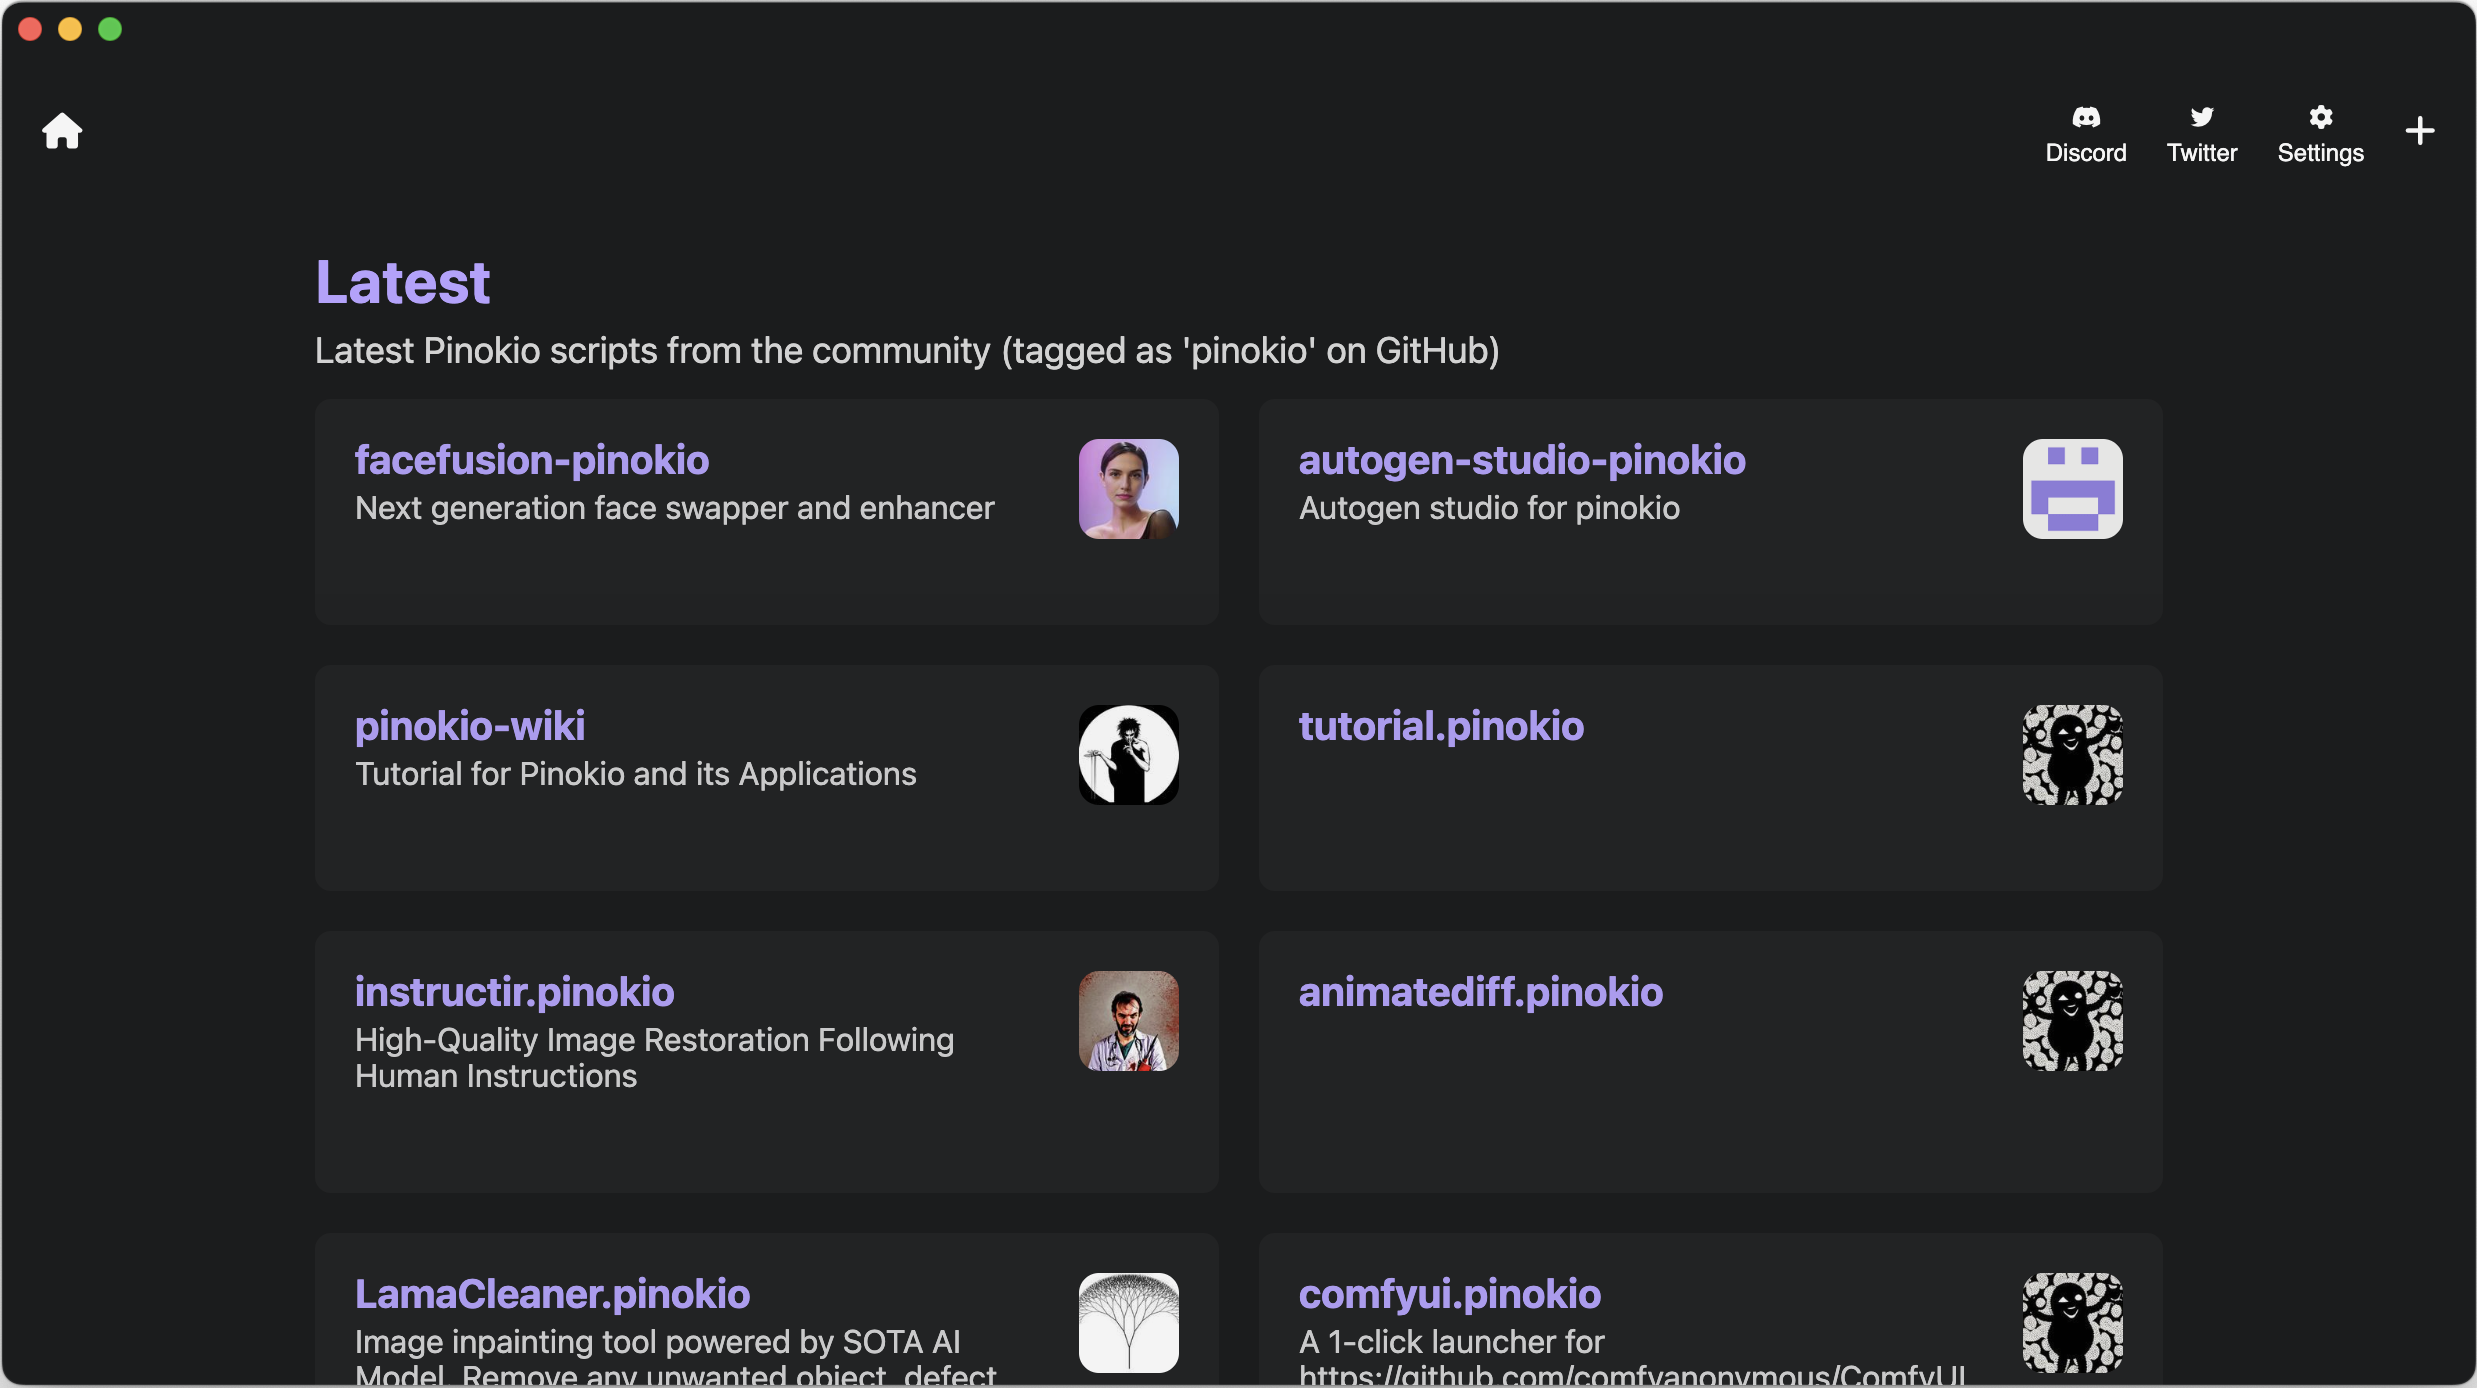
Pinokio constructs the "Latest" section automatically from GitHub "/repositories" API at https://api.github.com/search/repositories?q=topic:pinokio&sort=updated&direction=desc
So if you tagged your repository as "pinokio" but doesn't show up, check in the API result, and try to figure out why it's not included in there.
While it is important to understand how all this works, in most cases you may want a simple "launcher combo", which includes:
App install script: Installs the app dependencies
App Launch script: Starts the app
UI: Displays the launcher UI.
Reset script: Resets the app state when something goes wrong.
Update script: Updates the app to the latest version with 1 click.
This use case is needed so often, that we've implemented a program that automatically generates these scripts instantly. It's called Gepeto.
Often you may want to share more info about each script. You can use the newsfeed for that.
To do this, simply create a pinokio_meta.json file, with a posts array attribute, where each item is an x.com URL. Here's an example:
{  "posts": ["https://x.com/cocktailpeanut/status/1819482952071323788","https://x.com/cocktailpeanut/status/1819439443394109837","https://x.com/cocktailpeanut/status/1800944955738685648","https://x.com/cocktailpeanut/status/1754244867159413001","https://x.com/cocktailpeanut/status/1729884460114727197","https://x.com/cocktailpeanut/status/1728075614807048208"
  ]
}
You can see it in action: https://github.com/cocktailpeanutlabs/comfyui/blob/main/pinokio_meta.json
Once you publish, this will be immediately reflected on the script landing page.
<iframe width="1280" height="720" src="https://www.youtube.com/embed/D8jdowszkMg" title="YouTube video player" frameborder="0" allow="accelerometer; autoplay; clipboard-write; encrypted-media; gyroscope; picture-in-picture" allowfullscreen></iframe>
Gepeto is a program that lets you automatically generate Pinokio scripts, specifically for app launchers.
Let's start by actually generating an app and its launcher in 1 minute.
<iframe width="1280" height="720" src="https://www.youtube.com/embed/I-_W-MkV8tc" title="YouTube video player" frameborder="0" allow="accelerometer; autoplay; clipboard-write; encrypted-media; gyroscope; picture-in-picture" allowfullscreen></iframe>
If you don't have gepeto installed already, find it on Pinokio and install first.
You will see a simple web UI that lets you fill out a form. For simplicity, just enter Helloworld as the project name, and press submit.
This will initialize a project. When you go back to Pinokio home,
You will see a new entry named Helloworld. Click into it and you'll see the launcher screen.
Also, check your /PINOKIO_HOME/api folder, you will find a new folder named Helloworld with some script files.
Now let's click the install button to install the app, and when it's over, click start to launch.

You will see a minimal gradio app, where you can enter a prompt and it will generate an image using Stable Diffusion XL Turbo.
So what just happened? We've just created an empty project, which comes with a minimal demo app.
Let's take a look at each generated file in the next section.
Gepeto automatically generates a minimal set of scripts required for an app launcher. A typical app launcher has the following features:
Install: Install the dependencies required to run the app. (install.js)
Launch: Launch the app itself. (start.js)
Reset install: Reset all the installed dependencies in case you need to reinstall fresh. (reset.js)
Update: Update to the latest version when the project gets updated. (update.js)
GUI: The script that describes what the launcher will look like and behave on Pinokio home and as a sidebar menu. (pinokio.js)
Here's what it looks like:
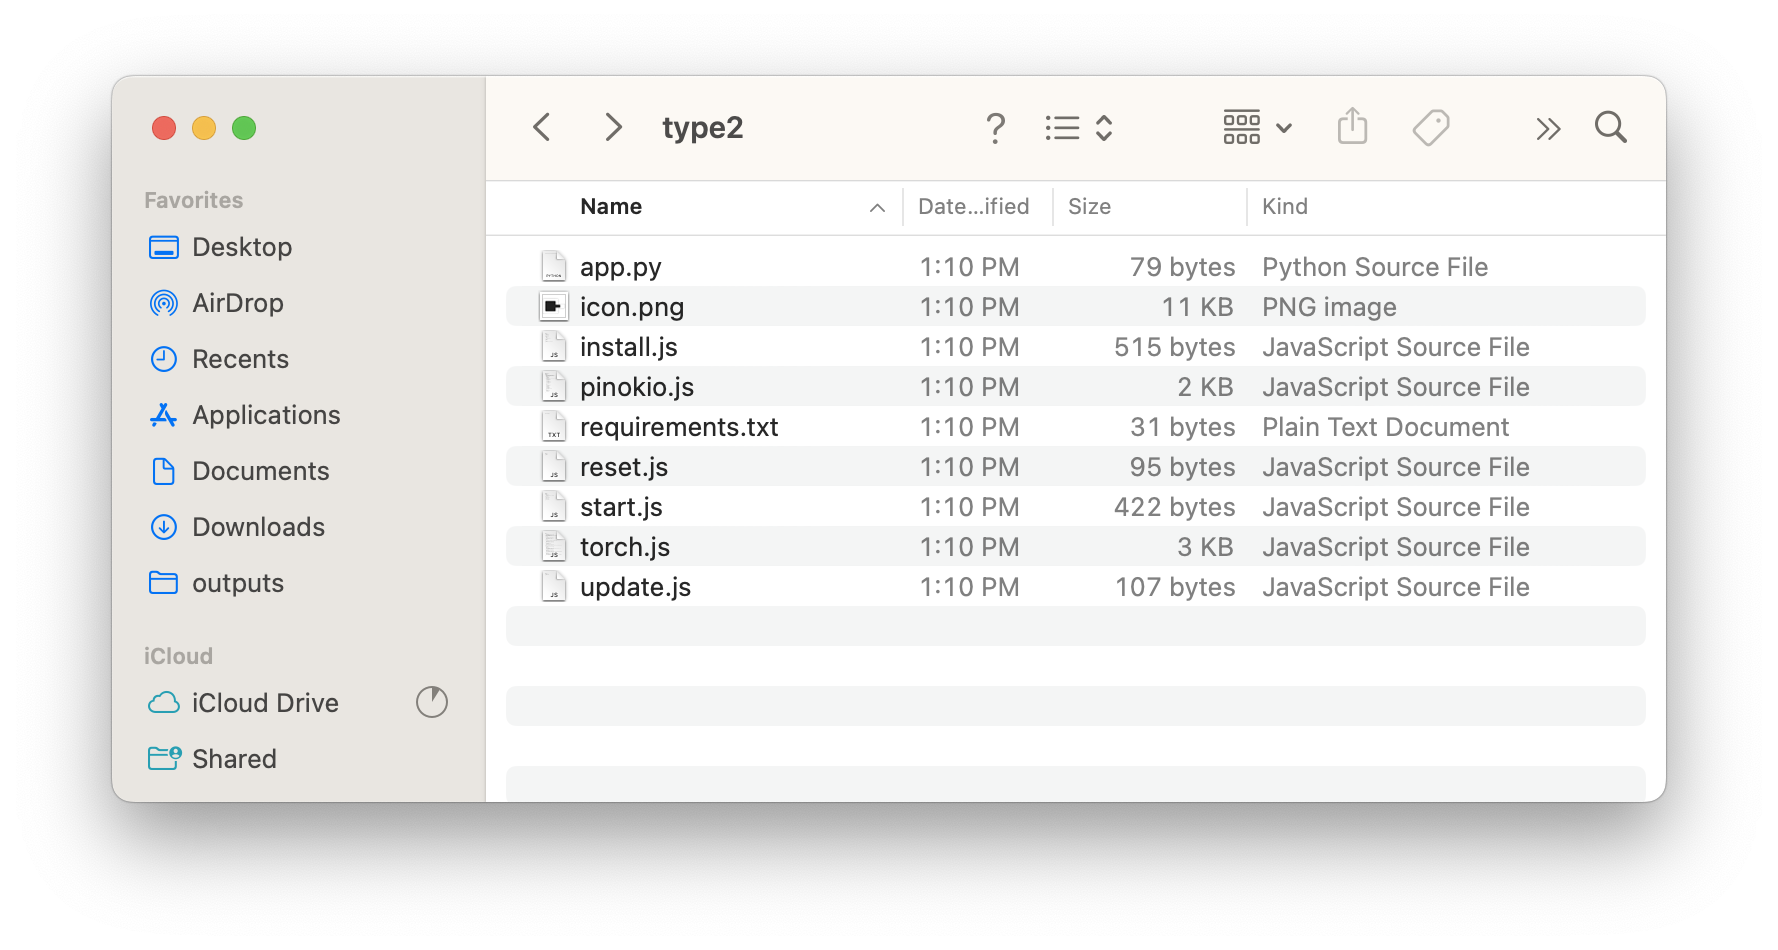
Note that in addition to the scripts mentioned above, gepeto has generated some extra files:
app.py: A simple demo app. Replace this with your own code.
requirements.txt: declares all the required PIP dependencies for app.py. Replace with your own.
icon.png: A default icon file for the app. Replace with your own.
torch.js: The torch.js is a utility script that gets called from install.js. Since torch is used in almost all AI projects, and it's quite tricky to install them in a cross-platform manner, this script is included by default. You don't have to worry about this file, just understand that it's used by install.js. Do not touch.
The notable files to look at are app.py and requirements.txt files:
import gradio as grimport torchfrom diffusers import DiffusionPipelineimport devicetorch# Get the current device ("mps", "cuda", or "cpu")device = devicetorch.get(torch)# Create a diffusion pipelinepipe = DiffusionPipeline.from_pretrained("stabilityai/sdxl-turbo").to(device)# Run inferencedef generate_image(prompt):return pipe( prompt, num_inference_steps=2, strength=0.5, guidance_scale=0.0).images[0]# Create a text input + image output UI with Gradioapp = gr.Interface(fn=generate_image, inputs="text", outputs="image")app.launch()The below are the libraries required to run app.py.
transformers
accelerate
diffusers
gradio
devicetorch
So how are these files actually used?
If you look inside install.js, you will see that it's running pip install -r requirements.txt to install the dependencies inside the file, like this:
module.exports = {
  run: [// Delete this step if your project does not use torch{  method: "script.start",  params: {uri: "torch.js",params: {  venv: "env",                // Edit this to customize the venv folder path  // xformers: true   // uncomment this line if your project requires xformers}  }},// Edit this step with your custom install commands{  method: "shell.run",  params: {venv: "env",                // Edit this to customize the venv folder pathmessage: [  "pip install -r requirements.txt"],  }},//  Uncomment this step to add automatic venv deduplication (Experimental)//  {//    method: "fs.link",//    params: {//      venv: "env"//    }//  },{  method: "notify",  params: {html: "Click the 'start' tab to get started!"  }}
  ]}
The first step runs script.start to call a script named torch.js. This installs torch.
The second step runs pip install -r requirements.txt file to install everything in that file.


