improve employee productivity using genai
1.0.0
Employee Productivity GenAI Assistant Example is an innovative code sample designed to elevate the efficiency and effectiveness of writing tasks through the integration of AI technologies. Tailored for AWS users, this assistant example utilizes Amazon Bedrock and generative AI models to automate the creation of initial templates, that can also be customized for your own needs. Users can input both text and images, benefiting from the multimodal capabilities of cutting-edge AI like the Claude 3 family, which supports dynamic interaction with multiple data types.
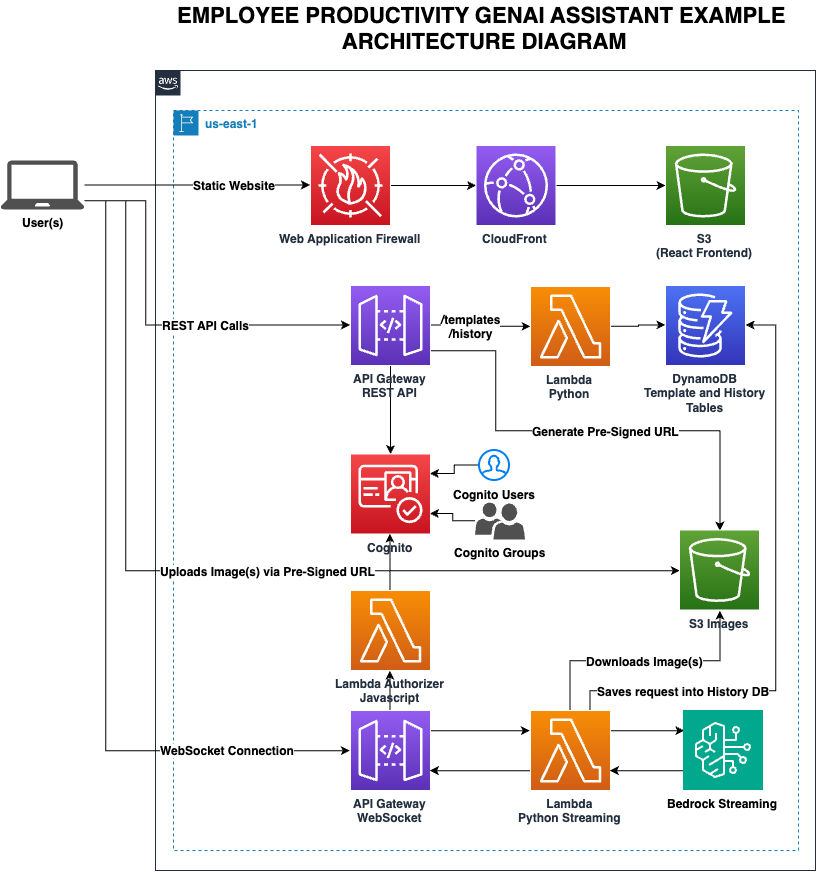
The Employee Productivity GenAI Assistant Example is built on robust AWS serverless technologies such as Lambda, API Gateway, DynamoDB, and S3, ensuring scalability, high availability, and security through Cognito. These technologies provide a foundation that allows the Employee Productivity GenAI Assistant Example to respond on-demand to user needs while maintaining strict security standards. The core of its generative abilities is derived from the powerful AI models available in Amazon Bedrock, which help deliver tailored and high-quality content swiftly.
Employee Productivity GenAI Assistant Example showcases its functionalities through a series of interactive GIFs, making it easy for users to understand and utilize its features:
By providing a streamlined interface and comprehensive tools, Employee Productivity GenAI Assistant Example not only simplifies the generation of complex documents but also enhances user productivity and creativity. This GitHub repository serves as a guide for deploying this solution on user-owned AWS accounts, ensuring that anyone can set up and start benefiting from the advanced capabilities of this AI-powered writing assistant.
Architectural Patterns and Reusable Components
In addition to the interactive features, the Employee Productivity GenAI Assistant Example provides a robust architectural pattern for building Generative AI solutions on AWS. By leveraging Amazon Bedrock and AWS serverless services such as Lambda, API Gateway, and DynamoDB, the example demonstrates a scalable and secure approach to deploying Generative AI applications. This architecture pattern can be used as a foundation to build various Generative AI solutions tailored to different use cases. Furthermore, the solution includes a reusable component-driven UI built on the React framework, enabling developers to easily extend and customize the interface to fit their specific needs. The example also showcases the implementation of streaming support using WebSockets, allowing for real-time responses in both chat-based interactions and one-time requests, enhancing the user experience and responsiveness of the Generative AI assistant.
improve-employee-productivity-using-genai/
│
├── backend/ - Contains all backend related files.
│ ├── artifacts/ - Artifacts such as screenshots
│ ├── src/ - Source code for Lambda functions.
│ ├── utils/ - Utility scripts such as helper to create Cognito users
│ ├── layer/ - Code for Lambda layers.
│ └── template.yaml - Main SAM template for Infrastructure as Code (IaC) deployment.
│
└── frontend/ - Houses the frontend React application.
│ ├── src/ - Main folder for React code.
│     └── App.js - Entry point for the React application.
│ └── .env - Environment variables created on deployment (auto-generated).
│
├── deploy.sh - Single bash script for deploying both backend and frontend.
└── default_templates.json - Default templates that gets uploaded to DynamoDB at deployment for bootstrap.
Before you begin with the deployment and development of Employee Productivity GenAI Assistant Example, ensure you have the following pre-requisites set up:
pip installed and workingPlease ensure these are installed and properly configured before proceeding with the deployment or development of Employee Productivity GenAI Assistant Example.
️ Important: Before proceeding with the deployment, make sure you have completed all the Pre-requisites.
Deployment of Employee Productivity GenAI Assistant Example involves executing a bash script that handles the setup of both the backend and frontend. Below are the detailed steps that the script performs:
To deploy Employee Productivity GenAI Assistant Example, use the following commands in your terminal, including the AWS region as a required argument:
./deploy.sh --region=your-aws-region --email=your-email
./deploy.sh --backend --region=your-aws-region --email=your-email
./deploy.sh --frontend --region=your-aws-region --email=your-email
./deploy.sh --delete --region=your-aws-region --email=your-email
./deploy.sh --container --region=your-aws-region --email=your-email
Replace your-aws-region with the appropriate AWS region (e.g., us-east-1)
Ensure to run these commands from the root of the project directory and replace your-aws-region with the actual AWS region you intend to use.
Once you have finished deployed, go to instructions below on Post-Deployment Steps.
For some details on what the script does, see below:
--delete flag is used, the script prompts for confirmation to delete the specified AWS stack.--backend is specified):
sam build --template "$SAM_TEMPLATE" --parallel --cached
--container is specified the ./deploy.sh it'll trigger to run the SAM like: sam build --template "$SAM_TEMPLATE" --parallel --cached --use-container
--frontend is specified):
.env file in the frontend directory with these outputs.aws-exports.json for AWS configuration.AWS CloudShell allows you to have a free, and instant Linux environment acessible from within your AWS console. To install the solution using AWS CloudShell, please follow the steps below in order.
Installing Dependecies: First, ensure you have the necessary development tools and libraries installed. Open AWS CloudShell and execute the following commands:
# Install Development Tools
sudo yum groupinstall "Development Tools" -y &&

# Install necessary libraries
sudo yum install openssl-devel bzip2-devel libffi-devel zlib-devel xz-devel ncurses-devel readline-devel sqlite-devel -y
Installing Python 3.11 with PyEnv: AWS CloudShell does not come with Python 3.11, so we'll need to install PyEnv to then install and set Python 3.11 as the default Python version in our shell.
# Install PyEnv
git clone https://github.com/pyenv/pyenv.git ~/.pyenv

# Set .bash_profile env
echo ' ' >> ~/.bash_profile
echo '# Pyenv Configuration' >> ~/.bash_profile
echo 'export PYENV_ROOT="$HOME/.pyenv"' >> ~/.bash_profile
echo 'export PATH="$PYENV_ROOT/bin:$PATH"' >> ~/.bash_profile
echo 'eval "$(pyenv init -)"' >> ~/.bash_profile

# Reinitialize your Shell
source ~/.bash_profile

# Install Python 3.11
pyenv install 3.11

# Set Python 3.11 as default with PyEnv
pyenv global 3.11
Create New Working Folder on CloudShell: AWS CloudShell home directory has only 1GB of storage, we'll need to use the temporary storage to build and deploy this application. First let's create a folder in the root directory and set proper user permission.
# Folder creation
sudo mkdir /aws-samples &&

# Setting folder permissions
sudo chown cloudshell-user -R /aws-samples
Clone repository and deploy solution: Now that we have a folder and all dependencies installed, let's go step by step on how to deploy the solution using AWS CloudShel.
# Navigate to the newly created folder
cd /aws-samples

# Clone the repo in the /aws-samples folder
git clone https://github.com/aws-samples/improve-employee-productivity-using-genai.git

# Navigate to the git folder
cd improve-employee-productivity-using-genai/

# Before running the deployment command, set the maximum npm memory to 1024MB to avoid OOM error
export NODE_OPTIONS="--max_old_space_size=1024"
Deploy the Backend of the solution: Now that we have all the dependecies to deploy our application we can deploy the backend of our solution by using the command below. We are using the deployment option for backend and then frontend because Cloudshell does not have enough memory to keep deploy both in the same command. Please change the region and e-mail before running the command below.
# Run the deployment command for the backend
./deploy.sh --backend --region=your-aws-region --email=your-email
Deploy the Frontend of the solution: Finally the last thing remaining is to deploy the Frontend of the solution. Please use the same region and e-mail as you've ran in the Backend command above.
# Run the deployment command for the frontend
./deploy.sh --frontend --region=your-aws-region --email=your-email
The deployment can take anywhere from 15-30 mins, please be aware that if you don't interact with AWS CloudShell for more than 20 minutes, your CloudShell environment will be deleted. It's recommended that you have a second CloudShell tab open and you run some commands once every 10 mins to avoid the automatically shutdown.
Note: If this command fails due to CloudShell out of memory, please just re-run the
--frontendcommand again and it should work.
Once the deployment has completed, you'll be displayed with the CloudFront URL, username and temporary password to access the solution. Please check the Post Deployment section
Deploying the Employee Productivity GenAI Assistant Example using AWS Cloud9 provides a streamlined and consistent development environment setup. Follow these detailed steps to set up your Cloud9 environment and deploy the application efficiently.
Note: EBS Volume is autoresized:
Open the AWS Cloud9 Console:
Create a New Environment:
GenAI-Productivity-Env, and click Next step.Configure the Environment:
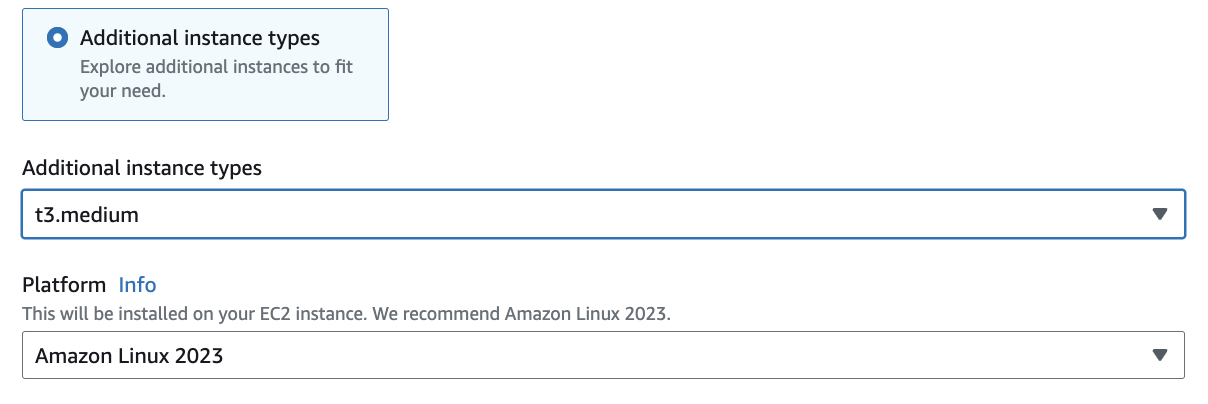
t3/t3.medium or larger to ensure you have enough computing power.AWS System Manager (SSM) as the connection type
Review and Create:
Once your environment is ready, you need to prepare it for deploying the Employee Productivity GenAI Assistant Example.
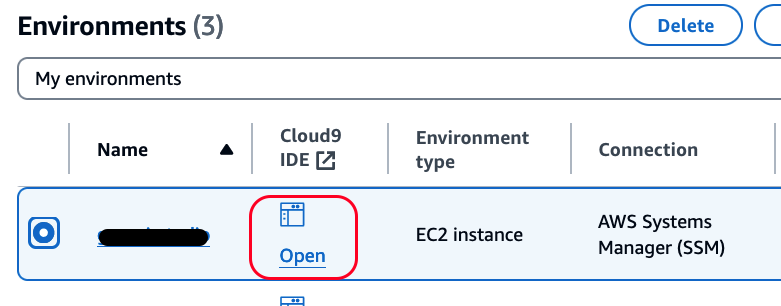
Access Your Cloud9 Environment:
Clone the Project Repository:
git clone https://github.com/aws-samples/improve-employee-productivity-using-genai
cd improve-employee-productivity-using-genaiYou can deploy both the backend and frontend or handle them separately.
To Deploy Both Backend and Frontend (Recommended):
./deploy.sh --container --region=<your-aws-region> --email=<your-email>Replace with your AWS region (e.g., us-east-1) and with your actual email address.
To Deploy Only the Backend::
./deploy.sh --backend --container --region=<your-aws-region> --email=<your-email>Replace with your AWS region (e.g., us-east-1) and with your actual email address.
To Deploy Only the Frontend::
./deploy.sh --frontend --region=<your-aws-region> --email=<your-email>Replace with your AWS region (e.g., us-east-1) and with your actual email address.
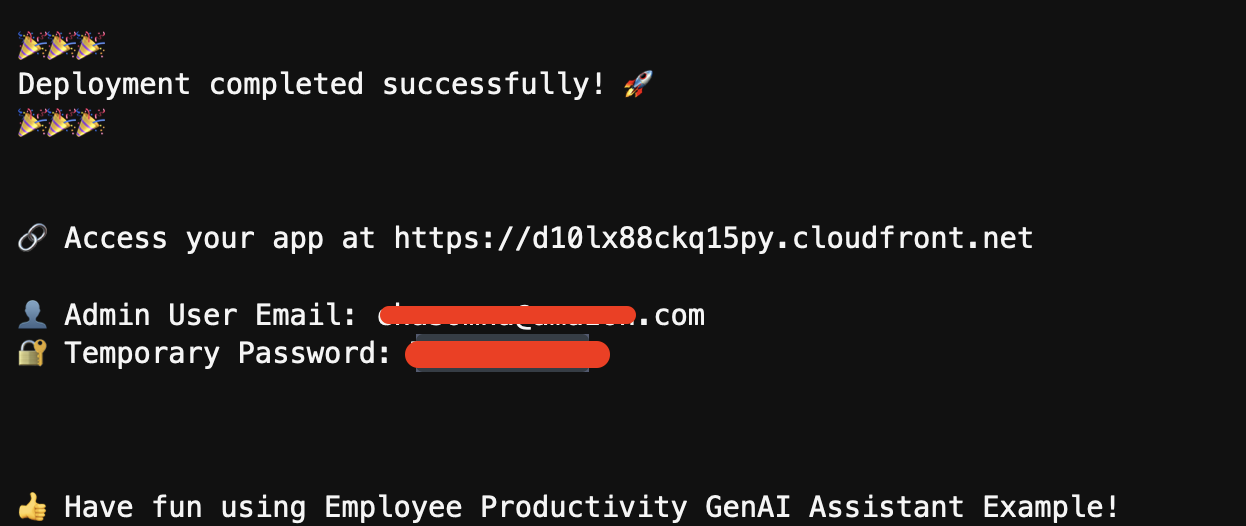 After the deployment script completes, go to the next section Post-Deployment Steps
After successfully deploying Employee Productivity GenAI Assistant Example, since the deployment creates by default ONLY the Admin user on Cognito, please follow these steps to create additional Cognito users to give access your Employee Productivity GenAI Assistant Example deployment:
Access the Application:
Sign In to the Application:
<your-email>) to sign in.Explore the Application:
Create Additional Users (Optional):
EmployeeProductivityGenAIAssistantExample User pool.Assign User Roles (Optional):
? Congratulations on deploying and setting up Employee Productivity GenAI Assistant Example! Explore its capabilities and enjoy the experience.
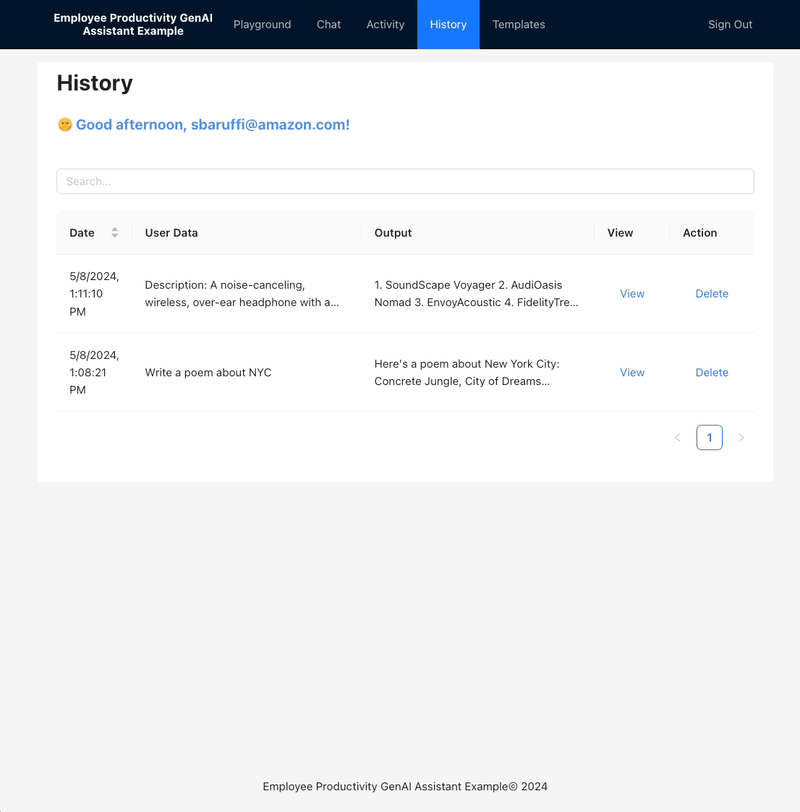
.env and aws-exports.json files in the frontend directory.Explore the capabilities of Employee Productivity GenAI Assistant Example with these engaging demonstrations. Each feature is highlighted through interactive GIFs that show the system in action:
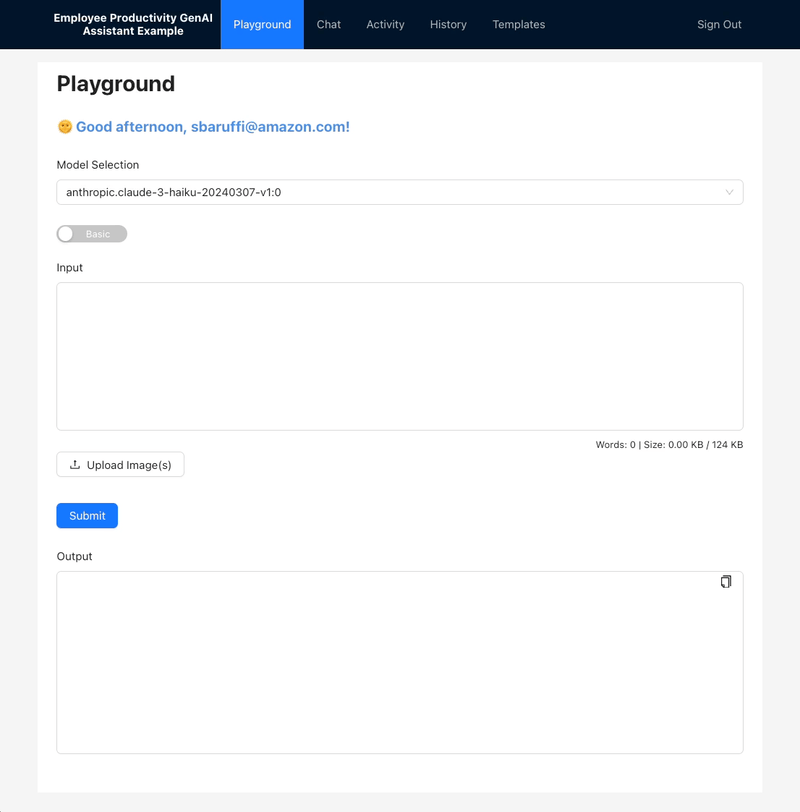
Playground Usability:
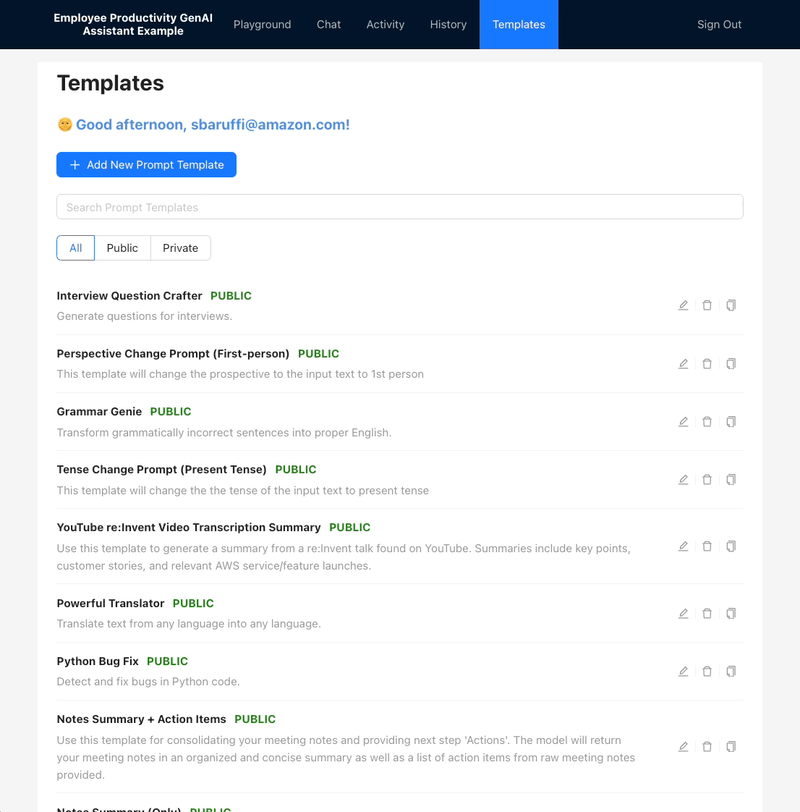
Template Creation:
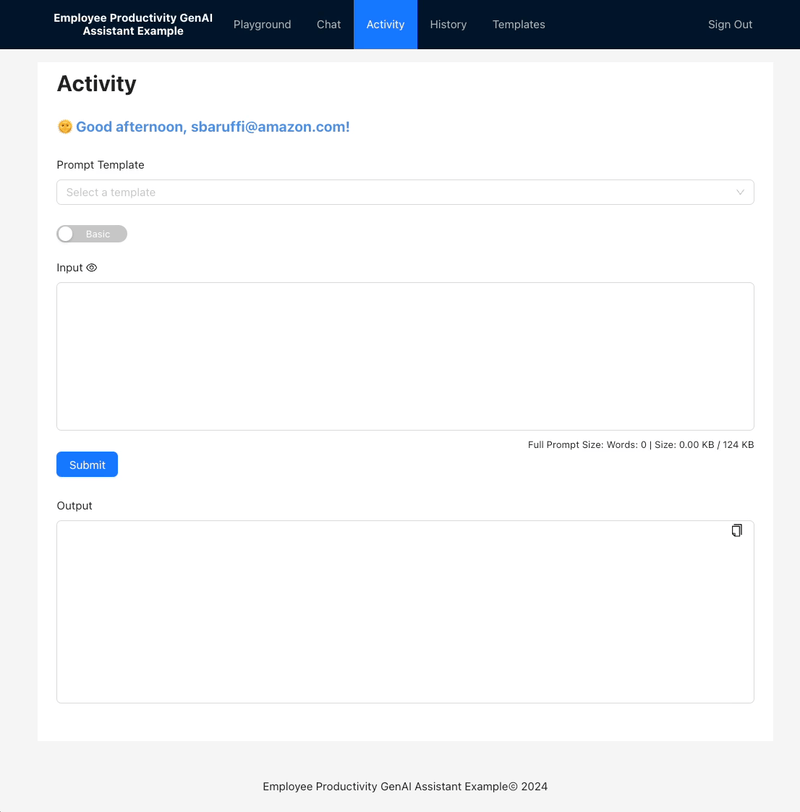
Template Application in Activity:
Activity History Feature:
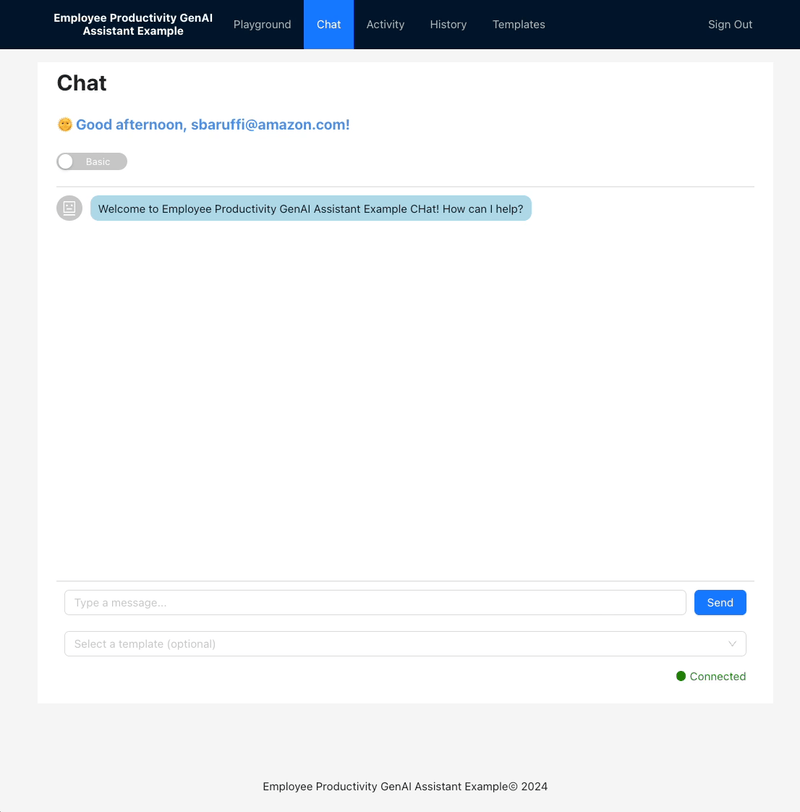
Interactive Chat with Templates:
Multi-Modality Input:

These tools are designed to boost your productivity and creativity by streamlining your interaction with AI models in a serverless environment.
The cost of running the Employee Productivity GenAI Assistant Example can vary based on your usage patterns and the specific Amazon Bedrock models you choose to utilize. To provide a rough estimate, we've created a cost estimator link that considers a scenario with 50 users, each utilizing the tool 5 times a day with an average of 500 input tokens and 200 output tokens.
The estimated monthly cost is based on the following assumptions:
Bedrock Pricing can be seen in the AWS Bedrock Pricing page. The estimated costs for the given scenario are as follows:
Claude 3 Haiku Model:
Claude 3 Sonnet Model:
Claude 3.5 Sonnet Model:
Claude 3 Opus Model:
Notes: While the cost estimates are calculated using a single model, you have the flexibility to switch between models as needed. For example, if you require a more advanced model like Opus for a specific request, you'll only be charged for that usage. For most requests, you can utilize more cost-optimized models like Haiku, which will help keep the overall cost of the tool lower and optimized for your needs.
Note: The estimate does not consider the AWS Free Tier for eligible services. Your actual costs may be lower if you are still within the Free Tier limits. Please also note that the pricing for AWS services may change over time, so the actual costs may vary from these estimates.
It's important to note that this is just an estimate and does not represent the exact cost. The purpose is to provide a high-level idea of the potential cost based on the given scenario. The actual cost will vary depending on your specific usage patterns and the Amazon Bedrock models you choose to utilize.
One of the great advantages of the cloud and serverless architecture is the ability to scale resources up or down based on demand. As a result, the cost of the solution will increase or decrease accordingly, ensuring you only pay for the resources you consume.
Additionally, some components of the solution, such as AWS Lambda, S3, CloudFront, DynamoDB and Amazon Cognito, may not incur additional costs if you are still within the AWS Free Tier limits.
Cost Estimator Link: https://calculator.aws/#/estimate?id=5fa739dd54db78d439bb602e17bd8af8a1d78f07
Note: The cost estimator does not include the charges for Amazon Bedrock, as the Claude models are not yet supported in the calculator.
This project is licensed under the MIT License - see the LICENSE file for details.
We welcome contributions to Employee Productivity GenAI Assistant Example! If you have suggestions or want to report issues, feel free to open a pull request or issue.
When implementing solutions, it's essential to follow best practices to ensure security, reliability, and observability. Below are some recommendations, but note that this list is non-exhaustive and there could be more to consider.
To enhance data security, consider enabling encryption using a Customer Managed Key (CMK) stored in AWS Key Management Service (KMS) for various services. This provides an additional layer of security by allowing you to control access to the encryption keys.
Implementing robust observability and logging mechanisms is crucial for monitoring, troubleshooting, and security auditing.
AccessLogSetting property to log access requests.
For Lambda functions running in a Virtual Private Cloud (VPC), ensure proper configuration of VPC endpoints to facilitate secure and efficient communication. This can help keep all calls internal to the VPC and avoid using AWS public endpoints.
By implementing these best practices, you can significantly enhance the security, reliability, and observability of your environment. Always consider the specific needs of your application and infrastructure to determine the most appropriate configurations.


