Lovelace
velace's first appearance in these alleys.
Go read the Lovelace documentation.
Lovelace is a web application which allows free interaction with ChatGPT using Python's GPT4FREE library. The software is written in JavaScript, using NodeJS + Express + SocketIO on the server side and Vite + ReactJS on the Frontend.
The backend allows different clients to communicate with ChatGPT. If your purpose with Lovelace is to use it for your own ends or purposes, you can only mount the Backend server in your network and ignore the other side of the application, that is, the client; the backend allows its interaction through the API, or you can use the connection by WebSocket using some SocketIO client.
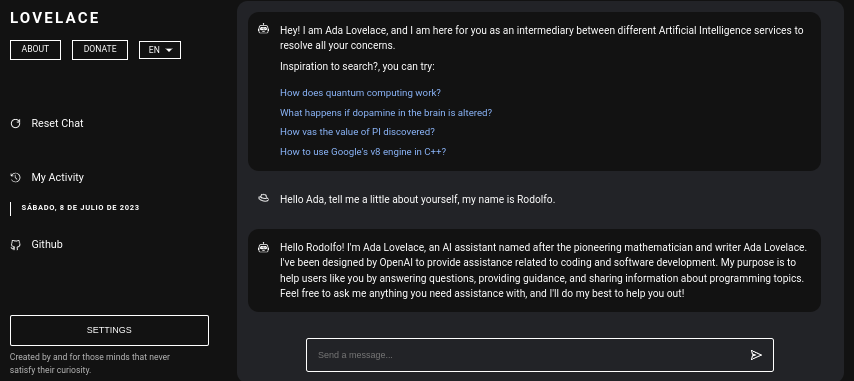
Table of Contents:
Installing Lovelace on your computer or server is relatively simple, you shouldn't have any major complications in the process; however, before you start cloning the repository, make sure you have at least NodeJS v18.0.0 and Python v3.10.
Consider that, in case you do not have the required NodeJS version installed on your system, you can use the version manager NVM (Node Version Manager).
# Installing NVM on your system...
export NVM_DIR="$HOME/.nvm" && (
  git clone https://github.com/nvm-sh/nvm.git "$NVM_DIR"
  cd "$NVM_DIR"
  git checkout `git describe --abbrev=0 --tags --match "v[0-9]*" $(git rev-list --tags --max-count=1)`
) && . "$NVM_DIR/nvm.sh"

# Once NVM has been installed, we proceed to install the specified NodeJS version (> 18.0.0)
nvm install 18.0.0
If you don't have Python v3.10 on your system, you might consider the following:
# (DEBIAN)
sudo add-apt-repository ppa:deadsnakes/ppa && sudo apt update && sudo apt install python3.10

# (MacOS)
brew install [email protected]
In the same way, consider having pip installed on your system, since it will be used when installing the necessary modules to be able to mount the backend server within the network.
curl https://bootstrap.pypa.io/get-pip.py -o get-pip.py
python3 get-pip.py
Now, assuming you have the aforementioned dependencies installed on your system, we can proceed to the next step...
Before we start installing and configuring the backend server as the Lovelace frontend, we need to clone the Github repository where the application source code is located.
Consider that, at this point in the reading, I assume that you already have Python version 3.10 or higher and NodeJS version 18.0.0; In the previous reading, before proceeding with the installation, the steps to install each one of them were explained.
# Cloning the Github repository that contains the source code (I stole it from a cyber).
git clone https://github.com/CodeWithRodi/Lovelace/ && cd Lovelace

# Accessing the "Client" folder, which stores the source code of the
# Vite + ReactjS (Frontend) application, and then installing its required modules from NPM.
cd Server && npm install --force && pip install -r Requirements.txt

# Like the previous line, we access the "Server" folder that houses the source code
# for the Lovelace Backend, then we install the NPM packages required to mount on the network.
cd ../Client && npm install --force
You may prefer to run everything in just one line...
git clone https://github.com/CodeWithRodi/Lovelace/ && cd Lovelace && cd Server && npm install --force && pip install -r Requirements.txt && cd ../Client && npm install --force && cd ..Keep in mind that, when you install the necessary modules to run the server, the pip install -r Requirements.txt command is executed in order to install the necessary packages to be able to use the GPT4FREE library. from Python. If you don't have pip installed or you don't install the Python packages, even though you have the backend server and the client mounted on the network, you won't be able to do anything, because when a request is made to both Through WebSocket's or via API using the NodeJS python-shell library from the backend, communication is made to the corresponding Python file that is in charge of returning the response and if it does not have its necessary requirements, it will throw an error.
Once you've cloned the Github repository, we can move on to configuring and network-mounting both the frontend and backend applications, however, let's dig a little deeper into what stores each subfolder that contains the folder generated by cloning the repository.
| Folder | Description |
|---|---|
| Client | The "Client" folder stores the source code of the Vite + React application, that is, the Lovelace frontend, where you can mount the website on your network to be able to communicate with the backend and establish quality conversations with the AI! |
| Documentation | The "Documentation" folder houses the source code of the software docs: https://lovelace-docs.codewithrodi.com/. |
| Server | The "Server" folder houses the source code for the Lovelace backend, where it is built under NodeJS using Express to provide the API and SocketIO for transmission of responses under WebSocket's. |
Also, apart from folders, you will come across some files, which in the same way will be presented together with a description below.
| File | Description |
|---|---|
| .clocignore | It is used by the "cloc" software, which allows counting the lines of software code, separating them by technology and the comments that the programming language used may have. Inside the "clocignore" file, there are the paths of those files and directories that the software must ignore when counting. |
| LICENSE | Contains the Lovelace license to which the source code of the Client and Server are subject. This software is licensed under the MIT license. |
Once the repository has been cloned and you have subsequently installed the necessary Server and Client NPM modules, it is time to set up the backend to start using the software.
Let's start with the server, this is where the magic will happen, you can communicate with the AI through API requests or using WebSocket's; Next, you will be presented with the series of commands to be able to mount the server within the network.
# Accessing the <Server> folder that houses the repository you cloned earlier
cd Server/

# Running the server...
npm run start
If you have done everything correctly, the server should already be running on your system. You can check it if you access http://0.0.0.0:8000/api/v1/!
Script (npm run <script_name>) |
Description |
|---|---|
| start | The normal execution of the server begins, you can consider this option in case you want to mount it in production. |
| dev | Start the execution of the server in development mode with the help of the "nodemon" package. |
You should know that environment variables are dynamic character values, which allow you to store information related to credentials, configurations, etc..., then you will be presented with the ".env" file located within the server's source code, where in turn you will have a description about the operation of the available variables.
# Specifies the execution mode of the server, considers the value of <NODE_ENV>
# can be <development> and <production>.
NODE_ENV = production

# Address of the server where the client application is running.
CLIENT_HOST = https://lovelace.codewithrodi.com/

# Port where the server will
# start executing over the network.
SERVER_PORT = 8000

# Hostname where the server will be launched in
# complement with the previously established
# port on the network.
SERVER_HOST = 0.0.0.0

# If you have an SSL certificate, you must
# specify the certificate and then the key.
SSL_CERT =
SSL_KEY =

# Others...
CORS_ORIGIN = *
BODY_MAX_SIZE = 100kb
Assuming that at this point in the reading you already have the backend server set up on the network, we can continue to set up the client's server, where, in this way, you can start interacting with the AI through the website that you will configure next...
The client application is built with ReactJS using Vite as its development tool. With just a few terminal commands, you can quickly set up and deploy the application on your network in no time! By following our instructions and utilizing the power of ReactJS and Vite, you'll experience a seamless and efficient setup process.
Make sure that, in order to use the web application correctly, it is necessary that the server is already running on the network.
# Accessing the existing <Client> folder within the cloned repository
cd Client/

# Assuming you have already installed the necessary npm packages <npm install --force>
# we will proceed to start the server in development mode
npm run dev
Happy hacking!... Your server should be running at http://0.0.0.0:5173/.
In the same way in which it was done in the previous reading, the list of environment variables that the client application has in its ".env" file will be presented next, along with a description of it.
# Address where the backend server was mounted, you must
# be sure to specify in the address if you have ridden
# the server under HTTPS, changing <http> to <https> ;)
VITE_SERVER = http://0.0.0.0:8000

# The server has a suffix to be able to access its respective API
# in this case we use v1
VITE_API_SUFFIX = /api/v1

# Others...
VITE_DONATE_LINK = https://ko-fi.com/codewithrodi
VITE_GPT4FREE_LINK = https://github.com/xtekky/gpt4free
VITE_SOFTWARE_REPOSITORY_LINK = https://github.com/codewithrodi/LovelaceIn case you want to modify the network address or the port that is used when launching the Vite server on the network, you can consider modifying the vite.config.js file. This file contains the configuration settings for the Vite server. Below are the contents of the vite.config.js file:
export default defineConfig({
  plugins: [react()],
  server: {
    // If you want to change the network address where the server will be mounted
    // you must change <0.0.0.0> to the desired one.
    host: '0.0.0.0',
    // Following the same line above, you must modify the port <5173>
    // for which you want to ride on the network.
    port: 5173
  },
  define: {
    global: {}
  }
});
Please note that modifying these settings should be done with caution, as it may affect the accessibility of the server. Make sure to choose a suitable network address and a port that is not already in use.
Vite is a popular choice for developing web applications written in JavaScript due to its highly efficient environment. It offers significant advantages such as drastically reducing the startup time when loading new modules or compiling the source code during the development process. By leveraging Vite, developers can experience improved productivity and faster development cycles. Its speed and performance optimizations make it a valuable tool for web development projects.
The web application has the ability to detect the language of the web browser from which the platform is accessed, in order to later be able to detect if there is a translation of the content available in the requested language, if it does not exist, a translation will be returned. by default, which corresponds to English.
Consider that, to add new translations, you can access Client/src/Locale/, where this last Locale/ folder houses a series of JSONs which are in the following format {LANGUAGE_IN_ISO_369}.json; In case you want to add a new translation, you just have to follow the format and copy the respective keys whose value is updated to the desired language that you are creating.
Currently, the following translations exist within the web application: French - Arabic - Chinese - German - English - Spanish - Italian - Portuguese - Russian - Turkish.
If your intention is to utilize Lovelace for your individual needs and objectives, you may disregard the Client application implemented in ReactJS. Instead, divert your attention towards the Server, as it is where the enchantment truly takes place.
Keep in mind that when communicating with the backend using the API or WebSocket's, the data sent as Model or Role is not case-sensitive, that is, if the value of Model is gPT-3.5-TUrbO will not matter, since it will be formatted from the backend, the Prompt is obviously not important either, but the value assigned to Provider is, in later readings you will learn how to obtain the available providers to be able to use when establishing an interaction with the AI, in the same way that you will be able to know what their respective models are, or you can now access the same path /api/v1/chat/providers/ of the public instance of the lovelace backend and view the information.
Here's an example using the API via the native Fetch function:
const Data = {
// Select the model you want to use for the request.
// <GPT-3.5-Turbo> | <GPT-4>
Model: 'GPT-3.5-Turbo', // Recommended Model
// Use a provider according to the model you used, consider
// that you can see the list of providers next to the models
// that have available in:
// [GET REQUEST]: http://lovelace-backend.codewithrodi.com/api/v1/chat/providers/
Provider: 'GetGpt', // Recommended Provider, you can also use 'DeepAi'
// GPT Role
Role: 'User',
// Prompt that you will send to the model
Prompt: 'Hi Ada, Who are you?'
};
// Note that if you want to use your own instance replace
// <https://lovelace-backend.codewithrodi.com> for the address
// from your server, or <http://0.0.0.0:8000> in case it is
// is running locally.
const Endpoint = 'https://lovelace-backend.codewithrodi.com/api/v1/chat/completions';
// We will make the request with the Fetch API provided in a way
// native by JavaScript, specified in the first instance
// the endpoint where our request will be made, while as a second
// parameter we specify by means of an object the method, the header and the
// body that will have the request.
fetch(Endpoint, {
// /api/v1/chat/completions/
method: 'POST',
// We are sending a JSON, we specify the format
// in the request header
headers: { 'Content-Type': 'application/json' },
body: JSON.stringify(Data)
})
// We transform the response into JSON
.then((Response) => Response.json())
// Once the response has been transformed to the desired format, we proceed
// to display the response from the AI in the console.
.then((Response) => console.log(Response.Data.Answer))
// Consider that <Response> has the following structure
// Response -> { Data: { Answer: String }, Status: String(Success | ClientError) }
.catch((RequestError) => console.error(RequestError));In case you want to use Axios when making the communication, you can consider:
const Axios = require('axios');

const Data = {
    Model: 'GPT-3.5-Turbo', // Recommended Model
    Provider: 'GetGpt', // Recommended Provider, you can also use 'DeepAi'
    // GPT Role
    Role: 'User',
    Prompt: 'Hi Ada, Who are you?'
};

const Endpoint = 'https://lovelace-backend.codewithrodi.com/api/v1/chat/completions';

(async function(){
    const Response = (await Axios.post(Endpoint, Data, { headers: { 'Content-Type': 'application/json' } })).data;
    console.log(Response.Data.Answer);
})();
You can see how the client communicates with the backend via the API by looking at the Client/src/Services/Chat/Context.jsx and Client/src/Services/Chat/Service.js files, where magic happens.
From the backend server, a WebSocket's server is provided with the help of SocketIO, so it is recommended to use a client provided by the same library, such as npm i socket.io-client in the case of NodeJS. It is recommended to use this type of communication if you want an "instantaneous" response, since the response from the AI, unlike using communication via API, you should not wait for the AI to finish processing the response in order to be displayed. . Using WebSocket's the response from the AI is transmitted in parts, generating an interaction with the client instantly.
const { io } = require('socket.io-client');

// Using the NodeJS 'readline' module, like this
// allow <Prompts> to be created by the user
// to our console application.
const ReadLine = require('readline').createInterface({
    input: process.stdin,
    output: process.stdout
});

// We store the address where the Lovelace backend is mounted.
// In case your instance is running locally
// you can change the value of <Endpoint> to something like <http://0.0.0.0:8000>.
const Endpoint = 'http://lovelace-backend.codewithrodi.com/';

(async function(){
    const Socket = io(Endpoint).connect();
    console.log(`Connecting to the server... [${Endpoint}]`);

    Socket.on('connect', () => {
        console.log('Connected, happy hacking!');
        RunApplicationLoop();
    });

    Socket.on('disconnect', () => {
        console.log('nDisconnected, bye bye...!');
        process.exit(0);
    });

    // We use <process.stdout.write(...)> instead of <console.log(...)> because
    // in this way we print directly to the console without each time
    // that a part of the response is received, a new line (n) is executed.
    Socket.on('Response', (StreamedAnswer) => process.stdout.write(StreamedAnswer));

    const BaseQuery = {
        // We indicate the model that we want to use to communicate with the AI
        // 'GPT-3.5-Turbo' - 'GPT-4'
        Model: 'GPT-3.5-Turbo',
        // Provider to use in the communication, keep in mind that not all
        // providers offer ChatGPT 3.5 or ChatGPT 4. You can make a request
        // [GET] to <https://lovelace-backend.codewithrodi.com/api/v1/chat/providers/>
        Provider: 'GetGpt',
        Role: 'User',
    };

    const HandleClientPrompt = () => new Promise((Resolve, Reject) => {
        const HandleStreamedResponseEnd = (MaybeError) => {
            if(MaybeError){
                return Reject(MaybeError);
            }
            Resolve();
        };

        ReadLine.question('Prompt > ', (Prompt) => {
            // We issue <Prompt> to the server, where as the second parameter
            // send the Query to it, specifying the Model, Provider, Role and Prompt.
            // The last parameter corresponds to the Callback that will be called
            // once the transmission of the response is finished, consider that this
            // callback receives a parameter, which corresponds to whether there is an error
            // or not during transmission, its content is therefore the error.
            Socket.emit('Prompt', { Prompt, ...BaseQuery }, HandleStreamedResponseEnd);
        });
    });

    const RunApplicationLoop = async () => {
        while(true){
            await HandleClientPrompt();
            console.log('n');
        }
    };
})();If you want to establish communication with the Lovelace Backend through WebSocket's in another language than the one presented, you can consider:
Consider that, despite the fact that the GPT4FREE python library is used within the backend, the latter's providers are different from those offered by Lovelace. You can obtain the list of available providers using the API, where you will obtain information such as the models that it allows to use, the web address where the service is hosted and the name that must be specified when interacting with the AI as you have seen in the examples. previous (API, WS).
The response you should get from https://lovelace-backend.codewithrodi.com/api/v1/chat/providers/ should be:
{
   "Status":"Success",
   "Data":{
      "Providers":{
        // List of providers available to use on WebSocket's
        "WS":[
            {
                // Name to specify when making the query
                "Name":"DeepAi",
                // Web address where the service is hosted
                "Website":"https://deepai.org",
                // Available models
                "Models":["gpt-3.5-turbo"]

            },
            // ! Others WebSocket's providers...
            { "Name":"Theb", "Website":"https://theb.ai", "Models":["gpt-3.5-turbo"] },
            { "Name":"Yqcloud", "Website":"https://chat9.yqcloud.top/", "Models":["gpt-3.5-turbo"] },
            { "Name":"You", "Website":"https://you.com", "Models":["gpt-3.5-turbo"] },
            { "Name":"GetGpt", "Website":"https://chat.getgpt.world/", "Models":["gpt-3.5-turbo"] }
        ],
        // List of Providers available to be able to use through the API
        "API":[
            {
                // Name to specify when making the query
                "Name":"Aichat",
                // Web address where the service is hosted
                "Website":"https://chat-gpt.org/chat",
                // Available models
                "Models":["gpt-3.5-turbo"]
            },
            // ! Others API providers...
            { "Name":"ChatgptLogin", "Website":"https://chatgptlogin.ac", "Models":["gpt-3.5-turbo"] },
            { "Name":"DeepAi", "Website":"https://deepai.org", "Models":["gpt-3.5-turbo"] },
            { "Name":"Yqcloud", "Website":"https://chat9.yqcloud.top/", "Models":["gpt-3.5-turbo"] },
            { "Name":"You", "Website":"https://you.com", "Models":["gpt-3.5-turbo"] },
            { "Name":"GetGpt", "Website":"https://chat.getgpt.world/", "Models":["gpt-3.5-turbo"] }
        ]
      }
   }
}
As you have seen, the list of providers is divided into 2 parts, one for those queries made through the API while for those that use WebSocket's.
Unlike other examples where requests to the Lovelace backend server are involved, obtaining the list of providers and their respective available models is quite an easy task, since we only have to send a [GET] request to /api/v1 /chat/providers/, where the response will be the JSON that was shown to you previously.
For the following example, we'll use Axios within NodeJS, which you can install using the NPM package manager using the npm i axios command.
const Axios = require('axios');

(async function(){
    // Consider that, you can replace <https://lovelace-backend.codewithrodi.com> with
    // the address where your backend server is mounted. If t

