This project serves as a baseline for developers to extend their use cases across various large language models (LLMs) using Amazon Bedrock agents. The goal is to showcase the potential of leveraging multiple models on Bedrock to create chained responses that adapt to diverse scenarios. In addition to generating text-based outputs, this app also supports creating and examining images using image generation and text-to-image models. This expanded functionality enhances the versatility of the application, making it suitable for more creative and visual use cases.
For those who prefer an Infrastructure-as-Code (IaC) approach, we also provide an AWS CloudFormation template that sets up the core components like an Amazon Bedrock agent, S3 bucket, and a Lambda function. If you'd prefer to deploy this project via AWS CloudFormation, please refer to the workshop guide here.
Alternatively, this README will walk you through the step-by-step process to manually set up and configure Amazon Bedrock agents via the AWS Console, giving you the flexibility to experiment with the latest models and fully unlock the potential of Bedrock agents.
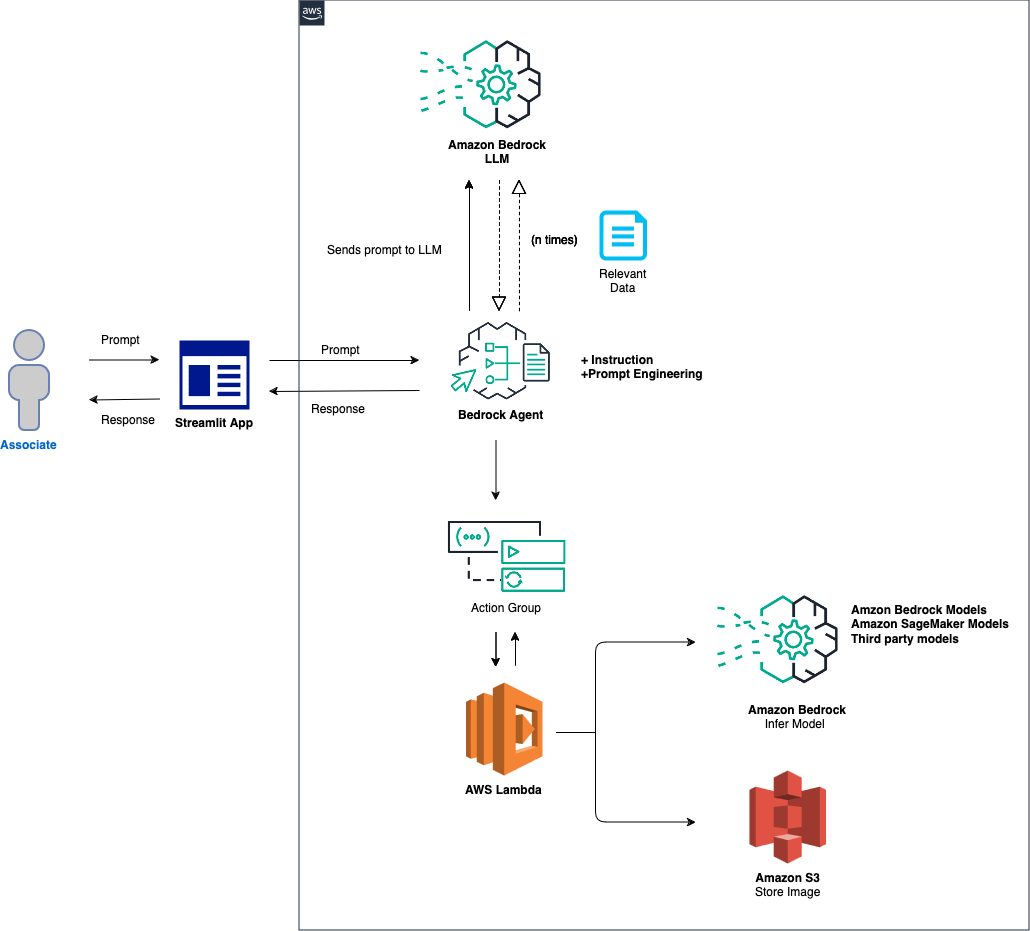
The high-level overview of the solution is as follows:
Agent and Environment Setup: The solution begins by configuring an Amazon Bedrock agent, an AWS Lambda function, and an Amazon S3 bucket. This step establishes the foundation for model interaction and data handling, preparing the system to receive and process prompts from a front-end application. Prompt Processing and Model Inference: When a prompt is received from the front-end application, the Bedrock agent evaluates and dispatches the prompt, along with the specified model ID, to the Lambda function using the action group mechanism. This step leverages the action group's API schema for precise parameter handling, facilitating effective model inference based on the input prompt. Data Handling and Response Generation: For tasks involving image-to-text or text-to-image conversion, the Lambda function interacts with the S3 bucket to perform necessary read or write operations on images. This step ensures the dynamic handling of multimedia content, culminating in the generation of responses or transformations dictated by the initial prompt.
In the following sections, we will guide you through:
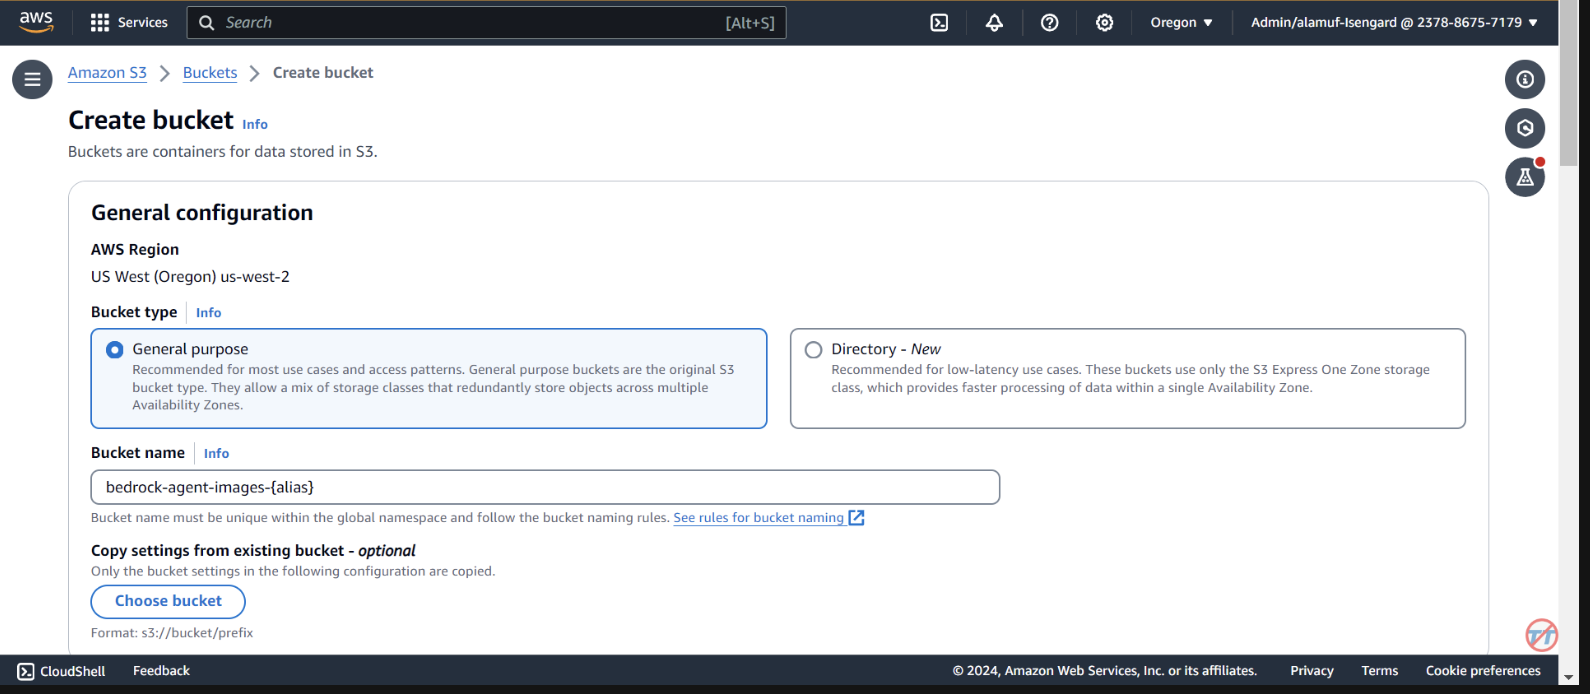
AWS SAM (Serverless Application Model) is an open-source framework that helps you build serverless applications on AWS. It simplifies the deployment, management, and monitoring of serverless resources such as AWS Lambda, Amazon API Gateway, Amazon DynamoDB, and more. Here's a comprehensive guide on how to set up and use AWS SAM.
The Framework simplifies the process of creating, deploying, and managing serverless applications by abstracting away the complexities of cloud infrastructure. It provides a unified way to define and manage your serverless resources using a configuration file and a set of commands.
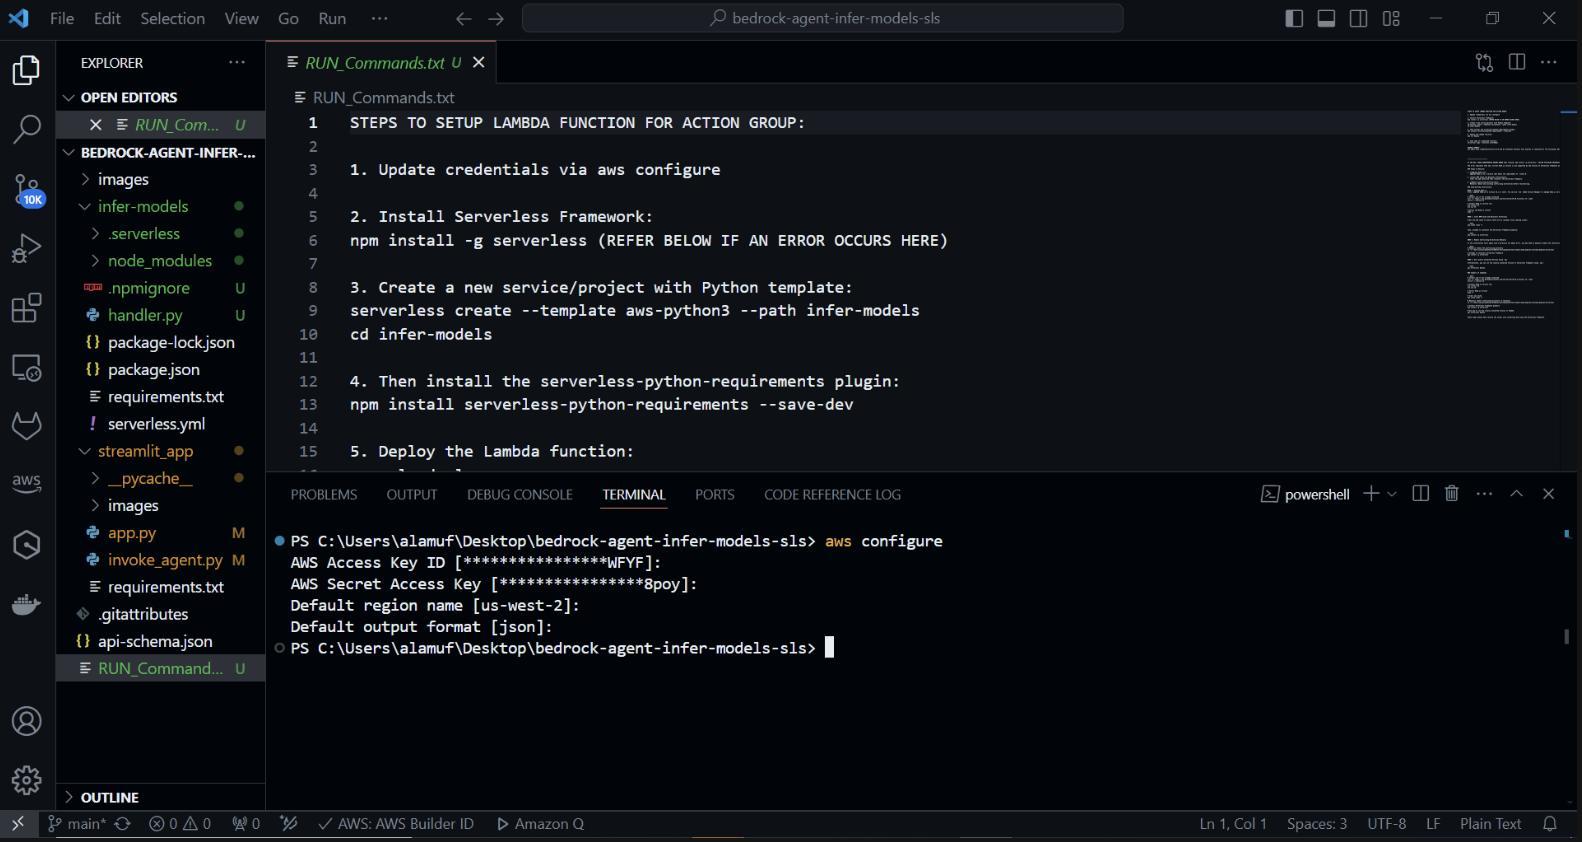
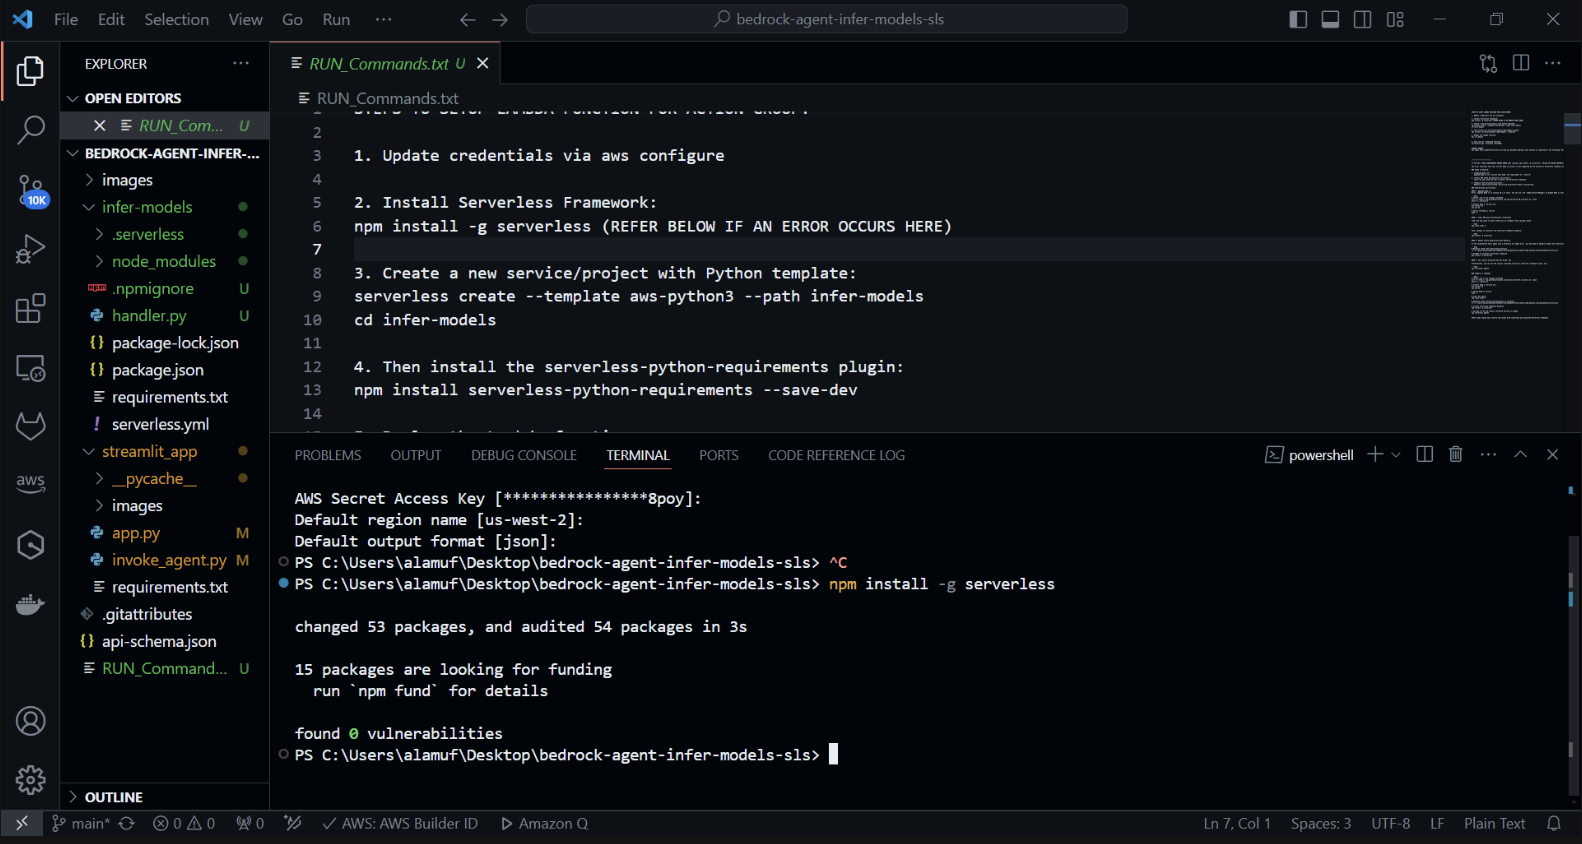
Create a new Serverless project with a Python template. In your terminal, run: cd infer-models Then run serverless
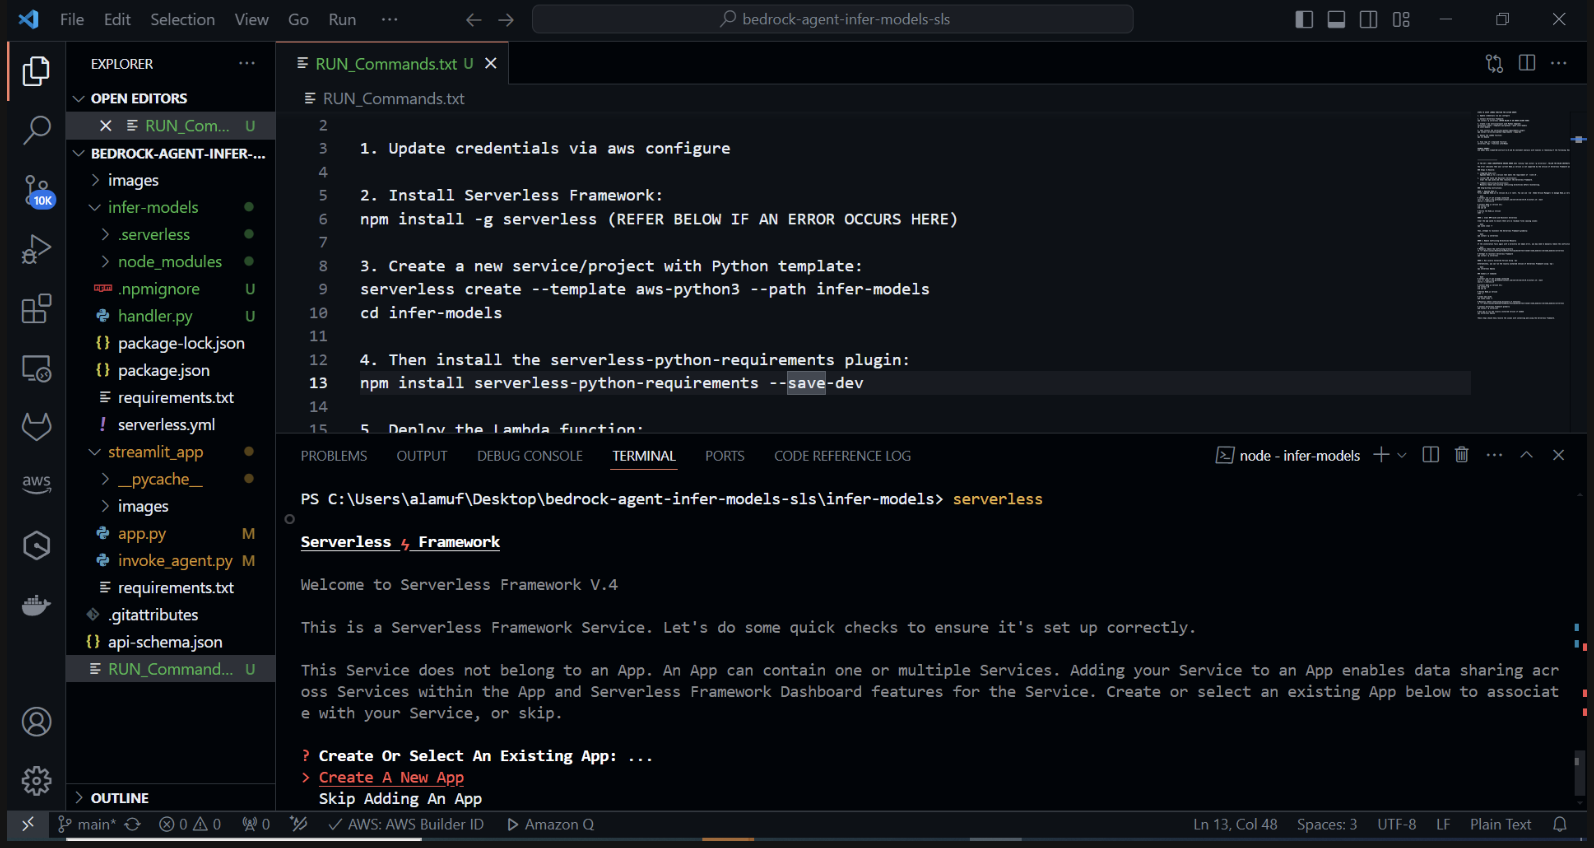
This will start the Serverless Framework's interactive project creation process.. You'll be prompted with several options: Choose "Create new Serverless app". Select the "aws-python3" template and provide "infer-models" as the name for your project.
This will create a new directory called infer-models with a basic Serverless project structure and a Python template.
You may also be prompted to login/register. select the "Login/Register" option. This will open a browser window where you can create a new account or log in if you already have one. After logging in or creating an account, choose the "Framework Open Source" option, which is free to use.
If your stack fails to deploy, please comment out line 2 of the serverless.yml file
After executing the serverless command and following the prompts, a new directory with the project name (e.g., infer-models) will be created, containing the boilerplate structure and configuration files for the Serverless project.
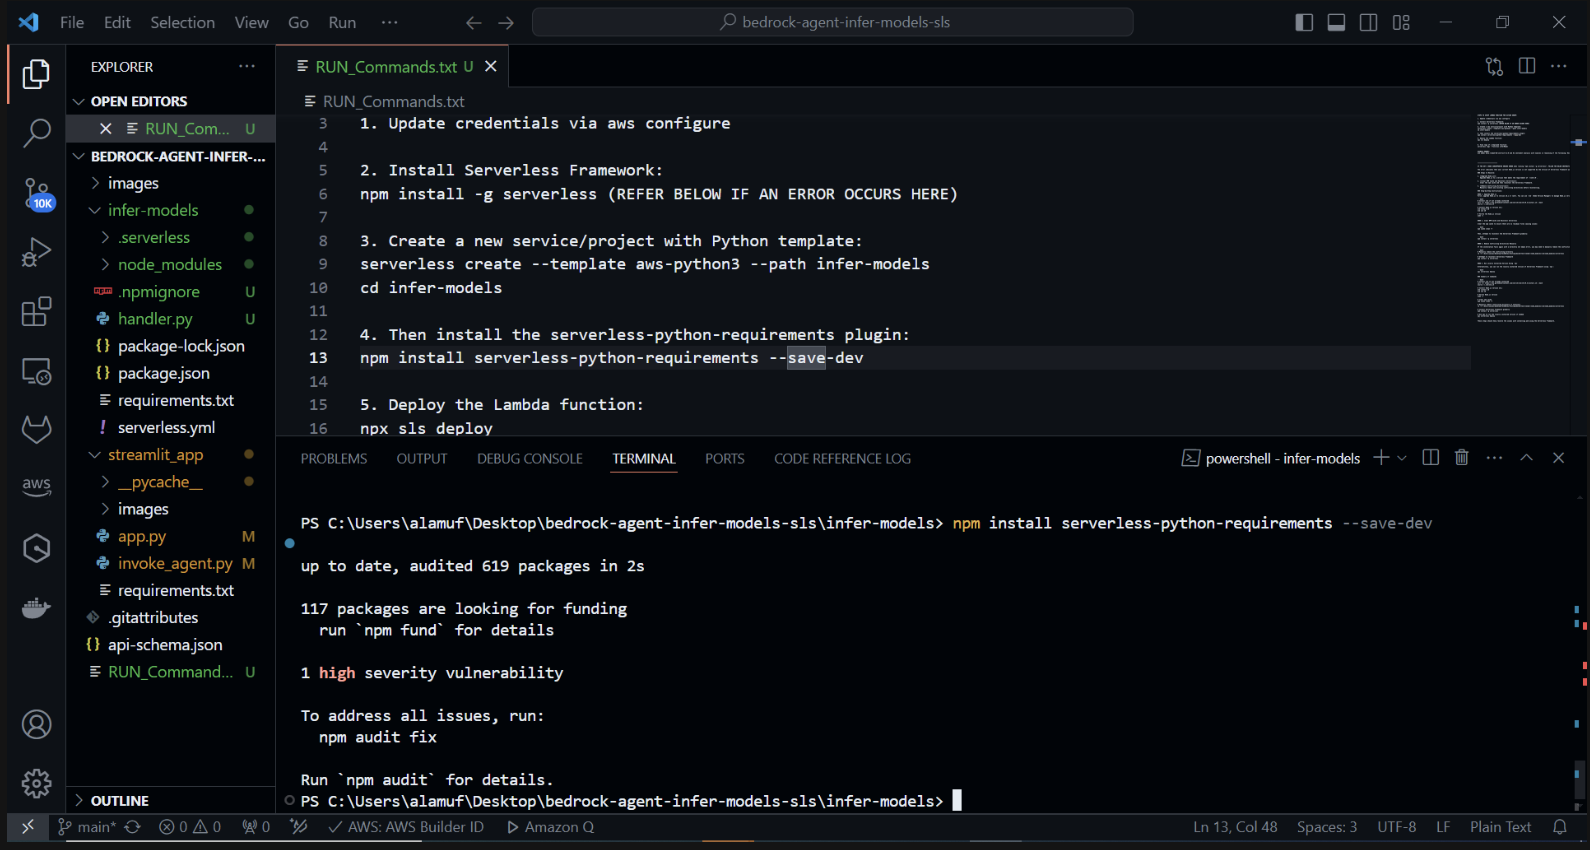
Now we will Install the serverless-python-requirements Plugin: The serverless-python-requirements plugin helps manage Python dependencies for your Serverless project. Install it by running:
npm install serverless-python-requirements —save-dev
3.)
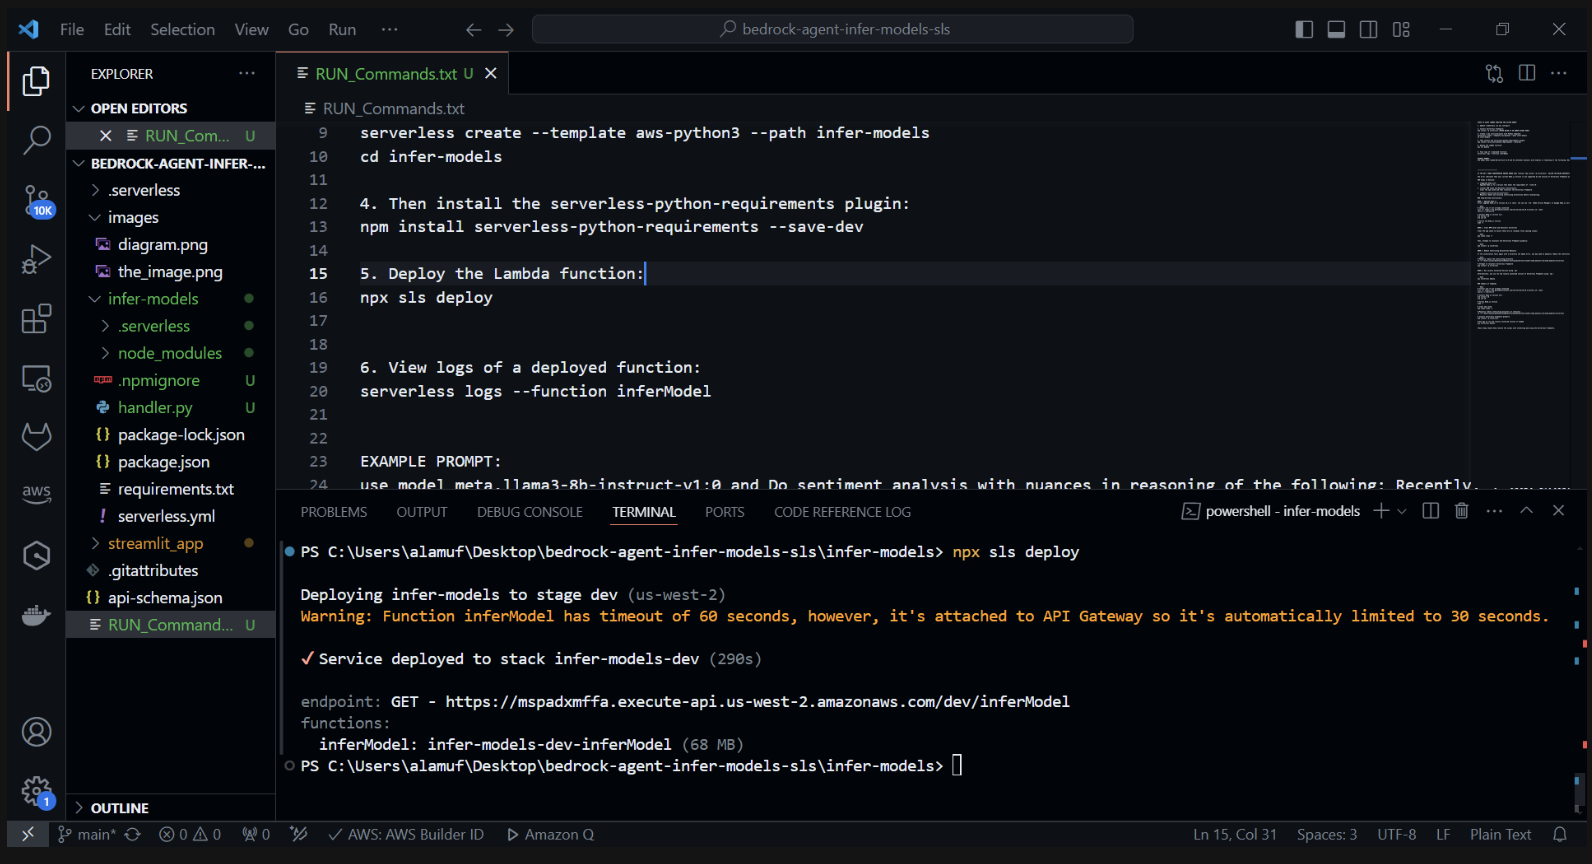
npx sls deploy
(BEFORE RUNNING THE ABOVE COMMAND, DOCKER ENGINE WILL NEED TO BE INSTALLED AND RUNNING. MORE INFORMATION CAN BE FOUND HERE )
(This will package and deploy the AWS Lambda function)
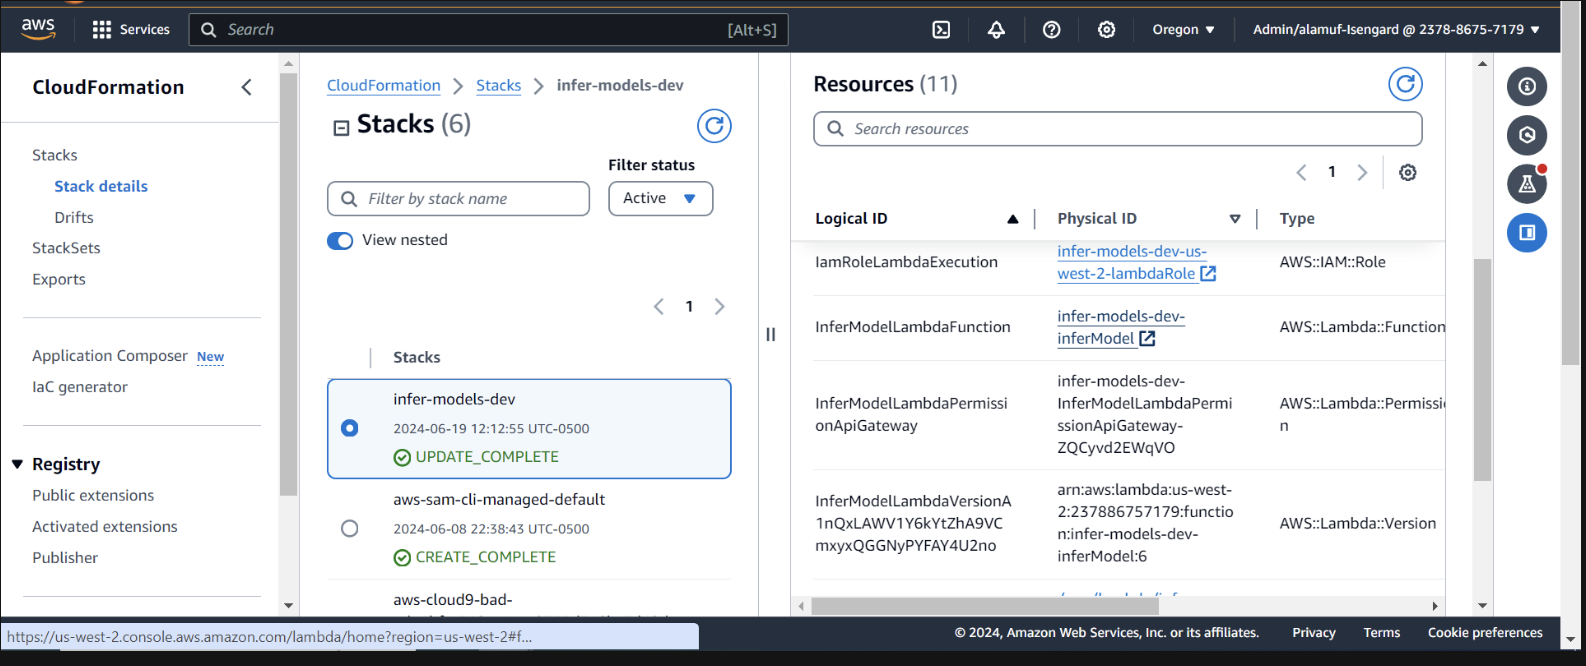
Inspect the deployment within CloudFormation in the AWS Console

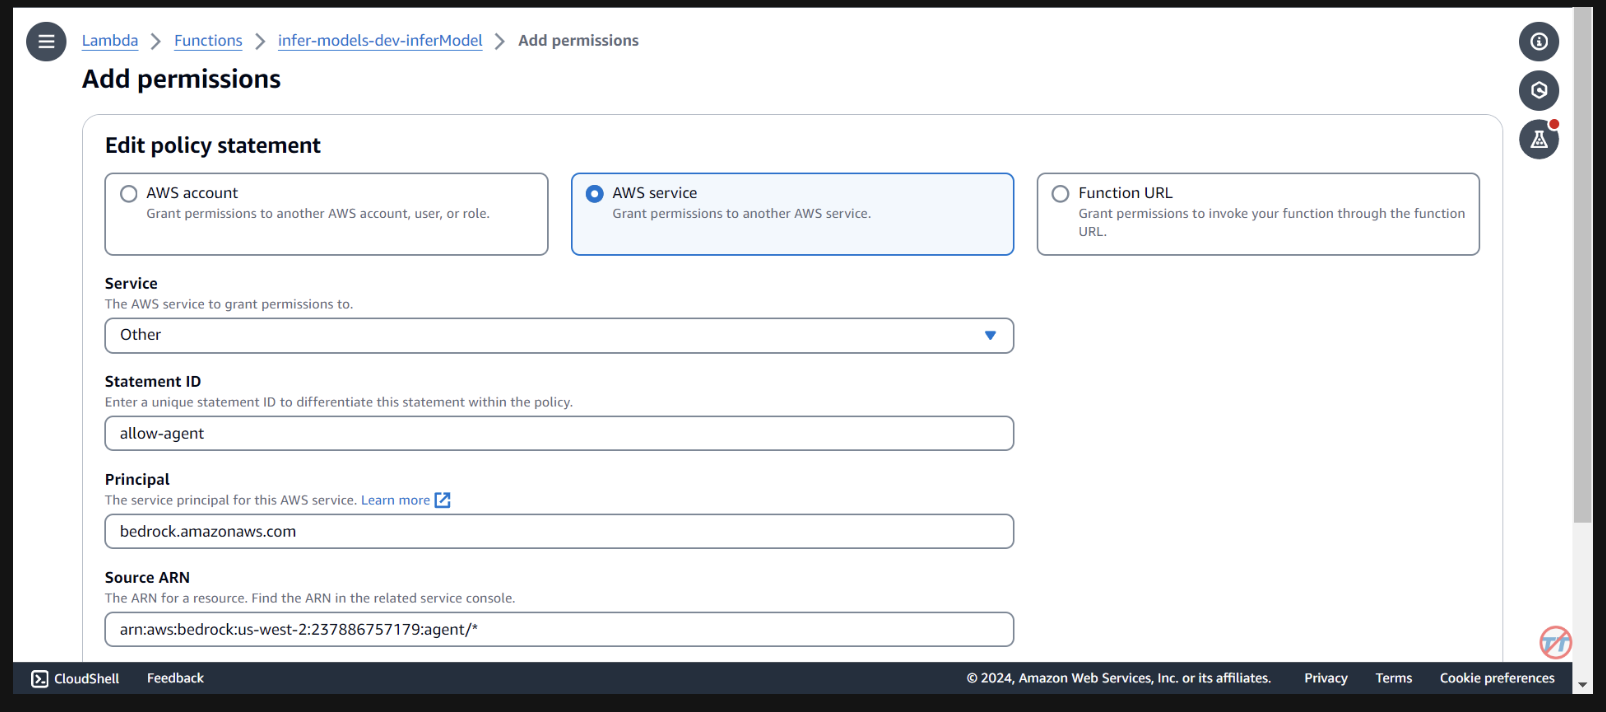
We need to provide the bedrock agent permissions to invoke the lambda function. Open the lambda function and scroll down to select the Configuration tab. On the left, select Permissions. Scroll down to Resource-based policy statements and select Add permissions.
Select AWS service in the middle for your policy statement. Choose Other for your service, and put allow-agent for the StatementID. For the Principal, put bedrock.amazonaws.com .
Enter arn:aws:bedrock:us-west-2:{aws-account-id}:agent/*. Please note, AWS recommends least privilege so only the allowed agent can invoke this Lambda function. A * at the end of the ARN grants any agent in the account access to invoke this Lambda. Ideally, we would not use this in a production environment. Lastly, for the Action, select lambda:InvokeFunction, then Save.
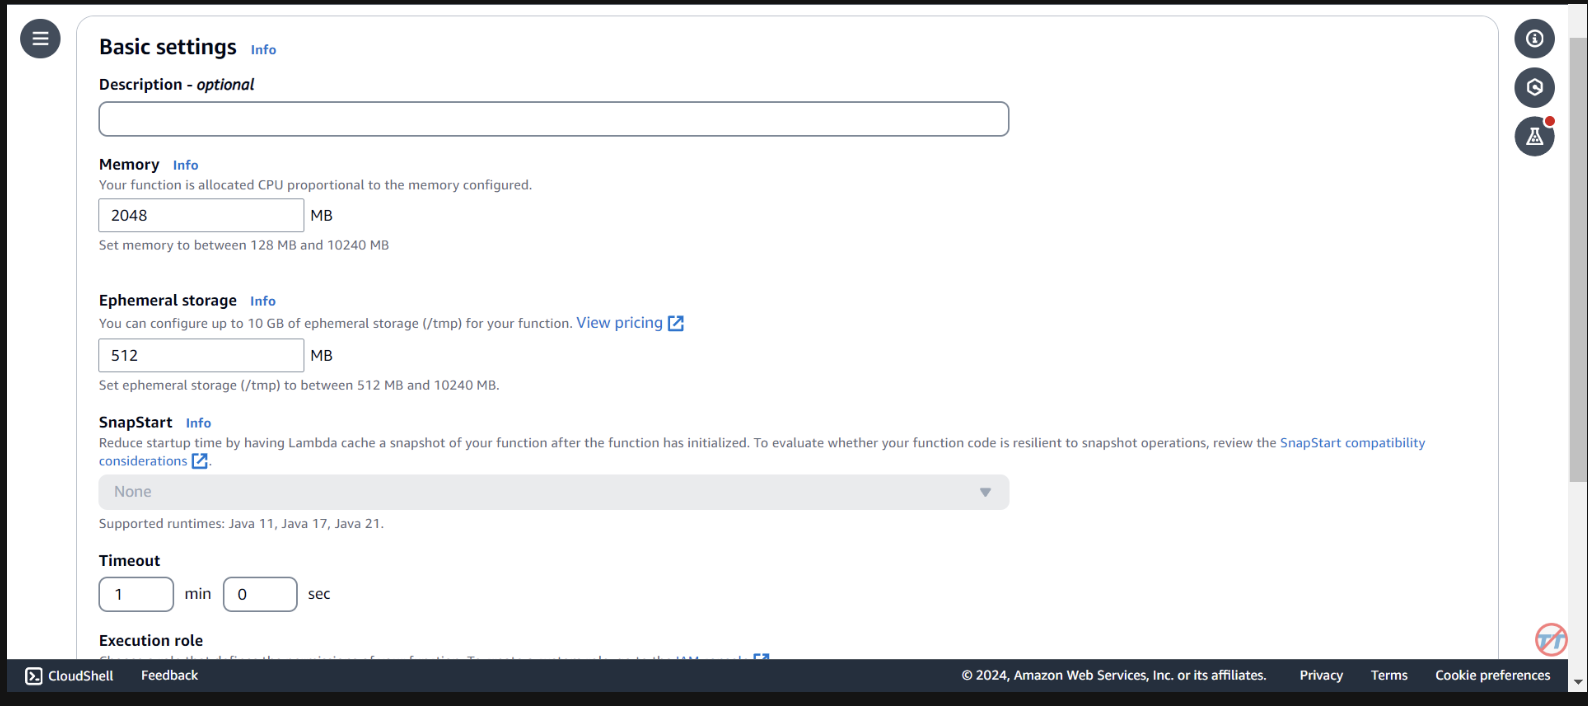
To help with inference, we will increase the CPU/memory on the Lambda function. We will also increase the timeout to allow the function enough time to complete the invocation. Select General configuration on the left, then Edit on the right.
Change Memory to 2048 MB and timeout to 1 minute. Scroll down, and select Save.
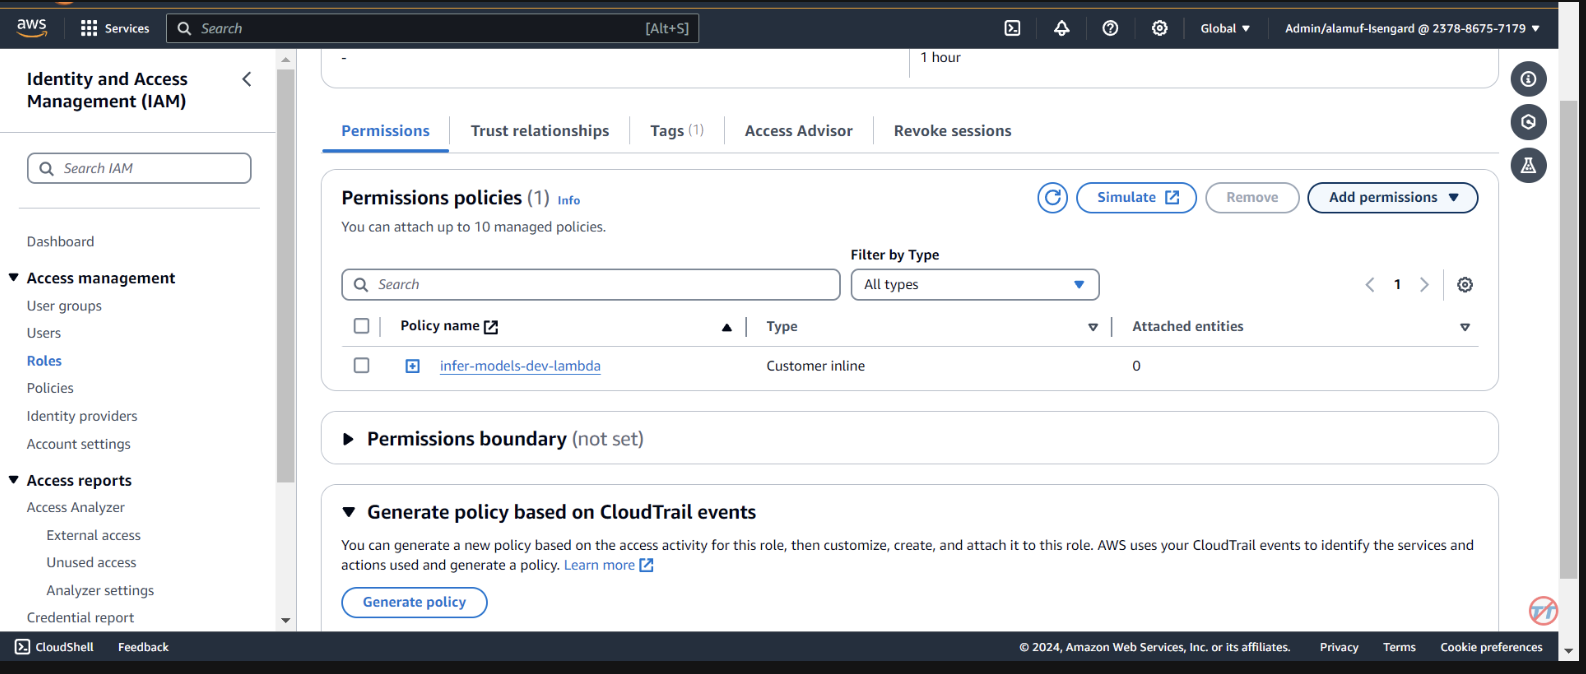
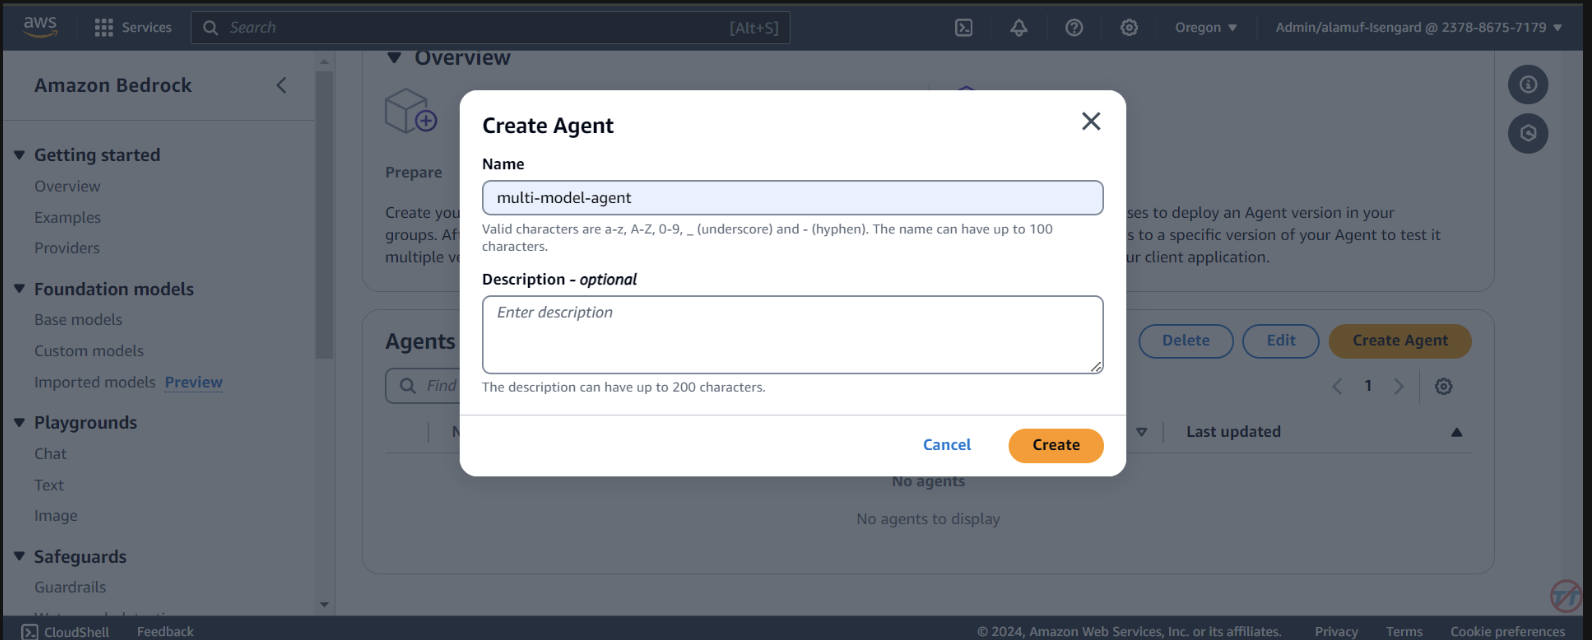
Agents. Provide an agent name, like multi-model-agent then create the agent.
You are a research agent that interacts with various large language models. You pass the model ID and prompt from requests to large language models to create and store images. Then, the LLM will return a presigned URL to the image similar to the URL example provided. You also call LLMS for text and code generation, summarization, problem solving, text-to-sql, response comparisons and ratings. Remeber. you use other large language models for inference. Do not decide when to provide your own response, unless asked.
After, make sure you scroll to the top and select the Save button before moving to the next step.
Next, we will add an action group. Scroll down to Action groups then select Add. Call the action group call-model.
For the Action groupt type, choose Define with API schemas
The next section, we will select an existing Lambda function infer-models-dev-inferModel.
For the API Schema, we will choose Define with in-line OpenAPI schema editor. Copy & paste the schema from below into the In-line OpenAPI schema editor, then select Add:
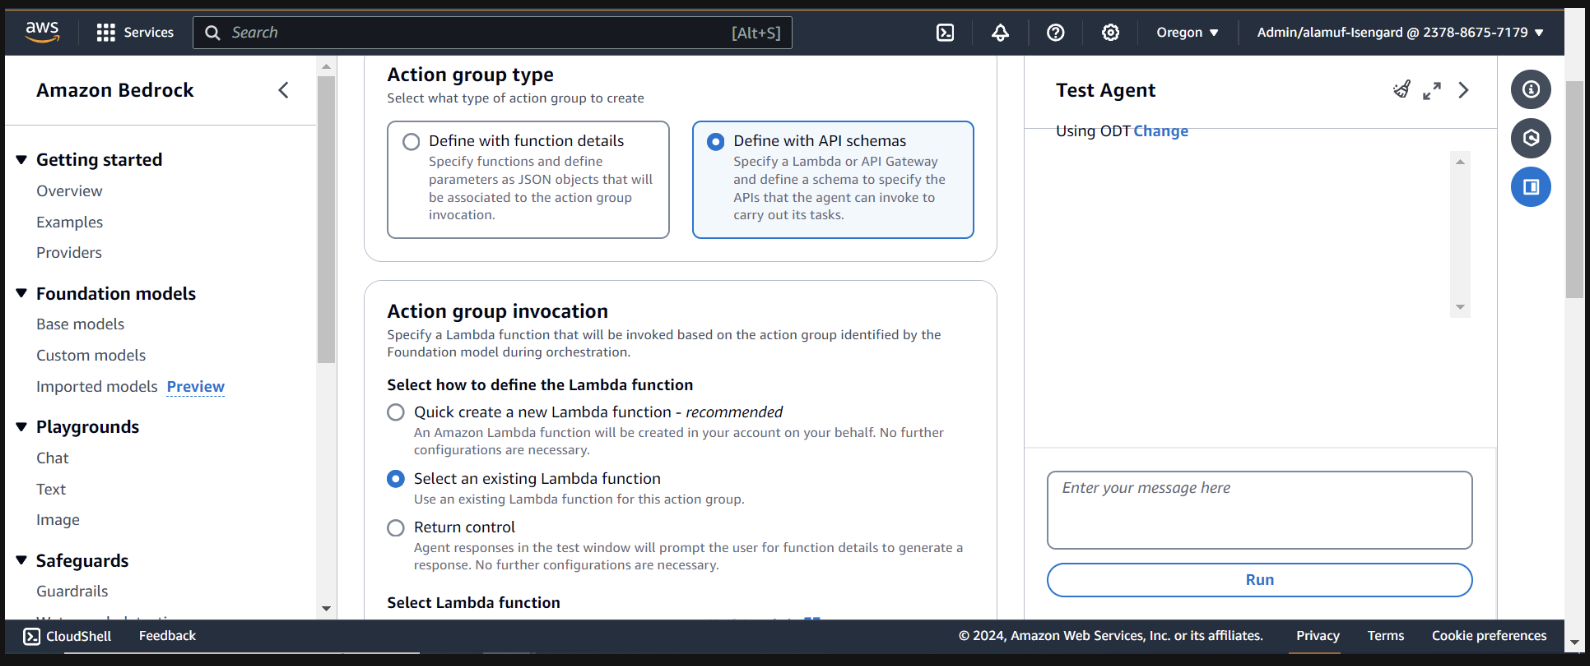
(This API schema is needed so that the bedrock agent knows the format structure and parameters required for the action group to interact with the Lambda function.)
{
  "openapi": "3.0.0",
  "info": {
    "title": "Model Inference API",
    "description": "API for inferring a model with a prompt, and model ID.",
    "version": "1.0.0"
  },
  "paths": {
    "/callModel": {
      "post": {
        "description": "Call a model with a prompt, model ID, and an optional image",
        "parameters": [
          {
            "name": "modelId",
            "in": "query",
            "description": "The ID of the model to call",
            "required": true,
            "schema": {
              "type": "string"
            }
          },
          {
            "name": "prompt",
            "in": "query",
            "description": "The prompt to provide to the model",
            "required": true,
            "schema": {
              "type": "string"
            }
          }
        ],
        "requestBody": {
          "required": true,
          "content": {
            "multipart/form-data": {
              "schema": {
                "type": "object",
                "properties": {
                  "modelId": {
                    "type": "string",
                    "description": "The ID of the model to call"
                  },
                  "prompt": {
                    "type": "string",
                    "description": "The prompt to provide to the model"
                  },
                  "image": {
                    "type": "string",
                    "format": "binary",
                    "description": "An optional image to provide to the model"
                  }
                },
                "required": ["modelId", "prompt"]
              }
            }
          }
        },
        "responses": {
          "200": {
            "description": "Successful response",
            "content": {
              "application/json": {
                "schema": {
                  "type": "object",
                  "properties": {
                    "result": {
                      "type": "string",
                      "description": "The result of calling the model with the provided prompt and optional image"
                    }
                  }
                }
              }
            }
          }
        }
      }
    }
  }
}
Orchestration tab, enable the Override orchestration template defaults option.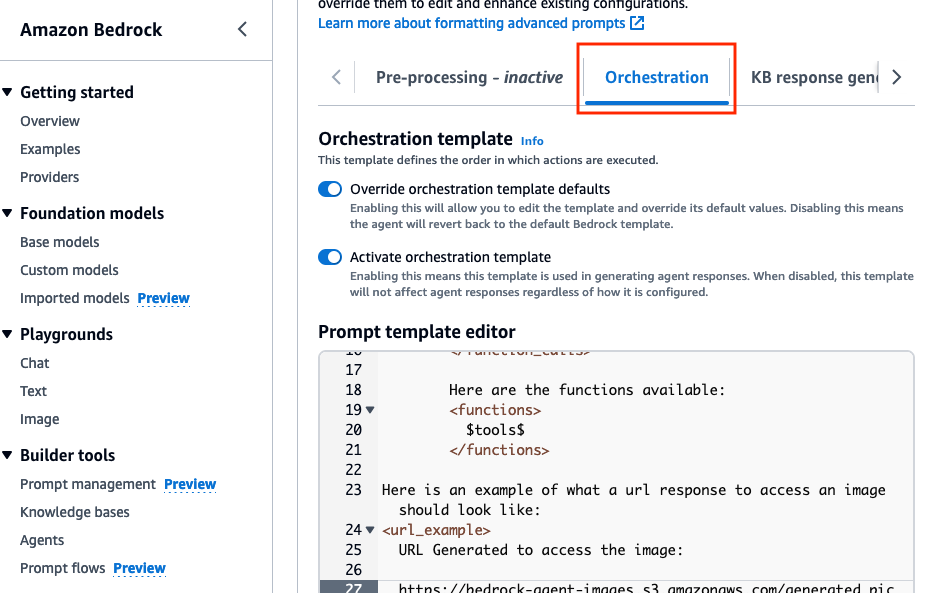
Here is an example of what a url response to access an image should look like:
<url_example>
  URL Generated to access the image:

  https://bedrock-agent-images.s3.amazonaws.com/generated_pic.png?AWSAccessKeyId=123xyz&Signature=rlF0gN%2BuaTHzuEDfELz8GOwJacA%3D&x-amz-security-token=IQoJb3JpZ2msqKr6cs7sTNRG145hKcxCUngJtRcQ%2FzsvDvt0QUSyl7xgp8yldZJu5Jg%3D%3D&Expires=1712628409
</url_example>
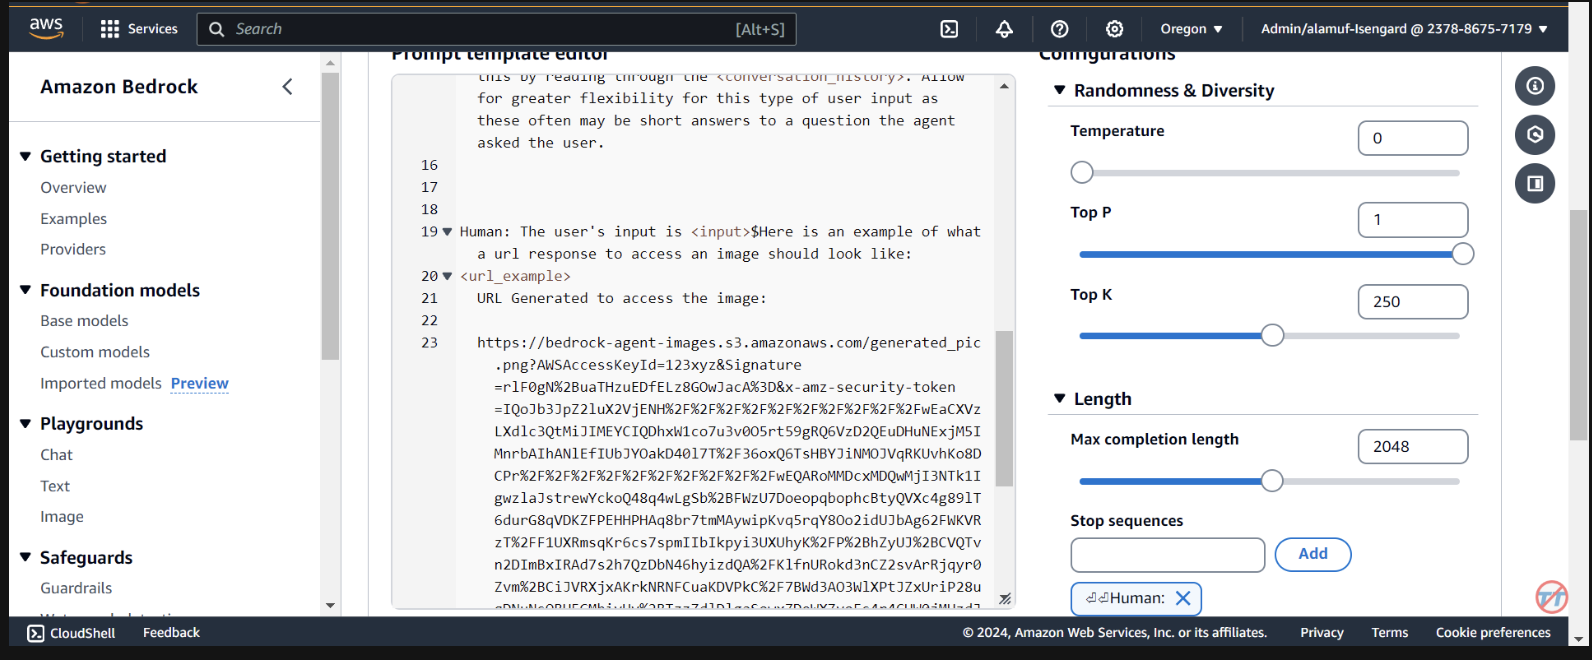
This prompt helps provide the agent an example when formatting the response of a presigned url after an image is generated in the S3 bucket. Additionally, there is an option to use a custom parser Lambda function for more granular formatting.
Scroll to the bottom and select the Save and exit button.
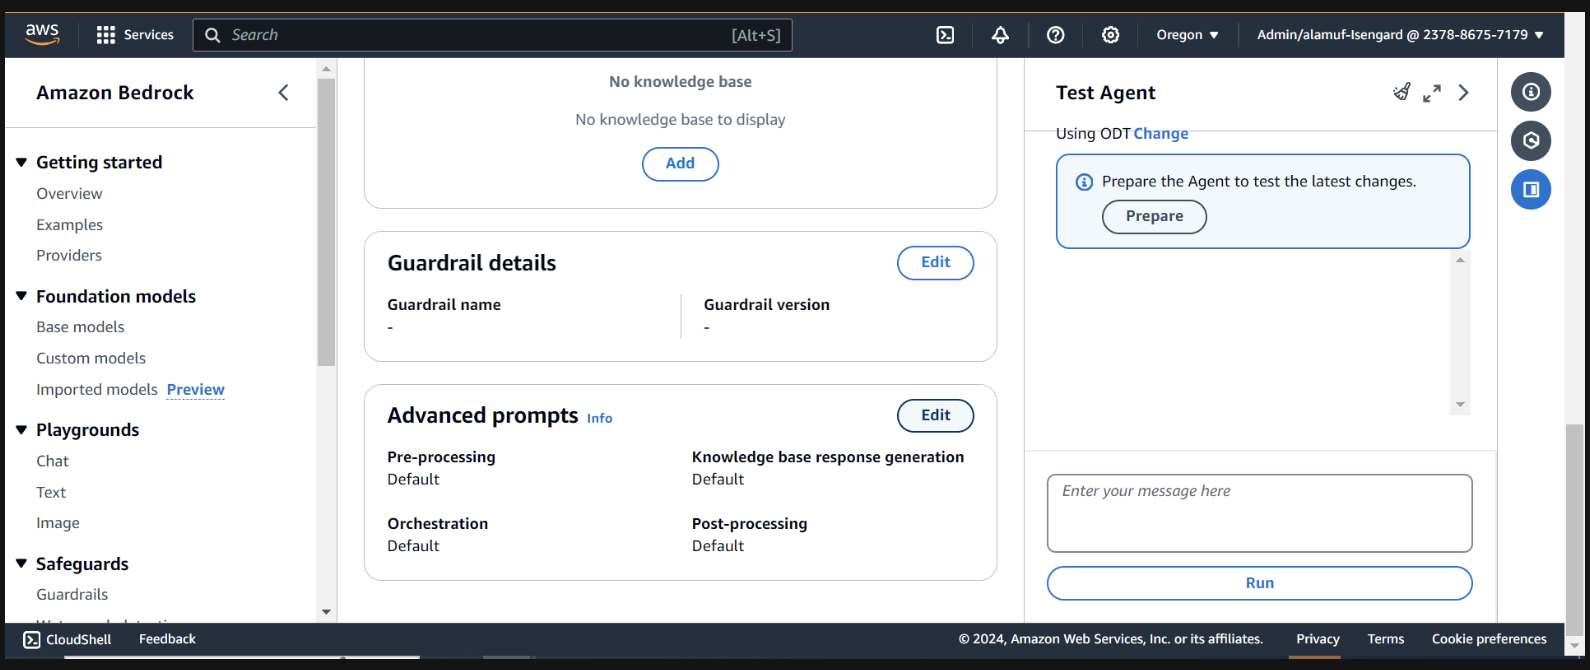
After, make sure to hit the Save and exit button again at the top, then the Prepare button at the top of the test agent UI on the right. This will allow us to test the latest changes.
(Before proceeding, please make sure to enable all models via Amazon Bedrock console that you plan on testing with.)
To start testing, prepare the agent by finding the prepare button on the Agent builder page
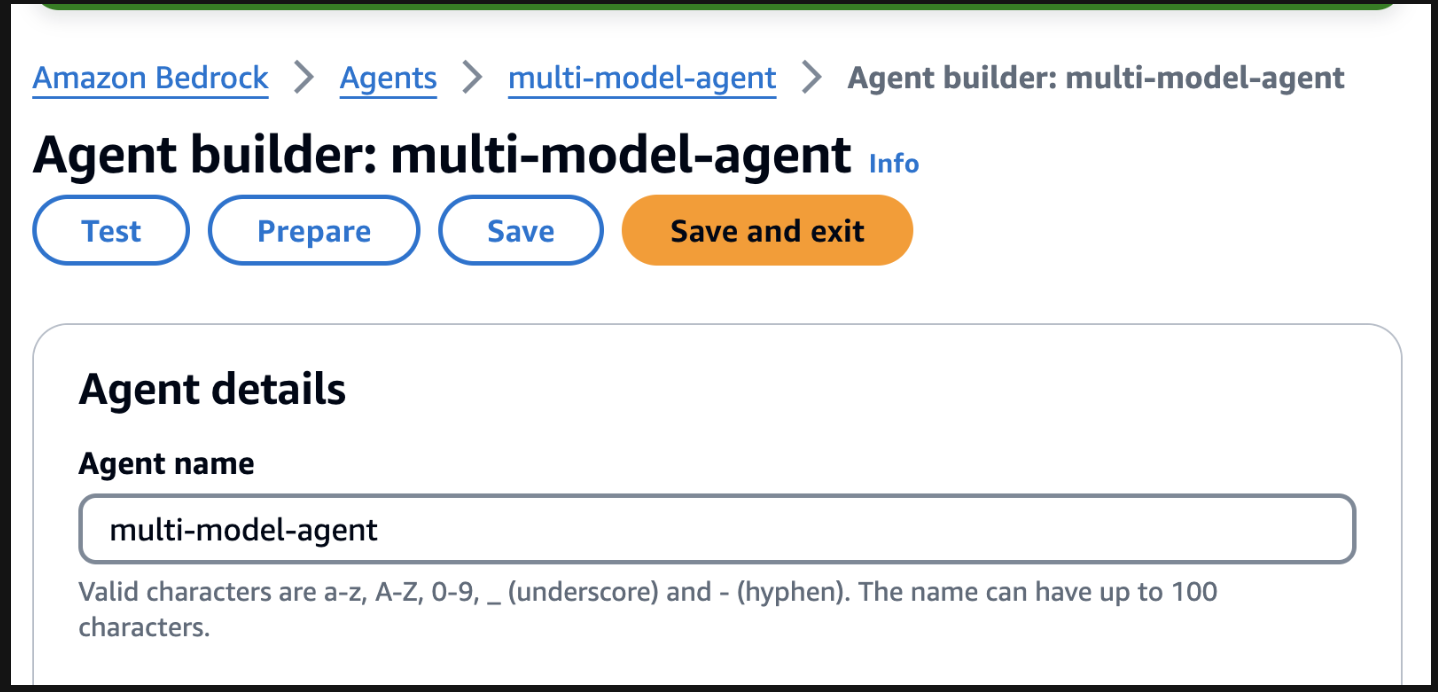
On the right, you should see an option to test the agent with a user input field. Below are a few prompts that you can test. However, it is encouraged you become creative and test variations of prompts.
One thing to note before testing. When you do text-to-image or image-to-text, the project code references the same .png file statically. In an ideal environment, this step can be configured to be more dynamically.
Use model amazon.titan-image-generator-v1 and create me an image of a woman in a boat on a river.
Use model anthropic.claude-3-haiku-20240307-v1:0 and describe to me the image that is uploaded. The model function will have the information needed to provide a response. So, dont ask about the image.
Use model stability.stable-diffusion-xl-v1. Create an image of an astronaut riding a horse in the desert.
Use model meta.llama3-70b-instruct-v1:0. You are a gifted copywriter, with special expertise in writing Google ads. You are tasked to write a persuasive and personalized Google ad based on a company name and a short description. You need to write the Headline and the content of the Ad itself. For example: Company: Upwork Description: Freelancer marketplace Headline: Upwork: Hire The Best - Trust Your Job To True Experts Ad: Connect your business to Expert professionals & agencies with specialized talent. Post a job today to access Upwork's talent pool of quality professionals & agencies. Grow your team fast. 90% of customers rehire. Trusted by 5M+ businesses. Secure payments. - Write a persuasive and personalized Google ad for the following company. Company: Click Description: SEO services
(If you would like to have a UI setup with this project, continue to step 6)
You will need to have an agent alias ID, along with the agent ID for this step. Go to the Bedrock management console, then select your multi-model agent. Copy the Agent ID from the top-right of the Agent overview section. Then, scroll down to Aliases and select Create. Name the alias a1, then create the agent. Save the Alias ID generated, NOT the alias name.
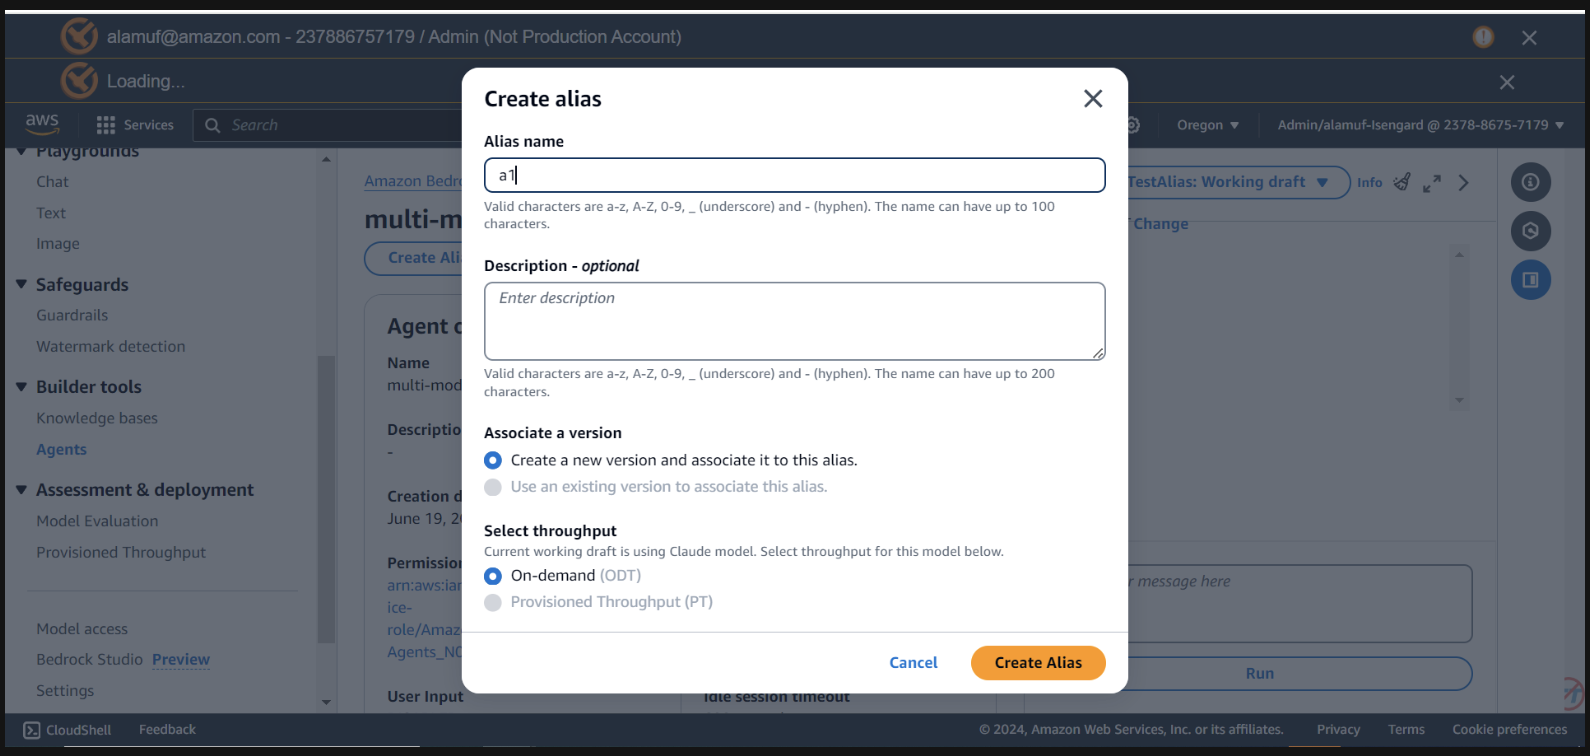
now, navigate back to the IDE you used to open up the project.
Navigate to streamlit_app Directory:
Update Configuration:
Open the invoke_agent.py file.
On line 19 & 20, update the agentId and agentAliasId variables with the appropriate values, then save it.
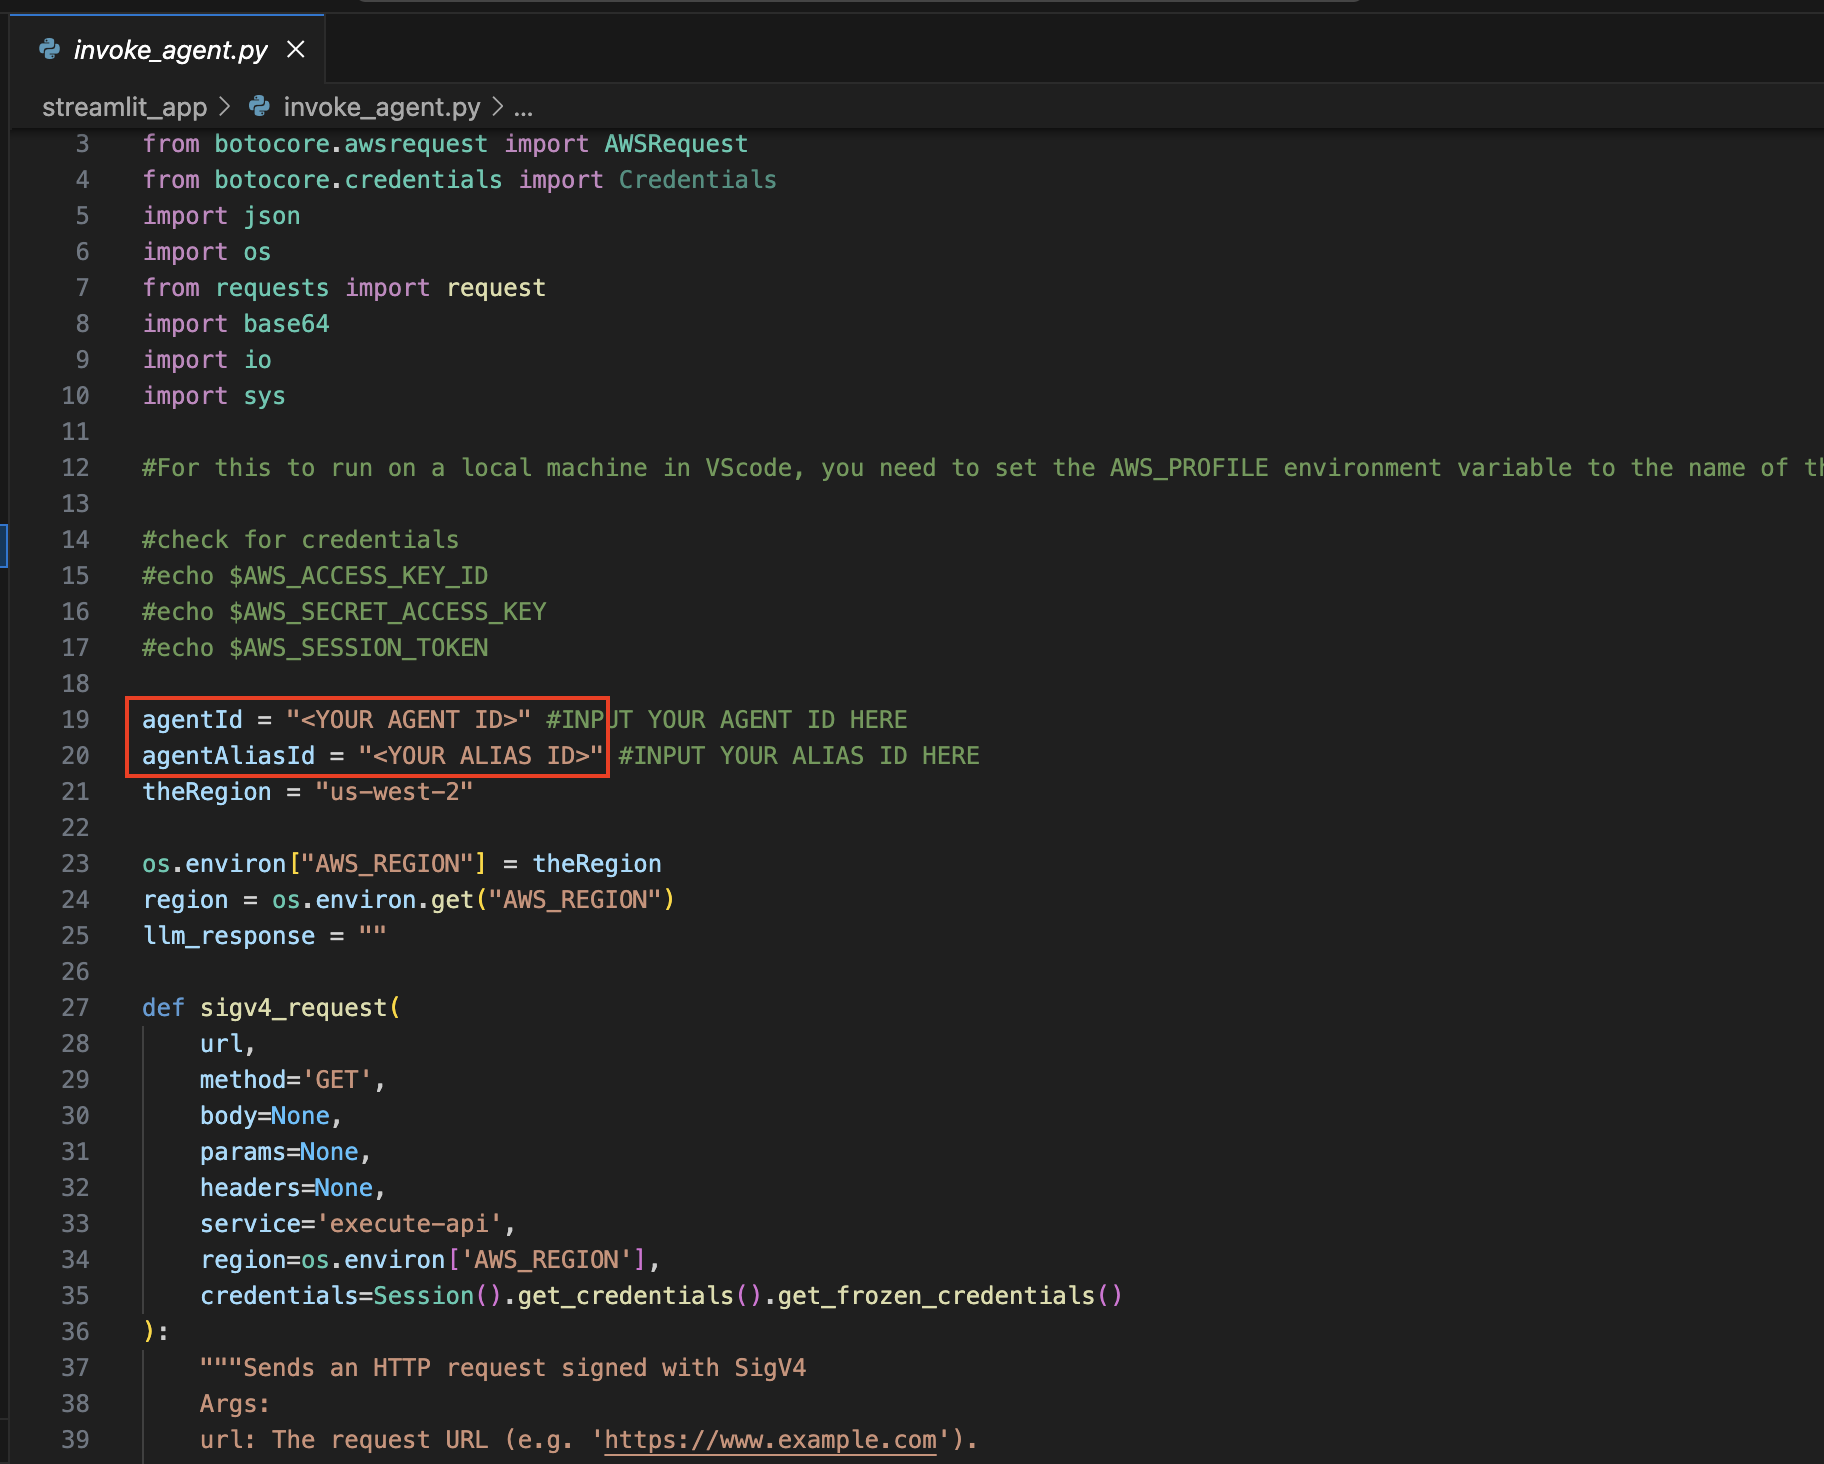
Install Streamlit (if not already installed):
Run the following command to install all of the dependencies needed:
pip install streamlit boto3 pandasRun the Streamlit App:
streamlit_app directory:
streamlit run app.py
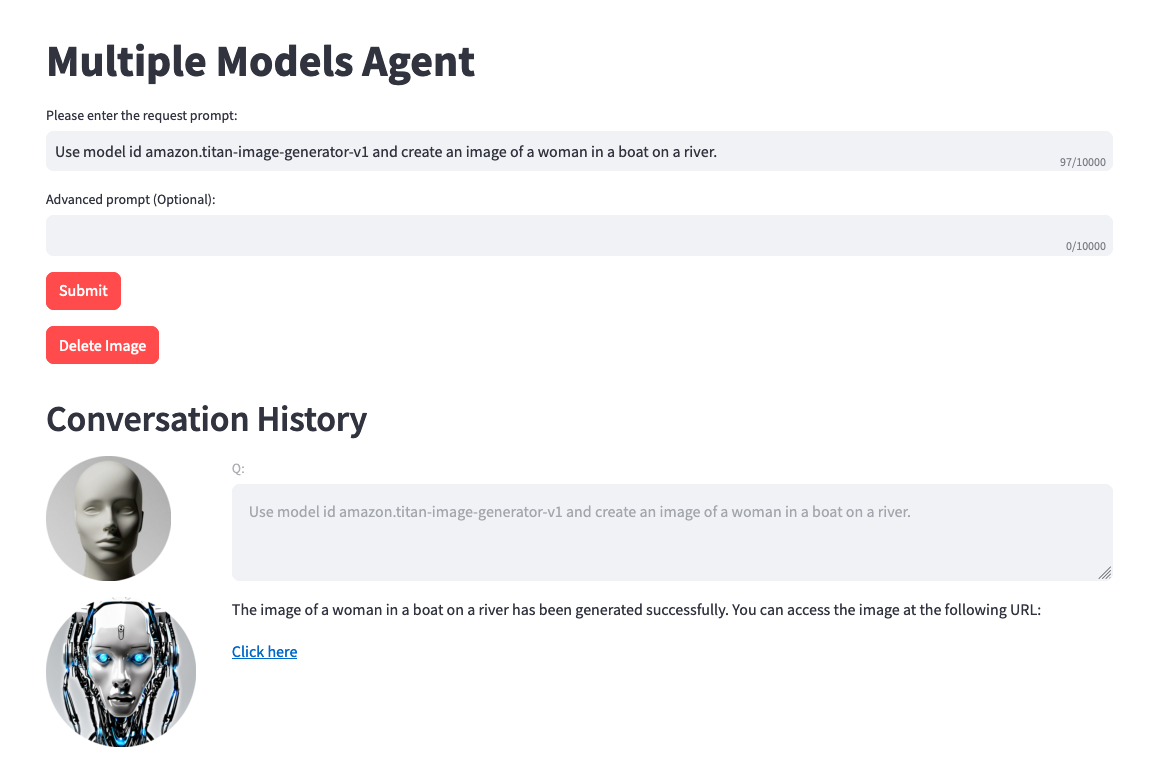
Remember that you can use any available model from Amazon Bedrock, and are not limited to the list above. If a model ID is not listed, please refer to the latest available models (IDs) on the Amazon Bedrock documentation page here.
You can leverage the provided project to fine-tune and benchmark this solution against your own datasets and use cases. Explore different model combinations, push the boundaries of what's possible, and drive innovation in the ever-evolving landscape of generative AI.
See CONTRIBUTING for more information.
This library is licensed under the MIT-0 License. See the LICENSE file.