
New robot in town: SO-100

We just added a new tutorial on how to build a more affordable robot, at the price of $110 per arm!
Teach it new skills by showing it a few moves with just a laptop.
Then watch your homemade robot act autonomously ?
Follow the link to the full tutorial for SO-100.
LeRobot: State-of-the-art AI for real-world robotics
? LeRobot aims to provide models, datasets, and tools for real-world robotics in PyTorch. The goal is to lower the barrier to entry to robotics so that everyone can contribute and benefit from sharing datasets and pretrained models.
? LeRobot contains state-of-the-art approaches that have been shown to transfer to the real-world with a focus on imitation learning and reinforcement learning.
? LeRobot already provides a set of pretrained models, datasets with human collected demonstrations, and simulation environments to get started without assembling a robot. In the coming weeks, the plan is to add more and more support for real-world robotics on the most affordable and capable robots out there.
? LeRobot hosts pretrained models and datasets on this Hugging Face community page: huggingface.co/lerobot
 |
 |
 |
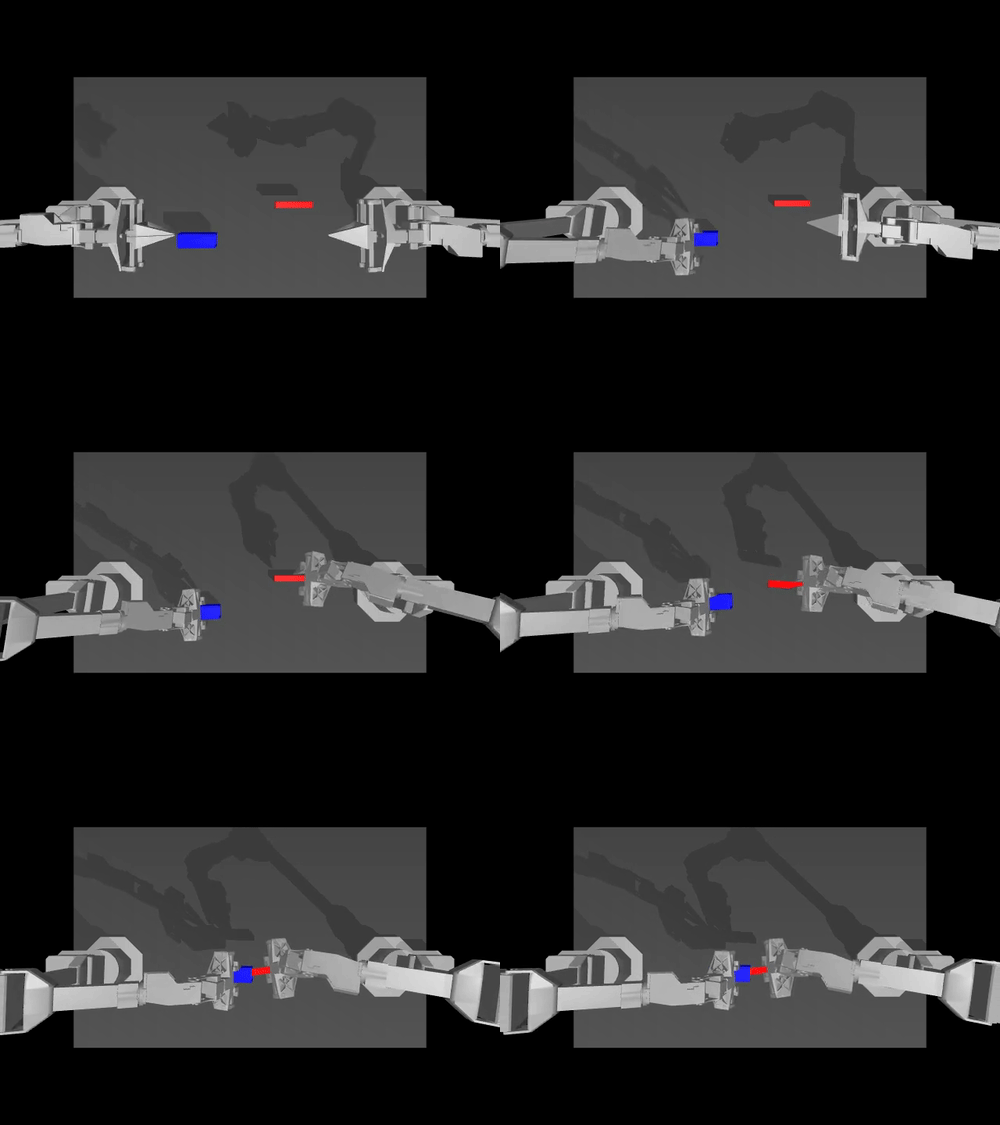
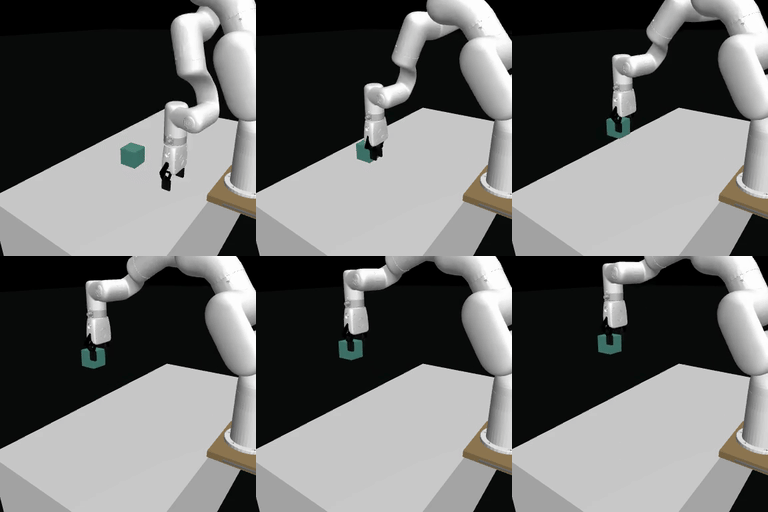
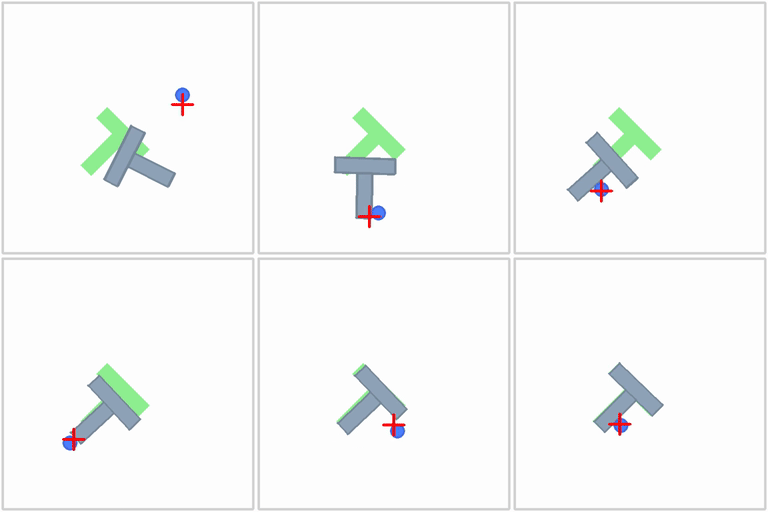
| ACT policy on ALOHA env | TDMPC policy on SimXArm env | Diffusion policy on PushT env |
Download our source code:
git clone https://github.com/huggingface/lerobot.git
cd lerobot
Create a virtual environment with Python 3.10 and activate it, e.g. with miniconda:
conda create -y -n lerobot python=3.10
conda activate lerobot
Install ? LeRobot:
pip install -e .NOTE: Depending on your platform, If you encounter any build errors during this step you may need to install
cmakeandbuild-essentialfor building some of our dependencies. On linux:sudo apt-get install cmake build-essential
For simulations, ? LeRobot comes with gymnasium environments that can be installed as extras:
For instance, to install ? LeRobot with aloha and pusht, use:
pip install -e ".[aloha, pusht]"To use Weights and Biases for experiment tracking, log in with
wandb login(note: you will also need to enable WandB in the configuration. See below.)
.
├── examples             # contains demonstration examples, start here to learn about LeRobot
|   └── advanced         # contains even more examples for those who have mastered the basics
├── lerobot
|   ├── configs          # contains hydra yaml files with all options that you can override in the command line
|   |   ├── default.yaml   # selected by default, it loads pusht environment and diffusion policy
|   |   ├── env            # various sim environments and their datasets: aloha.yaml, pusht.yaml, xarm.yaml
|   |   └── policy         # various policies: act.yaml, diffusion.yaml, tdmpc.yaml
|   ├── common           # contains classes and utilities
|   |   ├── datasets       # various datasets of human demonstrations: aloha, pusht, xarm
|   |   ├── envs           # various sim environments: aloha, pusht, xarm
|   |   ├── policies       # various policies: act, diffusion, tdmpc
|   |   ├── robot_devices  # various real devices: dynamixel motors, opencv cameras, koch robots
|   |   └── utils          # various utilities
|   └── scripts          # contains functions to execute via command line
|       ├── eval.py                 # load policy and evaluate it on an environment
|       ├── train.py                # train a policy via imitation learning and/or reinforcement learning
|       ├── control_robot.py        # teleoperate a real robot, record data, run a policy
|       ├── push_dataset_to_hub.py  # convert your dataset into LeRobot dataset format and upload it to the Hugging Face hub
|       └── visualize_dataset.py    # load a dataset and render its demonstrations
├── outputs               # contains results of scripts execution: logs, videos, model checkpoints
└── tests                 # contains pytest utilities for continuous integration
Check out example 1 that illustrates how to use our dataset class which automatically downloads data from the Hugging Face hub.
You can also locally visualize episodes from a dataset on the hub by executing our script from the command line:
python lerobot/scripts/visualize_dataset.py
    --repo-id lerobot/pusht
    --episode-index 0
or from a dataset in a local folder with the root DATA_DIR environment variable (in the following case the dataset will be searched for in ./my_local_data_dir/lerobot/pusht)
DATA_DIR='./my_local_data_dir' python lerobot/scripts/visualize_dataset.py
    --repo-id lerobot/pusht
    --episode-index 0
It will open rerun.io and display the camera streams, robot states and actions, like this:
Our script can also visualize datasets stored on a distant server. See python lerobot/scripts/visualize_dataset.py --help for more instructions.
LeRobotDataset formatA dataset in LeRobotDataset format is very simple to use. It can be loaded from a repository on the Hugging Face hub or a local folder simply with e.g. dataset = LeRobotDataset("lerobot/aloha_static_coffee") and can be indexed into like any Hugging Face and PyTorch dataset. For instance dataset[0] will retrieve a single temporal frame from the dataset containing observation(s) and an action as PyTorch tensors ready to be fed to a model.
A specificity of LeRobotDataset is that, rather than retrieving a single frame by its index, we can retrieve several frames based on their temporal relationship with the indexed frame, by setting delta_timestamps to a list of relative times with respect to the indexed frame. For example, with delta_timestamps = {"observation.image": [-1, -0.5, -0.2, 0]} one can retrieve, for a given index, 4 frames: 3 "previous" frames 1 second, 0.5 seconds, and 0.2 seconds before the indexed frame, and the indexed frame itself (corresponding to the 0 entry). See example 1_load_lerobot_dataset.py for more details on delta_timestamps.
Under the hood, the LeRobotDataset format makes use of several ways to serialize data which can be useful to understand if you plan to work more closely with this format. We tried to make a flexible yet simple dataset format that would cover most type of features and specificities present in reinforcement learning and robotics, in simulation and in real-world, with a focus on cameras and robot states but easily extended to other types of sensory inputs as long as they can be represented by a tensor.
Here are the important details and internal structure organization of a typical LeRobotDataset instantiated with dataset = LeRobotDataset("lerobot/aloha_static_coffee"). The exact features will change from dataset to dataset but not the main aspects:
dataset attributes:
  ├ hf_dataset: a Hugging Face dataset (backed by Arrow/parquet). Typical features example:
  │  ├ observation.images.cam_high (VideoFrame):
  │  │   VideoFrame = {'path': path to a mp4 video, 'timestamp' (float32): timestamp in the video}
  │  ├ observation.state (list of float32): position of an arm joints (for instance)
  │  ... (more observations)
  │  ├ action (list of float32): goal position of an arm joints (for instance)
  │  ├ episode_index (int64): index of the episode for this sample
  │  ├ frame_index (int64): index of the frame for this sample in the episode ; starts at 0 for each episode
  │  ├ timestamp (float32): timestamp in the episode
  │  ├ next.done (bool): indicates the end of en episode ; True for the last frame in each episode
  │  └ index (int64): general index in the whole dataset
  ├ episode_data_index: contains 2 tensors with the start and end indices of each episode
  │  ├ from (1D int64 tensor): first frame index for each episode — shape (num episodes,) starts with 0
  │  └ to: (1D int64 tensor): last frame index for each episode — shape (num episodes,)
  ├ stats: a dictionary of statistics (max, mean, min, std) for each feature in the dataset, for instance
  │  ├ observation.images.cam_high: {'max': tensor with same number of dimensions (e.g. `(c, 1, 1)` for images, `(c,)` for states), etc.}
  │  ...
  ├ info: a dictionary of metadata on the dataset
  │  ├ codebase_version (str): this is to keep track of the codebase version the dataset was created with
  │  ├ fps (float): frame per second the dataset is recorded/synchronized to
  │  ├ video (bool): indicates if frames are encoded in mp4 video files to save space or stored as png files
  │  └ encoding (dict): if video, this documents the main options that were used with ffmpeg to encode the videos
  ├ videos_dir (Path): where the mp4 videos or png images are stored/accessed
  └ camera_keys (list of string): the keys to access camera features in the item returned by the dataset (e.g. `["observation.images.cam_high", ...]`)
A LeRobotDataset is serialised using several widespread file formats for each of its parts, namely:
safetensor tensor serialization formatsafetensor tensor serialization formatDataset can be uploaded/downloaded from the HuggingFace hub seamlessly. To work on a local dataset, you can set the DATA_DIR environment variable to your root dataset folder as illustrated in the above section on dataset visualization.
Check out example 2 that illustrates how to download a pretrained policy from Hugging Face hub, and run an evaluation on its corresponding environment.
We also provide a more capable script to parallelize the evaluation over multiple environments during the same rollout. Here is an example with a pretrained model hosted on lerobot/diffusion_pusht:
python lerobot/scripts/eval.py
    -p lerobot/diffusion_pusht
    eval.n_episodes=10
    eval.batch_size=10
Note: After training your own policy, you can re-evaluate the checkpoints with:
python lerobot/scripts/eval.py -p {OUTPUT_DIR}/checkpoints/last/pretrained_modelSee python lerobot/scripts/eval.py --help for more instructions.
Check out example 3 that illustrates how to train a model using our core library in python, and example 4 that shows how to use our training script from command line.
In general, you can use our training script to easily train any policy. Here is an example of training the ACT policy on trajectories collected by humans on the Aloha simulation environment for the insertion task:
python lerobot/scripts/train.py
    policy=act
    env=aloha
    env.task=AlohaInsertion-v0
    dataset_repo_id=lerobot/aloha_sim_insertion_human
The experiment directory is automatically generated and will show up in yellow in your terminal. It looks like outputs/train/2024-05-05/20-21-12_aloha_act_default. You can manually specify an experiment directory by adding this argument to the train.py python command:
hydra.run.dir=your/new/experiment/dirIn the experiment directory there will be a folder called checkpoints which will have the following structure:
checkpoints
├── 000250  # checkpoint_dir for training step 250
│   ├── pretrained_model  # Hugging Face pretrained model dir
│   │   ├── config.json  # Hugging Face pretrained model config
│   │   ├── config.yaml  # consolidated Hydra config
│   │   ├── model.safetensors  # model weights
│   │   └── README.md  # Hugging Face model card
│   └── training_state.pth  # optimizer/scheduler/rng state and training step
To resume training from a checkpoint, you can add these to the train.py python command:
hydra.run.dir=your/original/experiment/dir resume=trueIt will load the pretrained model, optimizer and scheduler states for training. For more information please see our tutorial on training resumption here.
To use wandb for logging training and evaluation curves, make sure you've run wandb login as a one-time setup step. Then, when running the training command above, enable WandB in the configuration by adding:
wandb.enable=trueA link to the wandb logs for the run will also show up in yellow in your terminal. Here is an example of what they look like in your browser. Please also check here for the explanation of some commonly used metrics in logs.

Note: For efficiency, during training every checkpoint is evaluated on a low number of episodes. You may use eval.n_episodes=500 to evaluate on more episodes than the default. Or, after training, you may want to re-evaluate your best checkpoints on more episodes or change the evaluation settings. See python lerobot/scripts/eval.py --help for more instructions.
We have organized our configuration files (found under lerobot/configs) such that they reproduce SOTA results from a given model variant in their respective original works. Simply running:
python lerobot/scripts/train.py policy=diffusion env=pushtreproduces SOTA results for Diffusion Policy on the PushT task.
Pretrained policies, along with reproduction details, can be found under the "Models" section of https://huggingface.co/lerobot.
If you would like to contribute to ? LeRobot, please check out our contribution guide.
To add a dataset to the hub, you need to login using a write-access token, which can be generated from the Hugging Face settings:
huggingface-cli login --token ${HUGGINGFACE_TOKEN} --add-to-git-credentialThen point to your raw dataset folder (e.g. data/aloha_static_pingpong_test_raw), and push your dataset to the hub with:
python lerobot/scripts/push_dataset_to_hub.py
--raw-dir data/aloha_static_pingpong_test_raw
--out-dir data
--repo-id lerobot/aloha_static_pingpong_test
--raw-format aloha_hdf5
See python lerobot/scripts/push_dataset_to_hub.py --help for more instructions.
If your dataset format is not supported, implement your own in lerobot/common/datasets/push_dataset_to_hub/${raw_format}_format.py by copying examples like pusht_zarr, umi_zarr, aloha_hdf5, or xarm_pkl.
Once you have trained a policy you may upload it to the Hugging Face hub using a hub id that looks like ${hf_user}/${repo_name} (e.g. lerobot/diffusion_pusht).
You first need to find the checkpoint folder located inside your experiment directory (e.g. outputs/train/2024-05-05/20-21-12_aloha_act_default/checkpoints/002500). Within that there is a pretrained_model directory which should contain:
config.json: A serialized version of the policy configuration (following the policy's dataclass config).model.safetensors: A set of torch.nn.Module parameters, saved in Hugging Face Safetensors format.config.yaml: A consolidated Hydra training configuration containing the policy, environment, and dataset configs. The policy configuration should match config.json exactly. The environment config is useful for anyone who wants to evaluate your policy. The dataset config just serves as a paper trail for reproducibility.To upload these to the hub, run the following:
huggingface-cli upload ${hf_user}/${repo_name} path/to/pretrained_modelSee eval.py for an example of how other people may use your policy.
An example of a code snippet to profile the evaluation of a policy:
from torch.profiler import profile, record_function, ProfilerActivity

def trace_handler(prof):
    prof.export_chrome_trace(f"tmp/trace_schedule_{prof.step_num}.json")

with profile(
    activities=[ProfilerActivity.CPU, ProfilerActivity.CUDA],
    schedule=torch.profiler.schedule(
        wait=2,
        warmup=2,
        active=3,
    ),
    on_trace_ready=trace_handler
) as prof:
    with record_function("eval_policy"):
        for i in range(num_episodes):
            prof.step()
# insert code to profile, potentially whole body of eval_policy functionIf you want, you can cite this work with:
@misc{cadene2024lerobot,
    author = {Cadene, Remi and Alibert, Simon and Soare, Alexander and Gallouedec, Quentin and Zouitine, Adil and Wolf, Thomas},
    title = {LeRobot: State-of-the-art Machine Learning for Real-World Robotics in Pytorch},
    howpublished = "url{https://github.com/huggingface/lerobot}",
    year = {2024}
}
Additionally, if you are using any of the particular policy architecture, pretrained models, or datasets, it is recommended to cite the original authors of the work as they appear below:
@article{chi2024diffusionpolicy,
	author = {Cheng Chi and Zhenjia Xu and Siyuan Feng and Eric Cousineau and Yilun Du and Benjamin Burchfiel and Russ Tedrake and Shuran Song},
	title ={Diffusion Policy: Visuomotor Policy Learning via Action Diffusion},
	journal = {The International Journal of Robotics Research},
	year = {2024},
}@article{zhao2023learning,
title={Learning fine-grained bimanual manipulation with low-cost hardware},
author={Zhao, Tony Z and Kumar, Vikash and Levine, Sergey and Finn, Chelsea},
journal={arXiv preprint arXiv:2304.13705},
year={2023}
}@inproceedings{Hansen2022tdmpc,
title={Temporal Difference Learning for Model Predictive Control},
author={Nicklas Hansen and Xiaolong Wang and Hao Su},
booktitle={ICML},
year={2022}
}@article{lee2024behavior,
title={Behavior generation with latent actions},
author={Lee, Seungjae and Wang, Yibin and Etukuru, Haritheja and Kim, H Jin and Shafiullah, Nur Muhammad Mahi and Pinto, Lerrel},
journal={arXiv preprint arXiv:2403.03181},
year={2024}
}