This repository contains all the project files and necessary details about applications required to run the project on your local machine.
| Title | Description | Link |
|---|---|---|
| Demo :movie_camera: | Demo and showcase of major highlights in the project | ? Refer |
| Requirements :heavy_check_mark: | Requirements and essential links to get started with the project | ? Refer |
| Setup :small_red_triangle_down: | How to setup complete project inside your local system - Windows 10 | ? Refer |
| Project Guide :page_with_curl: | Reference documentation of overall project, it's application, and how to present and showcase demo | ?Refer |
| Troubleshooting Issues :muscle: | Guide to resolve errors faced during reproducibility | To be Updated |
Do you like it? ❤️ Follow me on Twitter, GitHub, & LinkedIn to say Hi
In this section, we try to understand through video demo to play around the project and what all can be achieved through it.
General Overview - To be updated
Add/Update Database - To be updated
Creating/Deleting Database Triggers - To be updated
Please be slightly patient while I create and upload the demo video. Follow and star this project to get latest notifications and update. ?
To build this project without any errors/issues, the following requirements needs to be satisfied
Windows Operating System (Win 10 is preferred)
Google Chrome Browser (v80 or Higher)
WAMP Web Server (v3.0 or higher)
Code Editor (Visual Studio Code - Preferred)
If you are not aware if you have the right versions or you need to install them, fret not. Continue to the installation section at next.
To download latest google chrome web browser on Windows OS and install in your system, just go the following link - Download Google Chrome Web Browser. Once you visit, it will have option for you to download chrome and then install it as usual.
If you are on Linux OS, then you can follow - Install Chrome on Linux Mint - Easy Step-By-Step Guide | Digital Ocean.
If you are on Mac OS, then you can follow - How To Install Google Chrome On Mac Quickly.
?️NOTE: Google chrome is preferred browser to run everything smoothly, but you can use any other browser of your choice as well. It is not a hard requirement, but can help you ease your UI & UX experience.
Installing WAMP Web Server and running a local server on your machine is crucial for replicating and reproducing all the results for this project.
Downloading WAMP Server - Go and grab the WAMP installer application from here. The size varies based on which version you download. I have v3.3.0 on my system whose download size was 644 MB.
Once you have downloaded, Install the with the following settings.
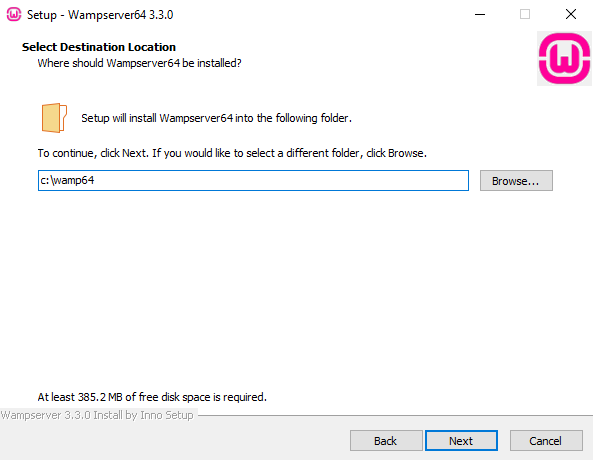
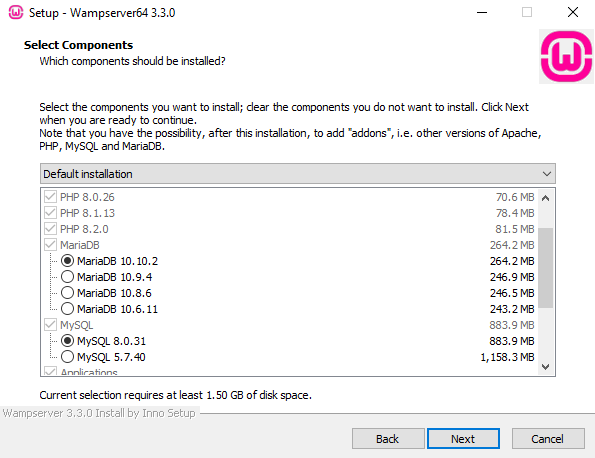
After this, it will take some time and then install it. After some time, it will ask for a prompt on choosing the default browser on which your local server will be hosted. It initially shows me Edge, but I wish to change it to Google Chrome.
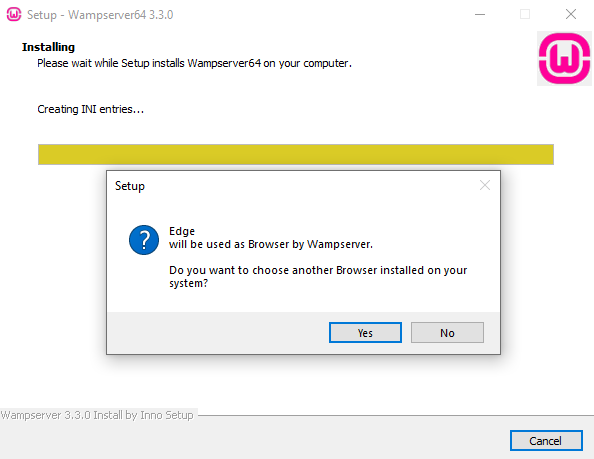
For changing it to Google Chrome, Just select Yes here, and then find where you have installed Google Chrome on your system. In my case, It's at the following directory.
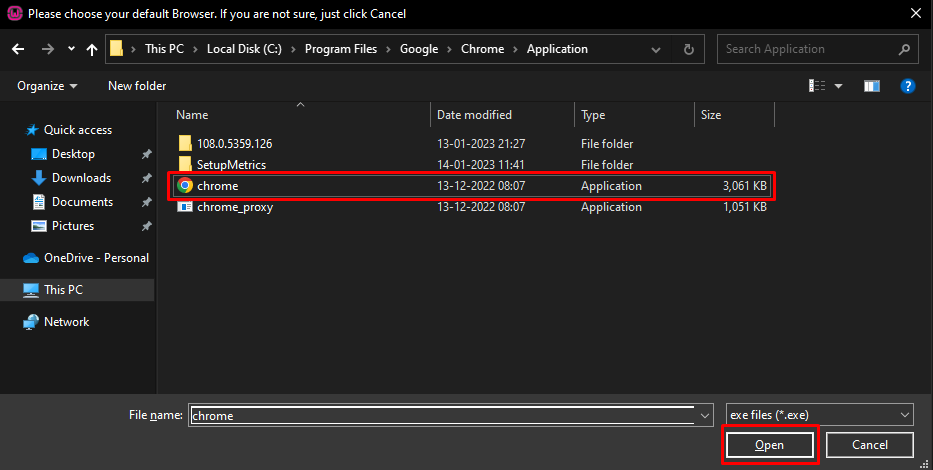
Once we have chosen browser, It will ask for Code editor in a similar fashion.
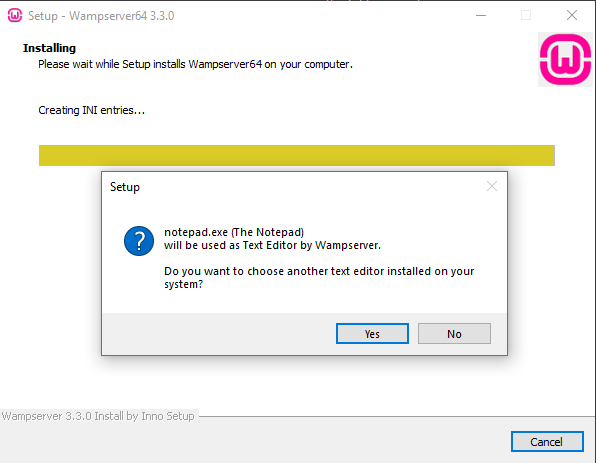
By default it will set Notepad Windows Application, but as we prefer and have already setup Visual Studio Code Editor, we will go ahead and select it from the installed directory.
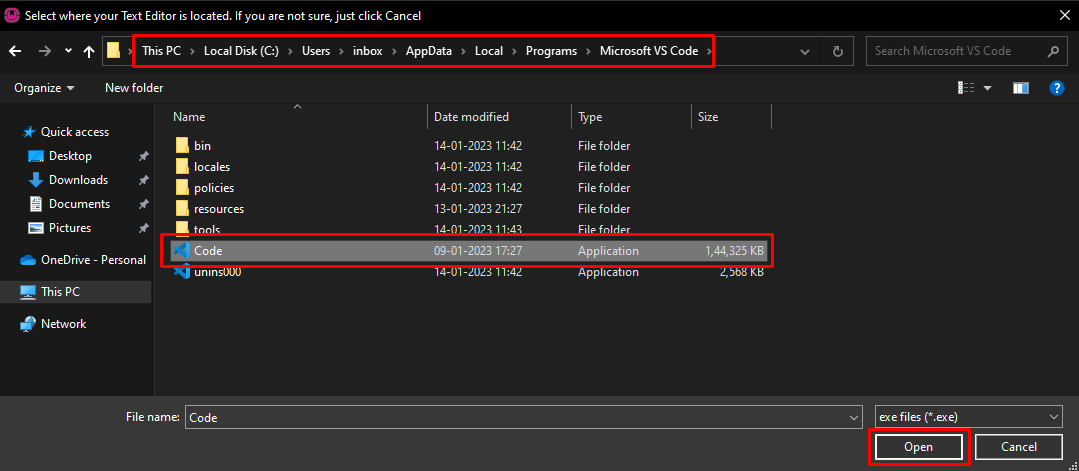
This will complete the installation of WAMP Server in our system.
To verify WAMP is successfully installed and the Server is running on your system, search for WAMP in your start menu applications and then run it as "administrator"
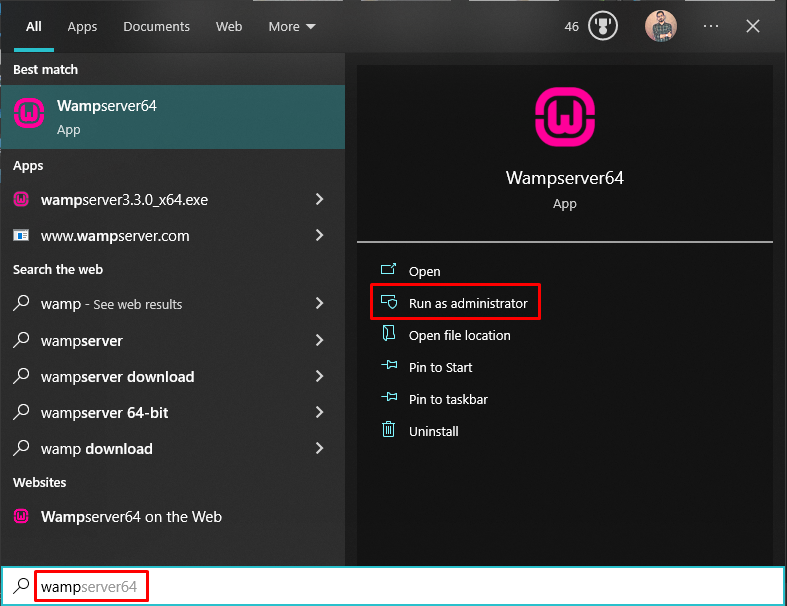
Once you run it, after few seconds, a green color wamp icon should appear on your tray icon.
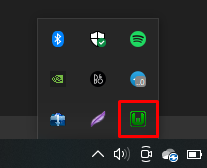
If the color is anything but green, it looks like there is some issue while running the server.
Start the WAMP server and wait for it while the server runs successfully.
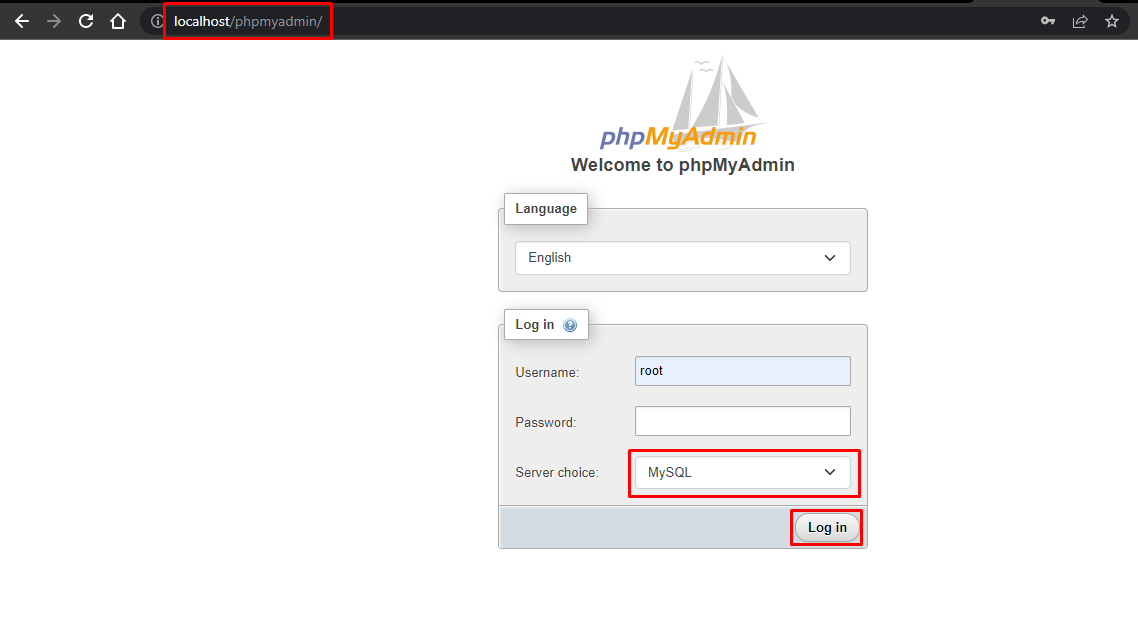
Open Google Chrome (or any browser) and type "http://localhost/phpmyadmin" without quotes. You will be presented with the login screen.
By default, the Username is "root" & and empty password. If this is not the case for you, you will need to change your username & password.
More to be updated soon .....
FIFA 18 Player management system is a player management software for monitoring and accessing players based on their FIFA 18 PC/XBOX game ratings. HTML, CSS, and JavaScript were used for front-end development, and PHP and MySQL were used for back-end development. The system mainly focuses on basic operation like adding a new player, new statistics, searching players with detailed information and edit as they grow their skills. It is a web-based application designed and developed to help users access players and organize their teams. It’s easy to use, and it features a familiar and attractive user interface combined with strong searching, insertion, and deletion with procedure capabilities.
One of the most difficult tasks is the selection of correct version of software. Once the system requirements are known the next step is to determine whether the software package fits the requirements. After initial selection further security is needed to determine the desirability of software compared with other candidates. This section first summarizes the application requirement question and then suggests more detailed comparisons.
This project consists of player details which include the likes of player’s age and nationality. It also consists of player statistics which include players technical skills. It also consists of tables containing information such as player earnings, club, and preferred position to play. It also provides a strong search, update, delete, and insert operations delivered with a user-friendly web-based UI. The project also helps the users to keep track of the player details in a computerized way without any trouble. The project contains 7 stored procedures and 3 triggers per table. Stored procedures are used in search engine. Every time the user searches through the database, a procedure is called, and the results is collected and displayed for the user in a structured manner. It also has 3 triggers namely “Insert, Delete and Update” triggers assigned separately to each table. Whenever operations such as insert or delete or update is performed on any table, these triggers are automatically called, and the logs are captured into 3 separate tables, individually for each trigger. Hence use of triggers provides users to trace back all the latest as well as the oldest changes into any table at any point of time.
Install wamp Download wamp from here 299Mb and update google chrome download latest chrome from here.
After installing wamp (Default directory : c:/wamp64/) , download the project and paste it in directory : (c:/wamp64/www/).
Set your wamp username to root and no password. Instructions to change username and password
Start wampServer64 from the desktop icon and open google chrome and type the following url without quotes: "http://localhost/phpmyadmin/" and enter root as username and press Go.
Now first you have to Load the database in your local server and then you can run the project.
To load the database :
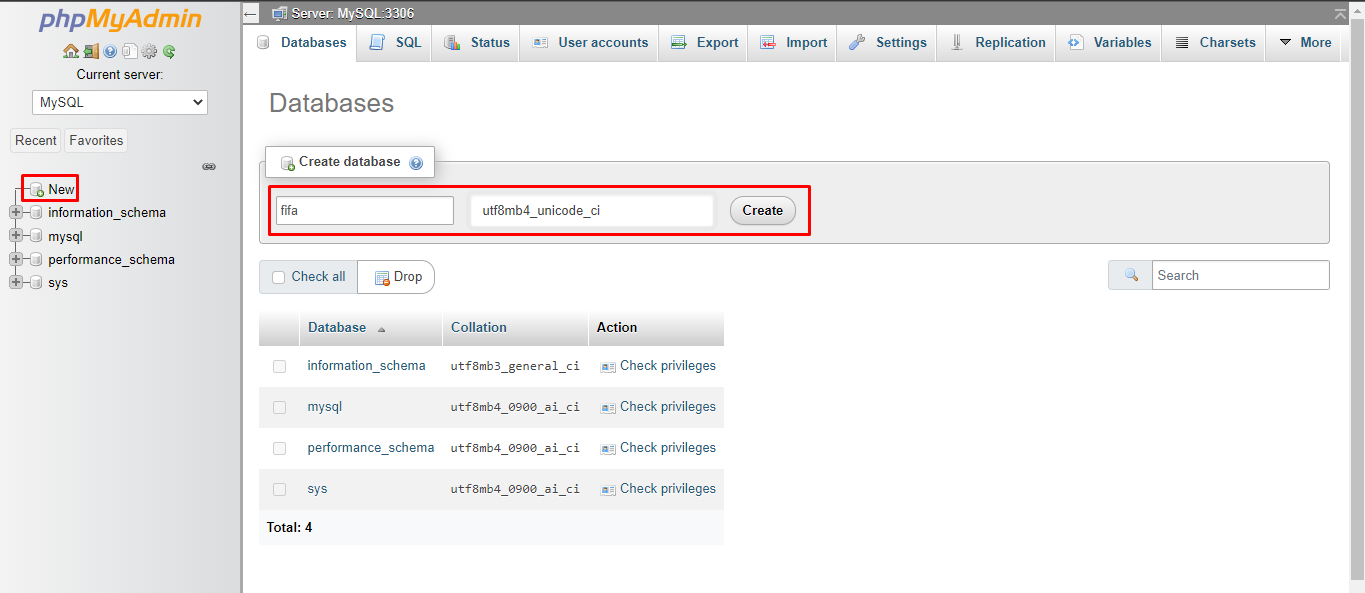
 - Click on +New on the left hand column
 - Give database name as "fifa" (without quotes and small case) and set character encoding to "utf8mb4_unicode_ci"
 - After creating the database successfully, on the upper main menu panel, click on Import and then click "choose file" from file to import menu. Now browse to directory where you saved the project (expected directory: c://wamp/www/your_project_name/db/fifa.sql) and click on fifa.sql and then go down and click Go (Do not change any other settings).
 - After importing successfully, loading the database is complete.
Run the project :
   - Open a new tab in chrome
   - type the following url : http://localhost/your_project_name_inside_www_directory/index.html
   - enjoy.
For further queries : Drop me mail at [email protected]