申请企业微信公众号在这里我就不详细说明了,大家可以看看网上的教程去申请
下面主要介绍一下该插件的使用方法
第一步:首先你要确保你已经安装好了python的报警框架elastalert(https://github.com/Yelp/elastalert.git)
具体的安装方法可以参考官方的文档https://elastalert.readthedocs.io/en/latest/running_elastalert.html
Below I take the clone repository installation as an example.
git clone https://github.com/Yelp/elastalert.gitpip install -r requirements.txt
pip install -r requirements-dev.txtpython2.7 setup.py install第二步修改配置文件
打开config/config.yaml按照里面的说明进行配置,其中es_rules中放置的是我写的一个wechat规则模板大家可以简单修改一下继续使用
第三步将elastalert_wechat_plugin目录下的所有文件拷贝到elastalert目录下即可
第四步创建Elasticsearch索引
进入我们的项目目录./elastalert/elastalert/ 执行
python2.7 create_index.py --config ../config/config.yaml --host es_host --port ex_post --username es_username --password es_password --no-ssl --no-verify-certsThis command will create an index in elasticsearch so that ElastAlert can save information and metadata about its query and its alerts back to Elasticsearch. This is not a required step, but is highly recommended. Because for auditing, testing is useful, and restarting elastalert does not affect counting and sending alerts. By default, the index created is called elastalert_status
第五步启动
python2.7 -m elastalert.elastalert --verbose --config config/config.yaml --rule es_rules/wechart.yaml config指定配置文件路径 rule指定你的微信报警文件
If you need more detailed installation process and instructions, please refer to my Toutiao Today Toutiao
start up
docker run -d hellolinux/elastalert_wechat_plugin:latest镜像自定义配置文件部署Download the git code https://github.com/Hello-Linux/elastalert_wechat_plugin.git. There are config and es_rules files inside. Modify the configuration files and rule configuration files and mount them into your container.
cd elastalert_wechat_plugindocker run -d -v ` pwd ` /config:/opt/elastalert/config -v ` pwd ` /es_rules:/opt/elastalert/es_rules hellolinux/elastalert_wechat_plugin:latest自定义elastalert版本The environment variable ENV ELASTALERT_VERSION exists in the Dockerfile. The default value is v0.1.38. Modify it to other versions for execution.
docker -e ELASTALERT_VERSION=版本号docker镜像地址Docker image
1.报警时间显示的是UTC时间This is mainly due to the fact that logstash uses the underlying UTC time after being passed to Elasticsearch. The solution is to start with the logstash filter and use date or grok to customize the timestamp timestamp.
date filter plugin:
filter {
date {
match = > [ " timestamp " , " dd/MMM/yyyy:HH:mm:ss " ]
target = > " @timestamp "
locale= > " en "
timezone = > " UTC "
  }
}
The timestamp above refers to the time field in your log, and the "dd/MMM/yyyy:HH:mm:ss" behind it refers to your log format. This depends on your log and may not be the same as mine.
date filter plug-in
filter {
grok {
  match = > { " message " = > " (?<logtime>d{4}-d{2}-d{2} d{2}:d{2}:d{2},d{1,3}) " }
  }
}
The above is just a simple match of the time in the log. It depends on your own situation. Here is a logtime field added. Since the field is changed, the field in your alarm plug-in
alert_text_args:
  - @timestamp
  - message
@timestamp also needs to be replaced with the logtime field.
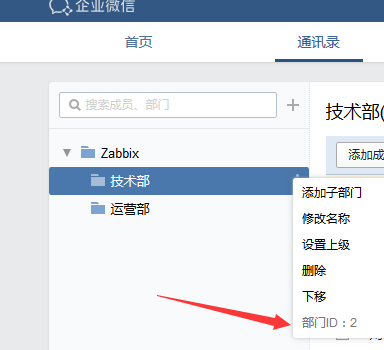
2.如何给企业微信多个部门发送告警There is no time to do this yet. A compromise solution is to write multiple rules in es_rules to indirectly implement alarm sending for multiple department IDs.
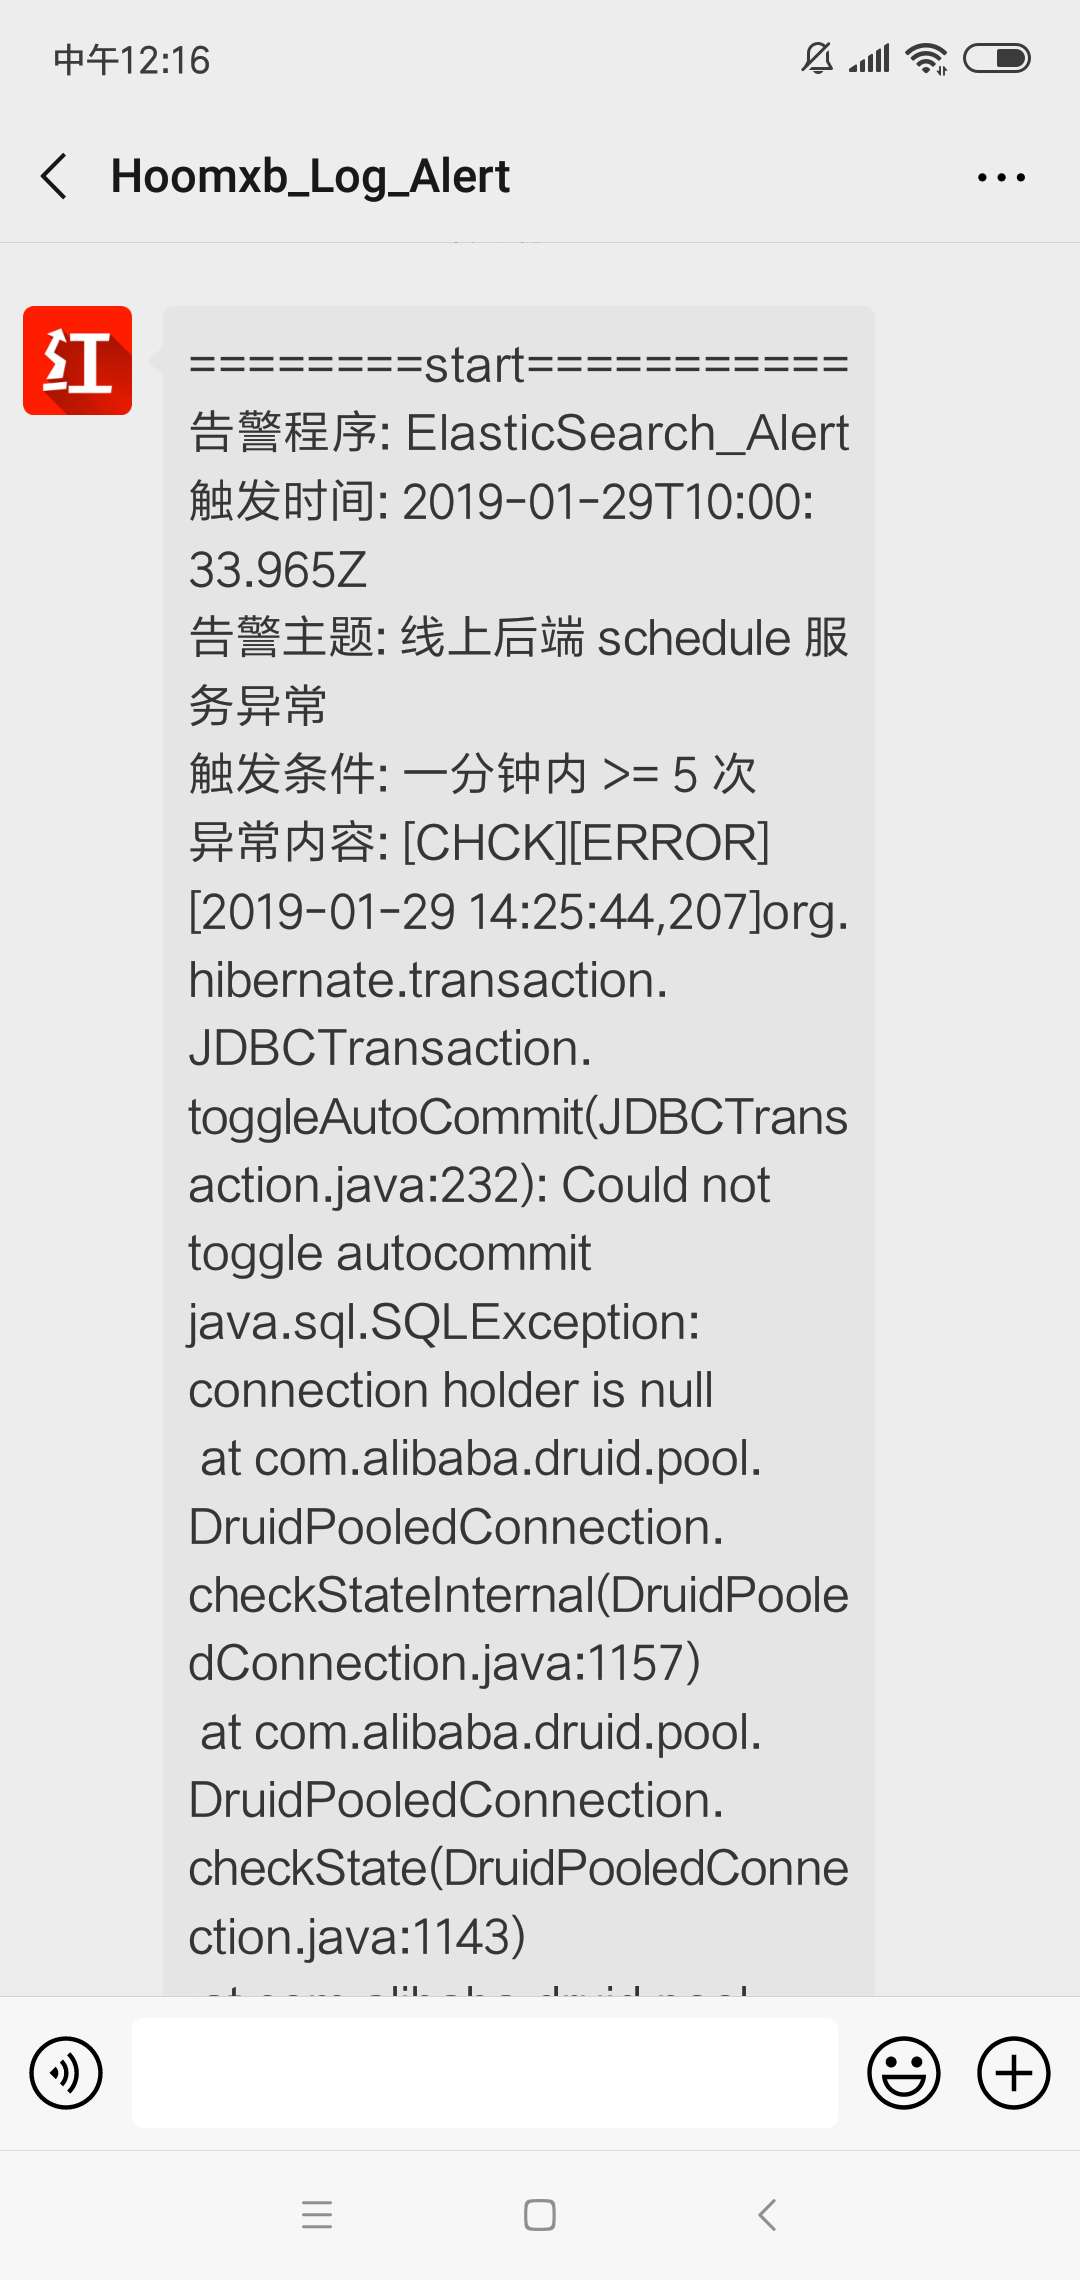
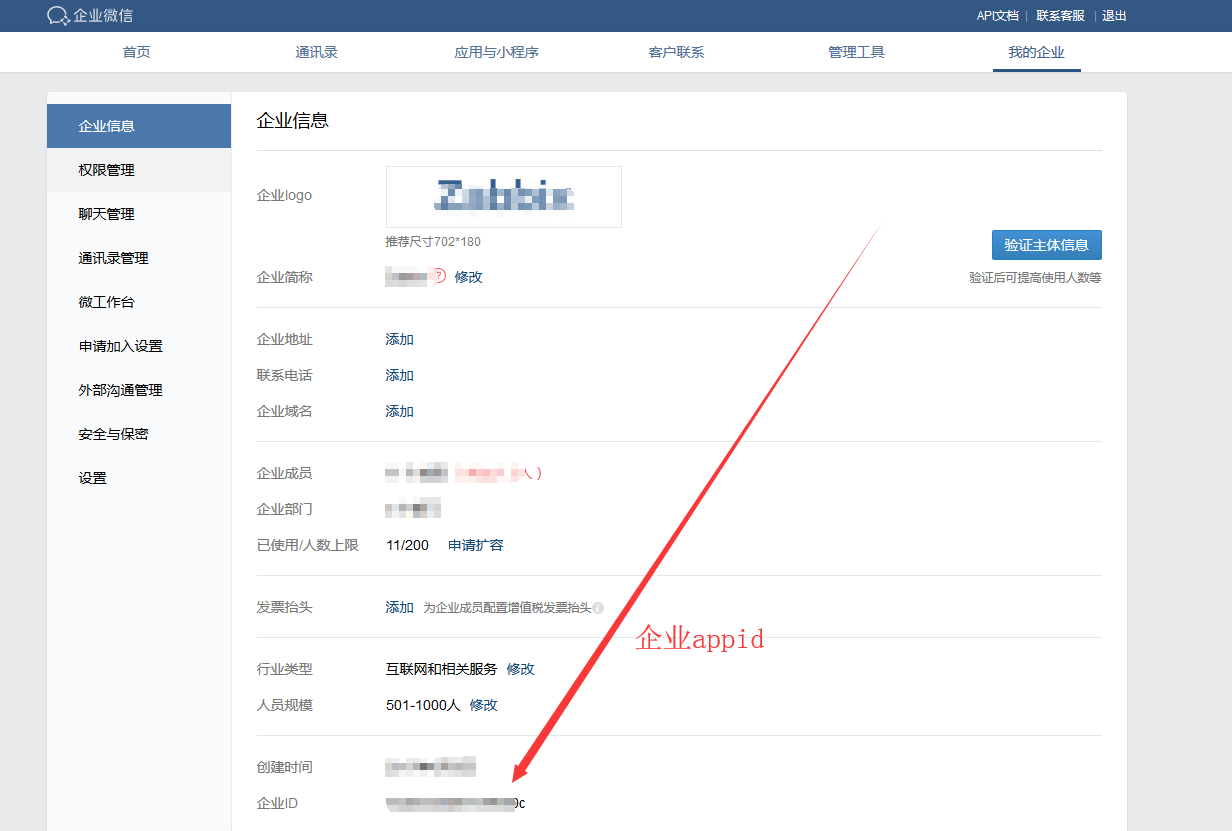
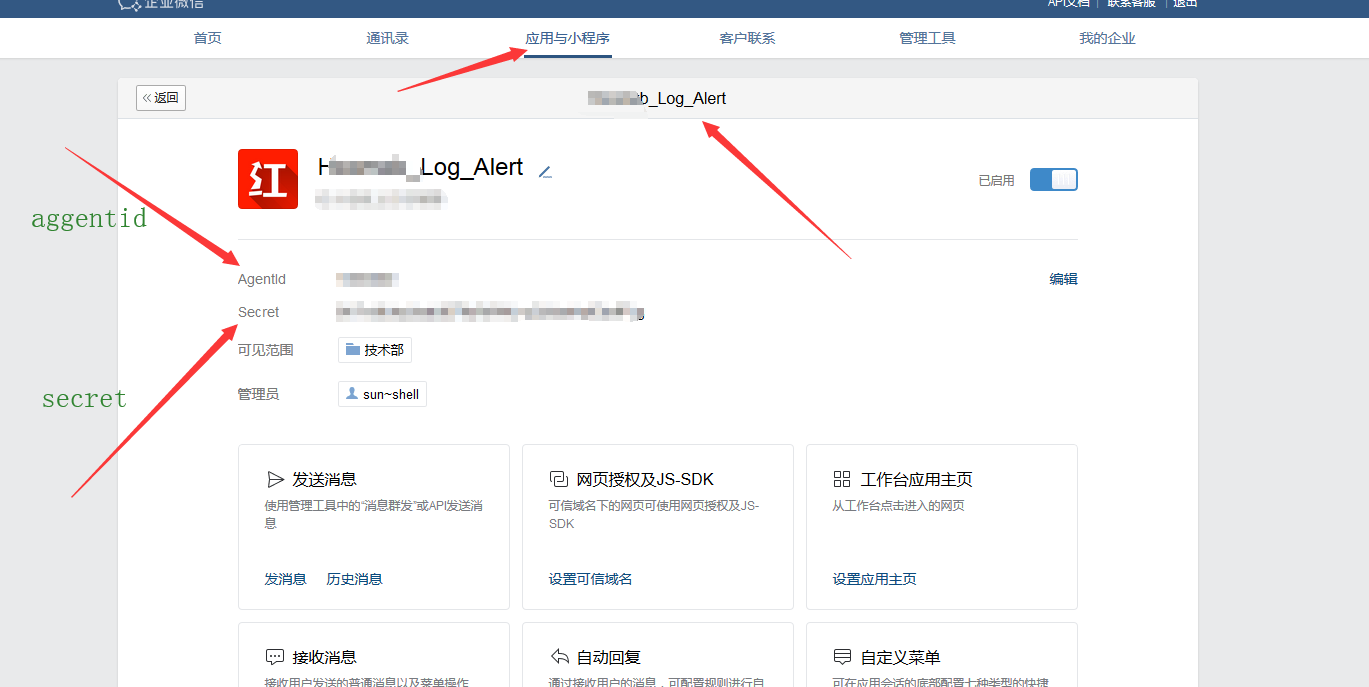
3.企业微信收不到报警This is mainly to check whether your alarm rules have been triggered, and secondly whether the configurations in your WeChat official account are correct.
伸出您可爱的双手支持一下作者呗!给他一点继续更新下去的勇气!