Assorted projects made while playing with the Raspberry Pi Pico.
Note Makepico is a script for creating ready-to-use Pico projects. The other items are Pico demos and games.
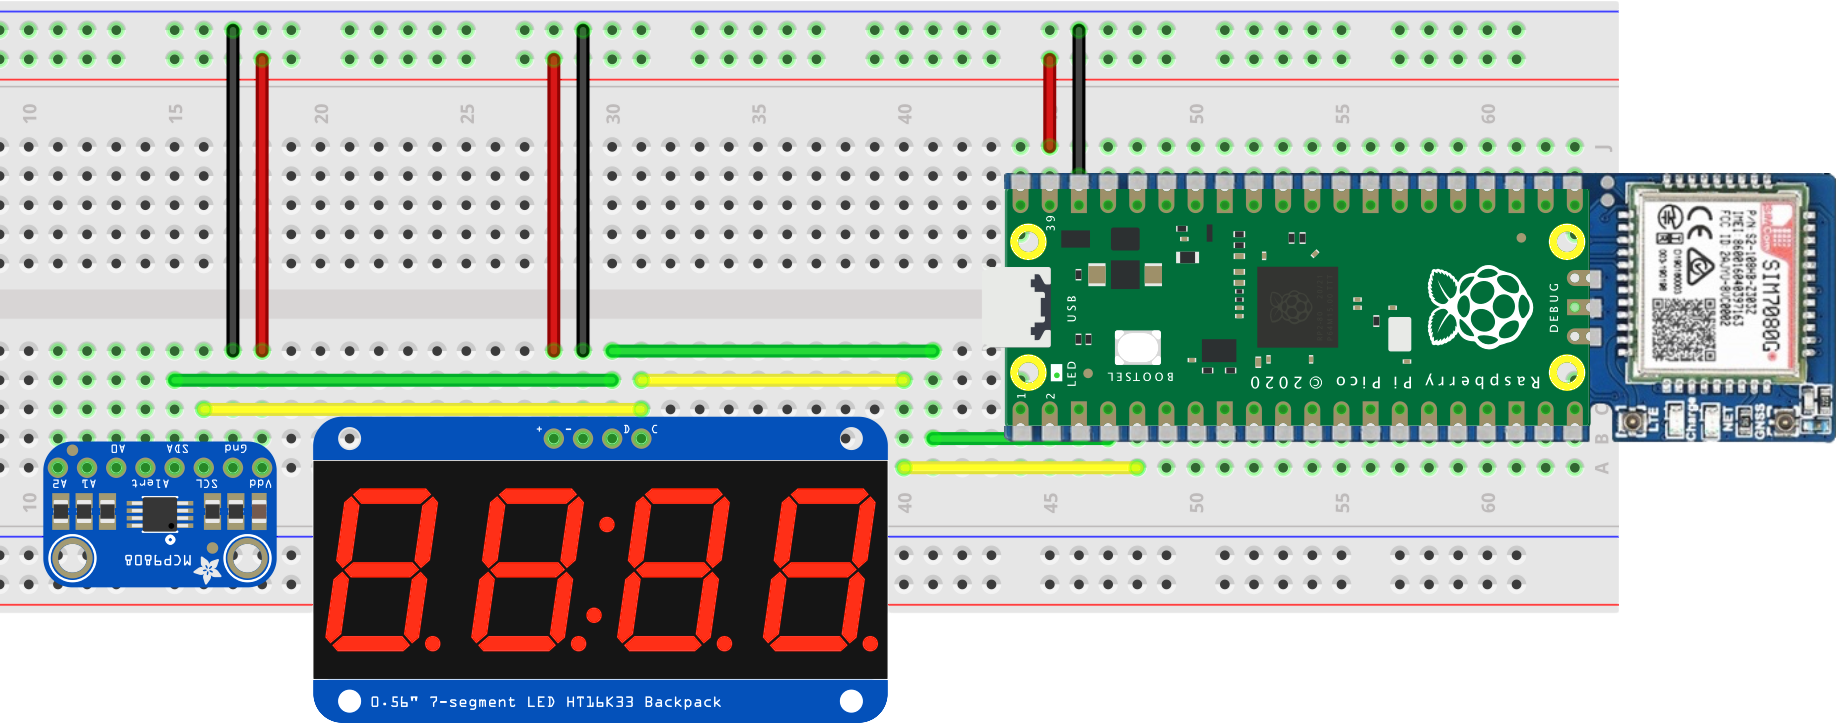
A sample C++ project bringing the Pico and the Waveshare Pico SIM7080G Cat-M1 modem board together.
This is the circuit layout:
GCC 10.3.1 arm-none-eabi: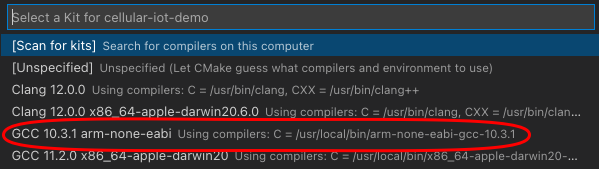

cd <YOUR_GIT_DIRECTORY>/pi-pico/cellular-iot-democmake -S . -B build/cmake --build build --clean-firstThe device accepts commands in JSON form. For example:
{"cmd": "num", "val": 2021}The JSON string must be converted to a base64 string for transmission by SMS:
SEND_DATA=$(echo '{"cmd": "num", "val": 2021}' | base64)You can then send the SMS. For example, using Twilio Super SIM:
curl -X POST https://supersim.twilio.com/v1/SmsCommands
    --data-urlencode "${SIM_SID}"
    --data-urlencode "Payload=${SEND_DATA}"
    -u "${ACCOUNT_SID}:${ACCOUNT_AUTH_TOKEN}"
You will need shell variables for your Super SIM’s SID, and your Twilio account SID and authorisation token. Different brands of SIM will have different settings, of course.
Alternatively, just punch those values into the cmd.sh script that’s included and call it with two arguments. For example"
./cmd.sh num 9876will send (base64 encoded):
{"cmd": "num", "val": 9876}Commands available from the device:
led — flash the Pico LED. Requires a val object with the number of flashes as an integer.num — write a value on the display. Requires a val object with the number (between 0 and 9999) as an integer.tmp — Send back a Celsius temperature reading. Requires your Super SIM’s fleet to be configured with an SMS Commands webhook, or equivalent for other brands of SIM. Super SIM device-originated SMS Commands are sent to the number 000, so you will need to alter that value in the code (in modem.cpp). It also requires server-side code to process or display the received data.tmpcon - Continuous temperature readout on the LED, but not data is posted elswhere.flash — flash a code on the LED. Requires a code object with a string pattern, eg. LBSBL where:
L — Long on (500ms)S — Short on (250ms)B - Short off (250ms)rssi - Continuous RSSI readout on the LED.This project uses the following third-party code:
A retro-style 3D arcade game written in C. For more details, see this page.
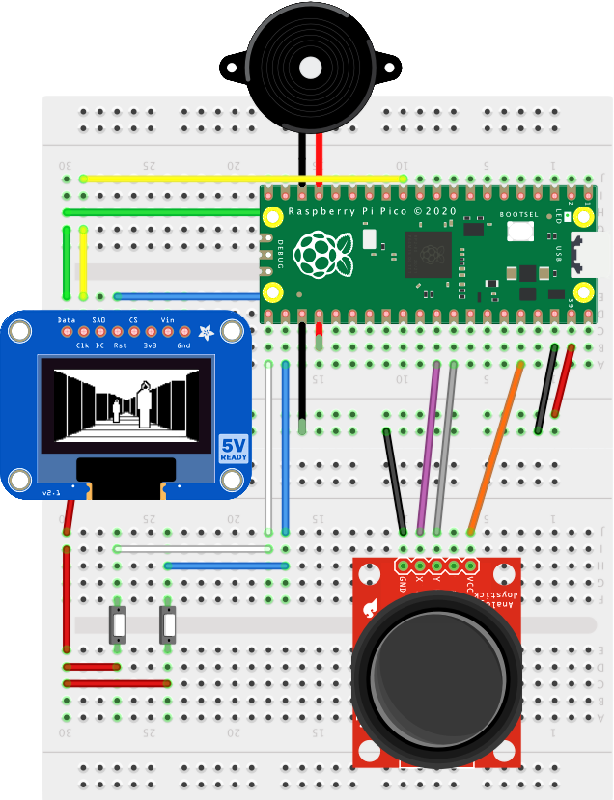
The joystick shown is not the one used, but it gives you the idea. Connect purple to the X pin, white to the Y pin.
Build from source code, or copy phantoms.uf2 to your Pico. Please check the SHA 256:
d9e4e2d28b8a5b983e1551d114cd4ae6d668858b43a9df6c92f946327a96f146
GCC 10.3.1 arm-none-eabi:
cd <YOUR_GIT_DIRECTORY>/pi-pico/phantomscmake -S . -B build/cmake --build build --clean-firstSee this blog post for full details.
This games is based on a 1982 original created by Ken Kalish of Med Systems for the Tandy Color Computer. The design is Ken’s; the code is mine, and I’ve taken only a few liberties with certain details.
Phantom Slayer uses TinyMT, copyright © 2011 Mutsuo Saito, Makoto Matsumoto, Hiroshima University and The University of Tokyo. All rights reserved. Licensed under the three-clause BSD Licence.
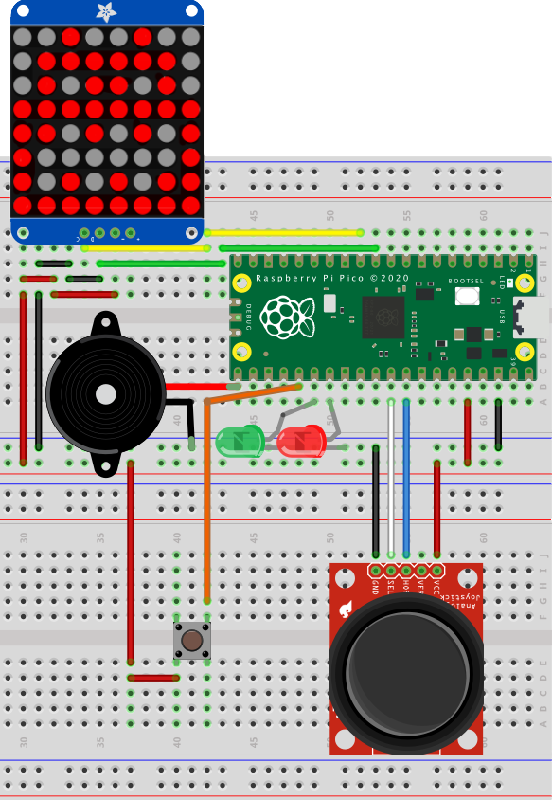
A sample C project to build a fun game.
Build from source code, or copy wumpus.uf2 to your Pico. Please check the SHA 256:
65957c643df25f89ddd3f70f16131c7037e582fa04743c35b7af78b90eb0a0f5
GCC 10.3.1 arm-none-eabi:
cd <YOUR_GIT_DIRECTORY>/pi-pico/wumpuscmake -S . -B build/cmake --build build --clean-firstThis is a fun little game to hunt the Wumpus. Move through the cave with the joystick.
A red light indicates a nearby pit — if you fall in, you’ll be killed.
A twittering sound indicates a nearby bat. If you enter its square, it will carry you to another part of the cave.
A green light indicates the Wumpus is close. Enter its square and it will eat you, but if you’re sure where it is, press the button to fire an arrow to kill it first. To fire the arrow successfully, back off and then move toward the Wumpus in the direction you want to the arrow to fly. If you miss, the beast will catch you!
This version was based on an Arduino version created by Corey Faure. This is very much his game, but I have taken a few liberties with a couple of the animations and rewritten the code.
Hunt the Wumpus uses TinyMT, copyright © 2011 Mutsuo Saito, Makoto Matsumoto, Hiroshima University and The University of Tokyo. All rights reserved. Licensed under the three-clause BSD Licence.
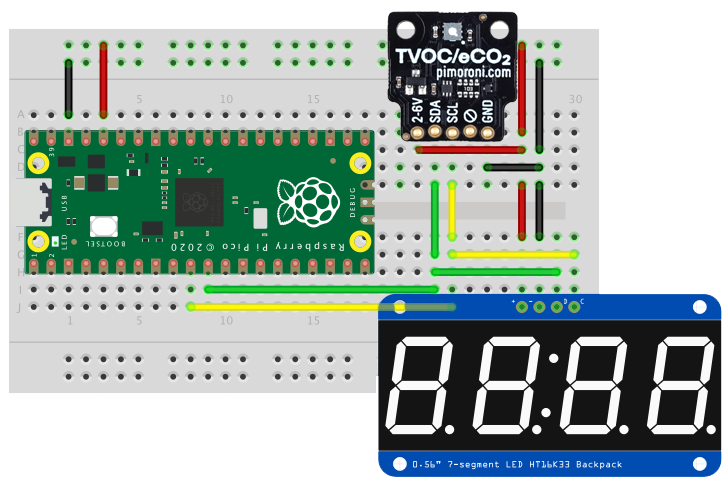
A sample C project. Requires an HT16K33-based 4-digit, 7-segment LED and an SGP30 TVOC sensor. I used this sensor and this display:
A sample C project. Requires an HT16K33-based 8x8 LED matrix. I used this display.
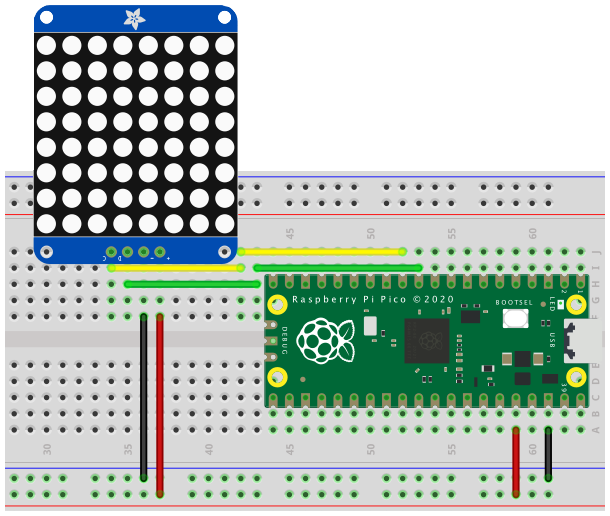
A sample MicroPython project. Requires an HT16K33-based 8x8 LED matrix.
Pico project set up script for Z Shell. Requires Pico C SDK pre-installed.
tmpcon and rssi commands to Cellular IoT Demo.POST ops and various improvements.main.c/cpp and main.h not project-specific files.CMakeLists.txt now uses CMake 3.14.main.c now calls stdio_init_all().-c switch to create a C++ project.-n option so you can add your name for code comments.utils.h/utils.c.-d/--debug switch to add VSCode SWD debugging support.launch.json.All source code released under the MIT Licence. Copyright © 2022, Tony Smith (@smittytone).


