light show
1.0.0
Welcome to the Tesla Light Show xLights guide! You can create and run your own light shows on Tesla vehicles.

A custom show can be run on a supported vehicle by loading it via a USB flash drive. Create and share your shows with others! A single show can be shared and run on any supported vehicle; they are not model-specific. The sequence data is stored in a .fseq file and the music comes from your choice of .mp3 or .wav.
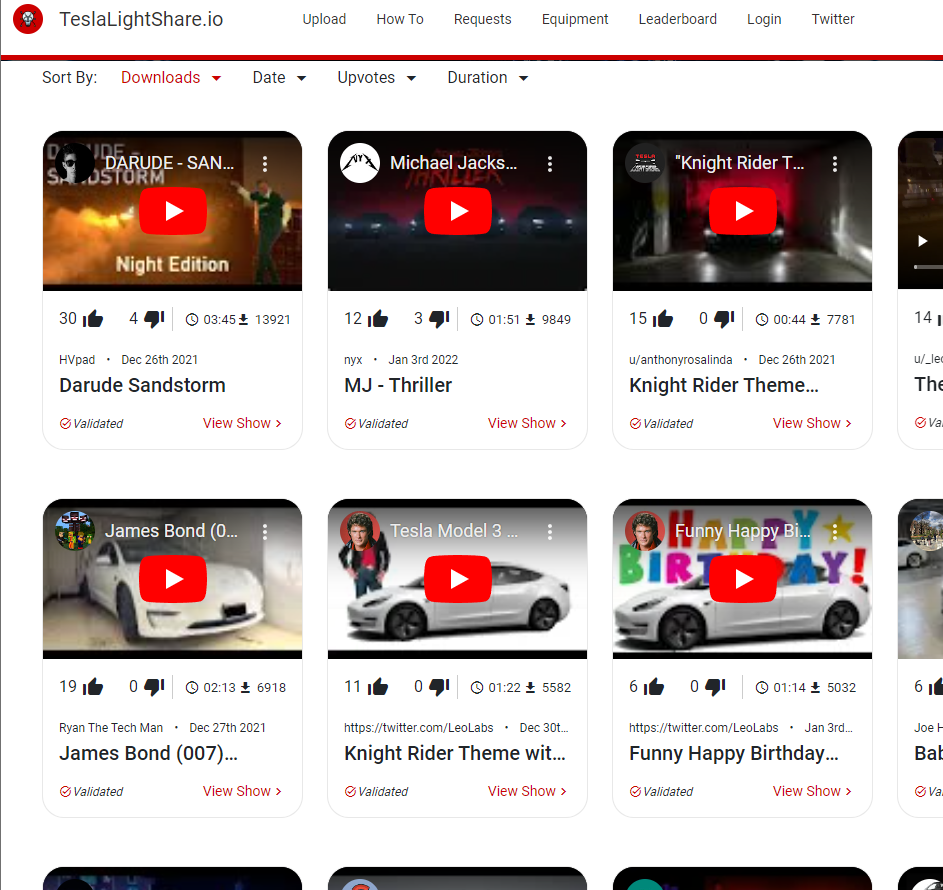
Multiple light show repositories can be found online. A screenshot from TeslaLightShare.io is below.
Insert the flash drive into one of the front USB, USB-C ports, or glovebox USB port, then wait a few seconds.
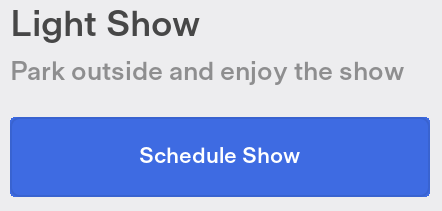
In Toybox, select Light Show and tap Schedule Show.
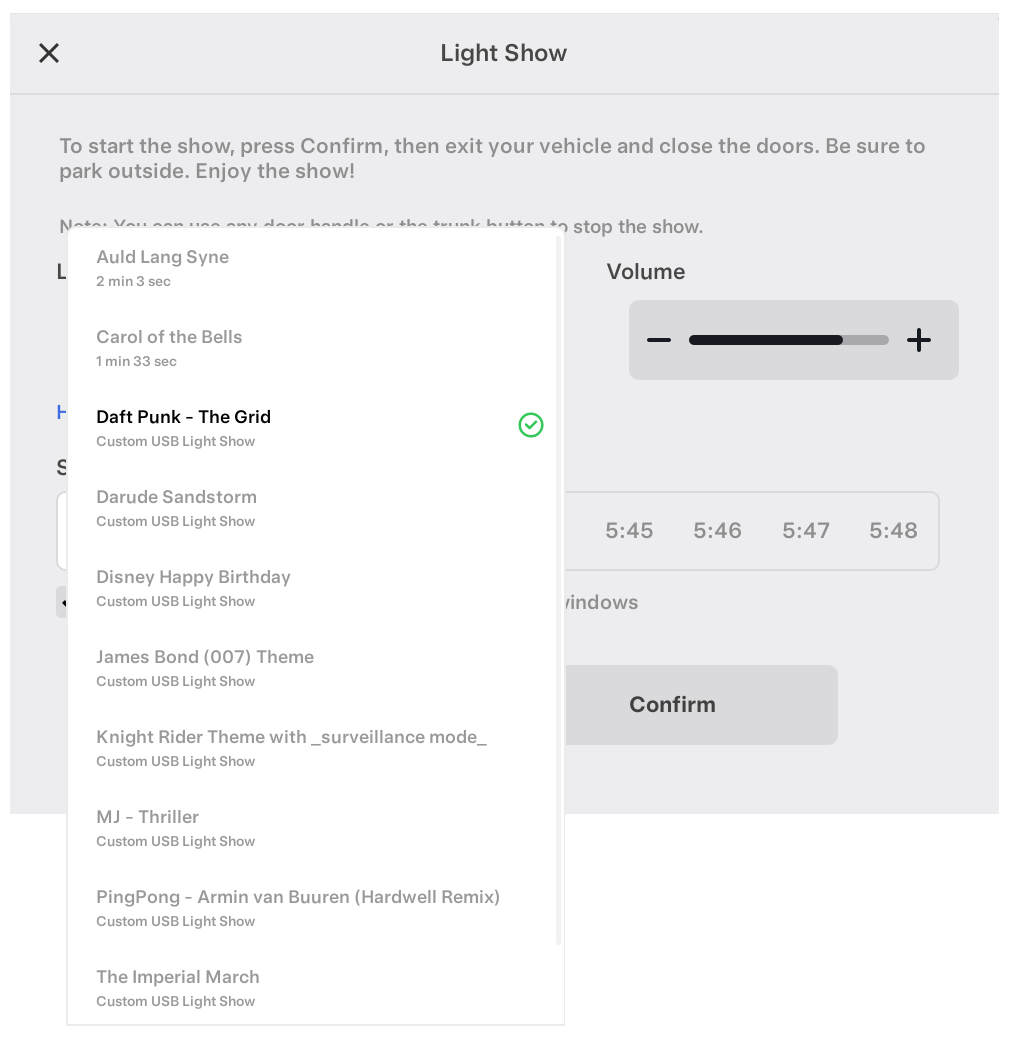
If the files on the USB flash drive meet the requirements, then the custom shows will be available to select from the drop-down menu.
reddit.com/r/TeslaLightShow/
Any transition of a light or closure contributes towards this command limit. Eg, turning a light on and off is 2 transitions.
Within each of the following 3 categories, transitions that happen at the same timestamp will only contribute 1 command towards the overall limit. Therefore, within these categories, it is recommended to align transitions at the same timestamp as much as possible.
In this example, two lights will be turned on and off again, one will be ramped and turn off again, and one closure will start moving. Because they're aligned, this effect only counts as two transitions - One at the beginning, and one at the end of the effect.
You can use both the mp3 and wav format (.wav is recommended). Make sure the file is encoded with a sample rate of 44.1 kHz; less common 48 kHz files won't properly sync to the light show.
Visit xLights Downloads to download and install the xLights application.
Download and unzip tesla_xlights_show_folder.zip, which is the Tesla xLights bare project directory.
Open the xLights application.
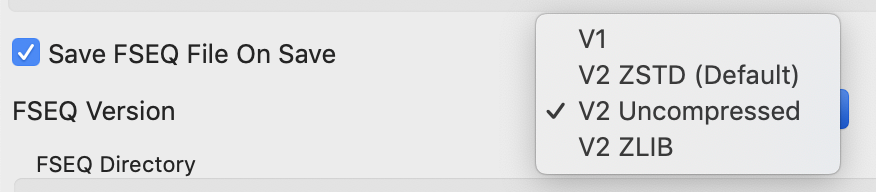
IMPORTANT: In File > Preferences > Sequences > FSEQ Version, select "V2 Uncompressed".
In File > Select Show Folder, navigate to and select the unzipped project directory, then select Open.
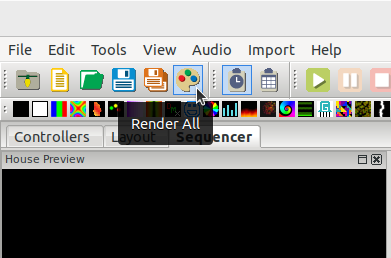
Select the Layout tab to view the Tesla 3D vehicle model.
Make sure that the 3D preview checkbox is selected.
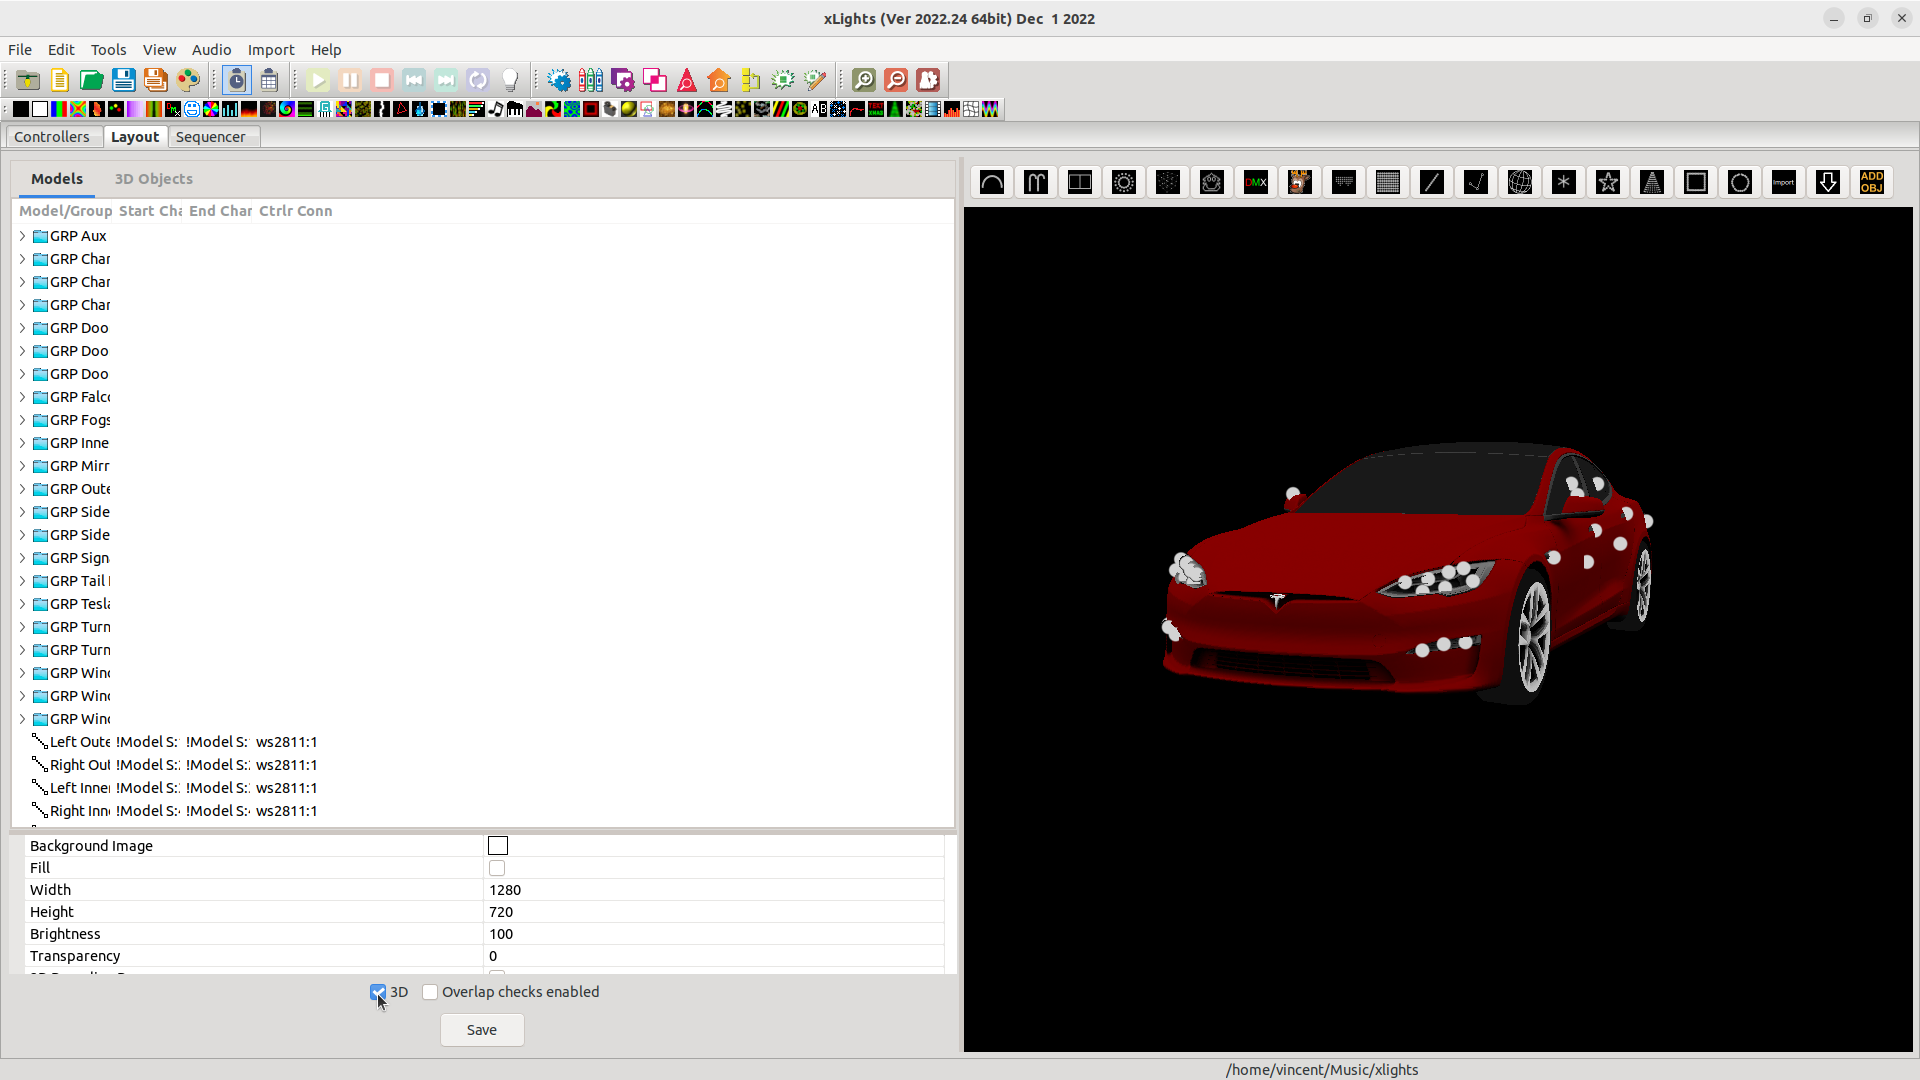
Select the Sequencer tab. For the best editing experience, only the timeline and House Preview are needed.

Note that the previewed Tesla Model S combined with the Cybertruck include the superset of lights and closures that are needed for all supported vehicles, and should be used to generate shows for all vehicle types. See light channel locations for information about where the lights are on each vehicle.
An example sequence is provided that can be run on the vehicle and/or opened in xLights. These instructions cover how to open it in xLights.
Follow the getting started instructions to set up the xLights project.
Download and unzip the example light show: lightshow_example_1_elevator_music.zip or lightshow_example_2_Max_Carlisle_Auld_Lang_Syne_In_the_City.zip.
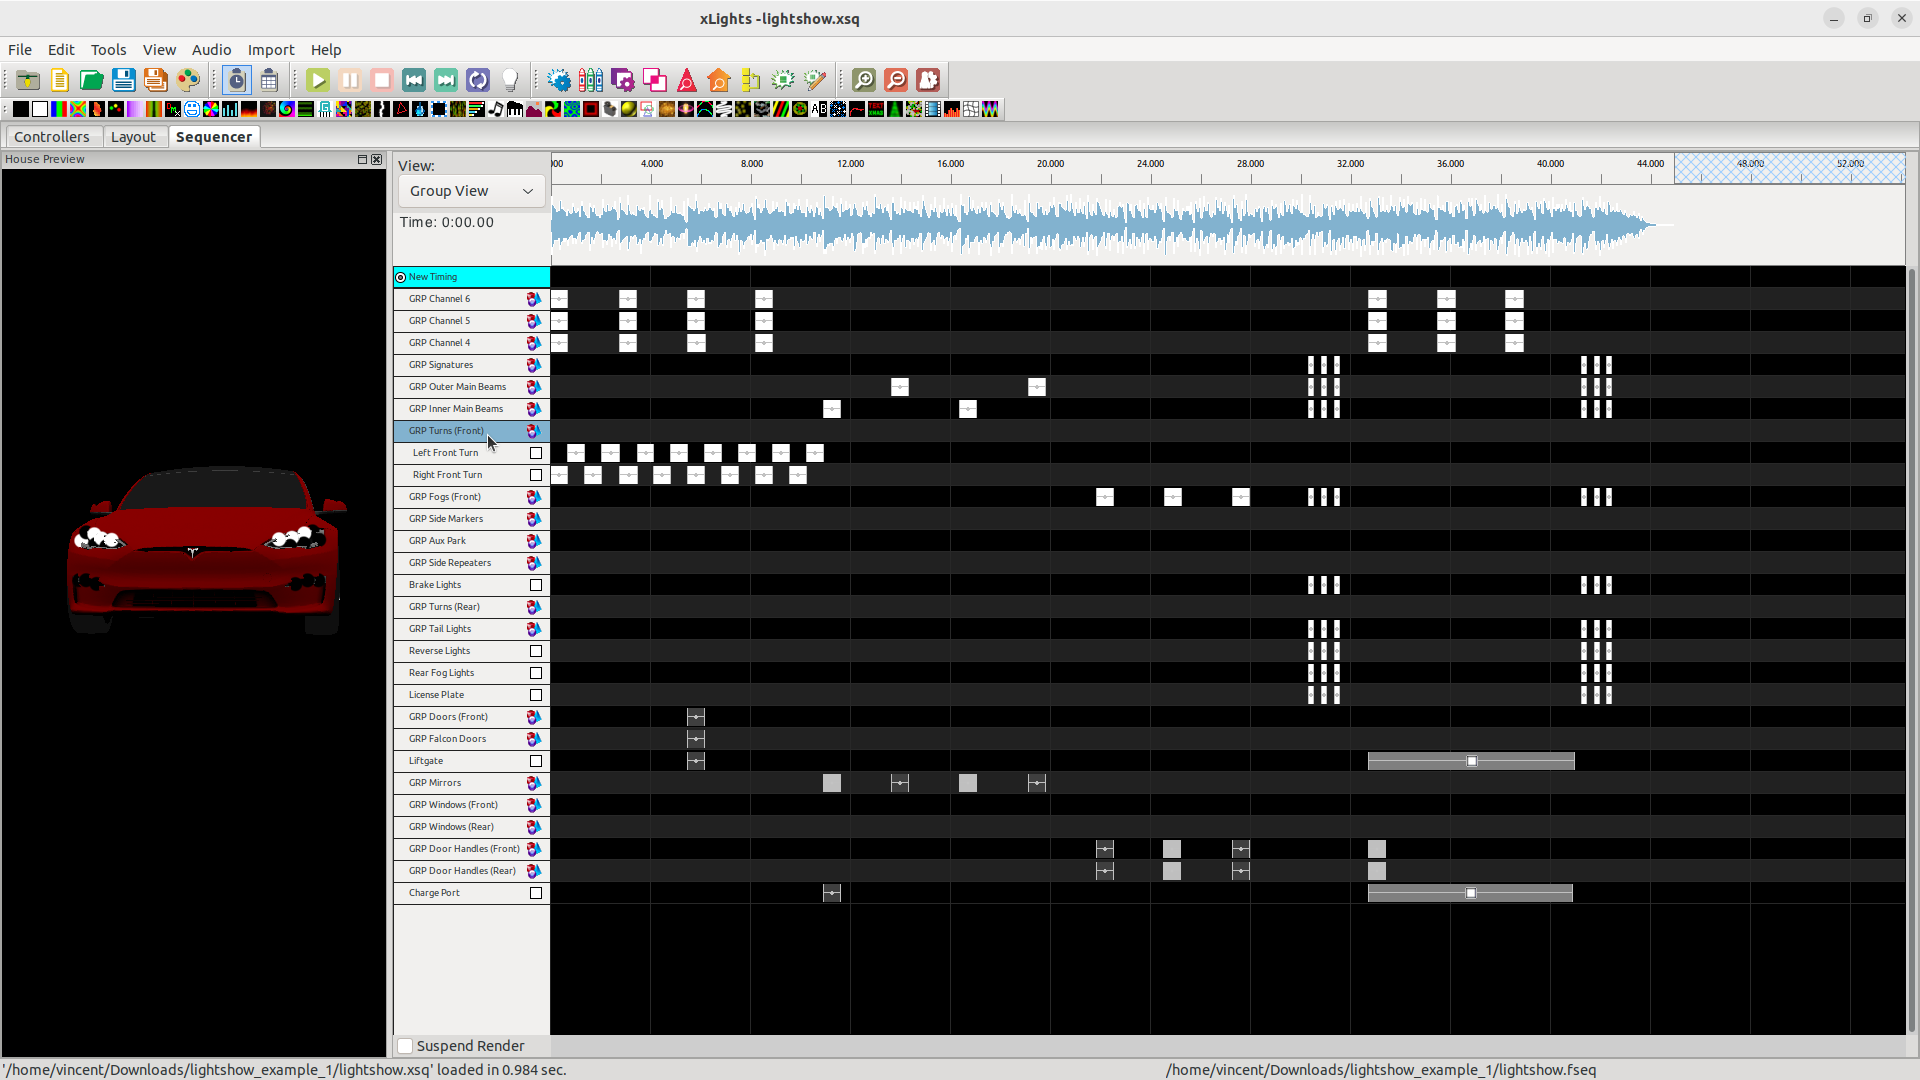
In File > Open Sequence, navigate to the unzipped folder and select the lightshow.xsq example file, then select Open.
In the Sequencer tab, double click groups in the timeline to reveal individual left / right control.
Follow the getting started instructions to set up the xLights project.
Select File > New Sequence
Select Musical Sequence
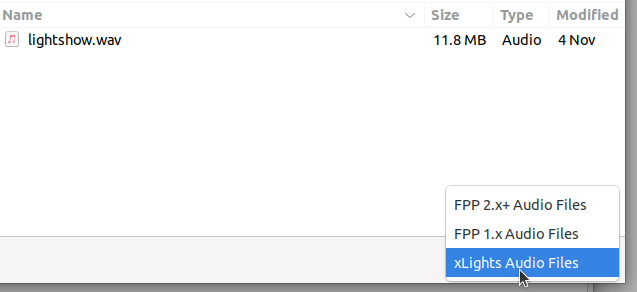
Navigate to your chosen .wav or mp3 file, select it, then select Open. Note that .wav files may be hidden unless file type is set to xLights Audio Files.
In the Wizard tab select Custom
Change the Frame interval to 20ms then select OK.
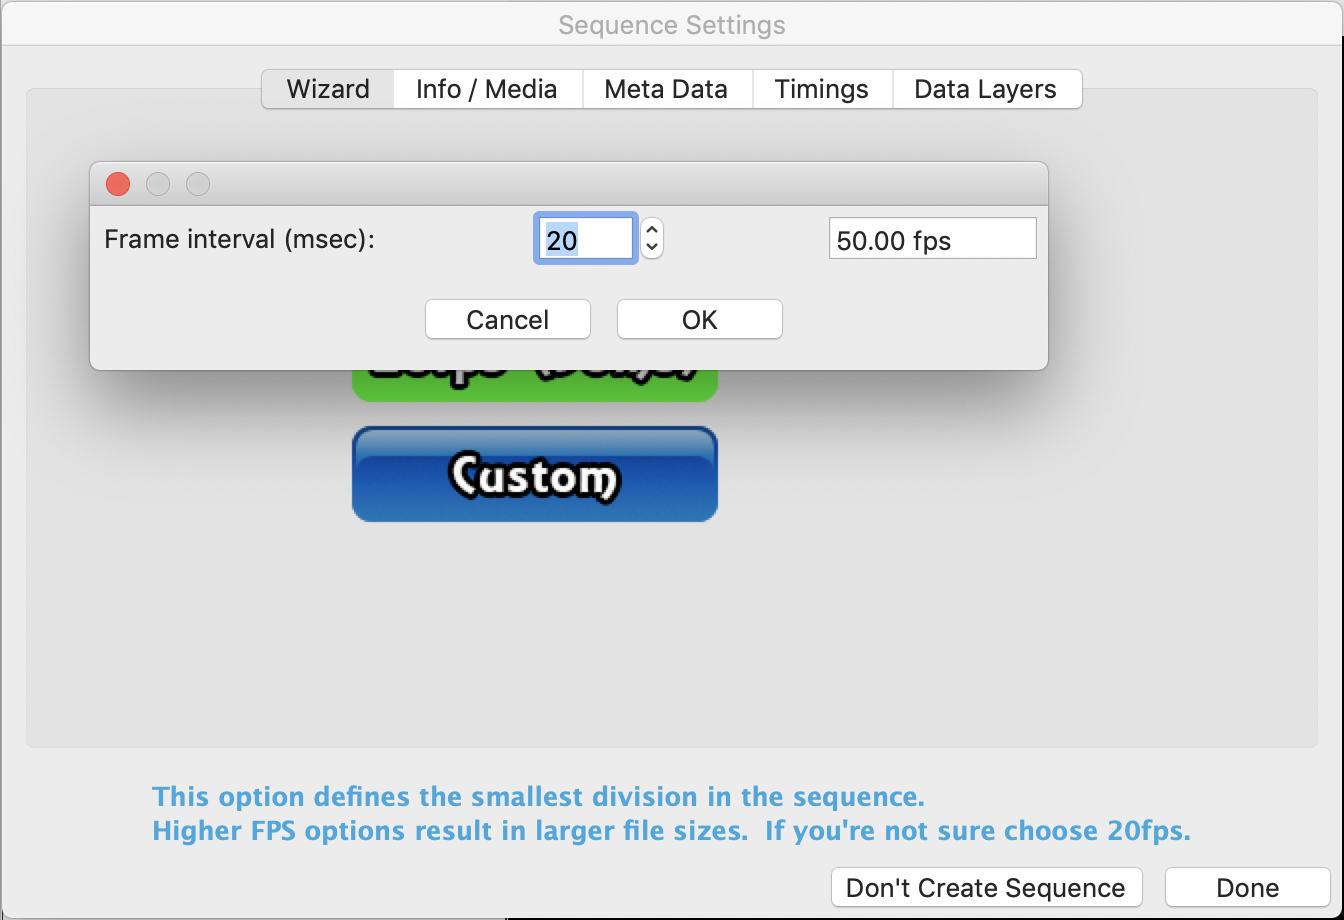
Note: any value between 15ms and 100ms is supported by the vehicle, but 20ms is recommended for nearly all use cases. The maximum show size limits do not depend on the frame interval.
Select Quick Start and wait for the sequencer to load
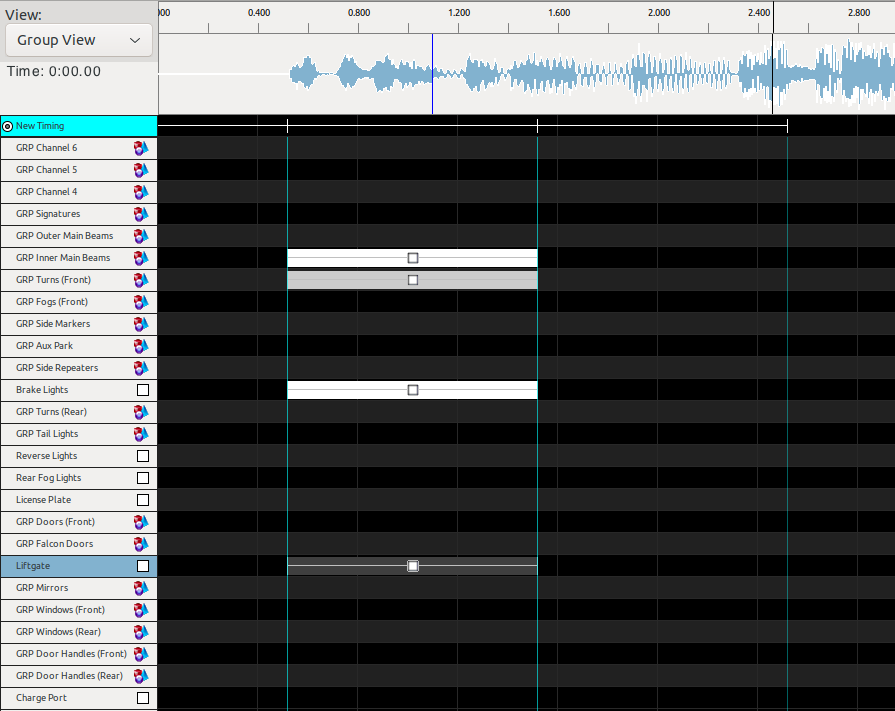
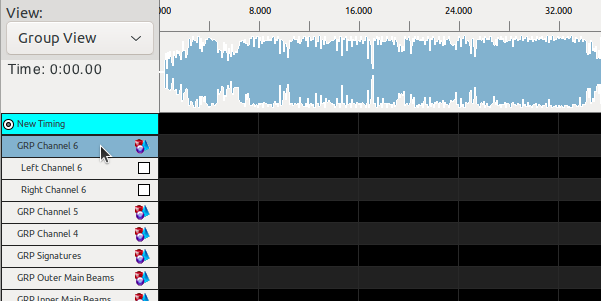
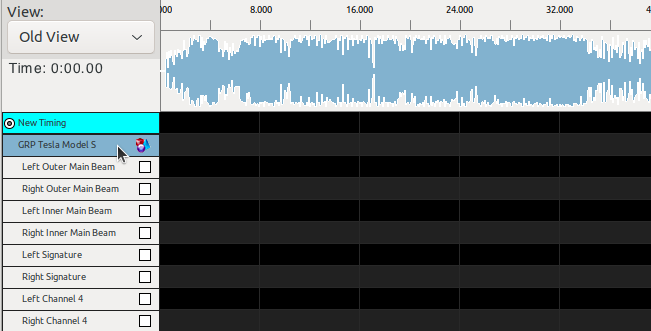
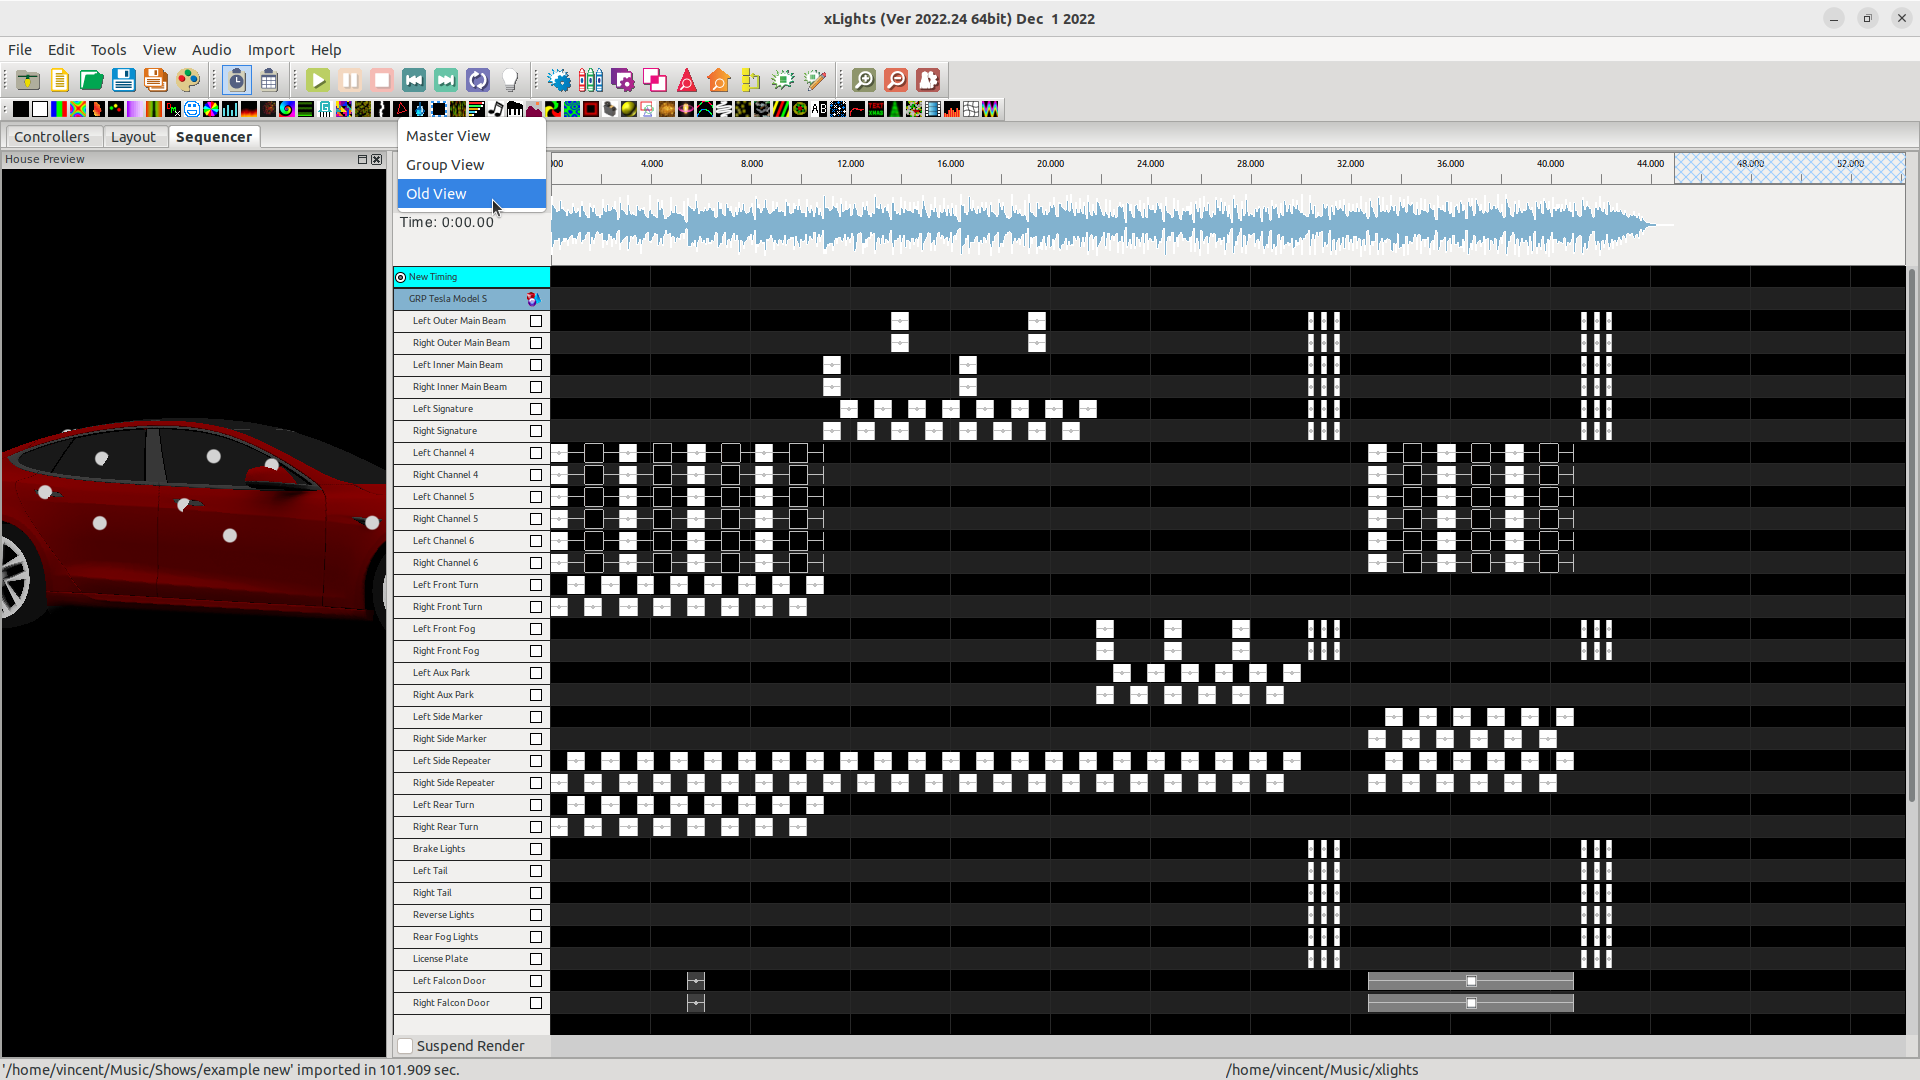
In the top left of the timeline, select "Group View" in the view selector. You can also choose "Old View" for the pre-update layout.

If using the recommended "Group View", you can double click the light groups to reveal and hide individual left/right control. Placing light effects in the group object will activate both the left and right light
If using the old view, double click on "GRP Tesla Model S" to view all channels
For more information on the workflow of creating xLights sequences, please use existing online resources. The rest of these instructions contain Tesla-specific information for show creators.
A Python validator script is provided to help check if your custom light show sequence meets these limitations, without needing a Tesla vehicle.
For usage, run:
python validator.py lightshow.fseq
macOS users should use this command instead:
python3 validator.py lightshow.fseq
Expected output looks like:
> python validator.py lightshow.fseq
Found 2247 frames, step time of 20 ms for a total duration of 0:00:44.940000.
Used 16.45% of the available memory
Most lights available on the vehicle can only turn on or off instantly, which corresponds to 0% or 100% brightness of an 'Effect' in xLights.
The minimum on-time for boolean light channels to produce light is 15ms, although human eyes will have a hard time seeing anything this short! Minimum on-time or off-time of 100ms generally makes the show more pleasing to look at.
In this example, the Left Front Fog turns on and off 3x:

Some channels can have a slow ramp in the intensity during turn-on or turn-off, to create graceful visual effects. Some even allow for full brightness control:
| Channel | Model S | Model X | Model 3/Y | Cybertruck |
|---|---|---|---|---|
| Outer Main Beam | Ramping | Ramping | Ramping on LED reflector headlights; Boolean on LED projector headlights |
Ramping |
| Inner Main Beam | Ramping | Ramping | Ramping | Ramping |
| Signature | Boolean | Boolean | Ramping | - |
| Channels 4-6 | Ramping | Ramping | Ramping | - |
| Front Turn | Boolean | Boolean | Ramping | Ramping |
| Front Side Markers | Boolean | Boolean | Boolean | Ramping |
| Front Light Bar | - | - | - | Full Brightness Control |
| Offroad Light Bar | - | - | - | ? |
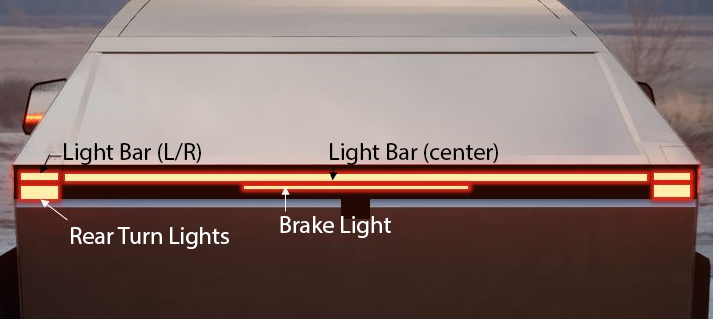
| Rear Light Bar | - | - | - | Full Brightness Control |
| Brake Light | Boolean | Boolean | Boolean | Full Brightness Control |
| Rear Turn | Boolean | Boolean | Boolean | Full Brightness Control |
| Bed Lights | - | - | - | Ramping |
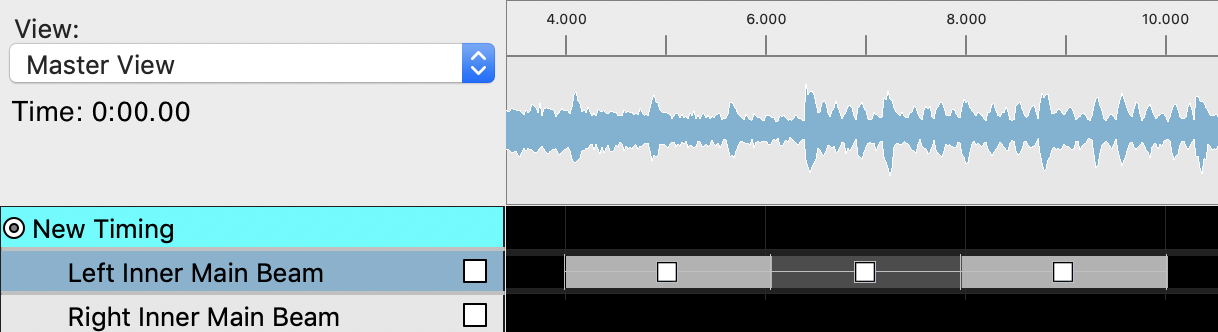
To command a light to turn on or off and follow a ramp profile, place the effect with the corresponding keyboard shortcut:
| Ramping Function | xLights Effect Brightness | Hotkey |
|---|---|---|
| Turn off; Instant | 0% | empty timeline |
| Turn off; 500 ms | 10% | W |
| Turn off; 1000 ms | 20% | S |
| Turn off; 2000 ms | 30% | X |
| Turn on; 500 ms | 70% | E |
| Turn on; 1000 ms | 80% | D |
| Turn on; 2000 ms | 90% | C |
| Turn on; Instant | 100% | F |
The keyboard layout is designed to be easy to use. Note that the effect types are grouped into vertical keyboard rows and sorted by duration.
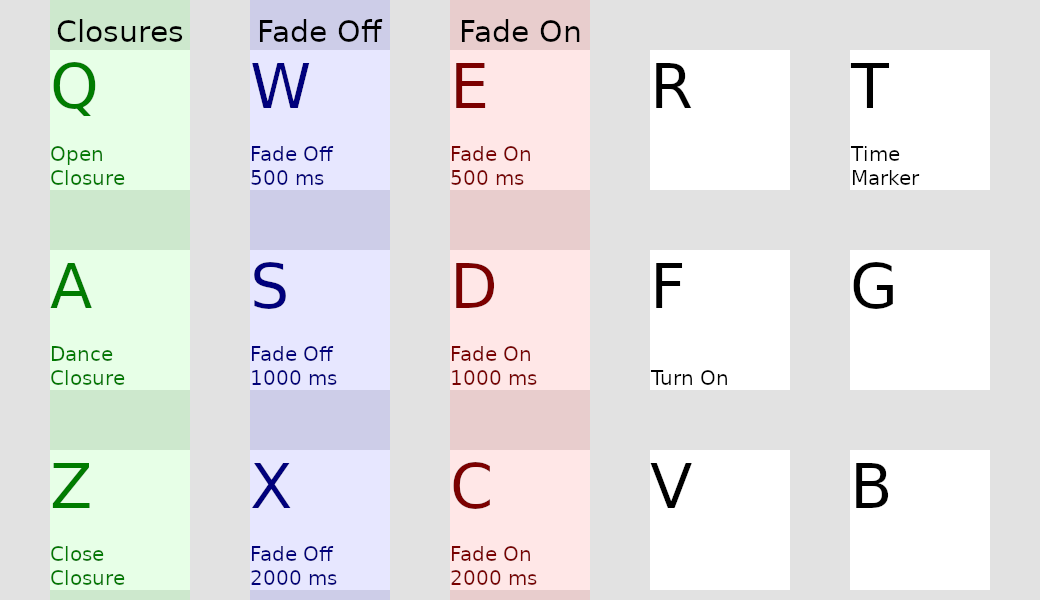
Left inner main beam, Turn on; 2000 ms, effect duration 1s: causes the light to ramp from 0% to 50% intensity over 1s, then instantly turn off (because of the empty timeline).
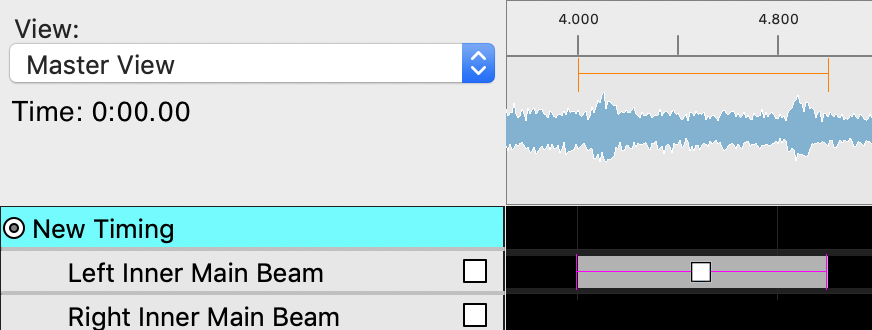
Left inner main beam, Turn on; 2000 ms, effect duration 4s: causes the light to ramp from 0% to 100% intensity over 2s, then stay at 100% intensity for 2s, then instantly turn off after 4s.
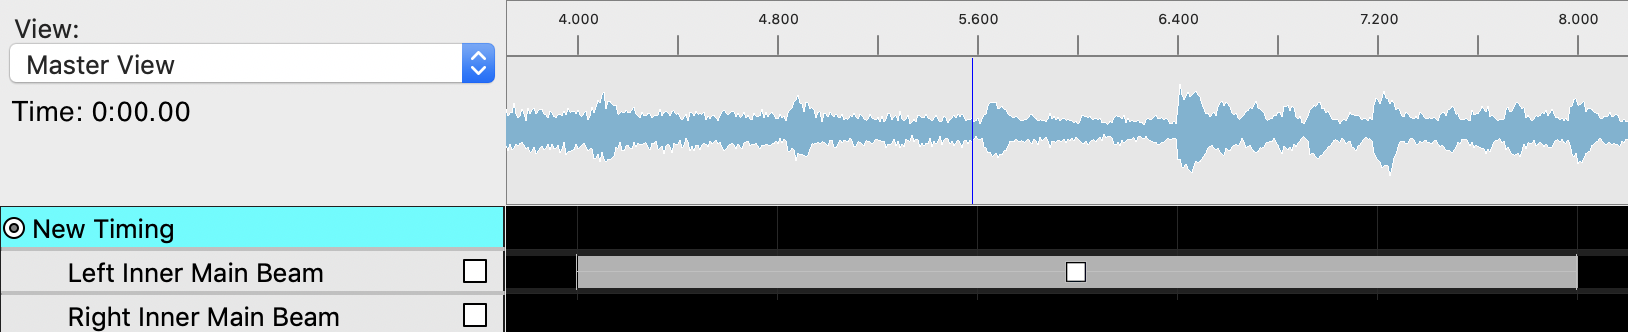
Left inner main beam, Turn on; 2000 ms for 2.06s, Turn off; 2000 ms for 1.9s, Turn on; 2000 ms for 2.06s: causes light to ramp to 100% intensity, then down close to, but not reaching, 0% intensity, then back up to 100% intensity, then instantly turn off.
Some lights on Cybertruck have full brightness control. Their brightness always corresponds to the value set in xLights.
Place an 'On' Effect using the shortcut F. Lights can be set to a steady-state brightness setpoint between 0% and 100% intensity using the 'Brightness' slider in the 'Colors' window.
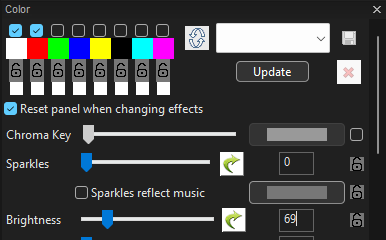
Custom ramp durations can be achieved using 'Value Curves'. The menu is opened when clicking the green arrow next to the brightness slider. To create a basic ramp, select 'Ramp' from the drop-down list and set the start/end duration to 0%/100%. The light will reach 0%/100% brightness at the end of the 'On' effect.
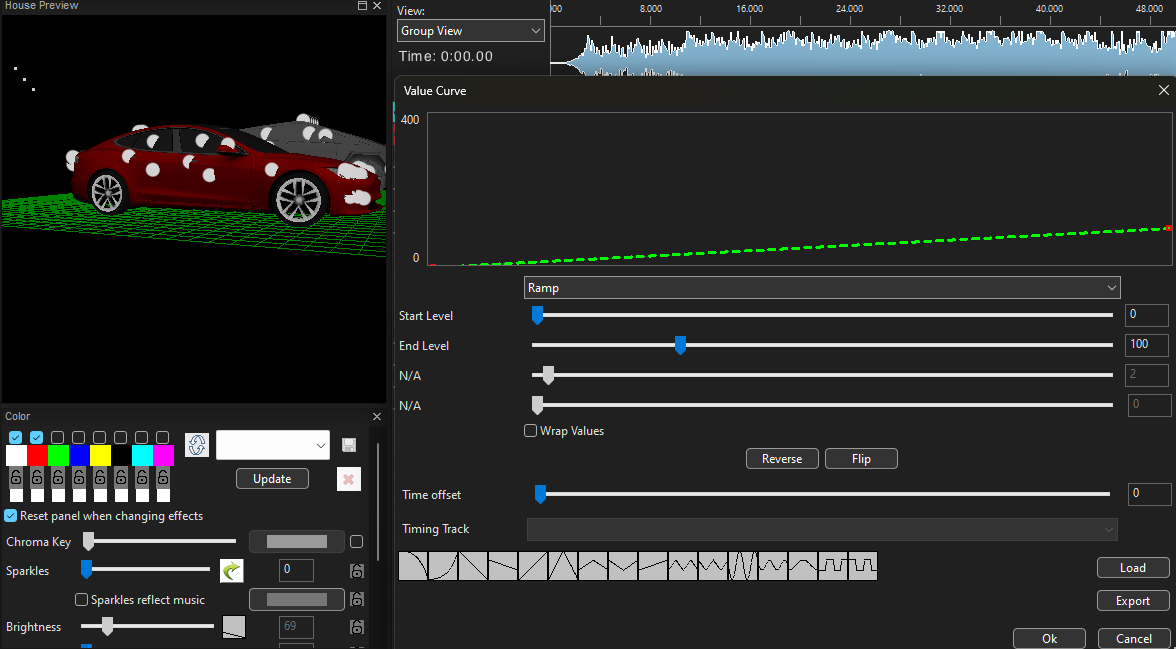
Value Curves can also be used to create more advanced custom brightness effects. Keep in mind that the maximum brightness is 100.
On cars without full brightness control, any brightness setting above 50% will set the light to ON and otherwise it will be OFF.
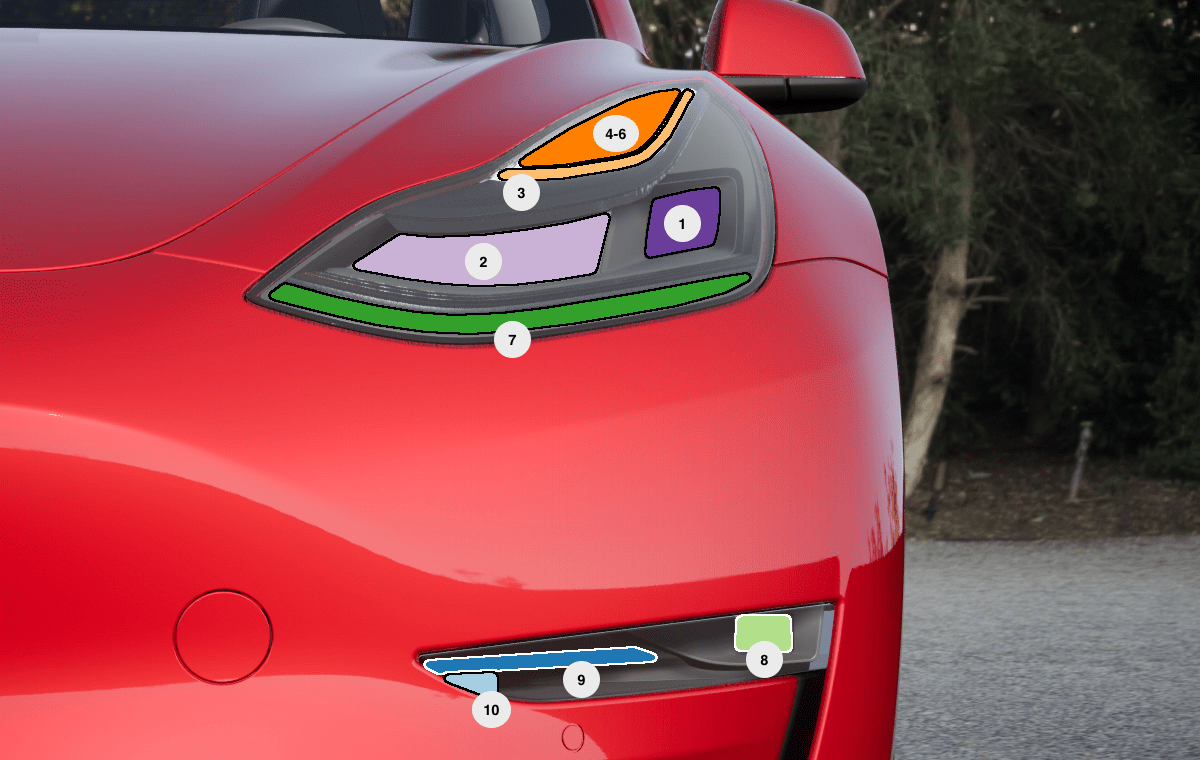
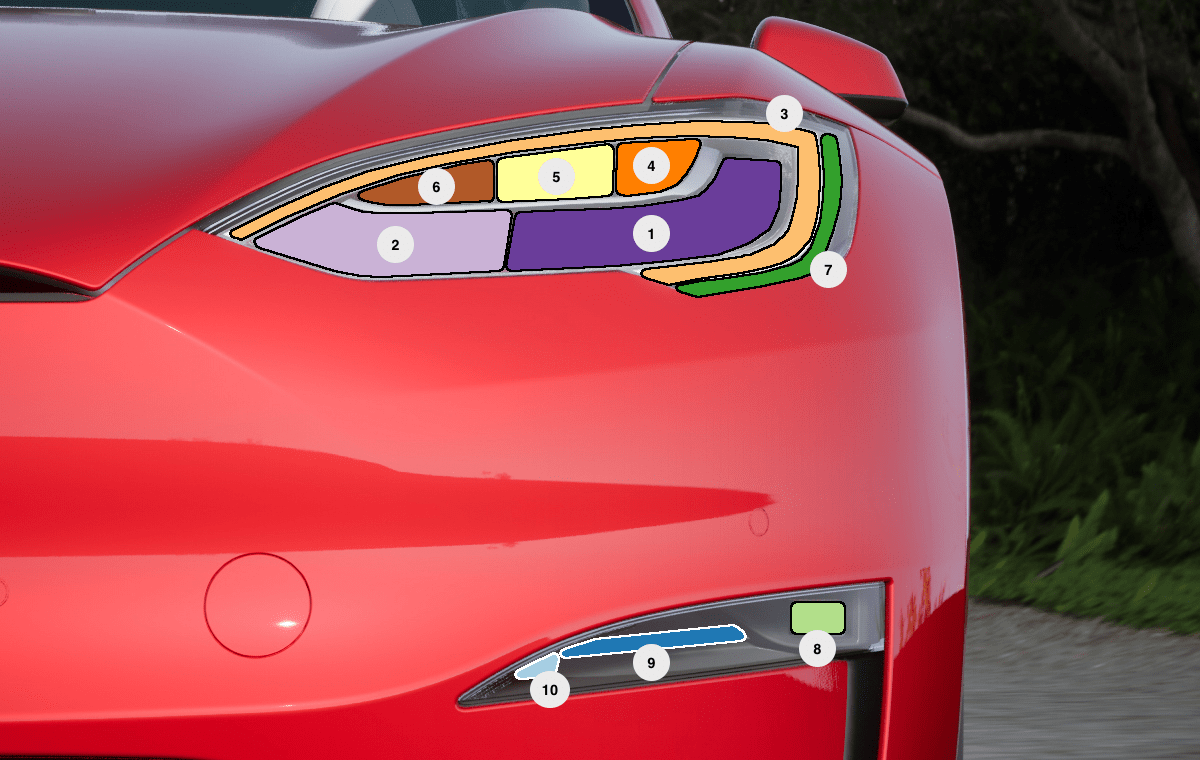
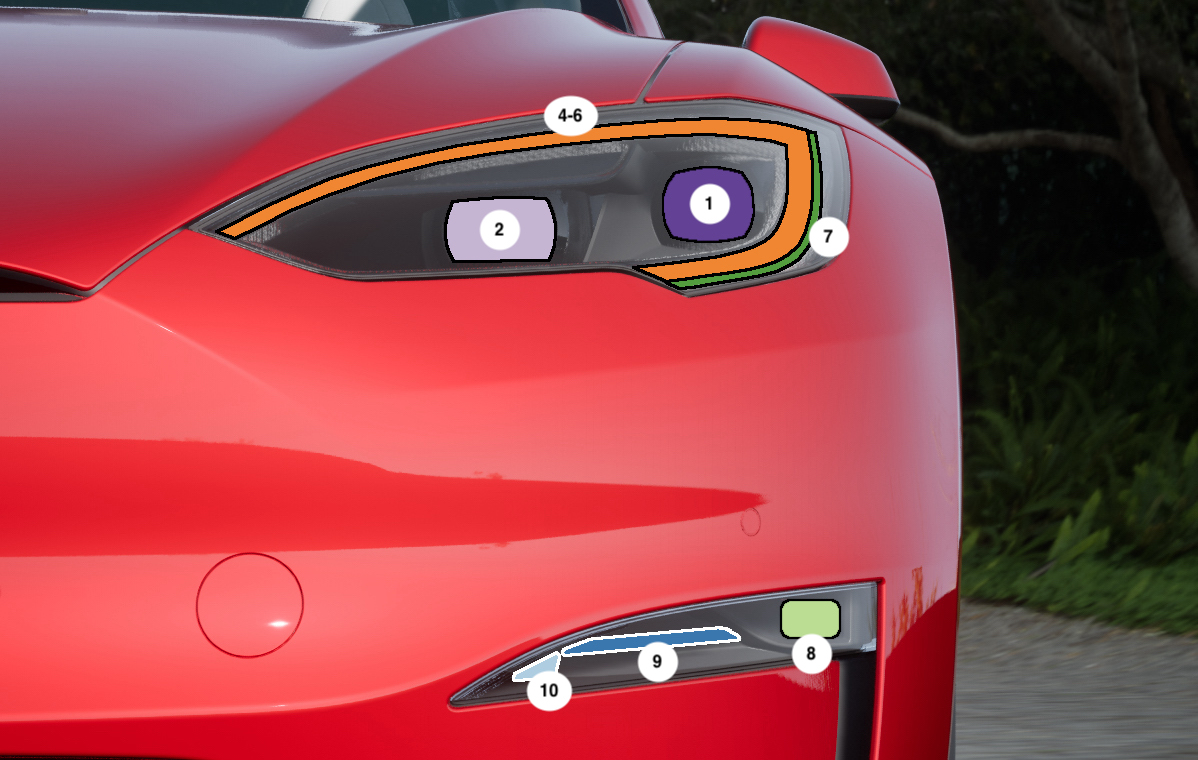
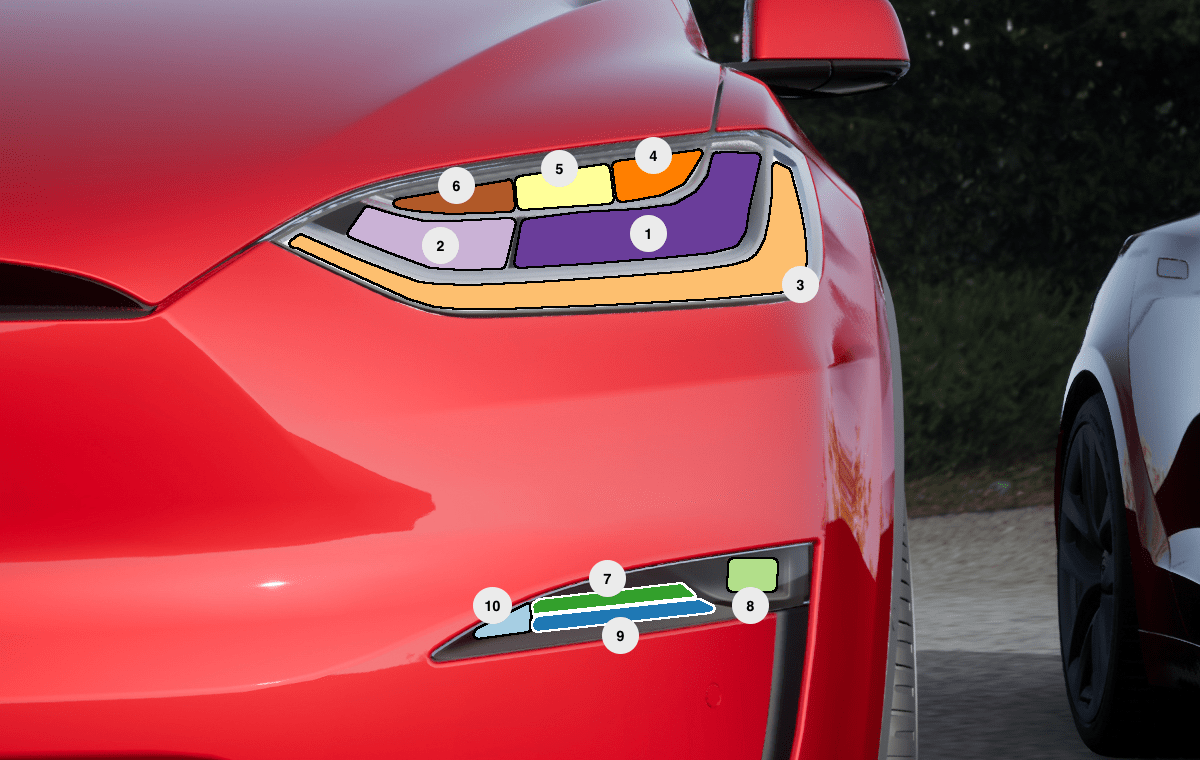
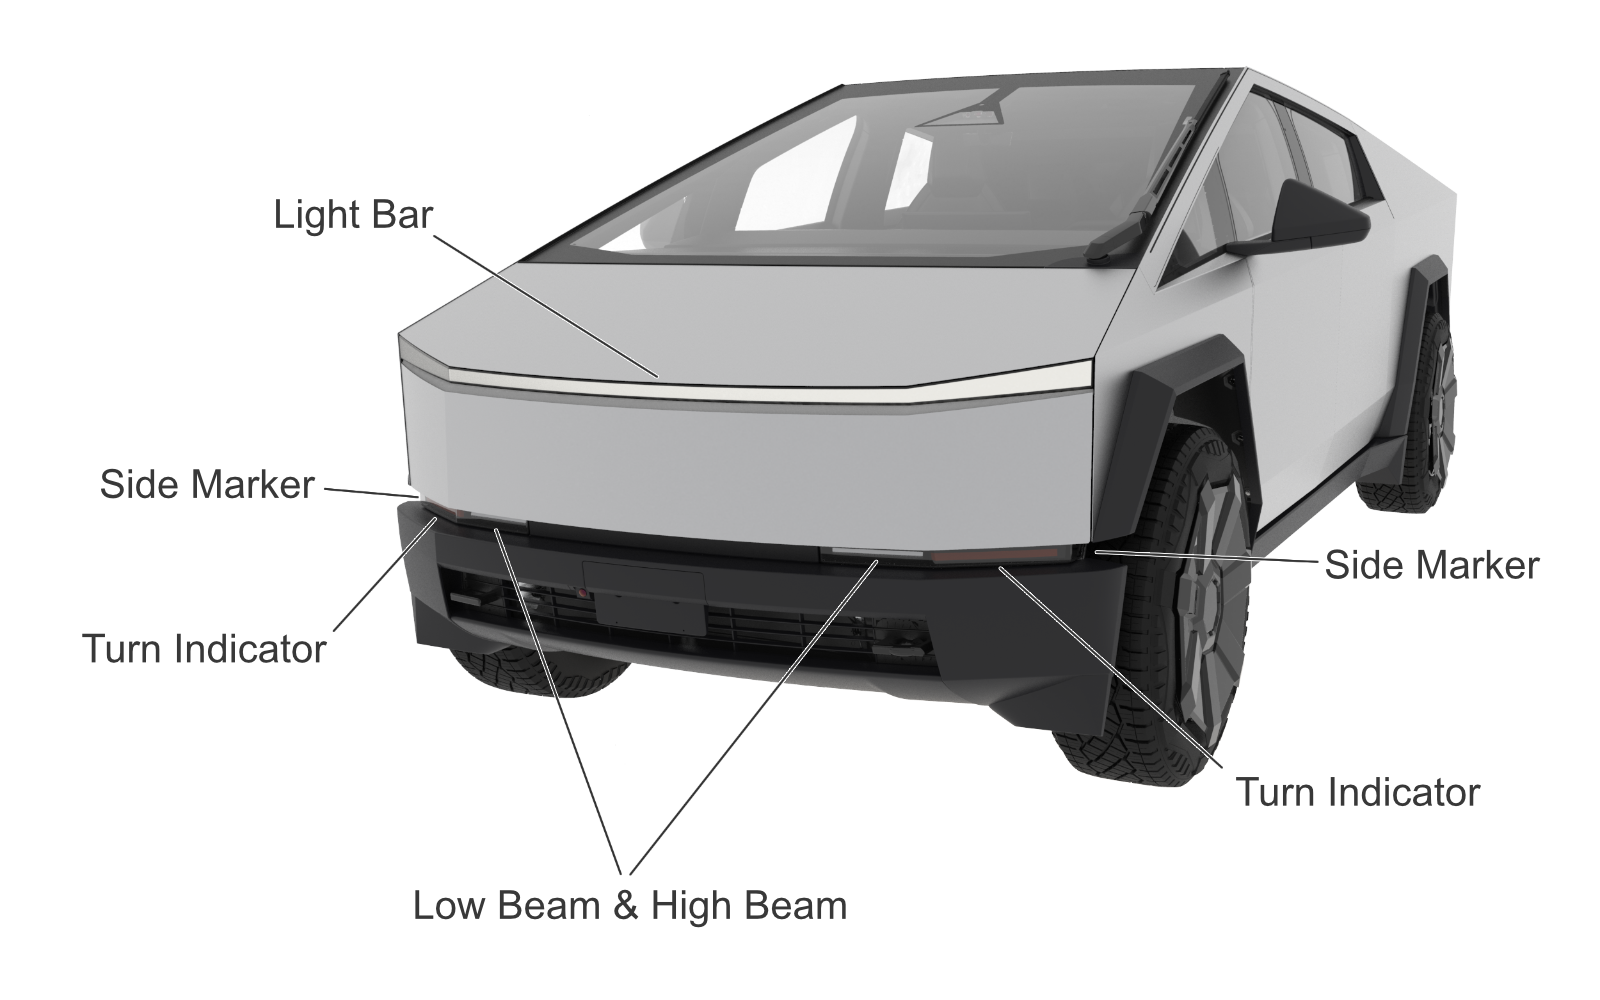
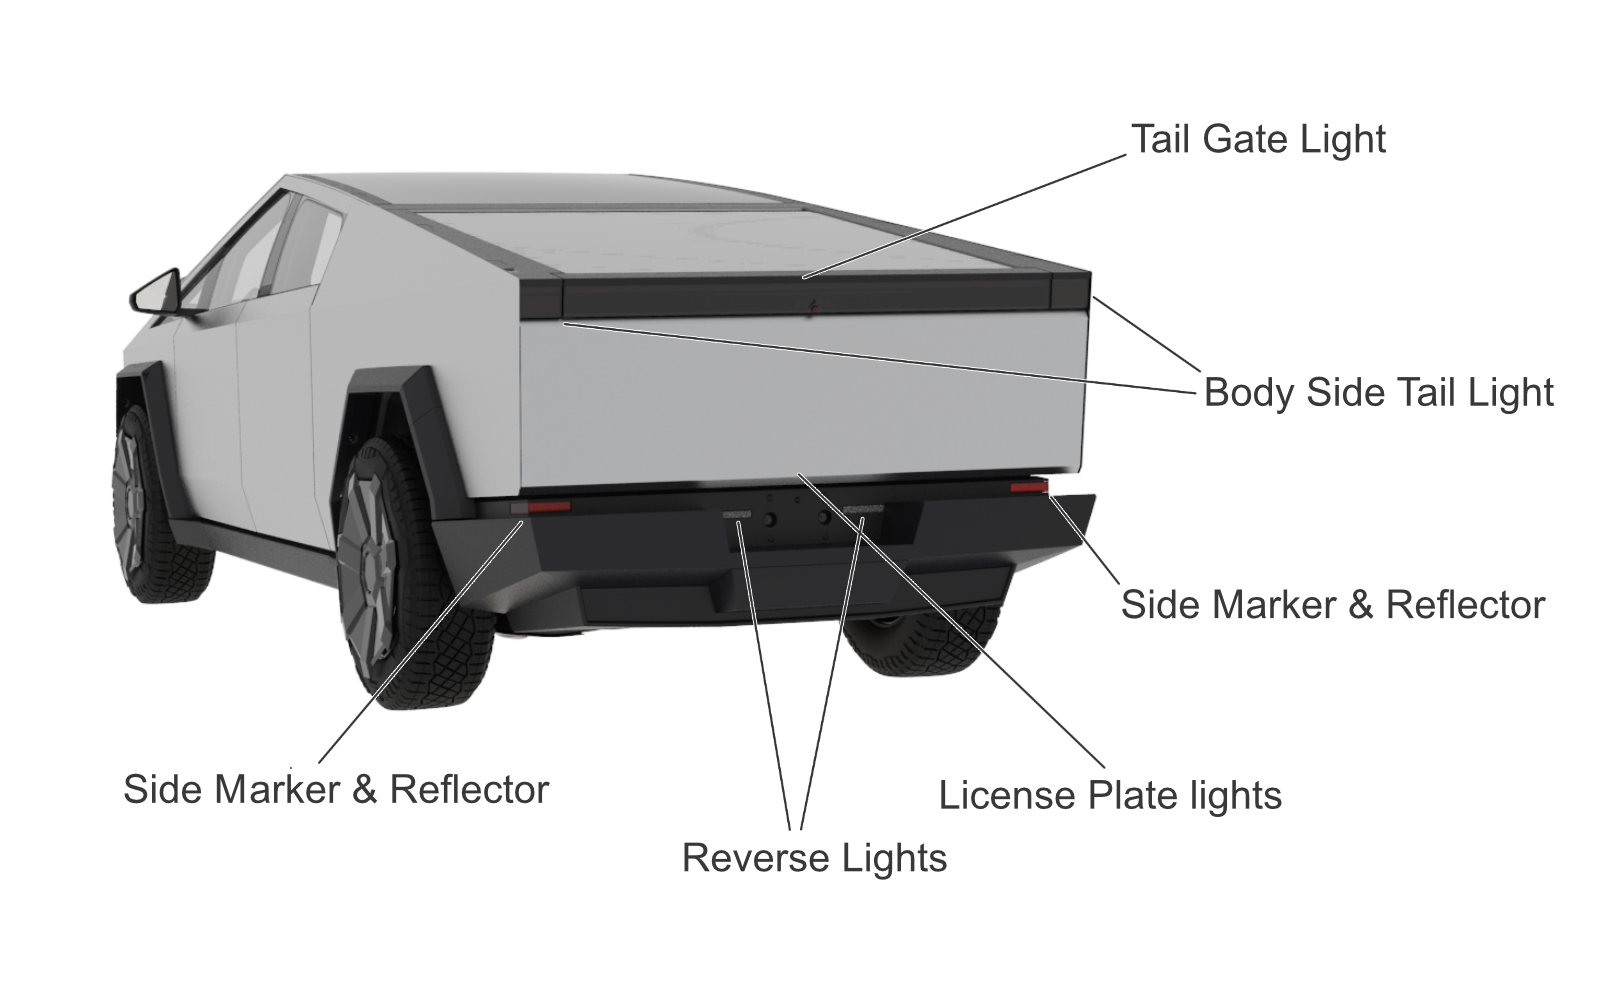
The following tables and images help show which channels are controlled on each car. Some vehicles have lights that do not exist, or have multiple lights driven by the same control output - see notes in Light channel mapping details for this information.
| Light Channel Name | Identifier in image - Model S/X | Identifier in image - Model 3/Y |
|---|---|---|
| Outer Main Beam | 1 | 1 |
| Inner Main Beam | 2 | 2 |
| Signature | 3 | 3 |
| Channel 4 | 4 | 4-6 |
| Channel 5 | 5 | 4-6 |
| Channel 6 | 6 | 4-6 |
| Front Turn | 7 | 7 |
| Front Fog | 8 | 8 |
| Aux Park | 9 | 9 |
| Side Marker | 10 | 10 |

In custom xLights shows, the following closures can be commanded:
| Channel | Model S | Model X | Model 3/Y | Cybertruck | Supports Dance? | Command Limit Per Show |
|---|---|---|---|---|---|---|
| Liftgate | Yes | Yes | Only vehicles with power liftgate | Yes (Frunk) | Yes | 6 |
| Mirrors | Yes | Yes | Yes | Yes | - | 20 |
| Charge Port | Yes | Yes | Yes | Yes | Yes | 3 |
| Windows | Yes | Yes | Yes | Yes | Yes | 6 |
| Door Handles | Yes | - | - | - | - | 20 |
| Front Doors | - | Yes | - | - | - | 6 |
| Falcon Doors | - | Yes | - | - | Yes | 6 |
To command a closure to move in a particular manner, place an effect with the following keyboard shortcuts:
| Closure Movement | xLights Effect Brightness |
|---|---|
| Idle | empty timeline |
| Open | Q |
| Dance | A |
| Close | Z |
| Stop | F |
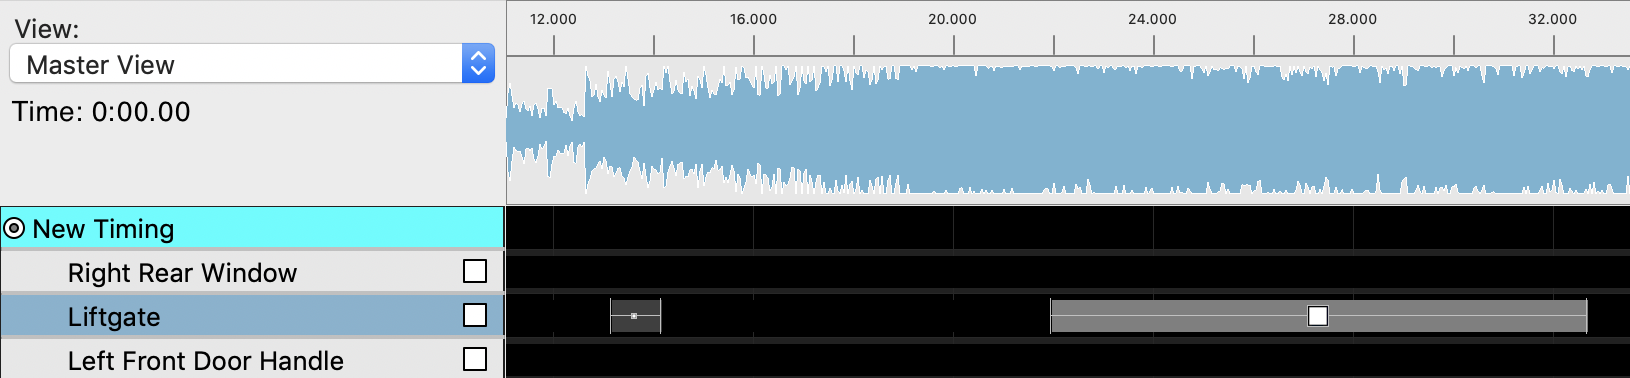
For Idle, Open, Close, and Stop, there is no minimum xLights effect duration in order for the command to take effect. For example, the following sequence has a liftgate open command with duration of only 1s ahead of the dance that comes later, and this is sufficient to open the liftgate all the way:
For Dance, the xLights effect must persist until the dancing is desired to stop.
| Closure Movement | Approximate Duration (s) |
|---|---|
| Open Liftgate | 14 |
| Close Liftgate | 4 |
| Open Front Doors | 22 |
| Close Front Doors | 3 |
| Open Falcon Doors | 20 |
| Close Falcon Doors | 8 |
| Windows | 4 |
| Mirrors, Door Handles, Charge Port | 2 |
This example will cause Aux Park lights to turn on constantly on Model 3/Y:

This example will cause the Aux Park lights to flash on Model 3/Y (note the blank time between each box compared to the other example):

(Left side marker || Left aux park || Right side marker || Right aux park) requests from xLights.(Left side marker || Left aux park)
(Right side marker || Right aux park)
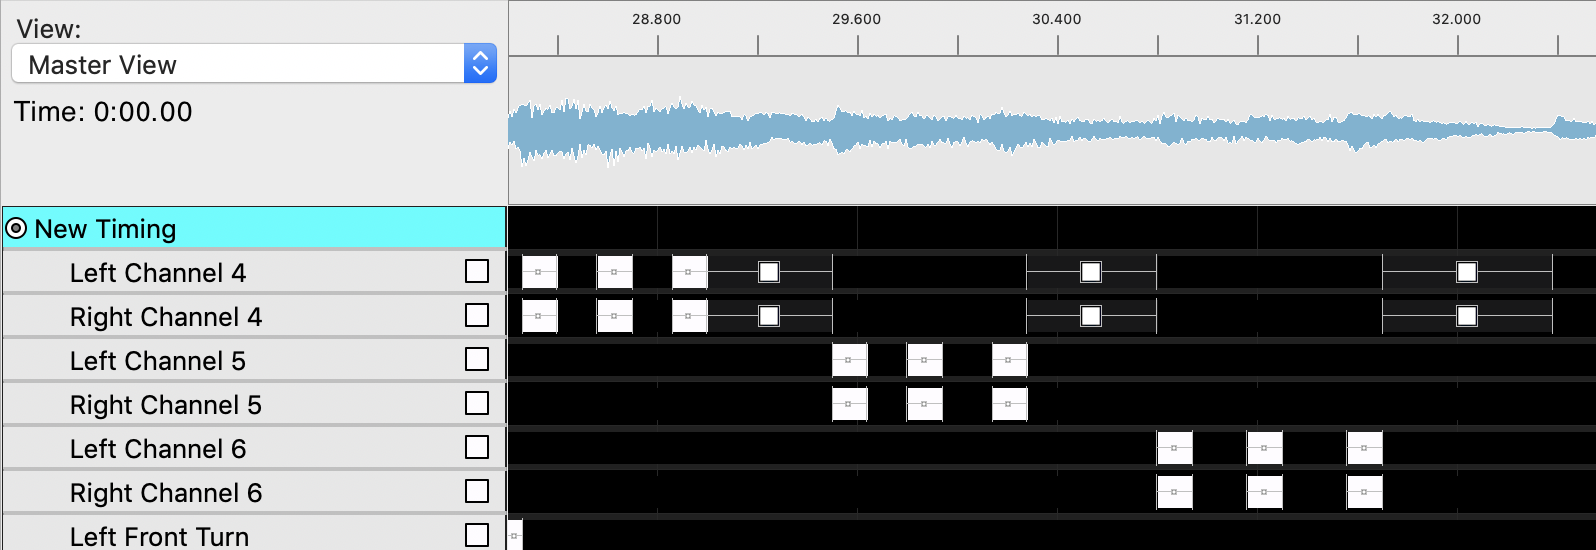
(Channel 4 || Channel 5 || Channel 6).In this example, each channel blinks 3x and ramps down after its last blink. Notice how an Turn Off, 500ms effect is added always on Channel 4, even when it's Channel 5 or Channel 6 that were turned on.
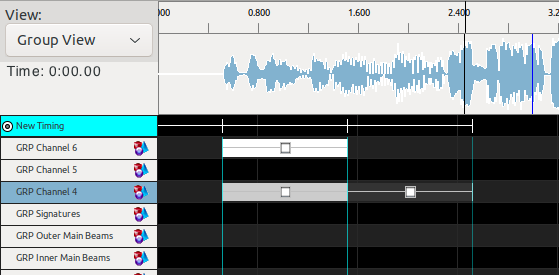
In this example, Channel 4 & 6 ramp up and ramp down again. Notice how Channel 6 has the Turn On; Instantly effect while Channel 4 defines the effect to be Turn On; 1000ms for both channels.
(Left tail || Right tail) requests from xLights - note that the license plate lights xLights channel will have no effect on these vehicles.The front and rear light bar have 60 individually controllable LEDs each.
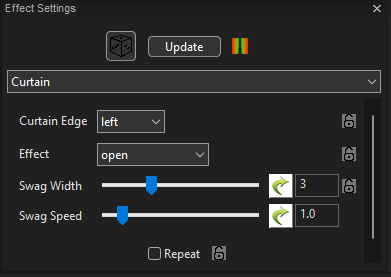
It's recommended to use xLights' integreated effects to program the light bar. Good ones for getting started are: Curtain, Marble, Morph and On. Most effects can be customized using the 'Effect Settings' Window. The visualization will display all effects accurately, but keep in mind that the lights are very diffused.
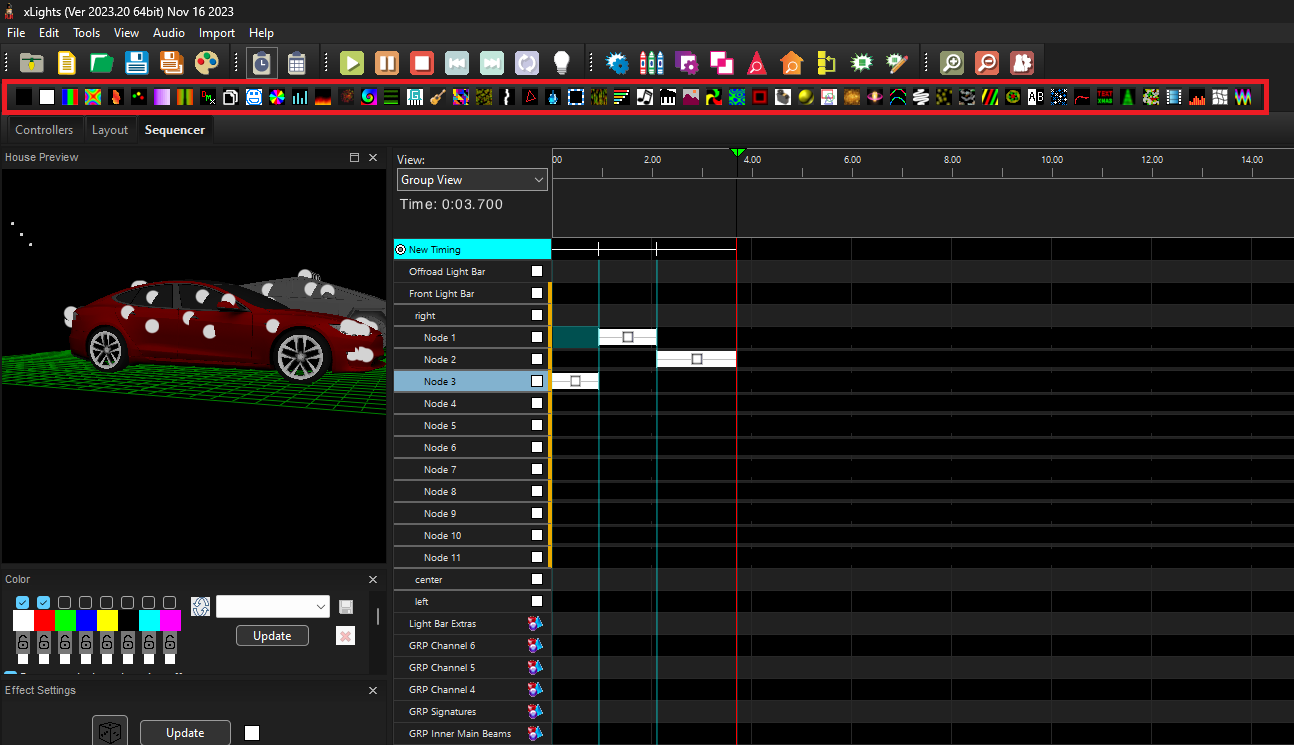
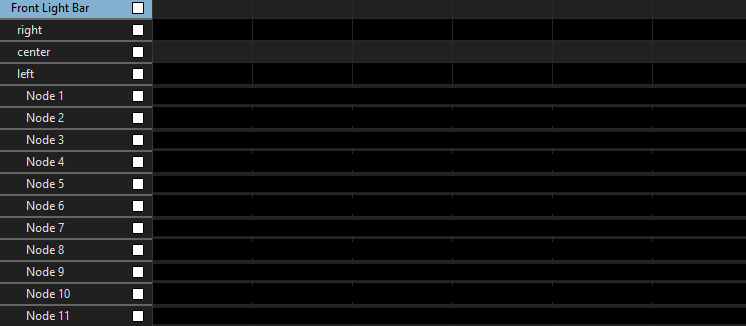
The front light bar is grouped intro three segments: Left, Center, Right. Left/Right are the outer angled portions of the front light bar. The segments can be accessed by double clicking on the light bar in the timeline.
The rear light bar is grouped into the same three segments. Center consists of the 52 LEDs on the bed door, while Left/Right are 4 LEDs each above the Turn Signals.
Even the individual LEDs can be programmed by double clicking on the segments (Left, Center, Right) in the timeline.
To make old light shows look as good as possible on the new Cybertruck's lights, the following channels are remapped:
All old .xsq and .fseq files are fully compatible with this light show update. You can edit older .xsq files instantly without converting them. Keep in mind that there is no backwards compatibility, once you save them, you won't be able to open them with the old project folder anymore.
All old .fseq files are fully compatible with this light show update. You only need to convert old show files if you want to edit them with the refreshed XLights configuration.
Create a new folder for the converted project and copy the old audio file over.
Create a new sequence with the audio file from the new folder.
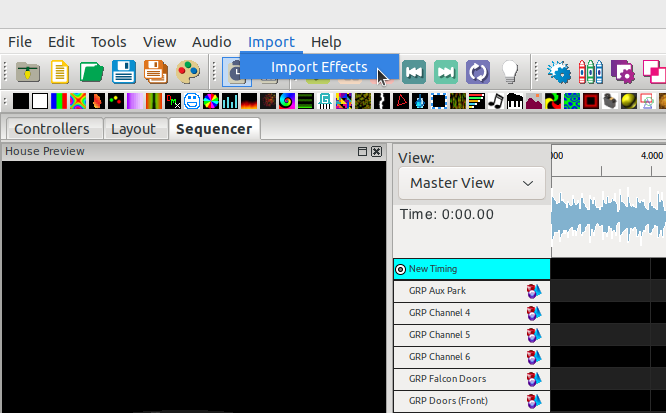
Select Import -> Import Effects and choose your old .xsq file.
In "Map Channels" Window, select "Load Mapping" and choose "2022_mapping.xmap" located in the tesla_xlights_show_folder.
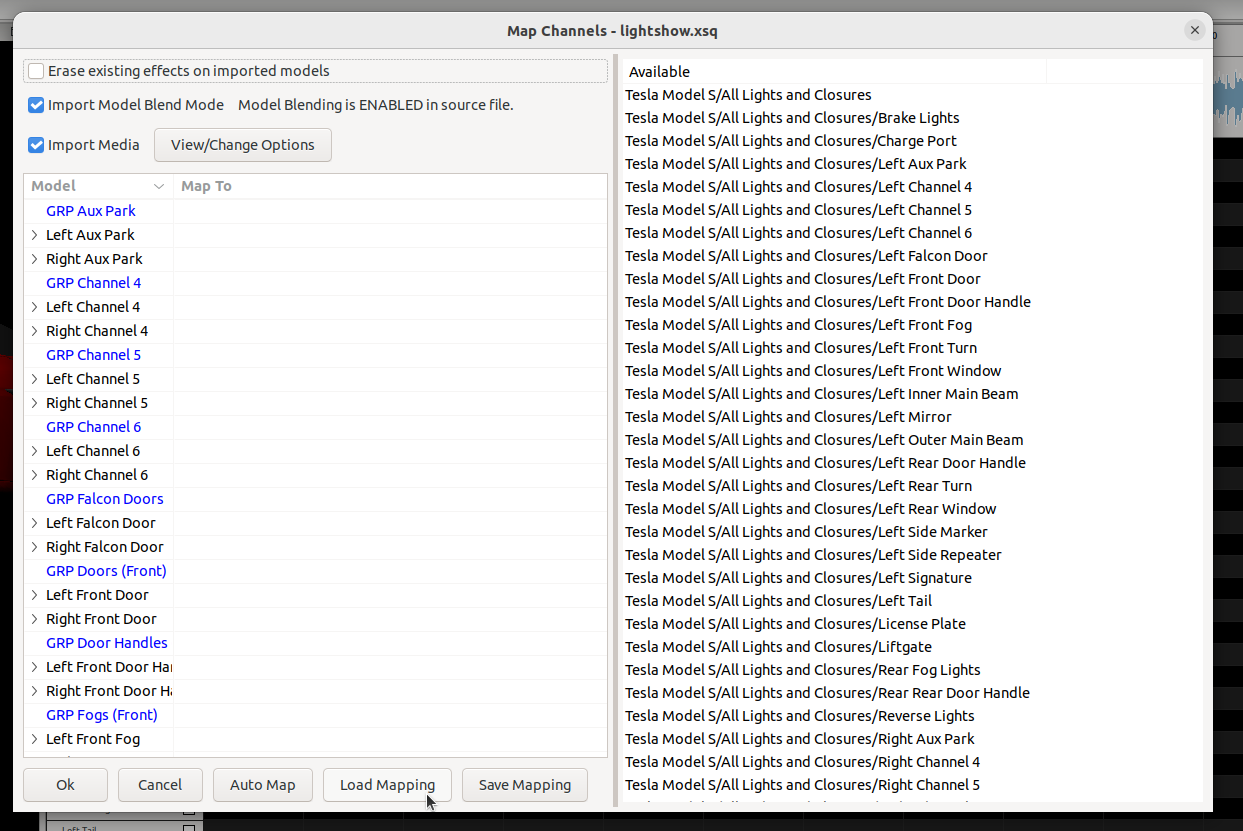
Press "Ok", the old sequence will import. It's recommended to use the "Old View" for working with converted files.
Press "Render All" to see the imported effects in the preview.