RedAlert
1.0.0
Not Official Pikud Ha-Oref
This script creates a suite of binary sensors that issue warnings for all hazards signaled by PIKUD HA-OREF. These hazards encompass red alerts for missile and rocket fire, breaches by unauthorized aircraft, seismic activity, tsunami warnings, terrorist incursions, chemical spill emergencies, non-conventional warfare, among other dangers. Upon receiving an alert, the specific type of threat is indicated at the start of the message (for instance, ירי רקטות וטילים for rocket and missile fire).
The script offers additional functionalities, such as archiving all alert details in a historical text and CSV files and facilitating the creation of additional sub-sensors derived from the primary sensor.
Note
You can customize the sensor name to your liking, with red_alert set as the default.
binary_sensor.red_alert: Holds PIKUD HA-OREF data, triggering on alarms and resetting otherwise. It’s useful for automations or creating additional sensors.binary_sensor.red_alert_city: Similar to the above but only triggers if the specified city is targeted by the alarm.input_text.red_alert: Logs the most recent alert data, serving as a historical log.input_boolean.red_alert_test: Simulates a dummy alert to verify automation setups.The script automatically generates two GeoJSON files that store the alert’s geolocation data, which can be displayed on the Home Assistant map.
Tip
For saving history data you need to create a folder called www inside the Home Assistant directory.
To ensure the history of sensors is maintained after a restart in Home Assistant, it’s advisable to establish input text and boolean helpers. It’s best to do this prior to installation. Here’s how you can proceed:
configuration.yaml.#/config/configuration.yaml
homeassistant:
allowlist_external_urls:
- http://192.168.86.20:8123 # YOUR HOME ASSISTANT IP
- http://homeassistant.local:8123
allowlist_external_dirs:
- "/config/www"
input_text:
red_alert:
name: Last Alert in Israel
min: 0
max: 255
input_boolean:
red_alert_test:
name: Test Alert
icon: mdi:alert-circleSettings > Add-ons > Ad-on-store and search for AppDaemon.requests Python package under the Python Packages section.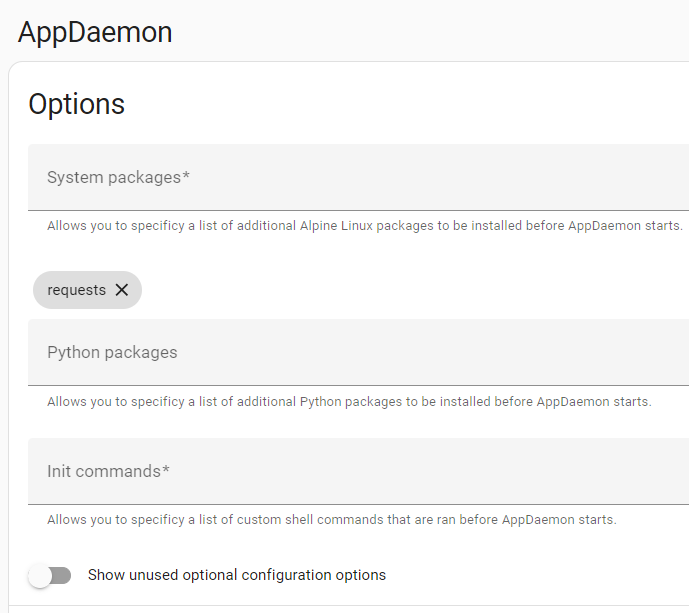
/addon_configs/a0d7b954_appdaemon/appdaemon.yaml and make the changes under appdeamon section as described:Tip
If you’re using the File Editor add-on, it’s set up by default to only allow file access to the main Home Assistant directory. However, the AppDaemon add-on files are located in the root directory. To access these files, follow these steps:
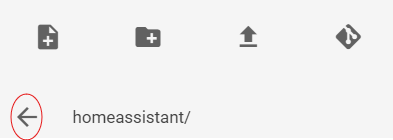
Go to Settings > Add-ons > File Editor > Configuration
Toggle off the Enforce Basepath option.
In the File Editor, click on the arrow next to the directory name (which will be ‘homeassistant’). This should give you access to the root directory where the AppDaemon add-on files are located.
Important
You can locate your own coordinates (latitude & longitude) here: https://www.latlong.net/
latitude: 31.9837528longitude: 34.7359077time_zone: Asia/Jerusalem.app_dir: /homeassistant/appdaemon/apps/.
/addon_configs/a0d7b954_appdaemon/apps to /config/appdaemon/apps.#/addon_configs/a0d7b954_appdaemon/appdaemon.yaml
---
# secrets: /homeassistant/secrets.yaml
appdaemon:
app_dir: /homeassistant/appdaemon/apps/ # If you install this script via HACS
latitude: 31.9837528
longitude: 34.7359077
elevation: 2
time_zone: Asia/Jerusalem
plugins:
HASS:
type: hass
#token: !secret appdaemon
http:
timeout: 30
admin:
api:
hadashboard:You have two choices to download the script: manually or via HACS. Installing from HACS ensures that if any new version of the script becomes available, you’ll receive a notification in Home Assistant. Manual download won’t provide you with future automatic updates. Pick the method that suits you best.
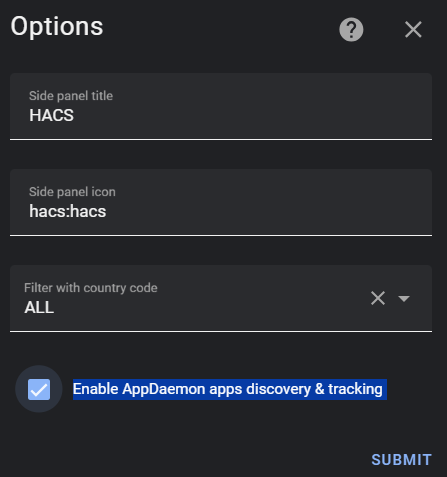
appdaemon/apps directory and proceed to the final stepIn Home Assistant: Navigate to Settings > Integrations > HACS > Configure and enable AppDaemon apps discovery & tracking. After enabling, return to the main HACS screen.
Navigate to the Custom Repositories page and add the following repository as AppDaemon: https://github.com/idodov/RedAlert/
Return to the main HACS screen and search for Red Alerts Israel. Click on Download and proceed to the final step
In the appdaemon/apps/apps.yaml file, add the following code.
Important
Make sure to replace the city_names values as PIKUD HA-OREF defines them. For example, don’t write תל אביב, instead write: תל אביב - דרום העיר.
For a list of city and area names - Click Here
#/appdaemon/apps/apps.yaml
red_alerts_israel:
  module: red_alerts_israel
  class: Red_Alerts_Israel
  interval: 2
  timer: 120
  sensor_name: "red_alert"
  save_2_file: True
  city_names:
    - תל אביב - מרכז העיר
    - כיסופים
    - שדרות, איבים, ניר עם
    - אשדוד - א,ב,ד,ה
- נתיב הל''ה| Parameter | Description | Example |
|---|---|---|
interval |
The interval in seconds at which the script runs | 2 |
timer |
The duration, in seconds, for which the sensor remains on after an alert | 120 |
sensor_name |
The name of the primary binary sensor in Home Assistant (binary_sensor.#sensor_name#) |
red_alert |
save_2_file |
Store historical data files. Each time an alert is triggered, a dedicated TXT file and CSV file will save the data. This file is accessible from the Home Assistant WWW directory/ The CSV can be opened in any spreadsheet application, such as Excel or Google Sheets | True |
city_names |
The names of the cities that activate the second binary sensor that will be named binary_sensor.#sensor_name#_city. You can add as many cities you want
|
תל אביב - מרכז העיר |
Home Assistant initializes four distinct entities:
binary_sensor.red_alert: This is the main entity that becomes active during a Red Alert in Israel and reverts to inactive otherwise. It encompasses a range of attributes like category, ID, title, data, description, active alert count, and emojis.binary_sensor.red_alert_city: This entity retains PIKUD-HA-OREF data and is activated solely if the alert includes the specified city.input_text.red_alert: Intended for logging alert history in the logbook. Given Home Assistant’s 255-character limit for text entities, extensive events may lead to data being cut off or omitted. Therefore, it’s inadvisable to rely on this entity for automation triggers or to generate sub-sensors.input_boolean.red_alert_test: Flipping this switch generates fictitious data (for selected cities) that activates the sensor for a set duration as per the timer configuration.Card Example
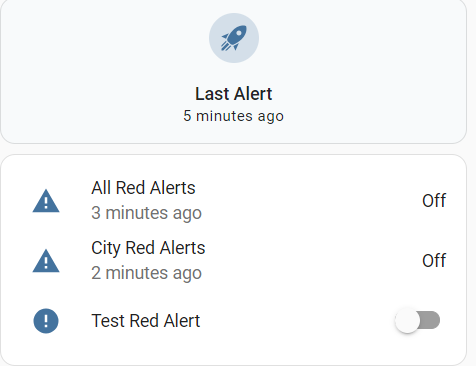
type: vertical-stack
cards:
- type: tile
entity: input_text.red_alert
vertical: true
state_content: last-changed
- type: entities
entities:
- entity: binary_sensor.red_alert
- entity: binary_sensor.red_alert_city
- entity: input_boolean.red_alert_test
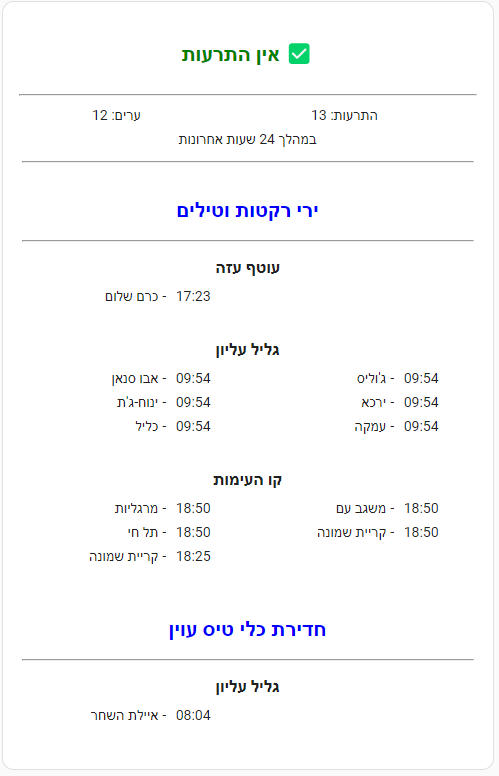
state_color: true24 Hours History
Tip
You can modify the card by choosing to show or not to show the history and more information data.
{% set show_history = False %} False is to not show the 24 hours alert history
{% set show_info = False %} - False is to not show the more info data
type: markdown
content: >-
{% set show_history = True %}
{% set show_info = True %}
{% set alerts = state_attr('binary_sensor.red_alert',
'last_24h_alerts_group') %}
{% set oref = states('binary_sensor.red_alert') %}
<table width=100%><tr><td align=center>
{% if oref == 'on' %}
# <font color = red>{{ state_attr('binary_sensor.red_alert', 'prev_title')
}}</font> {{ state_attr('binary_sensor.red_alert', 'emoji') }}
</td></tr>
<tr><td align=center><big><big>
<b>{{ state_attr('binary_sensor.red_alert', 'alert_txt') }}</b></big></big>
{% else %}
## <font color=green>אין התרעות</font> ✅{% endif %}
</td></tr></table>
{% set current_date = now().date() %}
{% if state_attr('binary_sensor.red_alert', 'prev_last_changed') |
regex_match("^\d{4}-\d{2}-\d{2}T\d{2}:d{2}:d{2}.d+$") %}
{% set last_changed_timestamp = state_attr('binary_sensor.red_alert',
'prev_last_changed') | as_timestamp %}
{% if current_date == (last_changed_timestamp | timestamp_custom('%Y-%m-%d',
true) | as_datetime).date() %}
{% set current_timestamp = now().timestamp() %}
{% set time_difference = current_timestamp - last_changed_timestamp %}
<center>התרעה אחרונה נשלחה {% if time_difference < 3600 %} לפני {{
(time_difference / 60) | int }} דקות
{% elif time_difference < 86400 %}היום בשעה {{ last_changed_timestamp |
timestamp_custom('%H:%M', true) }}
{% else %}בתאריך {{ last_changed_timestamp | timestamp_custom('%d/%m/%Y',
true) }}, בשעה {{ last_changed_timestamp | timestamp_custom('%H:%M', true) }}
{% endif %}{% endif %}{% endif %}
</ha-alert>
{% if alerts and show_history %}
{% if show_info %}
<hr>
<table width=100%>
<tr><td align=center>
{{ state_attr('binary_sensor.red_alert', 'cities_past_24h') | length }}
:ערים</td>
<td align=center>
{{ state_attr('binary_sensor.red_alert', 'last_24h_alerts') | length }}
:התרעות</td></tr>
<tr>
<td colspan=2 align=center>
במהלך 24 שעות אחרונות
</td>
</tr>
<tr><td colspan=2><hr></td></tr>
</table>
{% endif %}
<table width=100% align=center>
{% for alert_type, areas in alerts.items() %}
<tr>
<td></td>
</tr>
<tr>
<td colspan=6 align=center><h2><font color=blue>{{ alert_type }}</font></h2>
<hr></td>
</tr>
{% for area, cities in areas.items() %}
<tr>
<td></td>
</tr>
<tr>
<td colspan=6 align=center><big><b>{{ area }}</b></big></td></tr>
<tr>
<td colspan=6></td>
</tr>
{% for city_pair in cities|batch(2) %}
<tr><td align=right valign=top>{{ city_pair[0].city }}</td>
<td valign=top> - </td><td valign=top>{{ city_pair[0].time[11:16] }}</td>{% if
city_pair|length > 1 %}
<td align=right valign=top>{{ city_pair[1].city }}</td>
<td valign=top> - </td><td valign=top>{{ city_pair[1].time[11:16] }}{% else
%}</td>{% endif %}</tr>
{% endfor %}
<tr>
<td colspan=6> </td>
</tr>
{% endfor %}
{% endfor %}
</table>
{% else %}
{% endif %}
Tip
Use this trigger in automation {{ (as_timestamp(now()) - as_timestamp(states.binary_sensor.red_alert.last_updated)) > 30 }} to know when the script fails to run.
You can also create a specialHis markdown card to track the sensor:

type: markdown
content: >-
  {% set status = (as_timestamp(now()) -
  as_timestamp(states.binary_sensor.red_alert.last_updated)) < 30 %}
  {% if status %}
  <ha-alert alert-type="info">Run **{{ state_attr('binary_sensor.red_alert', 'count') }}** times since restart
  {% else %}
  <ha-alert alert-type="warning">**SCRIPT IS NOT RUNNING!!!**
  {% endif %}
</ha-alert>You can use any attribue from the sensor. For example, to show the title on lovelace card, use this code syntax:
{{ state_attr('binary_sensor.red_alert', 'title') }}
| Attribute name | Means | Example |
|---|---|---|
| `active_now' |
on when there is a live alert, off when there is no live alerts |
off |
count |
Counts the number of times the script has run since the last restart of Home Assistant. By monitoring this data, you can determine if and when the script is not running. | 12345 |
cat |
Category number. can be from 1 to 13 | 1 |
title |
Attack type in text | ירי רקטות וטילים |
data |
List of cities as string | תל אביב - מרכז העיר |
cities |
List of cities that are attacked | - קריית שמונה |
alerts_count |
Number of live alerts | 4 |
my_cities |
The defined user cities | - תל אביב - מרכז העיר |
areas |
List of areas as string | גוש דן |
desc |
Explain what to do | היכנסו למרחב המוגן ושהו בו 10 דקות |
duration |
How many seconds to be in the safe room | 600 |
id |
Id of the alert | 133413399870000000 |
data_count |
Number of cities that are attacked | 1 |
cities_past_24h |
List of cities that had attacked in the past 24 hours | - שלומי |
last_24h_alerts |
List of all alerts in the past 24 hours |
title, city, area, time
|
last_24h_alerts_group |
List of all 24 hours alerts grouped by title and area |
titile, area, city, time
|
emoji |
Icon for type of attack | |
prev_* |
Last data from each attribue | Stores the most recent information when the sensor was active |
alert |
One line full text | ירי רקטות וטילים ב־קו העימות - בצת, שלומי |
alert_alt |
Breaking line full text | ירי רקטות וטילים/n* קו העימות: בצת, שלומי |
alert_txt |
One line text | קו העימות: בצת, שלומי |
alert_wa |
Optimize text message to send via whatsapp | 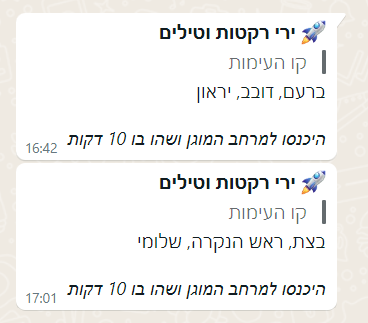 |
alert_tg |
Optimize text message to send via telegram |
Example:
count: 237
id: 1234567890000000
cat: 1
title: ירי רקטות וטילים
desc: היכנסו למרחב המוגן ושהו בו 10 דקות
data: אבירים, פסוטה
areas: קו העימות
data_count: 2
duration: 600
last_changed: "2024-03-29T20:18:36.354614"
emoji: ️
icon_alert: mdi:alert
prev_last_changed: "2024-03-29T20:18:36.354636"
prev_cat: 1
prev_title: ירי רקטות וטילים
prev_desc: היכנסו למרחב המוגן ושהו בו 10 דקות
prev_data: שלומי
prev_data_count: 1
prev_duration: 600
prev_areas: קו העימות
alert: "ירי רקטות וטילים ב־קו העימות: שלומי"
alert_alt: |-
  ירי רקטות וטילים
   * קו העימות: שלומי
alert_txt: "קו העימות: שלומי"
alert_wa: |-
   *ירי רקטות וטילים*
  > קו העימות
  שלומי

  _היכנסו למרחב המוגן ושהו בו 10 דקות_
friendly_name: All Red Alerts
icon: mdi:alert
alert_tg: |-
   **ירי רקטות וטילים**
  **__קו העימות__** — שלומי

  __היכנסו למרחב המוגן ושהו בו 10 דקות__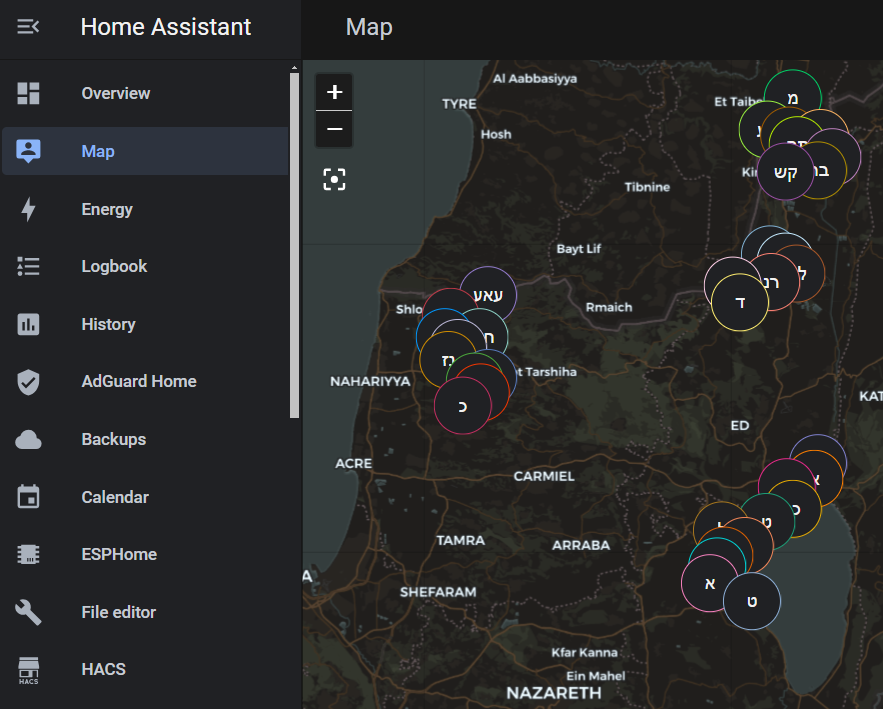
The script also creates two GeoJSON files automatically, which store the alert’s geolocation data and can be displayed on the Home Assistant map. Both files are located in the \homeassistantconfigwww directory. The red_alert_24h.geojson file stores data for alerts from the last 24 hours, and the red_alert_latest.geojson file stores the most recent alert data.
To display the data on the Home Assistant map:
http://homeassistant.local:8123/local/red_alert_24h.geojson.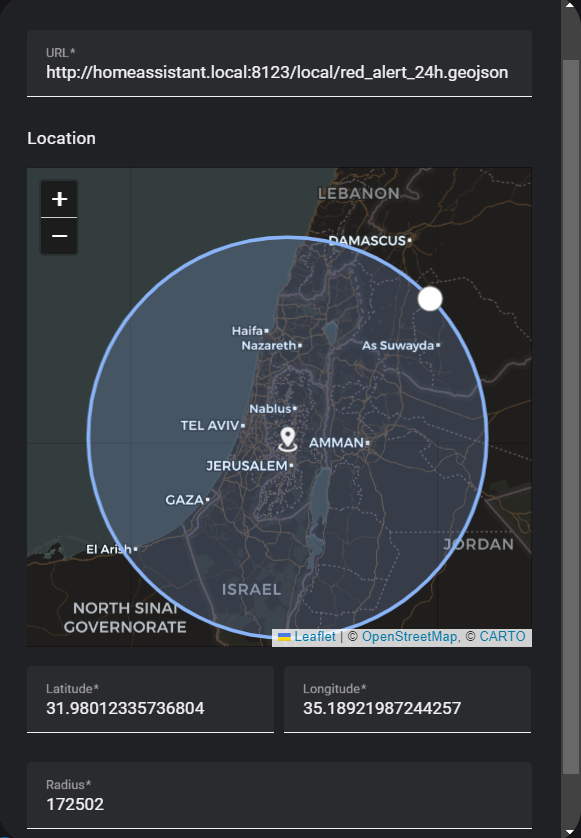
Note
If the GeoJSON integration can't access the GeoJSON file, open the configuration.yaml file and add the necessary approval, like this:
homeassistant:
  allowlist_external_urls:
    - http://192.168.86.174:8123      # YOUR HA IP
    - http://homeassistant.local:8123
  allowlist_external_dirs: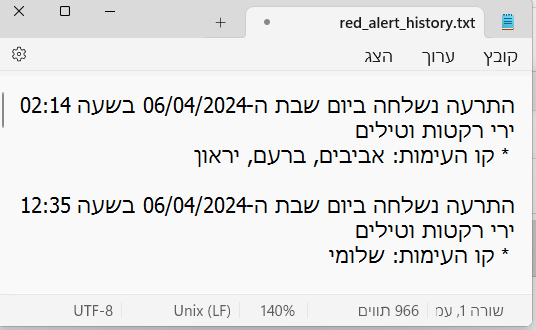
- "/config/www"The script stores the sensor data in a text file named red_alert_history.txt and red_alert_history.csv, both located in the \homeassistantconfigwww directory. Each time an alert (including test alerts) is triggered, the files gets updated. The dedicated CSV file can be opened in any spreadsheet application, such as Excel or Google Sheets.
You can directly access these files from your browser using the provided URL: http://homeassistant.local:8123/local/red_alert_history.txt.
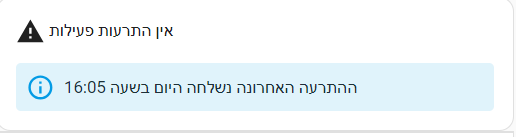
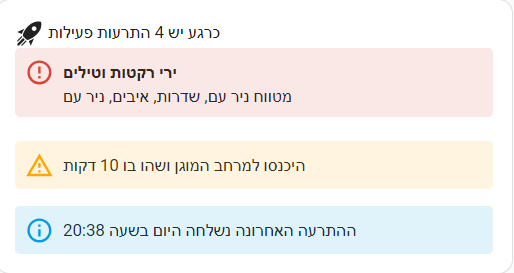
Displays whether there is an alert, the number of active alerts, and their respective locations.
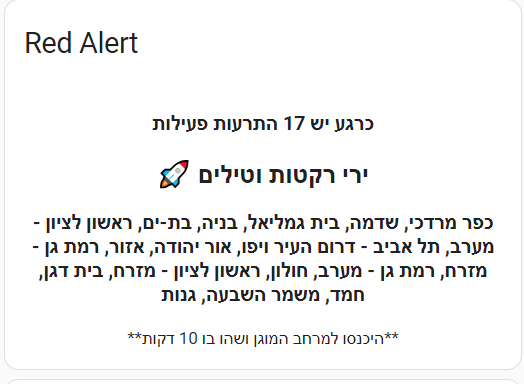
type: markdown
content: >-
  <center><h3>{% if state_attr('binary_sensor.red_alert', 'data_count') > 0 %}
  כרגע יש {% if state_attr('binary_sensor.red_alert', 'data_count') > 1 %}{{
  state_attr('binary_sensor.red_alert', 'data_count') }} התרעות פעילות{% elif
  state_attr('binary_sensor.red_alert', 'data_count') == 1 %} התרעה פעילה אחת{%
  endif %}{% else %} אין התרעות פעילות{% endif %}</h3>

  {% if state_attr('binary_sensor.red_alert', 'data_count') > 0 %}<h2>{{
  state_attr('binary_sensor.red_alert', 'emoji') }} {{
  state_attr('binary_sensor.red_alert', 'title') }}</h2>
  <h3>{{ state_attr('binary_sensor.red_alert', 'data') }}</h3>
  **{{ state_attr('binary_sensor.red_alert', 'desc') }}** {% endif %} </center>
title: Red Alert
Using this script, you have the flexibility to include additional information, such as the precise time the alert was triggered.
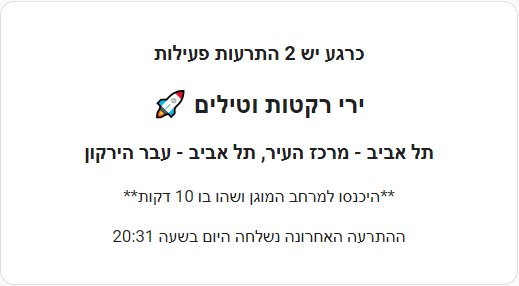
type: markdown
content: >-
<center><h3>{% if state_attr('binary_sensor.red_alert', 'data_count') > 0 %}
כרגע יש {% if state_attr('binary_sensor.red_alert', 'data_count') > 1 %}{{
state_attr('binary_sensor.red_alert', 'data_count') }} התרעות פעילות{% elif
state_attr('binary_sensor.red_alert', 'data_count') == 1 %} התרעה פעילה אחת{%
endif %}{% else %} אין התרעות פעילות{% endif %}</h3>
{% if state_attr('binary_sensor.red_alert', 'data_count') > 0 %}<h2>{{
state_attr('binary_sensor.red_alert', 'emoji') }} {{
state_attr('binary_sensor.red_alert', 'title') }}</h2> <h3>{{
state_attr('binary_sensor.red_alert', 'data') }}</h3> **{{
state_attr('binary_sensor.red_alert', 'desc') }}** {% endif %}
{% if state_attr('binary_sensor.red_alert', 'last_changed') |
regex_match("^\d{4}-\d{2}-\d{2}T\d{2}:d{2}:d{2}.d+$") %}
{% set last_changed_timestamp = state_attr('binary_sensor.red_alert',
'last_changed') | as_timestamp %}
{% set current_date = now().date() %}
{% if current_date == (last_changed_timestamp | timestamp_custom('%Y-%m-%d',
true)
| as_datetime).date() %}
ההתרעה האחרונה נשלחה היום בשעה {{ last_changed_timestamp | timestamp_custom('%H:%M', true) }}
{% else %}התרעה אחרונה נשלחה בתאריך {{ last_changed_timestamp |
timestamp_custom('%d/%m/%Y', true) }}, בשעה {{ last_changed_timestamp |
timestamp_custom('%H:%M', true) }}
{% endif %}
{% endif %}
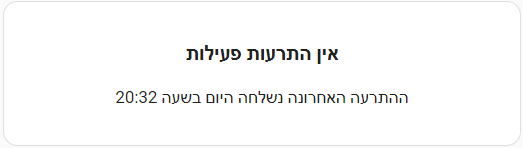
</center>Another nicer way:
type: markdown
content: >-
  <ha-icon icon="{{ state_attr('binary_sensor.red_alert', 'icon')
  }}"></ha-icon> {% if state_attr('binary_sensor.red_alert', 'data_count') > 0
  %}כרגע יש {% if state_attr('binary_sensor.red_alert', 'data_count') > 1 %}{{
  state_attr('binary_sensor.red_alert', 'data_count') }} התרעות פעילות{% elif
  state_attr('binary_sensor.red_alert', 'data_count') == 1 %} התרעה פעילה אחת{%
  endif %}{% else %}אין התרעות פעילות{% endif %}{% if
  state_attr('binary_sensor.red_alert', 'data_count') > 0 %}

  <ha-alert alert-type="error" title="{{ state_attr('binary_sensor.red_alert',
  'title') }}">{{ state_attr('binary_sensor.red_alert', 'data') }}</ha-alert>

  <ha-alert alert-type="warning">{{ state_attr('binary_sensor.red_alert',
  'desc') }}</ha-alert>

  {% endif %}

  {% if state_attr('binary_sensor.red_alert', 'last_changed') |
  regex_match("^\d{4}-\d{2}-\d{2}T\d{2}:d{2}:d{2}.d+$") %}

  {% set last_changed_timestamp = state_attr('binary_sensor.red_alert',
  'last_changed') | as_timestamp %}

  {% set current_date = now().date() %}{% if current_date ==
  (last_changed_timestamp | timestamp_custom('%Y-%m-%d', true)
   | as_datetime).date() %}<ha-alert alert-type="info">ההתרעה האחרונה נשלחה היום בשעה {{ last_changed_timestamp | timestamp_custom('%H:%M', true) }}
  {% else %}התרעה אחרונה נשלחה בתאריך {{ last_changed_timestamp |
  timestamp_custom('%d/%m/%Y', true) }}, בשעה {{ last_changed_timestamp |
timestamp_custom('%H:%M', true) }}{% endif %}{% endif %}</ha-alert>You have the flexibility to generate various automated actions triggered by the binary sensor or its subsidiary sensors. As an example, one potential application is to dispatch alert messages to a LED matrix screen (in pic: forwarding all alerts to the Ulanzi Smart Clock, which is based on ESPHome32 and features a screen).

(Change #your phone# to your entity name)
alias: Notify attack
description: "Real-time Attack Notification"
trigger:
  - platform: state
    entity_id:
      - binary_sensor.red_alert
    from: "off"
    to: "on"
condition: []
action:
  - service: notify.mobile_app_#your phone#
    data:
      message: "{{ state_attr('binary_sensor.red_alert', 'data') }}"
      title: "{{ state_attr('binary_sensor.red_alert', 'title') }} {{ state_attr('binary_sensor.red_alert', 'areas') }}"
mode: singleAs another illustration, you can configure your RGB lights to change colors repeatedly while the alert is active.

(Change light.#light-1# to your entity name)
alias: Alert in city
description: "When an alert occurs in your define city, the lights will cyclically change to red and blue for a duration of 30 seconds, after which they will revert to their previous states"
trigger:
- platform: state
  entity_id:
    - binary_sensor.red_alert_city
  from: "off"
  to: "on"
condition: []
action:
  - service: scene.create
    data:
      scene_id: before_red_alert
      snapshot_entities:
        - light.#light-1#
        - light.#light-2#
        - light.#light-3#
  - repeat:
      count: 30
      sequence:
        - service: light.turn_on
          data:
            color_name: blue
          target:
            entity_id:
            - light.#light-1#
            - light.#light-2#
            - light.#light-3#
        - delay:
            hours: 0
            minutes: 0
            seconds: 0
            milliseconds: 500
        - service: light.turn_on
          data:
            color_name: red
          target:
            entity_id:
            - light.#light-1#
            - light.#light-2#
            - light.#light-3#
        - delay:
            hours: 0
            minutes: 0
            seconds: 0
            milliseconds: 500
  - service: scene.turn_on
    data: {}
    target:
      entity_id: scene.before_red_alert
mode: singleThe "desc" attribute provides information on the duration in minutes for staying inside the safe room. This automation will generate a timer based on the data from this attribute. Before implementing this automation, it's essential to create a TIMER helper.
#your phone# to your entity name)
Alias: Safe to go out
description: "Notify on phone that it's safe to go outside"
mode: single
trigger:
  - platform: template
    value_template: >-
      {{ "תל אביב - מרכז העיר" in state_attr('binary_sensor.red_alert',
      'data').split(', ') }}
condition: []
action:
  - service: timer.start
    data:
      duration: >-
        {{ state_attr('binary_sensor.red_alert_city', 'duration') }}
    target:
      entity_id: timer.red_alert
  - service: notify.mobile_app_#your phone#
    data:
      title: ההתרעה הוסרה
message: אפשר לחזור לשגרהWhile you need to specify the cities in which the secondary binary sensor will be activated, you also have the flexibility to define additional sub-sensors based on the main sensor. Here are a few examples of how you can do this.
Note
To create a sensor that activates only when an attack occurs in a specific city that has similar character patterns in other city names, you should use the following approach. For example, if you want to create a sensor that activates when only "יבנה" and not "גן יבנה" is attacked, you can use the following code syntax. If you want to trigger a specific area, use the SPLIT function and make sure to type the city name and area exactly as they appear in https://www.oref.org.il/12481-he/Pakar.aspx
{{ "תל אביב - מרכז העיר" in state_attr('binary_sensor.red_alert', 'data').split(', ') }}
{{ "יבנה" in state_attr('binary_sensor.red_alert', 'data').split(', ') }}
{{ "אירוס" in state_attr('binary_sensor.red_alert', 'data').split(', ')
 or "בית חנן" in state_attr('binary_sensor.red_alert', 'data').split(', ')
 or "גן שורק" in state_attr('binary_sensor.red_alert', 'data').split(', ') }}
In cities with multiple zones, relying solely on the SPLIT function won't be effective if you've only defined the city name. If you need a sensor that triggers for all zones within the 11 cities divided into multiple alert zones, it's advisable to utilize the SEARCH_REGEX function instead of splitting the data.
{{ state_attr('binary_sensor.red_alert', 'data') | regex_search("תל אביב") }}
Israel is segmented into 30 metropolitan areas, allowing you to determine the general status of nearby towns without the need to specify each one individually. To achieve this, you can utilize the "areas" attribute. Here's the list of the 30 metropolitan areas in Israel, presented in alphabetical order:
אילת, בקעה, בקעת בית שאן, גוש דן, גליל עליון, גליל תחתון, דרום הגולן, דרום הנגב, הכרמל, המפרץ, העמקים, השפלה, ואדי ערה, יהודה, ים המלח, ירושלים, ירקון, לכיש, מנשה, מערב הנגב, מערב לכיש, מרכז הגליל, מרכז הנגב, עוטף עזה, ערבה, צפון הגולן, קו העימות, שומרון, שפלת יהודה ושרון
{{ "גוש דן" in state_attr('binary_sensor.red_alert', 'areas').split(', ') }}
The 'cat' attribute defines the alert type, with a range from 1 to 13. You have the option to set up a binary sensor for a particular type of alert with or without any city or area of your choice.
| Cat (number) | Type of Alert |
|---|---|
| 1 | Missle Attack |
| 6 | Unauthorized Aircraft Penetration |
| 13 | Infiltration of Terrorists |
Trigger for Automation
{{ state_attr('binary_sensor.red_alert', 'cat') == '6' }}
Sample trigger alert for unauthorized aircraft penetration in Nahal-Oz
{{ state_attr('binary_sensor.red_alert', 'cat') == '6'
and "נחל עוז" in state_attr('binary_sensor.red_alert', 'data').split(', ') }}

