This price is for single source code compilation, does not provide any technical support, and does not include installation. Don’t buy it if you are new to it!
The source code is only for research and learning code, illegal and commercial purposes are strictly prohibited! If you need commercial use, please purchase the official source code!
Only suitable for veterans and technical masters!
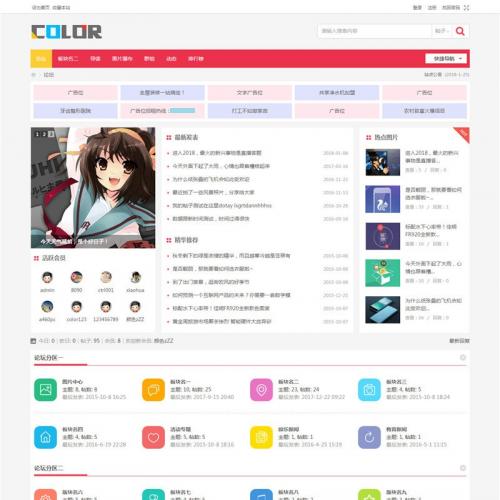
introduce:1 Including forum page, post list page and post content page, excluding portal homepage.
2 There are 4 template color schemes: red, green, orange, and blue, which are convenient for users to choose freely.
3 The template interface has a fixed width of 1200px, and the forum supports free switching between wide and narrow screens.
4 The template style is simple and elegant, and is compatible with various mainstream browsers.
Template installation instructions:1 Enter the application center from your website backend, find the template you want to install, click to purchase the application, after the payment is successful, click "Payment Completed", the page will jump to the installation page
2 After the template is successfully installed, enter the interface in the background - style management - set the newly installed template as the default style.
3 Backend - Tools - Update Cache, click "Site Home Page" in the upper right corner to see the newly installed template interface!
4. Please download the diy file in the data download column. The diy file cannot be used alone and can only be imported into the current template for use!
5 For more specific settings, please download the instruction manual to view!
Instructions for use of PC version:One template installation:
1 Purchase the application through the application center, enter the security password and jump to the payment page. After payment, the template will be automatically downloaded to your website.
If you do not jump to the download page after payment, please enter the purchase page again and click "Purchase App" - "Payment Completed"
2 Enter the backend, interface - style management - select the new template as the default computer version
3 Enter the background, Tools - Update Cache.
4 Click on the home page of the site - if you see the interface of the new template, it means the installation is successful!
2. Add test data:
If you are a user building a new website, the newly installed template will only see styles, no columns, no text, and no pictures.
Then you need to publish several posts for testing purposes. It is best to include pictures in the posts.
Posting method: Front-end forum - click to enter a certain section - click the post button (this screenshot uses the default template set as an example)
Three site function settings:
Turn on the navigation function: Backstage - Global - Site Functions - Turn on - Display in the main navigation. This template does not include a portal, so you do not need to turn it on. Other options can be turned on freely according to your needs.
Four forum homepage settings:
1. Set the forum as the default homepage: Backend - Interface - Navigation Settings - click on the forum item
2 Import the DIY file on the forum homepage: Enter the forum (the page ending with forum.php) at the front desk - click the DIY button in the upper right corner - click the advanced mode - click the "Import" button in the drop-down box on the right side of the save
——Select the file "forum-Forum Home Page.xml file" in the pop-up window--After importing, click the "Save" button in the upper right corner (this screenshot uses the default template set as an example)
3 Call data in the diy section: click the diy button in the upper right corner again - click advanced mode - move the mouse to the upper right corner of the section - blue edit - properties
——A property pop-up window will appear--click to set the sections to be displayed, the sorting method, etc.--OK--Save
4 Modify the upper text ad space: click the DIY button in the upper right corner again - click Advanced Mode - move the mouse to the upper right corner of each section - blue edit - properties
Five forum section settings
1 Add new partitions and sections: Backstage - Forum - Click to add a new section or add a new section
2 Upload personalized icons for each section: click Edit after the section - section icon upload - icon width setting - submit
3 Set the arrangement of section icons: click the edit button after the large section - fill in the numbers horizontally in the lower-level sub-sections of the forum homepage
4 Set a section to be displayed in the main navigation: click Edit after the section - Display in navigation - Yes
5. Set a section to be displayed in the form of waterfall flow: first set the width and height in the interface settings - then turn on the picture list mode in the forum section
If you can't see the effect, go to Tools - Update Statistics - Fill in the fid of the section - Check the box to include the existing cover theme - Submit, clear the browser history and check again
6. Set a certain section to have a topic classification label: click on the section to be set and edit - other - topic classification - enable, select yes - add category - submit
Six ways to replace website logo:
Enter your website server and find the folder/images starting with template/color, find logo.png and replace it
Note: The name of the replaced picture must be called logo, and the format must be png.
If you have done the above steps correctly but the logo has not changed, it is usually a browser cache problem. You can clear the browser history and check again.
Seven other basic settings:
1 Website color change: Backend - Interface - Style Management - Edit - Check Color - In the default color drop-down item - select the default or other colors you want (this screenshot uses the default template set as an example)
2 Set the website to a fixed width: Backend - Interface - Interface Settings - Site Width and Narrow Style - Select Narrow or Not
3. Main navigation display order adjustment: modify the previous number. The smaller the number, the higher it is.
4 Modify the phone and email address at the bottom of the website: Find the template folder—the file starting with color_—the common folder—download the footer.htm file to your computer
Before modifying, make a backup copy of the unchanged file, then use editing software such as DW to open the modified file - upload the modified file to overwrite the original file - update the cache in the background
5 Modify the bottom navigation of the website (Site Statistics - Report - Archiver - Black Room - Mobile Version): Backend - Interface - Navigation Settings - Bottom Navigation
6 Turn on or off friendly links: Backend - Interface - Interface Settings - Forum Home Page - Show Friendly Links - Select Yes or No
Modify the default friendly links: Backend - Operation - Friendly Links
picture: