中文说明点这里
商务合作请联系 Envoyer un courriel à [email protected].
Pour la coopération commerciale, veuillez contacter un e-mail [email protected].
Un ensemble de nœuds pour comfyui qui peuvent composer la couche et le masque pour réaliser des fonctionnalités de type Photoshop.
Il migrate certaines fonctions de base de Photoshop vers Comfyui, visant à centraliser le flux de travail et à réduire la fréquence de commutation logicielle.
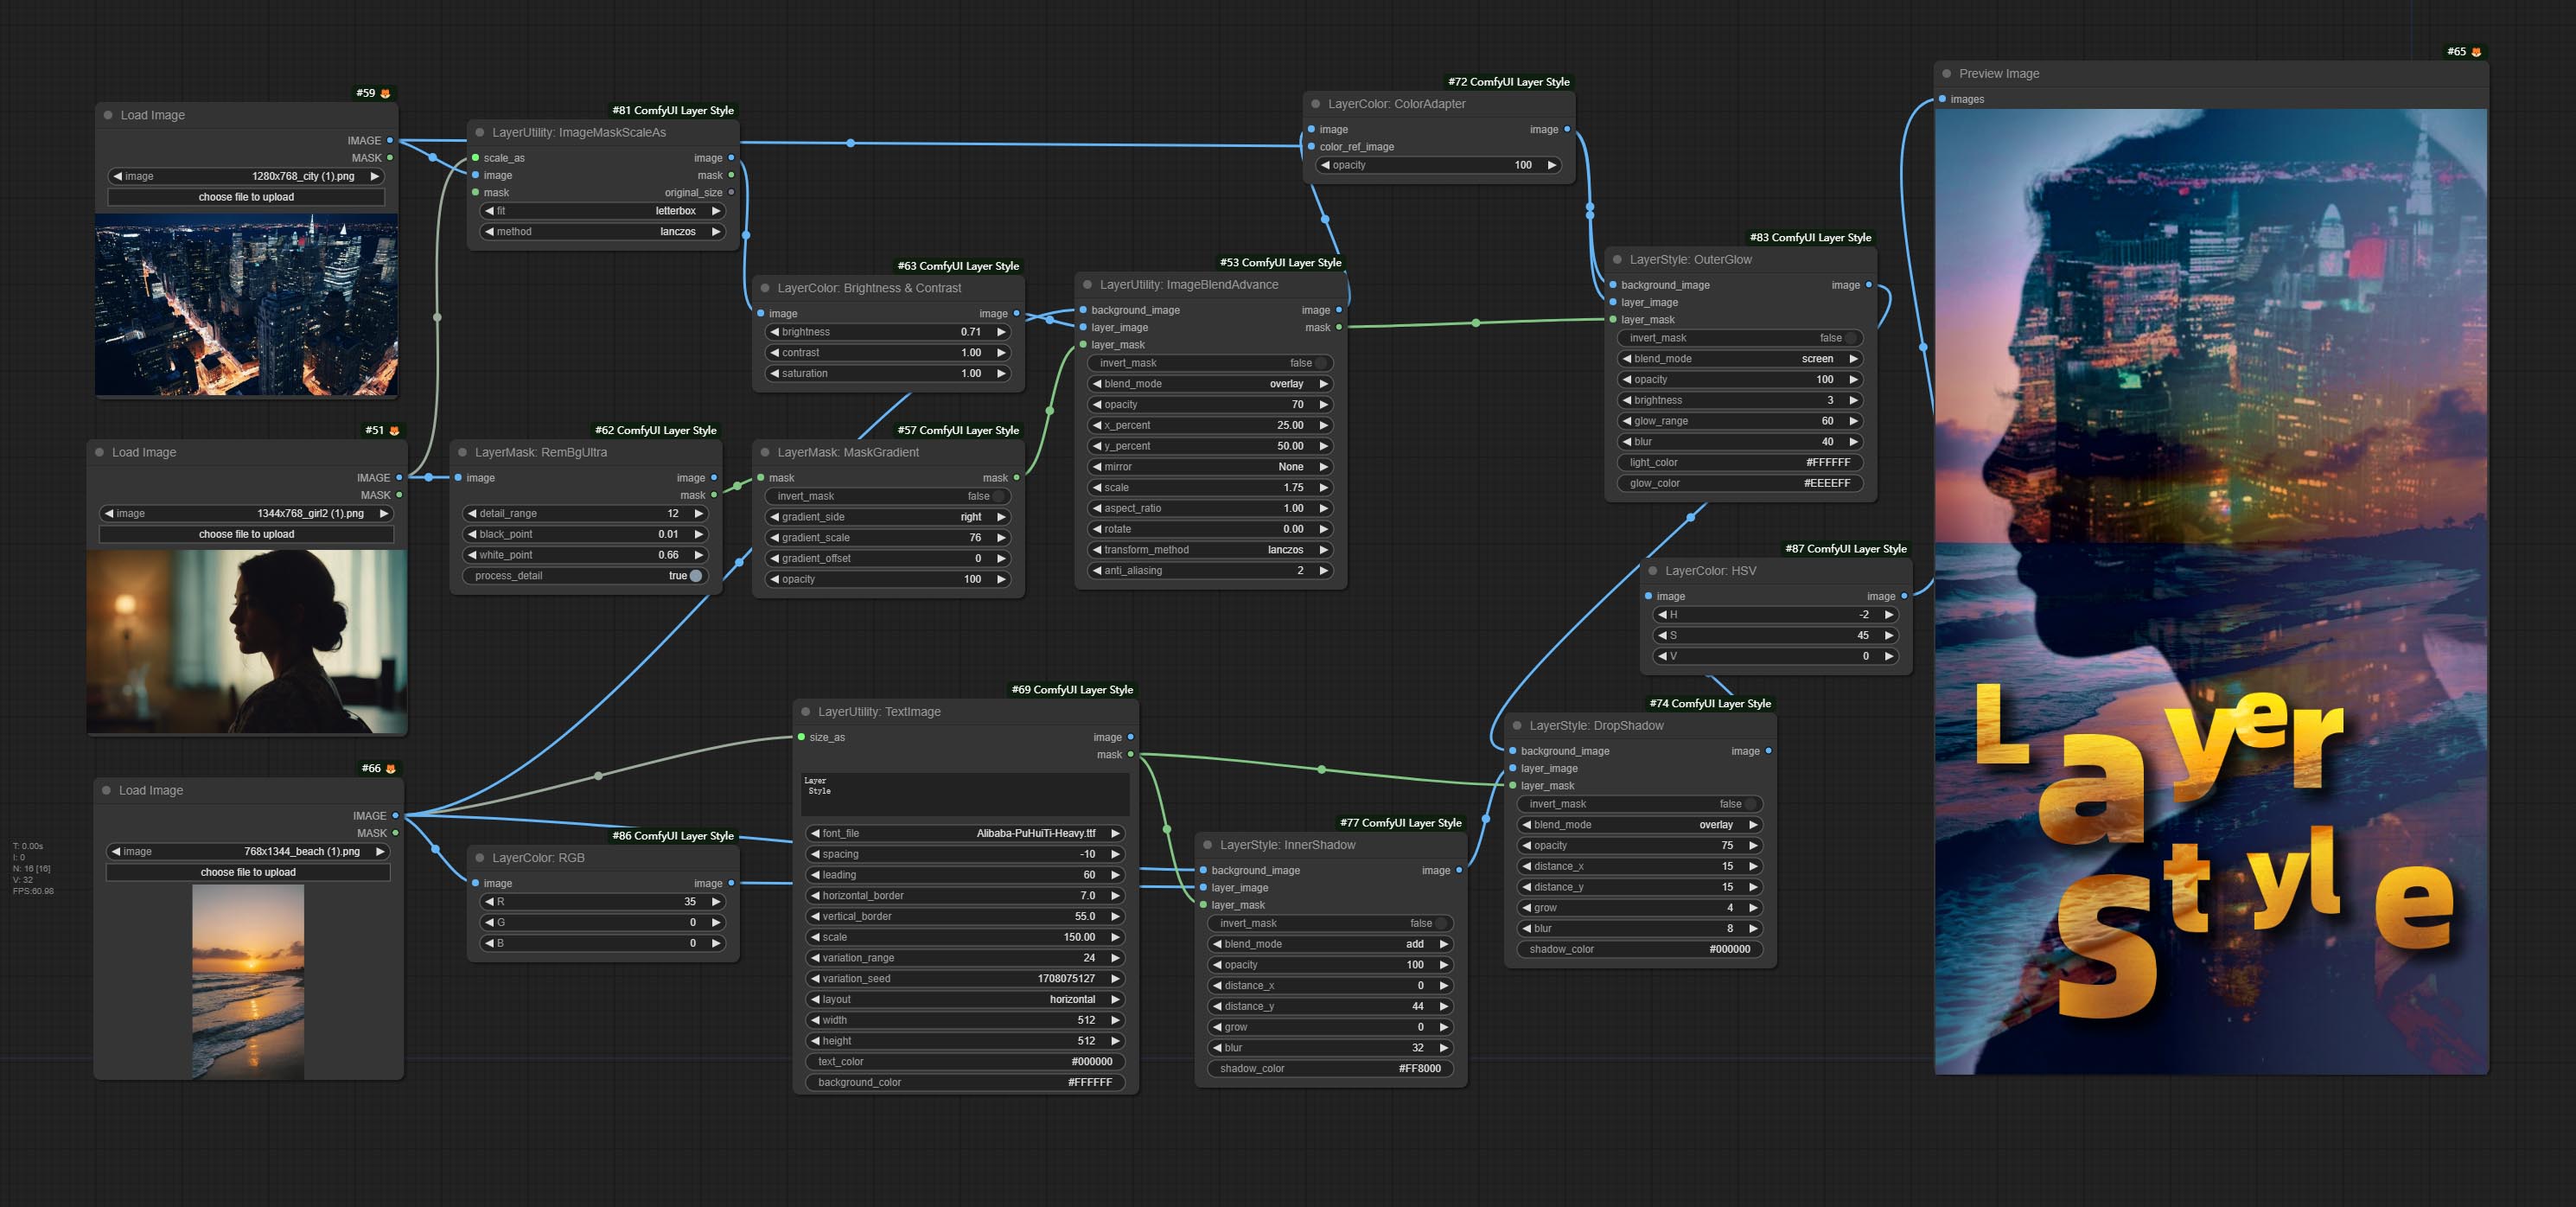
* Ce workflow (title_example_workflow.json) est dans le répertoire de workflow.
Certains fichiers de workflow JSON dans le répertoire workflow , c'est-à-dire des exemples de la façon dont ces nœuds peuvent être utilisés dans Comfyui.
(Prendre un package portable officiel ComfyUI et le package AKI Comfyui comme exemples, veuillez modifier le répertoire de l'environnement de dépendance pour d'autres environnements Comfyui)
Utiliser le gestionnaire Comfyui pour l'installation.
Ou ouvrez la fenêtre CMD dans le répertoire du plugin de Comfyui, comme ComfyUIcustom_nodes , Type
git clone https://github.com/chflame163/ComfyUI_LayerStyle.git
Ou téléchargez le fichier zip et extrait, copiez le dossier résultant dans ComfyUIcustom_ Nodes
Pour le package portable officiel de Comfyui, double-cliquez sur le répertoire de plugin install_requirements.bat , pour le package Aki Comfyui, double-cliquez sur l' install_requirements_aki.bat dans le répertoire du plugin et attendez que l'installation se termine.
Ou installer des packages de dépendance, ouvrez la fenêtre CMD dans le répertoire de plugin comfyui_layerstyle comme ComfyUIcustom_ NodesComfyUI_LayerStyle et entrez la commande suivante,
Pour le package portable officiel de Comfyui, Type:
 ......python_embededpython.exe -s -m pip install .whldocopt-0.6.2-py2.py3-none-any.whl
......python_embededpython.exe -s -m pip install .whlhydra_core-1.3.2-py3-none-any.whl
......python_embededpython.exe -s -m pip install -r requirements.txt
.repair_dependency.bat
Pour le package Aki Comfyui, Type:
 ....pythonpython.exe -s -m pip install .whldocopt-0.6.2-py2.py3-none-any.whl
....pythonpython.exe -s -m pip install .whlhydra_core-1.3.2-py3-none-any.whl
....pythonpython.exe -s -m pip install -r requirements.txt
.repair_dependency.bat
Utilisateurs domestiques chinois de BainetDisk et d'autres utilisateurs de Huggingface.co/Chflame163/Comfyui_layerstyle
Téléchargez tous les fichiers et copiez-les dans le dossier ComfyUImodels . Ce lien fournit tous les fichiers du modèle requis pour ce plugin. Ou téléchargez le fichier modèle en fonction des instructions de chaque nœud.
Si le nœud ne peut pas se charger correctement ou qu'il y a des erreurs pendant l'utilisation, veuillez vérifier le message d'erreur dans la fenêtre de terminal Comfyui. Voici des erreurs courantes et leurs solutions.
Ce message d'avertissement indique que le fichier INI ne peut pas être trouvé et n'affecte pas l'utilisation. Si vous ne voulez pas voir ces avertissements, veuillez modifier tous les fichiers *.ini.example dans le répertoire du plugin vers *.ini .
Cette erreur est que les psd_tools n'ont pas été installés correctement.
Solution:
../../../python_embeded/python.exe -s -m pip install psd_tools si une erreur se produit pendant l'installation de psd_tool, telles que ModuleNotFoundError: No module named 'docopt' , veuillez télécharger le WHL et le manuel de Docopt l'installer. Exécutez la commande suivante dans la fenêtre du terminal: ../../../python_embeded/python.exe -s -m pip install path/docopt-0.6.2-py2.py3-none-any.whl le path est le nom du chemin du fichier whl. Cette erreur est causée par une version incorrecte du package opencv-contrib-python , ou ce package est écrasant par d'autres packages OpenCV.
La raison du problème est la même que ci-dessus.
Cette erreur est causée par la version basse du package transformers .
Cette erreur est causée par la version basse du package protobuf .
repair_dependency.bat (pour le protable officiel Comfyui) ou repair_dependency_aki.bat (pour comfyui-aki-v1.x) dans le dossier du plugin pour les réparer automatiquement. Solution: réinstallez le package de dépendance onnxruntime .
Vérifiez l'environnement réseau. Si vous ne pouvez pas accéder à HuggingFace.co normalement en Chine, essayez de modifier le package HuggingFace_Hub pour forcer l'utilisation hf_mirror.
Rechercher constants.py dans le répertoire du package huggingface_hub (généralement Lib/site packages/huggingface_hub dans le chemin d'environnement virtuel), ajoutez une ligne après import os
os.environ['HF_ENDPOINT'] = 'https://hf-mirror.com'
Cette erreur est causée par la zone du masque trop grande ou trop petite lors de l'utilisation de la méthode PyMatting pour gérer les bords du masque.
Solution:
Lorsque cette erreur s'est produite, veuillez vérifier l'environnement réseau.
Si cette erreur se produit lors de l'exécution du nœud JoyCaption2 et qu'il a été confirmé que le fichier de modèle a été placé dans le répertoire correct, veuillez vérifier que la version du package de dépendance transformers est d'au moins 4,43.2 ou plus. Si la version transformers est supérieure ou égale à 4.45.0, et a également un message d'erreur:
 Error loading models: De️️scriptors cannot be created directly.
If this call came from a _pb2.py file, your generated code is out of date and must be regenerated with protoc >= 3.19.0.
......
Veuillez essayer de rétrograder le package de dépendance protobuf à 3.20.3, ou définir les variables d'environnement: PROTOCOL_BUFFERS_PYTHON_IMPLEMENTATION=python .
** Si l'erreur du package de dépendance après la mise à jour, veuillez double-cliquer sur repair_dependency.bat (pour le comfyui officiel) ou repair_dependency_aki.bat (pour comfyui-aki-v1.x) dans le dossier du plugin pour réinstaller les packages de dépendance.
Commissez les nœuds Benultra et LoadBenModel. Ces deux nœuds sont la mise en œuvre du projet PRAMALLC / BEN dans Comfyui.
Téléchargez le BEN_Base.pth et config.json à partir de Huggingface ou BainetDisk et copiez dans le dossier ComfyUI/models/BEN .
Fusionner le PR soumis par Jimlee2048, ajouter le nœud LoadBireFnetModelv2 et prendre en charge les modèles RMBG 2.0 de chargement.
Téléchargez les fichiers du modèle à partir de HuggingFace ou BainetDisk et copiez dans le dossier ComfyUI/models/BiRefNet/RMBG-2.0 .
Les nœuds Florence2 prennent en charge Base-ProPtgen-v2.0 et grand-comptgen-v2.0, téléchargez base-PromptGen-v2.0 et large-PromptGen-v2.0 Deux dossiers de HuggingFace ou BainetDisk et copier à ComfyUI/models/florence2 Folder .
Les nœuds SAM2ULTRA et ObjectDetector prennent en charge le lot d'image.
Les nœuds SAM2ULTRA et SAM2VIDEOULTRA ajoutent une prise en charge du modèle SAM2.1, y compris le modèle FP16 de Kijai. Téléchargez des fichiers de modèle à partir de bainetdisk ou huggingface.co/kijai/sam2-safetensers et copiez dans le dossier ComfyUI/models/sam2 .
Commissez JoyCaption2Split et LoadJoyCaption2Model, partager le modèle sur plusieurs nœuds JoyCaption2 améliore l'efficacité.
SegmentAnythingUltra and SegmentAnythingUltraV2 add the cache_model option, Easy to flexibly manage VRAM usage.
En raison des exigences de version élevée du nœud Llamavision pour transformers , qui affecte le chargement de certains plugins tiers plus anciens, de sorte que le plugin LayersTyle a abaissé l'exigence par défaut à 4.43.2. Si vous devez exécuter Llamavision, veuillez passer par vous-même à 4,45,0 ou plus.
Commissez JoyCaption2 et JoyCaption2ExtraOptions nœuds. De nouveaux packages de dépendances doivent être installés. Utilisez le modèle JoyCaption-Alpha-Two pour l'inférence locale. Peut être utilisé pour générer des mots rapides. Ce nœud est https://huggingface.co/john6666/joy-caption-alpha-two-cli-mod implémentation dans Comfyui, merci à l'auteur original. Télécharger les modèles Formez BainetDisk et BainetDisk, ou HuggingFace / OrengUteng et HuggingFace / Unsloth, puis copiez sur ComfyUI/models/LLM , téléchargez des modèles à partir de BainetDisk ou HuggingFace / Google, et copier à ComfyUI/models/clip , Donwload the cgrkzexw-599808 BainetDisk ou HuggingFace / John6666, et copiez sur ComfyUI/models/Joy_caption 。
Commissez le nœud Llamavision, utilisez le modèle de vision LLAMA 3.2 pour l'inférence locale. Peut être utilisé pour générer des mots rapides. Une partie du code pour ce nœud provient de Comfyui-PixtralllamamolMovision, merci à l'auteur original. Pour utiliser ce nœud, les transformers doivent être mis à niveau à 4,45,0 ou plus. Téléchargez des modèles à partir de BainetDisk ou HuggingFace / Seanscripts, et copiez à ComfyUI/models/LLM .
Commissez le nœud RandomGeneratorv2, ajoutez les options de plage et de graines moins aléatoires.
Commissez le nœud TextJoinv2, ajoutez des options Delimiter au-dessus de TextJion.
Engagez le nœud GaussianBlurv2, la précision des paramètres a été améliorée à 0,01.
Commissez le nœud UserPromptGenerArTOrtXtimgWithReference.
Commissez le nœud GrayValue, sortez les valeurs en niveaux de gris correspondant aux valeurs de couleur RVB.
LUT PLIPS, TexTImagev2, TextImage, SimpleteXtimage pour prendre en charge la définition de plusieurs dossiers dans resource-dir.ini , séparés par des virgules, des demi-colons ou des espaces. Prend en charge simultanément des mises à jour rafraîchissantes en temps réel.
LUT PLIPS, TexTImagev2, TextImage, SimpleTextimage Les nœuds prennent en charge la définition des polices multi-répertoires et des dossiers LUT, et prennent en charge les mises à jour rafraîchissantes et en temps réel.
Commissez le nœud HumanPartsultra, utilisé pour générer des masques de parties du corps humain. Il est basé sur le warrper de Metal3d / Comfyui_Human_parts, merci l'auteur original. Téléchargez le fichier de modèle à partir de baidunetdisk ou étreignant et copiez dans le dossier ComfyUImodelsonnxhuman-parts .
Les nœuds objectDetector Ajouter l'option de tri par confiance.
Commissez le nœud DrawBboxMask, utilisé pour convertir la sortie Bboxes par le nœud du détecteur d'objets en masque.
Commissez userPromptGenerAtRtXtimg et UserPromptGeneratorRPlaceword, utilisés pour générer des invites de texte et d'image et remplacer le contenu de l'invite.
Commissez le nœud PhipRomppt, utilisez des modèles de texte et visuel Microsoft PHI 3.5 pour l'inférence locale. Peut être utilisé pour générer des mots rapides, traiter des mots invités ou déduire des mots rapides à partir d'images. L'exécution de ce modèle nécessite au moins 16 Go de mémoire vidéo.
Téléchargez des fichiers de modèle à partir de BainetDisk ou HuggingFace.co/microsoft/PHI-3.5-Vision-struct et HuggingFace.co/microsoft/PHI-3.5-mini-instructe et copiez dans le dossier ComfyUImodelsLLM .
Commissez le nœud GetMainColors, il peut obtenir 5 couleurs principales de l'image. Commissez le nœud Colorname, il peut obtenir le nom de couleur de la valeur de couleur d'entrée.
Dupliquez le nœud de luminosité et de contraste sous forme de luminositéContrastv2, la couleur de l'ombre et le nœud de surbrillance en tant que coloofshadowhighlight, et de l'ombre et de la surmonté du masque d'ombre pour le masque v2, pour éviter les erreurs dans l'analyse du flux de travail Comfyui causé par le personnage "&" dans le nom du nœud.
Commissez les nœuds VQapRomppt et LoadVQAMODEL.
Download the model from BaiduNetdisk or huggingface.co/Salesforce/blip-vqa-capfilt-large and huggingface.co/Salesforce/blip-vqa-base and copy to ComfyUImodelsVQA folder.
Florence2Ultra, Florence2Image2Prompt 和 NODEFLORENCE2MODELS SOUTENIR LES NODES MIAOSHOUAI / FLORENCE-2-LAGE-PROMPTGERG-V1.5 et MIAOSHOUAI / FLORENCE-2-BASE-PROMPTGEN-V1.5.
Téléchargez les fichiers ComfyUImodelsflorence2 modèle à partir de BainetDisk ou HuggingFace.co/miaoshouai/florence-20 .
Commissez les nœuds BirefNetUlTrav2 et LoadBireFnetModel, qui prennent en charge l'utilisation du dernier modèle Birefnet. Téléchargez le fichier modèle à partir de bainetdisk ou googledrive nommé BiRefNet-general-epoch_244.pth au dossier ComfyUI/Models/BiRefNet/pth . Vous pouvez également télécharger plus de modèles Birefnet et les mettre ici.
ExtendCanvasv2 Node prend en charge l'entrée de valeur négative, cela signifie que l'image sera recadrée.
La couleur de titre par défaut des nœuds est changée en bleu-vert, et les nœuds dans la couche, la couchecolor, la couche de layerutilité et le manage de couche se distinguent par différentes couleurs.
Les nœuds de détection d'objets ont ajouté l'option de tri bbox, qui permet de tri de gauche à droite, de haut en bas et de grande à petite, ce qui rend la sélection d'objets plus intuitive et pratique. Les nœuds publiés hier ont été abandonnés, veuillez le remplacer manuellement par le nouveau nœud de version (désolé).
Commissez SAM2ULTRA, SAM2VIDEULTRA, ObjectDetectorfl2, ObjectDetectoryOloworld, ObjectDetectoryOlO8, ObjectDectorMask et BboxJoin NODES. Téléchargez des modèles à partir de BainetDisk ou HuggingFace.co/Kijai/Sam2-Safetensers et copiez dans le dossier ComfyUI/models/sam2 , téléchargez des modèles à partir de bainetdisk ou googledrive et copier dans le dossier ComfyUI/models/yolo-world . Cette mise à jour présente de nouvelles dépendances, veuillez réinstaller le package de dépendance.
Commissez le nœud RandomGenerator, utilisé pour générer des nombres aléatoires dans une plage spécifiée, avec des sorties d'int, float et booléen, prenant en charge la génération de lots de différents nombres aléatoires par lot d'image.
Committe le nœud EVF-SAMULTRA, il s'agit de l'implémentation de EVF-SAM dans Comfyui. Veuillez télécharger des fichiers de modèle à partir de baidUntDisk ou HuggingFace / EVF-SAM2, HuggingFace / EVF-SAM vers ComfyUI/models/EVF-SAM Folder (Enregistrez les modèles dans leurs sous-répertoires respectifs). En raison de l'introduction de nouvelles dépendances, après la mise à niveau du plugin, veuillez réinstaller les packages de dépendance.
Commissez Imagetaggersave et ImageAutocroPV3 nœuds. Utilisé pour implémenter le flux de travail de coupe et de marquage automatique pour l'ensemble de formation (le workflow image_tagger_save.json est situé dans le répertoire de workflow).
Engagez le nœud CheckMaskv2, ajoutait la méthode simple pour détecter les masques plus rapidement.
Commissez ImageReel et ImageReElCosite nœuds pour composer plusieurs images sur une toile.
NumberCalculatorV2 et NumberCalculator Ajouter la méthode min et max .
Optimiser la vitesse de chargement du nœud.
Florence2Image2Prompt Ajouter le support pour les modèles thwri/CogFlorence-2-Large-Freeze et thwri/CogFlorence-2.1-Large . Veuillez télécharger les fichiers du modèle à partir de BainetDisk ou HuggingFace / Cogflorence-2-Geleze et HuggingFace / Cogflorence-2.1-GARD, puis copiez-le dans le dossier ComfyUI/models/florence2 .
Merge Branch de ClownSharkBatwing "Utilisez GPU pour le mode de mélange de couleurs", la vitesse de certains calques se mélange de plus de dix fois.
Commissez Florence2ultra, Florence2Image2Prompt et Loadflorence2Model.
TransparentBackgroundultra Node Ajouter un nouveau support de modèle. Veuillez télécharger le fichier du modèle en fonction des instructions.
Commissez Segformerultrav2, SegFromerFashionPipeline et les nœuds de lampiles de segFormerClothspiline, utilisés pour la segmentation des vêtements. Veuillez télécharger le fichier du modèle en fonction des instructions.
Commit install_requirements.bat et install_requirements_aki.bat , une solution de clic pour installer des packages de dépendance.
Commissez le nœud transparentbackgroundultra, il supprime l'arrière-plan basé sur un modèle de fond transparent.
Changez le modèle Vitmatte du nœud ultra en un appel local. Please download all files of vitmatte model to the ComfyUI/models/vitmatte folder.
GetColorToneV2 node add the mask method to the color selection option, which can accurately obtain the main color and average color within the mask.
Node ImagesCaleByaspeclectRatiov2 Ajoutez l'option "background_color".
LUT Appliquer Ajouter l'option "Force".
Commissez le nœud AutoAdJustv2, ajoutez une entrée et une prise en charge de masque en option pour plusieurs modes de réglage des couleurs automatiques.
En raison de l'arrêt à venir des services de vision Gemini-Pro, Intertagger et PromptEmbellish ont ajouté l'API "Gemini-1.5-Flash" pour continuer à l'utiliser.
Les nœuds ultra a ajouté l'option d'exécuter VitMatte sur le dispositif CUDA, entraînant une augmentation de 5 fois de la vitesse d'exécution.
Commissez le nœud queuestop, utilisé pour terminer l'opération de file d'attente.
Optimiser les performances de la méthode VitMate pour les nœuds ultra lors du traitement de l'image de grande taille.
CropBymaskv2 Ajouter une option pour autour de la taille de coupe par multiples.
Engagez le nœud Mask Mask, il détecte si le masque contient des zones efficaces suffisantes. Commissez le nœud HSVValue, il convertit les valeurs de couleur en valeurs HSV.
Booleanoperatorv2, numberCalculatorv2, entier, float, nœuds booléens Ajouter une sortie de chaîne pour sortir la valeur en tant que chaîne à utiliser avec SwitchCase.
Engager le nœud SwitchCase, change la sortie en fonction de la chaîne de correspondance. Peut être utilisé pour tout type de commutation de données.
Commissez le nœud de chaîne, utilisé pour sortir une chaîne. Il s'agit du nœud simplifié de la zone de texte.
Engagez si le nœud , commutant la sortie en fonction de l'entrée conditionnelle booléenne. Peut être utilisé pour tout type de commutation de données.
Commit StringCondition Node, détermine si le texte contient ou ne contient pas une sous-chaîne.
Engager NumberCalculatorv2 Node , Ajoutez le Nth Root Operation. Commissez le nœud booleanoperatorv2, augmentant le jugement logique supérieur / inférieur, supérieur / inférieur ou égal. Les deux nœuds peuvent accéder aux entrées numériques et peuvent saisir des valeurs numériques dans le nœud. Remarque: l'entrée numérique a la priorité. Les valeurs dans les nœuds ne seront pas valides en cas d'entrée.
Committez le nœud SD3Negativeconditioning, encapsulez les quatre nœuds de condition négative dans SD3 dans un nœud séparé.
Node ImageReMovealpha Ajouter une entrée de masque en option.
Commissez le nœud hlfrequencydetailRestore, en utilisant un filtrage à basse fréquence et une conservation haute fréquence pour restaurer les détails de l'image, la fusion est meilleure.
Commissez les nœuds Addgrain et Maskgrain, ajoutez du bruit à une image ou à un masque.
Engagez le nœud Filmv2, la méthode FastGrain est ajoutée sur la base de la précédente, et la vitesse de génération de bruit est 10 fois plus rapide.
Engagez le Nœud ImageToMask, il peut être converti l'image en masque. Prend en charge la conversion de n'importe quel canal dans les modes de laboratoire, RGBA, YUV et HSV en masques, tout en fournissant un réglage de l'échelle des couleurs. Prise en charge de l'entrée facultative du masque pour obtenir des masques qui n'incluent que des pièces valides.
Les options Blackpoint et WhitePoint dans certains nœuds ont été changées en ajustement des curseurs pour un affichage plus intuitif. Incluez MaskEdgelTradetailv2, segmentAnythingUltrav2, rmbgultrav2 , personkultrav2 , birefnetultra, segformerb2cothesultra, mélanges massask et niveaux.
ImageScaleRestoreV2 and ImageScaleByAspectRatioV2 nodes add the total_pixel method to scale images.
Commissez le nœud MediappefacialSegment , utilisé pour segmenter les caractéristiques du visage, y compris les sourcils gauche et droit, les yeux, les lèvres et les dents.
Commissez le nœud BatchSelector , utilisé pour récupérer des images ou des masques spécifiés à partir d'images ou de masques par lots.
La couche crée de nouveaux sous-répertoires tels que Systemio, Data et Invite. Certains nœuds sont classés en sous-répertoires.
Commissez le nœud MaskByColor, générez un masque basé sur la couleur sélectionnée.
Commissez le nœud LoadPSD, il lisait le format PSD et les images de calque de sortie. Notez que ce nœud nécessite l'installation du package de dépendance psd_tools , si une erreur se produit lors de l'installation de PSD_Tool, telles que ModuleNotFoundError: No module named 'docopt' , veuillez télécharger le WHL et le manuel de Docopt l'installer.
Commissez le nœud SegformerB2ClotheSultra, il segmentait pour segmenter les vêtements de caractère. Le code de segmentation du modèle est de Startthua, grâce à l'auteur original.
Le nœud SaveImagePlus ajoute le flux de travail de sortie à la fonction JSON, prend en charge %date et %time pour intégrer la date ou l'heure à la trajectoire et le nom de fichier, et ajoute le commutateur d'aperçu.
Commissez le nœud SaveImagePlus , Il peut personnaliser le répertoire où l'image est enregistrée, ajouter un horodatage au nom du fichier, sélectionner le format de sauvegarde, définir le taux de compression d'image, définir s'il faut enregistrer le flux de travail et ajouter éventuellement des alerins invisibles sur l'image.
Commissez AddBlindwatermark, Showblindwatermark nœuds, ajoutez un filigrane invisible et filigrane décodé à l'image. Commit CreateQrcode, DecodeQrCode nœuds, il peut générer des images de code bidimensionnelles et décoder des codes bidimensionnels.
ImagesCaleRestorev2, imagesCaleByaspeclectRatiov2, ImageAutocroPV2 Les nœuds ajoutent des options pour width et height , qui peuvent spécifier la largeur ou la hauteur sous forme de valeurs fixes.
Commissez le nœud Purgevram, nettoyez Vram un RAM.
Commissez le nœud automatique, il peut ajuster automatiquement le contraste d'image et la balance des blancs.
Commissez le nœud RGBValue pour produire la valeur de couleur en tant que valeur décimale unique de R, G, B. Cette idée est de Vxinhao, merci.
Engager le nœud de graines pour produire la valeur des semences. L'imageMaskScaleas, ImagesCaleByspectratio, ImagesCaleByspectratiov2, ImagesCaleRestore, ImagesCaleRestorev2 augmente width , la sortie height .
Engager les niveaux de nœud, il peut atteindre la même fonction de réglage des niveaux de couleur que Photoshop.sharp & Soft Ajouter l'option "Aucun".
Commit Blendifmask Node, ce nœud coopère avec IMGaeblendv2 ou ImageBlendAdvancev2 pour obtenir le même mélange si fonction que Photoshop.
Commissez les nœuds de colorémpéres et de colorants, utilisés pour ajuster la température de couleur et l'équilibre des couleurs de l'image.
Ajoutez de nouveaux types de mode de mélange V2 entre les images. prend maintenant en charge jusqu'à 30 modes de mélange. Le nouveau mode Blend est disponible pour toutes les versions V2 qui prennent en charge les nœuds en mode mixte, y compris ImageBlend V2, ImageBlendAdvance V2, Dropshadow V2, Innershadow V2, OUSERGLOW V2, Innerglow V2, TRAP V2, ColorOverlay V2, GradientOverlay V2.
Une partie du code pour BlendMode v2 provient de nœuds virtuose pour comfyui. Merci aux auteurs originaux.
Commissez le nœud YOLOV8detect.
Committez le nœud QWenImage2Prompt, ce nœud est le reconditionnement du UForm-Gen2 Qwen Node de Comfyui_Vlm_Nodes, grâce à l'auteur original.
Commissez Booleanoperator, NumberCalculator, TextBox, Integer, Float, BooleanNodes. Ces nœuds peuvent effectuer des opérations mathématiques et logiques.
Commissez le nœud ExtendCanvasv2 , Prise en charge de l'entrée de valeur de couleur.
Commettre le nœud de lutte contre l'autobéie , il peut ajuster automatiquement la luminosité de l'image.
CreategradIentMask Node Ajouter une option center .
Commissez le nœud getColortOnev2, peut sélectionner les couleurs principales et moyennes pour l'arrière-plan ou le corps.
Commissez le nœud ImageRewardFilter, peut filtrer les images de mauvaise qualité.
Les nœuds ultra ajoutent la méthode VITMatte(local) , vous pouvez choisir cette méthode pour éviter d'accéder à HuggingFace.co si vous avez déjà téléchargé le modèle auparavant.
Commettre le nœud d'effet HDR , Il améliore la plage dynamique et l'attrait visuel des images d'entrée. Ce nœud est le reconditionnement des effets HDR (superbeasts.ai).
Commissez le nœud CropboxResolve.
Engagez le nœud BirefNetultra, il utilisant le modèle Birefnet pour supprimer l'arrière-plan a une meilleure capacité de reconnaissance et des détails de bord ultra-élevé.
Engagez le nœud ImageAutoCroPv2, il peut choisir de ne pas supprimer l'arrière-plan, de prendre en charge l'entrée du masque et de l'échelle par une taille latérale longue ou courte.
Commit ImageHub Node, prend en charge jusqu'à 9 ensembles de sortie de commutation d'image et de masque et prend en charge la sortie aléatoire.
Commissez le nœud TextJoin.
Commissez le nœud d'invite. Il sortit des mots rapides polis et prend en charge les images d'entrée en tant que références.
Les nœuds ultra ont été entièrement mis à niveau vers la version V2, avec l'ajout de la méthode de traitement de Vitmatte Edge, qui convient à la gestion des zones semi-transparentes. Incluez MaskEdgelTradetailv2, segmentAnythingultrav2, rmbgultrav2 et nœuds Personmaskultrav2.
Commissez la couleur de l'ombre et du nœud de surbrillance, il peut ajuster séparément la couleur des parties sombres et lumineuses. Engagez le Nœud Masque Shadow & Highlight, il peut sortir du masque pour les zones sombres et brillantes.
Commissez le nœud CropByMaskv2, sur la base du nœud d'origine, il prend en charge l'entrée crop_box , ce qui rend pratique de couper les couches de la même taille.
Commissez le nœud SimpleTextimage, il génère des images de composition simples et des masques à partir du texte. Ce nœud fait référence à certaines des fonctionnalités et du code de Zho-Zho-Zho / Comfyui-Text_image-Composite.
Commissez le nœud d'invite , inférence les invites basées sur l'image. et il peut remplacer le mot clé pour l'invite (Besoin de postuler pour la touche API Google Studio). Mettez à niveau Colrimagev2 et GradItImagev2 , Prise en charge de l'utilisateur Personnaliser les tailles prédéfinies et l'entrée size_as.
Commissez le nœud LAMA, il peut effacer les objets de l'image en fonction du masque. Ce nœud est le reconditionnement de IOPaint.
Committez l'imageMovealpha et les nœuds d'imagecombinealpha, le canal alpha de l'image peut être supprimé ou fusionné.
Commissez ImagesCaleRestorev2 et ImagesCaleByaspectratiov2 nœuds, prend en charge les images de mise à l'échelle pour des tailles de bord longs ou courtes spécifiées.
Commissez le nœud Personmaskultra, générez des masques pour le visage, les cheveux, la peau du corps, les vêtements ou les accessoires de Portrait. Le code de modèle pour ce nœud provient du générateur de masque A-personne.
Commissez le nœud Lightleak, ce filtre simule l'effet de fuite de lumière du film.
Commissez le nœud de film, ce filtre simule le grain, le bord sombre et le bord flou du film, la carte de profondeur d'entrée de support pour simuler le défocalisation. Il est réorganisé et encapsule de DigitalJohn / Comfyui-Proppost.
Commissez le nœud ImageAutoCrop, qui est conçu pour générer du matériel d'image pour les modèles de formation.
Engagez le nœud ImagesCaleByaspeclectratio, il peut être une image ou un masque à l'échelle en fonction du rapport trame.
Correction du bug de la gradation des couleurs dans le rendu de nœud LUT, et ce nœud prend désormais en charge l'espace colorimétrique. * Veuillez charger le fichier LUT de journal dédié pour l'image de l'espace colorimétrique du journal.
Commissez le nœud CreategradIentMask. Commissez les nœuds LayImageTransform et LayerMaskTransform.
Commissez le nœud MaskEdgeltraDeTail, il traite des masques rugueux vers des bords ultra fines.
Comictez le nœud tranchant et doux, il peut améliorer ou lisser les détails de l'image. Commissez le nœud maskbydifferent, il compare deux images et sortira un masque. Commissez le nœud SegmentAnythingultra, améliorez la qualité des bords du masque. * Si la segmentaire n'est pas installée, vous devrez télécharger manuellement le modèle.
Tous les nœuds ont des images par lots entièrement prises en charge, offrant une commodité à la création de vidéos. (Le nœud CropBymask ne prend en charge que les coupes de la même taille. Si un masque par lots_for_crop est entré, les données de la première feuille seront utilisées.)
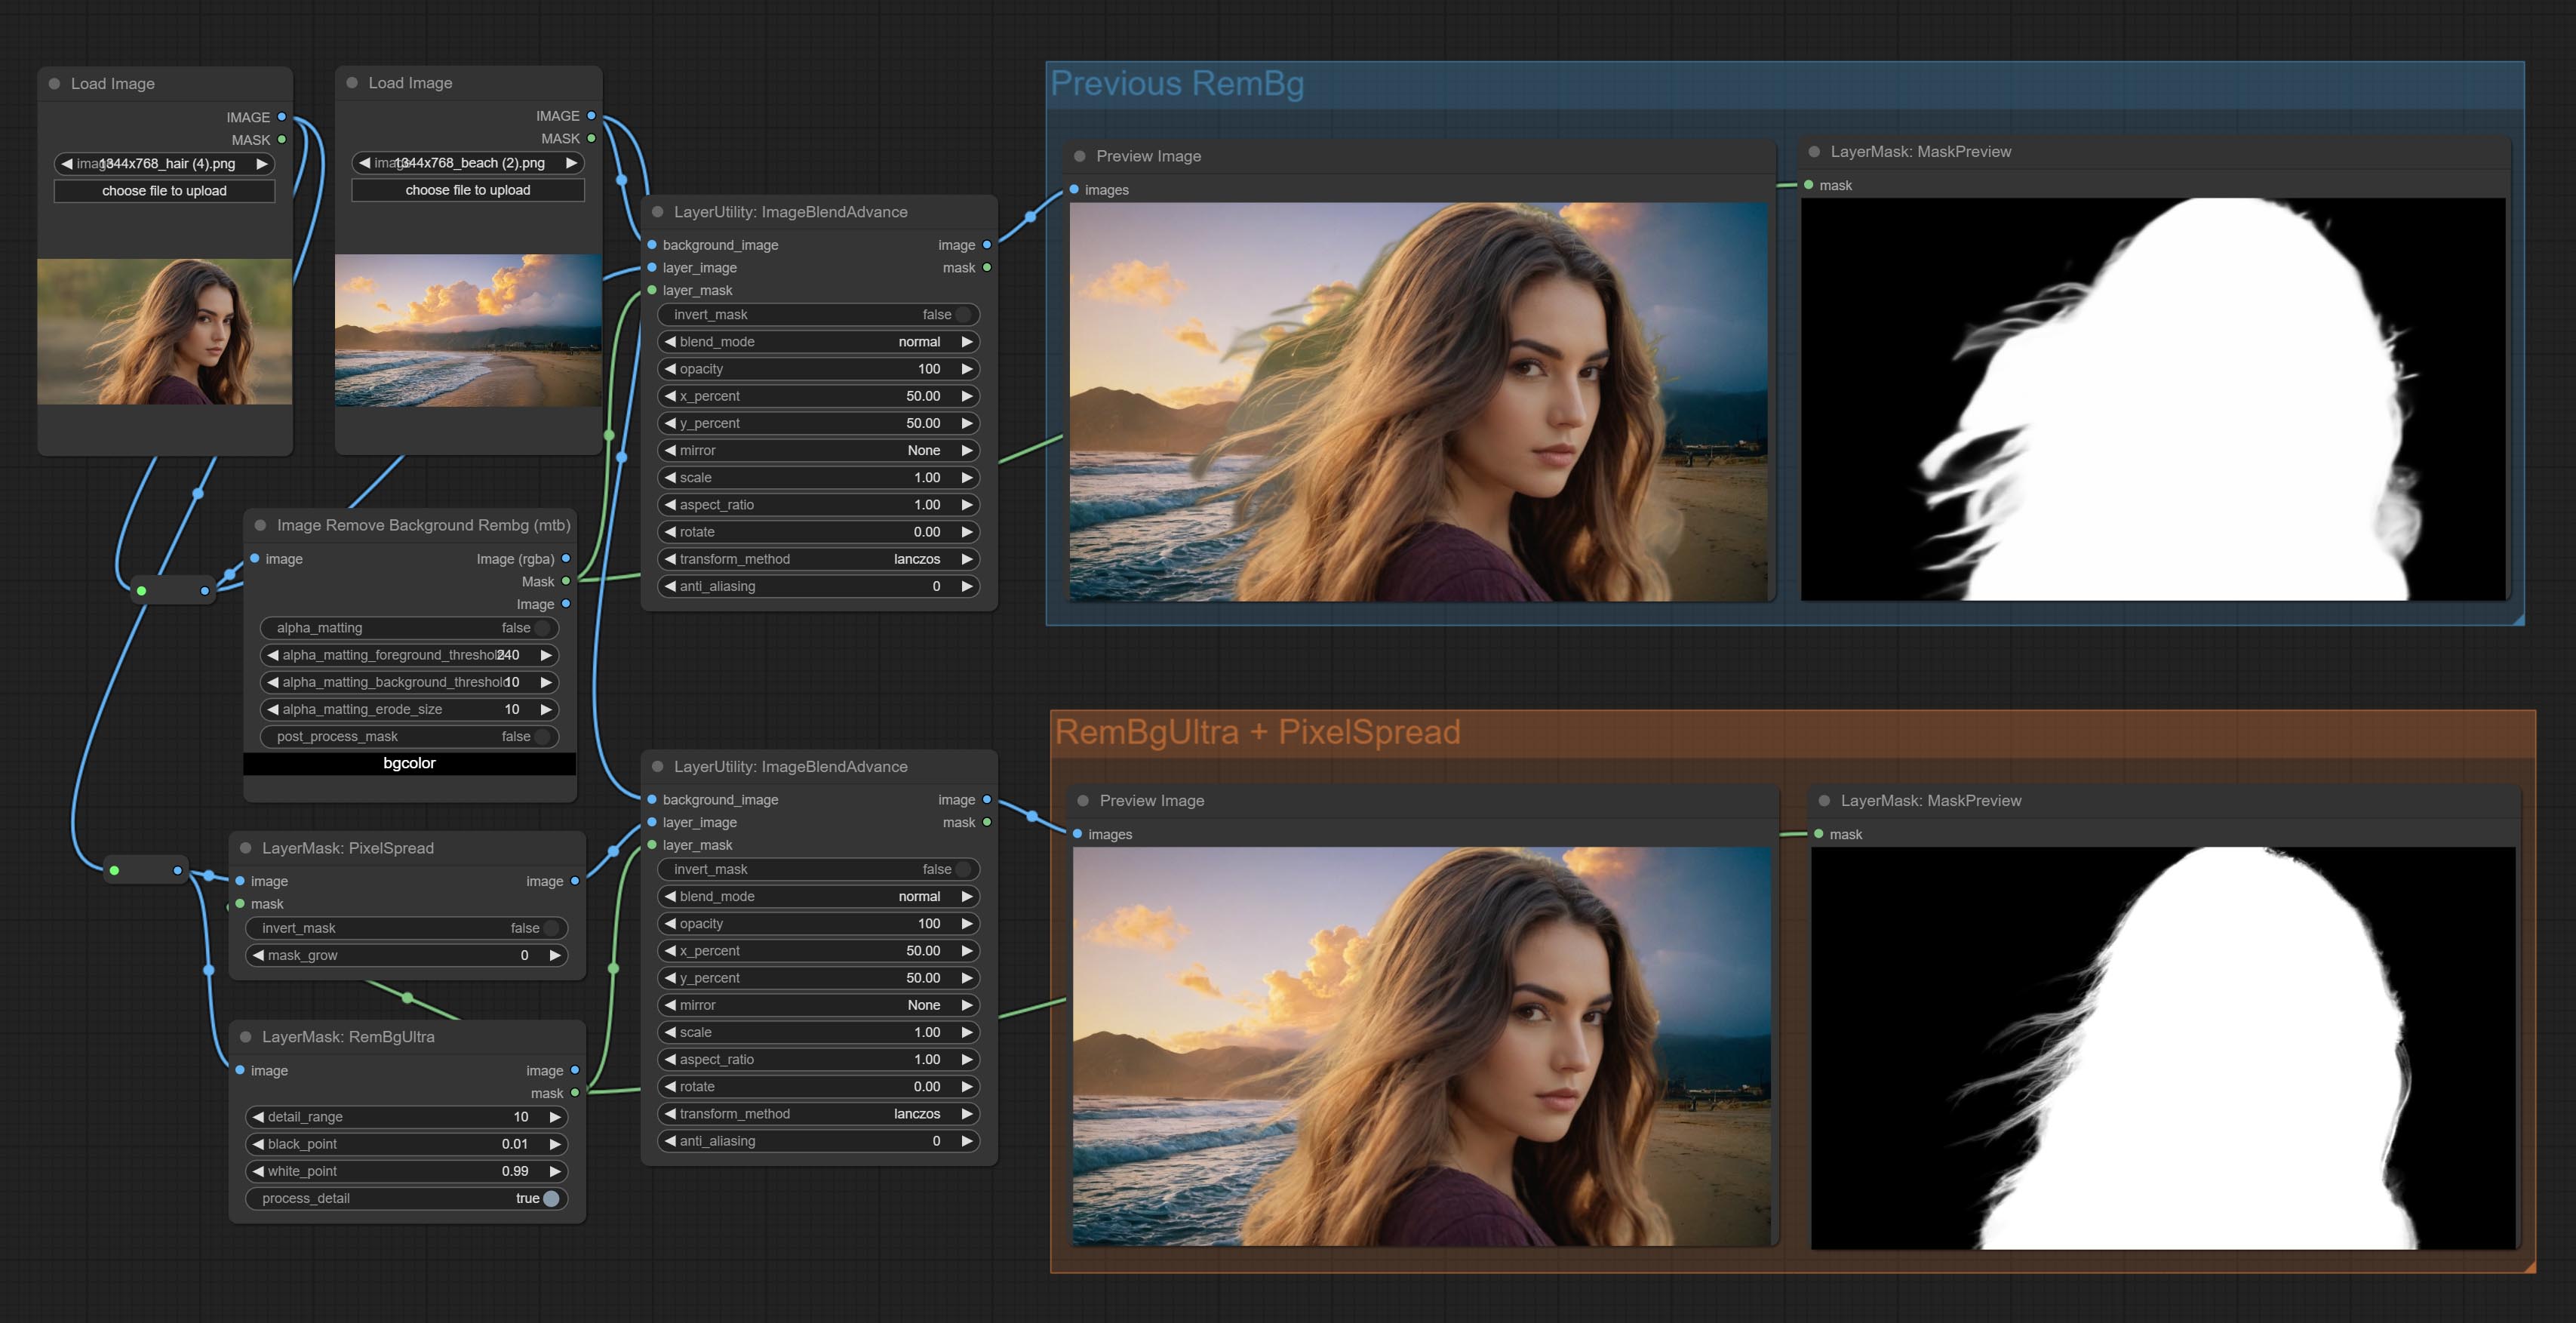
Commettre des nœuds Rembgultra et Pixelspread a considérablement amélioré la qualité du masque. * Rembgultra nécessite un téléchargement manuel du modèle.
Commissez le nœud TextiMage, il génère des images de texte et des masques.
Ajoutez de nouveaux types de mode de mélange entre les images. prend maintenant en charge jusqu'à 19 modes de mélange. Ajoutez Color_burn, Color_Dodge, Linear_burn, Linear_Dodge, Superlay, Soft_light, Hard_light, Vivid_light, Pin_light, Linear_light et Hard_mix . Le mode de mélange nouvellement ajouté est applicable à tous les nœuds qui prennent en charge le mode de mélange.
Commissez le nœud de filtre Colormap pour créer un effet de carte thermique pseudo-couleur.
Commissez l'aquarelle et les nœuds SkinBeauty - il s'agit de filtres d'image qui génèrent des effets aquarelle et de douceur de la peau.
Engagez le nœud ImageHift pour déplacer l'image et sortir un masque de couture de déplacement, ce qui rend pratique la création de textures continues.
Commissez le nœud ImageMaskScaleas pour ajuster la taille de l'image ou du masque en fonction de l'image de référence.
Commissez le nœud ImagesCalerestore pour travailler avec CropBymask pour les travaux locaux haut de gamme et de réparation.
Commissez les nœuds CropBymask et RestoRecropbox. La combinaison de ces deux peut se recadrer partiellement et redessiner l'image avant de la restaurer.
Commissez le nœud Coloradapter, qui peut automatiquement ajuster la tonalité de couleur de l'image.
Commissez le nœud Maskstroke, il peut générer des traits de contour de masque.
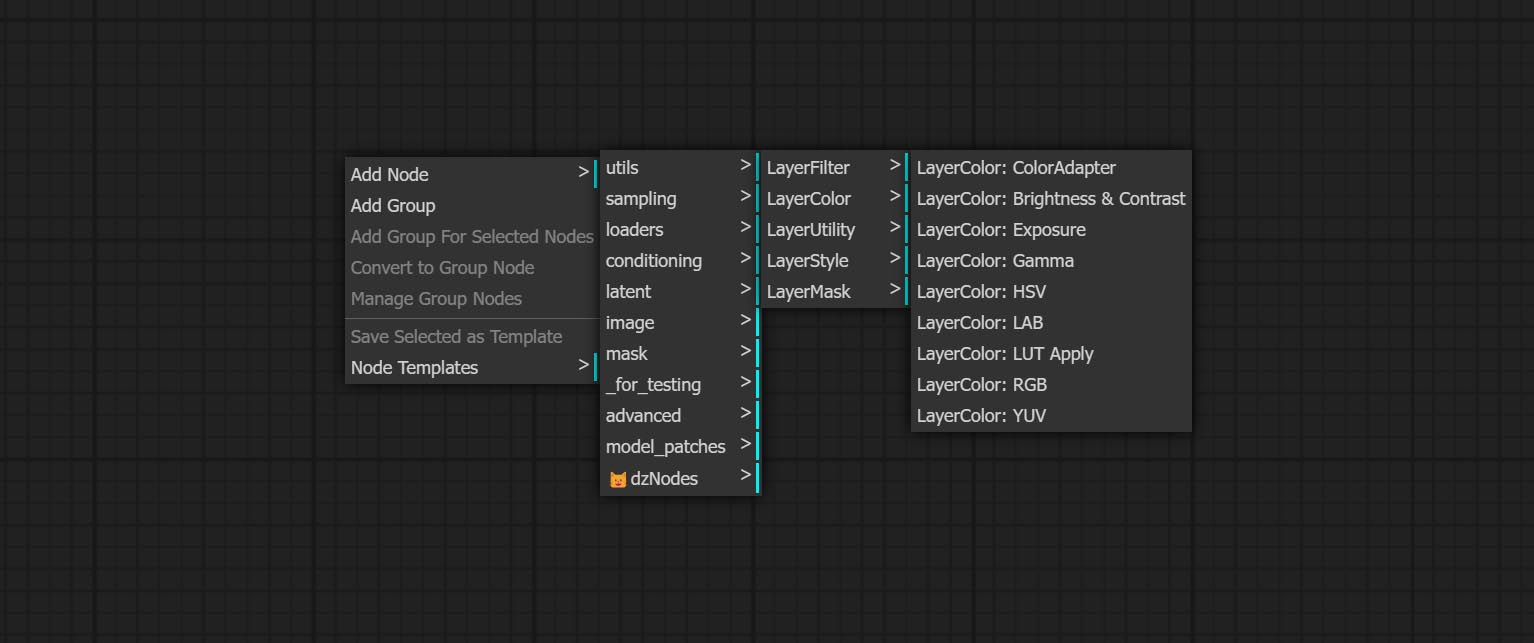
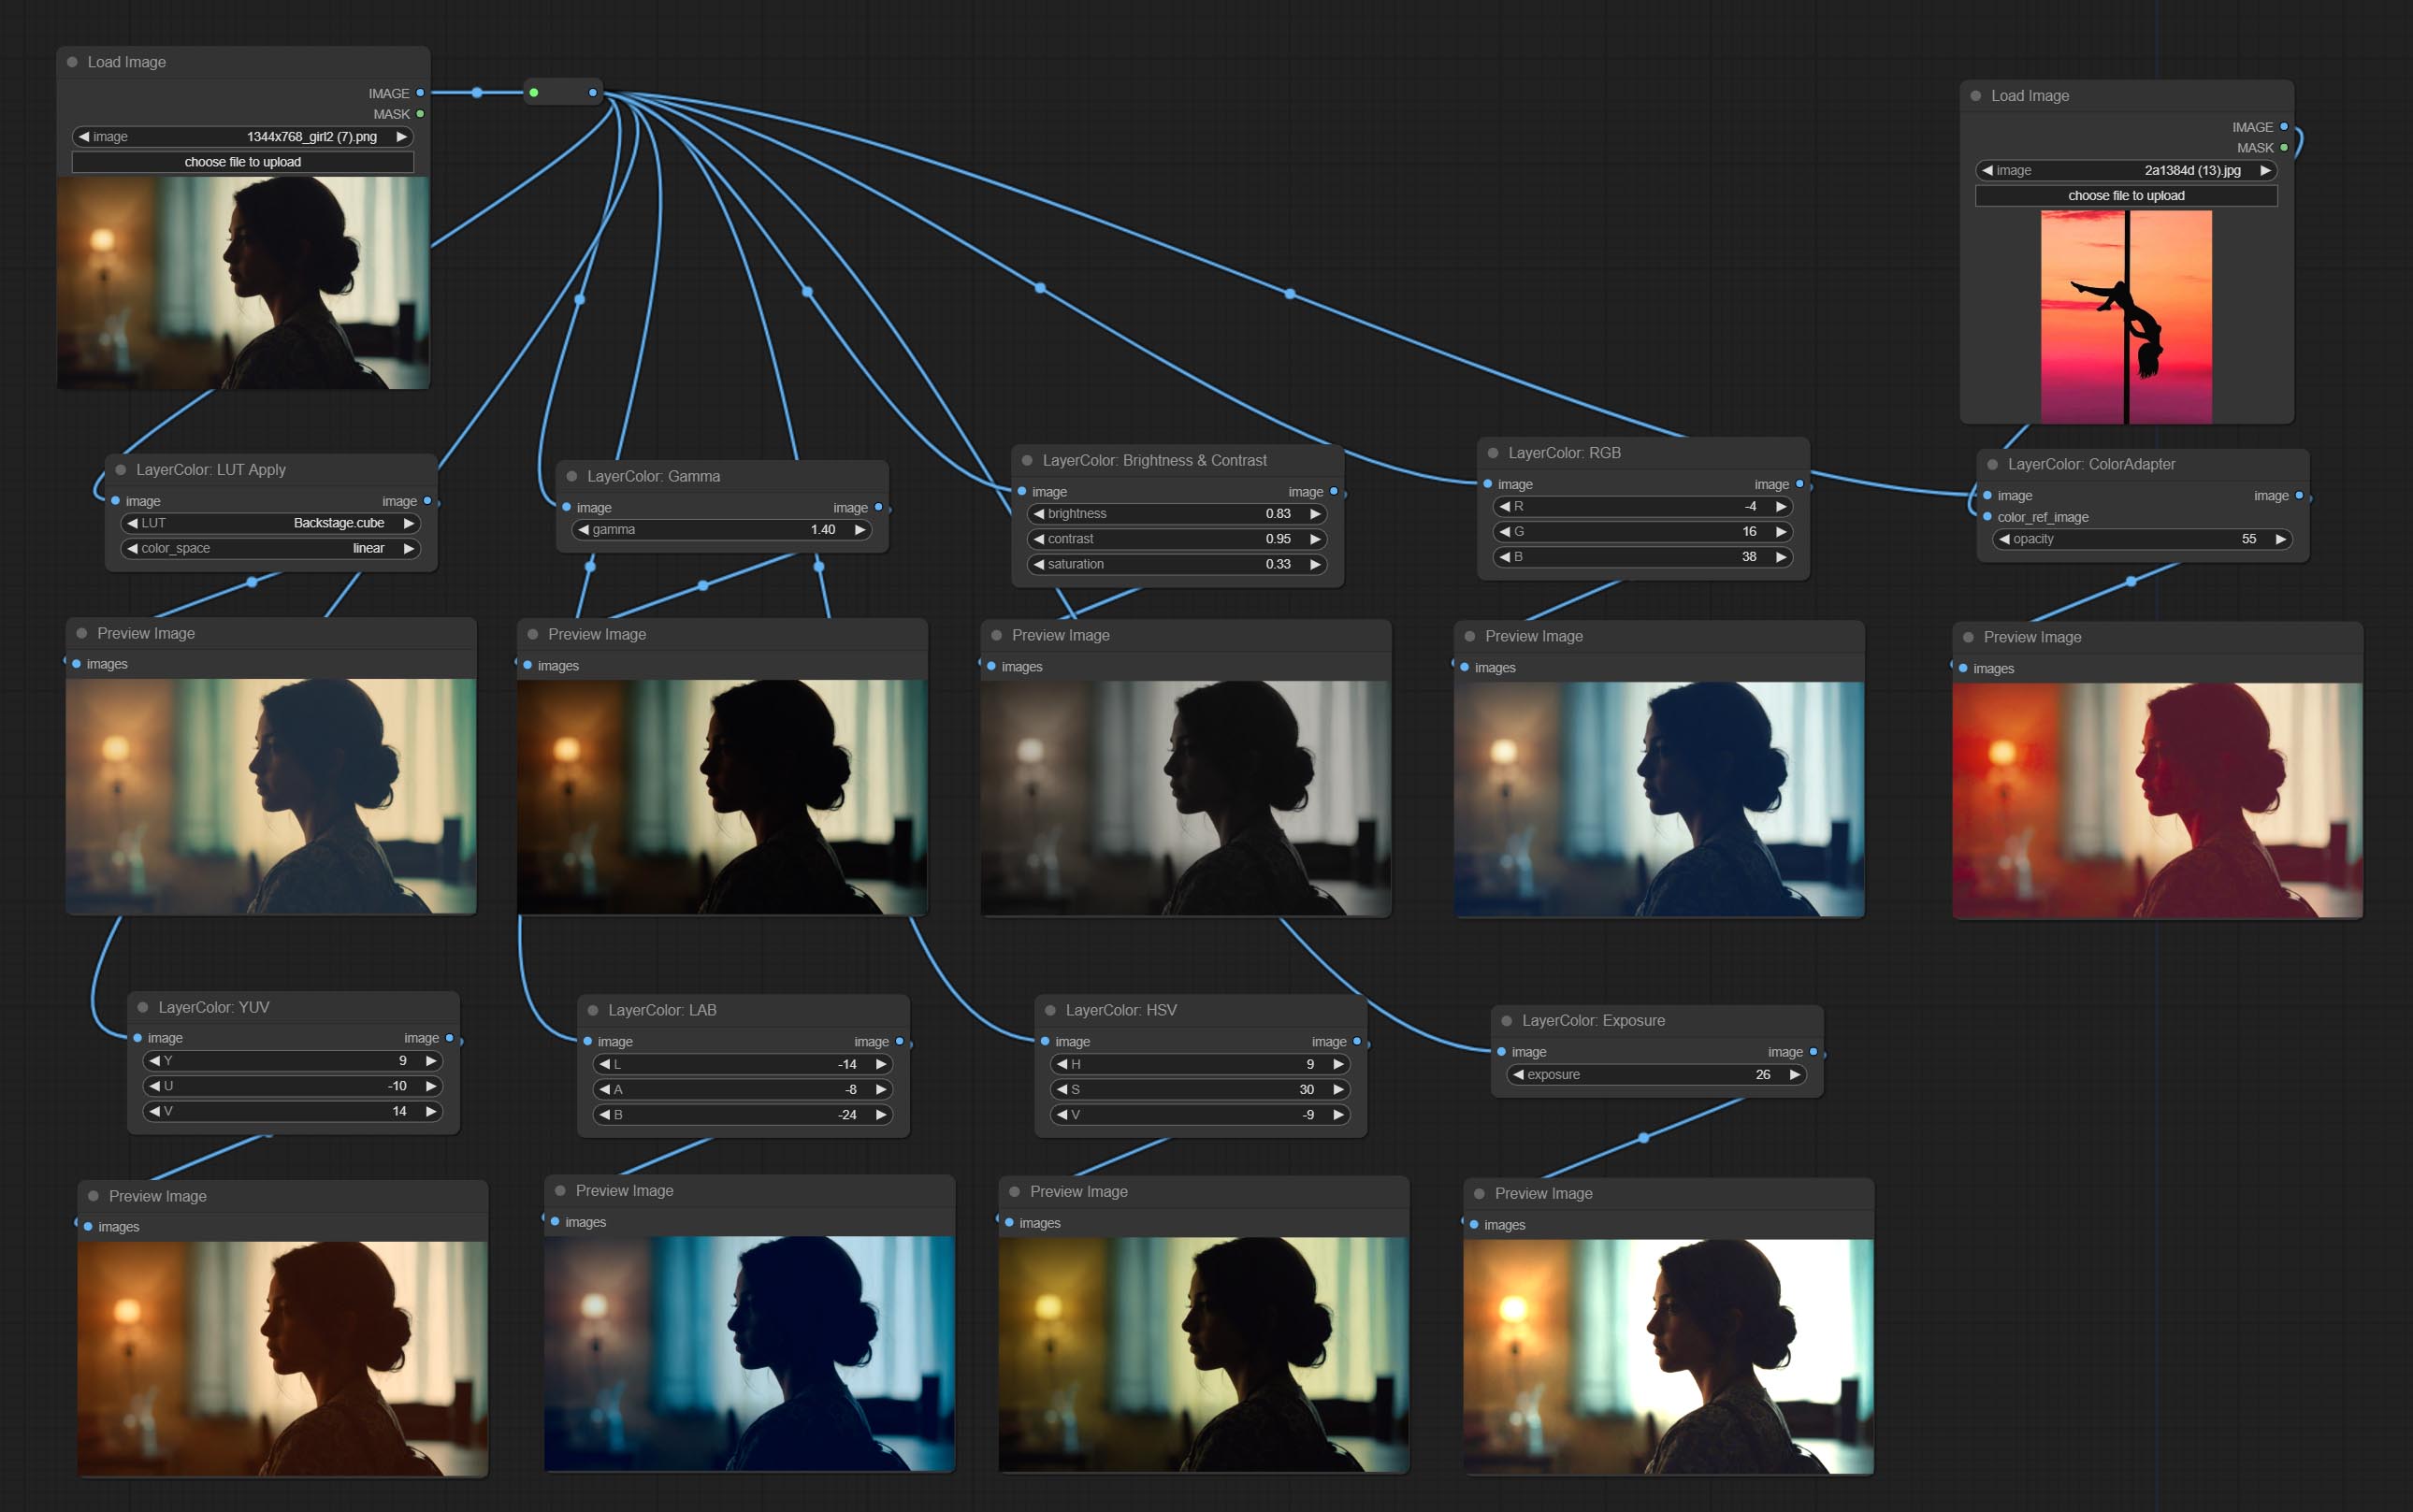
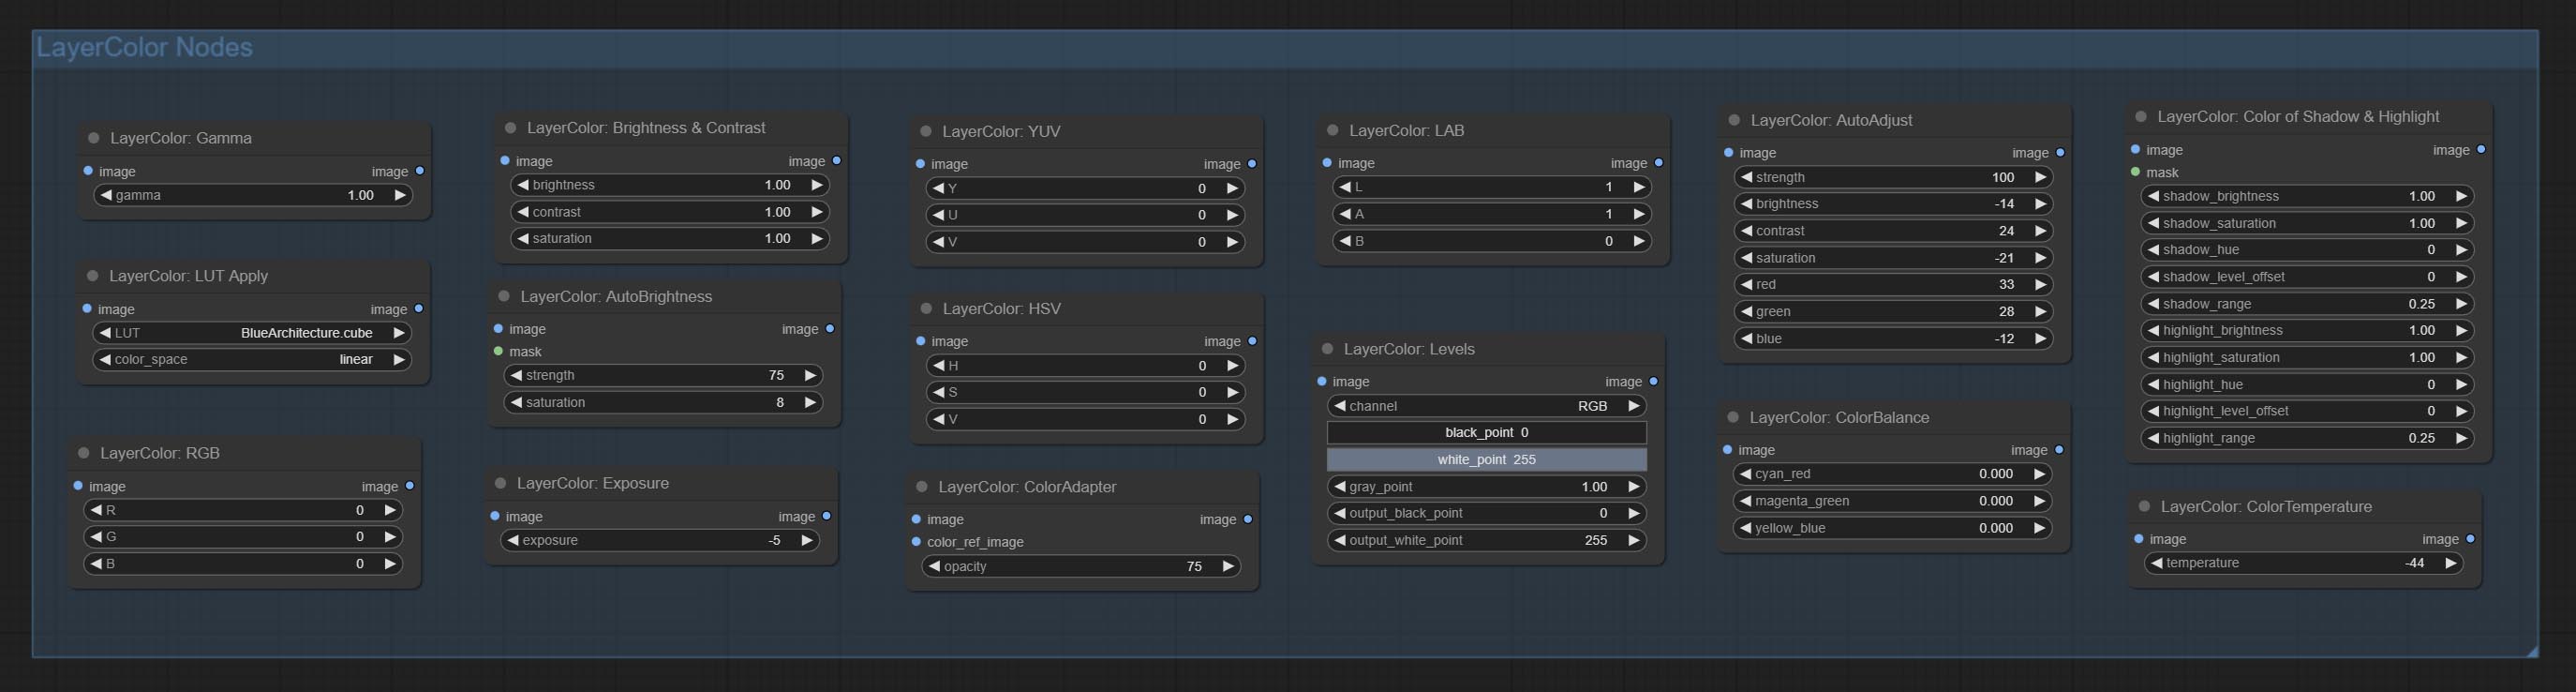
Ajouter le groupe de nœuds LayerColor, utilisé pour ajuster la couleur de l'image. Il comprend LUT PLIPS, GAMMA, LIMINGATION ET CONTRAST, RVB, YUV, LAB ADN HSV.
Commissez les nœuds ImageChannelsPlit et ImageChannelmerge.
Commissez le nœud MaskMotionBlur.
Commissez le nœud Softlight.
Commit ChannelShake Node, c'est-à-dire un filtre, peut produire un effet de dislocation de canal similaire comme le logo TikTok.
Commit Maskradient Node, peut créer un gradient dans le masque.
Commissez le nœud getColortone, peut obtenir la couleur principale ou la couleur moyenne de l'image. Commissez les nœuds maskgrow et masquedgeshrink.
Commissez le nœud MaskBoxDetect, qui peut détecter automatiquement la position via le masque et le sortir vers le nœud composite. Engagez XY à pourcentage de nœud pour convertir les coordonnées absolues en coordonnées pour pourcentage. Commissez le nœud GaussianBlur. Commissez le nœud GetImageSize.
Commissez le nœud ExtendCanvas.
Commissez le nœud ImageBlendAdvance. Ce nœud permet la synthèse d'images d'arrière-plan et de couches de différentes tailles, offrant une expérience de synthèse plus gratuite. Commissez le nœud PrintInfo en tant qu'aide de débogage de workflow.
Commissez les nœuds colorimages et gradiendImage, utilisés pour générer des images couleur solides et dégradées.
Commissez GradientOverlay et ColorOverlay Nœuds. Ajoutez un jugement d'entrée de masque non valide et ignorez-le lorsque le masque non valide est entrée.
Commissez les nœuds Innerglow, Innershadow et MotionBlur.
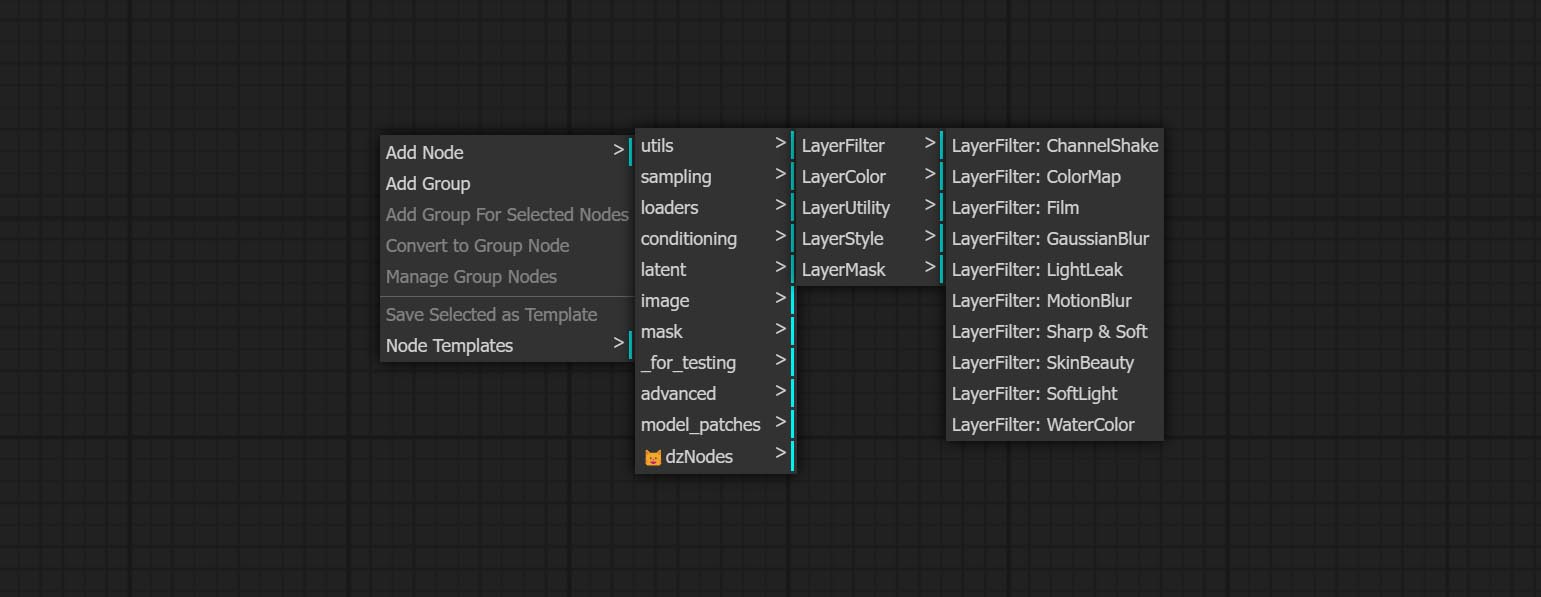
Renommandant tous les nœuds terminés, les nœuds sont divisés en 4 groupes : LayerTyle, Layermask, coucheutilité, couche de couche. Les flux de travail contenant des nœuds de versions anciens doivent être remplacés manuellement par de nouveaux nœuds de version.
Le nœud OUTERGLOW a subi des modifications significatives en ajoutant des options pour la luminosité , Light_Color et Glow_Color .
Commissez le nœud MaskInvert.
Commissez le nœud ColorPick.
Commettre le nœud de trait.
Commissez le nœud maskpreview.
Commissez le nœud ImageOpacity.
Le Layer_Mask n'est pas une entrée obligatoire maintenant. Il est autorisé à utiliser des couches et des masques avec différentes formes, mais la taille doit être cohérente.
Commissez le nœud ImageBlend.
Commettre un nœud exterglow.
Commissez le nœud DropShadow.
Les nœuds sont divisés en 5 groupes en fonction de leurs fonctions: couche, couchecolor, Layermask, couche et couche de couche.

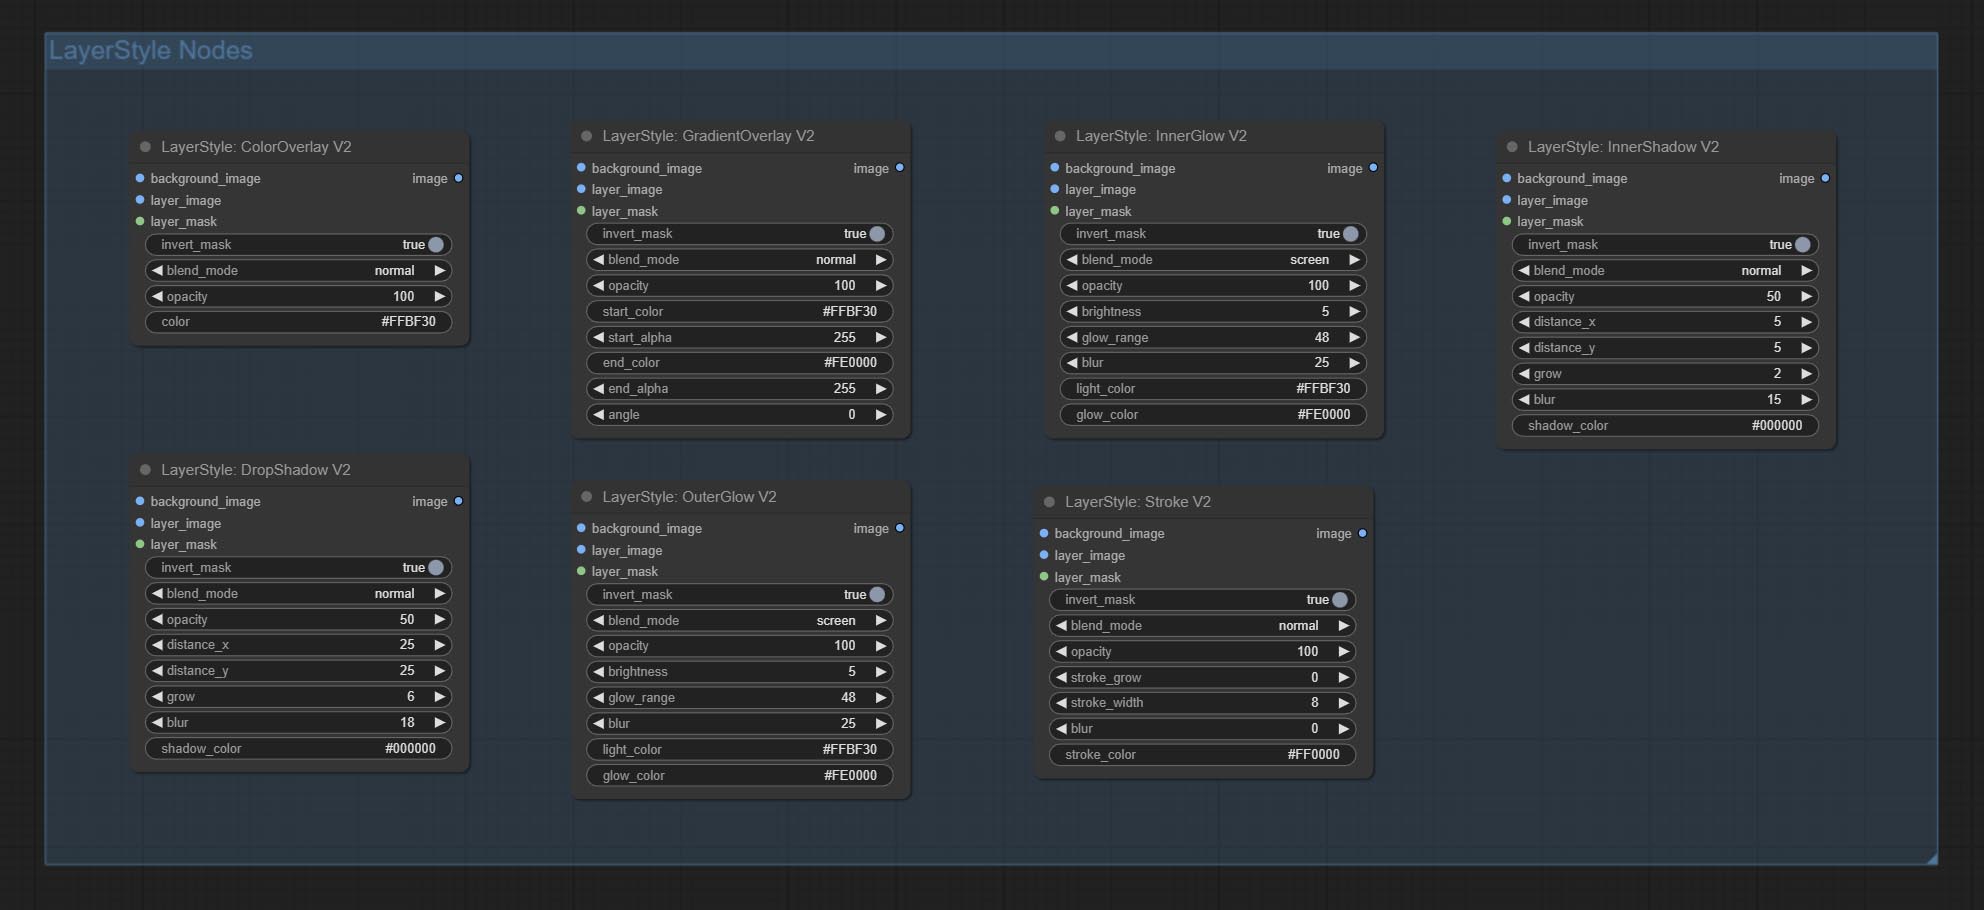
Générer l'ombre 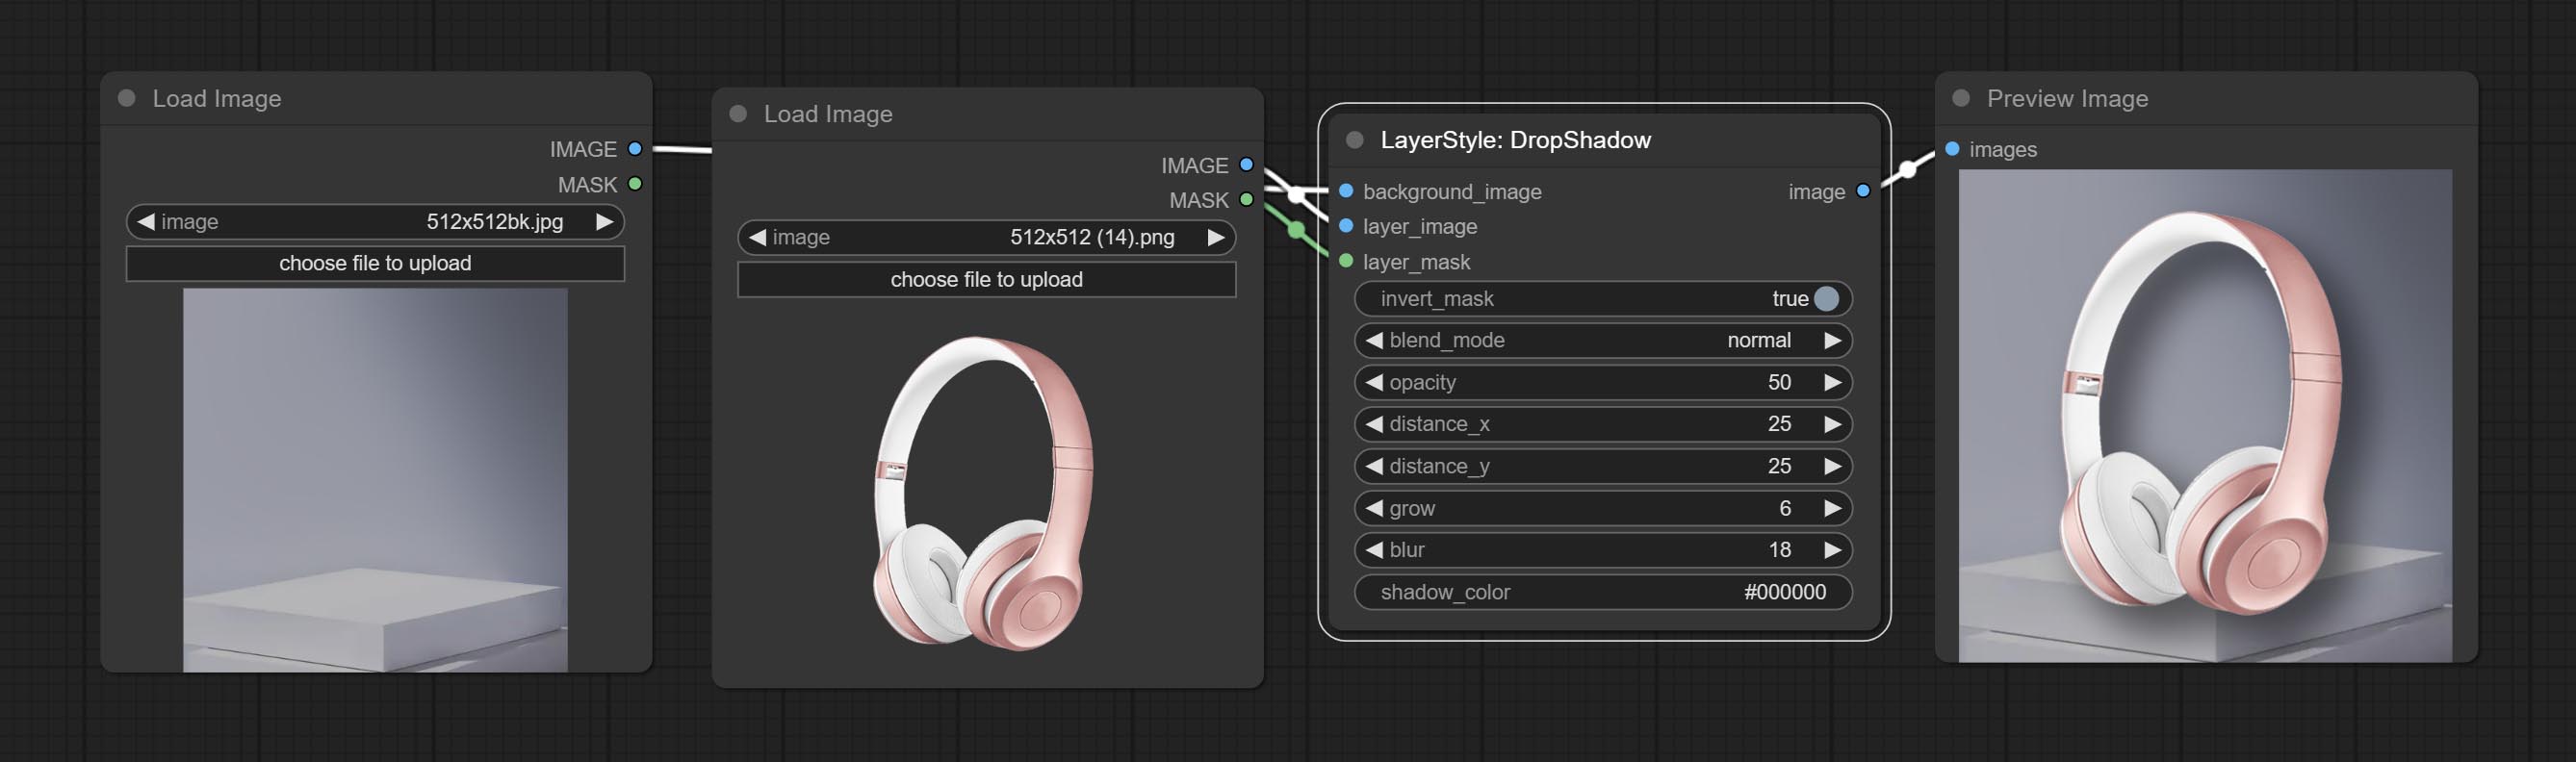
Options de nœud: 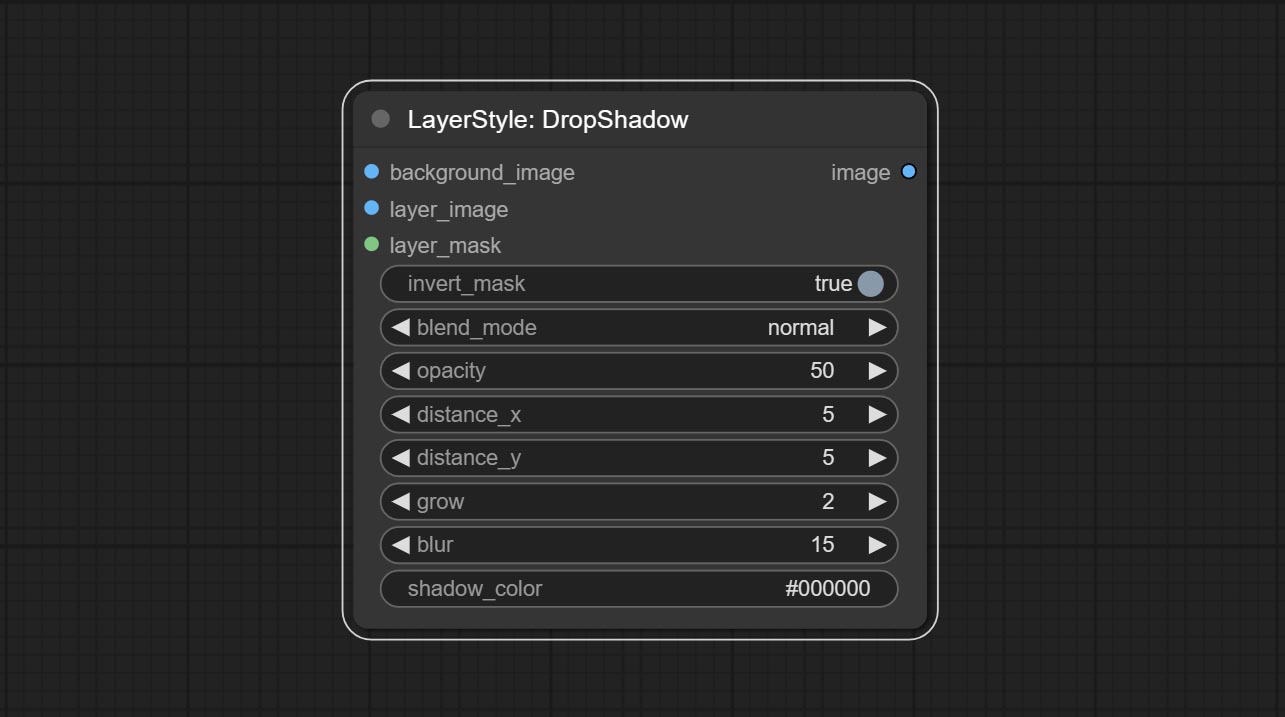
Générer une lueur extérieure 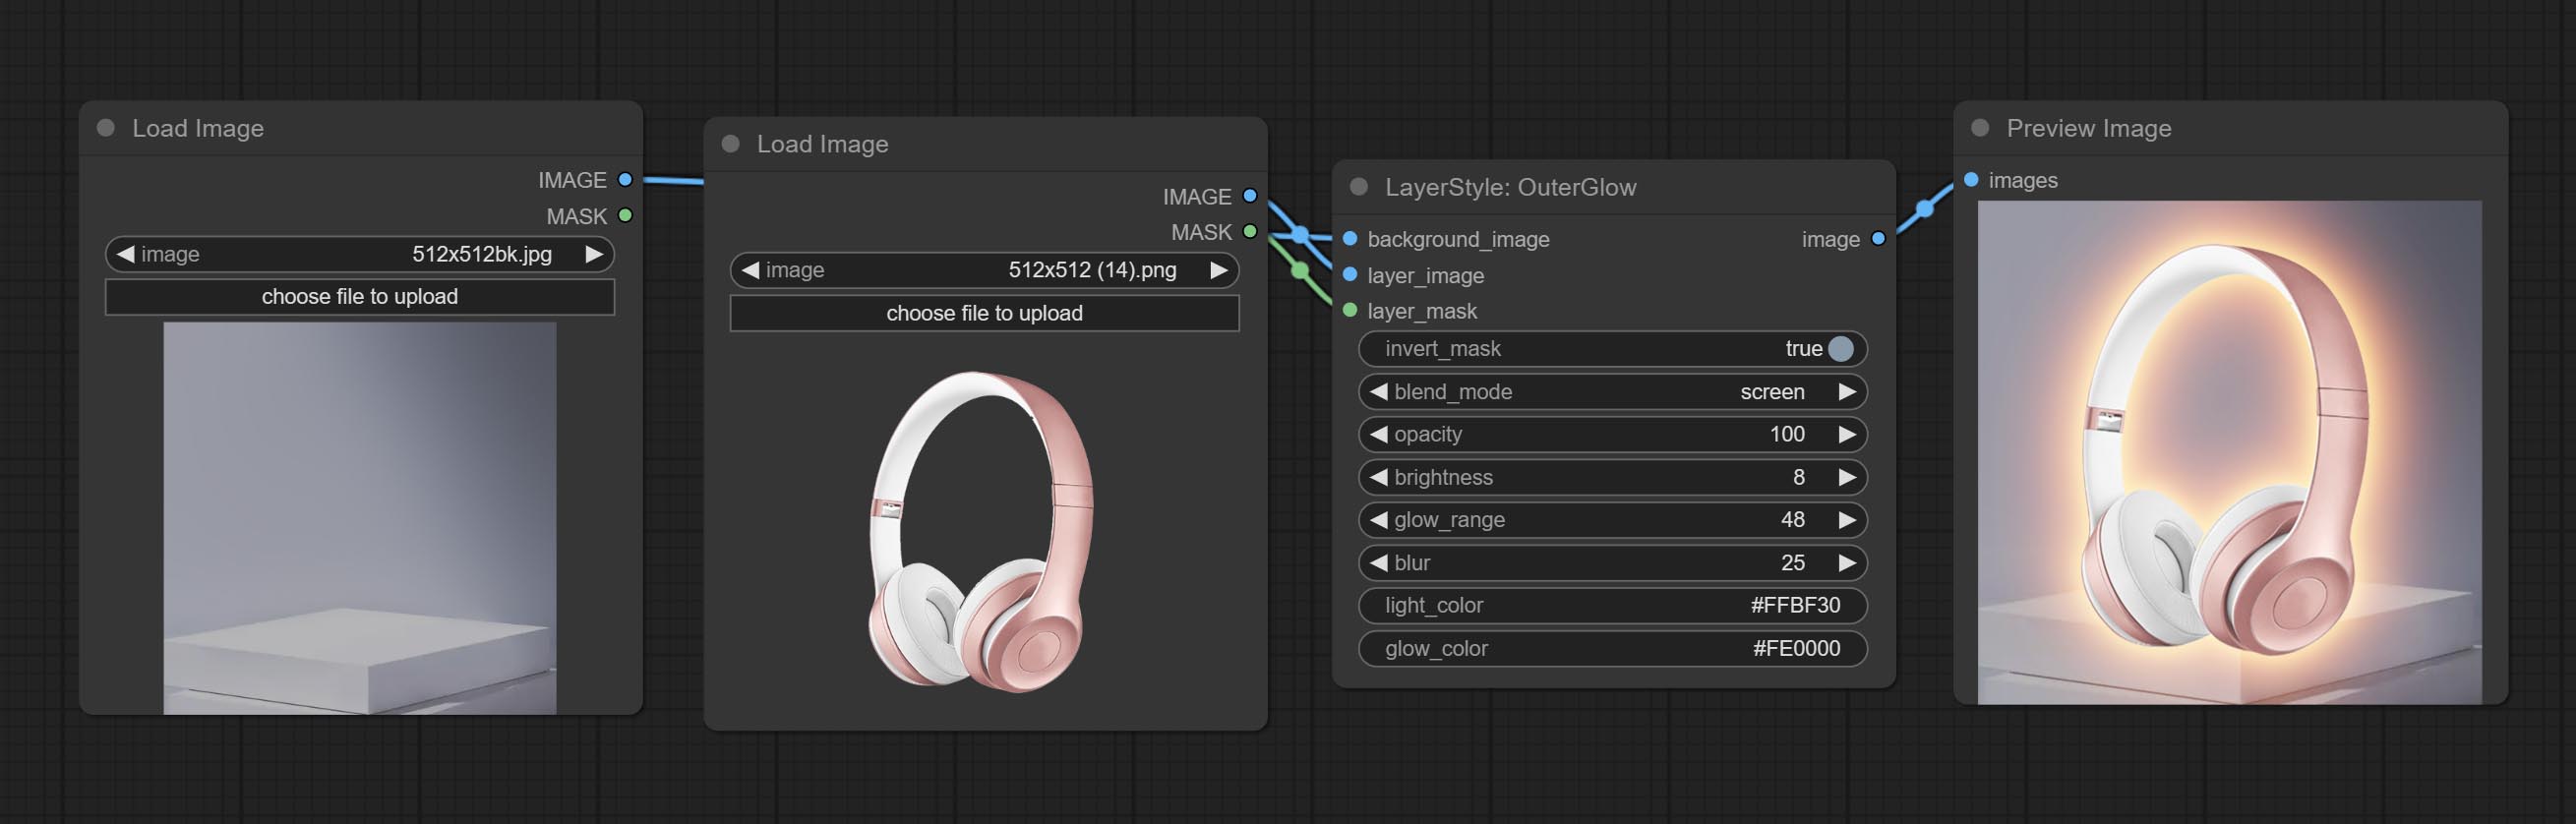
Options de nœud: 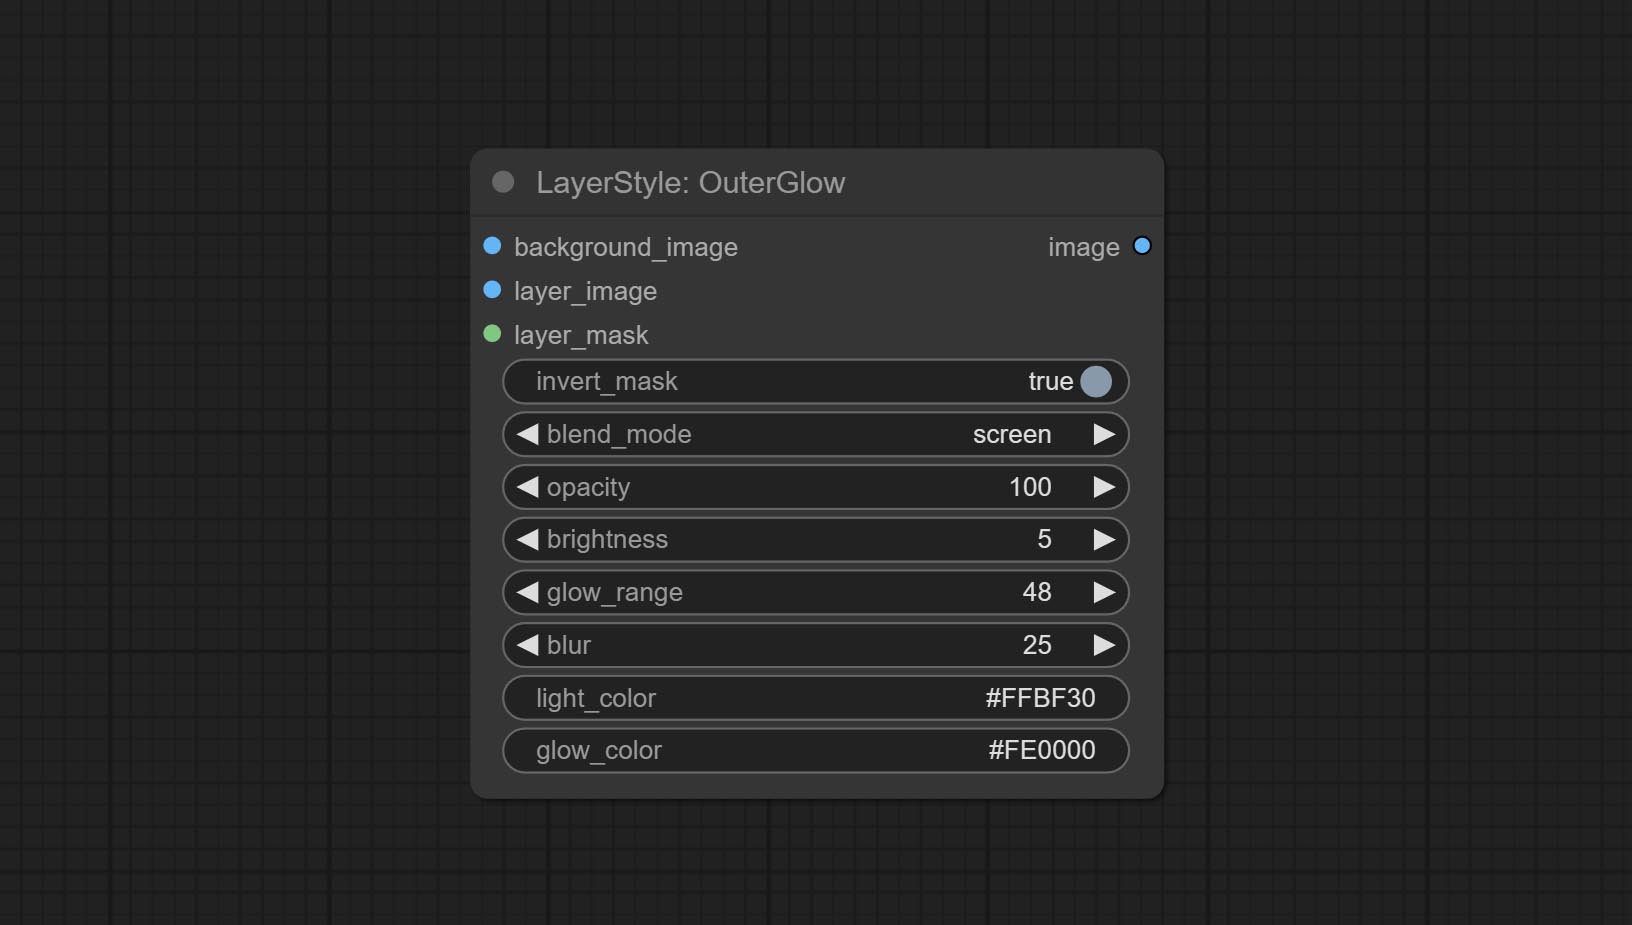
Générer l'ombre intérieure 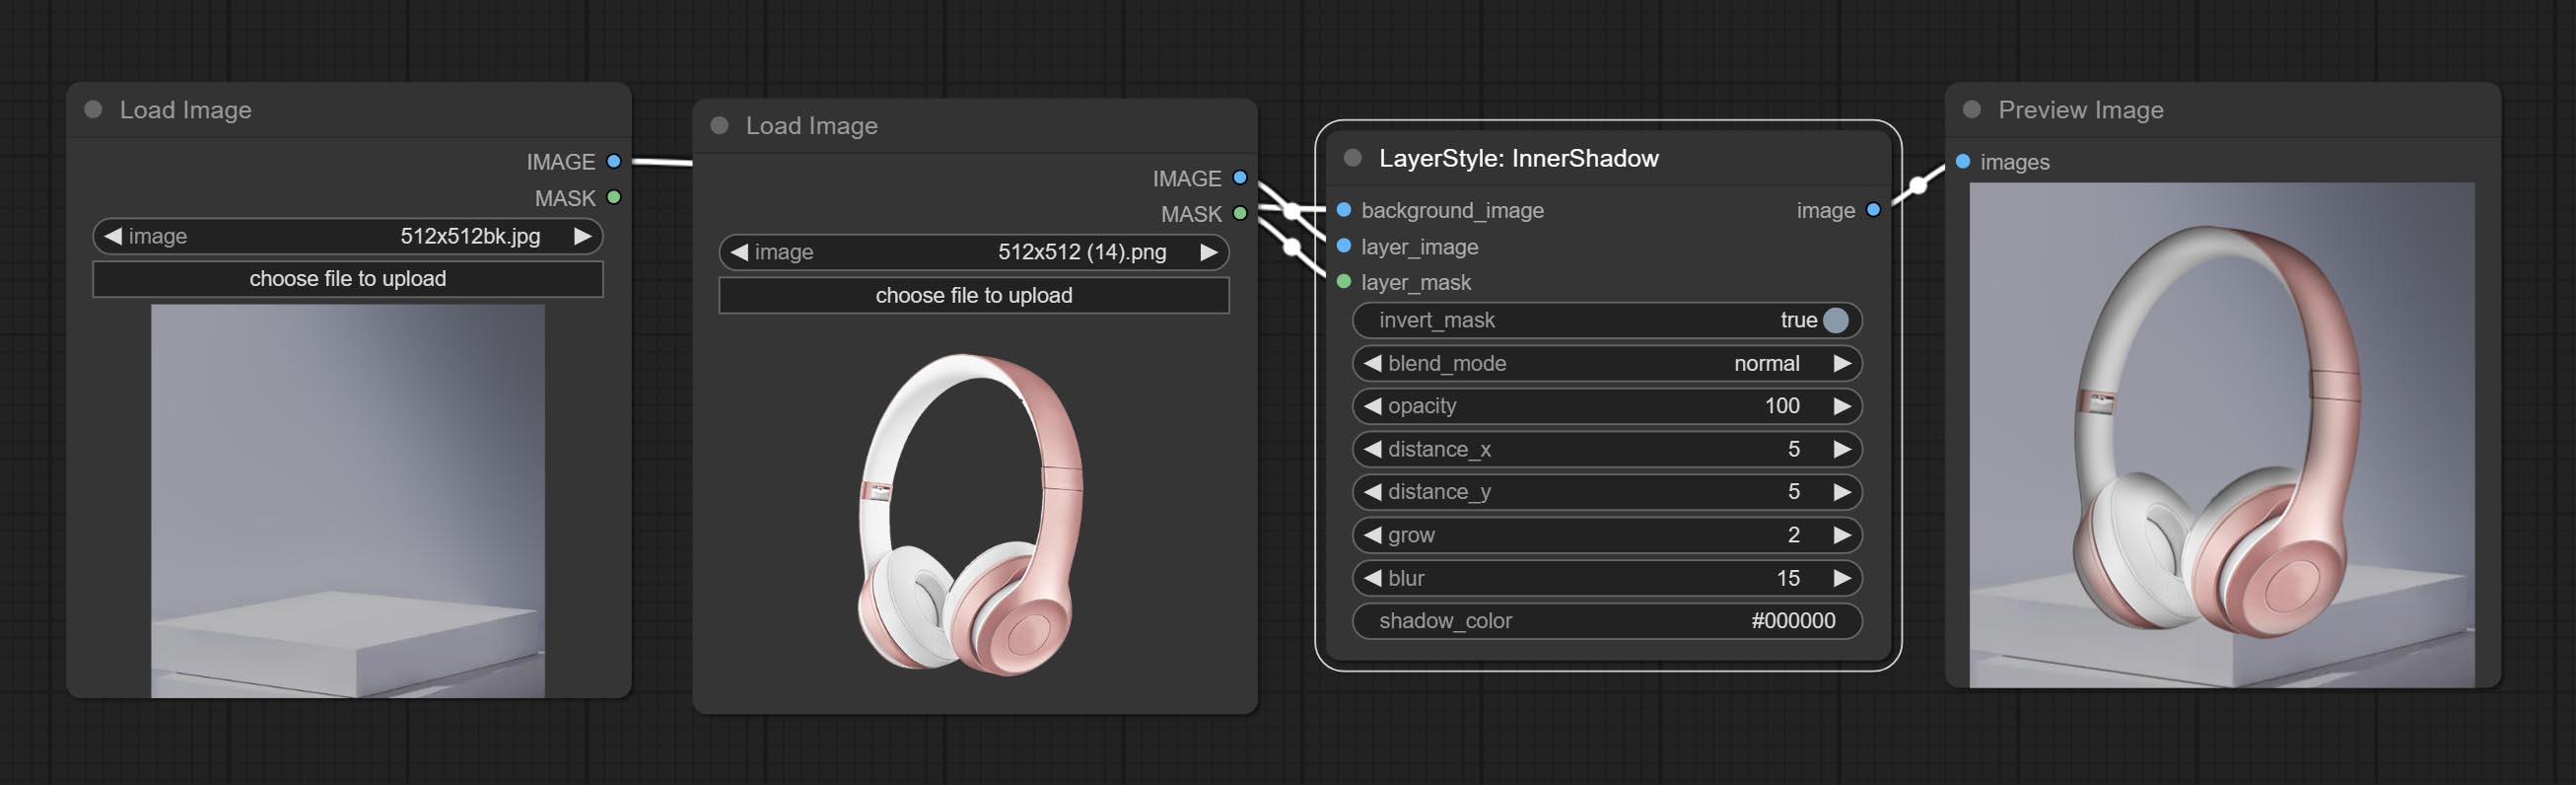
Options de nœud: 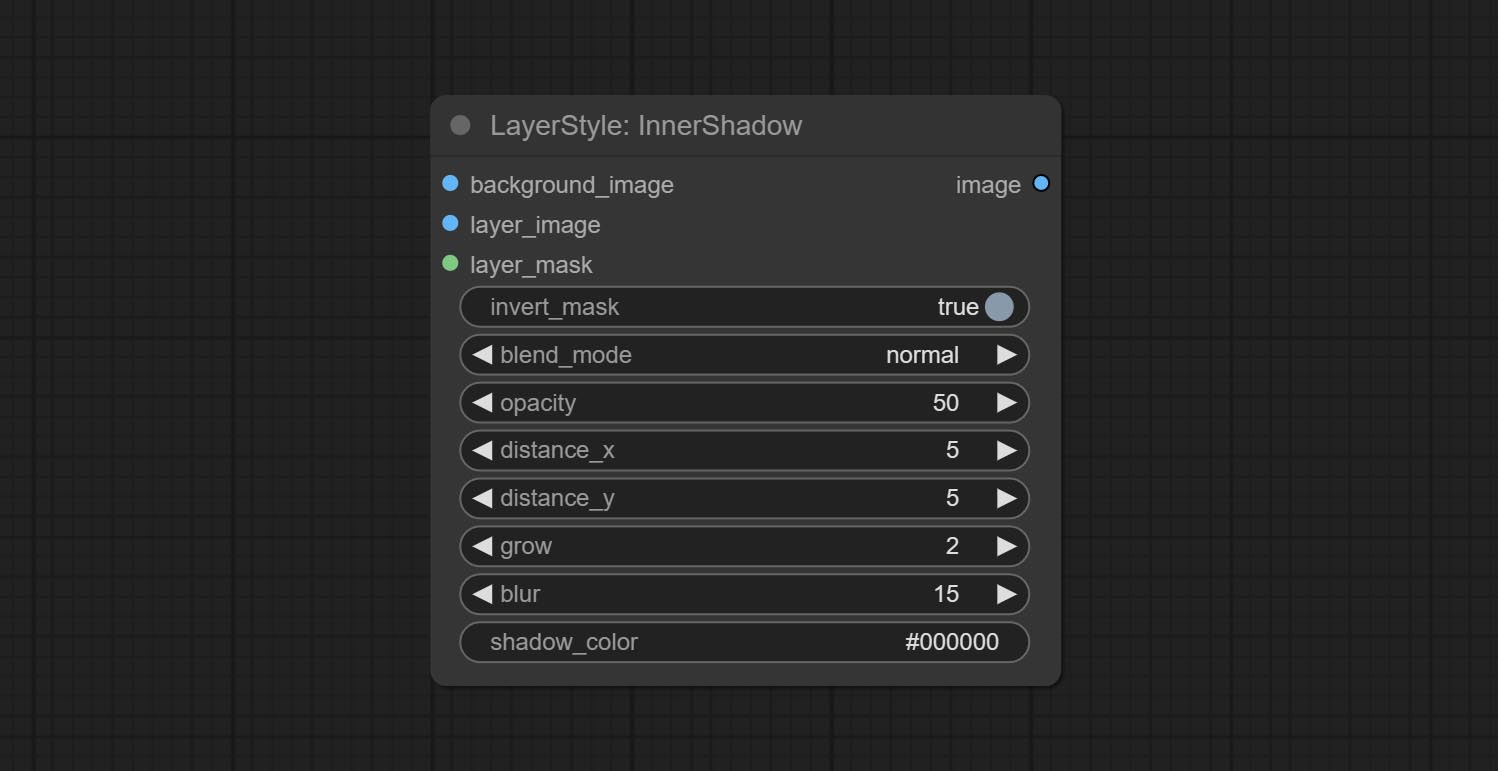
Générer une lueur intérieure 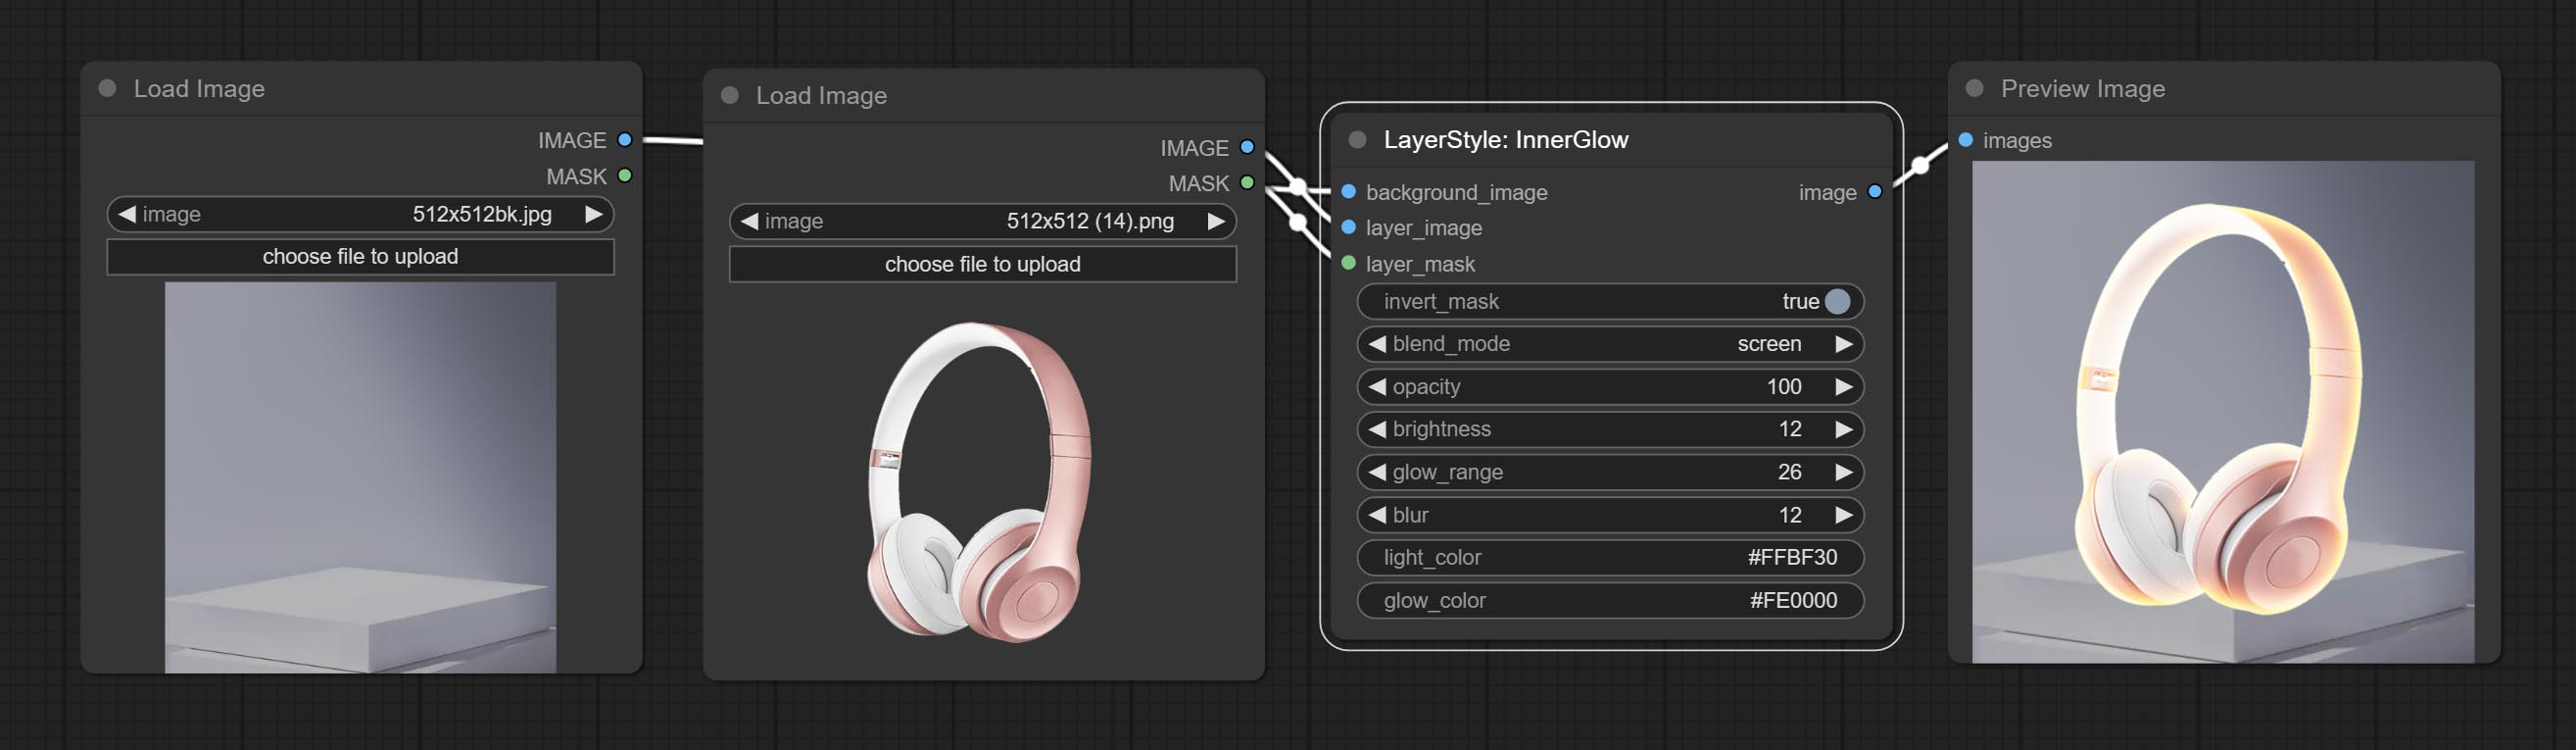
Options de nœud: 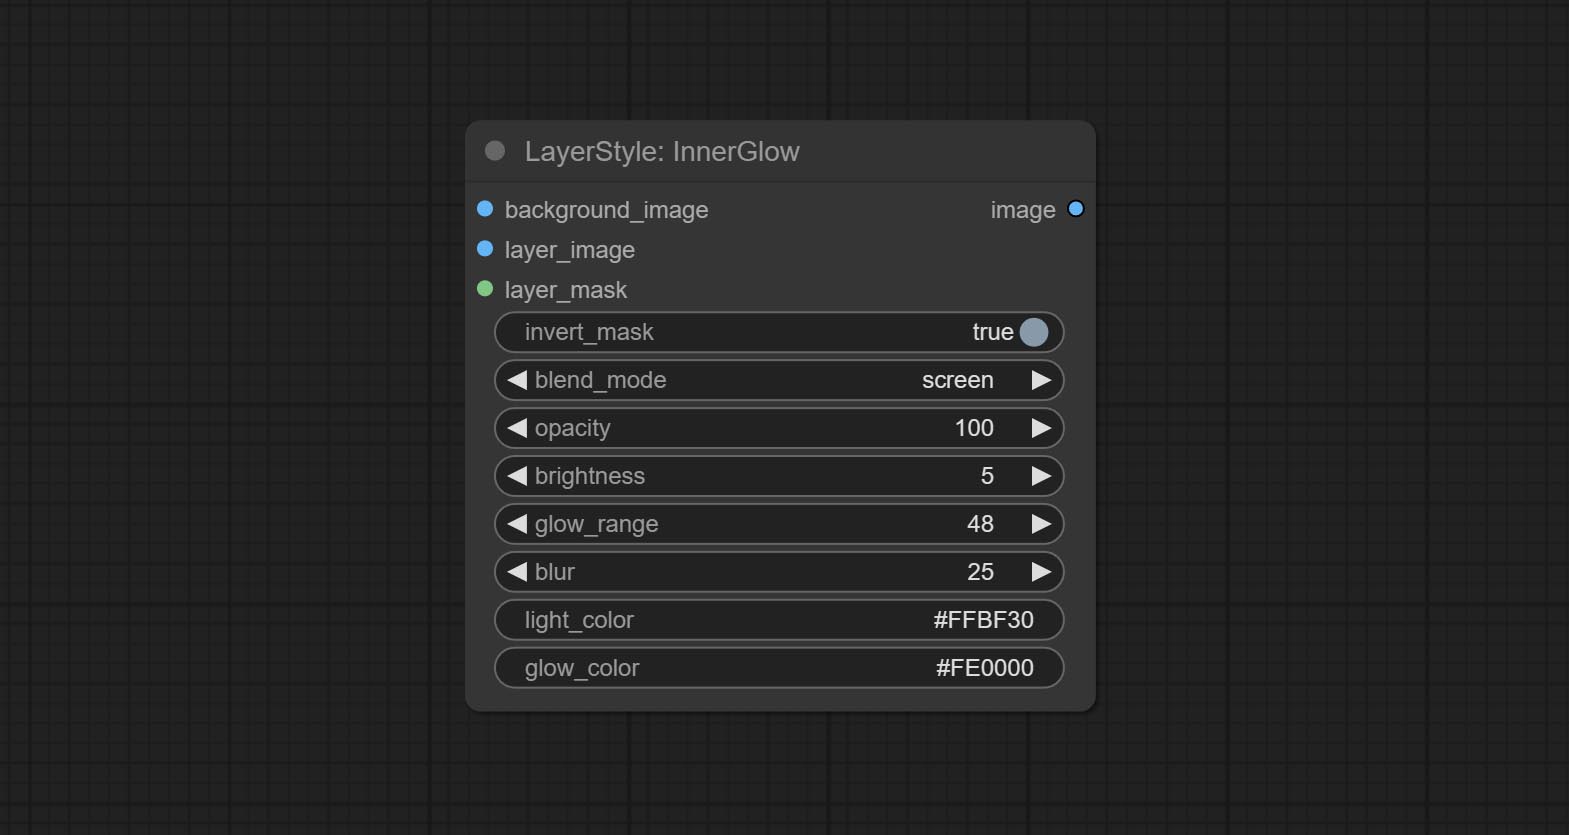
Générer une course de couche。 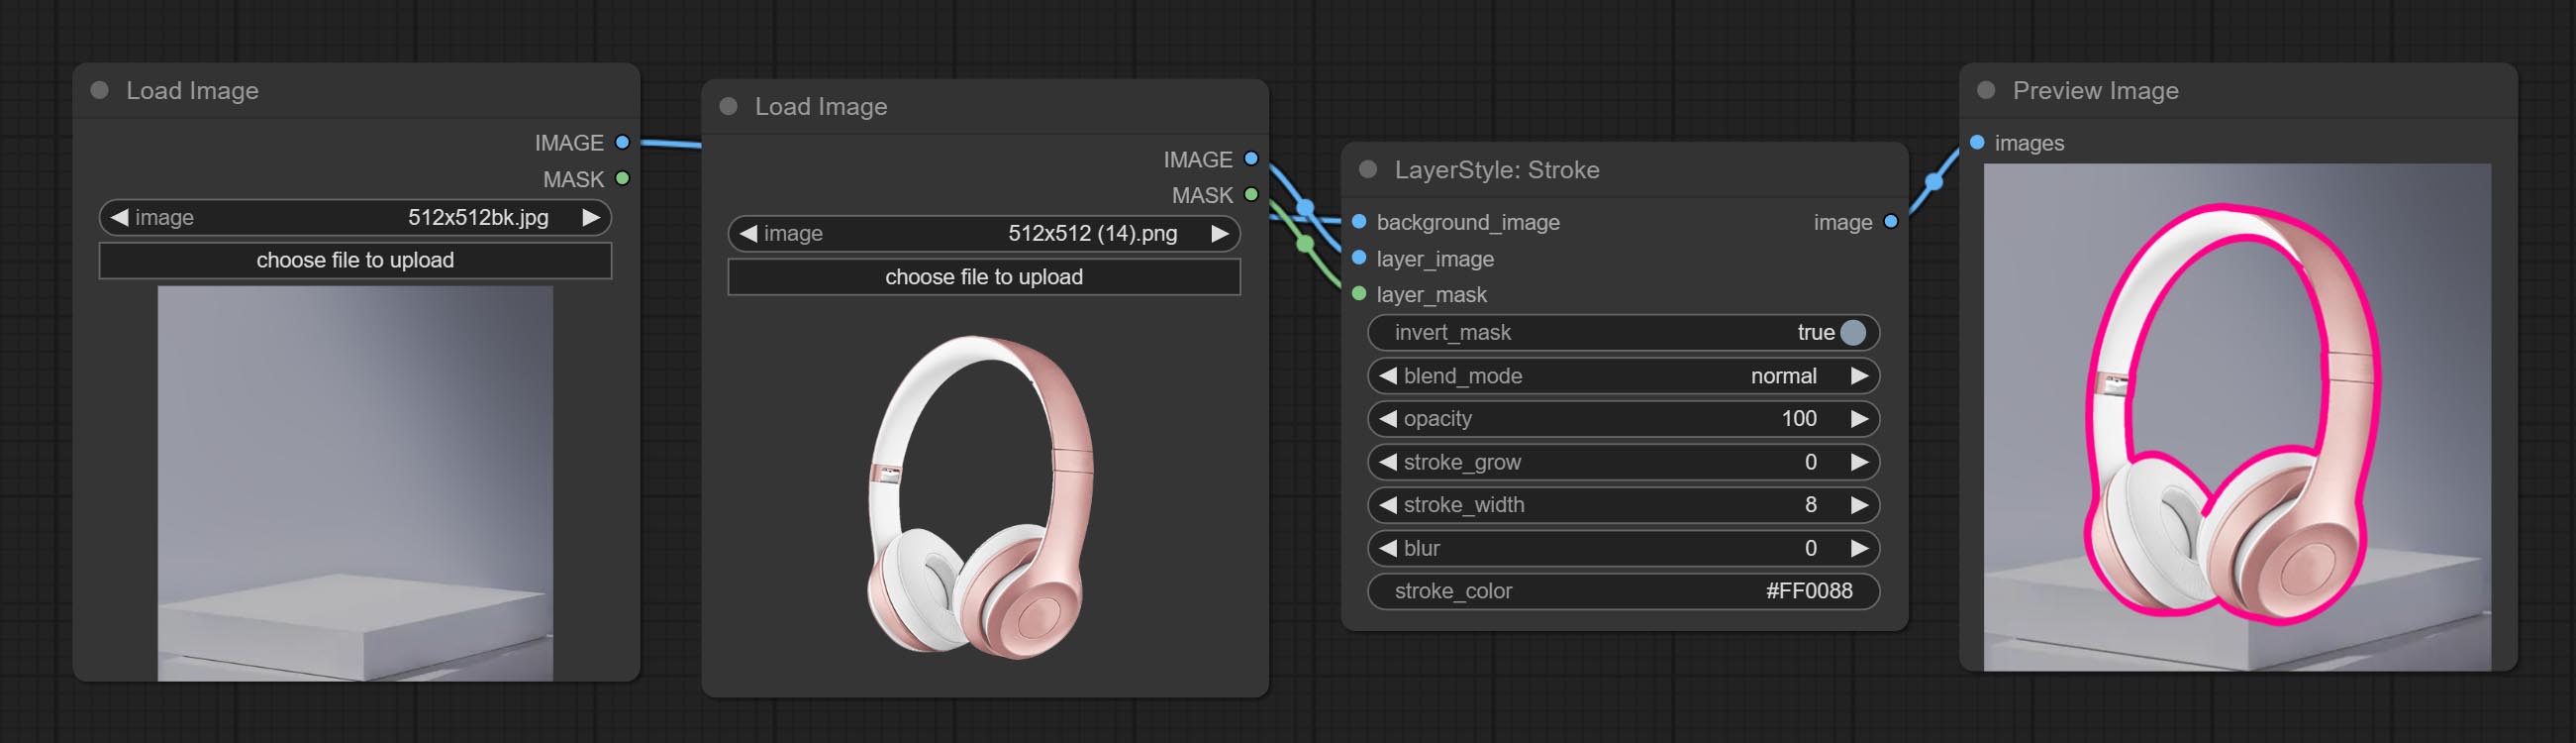
Options de nœud: 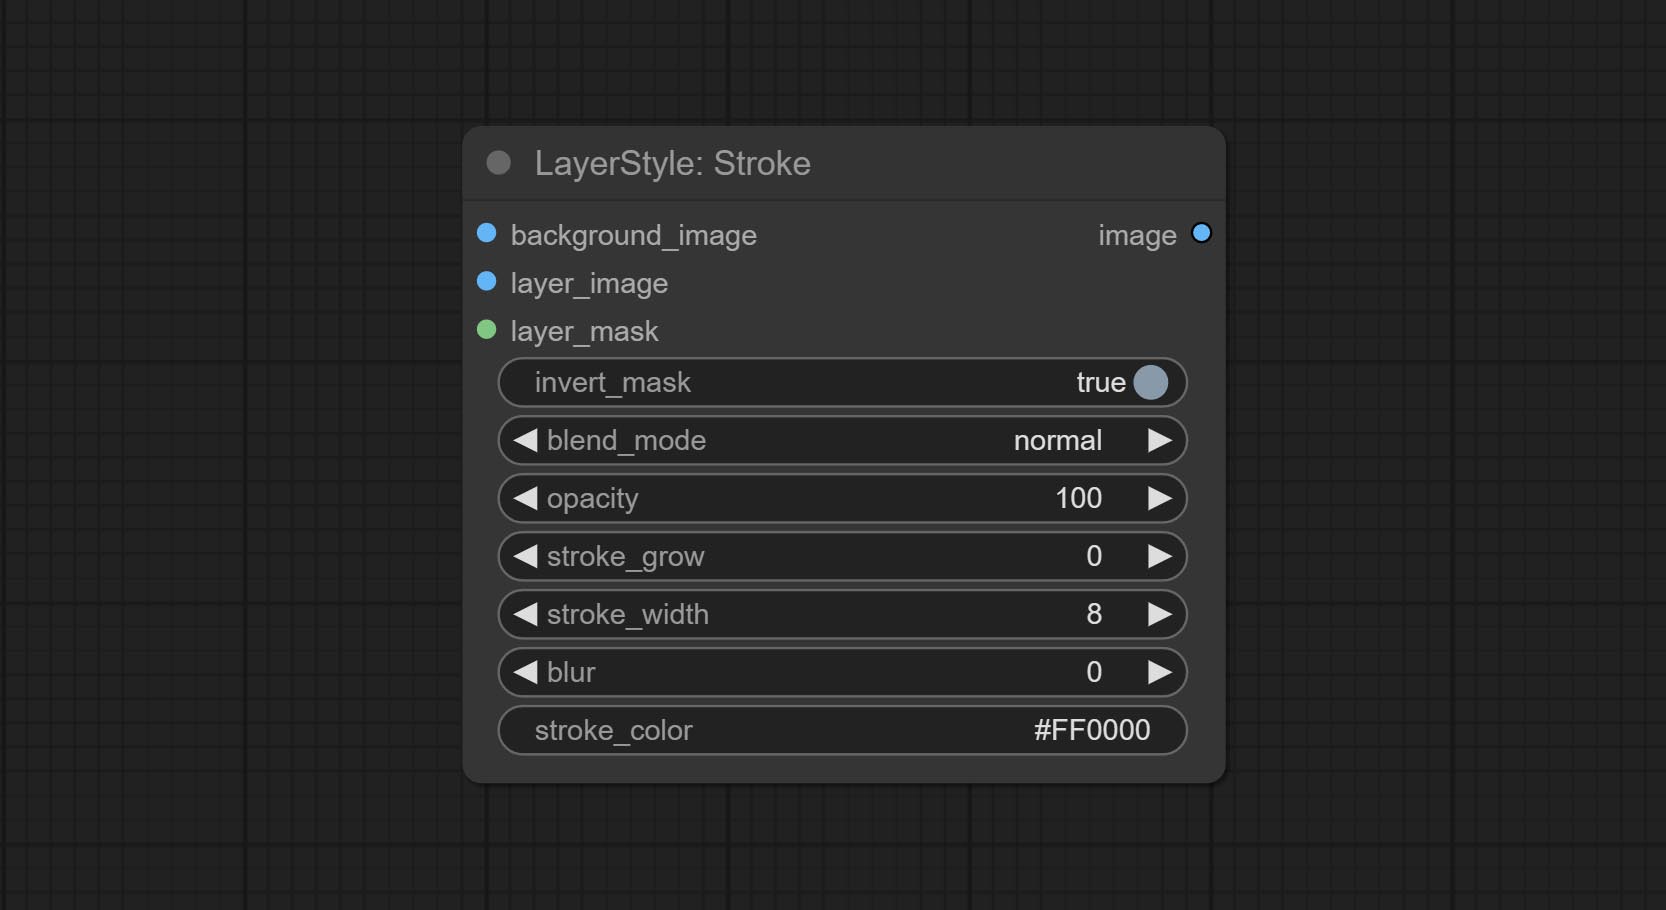
Générer une superposition de dégradé 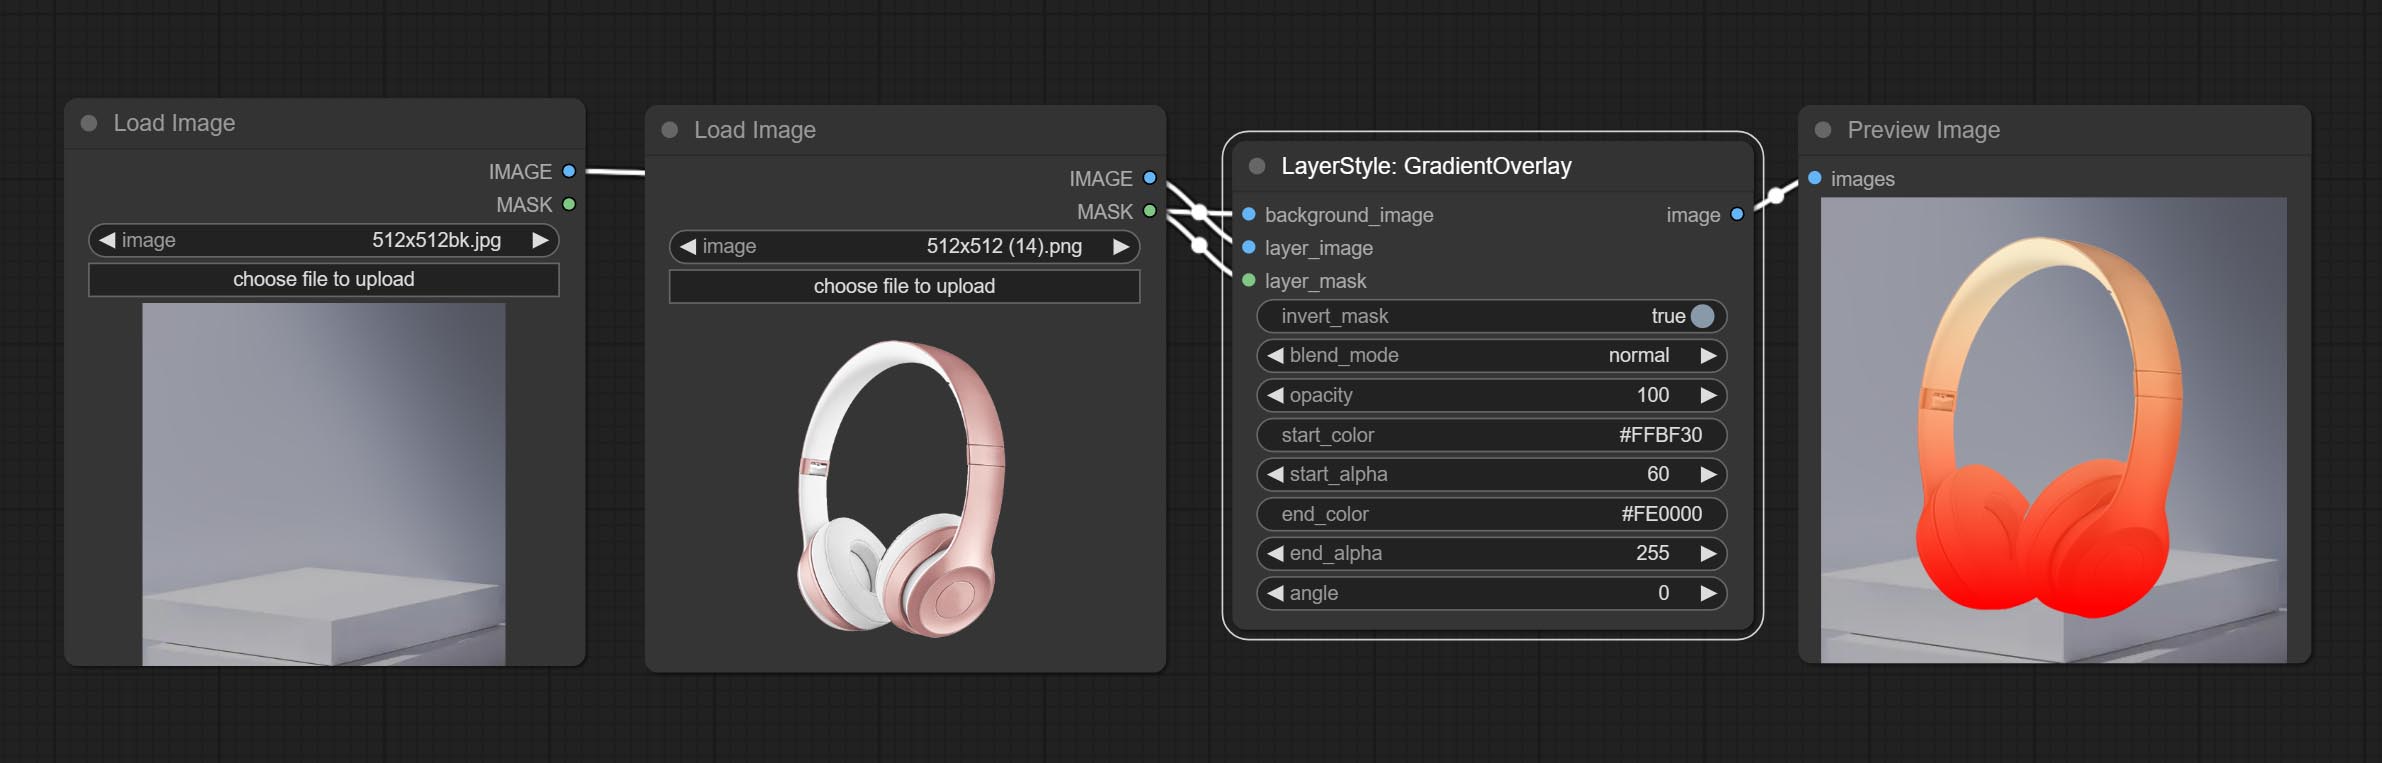
Options de nœud:
Generate color overlay 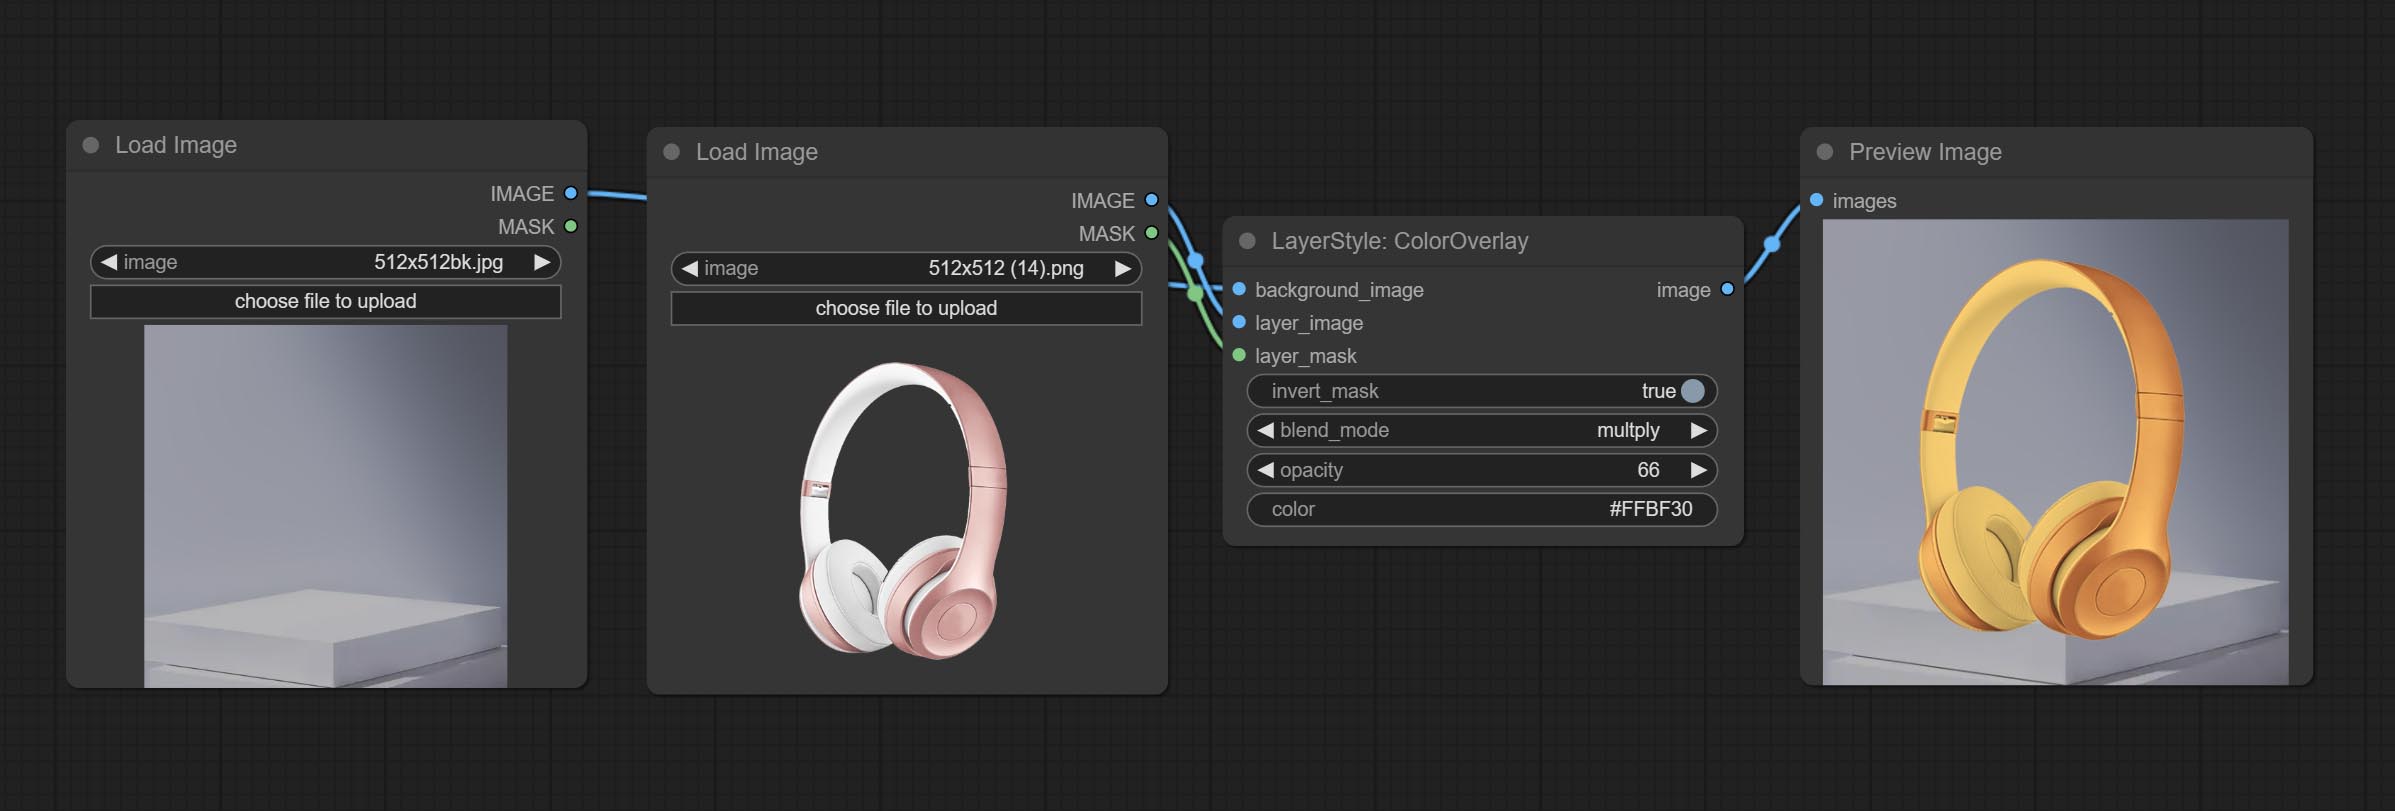
Node options: 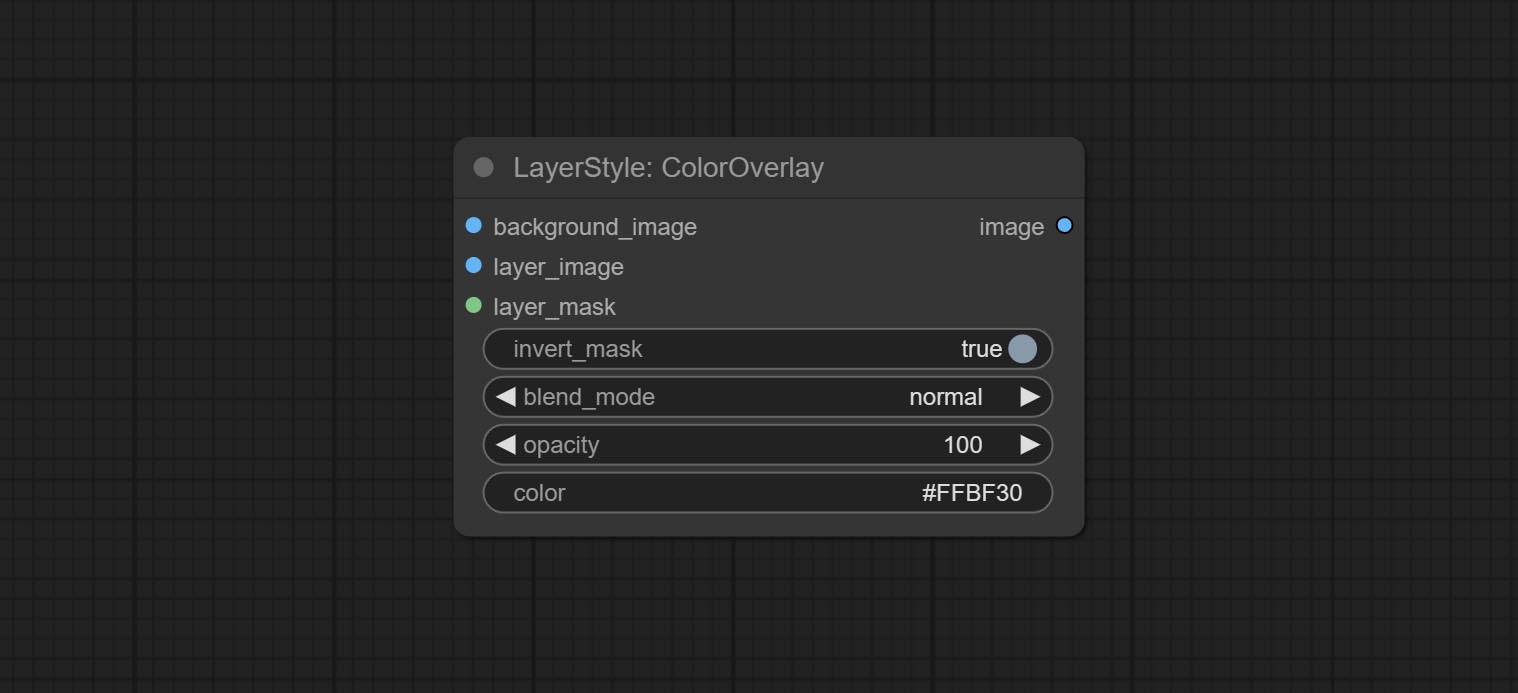
Apply LUT to the image. only supports .cube format. 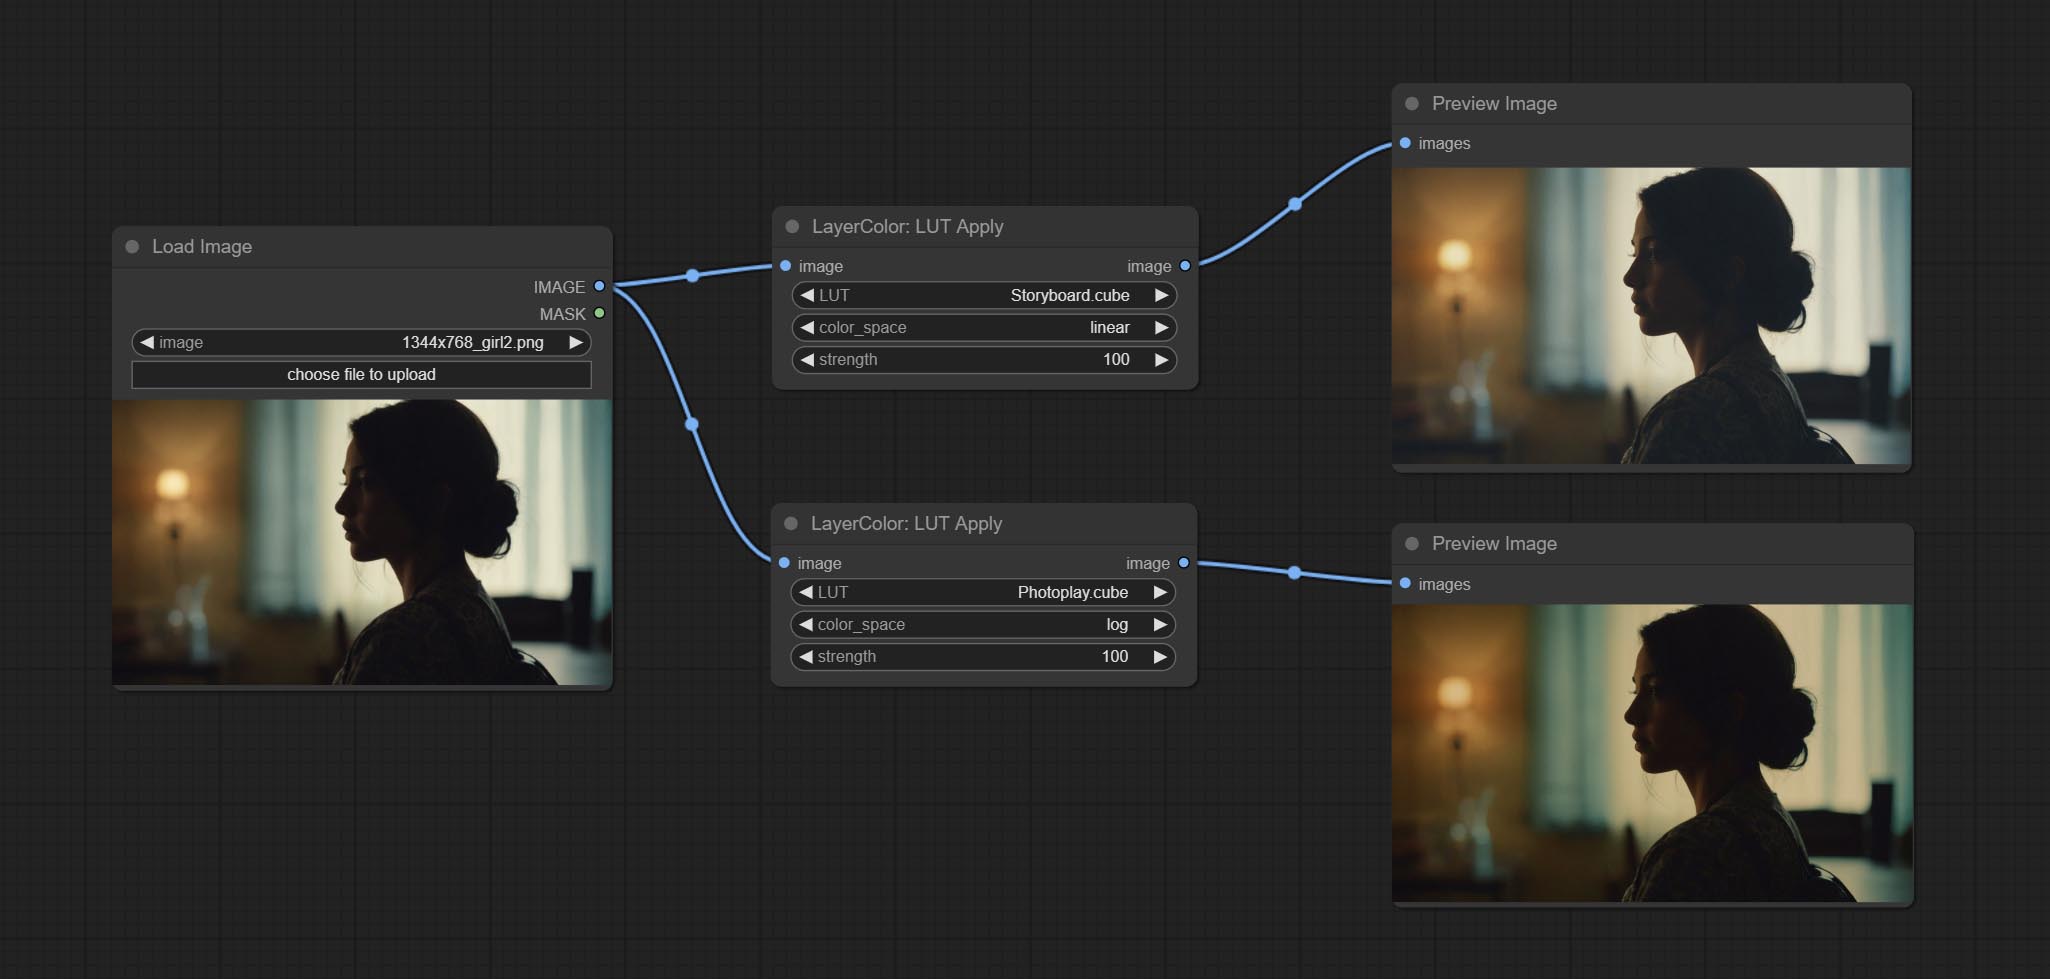
Node options: 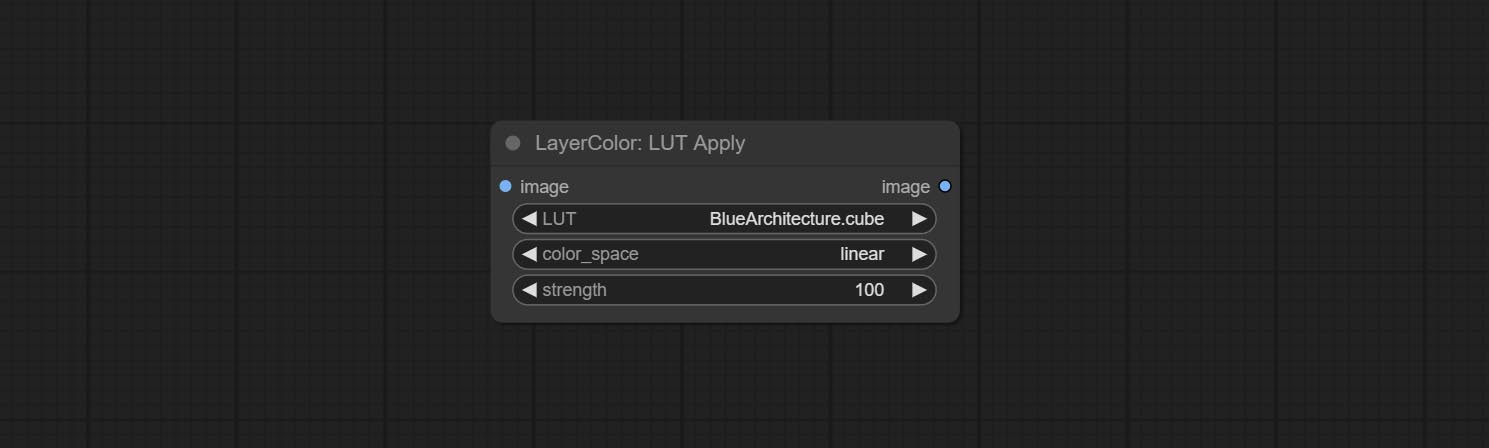
* LUT folder is defined in resource_dir.ini , this file is located in the root directory of the plug-in, and the default name is resource_dir.ini.example . to use this file for the first time, you need to change the file suffix to .ini . Open the text editing software and find the line starting with "LUT_dir=", after "=", enter the custom folder path name. support defining multiple folders in resource-dir.ini , separated by commas, semicolons, or spaces. all .cube files in this folder will be collected and displayed in the node list during ComfyUI initialization. If the folder set in ini is invalid, the LUT folder that comes with the plugin will be enabled.
Automatically adjust the brightness, contrast, and white balance of the image. Provide some manual adjustment options to compensate for the shortcomings of automatic adjustment. 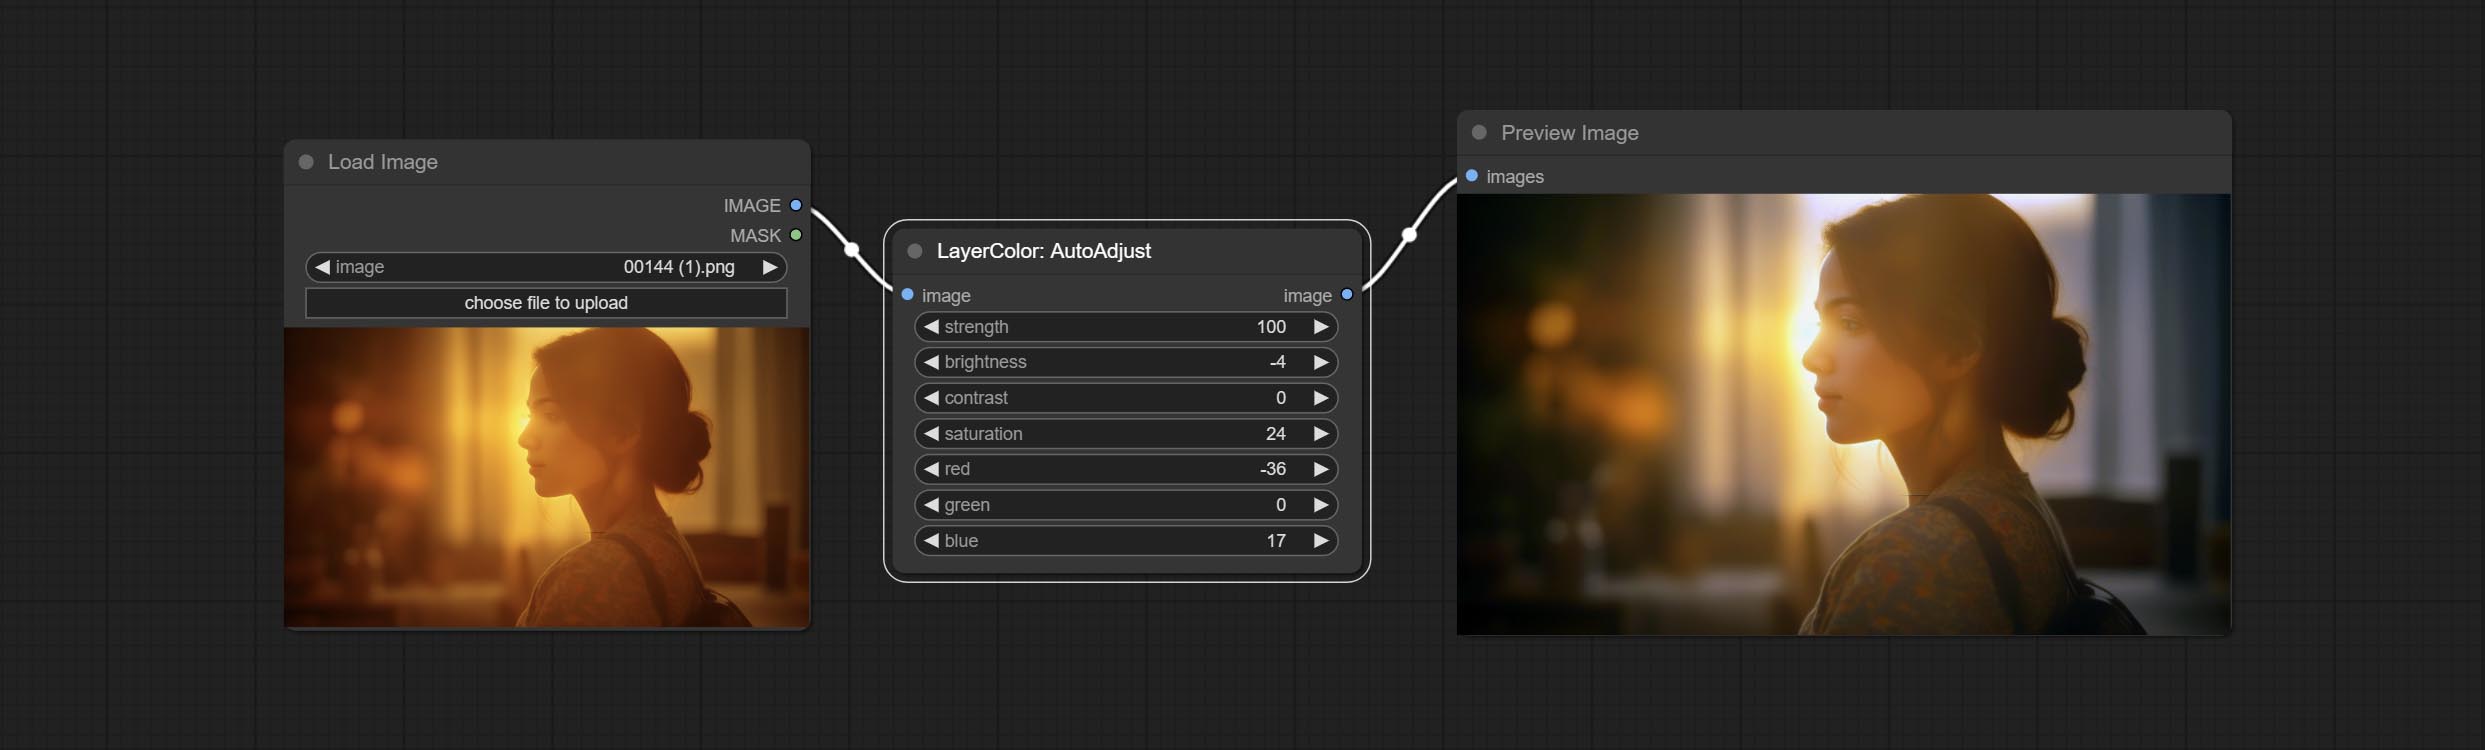
Node Options: 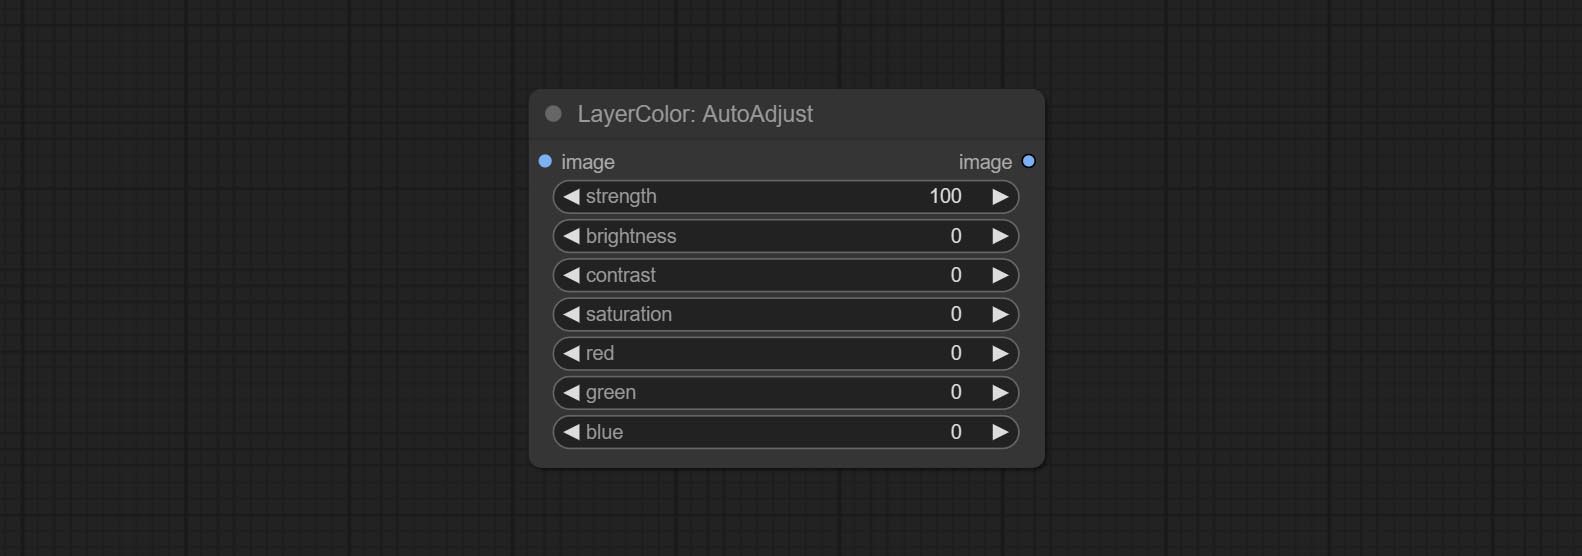
On the basis of AutoAdjust, add mask input and only calculate the content inside the mask for automatic color adjustment. Add multiple automatic adjustment modes. 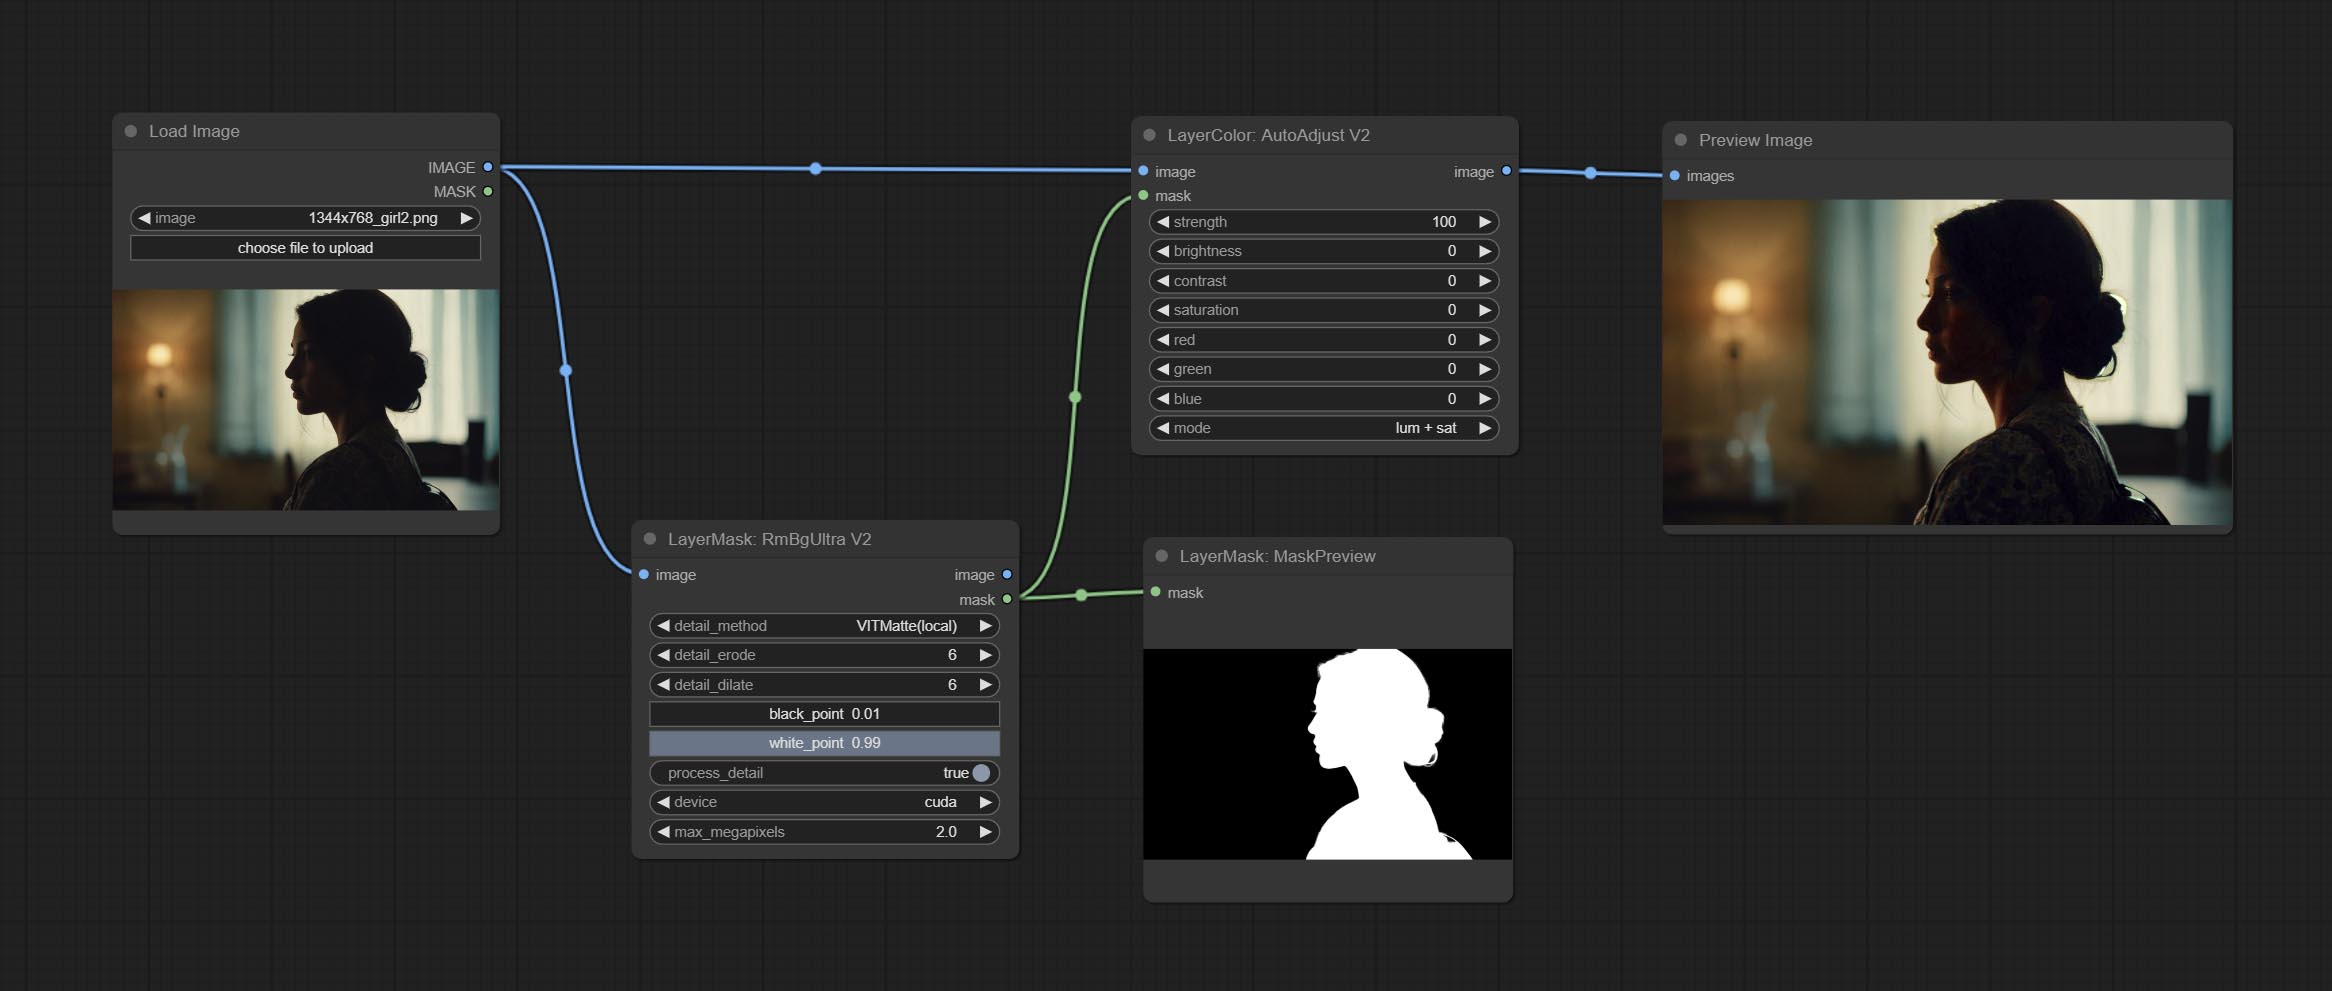
The following changes have been made based on AutoAdjust: 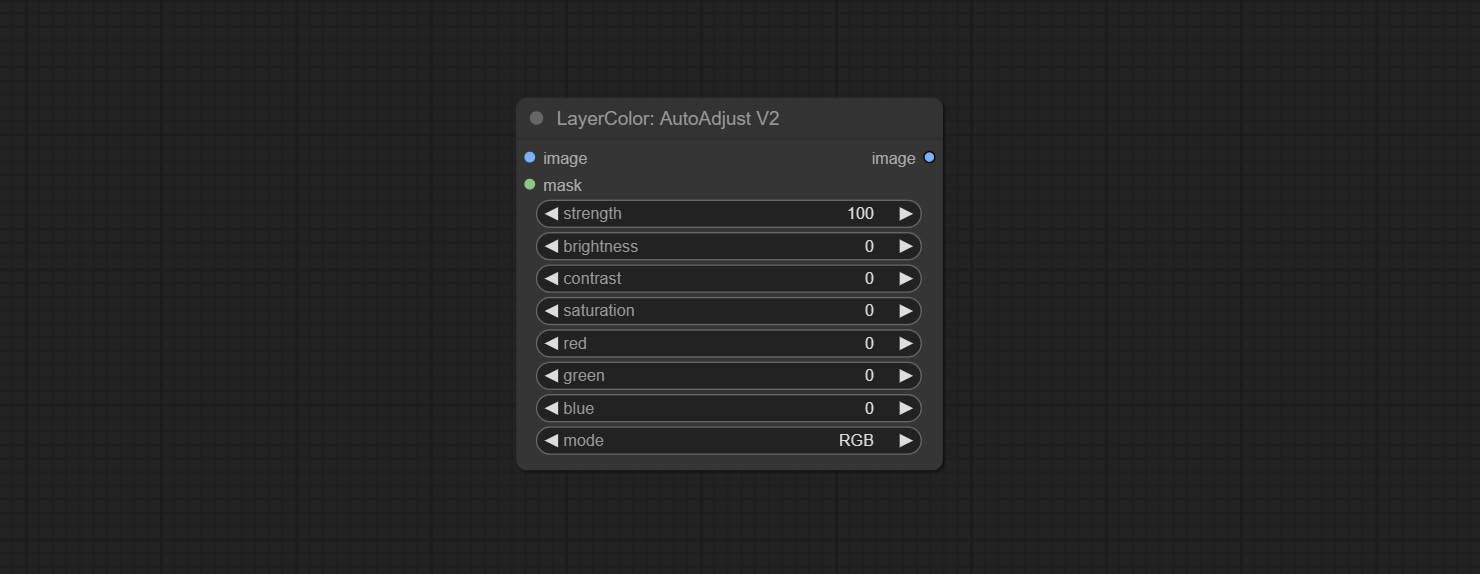
Automatically adjust too dark or too bright image to moderate brightness, and support mask input. When mask input, only the content of the mask part is used as the data source of the automatic brightness. The output is still the whole adjusted image. 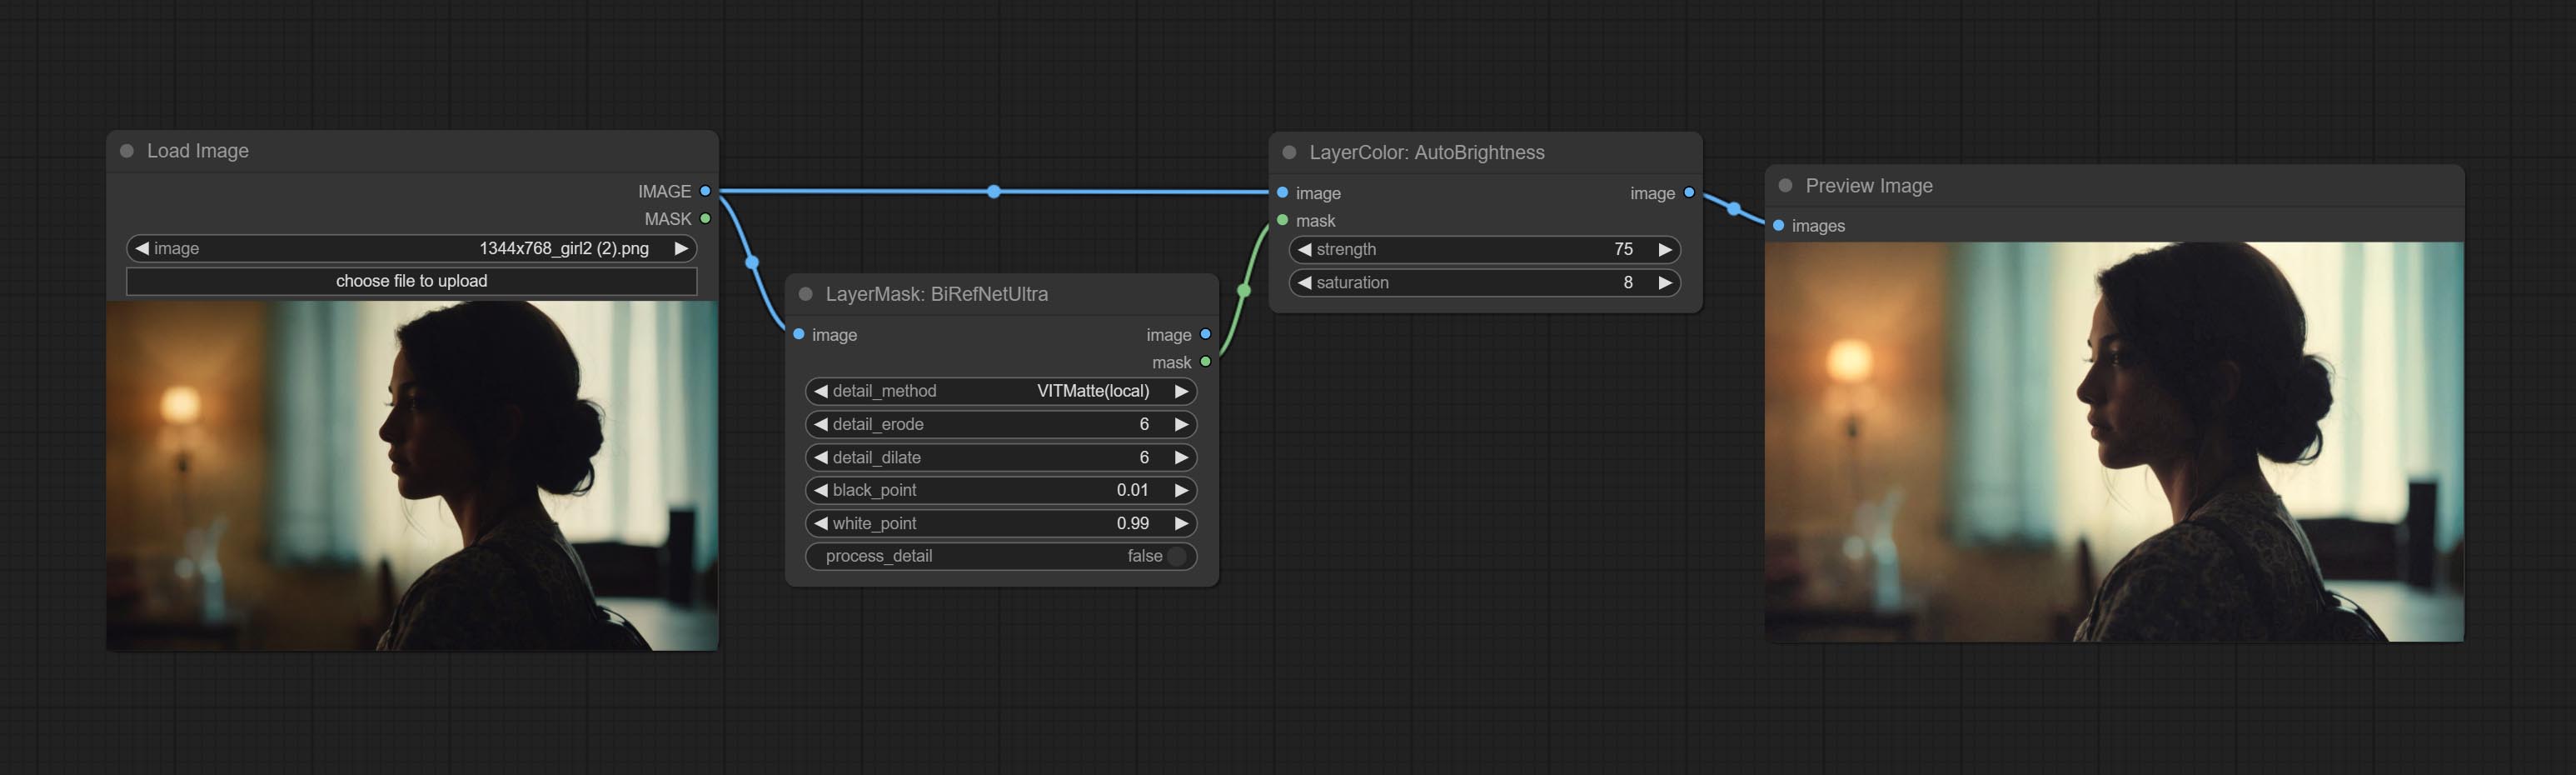
Node options: 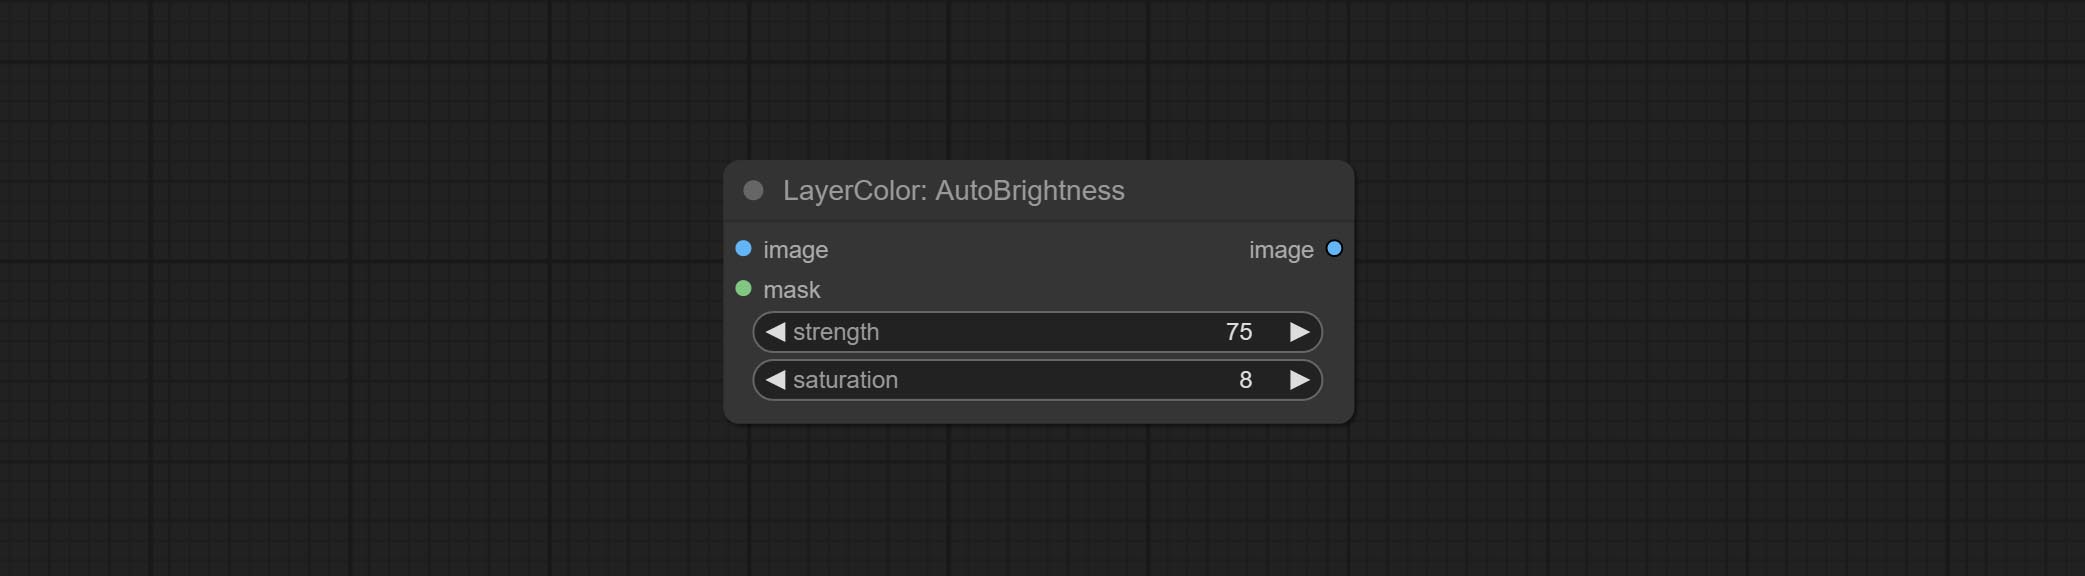
Auto adjust the color tone of the image to resemble the reference image. 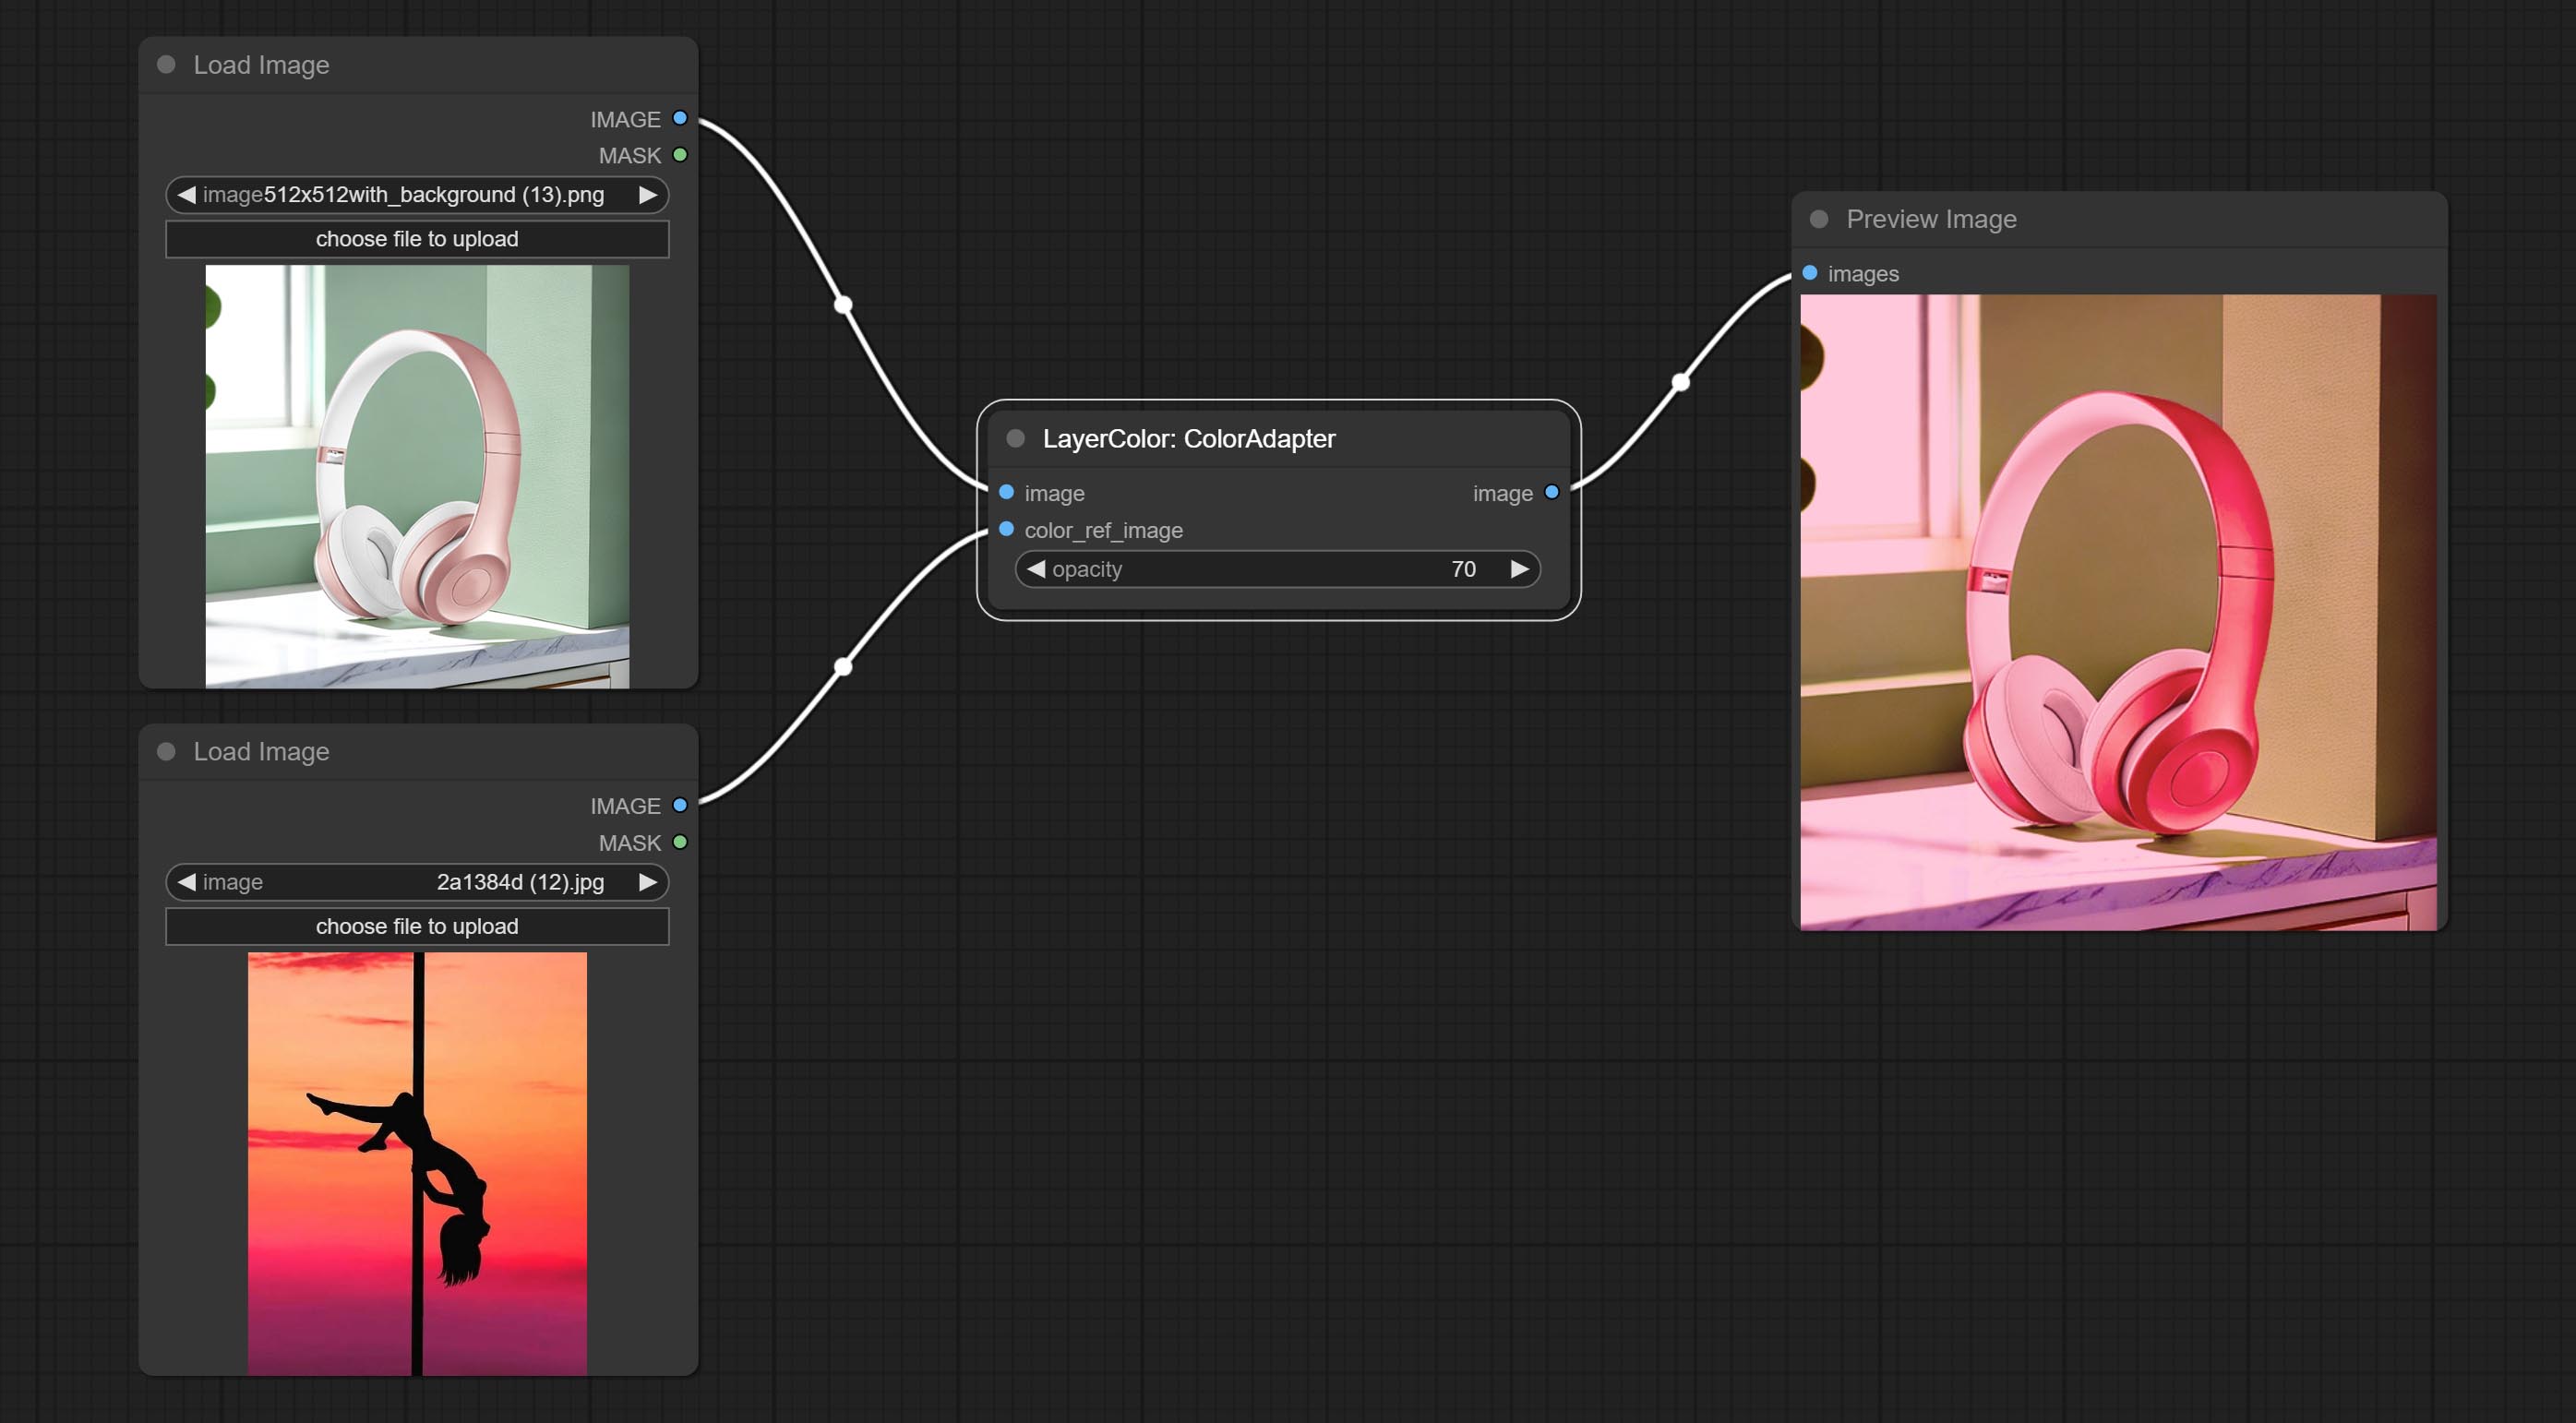
Node options: 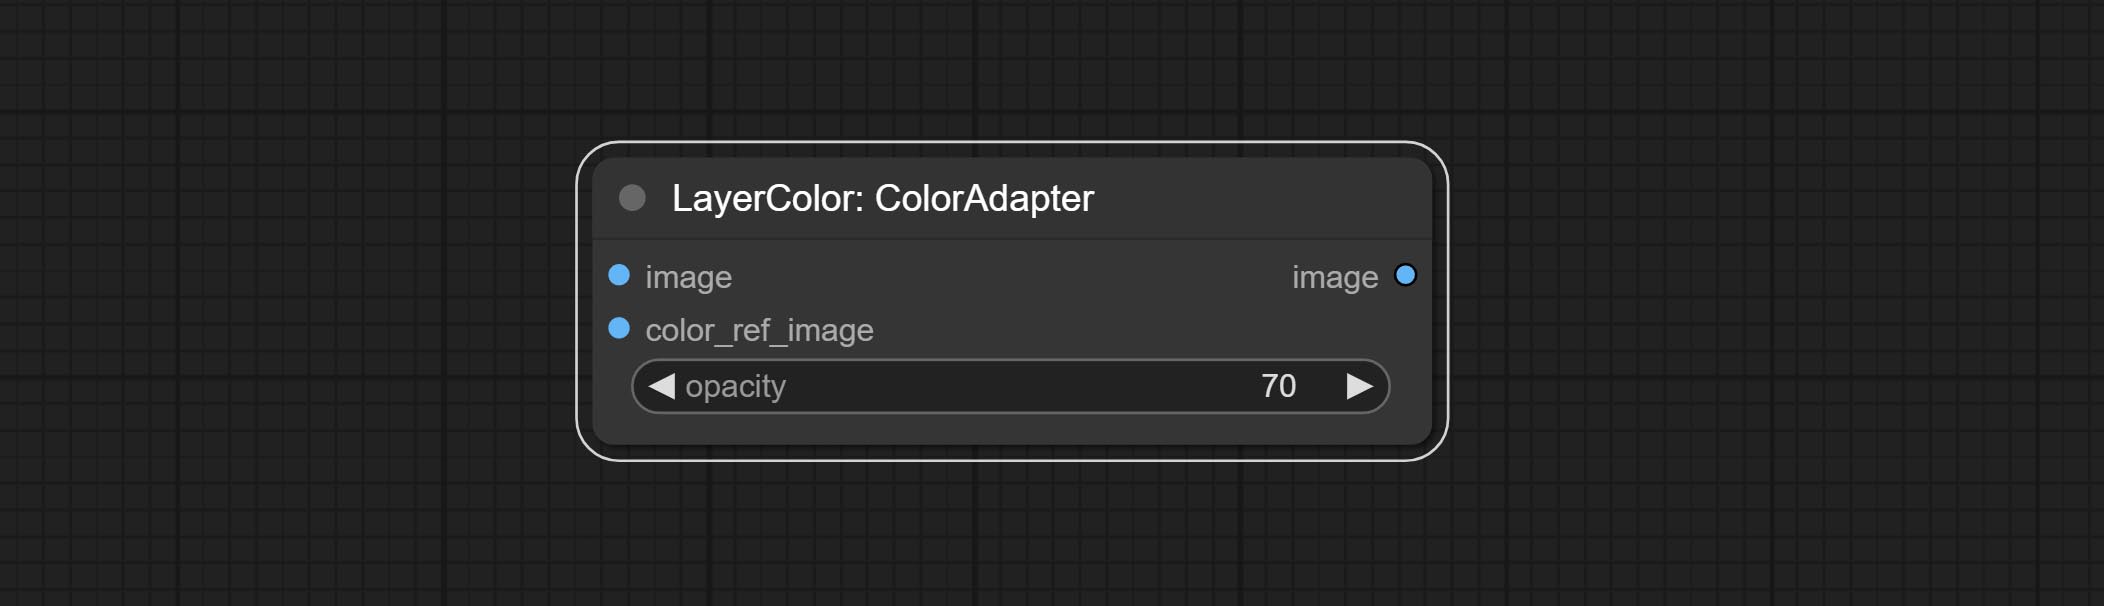
Change the exposure of the image. 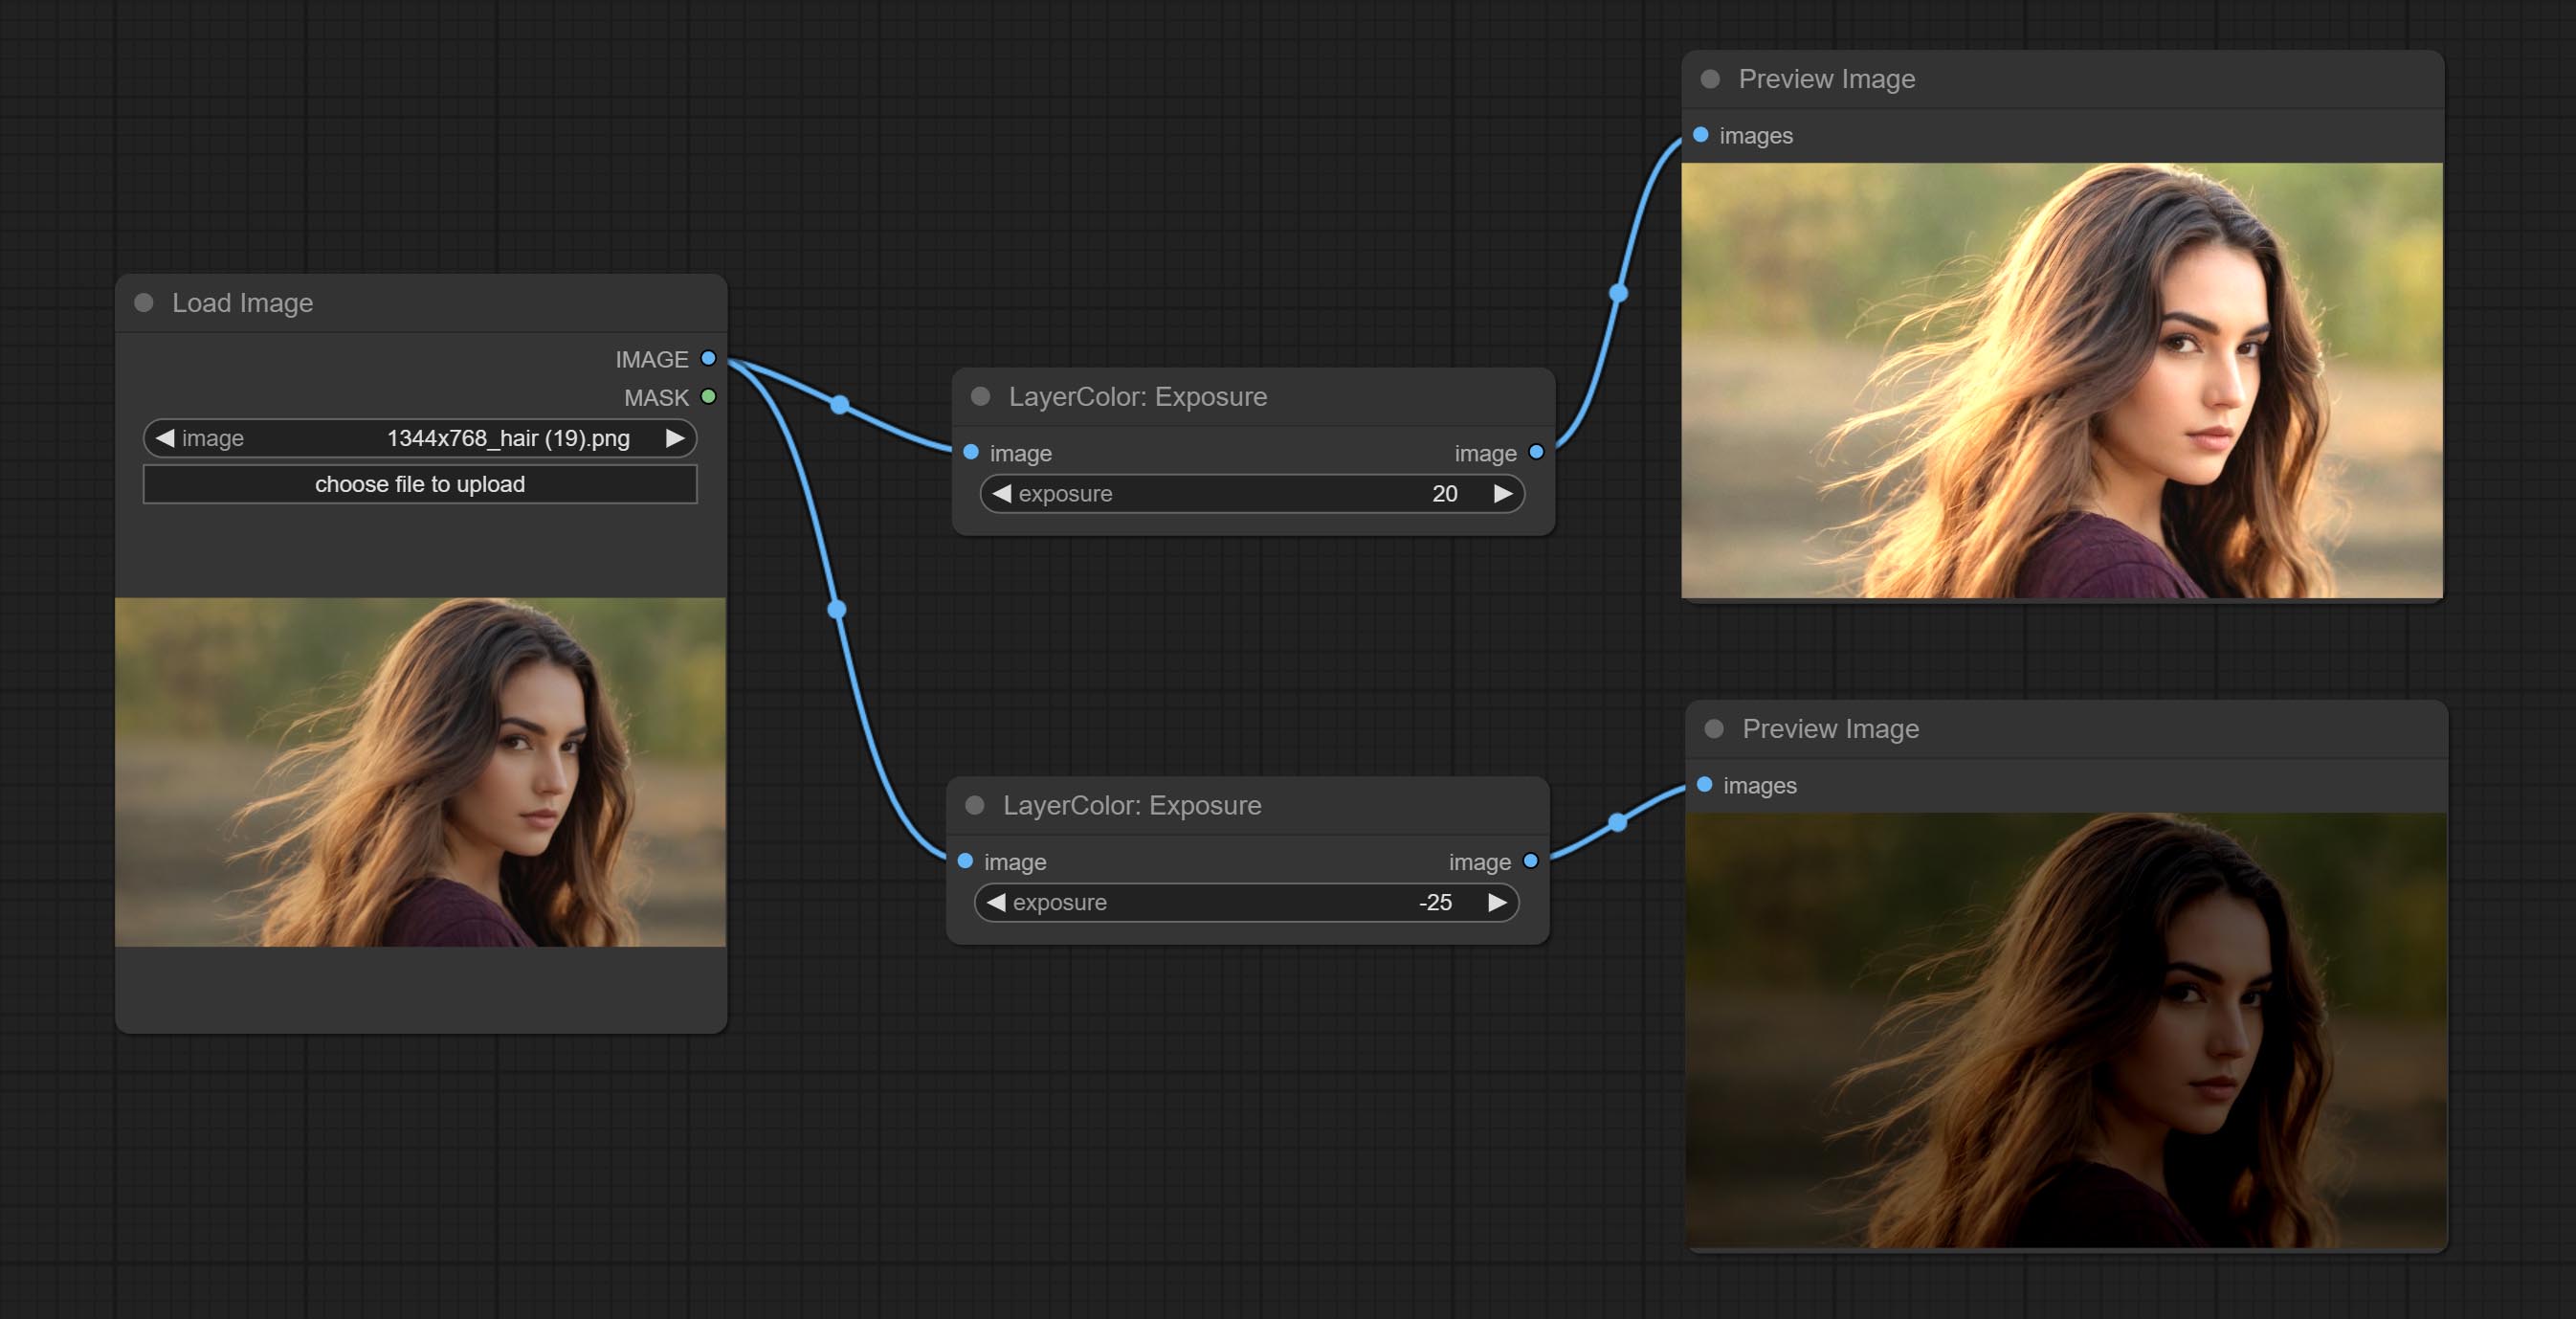
Adjust the color of the dark and bright parts of the image. 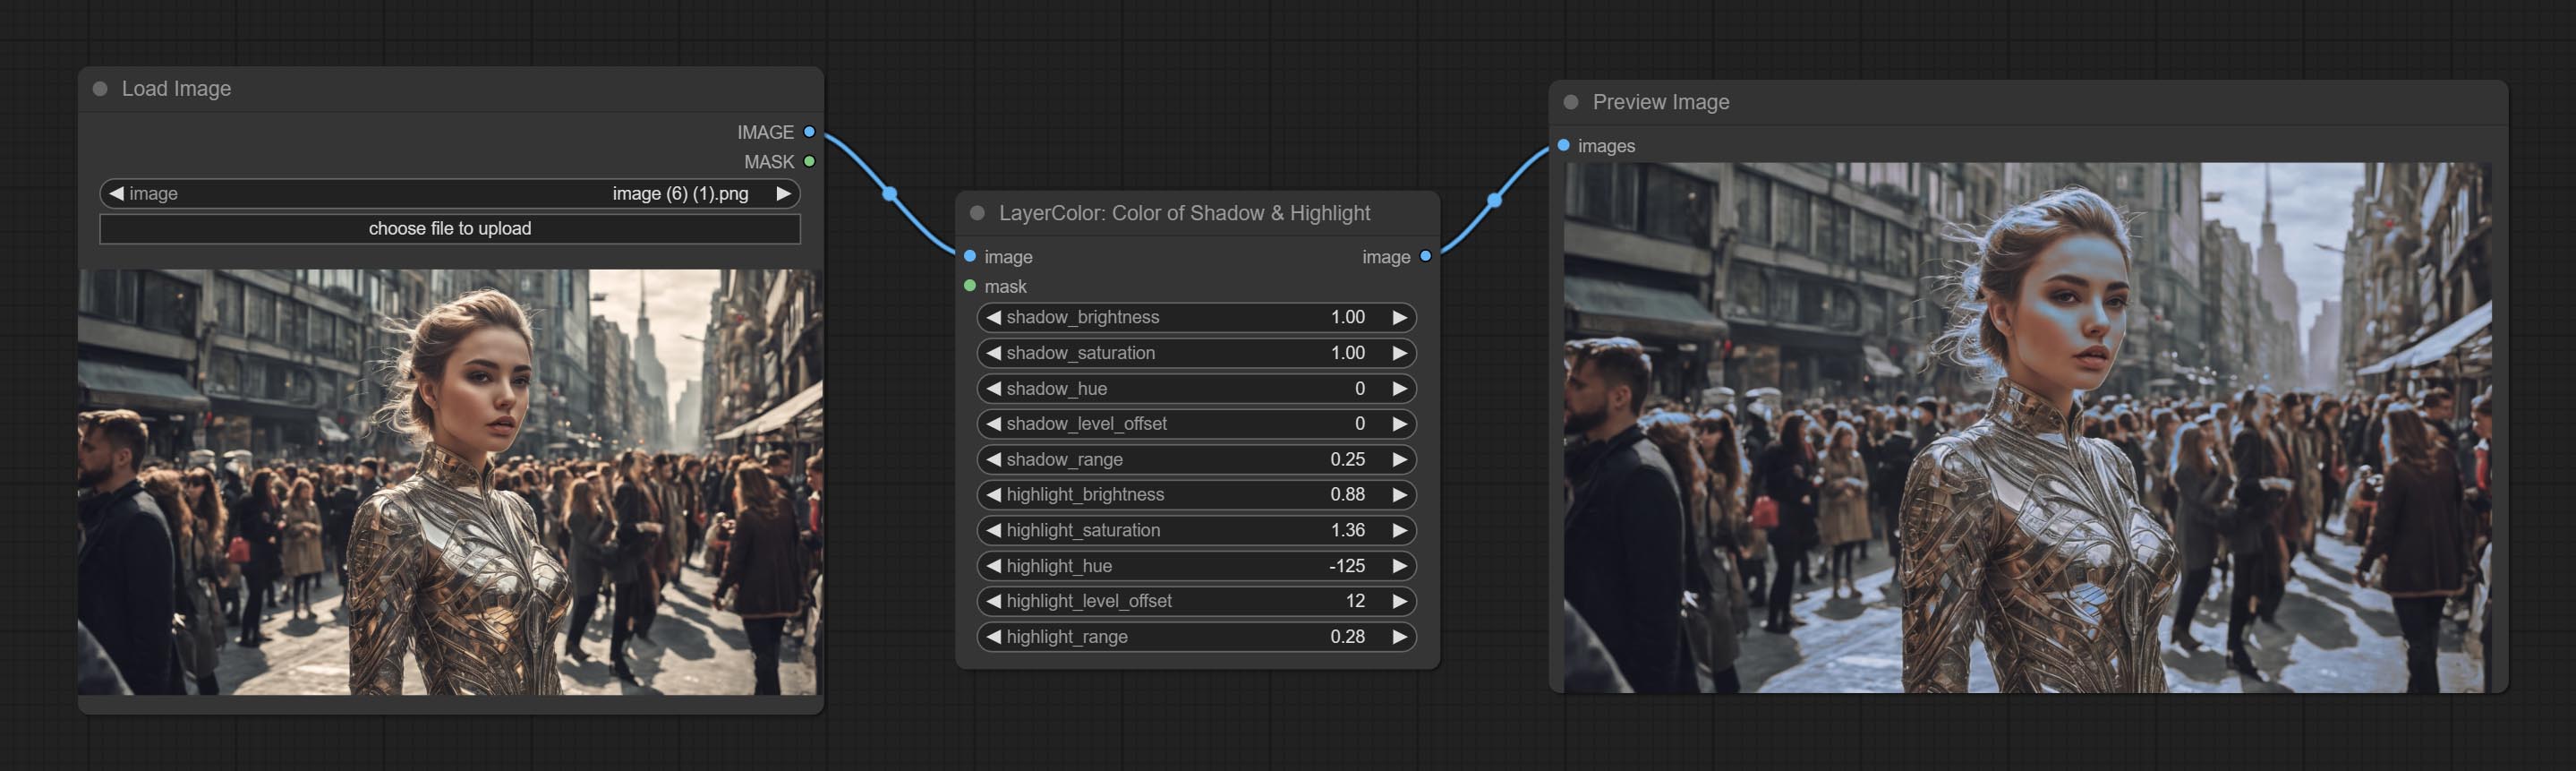
Node options: 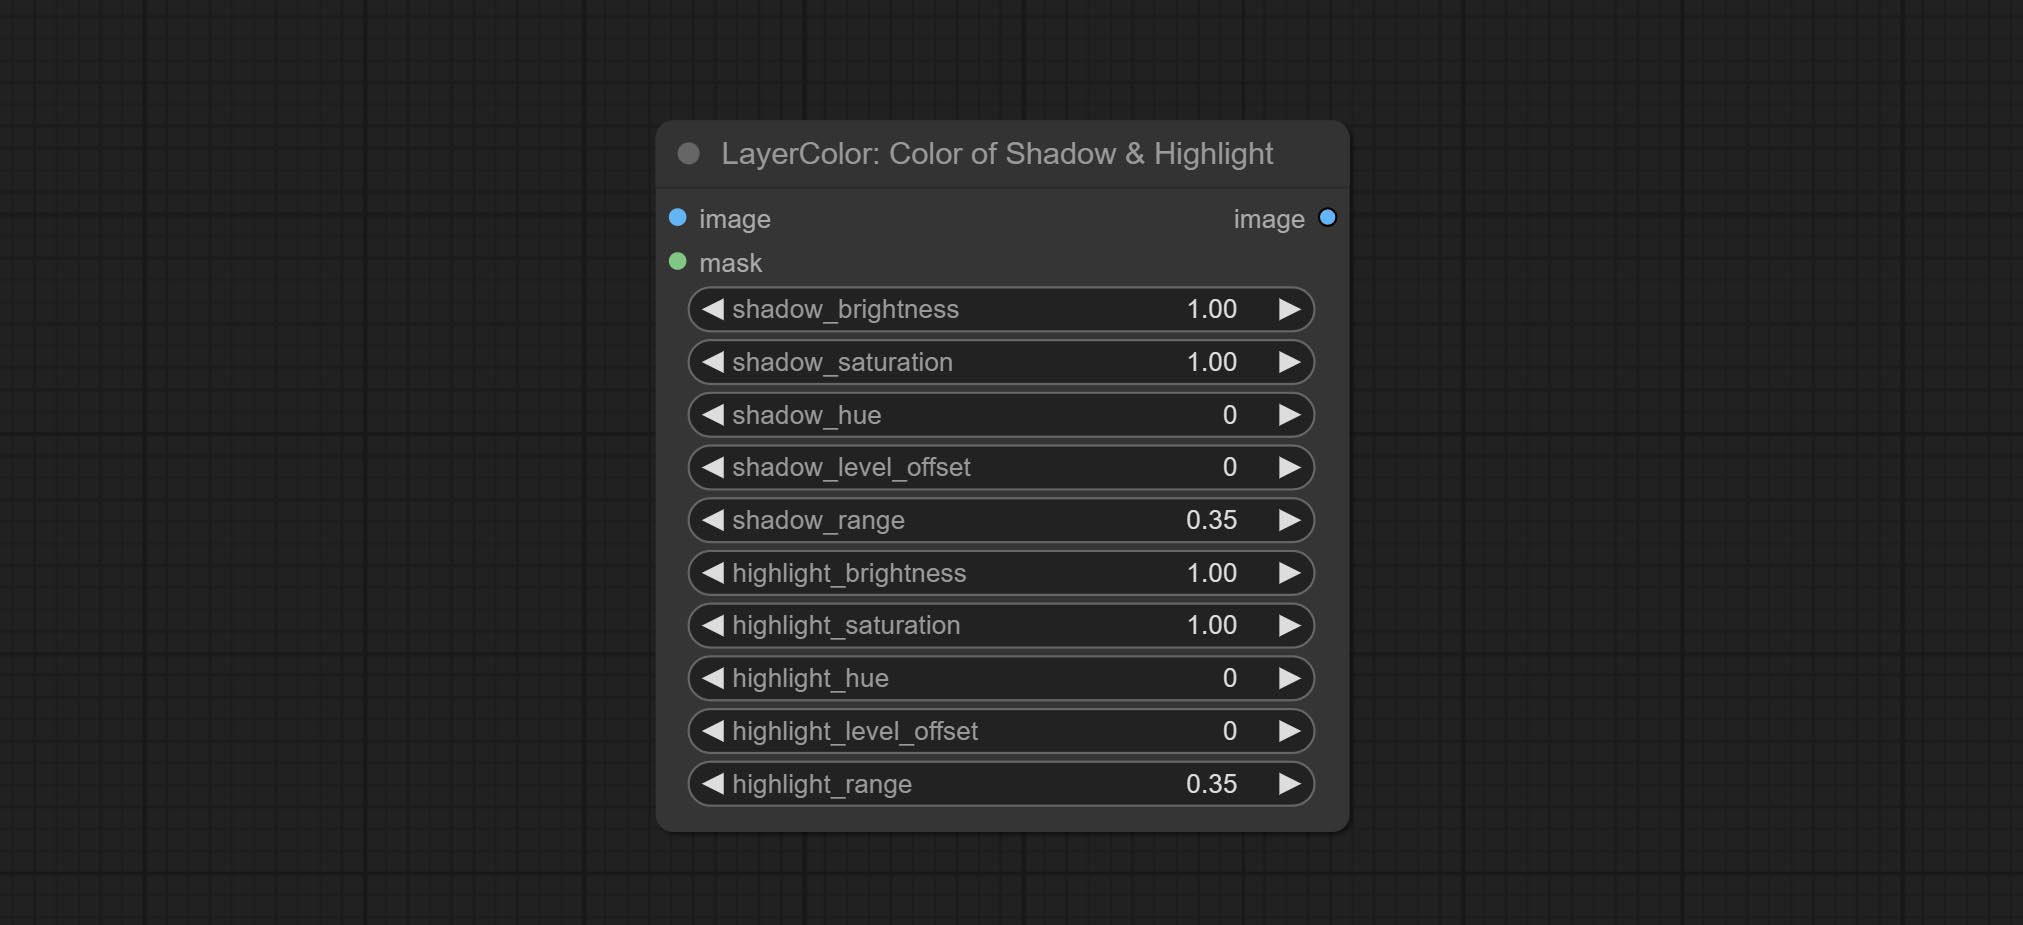
Node option:
A replica of the Color of Shadow & Highlight node, with the "&" character removed from the node name to avoid ComfyUI workflow parsing errors.

Change the color temperature of the image.
Node Options: 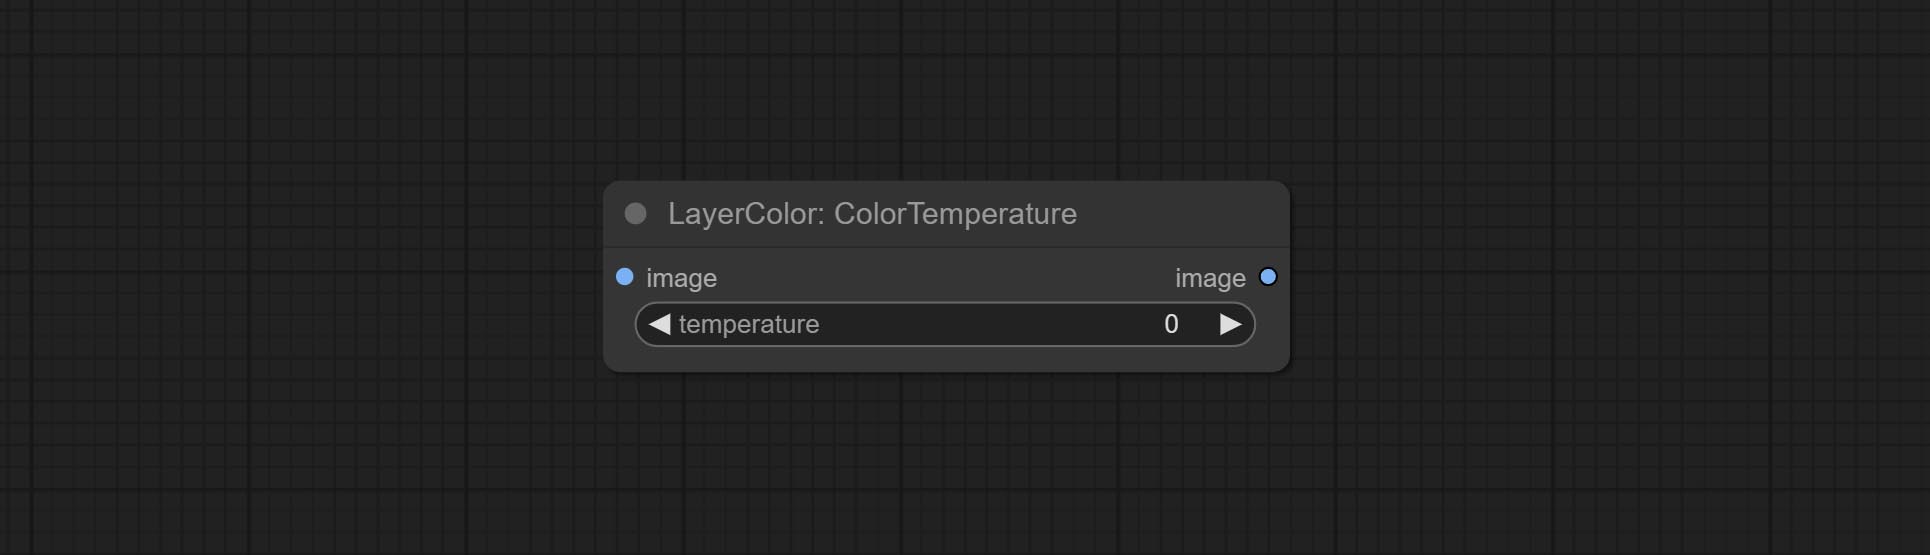
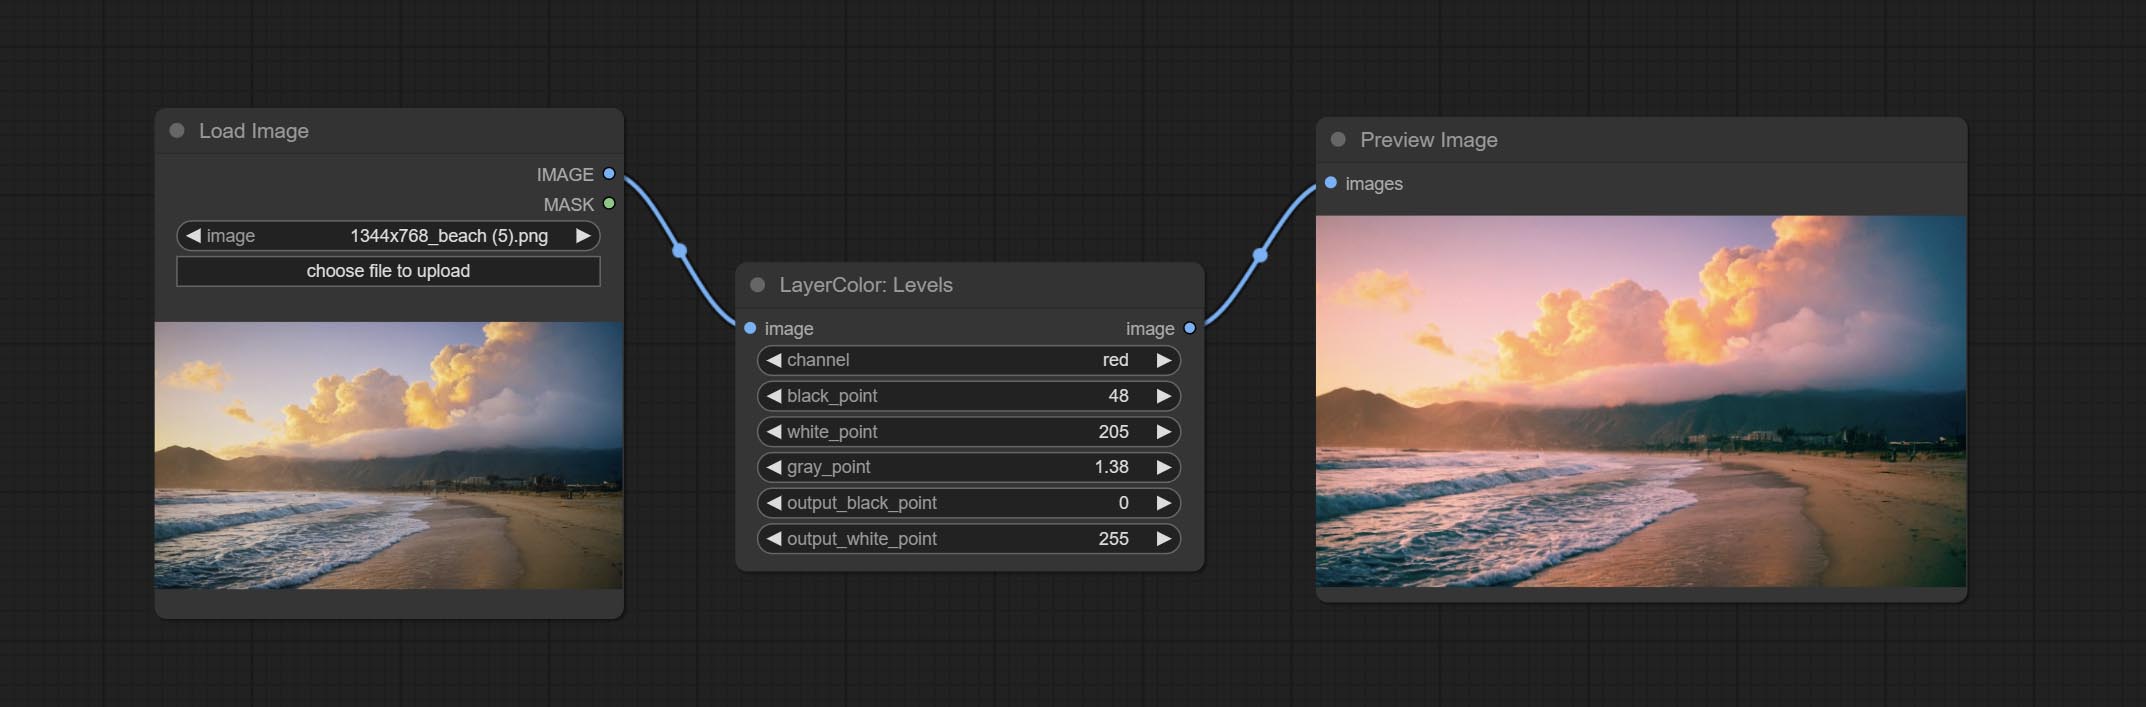
Change the levels of image.
Node Options: 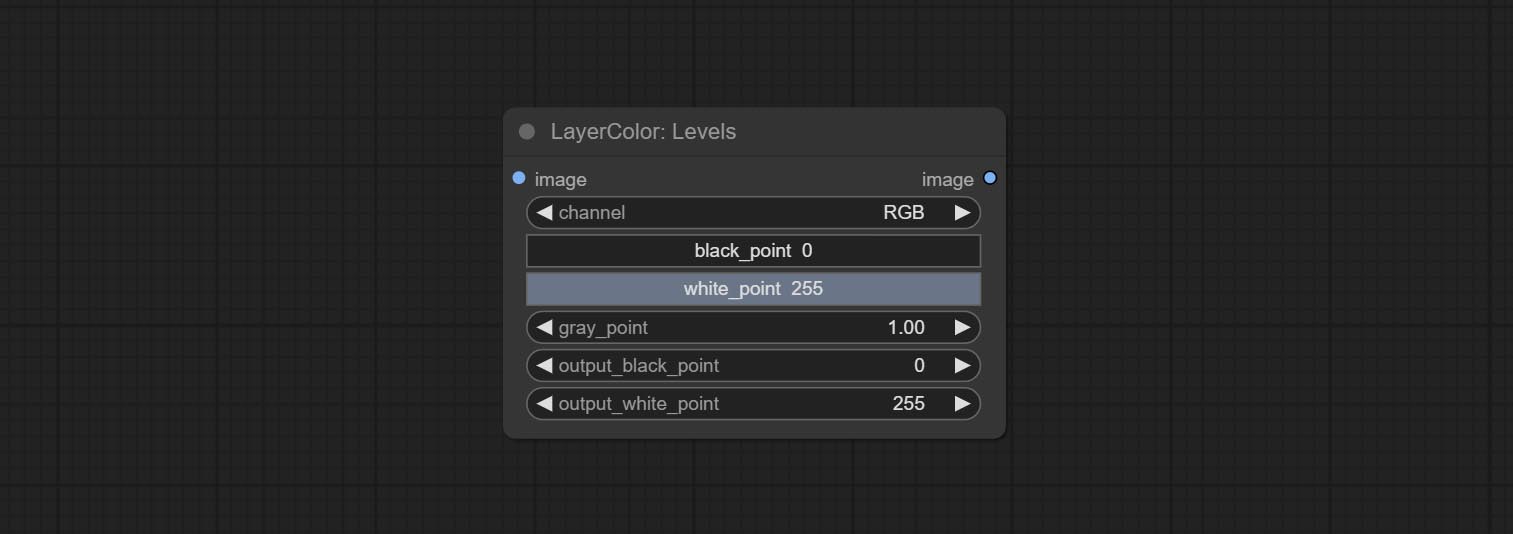
* If the black_point or output_black_point value is greater than white_point or output_white_point, the two values are swapped, with the larger value used as white_point and the smaller value used as black_point.
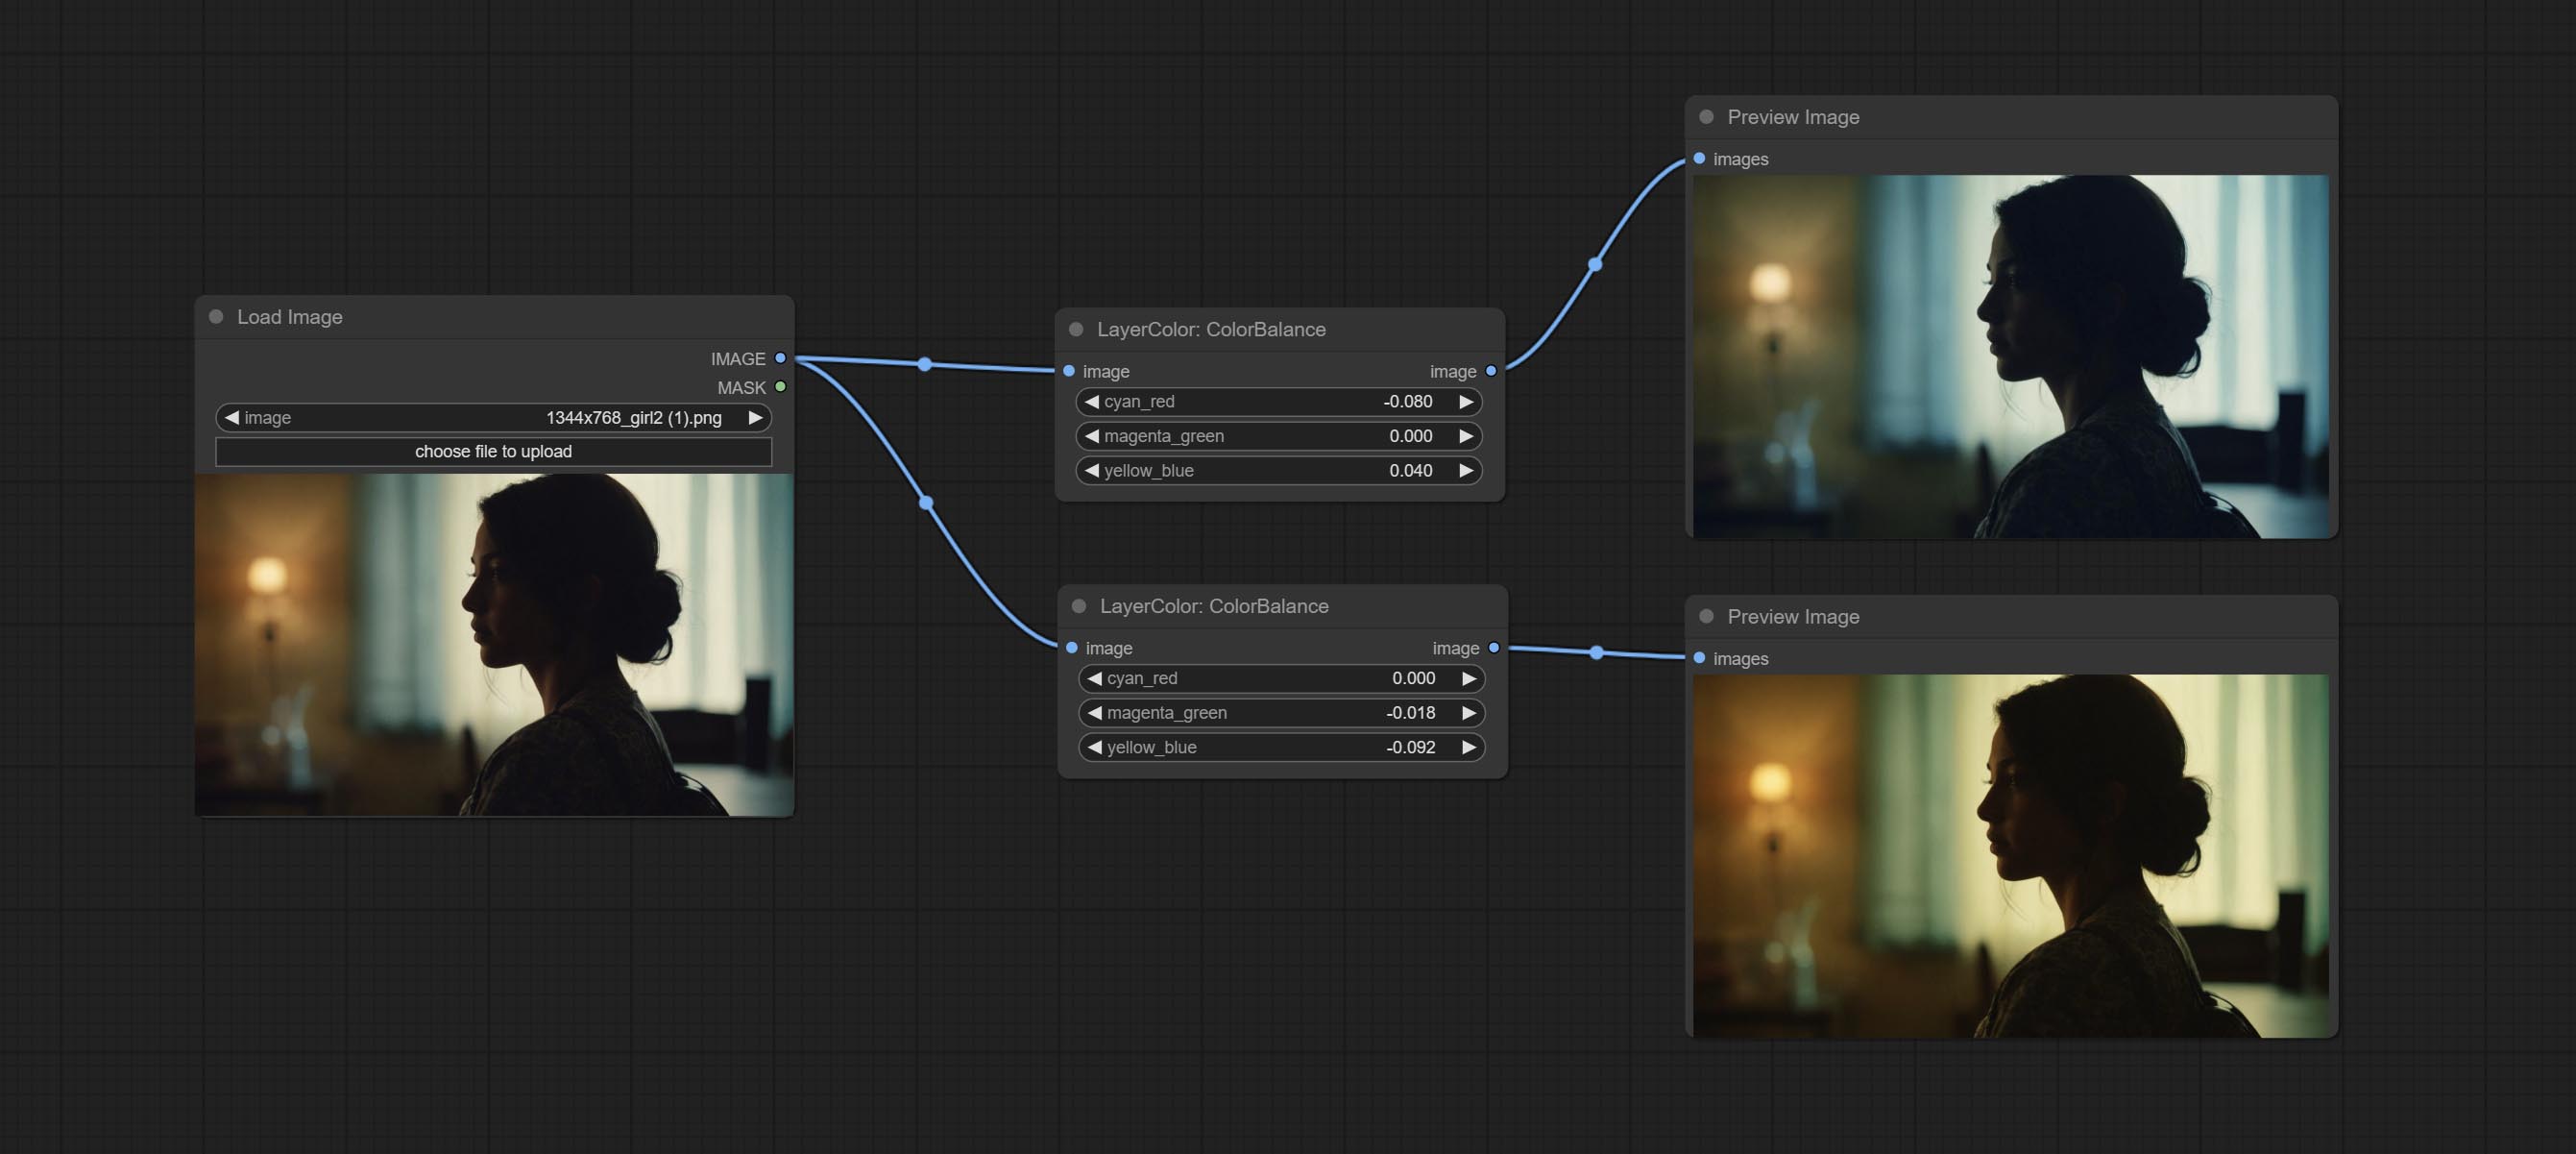
Change the color balance of an image.
Node Options: 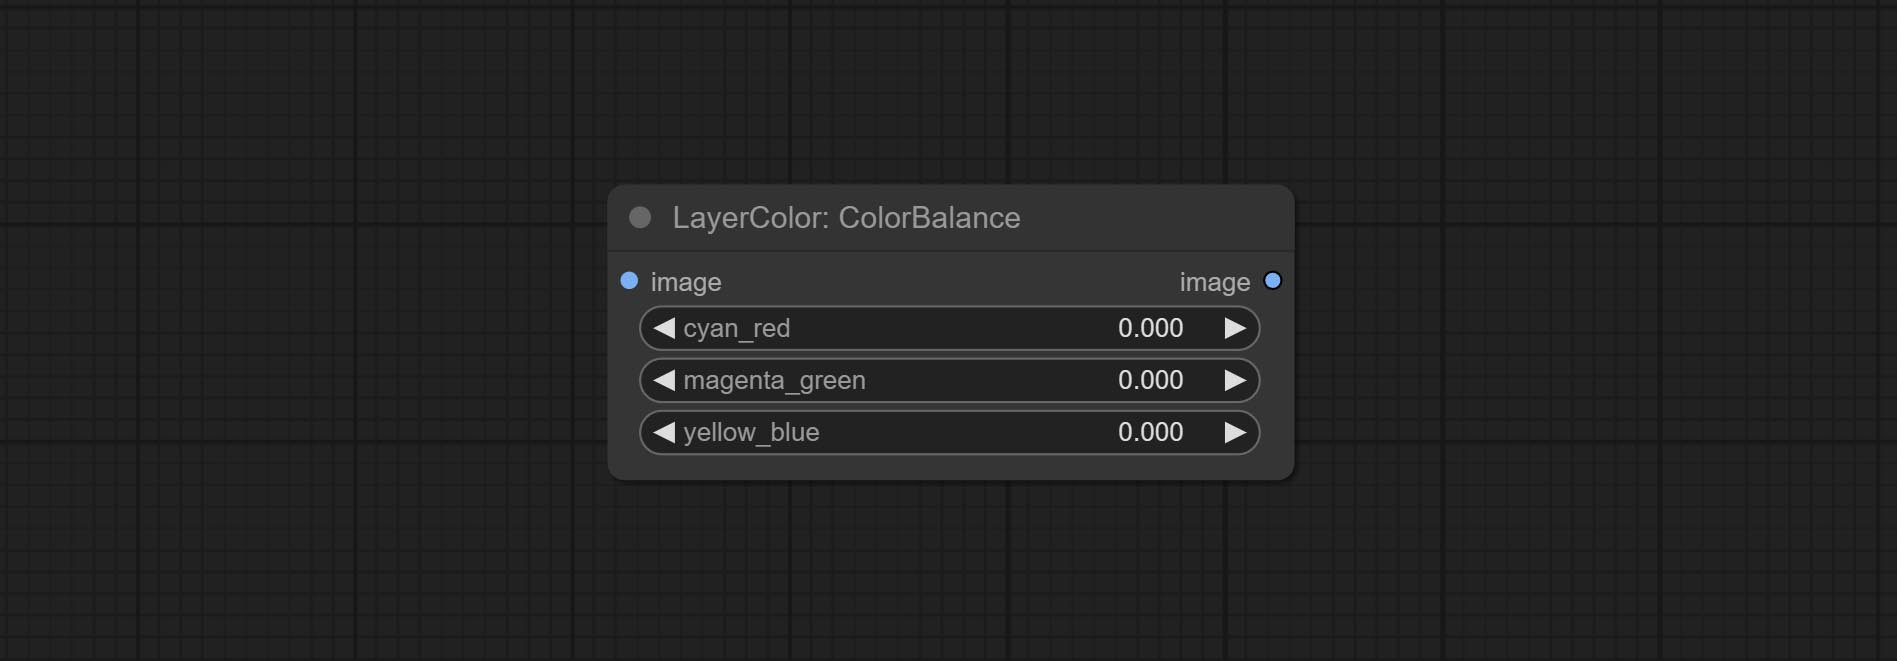
Change the gamma value of the image.
Node options: 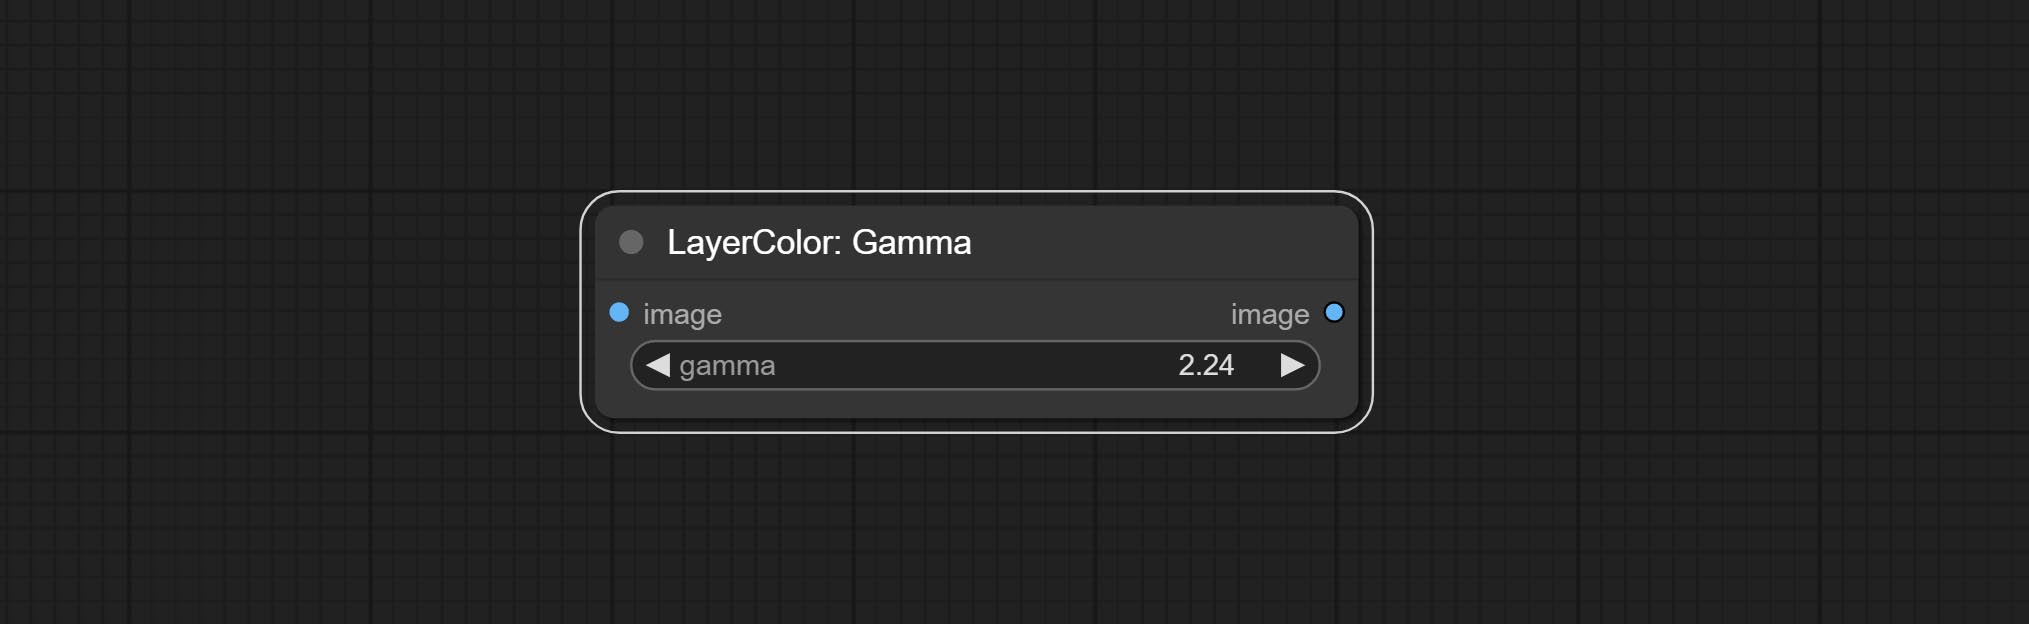
Change the brightness, contrast, and saturation of the image.
Node options: 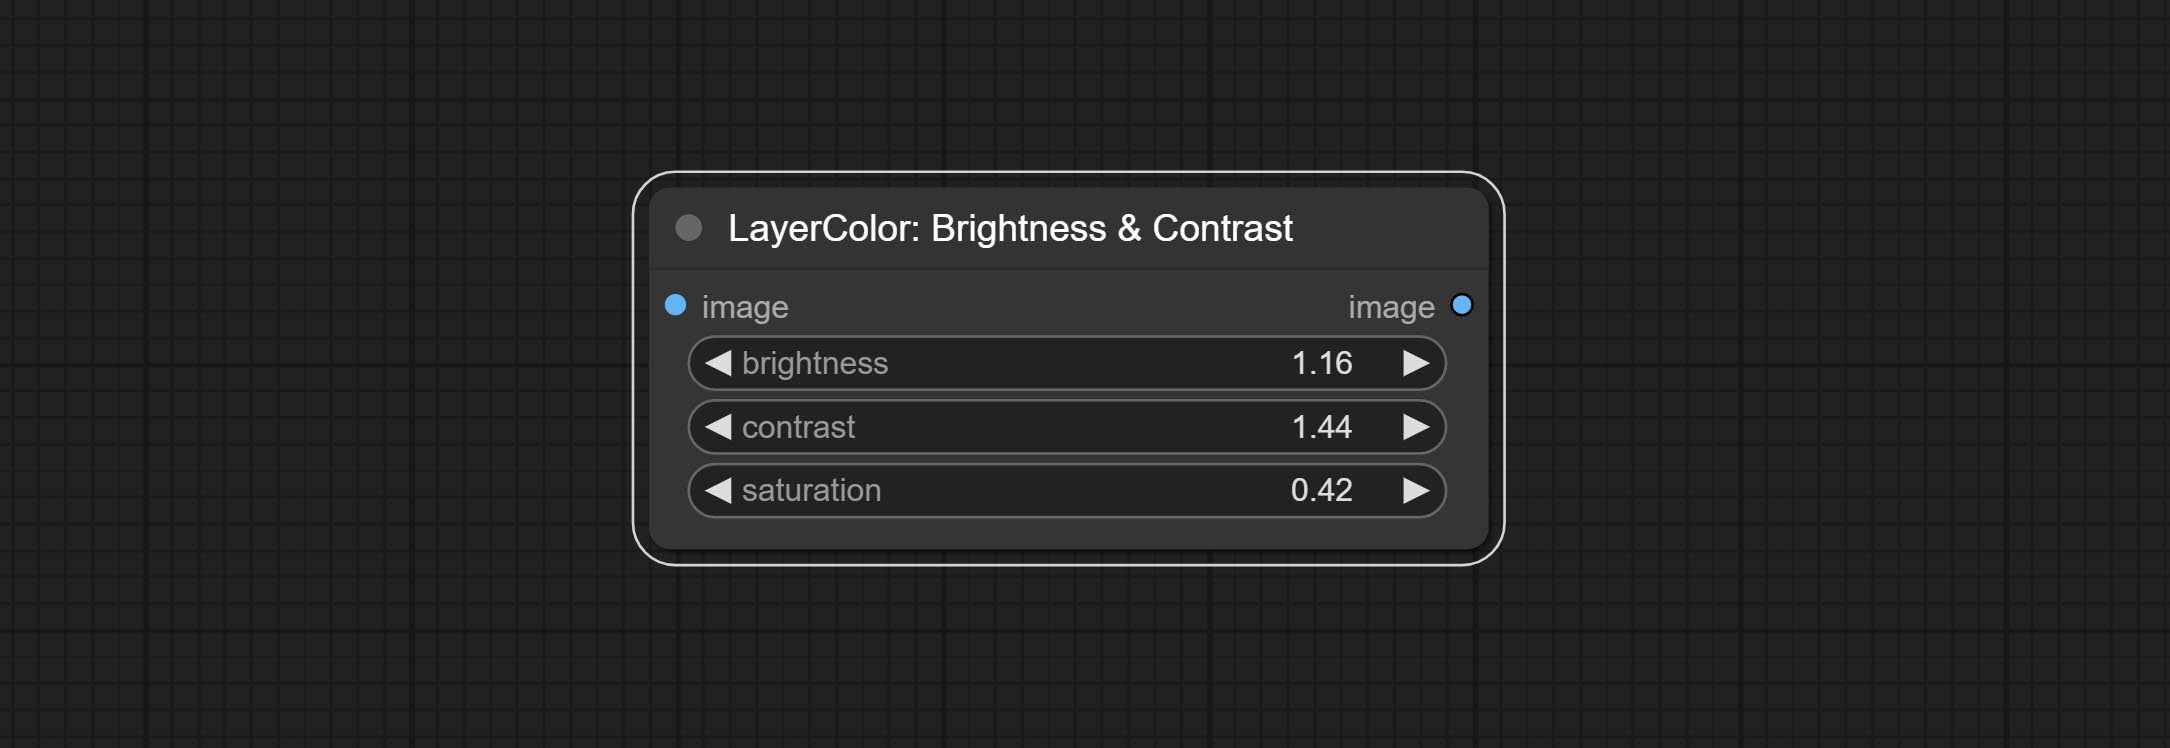
A replica of the Brightness & Contrast node, with the "&" character removed from the node name to avoid ComfyUI workflow parsing errors.
Adjust the RGB channels of the image.
Node options: 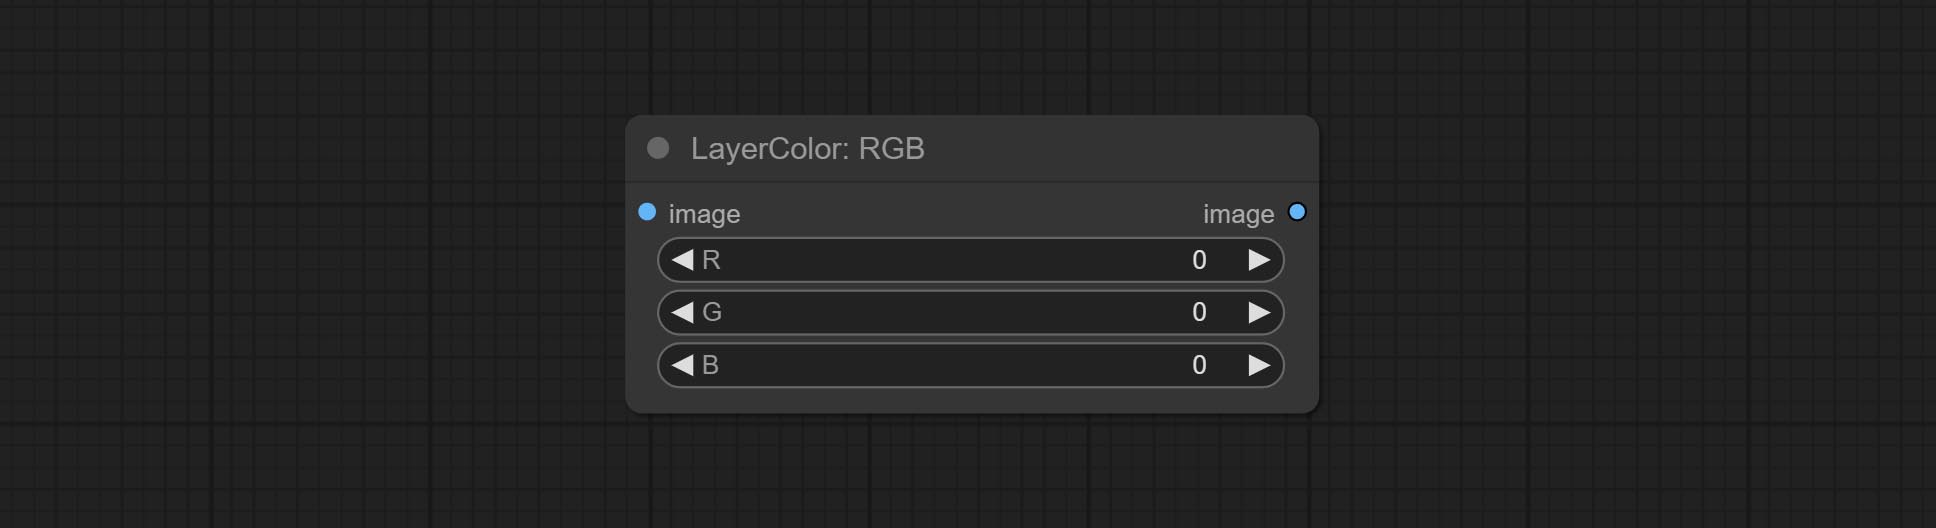
Adjust the YUV channels of the image.
Node options: 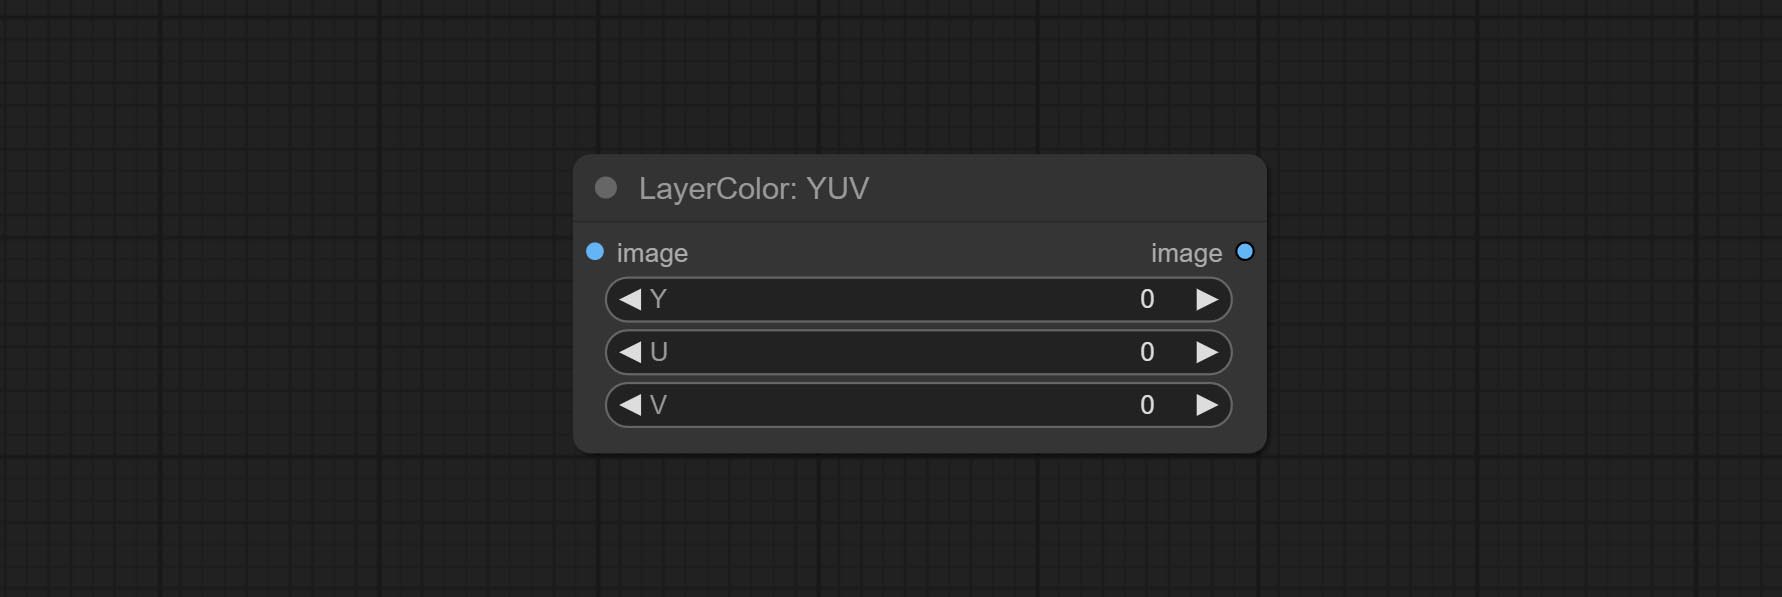
Adjust the LAB channels of the image.
Node options: 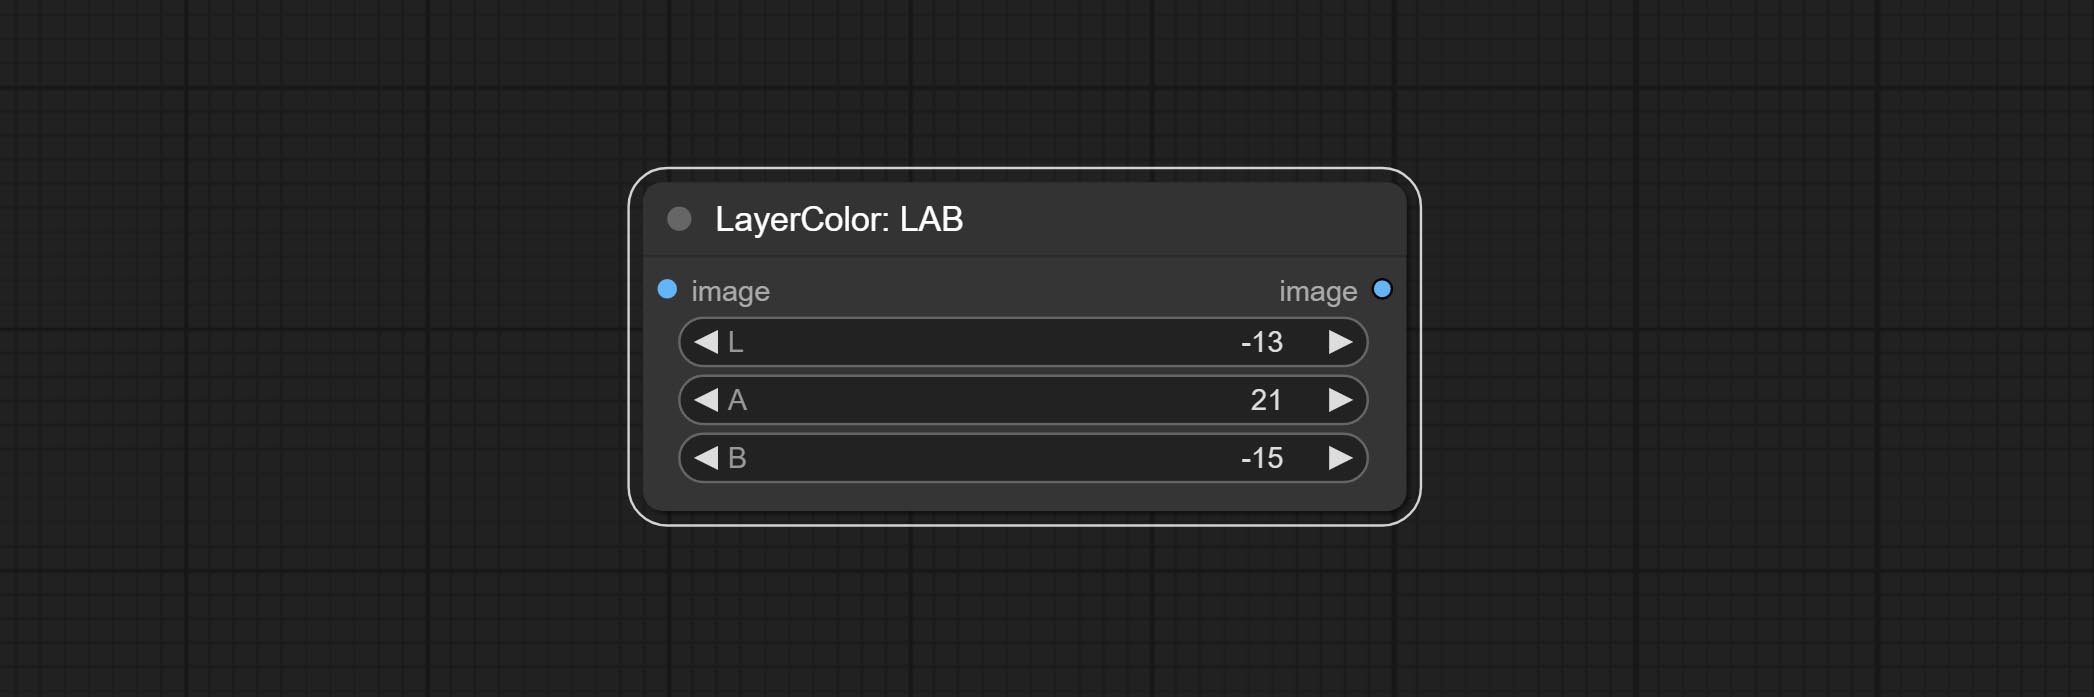
Adjust the HSV channels of the image.
Node options: 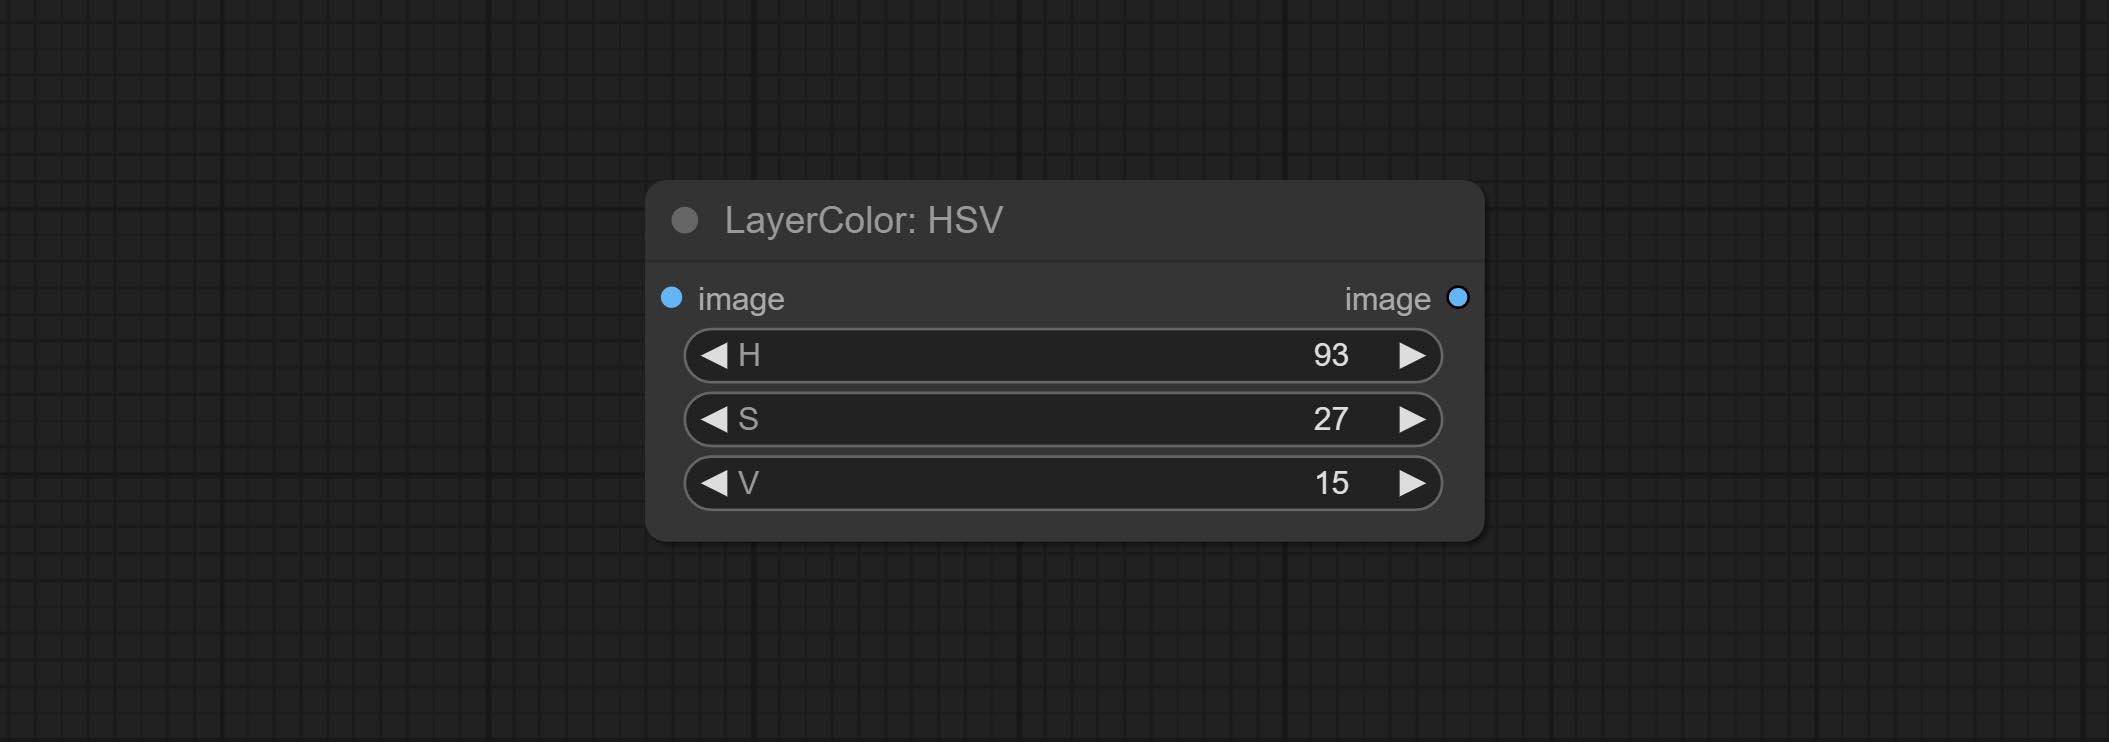
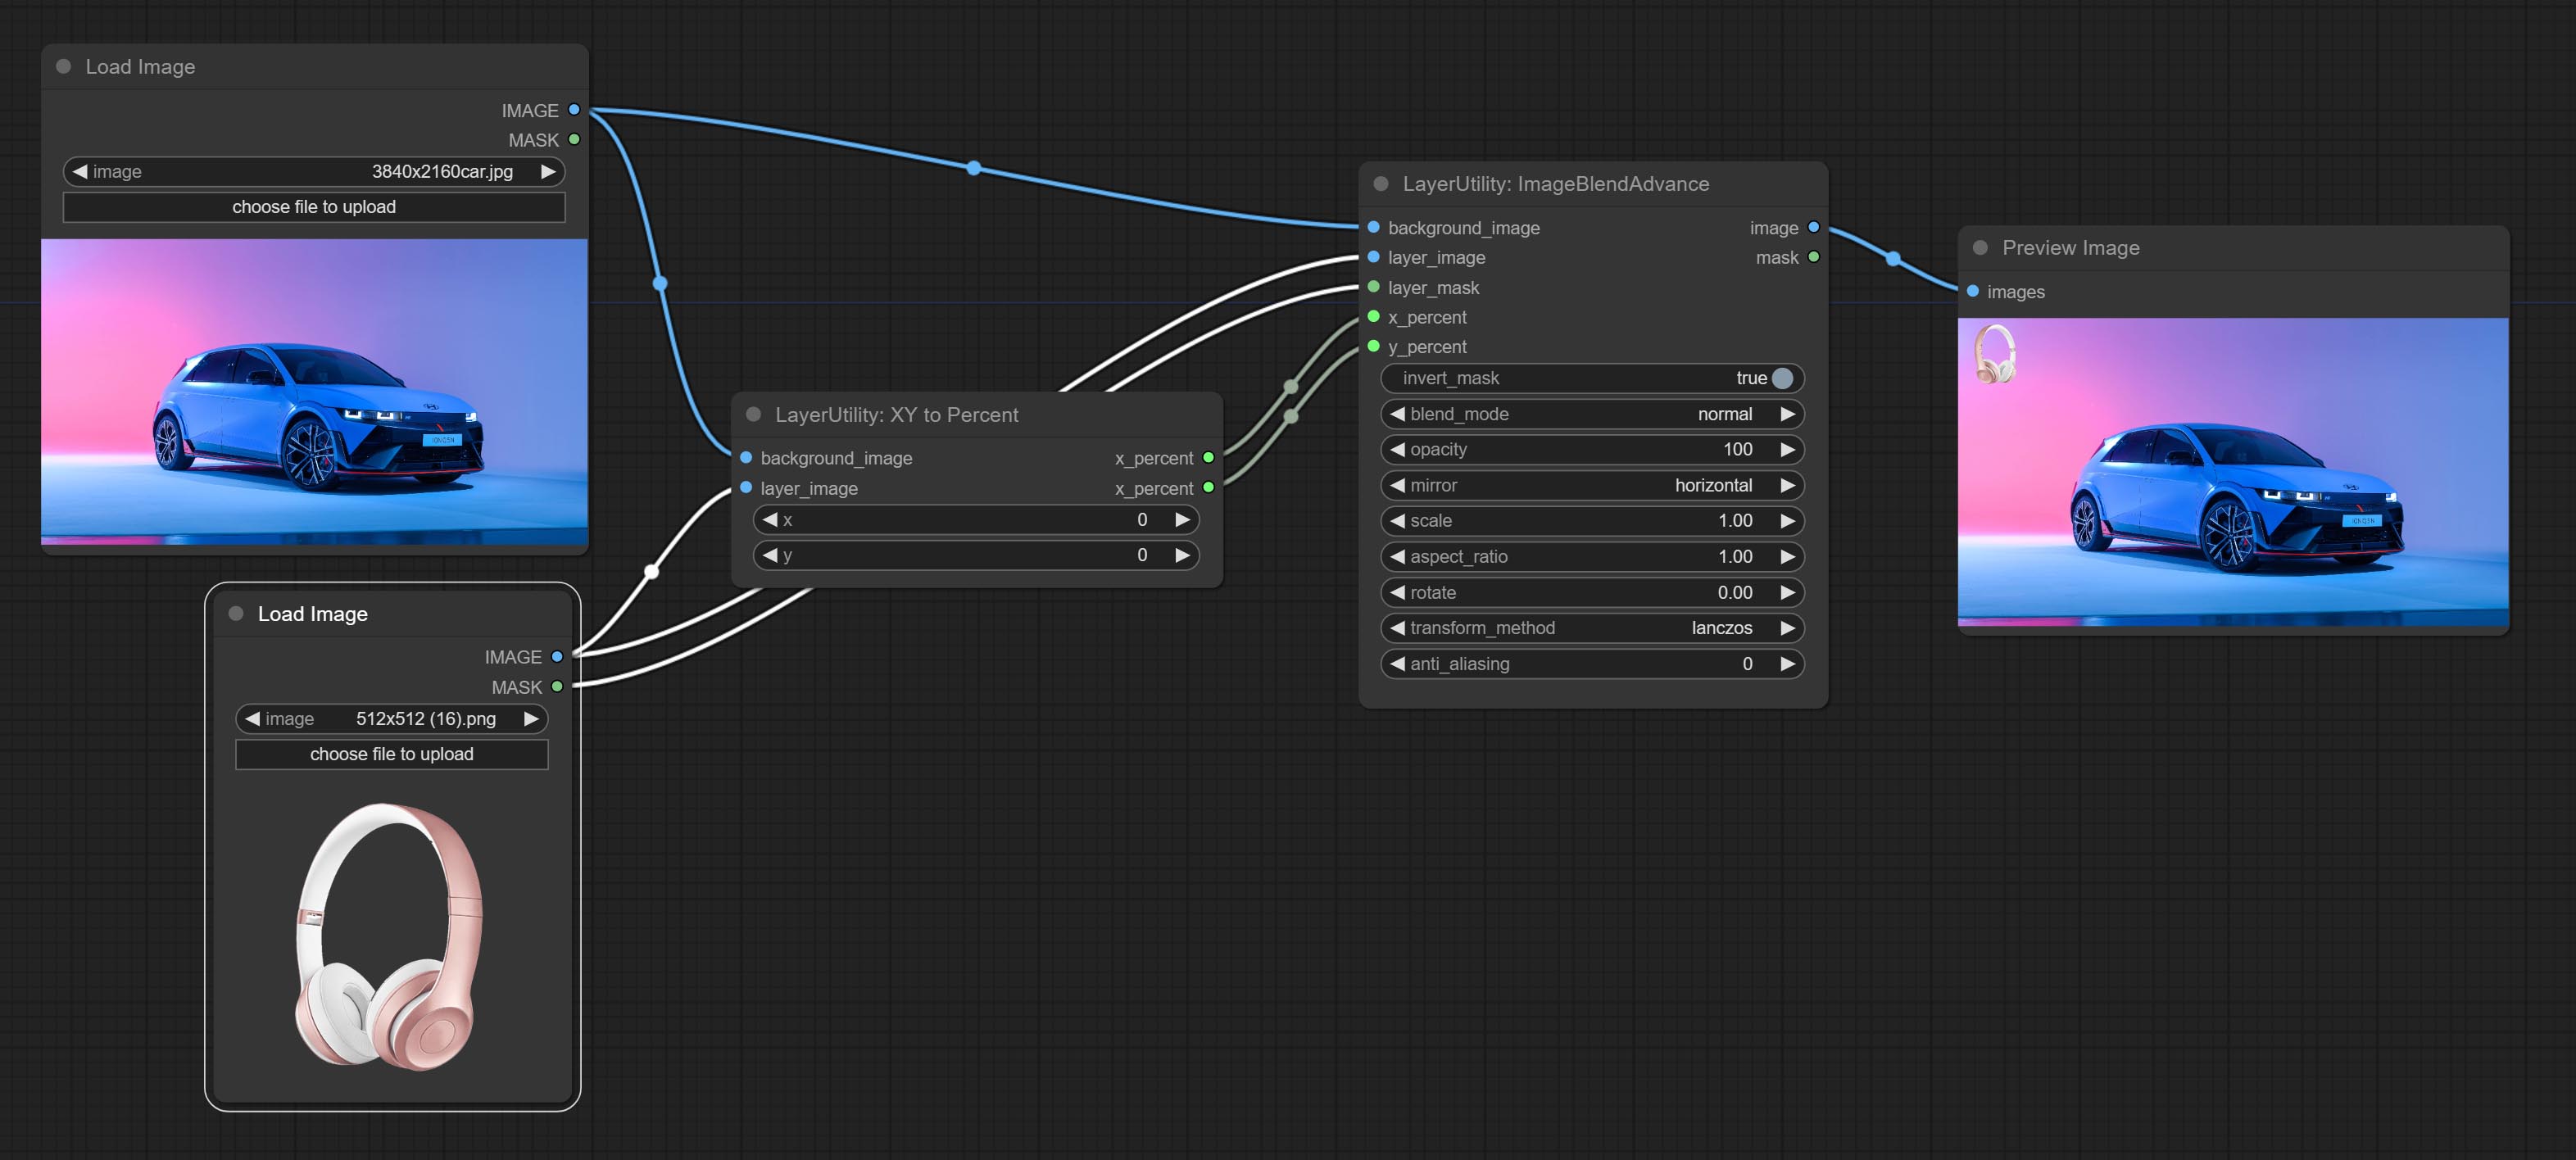
Used for compositing layers, allowing for compositing layer images of different sizes on the background image, and setting positions and transformations. multiple mixing modes are available for selection, and transparency can be set.
The node provide layer transformation_methods and anti_aliasing options. helps improve the quality of synthesized images.
The node provides mask output that can be used for subsequent workflows. 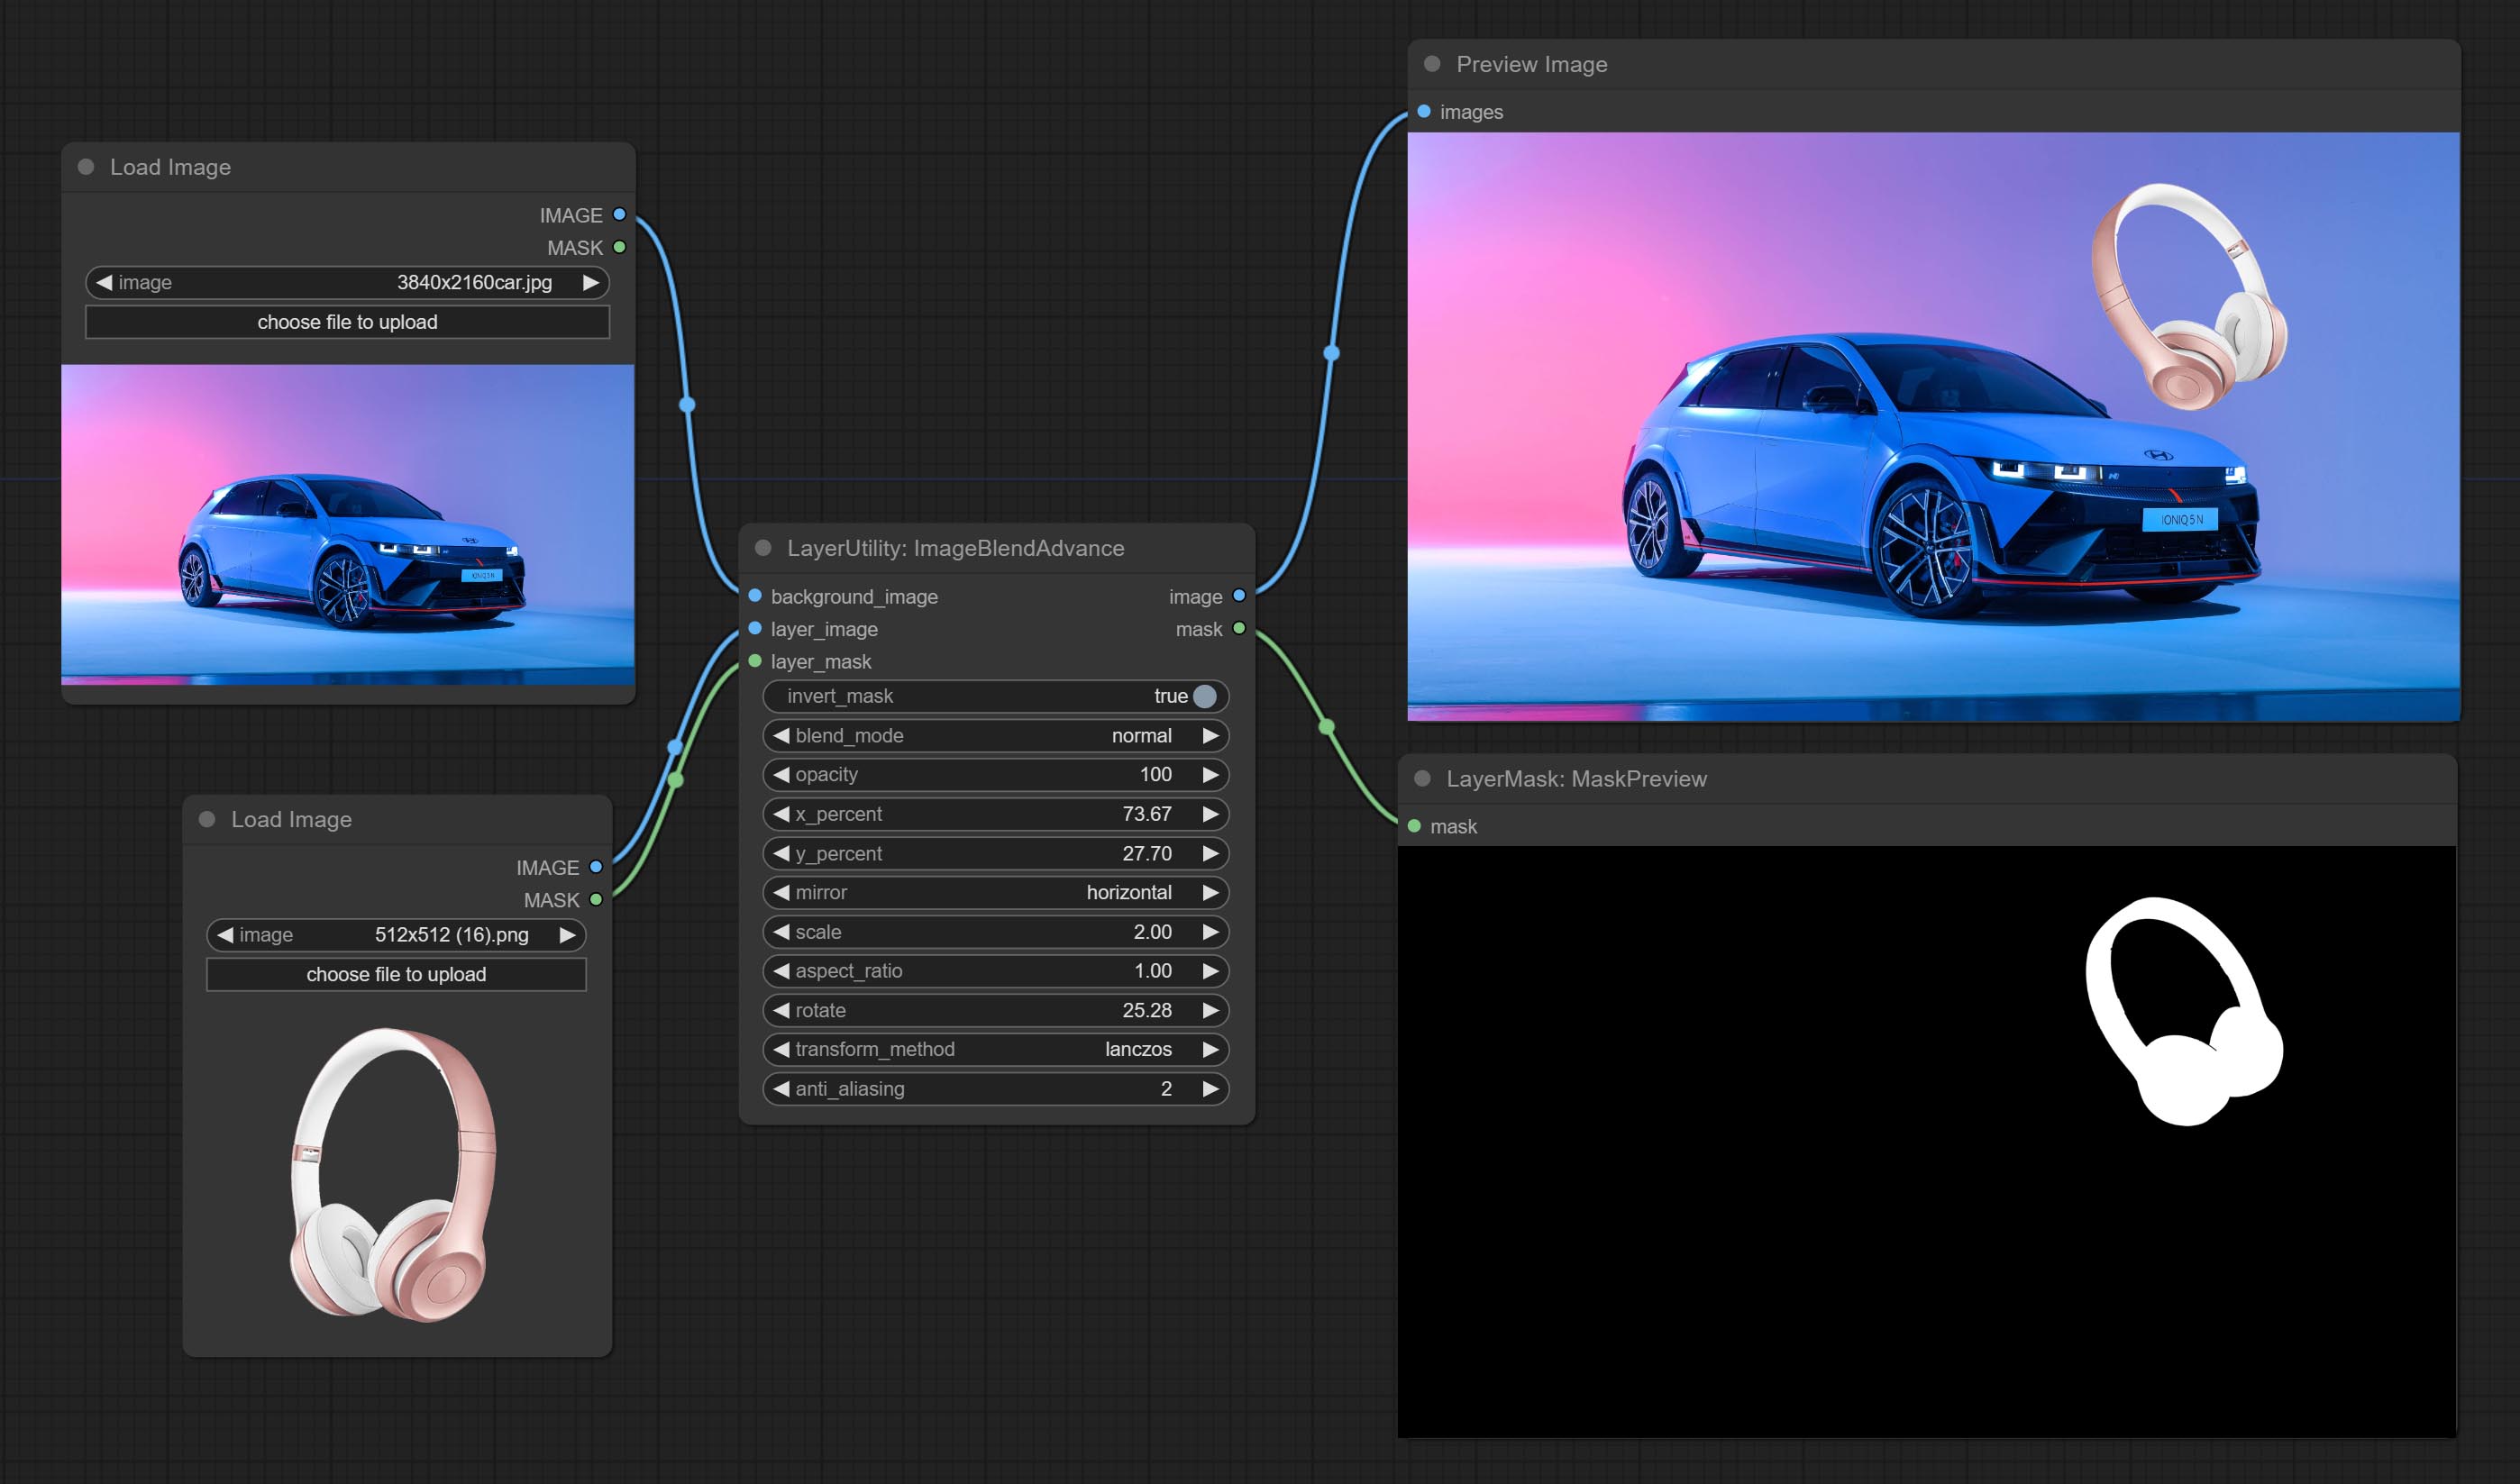
Node options: 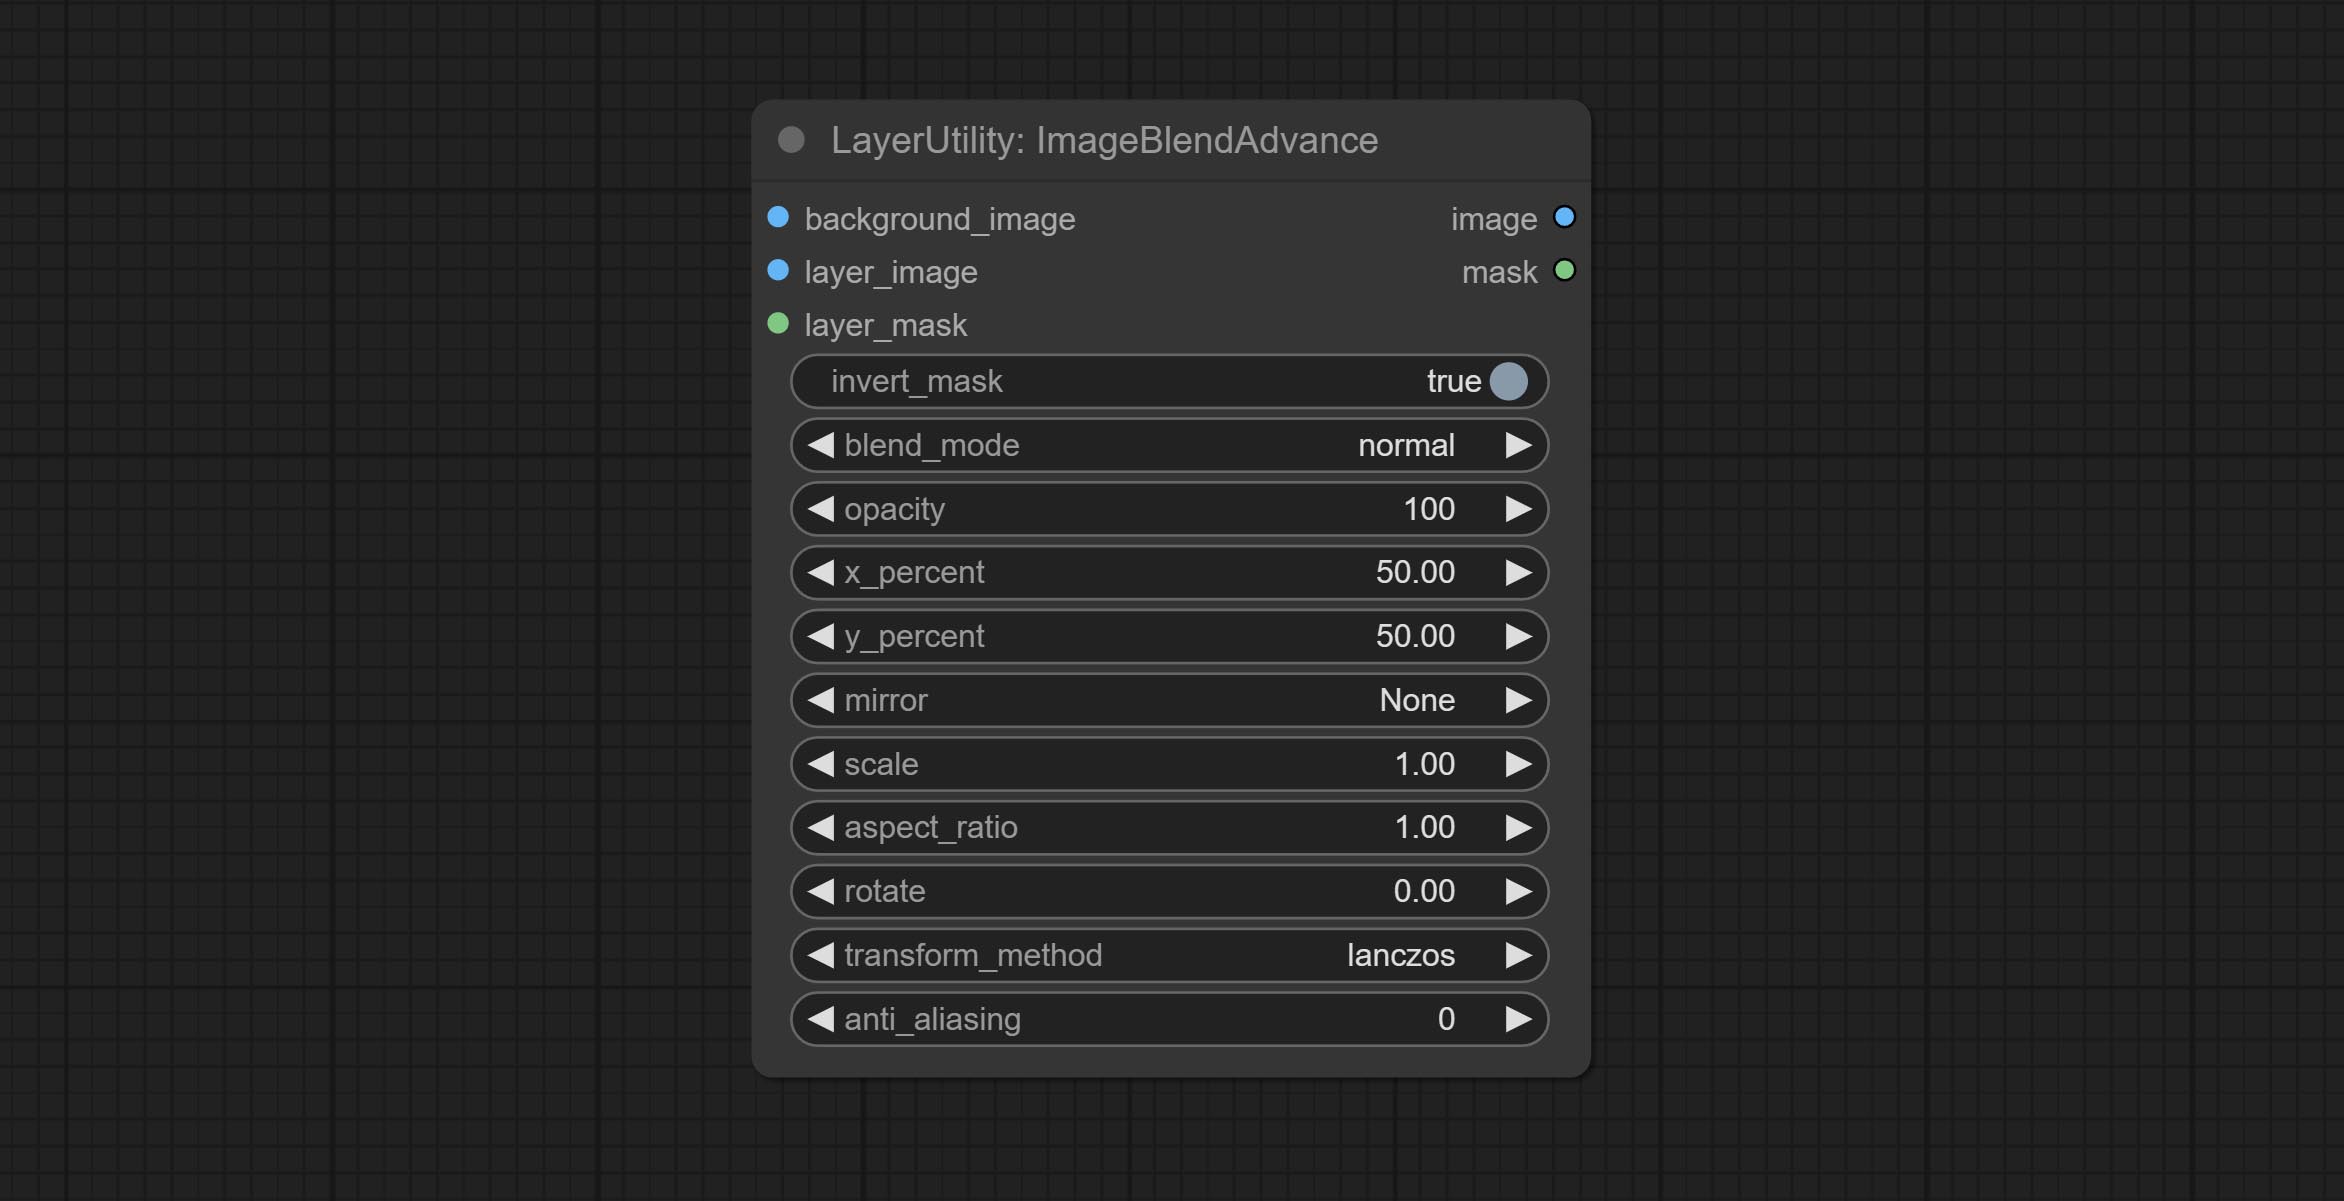
Crop the image according to the mask range, and set the size of the surrounding borders to be retained. This node can be used in conjunction with the RestoreCropBox and ImageScaleRestore nodes to crop and modify upscale parts of image, and then paste them back in place. 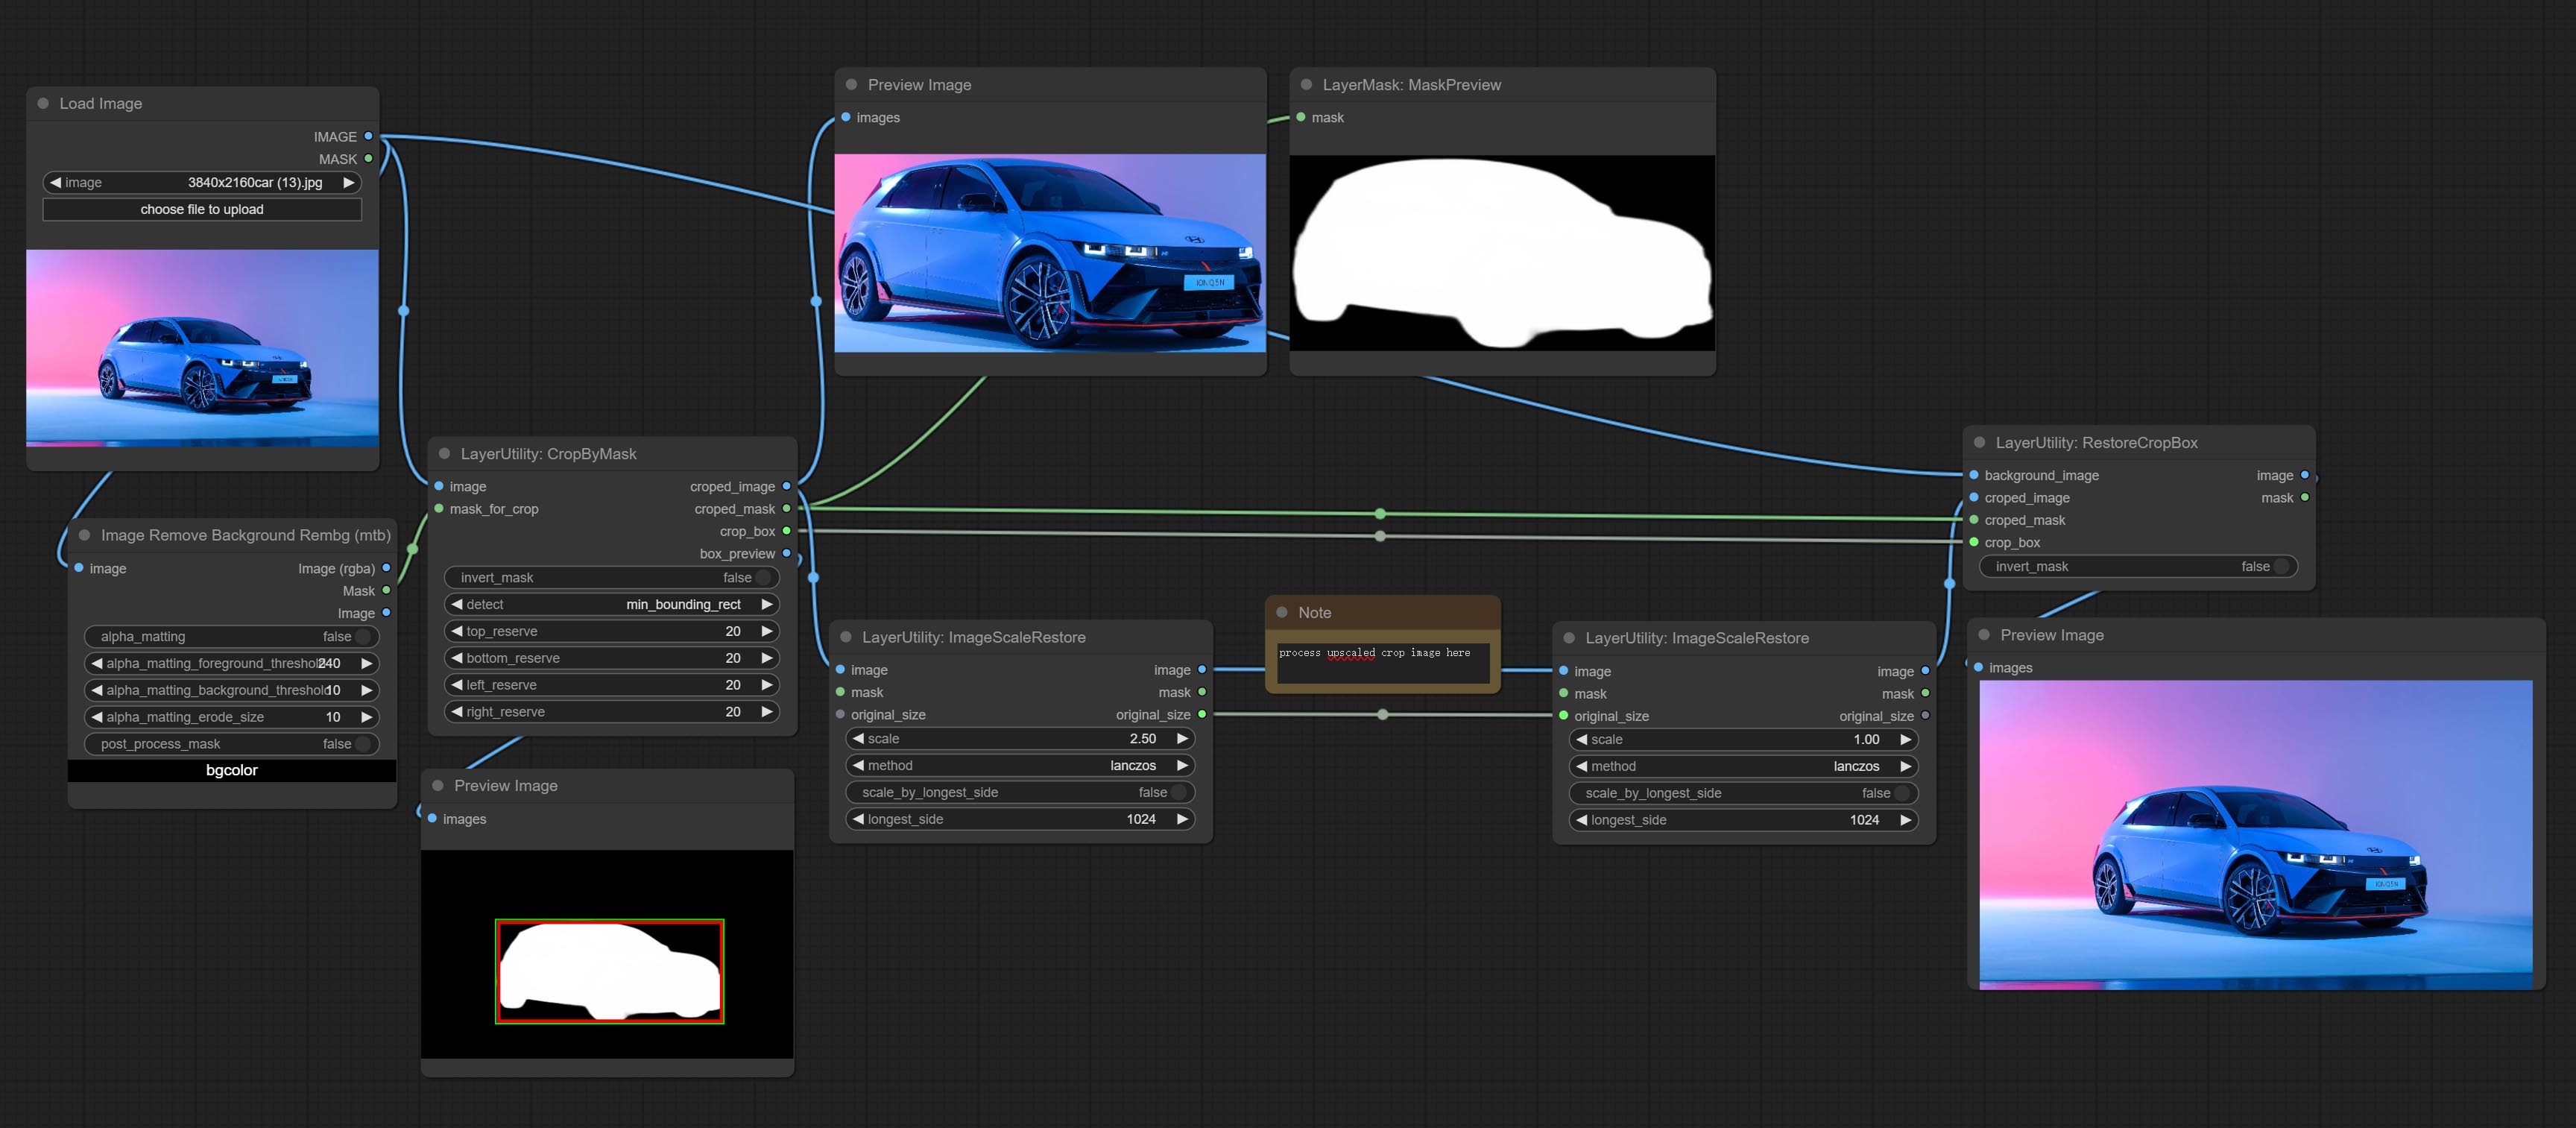
Node options: 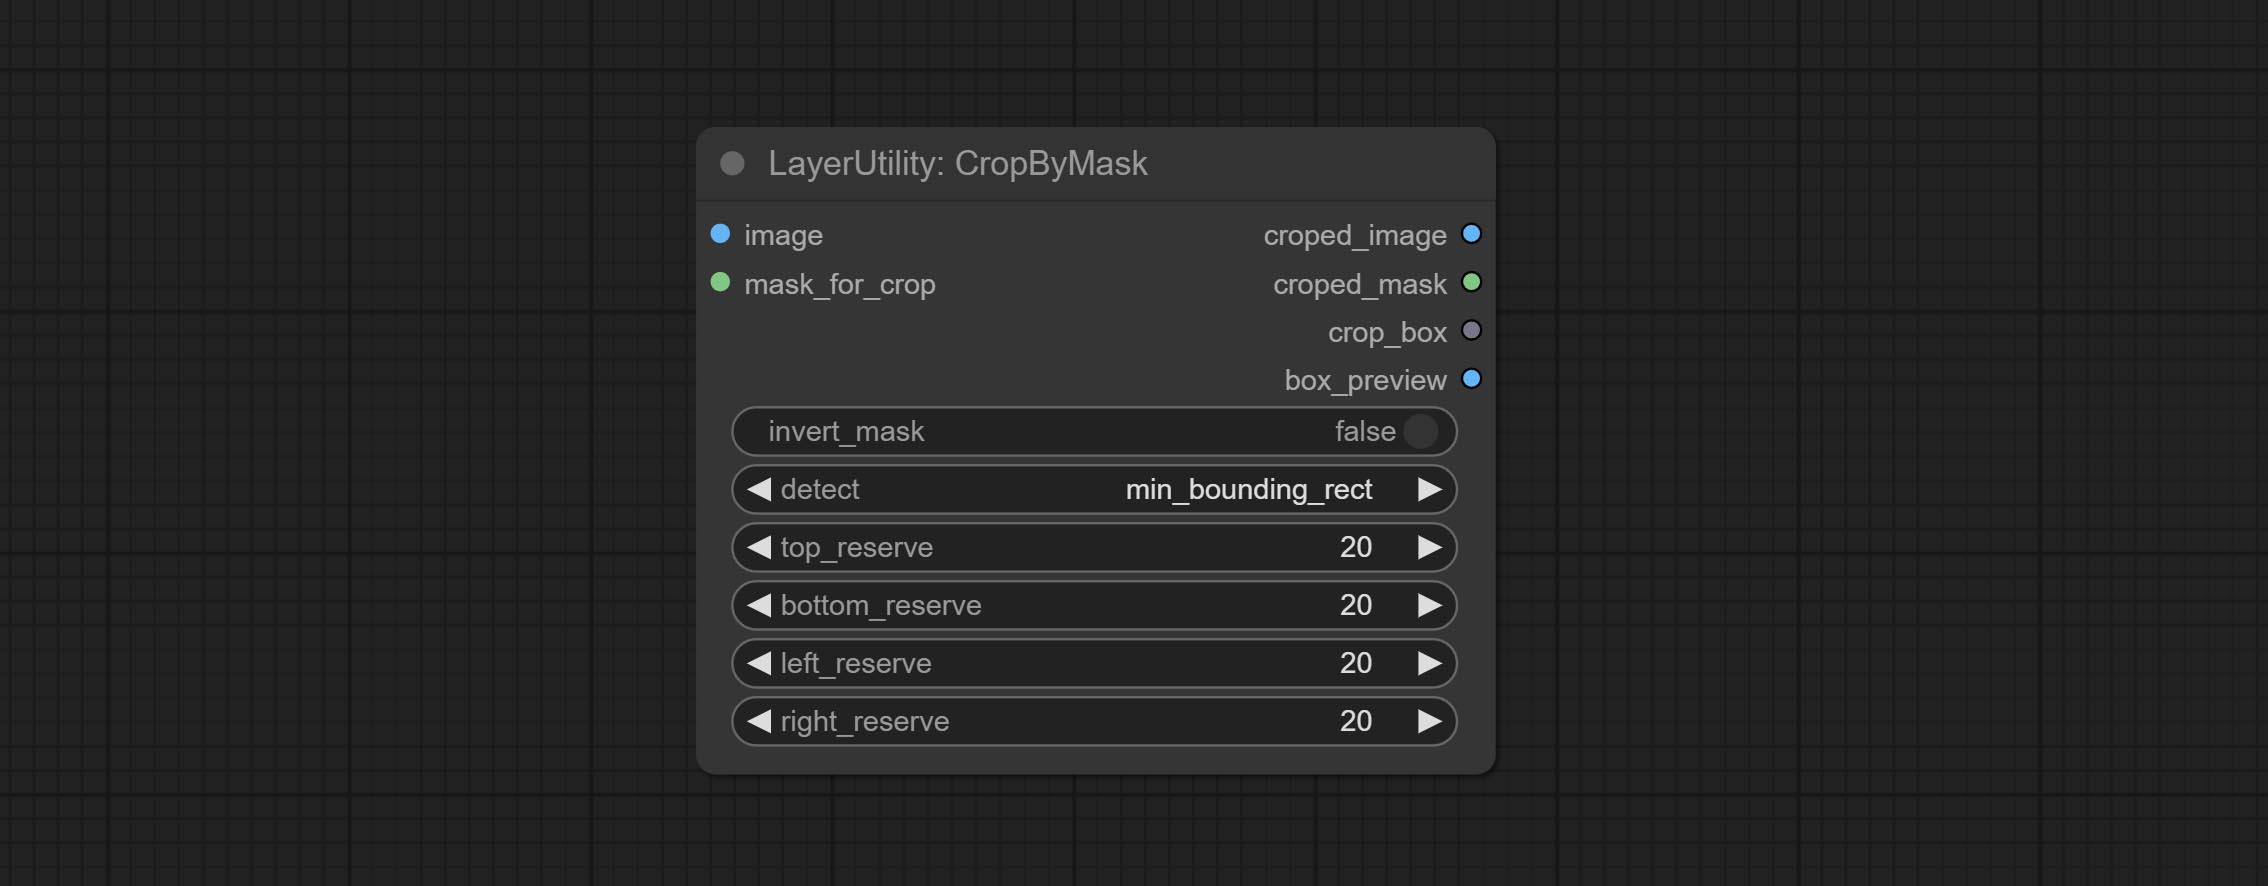
min_bounding_rect is the minimum bounding rectangle of block shape, max_inscribed_rect is the maximum inscribed rectangle of block shape, and mask-area is the effective area for masking pixels.Sortir:
The V2 upgraded version of CropByMask. Supports crop_box input, making it easy to cut layers of the same size.
The following changes have been made based on CropByMask: 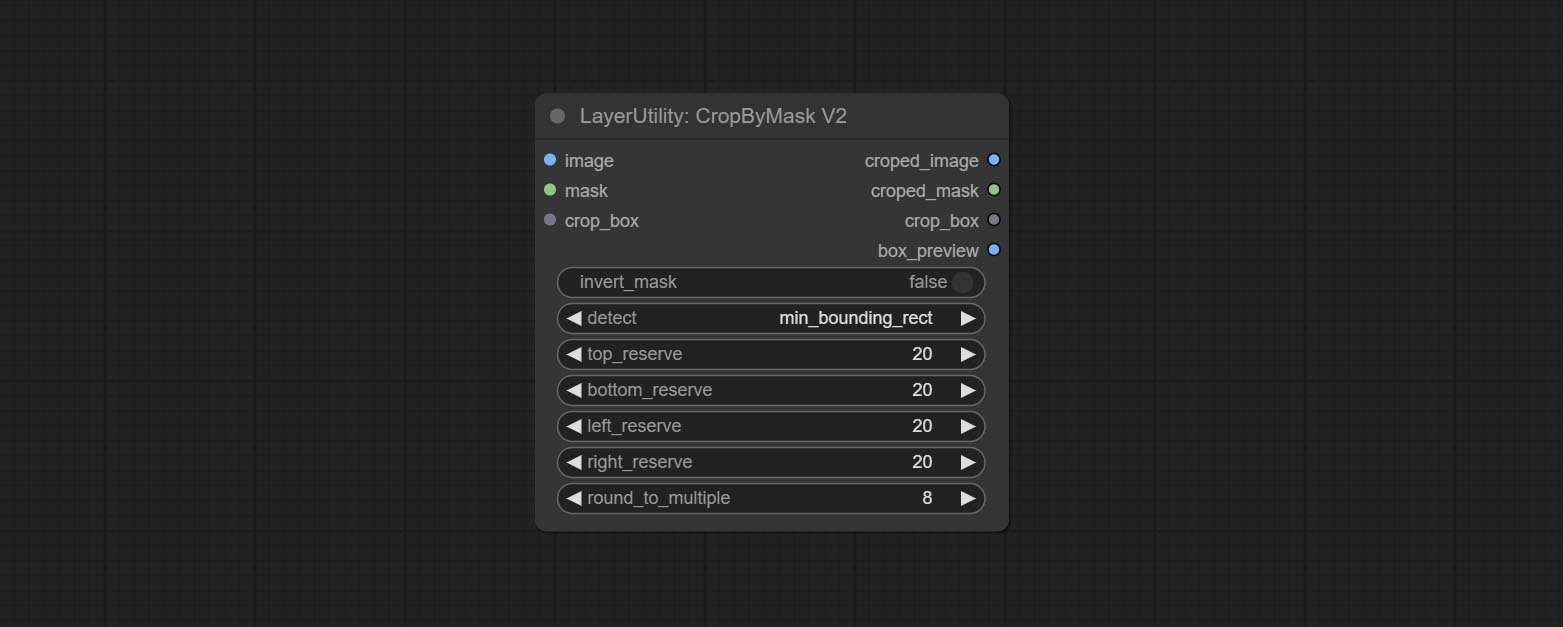
mask_for_crop reanme to mask 。crop_box . If there are inputs here, mask detection will be ignored and this data will be directly used for cropping.round_to_multiple to round the trimming edge length multiple. For example, setting it to 8 will force the width and height to be multiples of 8.Restore the cropped image to the original image by CropByMask.
Node options: 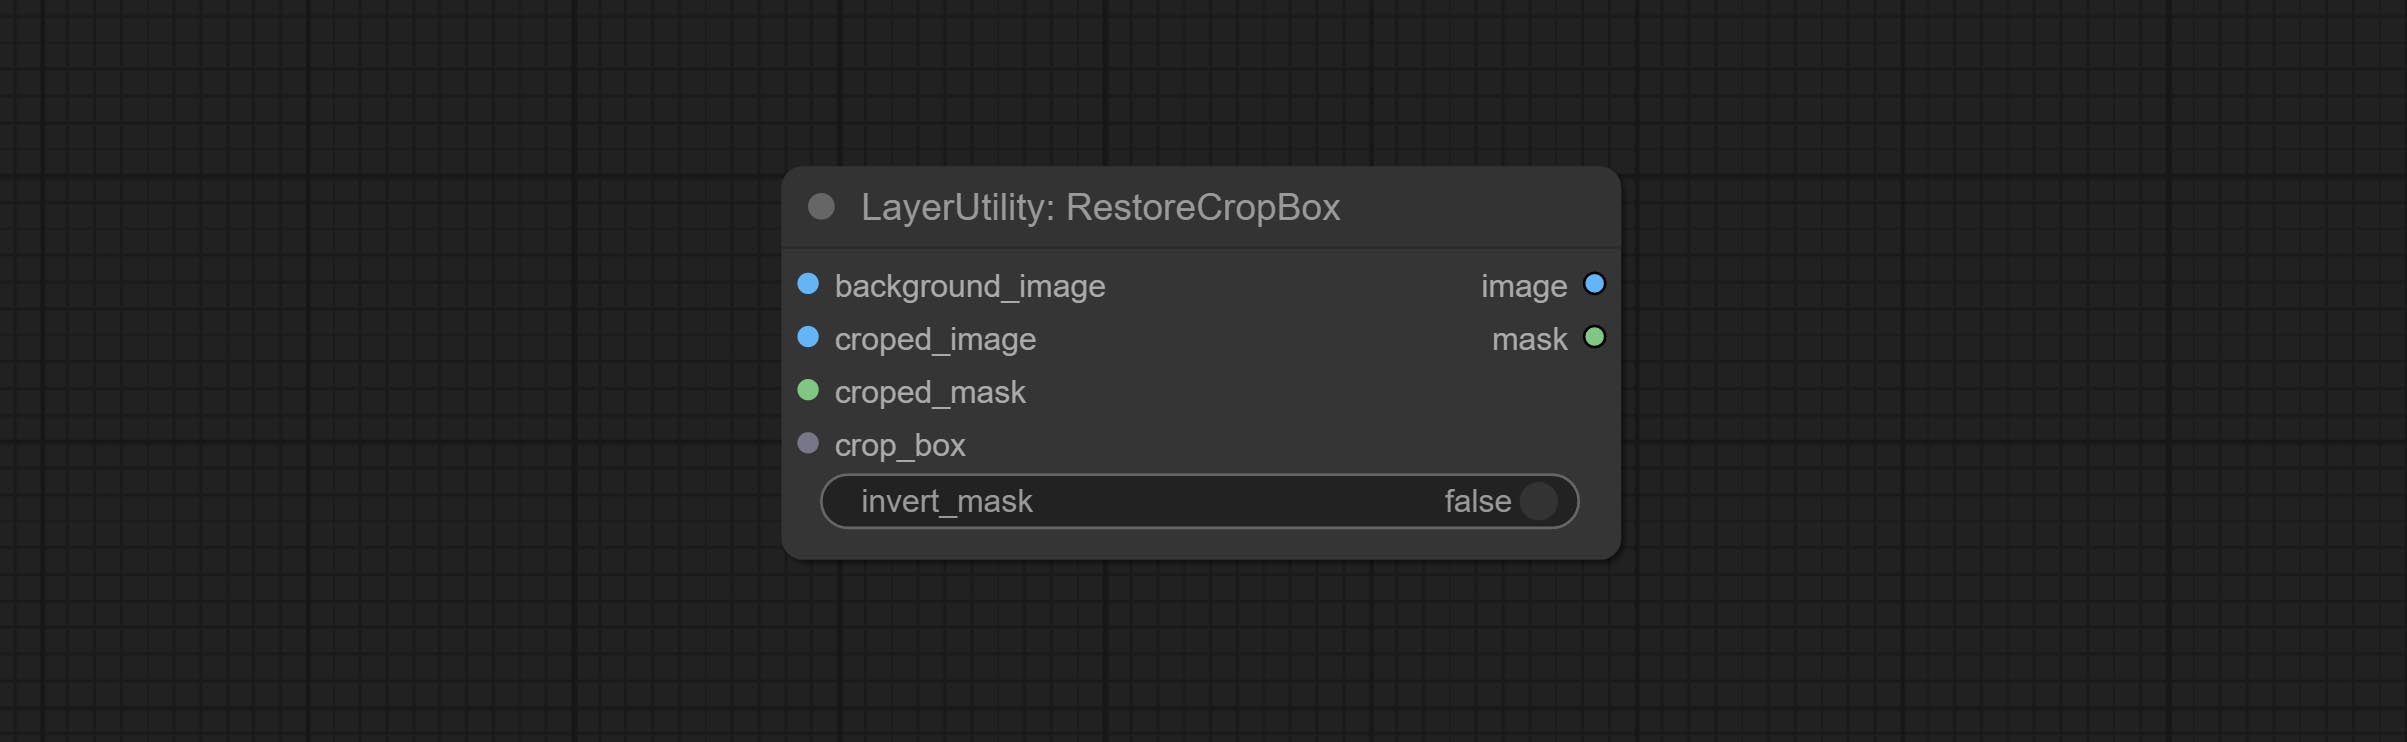
Parsing the corp_box to x , y , width , height . 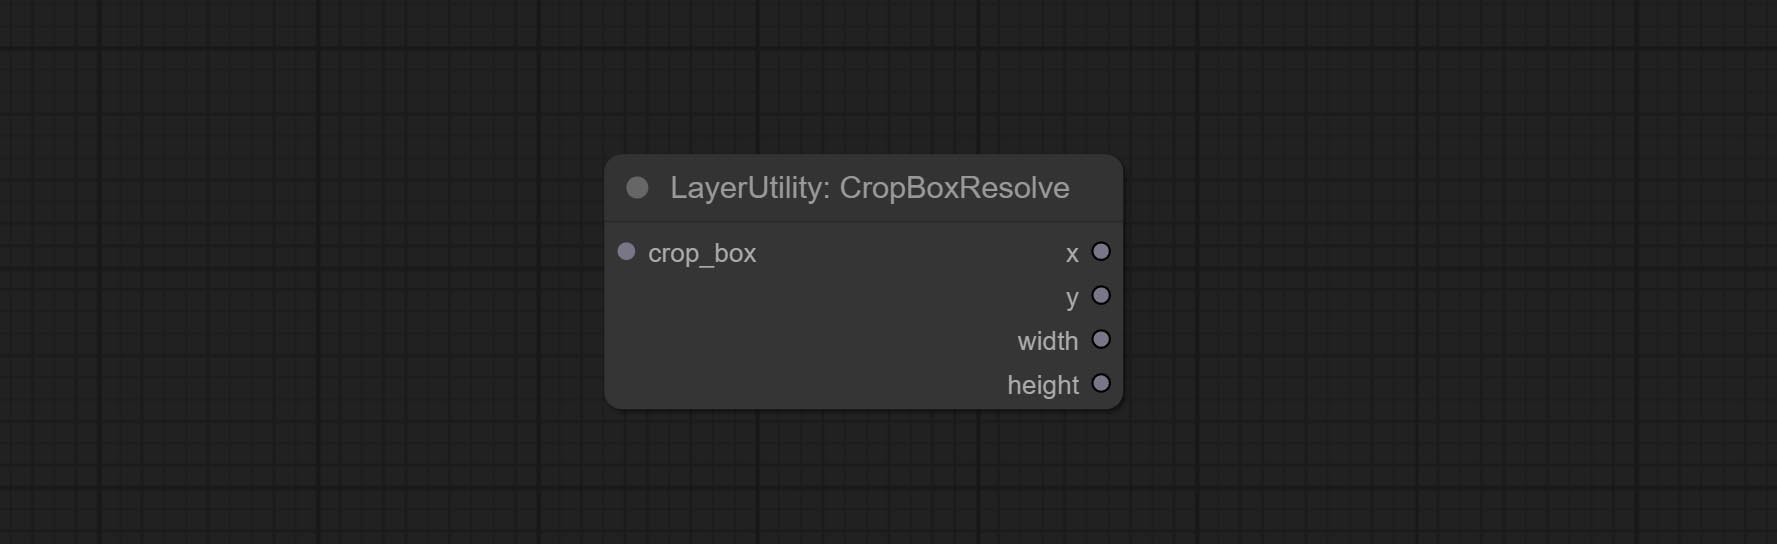
Image scaling. when this node is used in pairs, the image can be automatically restored to its original size on the second node. 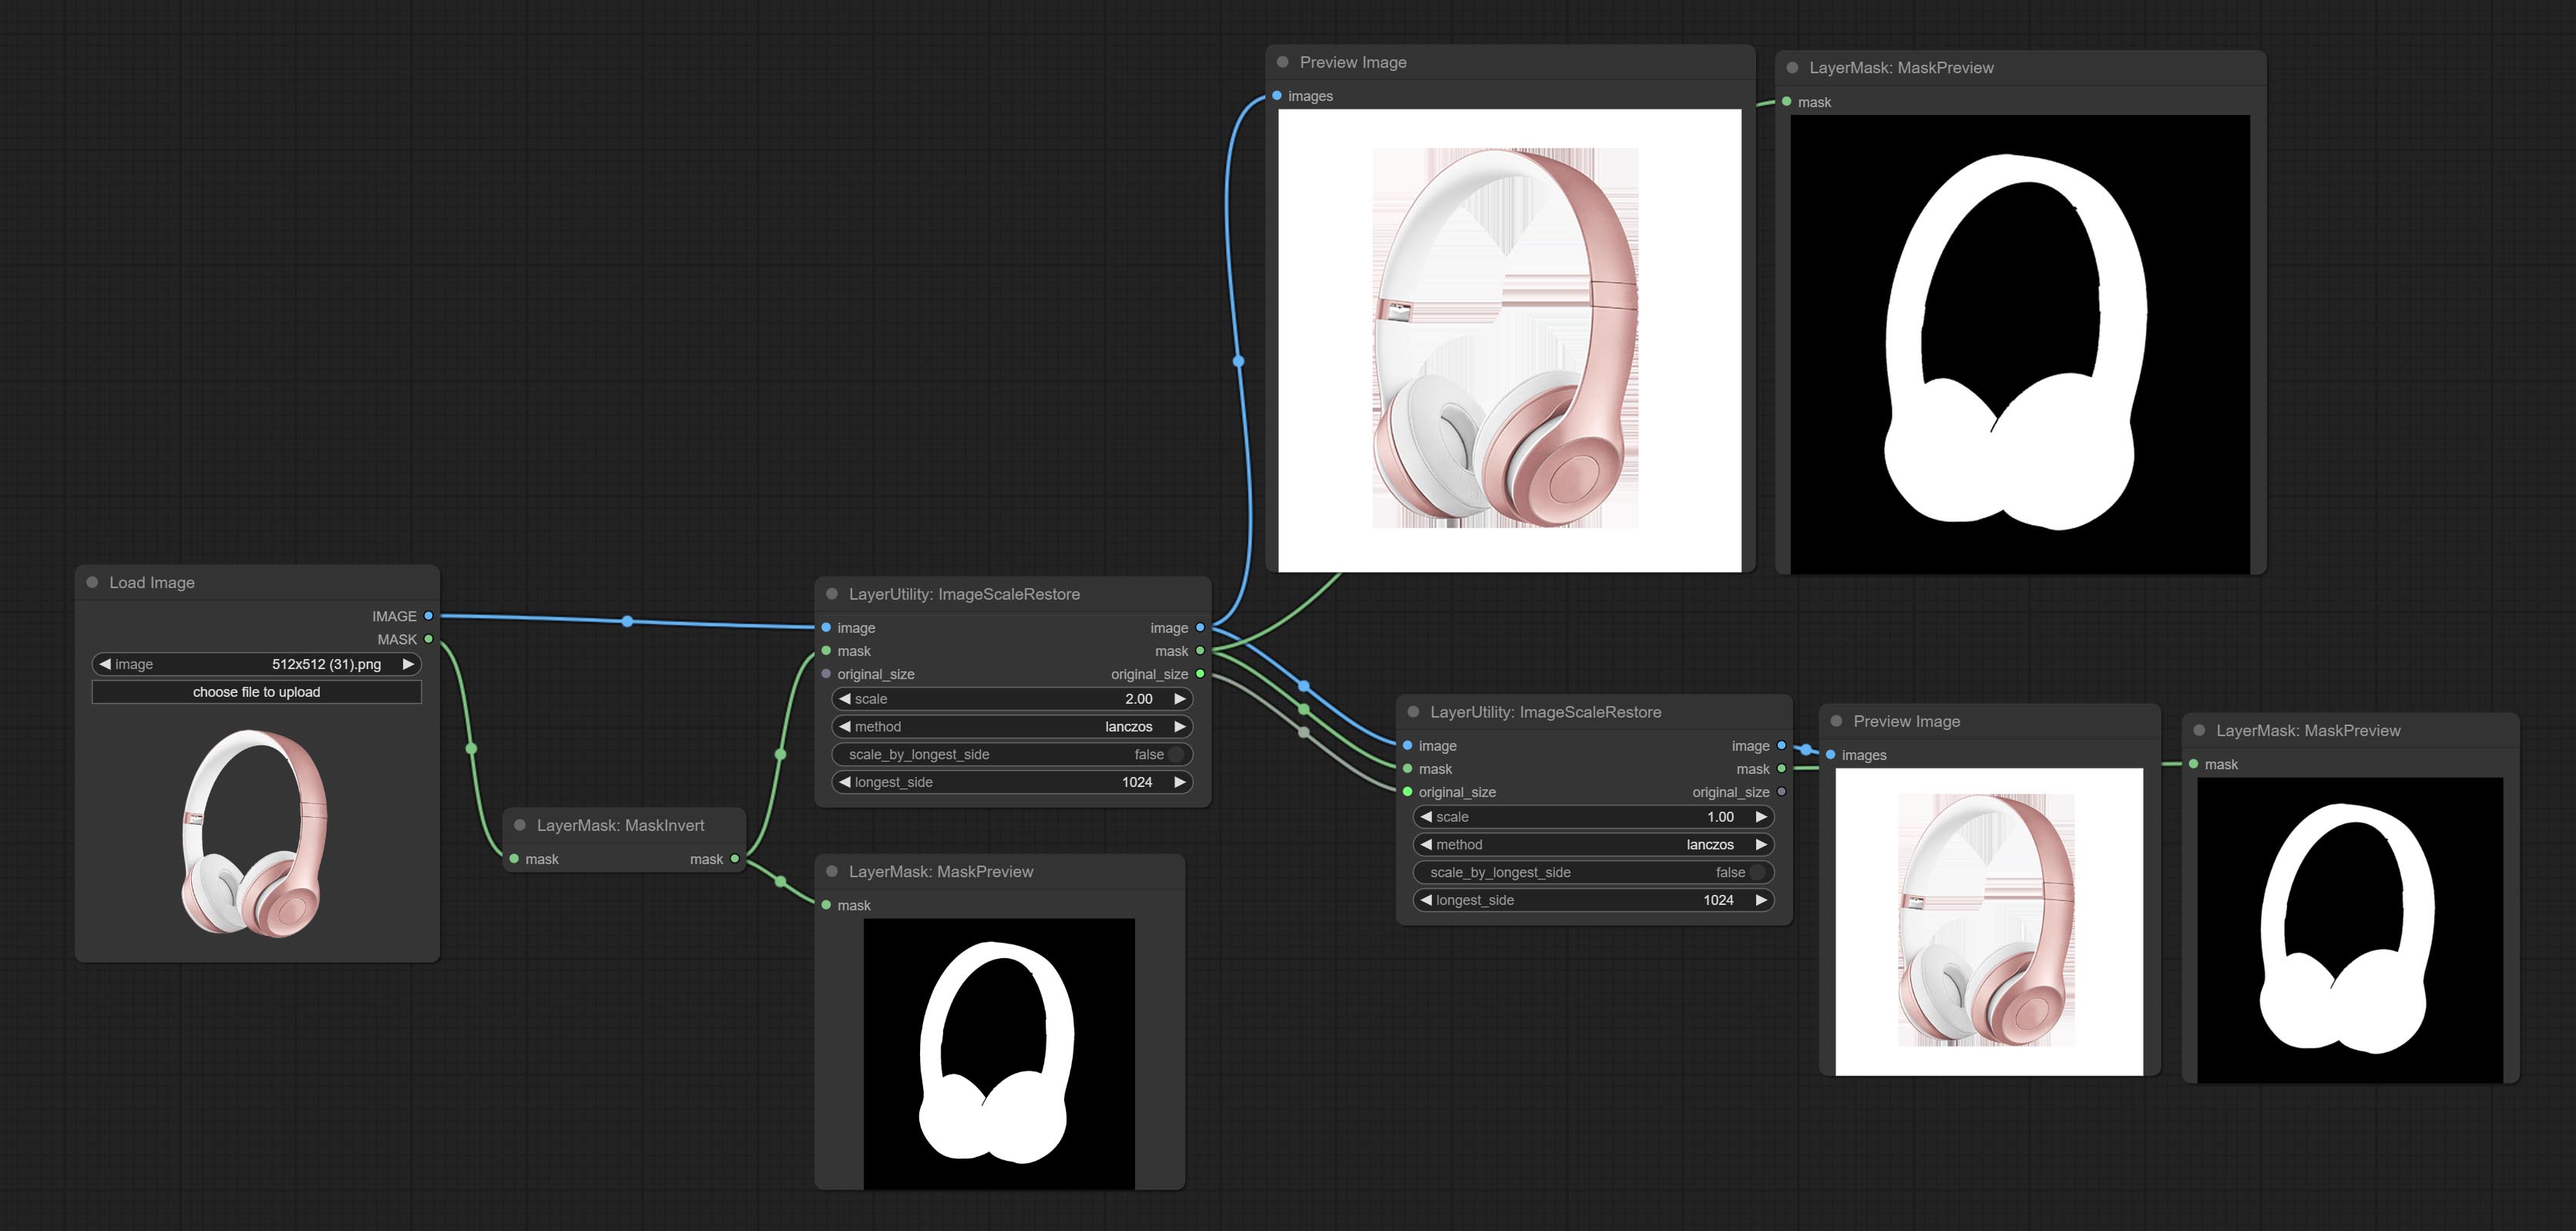
Node options: 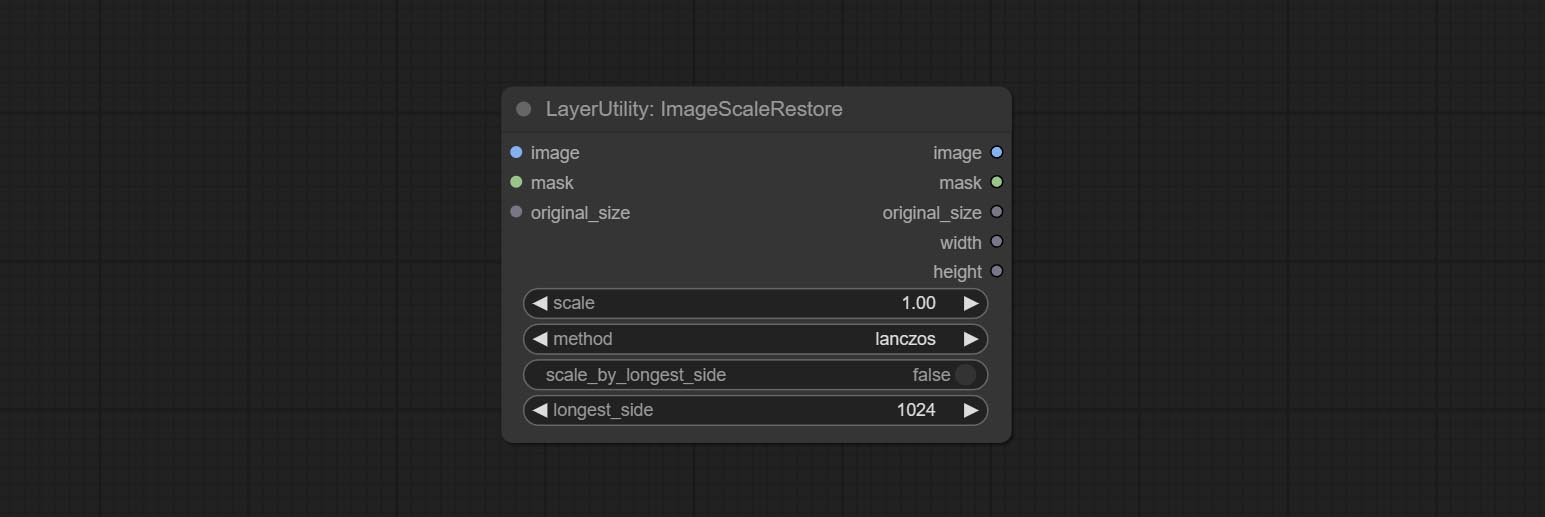
Outputs:
The V2 upgraded version of ImageScaleRestore.
Node options: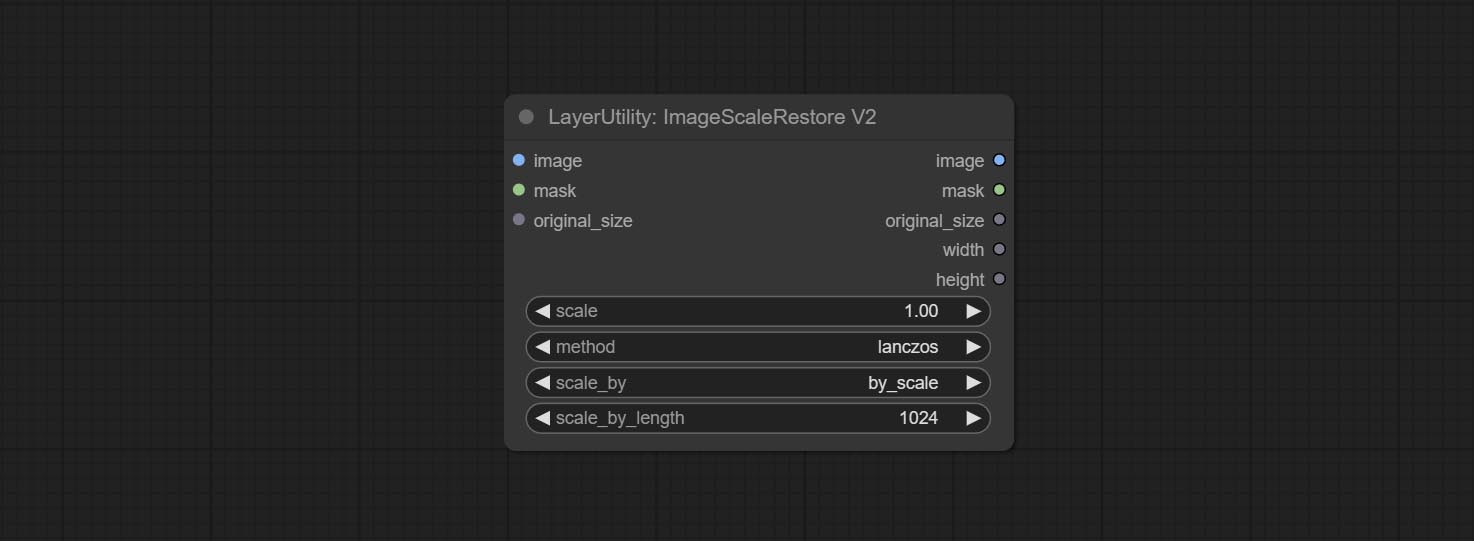
The following changes have been made based on ImageScaleRestore:
scale_by to specify the length of the edge. Scale the image or mask to the size of the reference image (or reference mask). 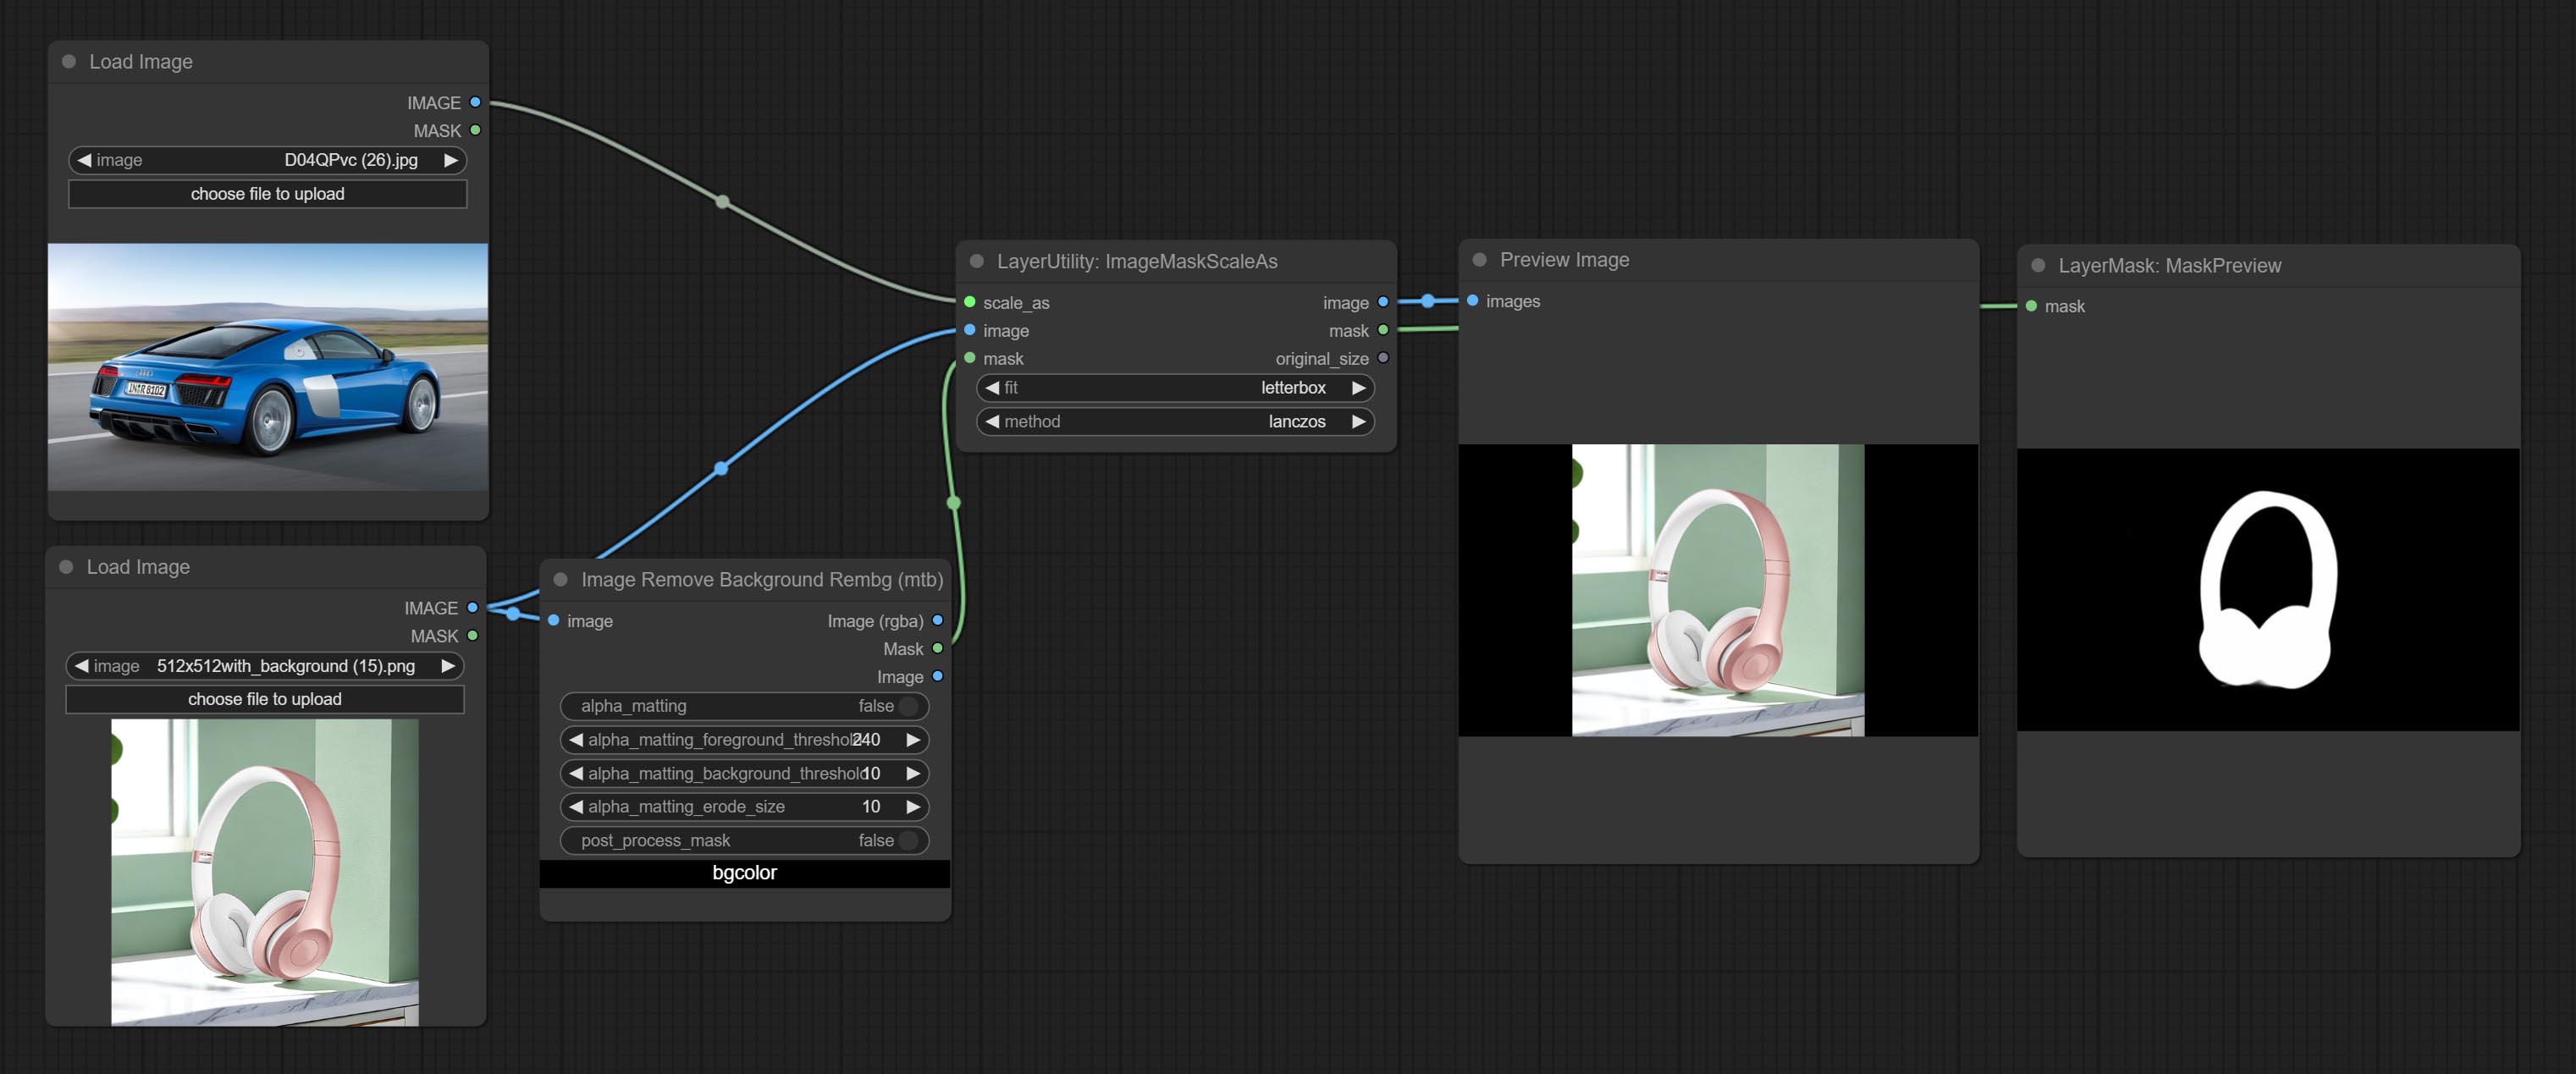
Node options: 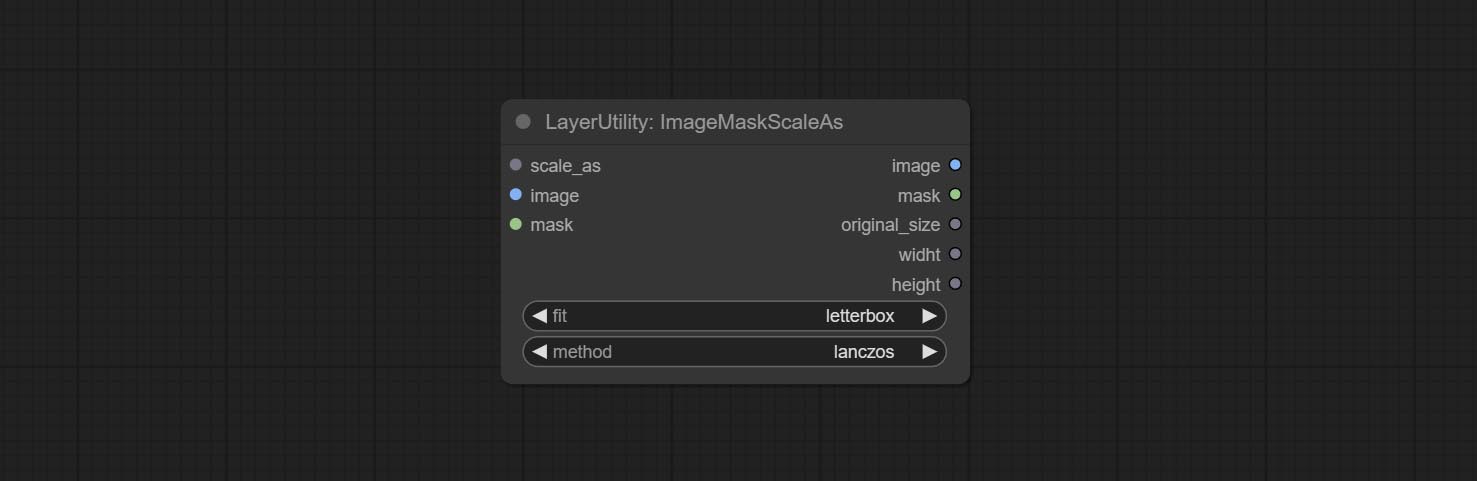
* Only limited to input images and masks. forcing the integration of other types of inputs will result in node errors.
Outputs:
Scale the image or mask by aspect ratio. the scaled size can be rounded to a multiple of 8 or 16, and can be scaled to the long side size. 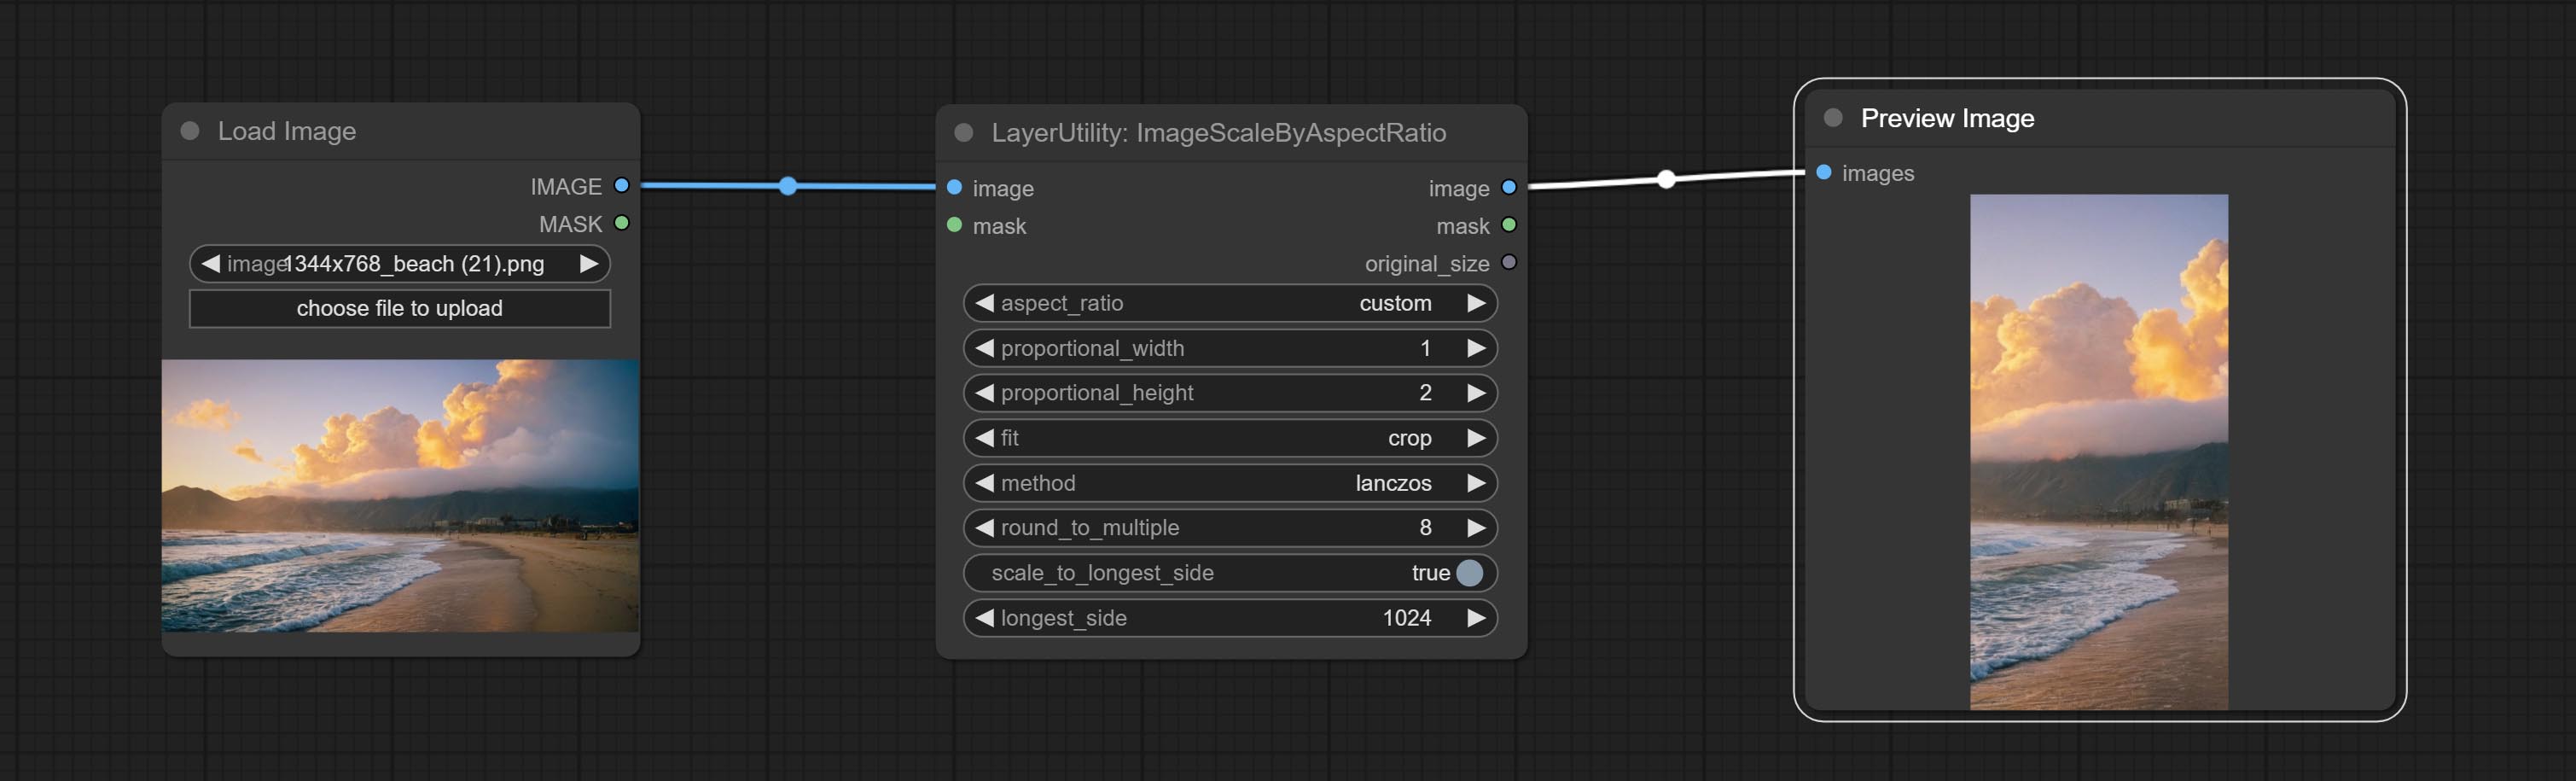
Node options: 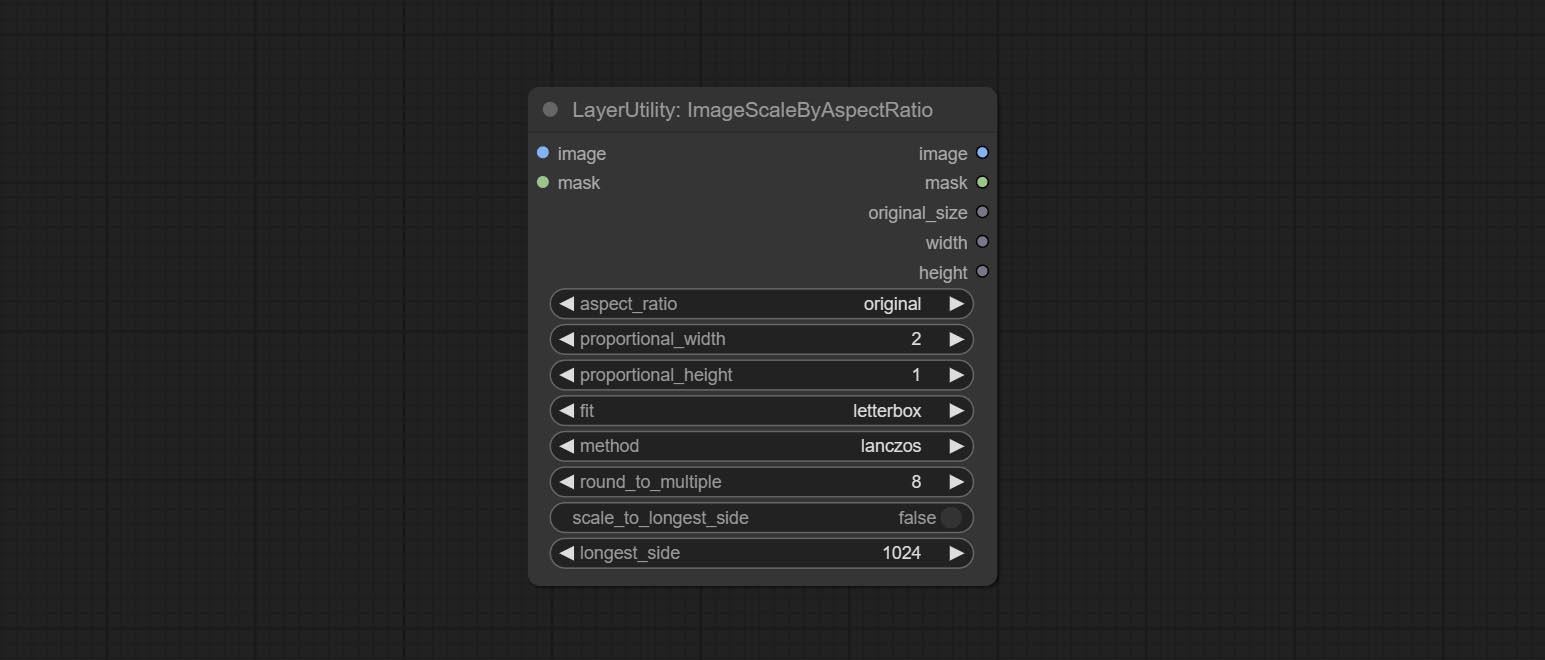
Outputs:
V2 Upgraded Version of ImageScaleByAspectRatio
Node options: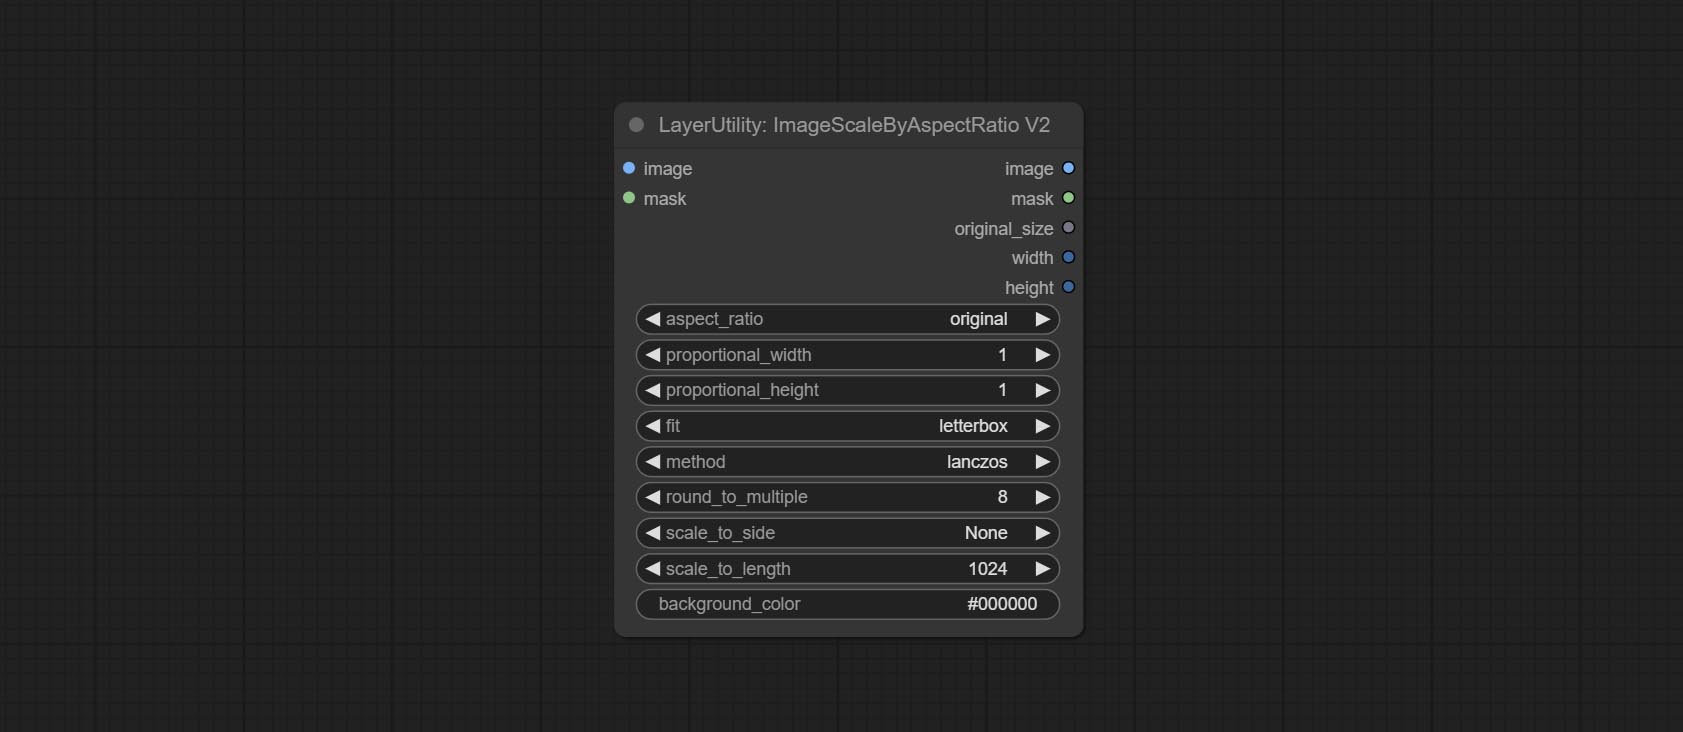
The following changes have been made based on ImageScaleByAspectRatio:
Inference the prompts based on the image. this node is repackage of the ComfyUI_VLM_nodes's UForm-Gen2 Qwen Node , thanks to the original author. Download model files from huggingface or Baidu Netdisk to ComfyUI/models/LLavacheckpoints/files_for_uform_gen2_qwen folder.
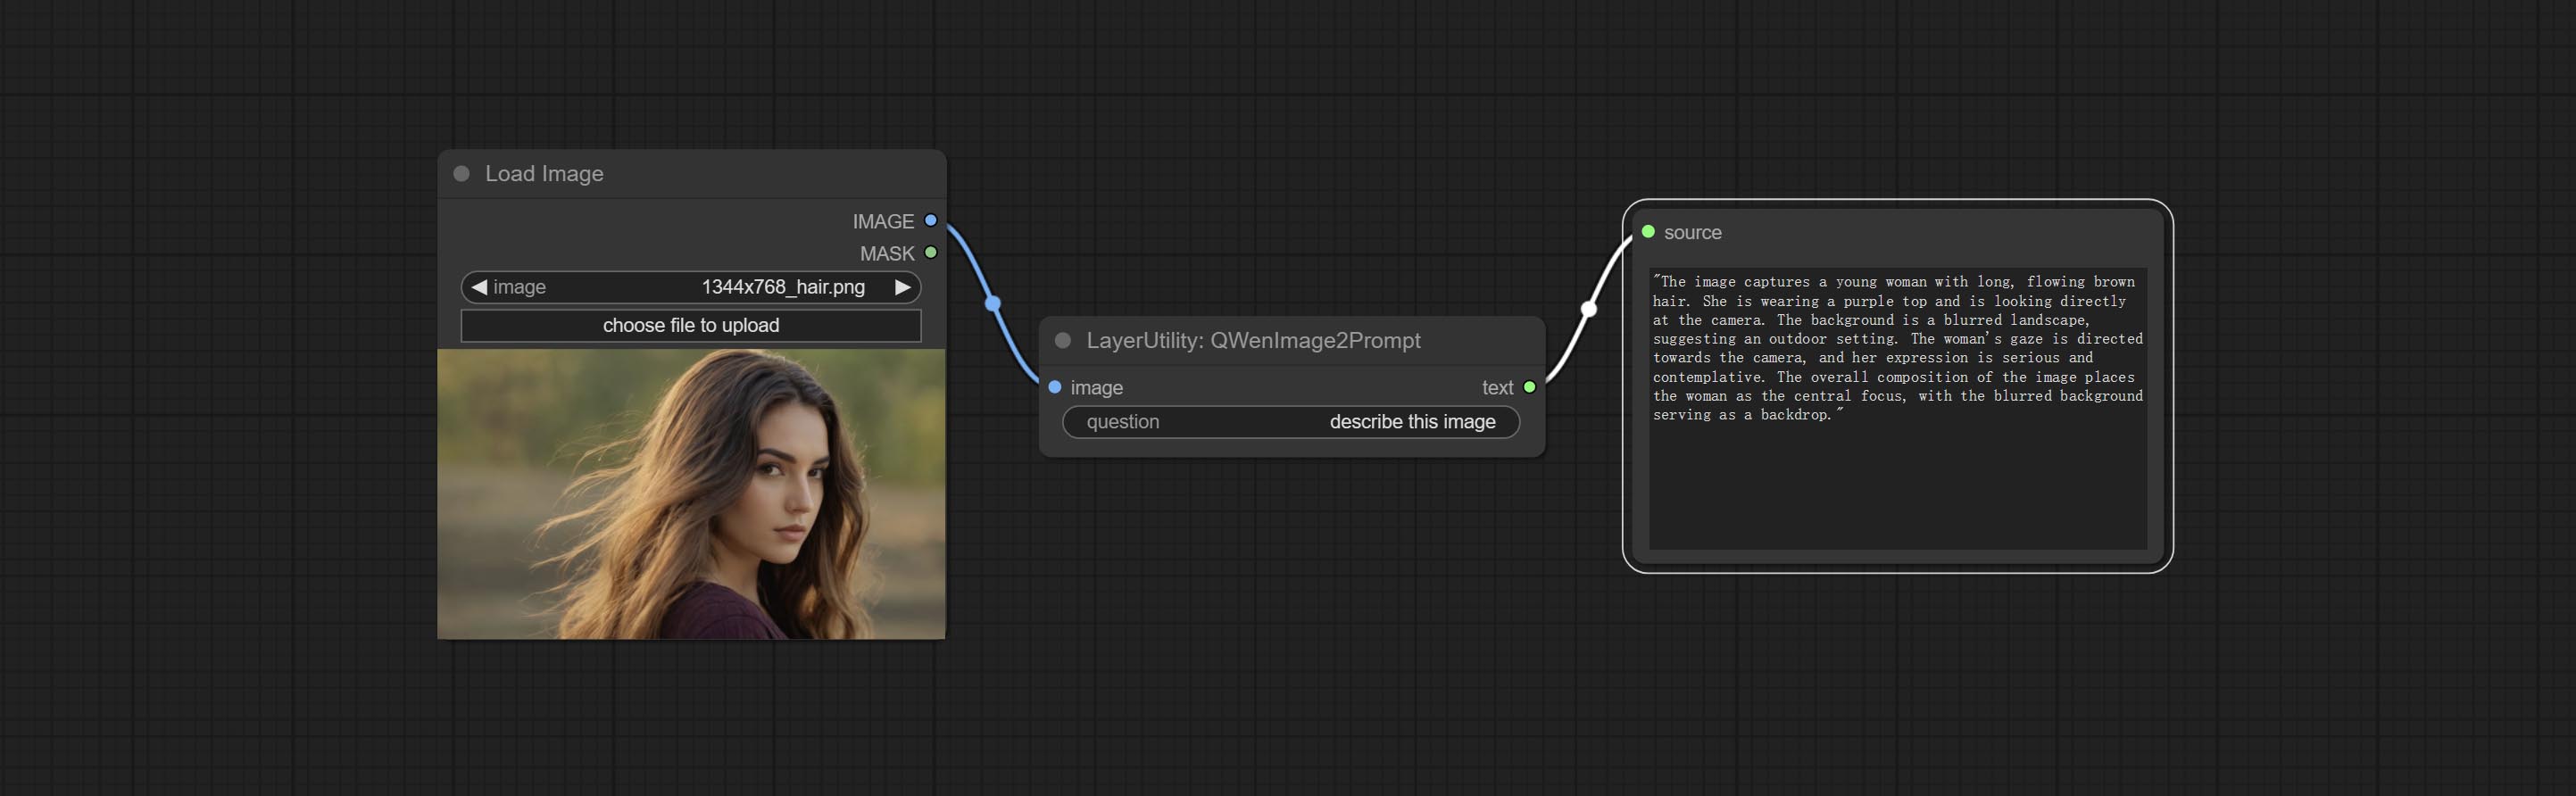
Node Options:
Use the Llama 3.2 vision model for local inference. Can be used to generate prompt words. part of the code for this node comes from ComfyUI-PixtralLlamaMolmoVision, thank you to the original author. To use this node, the transformers need upgraded to 4.45.0 or higher. Download models from BaiduNetdisk or huggingface/SeanScripts , and copy to ComfyUI/models/LLM . 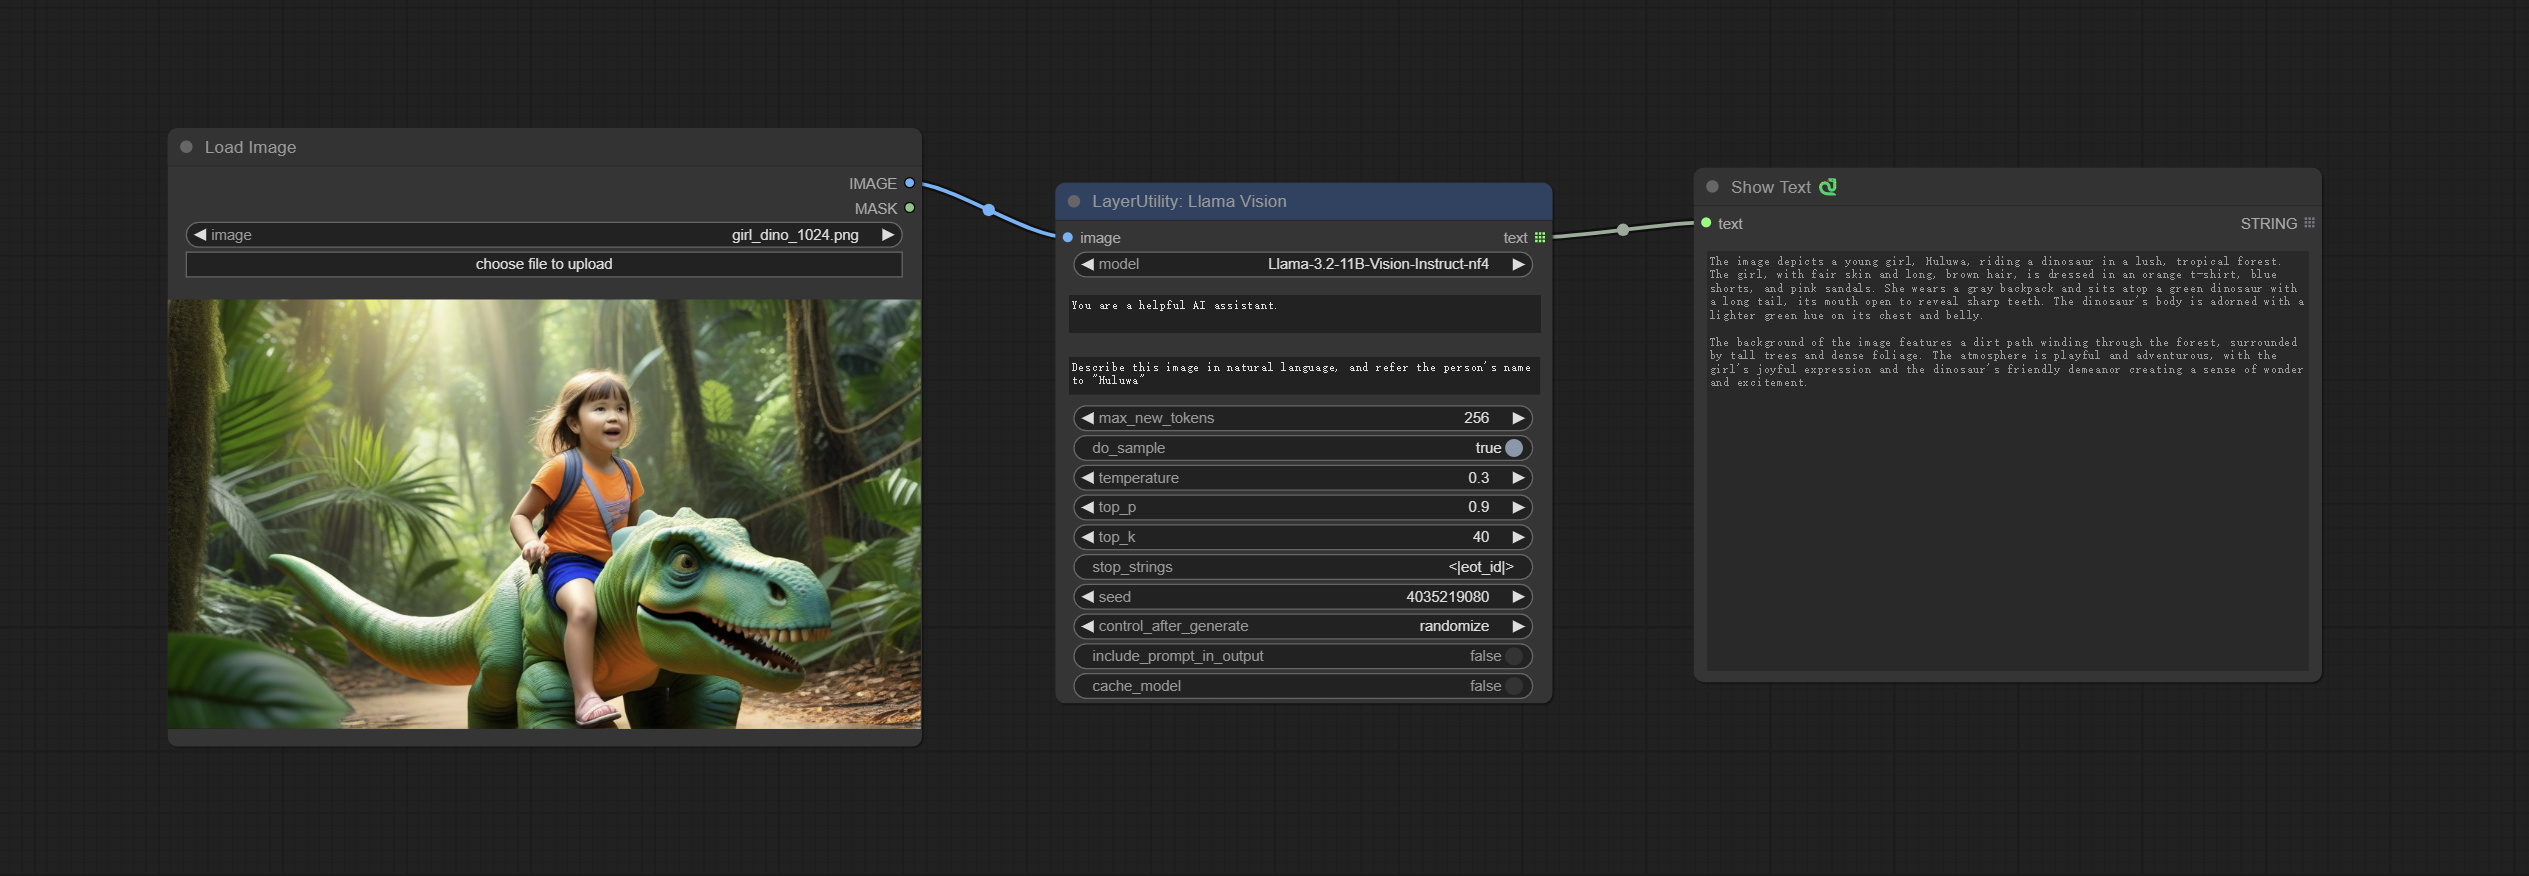
Node Options: 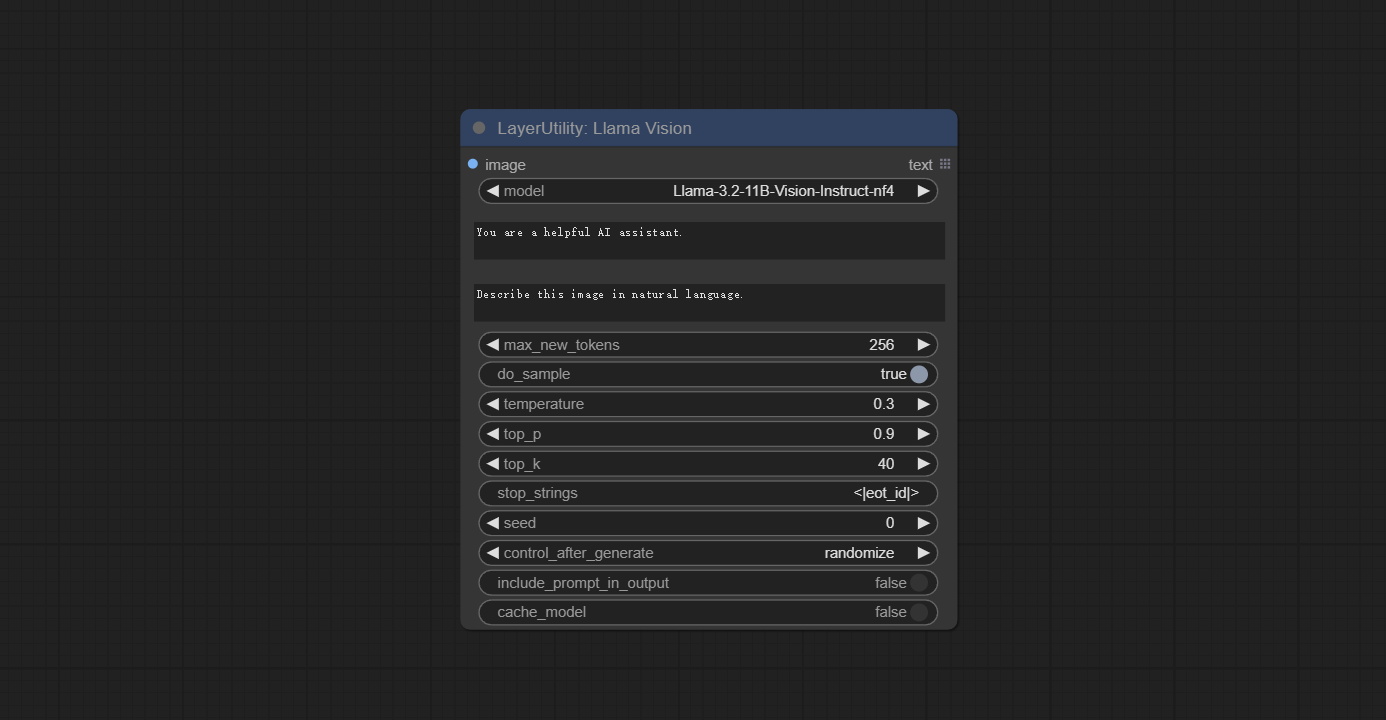
Use the JoyCaption-alpha-two model for local inference. Can be used to generate prompt words. this node is https://huggingface.co/John6666/joy-caption-alpha-two-cli-mod Implementation in ComfyUI, thank you to the original author. Download models form BaiduNetdisk and BaiduNetdisk , or huggingface/Orenguteng and huggingface/unsloth , then copy to ComfyUI/models/LLM , Download models from BaiduNetdisk or huggingface/google , and copy to ComfyUI/models/clip , Donwload the cgrkzexw-599808 folder from BaiduNetdisk or huggingface/John6666 , and copy to ComfyUI/models/Joy_caption 。 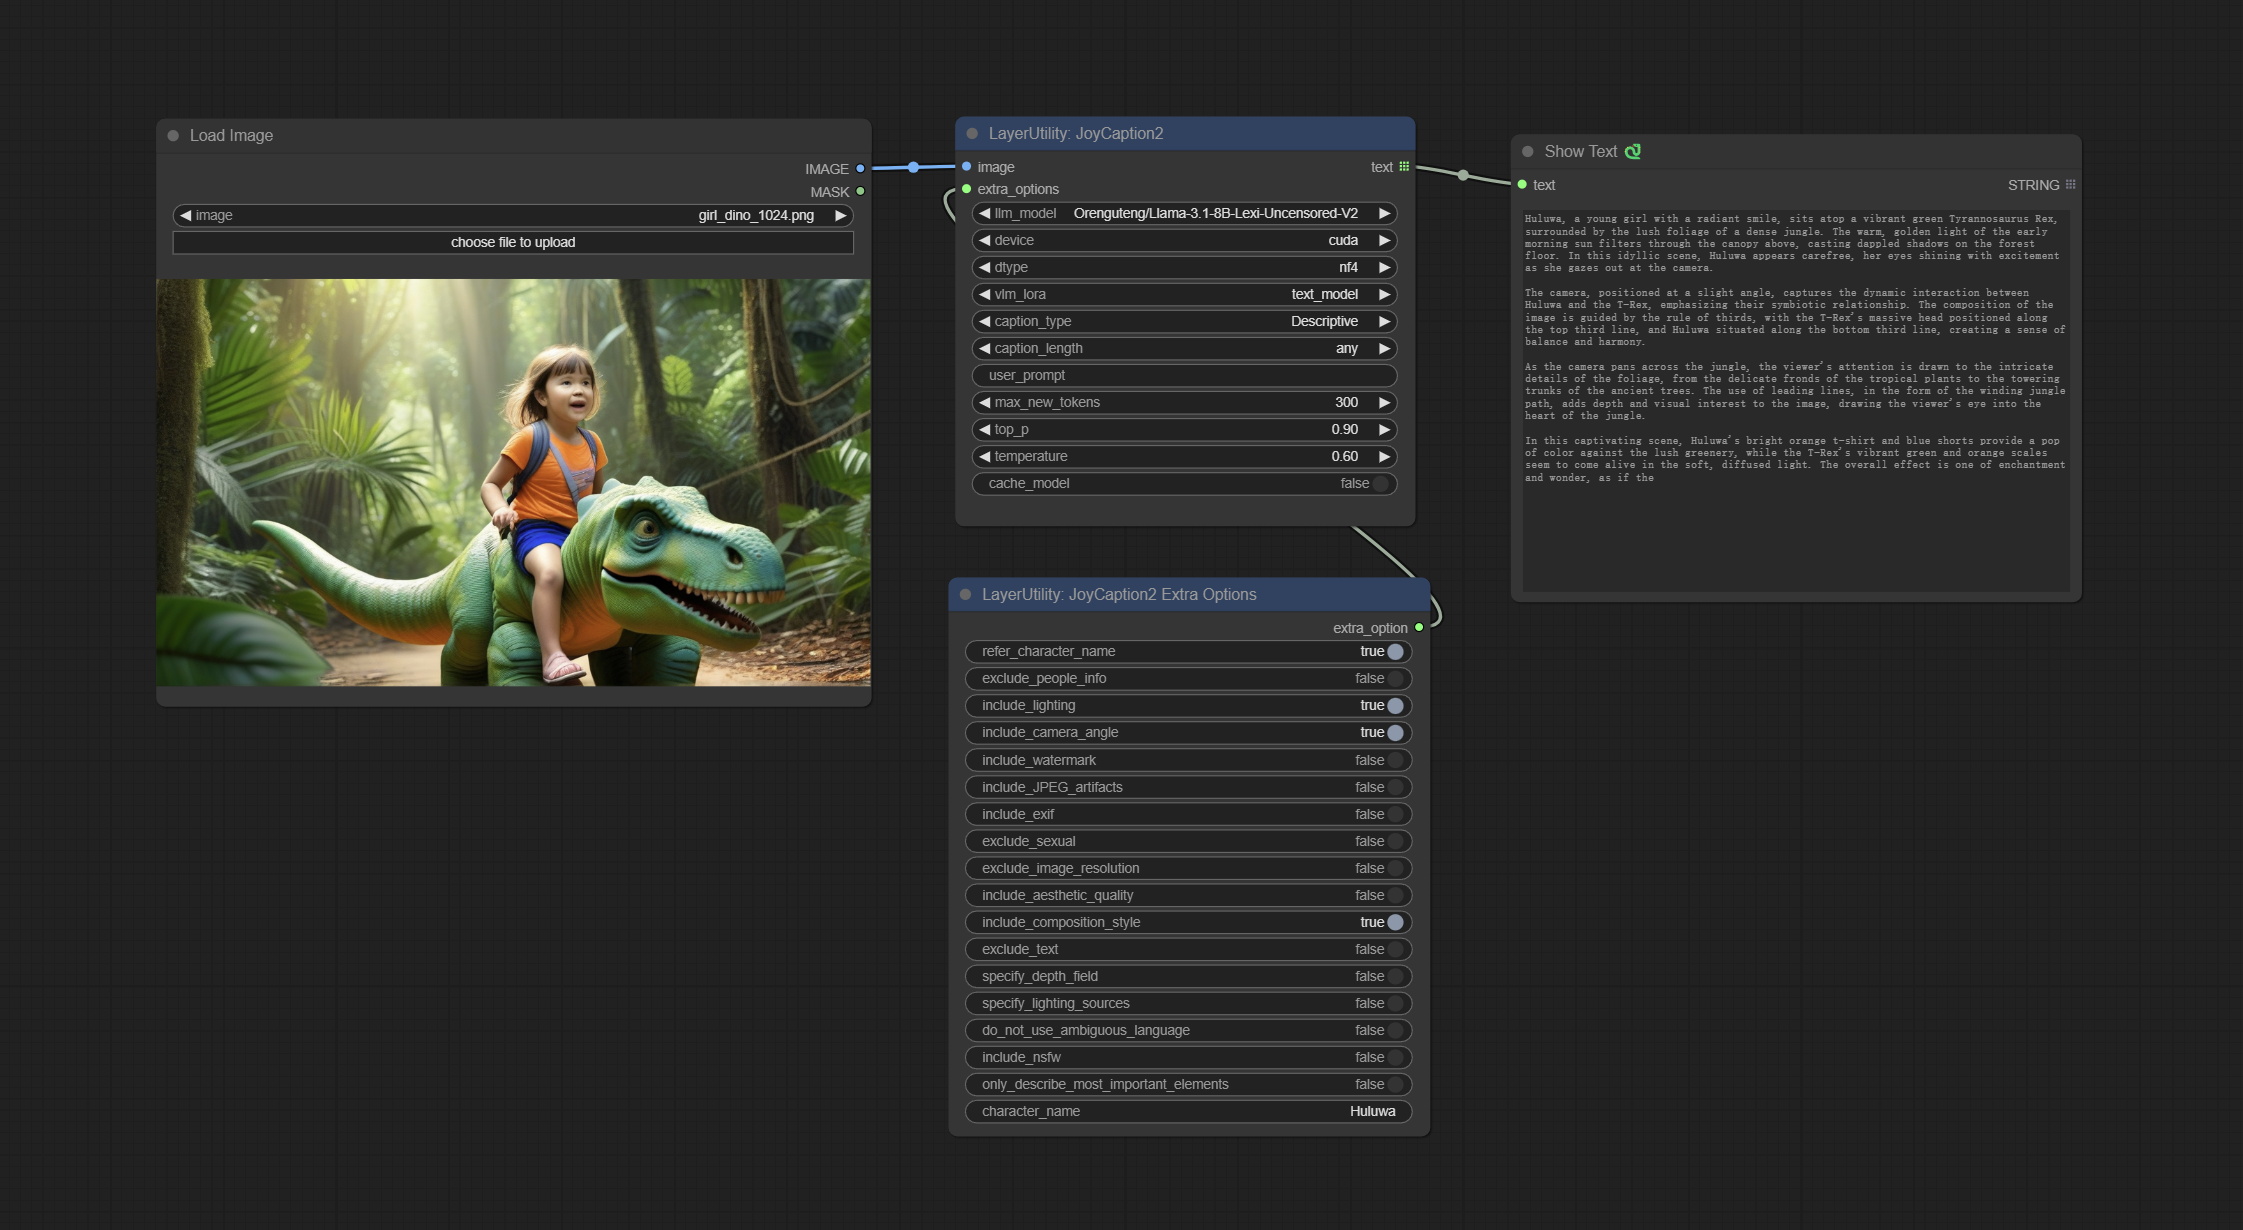
Node Options: 
The node of JoyCaption2 separate model loading and inference, and when multiple JoyCaption2 nodes are used, the model can be shared to improve efficiency.
Node Options: 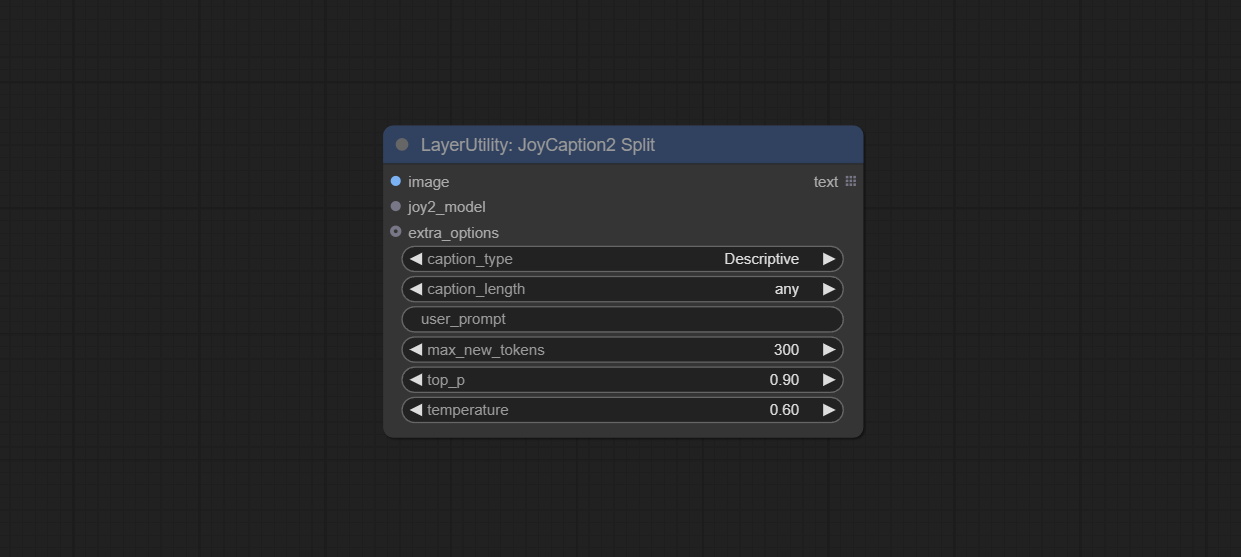
JoyCaption2's model loading node, used in conjunction with JoyCaption2Split.
Node Options: 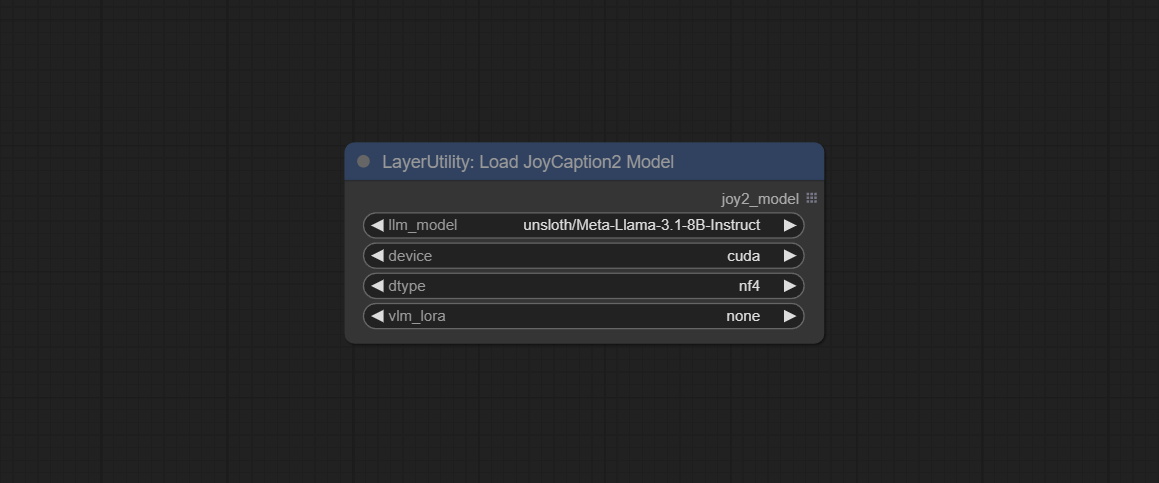
The extra_options parameter node of JoyCaption2.
Node Options: 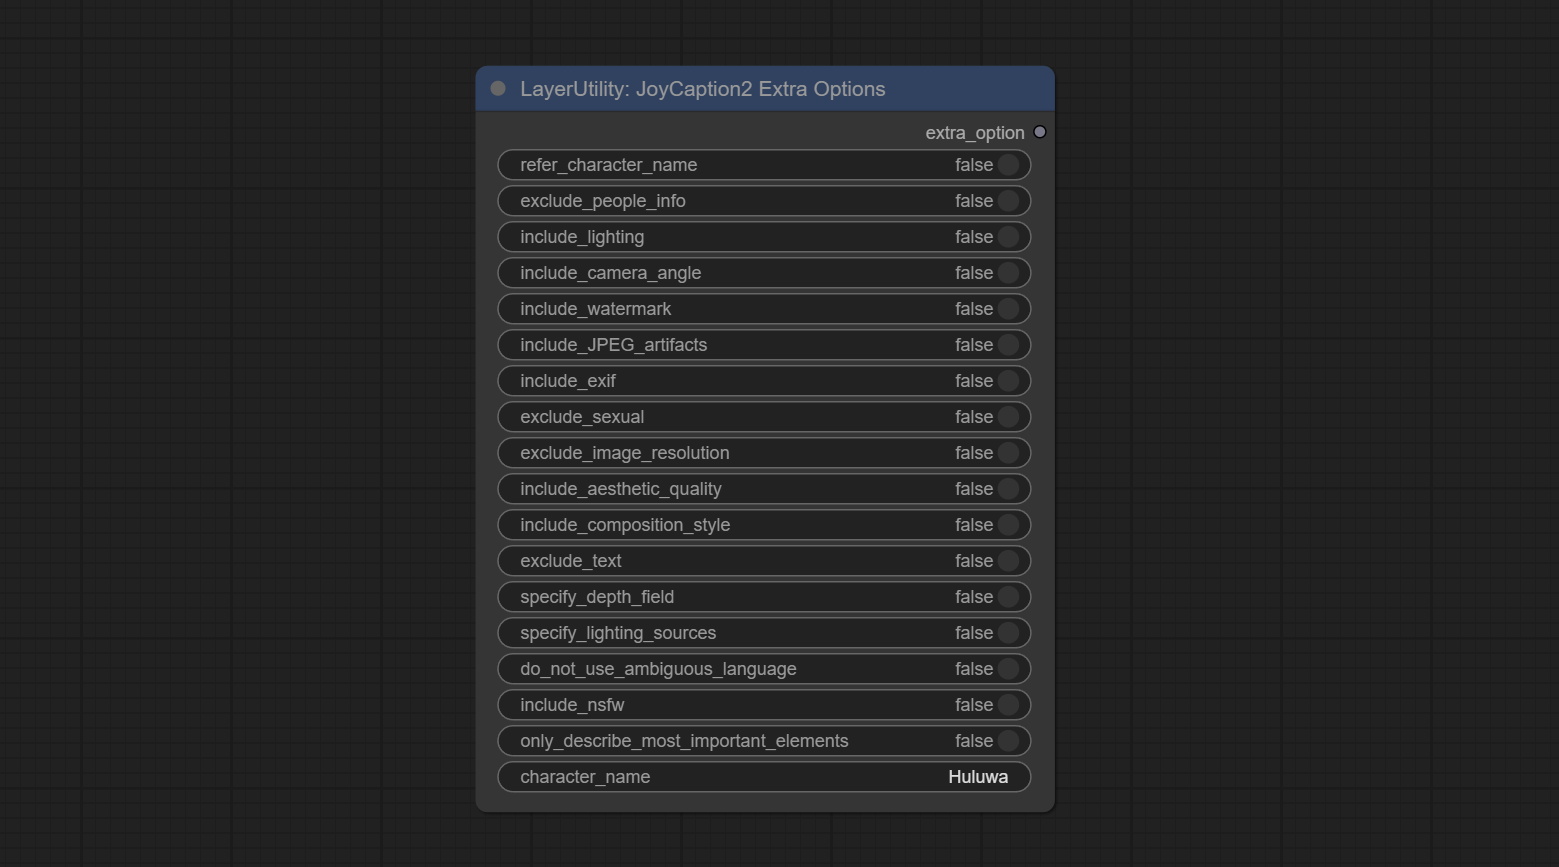
refer_character_name . Use Microsoft Phi 3.5 text and visual models for local inference. Can be used to generate prompt words, process prompt words, or infer prompt words from images. Running this model requires at least 16GB of video memory. Download model files from BaiduNetdisk or huggingface.co/microsoft/Phi-3.5-vision-instruct and huggingface.co/microsoft/Phi-3.5-mini-instruct and copy to ComfyUImodelsLLM folder. 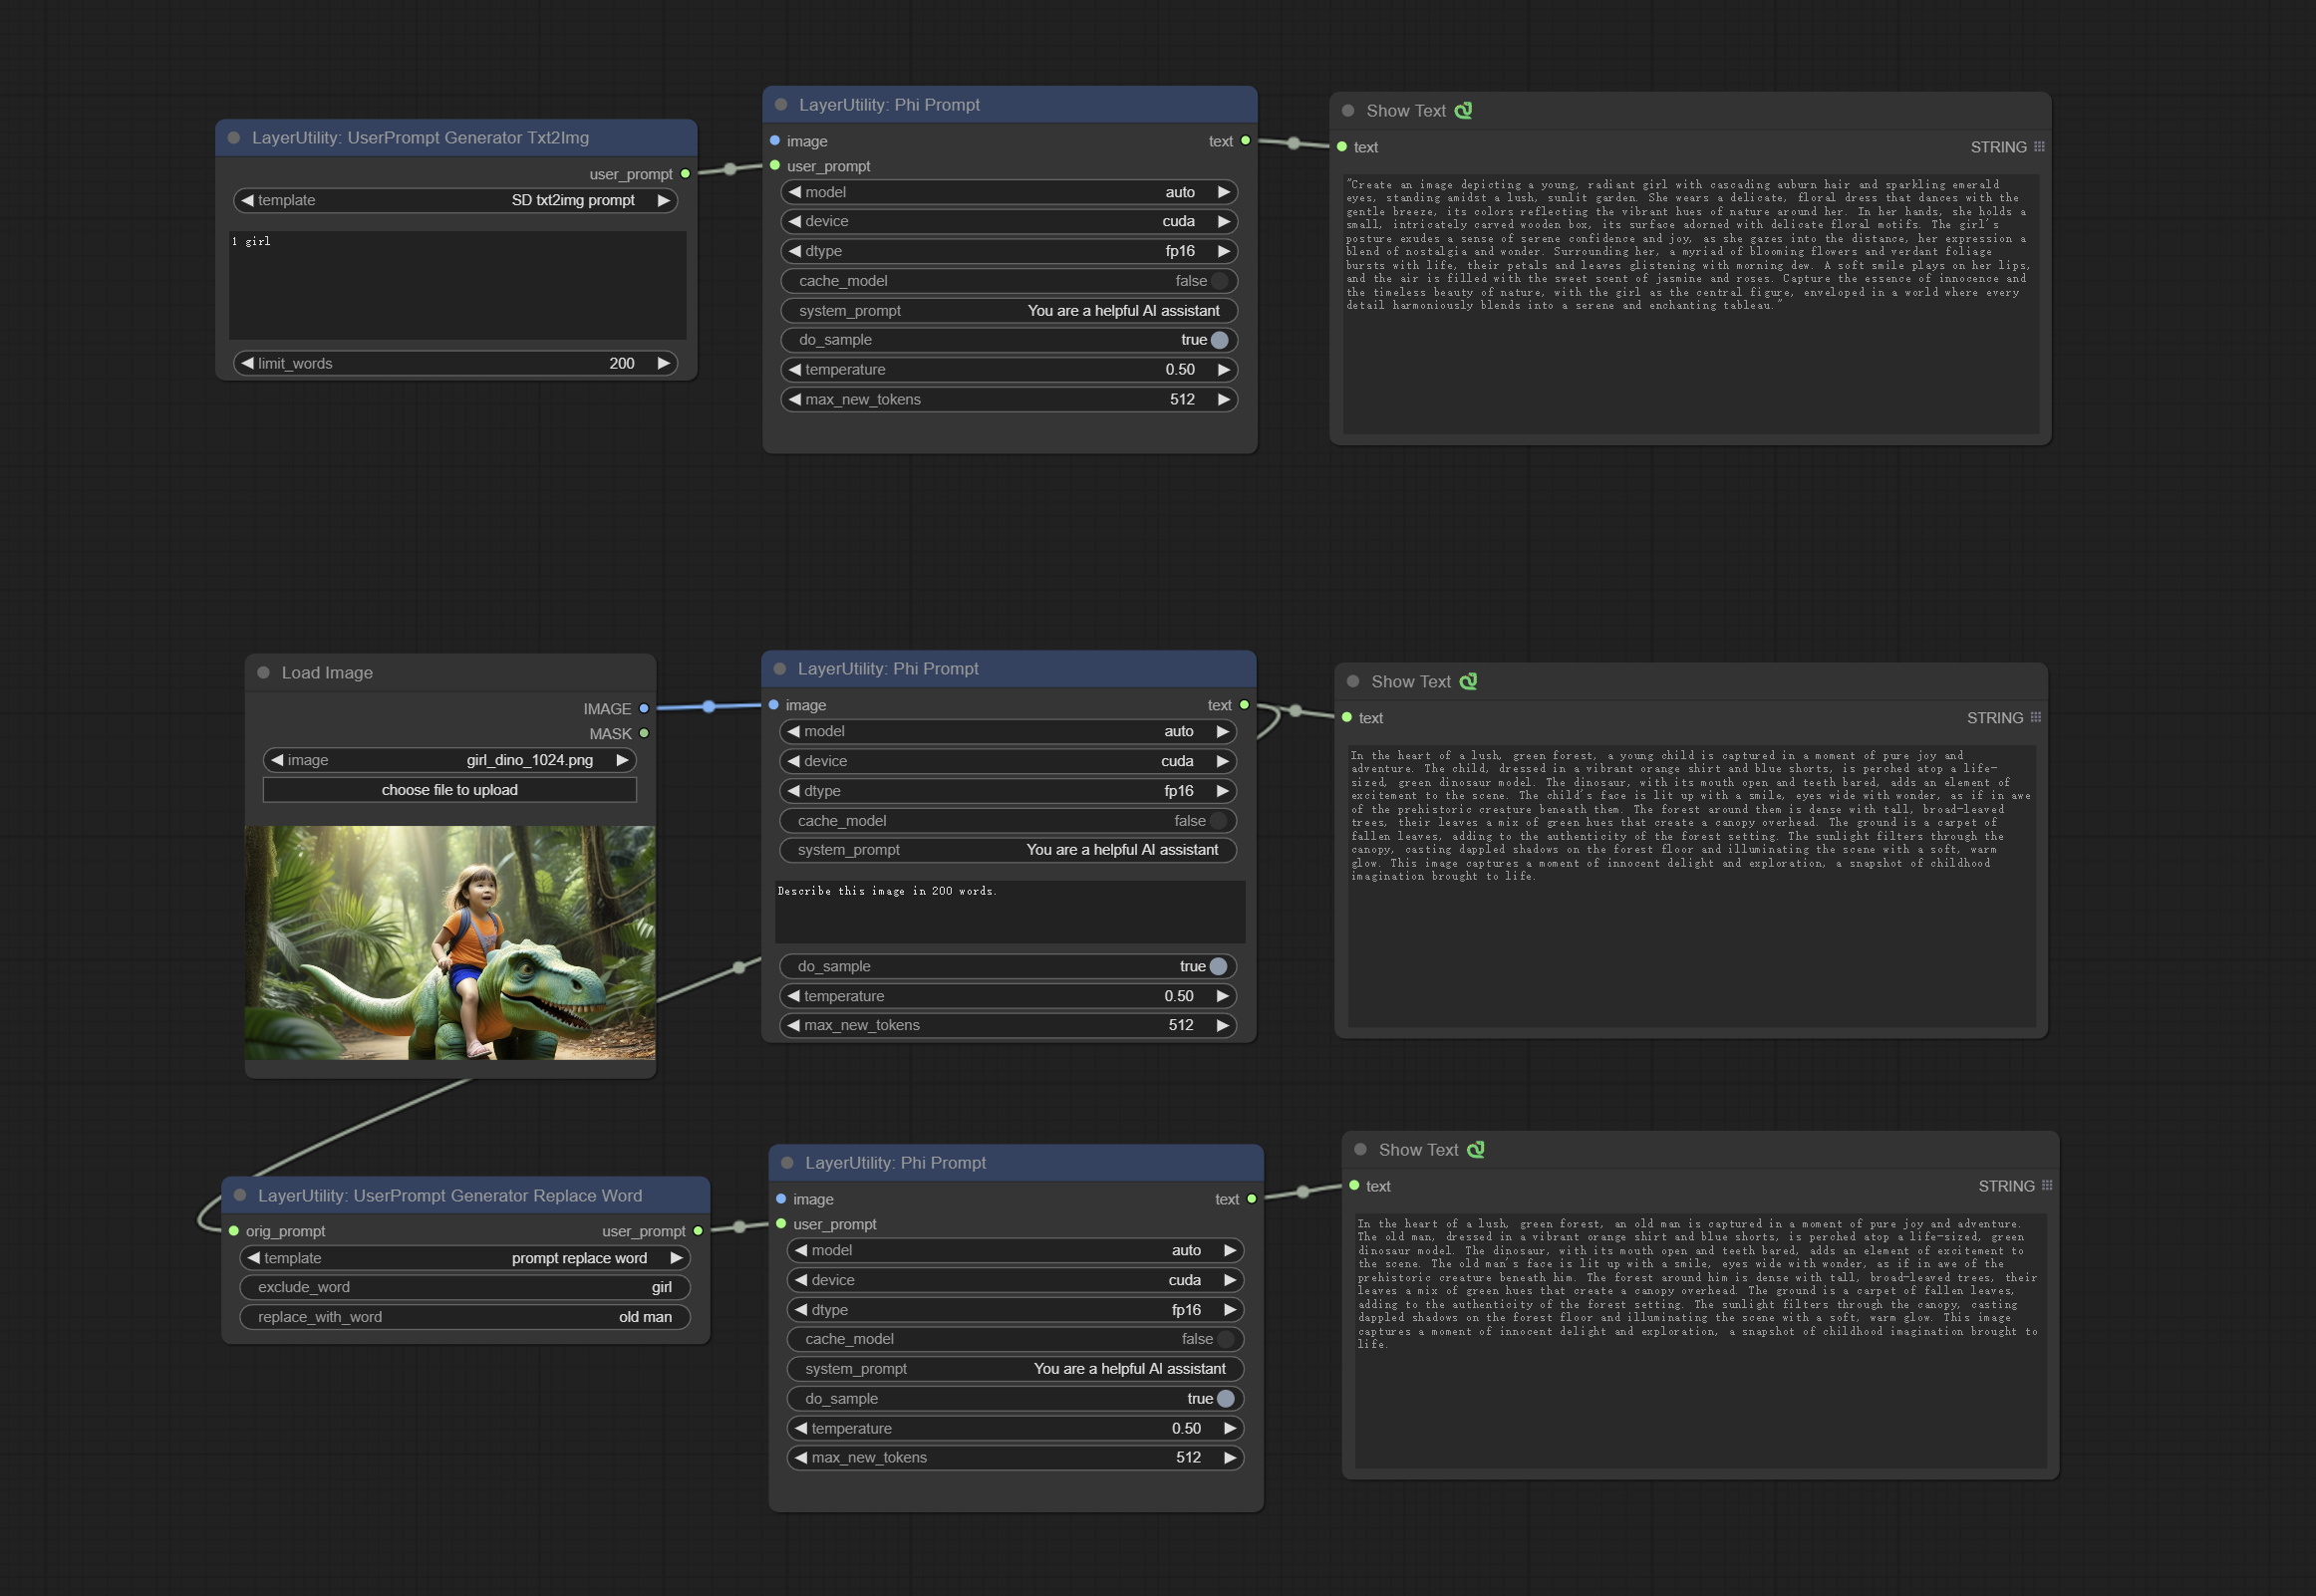
Node Options: 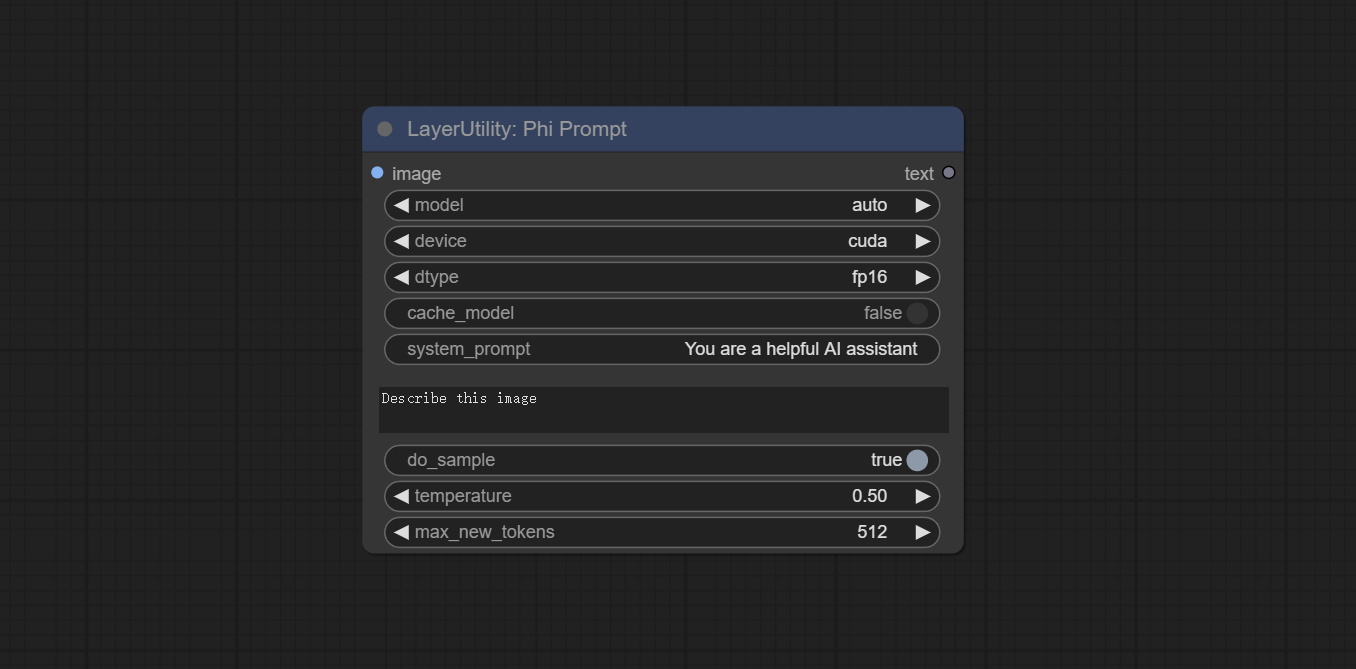
UserPrompt preset for generating SD text to image prompt words.
Node options: 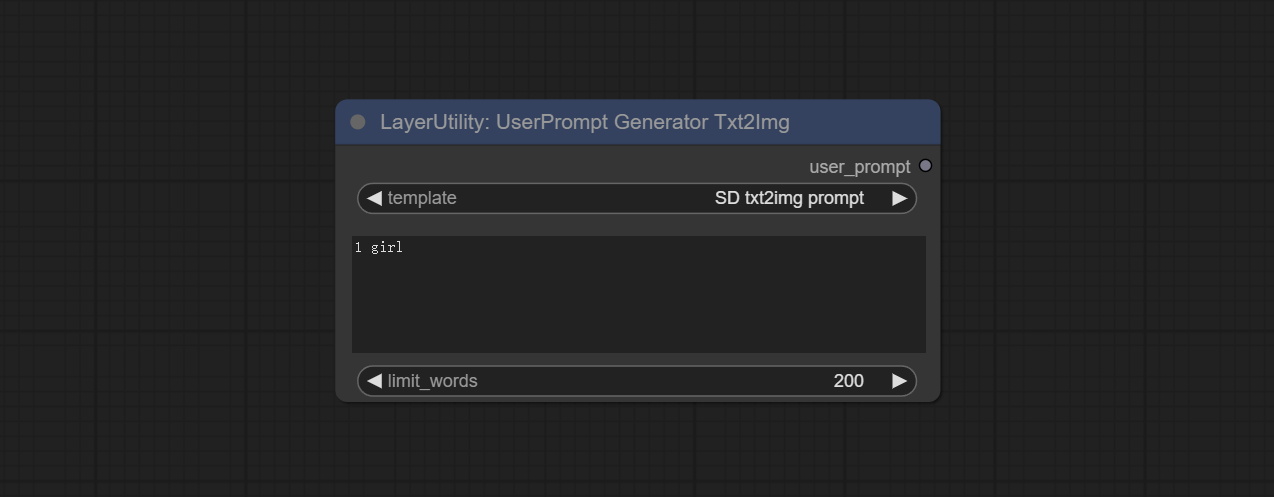
UserCompt preset for generating SD text to image prompt words based on input content.
Node options: 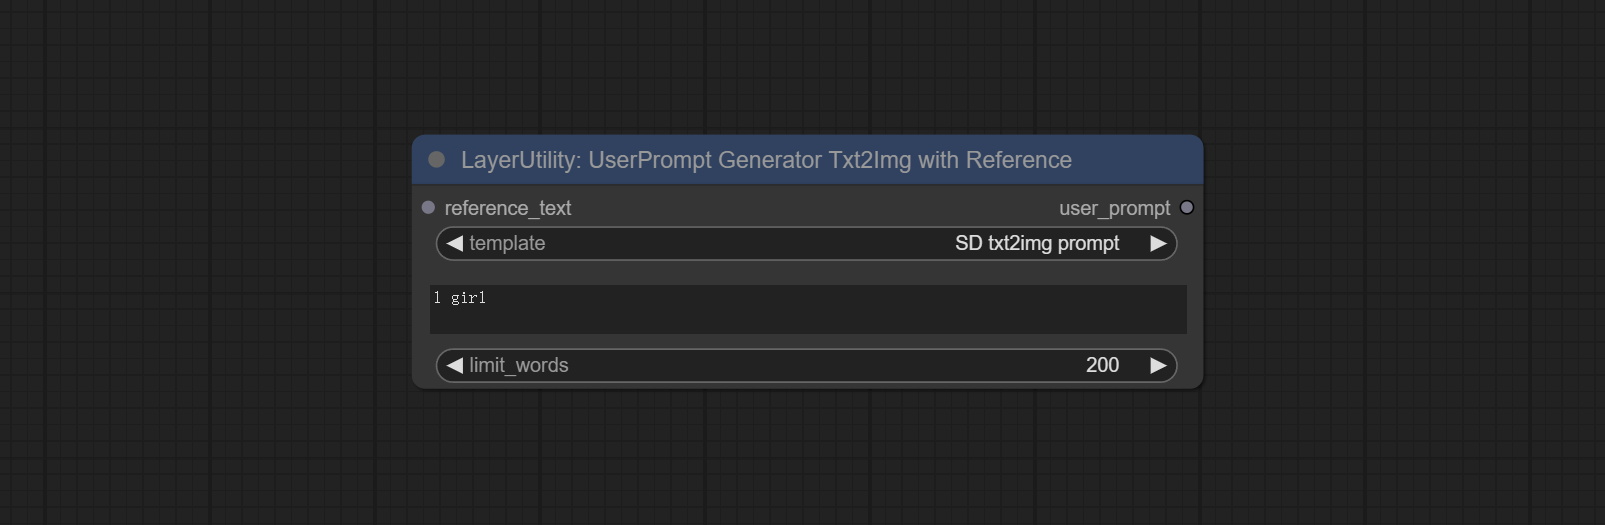
UserPrompt preset used to replace a keyword in text with different content. This is not only a simple replacement, but also a logical sorting of the text based on the context of the prompt words to achieve the rationality of the output content.
Node options: 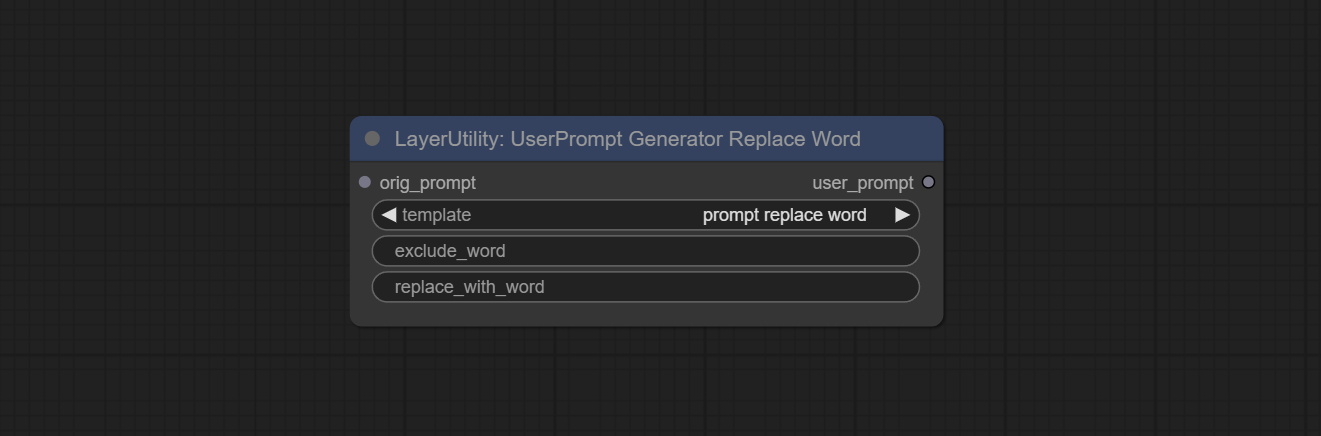
Inference the prompts based on the image. it can replace key word for the prompt. This node currently uses Google Gemini API as the backend service. Please ensure that the network environment can use Gemini normally. Please apply for your API key on Google AI Studio, And fill it in api_key.ini , this file is located in the root directory of the plug-in, and the default name is api_key.ini.example . to use this file for the first time, you need to change the file suffix to .ini . Open it using text editing software, fill in your API key after google_api_key= and save it. 
Node options: 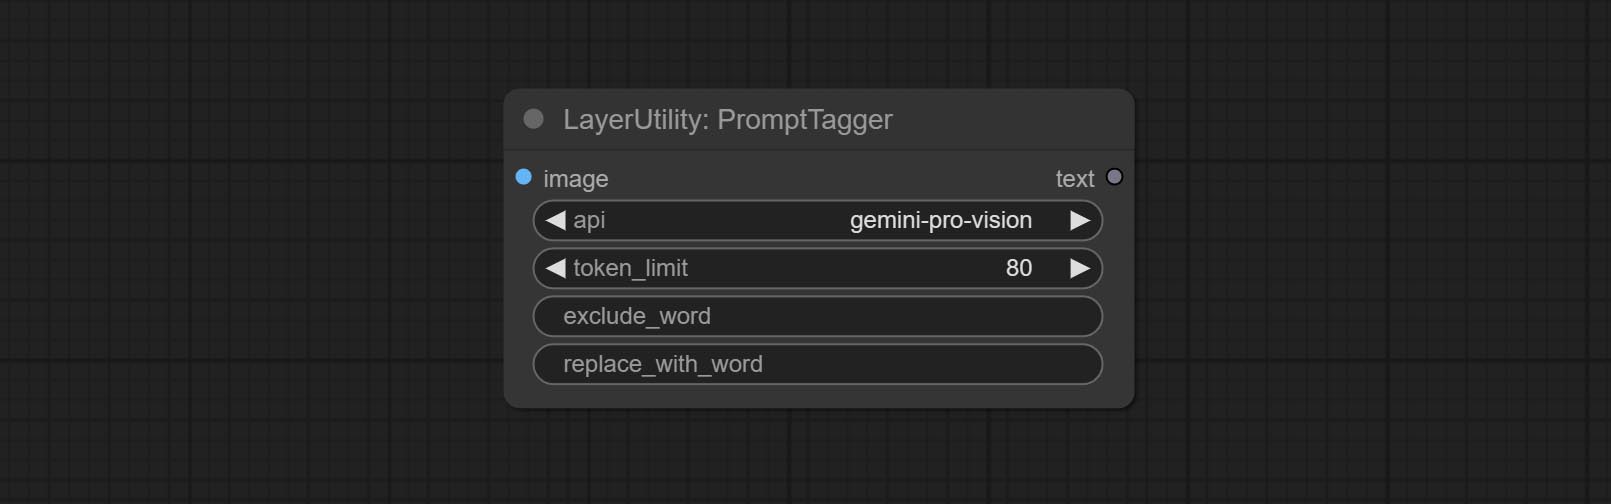
Enter simple prompt words, output polished prompt words, and support inputting images as references, and support Chinese input. This node currently uses Google Gemini API as the backend service. Please ensure that the network environment can use Gemini normally. Please apply for your API key on Google AI Studio, And fill it in api_key.ini , this file is located in the root directory of the plug-in, and the default name is api_key.ini.example . to use this file for the first time, you need to change the file suffix to .ini . Open it using text editing software, fill in your API key after google_api_key= and save it. 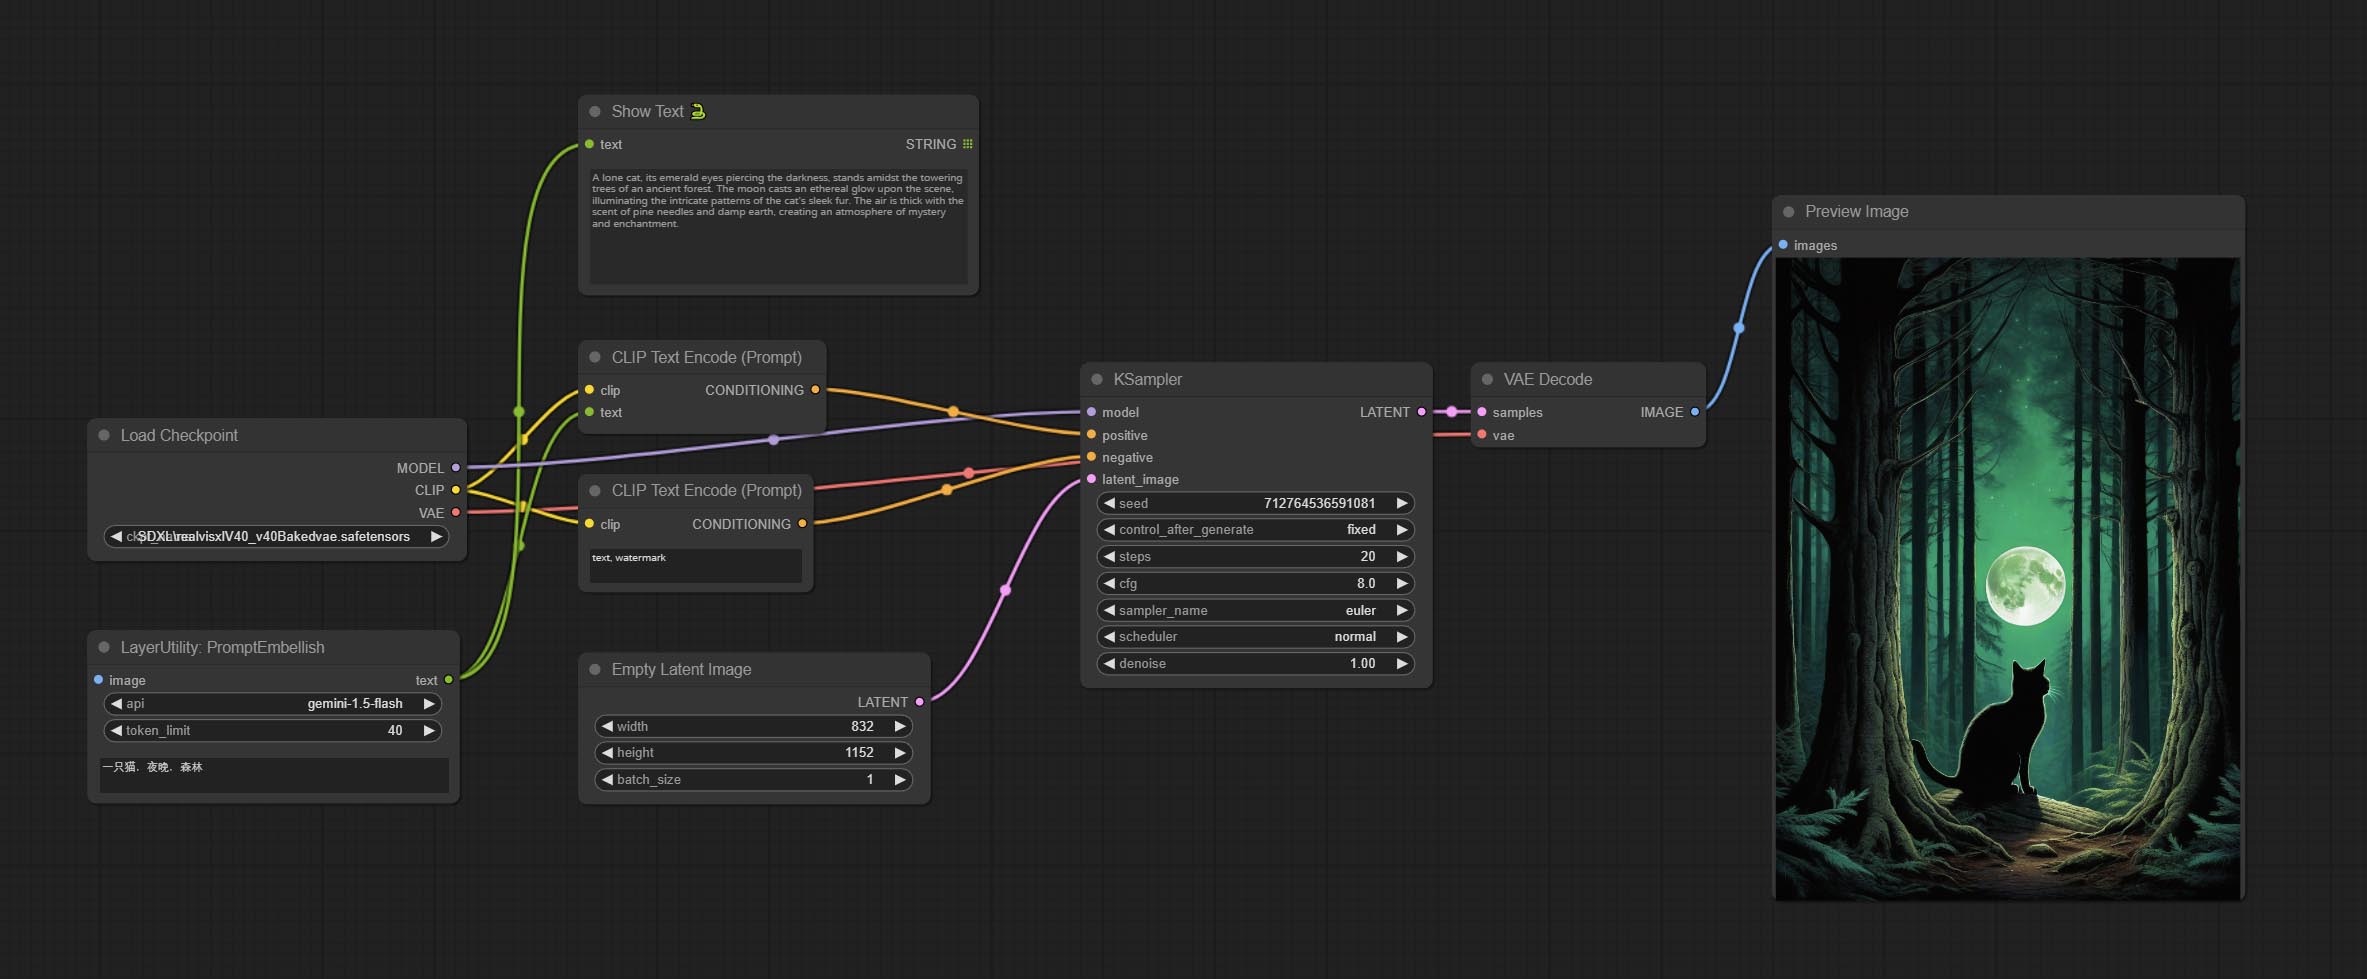
Node options: 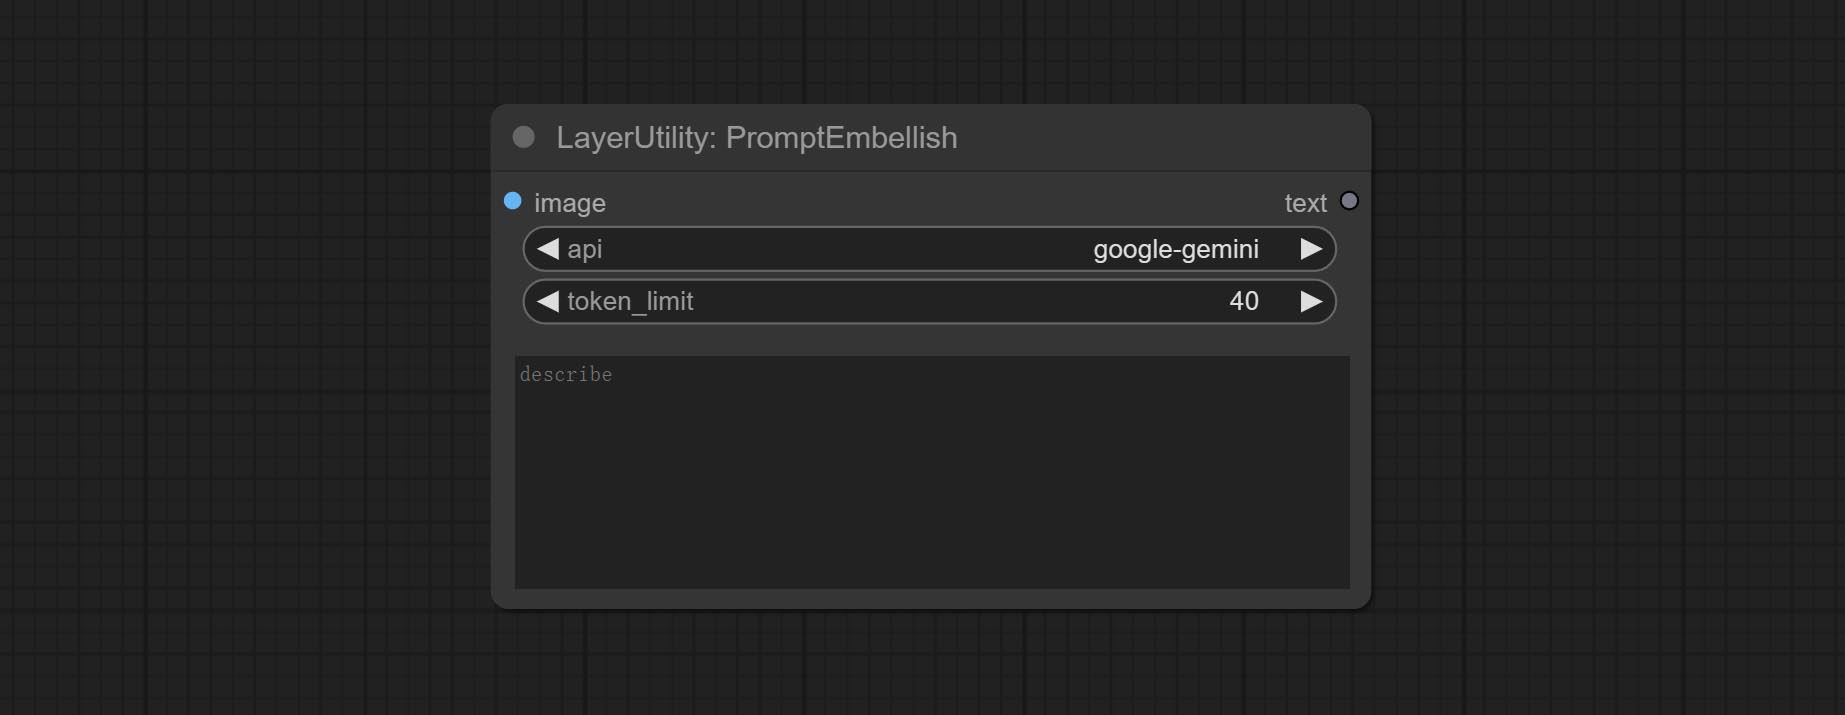
Use the Florence 2 model to infer prompt words. The code for this node section is fromyiwangsimple/florence_dw, thanks to the original author. *When using it for the first time, the model will be automatically downloaded. You can also download the model file from BaiduNetdisk to ComfyUI/models/florence2 folder. 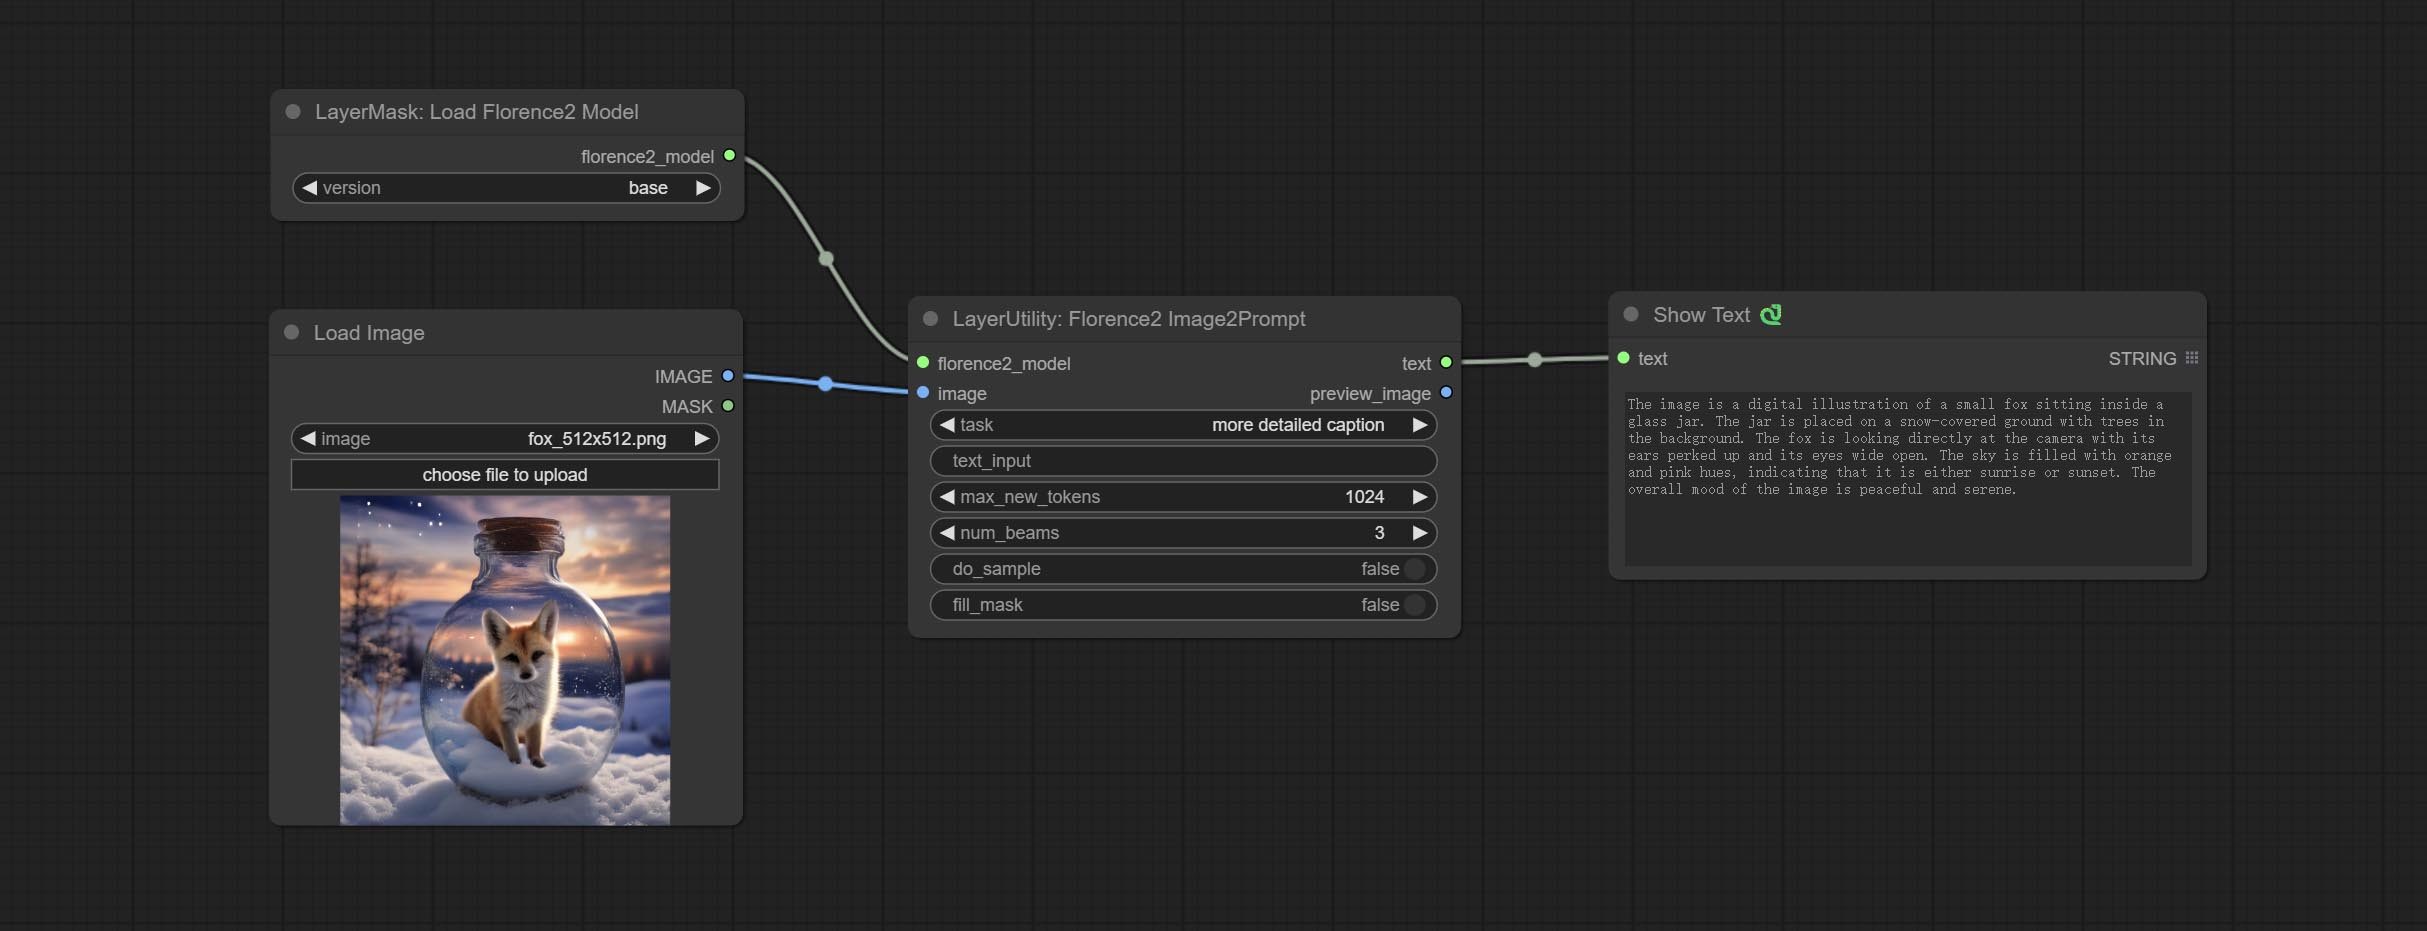
Node Options: 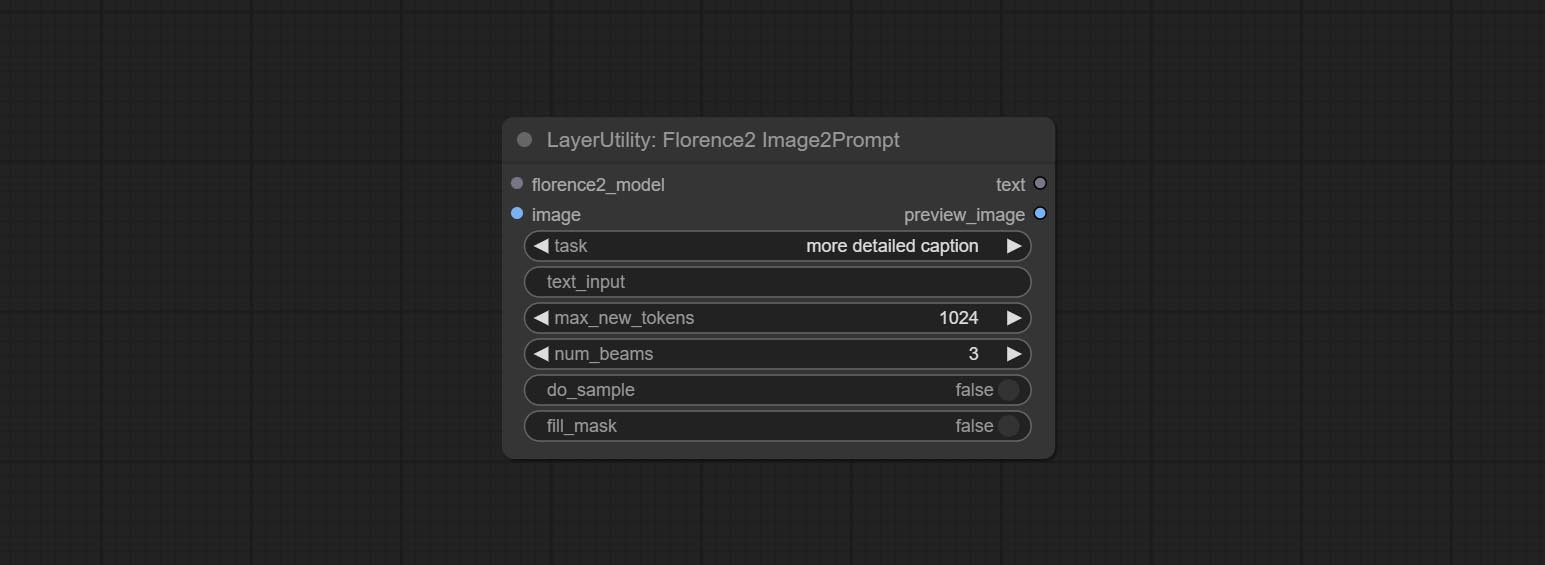
Use the blip-vqa model for visual question answering. Part of the code for this node is referenced from celoron/ComfyUI-VisualQueryTemplate, thanks to the original author.
*Download model files from BaiduNetdisk or huggingface.co/Salesforce/blip-vqa-capfilt-large and huggingface.co/Salesforce/blip-vqa-base and copy to ComfyUImodelsVQA folder.
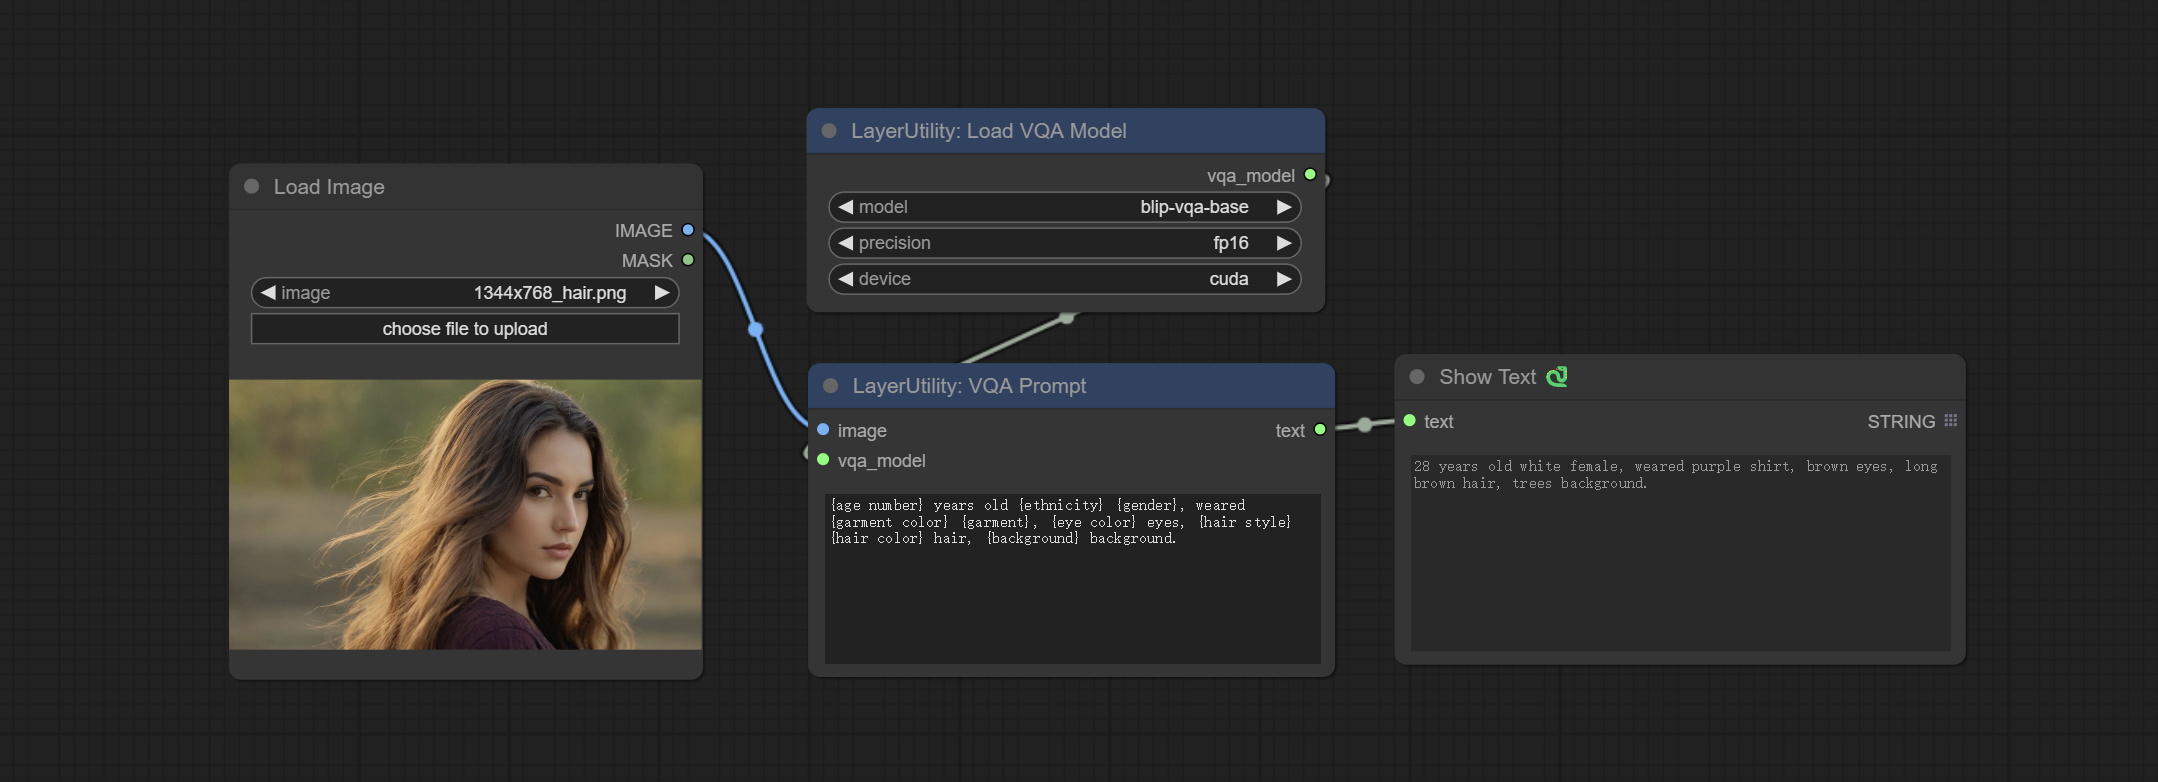
Node Options: 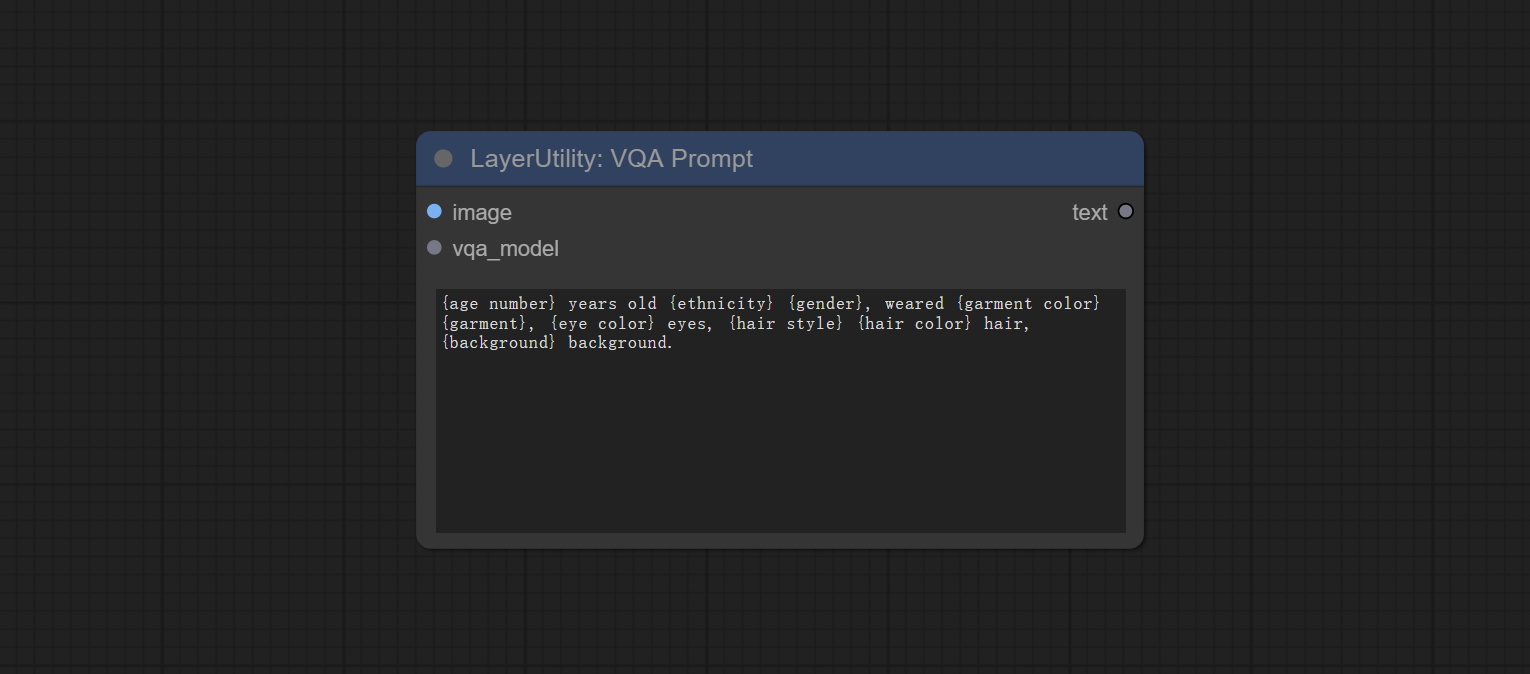
Load the blip-vqa model.
Node Options: 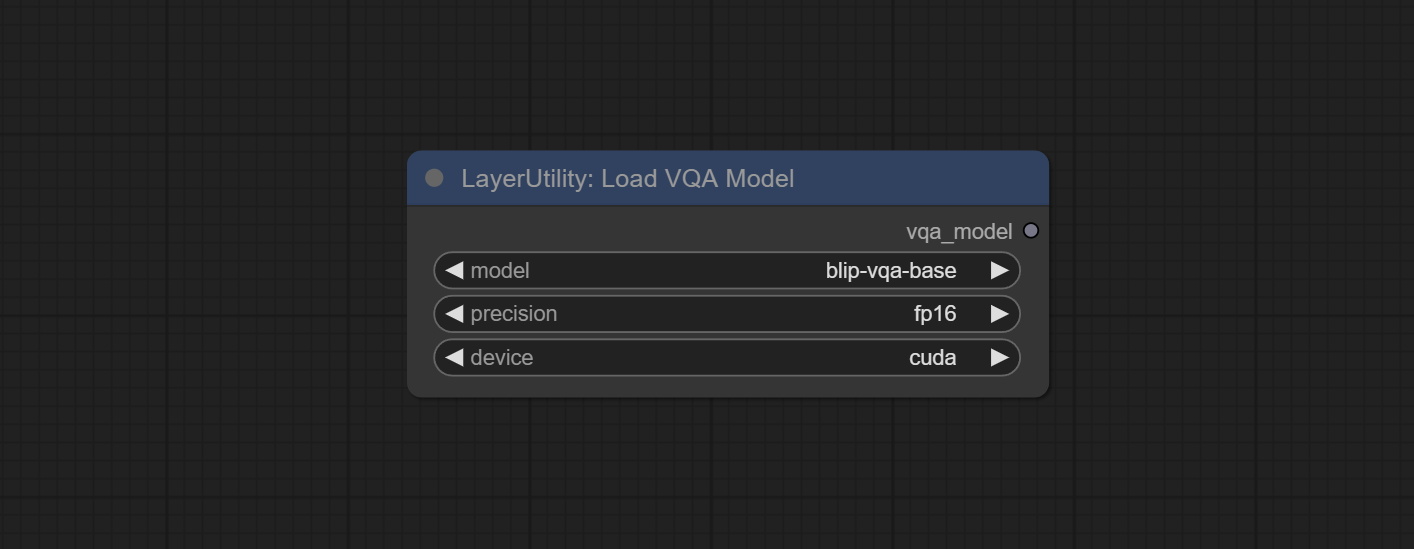
Shift the image. this node supports the output of displacement seam masks, making it convenient to create continuous textures. 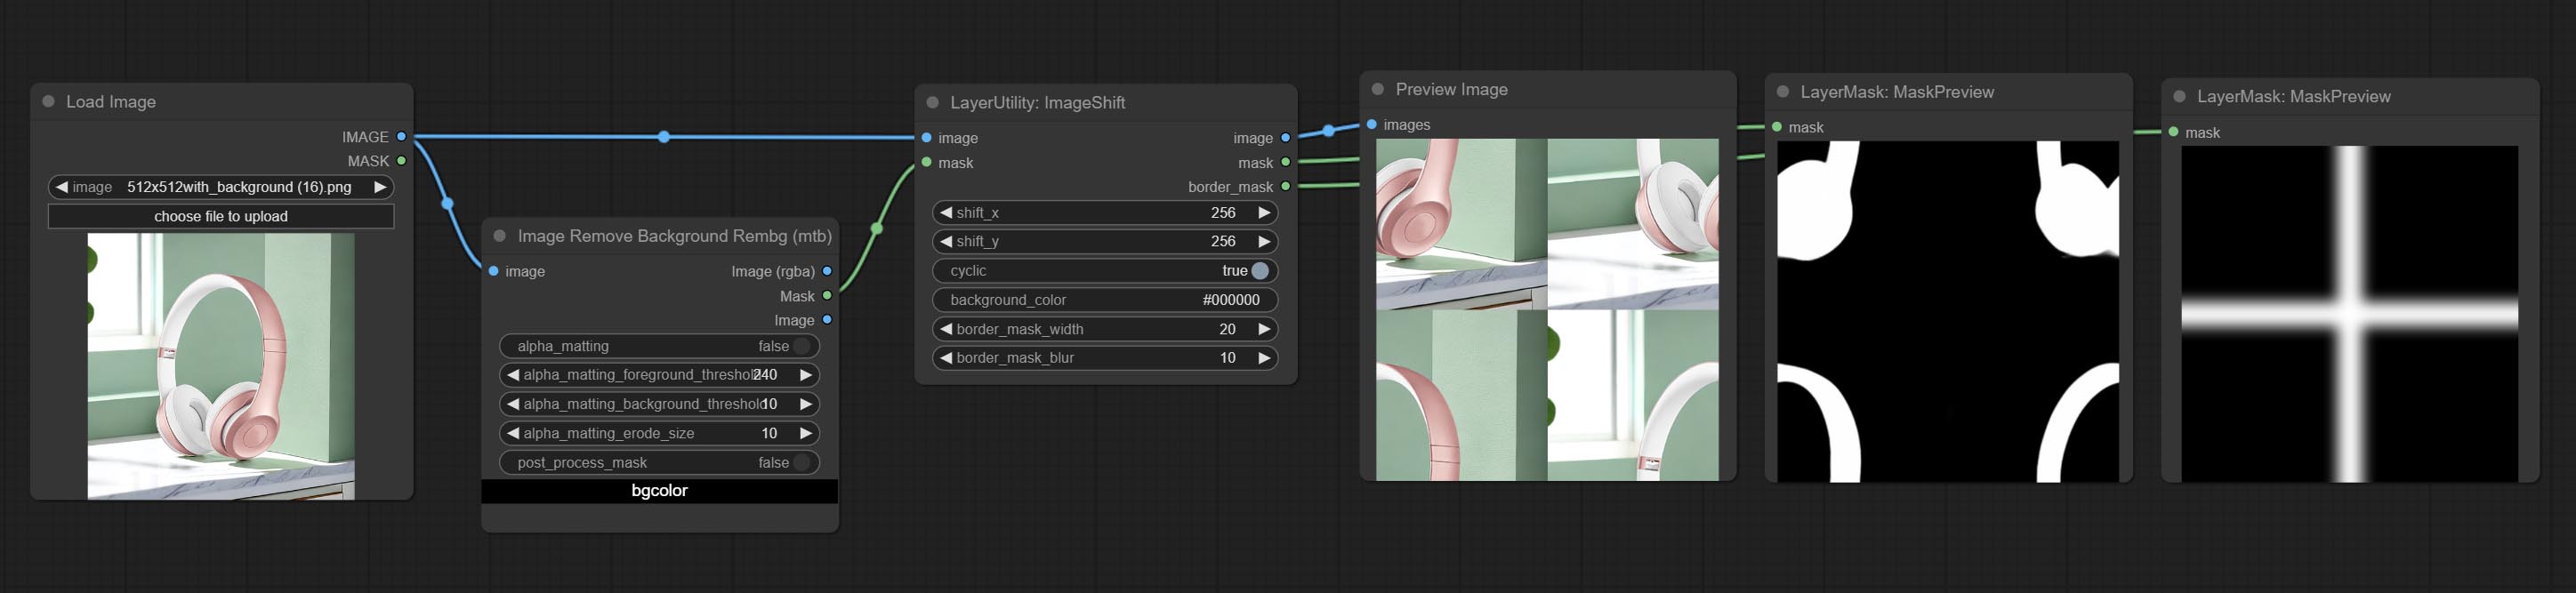
Node options: 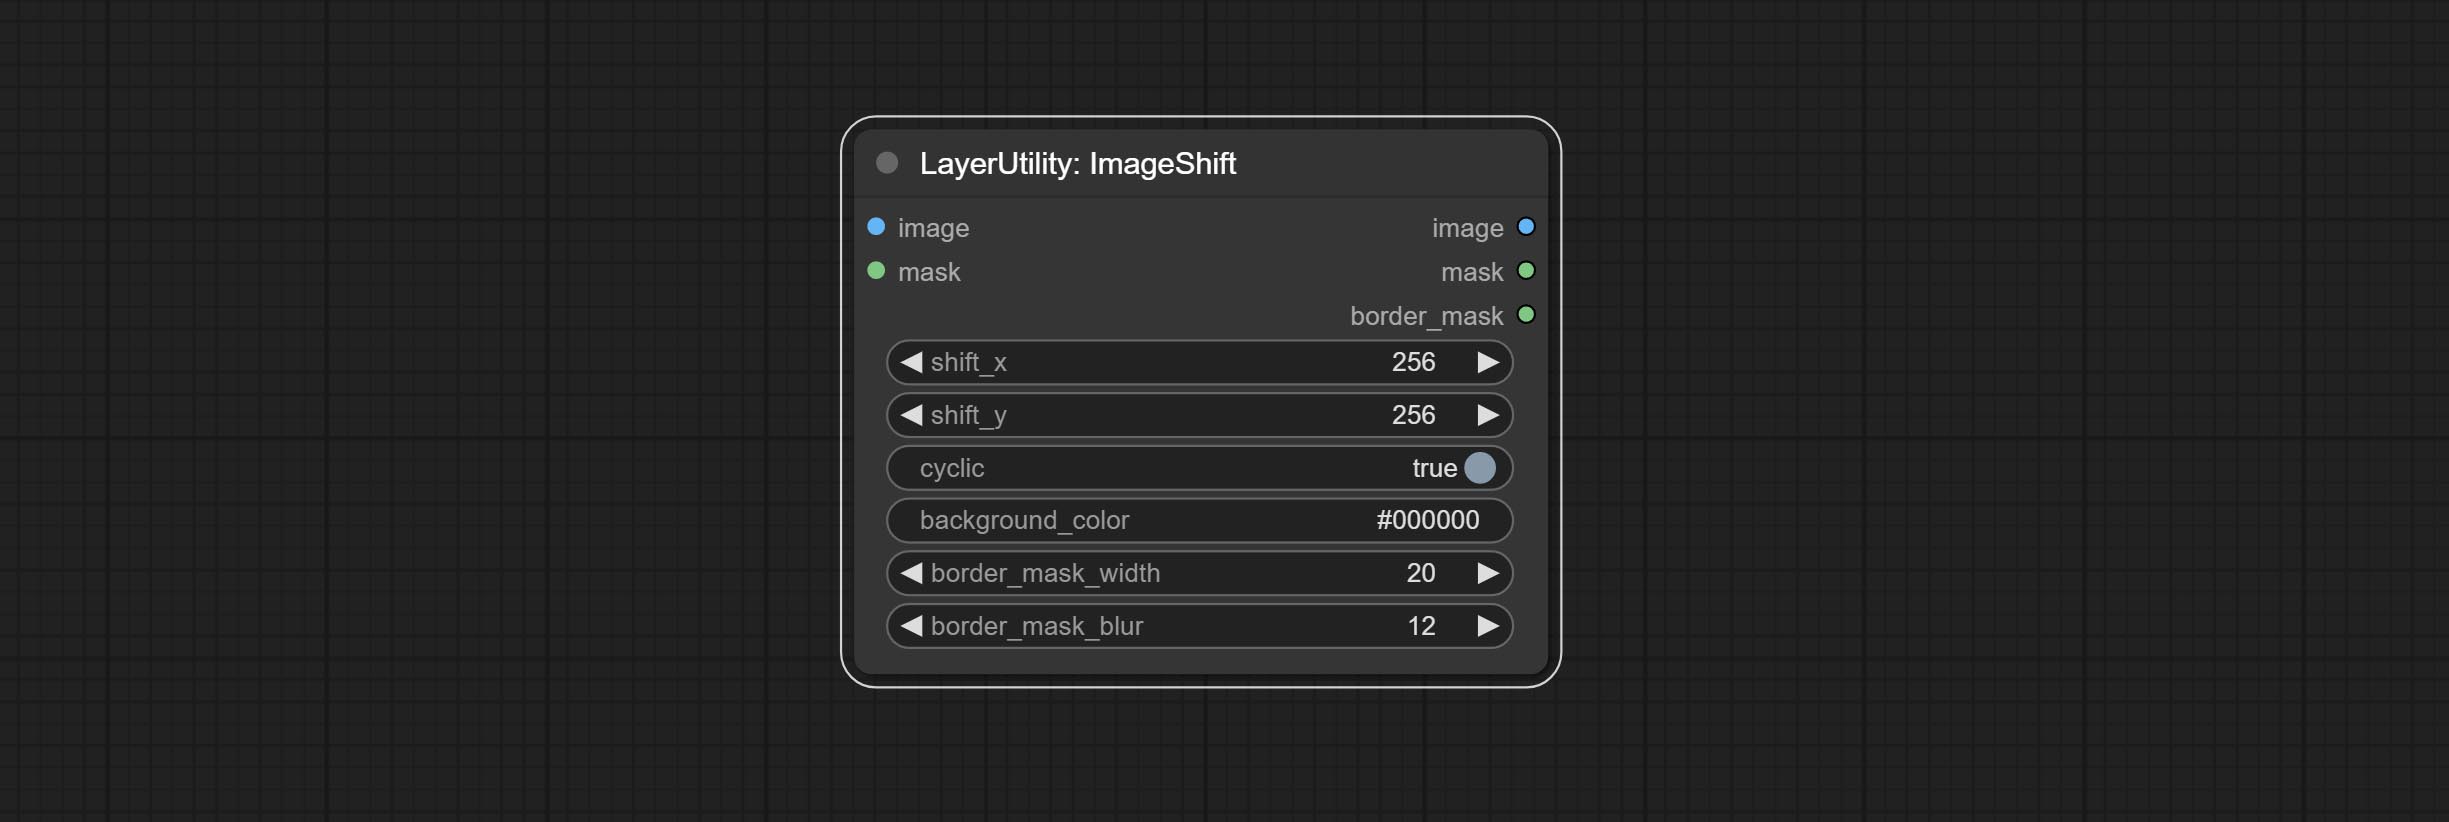
A simple node for composit layer image and background image, multiple blend modes are available for option, and transparency can be set. 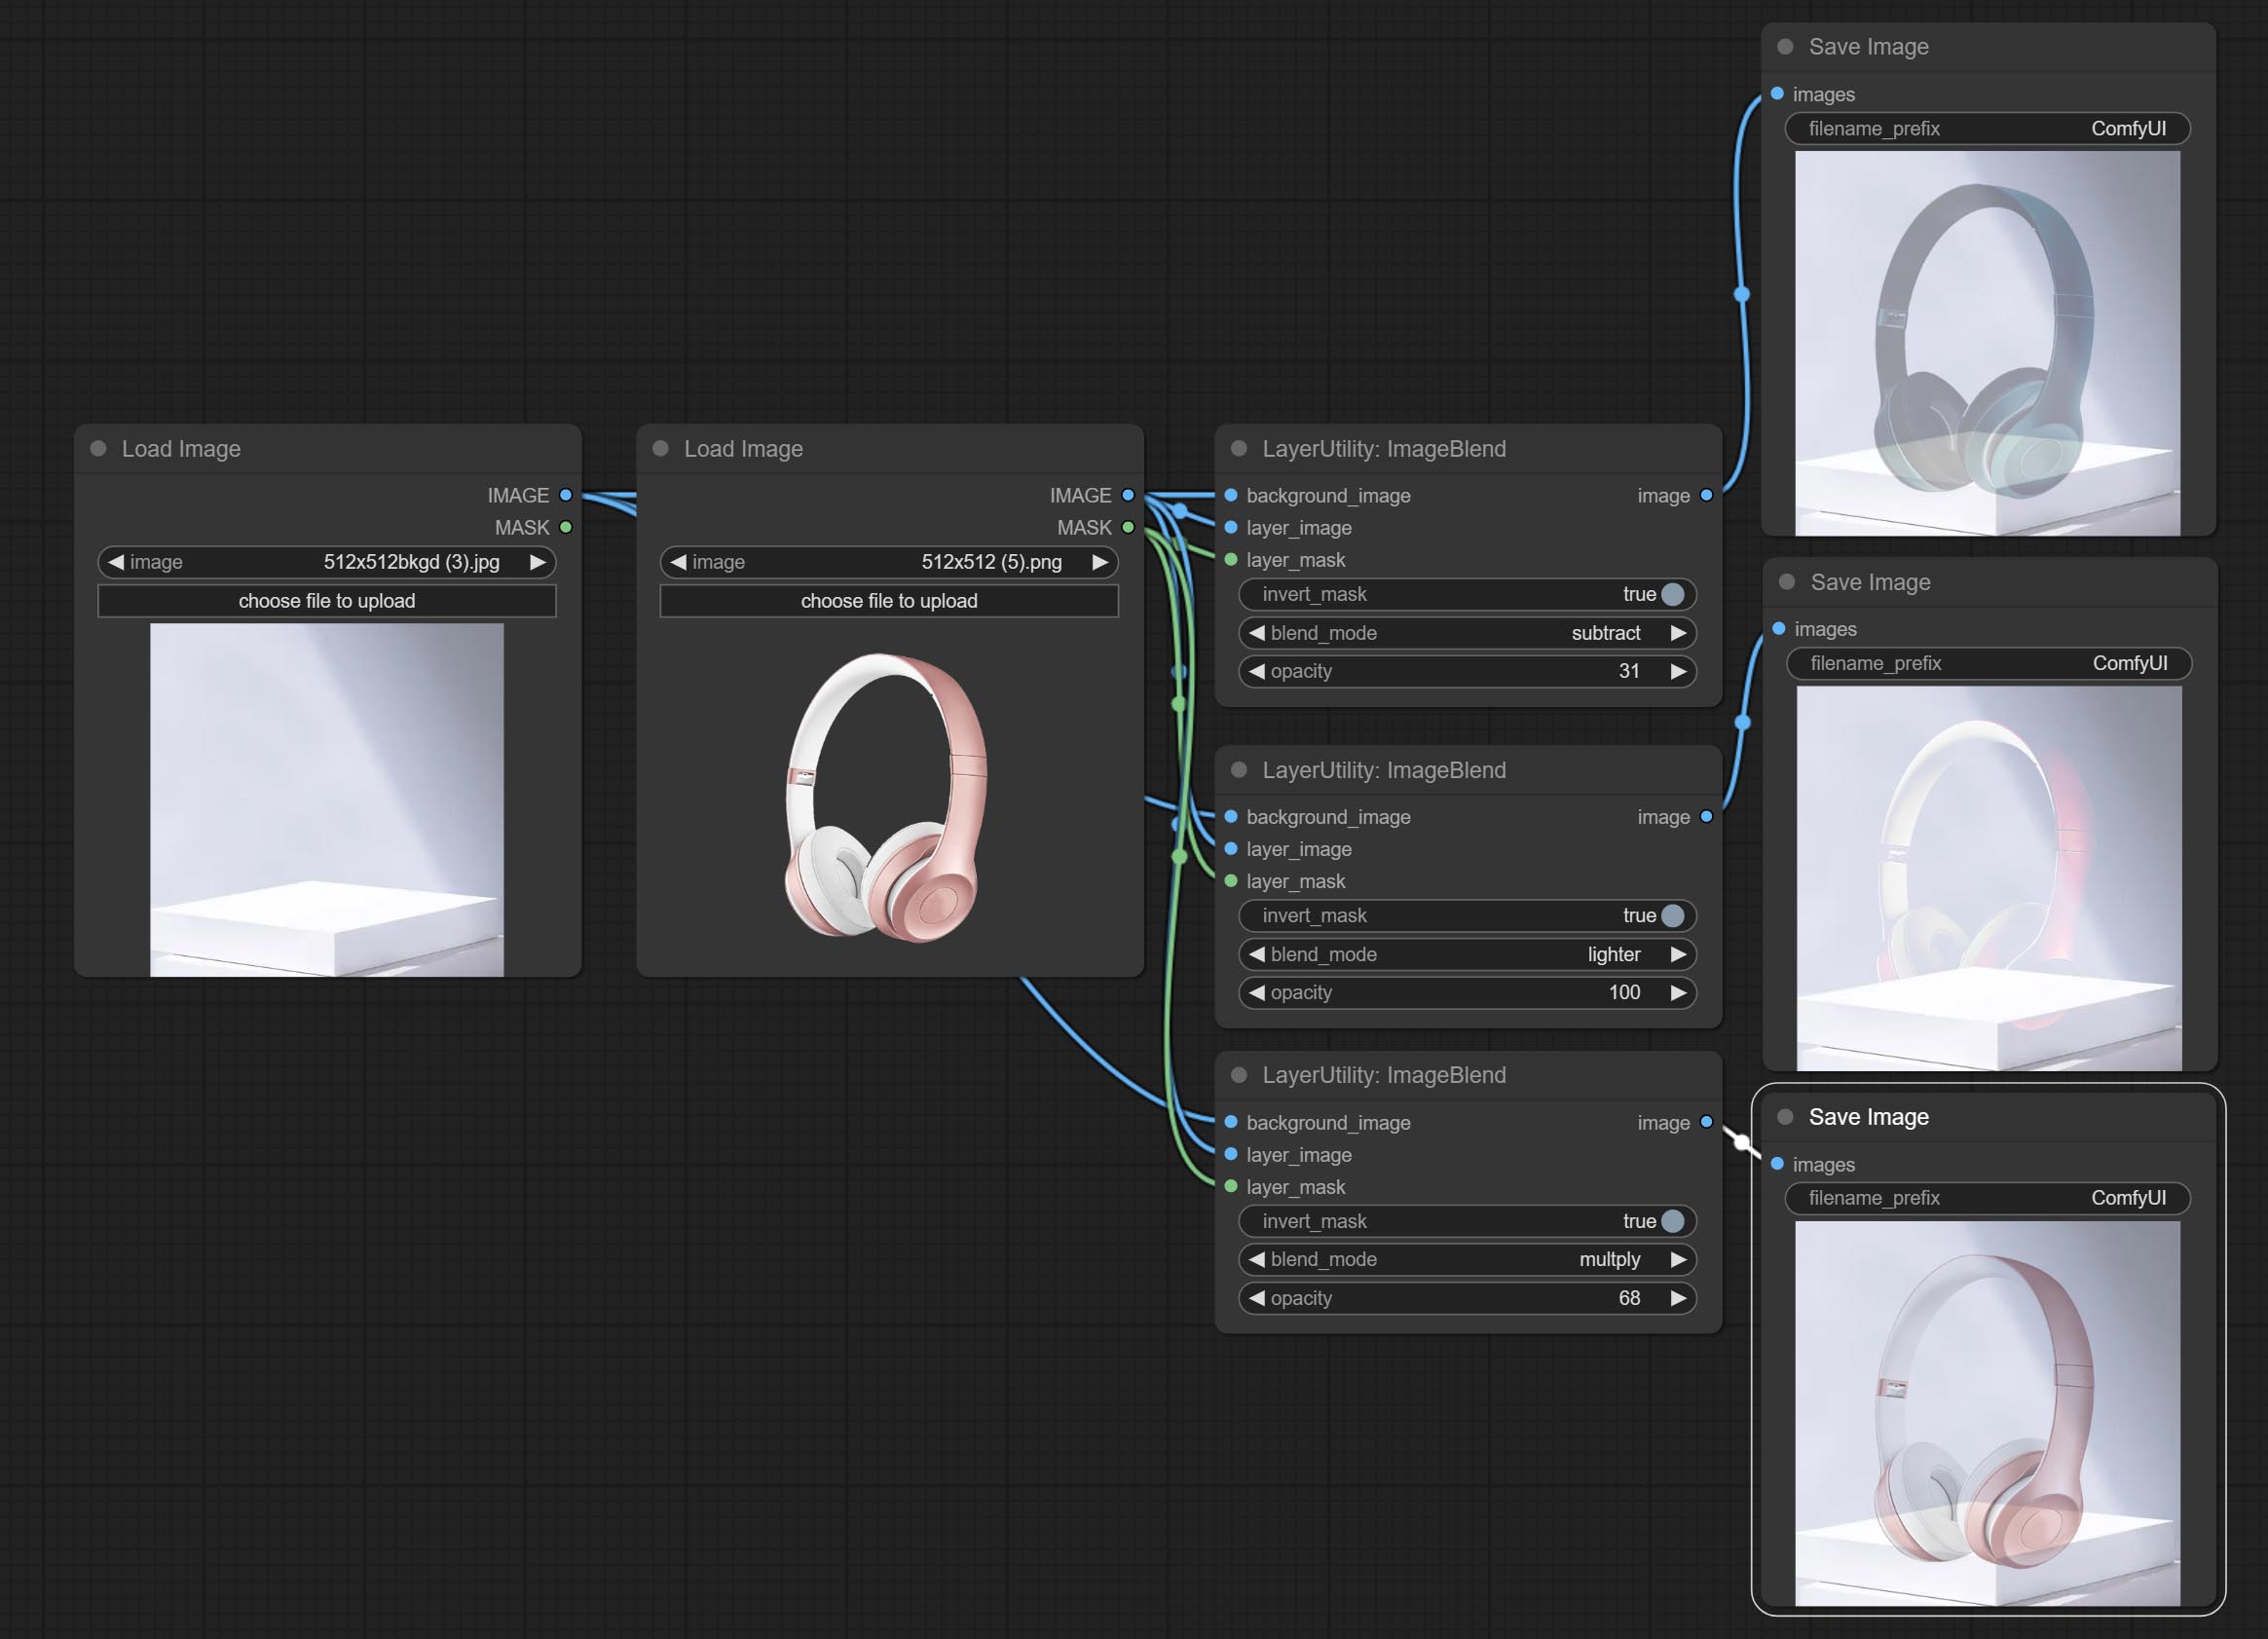
Node options: 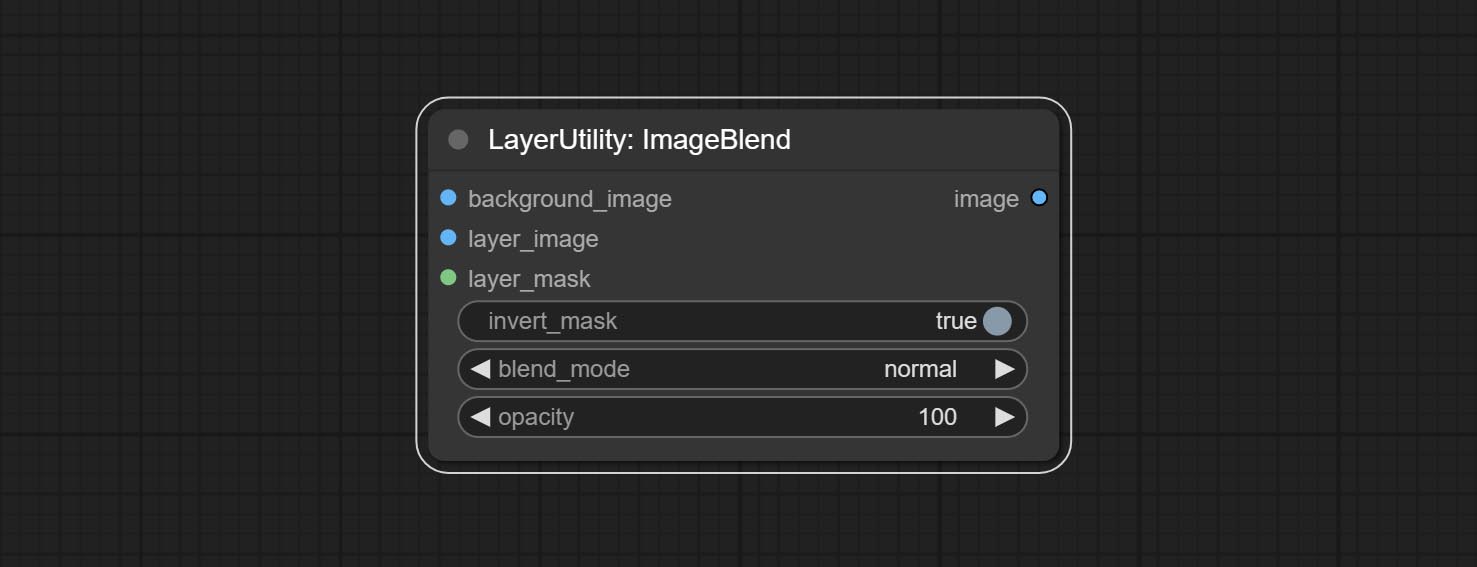
Display multiple images in one reel. Text annotations can be added to each image in the reel. By using the ImageReelComposite node, multiple reel can be combined into one image. 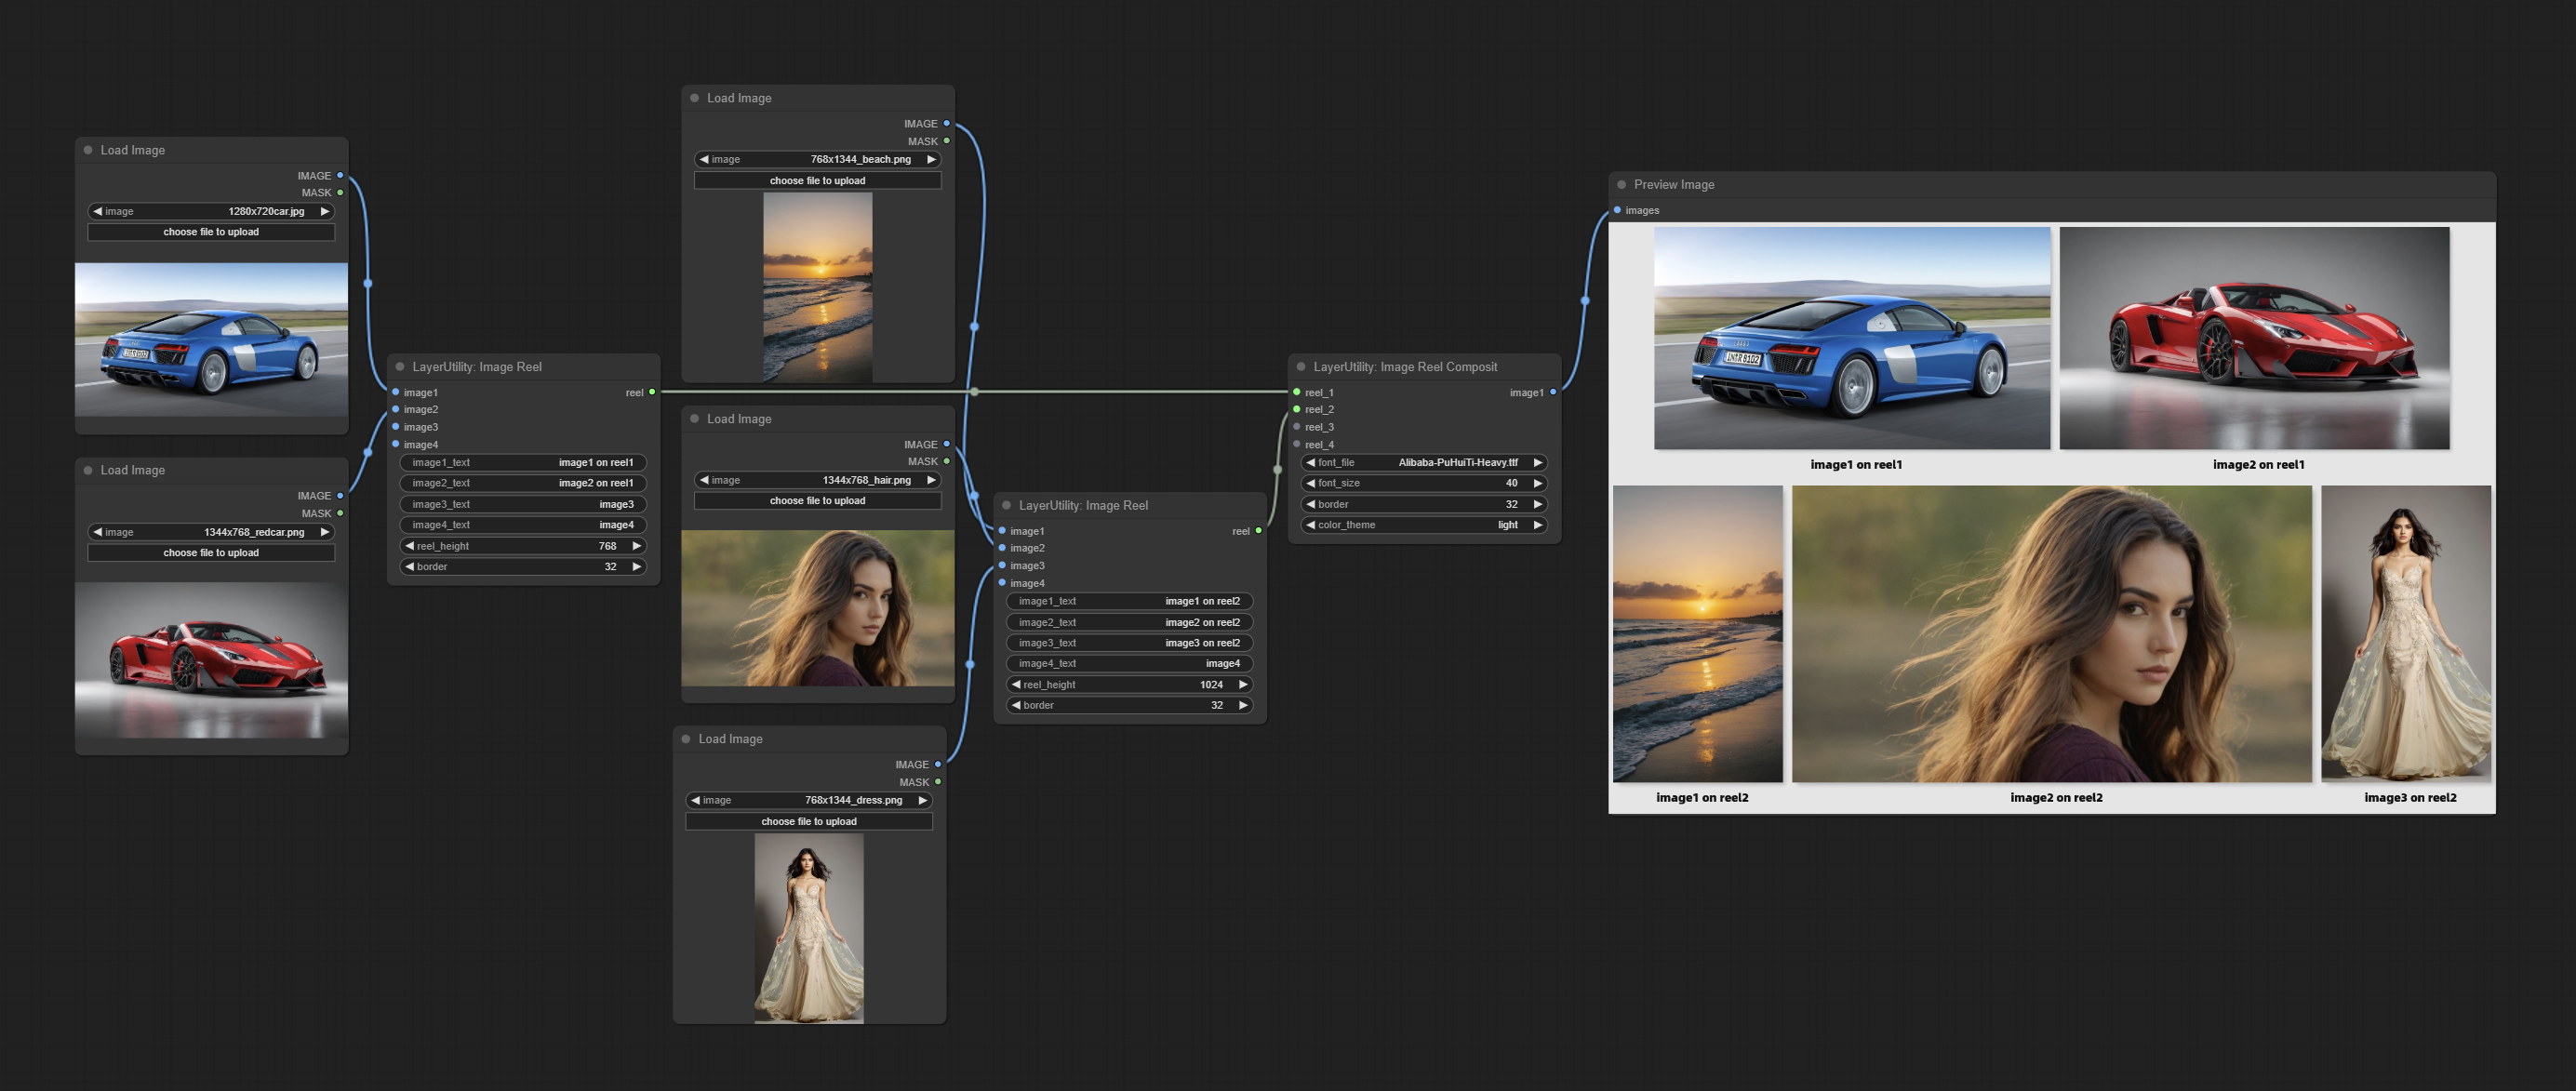
Node Options: 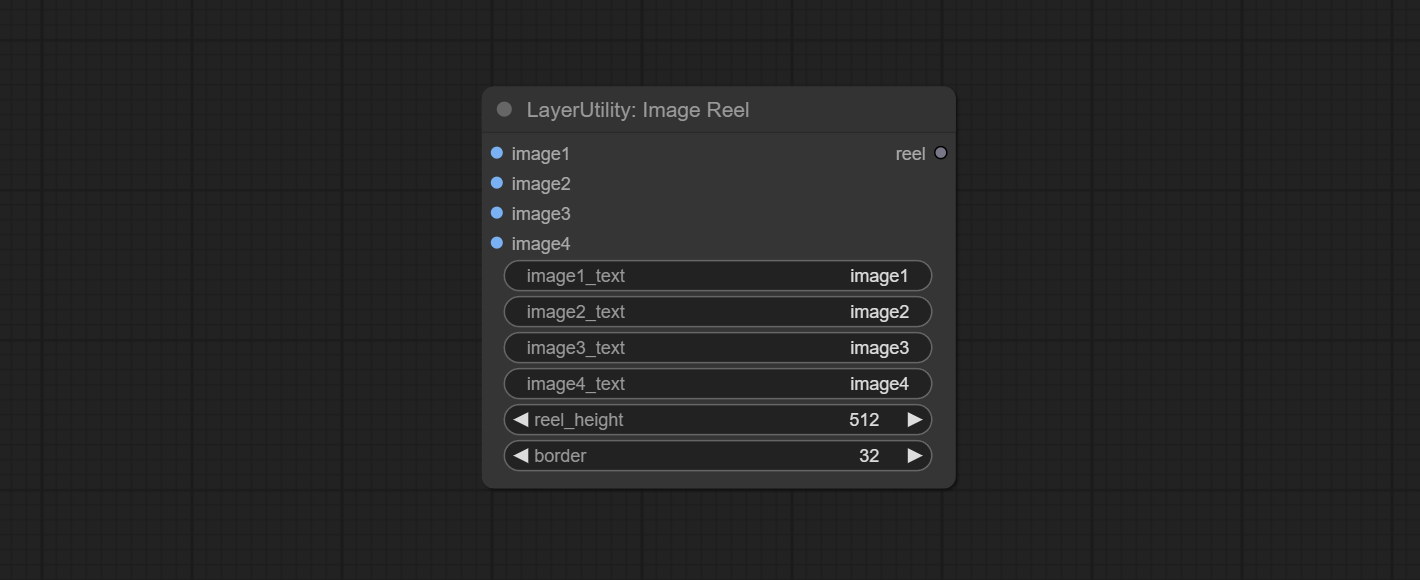
Sortir:
Combine multiple reel into one image.
Node Options: 
resource_dir.ini , this file is located in the root directory of the plug-in, and the default name is resource_dir.ini.example . to use this file for the first time, you need to change the file suffix to .ini . Open the text editing software and find the line starting with "FONT_dir=", after "=", enter the custom folder path name. support defining multiple folders in resource-dir.ini , separated by commas, semicolons, or spaces. all font files in this folder will be collected and displayed in the node list during ComfyUI initialization. If the folder set in ini is invalid, the font folder that comes with the plugin will be enabled. Adjust image opacity 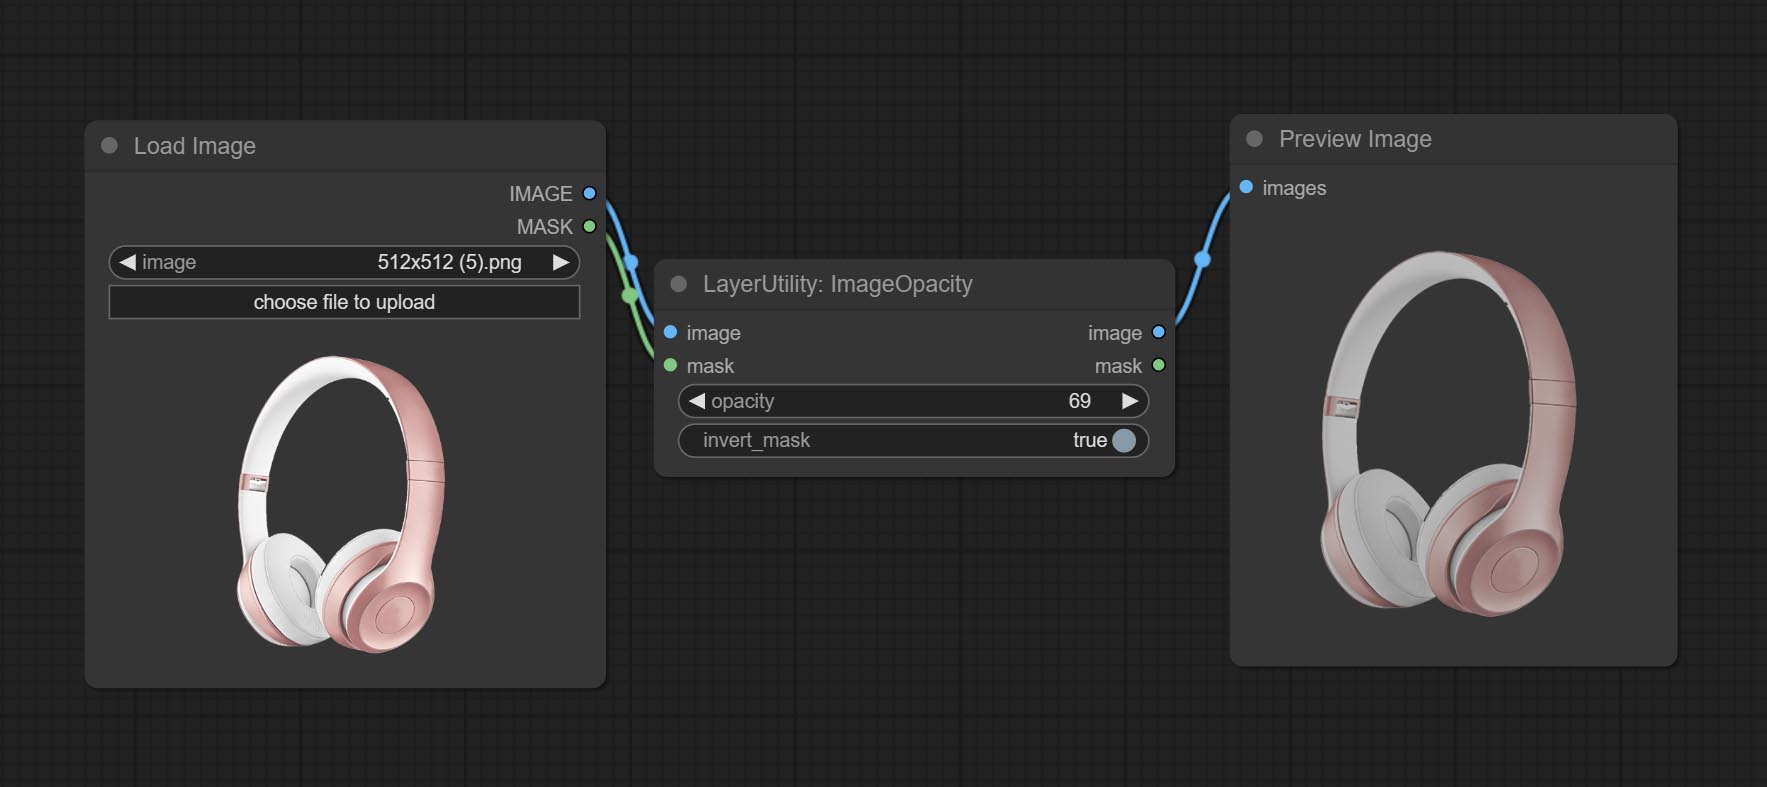
Node option:
Modify web extensions from mtb nodes. Select colors on the color palette and output RGB values, thanks to the original author. 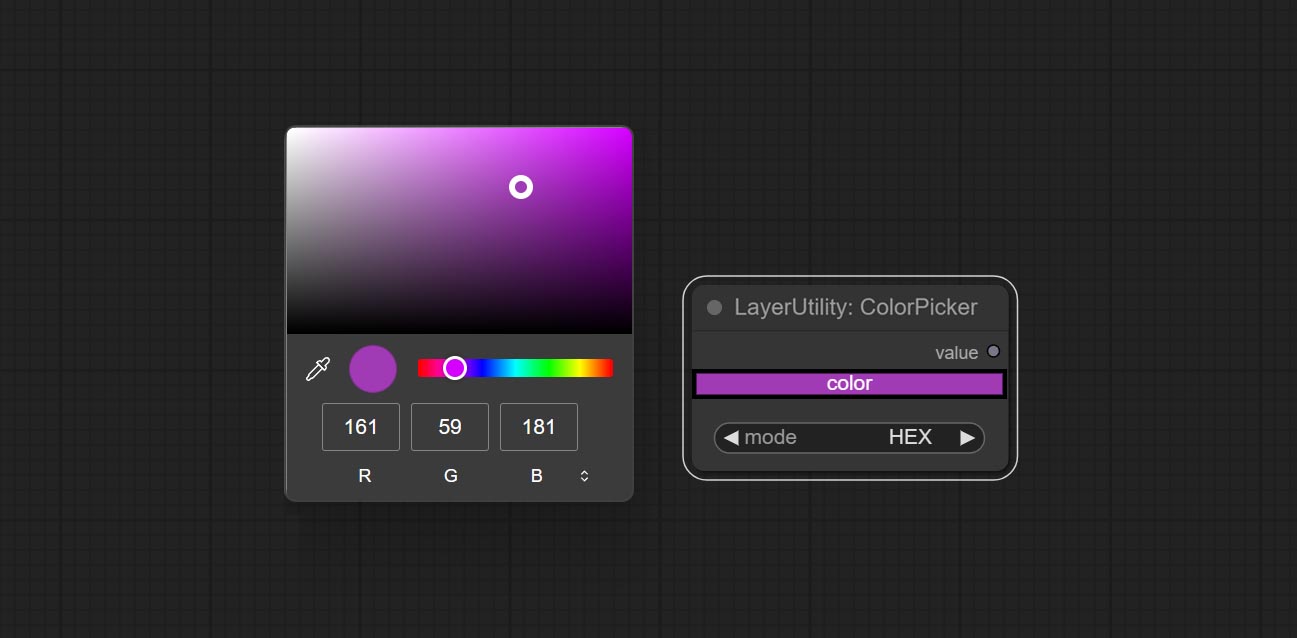
Node options:
Output type:
Output the color value as a single R, G, B three decimal values. Supports HEX and DEC formats for ColorPicker node output.
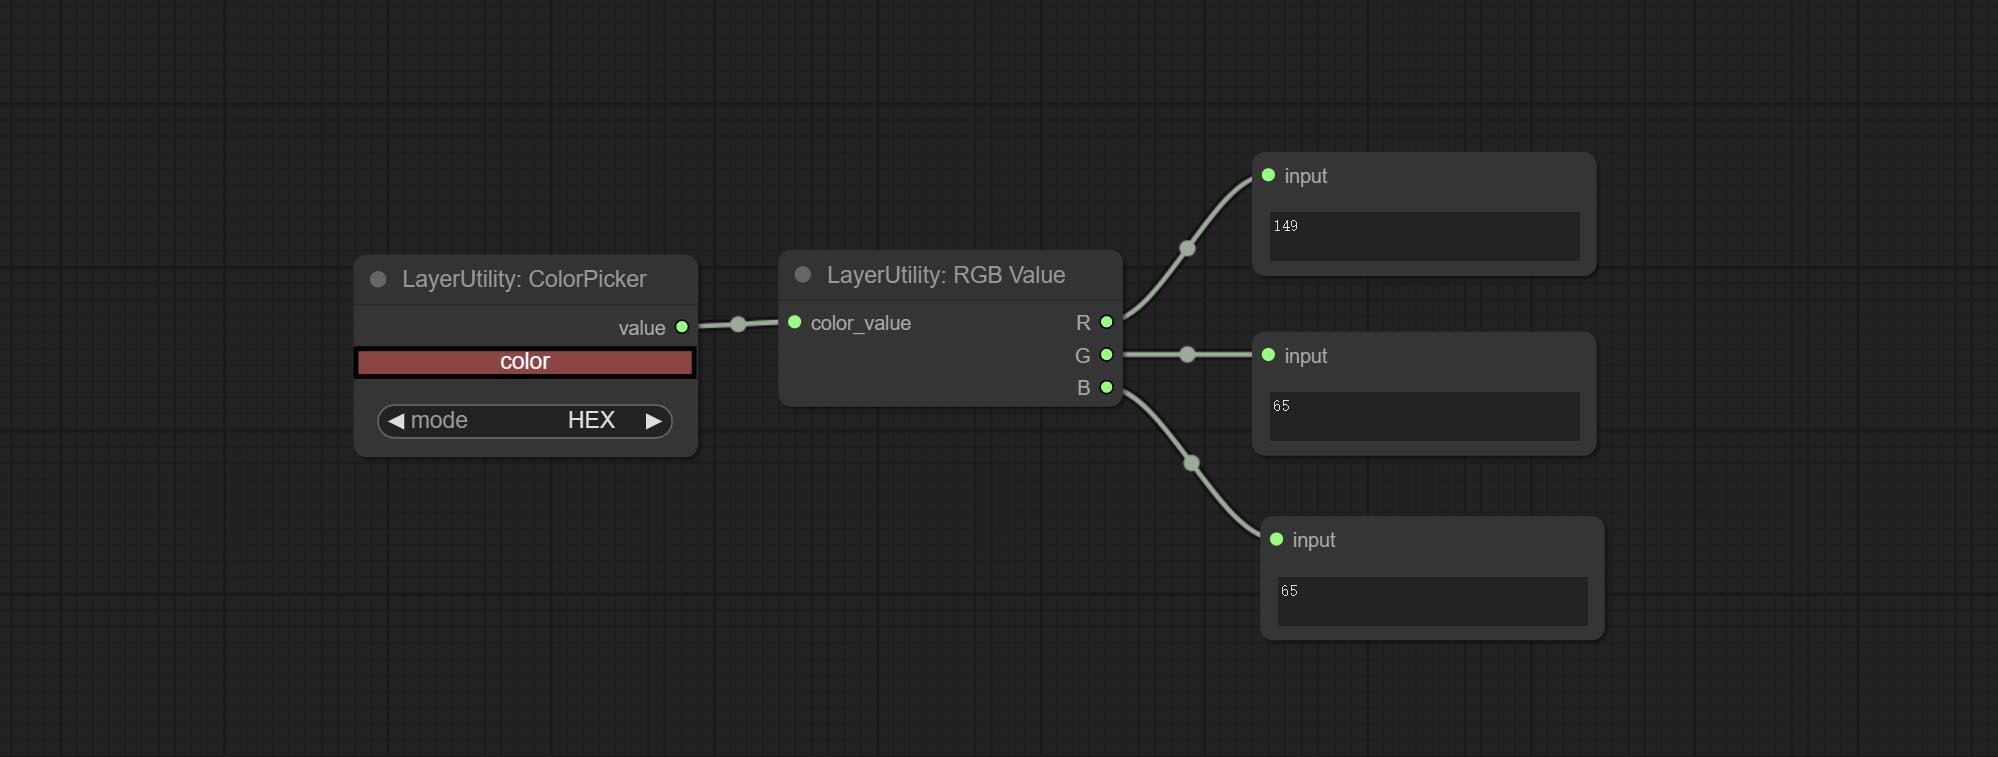
Node Options:
Output color values as individual decimal values of H, S, and V (maximum value of 255). Supports HEX and DEC formats for ColorPicker node output. 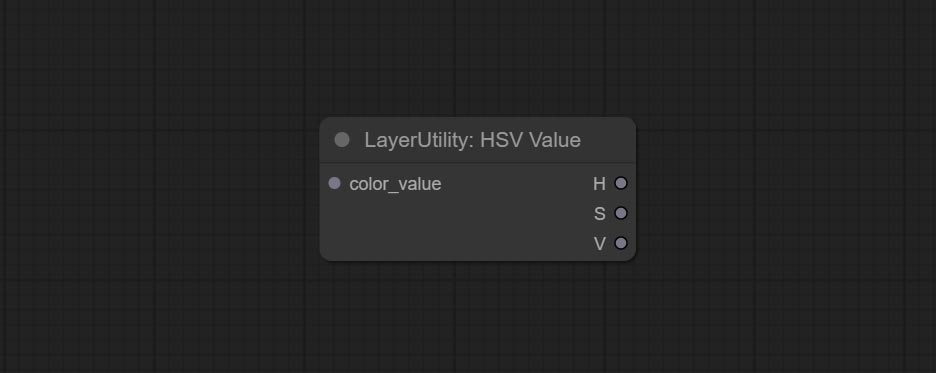
Node Options:
Output grayscale values based on color values. Supports outputting 256 level and 100 level grayscale values. 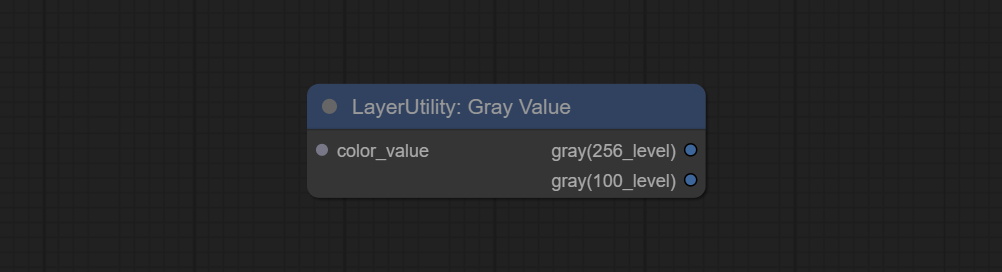
Node Options:
Outputs:
Obtain the main color or average color from the image and output RGB values. 
Node options: 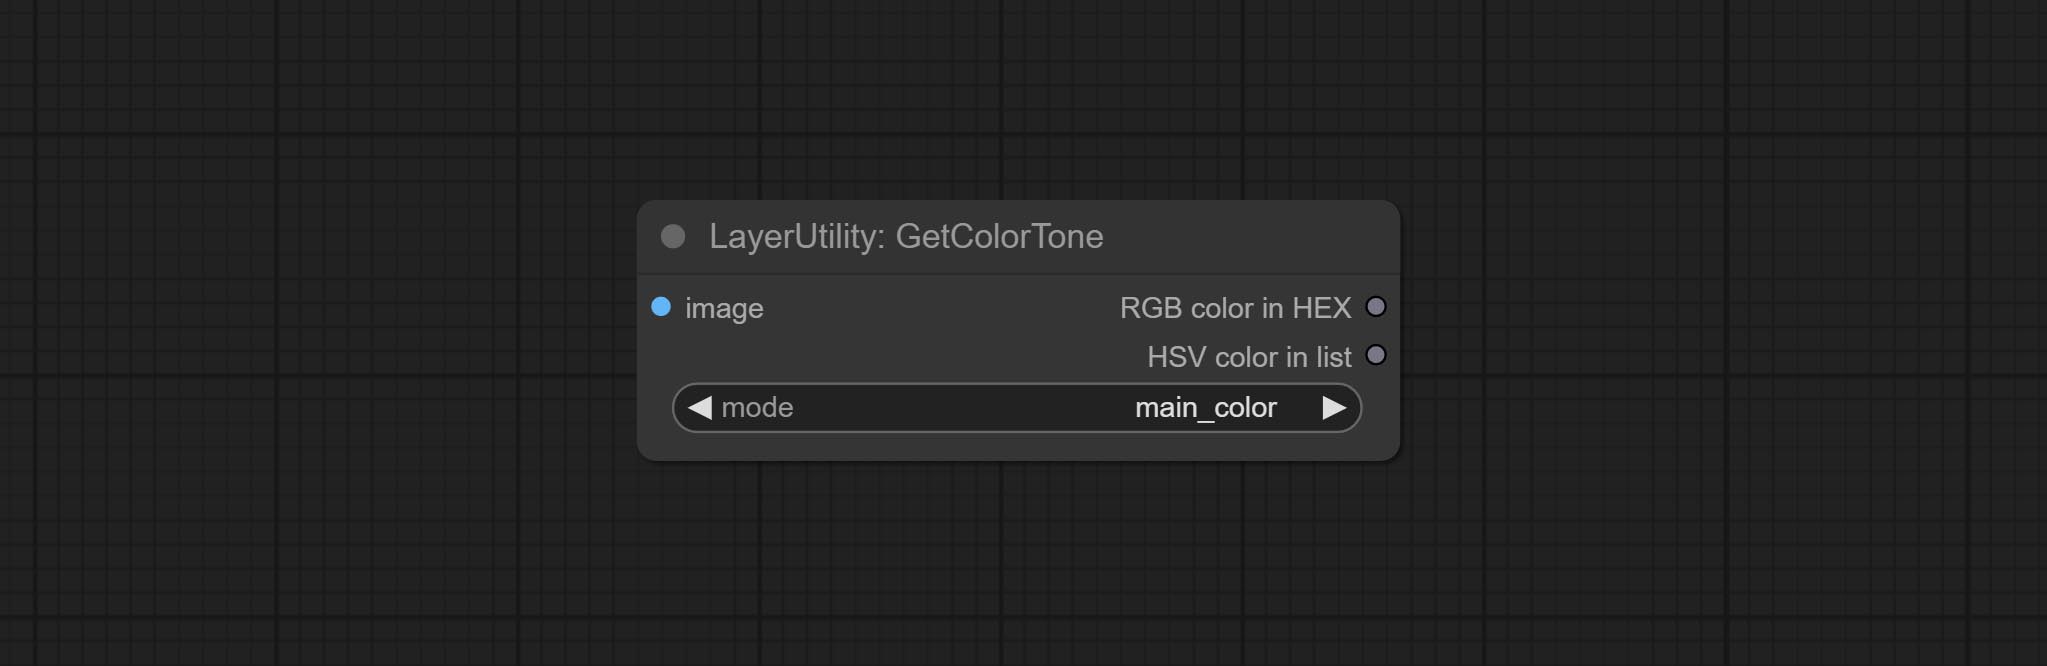
Output type:
V2 upgrade of GetColorTone. You can specify the dominant or average color to get the body or background. 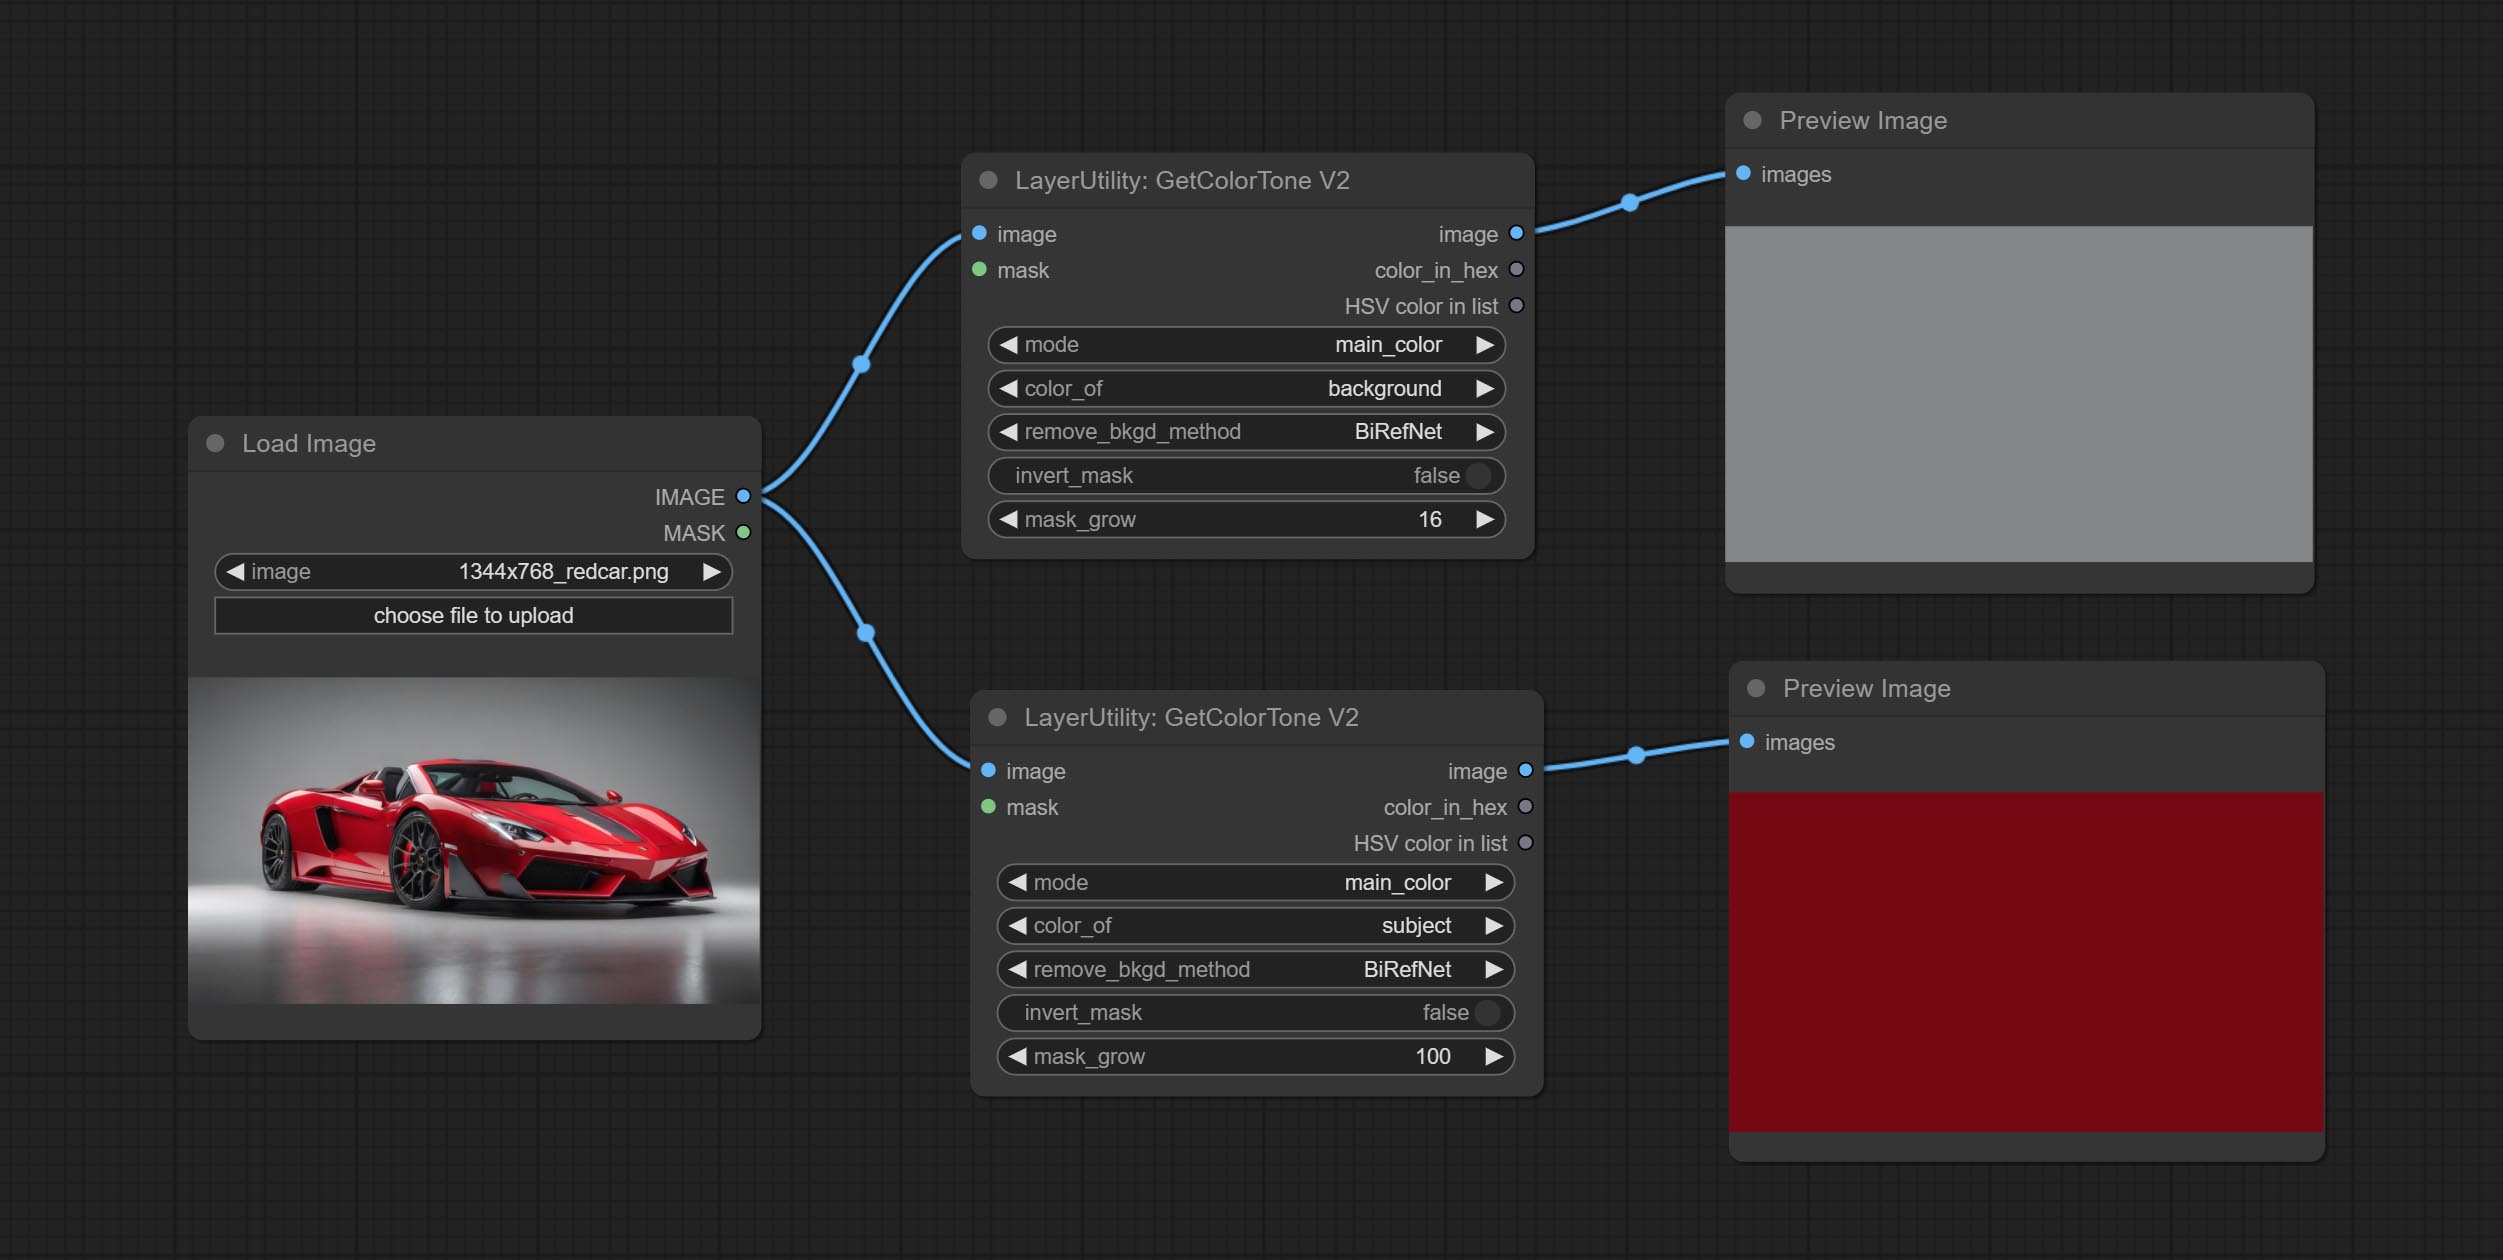
The following changes have been made on the basis of GetColorTong: 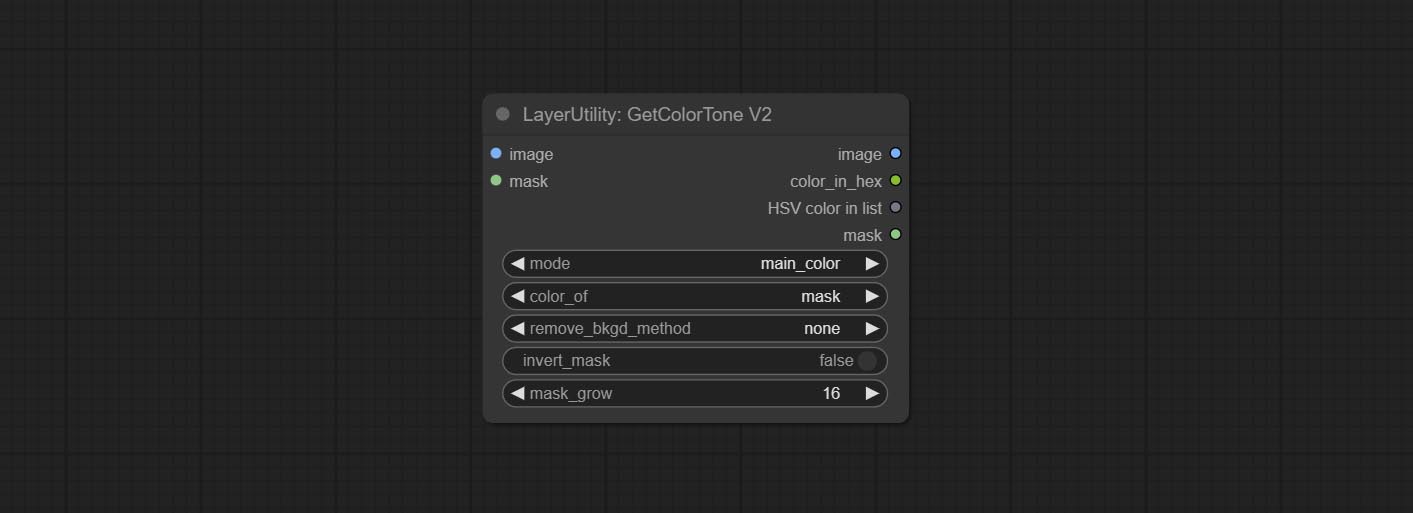
Sortir:
Obtain the main color of the image. You can obtain 5 colors. 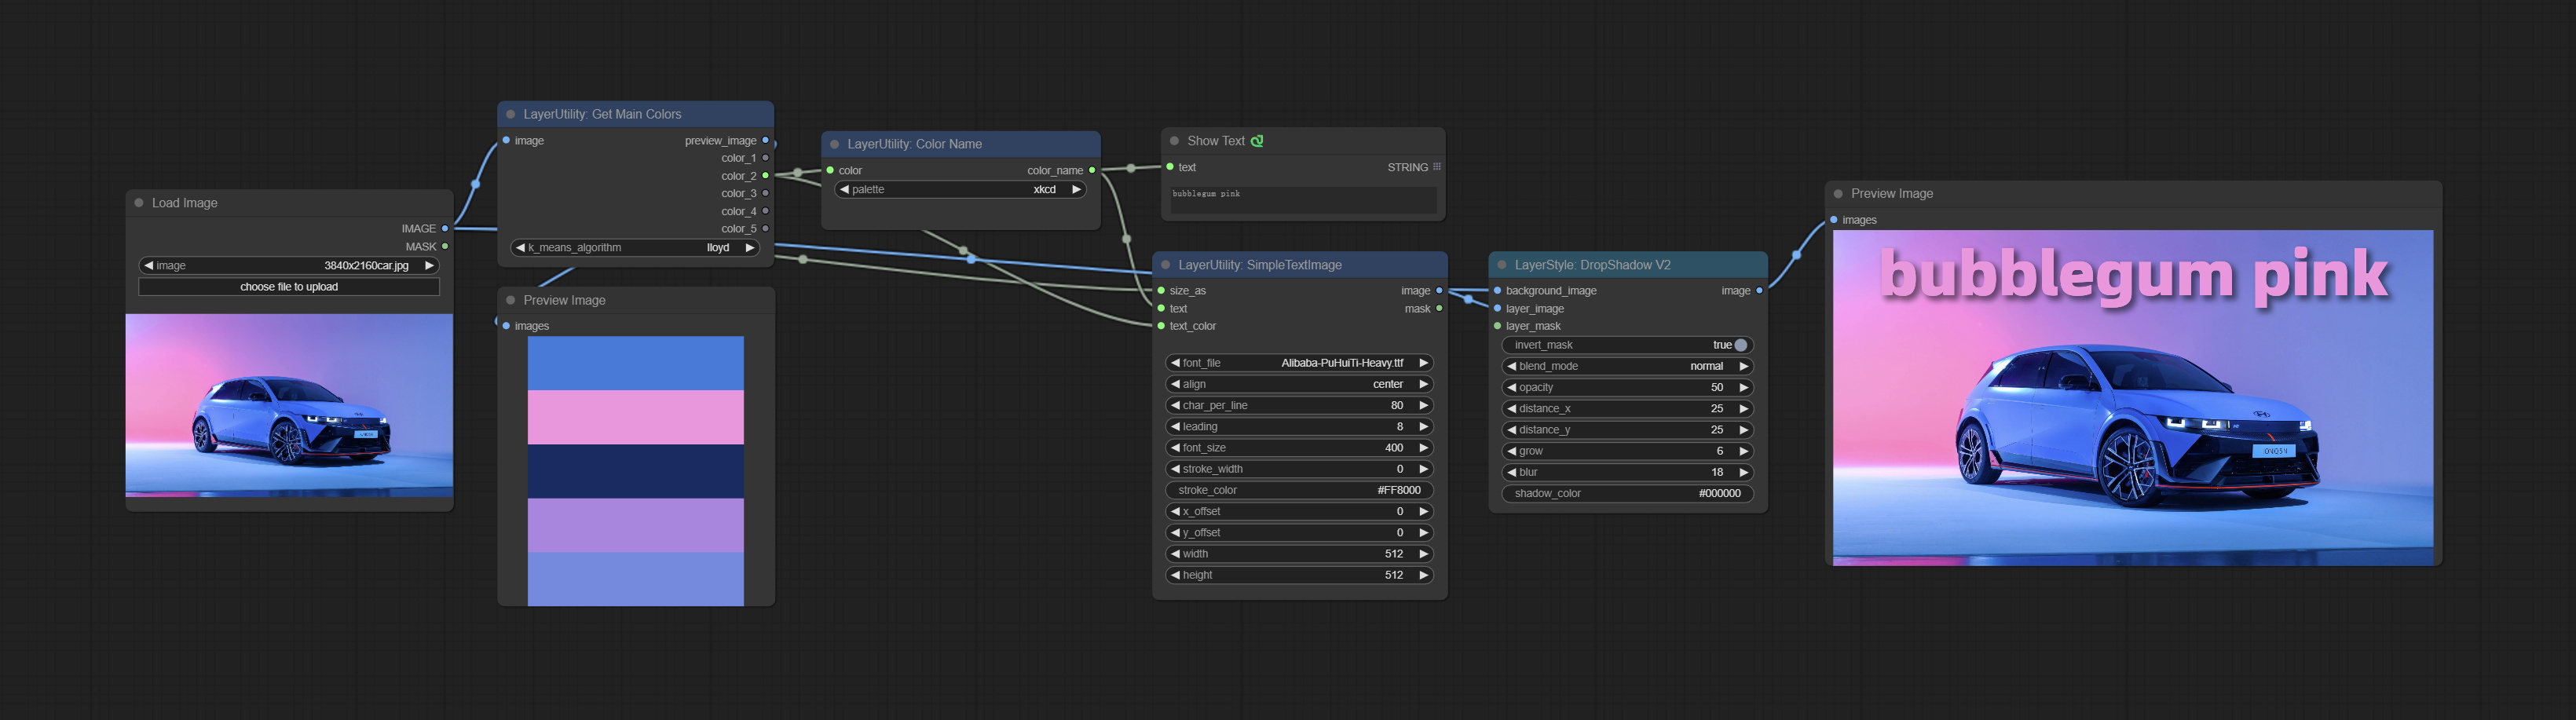
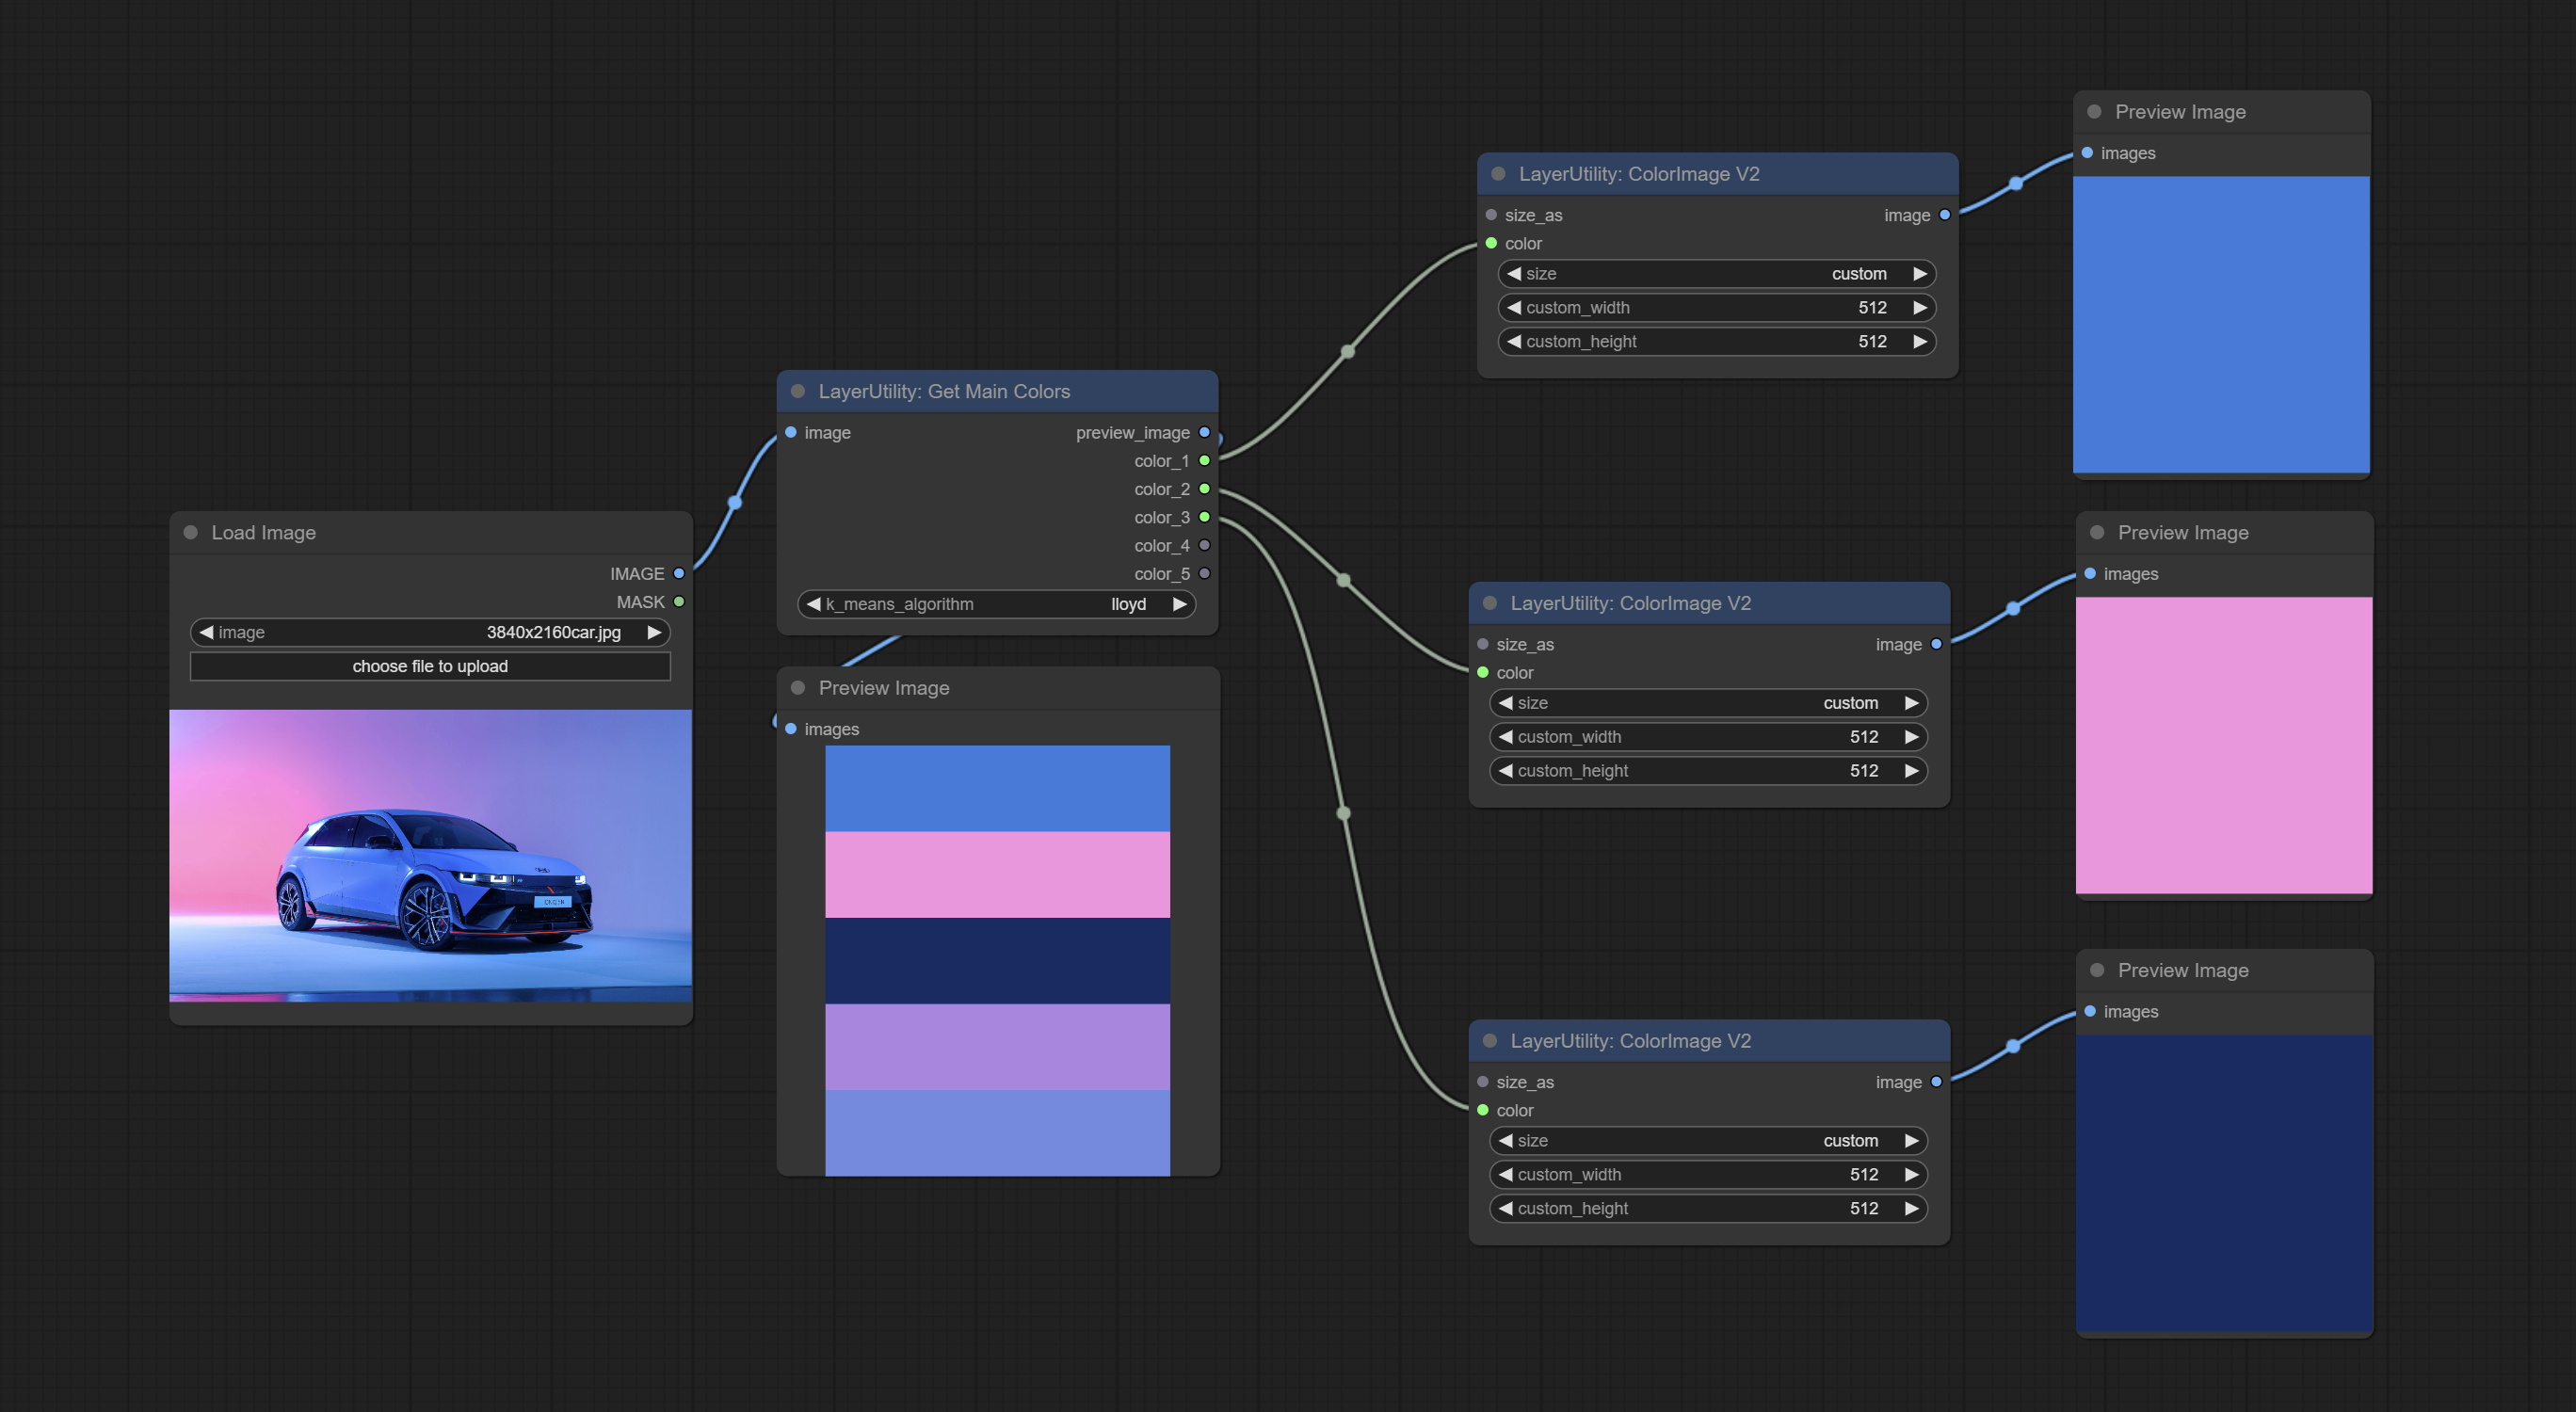
Node Options: 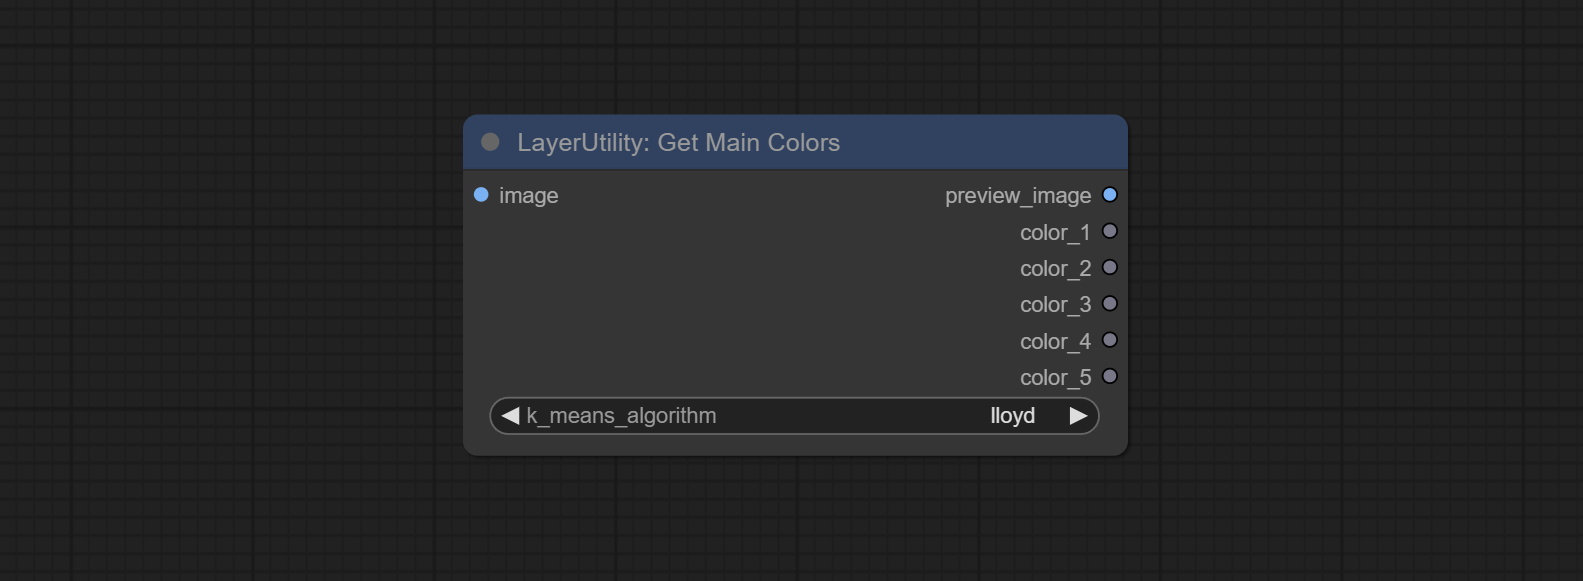
Outputs:
Output the most similar color name in the color palette based on the color value. 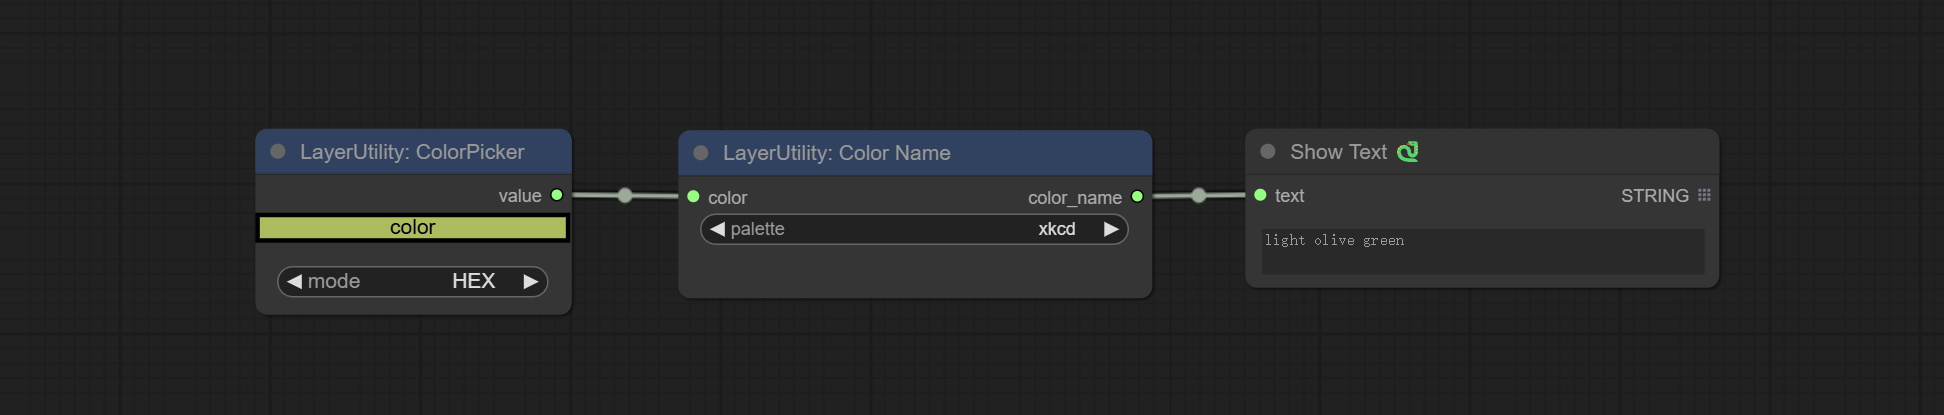
Node Options: 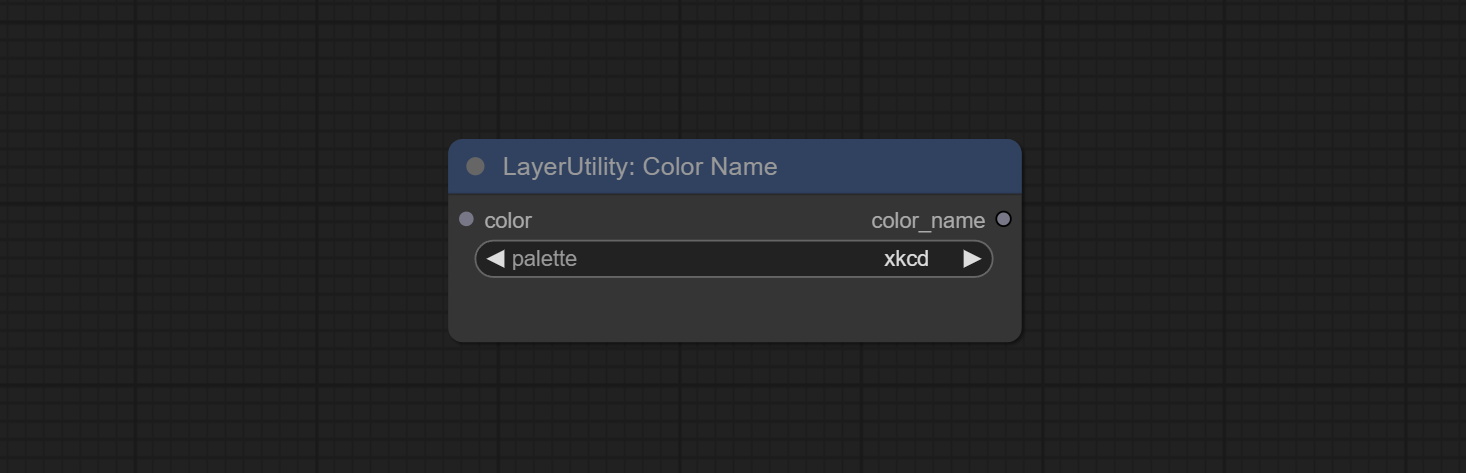
xkcd includes 949 colors, css3 includes 147 colors, and html4 includes 16 colors.Sortir:
Extend the canvas 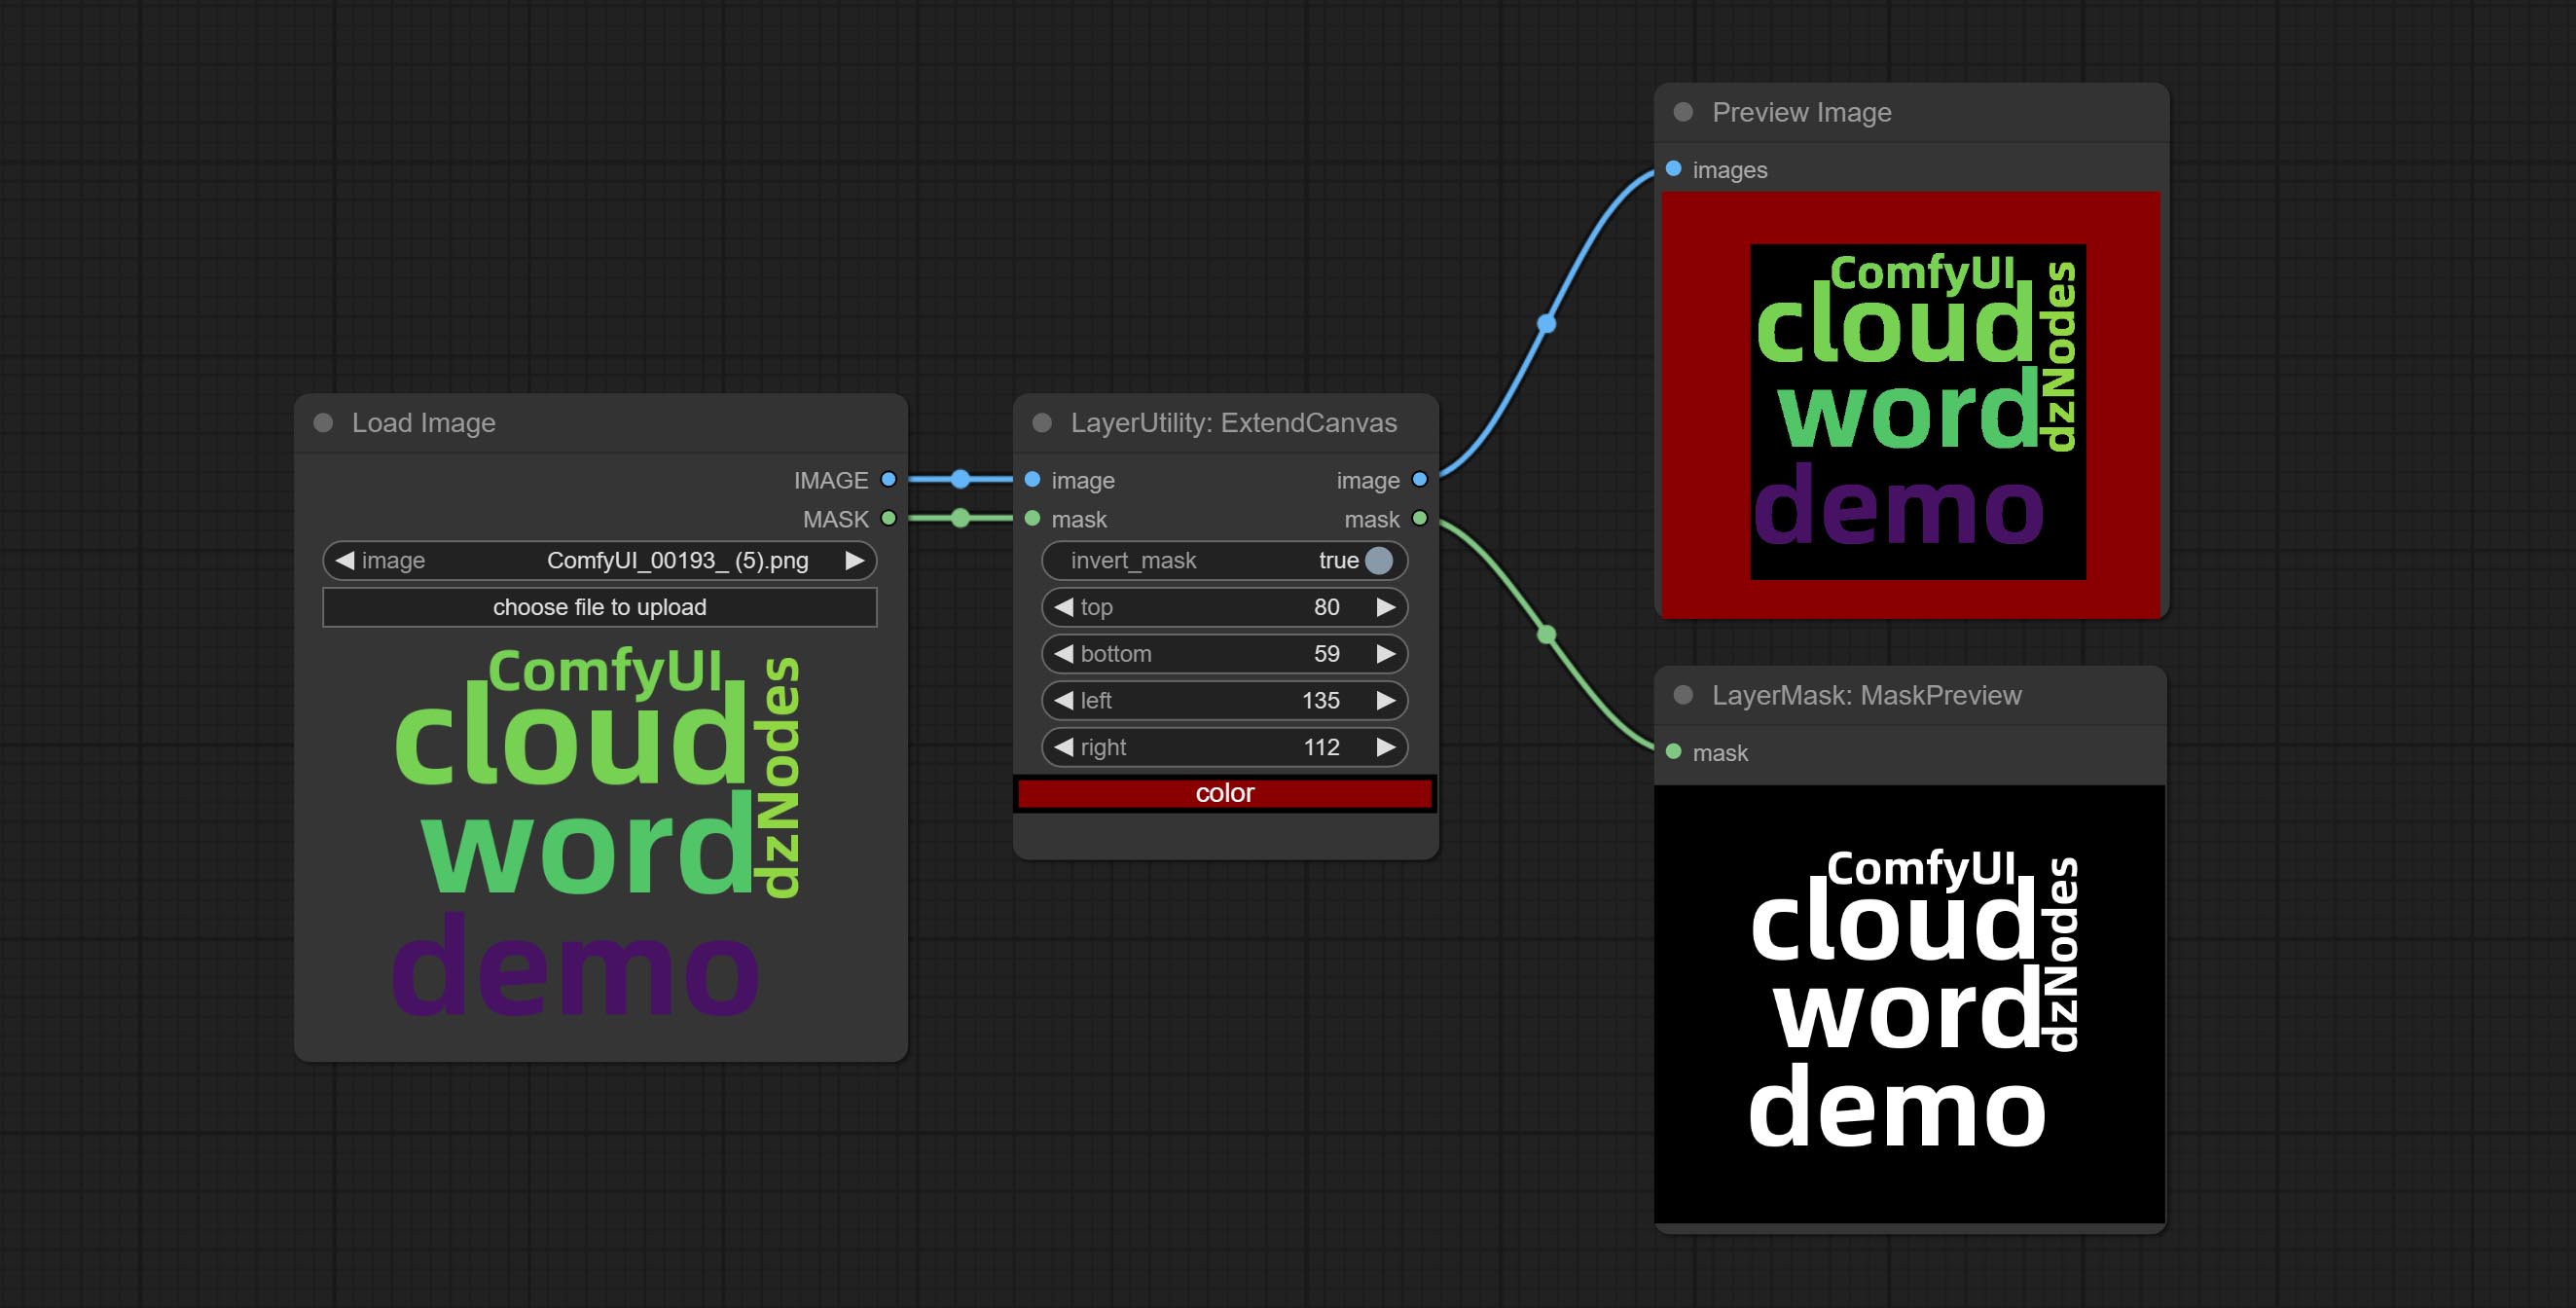
Node options: 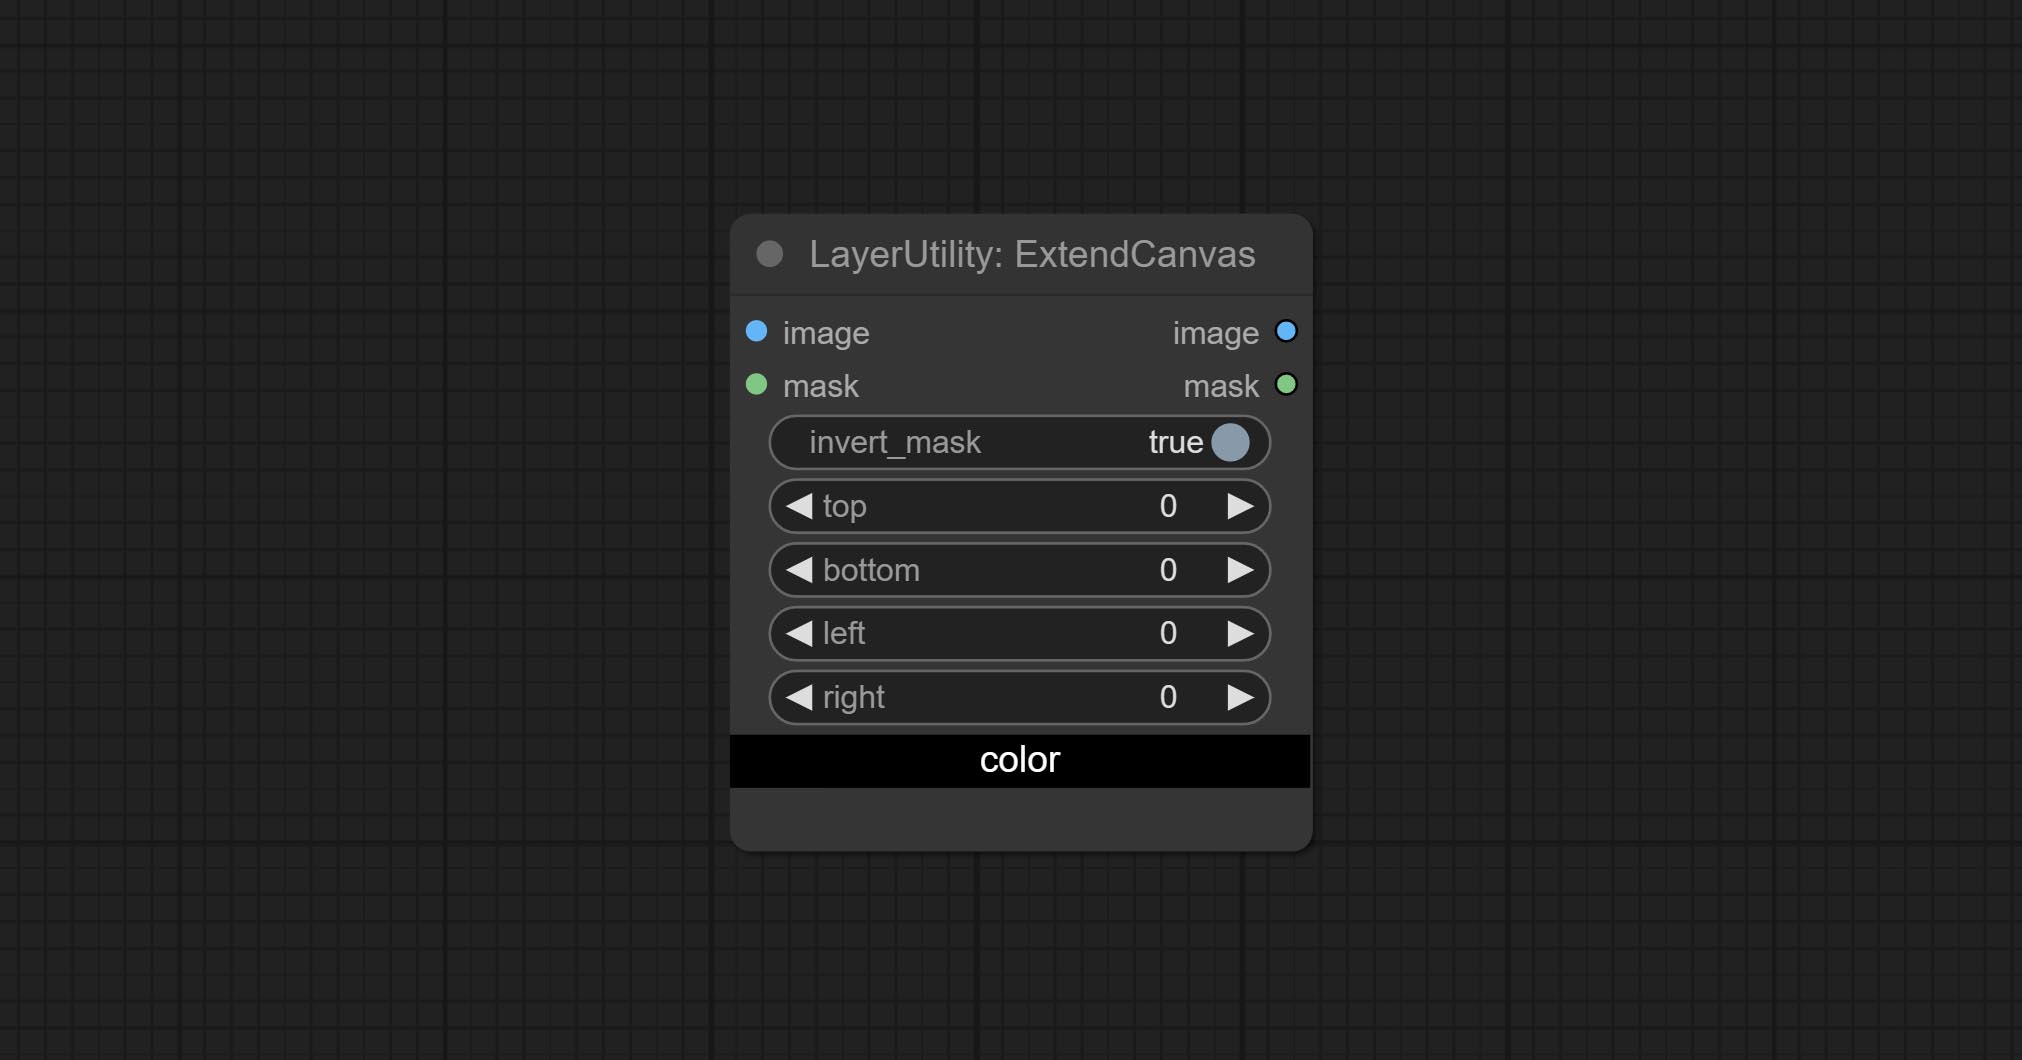
V2 upgrade to ExtendCanvas.
Based on ExtendCanvas, color is modified to be a string type, and it supports external ColorPicker input, Support negative value input, it means image will be cropped. 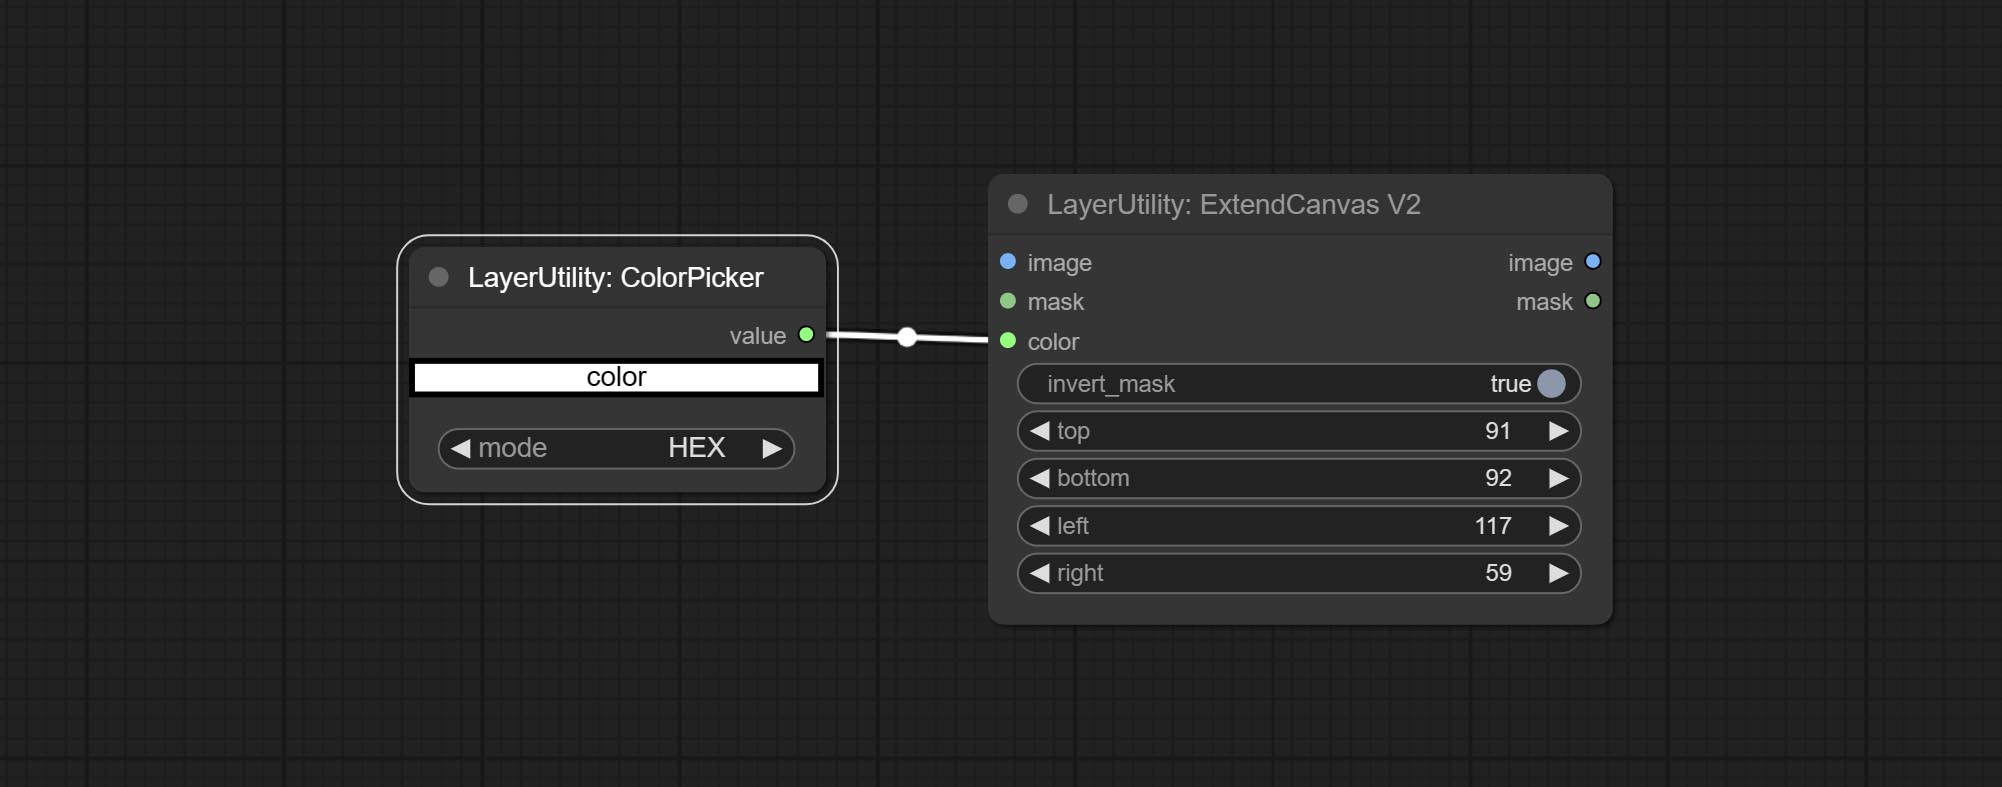
Convert absolute coordinates to percentage coordinates.
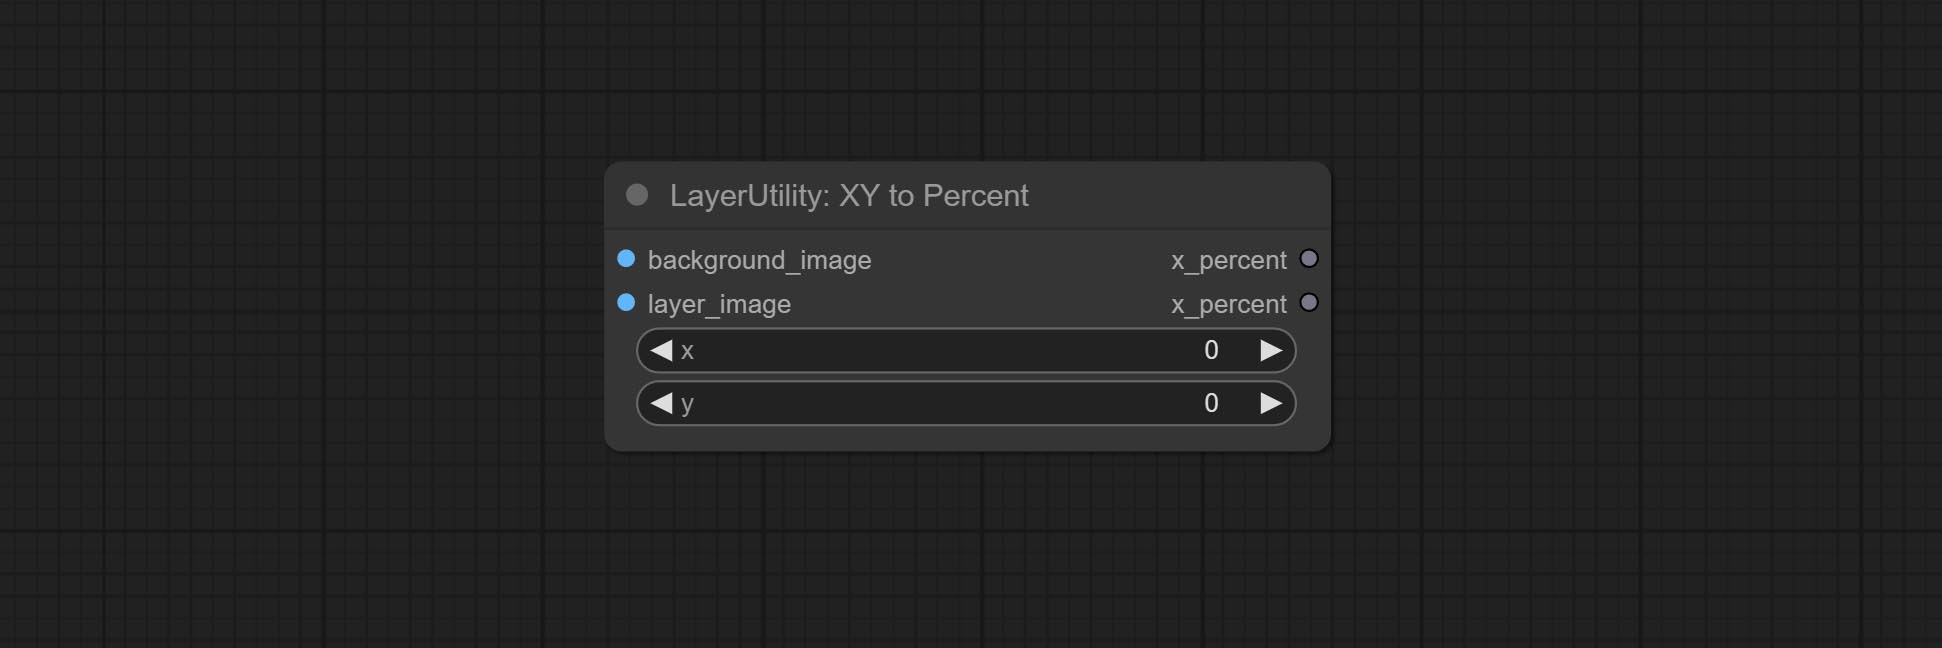
Node options:
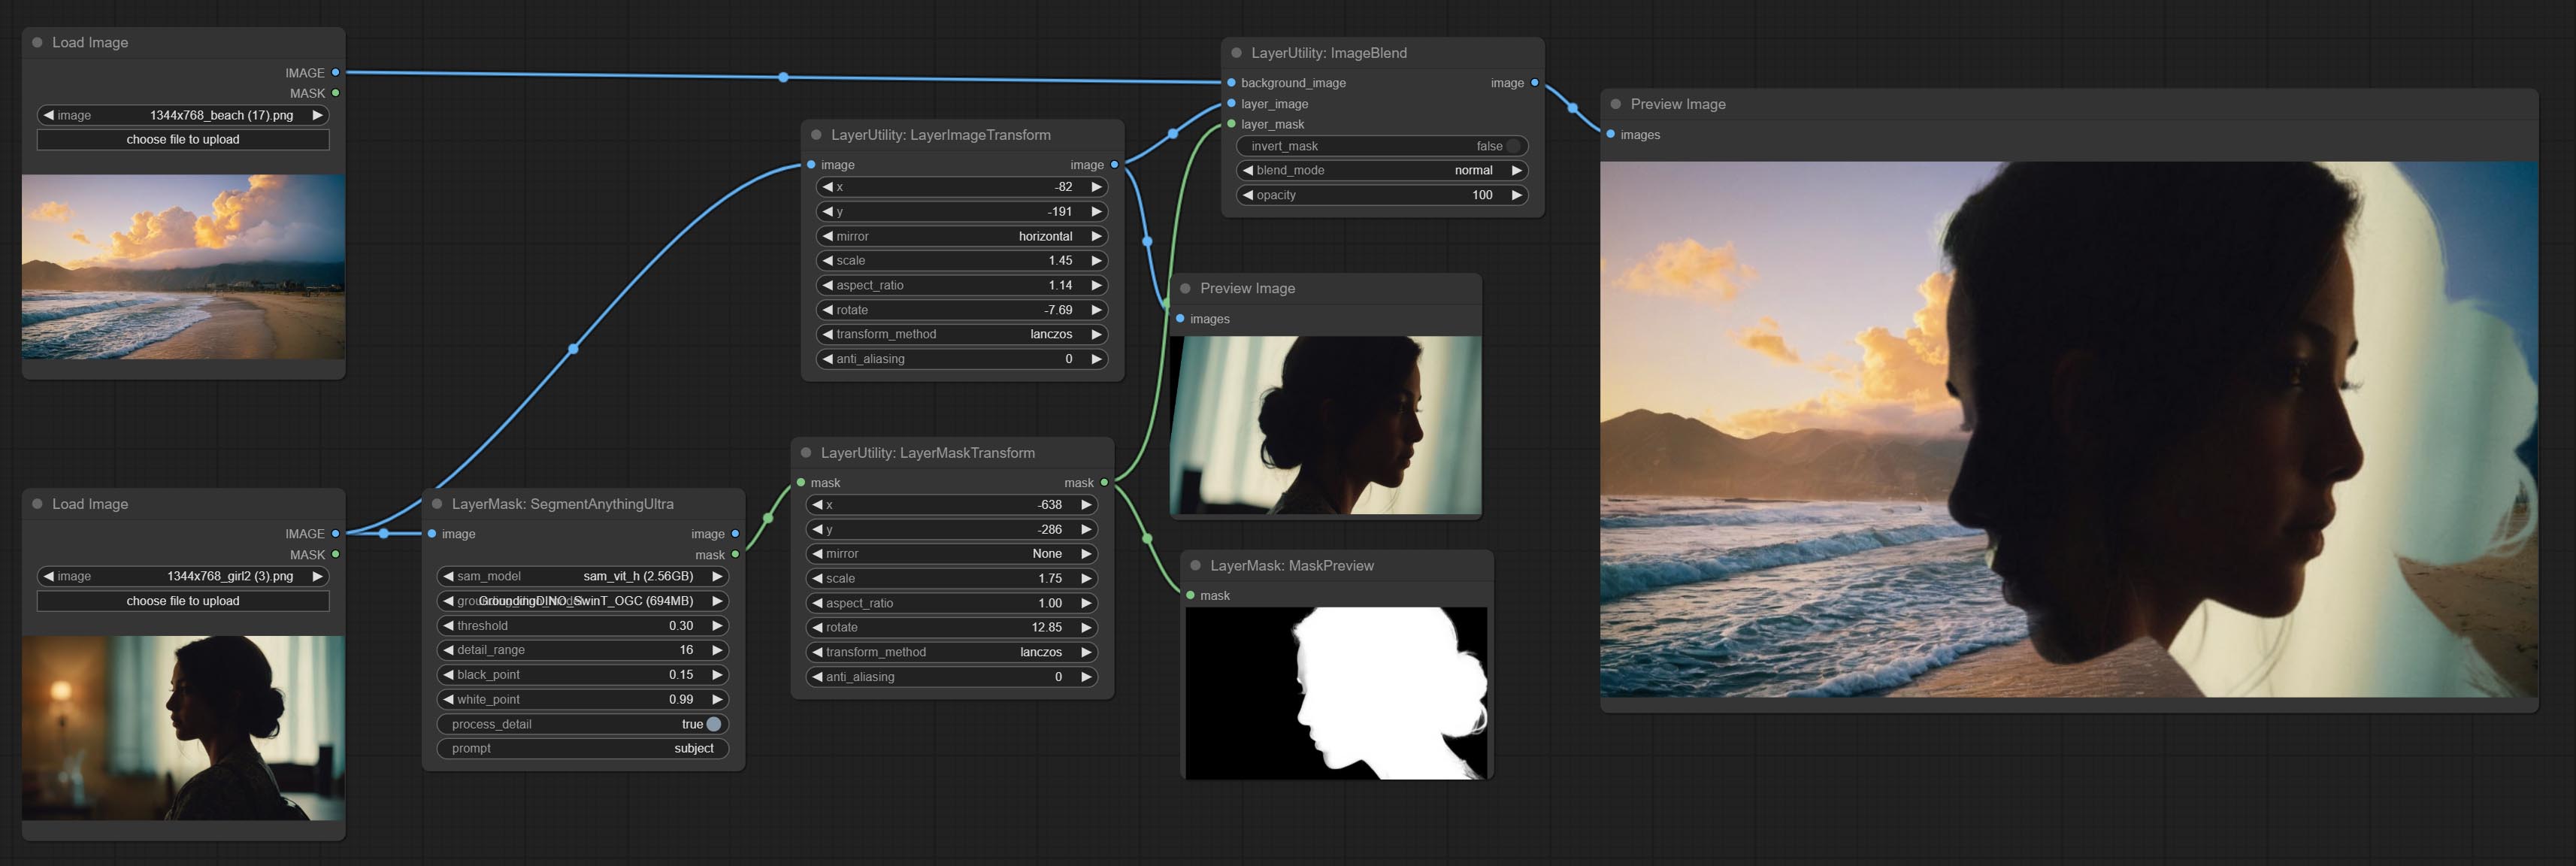
This node is used to transform layer_image separately, which can change size, rotation, aspect ratio, and mirror flip without changing the image size.
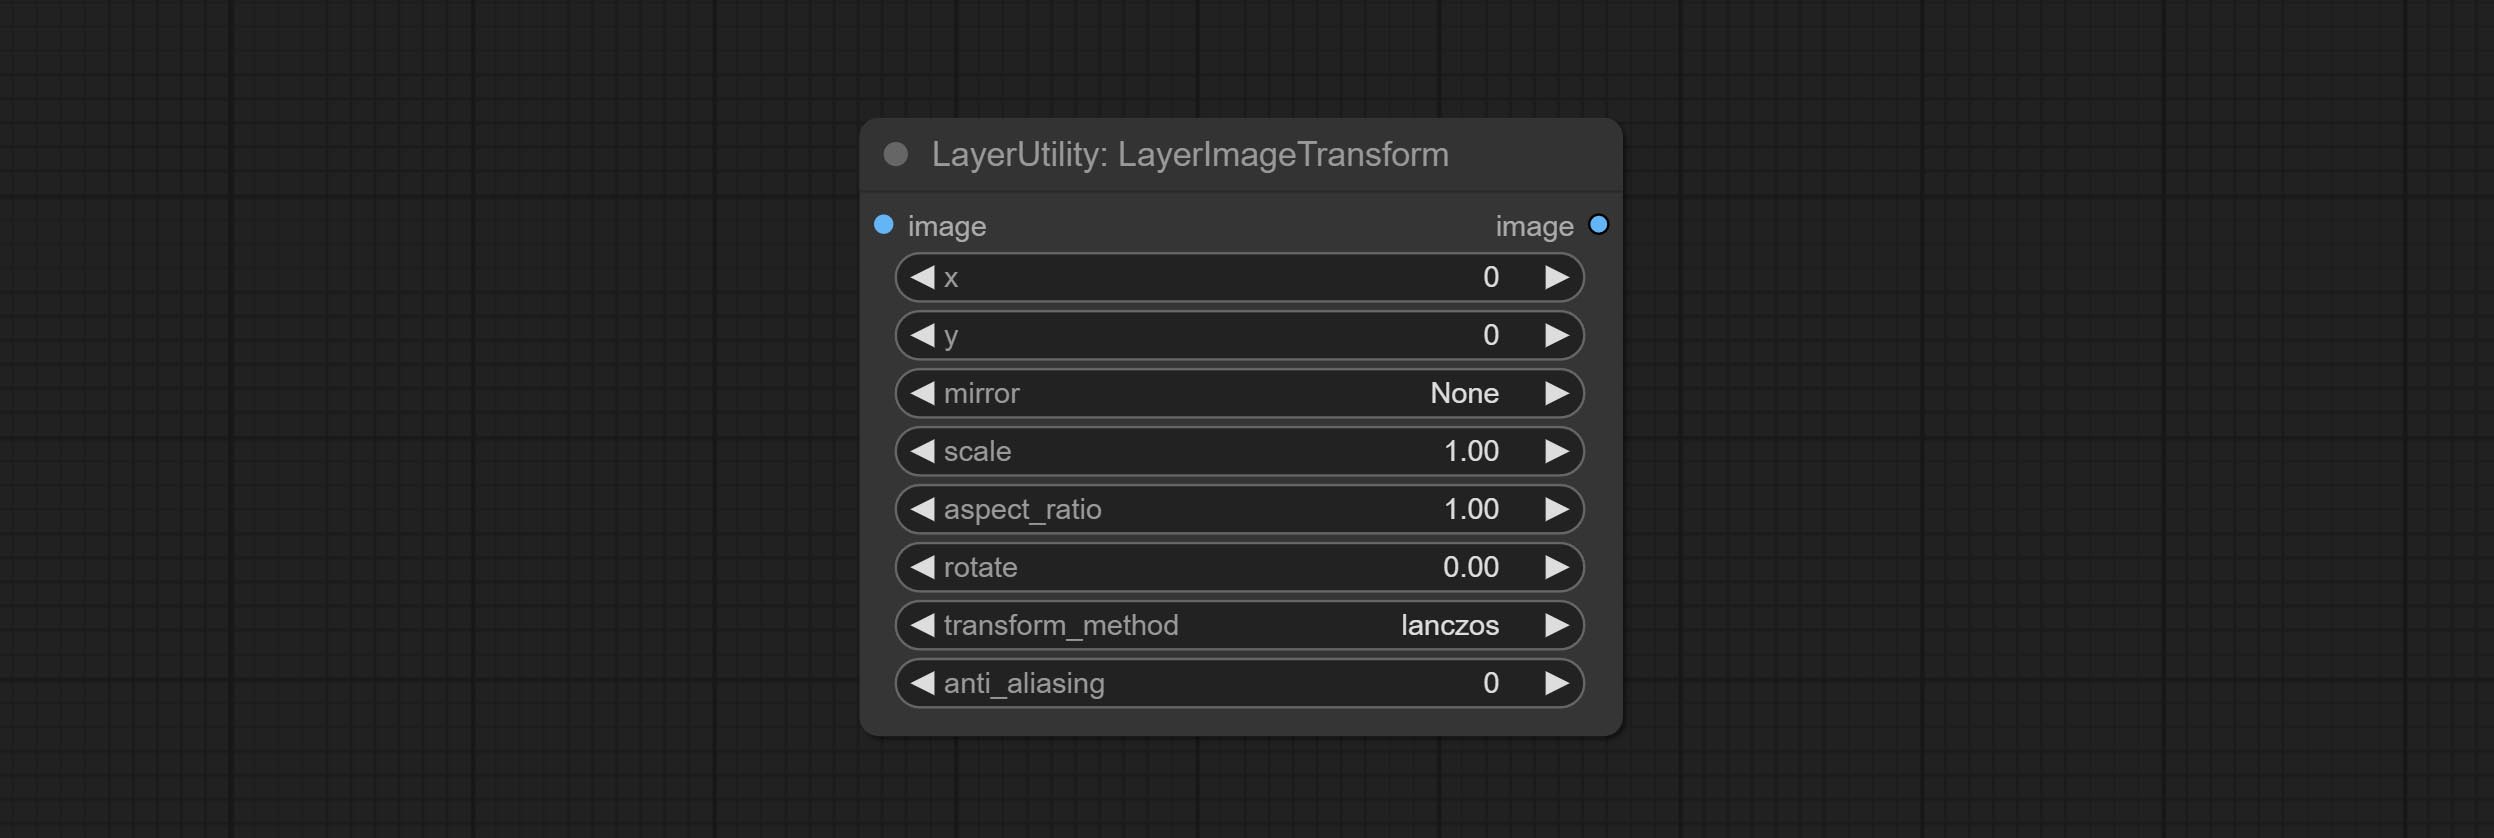
Node options:
Similar to LayerImageTransform node, this node is used to transform the layer_mask separately, which can scale, rotate, change aspect ratio, and mirror flip without changing the mask size.
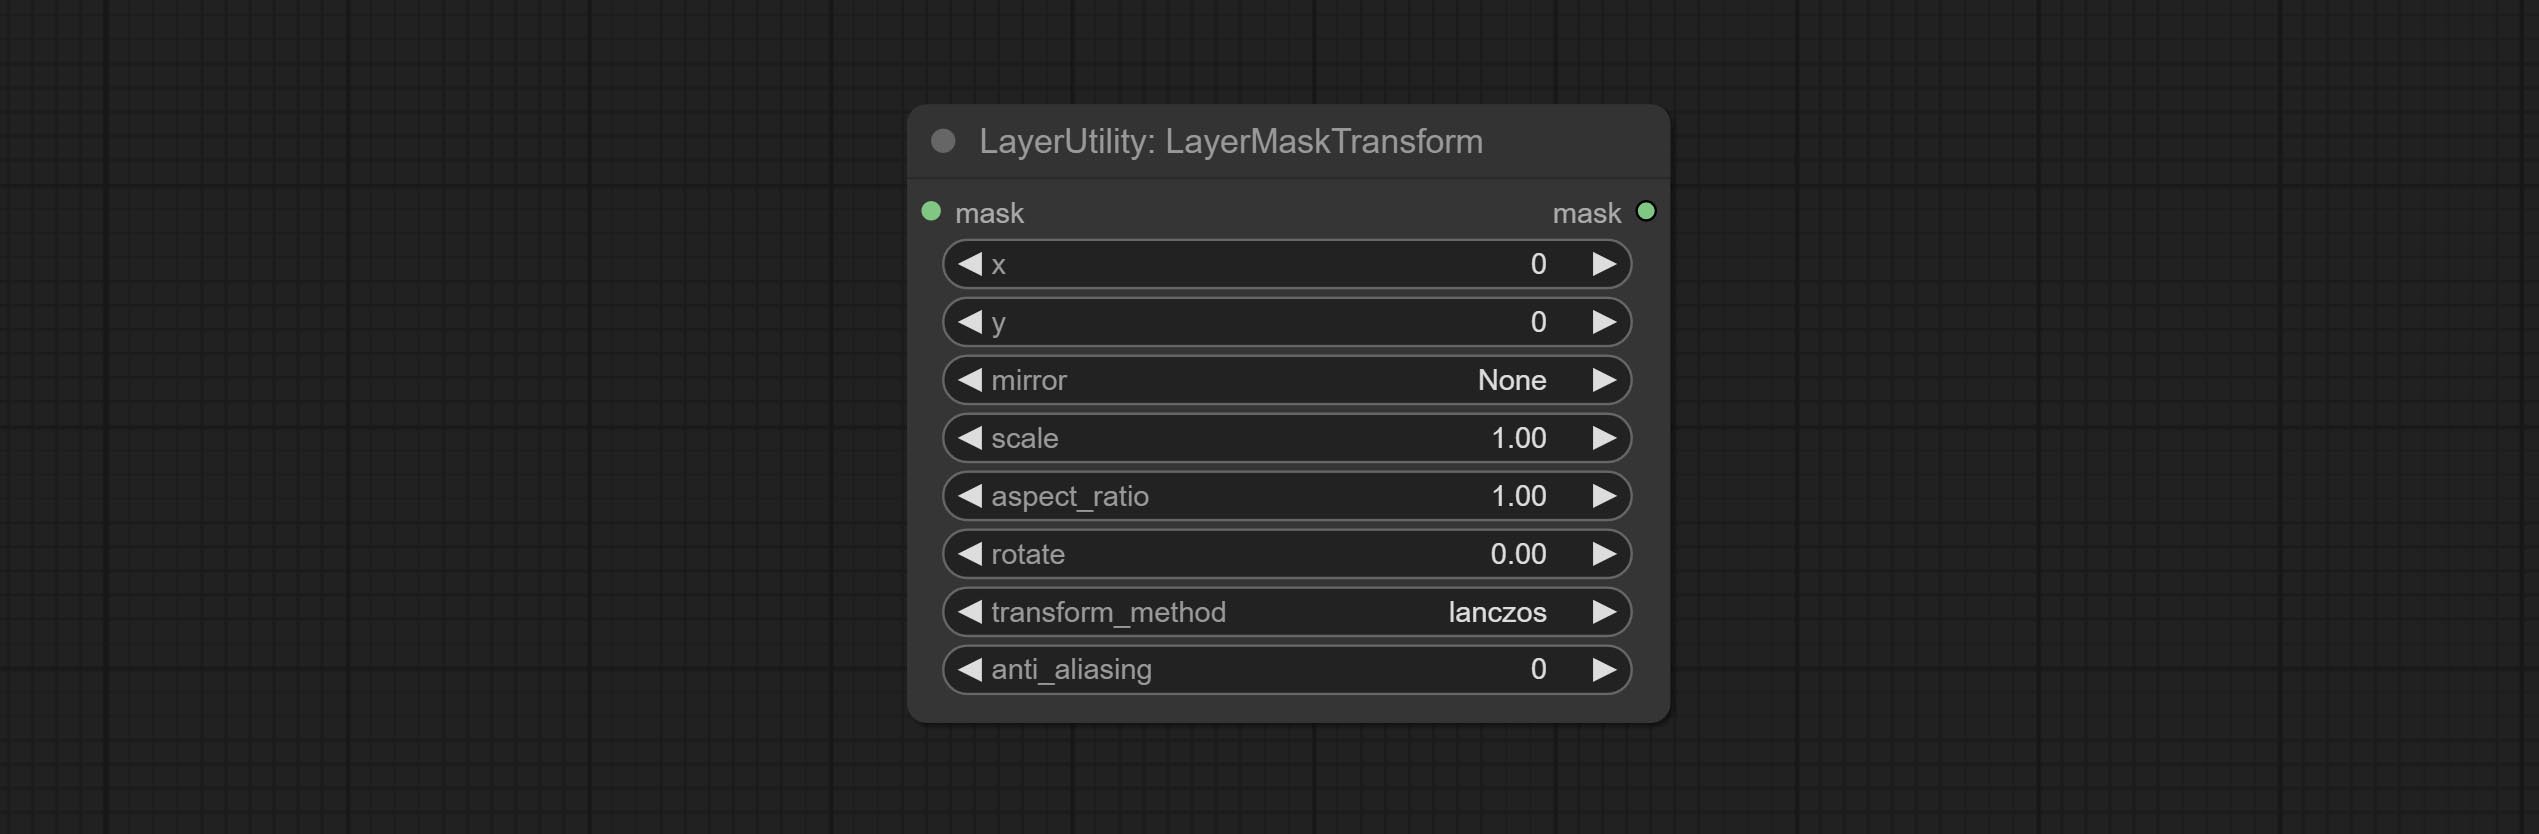
Node options:
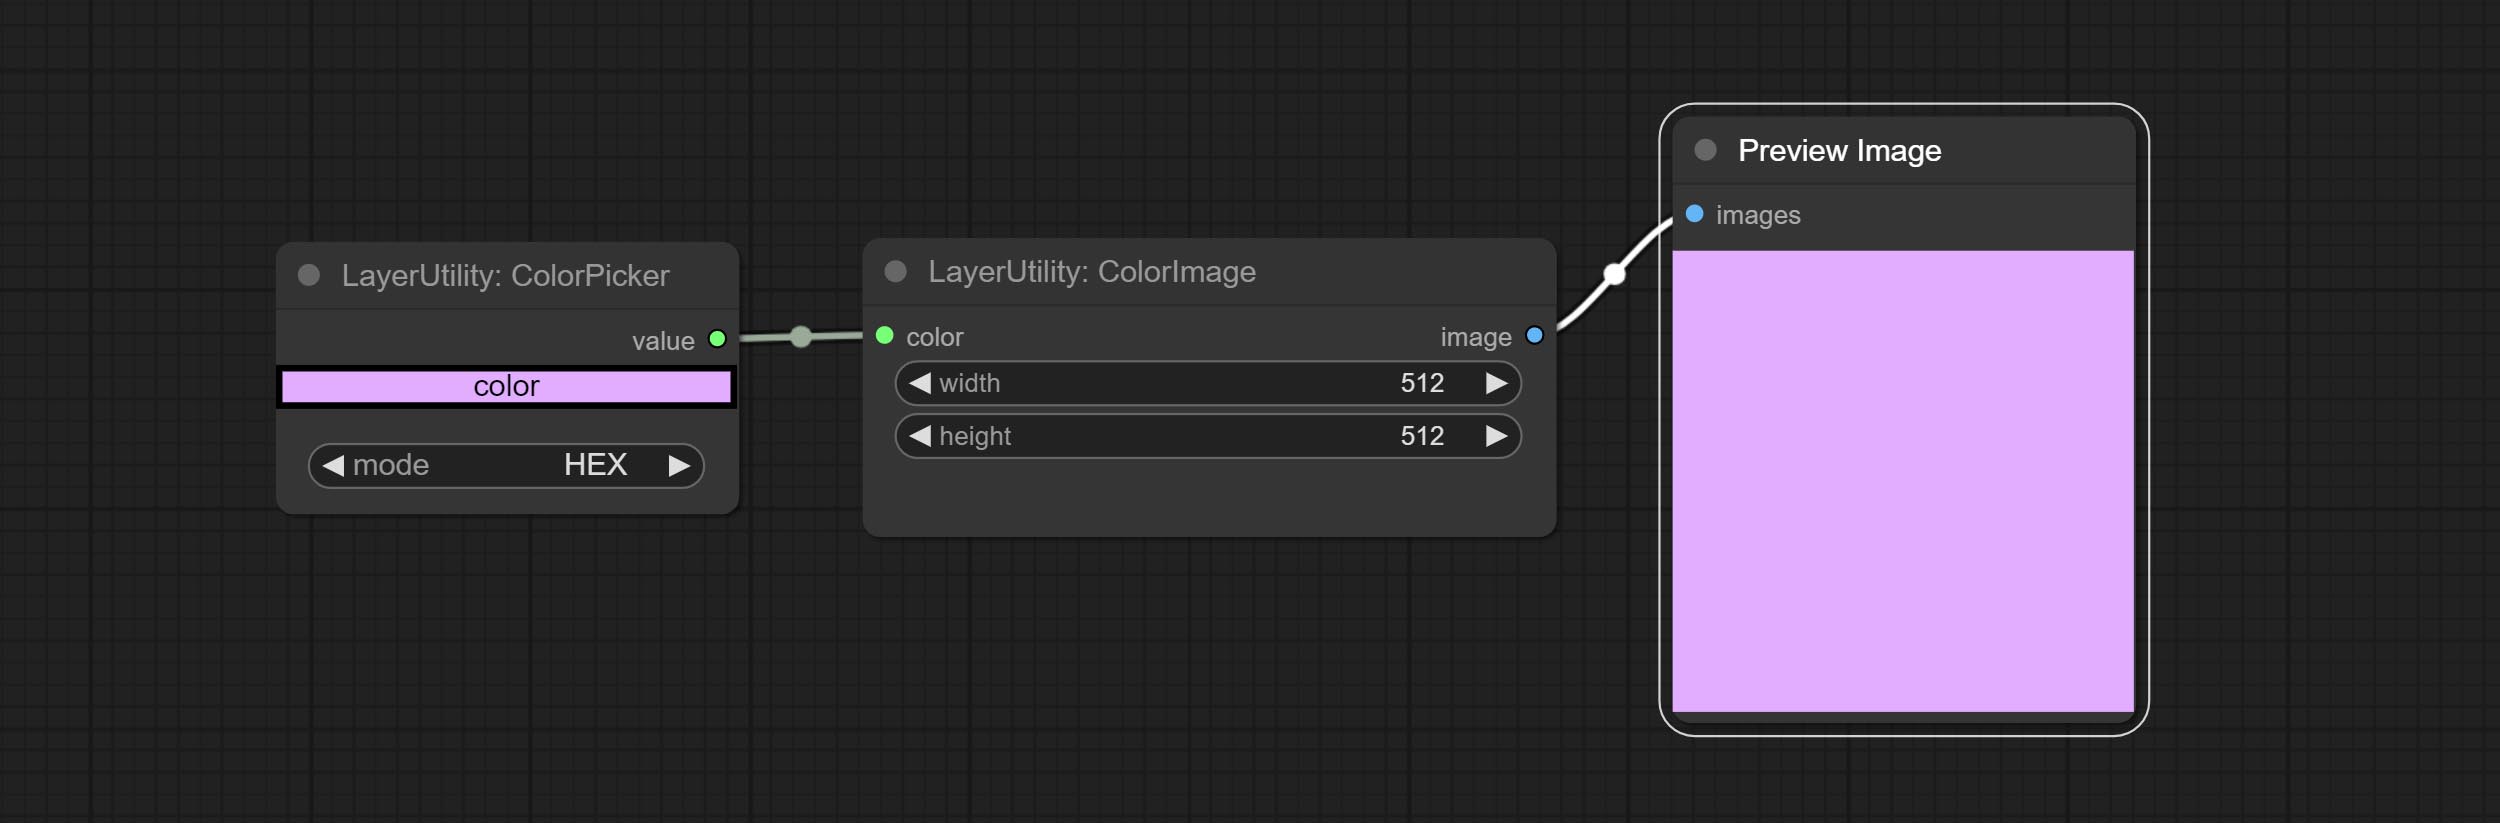
Generate an image of a specified color and size.

Node options:
The V2 upgraded version of ColorImage.
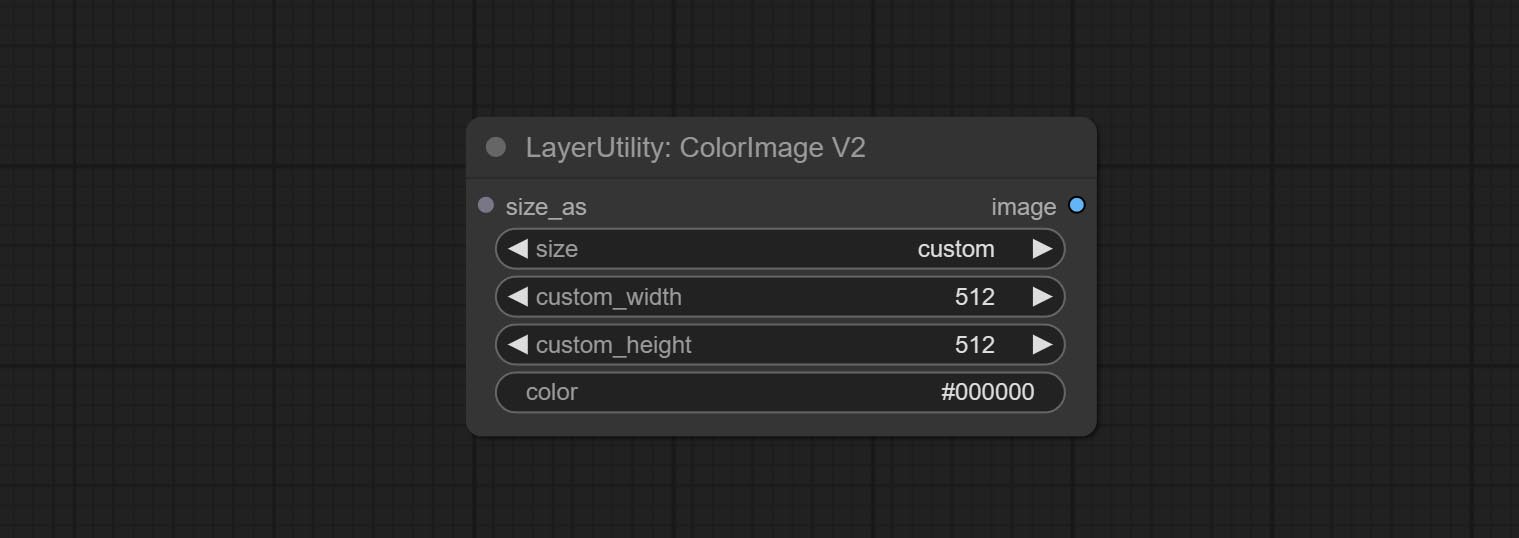
The following changes have been made based on ColorImage:
* Only limited to input images and masks. forcing the integration of other types of inputs will result in node errors. ** The preset size is defined in custom_size.ini , this file is located in the root directory of the plug-in, and the default name is custom_size.ini.example . to use this file for the first time, you need to change the file suffix to .ini . Open with text editing software. Each row represents a size, with the first value being width and the second being height, separated by a lowercase "x" in the middle. To avoid errors, please do not enter extra characters.
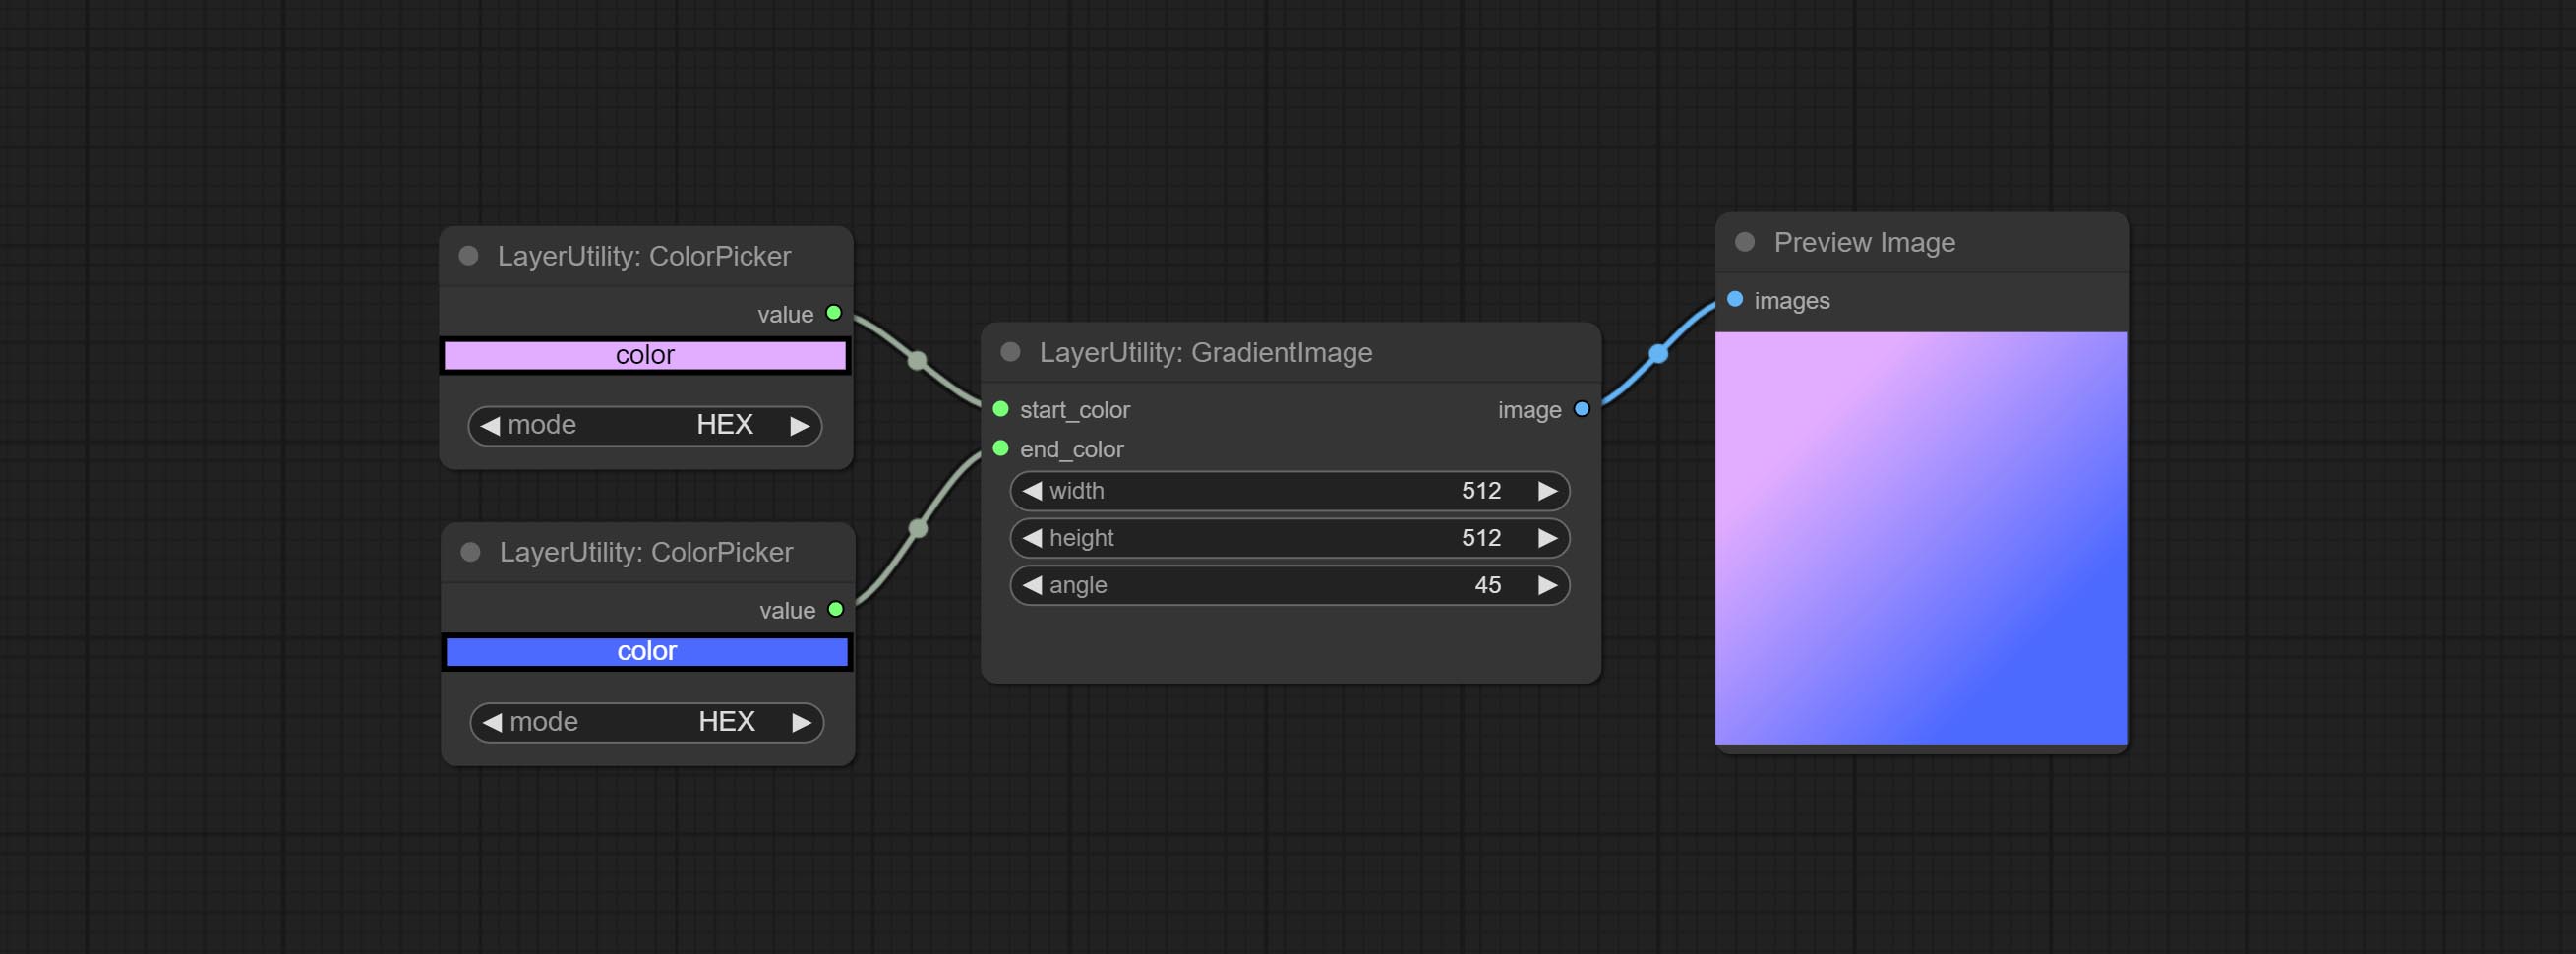
Generate an image with a specified size and color gradient.
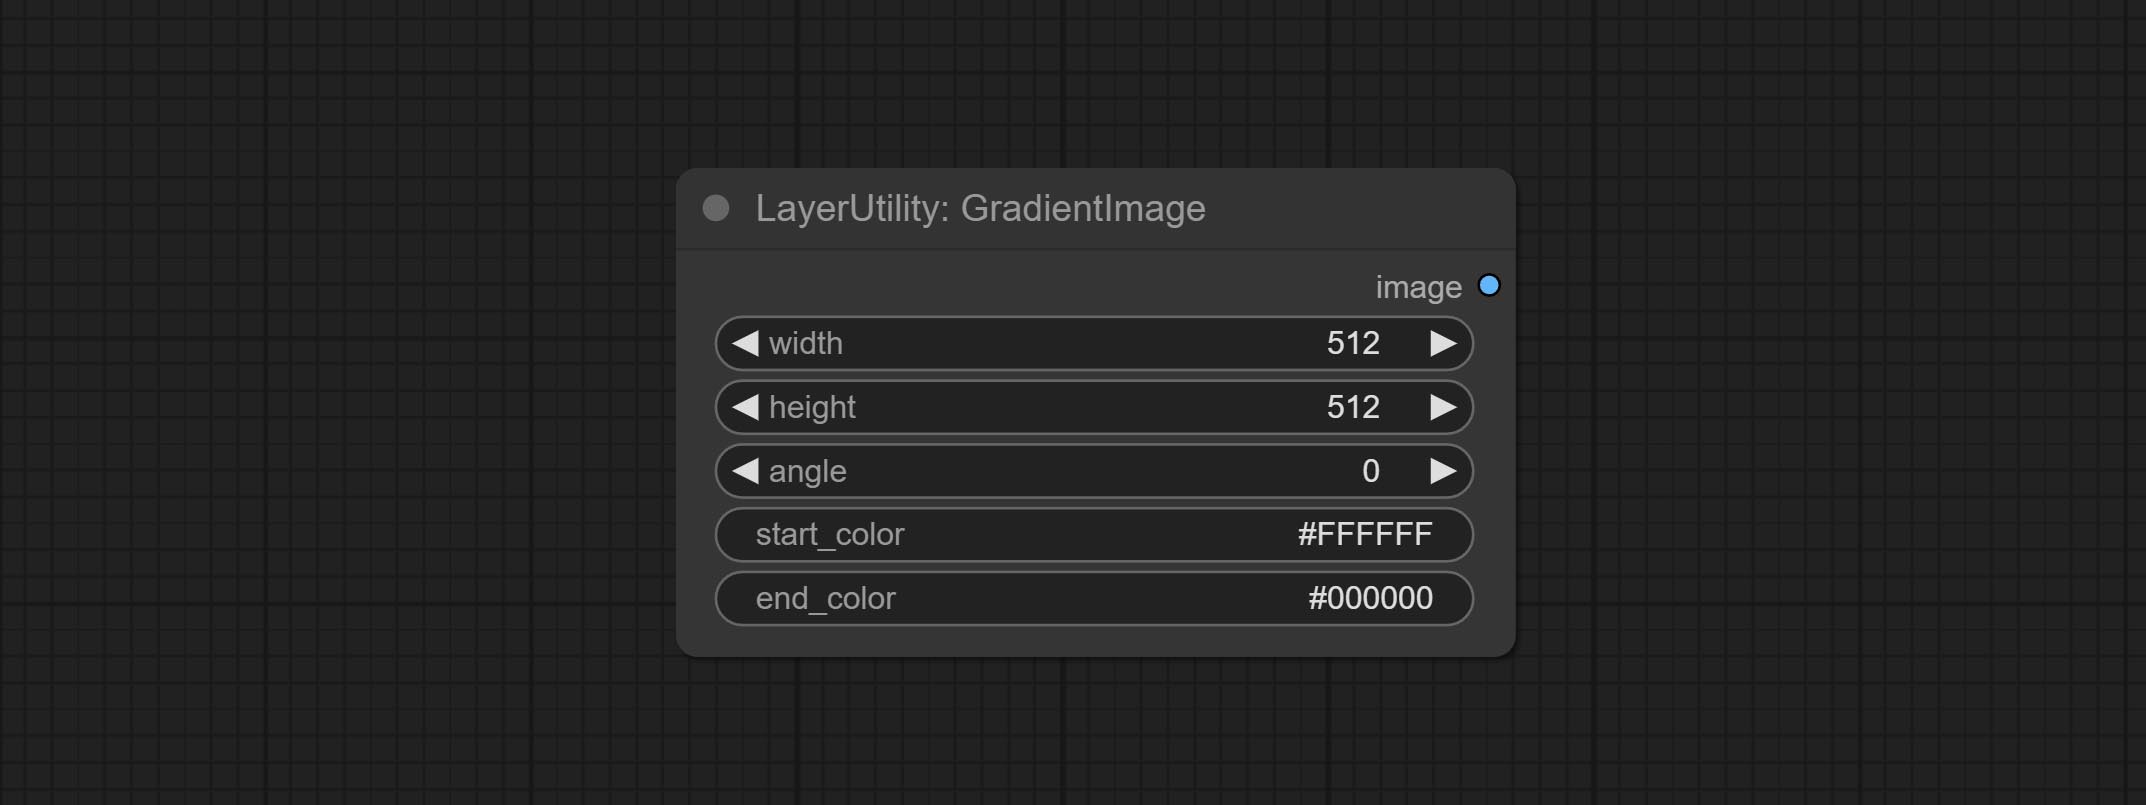
Node options:
The V2 upgraded version of GradientImage.
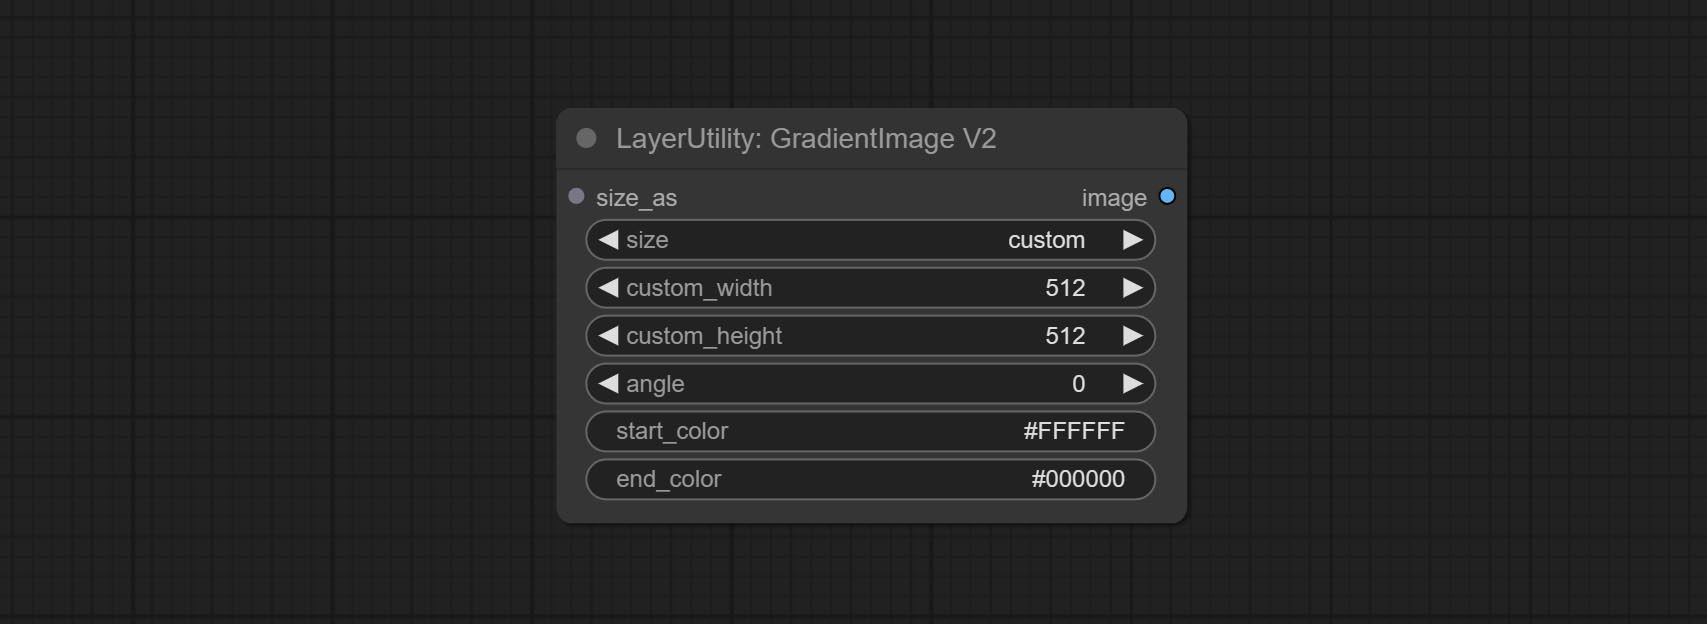
The following changes have been made based on GradientImage:
* Only limited to input images and masks. forcing the integration of other types of inputs will result in node errors. ** The preset size is defined in custom_size.ini , this file is located in the root directory of the plug-in, and the default name is custom_size.ini.example . to use this file for the first time, you need to change the file suffix to .ini . Open with text editing software. Each row represents a size, with the first value being width and the second being height, separated by a lowercase "x" in the middle. To avoid errors, please do not enter extra characters.
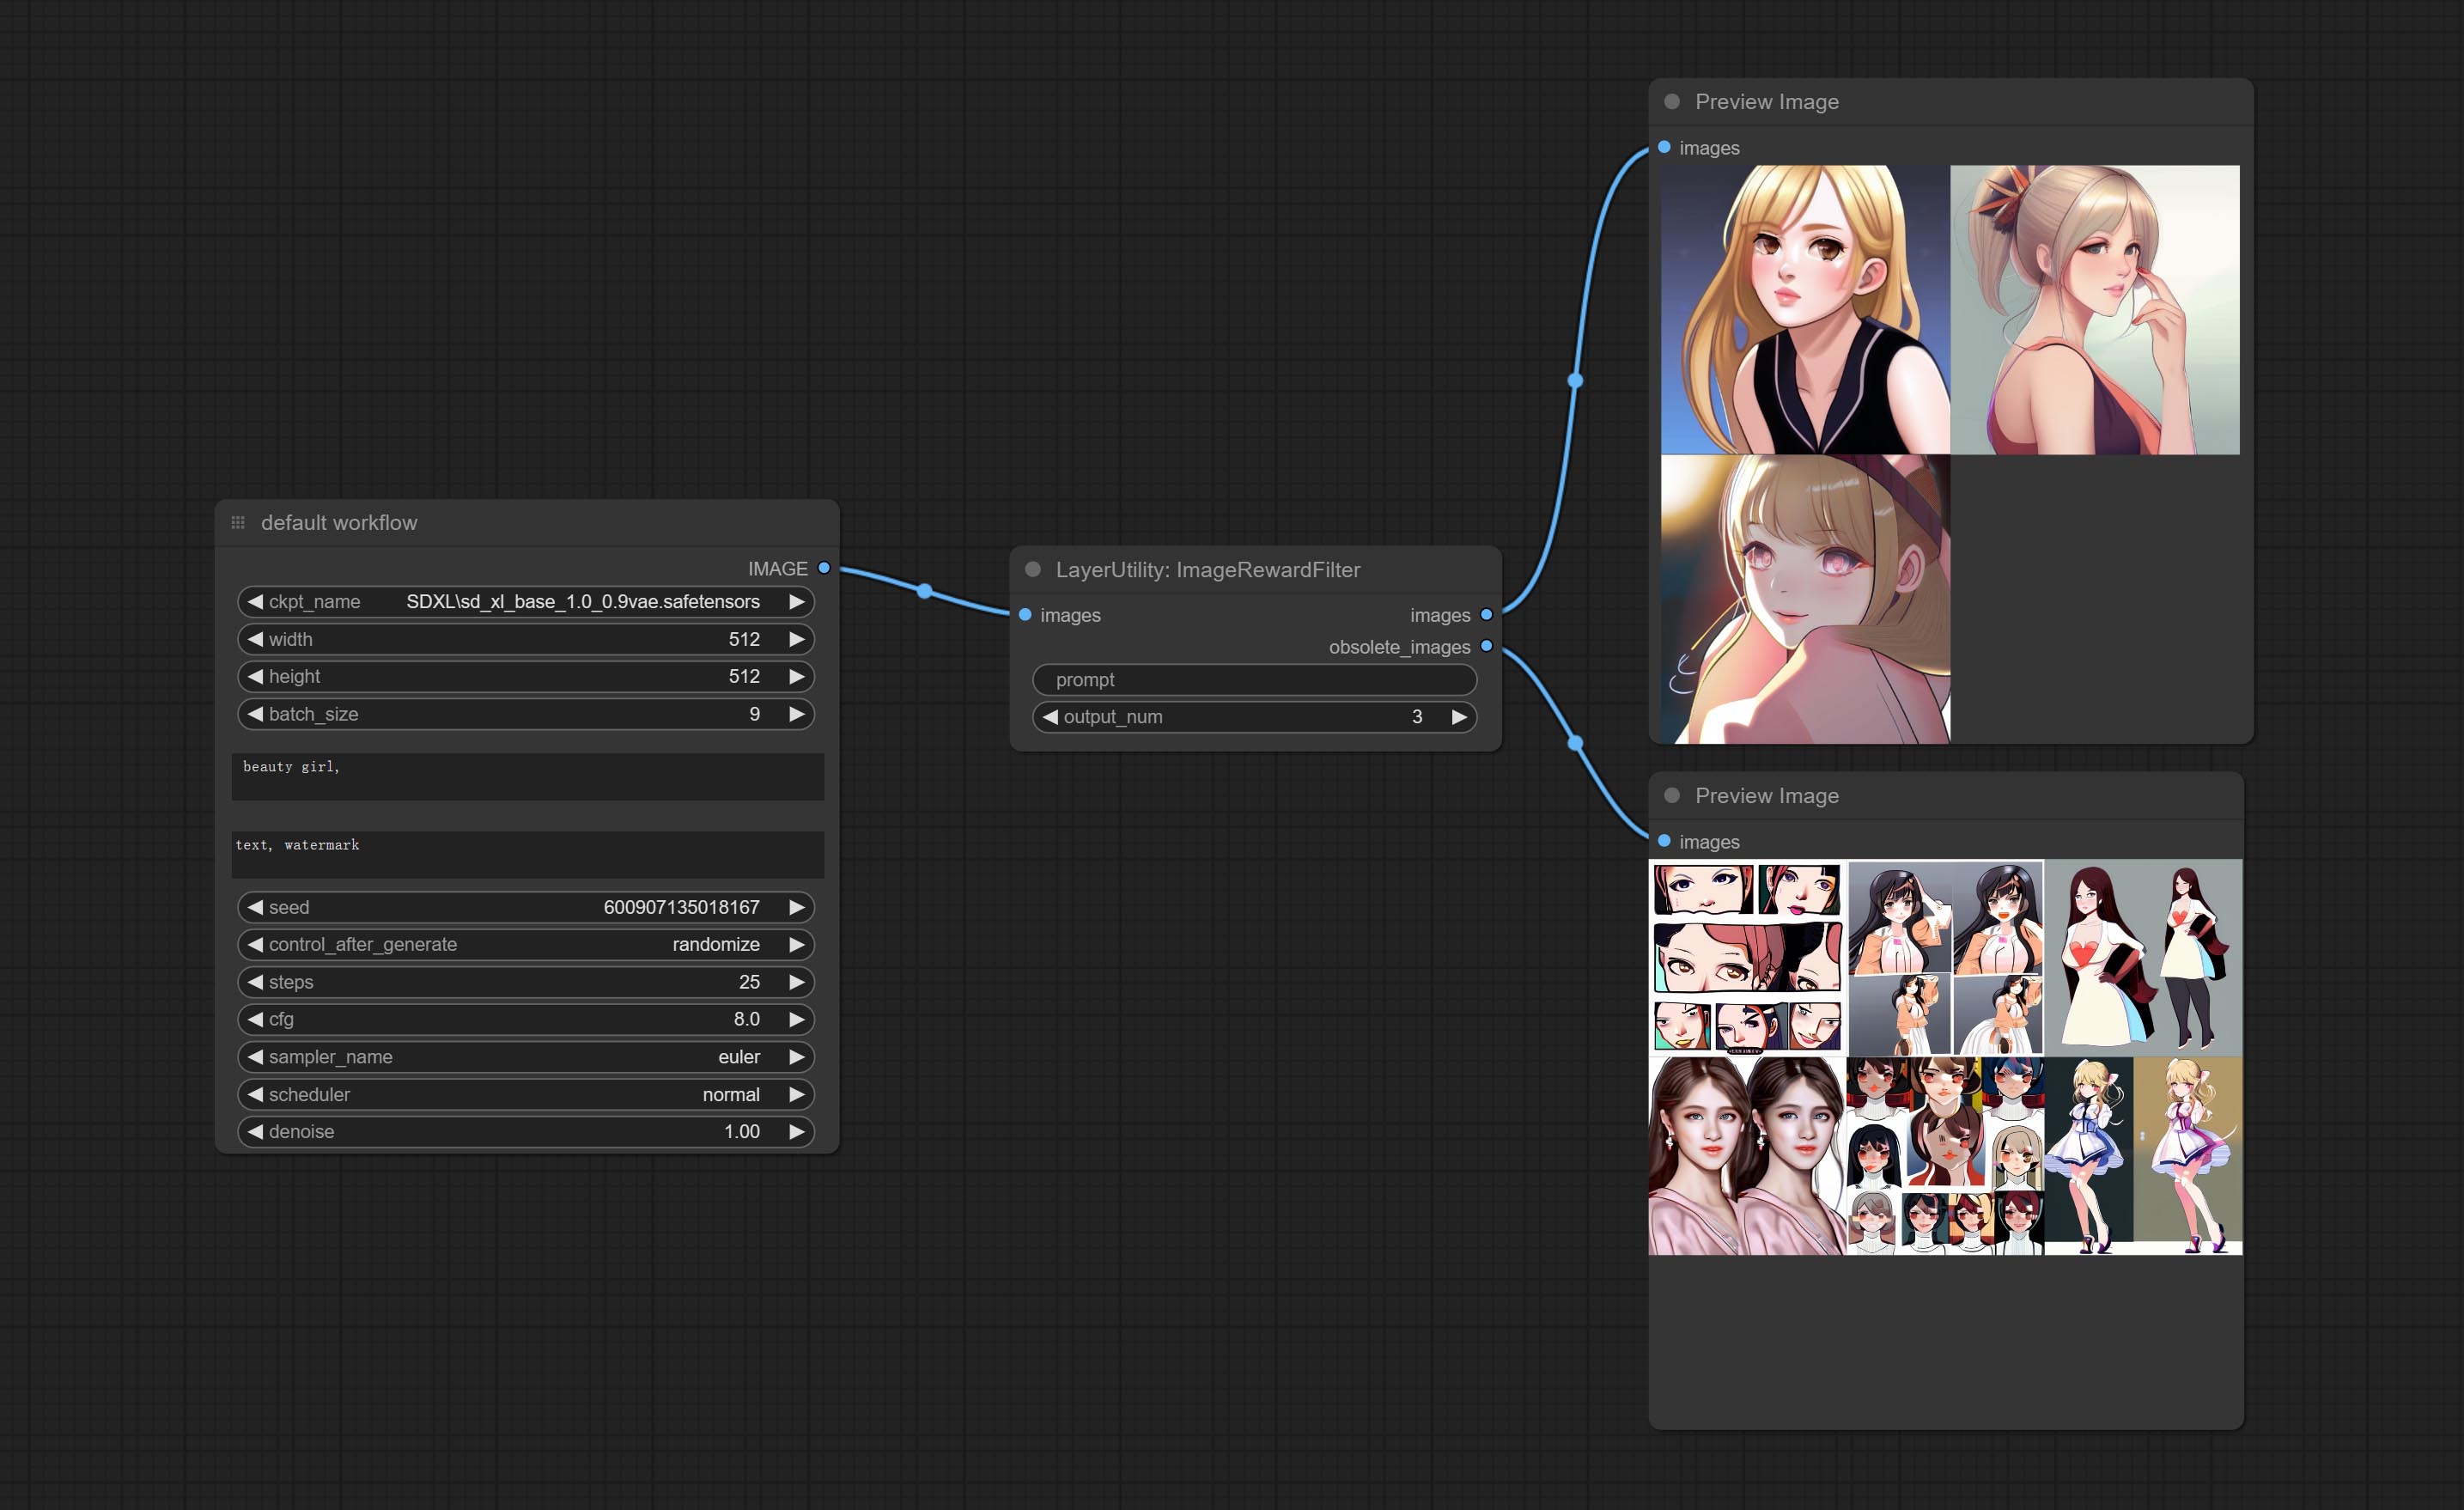
Rating bulk pictures and outputting top-ranked pictures. it used [ImageReward] (https://github.com/THUDM/ImageReward) for image scoring, thanks to the original authors.
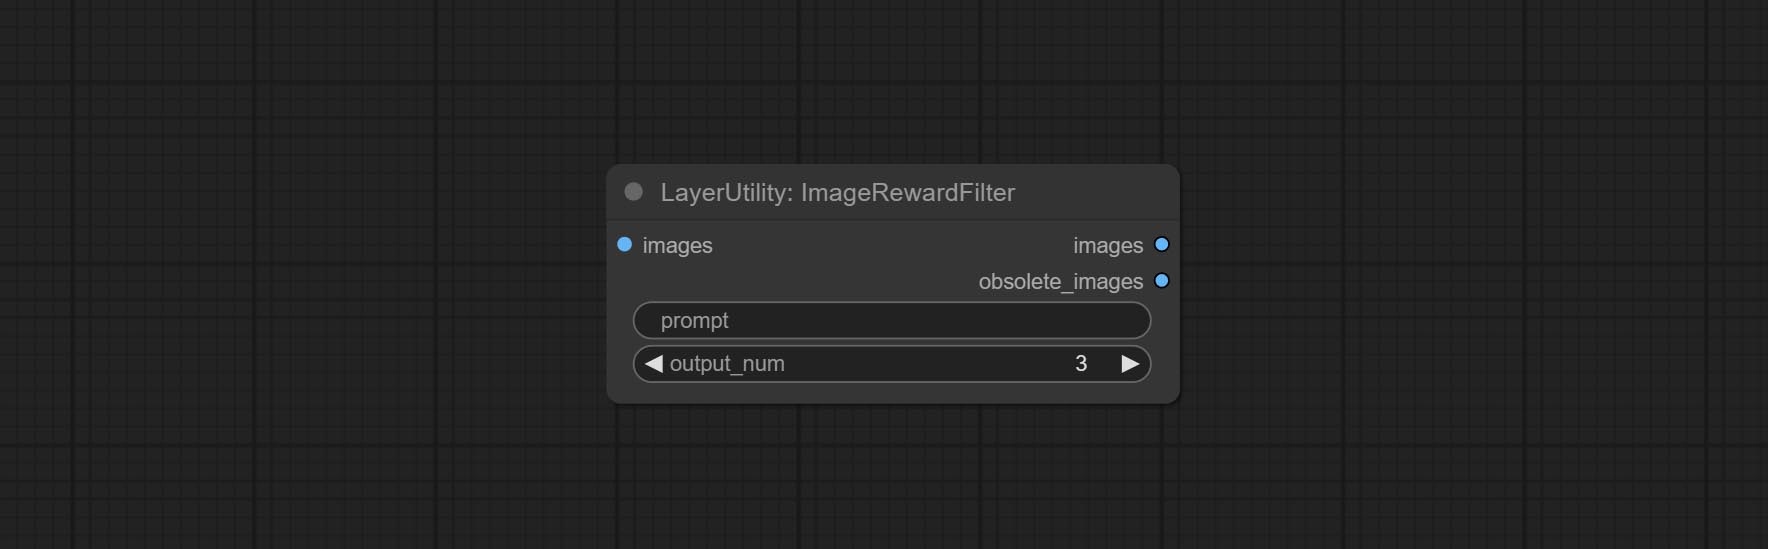
Node options:
Outputs:
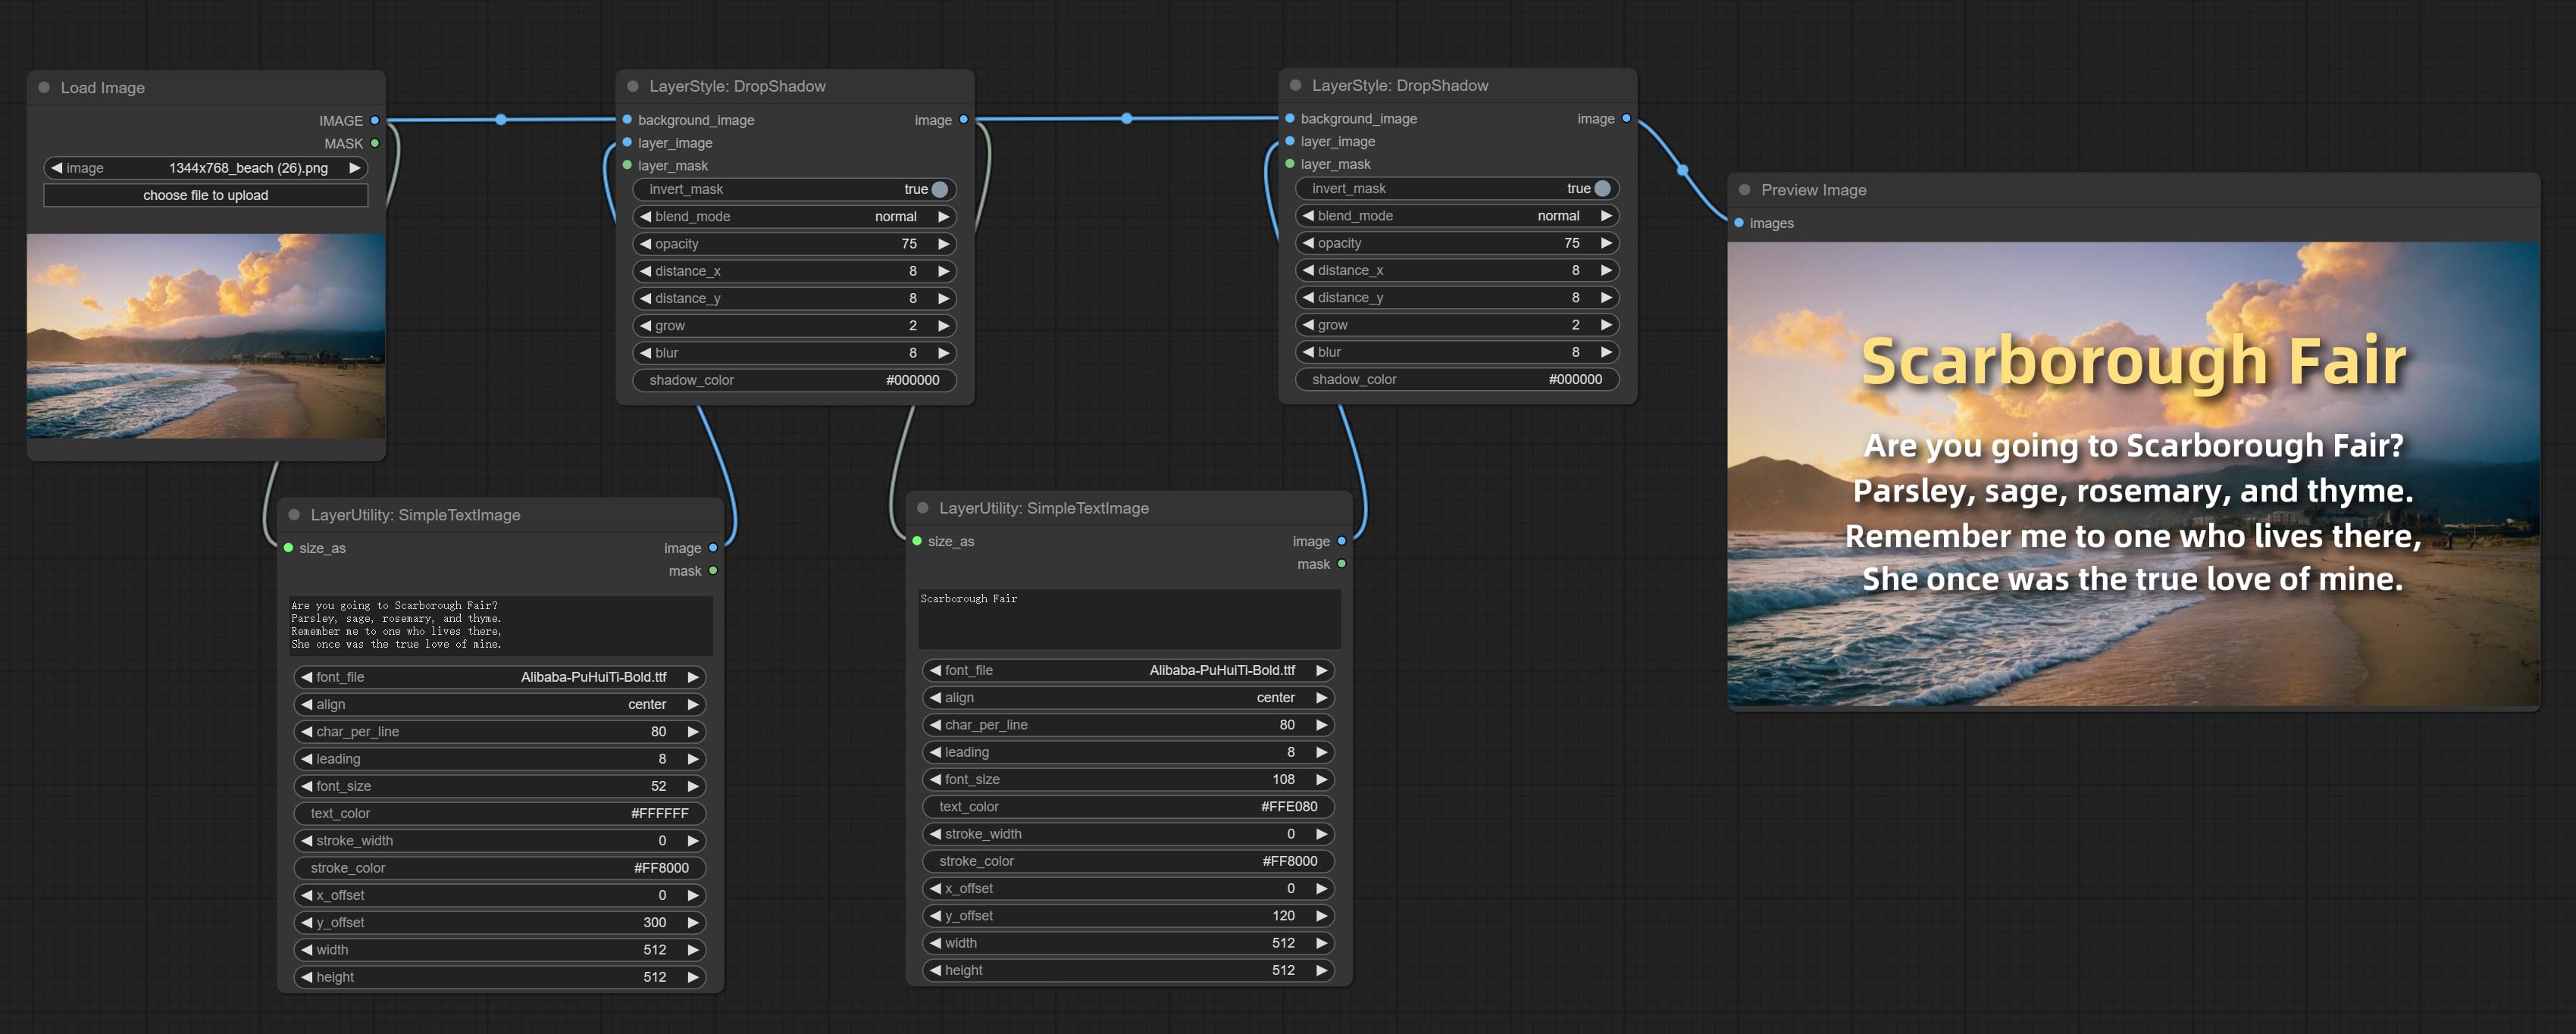
Generate simple typesetting images and masks from text. This node references some of the functionalities and code of ZHO-ZHO-ZHO/ComfyUI-Text_Image-Composite, thanks to the original author.
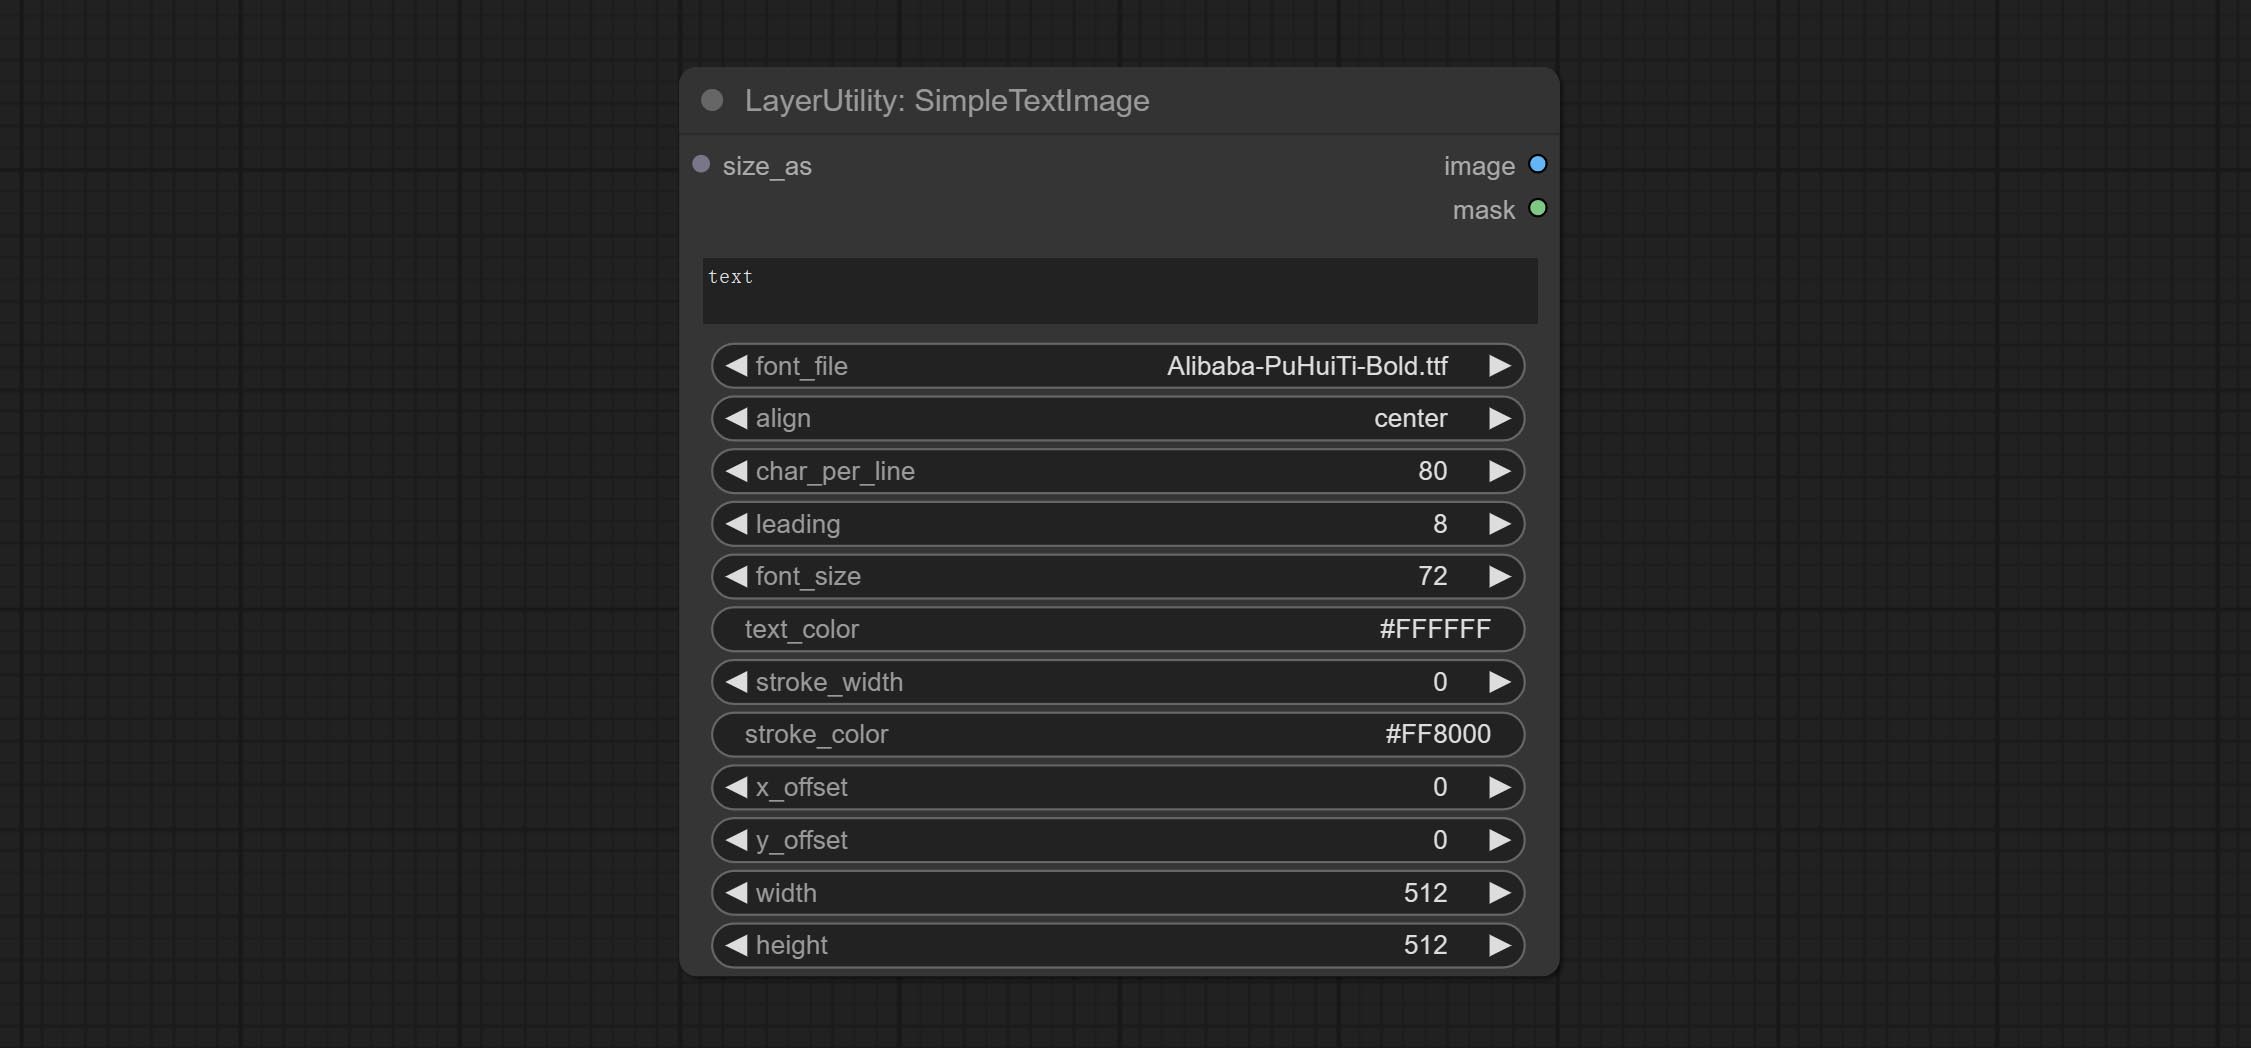
Node options:
* Only limited to input image and mask. forcing the integration of other types of inputs will result in node errors.
** The font folder is defined in resource_dir.ini , this file is located in the root directory of the plug-in, and the default name is resource_dir.ini.example . to use this file for the first time, you need to change the file suffix to .ini . Open the text editing software and find the line starting with "FONT_dir=", after "=", enter the custom folder path name. support defining multiple folders in resource-dir.ini , separated by commas, semicolons, or spaces. all font files in this folder will be collected and displayed in the node list during ComfyUI initialization. If the folder set in ini is invalid, the font folder that comes with the plugin will be enabled.
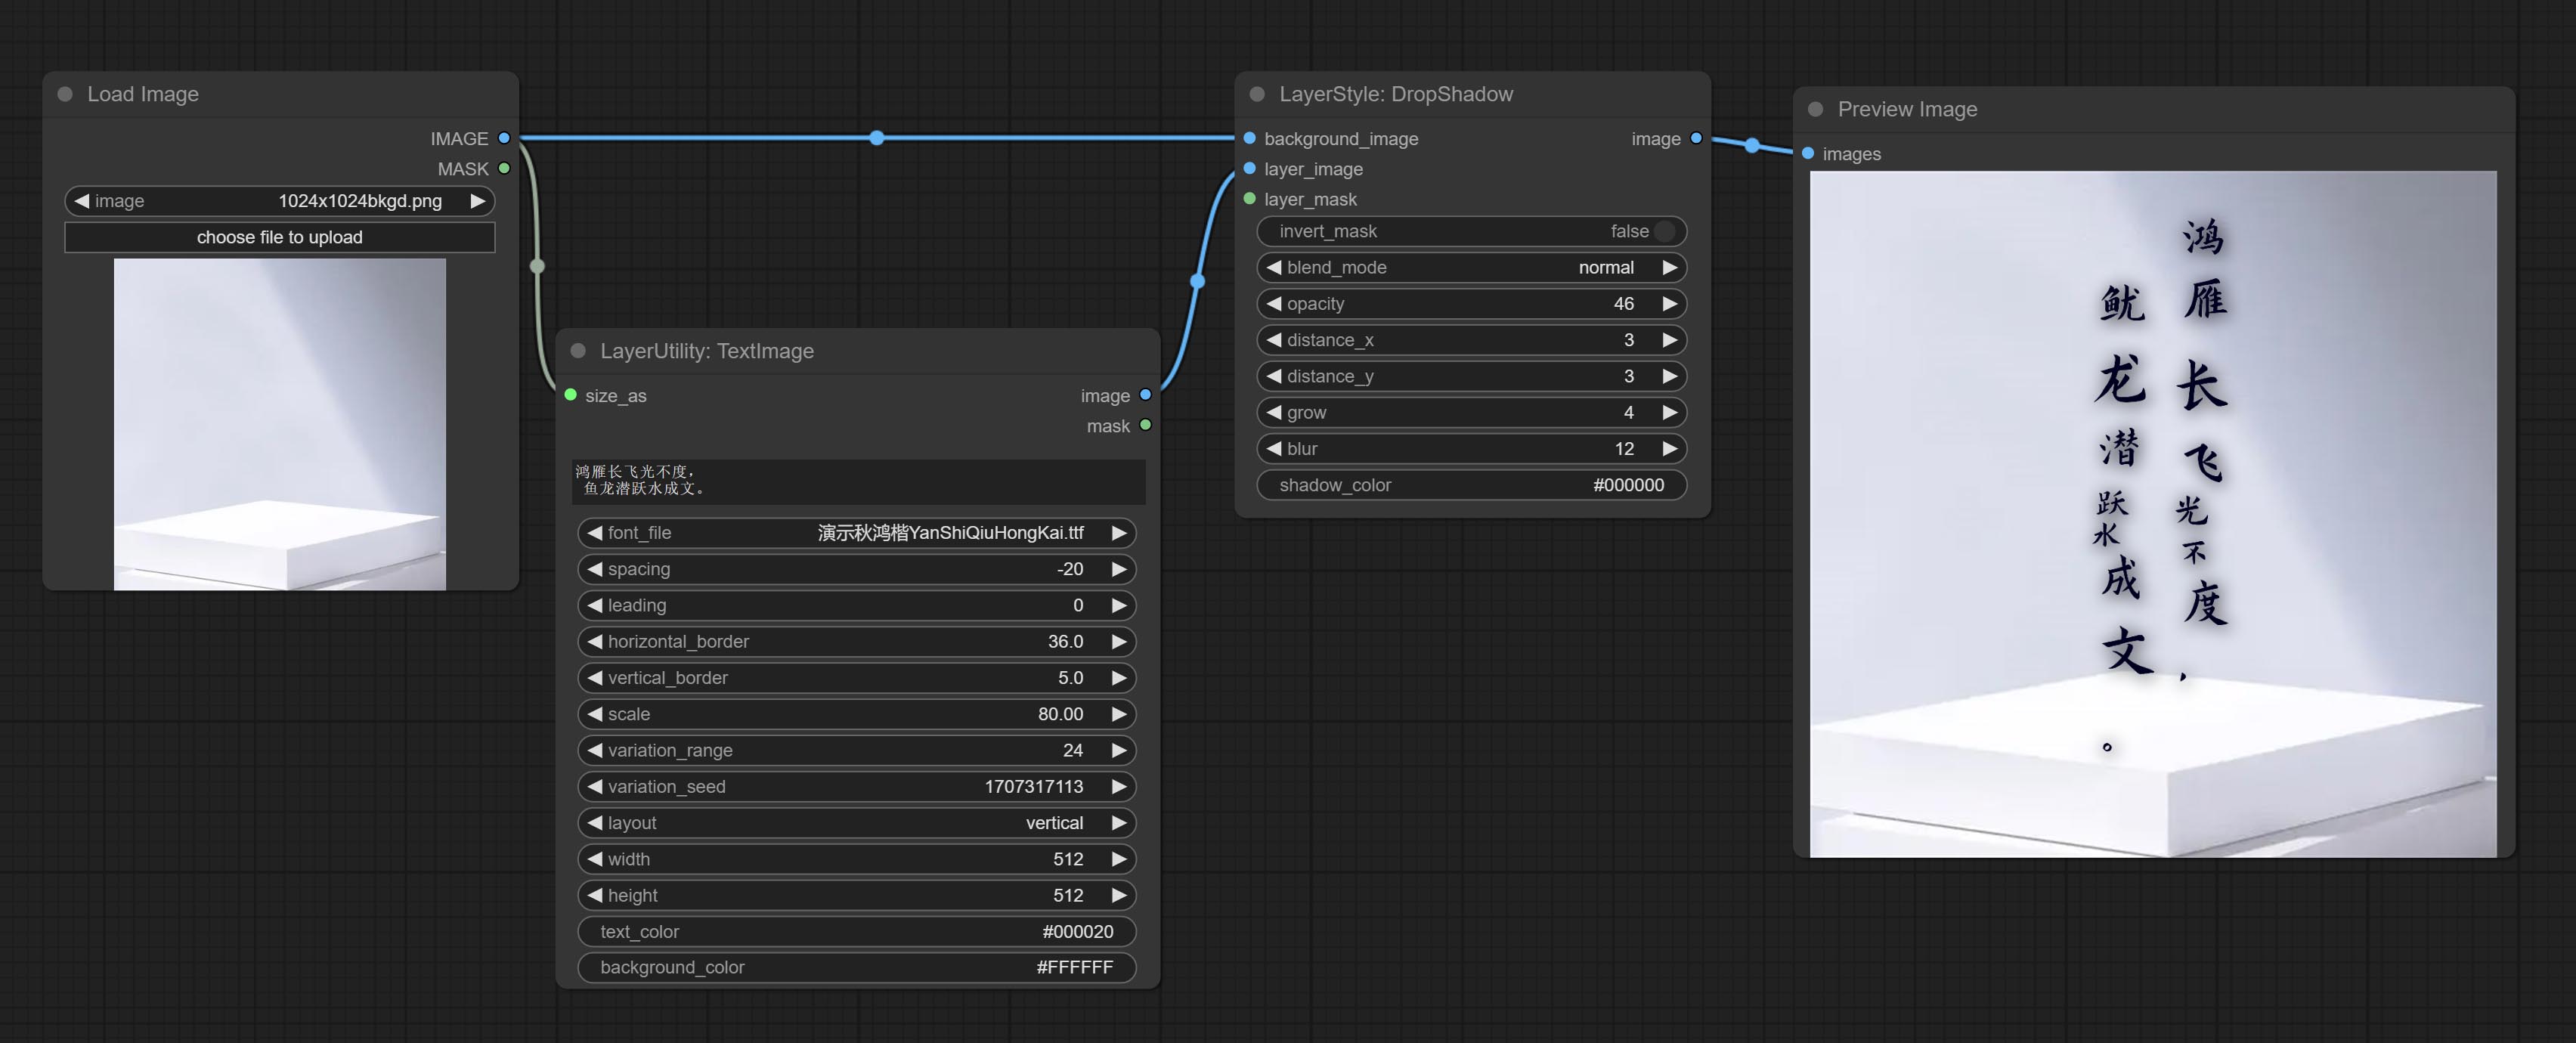
Generate images and masks from text. support for adjusting the spacing between words and lines, horizontal and vertical adjustments, it can set random changes in each character, including size and position.
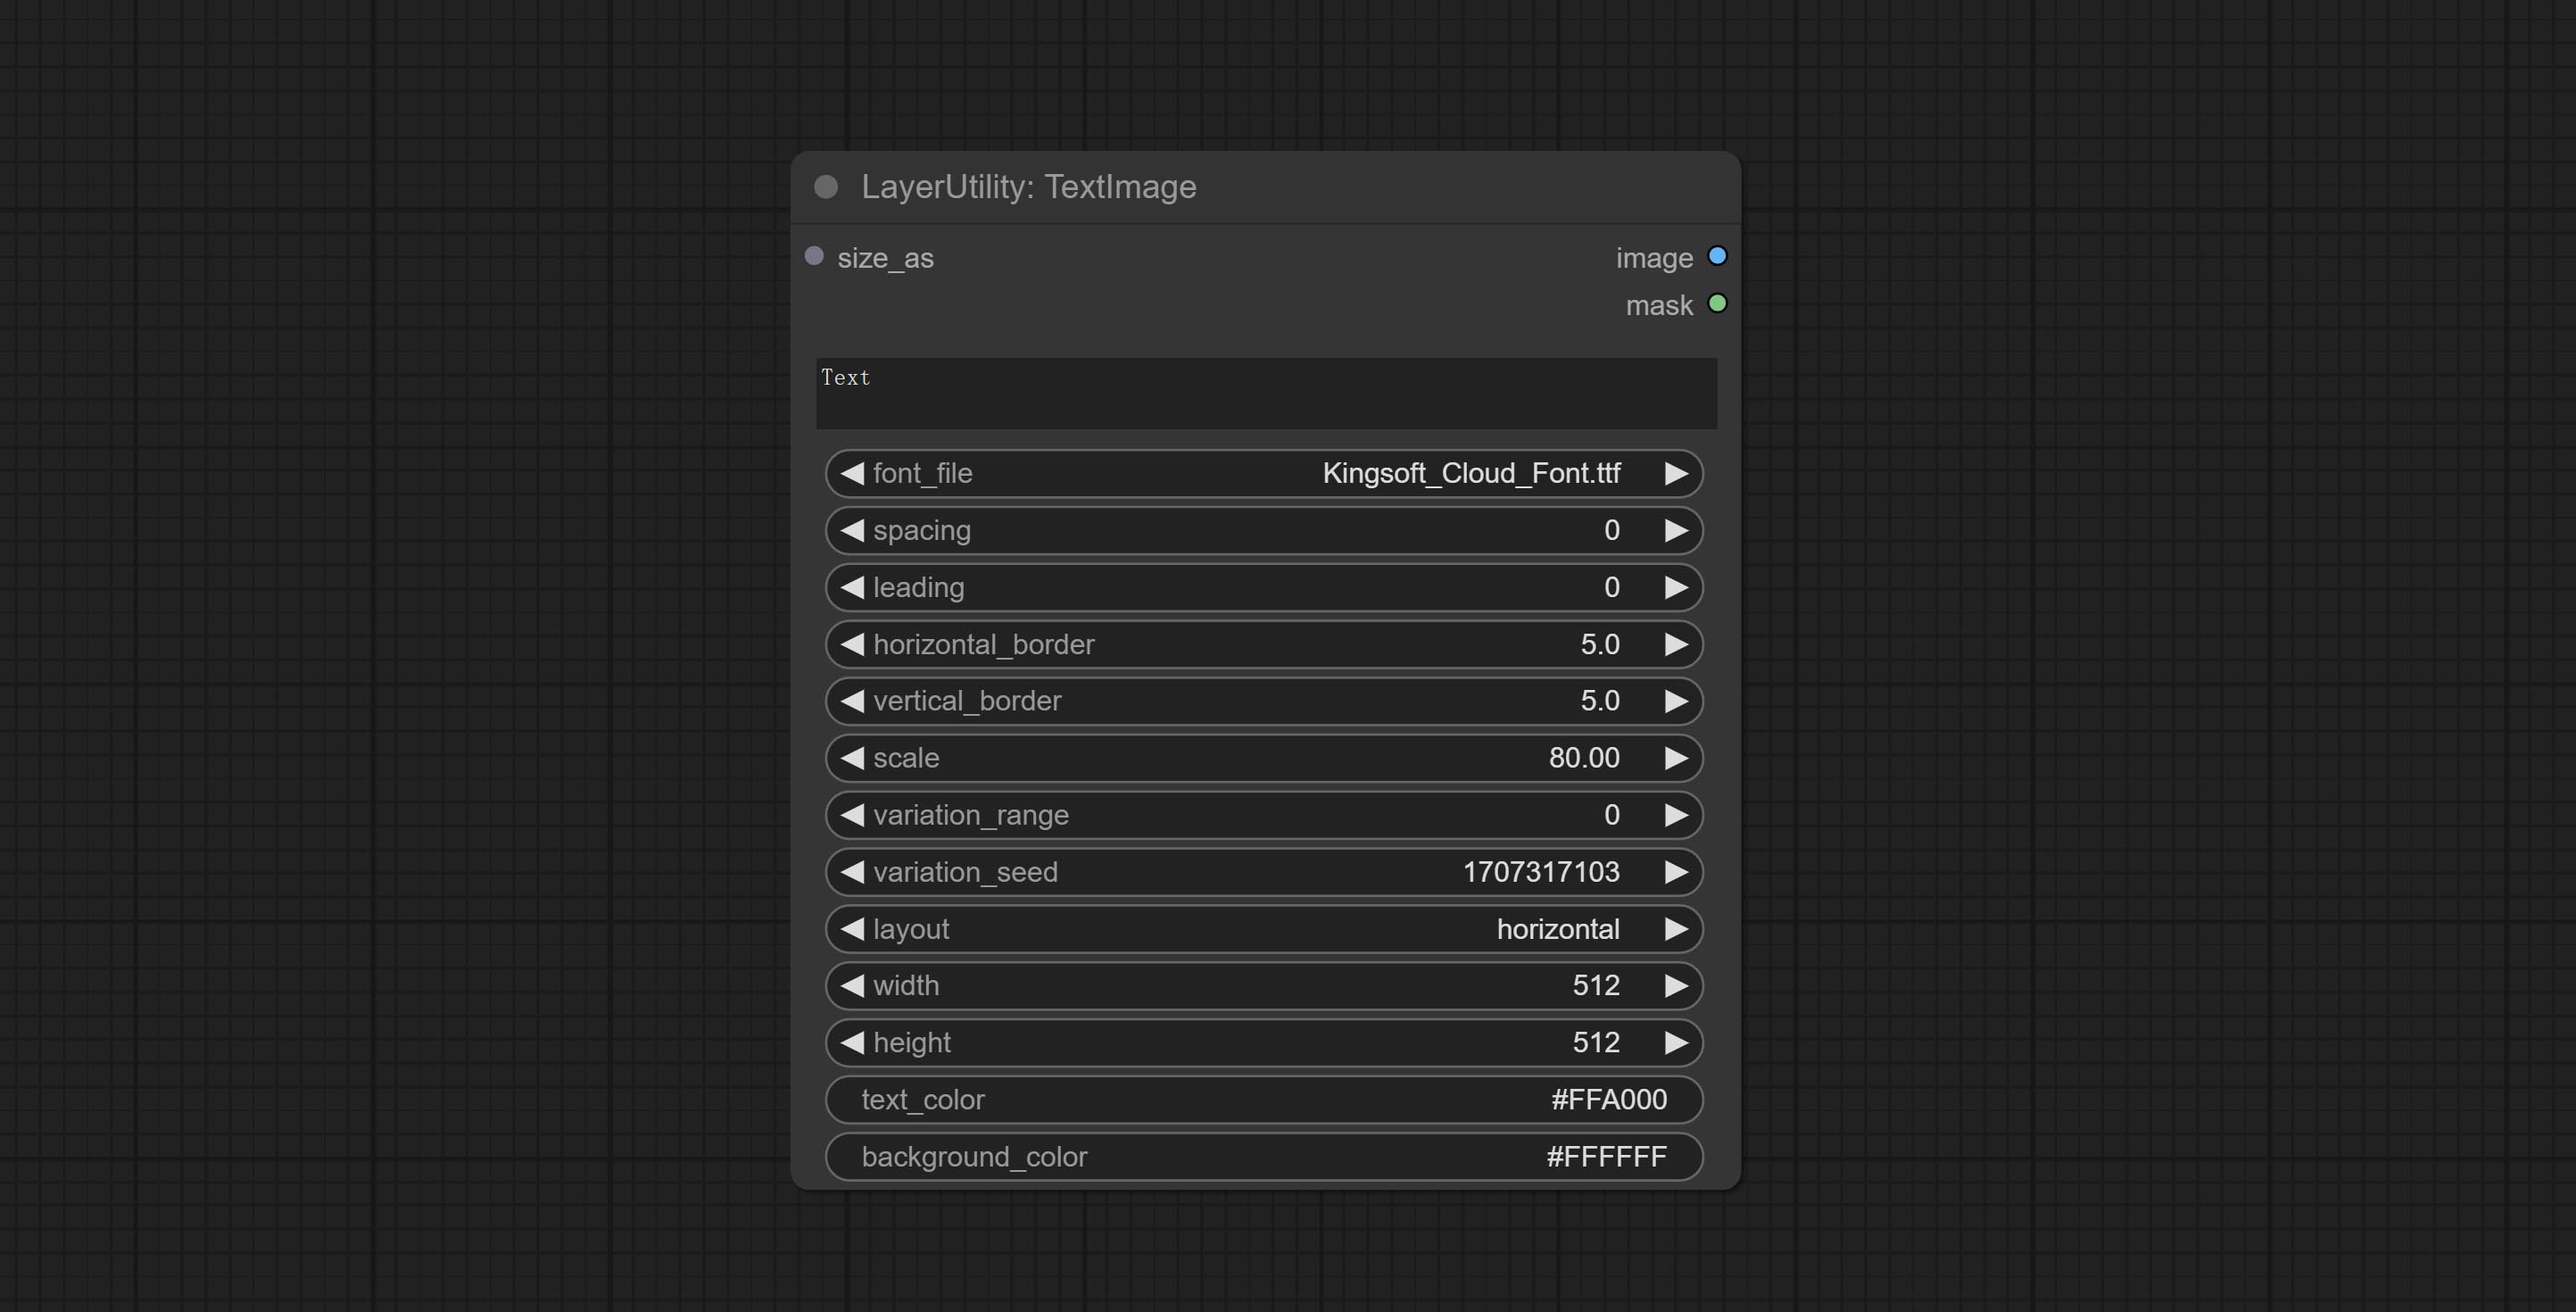
Node options:
* Only limited to input image and mask. forcing the integration of other types of inputs will result in node errors.
** The font folder is defined in resource_dir.ini , this file is located in the root directory of the plug-in, and the default name is resource_dir.ini.example . to use this file for the first time, you need to change the file suffix to .ini . Open the text editing software and find the line starting with "FONT_dir=", after "=", enter the custom folder path name. support defining multiple folders in resource-dir.ini , separated by commas, semicolons, or spaces. all font files in this folder will be collected and displayed in the node list during ComfyUI initialization. If the folder set in ini is invalid, the font folder that comes with the plugin will be enabled.
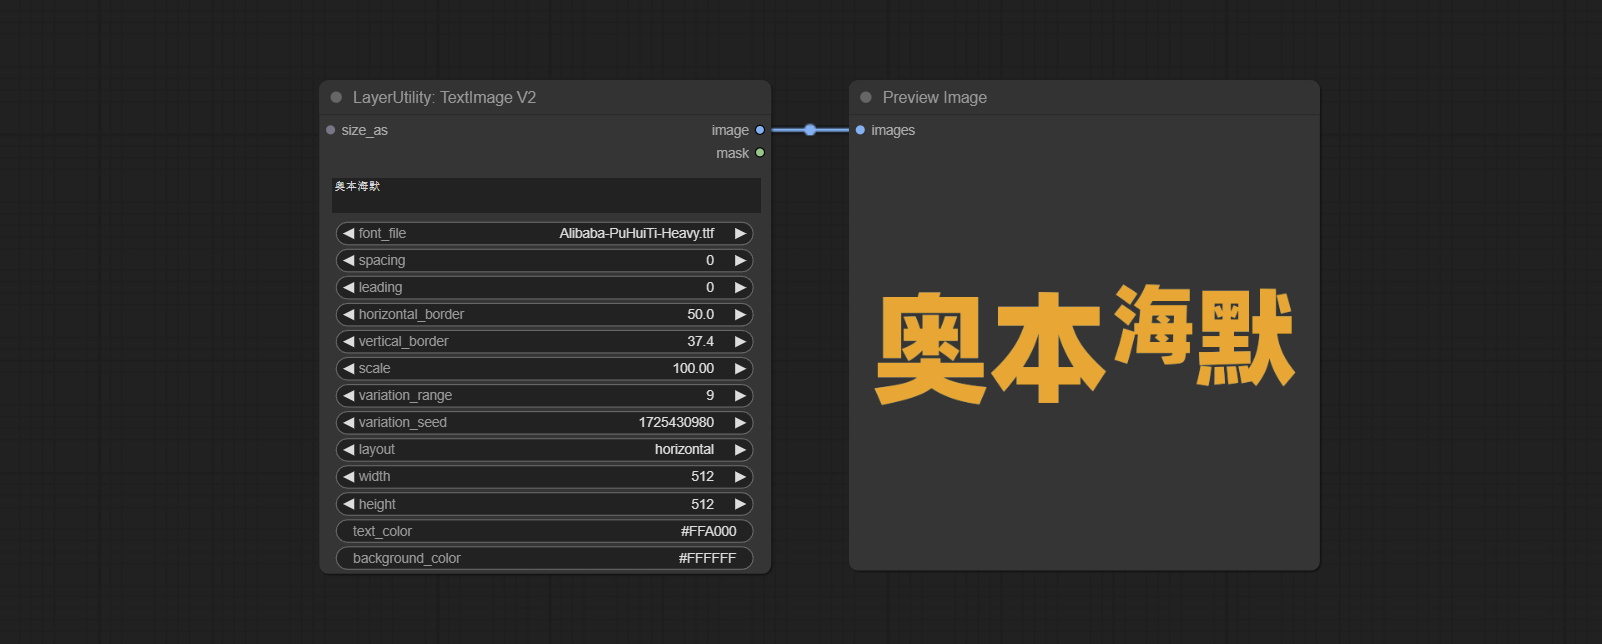
This node is merged from heshengtao. The PR modifies the scaling of the image text node based on the TextImage node. The font spacing follows the scaling, and the coordinates are no longer based on the top left corner of the text, but on the center point of the entire line of text. Thank you for the author's contribution.
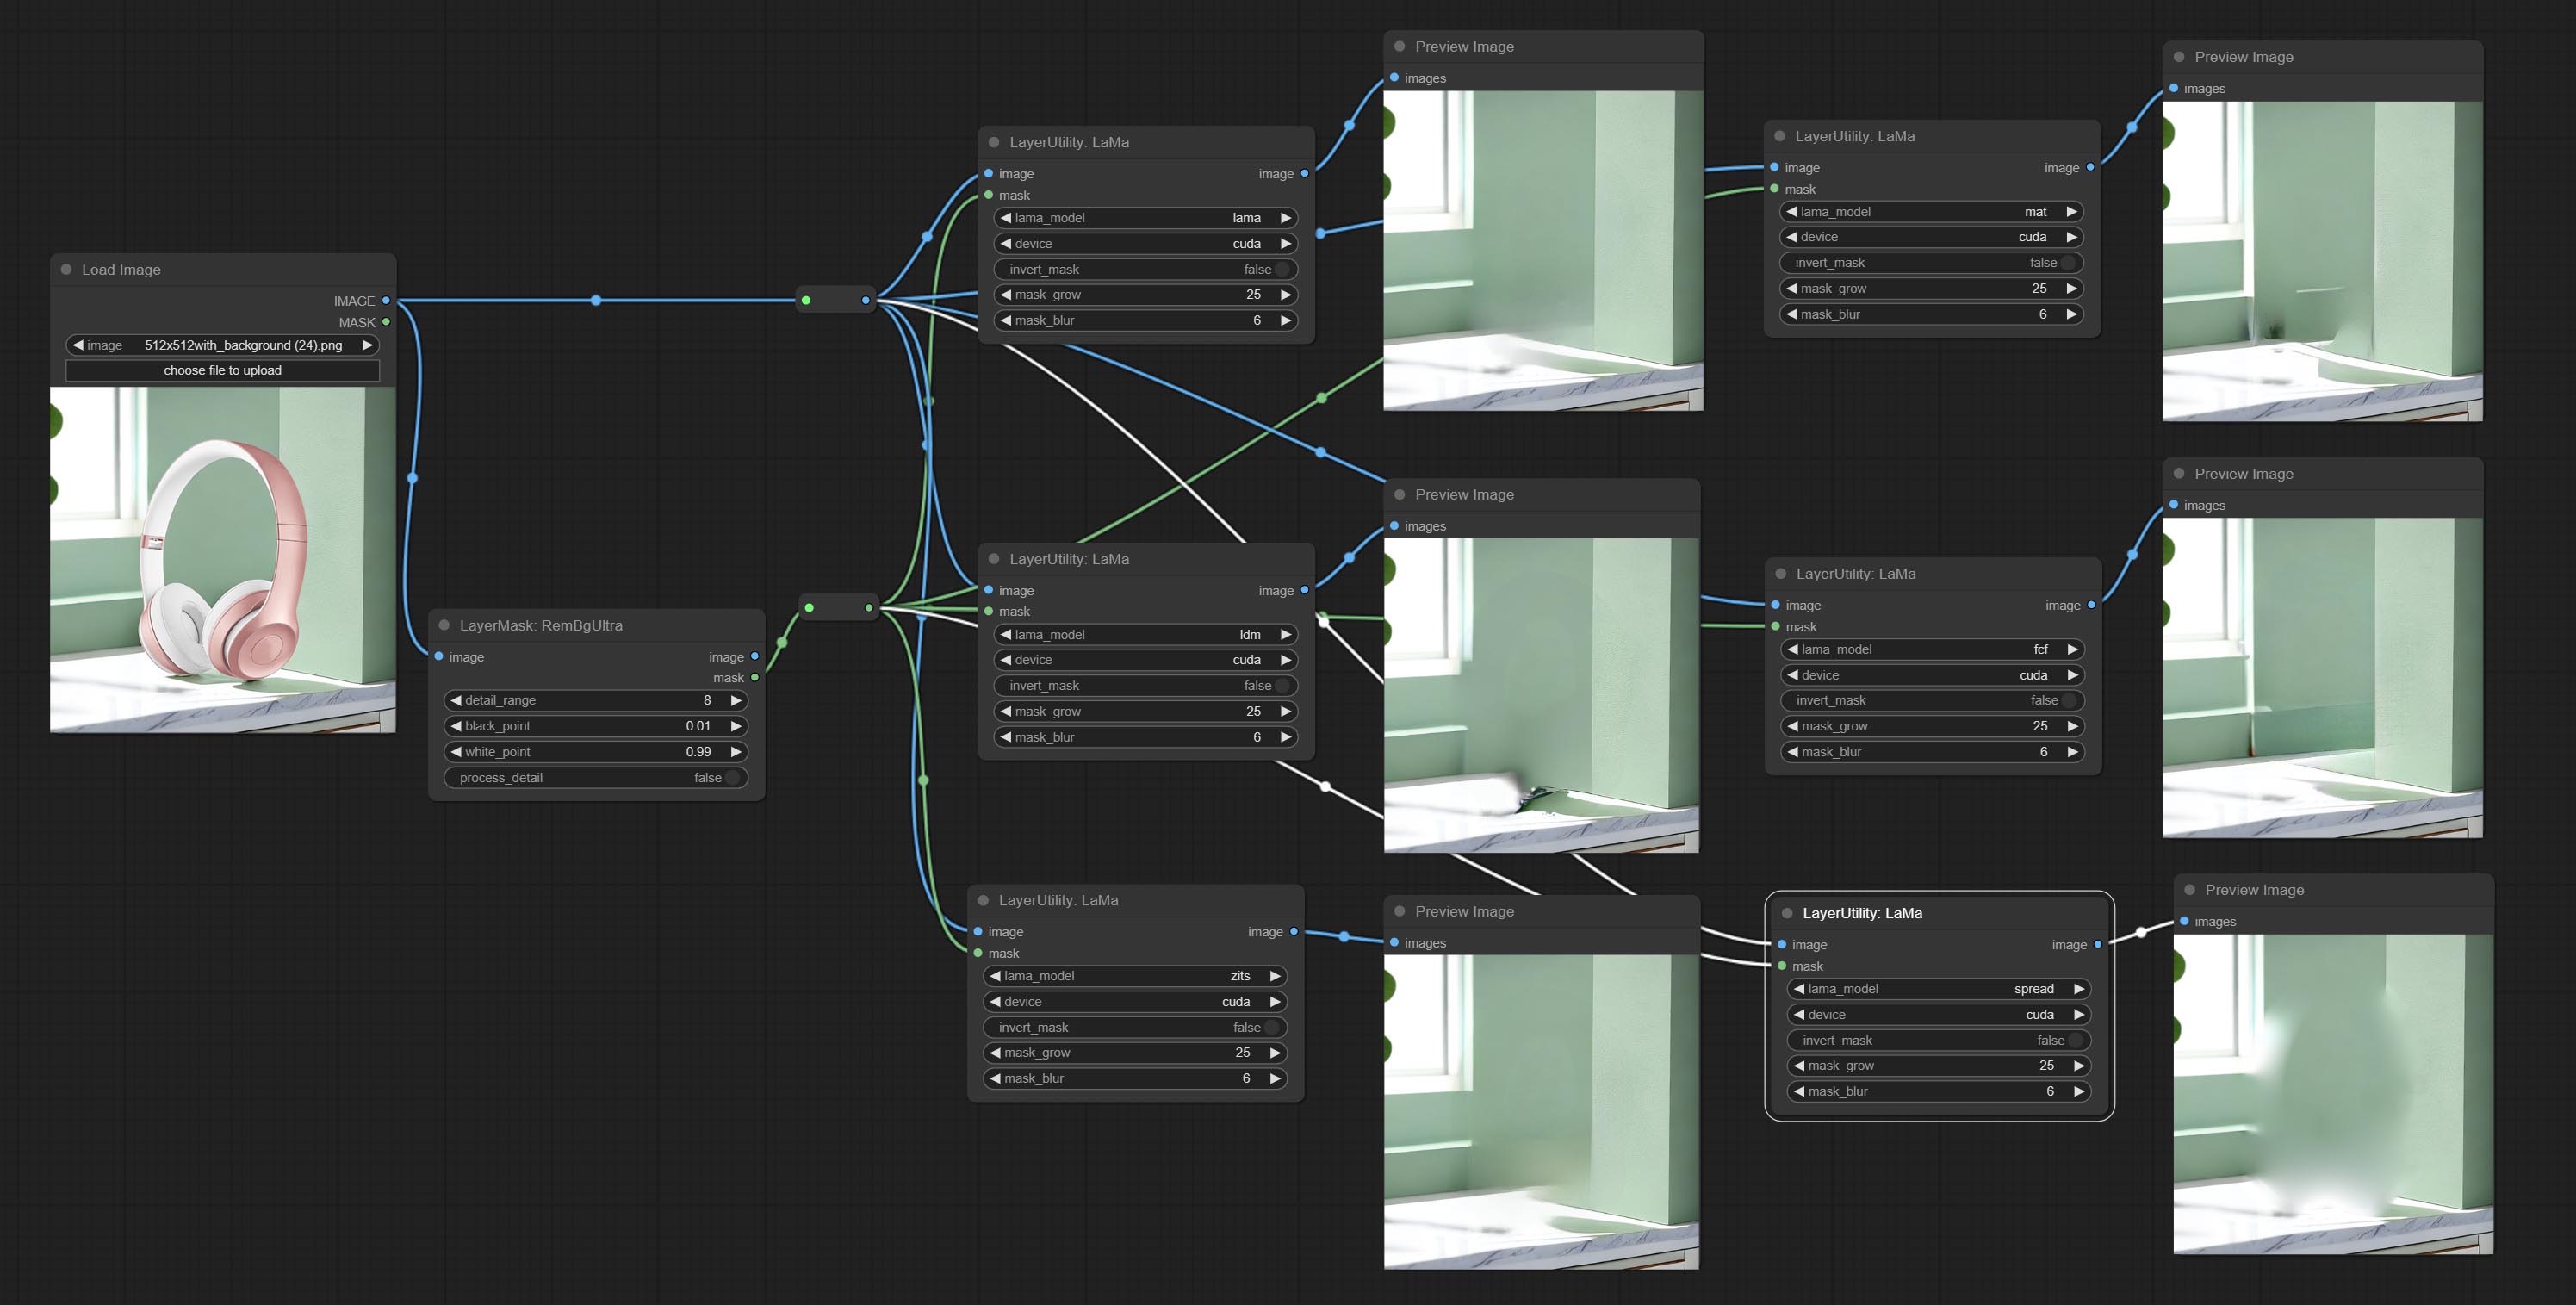
Erase objects from the image based on the mask. this node is repackage of IOPaint, powered by state-of-the-art AI models, thanks to the original author.
It is have LaMa, LDM, ZITS,MAT, FcF, Manga models and the SPREAD method to erase. Please refer to the original link for the introduction of each model.
Please download the model files from lama models(BaiduNetdisk) or lama models(Google Drive) to ComfyUI/models/lama folder.
Node optons: 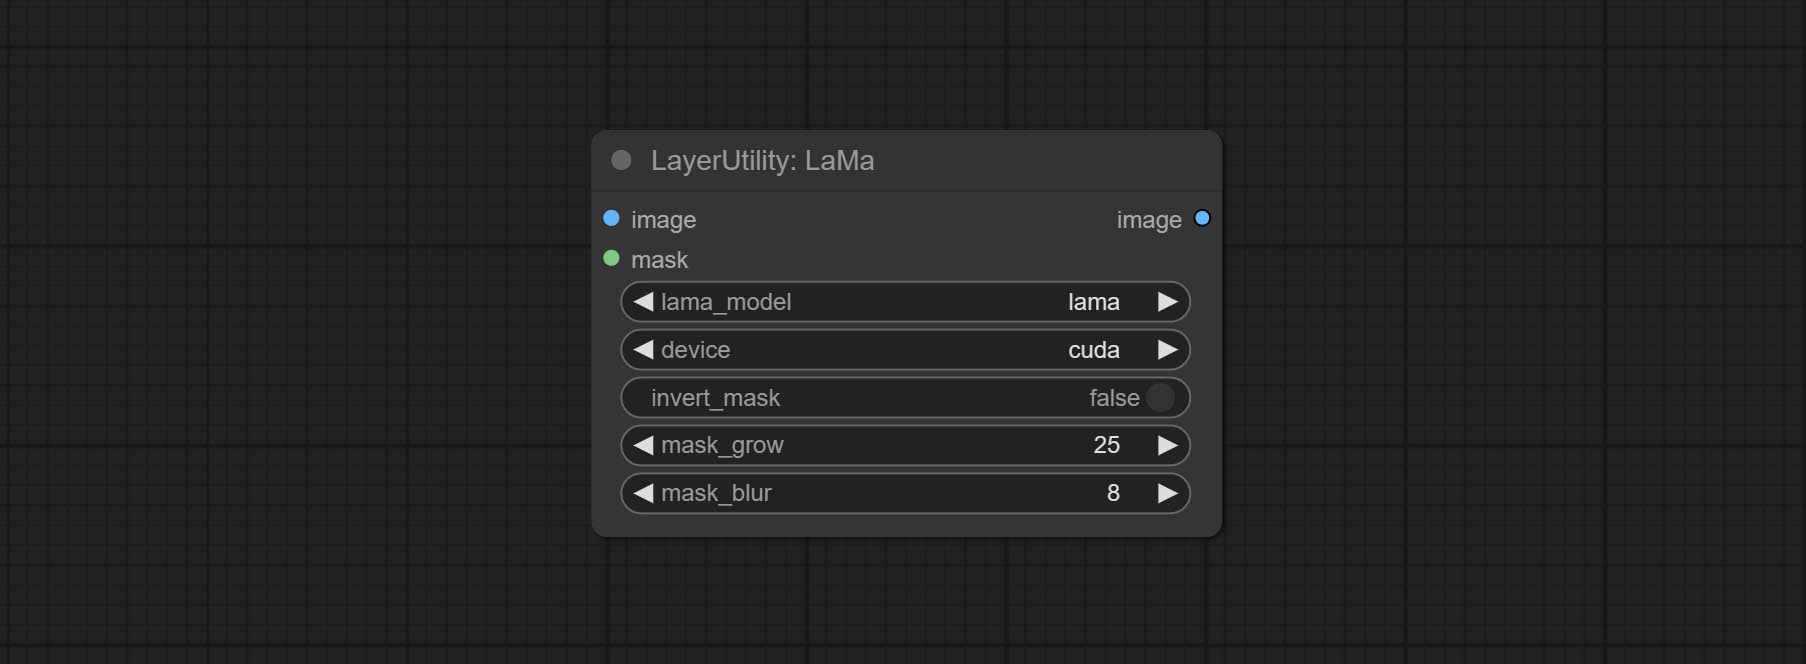
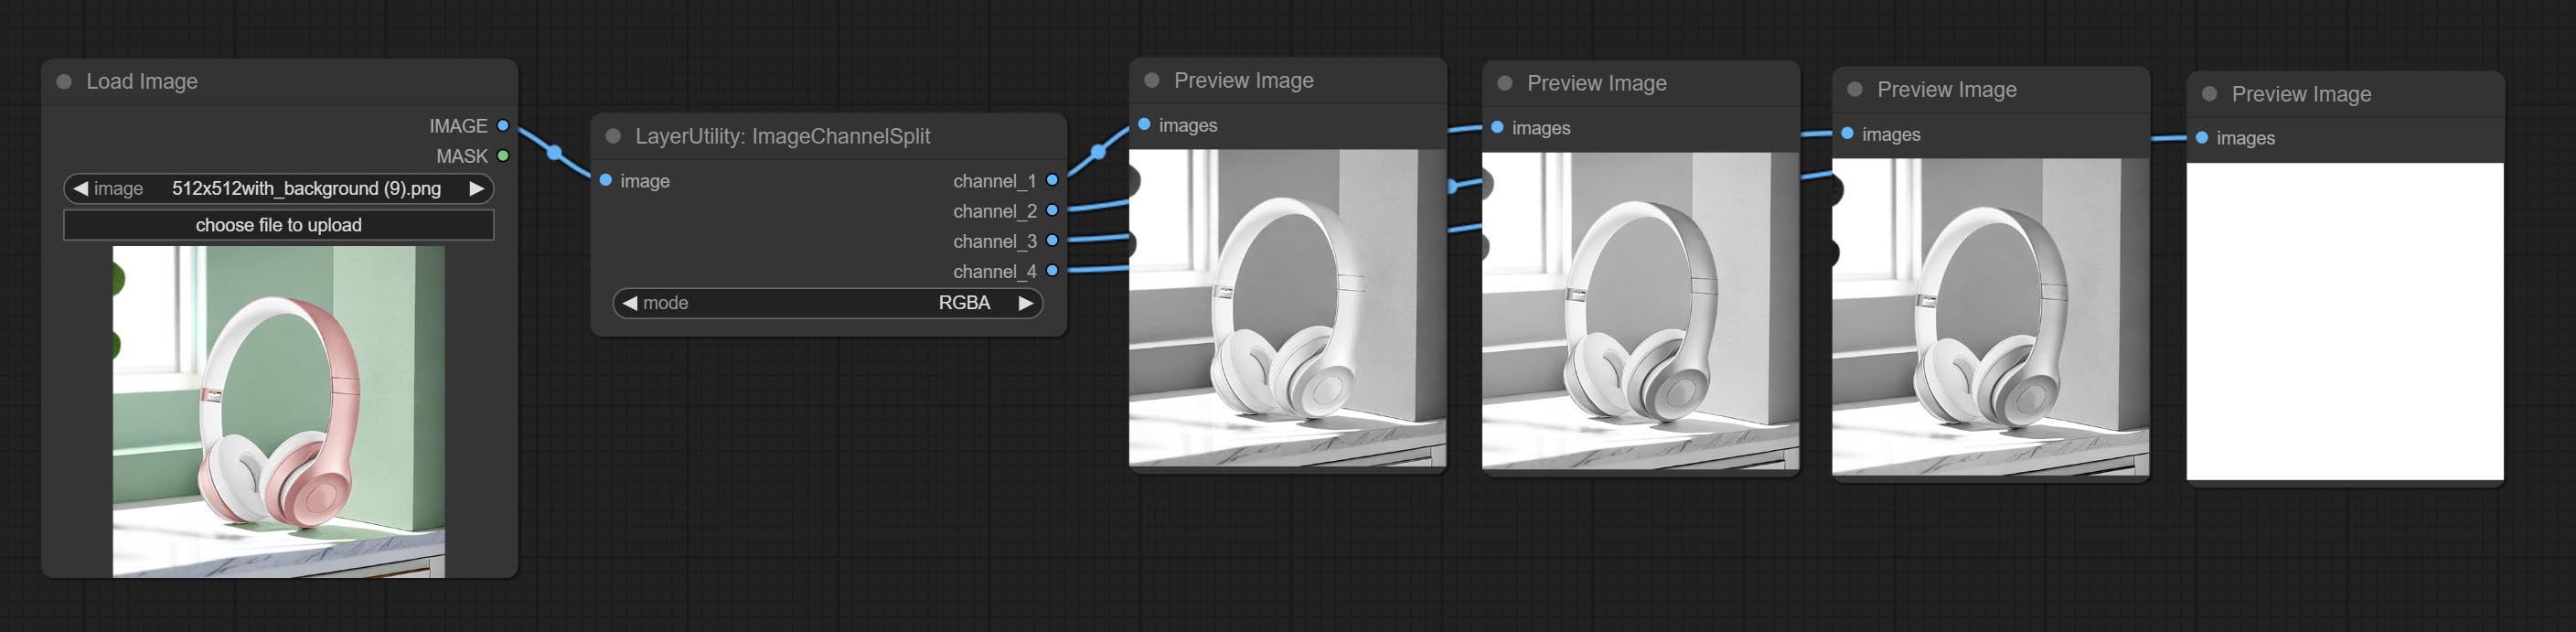
Split the image channel into individual images.
Node options: 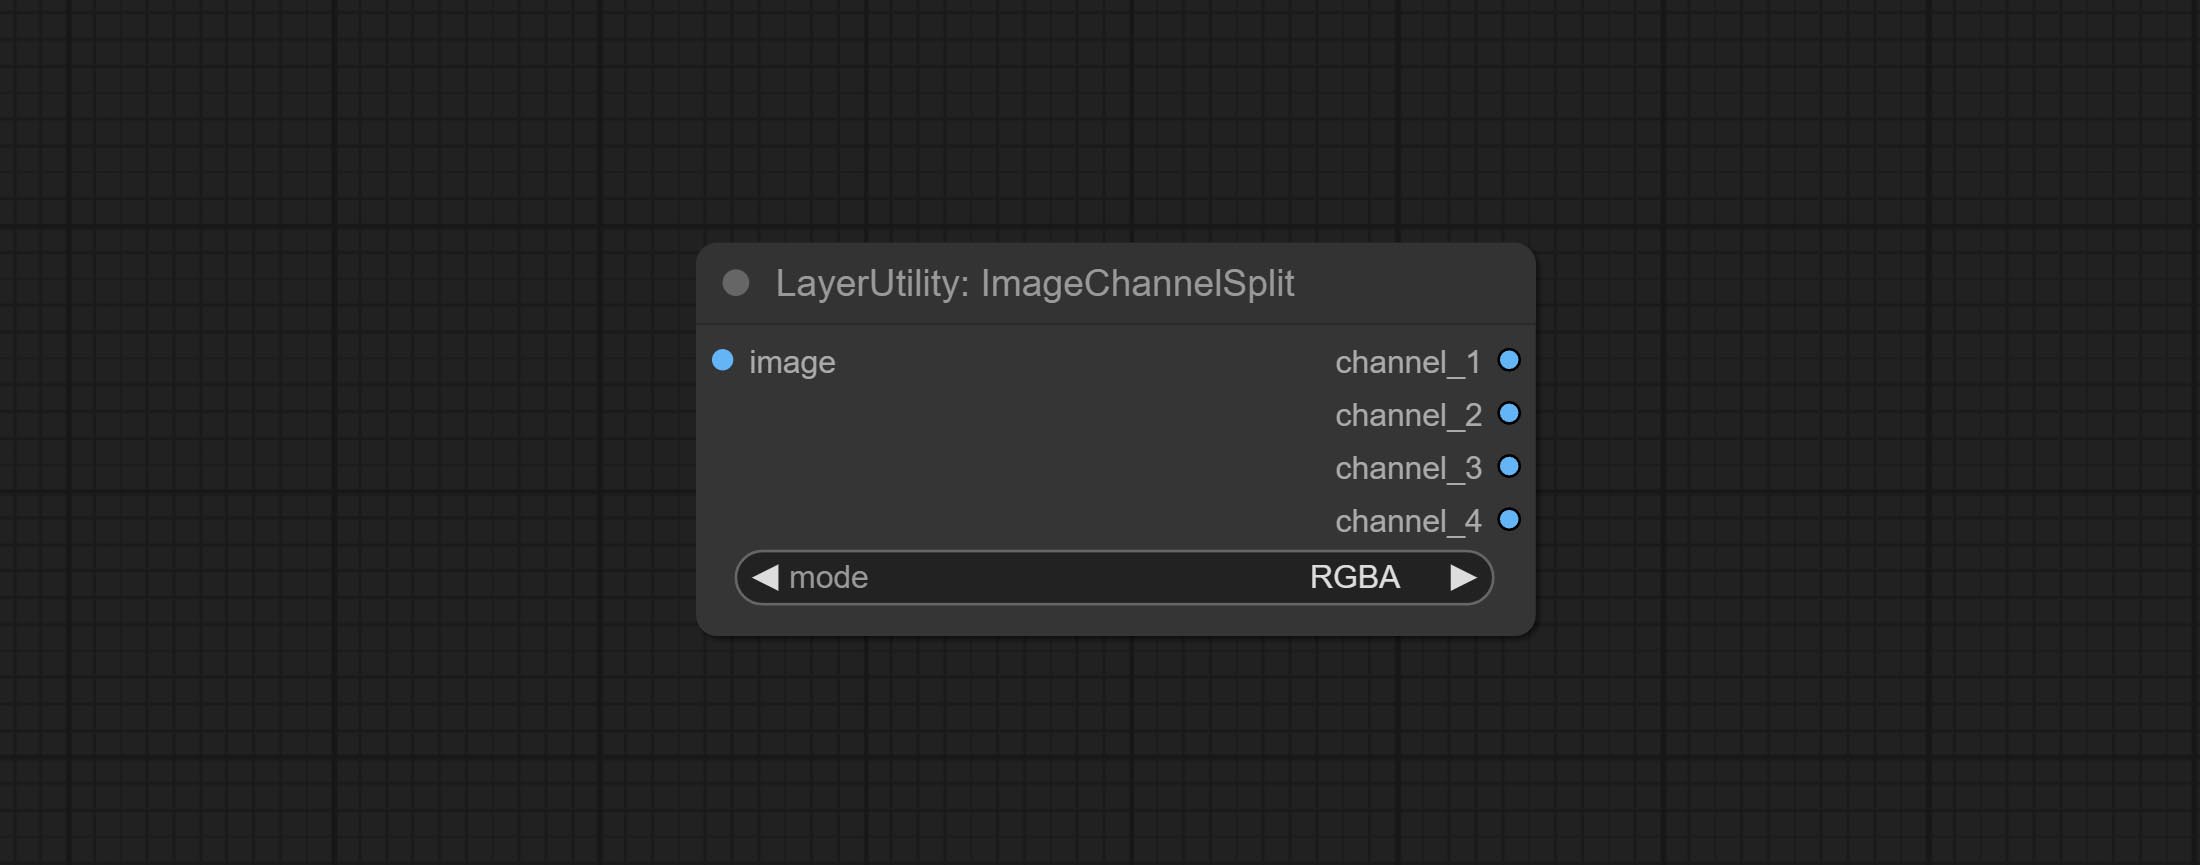
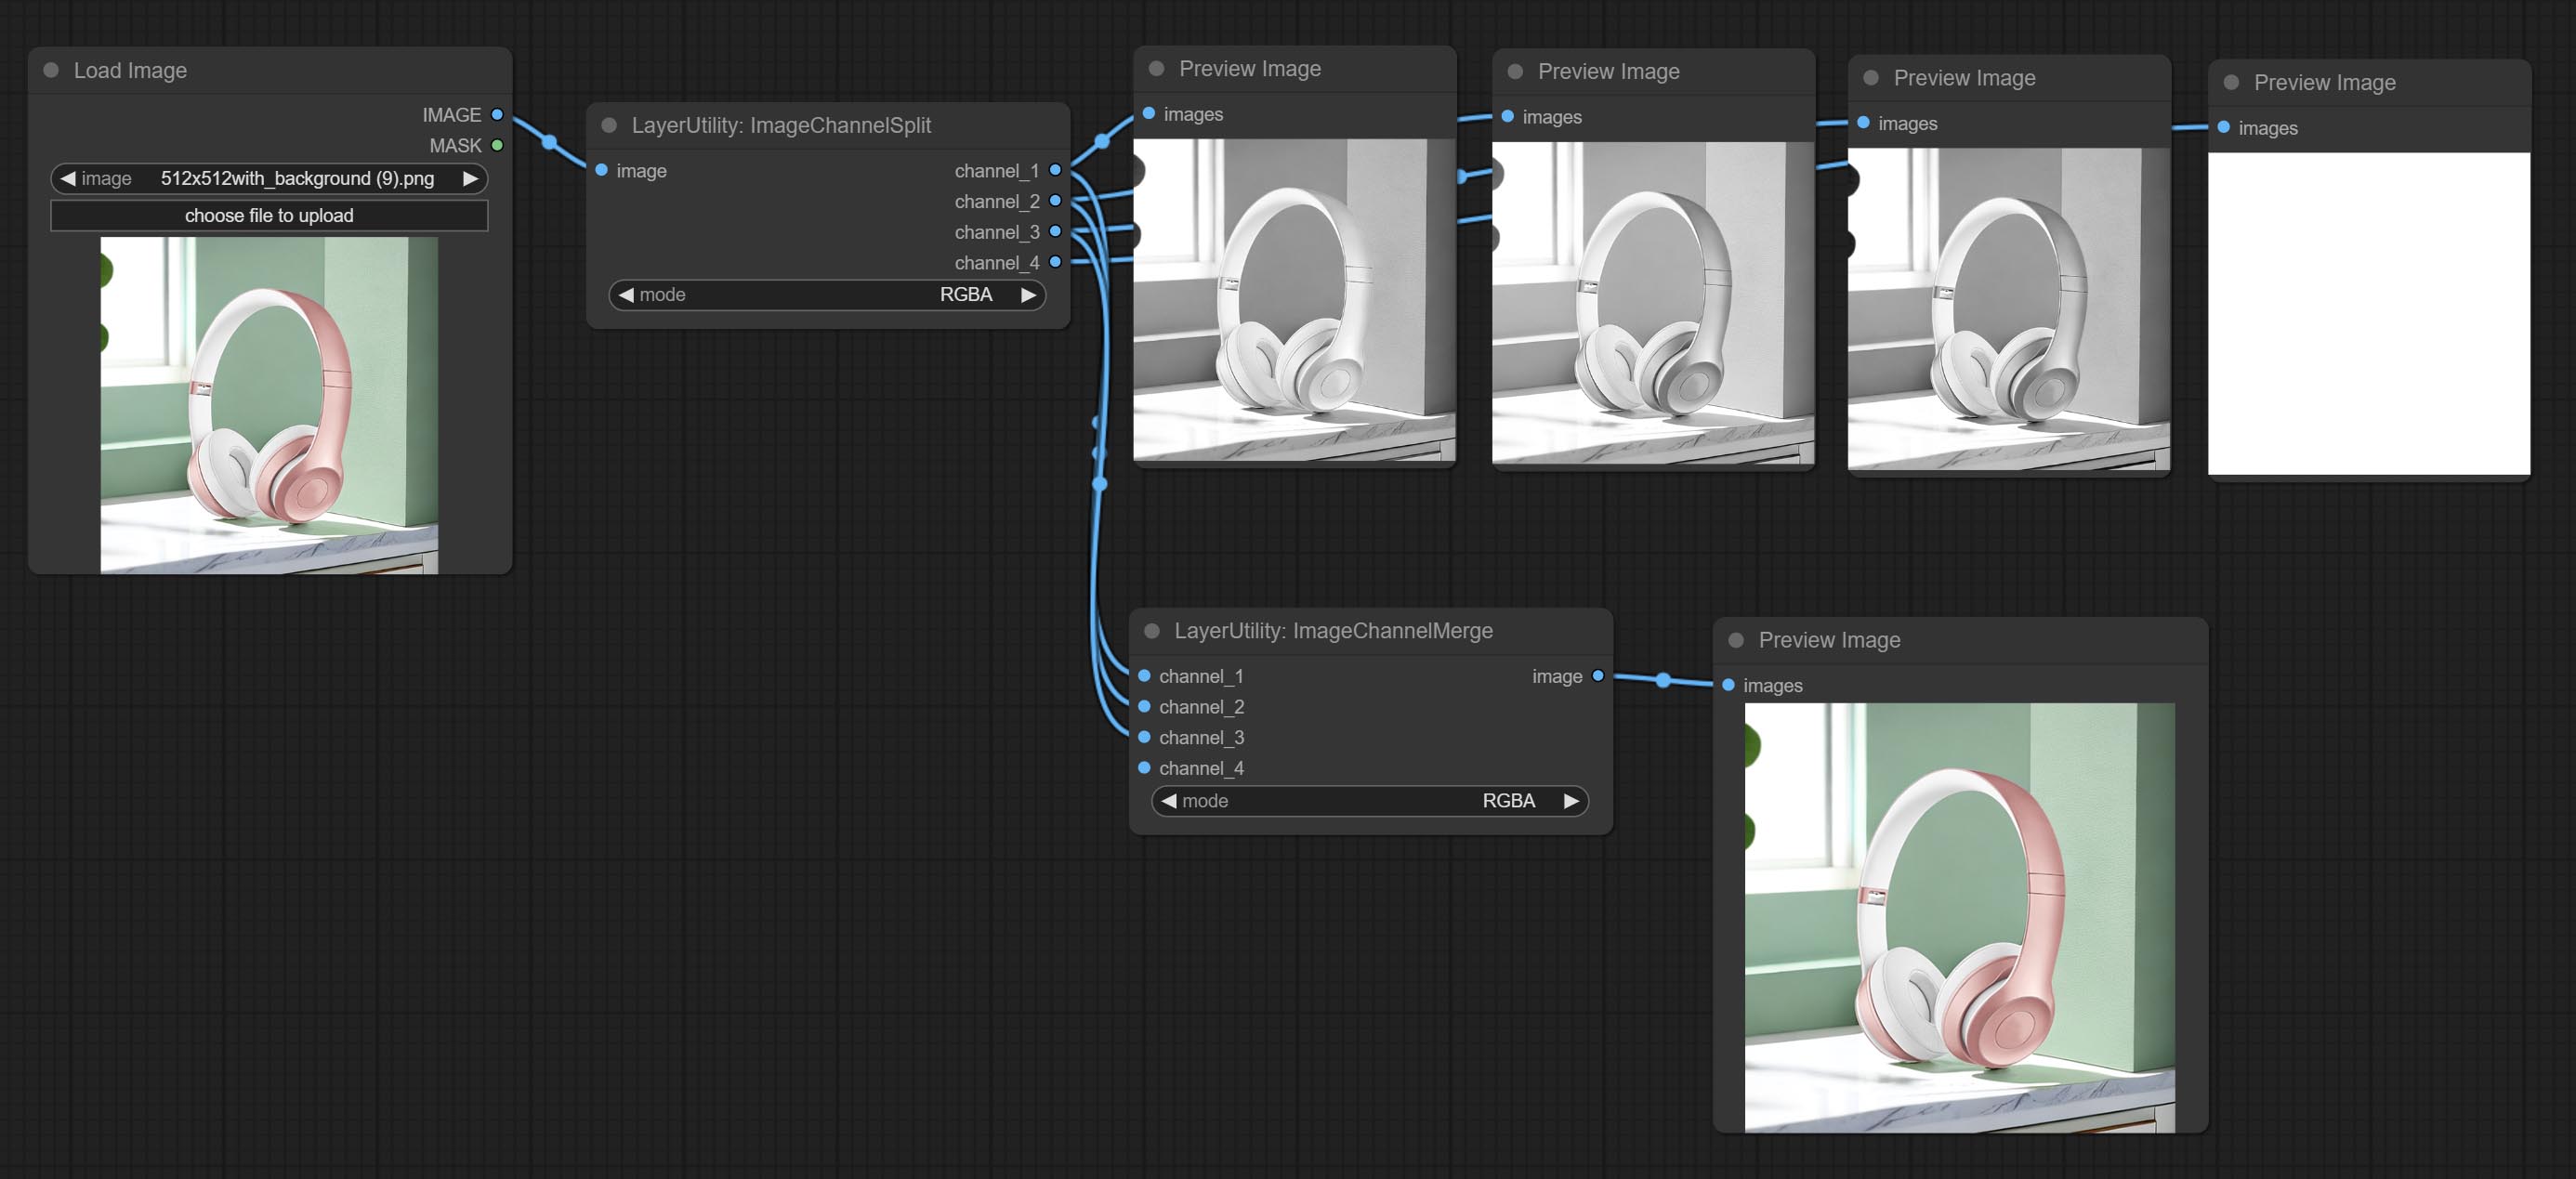
Merge each channel image into one image.
Node options: 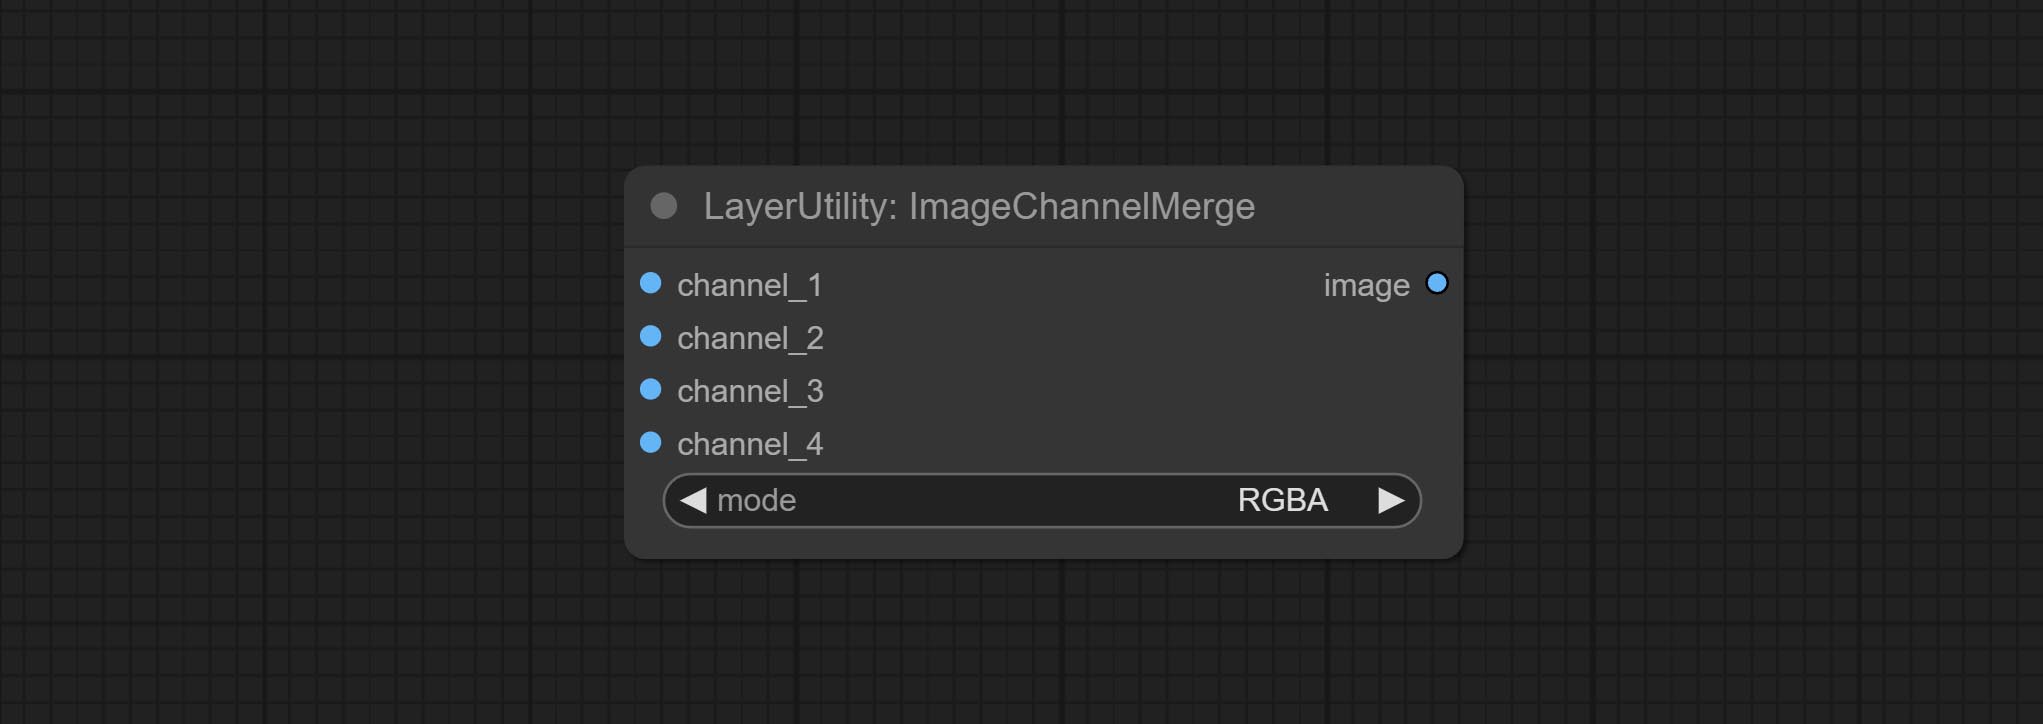
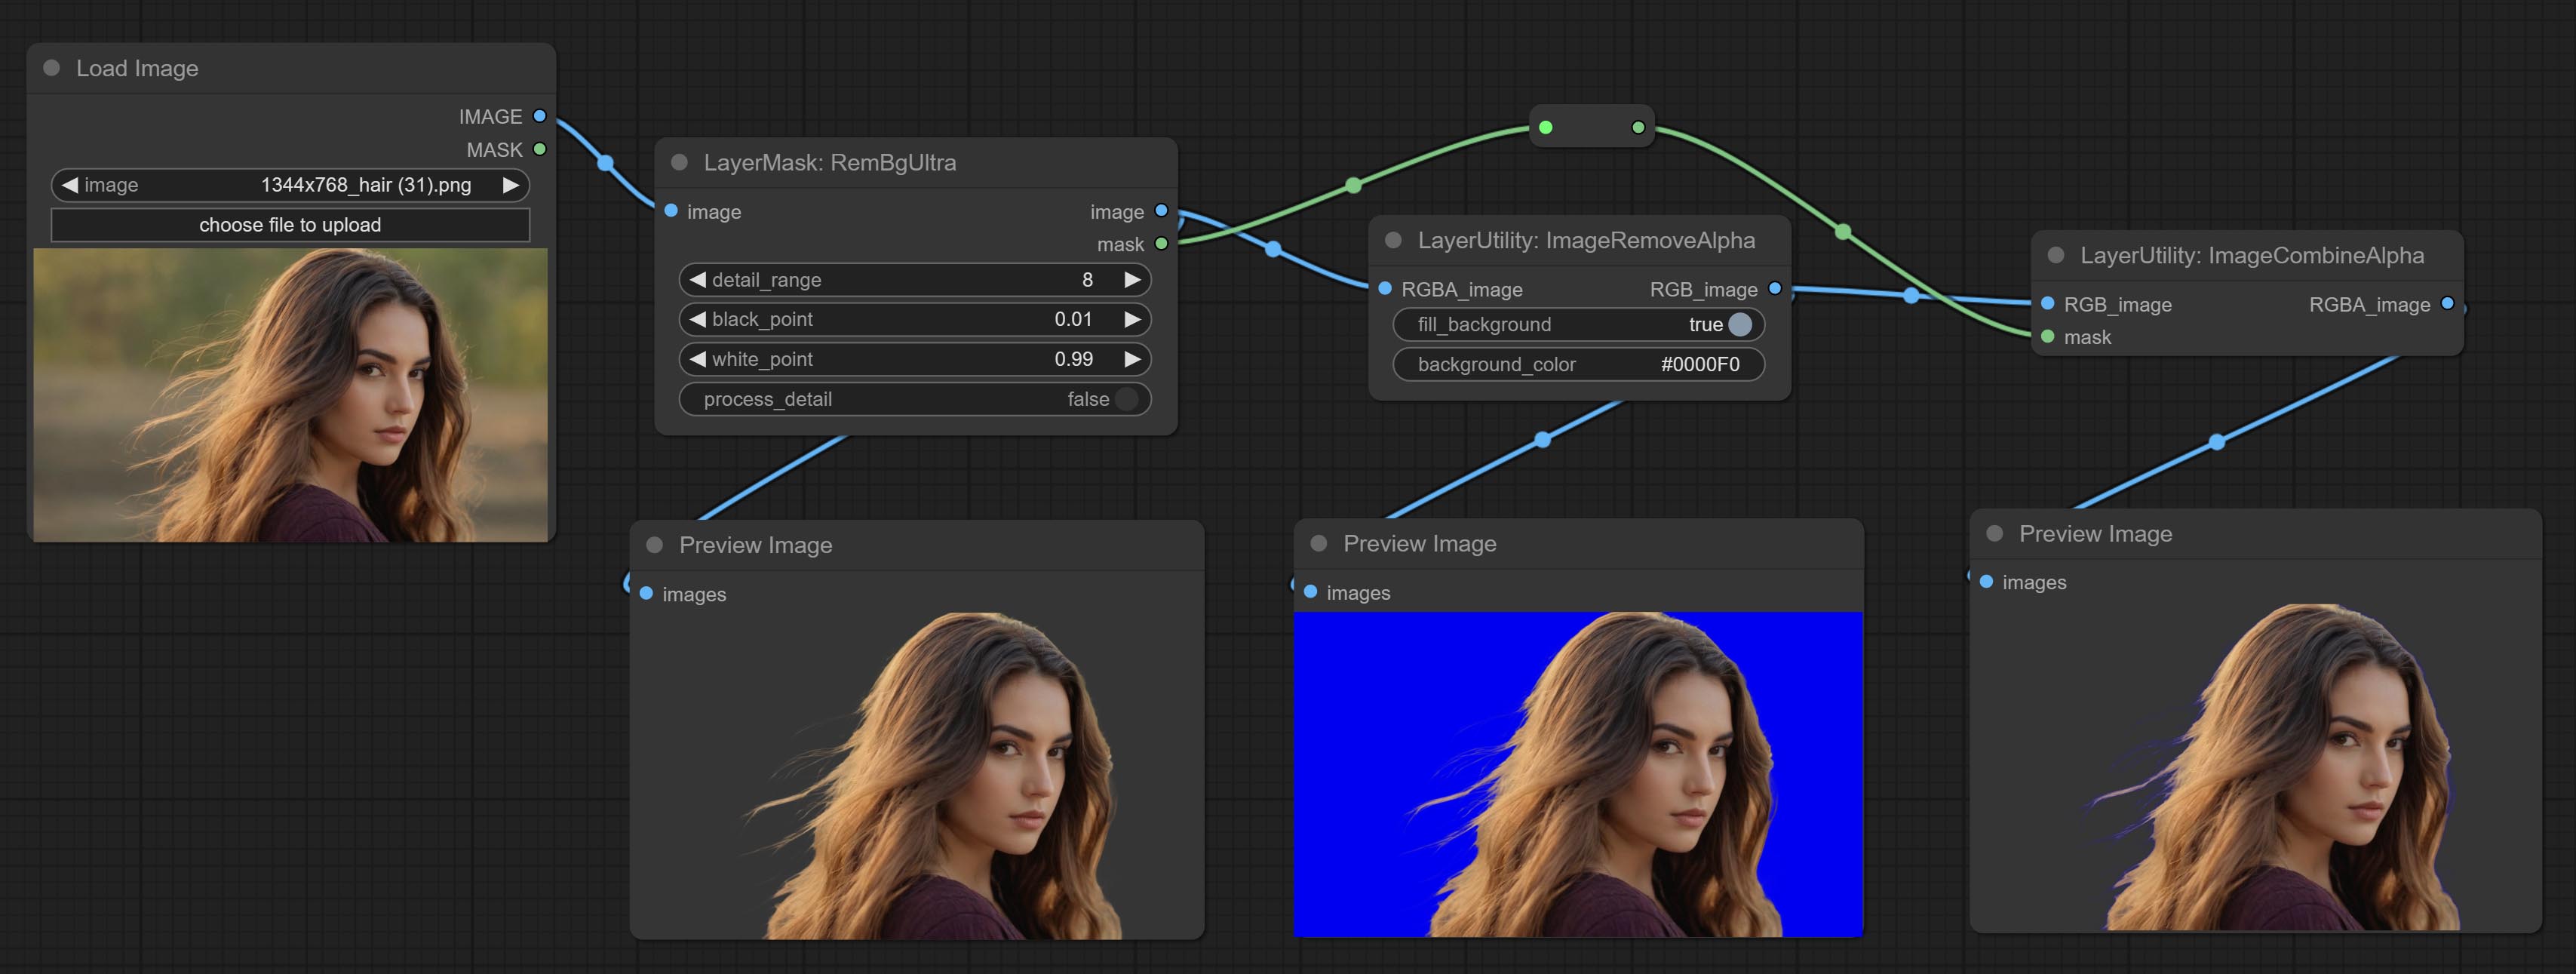
Remove the alpha channel from the image and convert it to RGB mode. you can choose to fill the background and set the background color.
Node options: 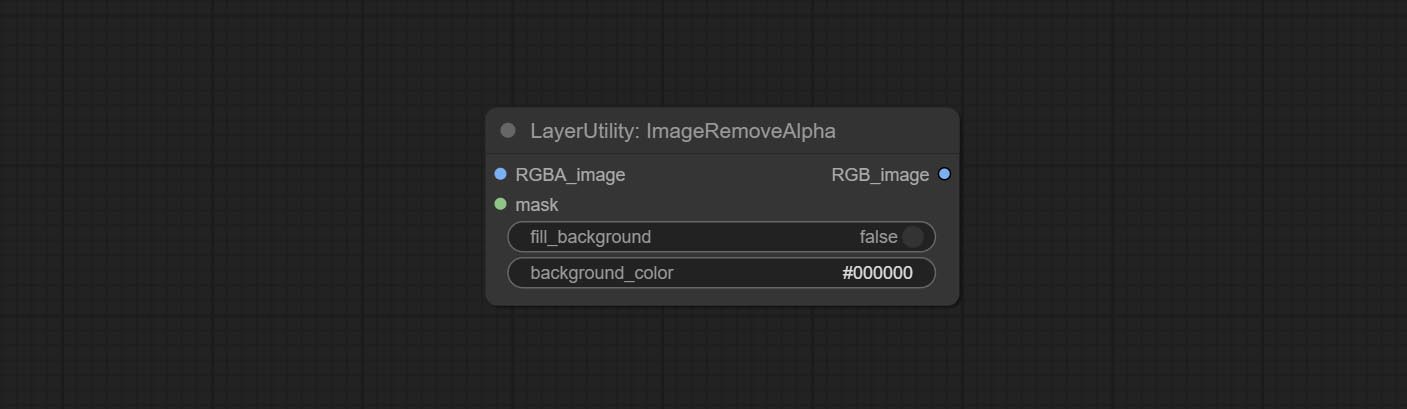
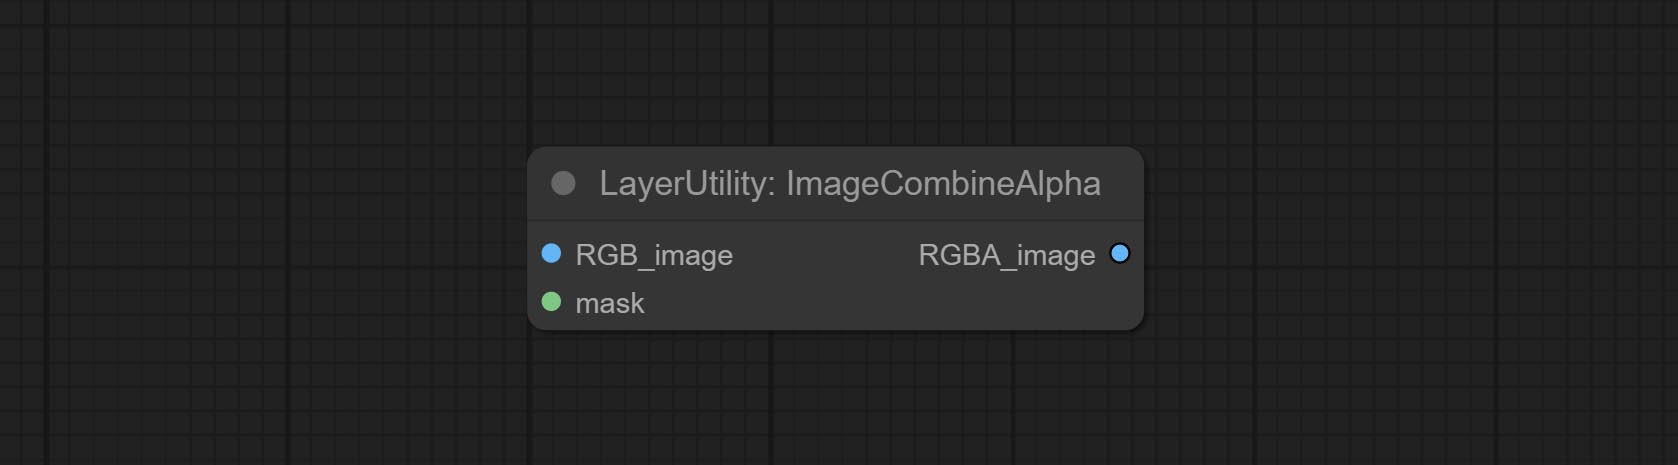
Merge the image and mask into an RGBA mode image containing an alpha channel.
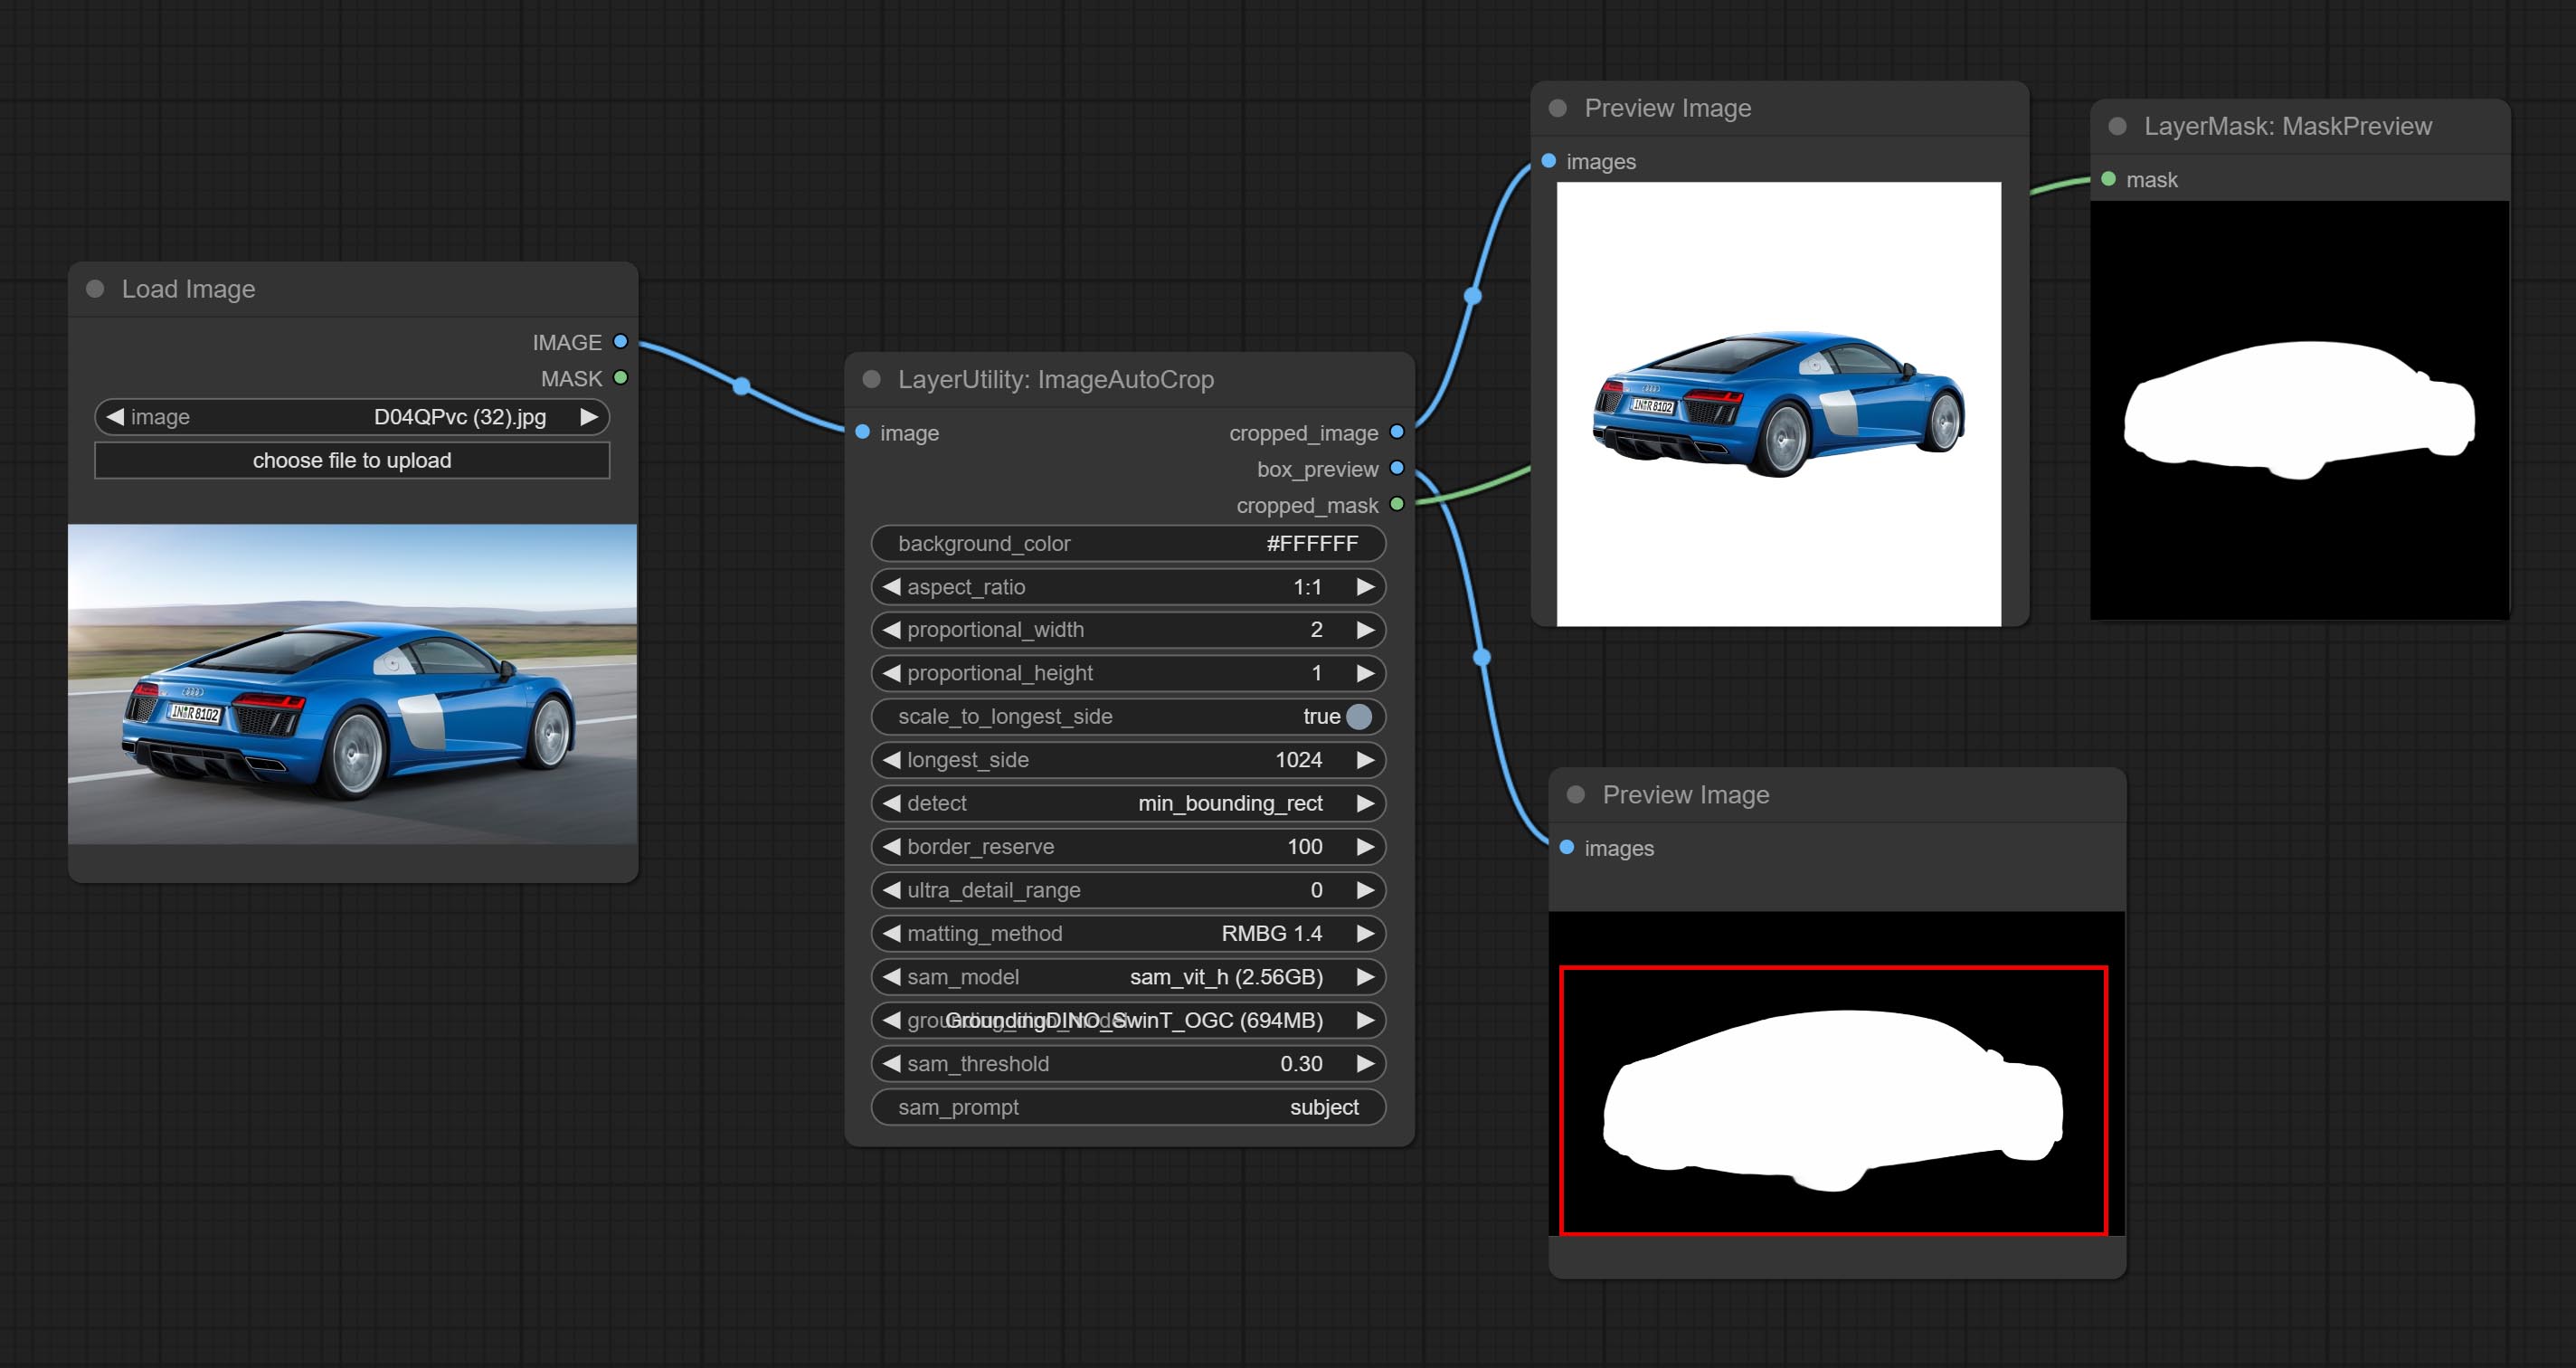
Automatically cutout and crop the image according to the mask. it can specify the background color, aspect ratio, and size for output image. this node is designed to generate the image materials for training models.
*Please refer to the model installation methods for SegmentAnythingUltra and RemBgUltra.
Node options: 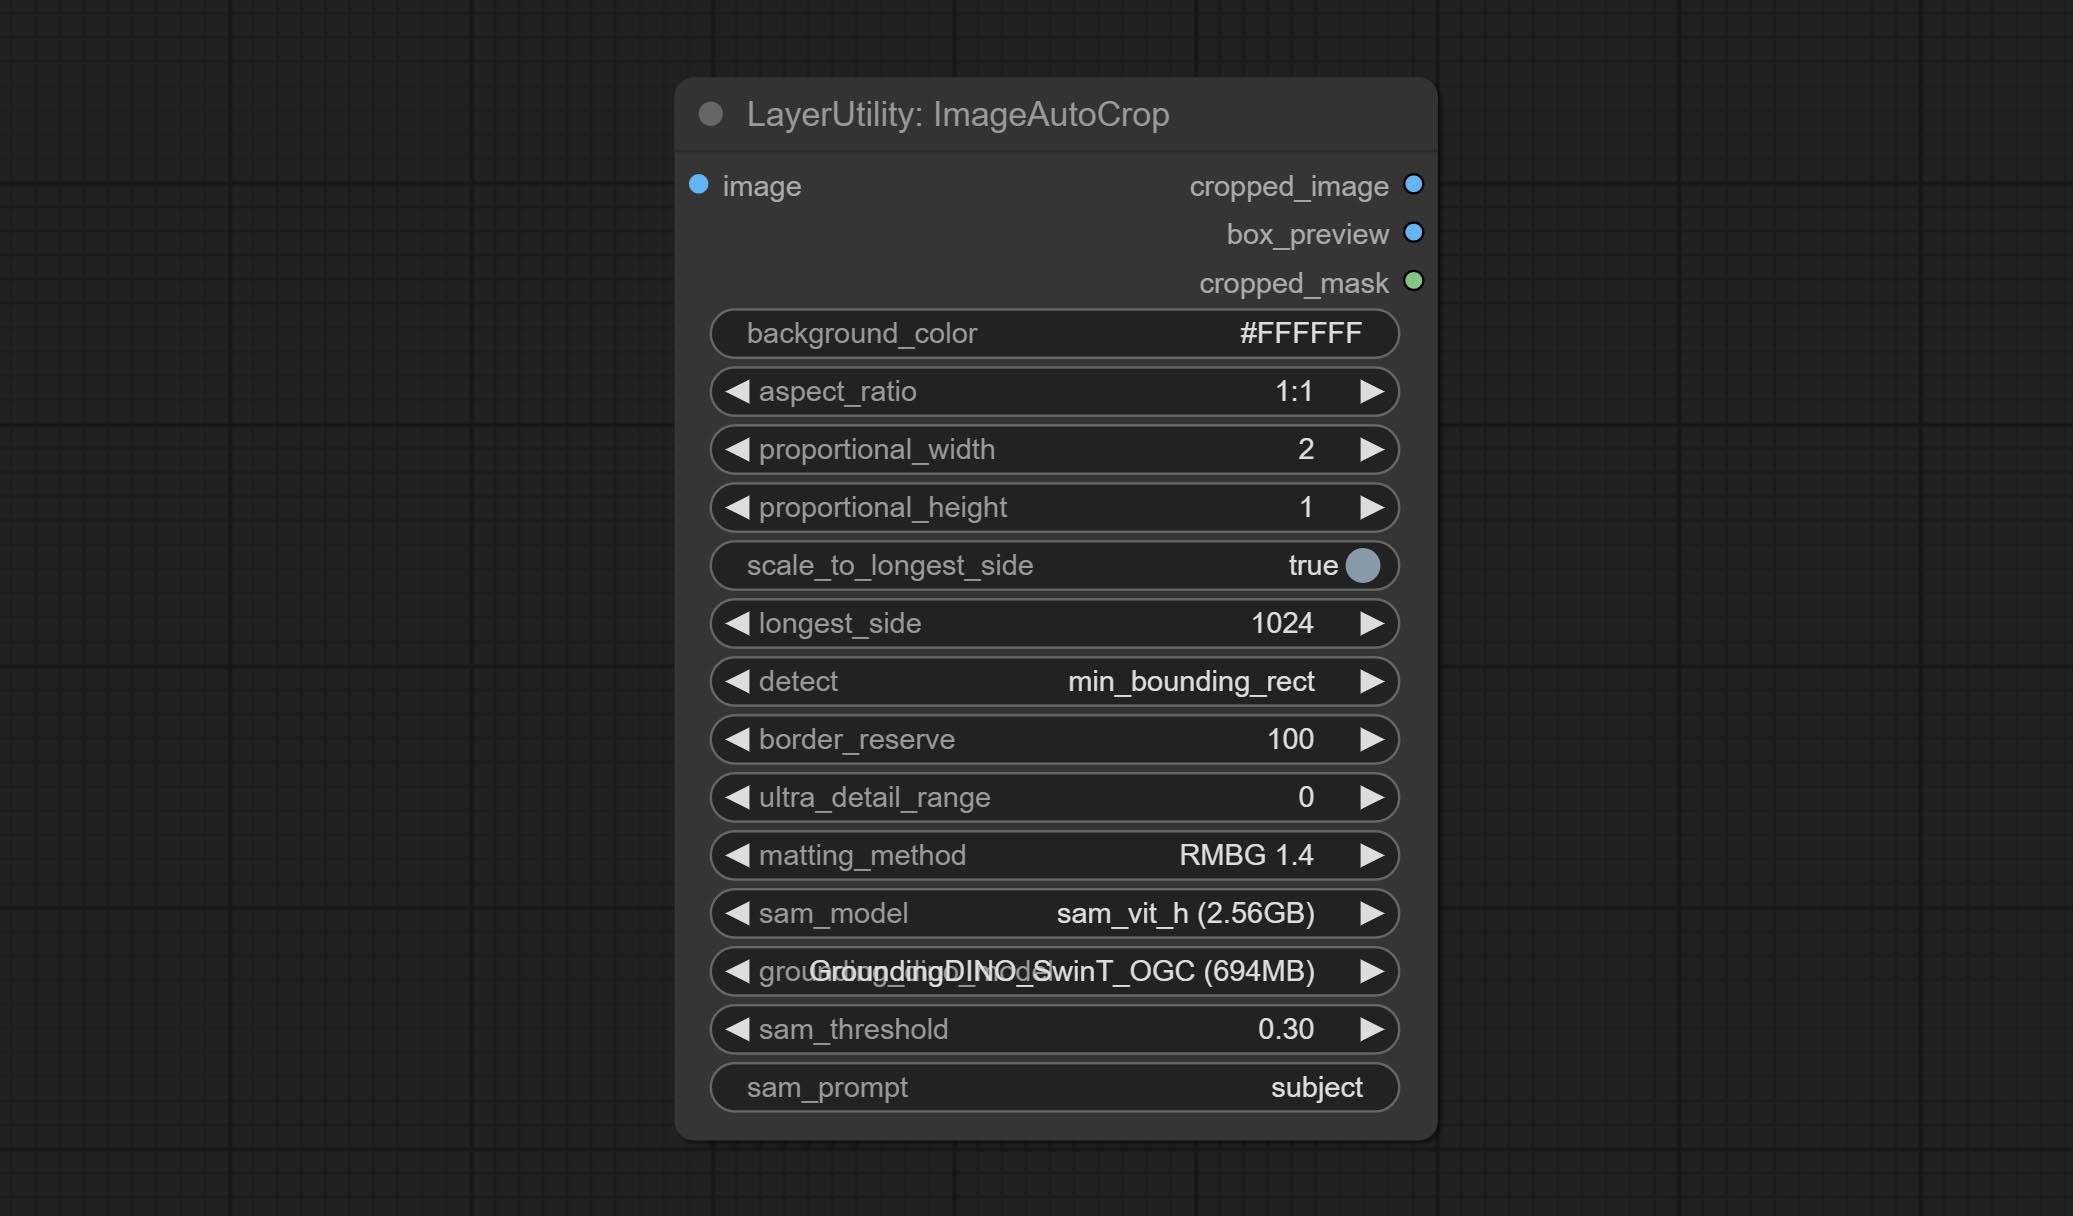
Output: cropped_image: Crop and replace the background image. box_preview: Crop position preview. cropped_mask: Cropped mask.
The V2 upgrad version of ImageAutoCrop , it has made the following changes based on the previous version: 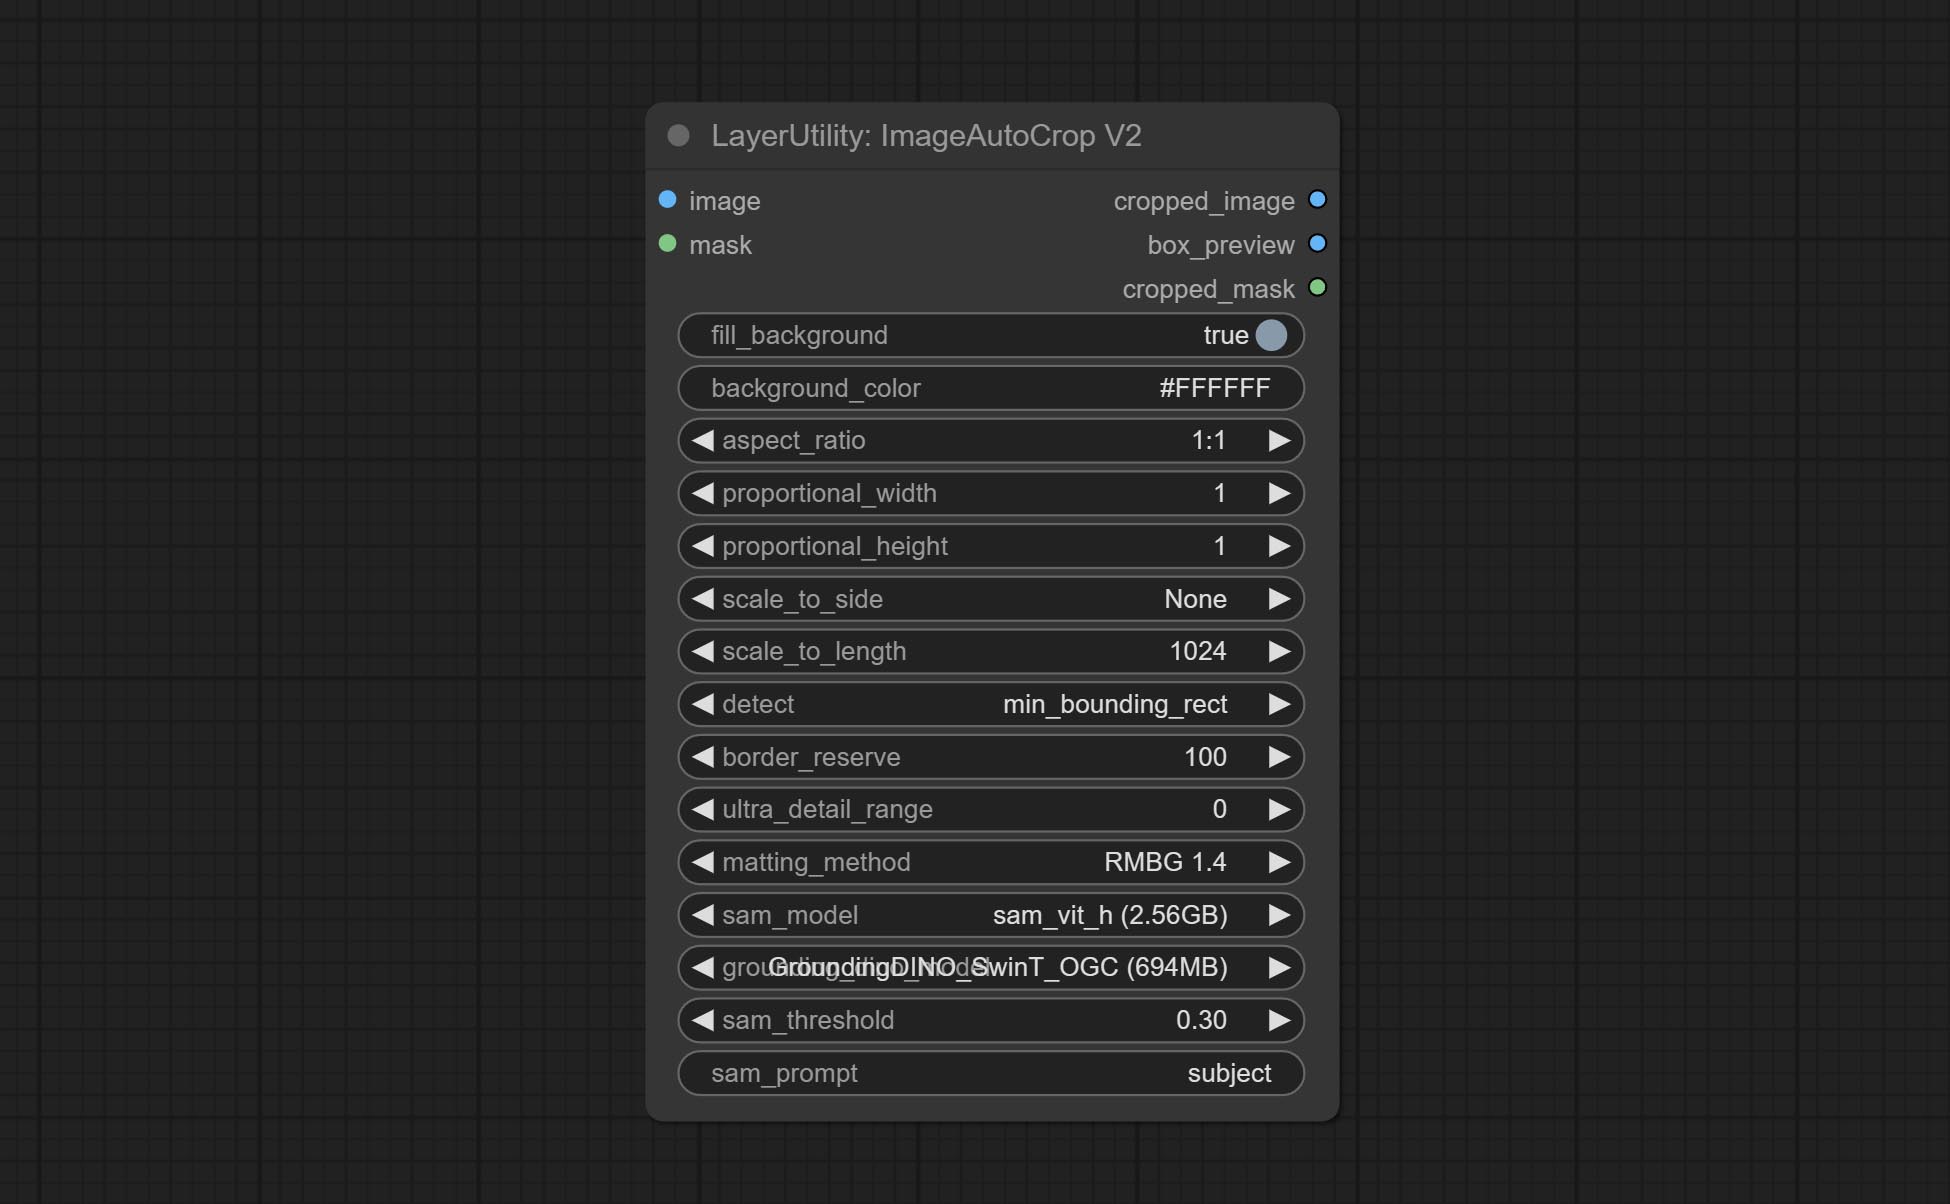
fill_background . When set to False, the background will not be processed and any parts beyond the frame will not be included in the output range.aspect_ratio adds the original option.scale_by to specify the length of the edge.Automatically crop the image to the specified size. You can input a mask to preserve the specified area of the mask. This node is designed to generate image materials for training the model.
Node Options: 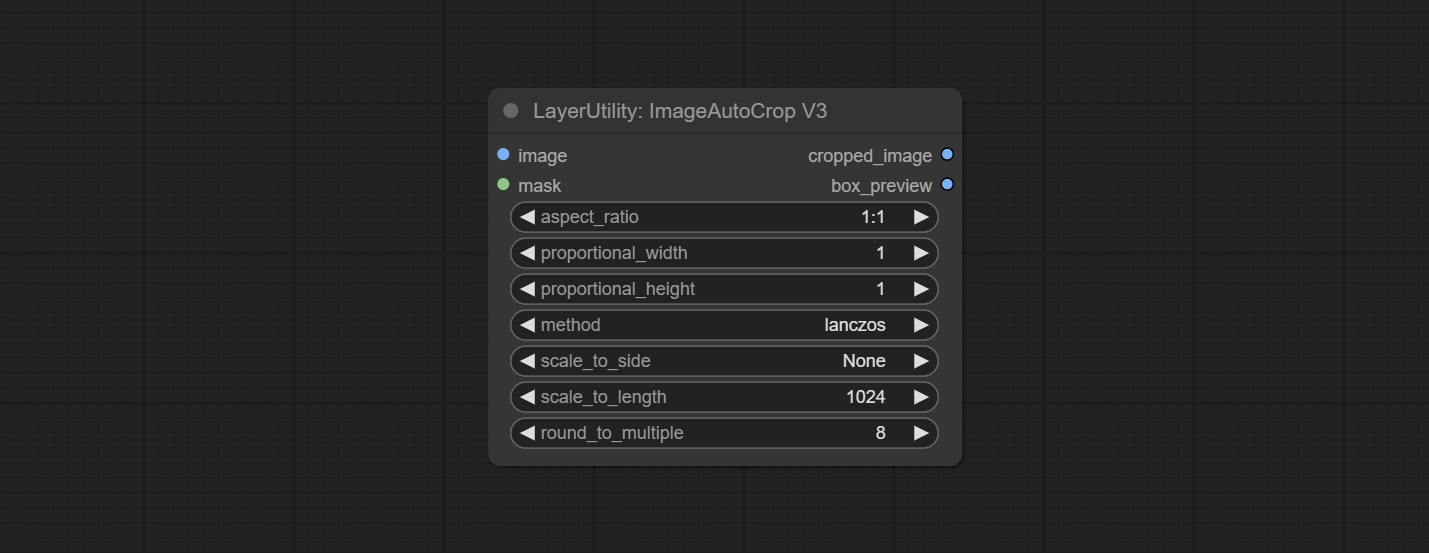
Outputs: cropped_image: The cropped image. box_preview: Preview of cutting position.
Using low frequency filtering and retaining high frequency to recover image details. Compared to kijai's DetailTransfer, this node is better integrated with the environment while retaining details. 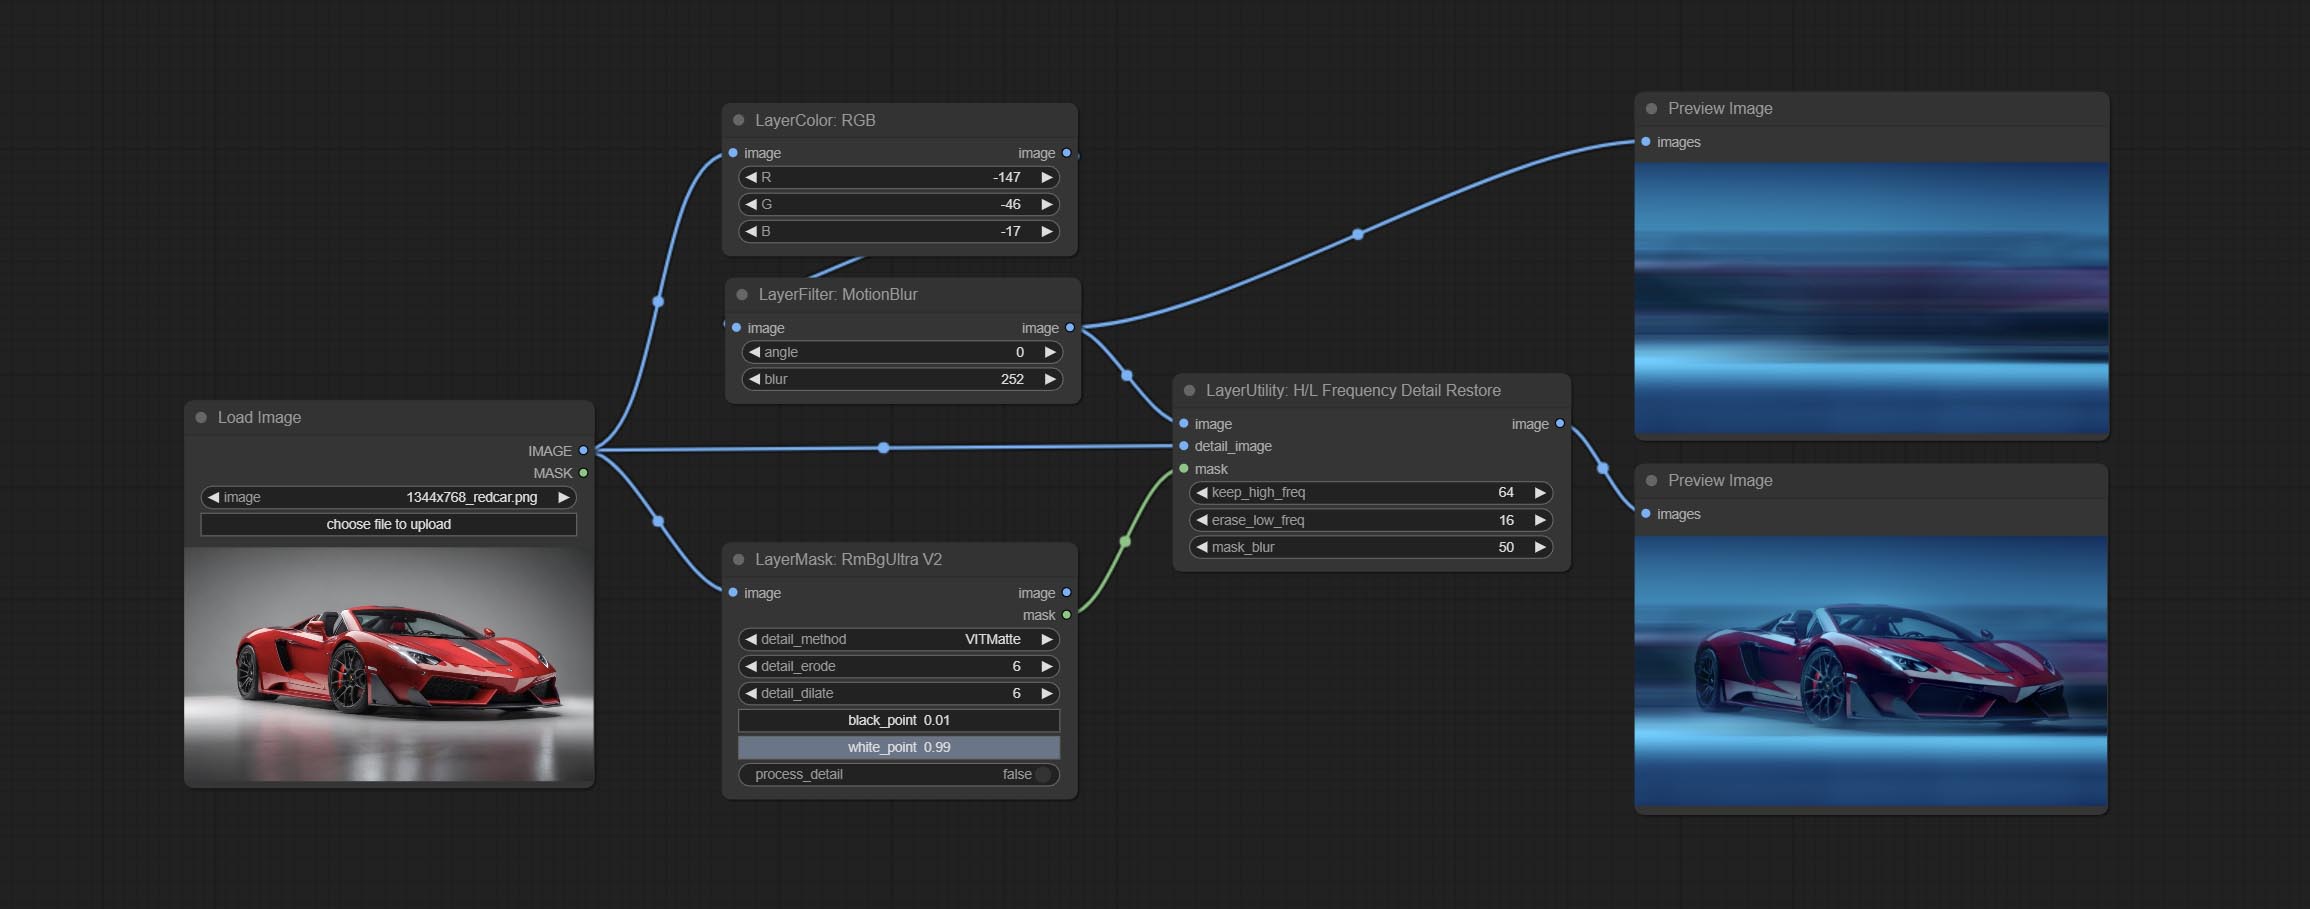
Node Options: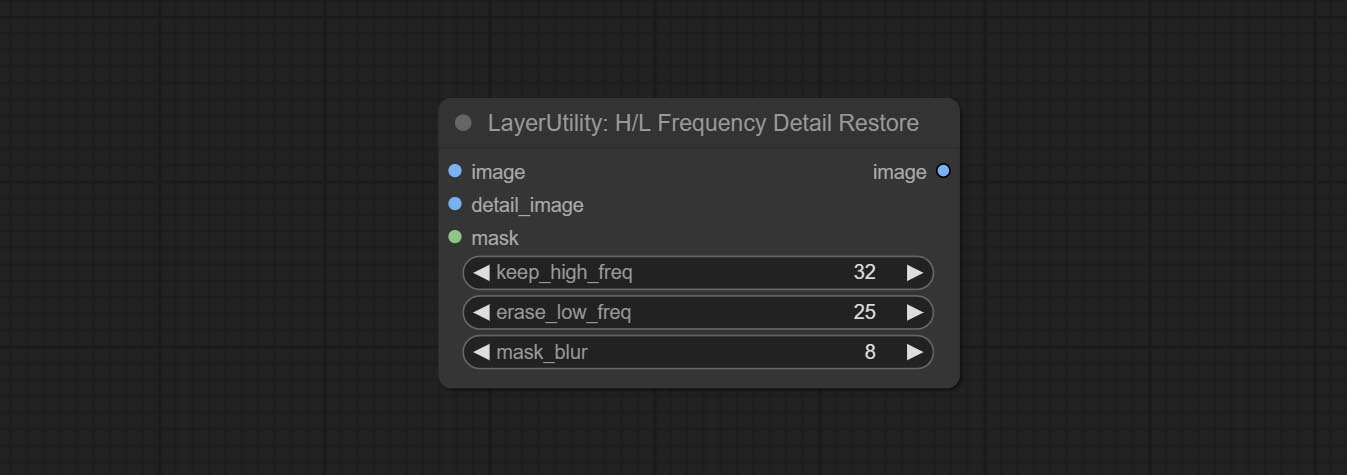
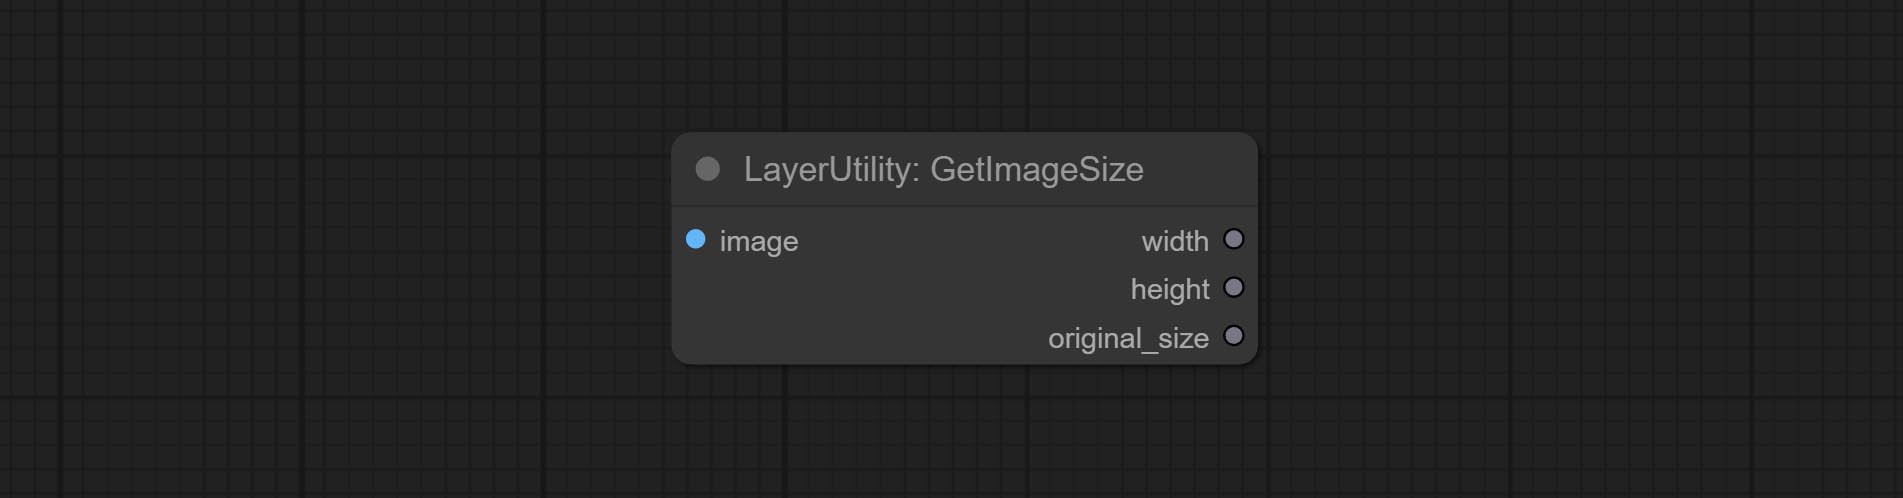
Obtain the width and height of the image.
Sortir:
Switch output from multiple input images and masks, supporting 9 sets of inputs. All input items are optional. if there is only image or mask in a set of input, the missing item will be output as None. 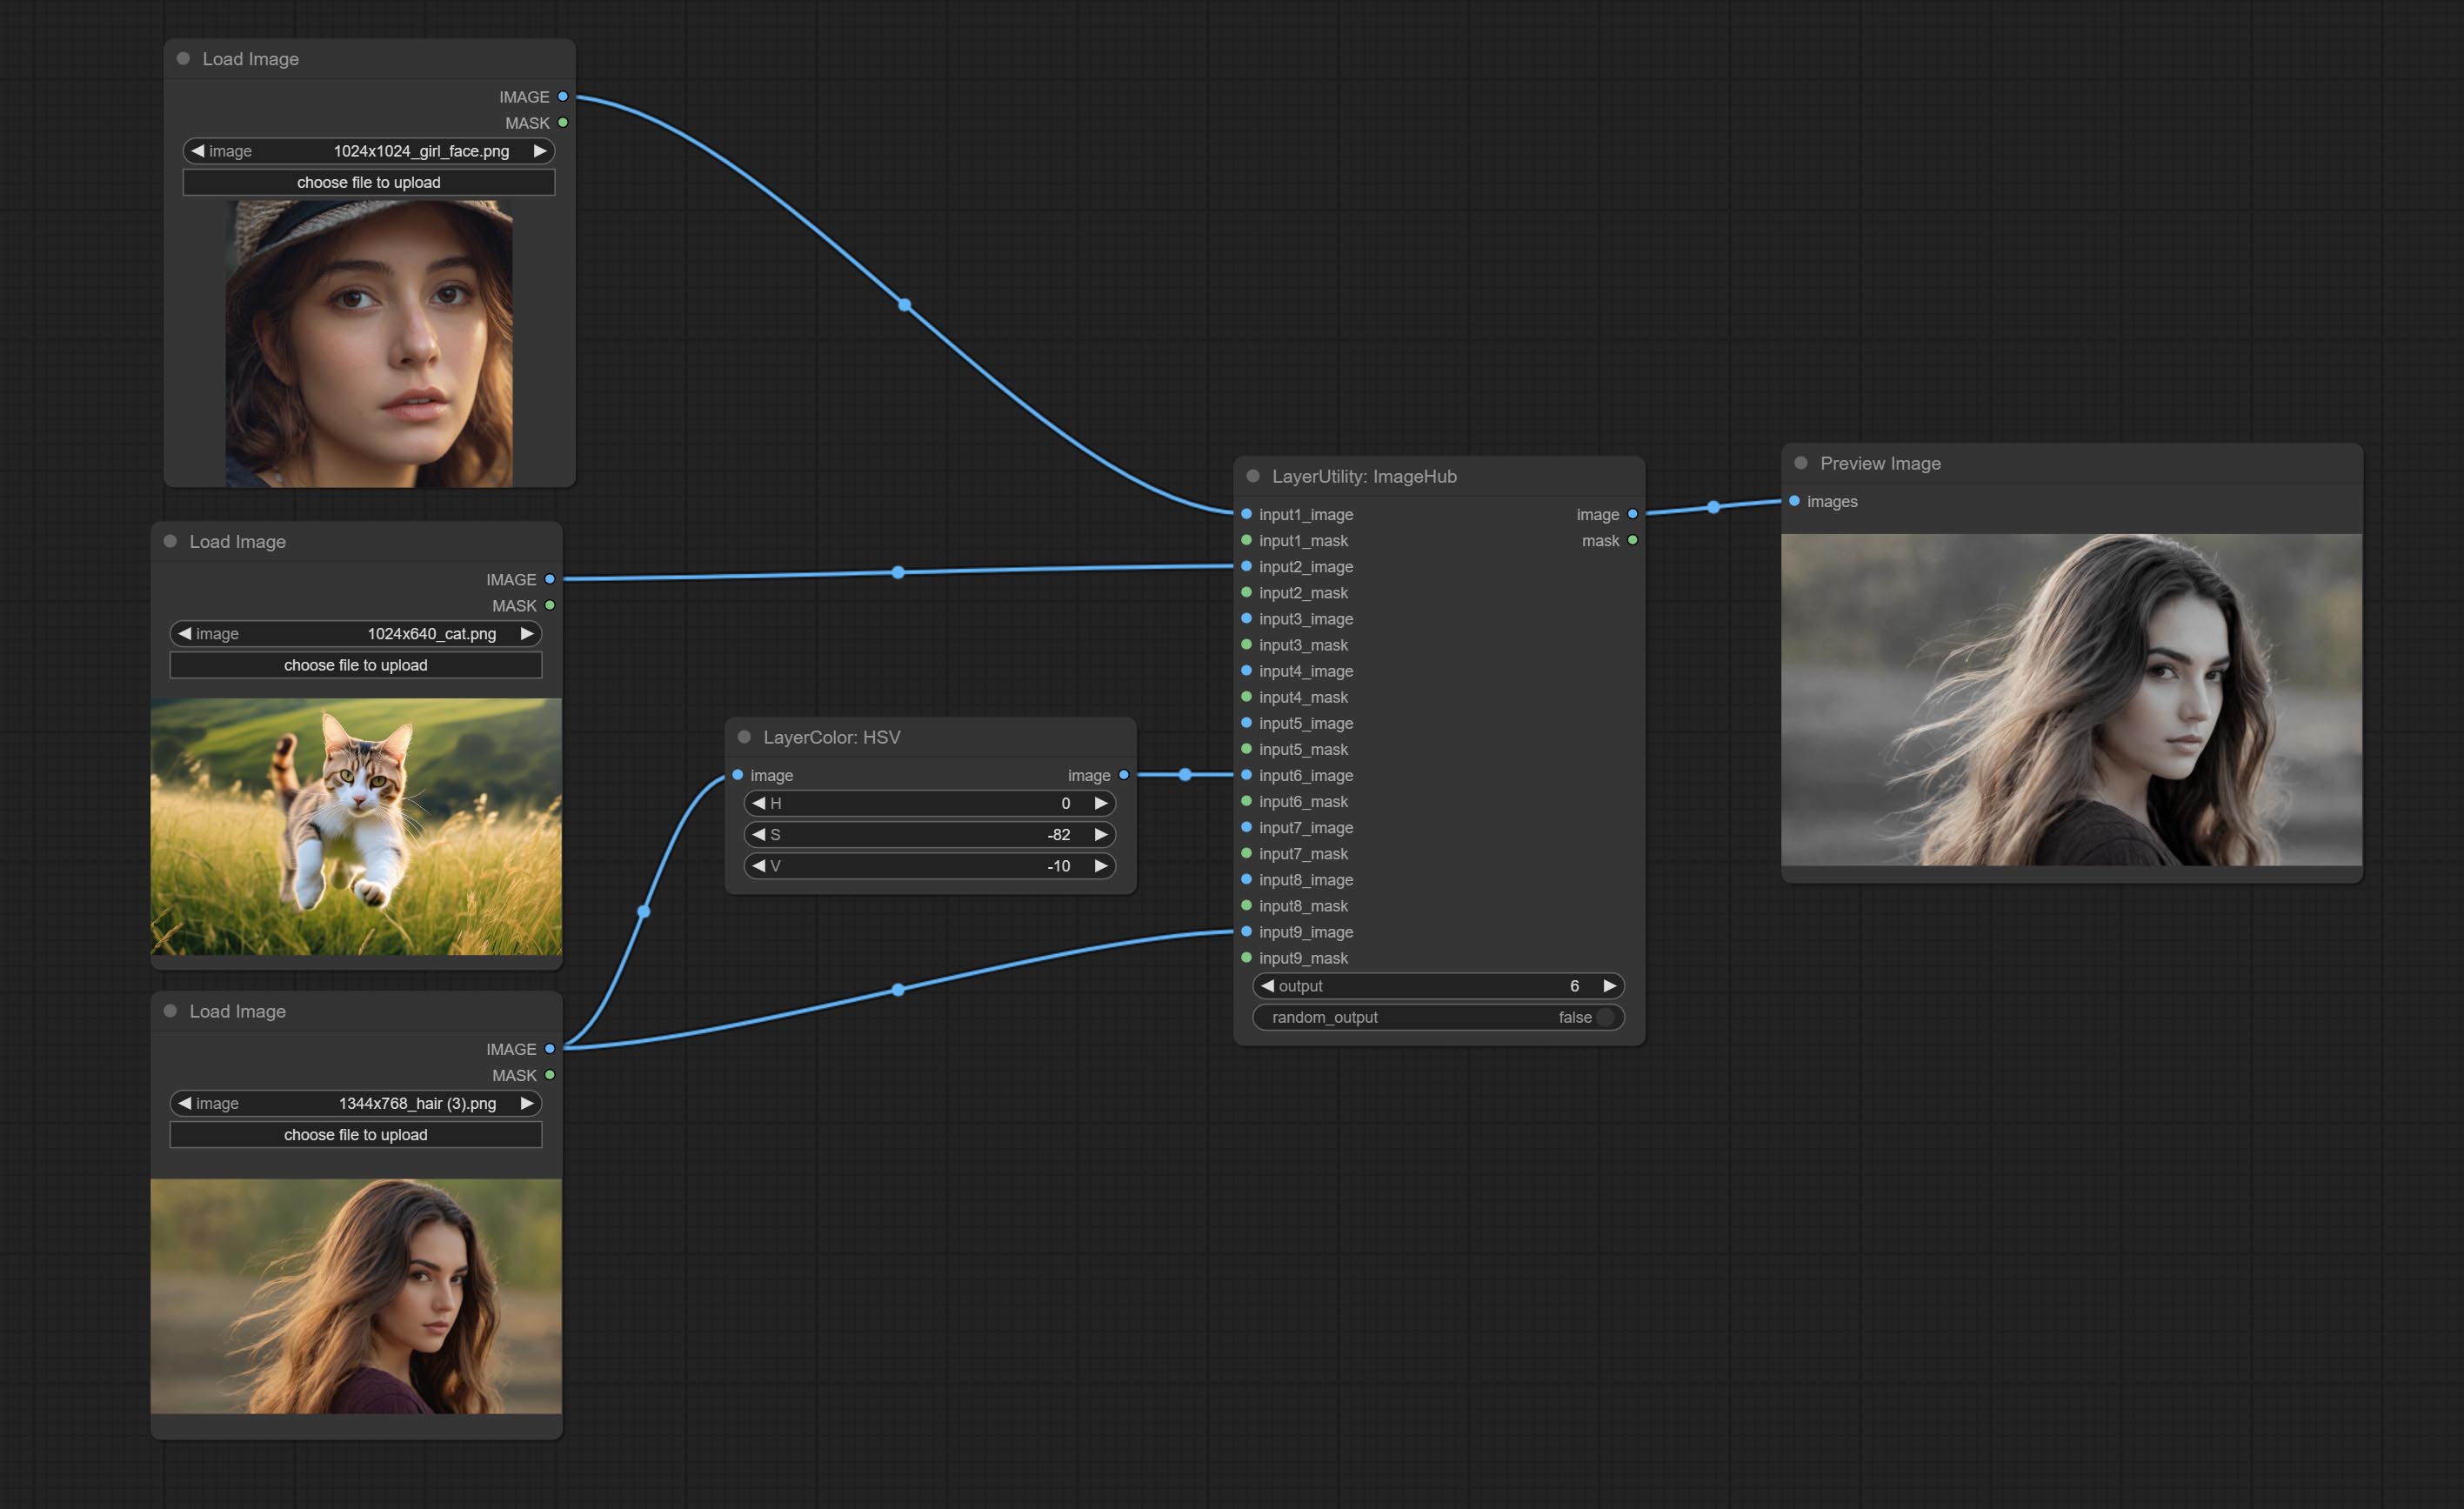
Node options: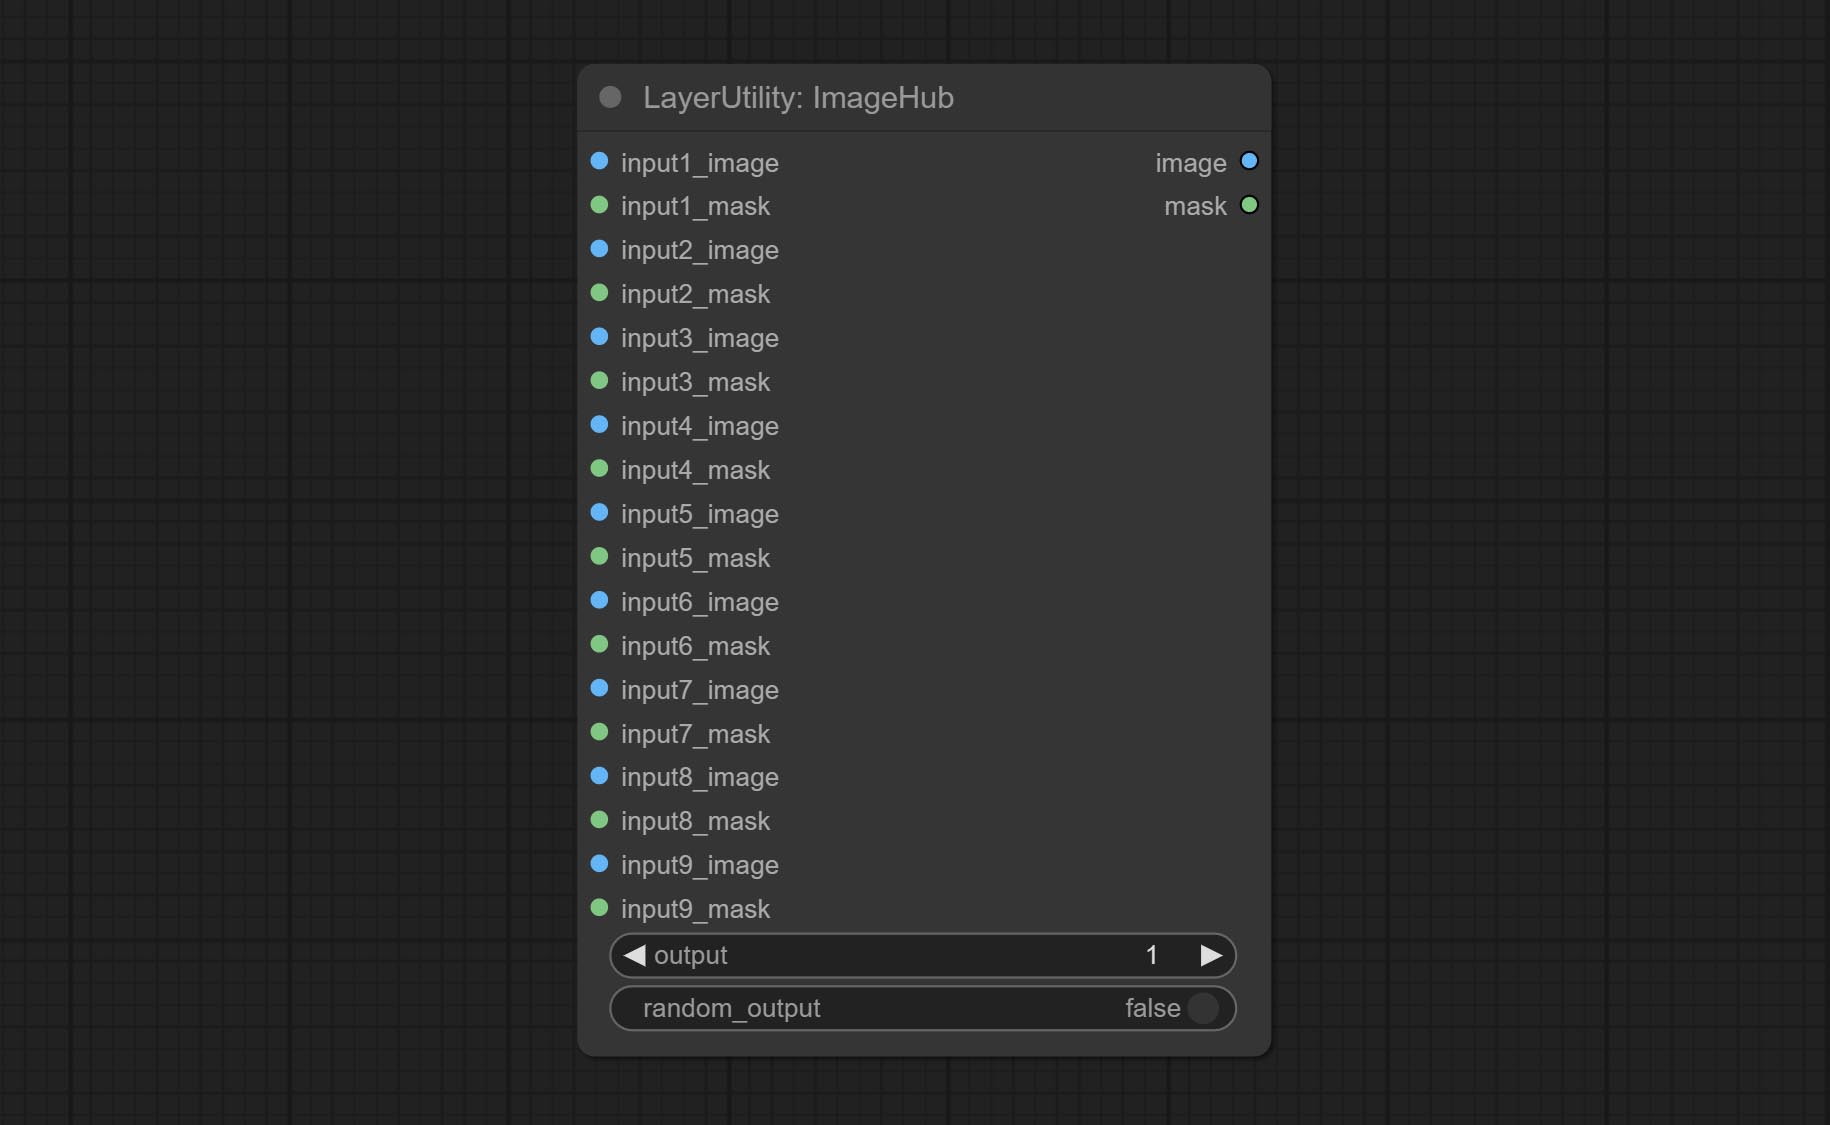
random-output option is True, this setting will be ignored.output setting will be ignored and a random set will be output among all valid inputs. Retrieve specified images or masks from batch images or masks. 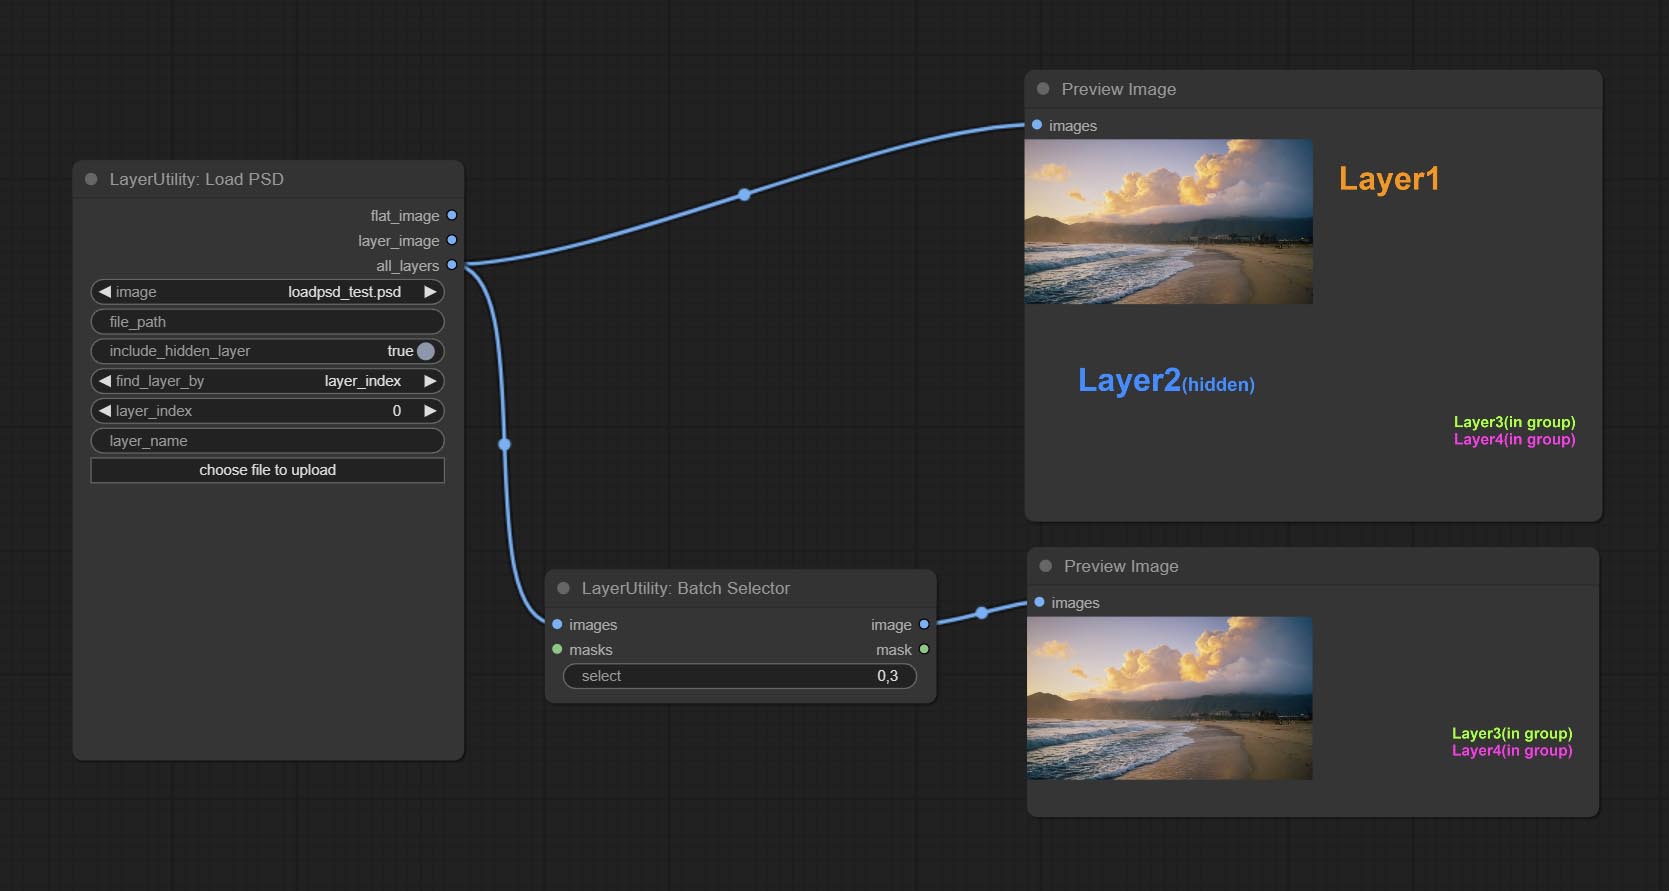
Node Options: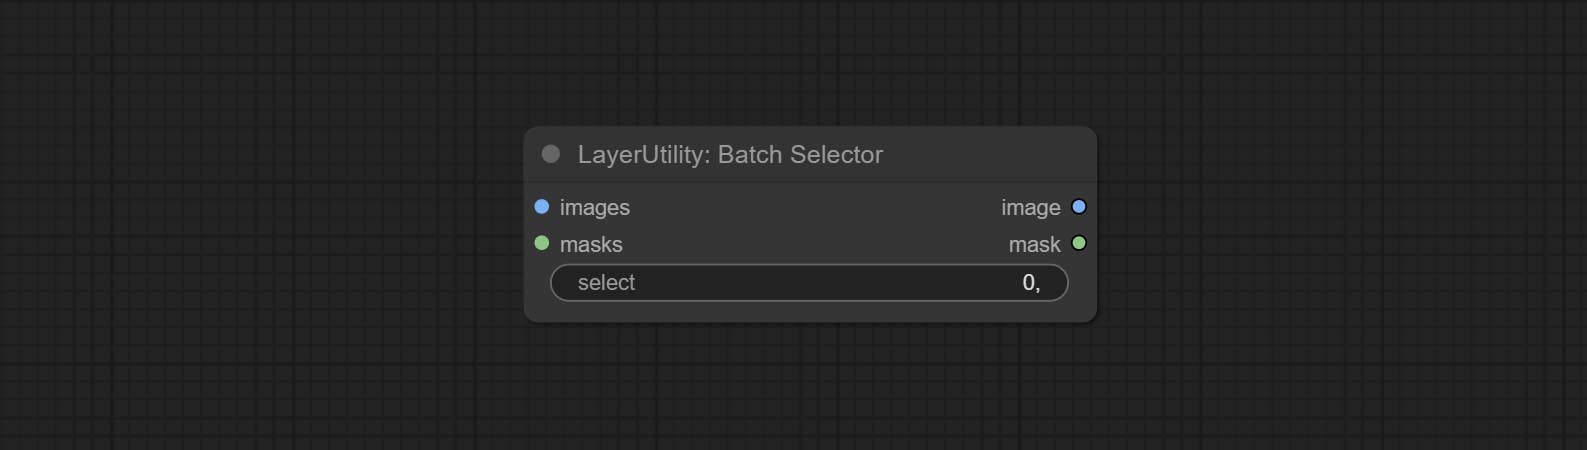
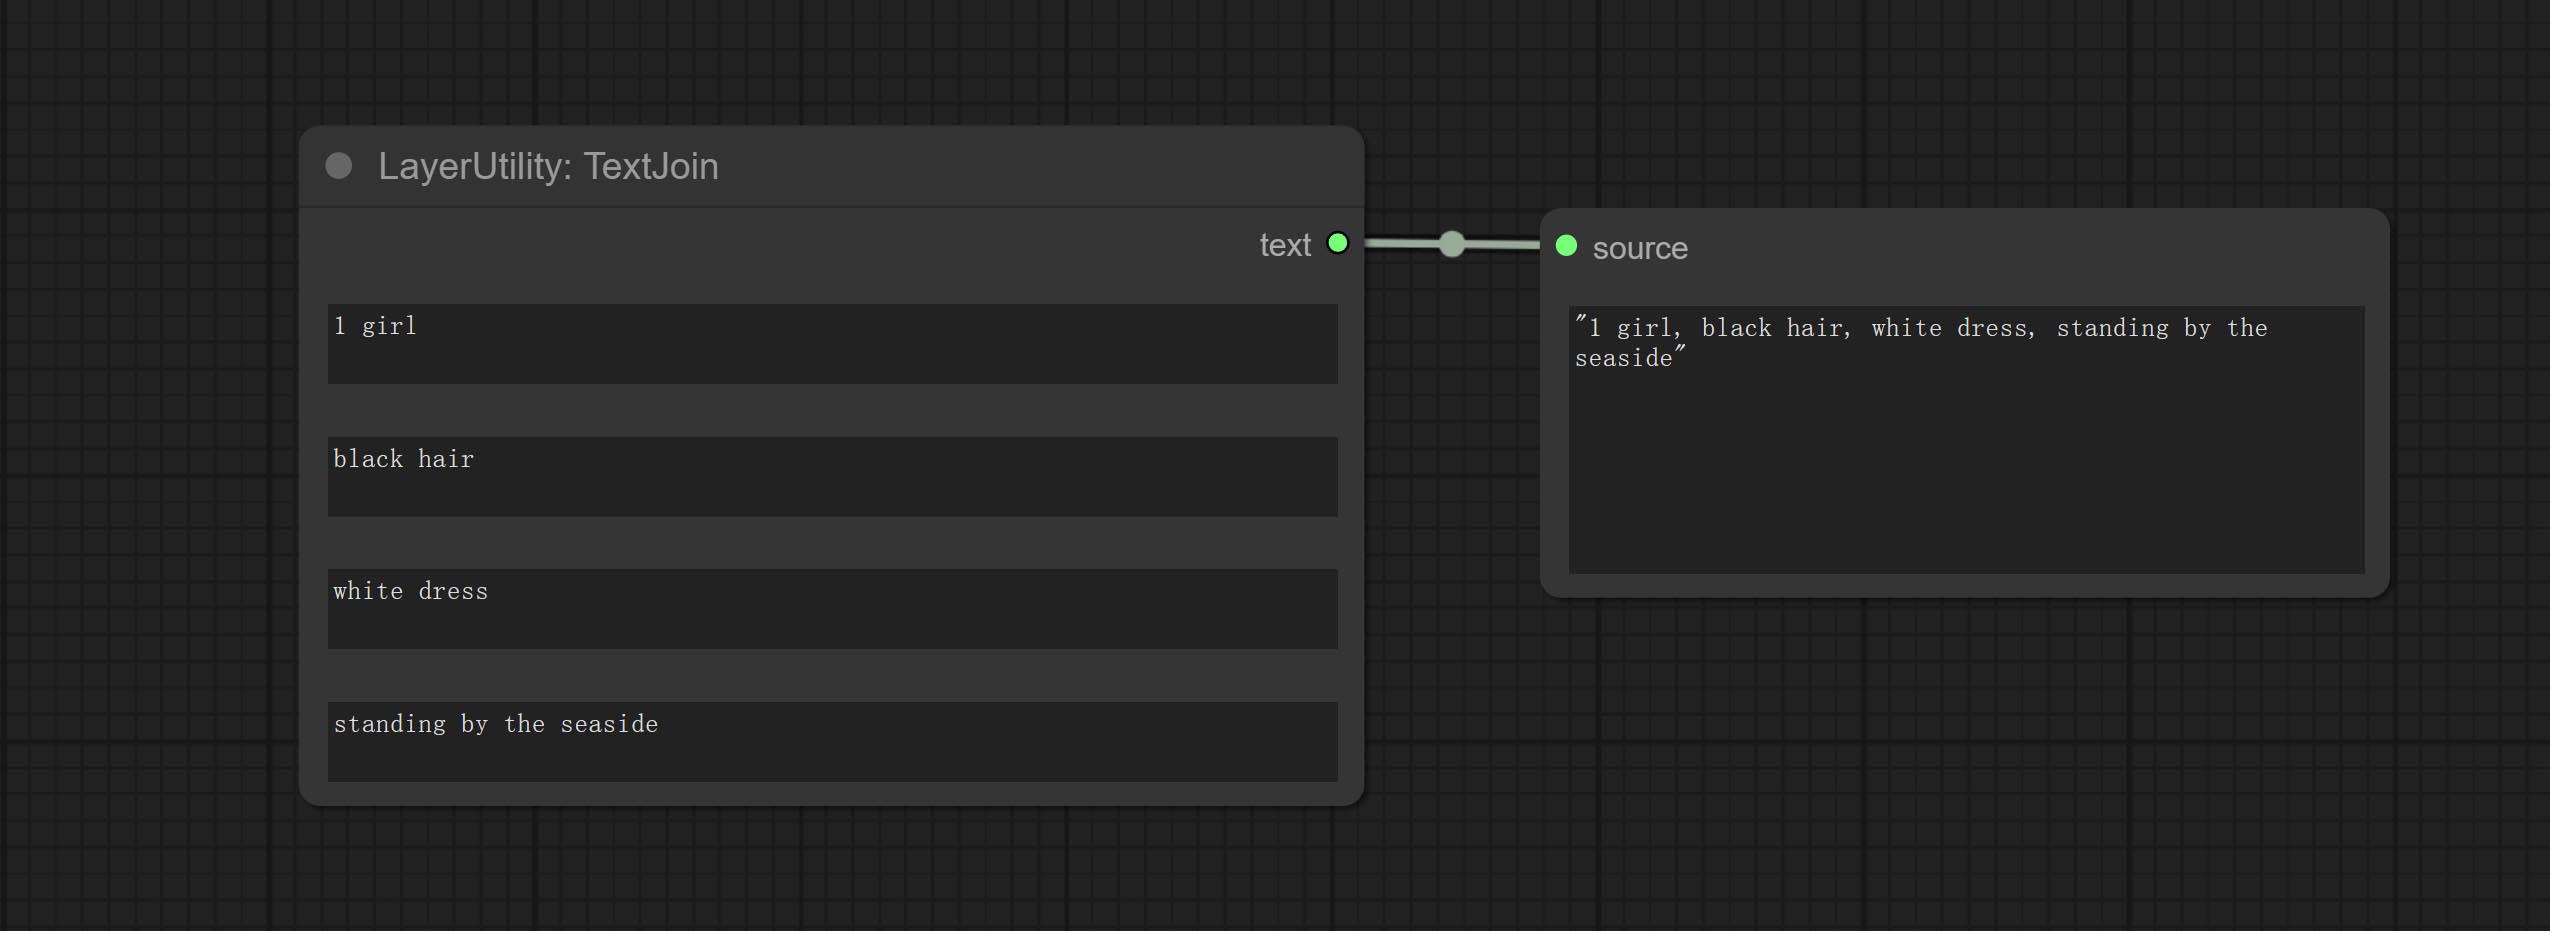
Combine multiple paragraphs of text into one.
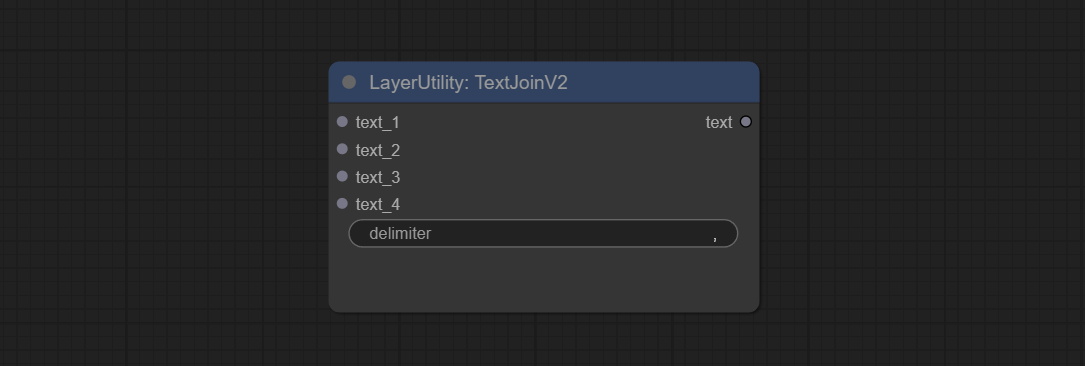
Added delimiter options on the basis of TextJoin.
Used to provide assistance for workflow debugging. When running, the properties of any object connected to this node will be printed to the console.
This node allows any type of input.
Output a string.
Output a string. same as TextBox.
Output a integer value.
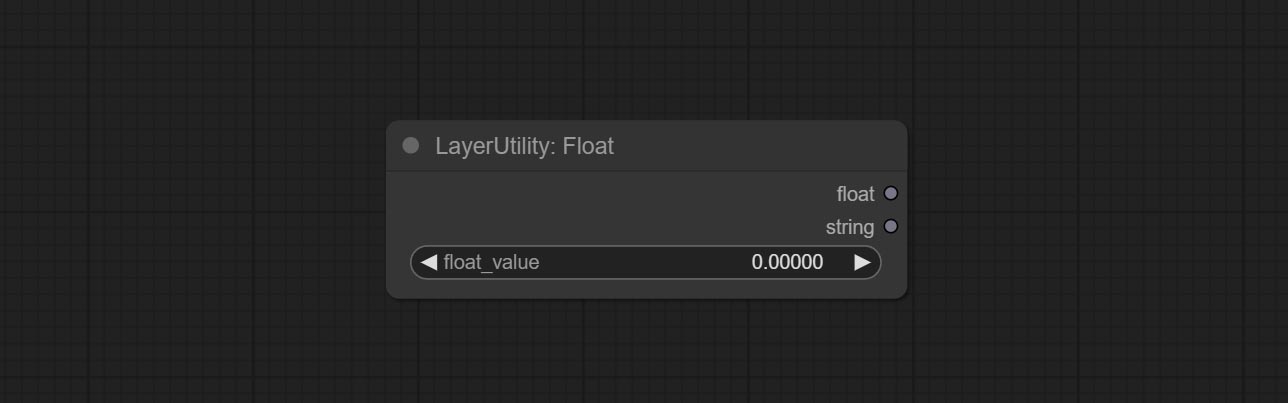
Output a floating-point value with a precision of 5 decimal places.

Output a boolean value.
Used to generate random value within a specified range, with outputs of int, float, and boolean. Supports batch and list generation, and supports batch generation of a set of different random number lists based on image batch. 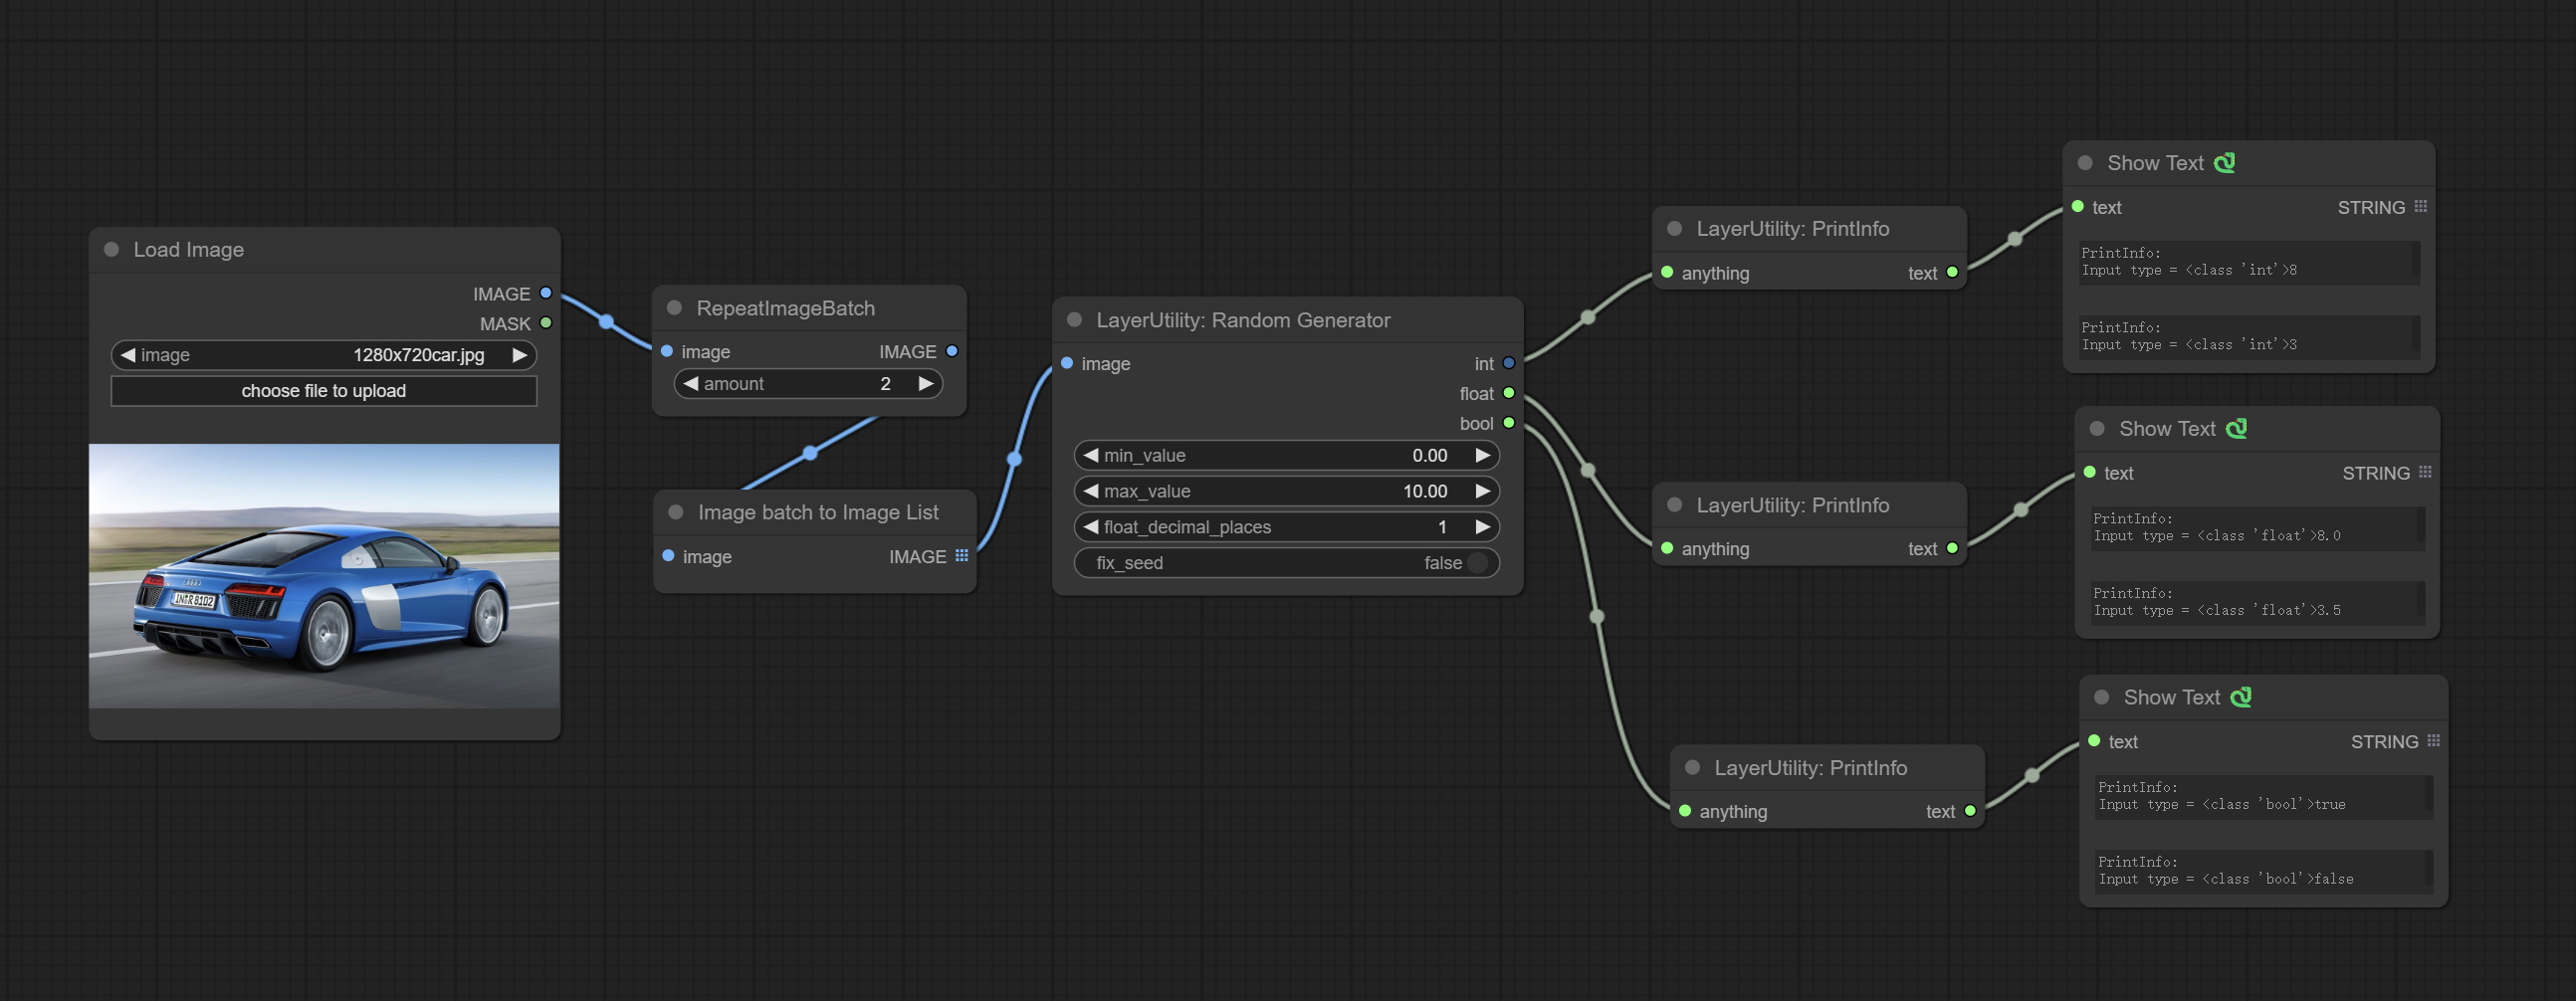
Node Options: 
Outputs: int: Integer random number. float: Float random number. bool: Boolean random number.
On the based of RandomGenerator, add the least random range and seed options.
Node Options: 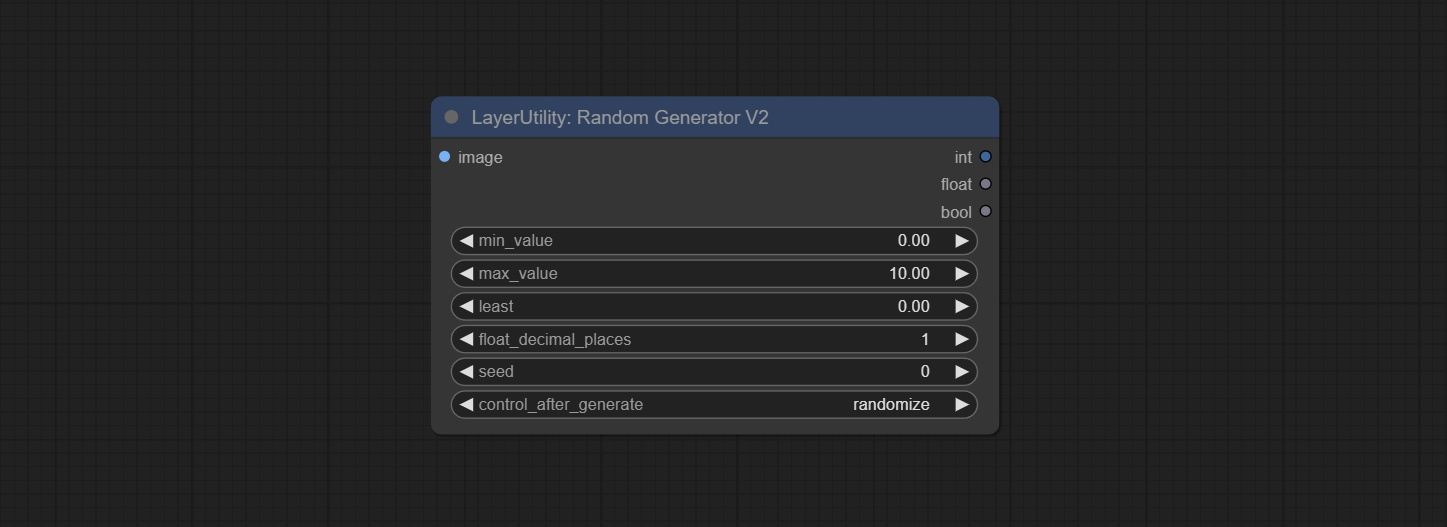
Outputs: int: Integer random number. float: Float random number. bool: Boolean random number.
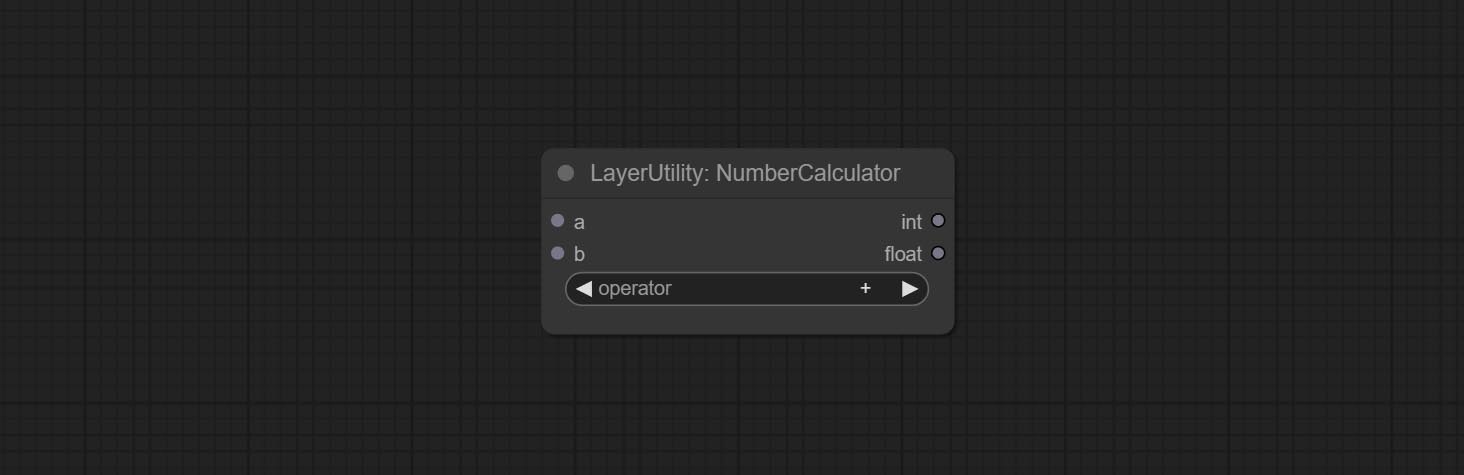
Performs mathematical operations on two numeric values and outputs integer and floating point results * . Supported operations include + , - , * , / , ** , // , % .
* The input only supports boolean, integer, and floating point numbers, forcing in other data will result in error.
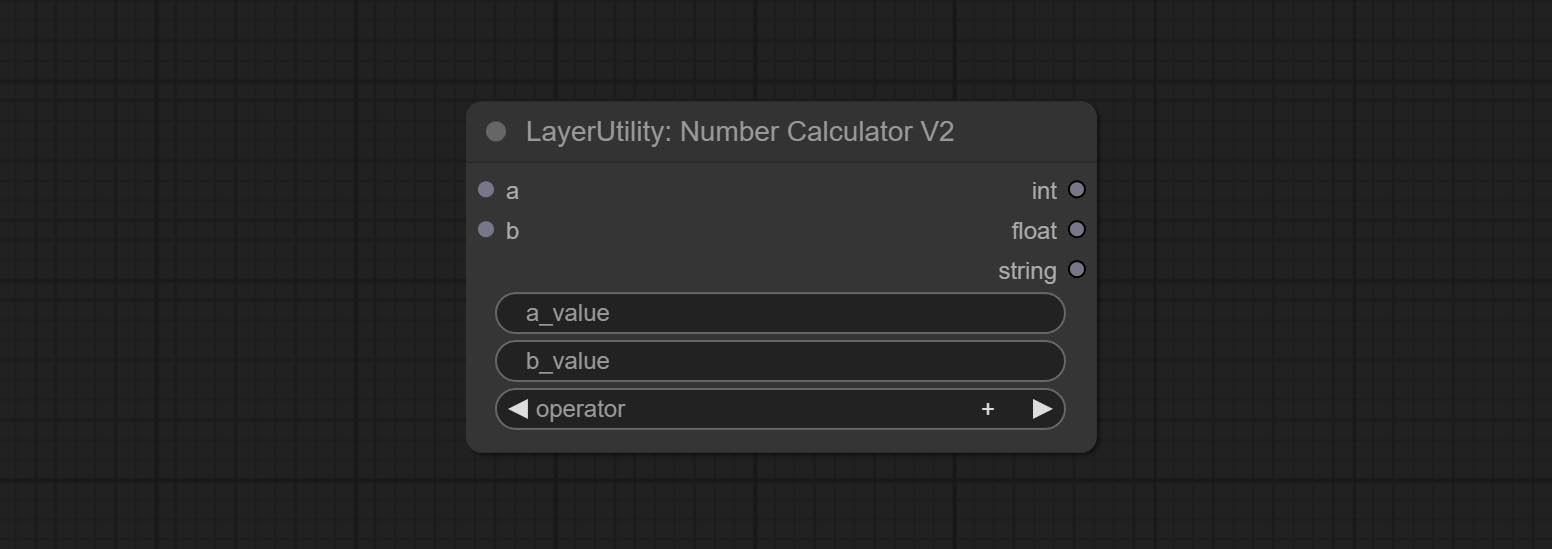
The upgraded version of NumberCalculator has added numerical inputs within nodes and square root operations. The square root operation option is nth_root Note: The input takes priority, and when there is input, the values within the node will be invalid.
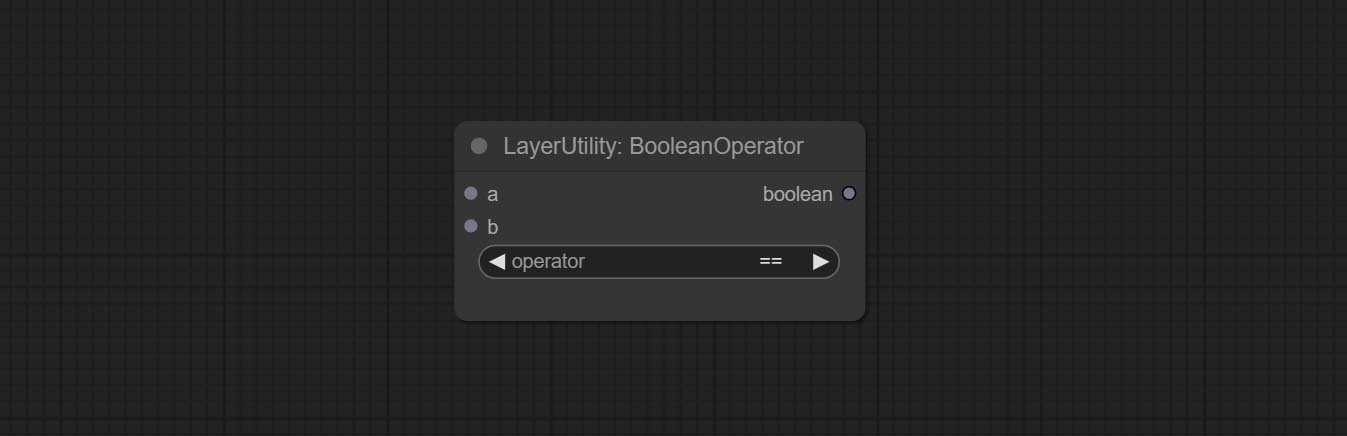
Perform a Boolean operation on two numeric values and output the result * . Supported operations include == , != , and , or , xor , not , min , max .
* The input only supports boolean, integer, and floating point numbers, forcing in other data will result in error. The and operation between the values outputs a larger number, and the or operation outputs a smaller number.
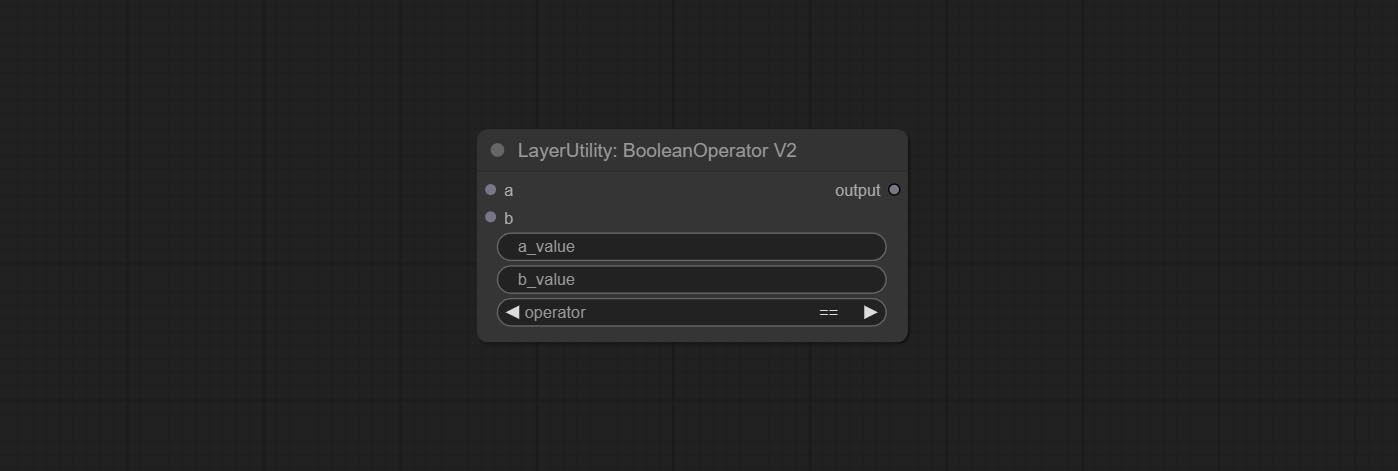
The upgraded version of Boolean Operator has added numerical inputs within nodes and added judgments for greater than, less than, greater than or equal to, and less than or equal to. Note: The input takes priority, and when there is input, the values within the node will be invalid.
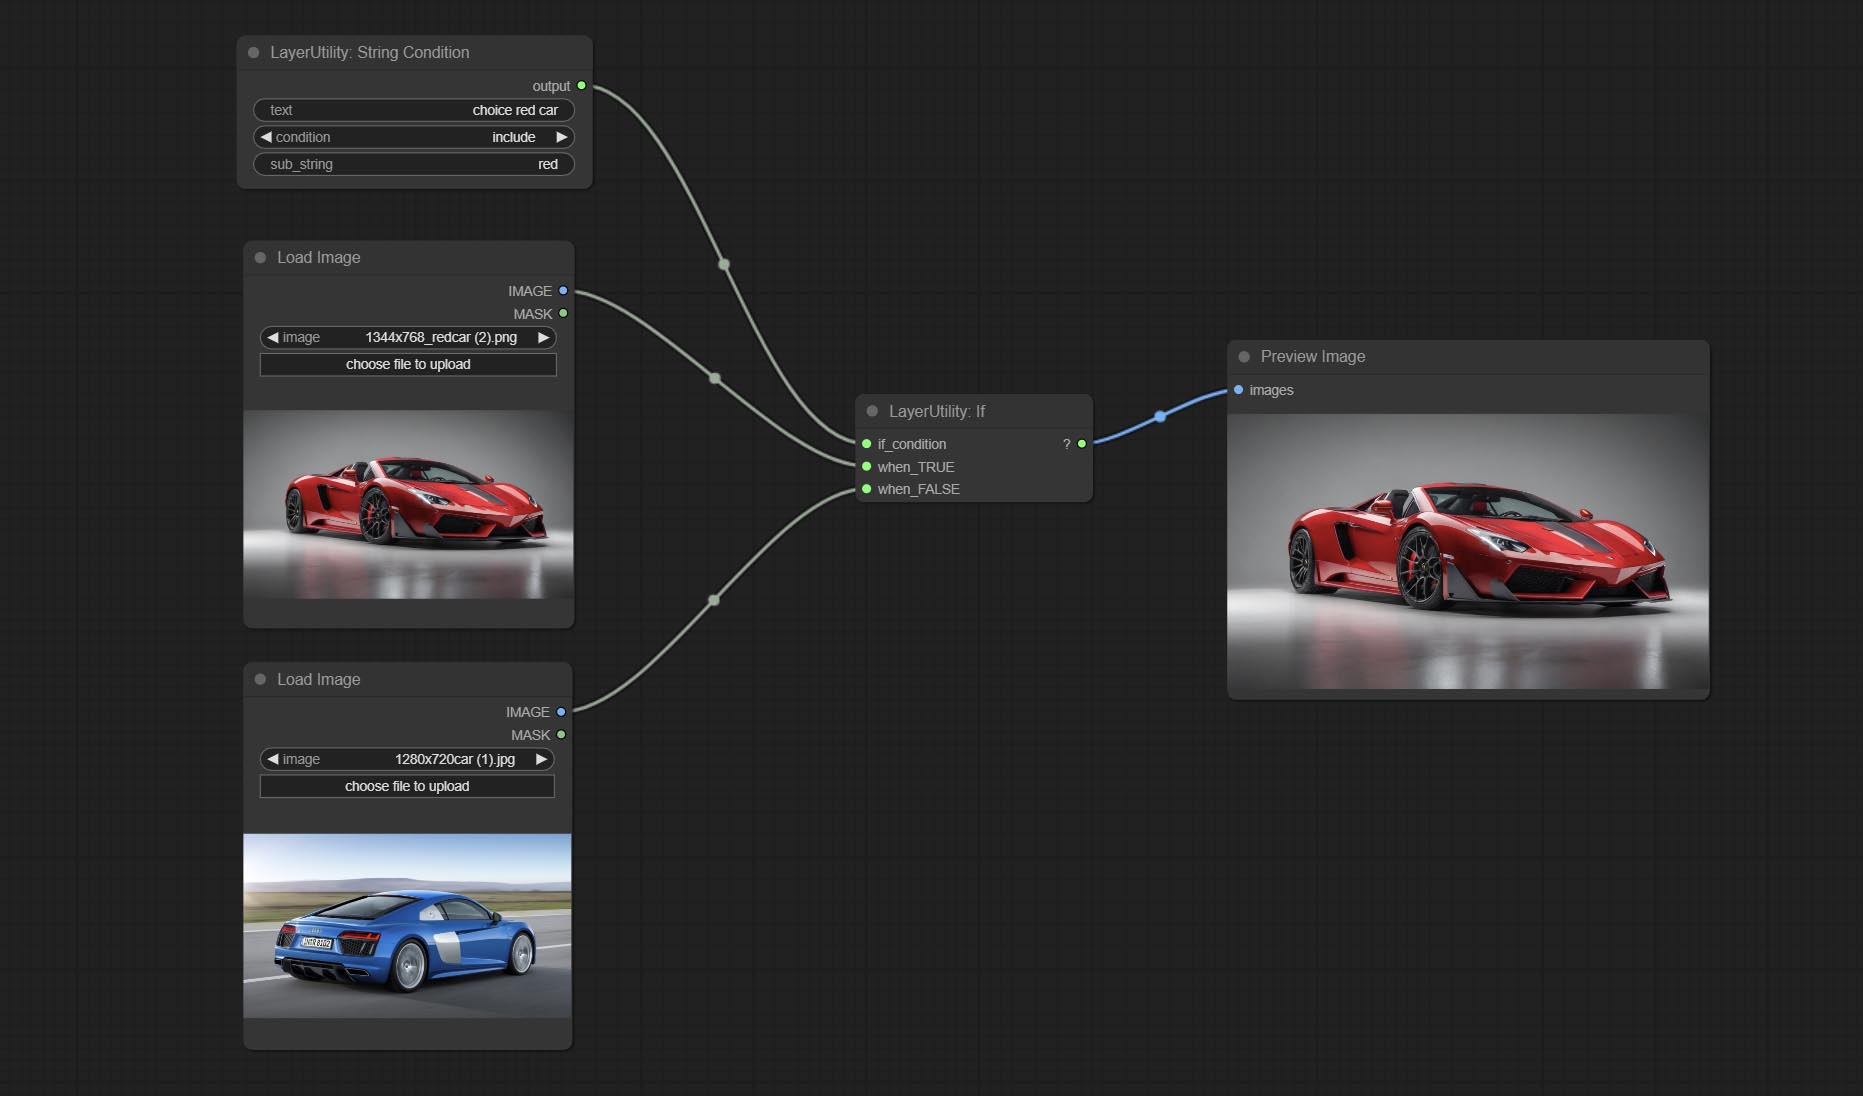
Determine whether the text contains or does not contain substrings, and output a Boolean value.
Node Options: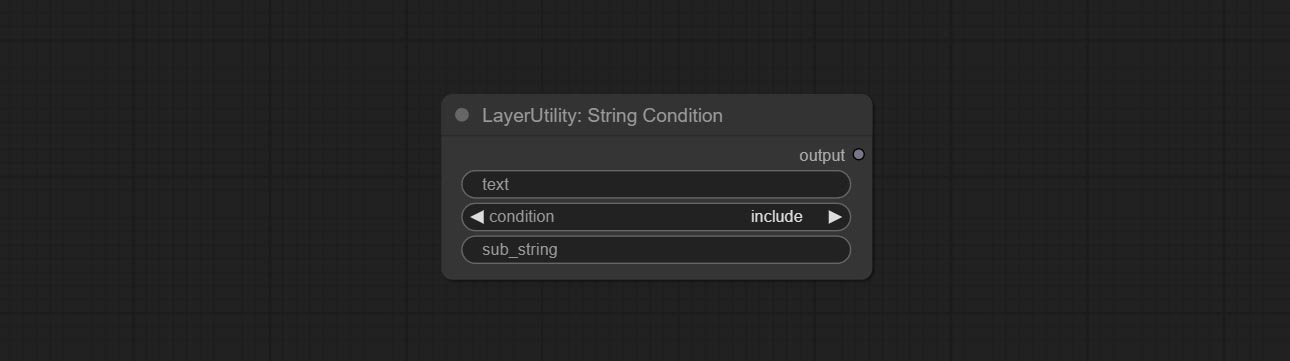
include determines whether it contains a substring, and exclude determines whether it does not.Check if the mask contains enough valid areas and output a Boolean value.
Node Options: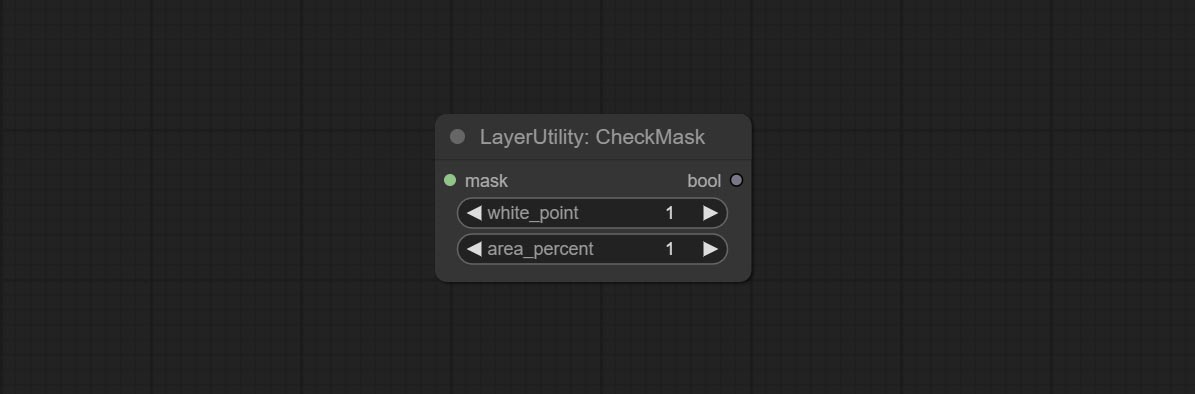
On the basis of CheckMask, the method option has been added, which allows for the selection of different detection methods. The area_percent is changed to a floating point number with an accuracy of 2 decimal places, which can detect smaller effective areas.
Node Options: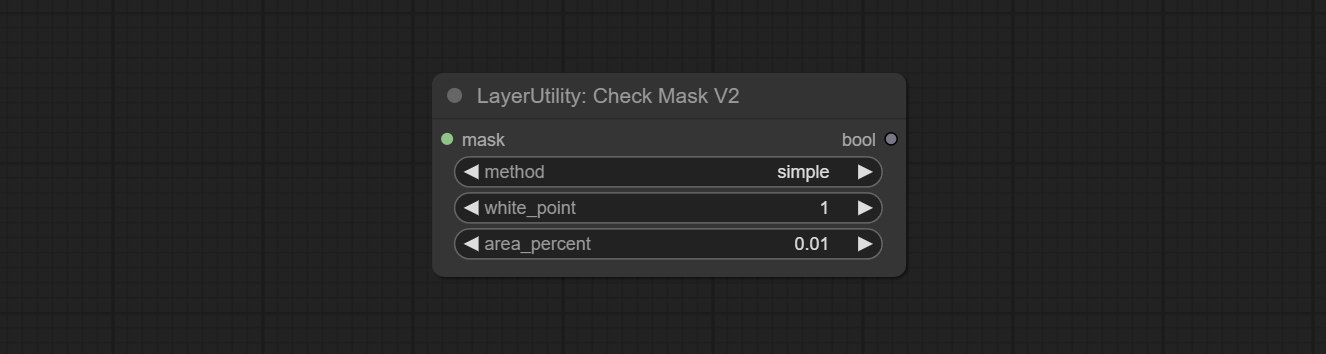
simple and detectability . The simple method only detects whether the mask is completely black, while the detect_percent method detects the proportion of effective areas.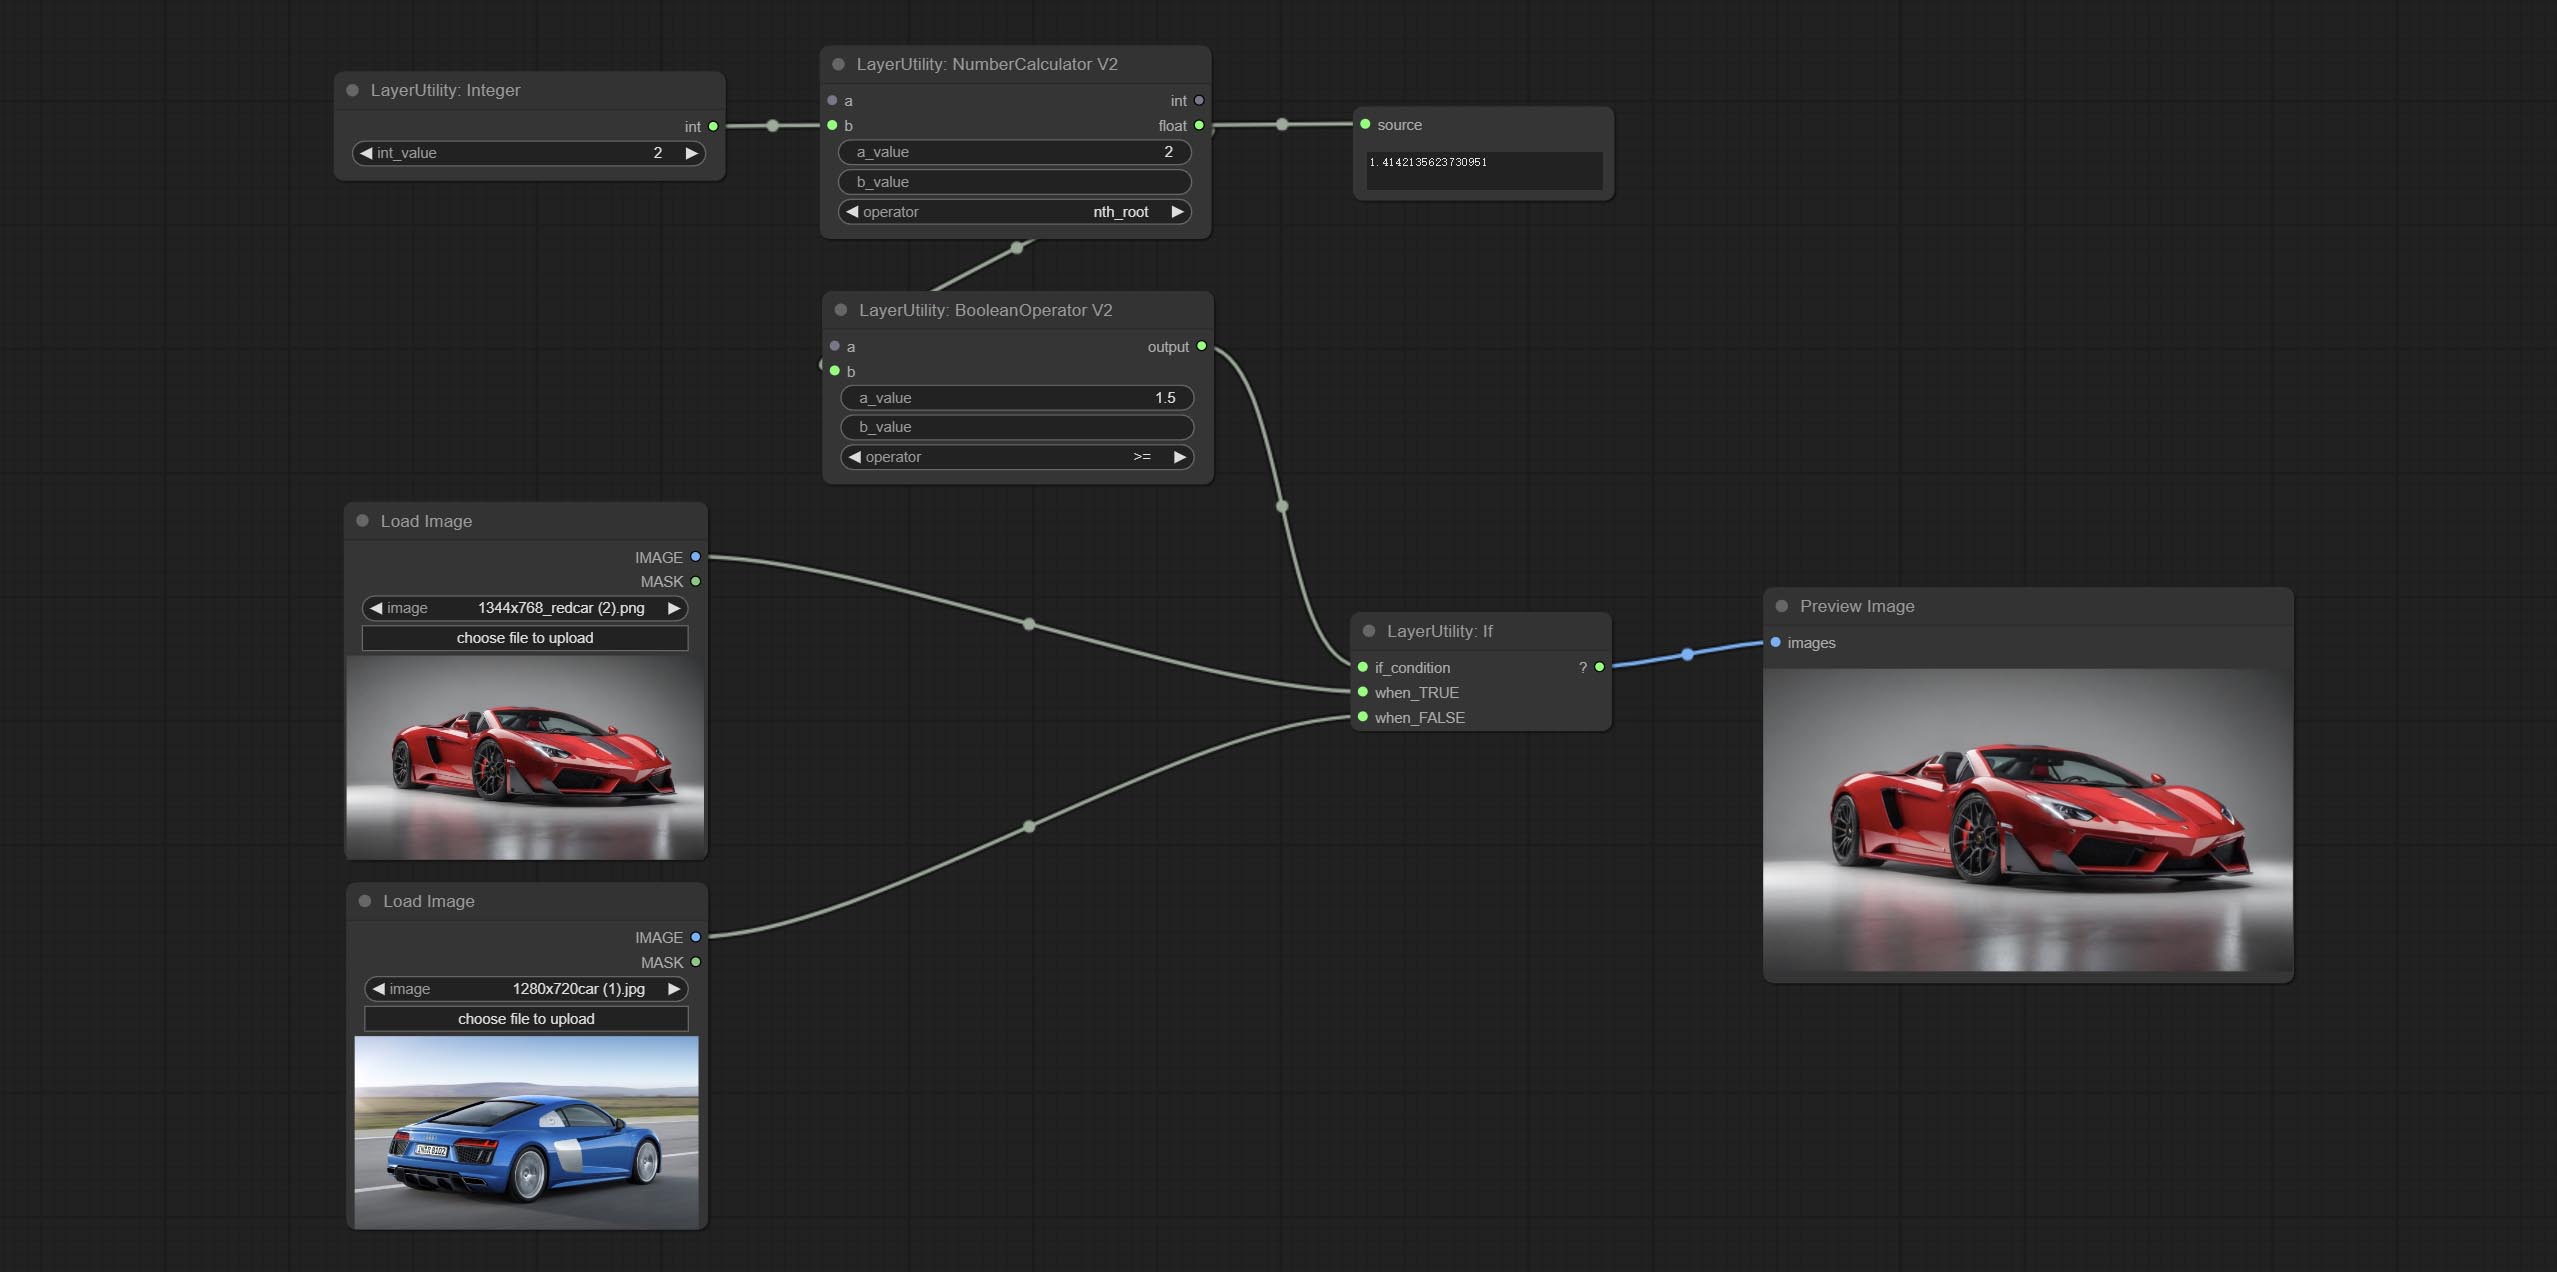
Switches output based on Boolean conditional input. It can be used for any type of data switching, including but not limited to numeric values, strings, pictures, masks, models, latent, pipe pipelines, etc.
Node Options: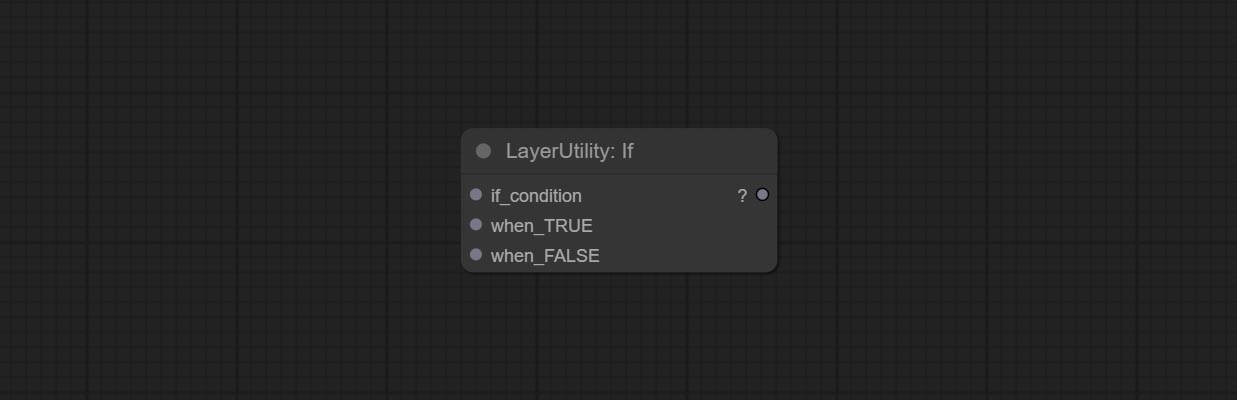

Switches the output based on the matching string. It can be used for any type of data switching, including but not limited to numeric values, strings, pictures, masks, models, latent, pipe pipelines, etc. Supports up to 3 sets of case switches. Compare case to switch_condition , if the same, output the corresponding input. If there are the same cases, the output is prioritized in order. If there is no matching case, the default input is output. Note that the string is case sensitive and Chinese and English full-width and half-width.
Node Options: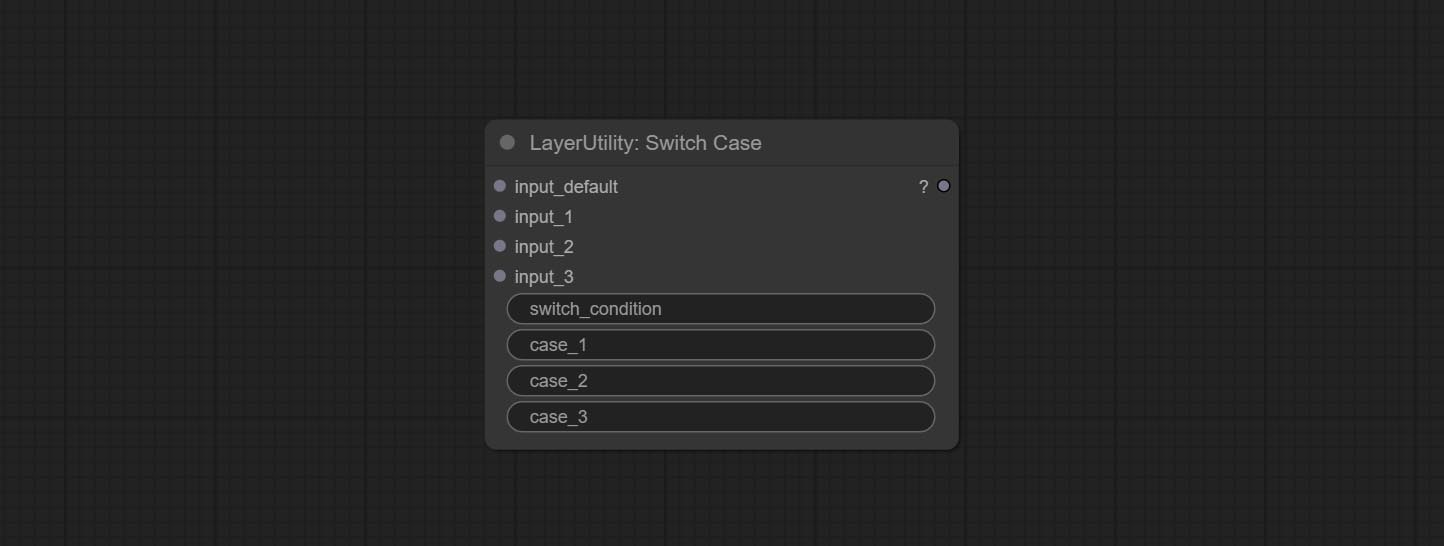
case_1 . This input is optional.case_2 . This input is optional.case_3 . This input is optional.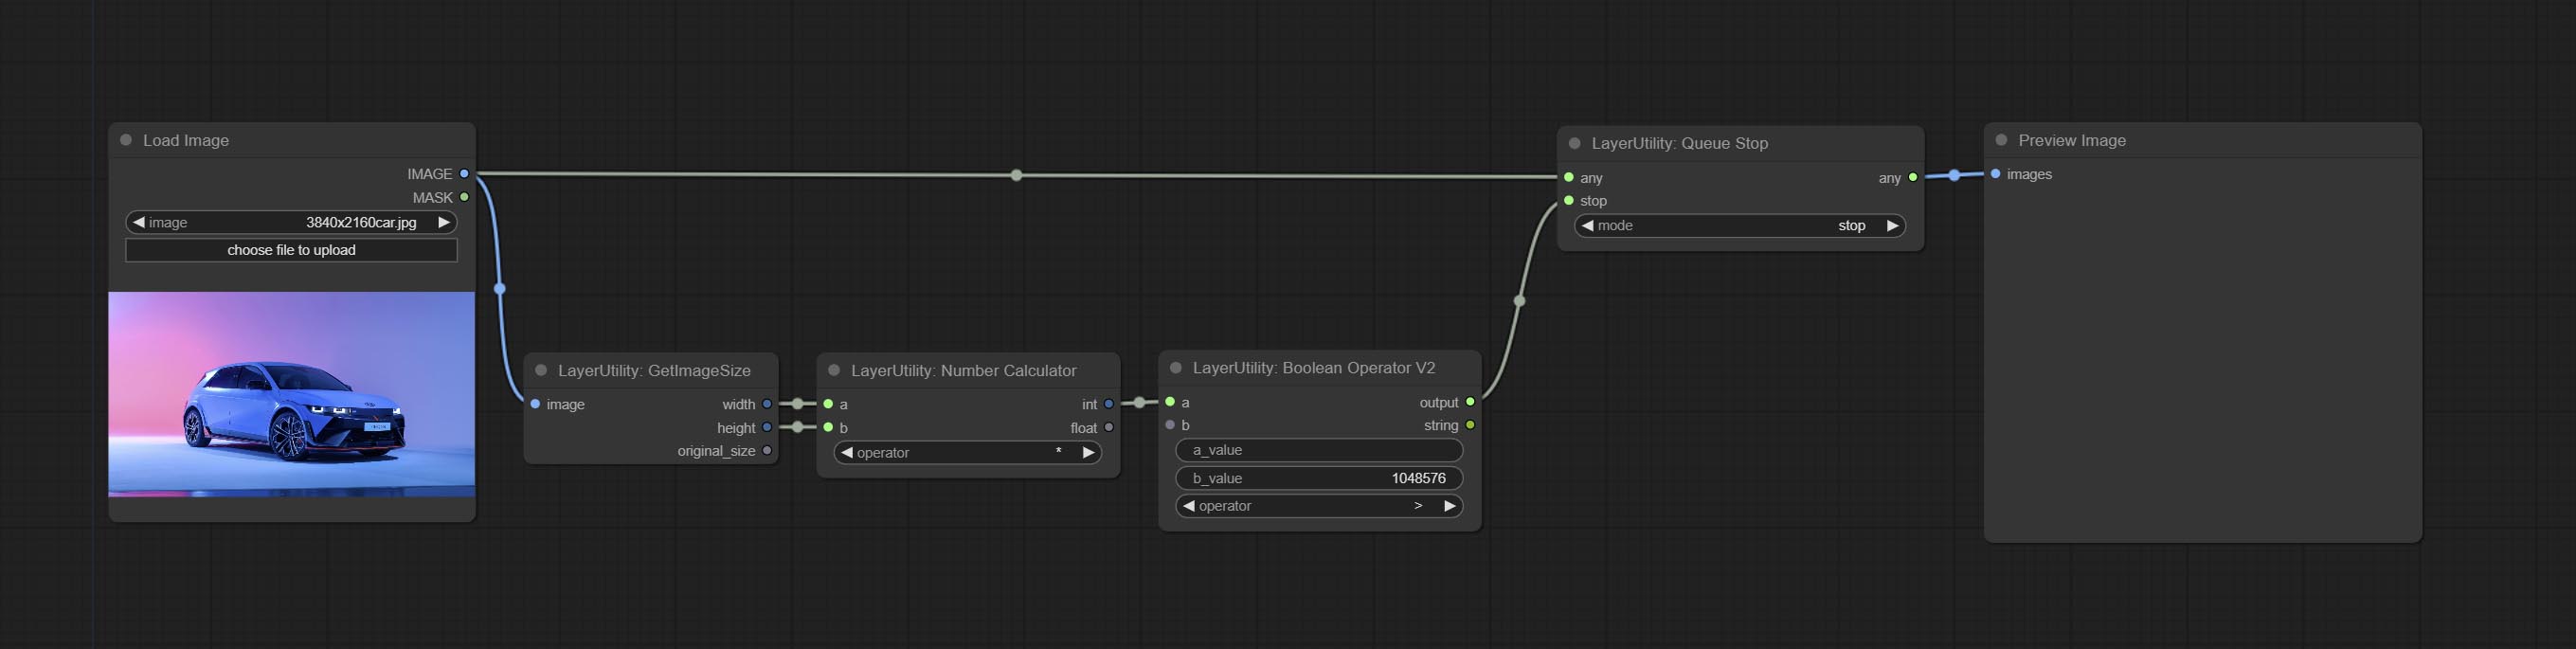
Stop the current queue. When executed at this node, the queue will stop. The workflow diagram above illustrates that if the image is larger than 1Mega pixels, the queue will stop executing.
Node Options: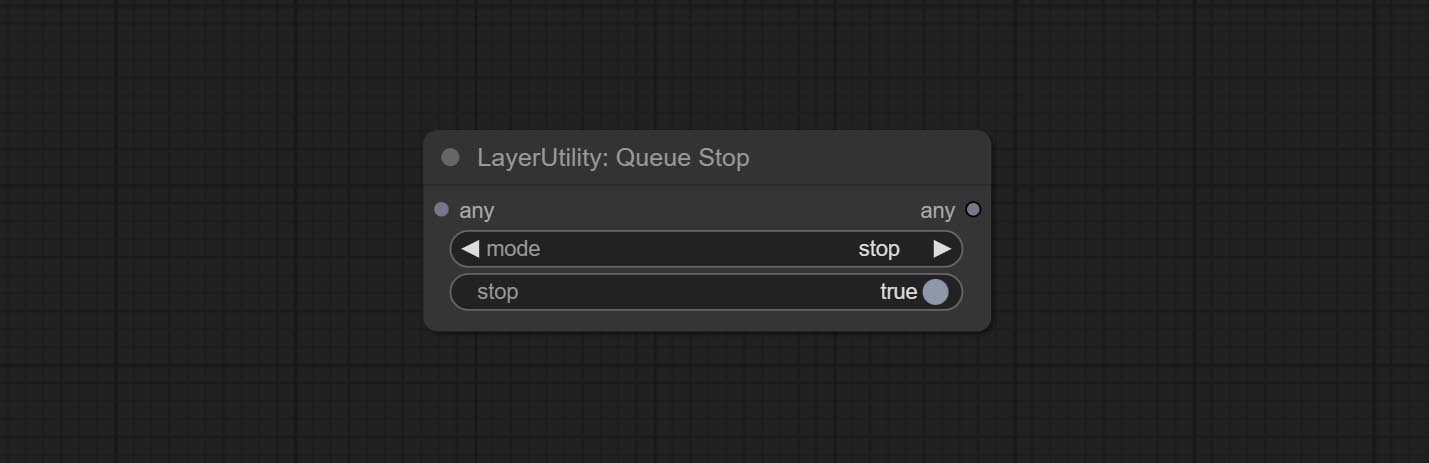
stop , it will be determined whether to stop based on the input conditions. If you choose continue , ignore the condition to continue executing the queue.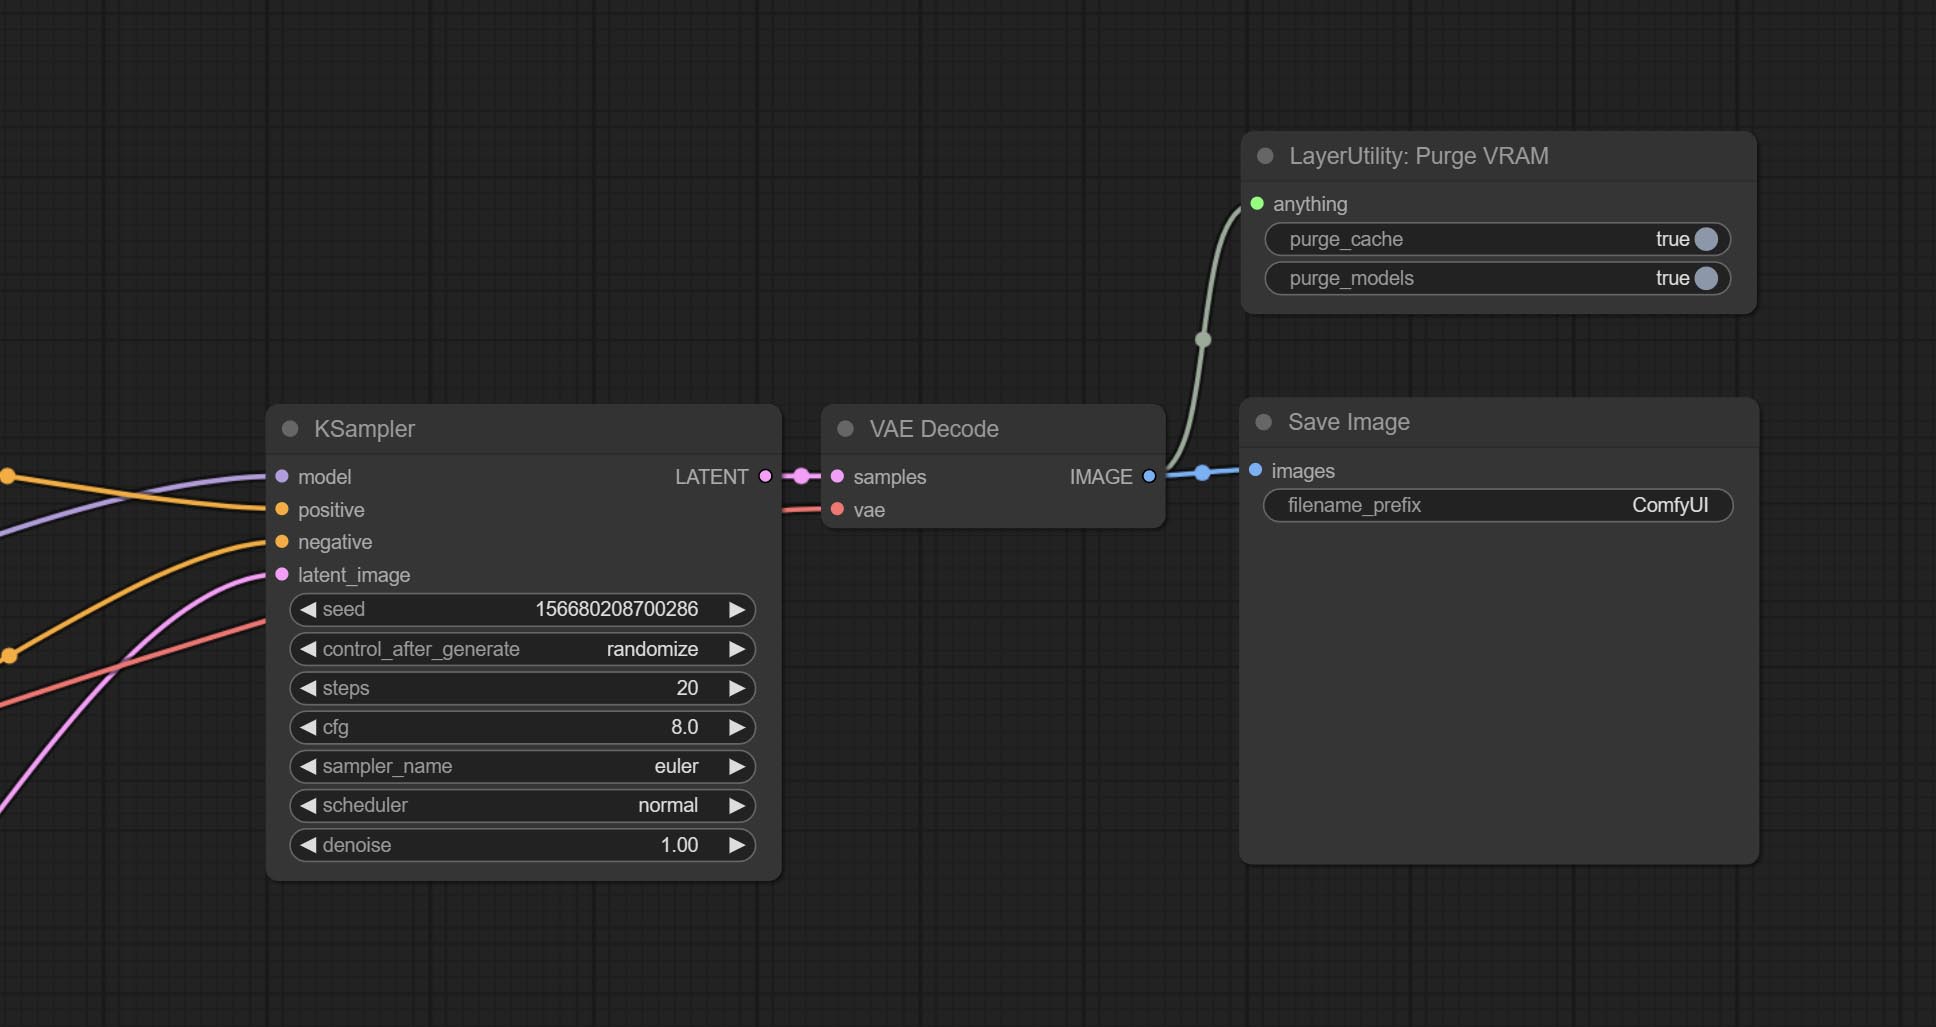
Clean up GPU VRAM and system RAM. any type of input can be accessed, and when executed to this node, the VRAM and garbage objects in the RAM will be cleaned up. Usually placed after the node where the inference task is completed, such as the VAE Decode node.
Node Options:
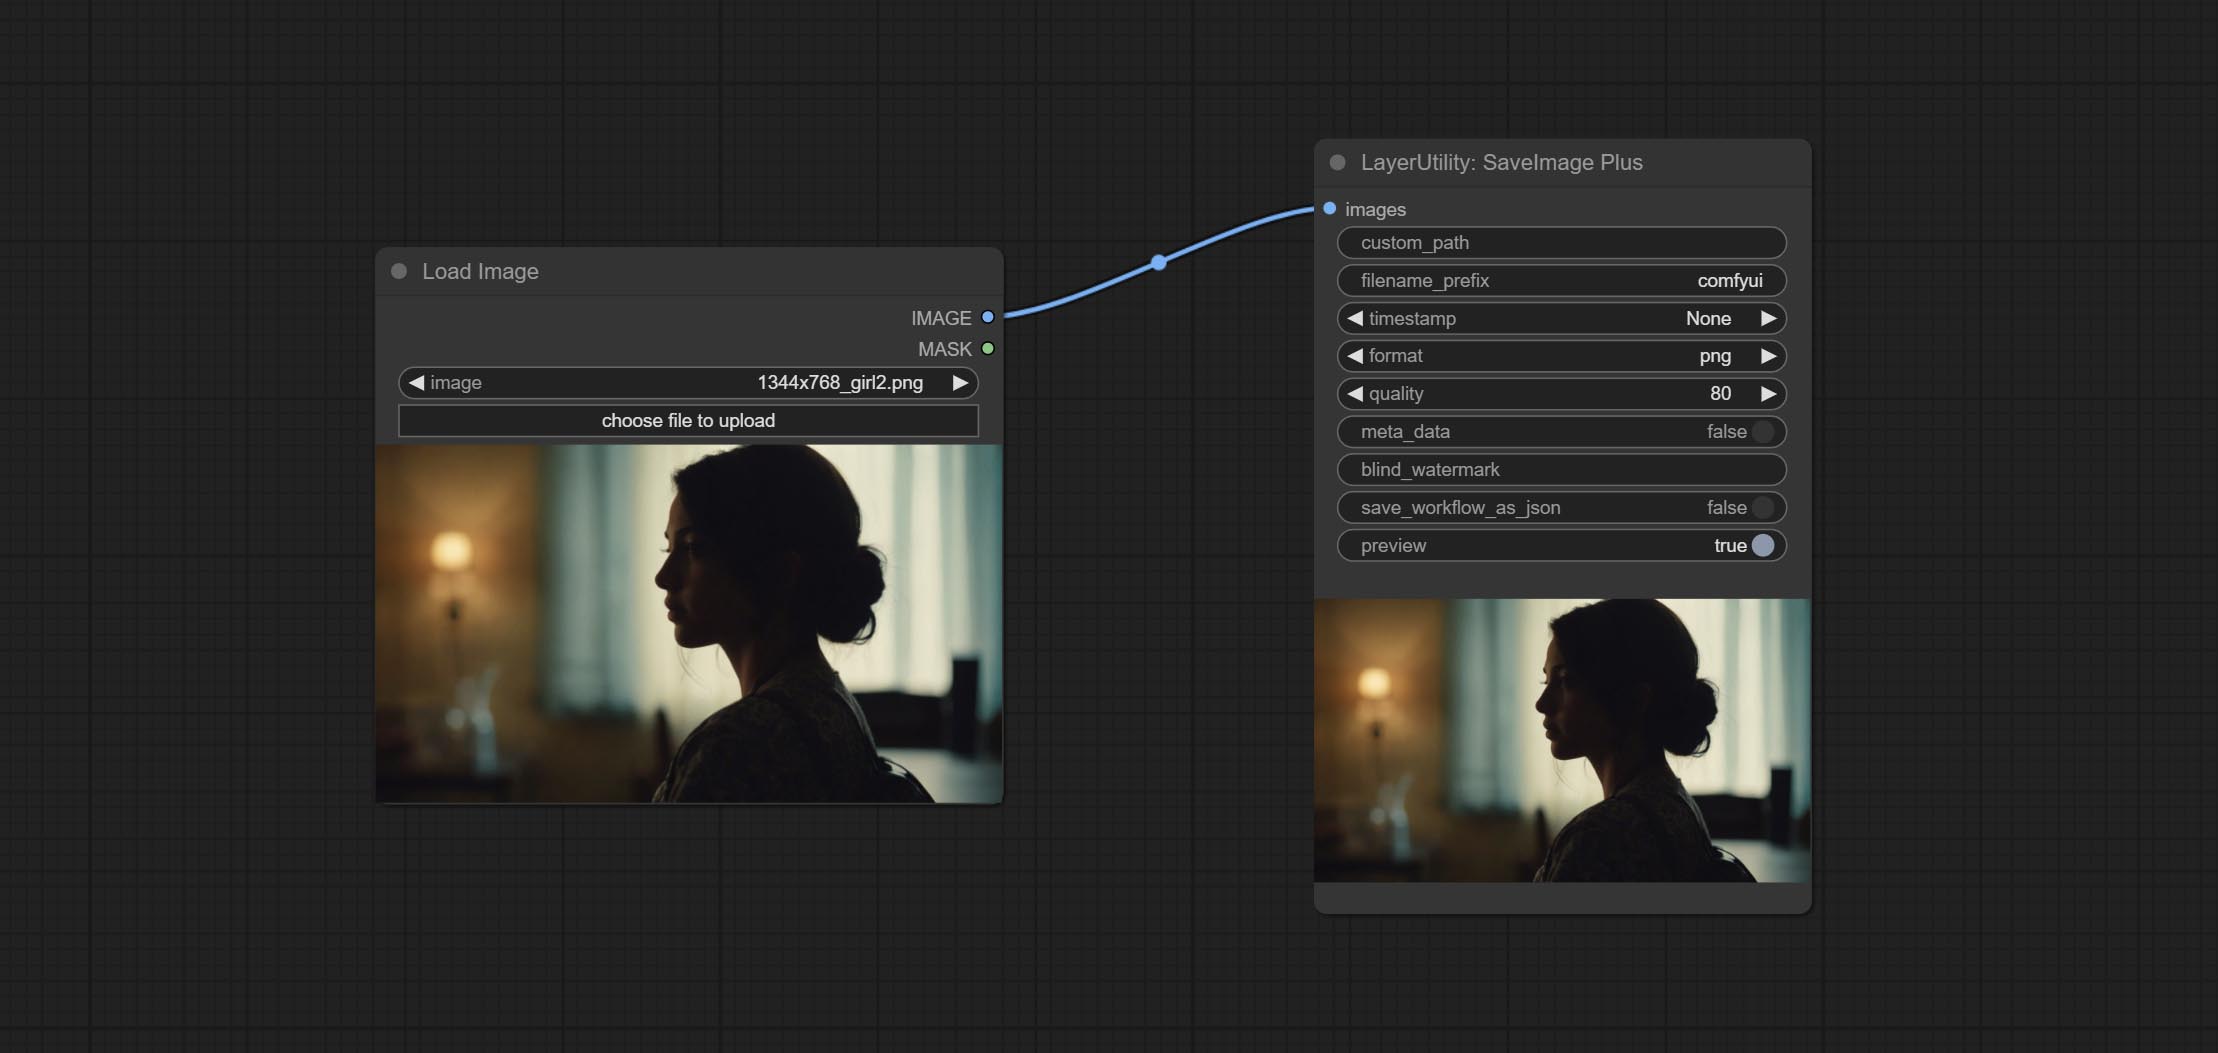
Enhanced save image node. You can customize the directory where the picture is saved, add a timestamp to the file name, select the save format, set the image compression rate, set whether to save the workflow, and optionally add invisible watermarks to the picture. (Add information in a way that is invisible to the naked eye, and use the ShowBlindWaterMark node to decode the watermark). Optionally output the json file of the workflow.
Node Options: 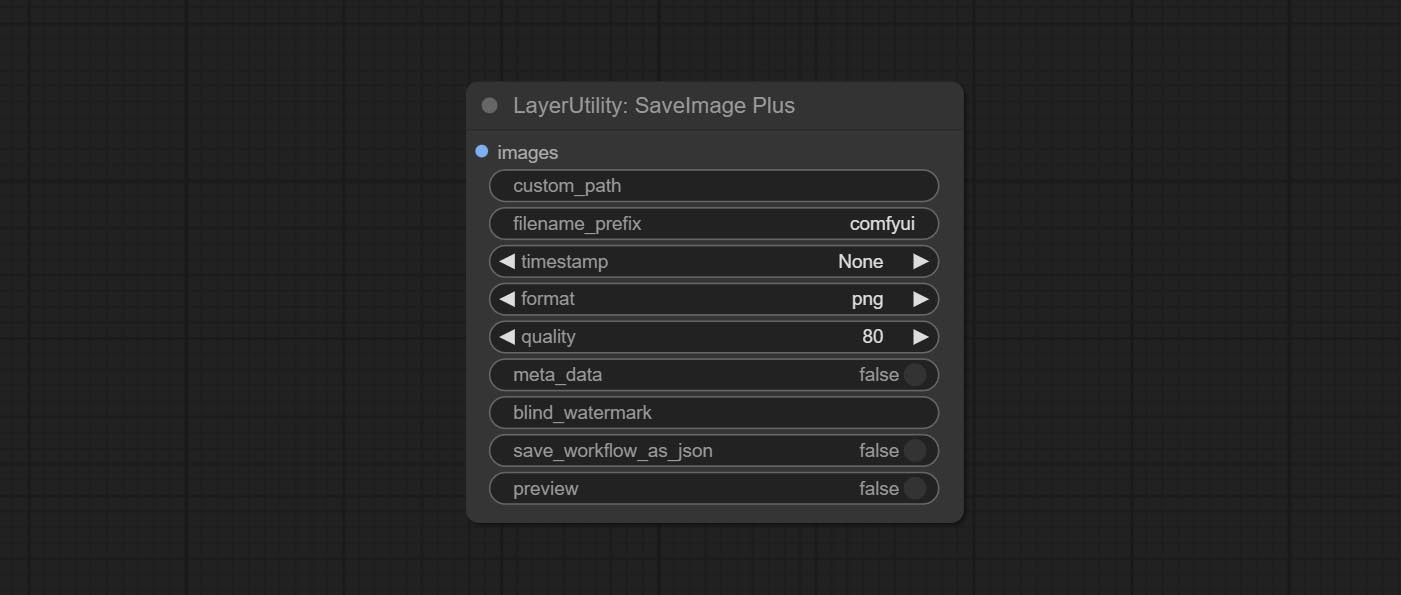
png and jpg . Note that only png format is supported for RGBA mode pictures.ShowBlindWaterMark node can decode watermarks. Note that pictures with watermarks are recommended to be saved in png format, and lower-quality jpg format will cause watermark information to be lost. * Enter %date for the current date (YY-mm-dd) and %time for the current time (HH-MM-SS). You can enter / for subdirectories. For example, %date/name_%tiem will output the image to the YY-mm-dd folder, with name_HH-MM-SS as the file name prefix.
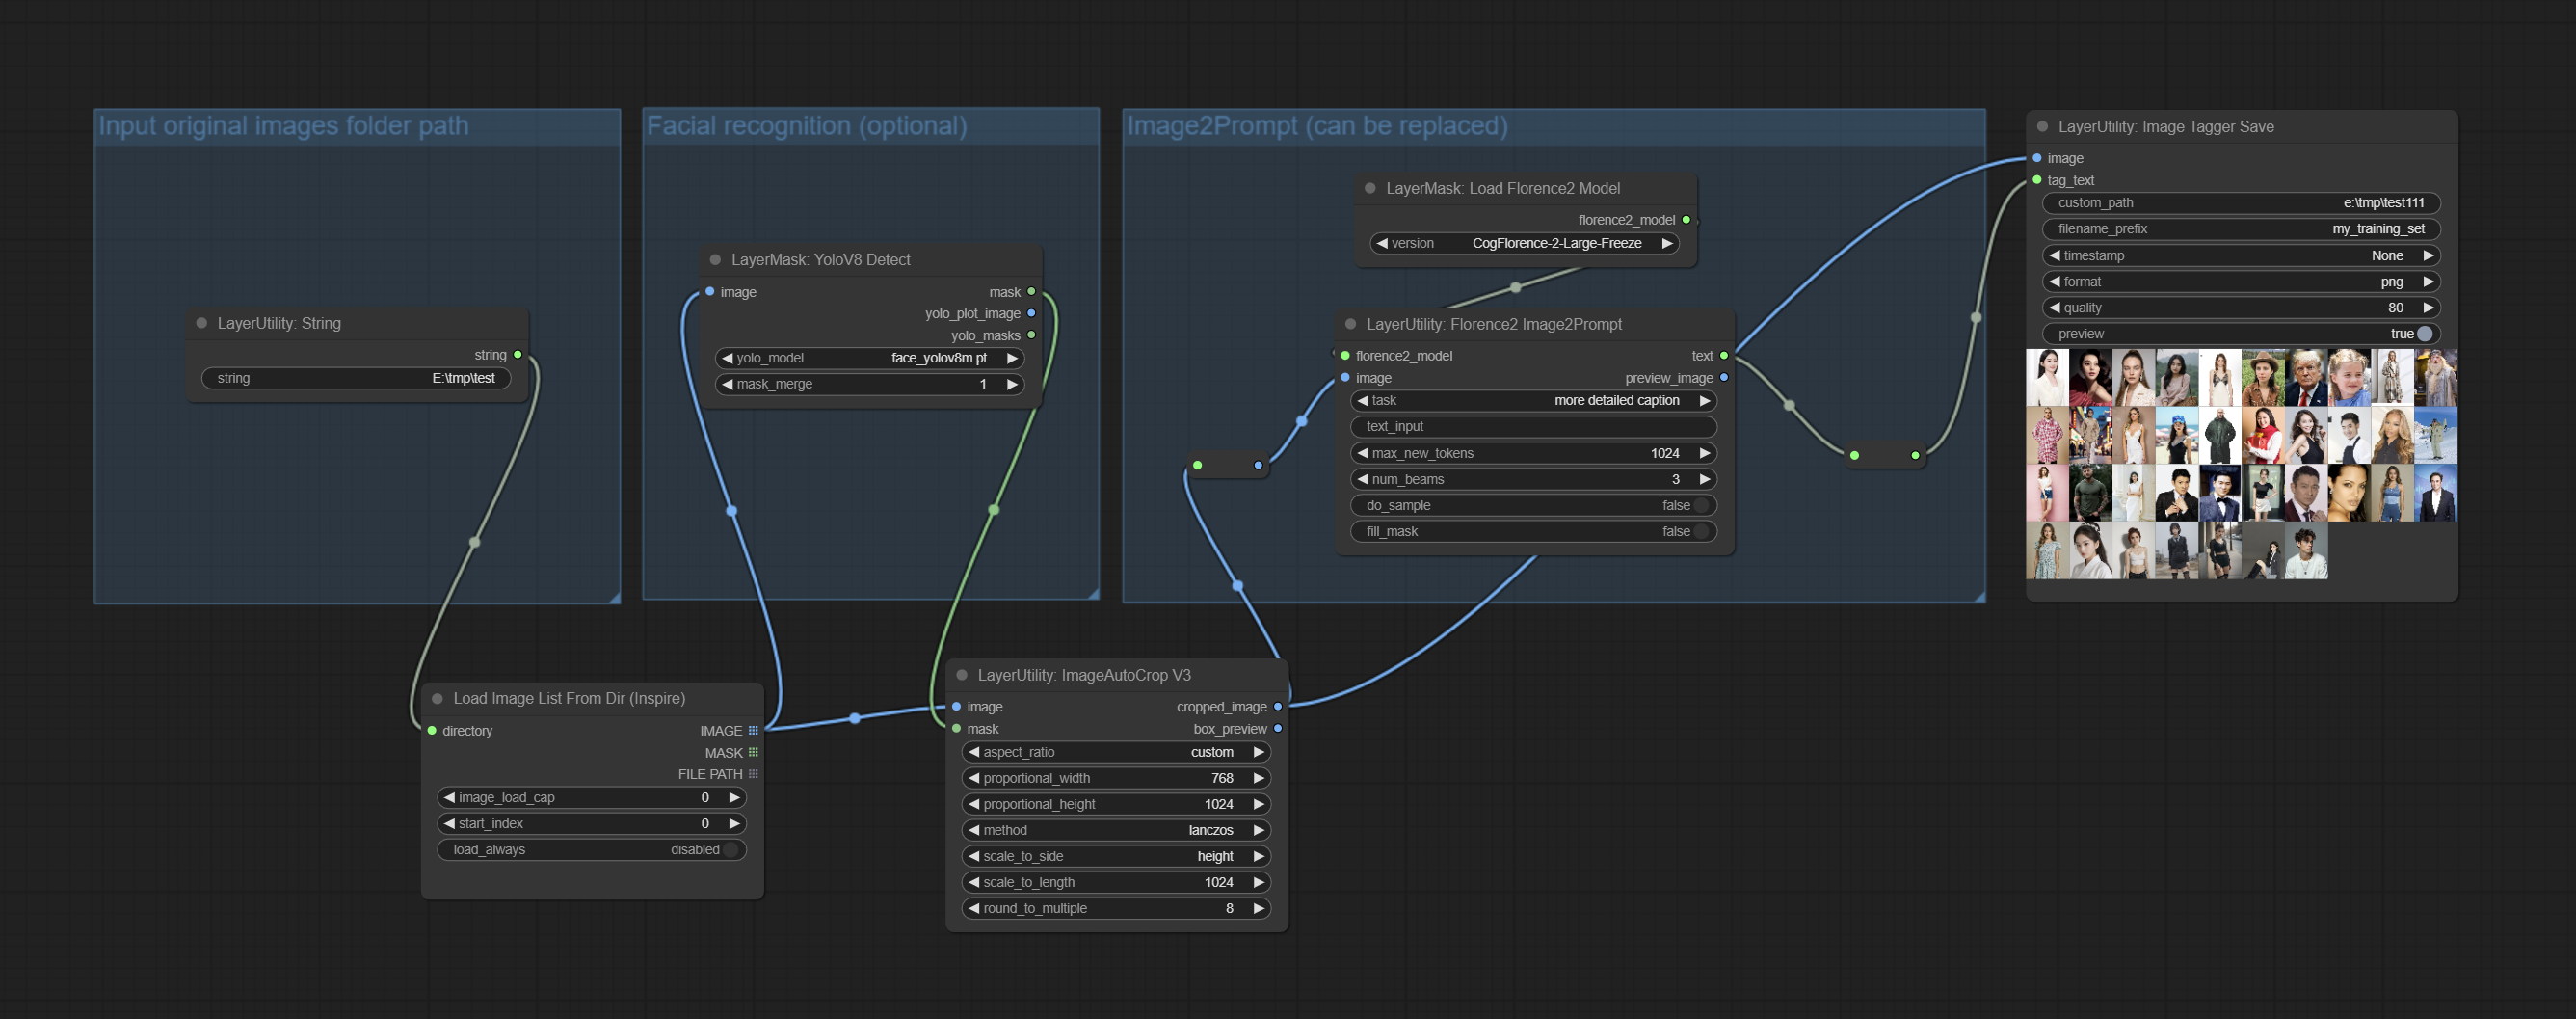
The node used to save the training set images and their text labels, where the image files and text label files have the same file name. Customizable directory for saving images, adding timestamps to file names, selecting save formats, and setting image compression rates. *The workflow image_tagger_stave.exe is located in the workflow directory.
Node Options: 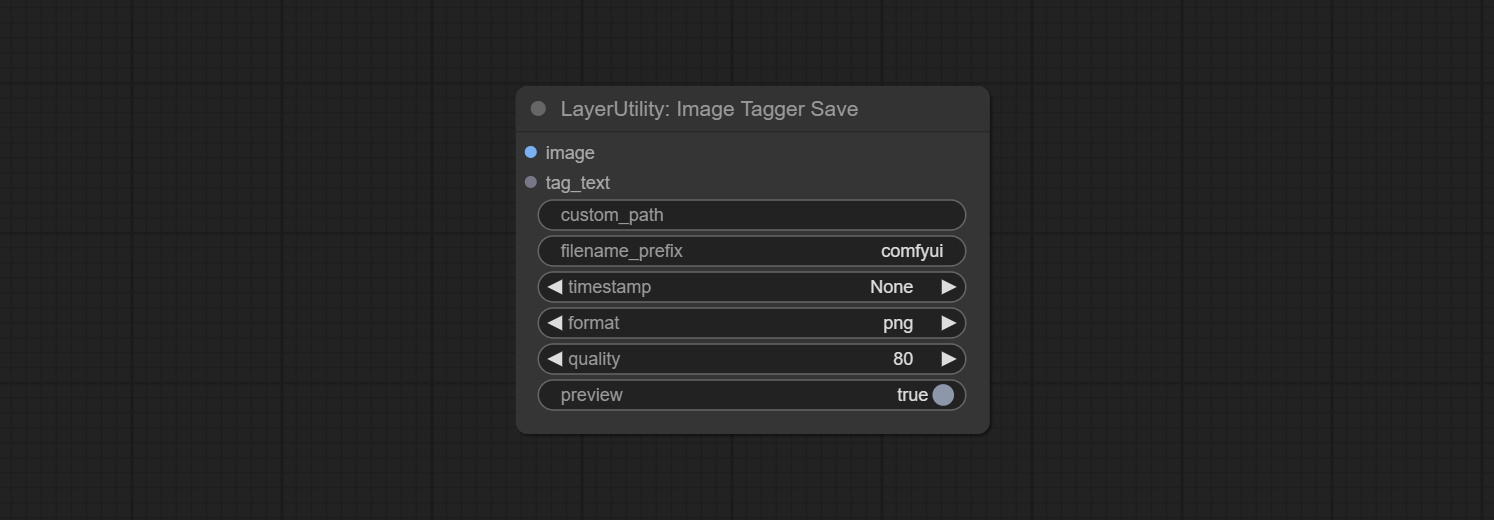
png and jpg . Note that only png format is supported for RGBA mode pictures. * Enter %date for the current date (YY-mm-dd) and %time for the current time (HH-MM-SS). You can enter / for subdirectories. For example, %date/name_%tiem will output the image to the YY-mm-dd folder, with name_HH-MM-SS as the file name prefix.
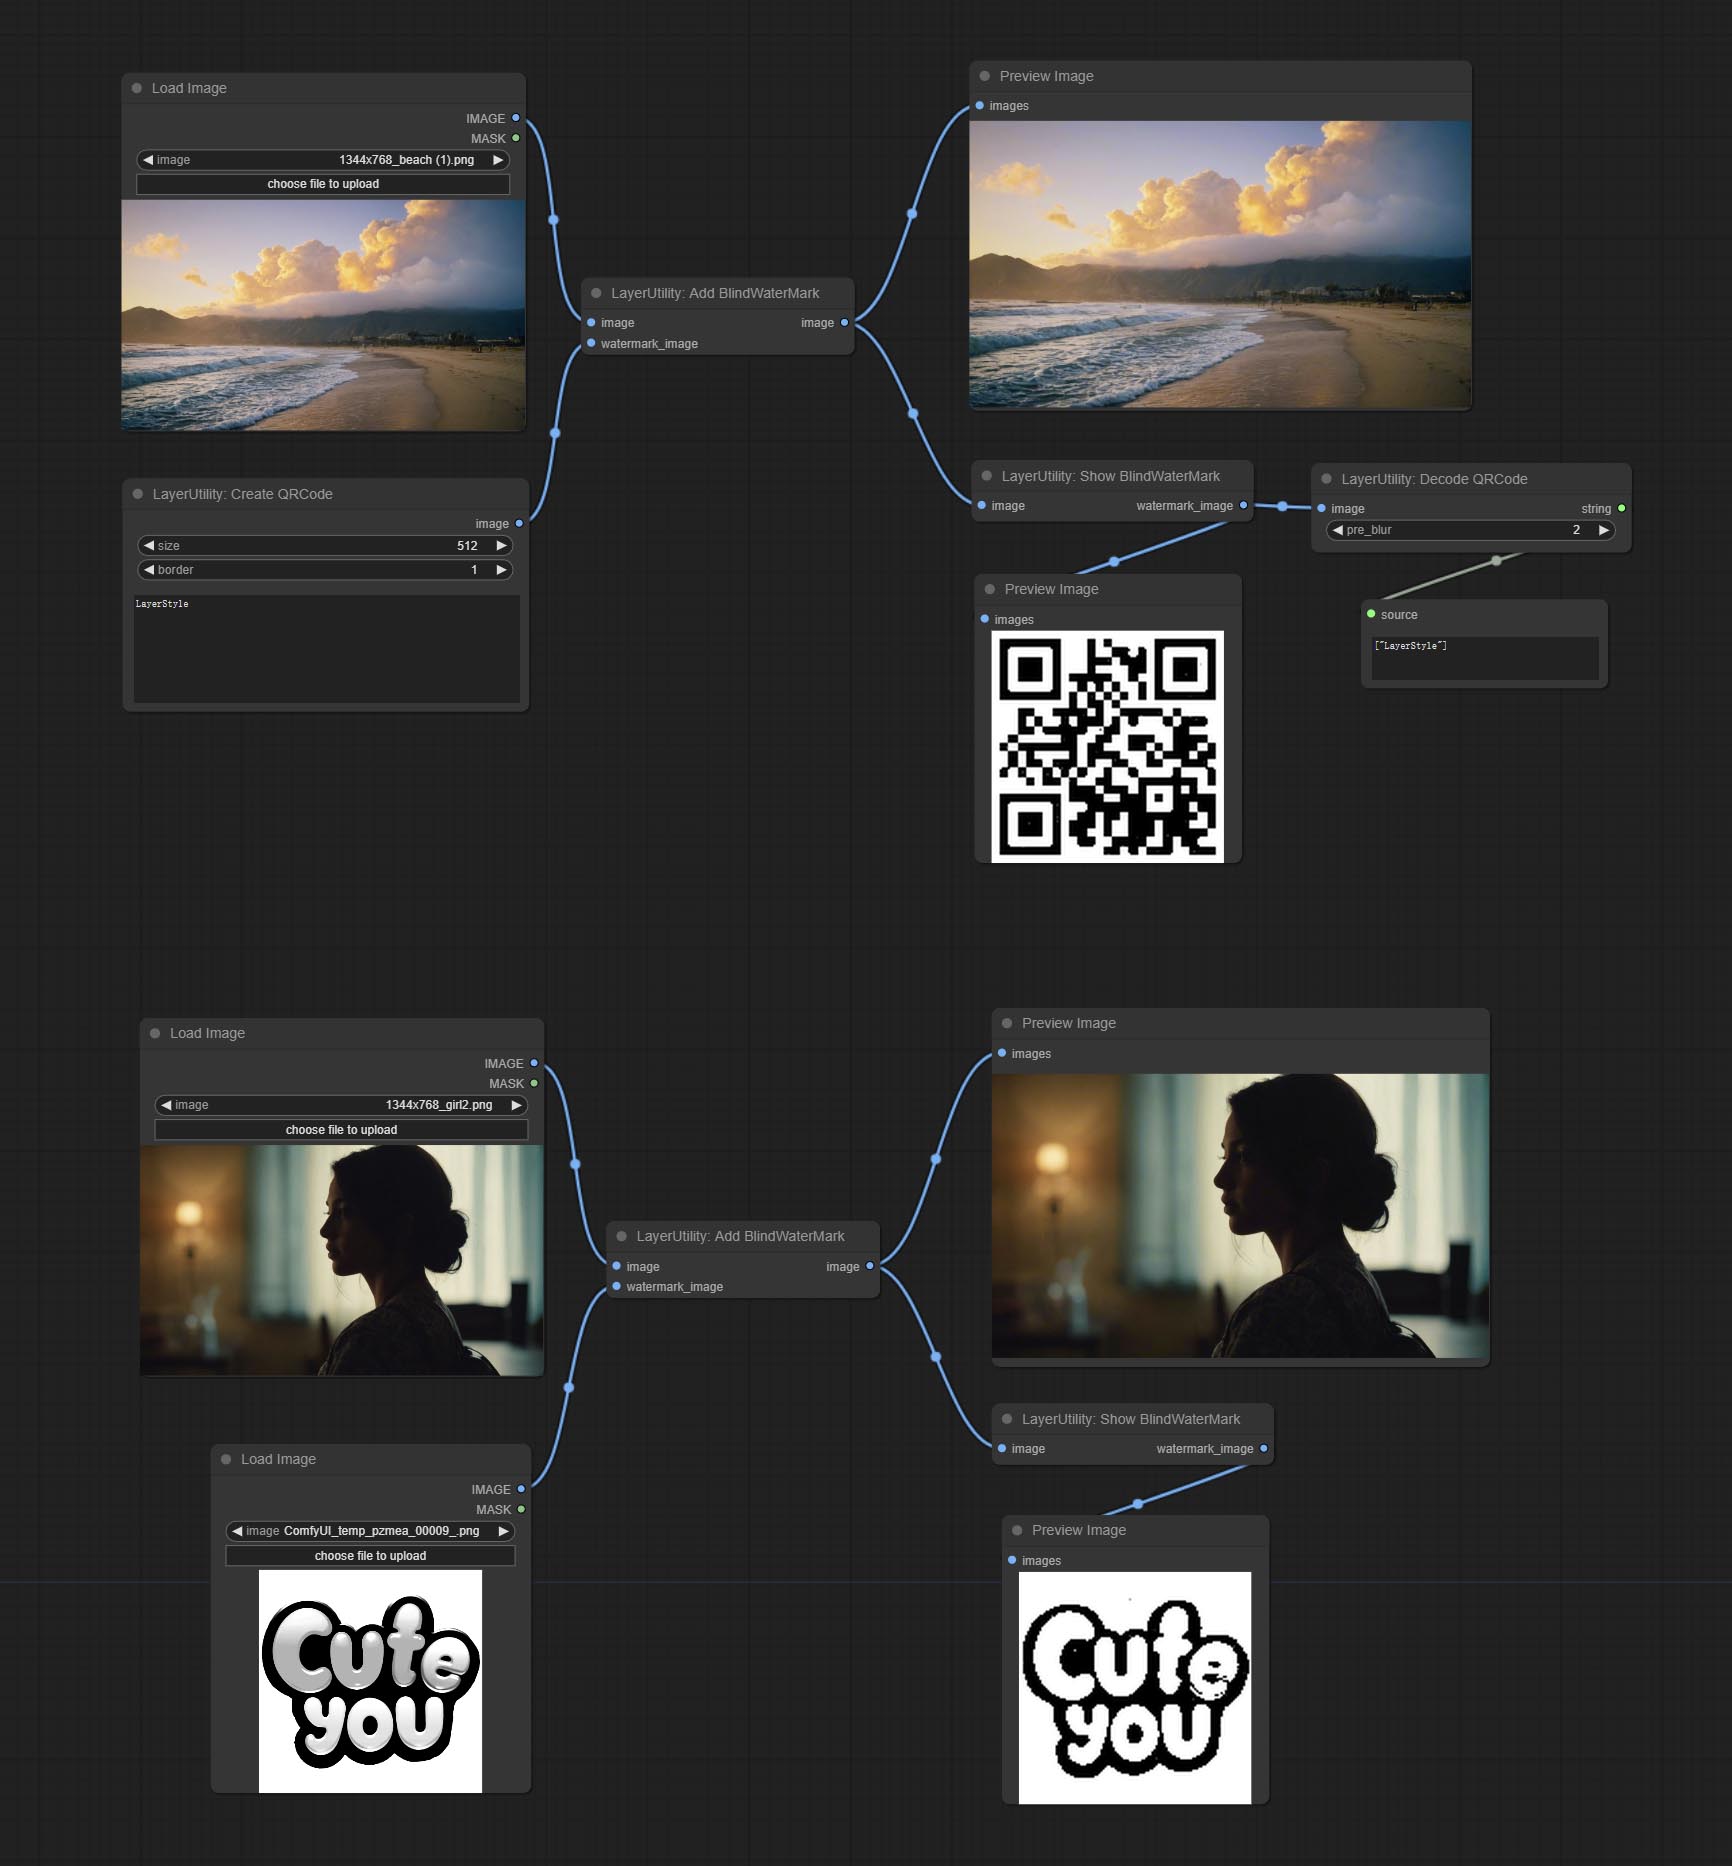
Add an invisible watermark to a picture. Add the watermark image in a way that is invisible to the naked eye, and use the ShowBlindWaterMark node to decode the watermark.
Node Options: 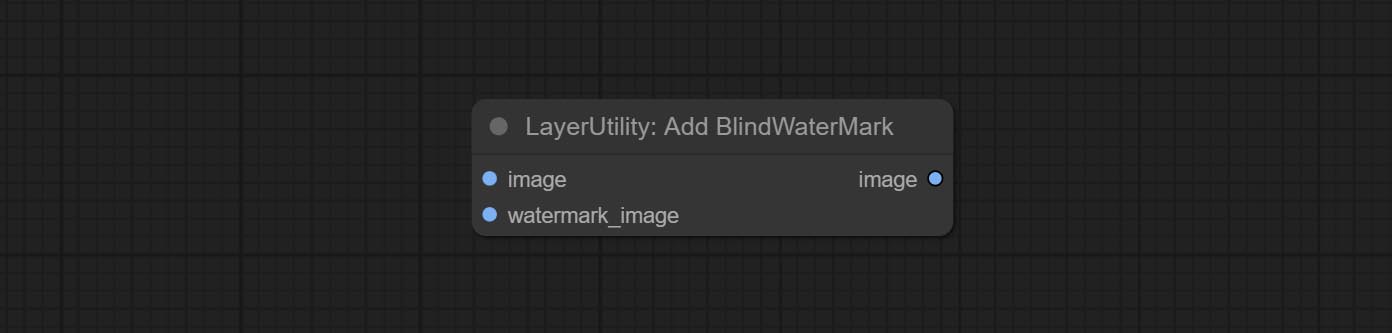
Decoding the invisible watermark added to the AddBlindWaterMark and SaveImagePlus nodes. 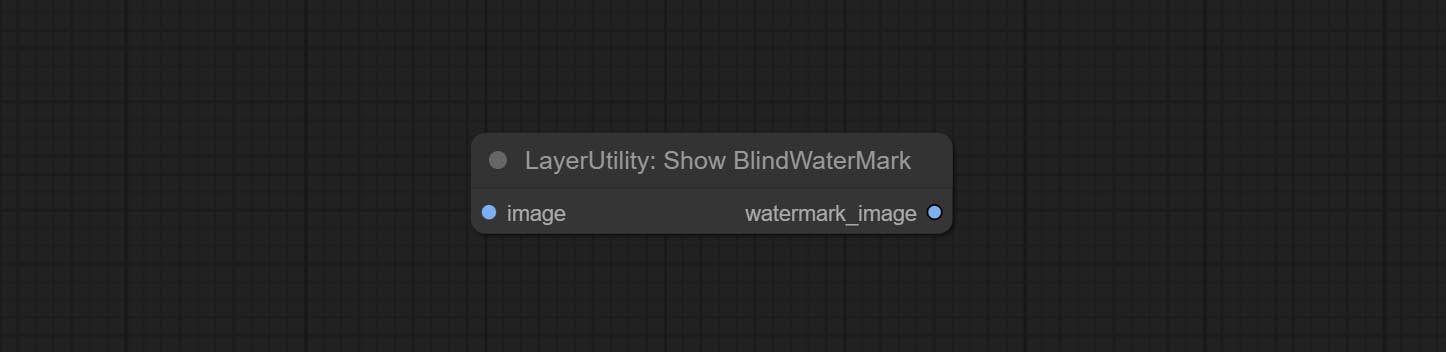
Generate a square QR code picture.
Node Options:
Decoding the QR code.
Node Options: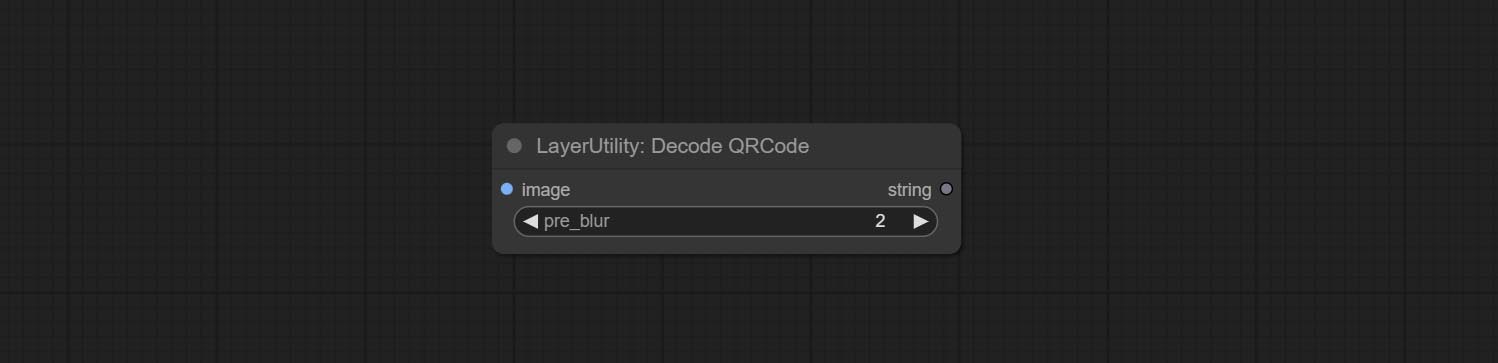
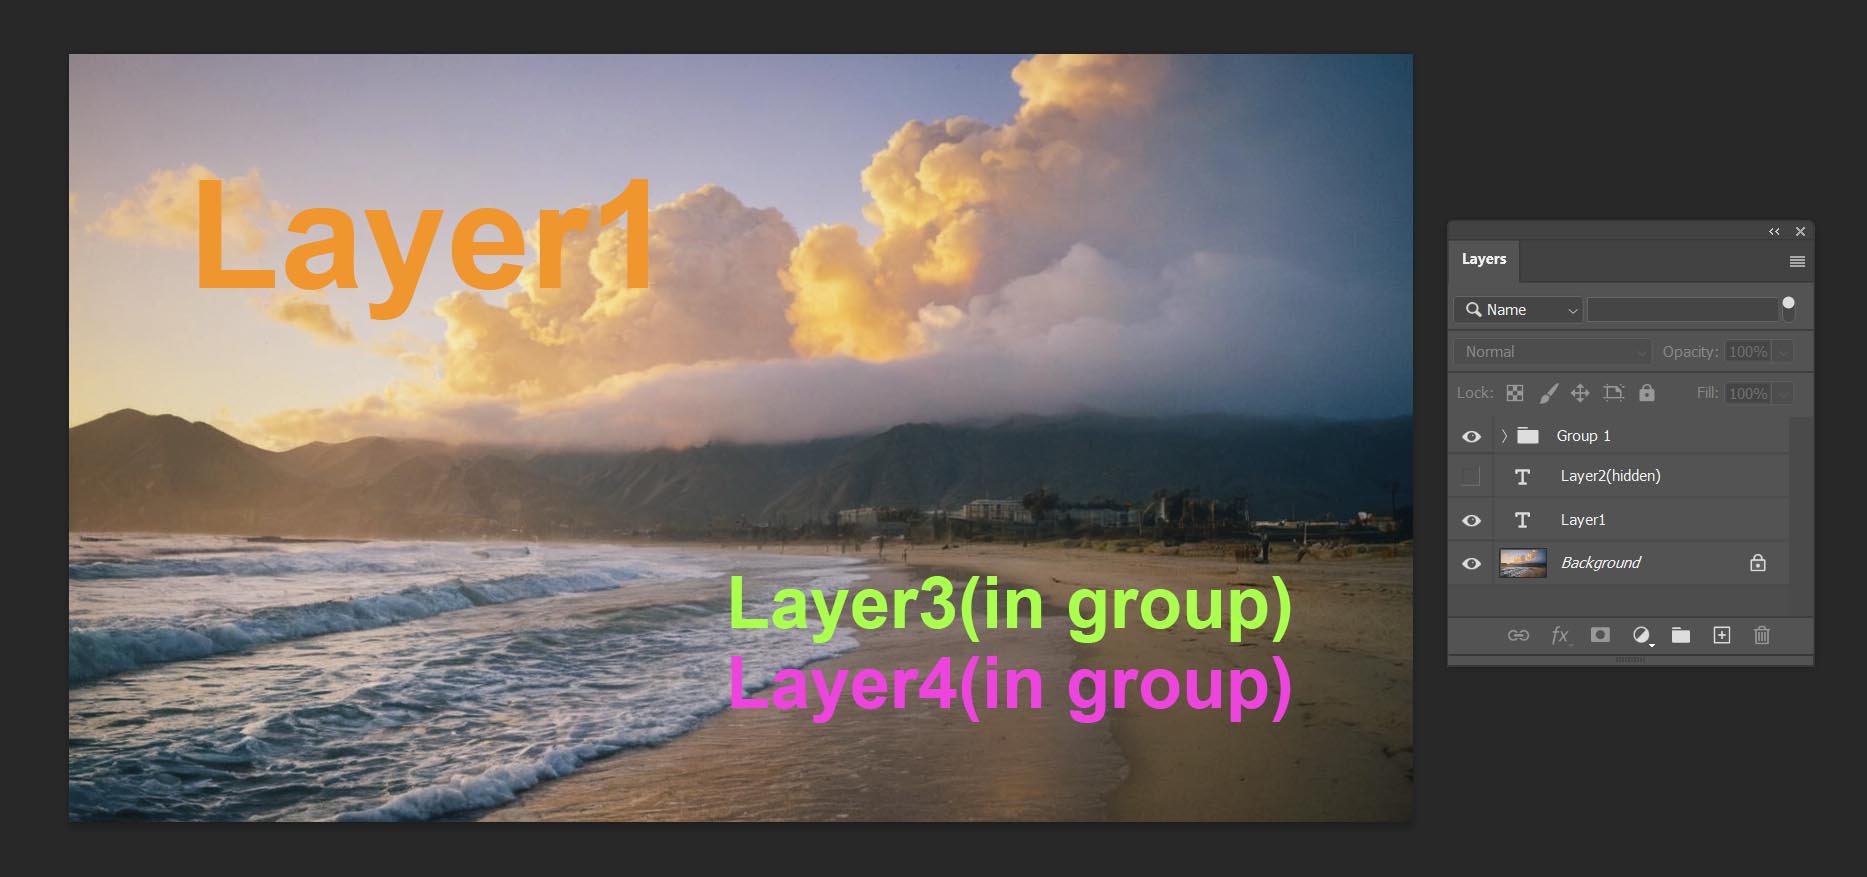
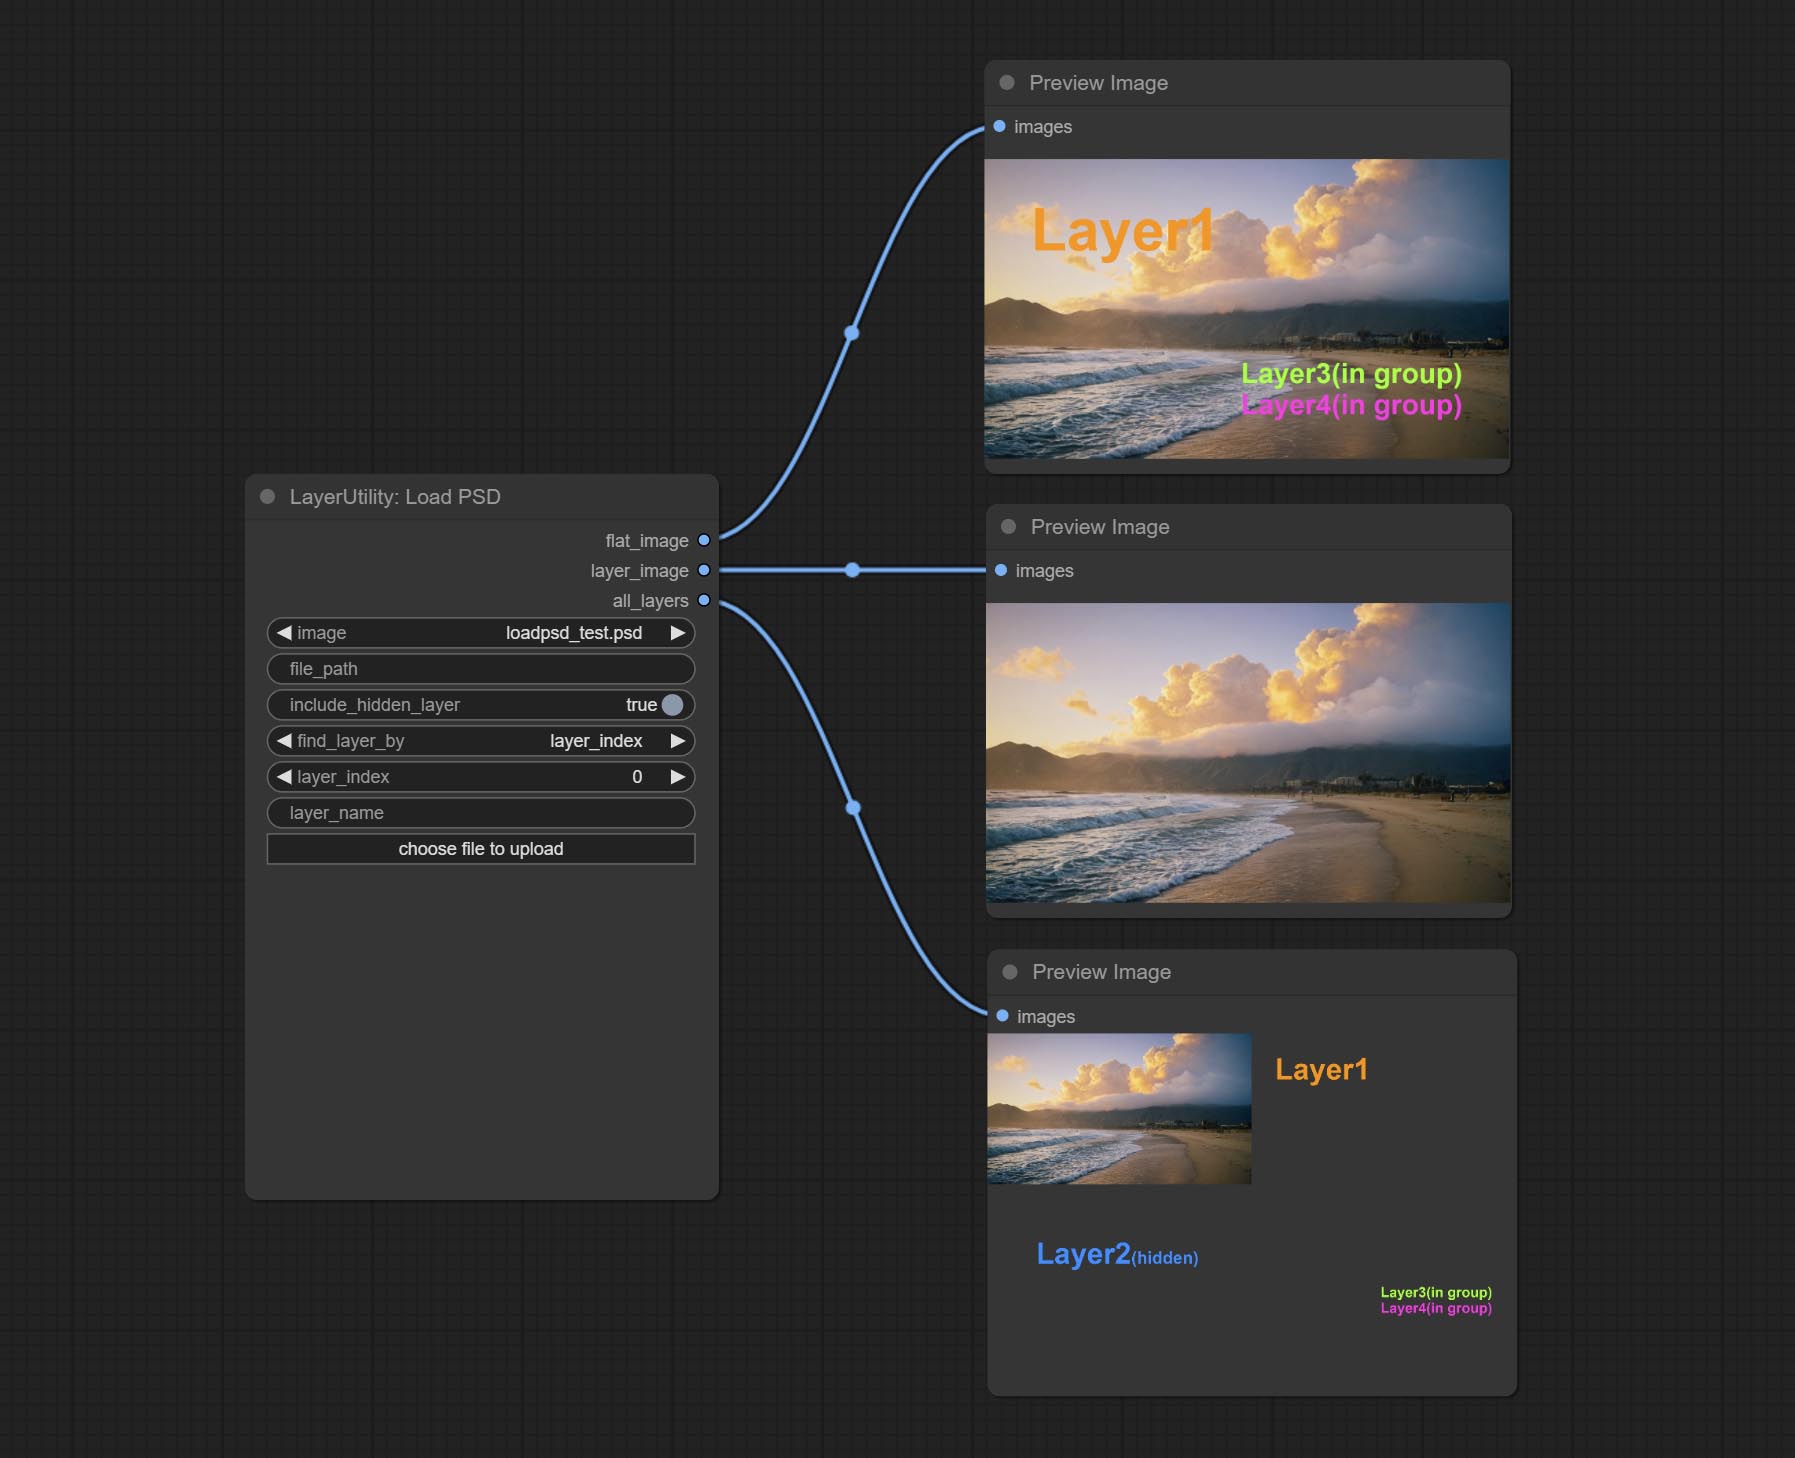
Load the PSD format file and export the layers. Note that this node requires the installation of the psd_tools dependency package, If error occurs during the installation of psd_tool, such as ModuleNotFoundError: No module named 'docopt' , please download docopt's whl and manual install it.
Node Options: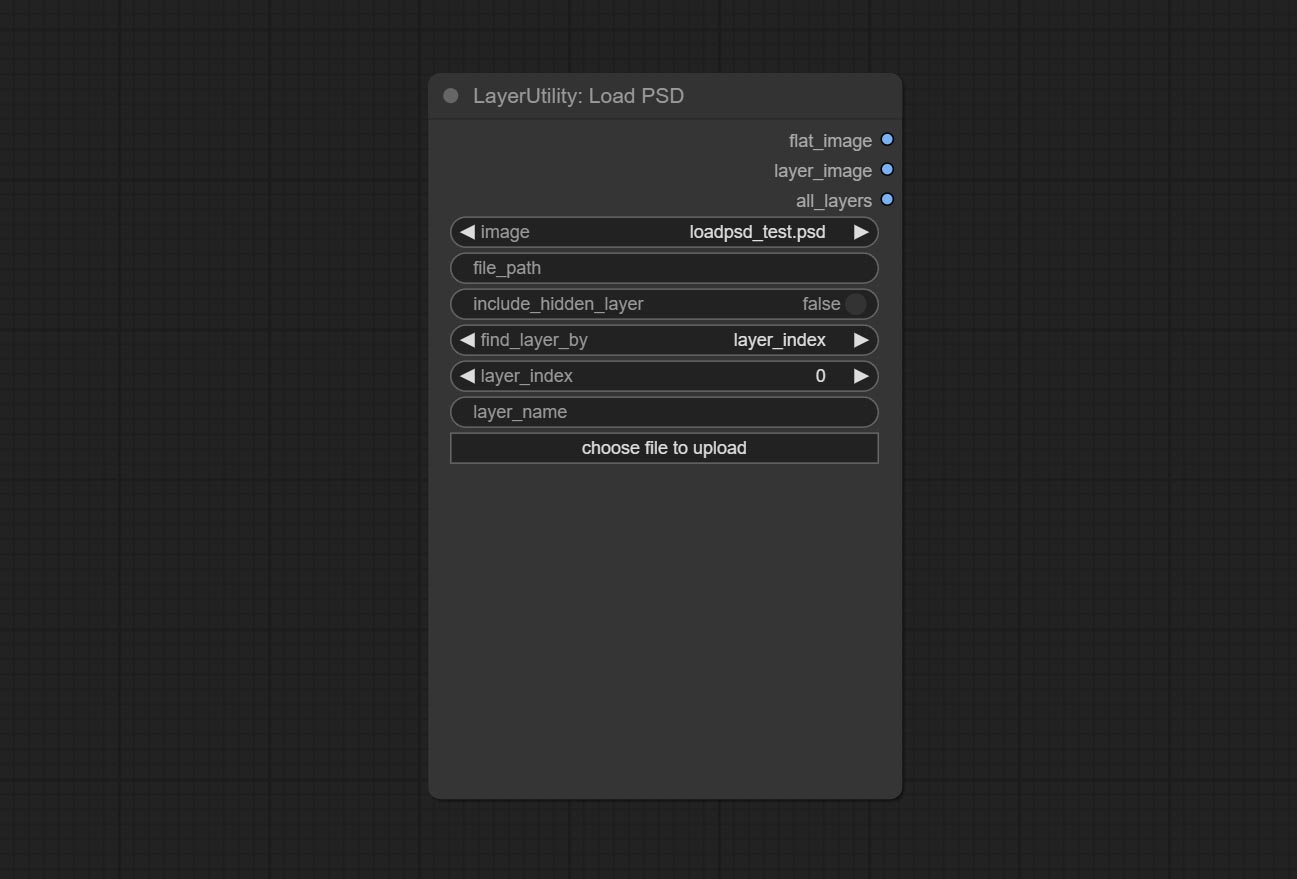
ComfyUI/input , where previously loaded psd images can be selected.Outputs: flat_image: PSD preview image. layer_iamge: Find the layer output. all_layers: Batch images containing all layers.
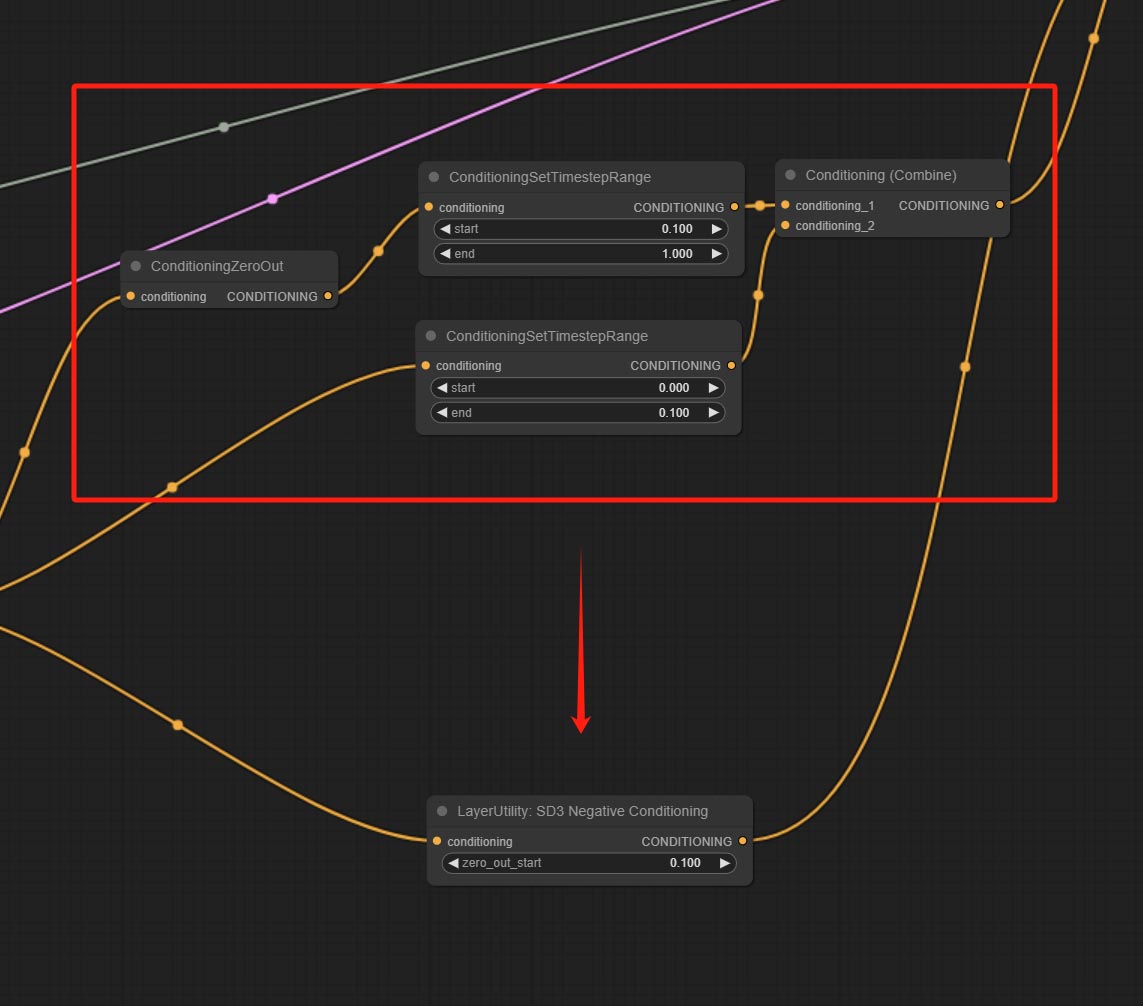
Encapsulate the four nodes of Negative Condition in SD3 into a separate node.
Node Options: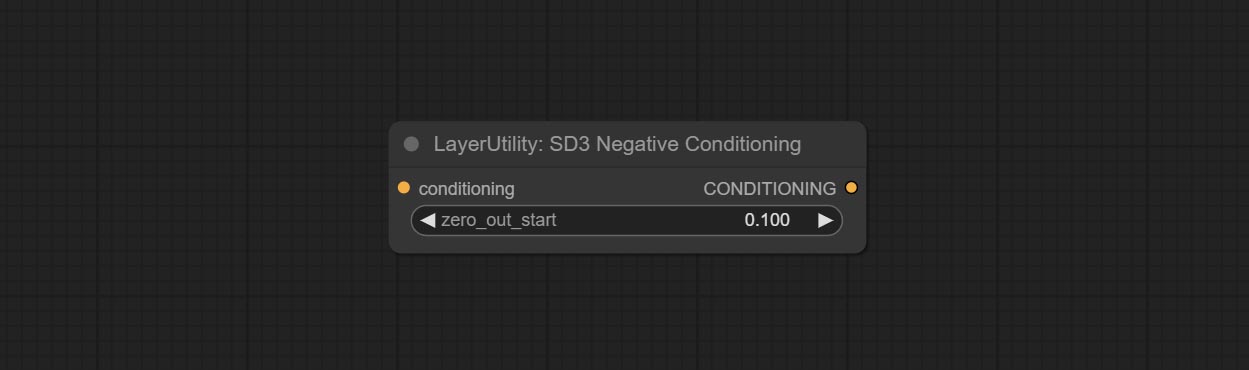
Reproduction of Photoshop's layer Style - Blend If function. This node outputs a mask for layer composition on the ImageBlend or ImageBlendAdvance nodes. mask is an optional input, and if you enter a mask here, it will act on the output. 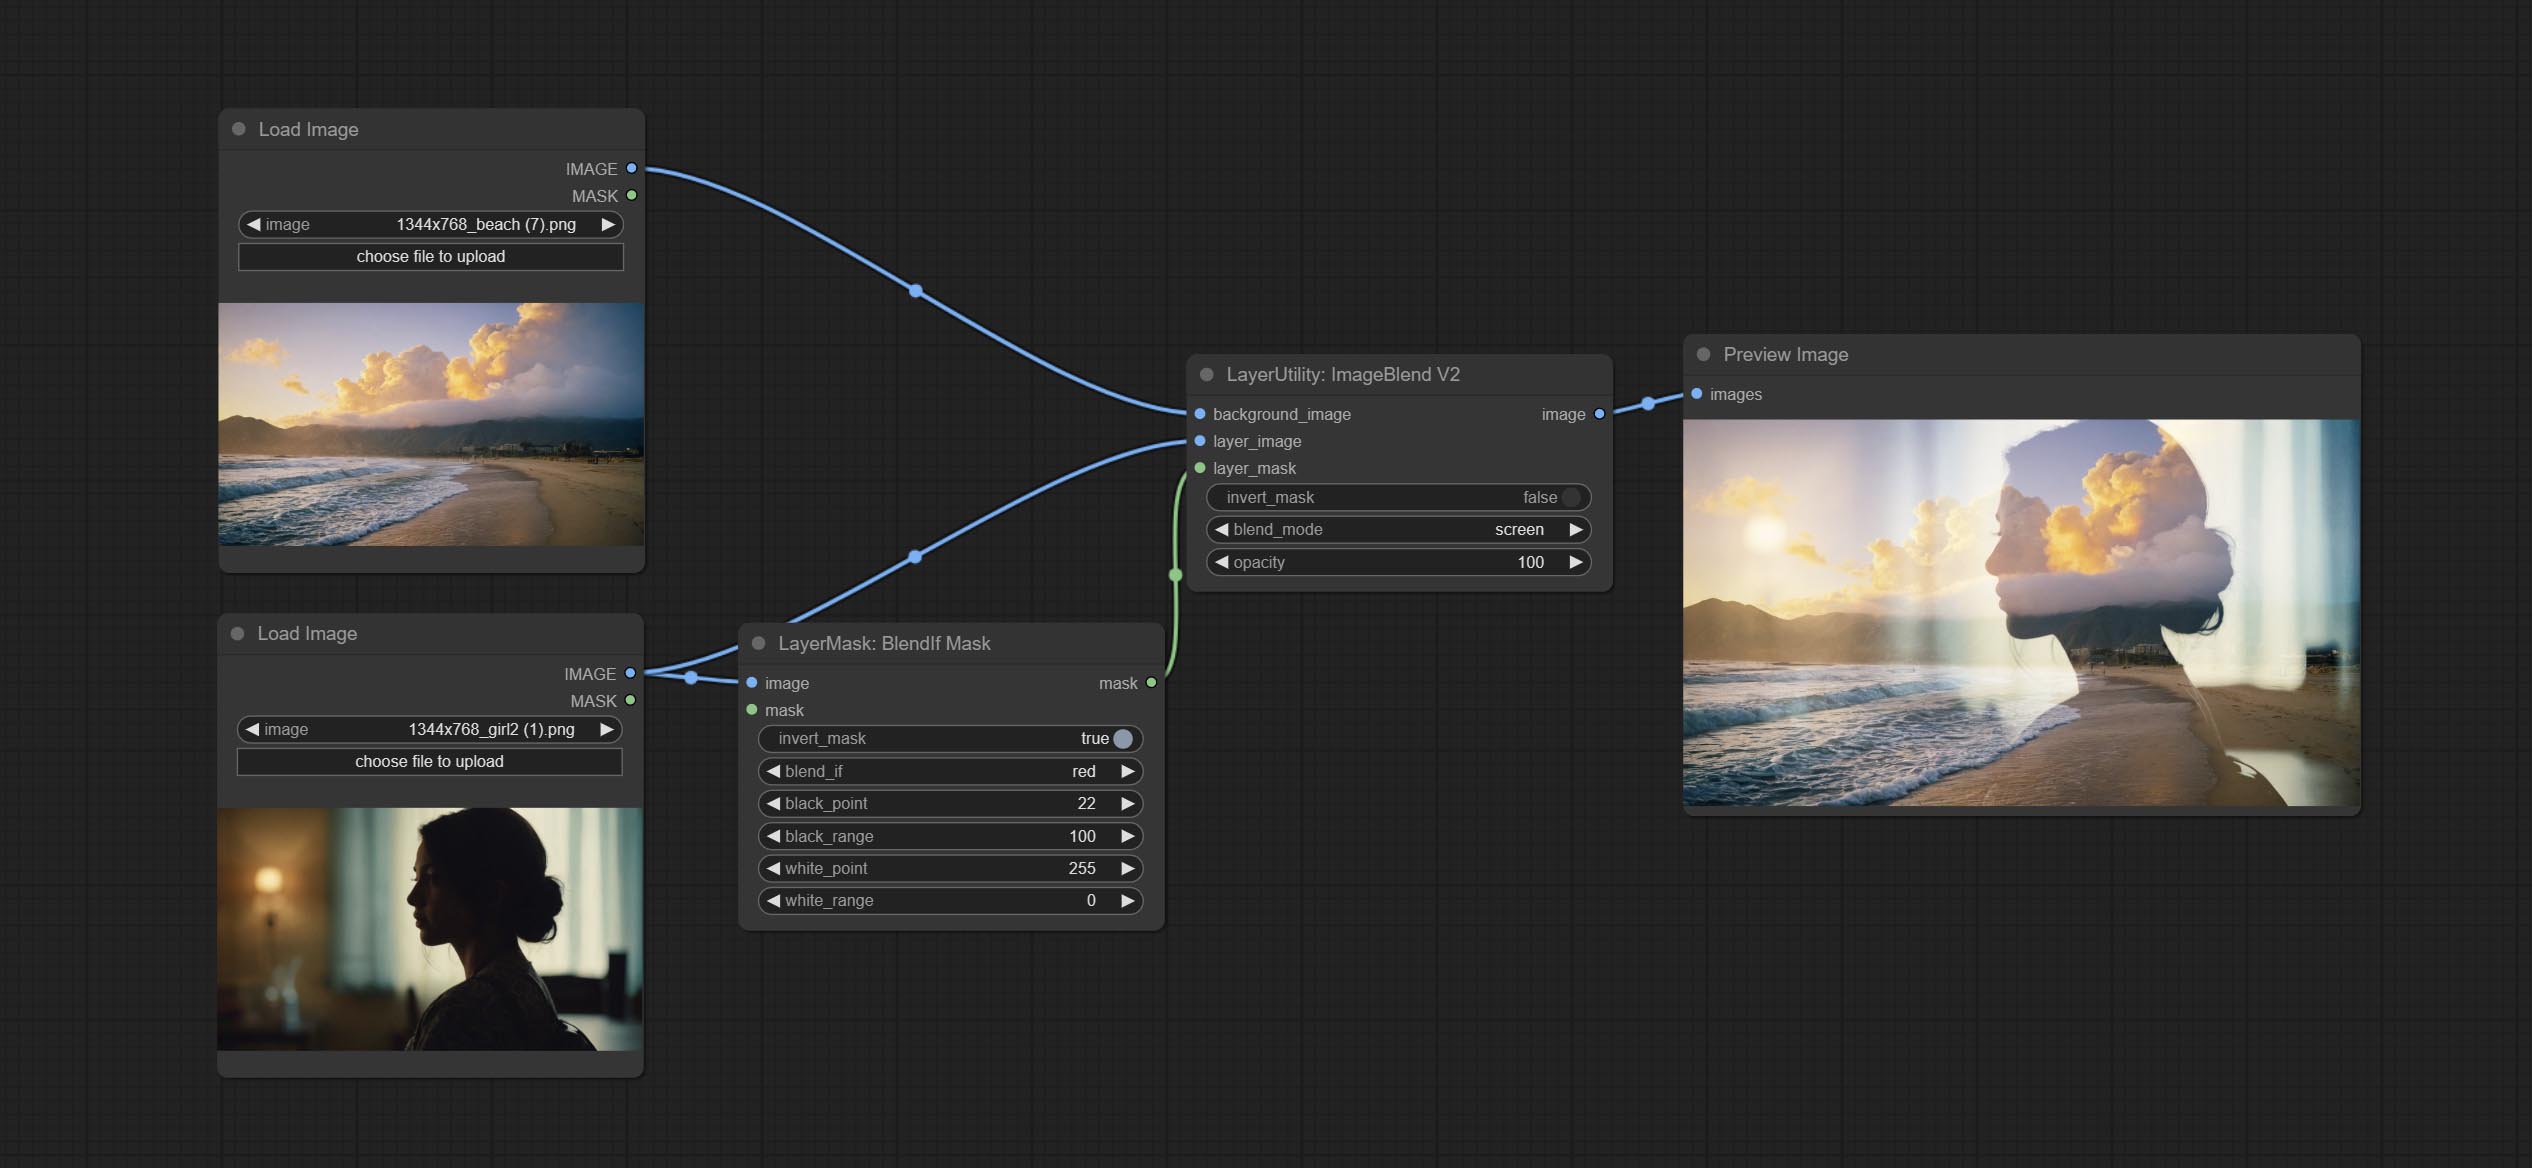
Node Options: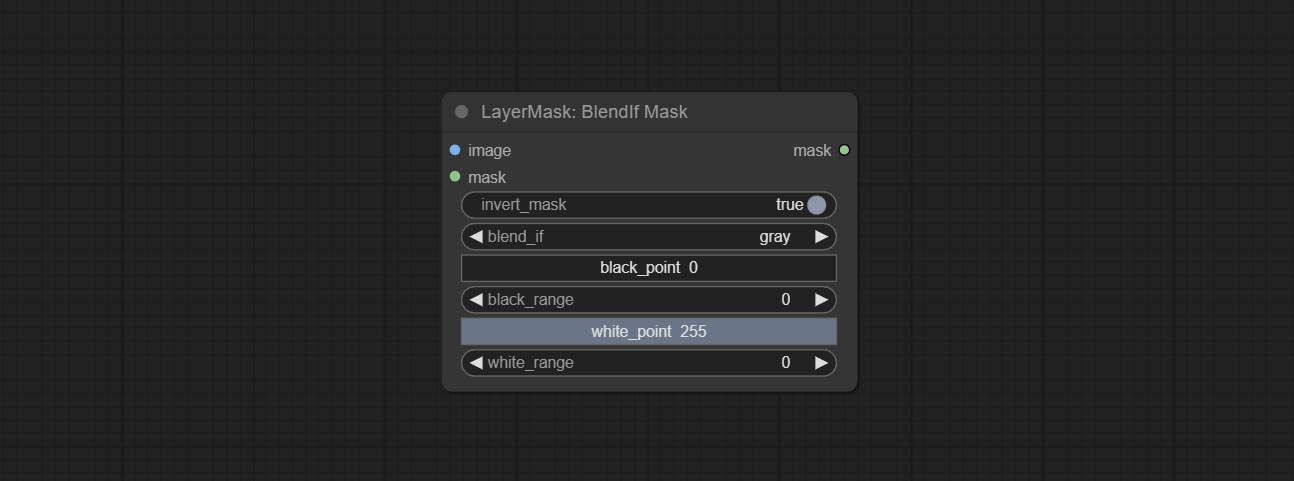
gray , red , green , and blue . Detect the area where the mask is located and output its position and size. 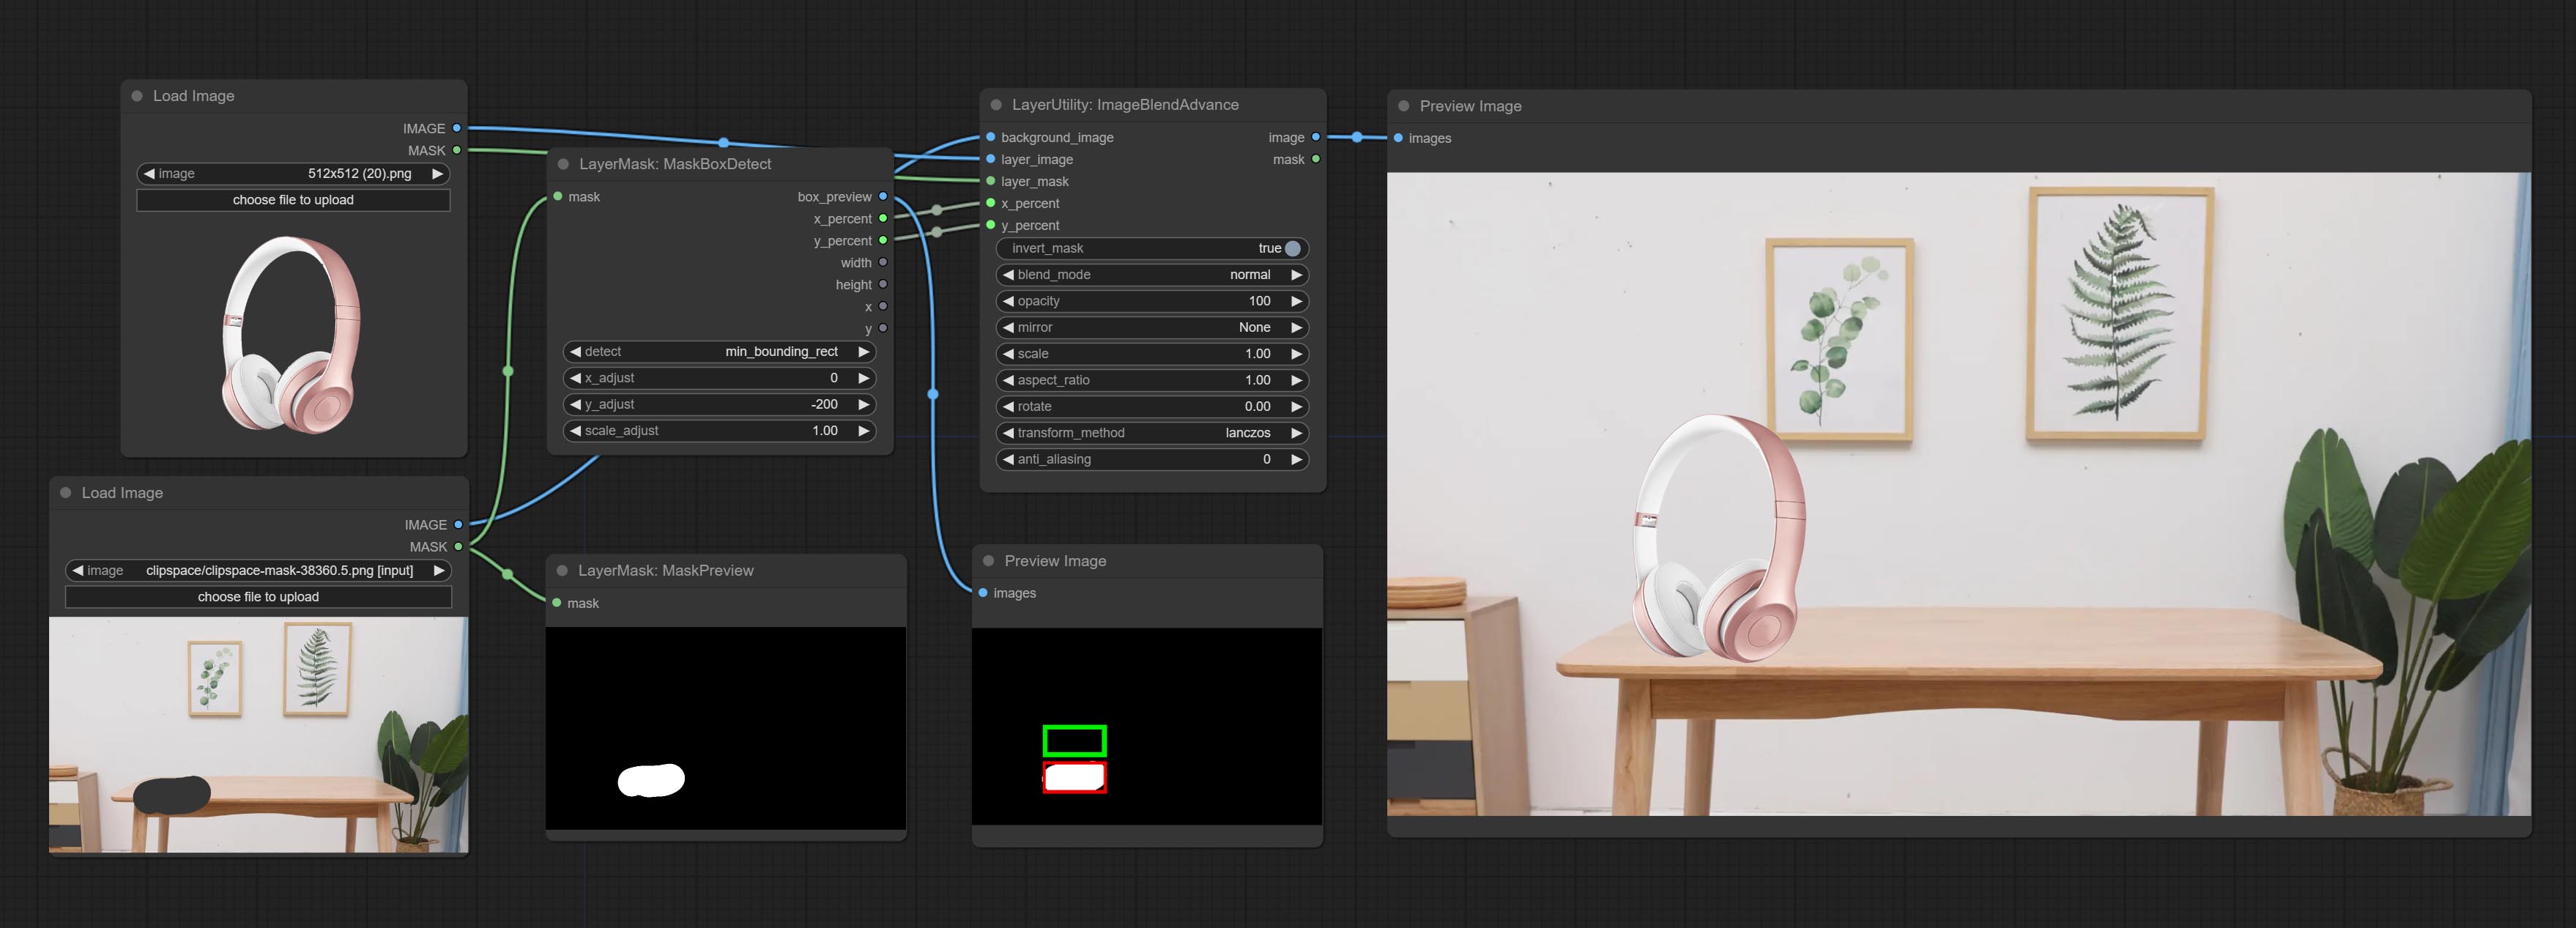
Node options: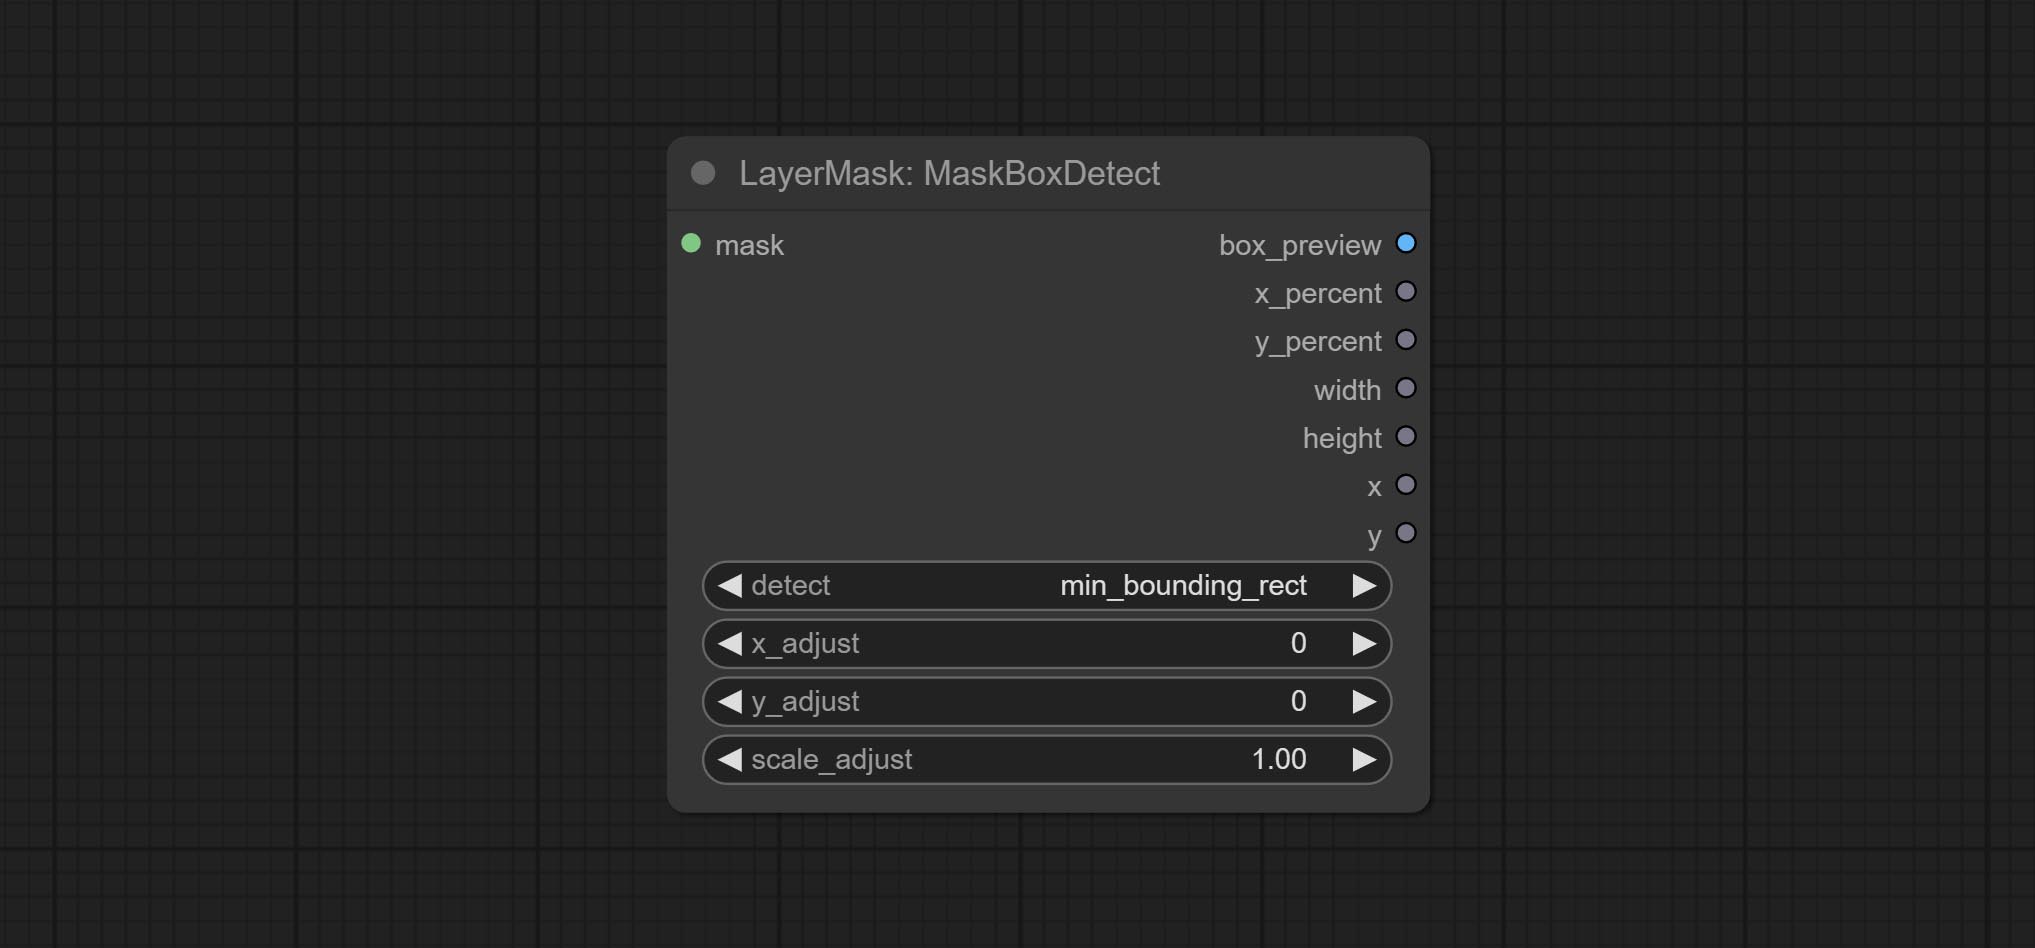
min_bounding_rect is the minimum bounding rectangle of block shape, max_inscribed_rect is the maximum inscribed rectangle of block shape, and mask-area is the effective area for masking pixels.Sortir:
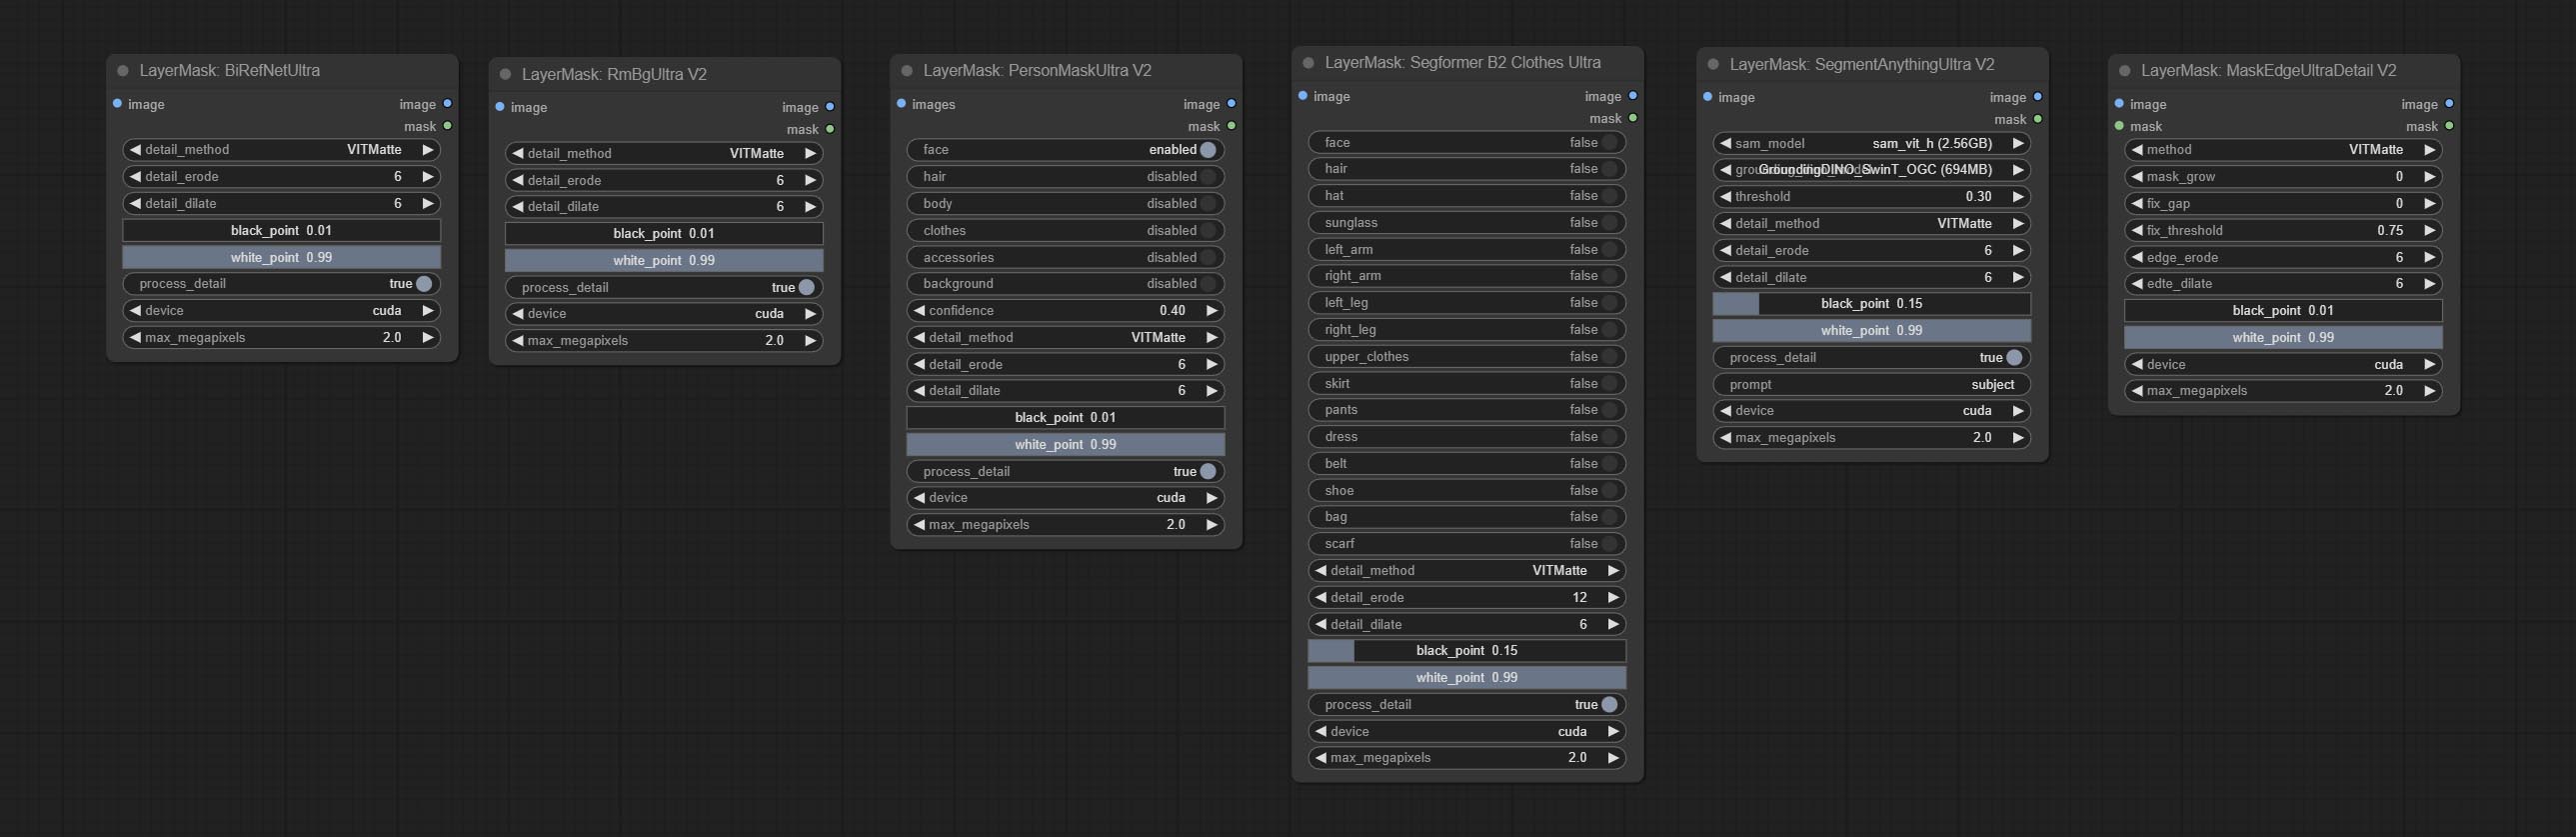
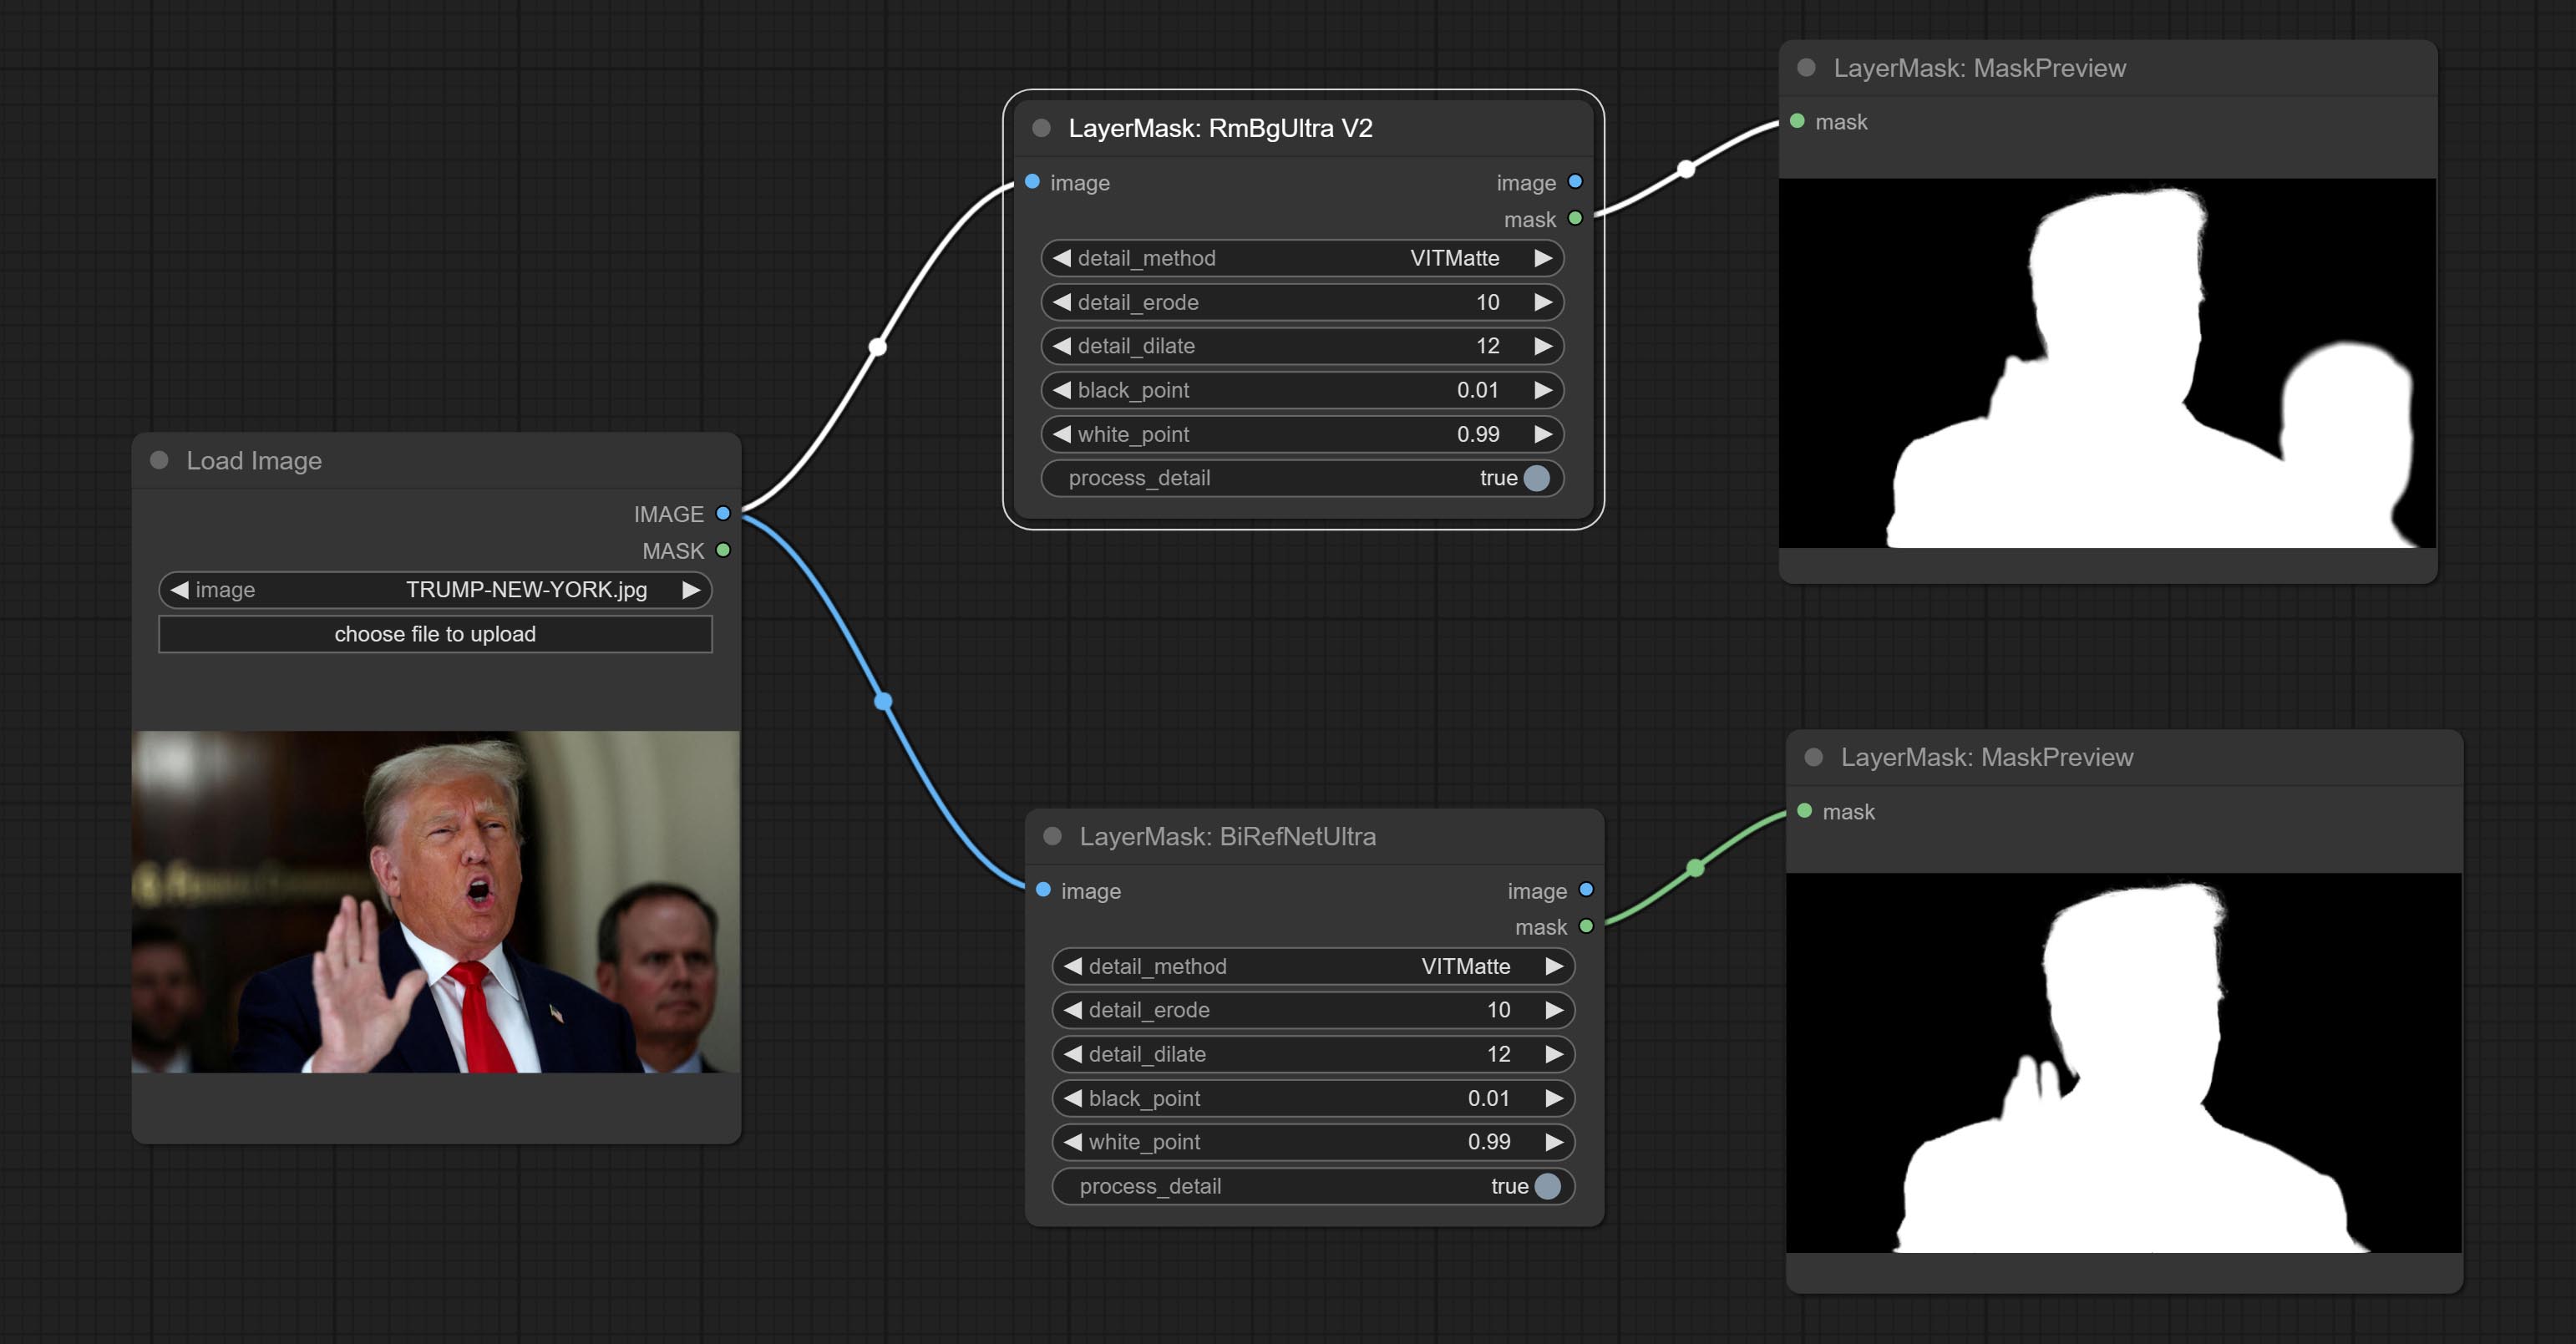
Nodes that use ultra fine edge masking processing methods, the latest version of nodes includes: SegmentAnythingUltraV2, RmBgUltraV2, BiRefNetUltra, PersonMaskUltraV2, SegformerB2ClothesUltra and MaskEdgeUltraDetailV2. There are three edge processing methods for these nodes:
PyMatting optimizes the edges of the mask by using a closed form matching to mask trimap.GuideFilter uses opencv guidedfilter to feather edges based on color similarity, and performs best when edges have strong color separation.VitMatte uses the transformer vit model for high-quality edge processing, preserving edge details and even generating semi transparent masks. Note: When running for the first time, you need to download the vitmate model file and wait for the automatic download to complete. If the download cannot be completed, you can run the command huggingface-cli download hustvl/vitmatte-small-composition-1k to manually download. After successfully downloading the model, you can use VITMatte(local) without accessing the network.device set whether to use CUDA for vitimate operations, which is about 5 times faster than CPU. max_megapixels set the maximum image size for vitmate operation, and oversized images will be reduced in size. For 16G VRAM, it is recommended to set it to 3. *Download all model files from BaiduNetdisk or Huggingface to ComfyUI/models/vitmatte folder.
The following figure is an example of the difference in output between three methods. 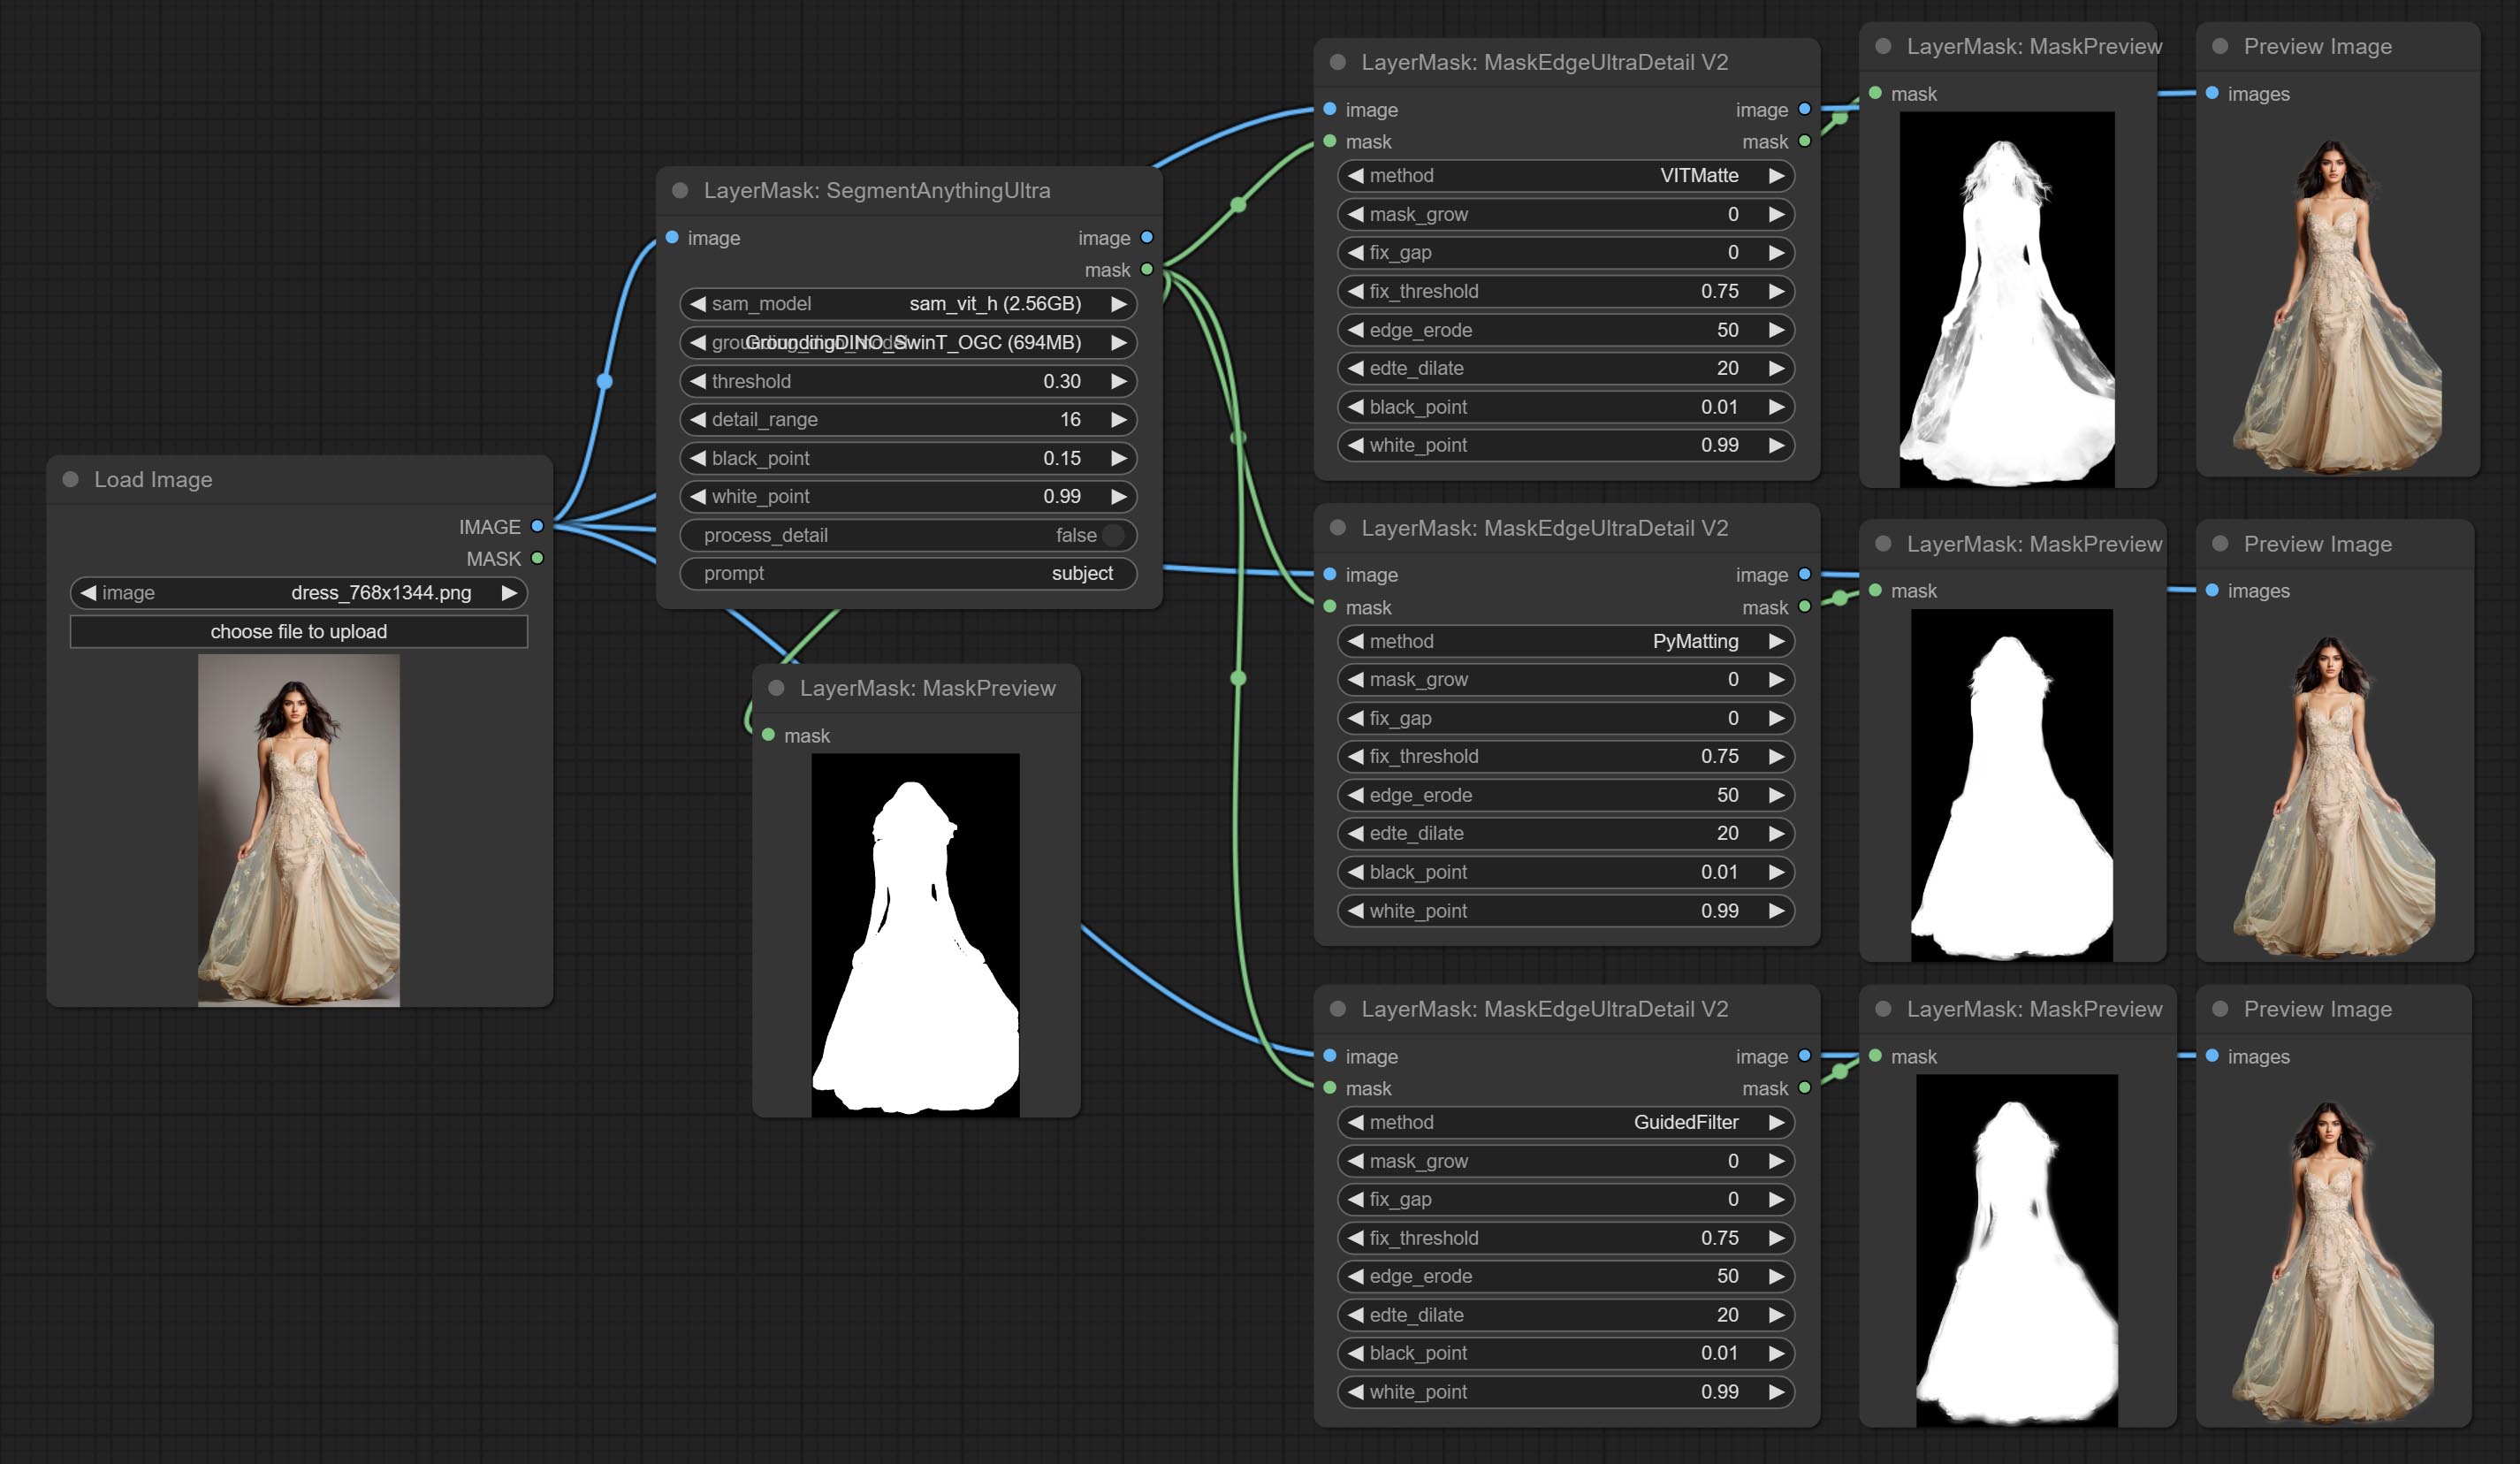
Improvements to ComfyUI Segment Anything, thanks to the original author.
*Please refer to the installation of ComfyUI Segment Anything to install the model. If ComfyUI Segment Anything has been correctly installed, you can skip this step.
ComfyUI/models/bert-base-uncased folder.ComfyUI/models/grounding-dino folder.ComfyUI/models/sams folder. *Or download them from GroundingDino models on BaiduNetdisk and SAM models on BaiduNetdisk . 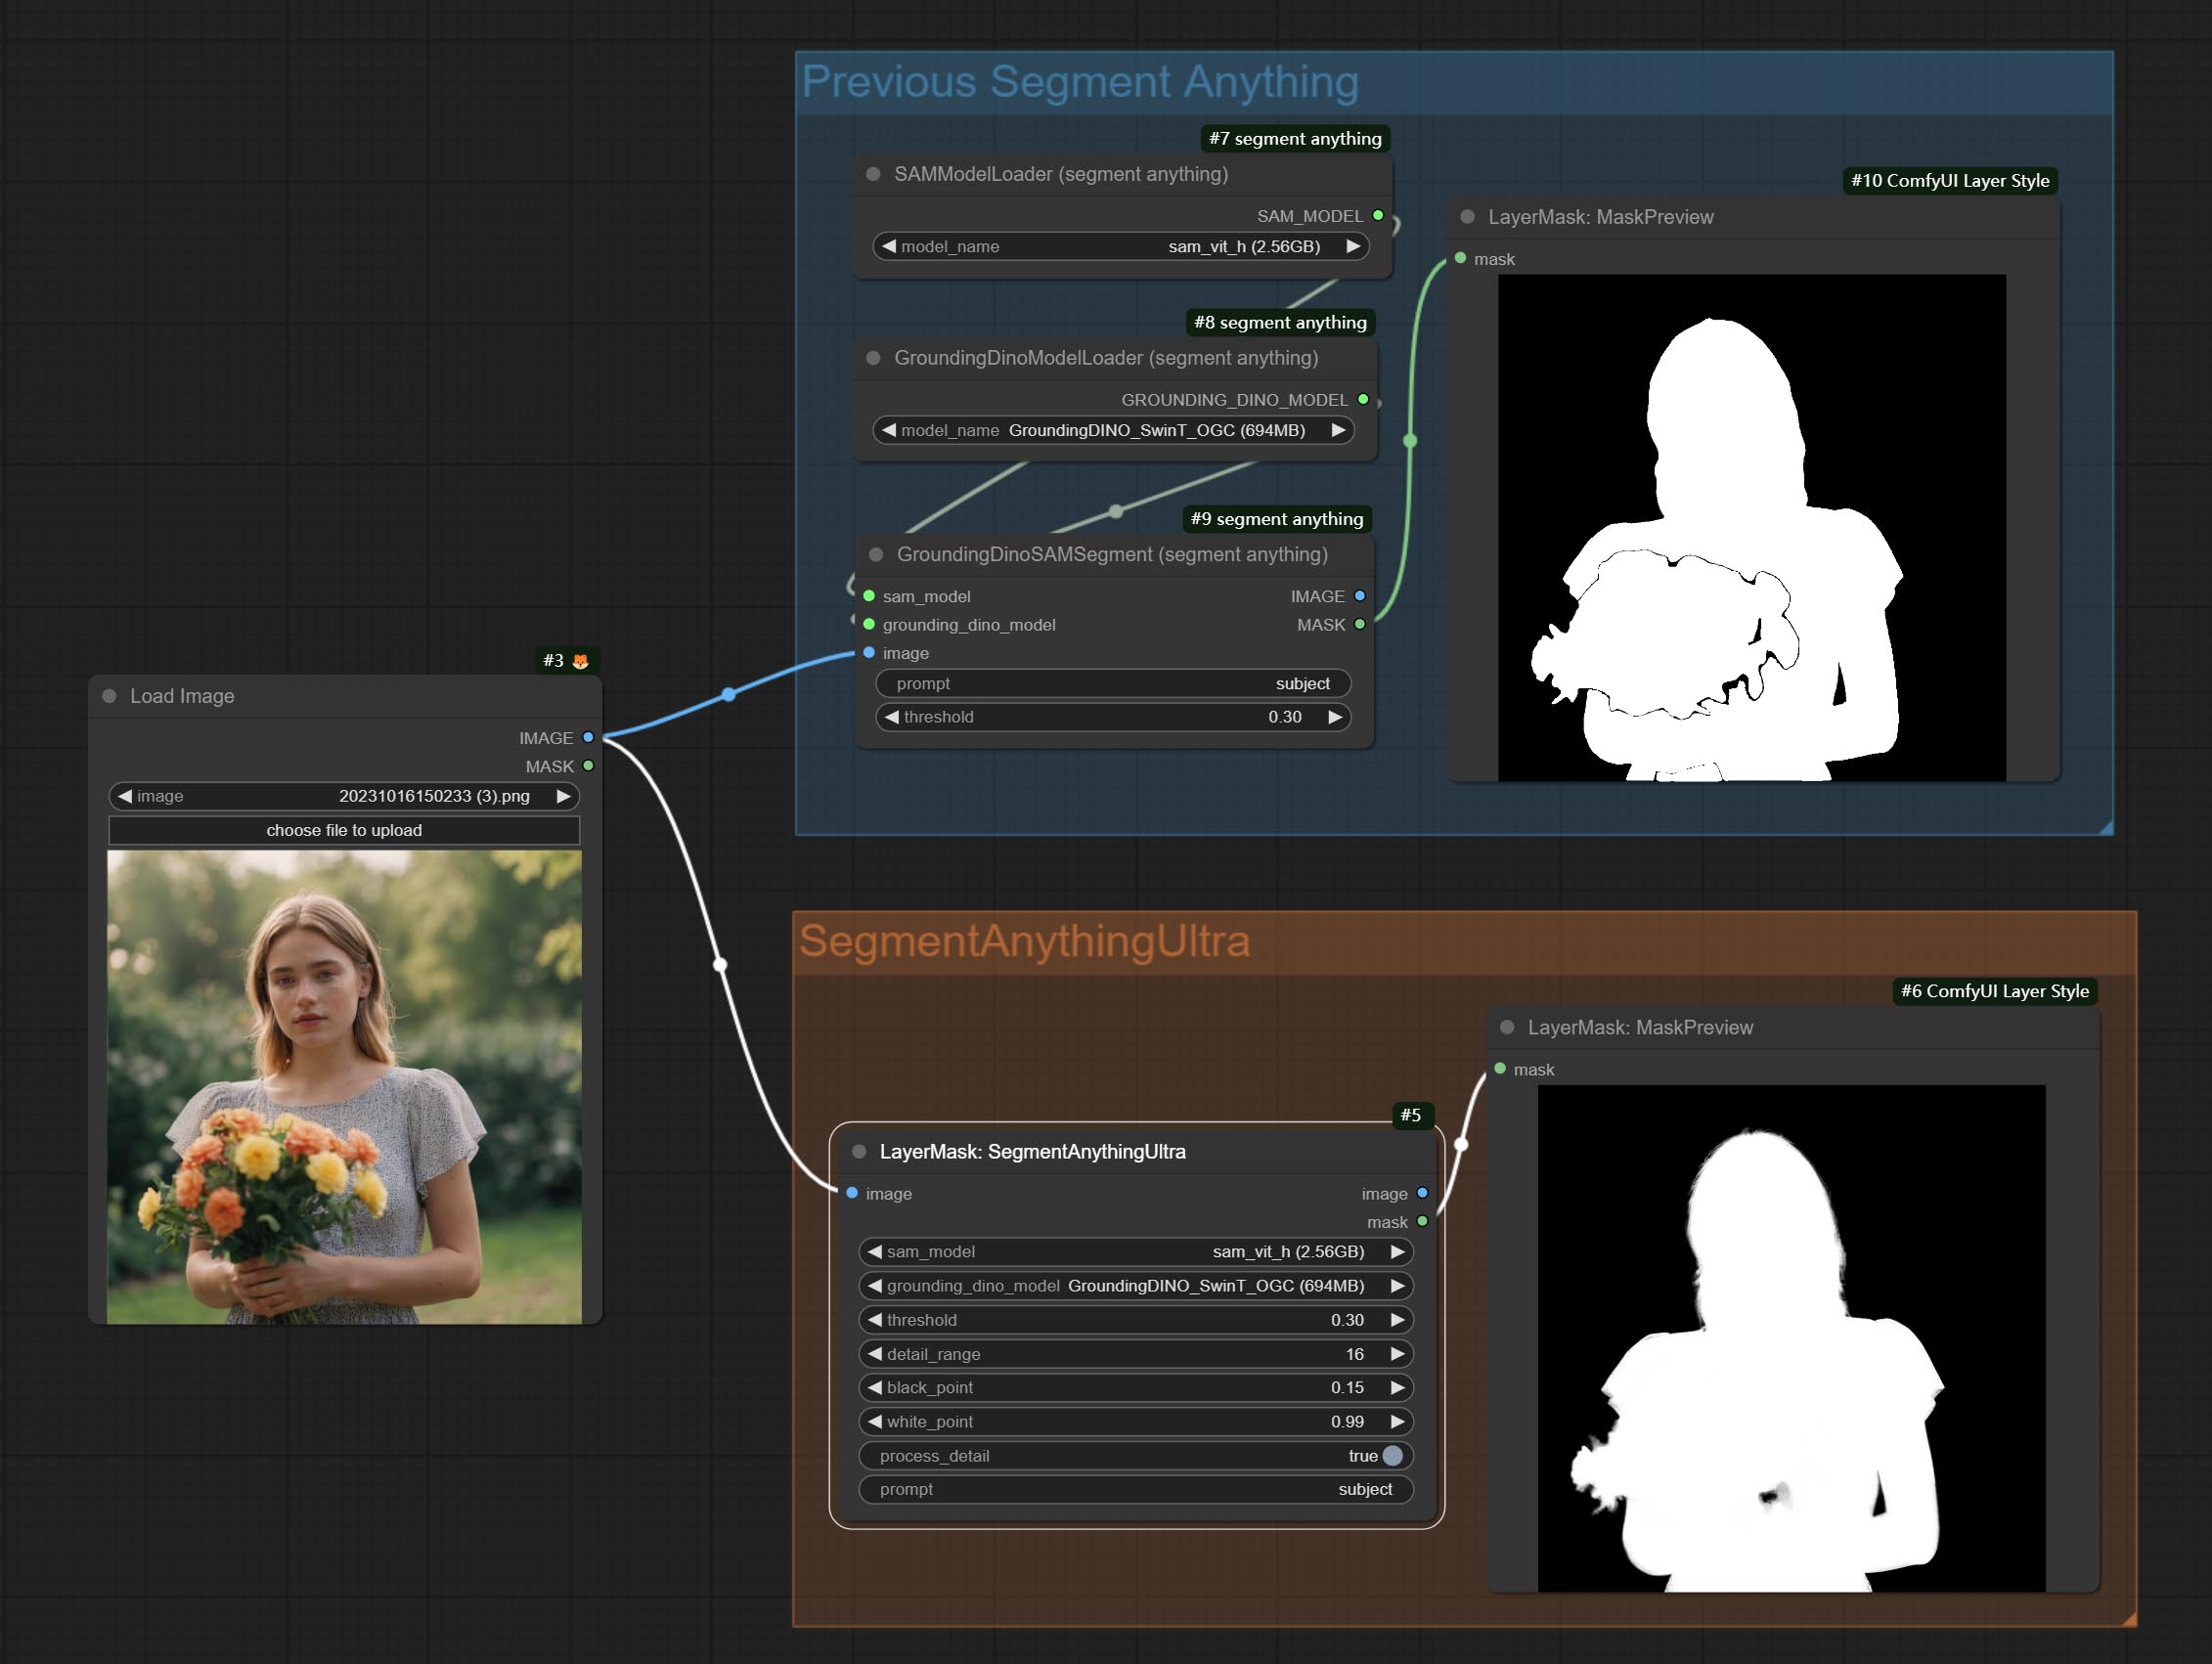
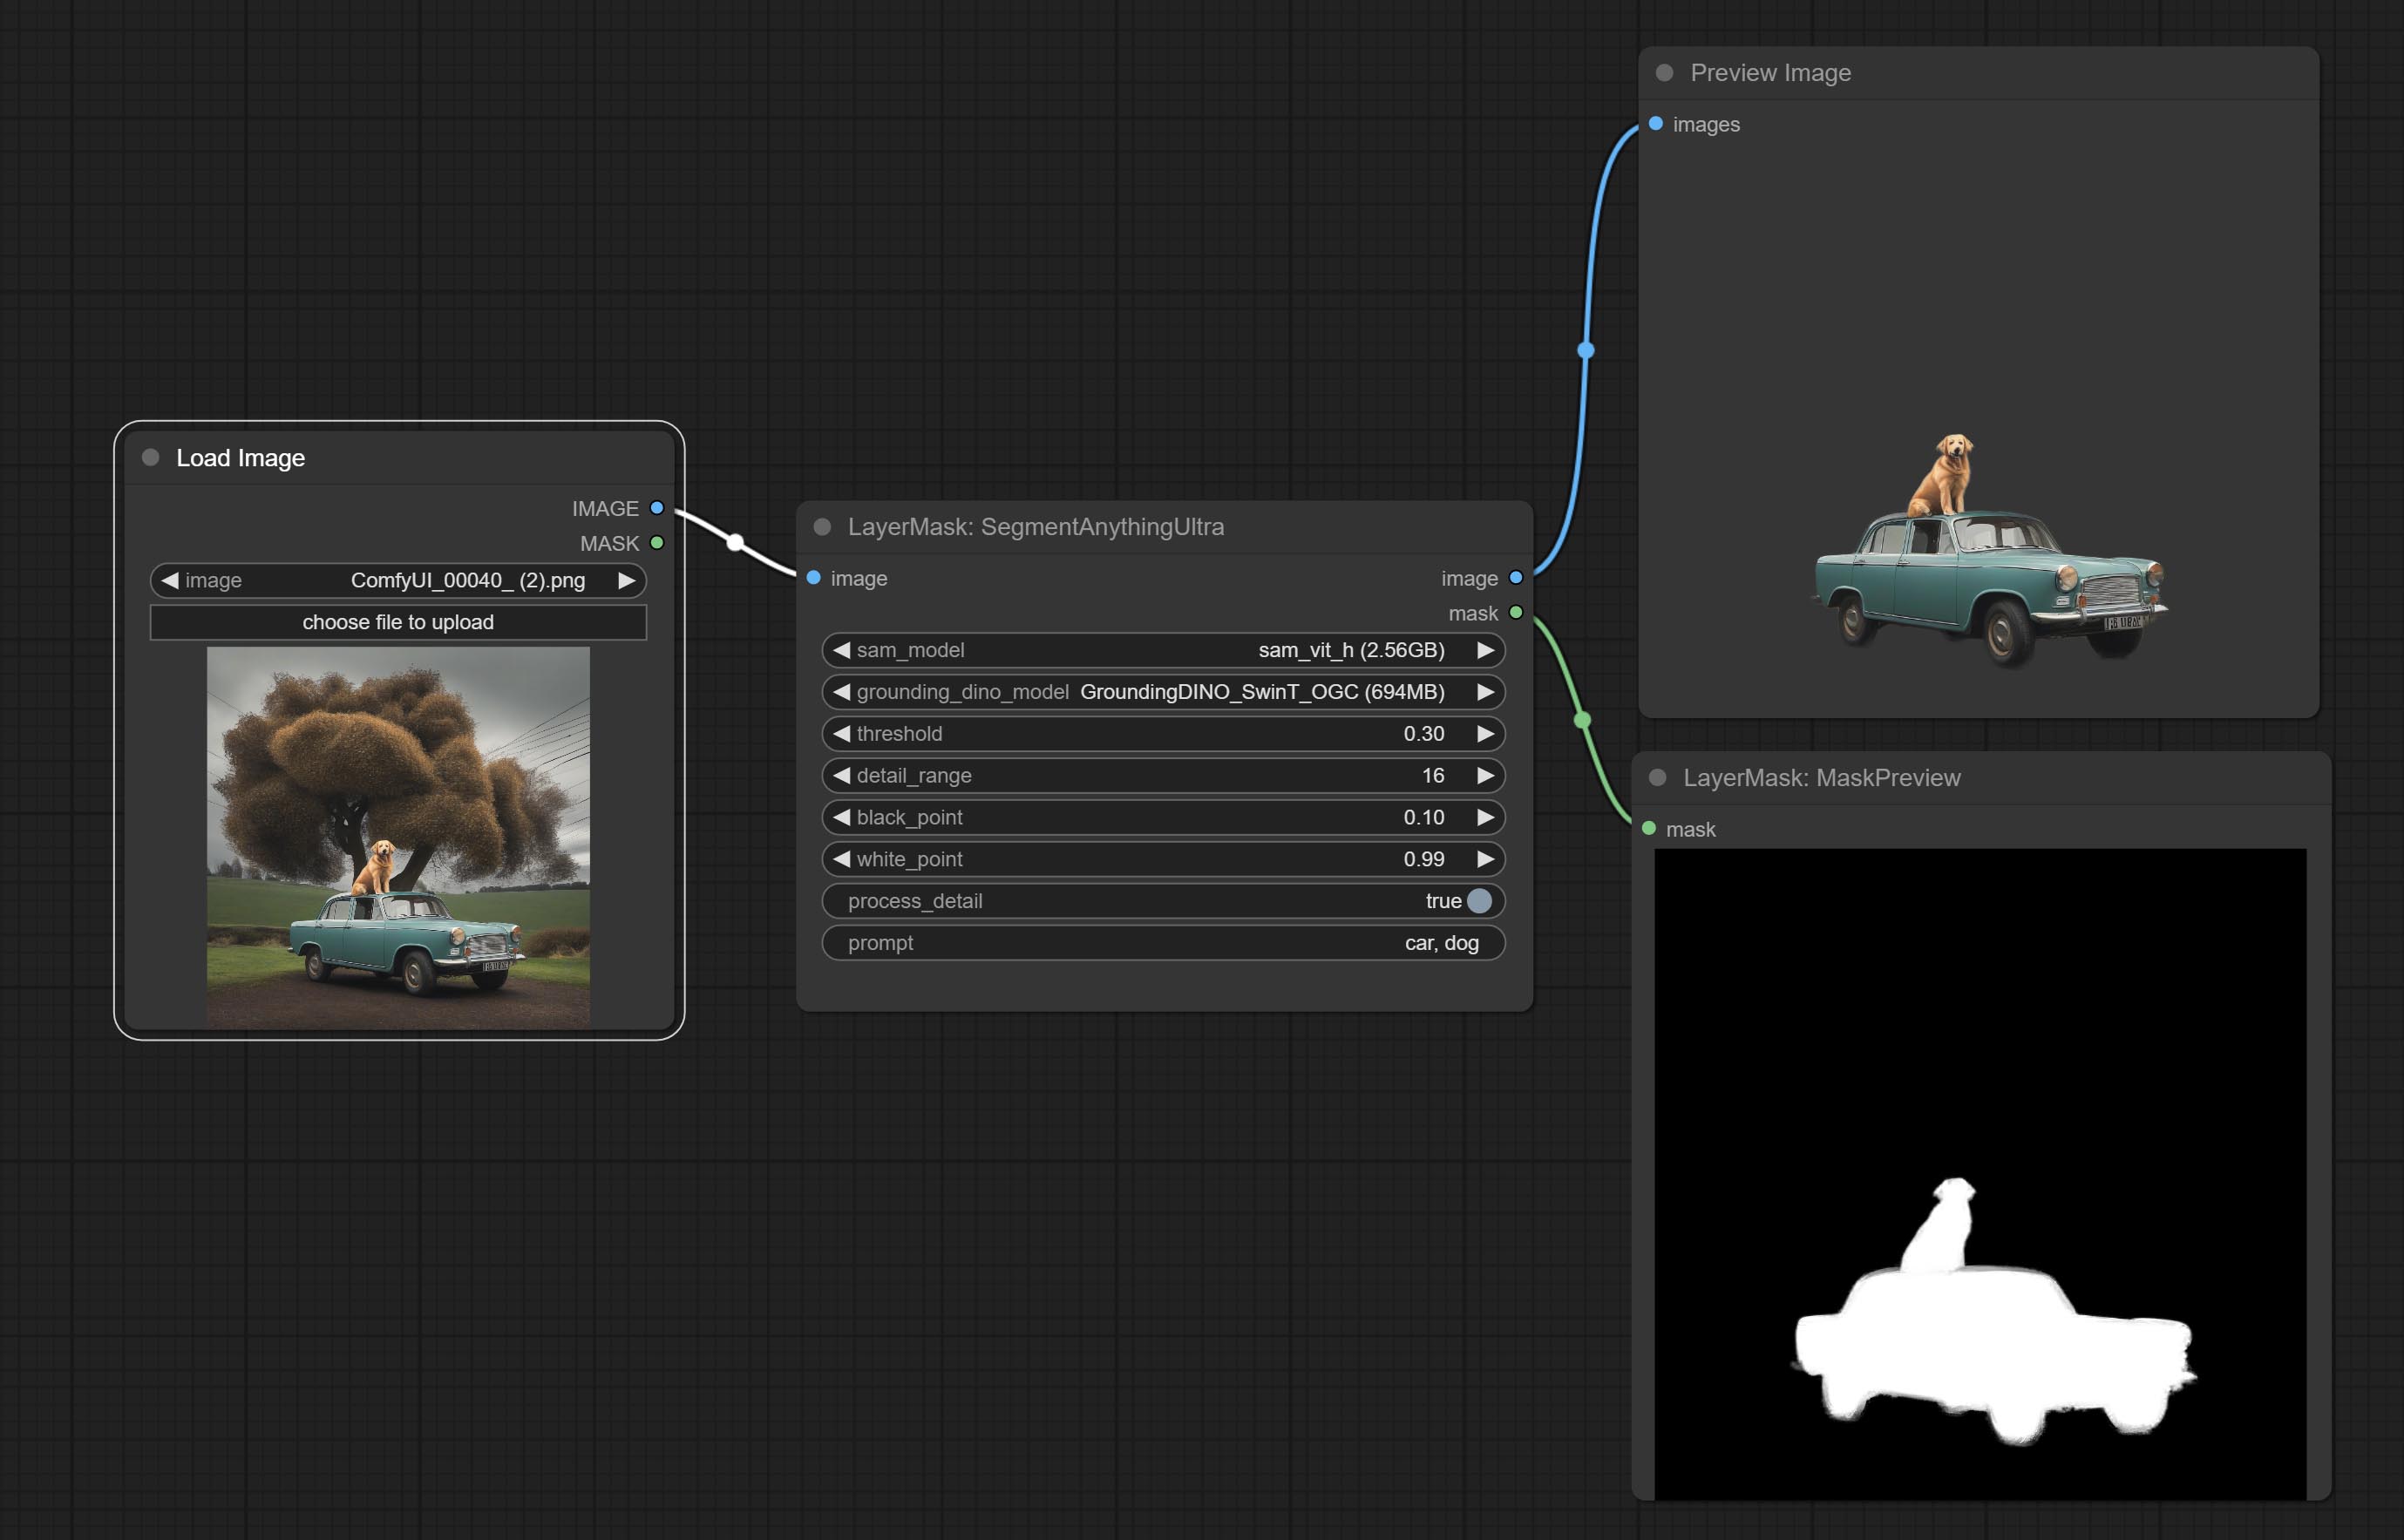
Node options:
The V2 upgraded version of SegmentAnythingUltra has added the VITMatte edge processing method.(Note: Images larger than 2K in size using this method will consume huge memory) 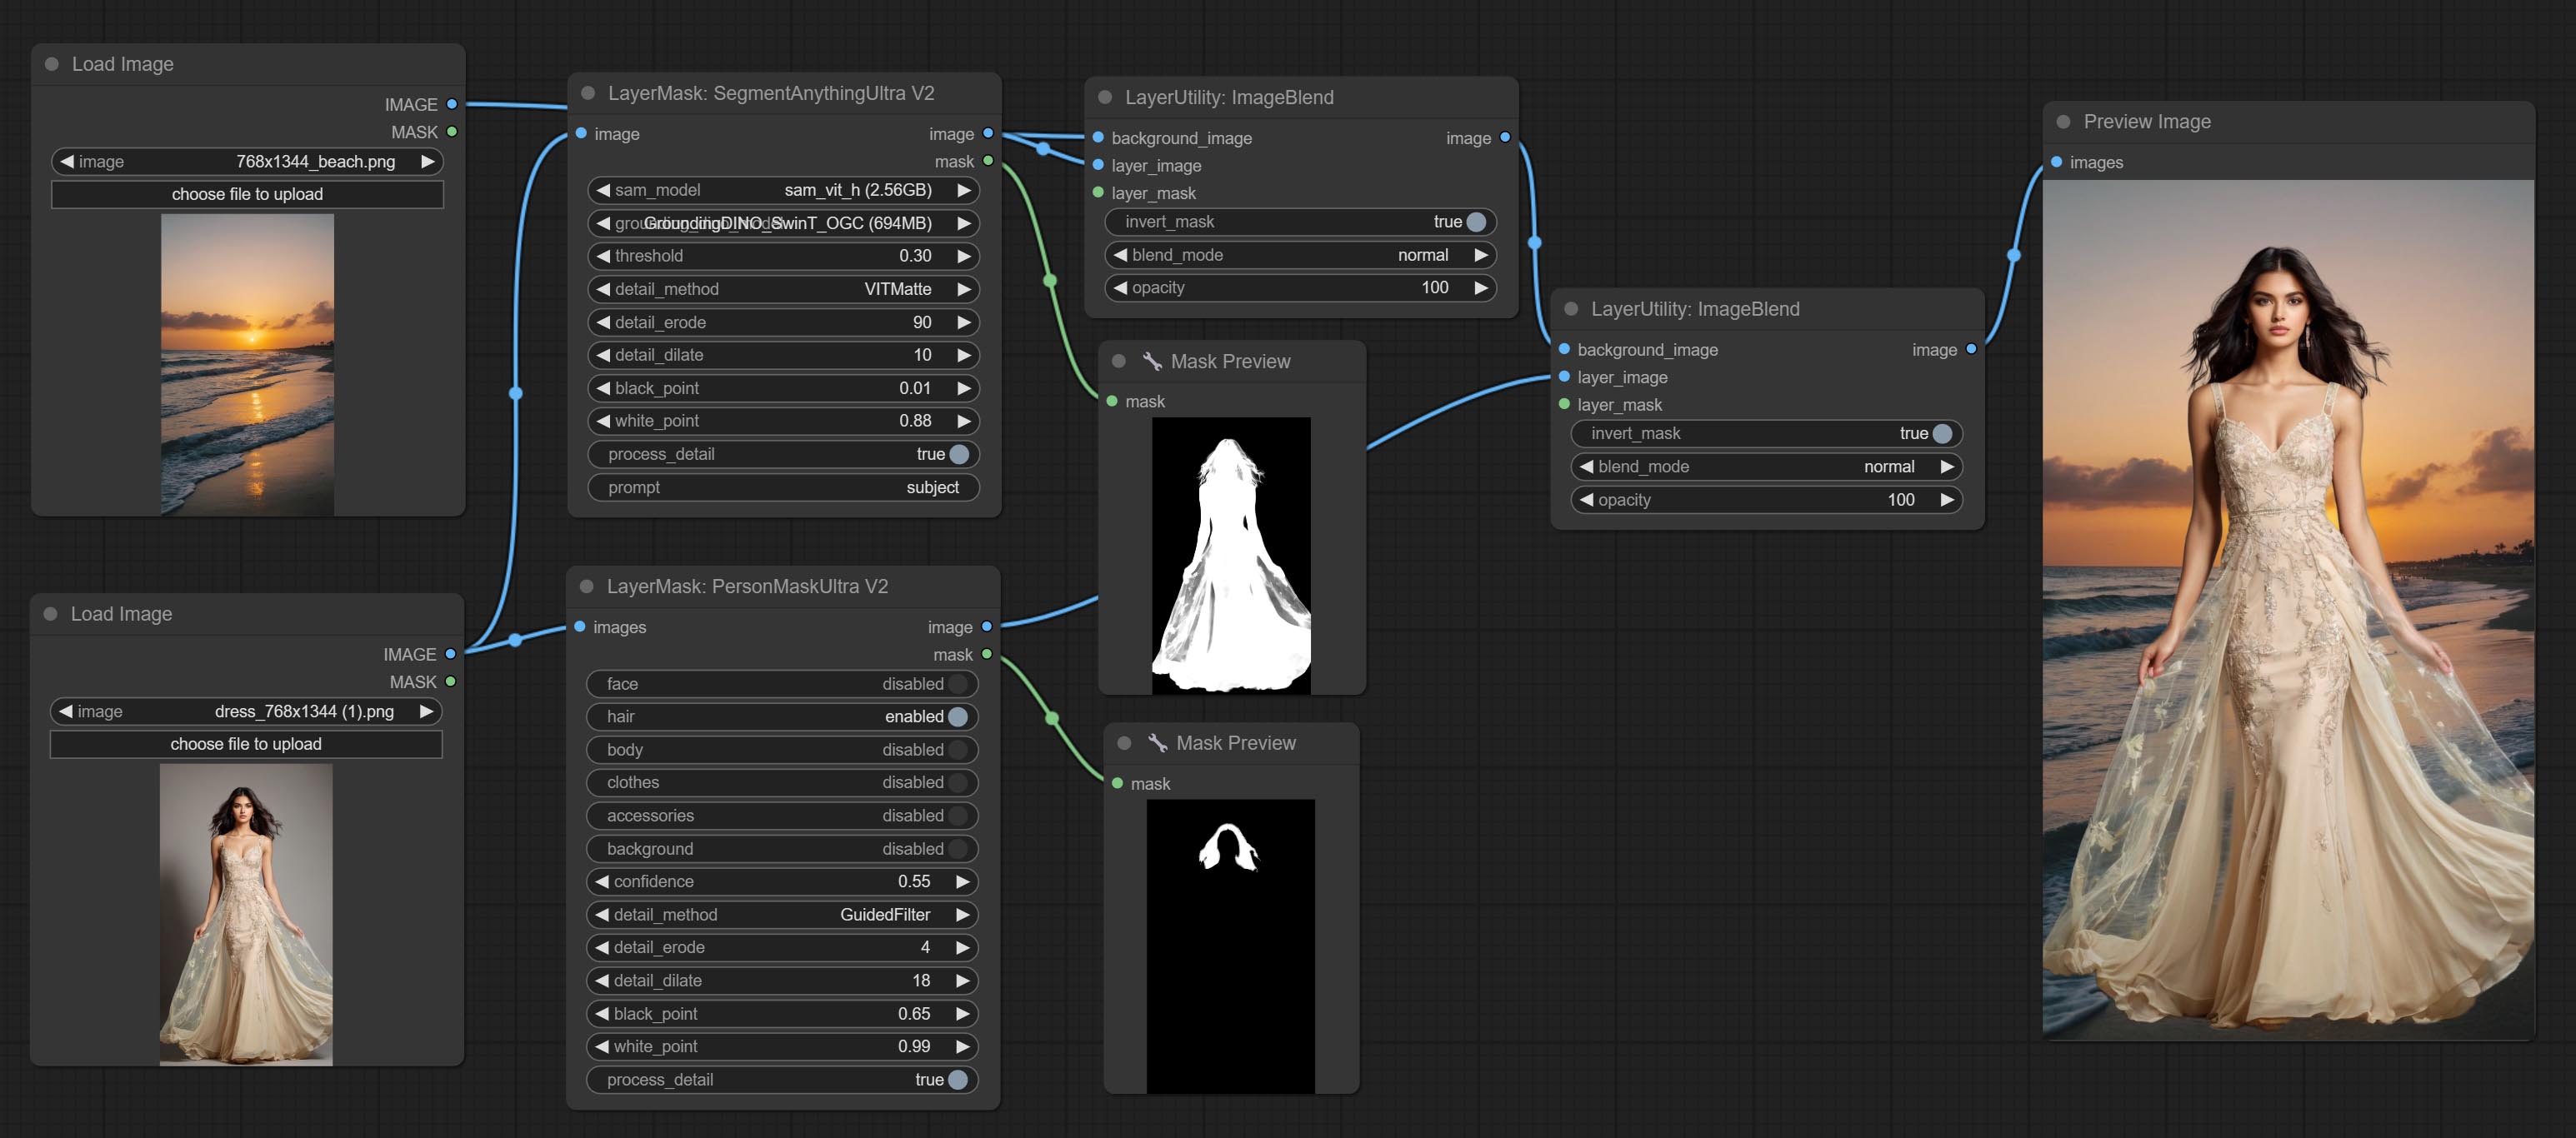
On the basis of SegmentAnythingUltra, the following changes have been made: 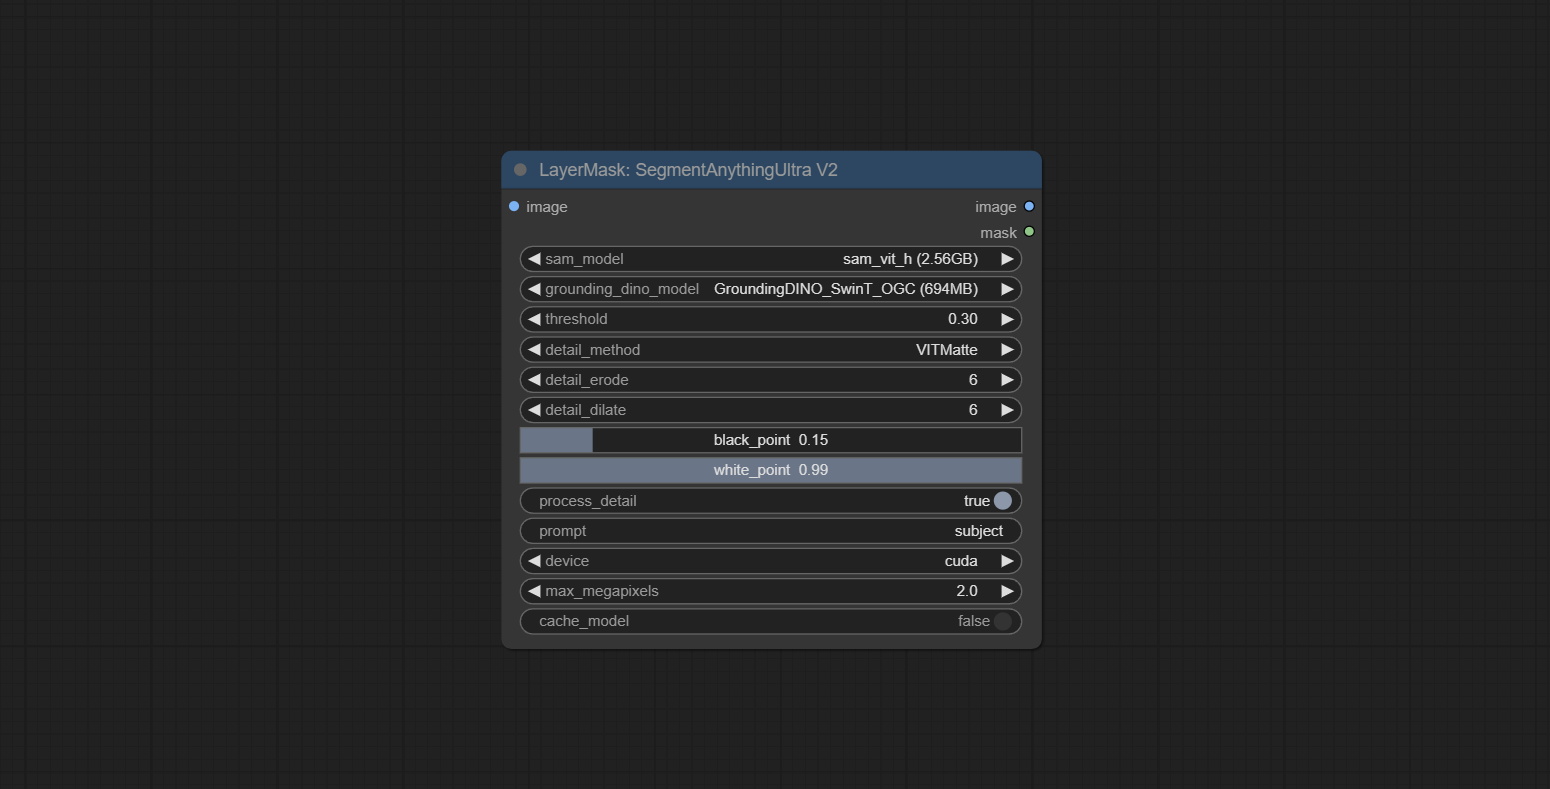
This node is modified from kijai/ComfyUI-segment-anything-2. Thank to kijai for making significant contributions to the Comfyui community.
SAM2 Ultra node only support single image. If you need to process multiple images, please first convert the image batch to image list.
*Download models from BaiduNetdisk or huggingface.co/Kijai/sam2-safetensors and copy to ComfyUI/models/sam2 folder.
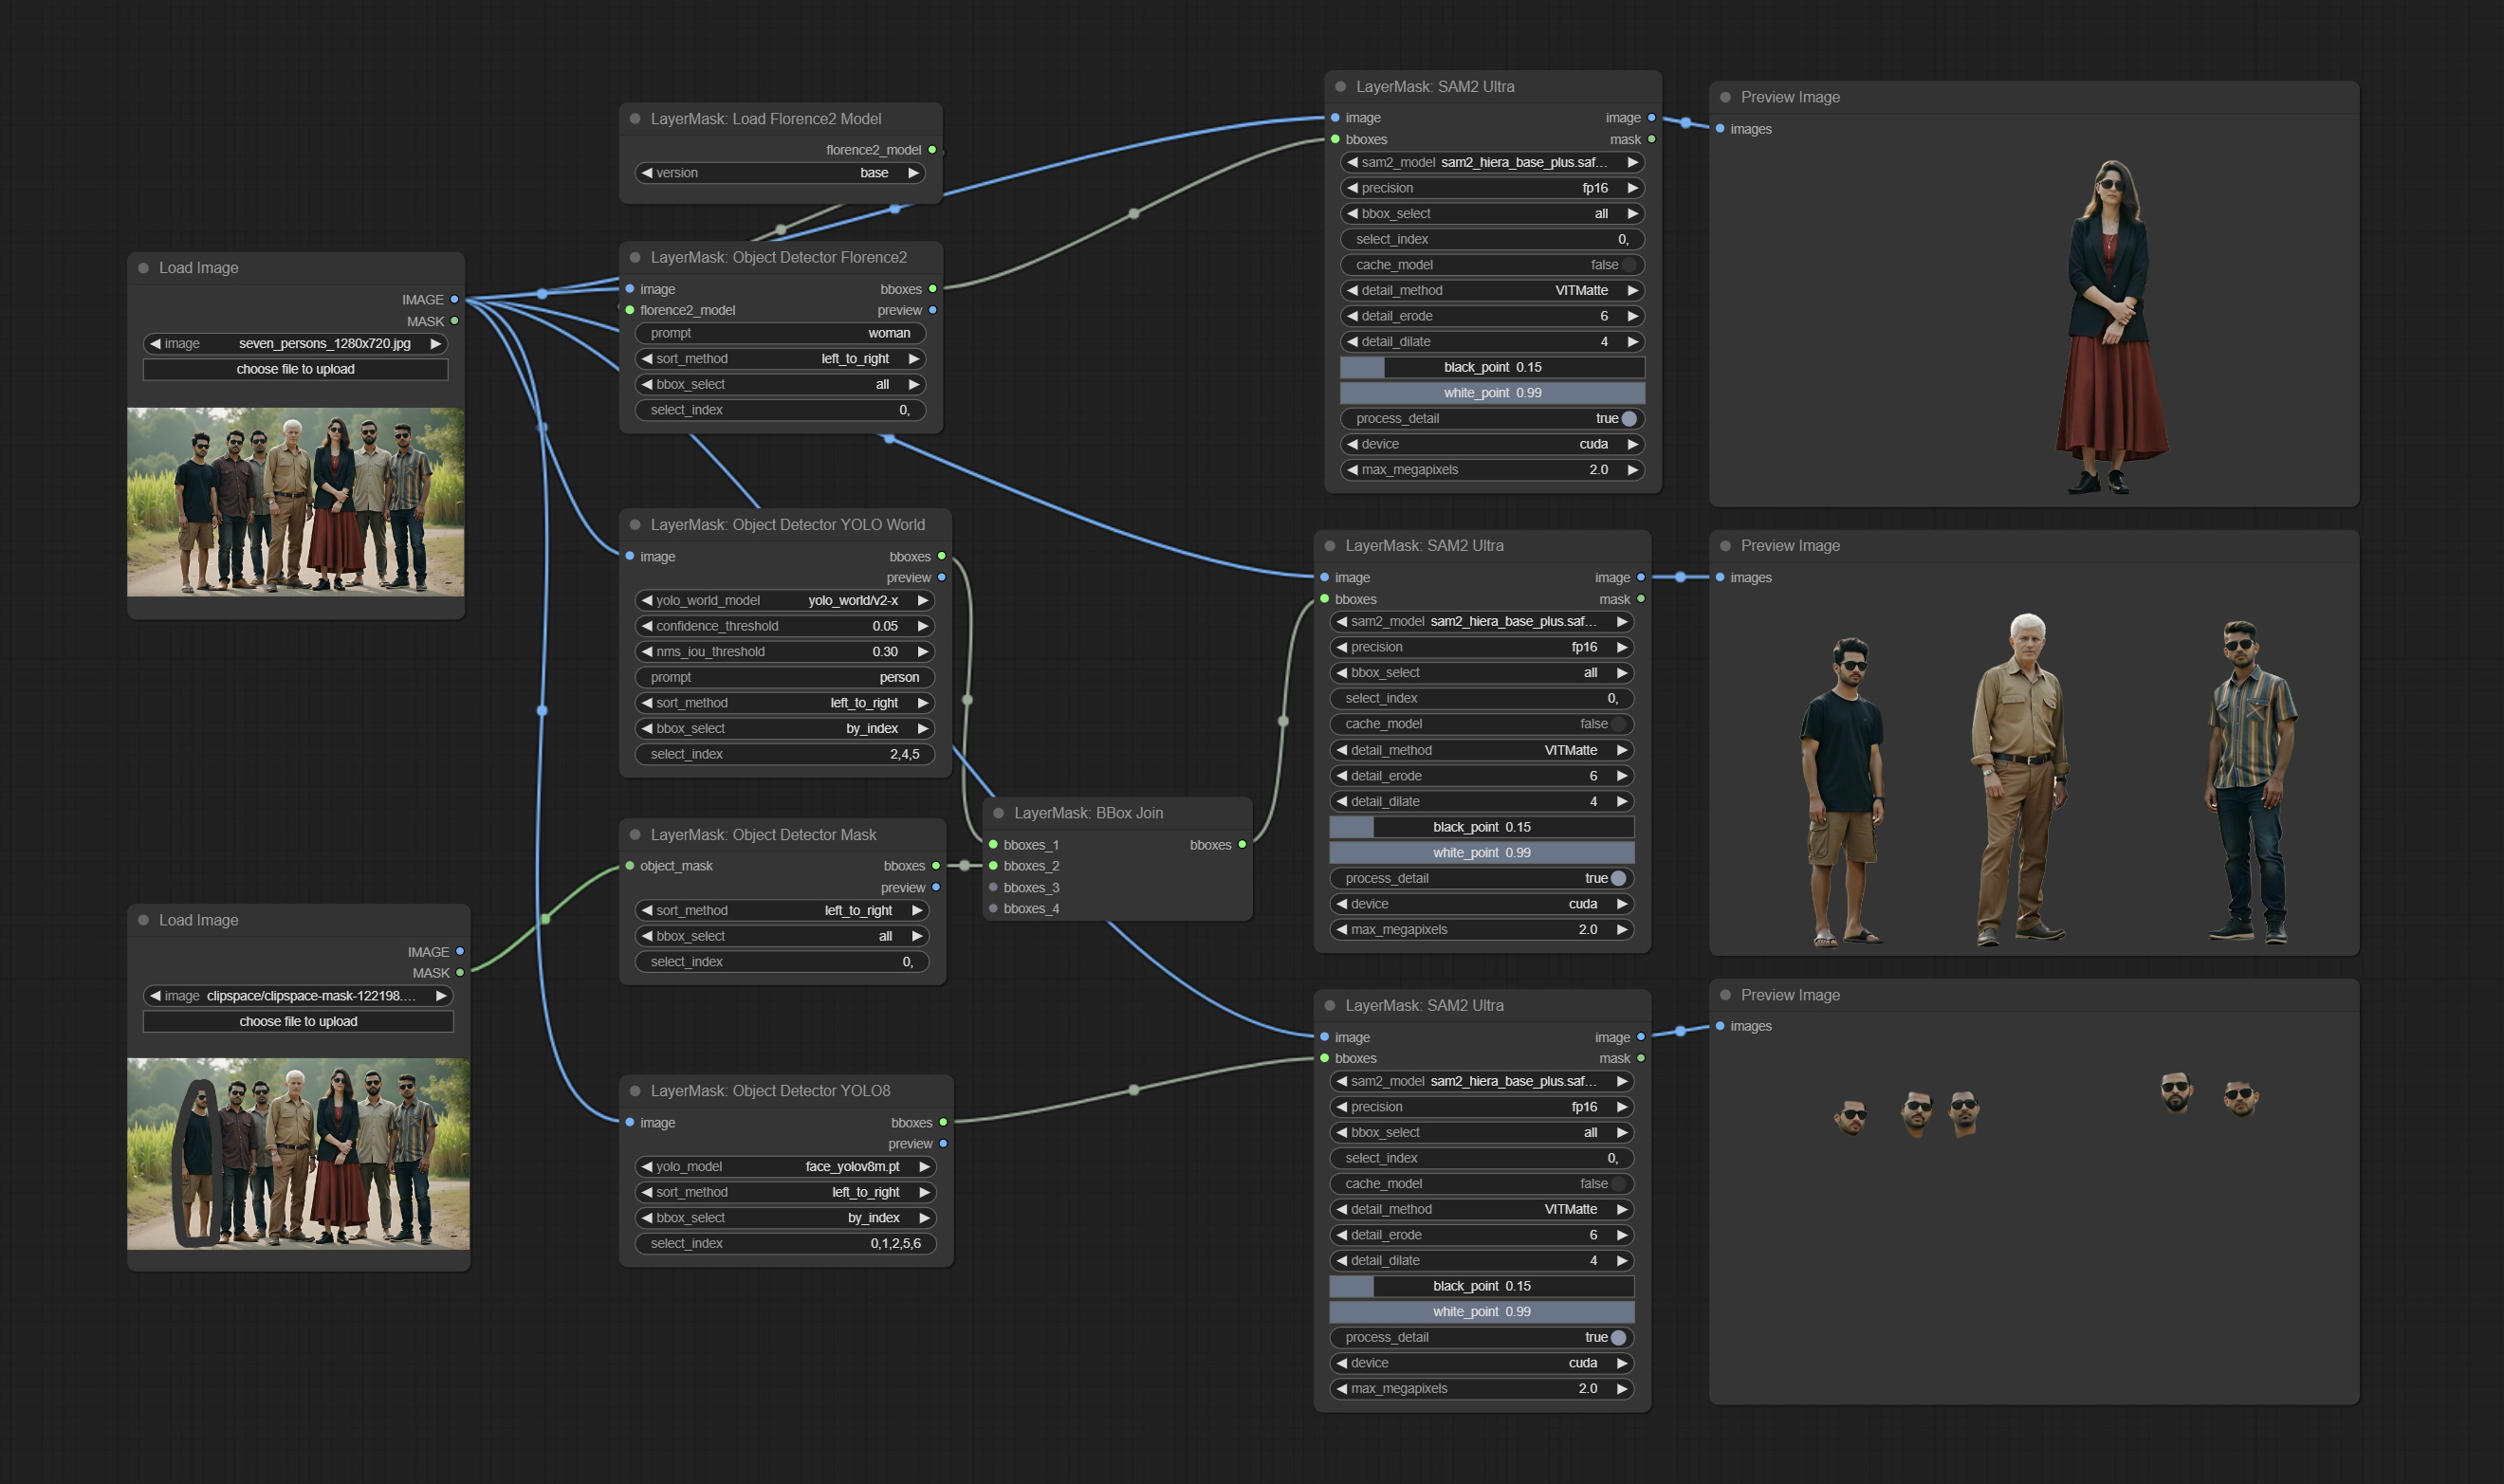
Node Options: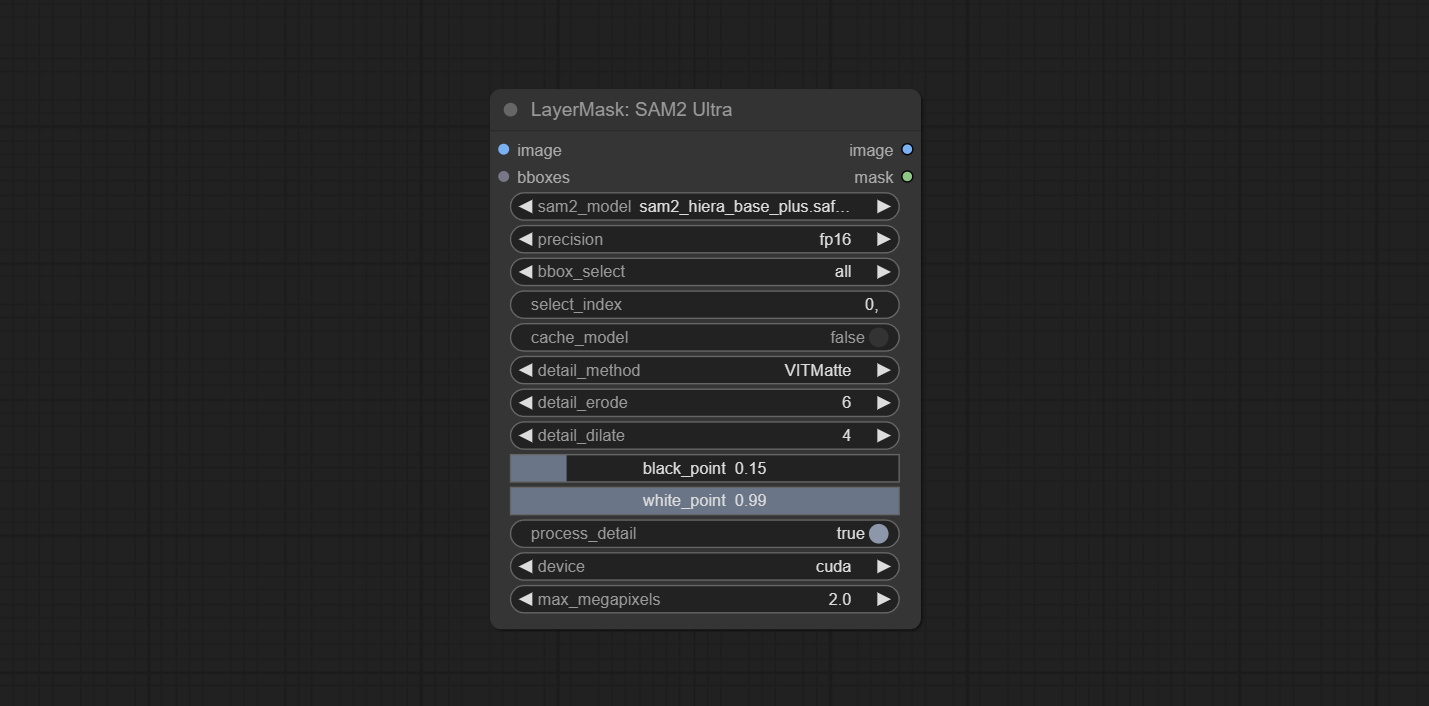
SAM2 Video Ultra node support processing multiple frames of images or video sequences. Please define the recognition box data in the first frame of the sequence to ensure correct recognition.
Node Options: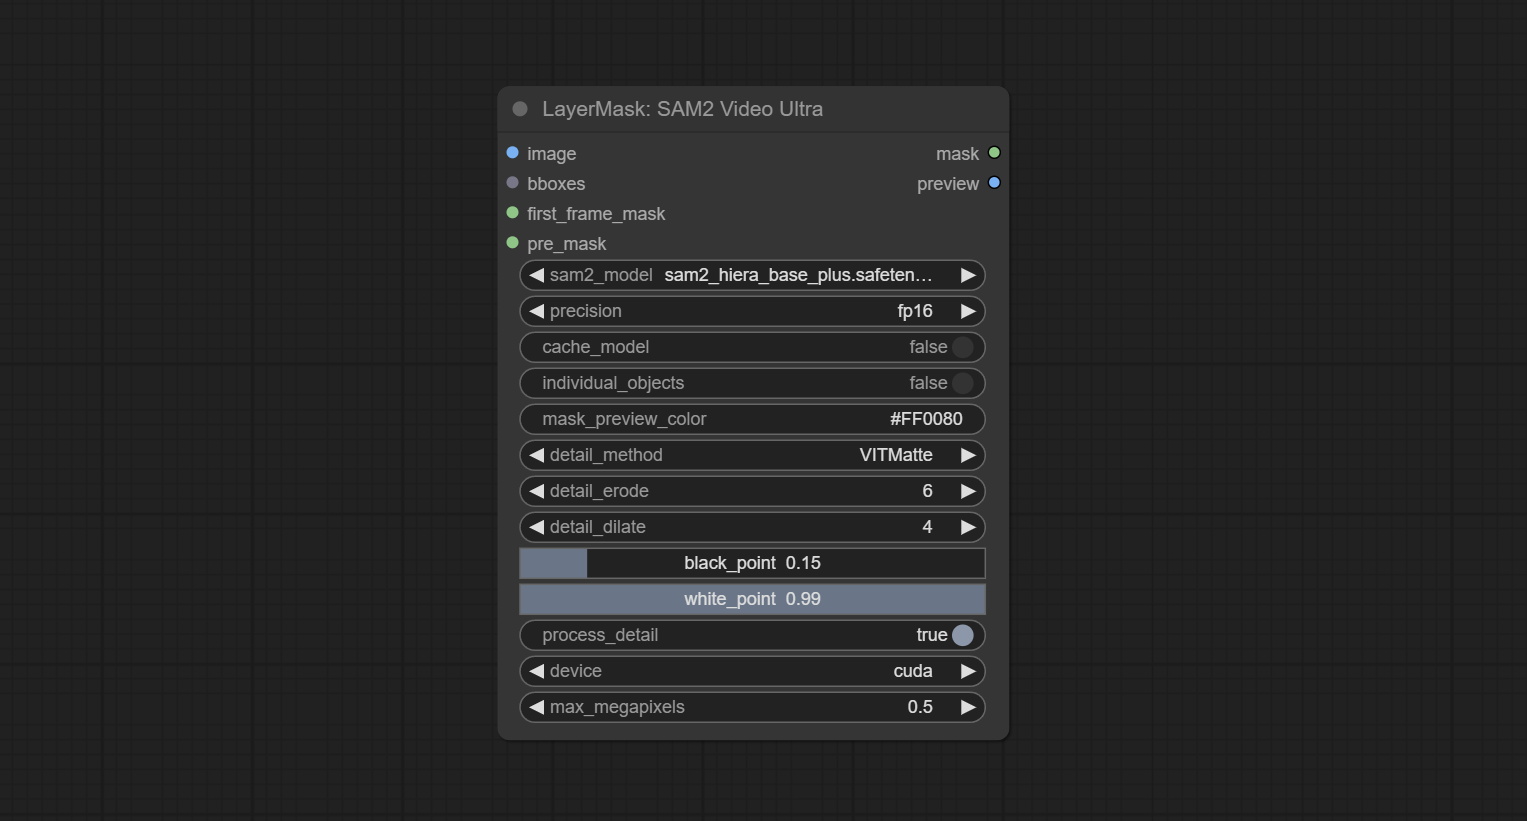
bboxes and first_frame_mask must have least one input. If first_frame_mask inputed, bbboxes will be ignored.bboxes and first_frame_mask must have least one input. If first_frame_mask inputed, bbboxes will be ignored. Use the Florence2 model to identify objects in images and output recognition box data.
*Download models from BaiduNetdisk and copy to ComfyUI/models/florence2 folder.
Node Options: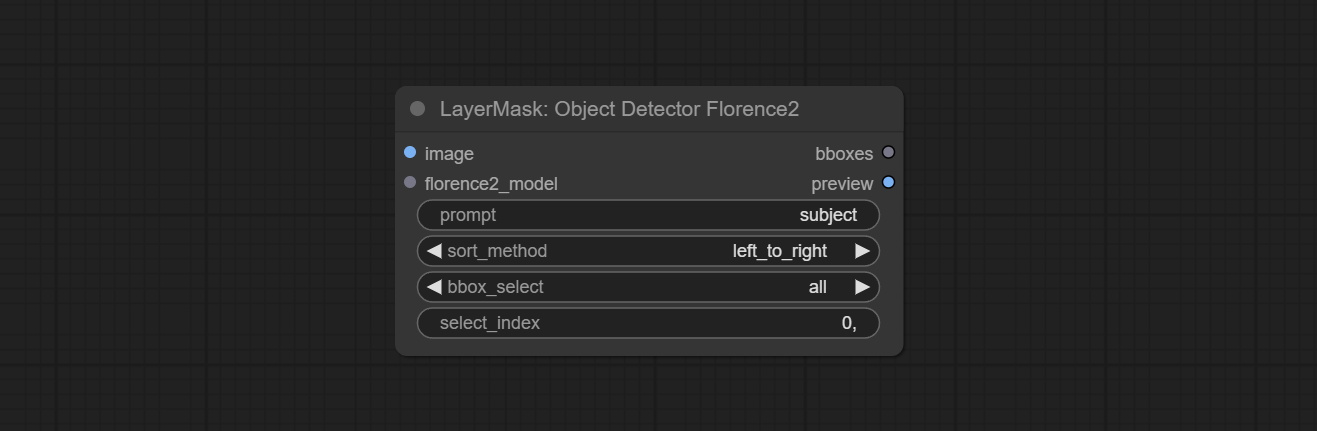
Use the YOLO-World model to identify objects in images and output recognition box data.
*Download models from BaiduNetdisk or GoogleDrive and copy to ComfyUI/models/yolo-world folder.
Node Options: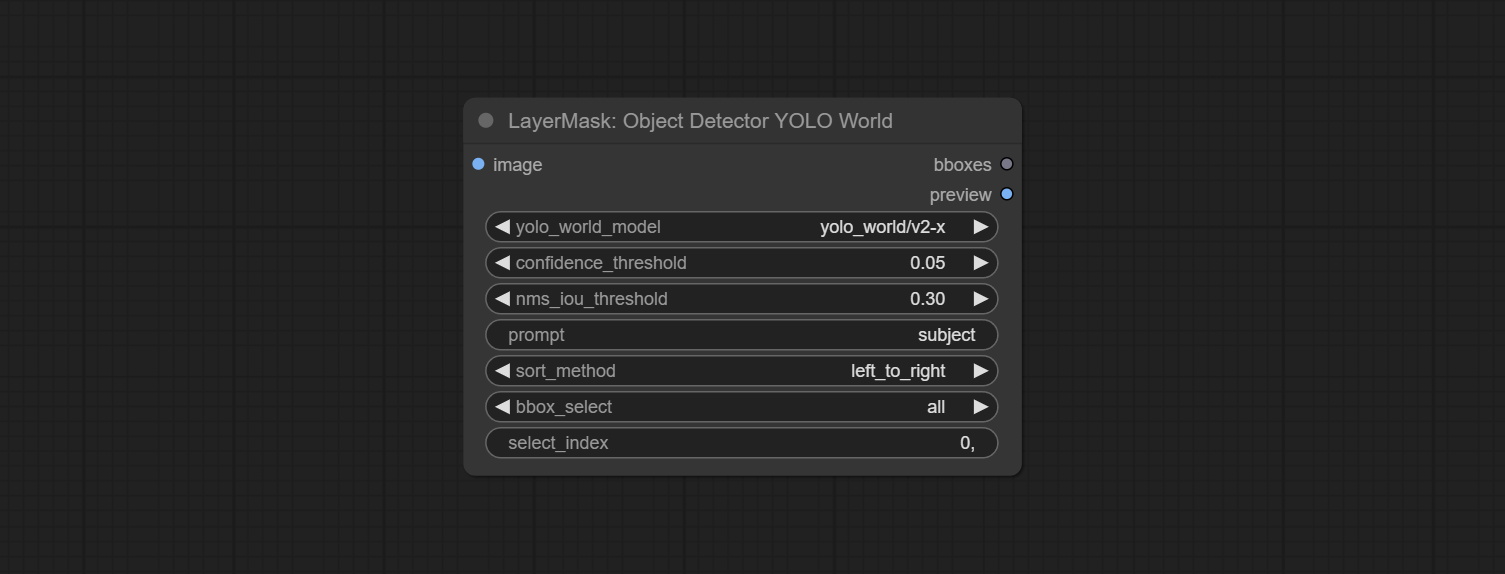
Use the YOLO-8 model to identify objects in images and output recognition box data.
*Download models from GoogleDrive or BaiduNetdisk and copy to ComfyUI/models/yolo folder.
Node Options: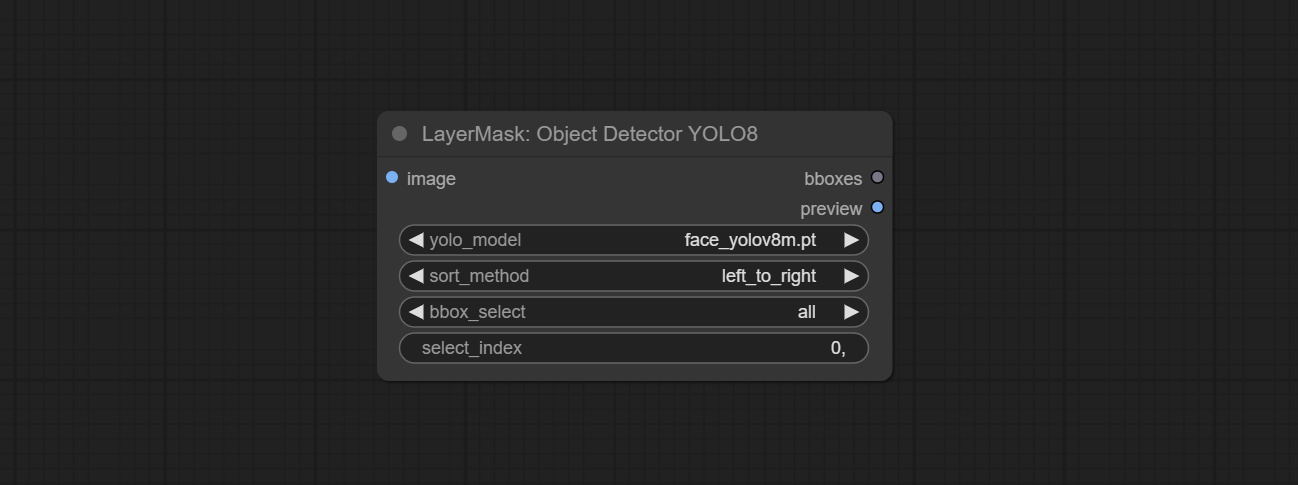
Use mask as recognition box data. All areas surrounded by white areas on the mask will be recognized as an object. Multiple enclosed areas will be identified separately.
Node Options: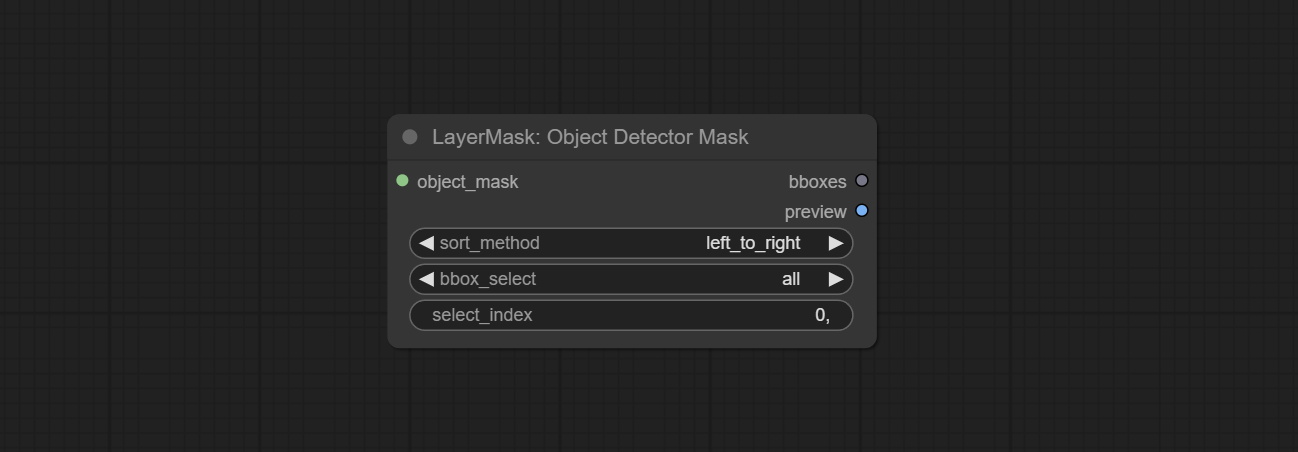
Merge recognition box data.
Node Options: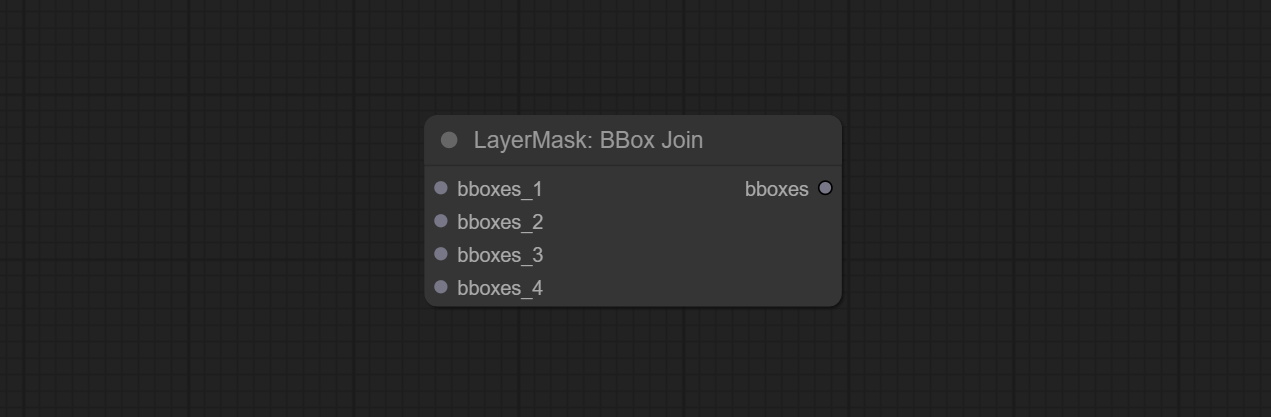
Draw the recognition BBoxes data output by the Object Detector node as a mask.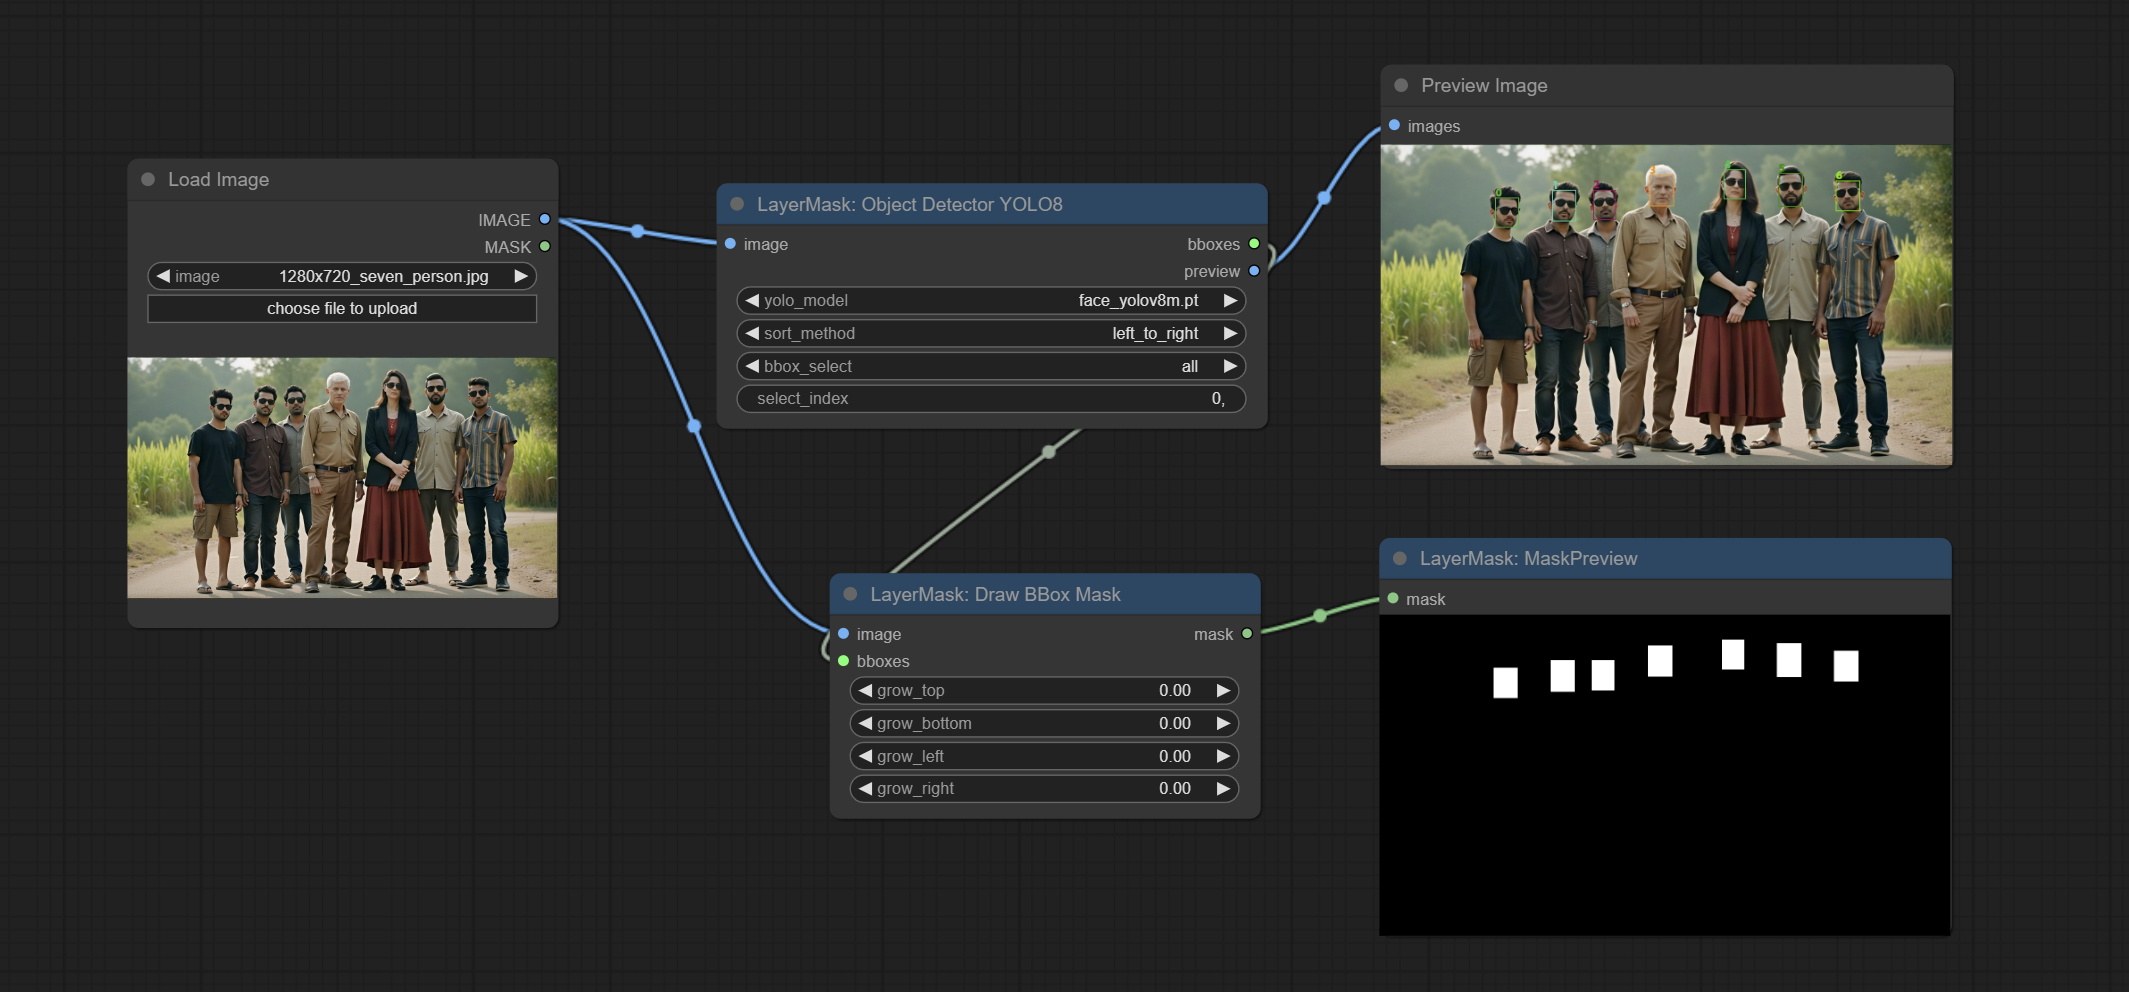
Node Options: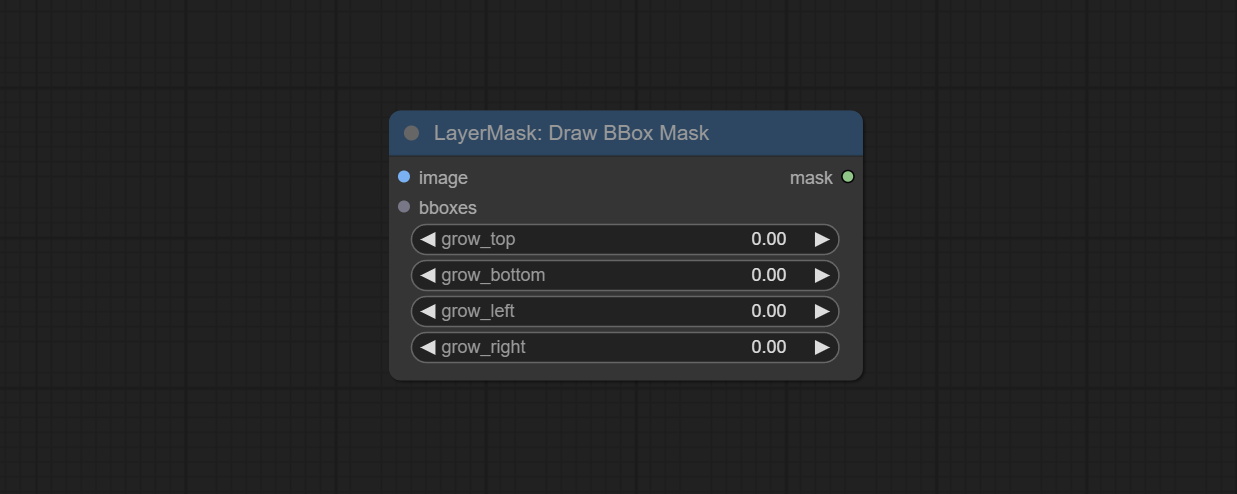
This node is implementation of EVF-SAM in ComfyUI.
*Please download model files from BaiduNetdisk or huggingface/EVF-SAM2, huggingface/EVF-SAM to ComfyUI/models/EVF-SAM folder(save the models in their respective subdirectories). 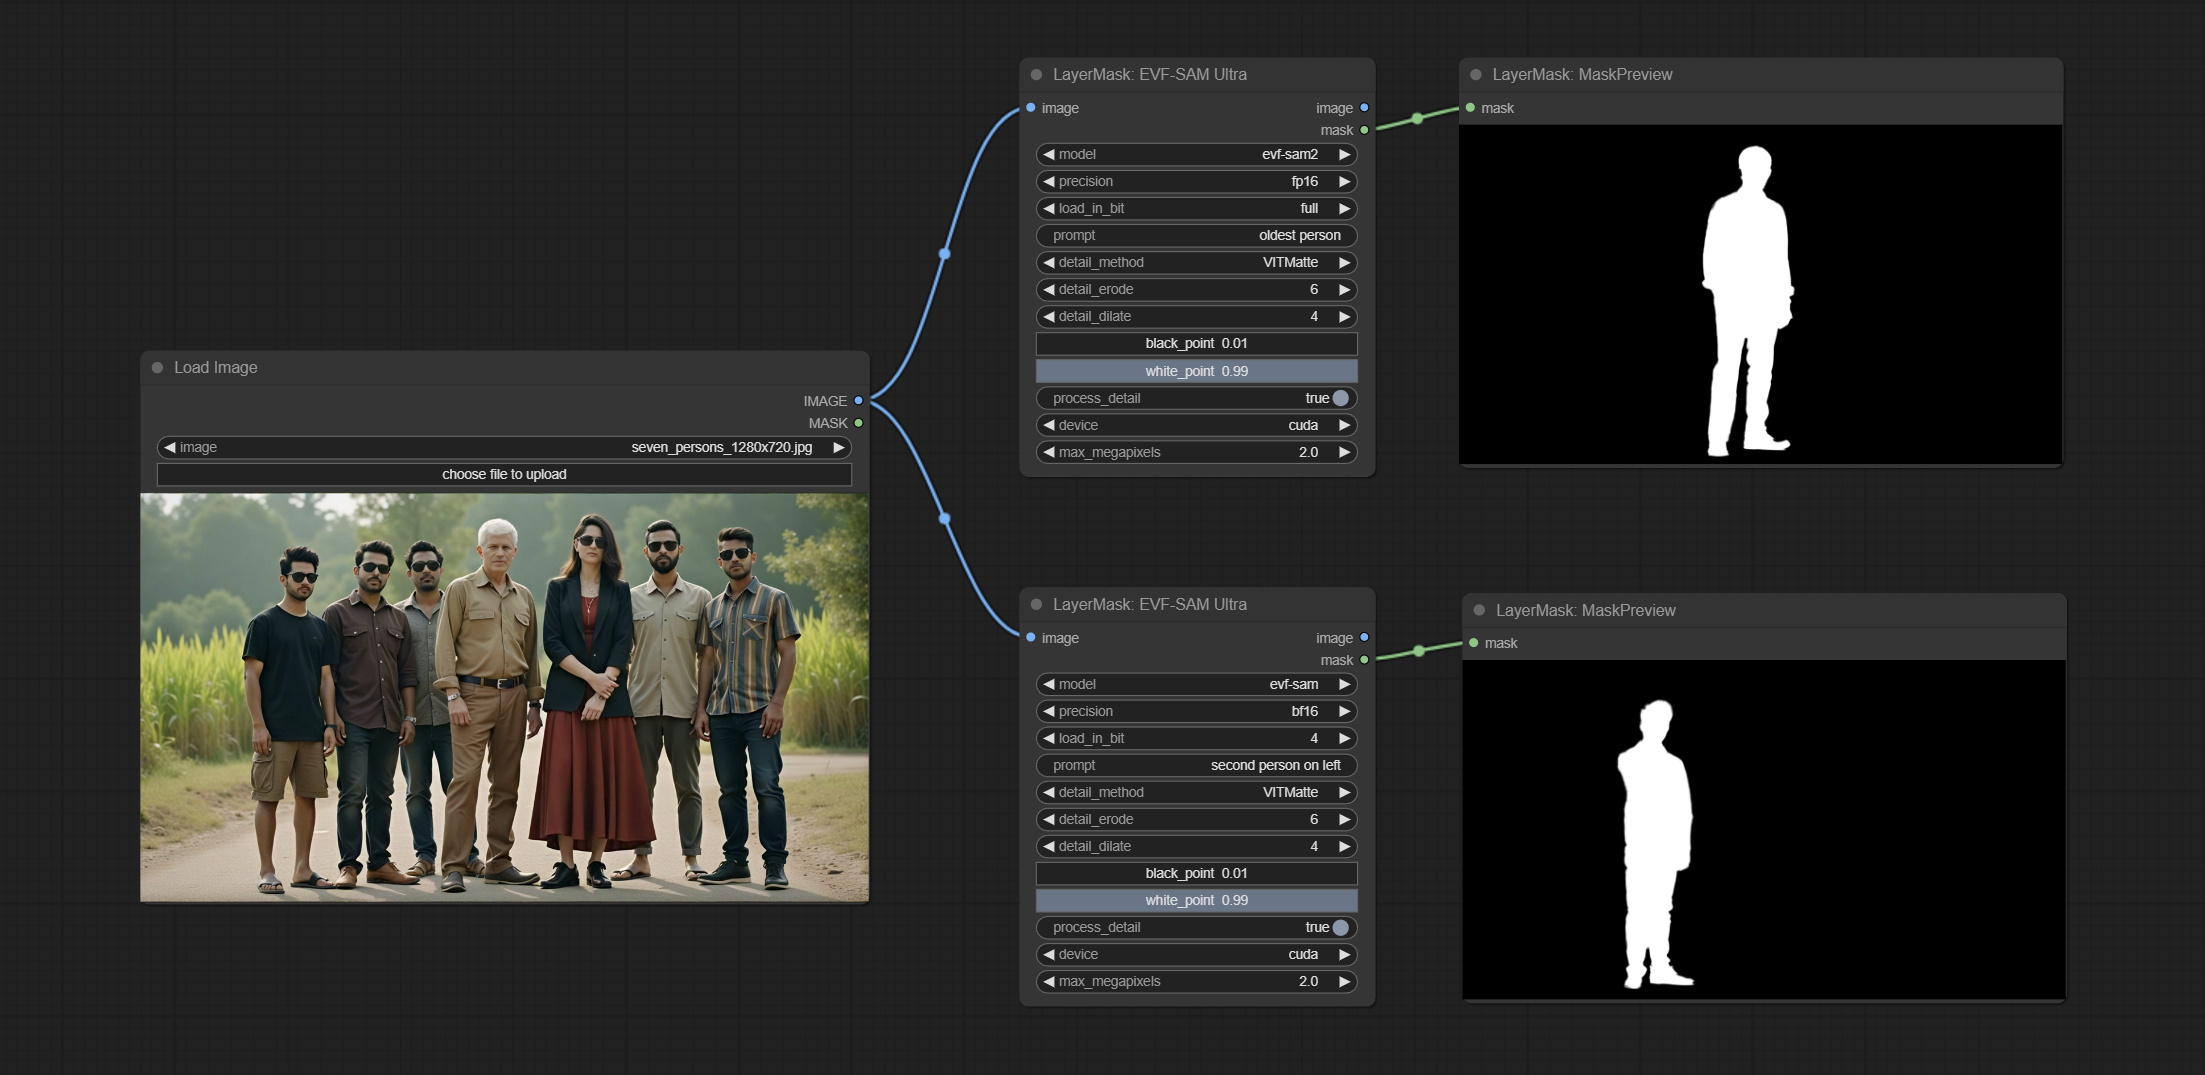
Node Options: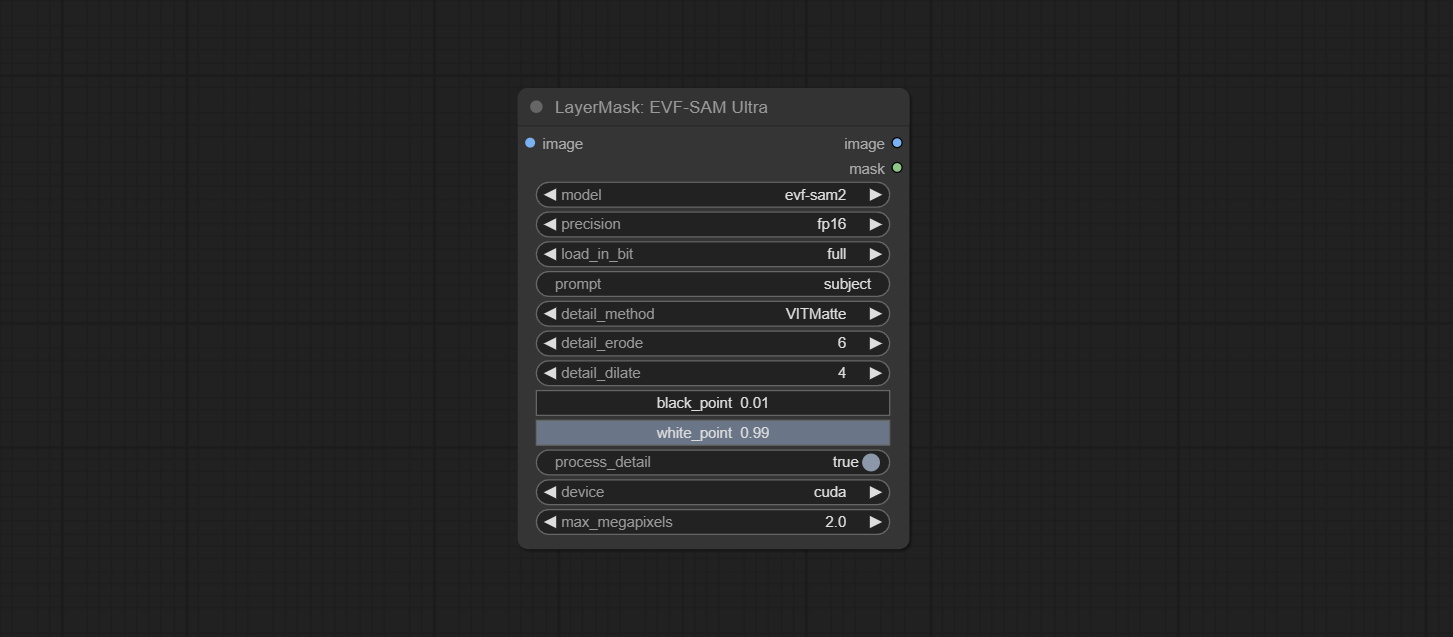
Using the segmentation function of the Florence2 model, while also having ultra-high edge details. The code for this node section is from spacepxl/ComfyUI-Florence-2, thanks to the original author. *Download the model files from BaiduNetdisk to ComfyUI/models/florence2 folder.
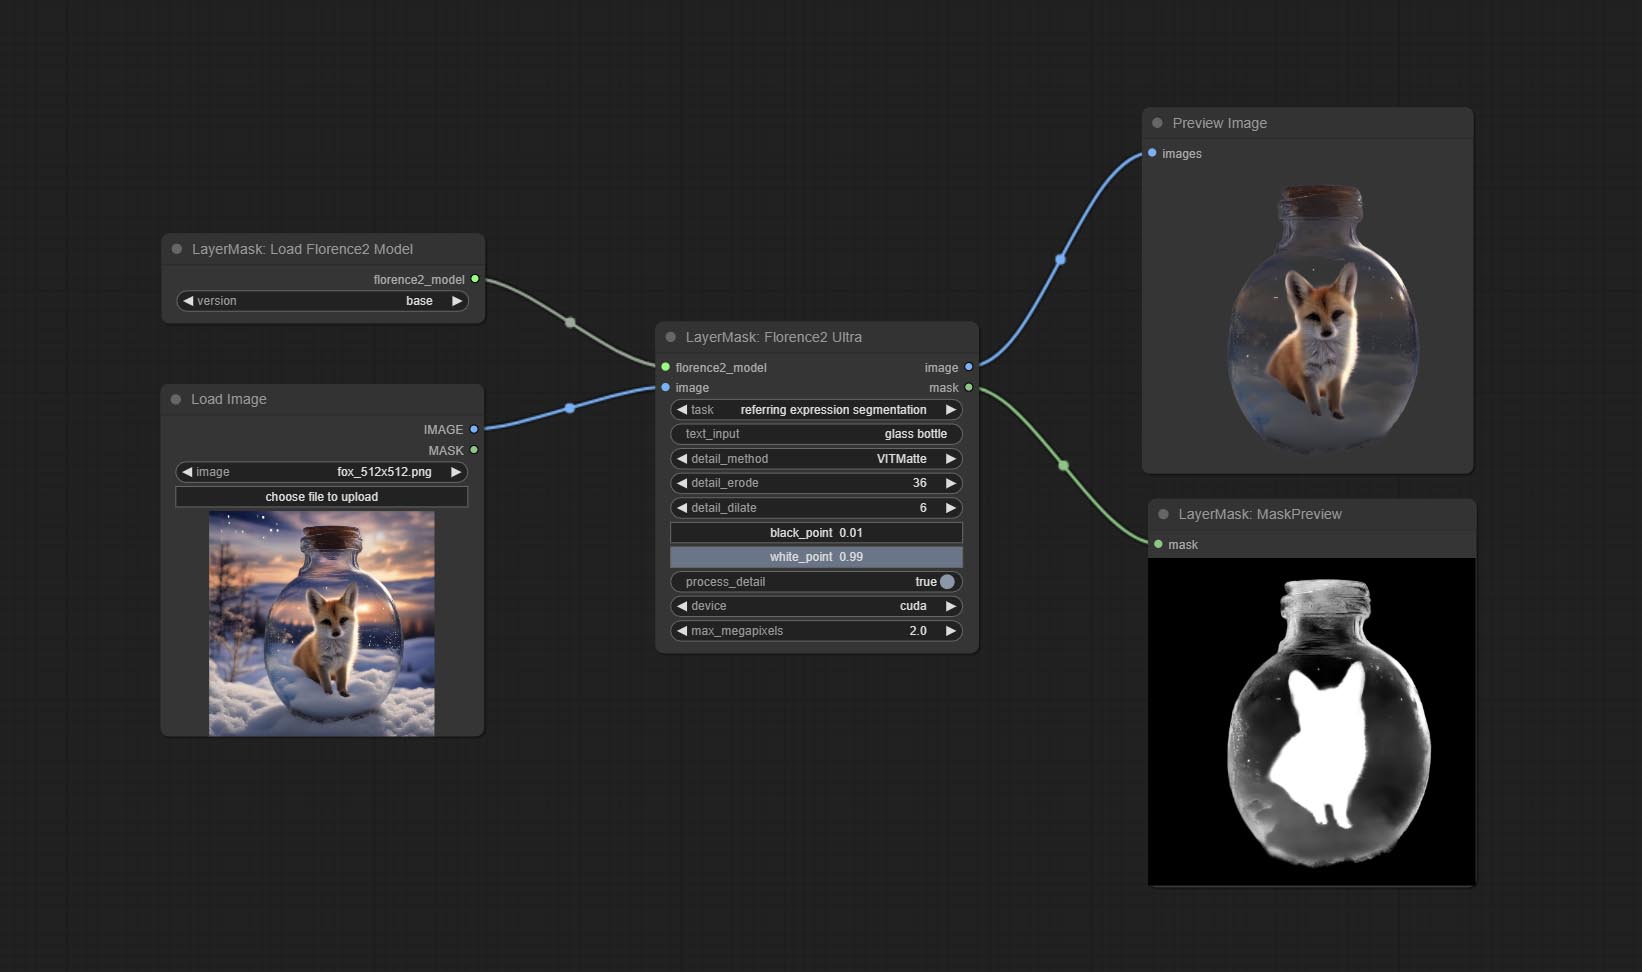
Node Options: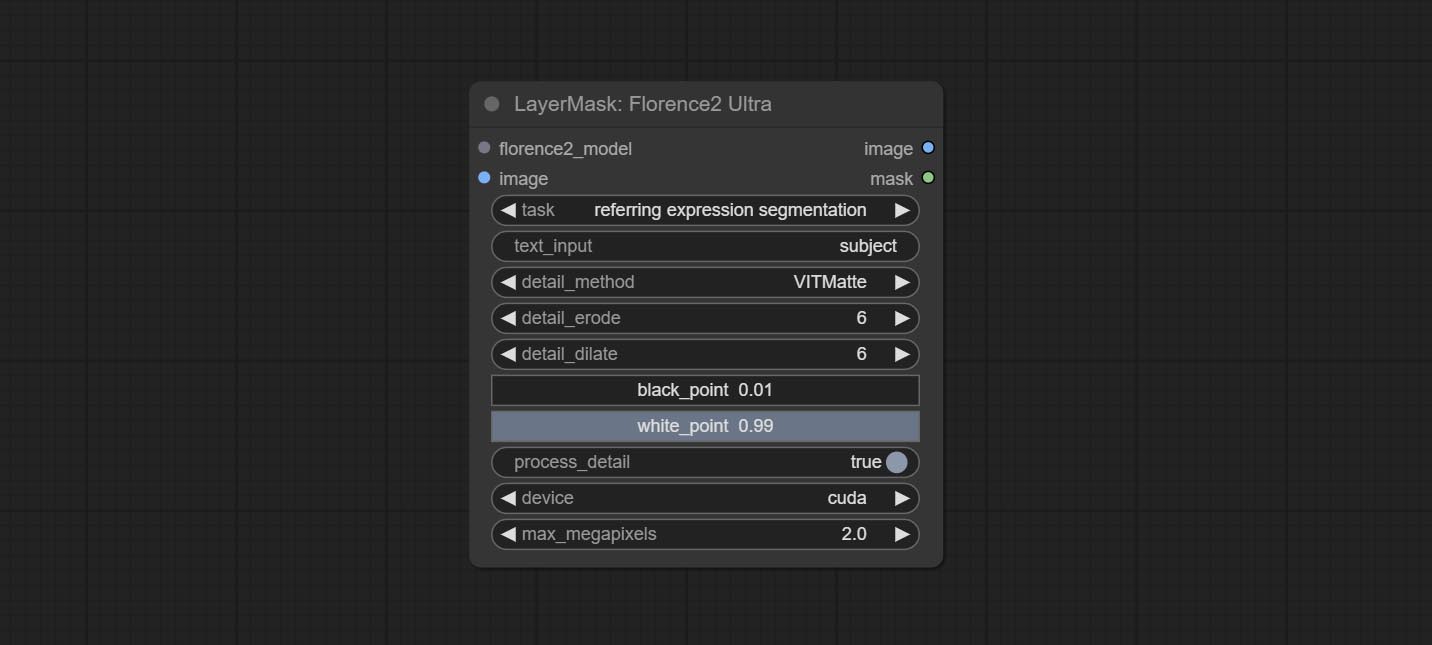
Florence2 model loader. *When using it for the first time, the model will be automatically downloaded.
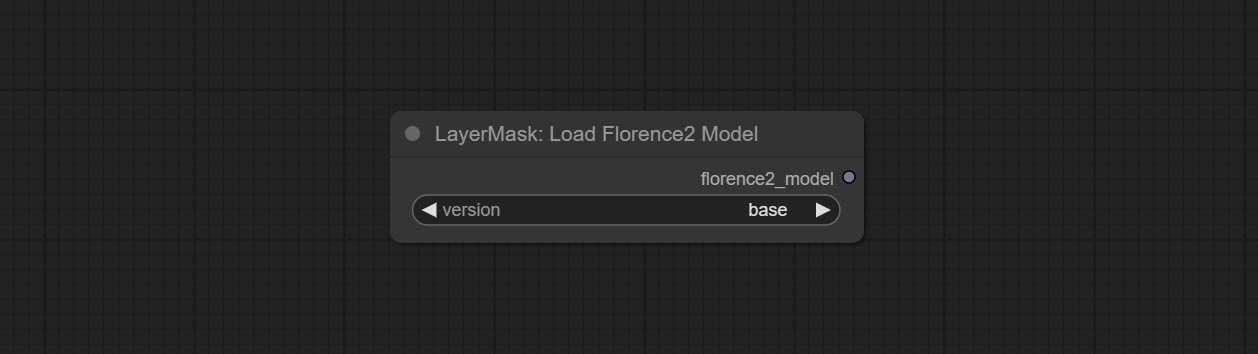
At present, there are base, base-ft, large, large-ft, DocVQA, SD3-Captioner and base-PromptGen models to choose from.
Remove background. compared to the similar background removal nodes, this node has ultra-high edge details.
This node combines the Alpha Matte node of Spacepxl's ComfyUI-Image-Filters and the functionality of ZHO-ZHO-ZHO's ComfyUI-BRIA_AI-RMBG, thanks to the original author.
*Download model files from BRIA Background Removal v1.4 or BaiduNetdisk to ComfyUI/models/rmbg/RMBG-1.4 folder. This model can be used for non-commercial purposes.
Node options: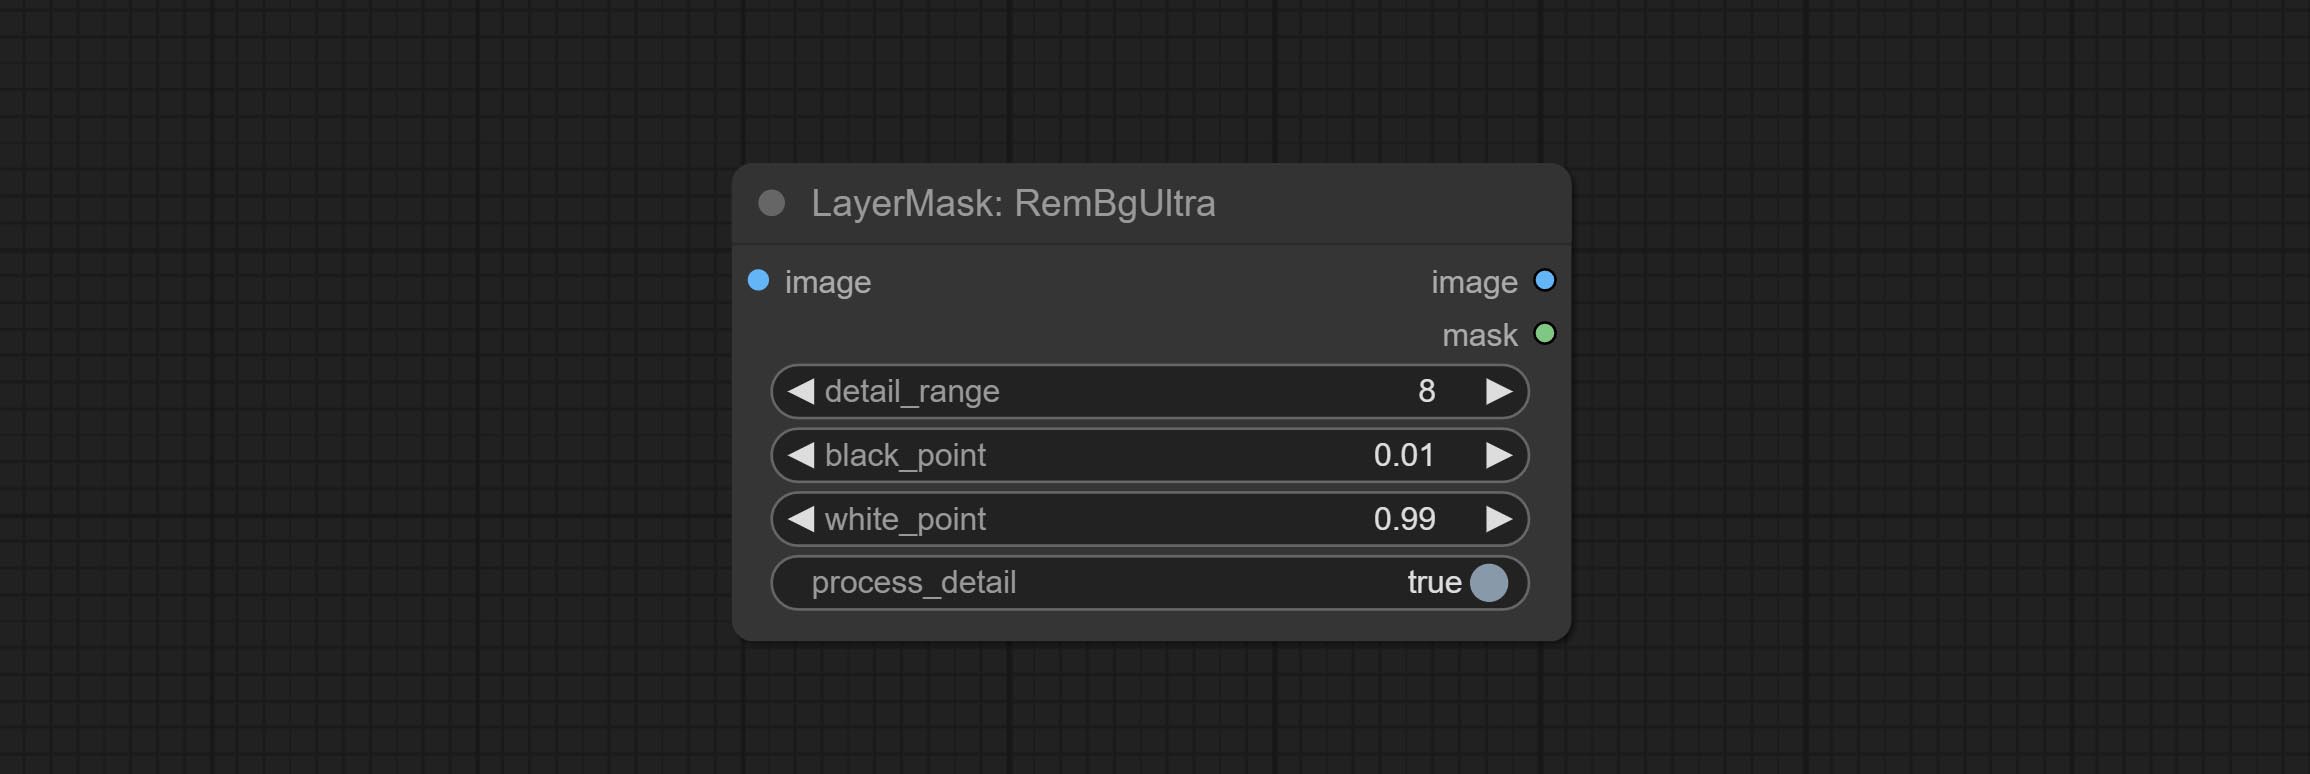
The V2 upgraded version of RemBgUltra has added the VITMatte edge processing method.(Note: Images larger than 2K in size using this method will consume huge memory)
On the basis of RemBgUltra, the following changes have been made: 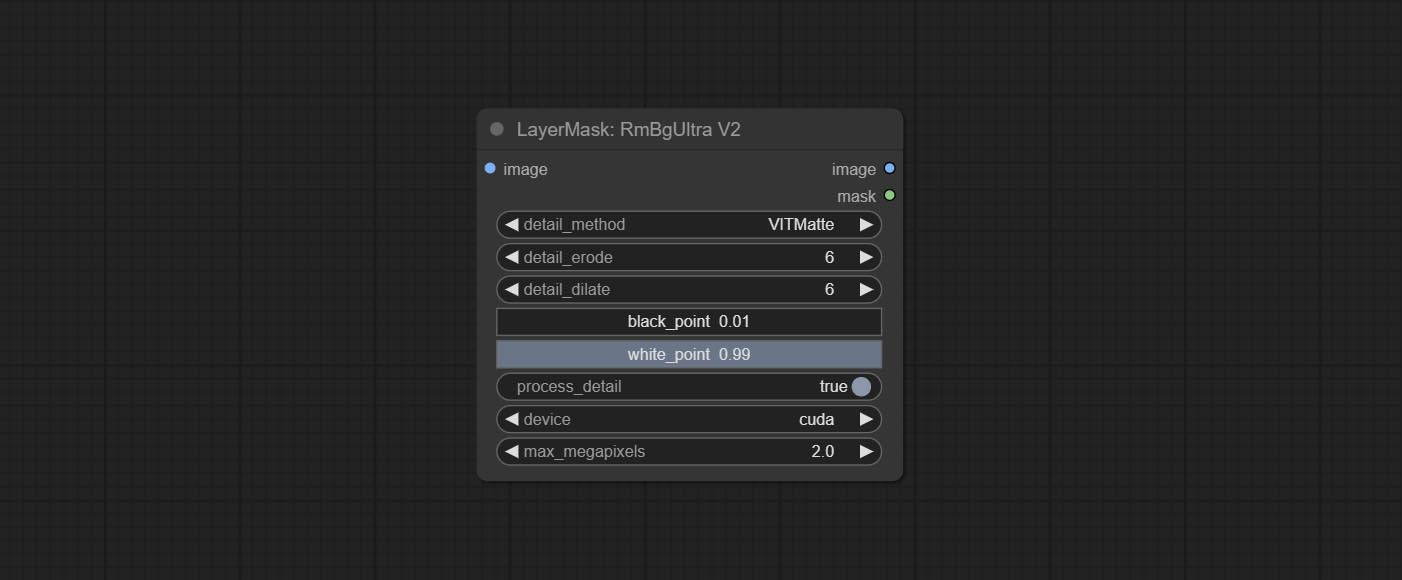
It is the implementation of PramaLLC/BEN project in ComfyUI. Thank you to the original author.
Download the BEN_Base.pth and config.json from huggingface or BaiduNetdisk and copy to ComfyUI/models/BEN folder.
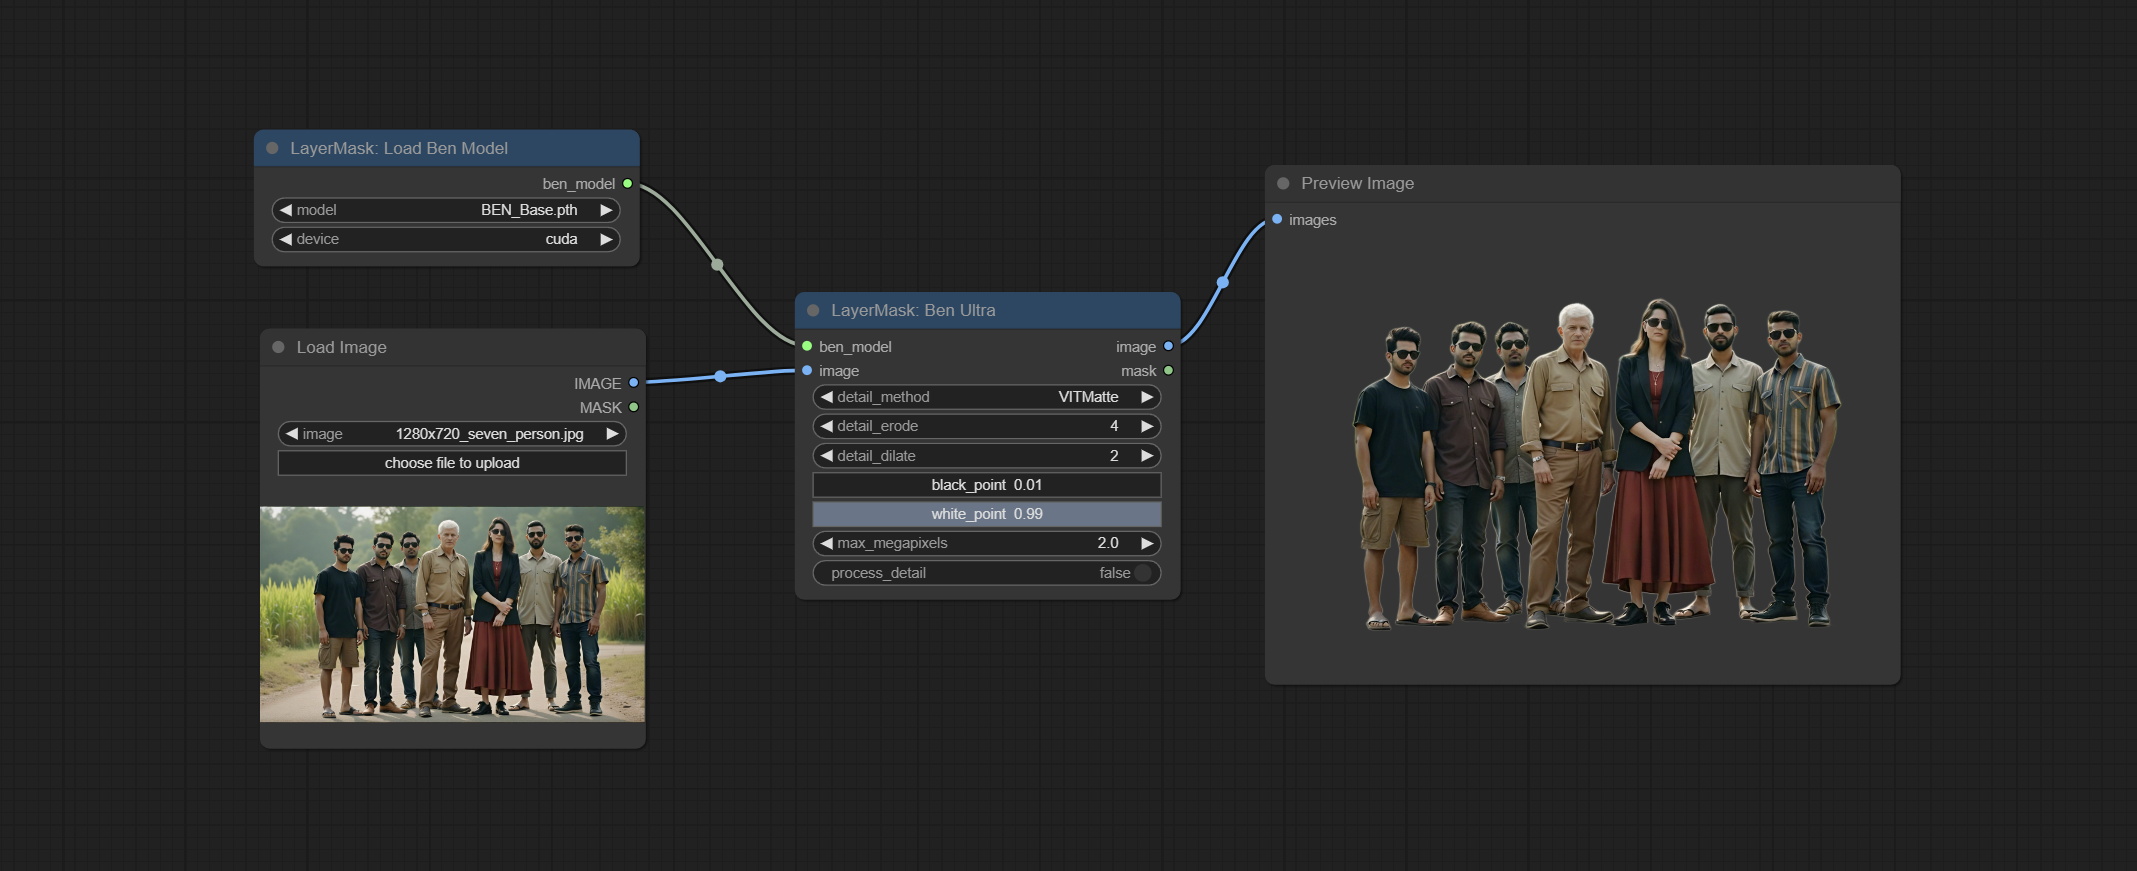
Node Options: 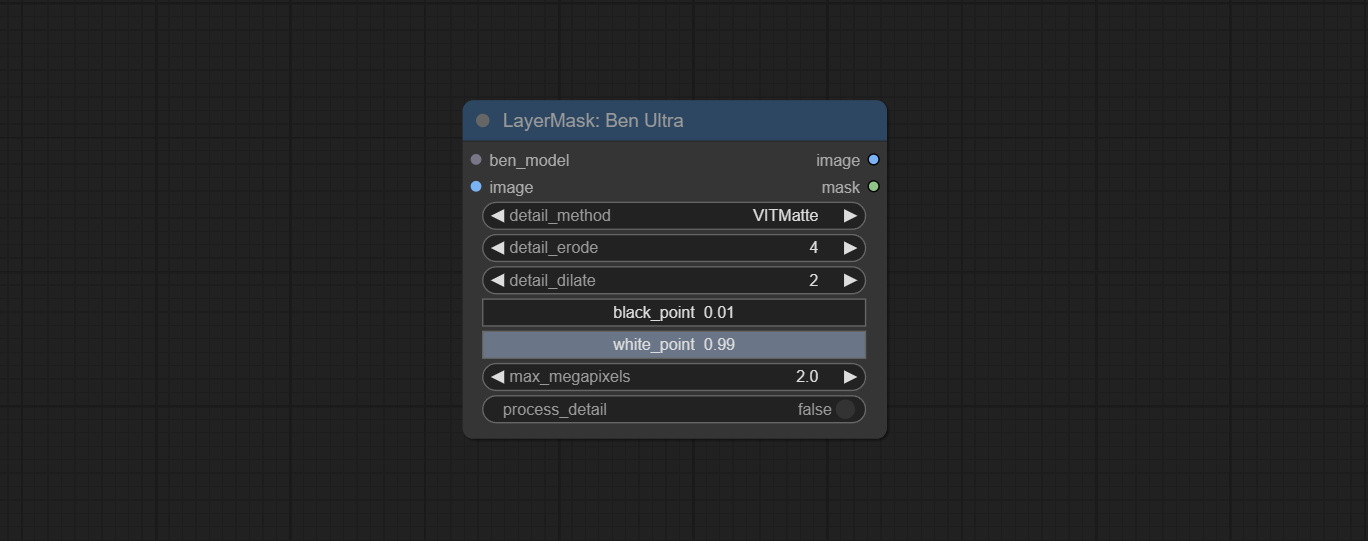
Load the BEN model.
Node Options: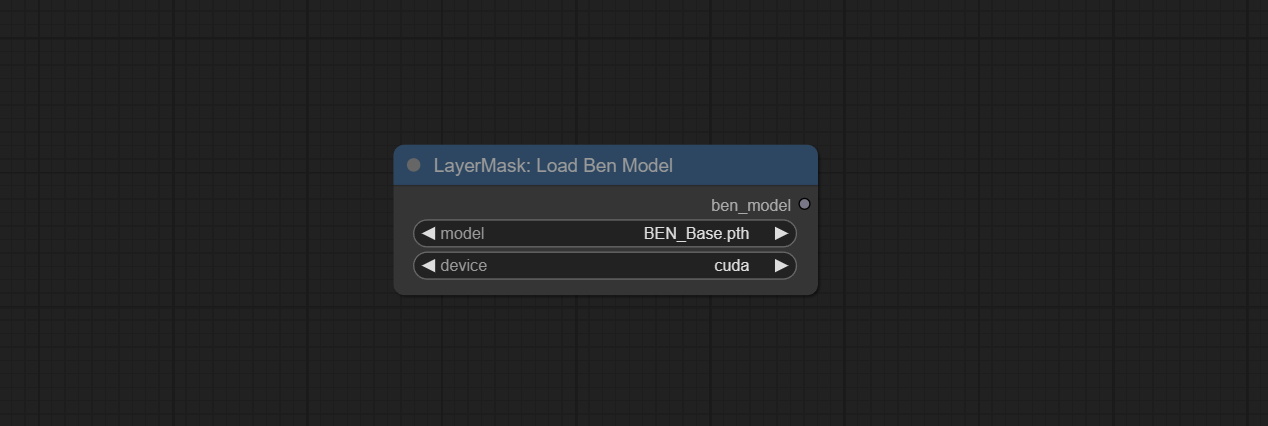
Using the BiRefNet model to remove background has better recognition ability and ultra-high edge details. The code for the model part of this node comes from Viper's ComfyUI-BiRefNet,thanks to the original author.
*From https://huggingface.co/ViperYX/BiRefNet or BaiduNetdisk download the BiRefNet-ep480.pth , pvt_v2_b2.pth , pvt_v2_b5.pth , swin_base_patch4_window12_384_22kto1k.pth , swin_large_patch4_window12_384_22kto1k.pth 5 files to ComfyUI/models/BiRefNet folder.
Node options: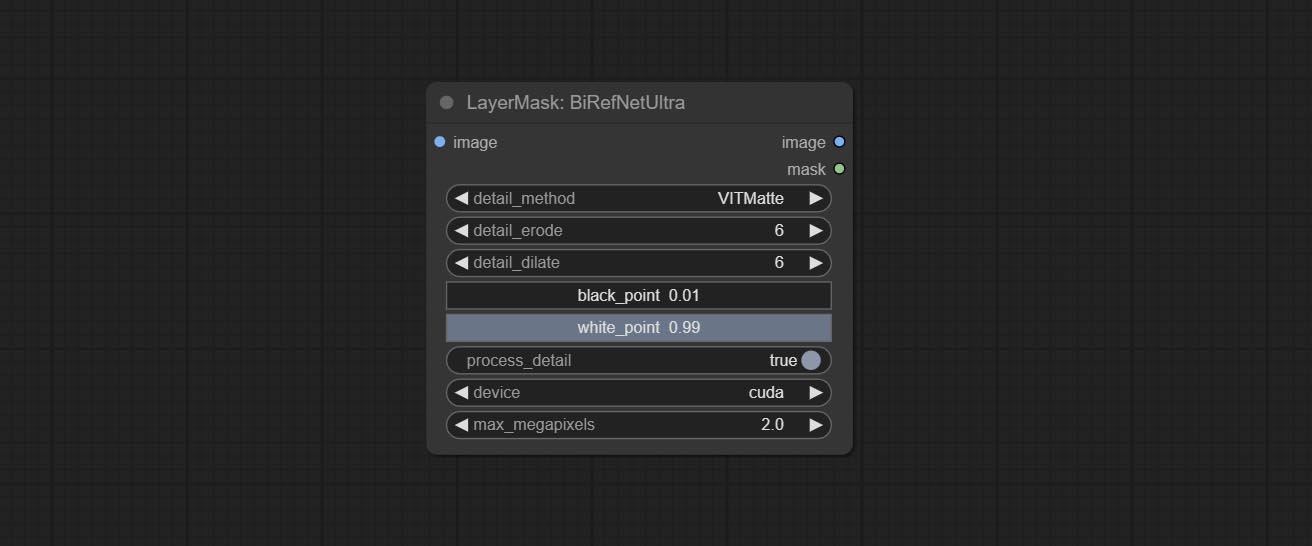
This node supports the use of the latest BiRefNet model. *Download model file from BaiduNetdisk or GoogleDrive named BiRefNet-general-epoch_244.pth to ComfyUI/Models/BiRefNet/pth folder. You can also download more BiRefNet models and put them here.
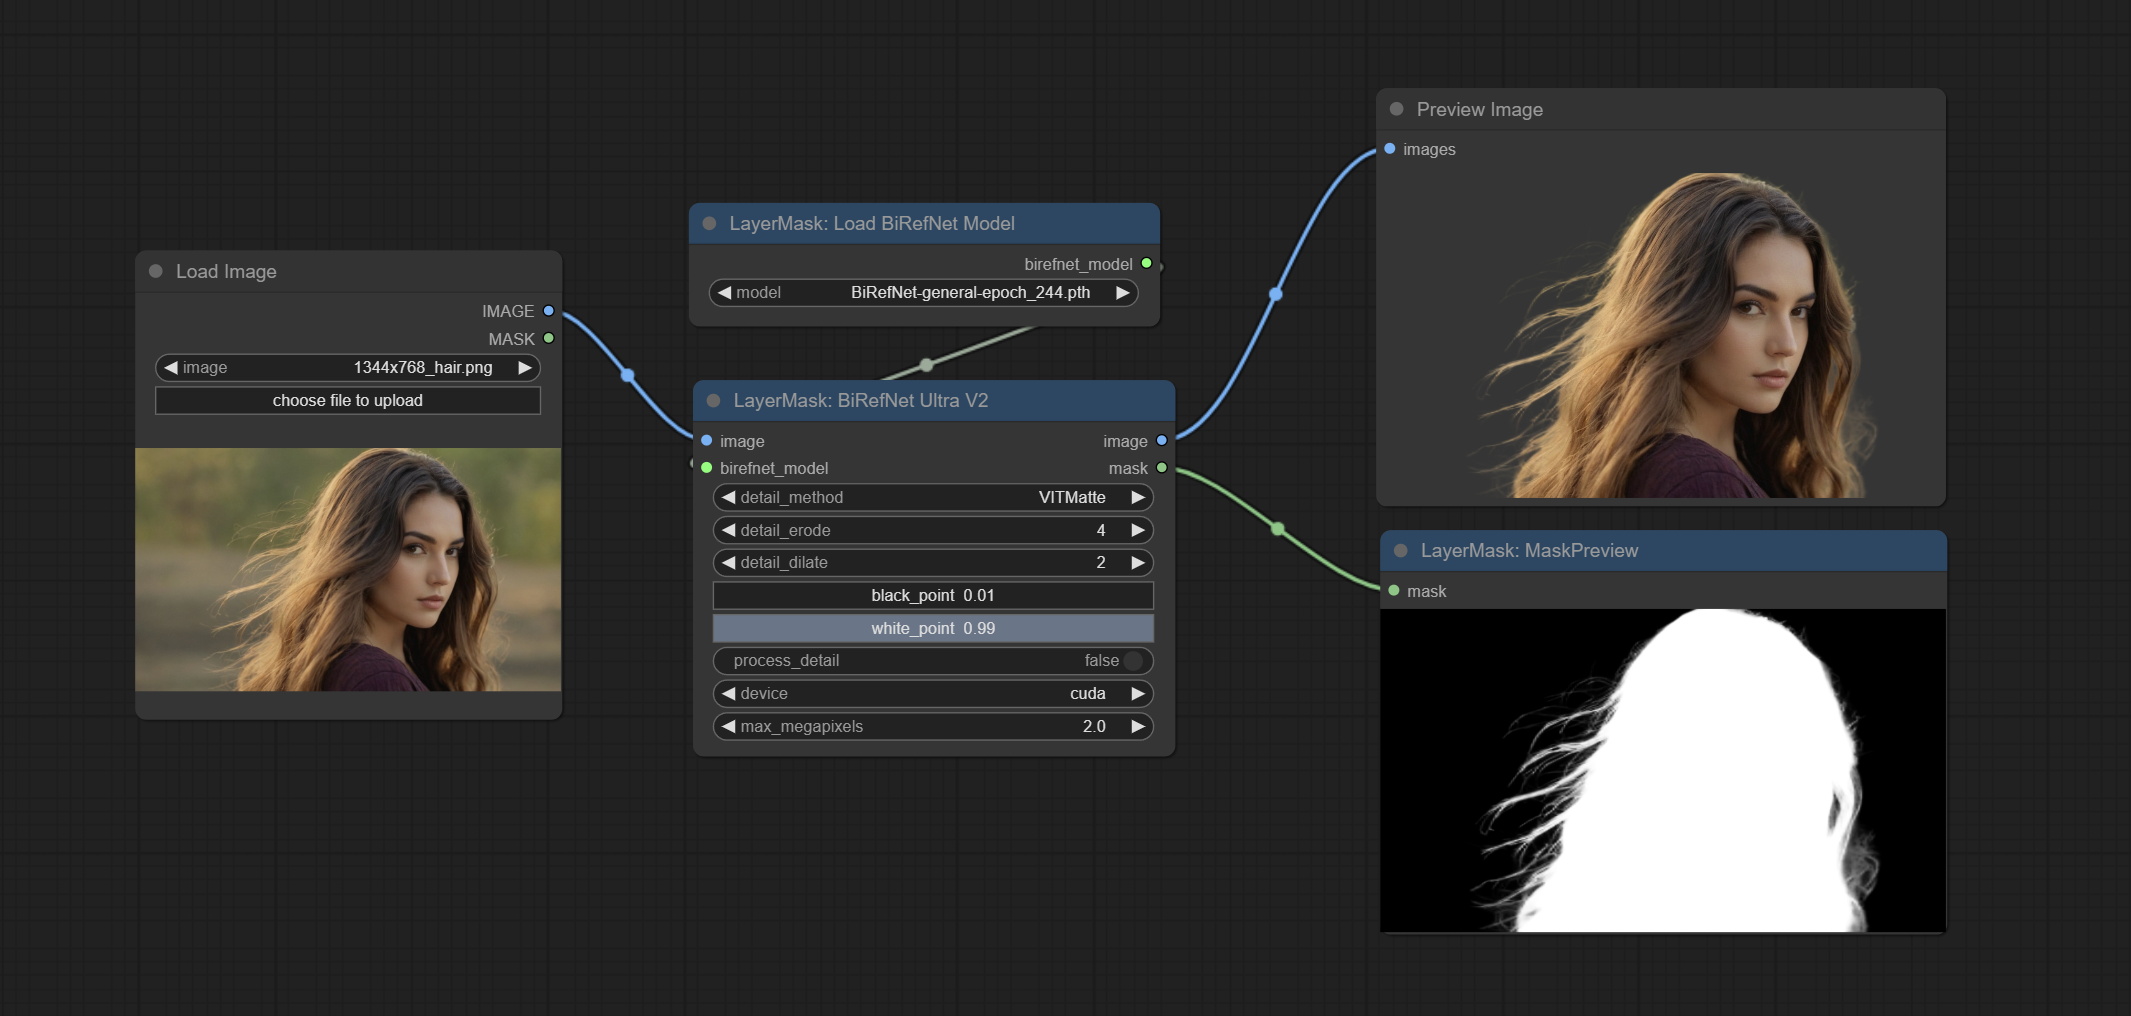
Node Options: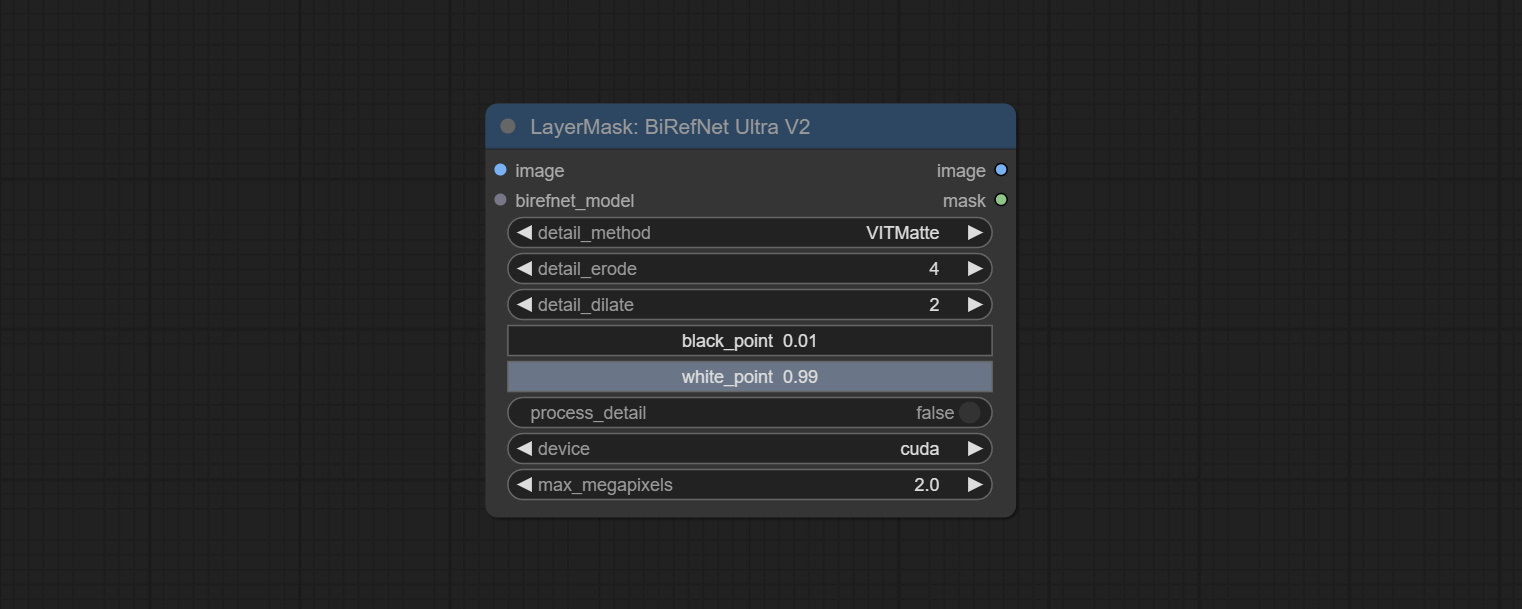
Load the BiRefNet model.
Node Options: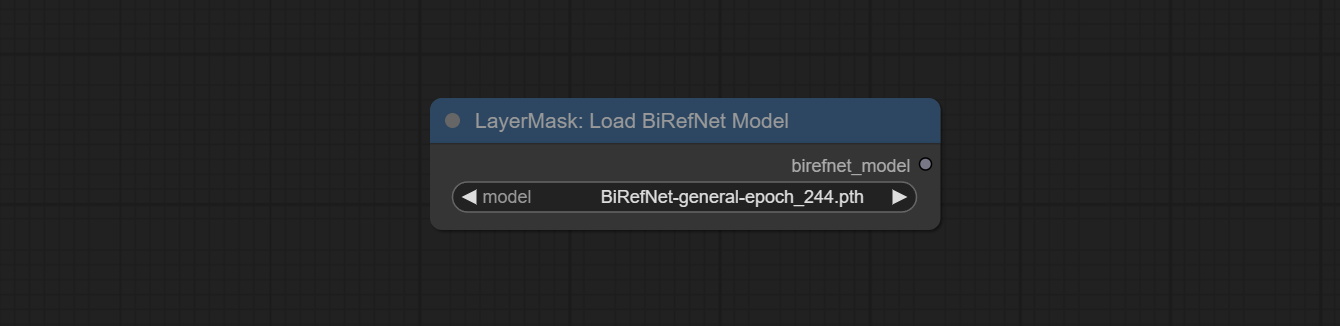
CoomfyUI/models/BiRefNet/pth folder for selection.This node is a PR submitted by jimlee2048 and supports loading RMBG-2.0 models.
Download model files from huggingface or 百度网盘 and copy to ComfyUI/models/BiRefNet/RMBG-2.0 folder.
Node Options: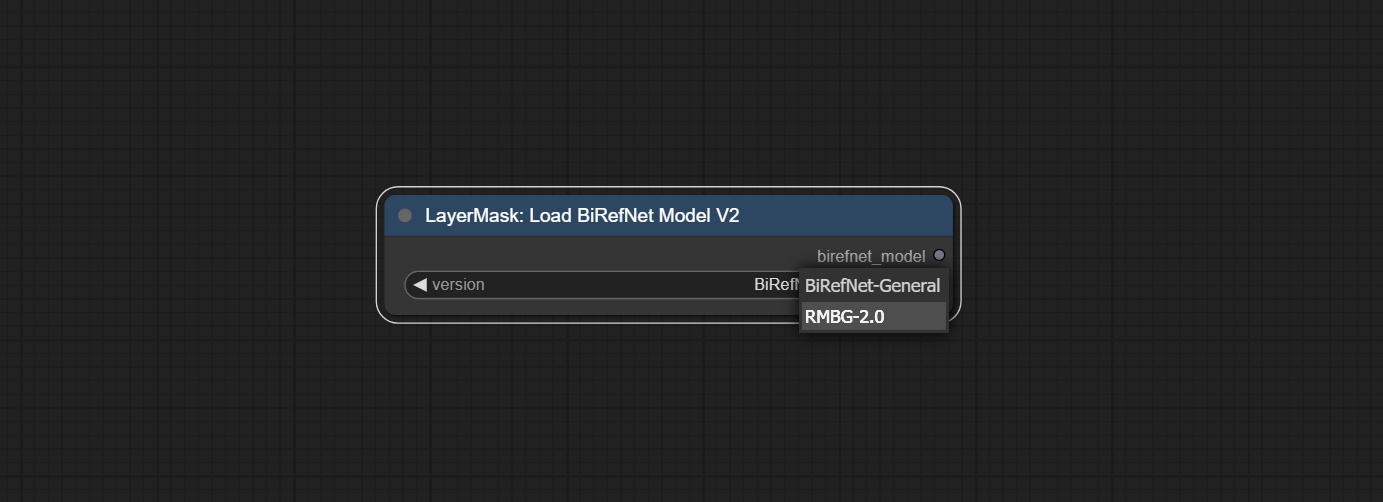
BiRefNet-General and RMBG-2.0 .Using the transparent-background model to remove background has better recognition ability and speed, while also having ultra-high edge details.
*From googledrive or BaiduNetdisk download all files to ComfyUI/models/transparent-background folder.
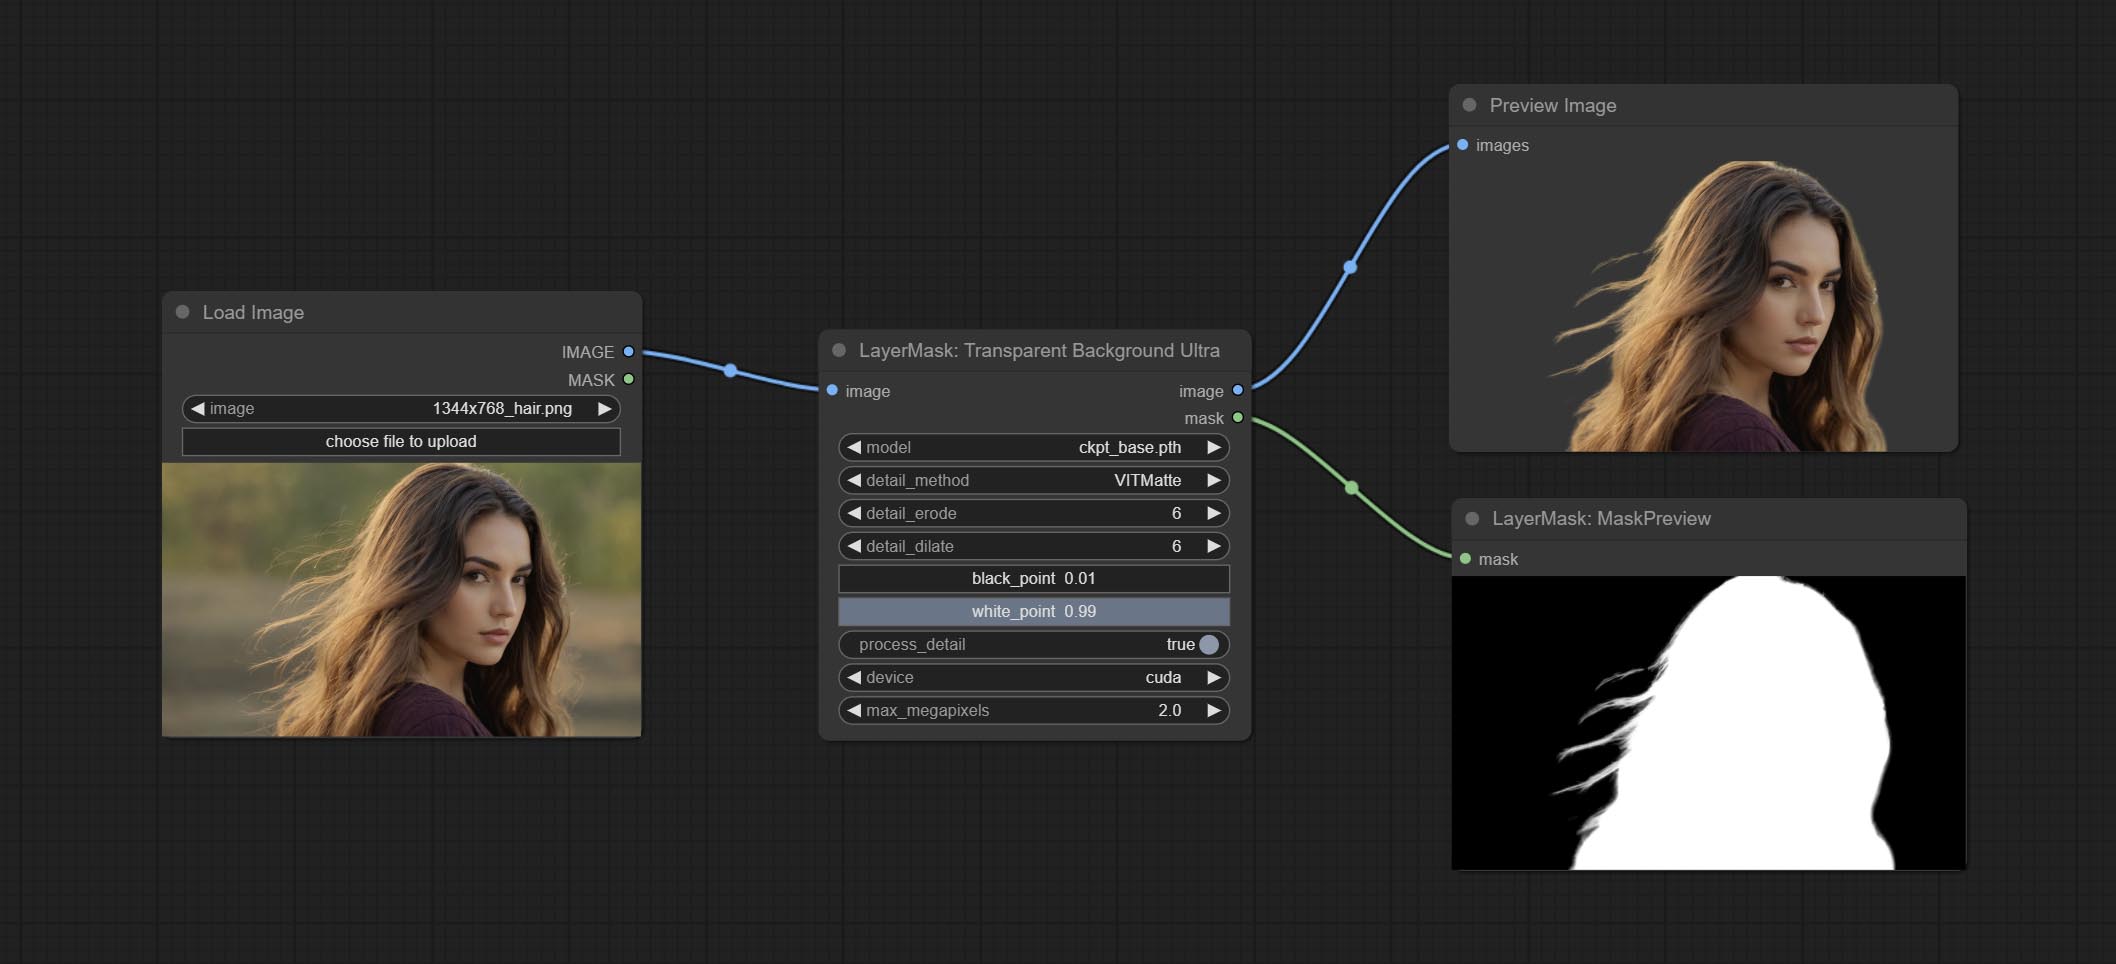
Node Options: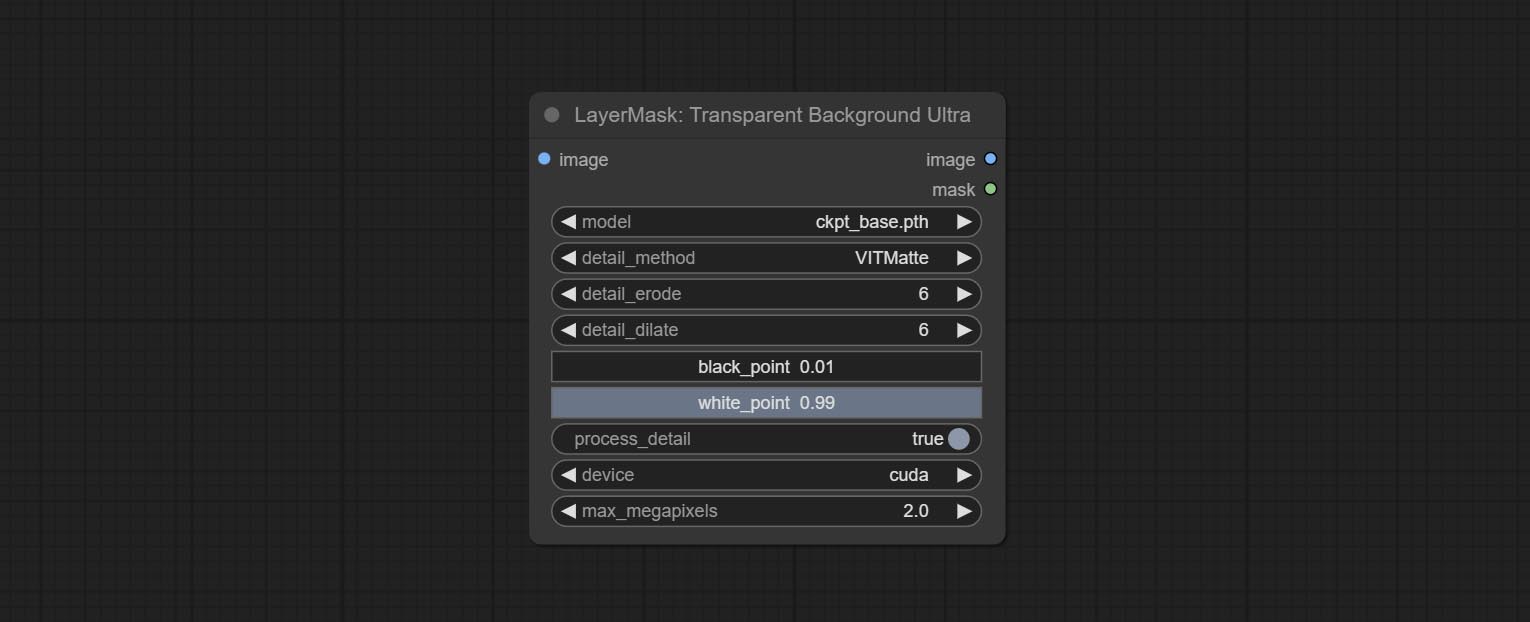
Generate masks for portrait's face, hair, body skin, clothing, or accessories. Compared to the previous A Person Mask Generator node, this node has ultra-high edge details. The model code for this node comes from a-person-mask-generator, edge processing code from ComfyUI-Image-Filters,thanks to the original author. *Download model files from BaiduNetdisk to ComfyUI/models/mediapipe folder.
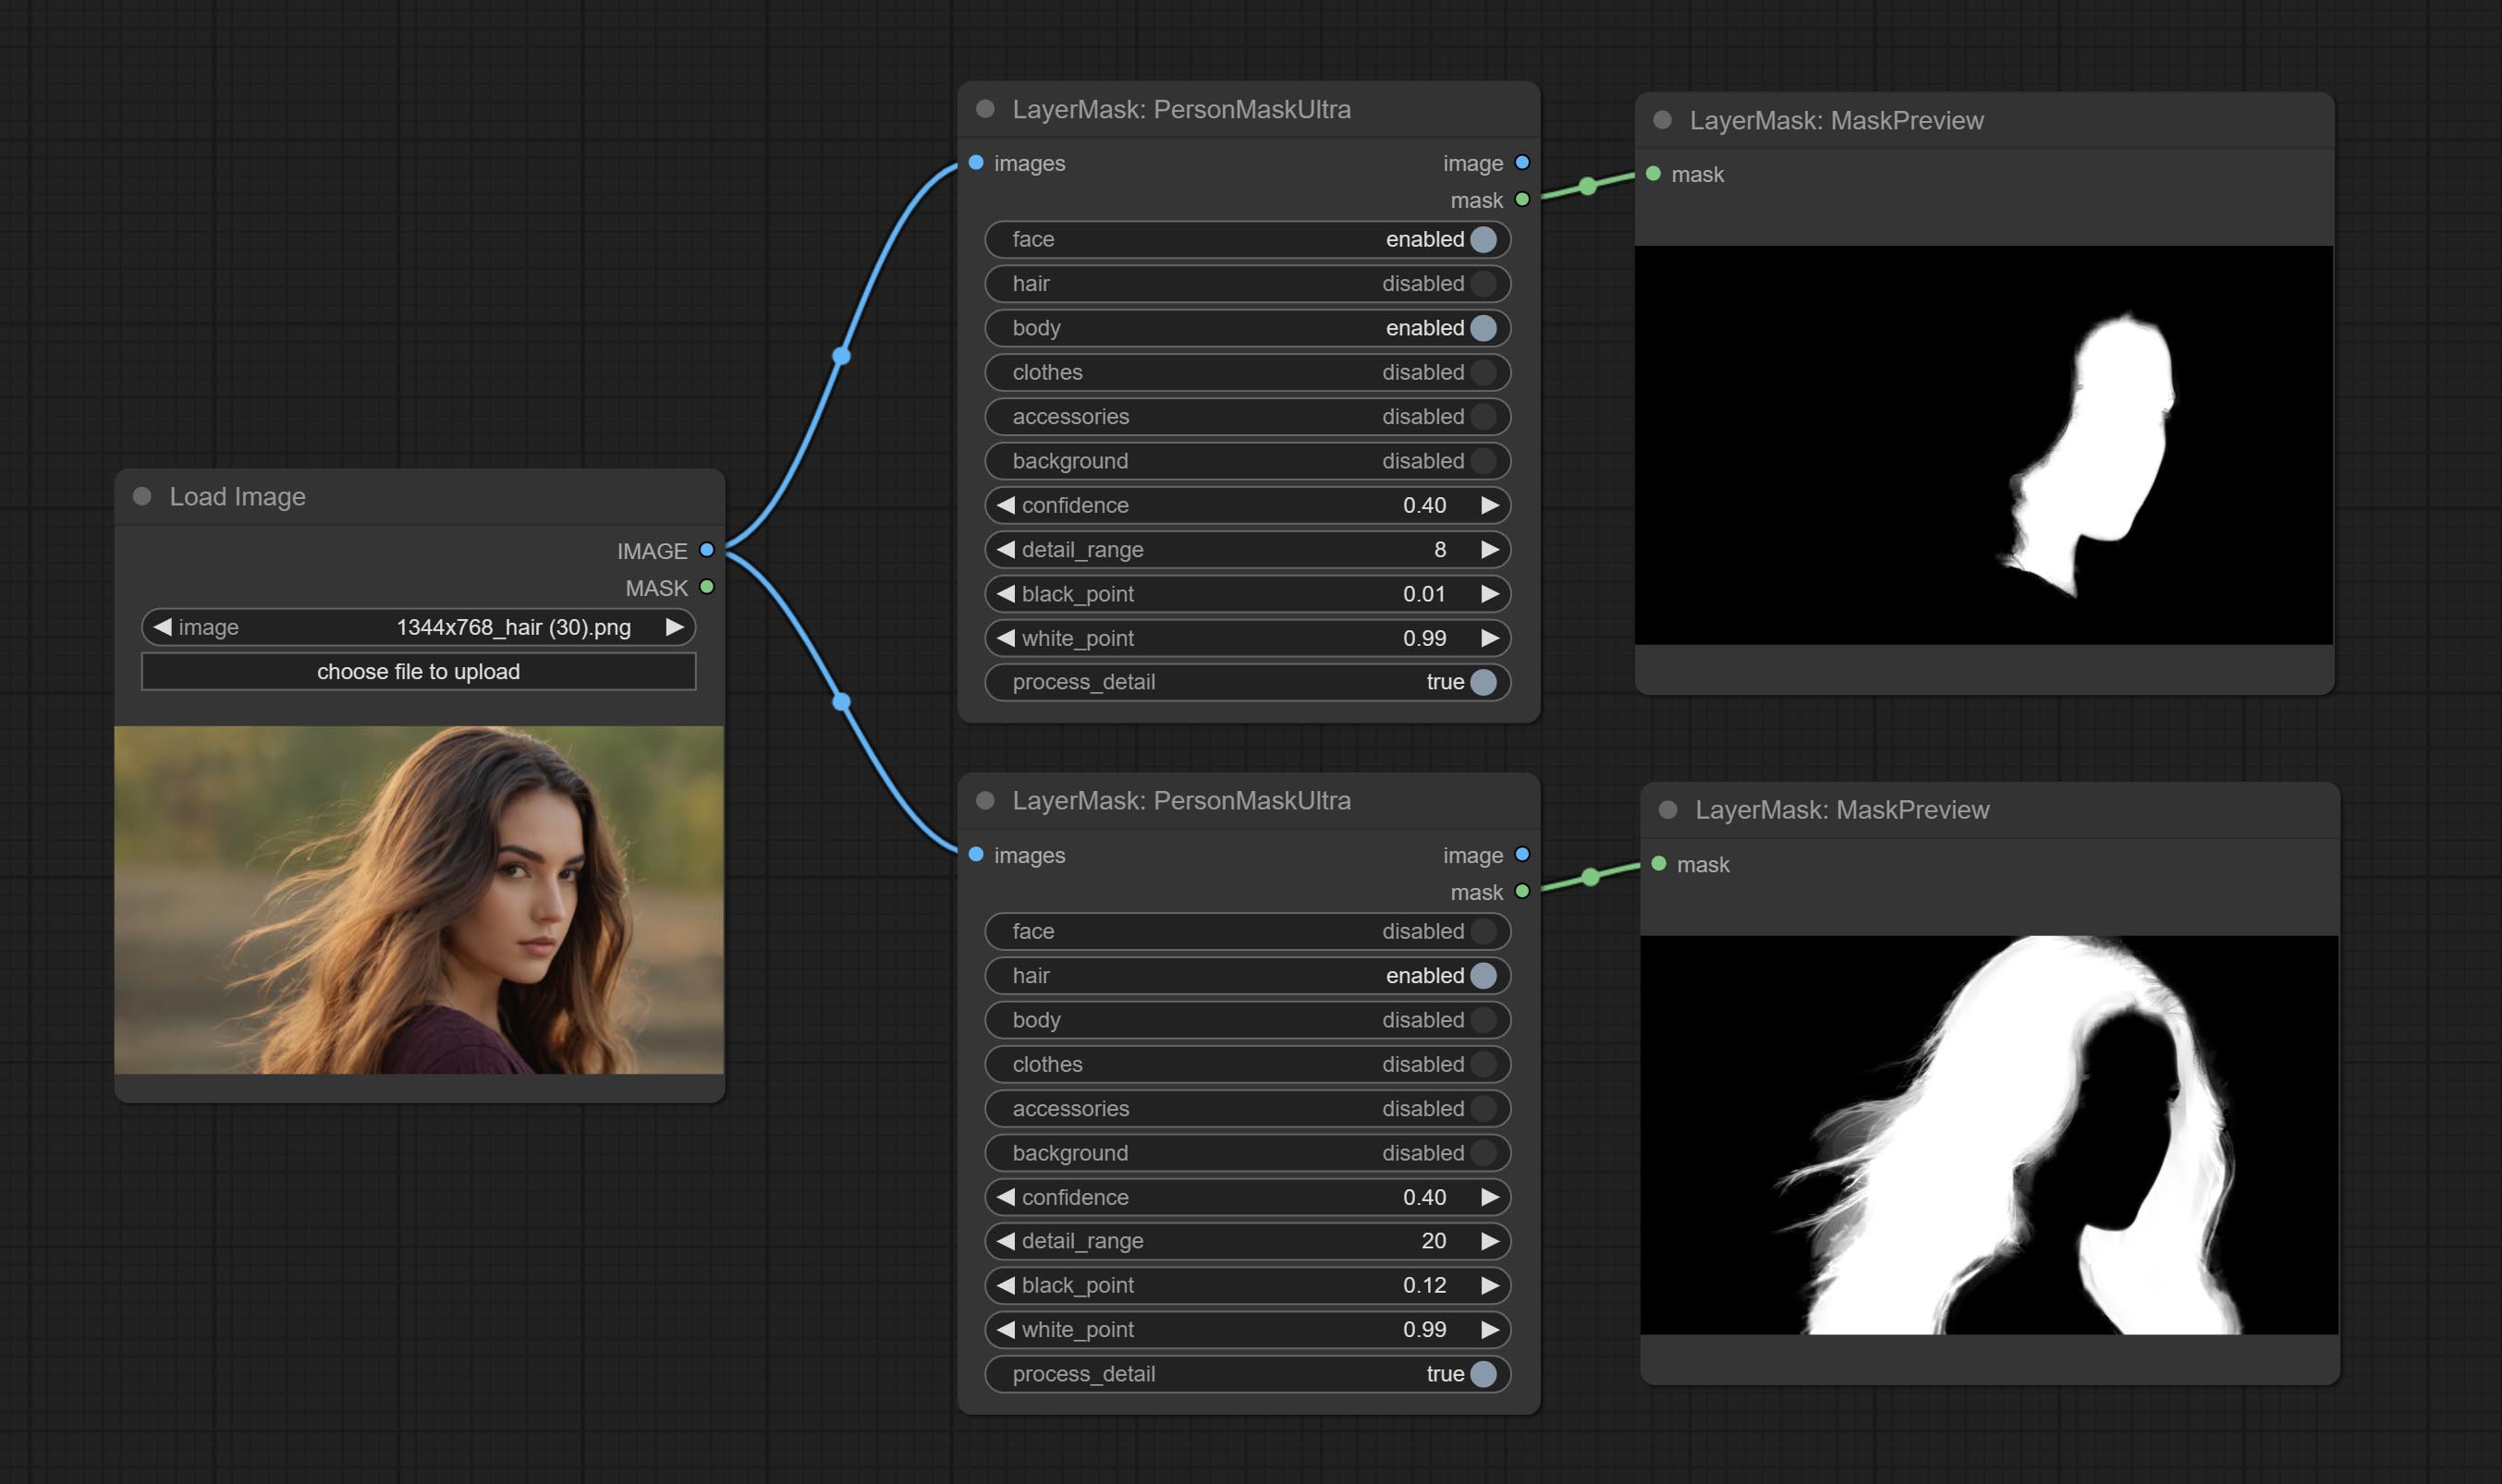
Node options: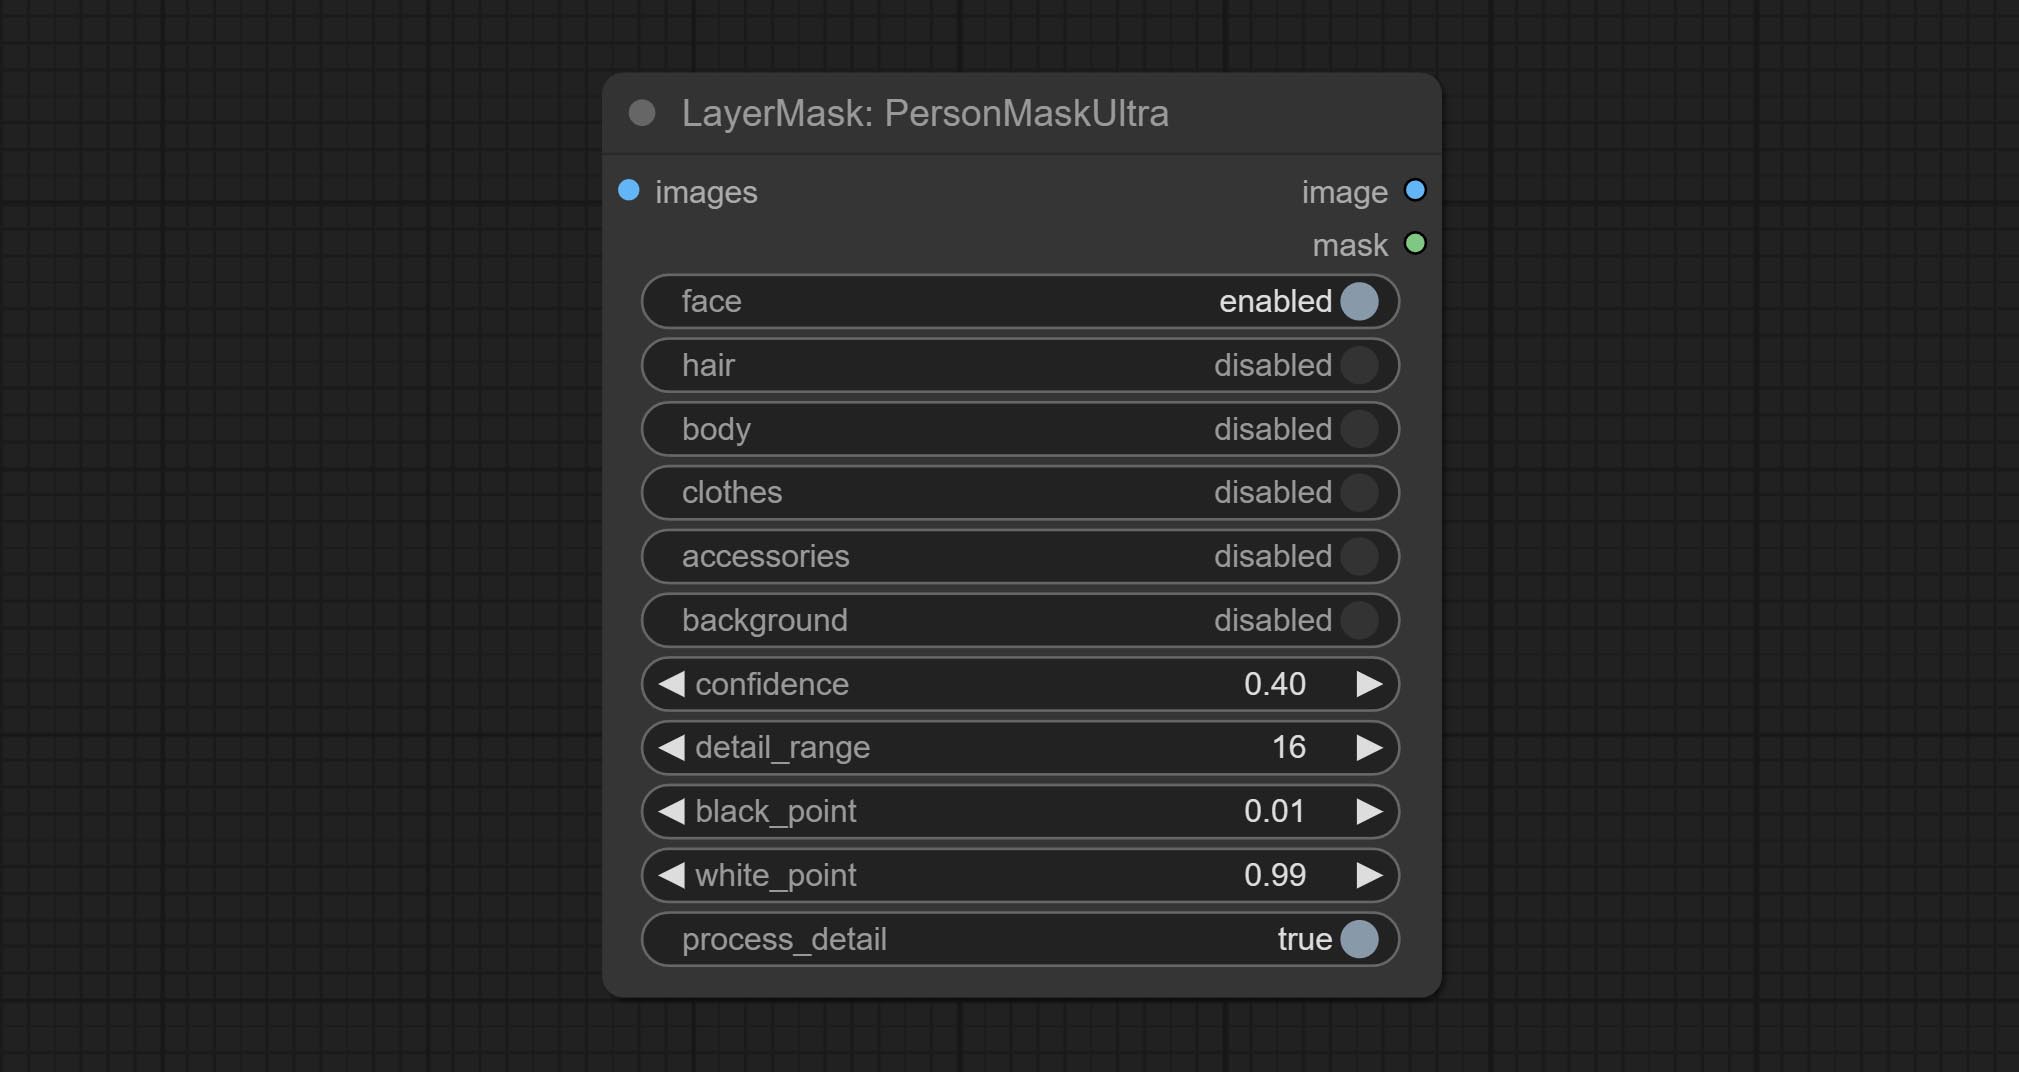
The V2 upgraded version of PersonMaskUltra has added the VITMatte edge processing method.(Note: Images larger than 2K in size using this method will consume huge memory)
On the basis of PersonMaskUltra, the following changes have been made: 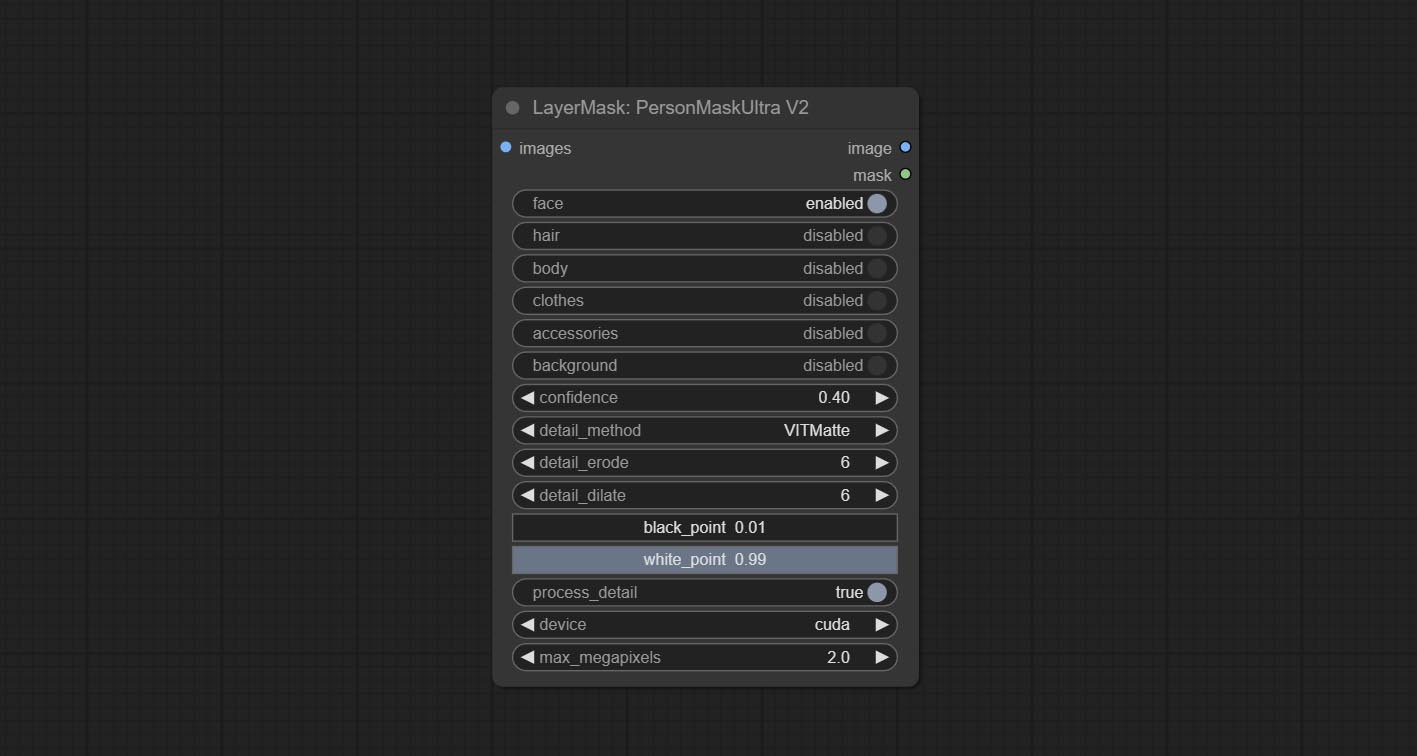
detail_method: Edge processing methods. provides VITMatte, VITMatte(local), PyMatting, GuidedFilter. If the model has been downloaded after the first use of VITMatte, you can use VITMatte (local) afterwards.
detail_erode: Mask the erosion range inward from the edge. the larger the value, the larger the range of inward repair.
detail_dilate: The edge of the mask expands outward. the larger the value, the wider the range of outward repair.
device: Set whether the VitMatte to use cuda.
max_megapixels: Set the maximum size for VitMate operations.

Generate masks for characters' faces, hair, arms, legs, and clothing, mainly used for segmenting clothing. The model segmentation code is fromStartHua,thanks to the original author. Compared to the comfyui_segformer_b2_clothes, this node has ultra-high edge details. (Note: Generating images with edges exceeding 2K in size using the VITMatte method will consume a lot of memory)
*Download all model files from huggingface or BaiduNetdisk to ComfyUI/models/segformer_b2_clothes folder.
Node Options: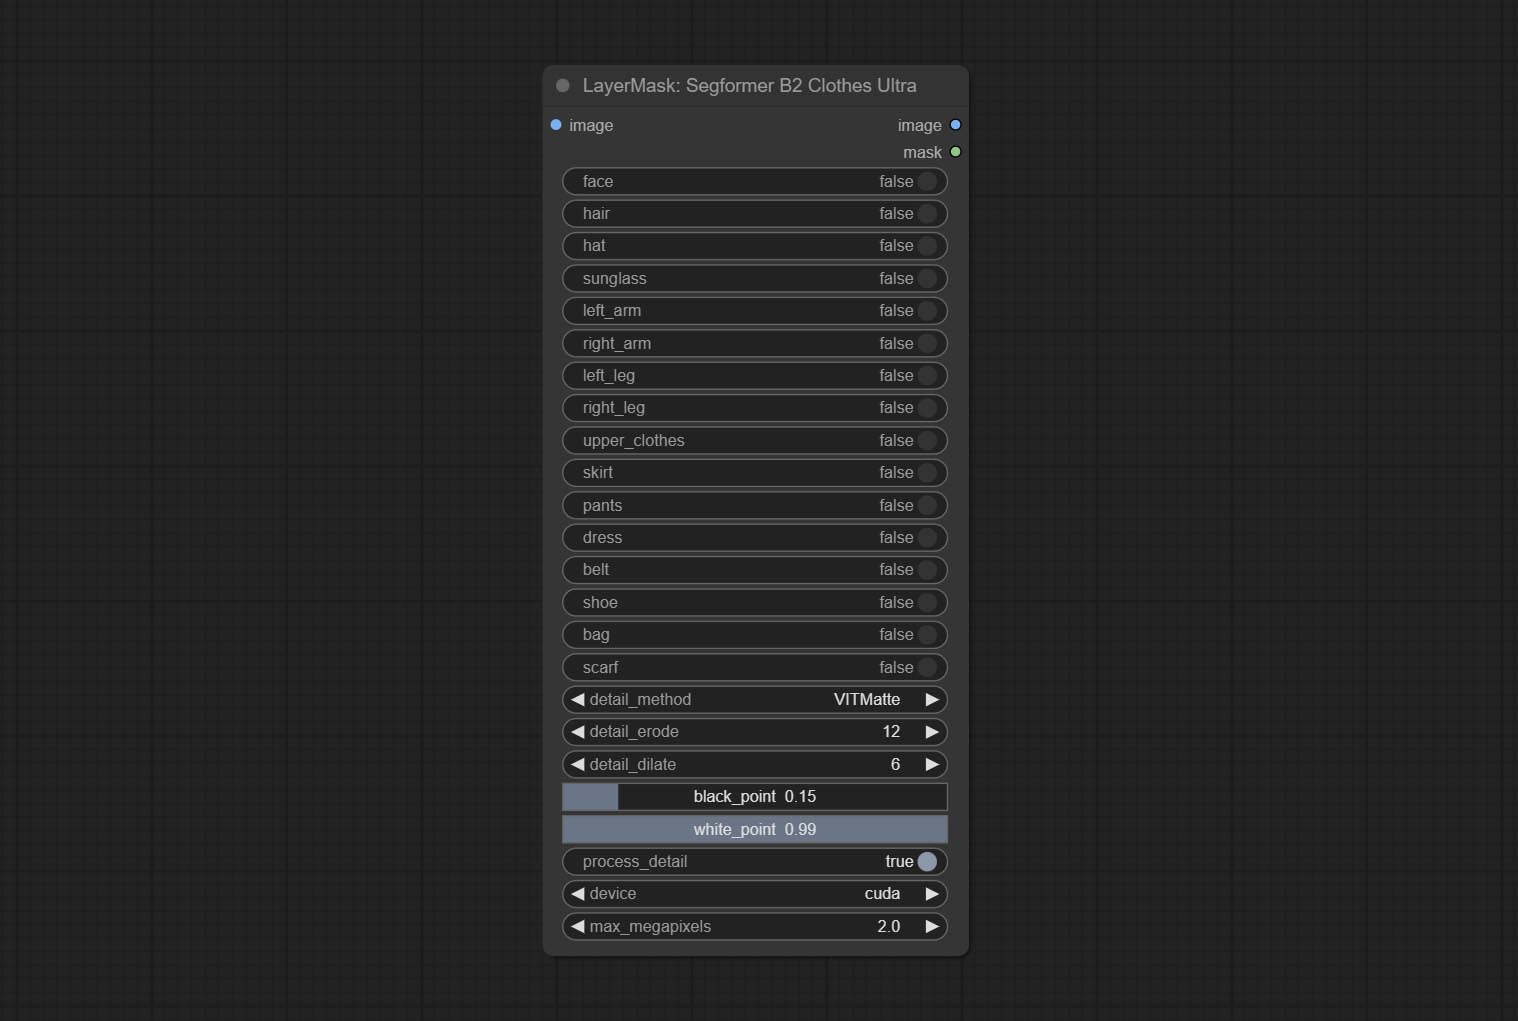
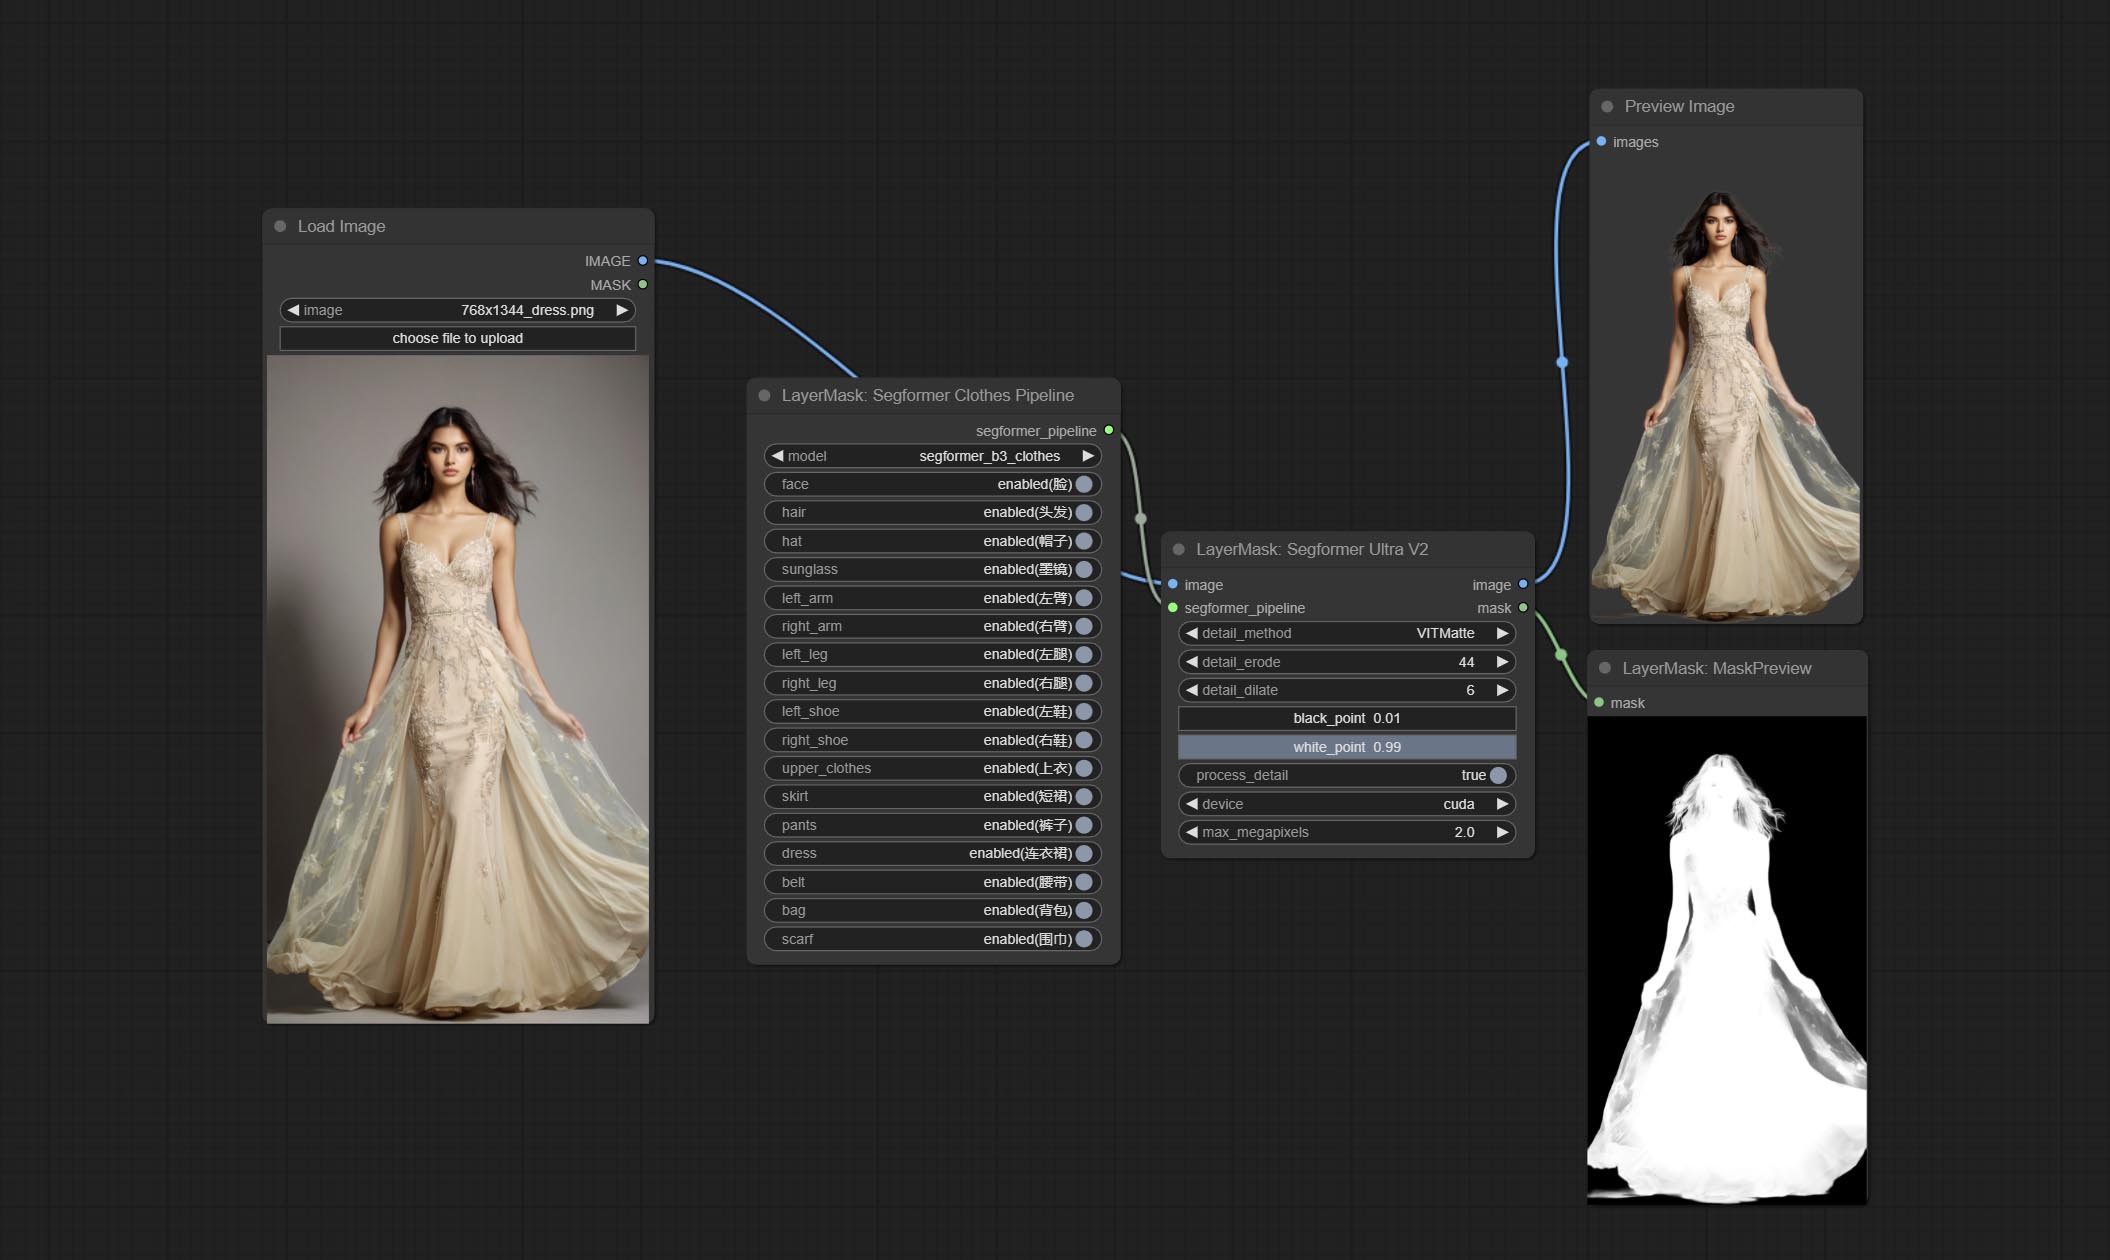
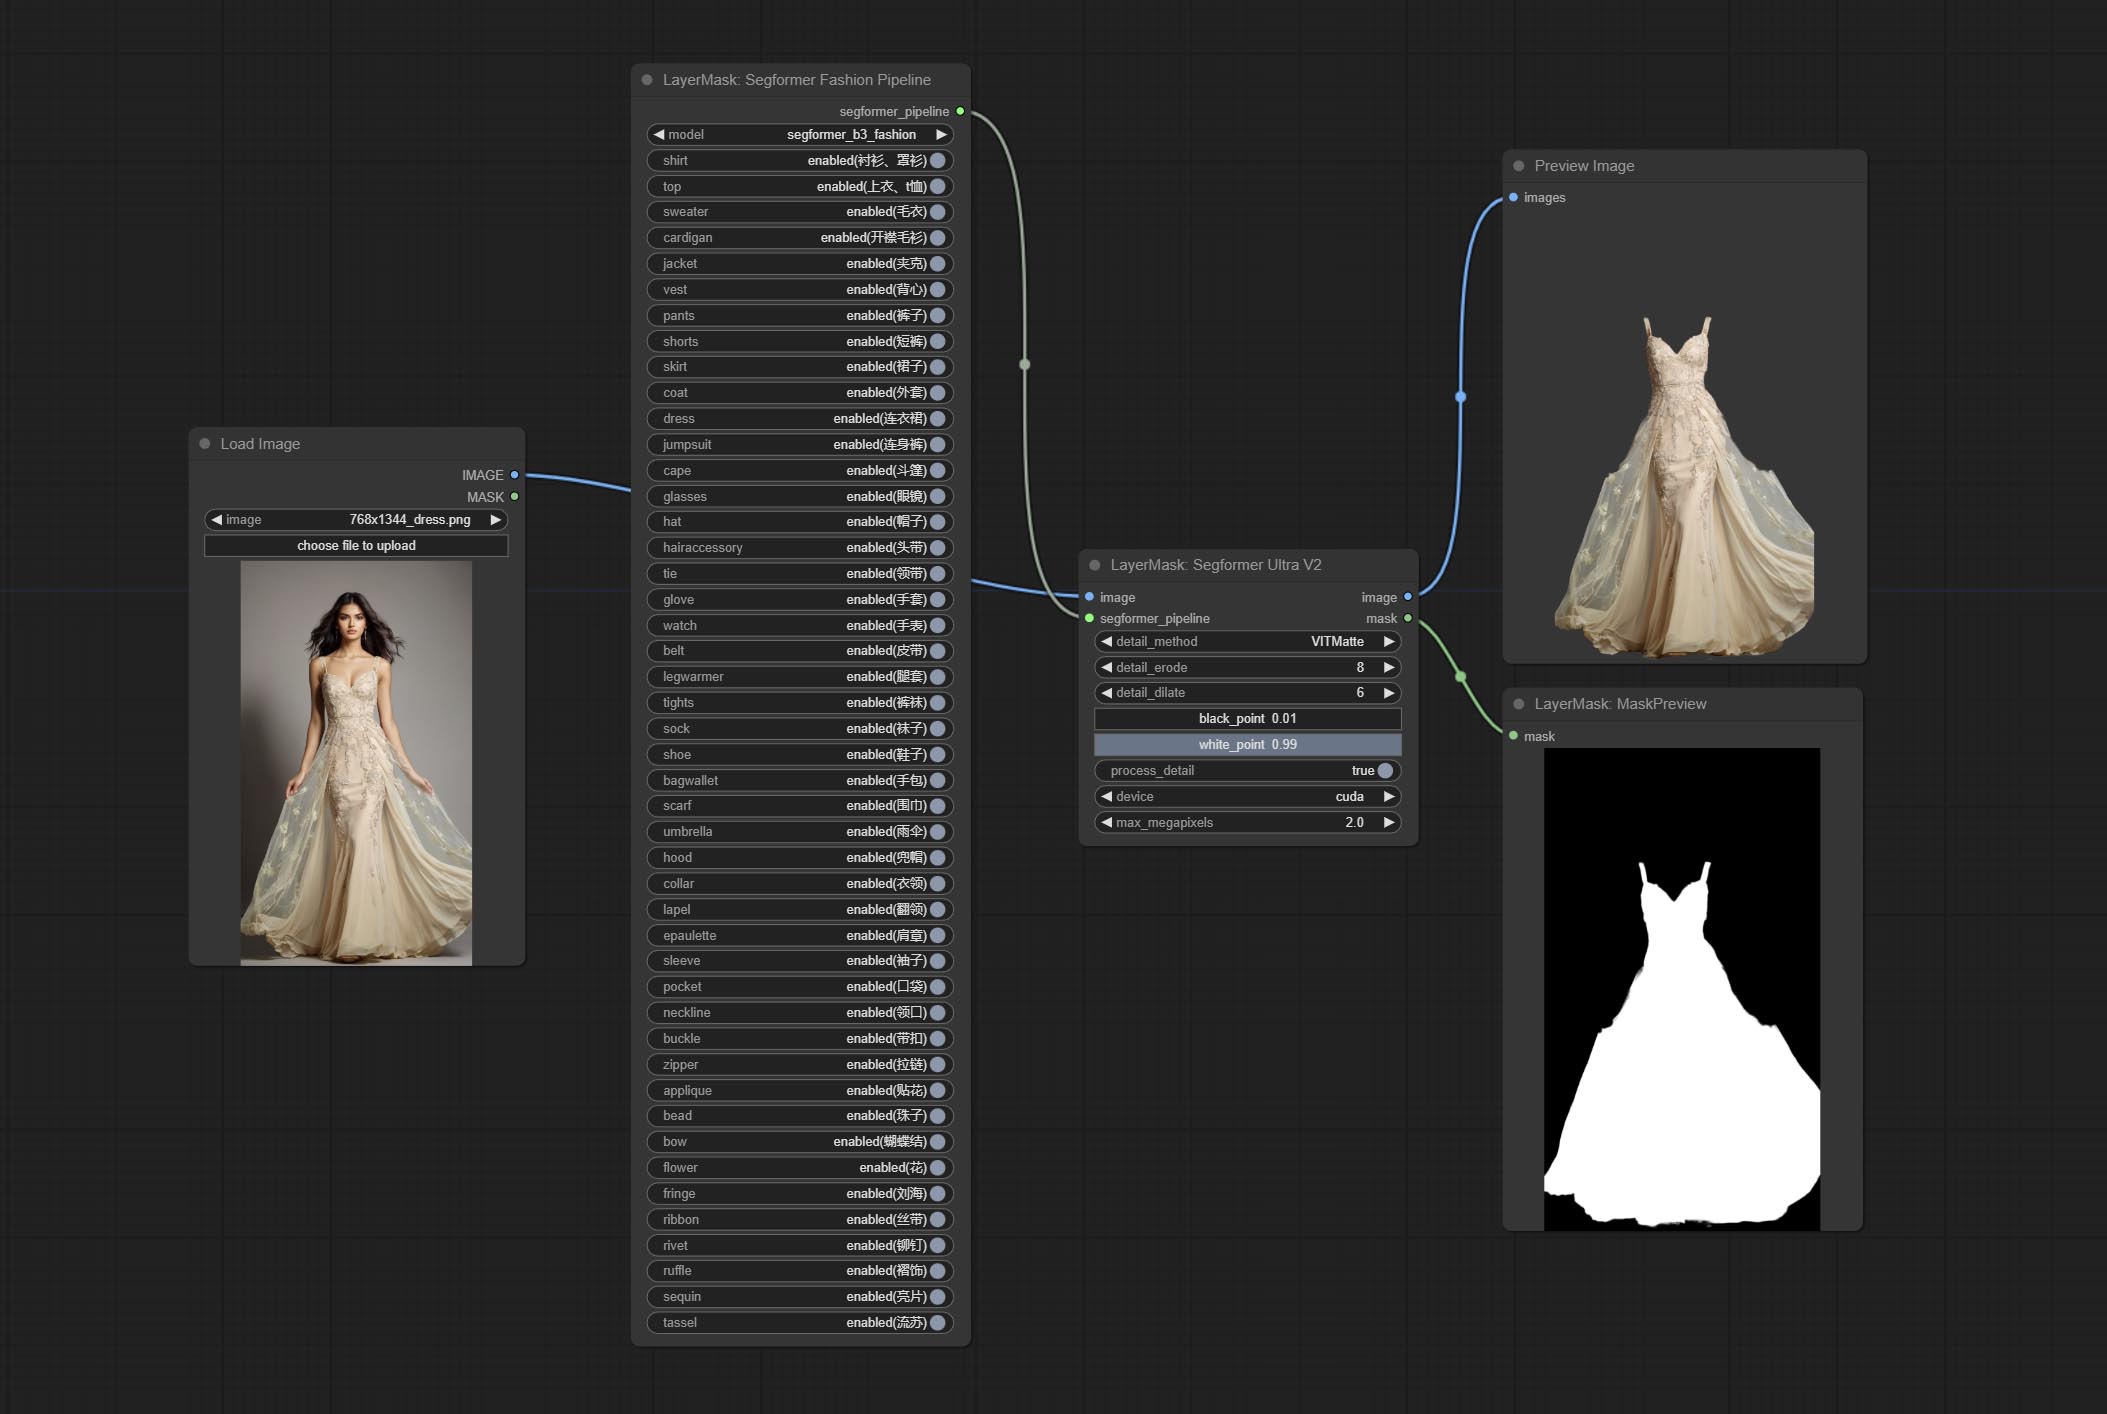
Using the segformer model to segment clothing with ultra-high edge details. Currently supports segformer b2 clothes, segformer b3 clothes and segformer b3 fashion。
*Download modelfiles from huggingface or BaiduNetdisk to ComfyUI/models/segformer_b2_clothes folder.
*Download modelfiles from huggingface or BaiduNetdisk to ComfyUI/models/segformer_b3_clothes folder.
*Download modelfiles from huggingface or BaiduNetdisk to ComfyUI/models/segformer_b3_fashion folder.
Node Options: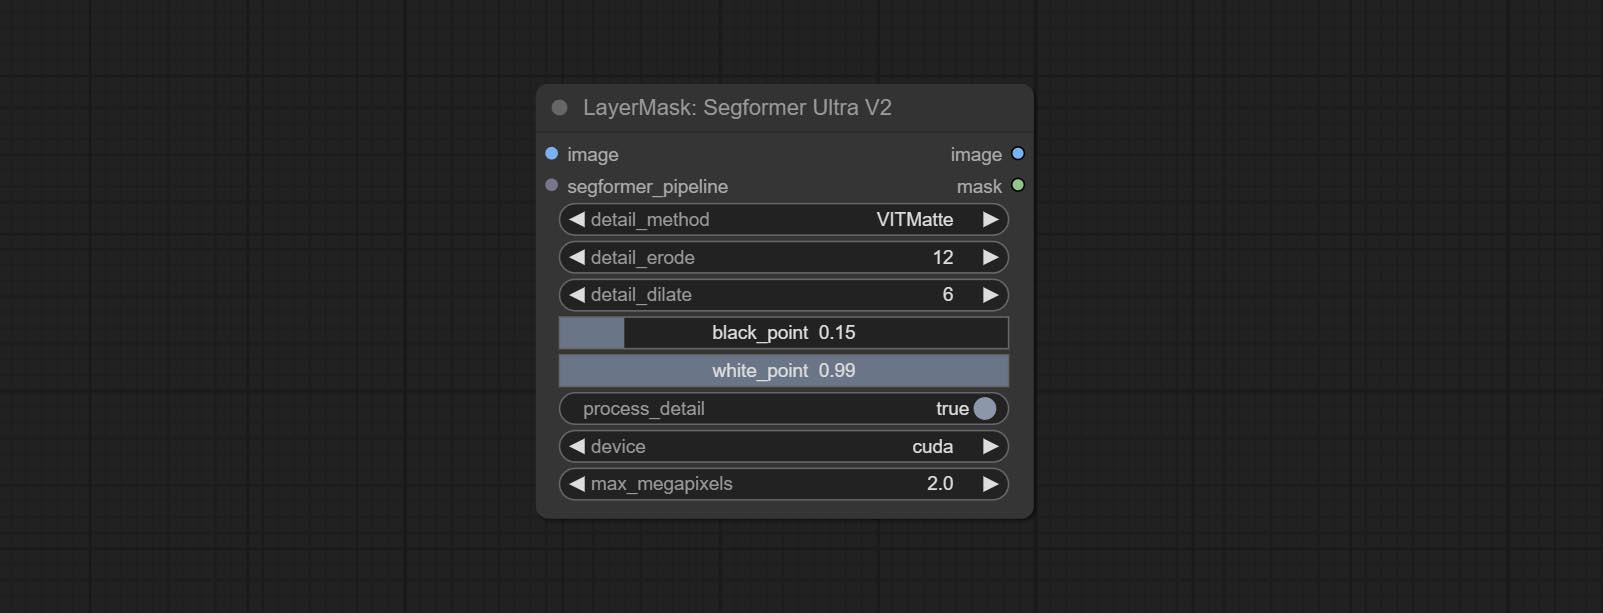
Select the segformer clothes model and choose the segmentation content.
Node Options:
Select the segformer fashion model and choose the segmentation content.
Node Options: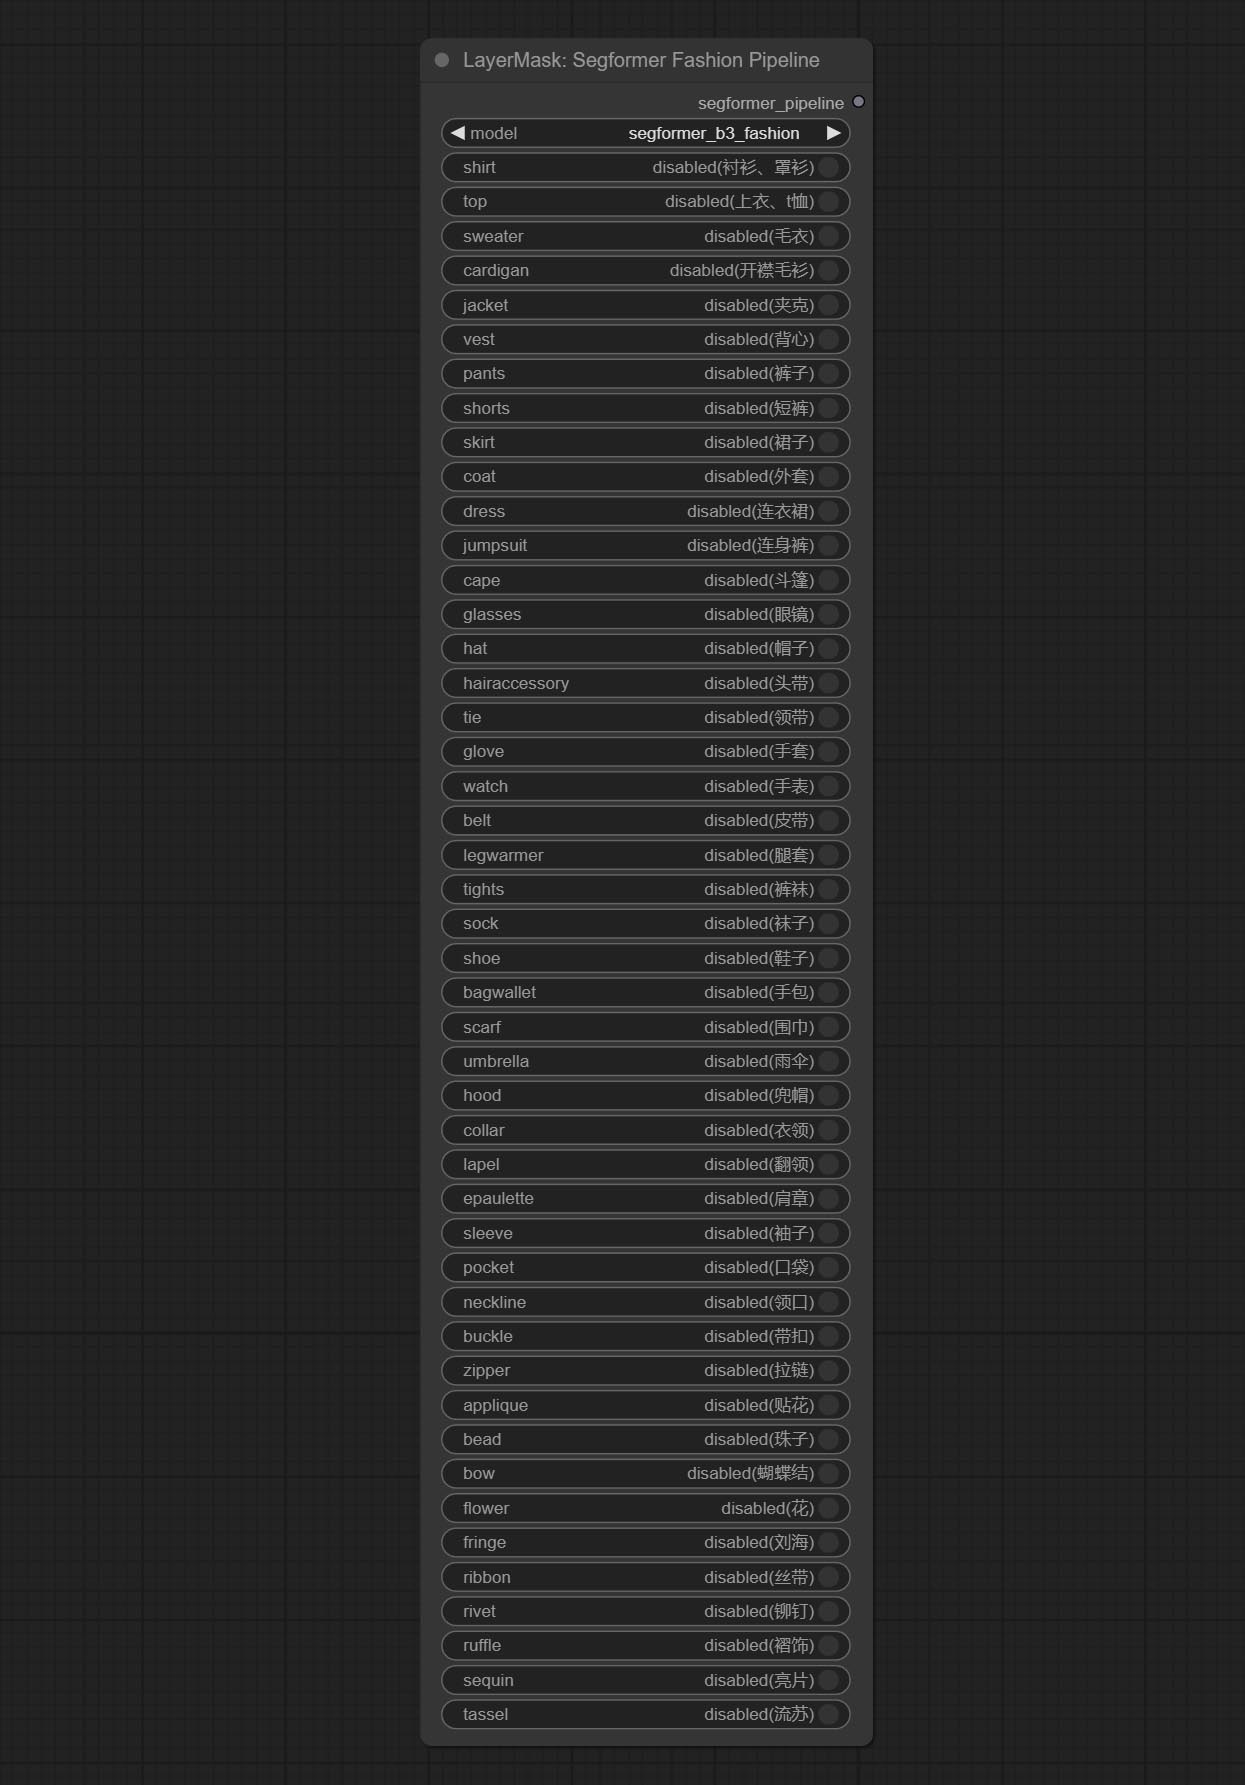
Used for generate human body parts masks, it is based on the warrper of metal3d/ComfyUI_Human_Parts, thank the original author. This node has added ultra-fine edge processing based on the original work. Download model file from BaiduNetdisk or huggingface and copy to ComfyUImodelsonnxhuman-parts folder. 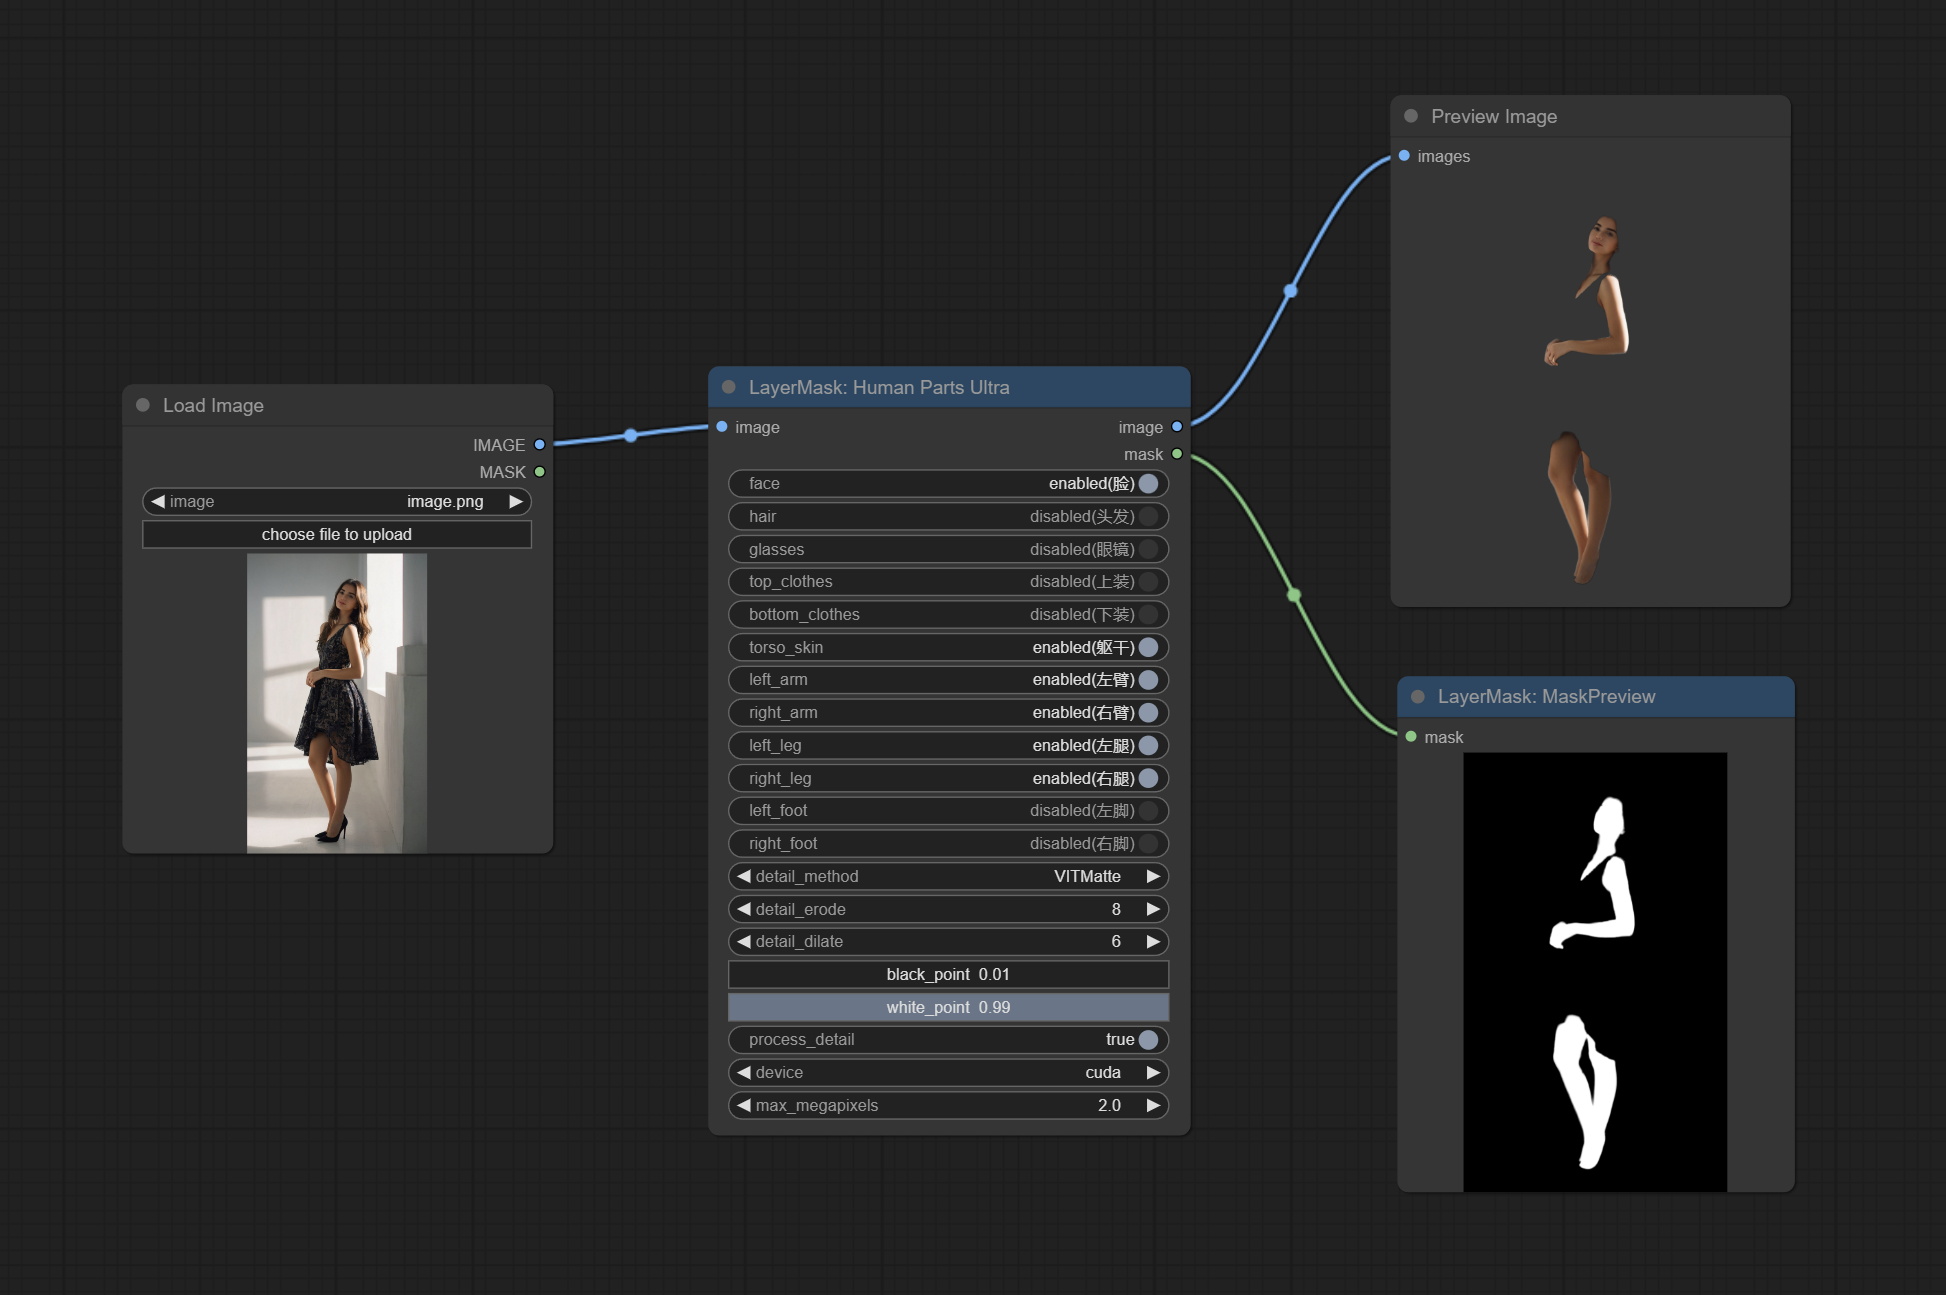
Node Options: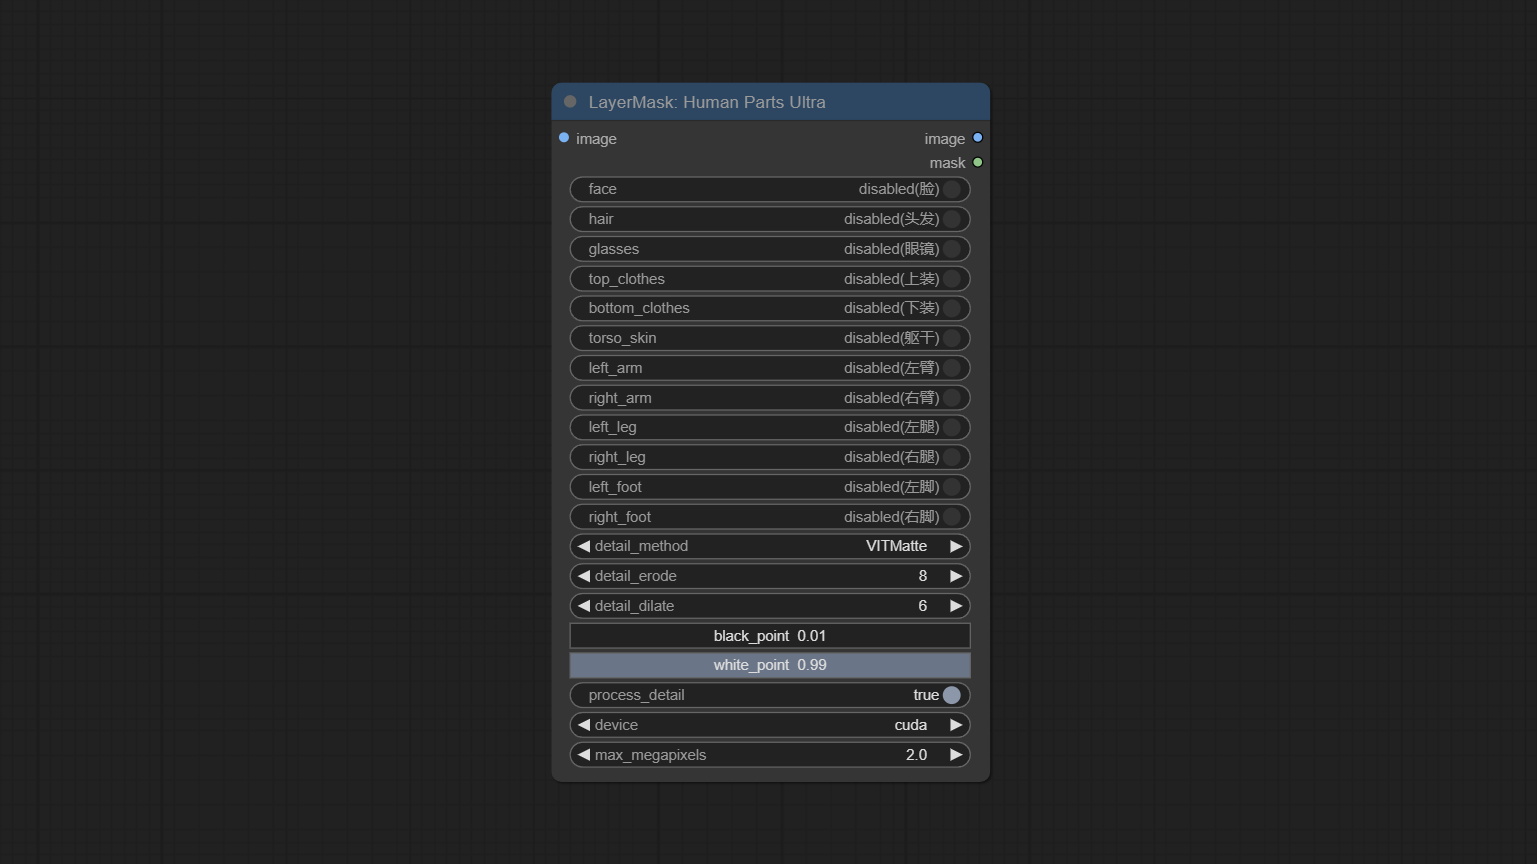
Process rough masks to ultra fine edges. This node combines the Alpha Matte and the Guided Filter Alpha nodes functions of Spacepxl's ComfyUI-Image-Filters, thanks to the original author. 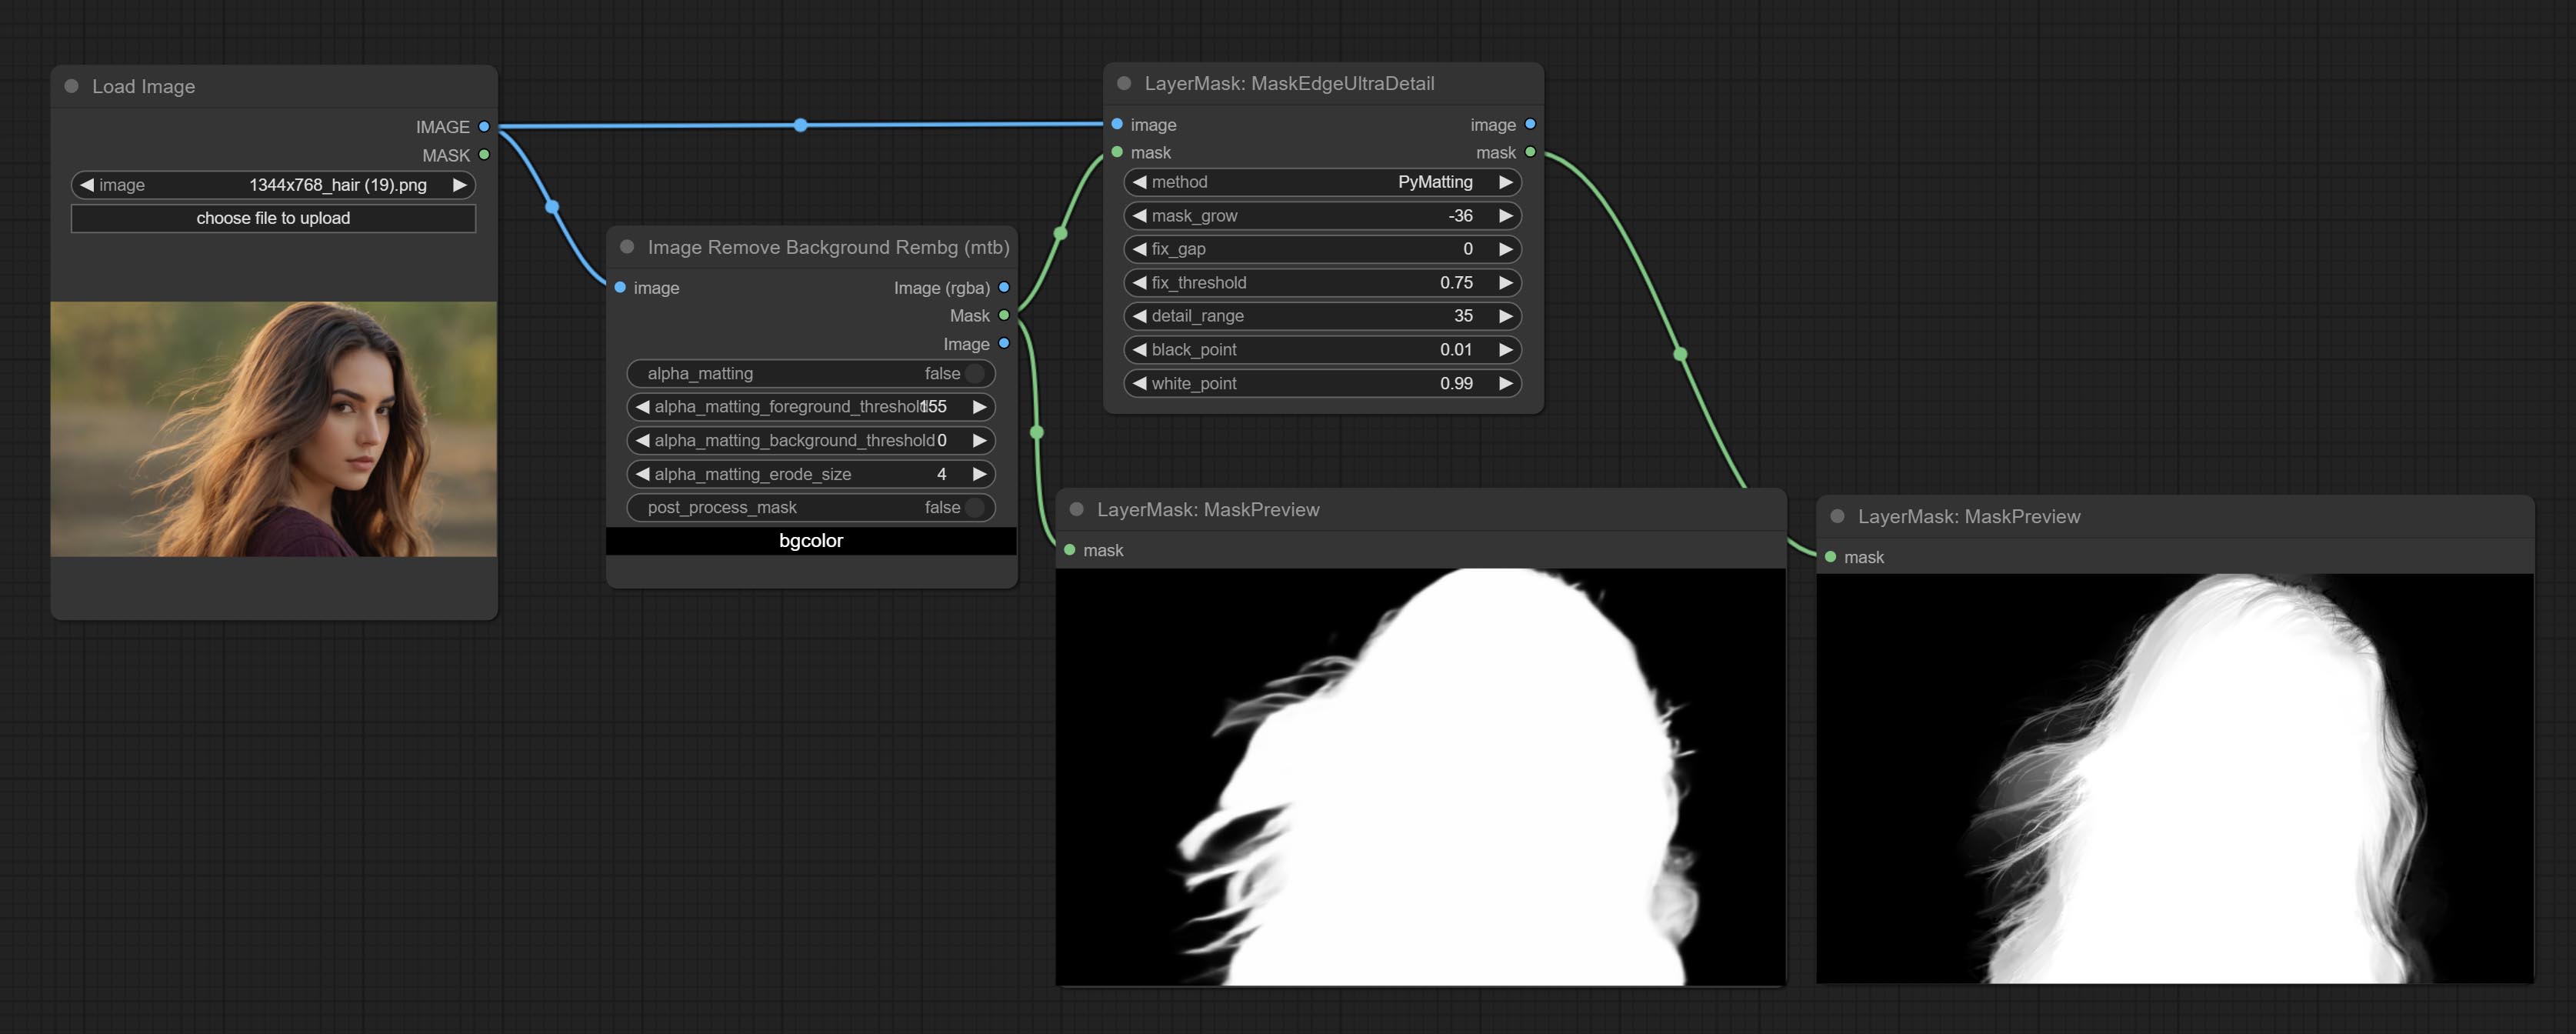
Node options: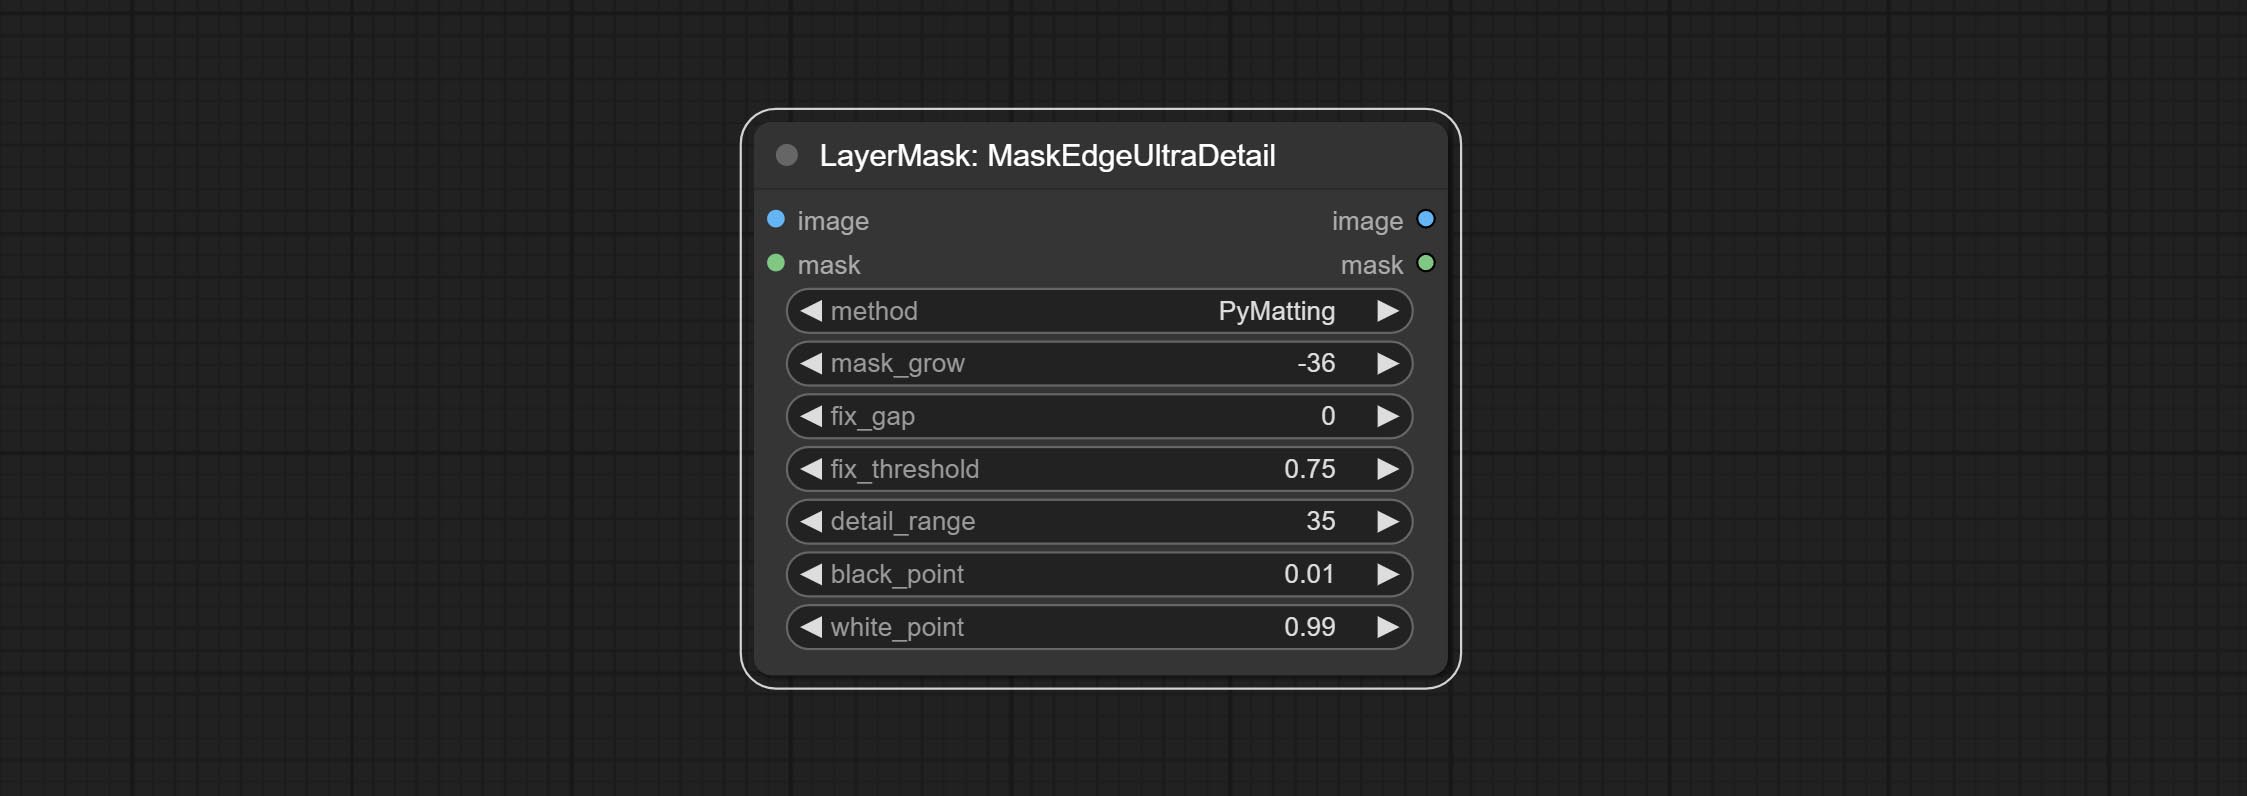
The V2 upgraded version of MaskEdgeUltraDetail has added the VITMatte edge processing method.(Note: Images larger than 2K in size using this method will consume huge memory)
This method is suitable for handling semi transparent areas.
On the basis of MaskEdgeUltraDetail, the following changes have been made: 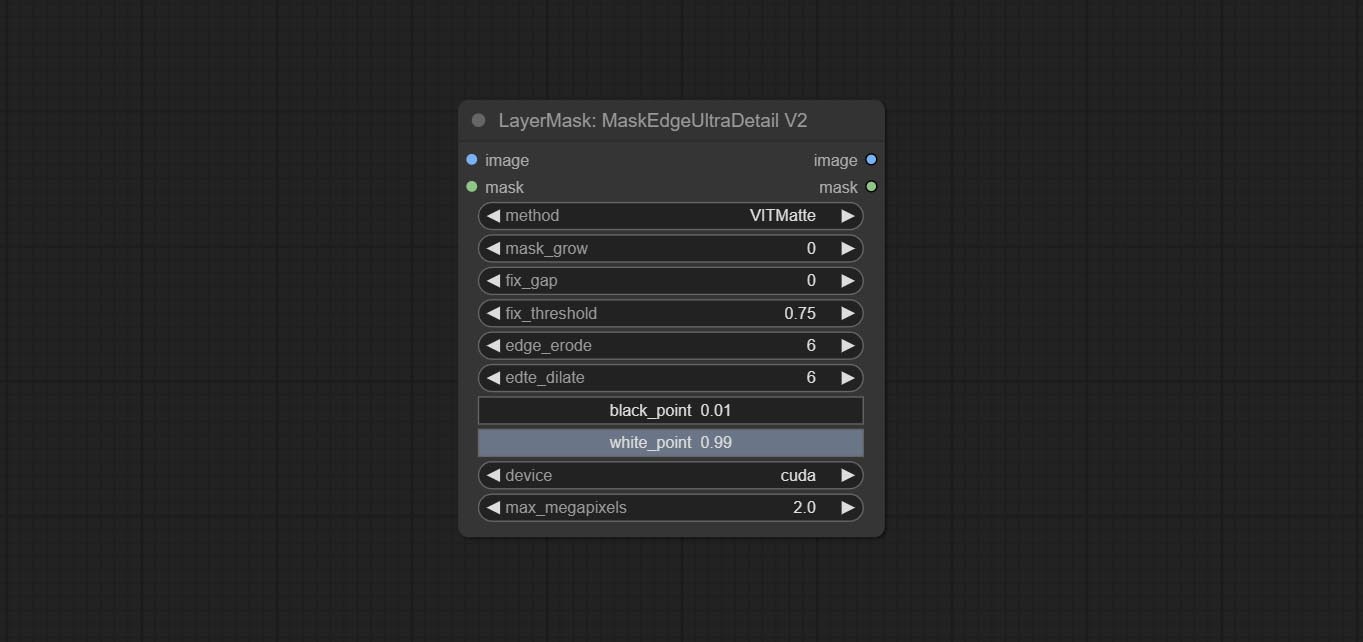
Use the YoloV8 model to detect faces, hand box areas, or character segmentation. Supports the output of the selected number of channels. Download the model files from GoogleDrive or BaiduNetdisk to ComfyUI/models/yolo folder.
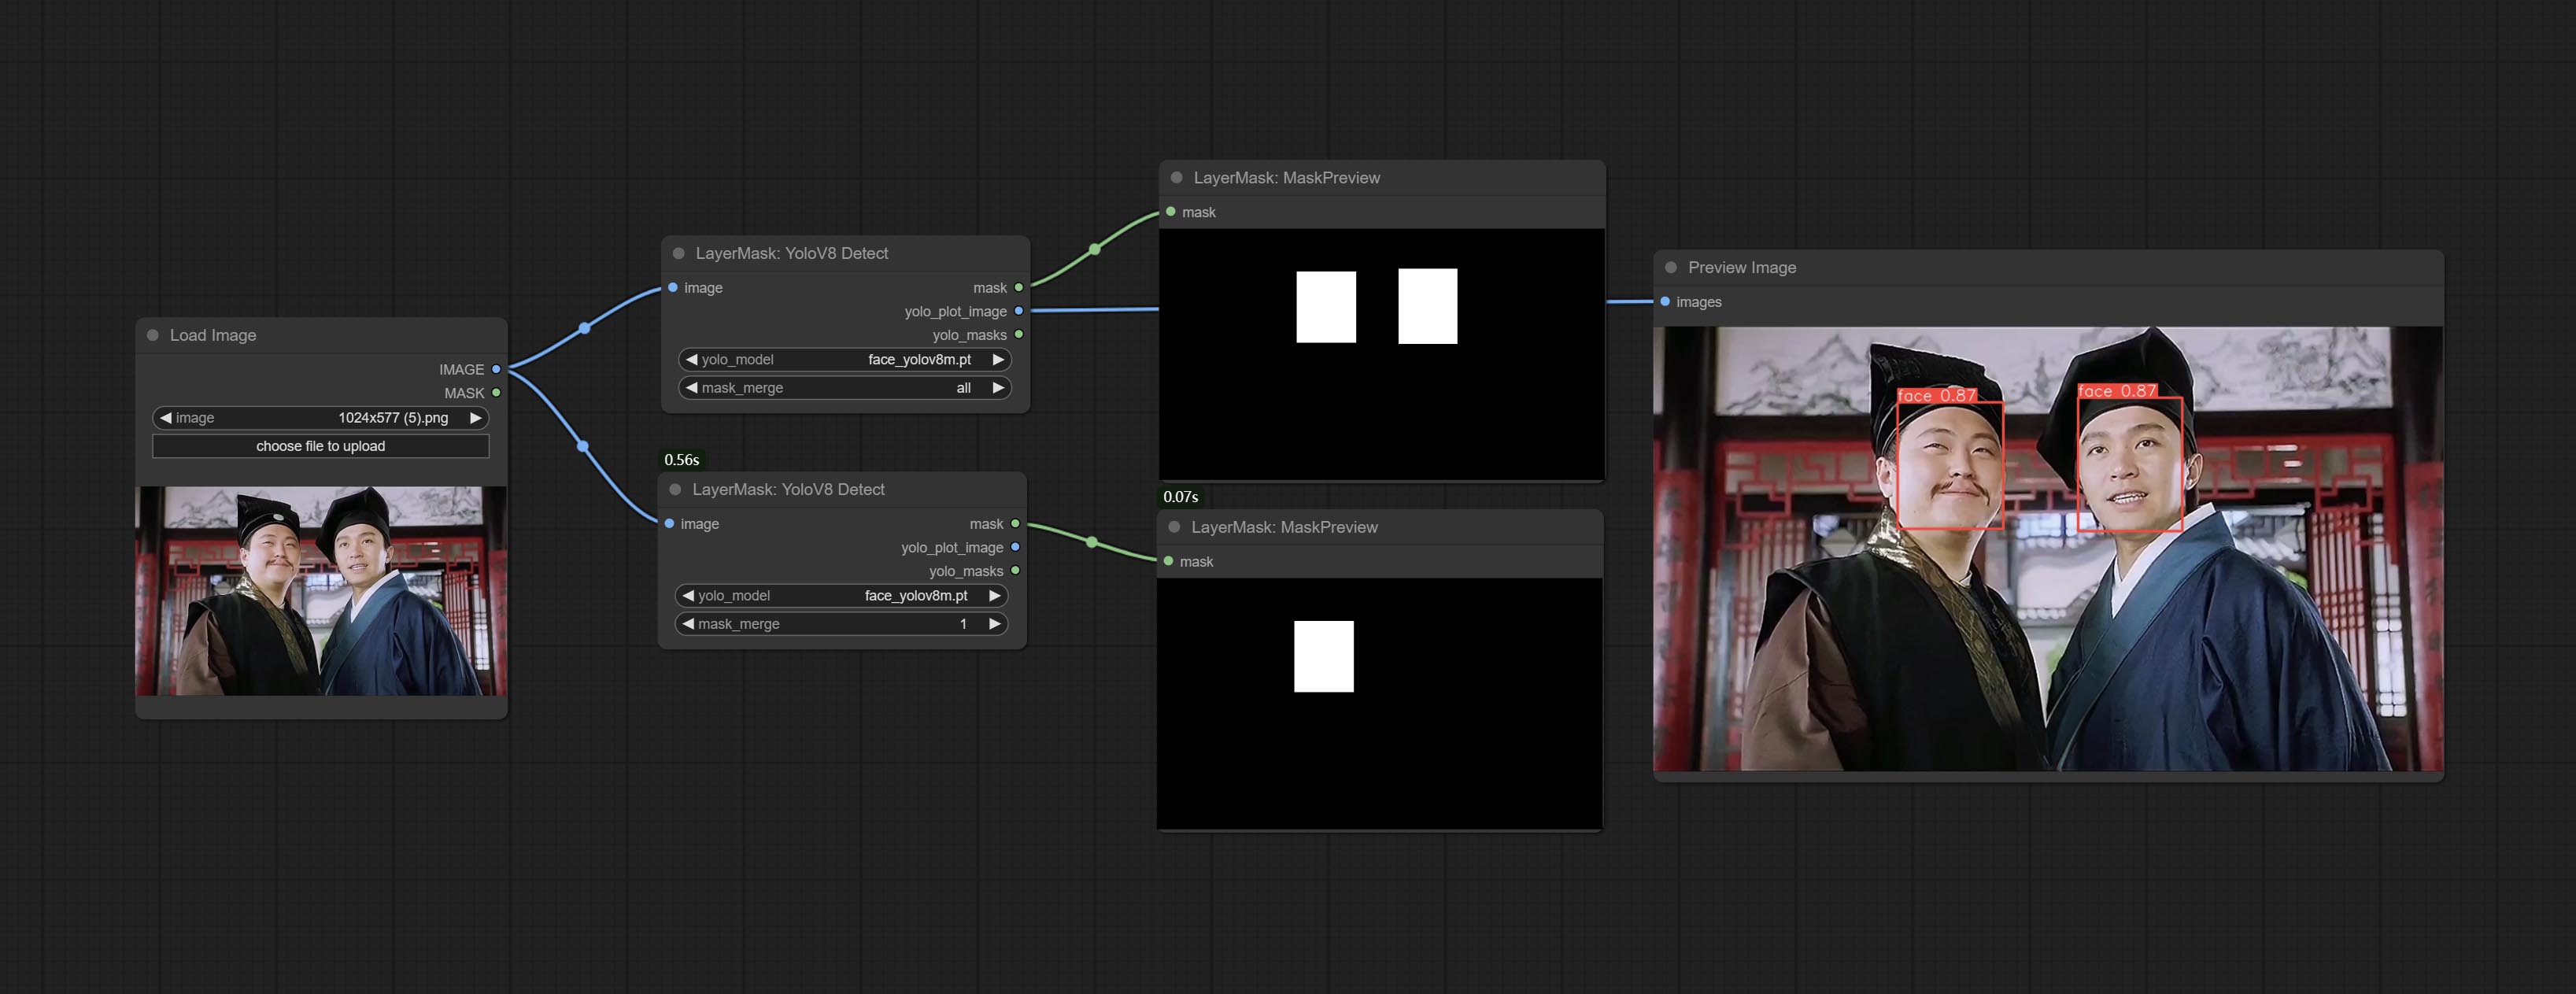
Node Options: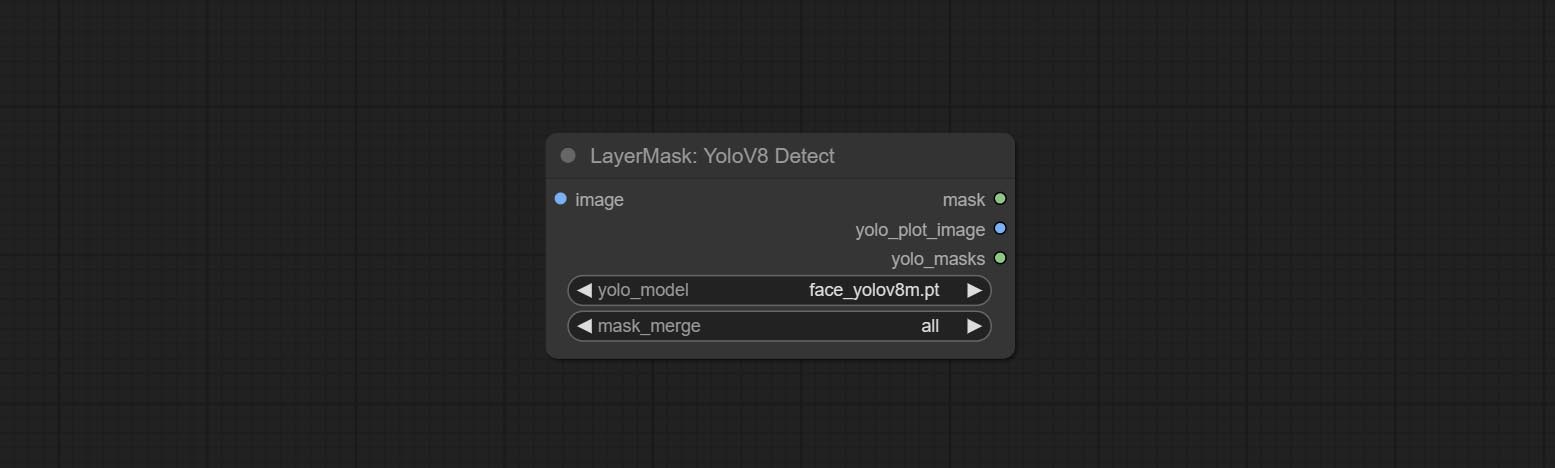
seg name can output segmented masks, otherwise they can only output box masks.all is to merge all mask outputs. The selected number is how many masks to output, sorted by recognition confidence to merge the output.Outputs:
Use the Mediapipe model to detect facial features, segment left and right eyebrows, eyes, lips, and tooth. *Download the model files from BaiduNetdisk to ComfyUI/models/mediapipe folder.
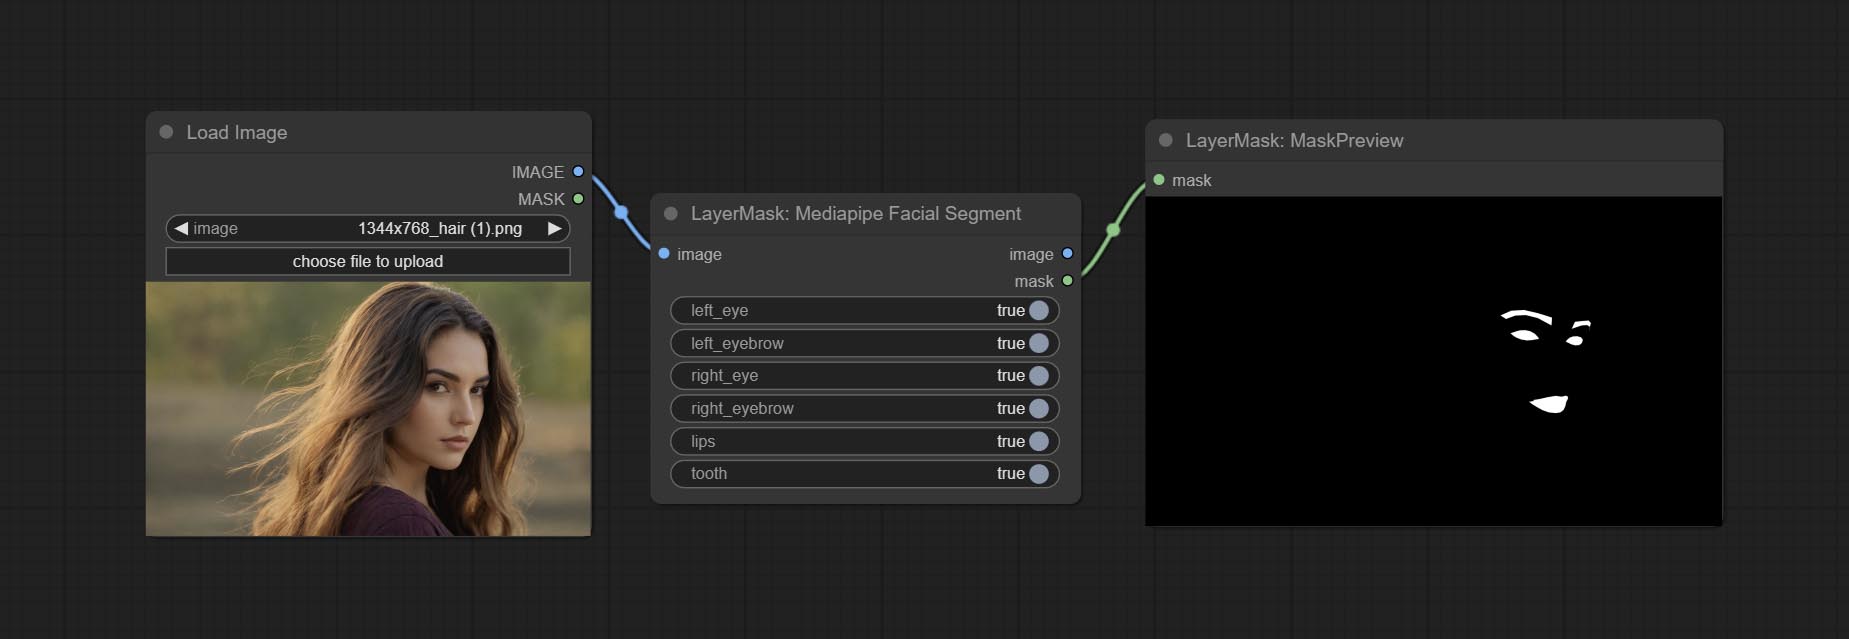
Node Options: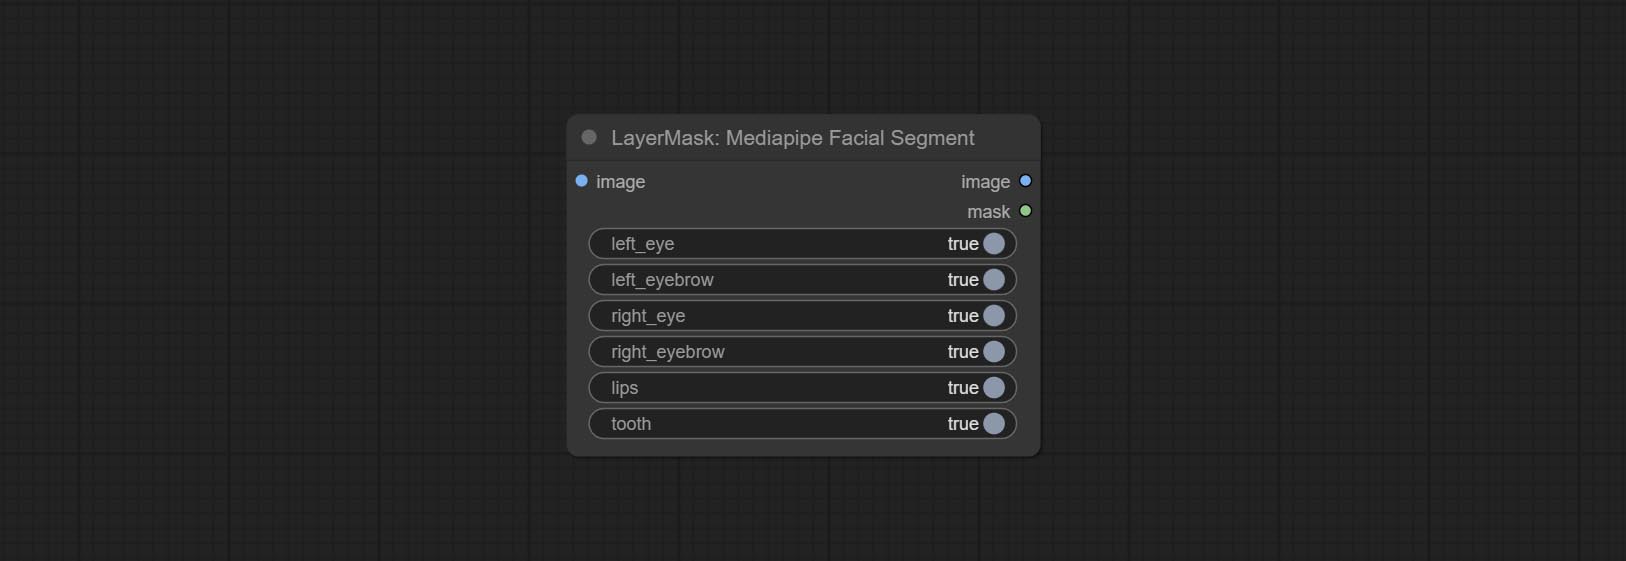
Generate a mask based on the selected color. 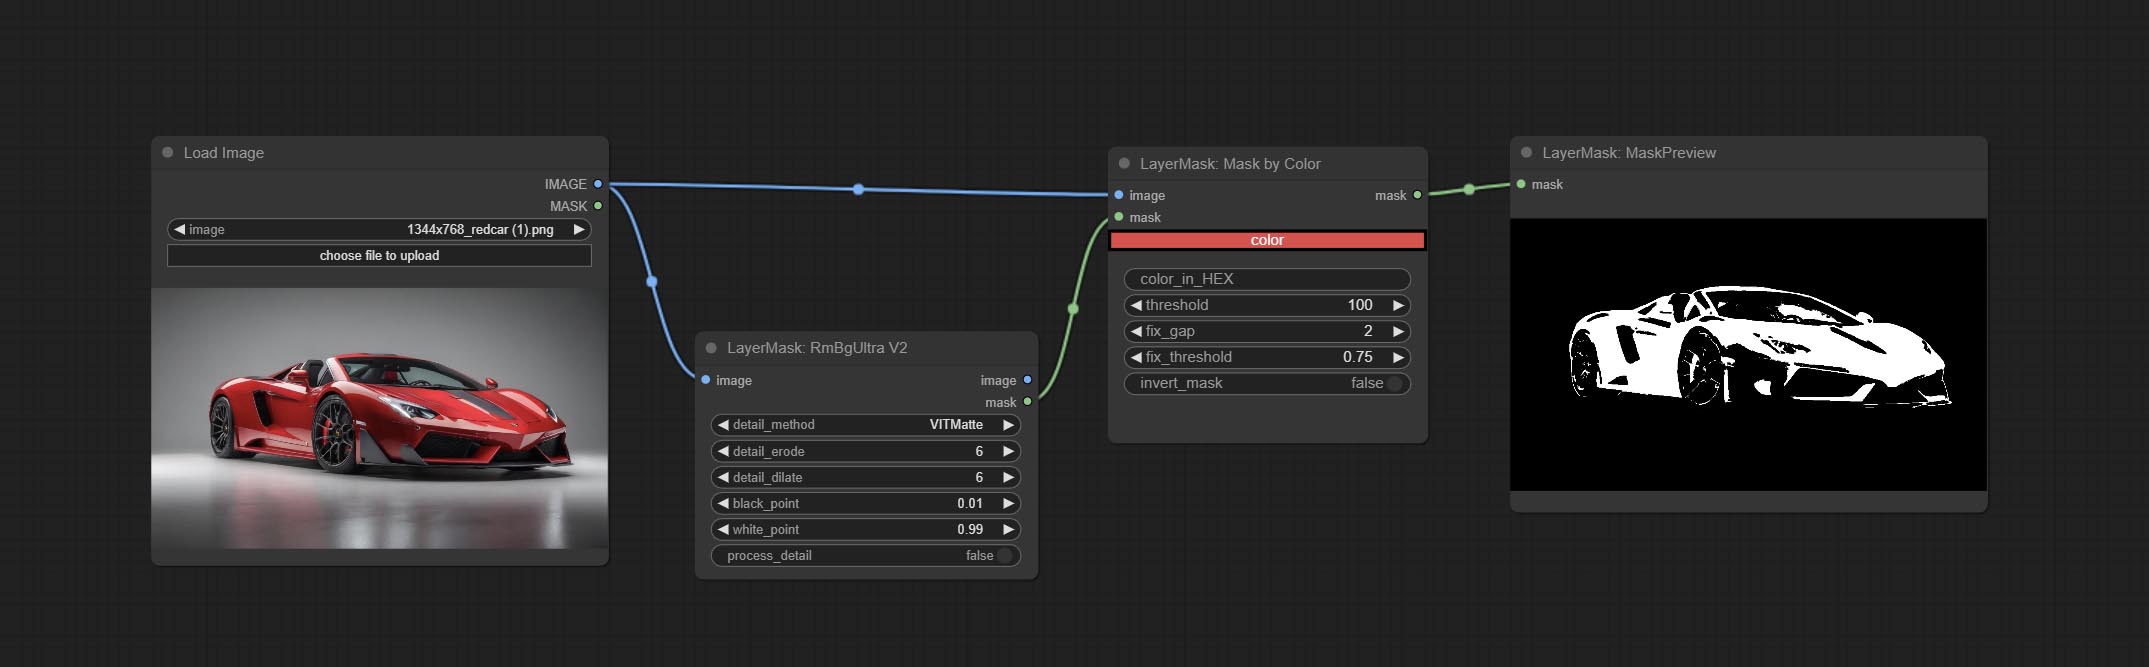
Node Options: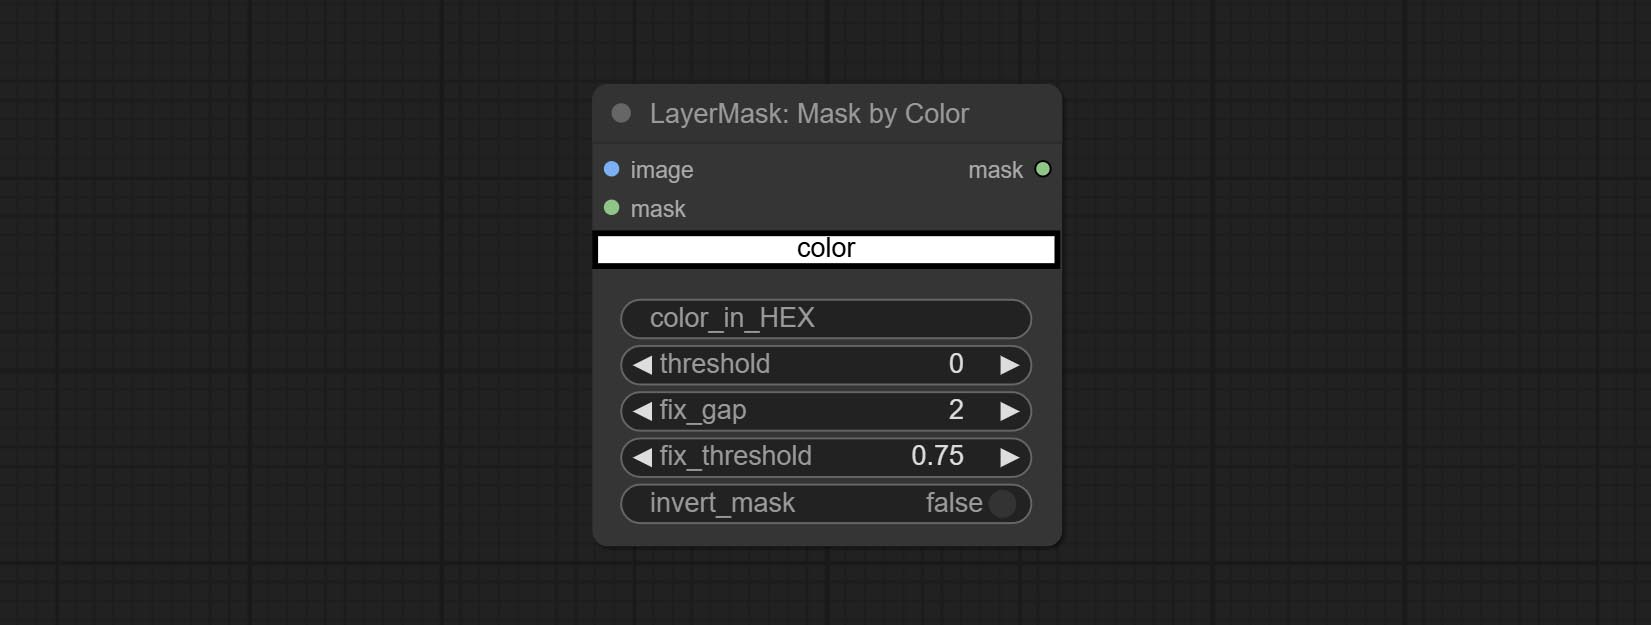
color . Convert the image to a mask. Supports converting any channel in LAB, RGBA, YUV, and HSV modes into masks, while providing color scale adjustment. Support mask optional input to obtain masks that only include valid parts. 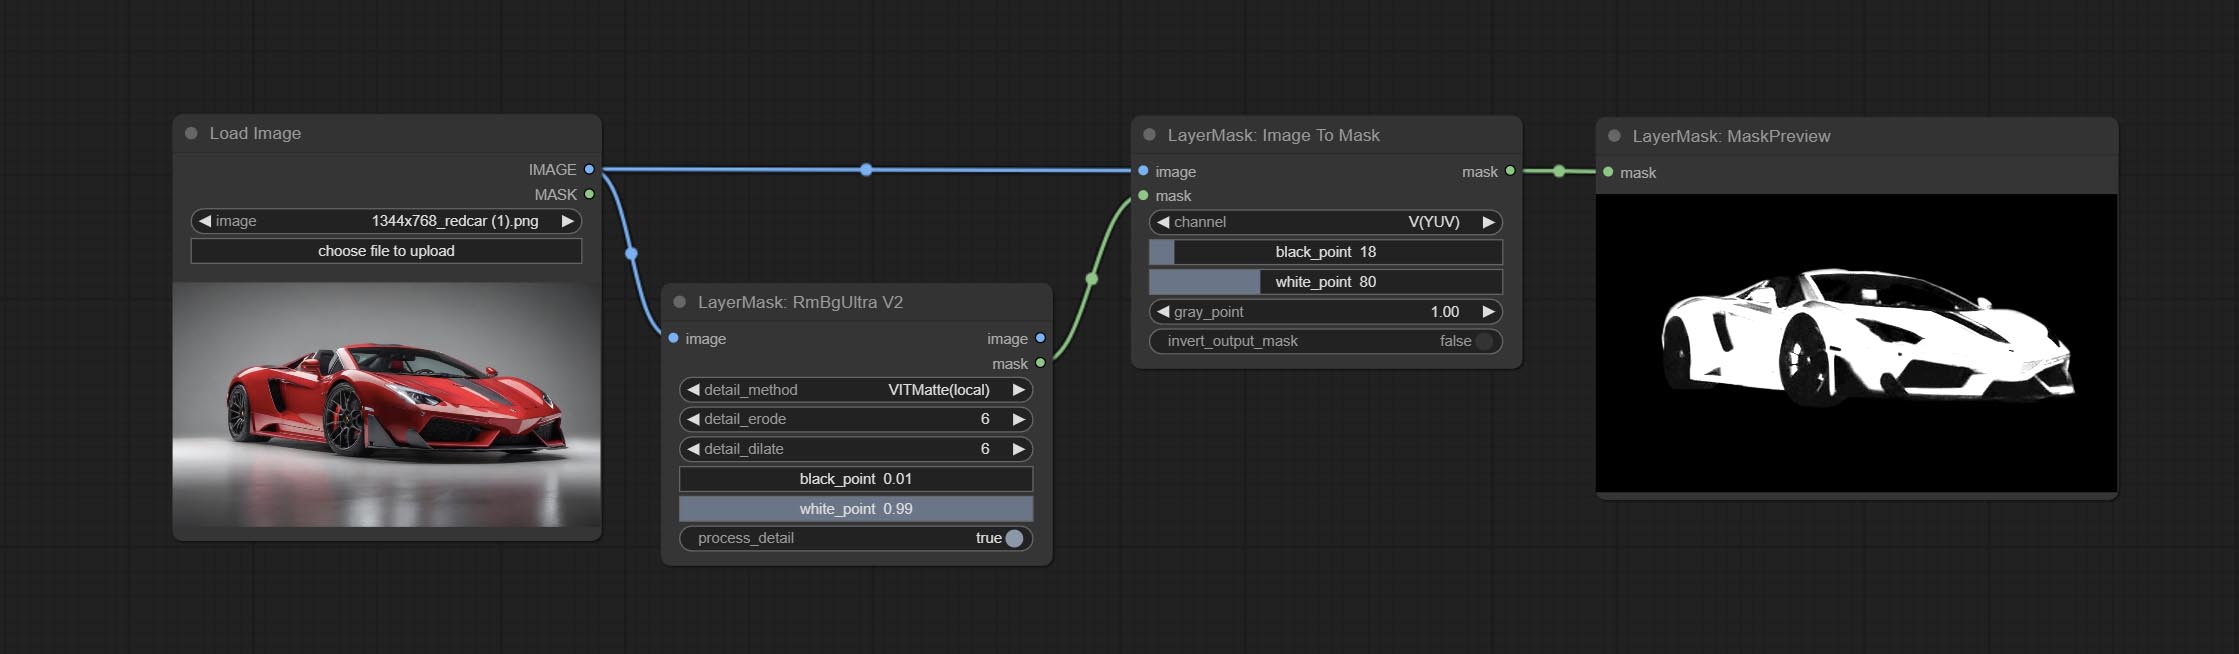
Node Options: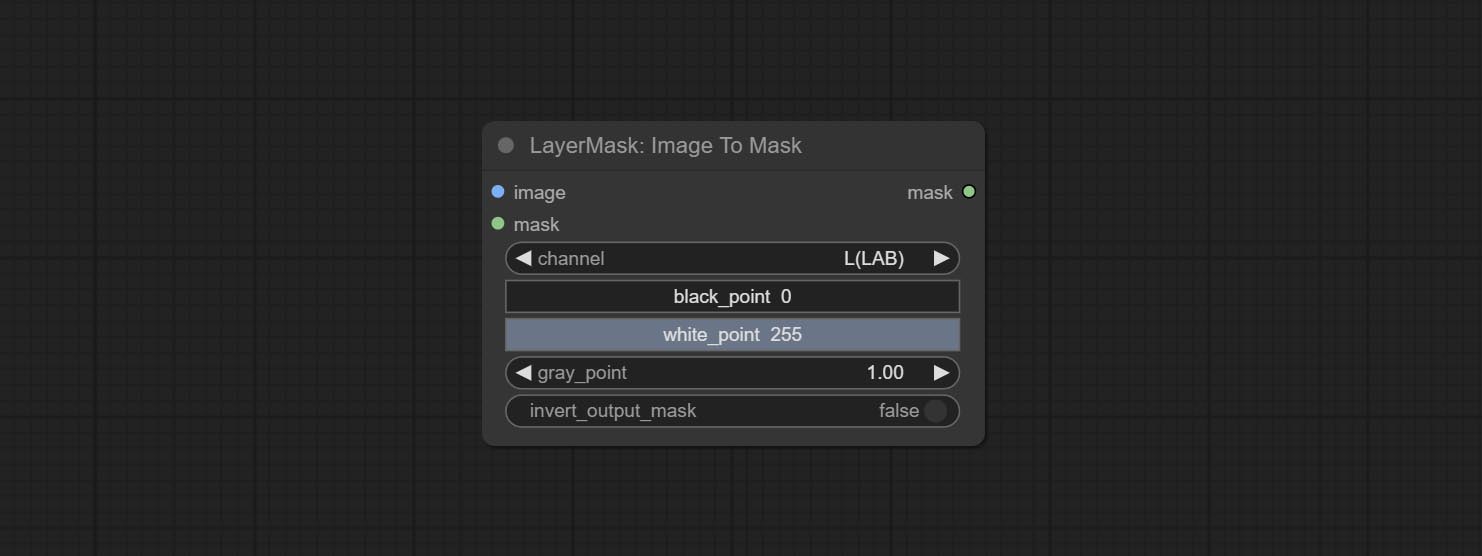
* If the black_point or output_black_point value is greater than white_point or output_white_point, the two values are swapped, with the larger value used as white_point and the smaller value used as black_point.
Generate masks for the dark and bright parts of the image. 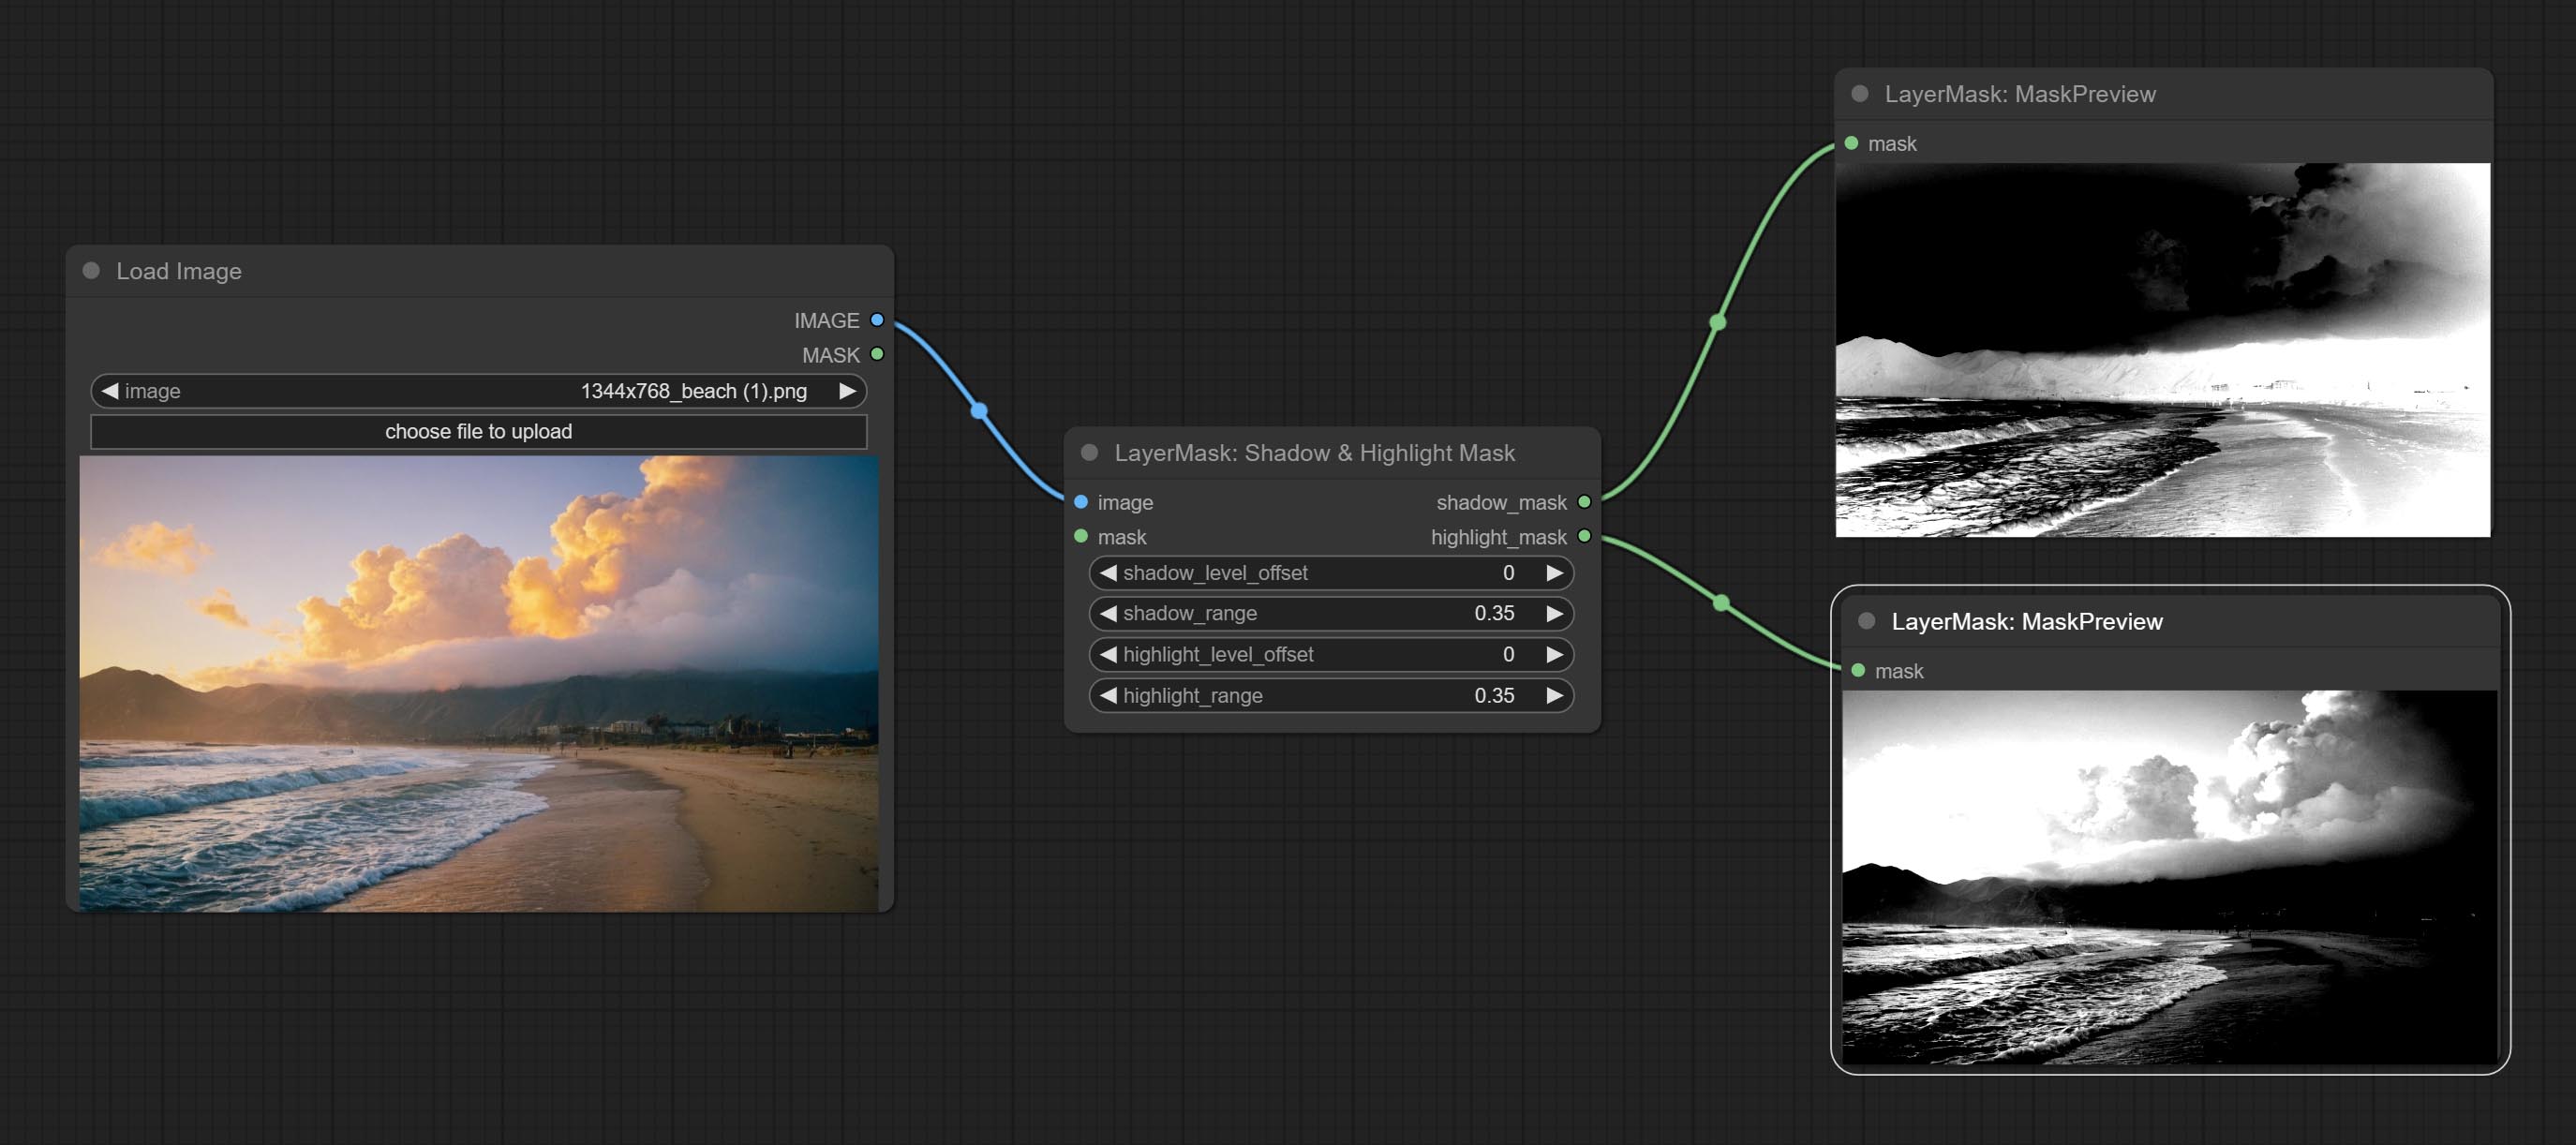
Node options: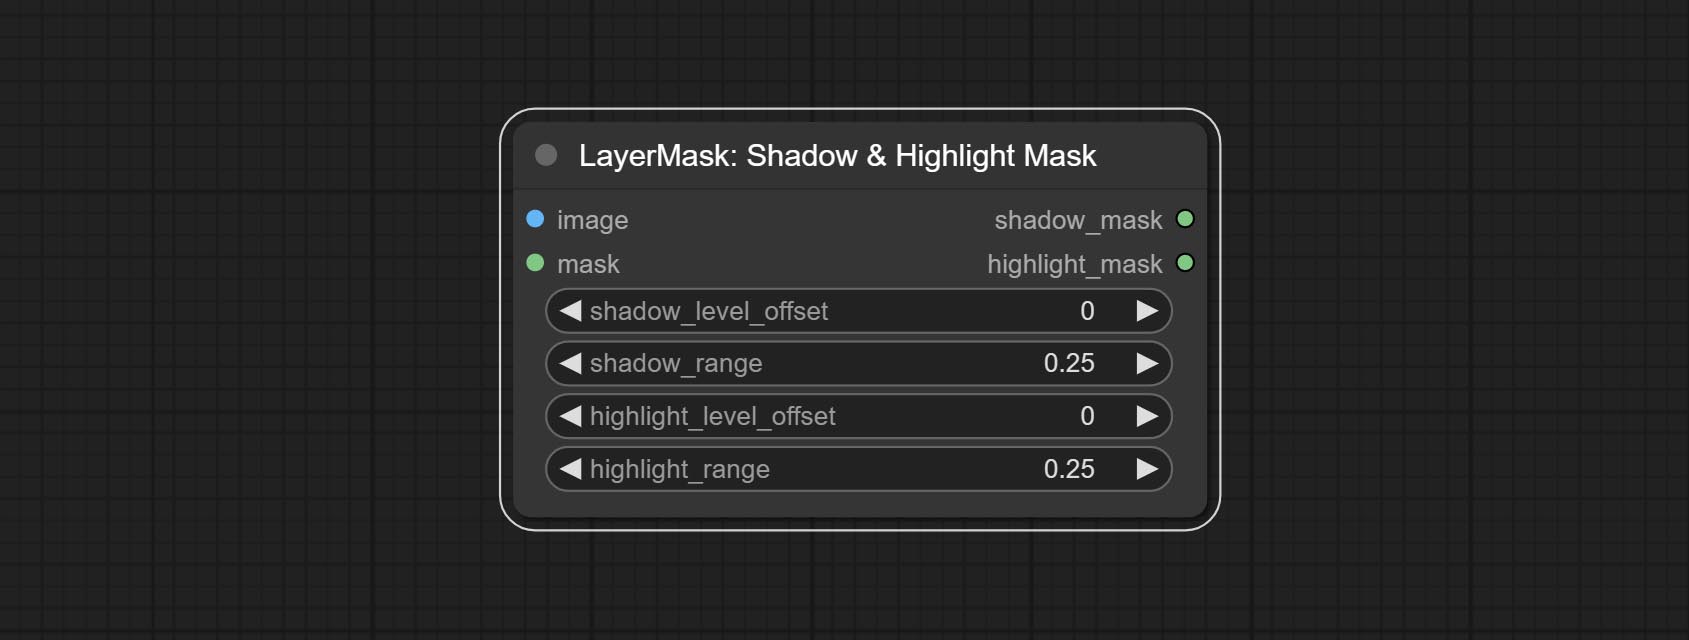
A replica of the Shadow & Highlight Mask node, with the "&" character removed from the node name to avoid ComfyUI workflow parsing errors.
Pixel expansion preprocessing on the masked edge of an image can effectively improve the edges of image composit. 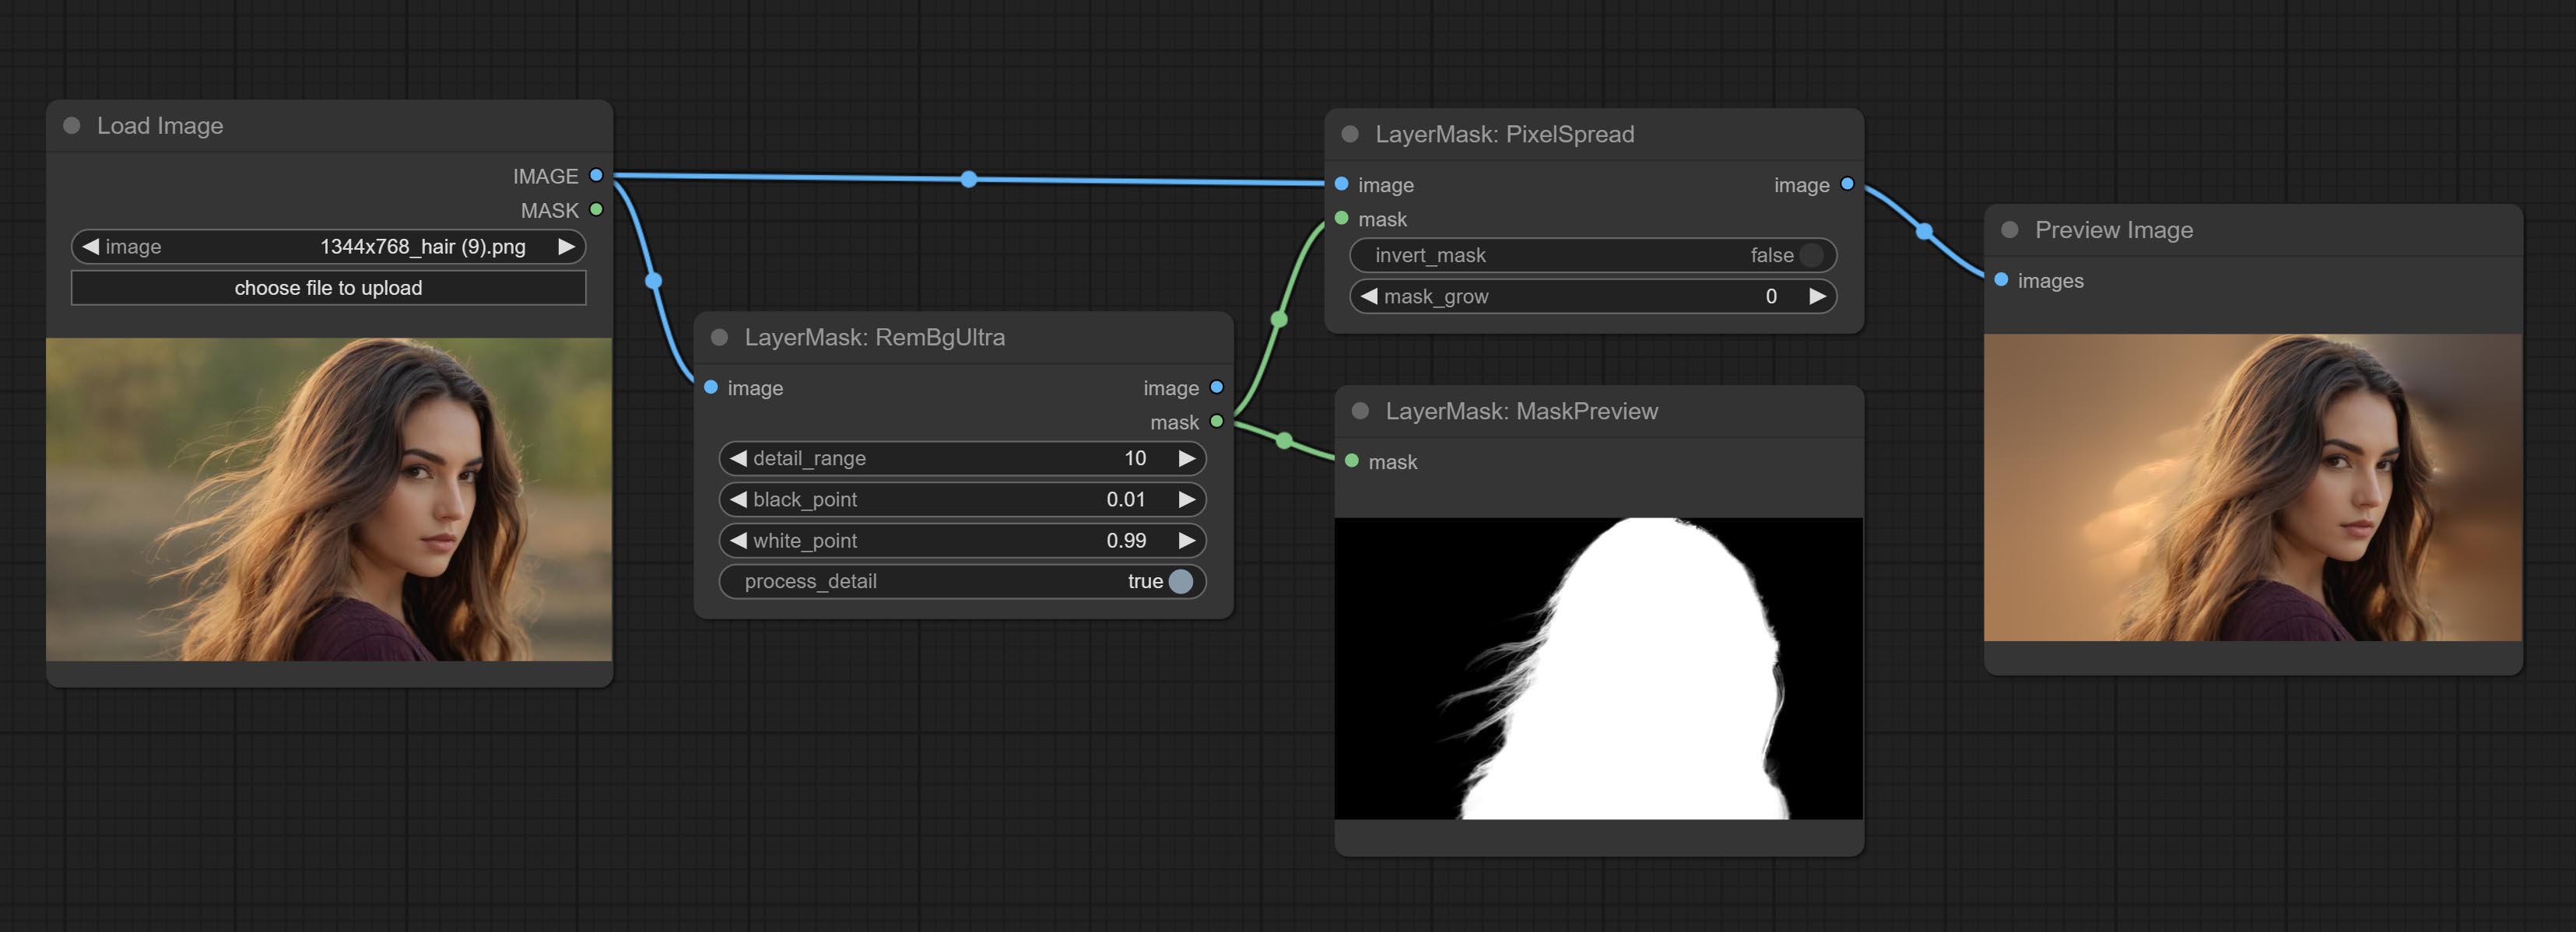
Node options: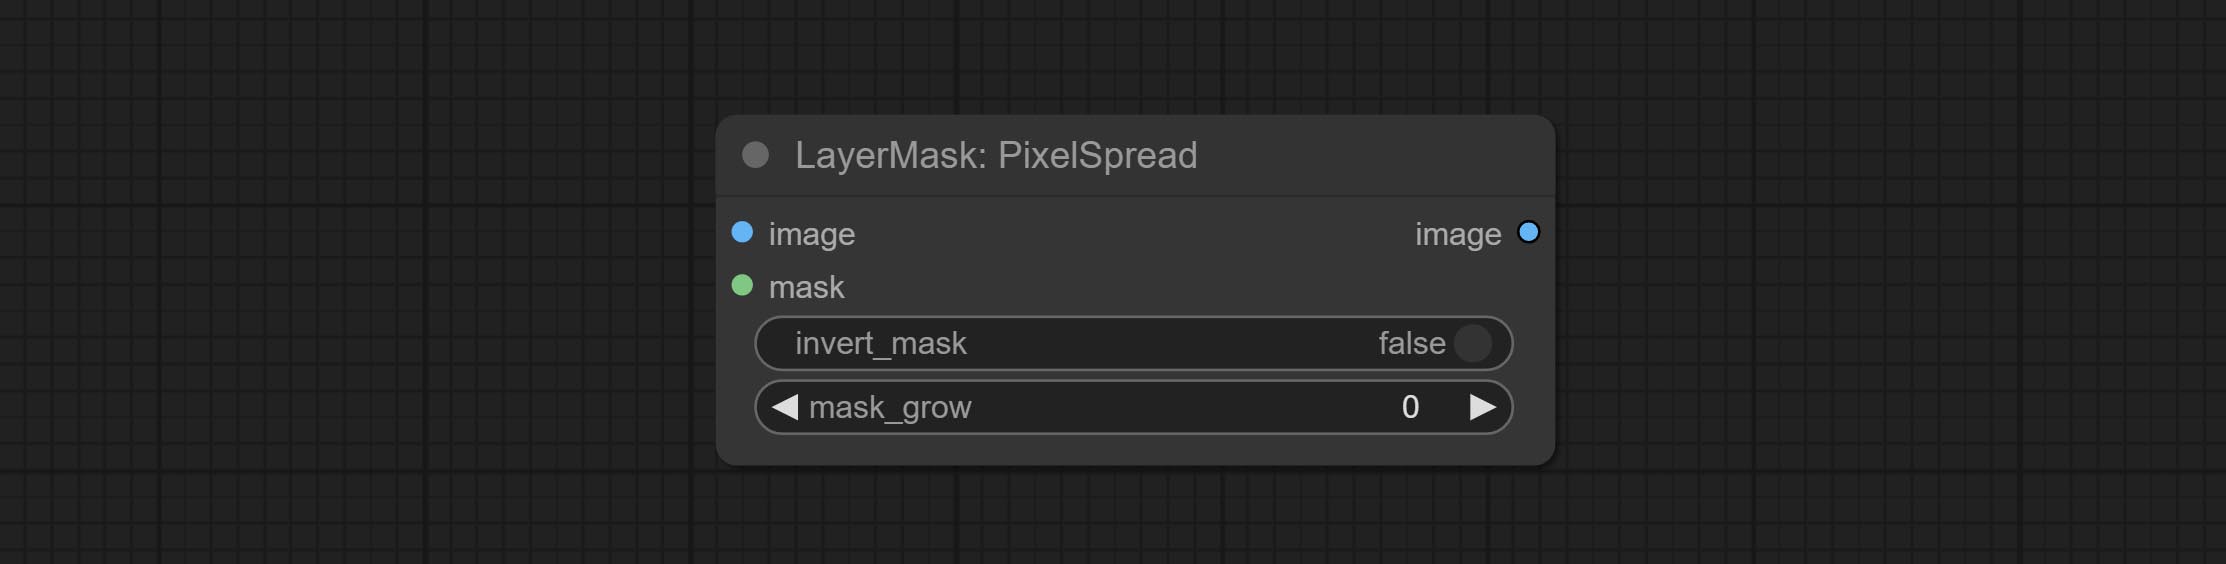
Calculate the differences between two images and output them as mask. 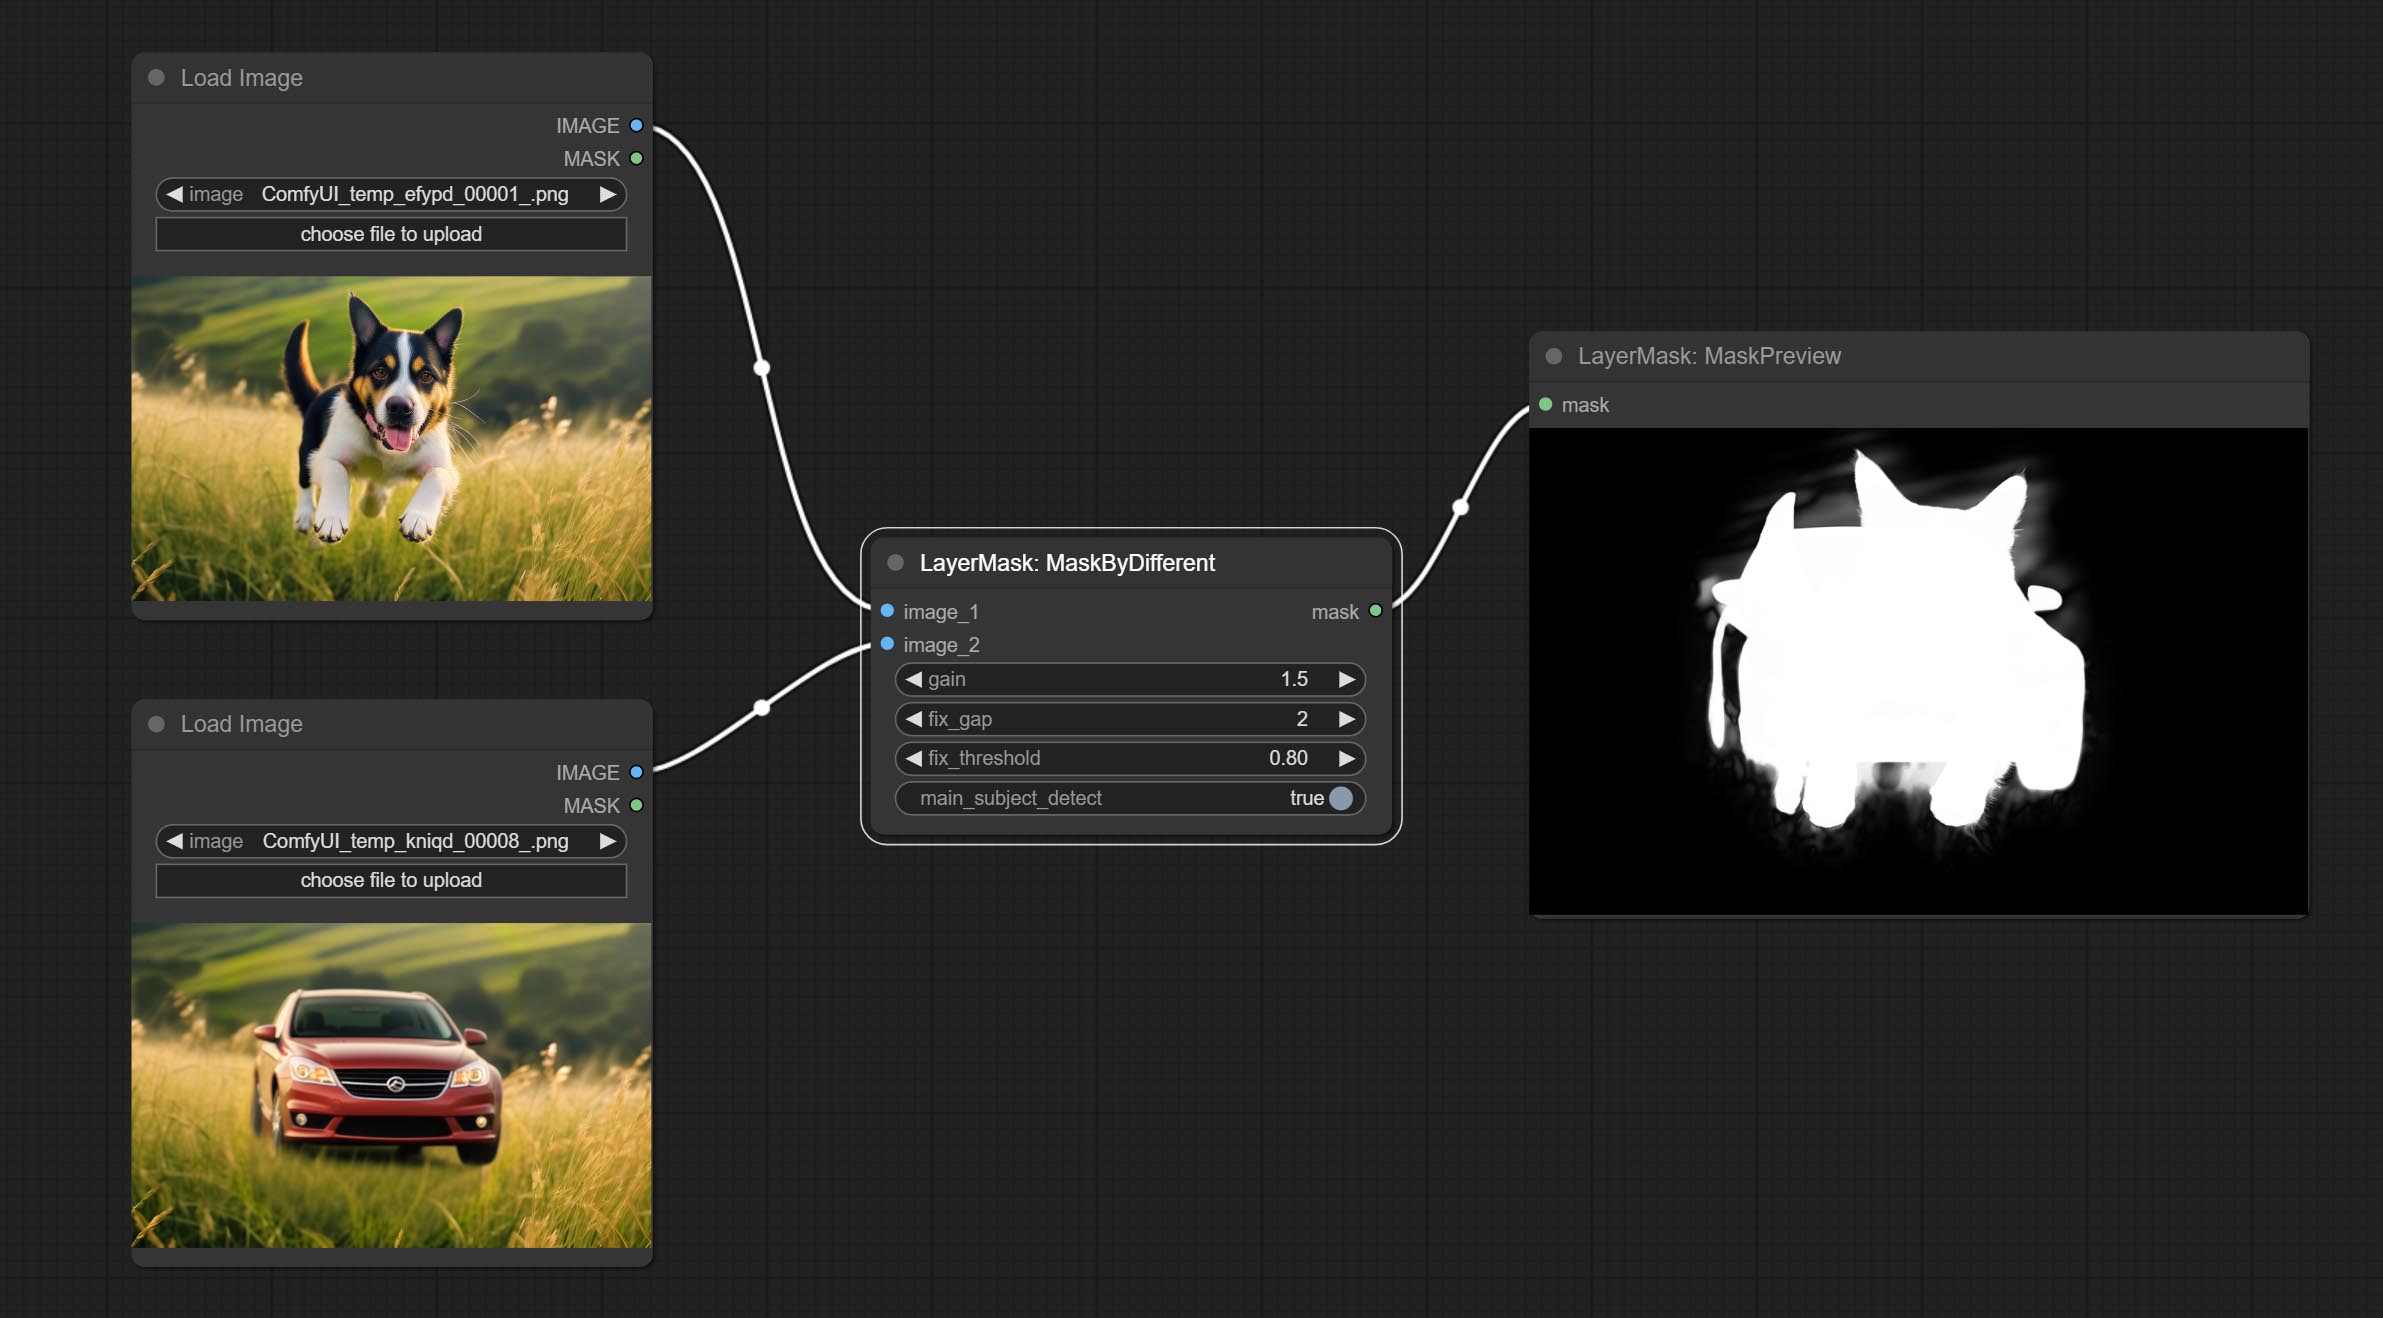
Node options: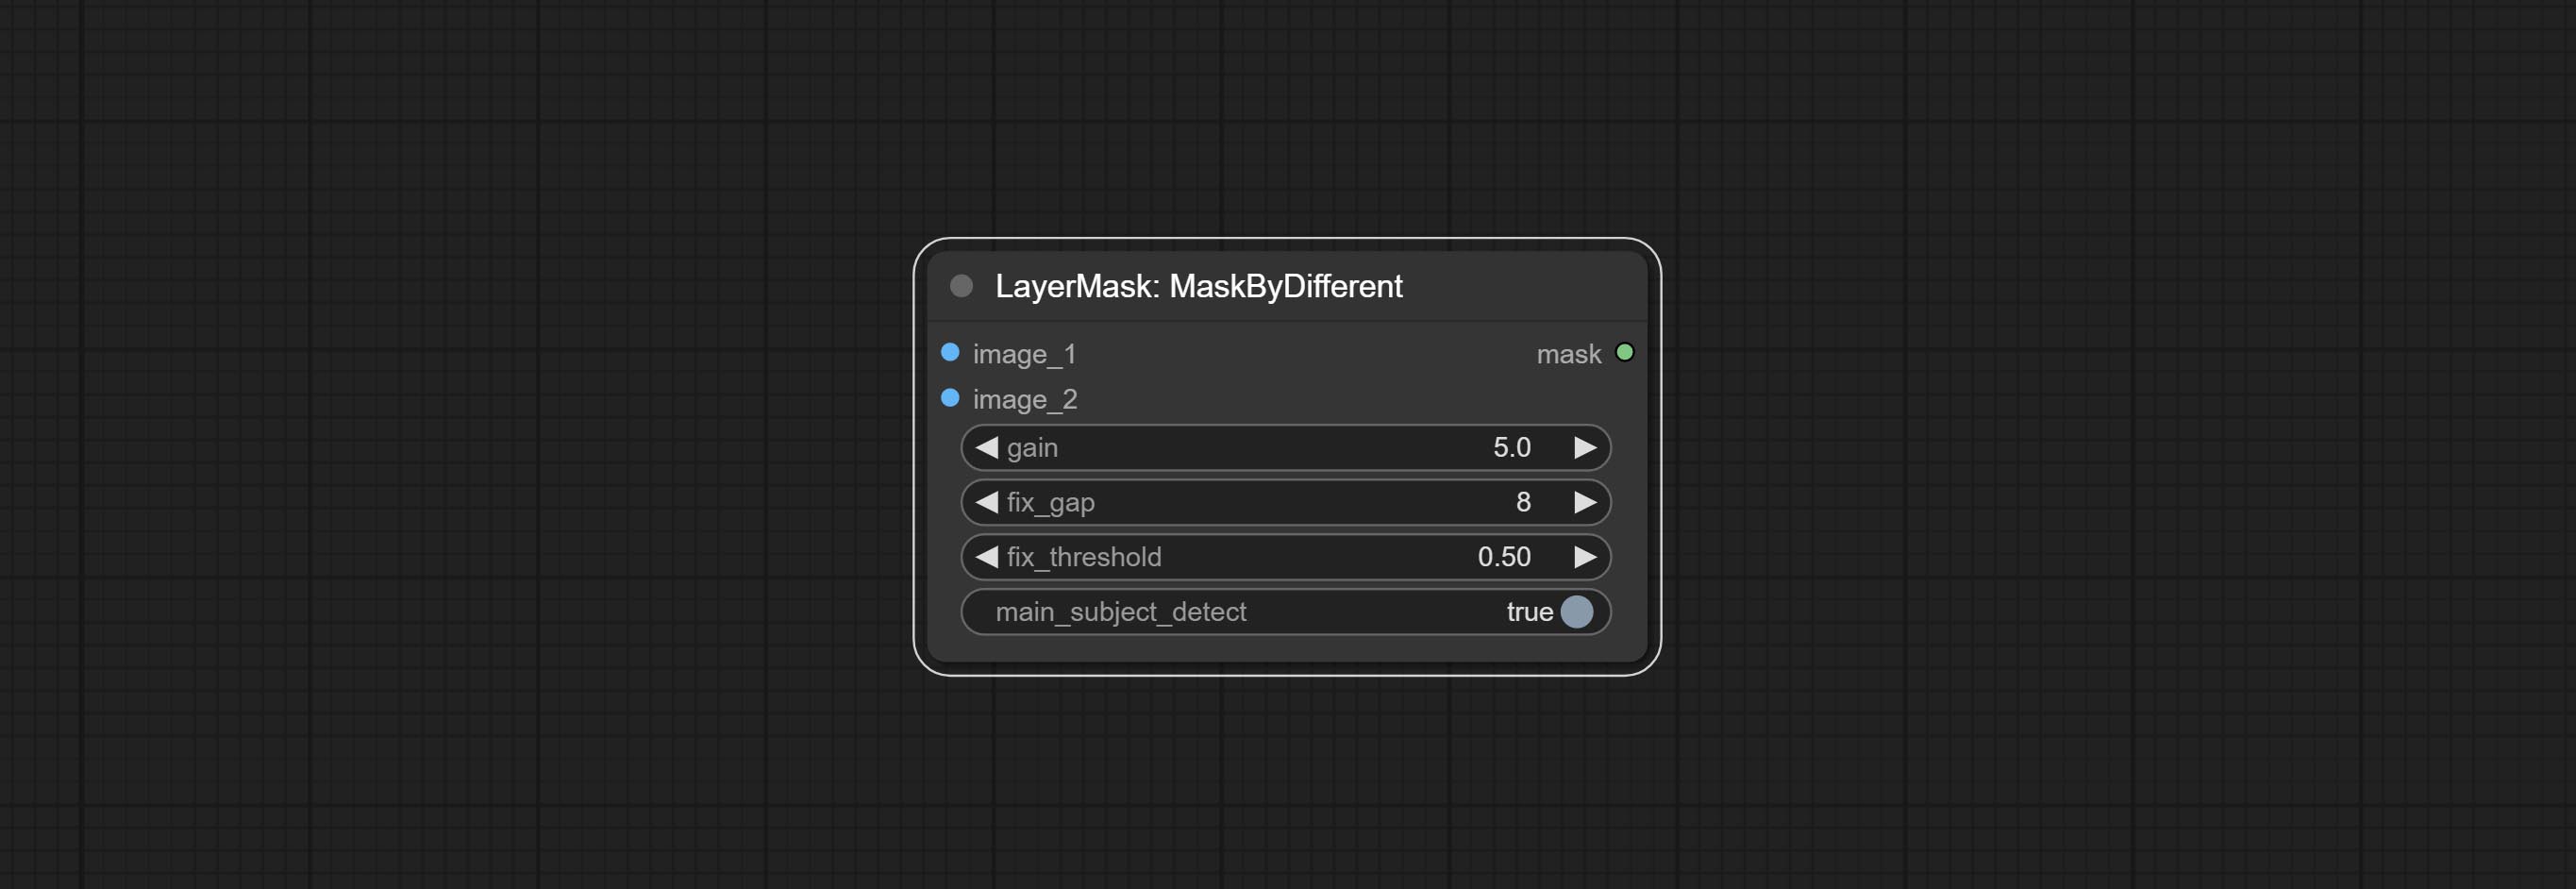
Grow and shrink edges and blur the mask 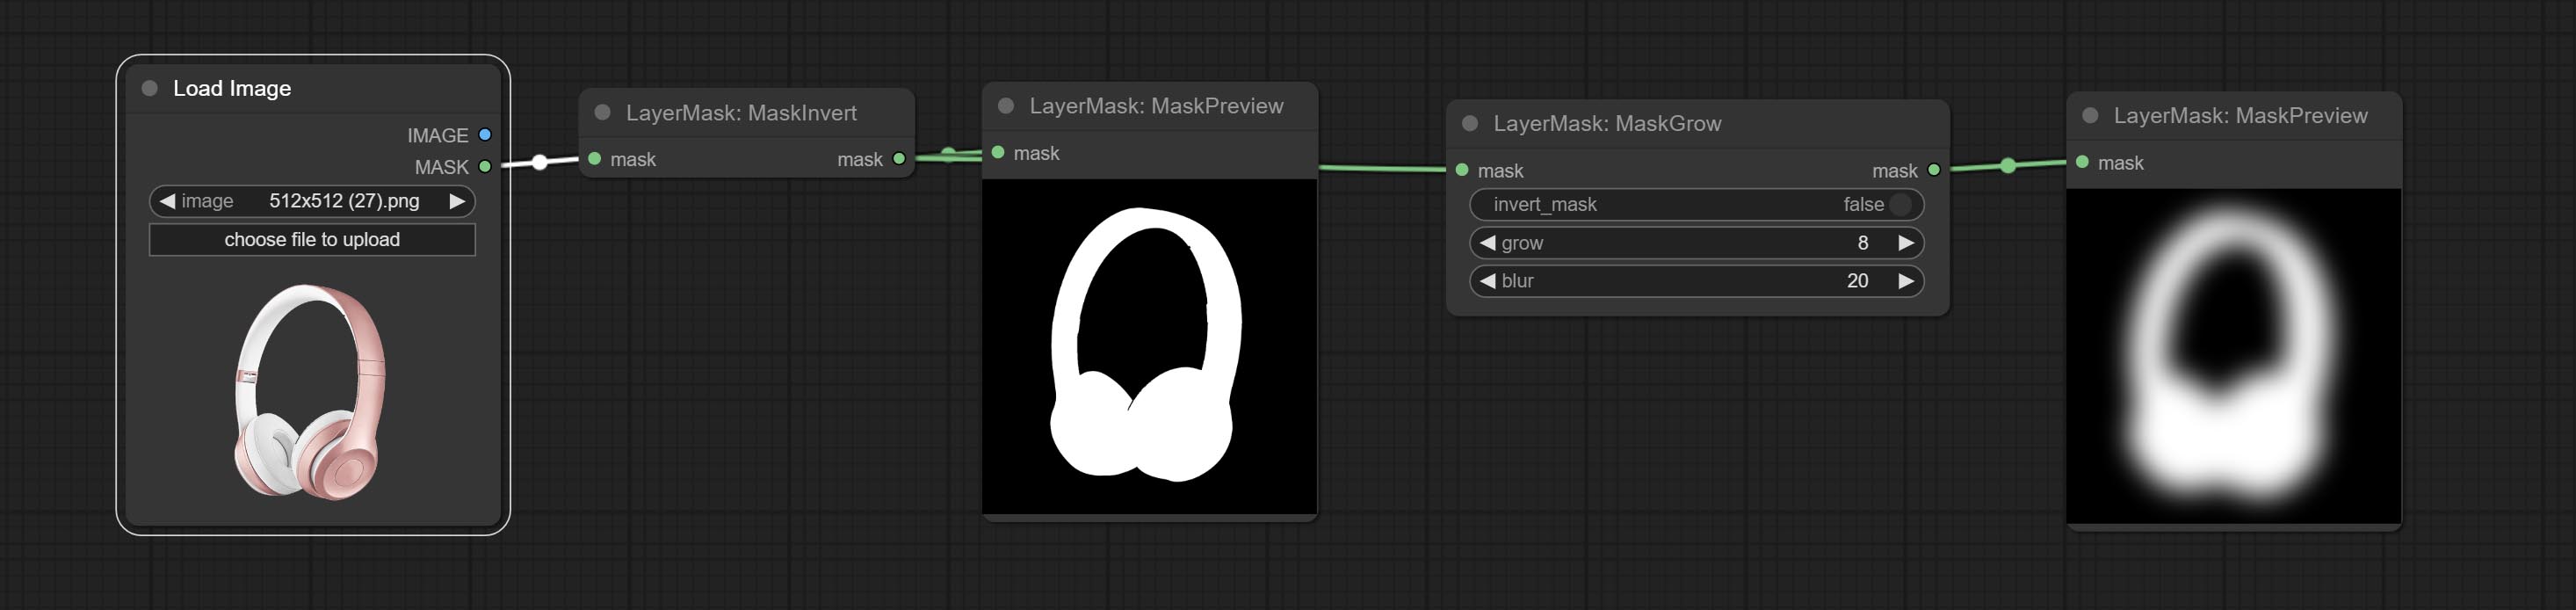
Node options: 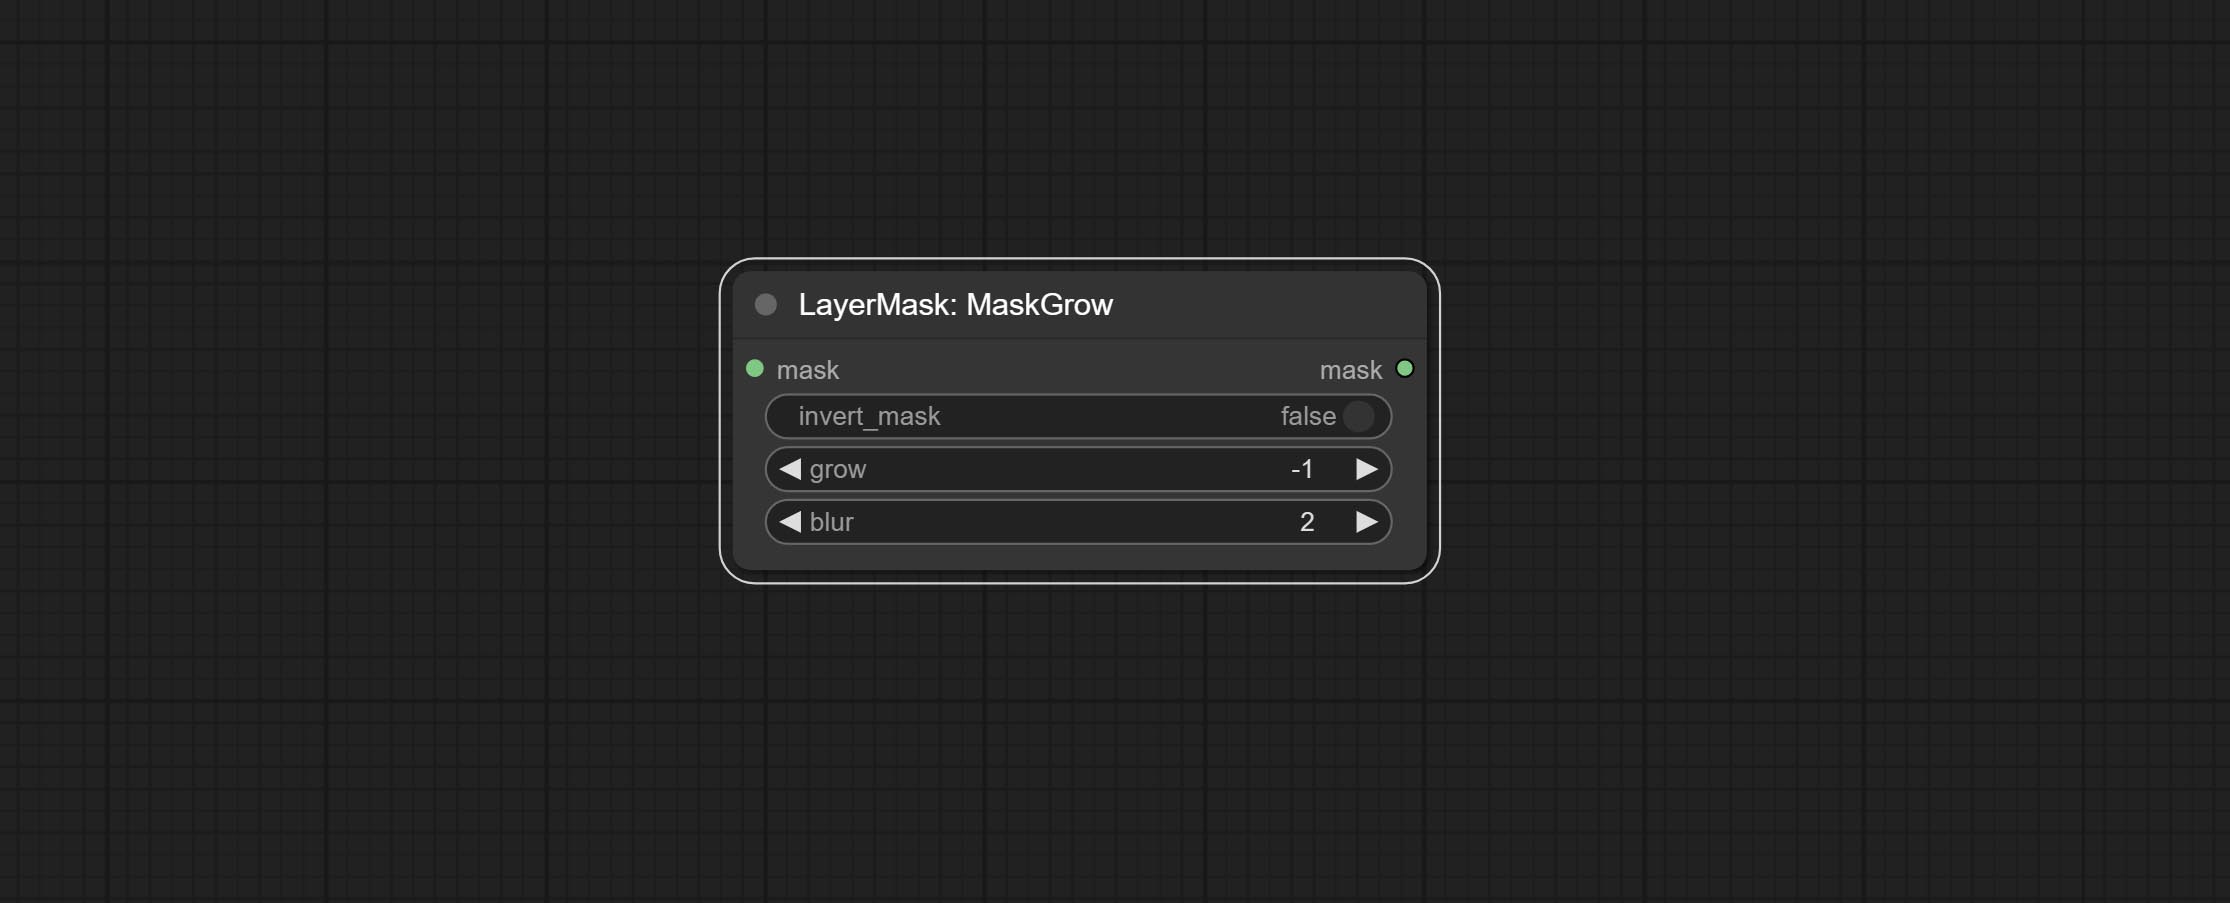
Smooth transition and shrink the mask edges while preserving edge details. 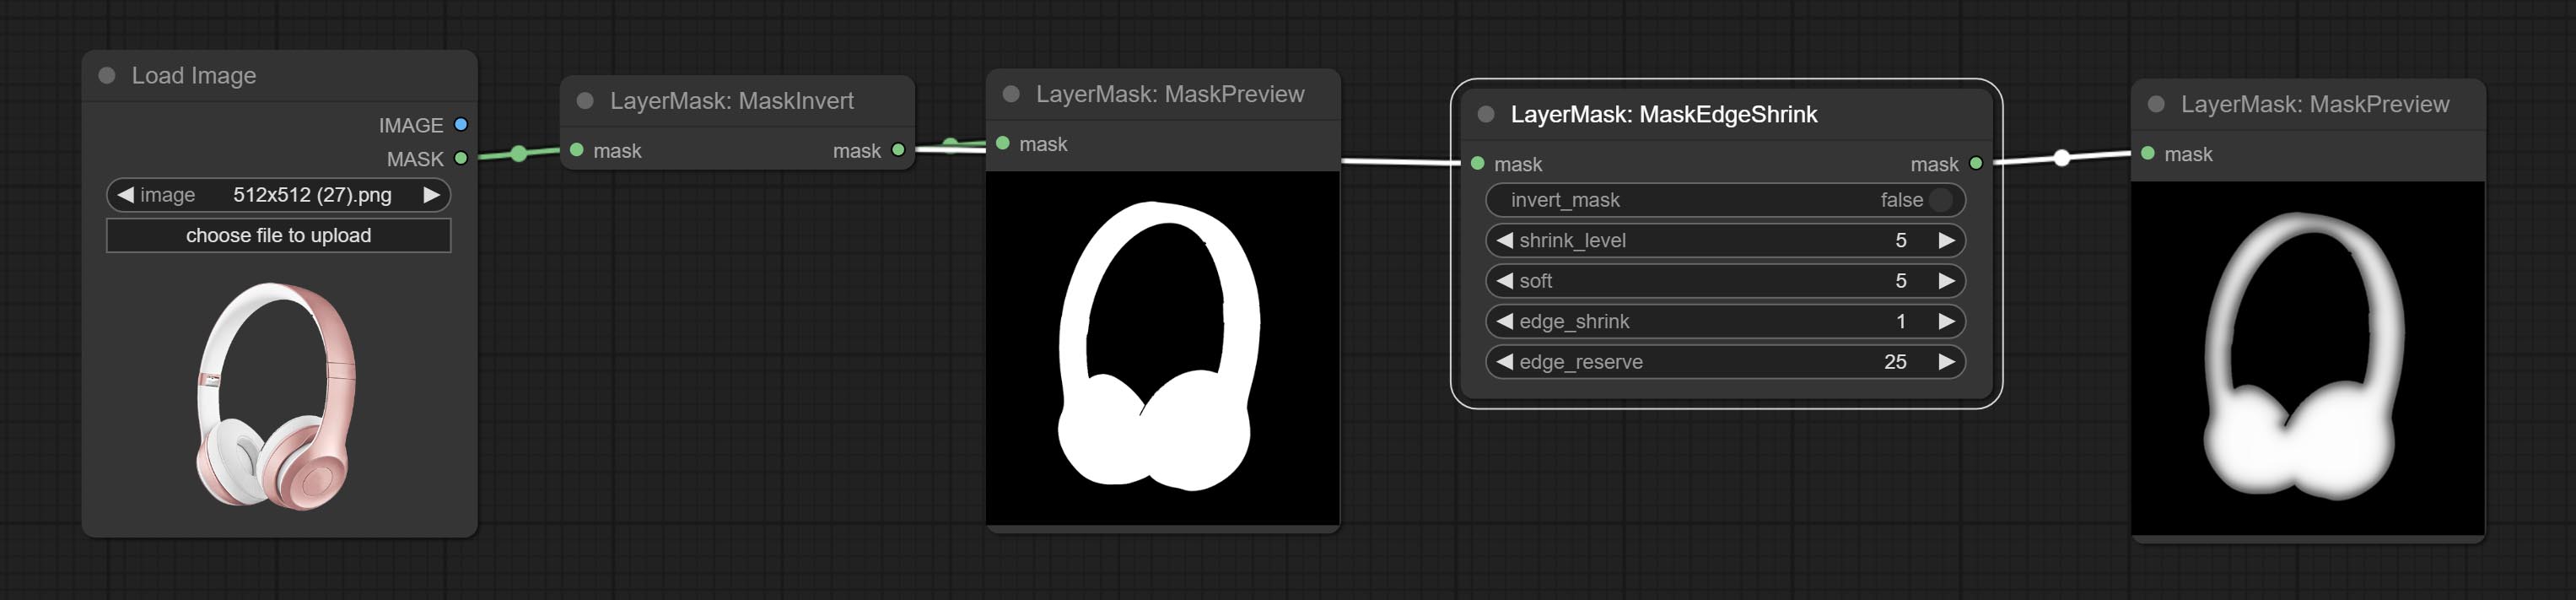
Node options: 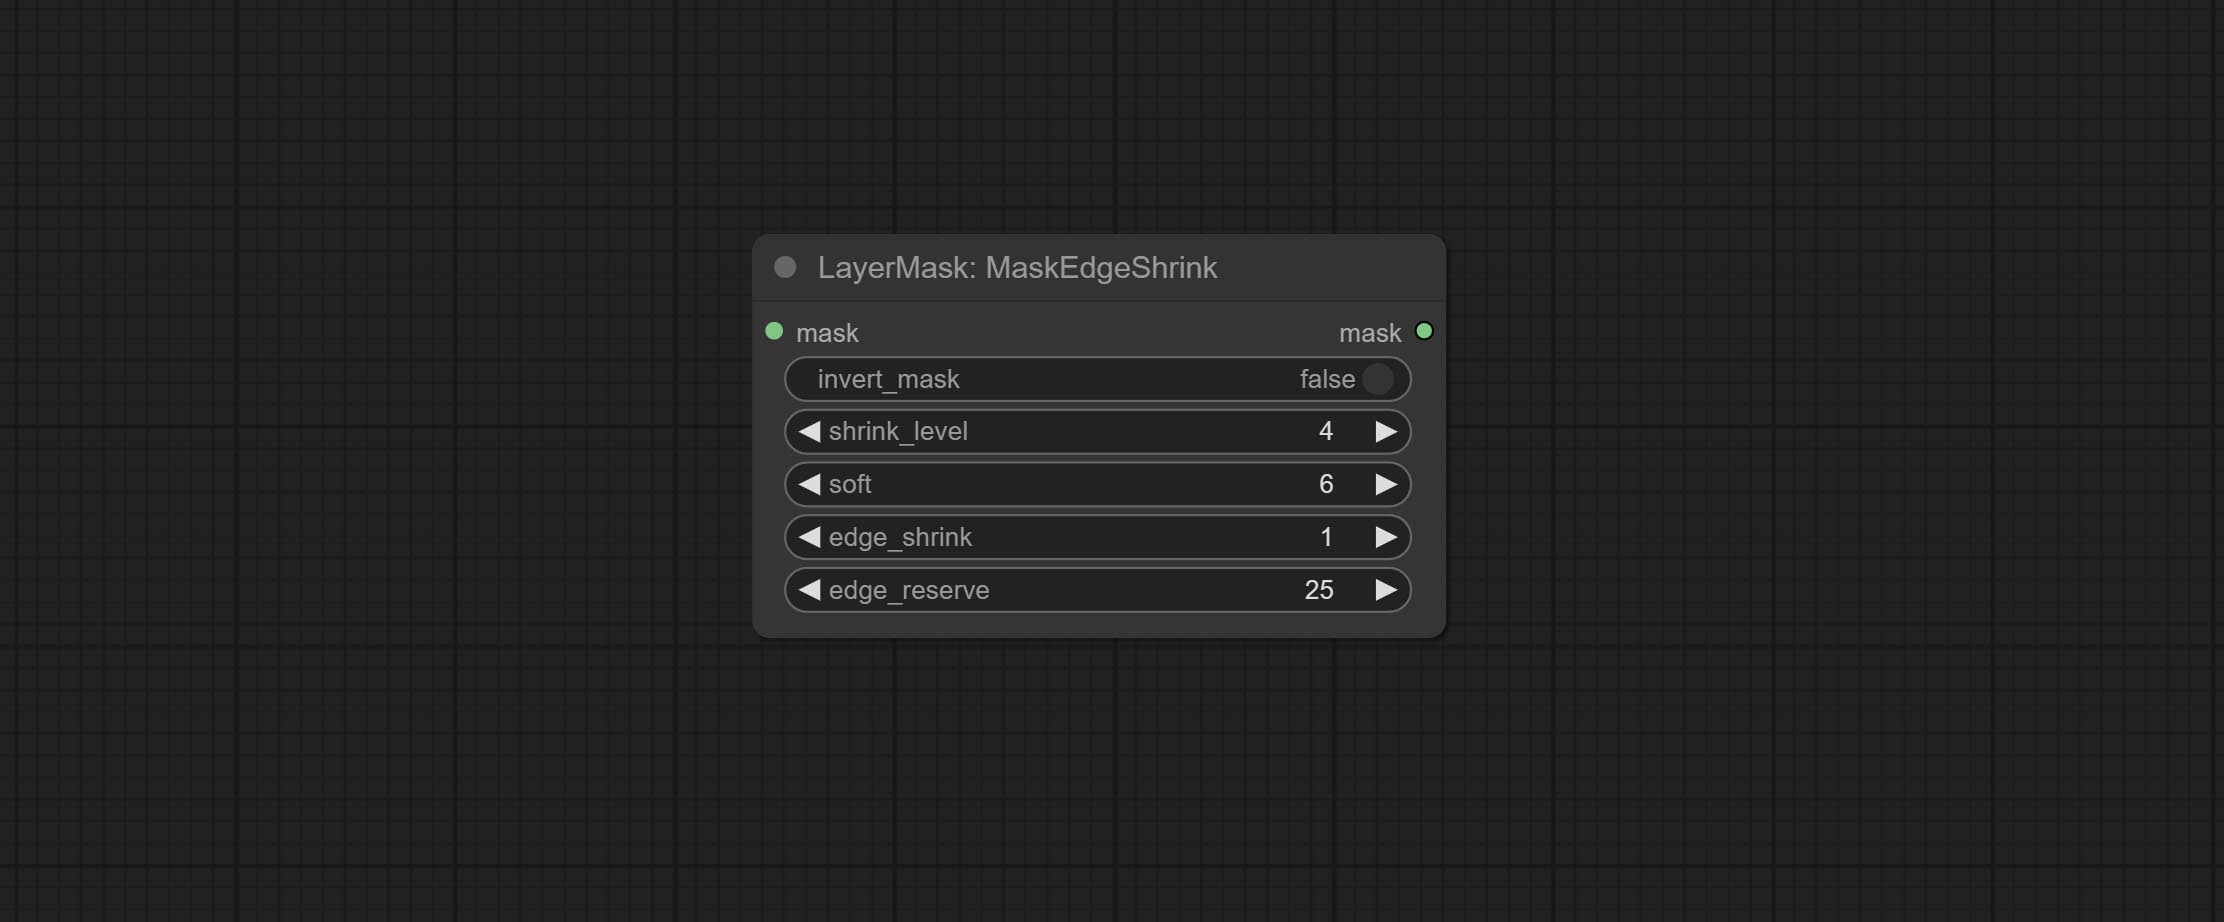
Comparison of MaskGrow and MaskEdgeShrink 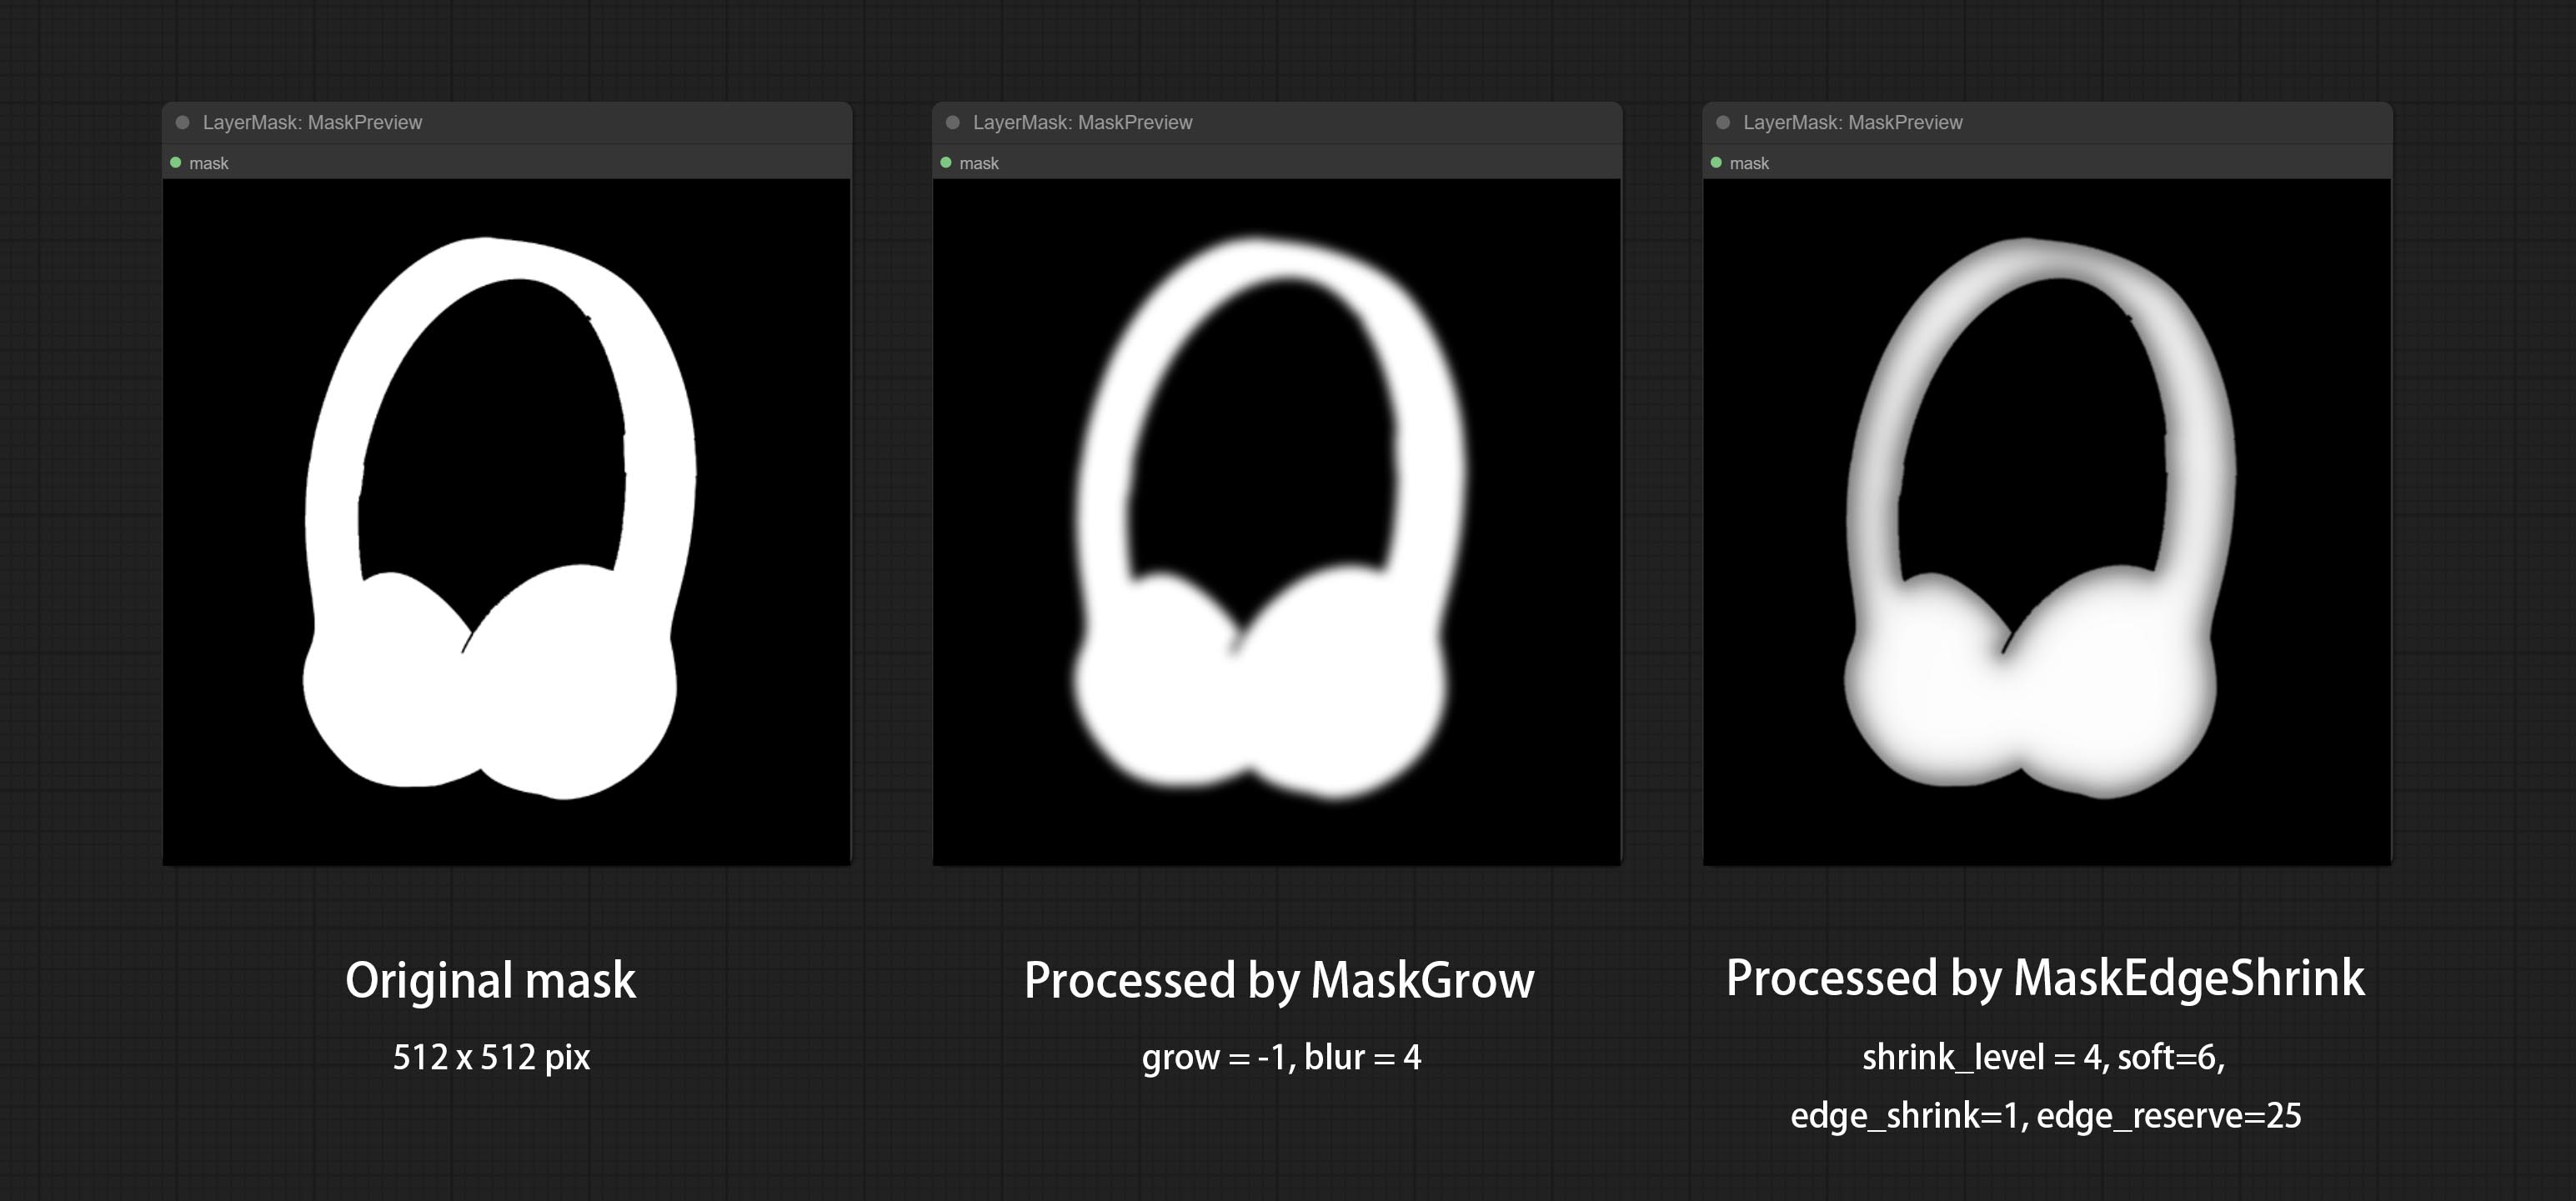
Create motion blur on the mask. 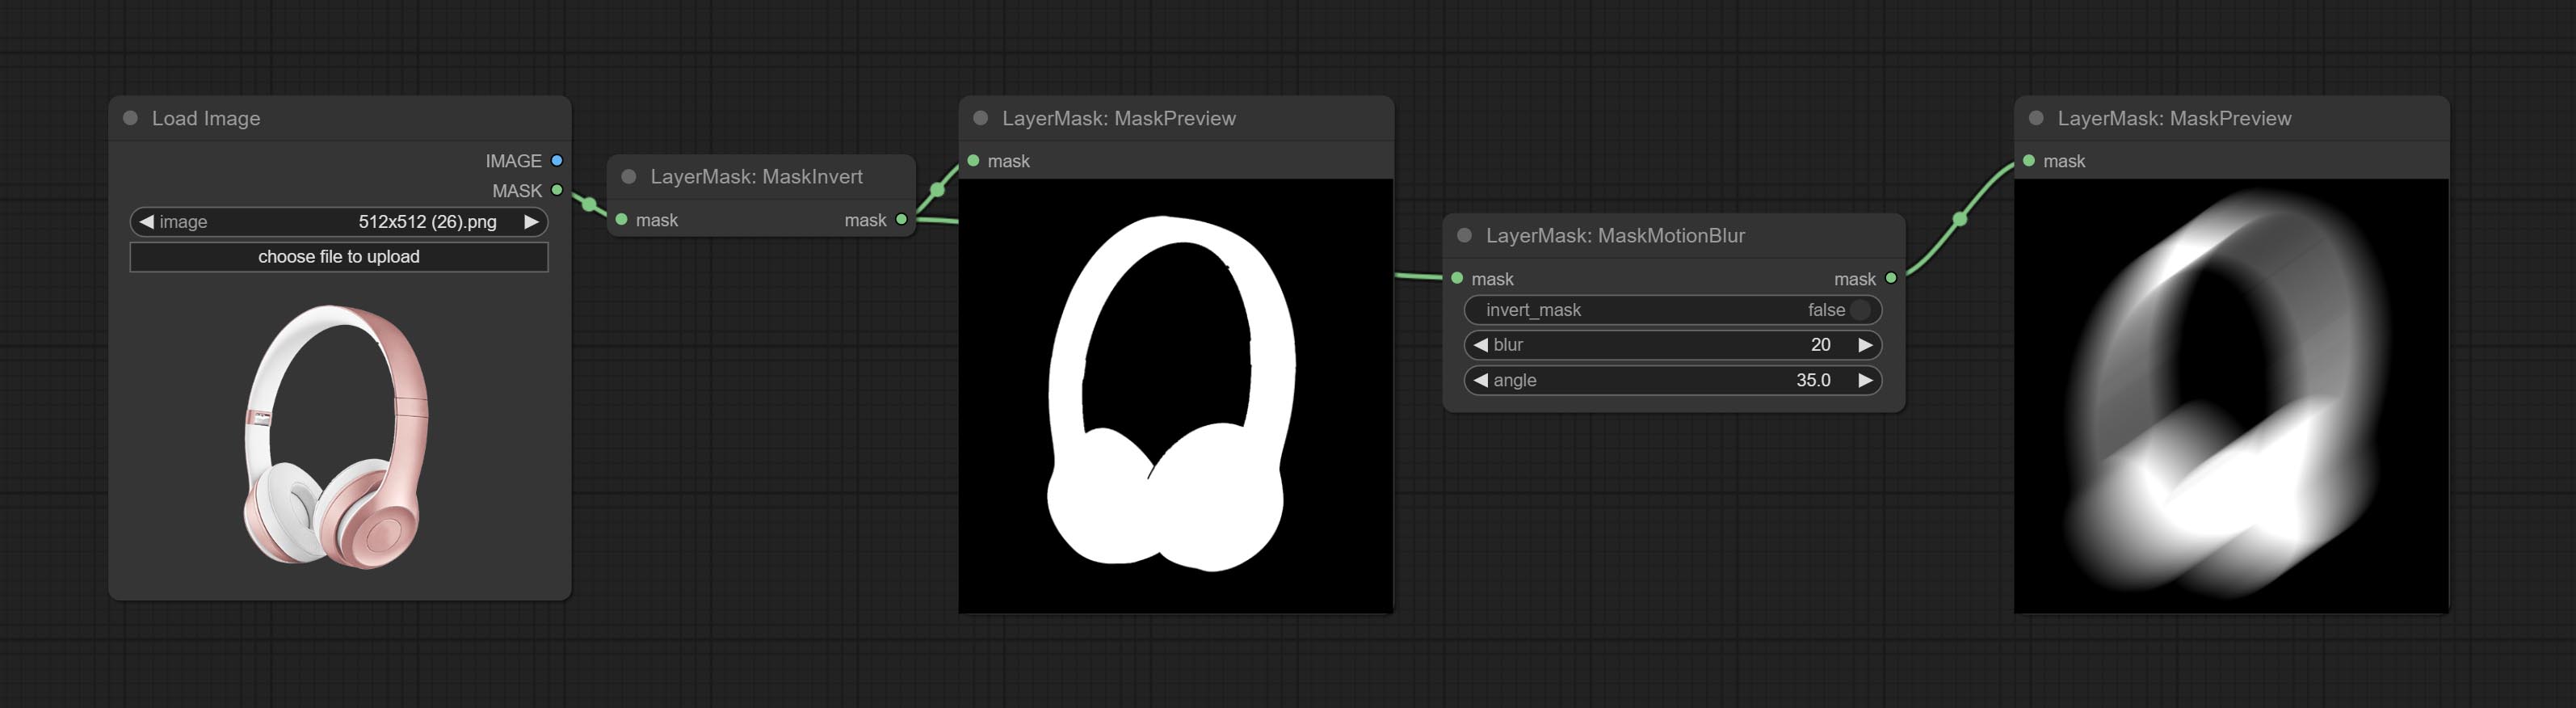
Node options: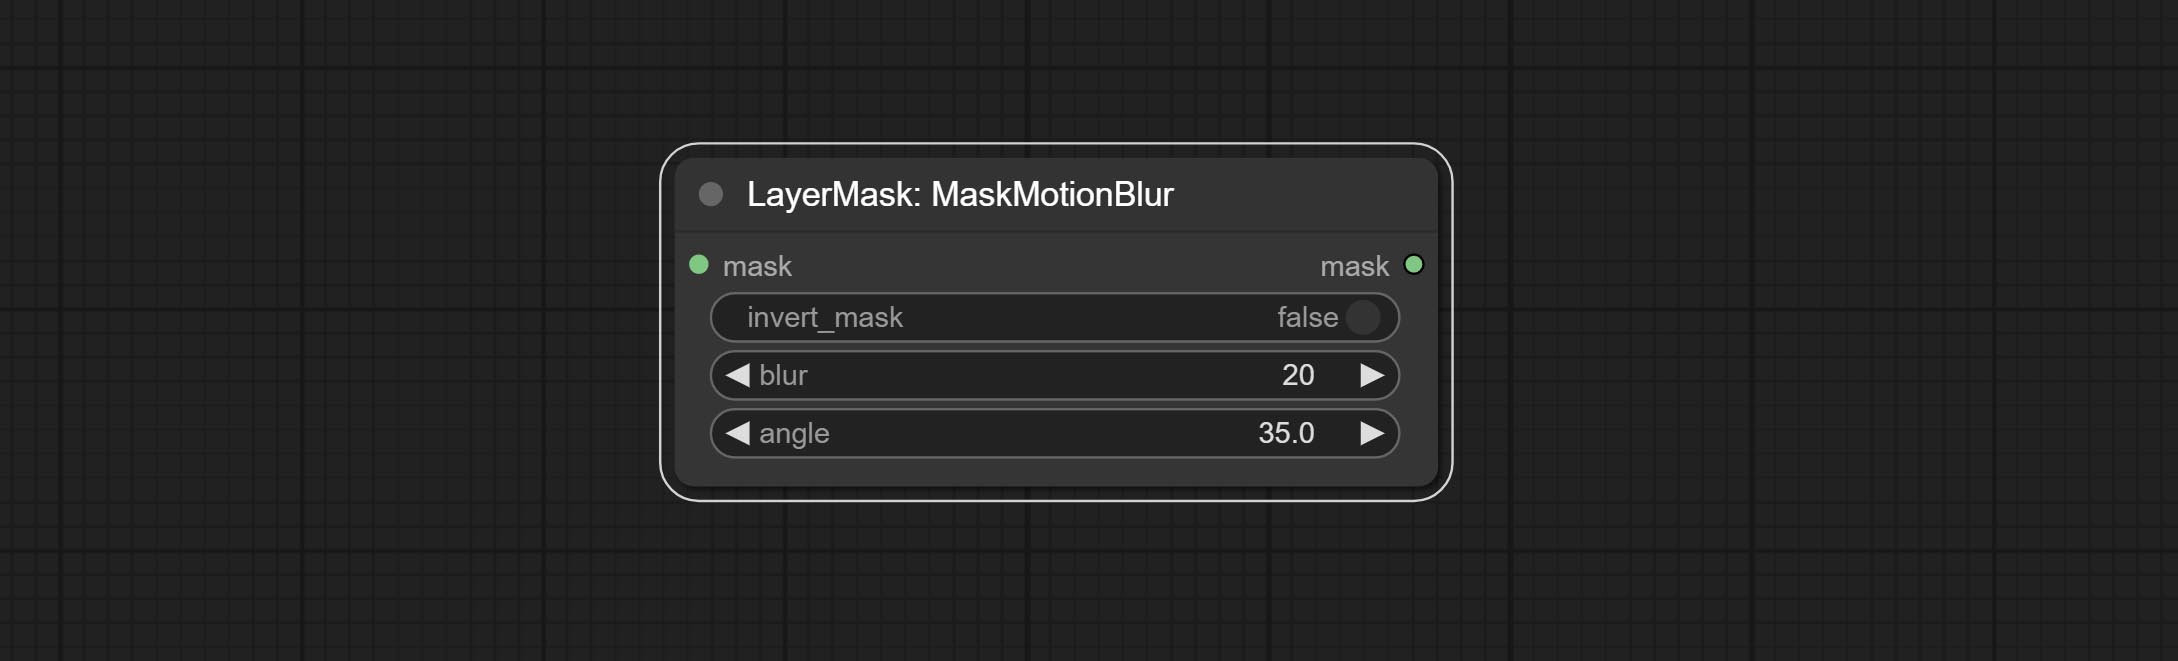
Create a gradient for the mask from one side. please note the difference between this node and the CreateGradientMask node. 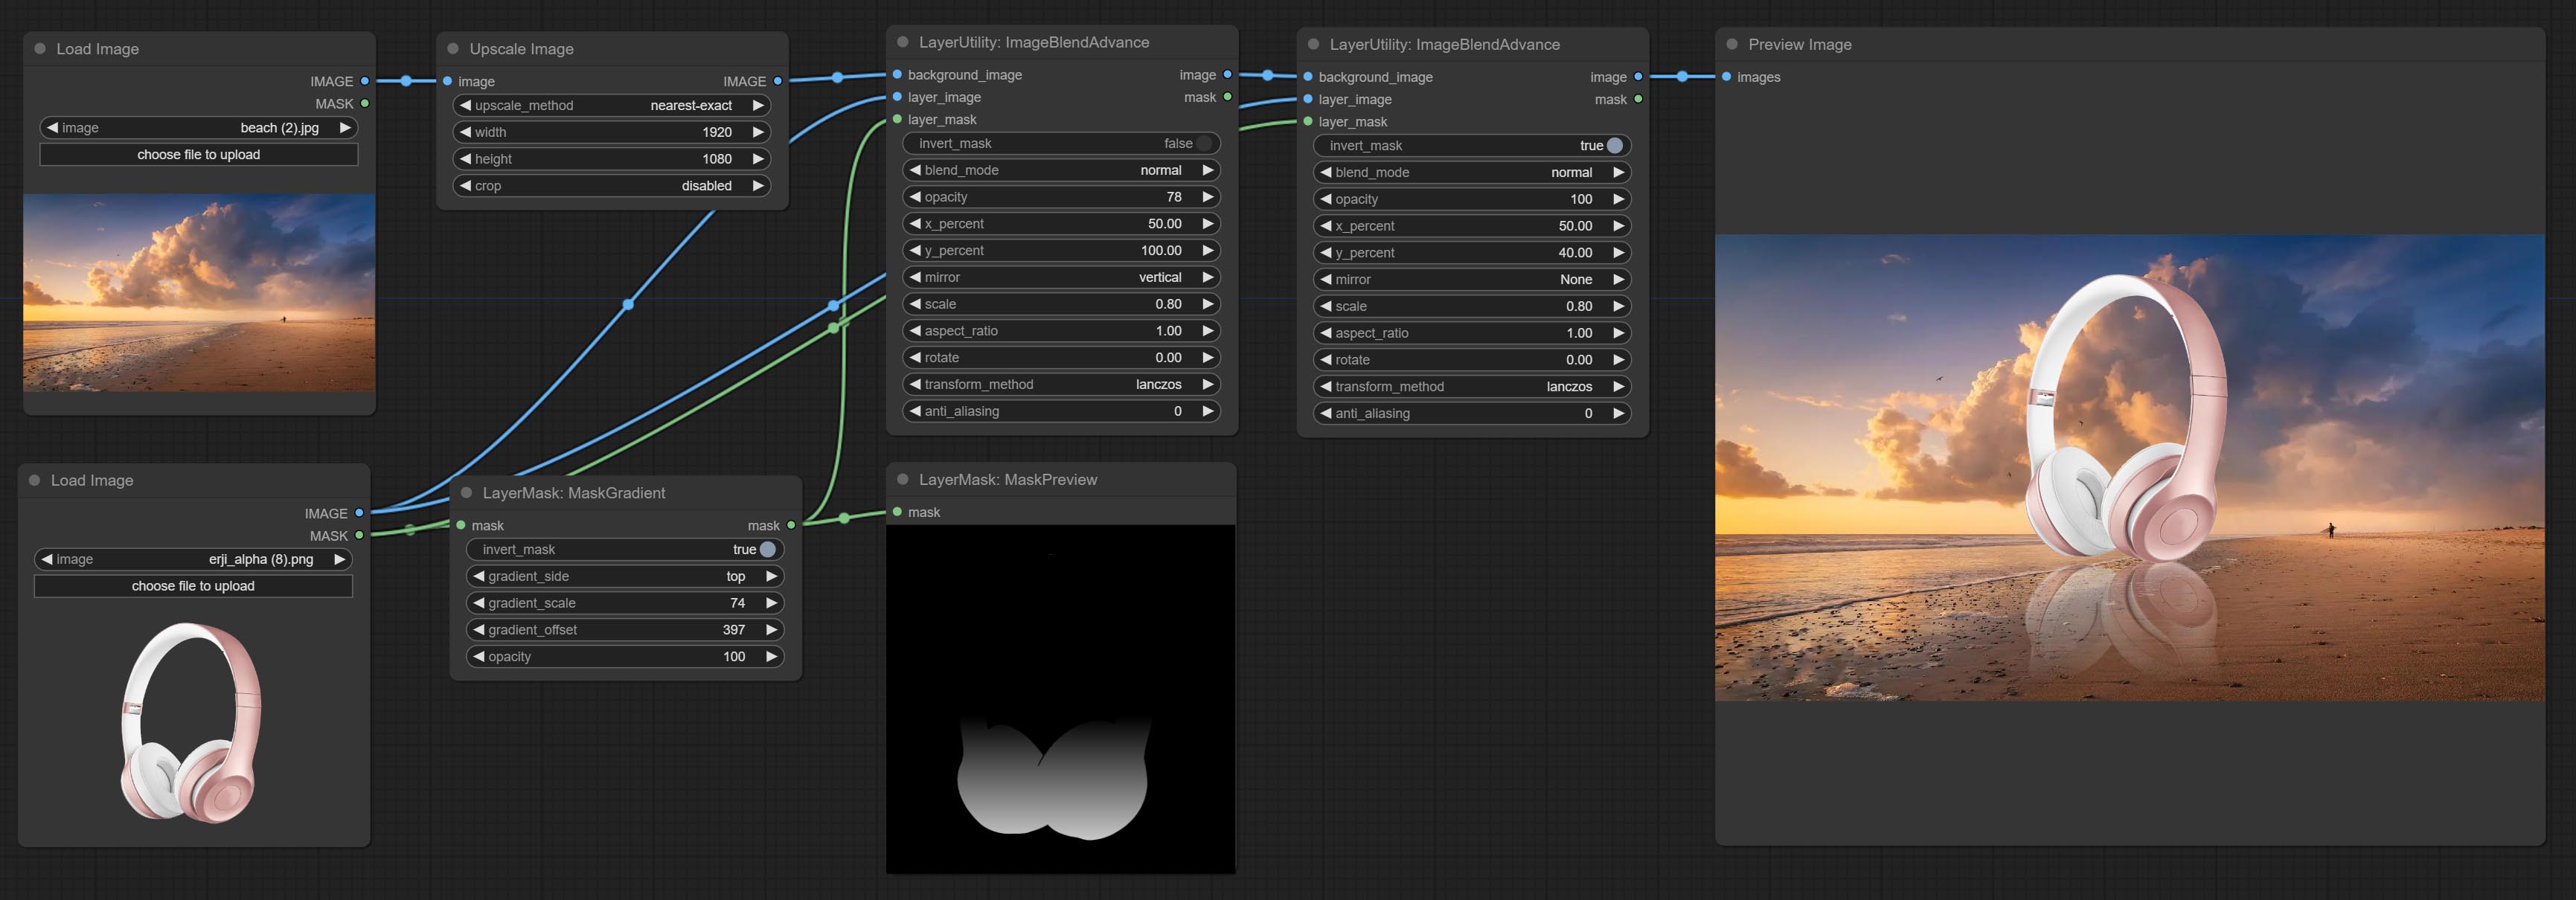
Node options: 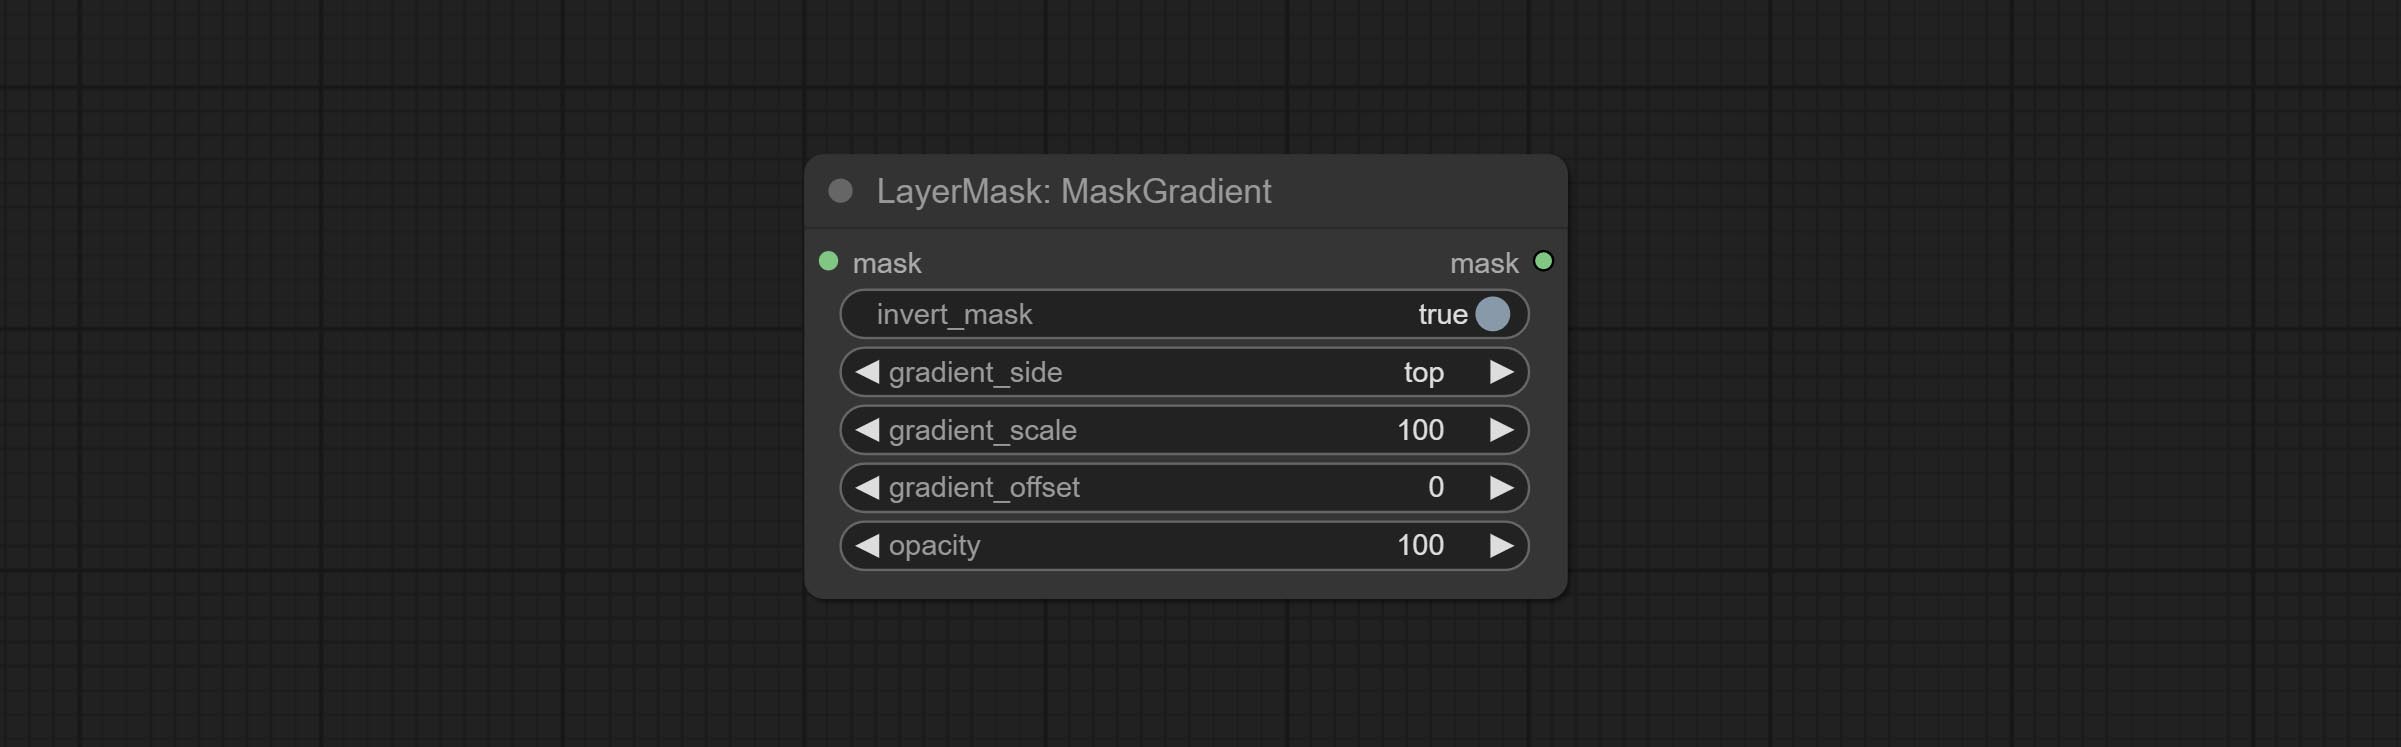
Create a gradient mask. please note the difference between this node and the MaskGradient node. 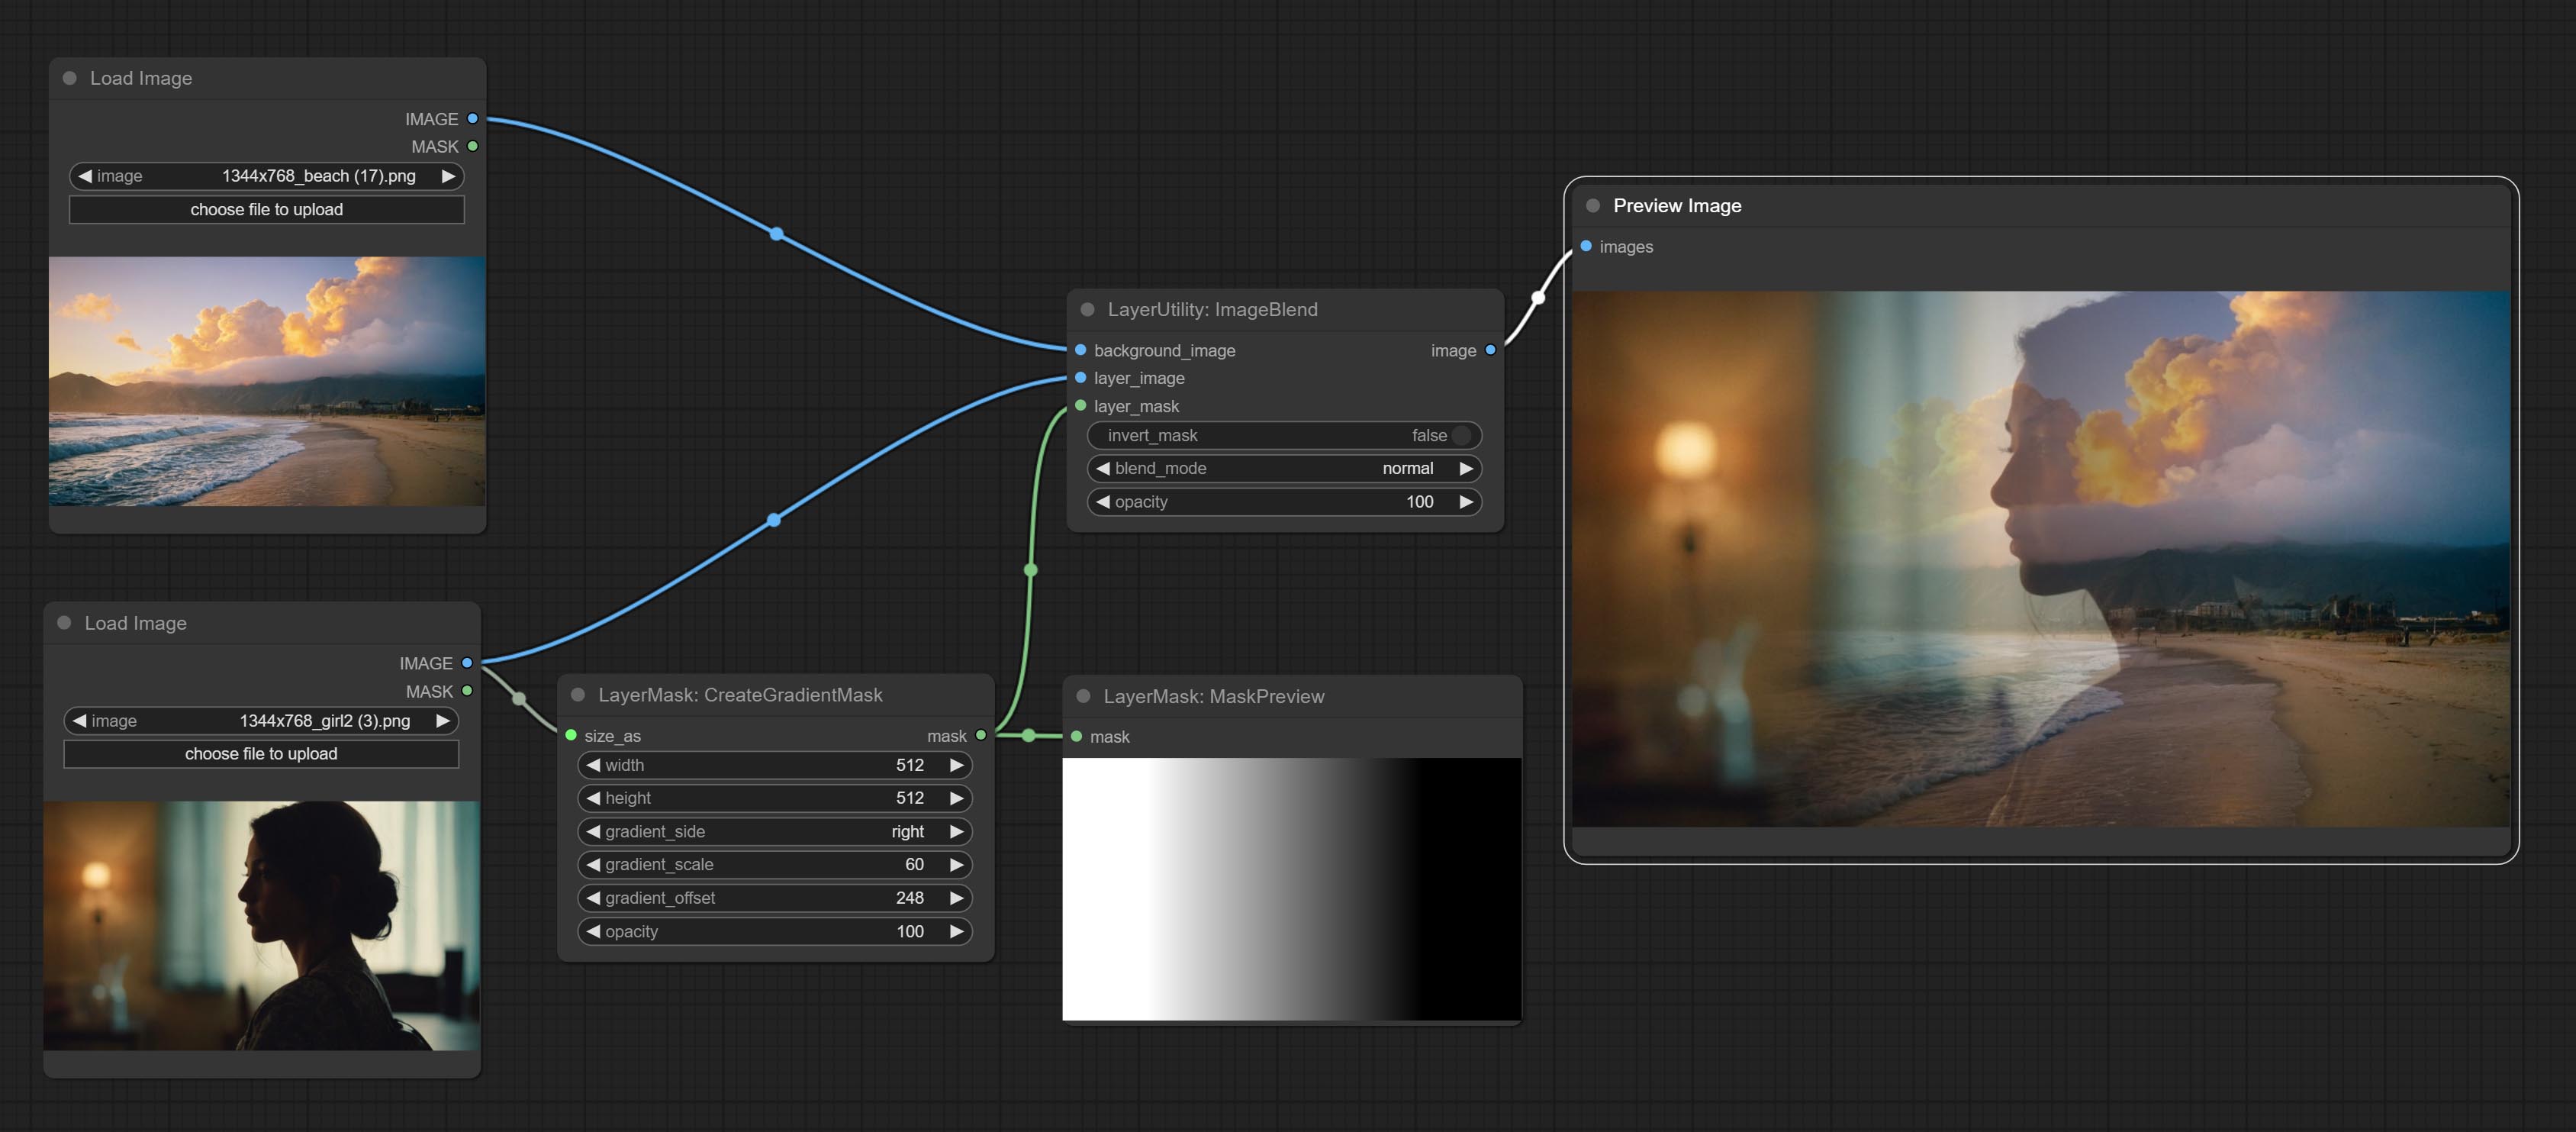
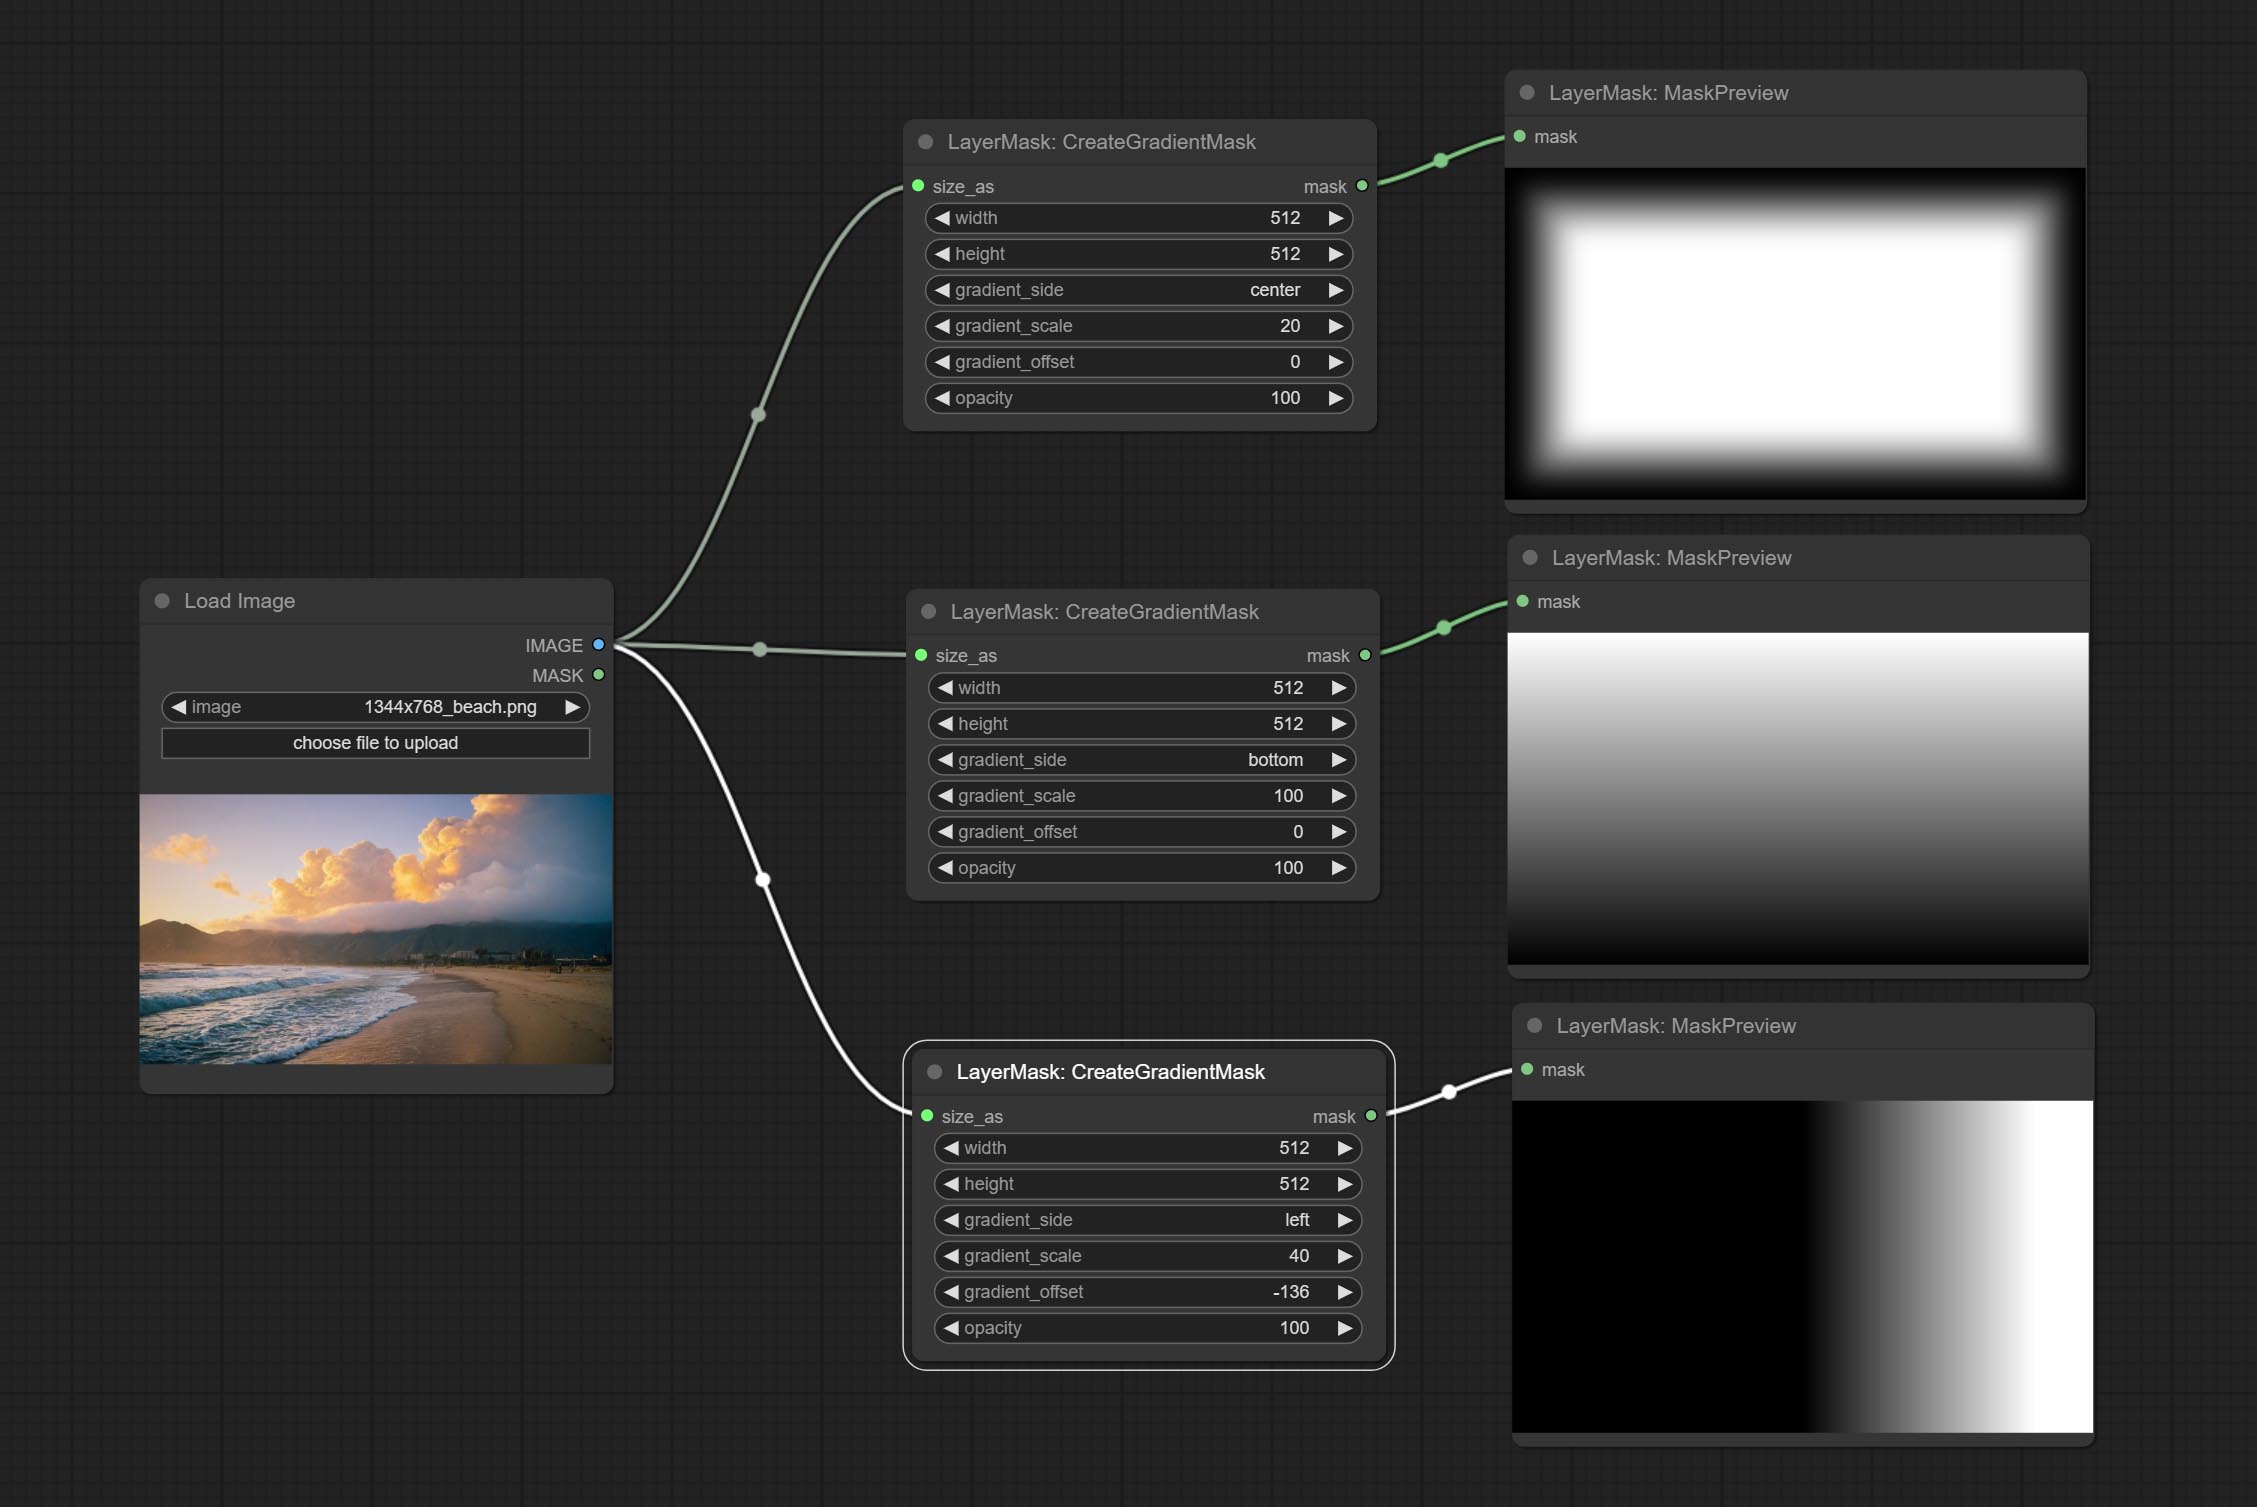
Node options:
gradient_side is center, the size of the gradient area is adjusted here, positive values are smaller, and negative values are enlarged.* Only limited to input image and mask. forcing the integration of other types of inputs will result in node errors.
Generate mask contour strokes. 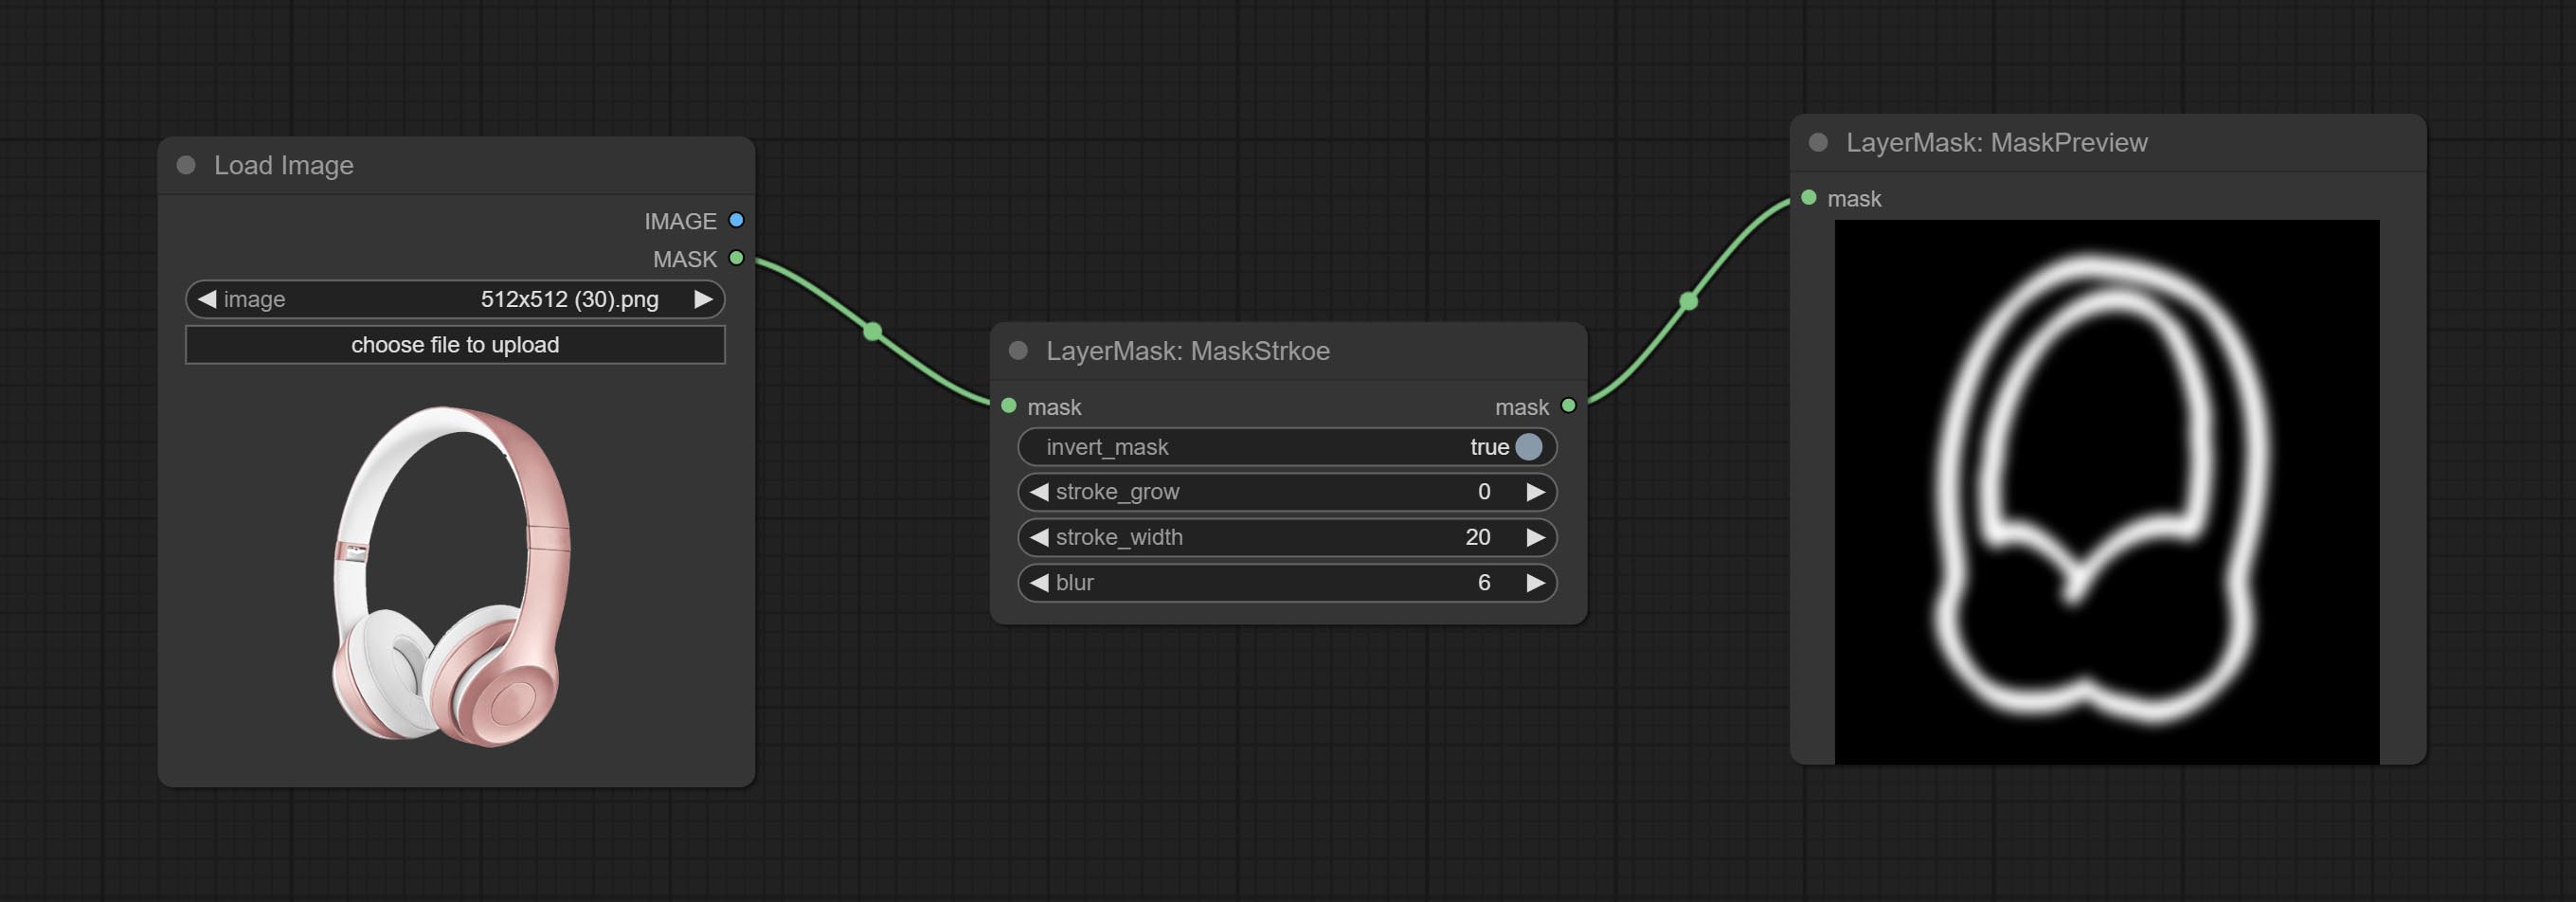
Node options: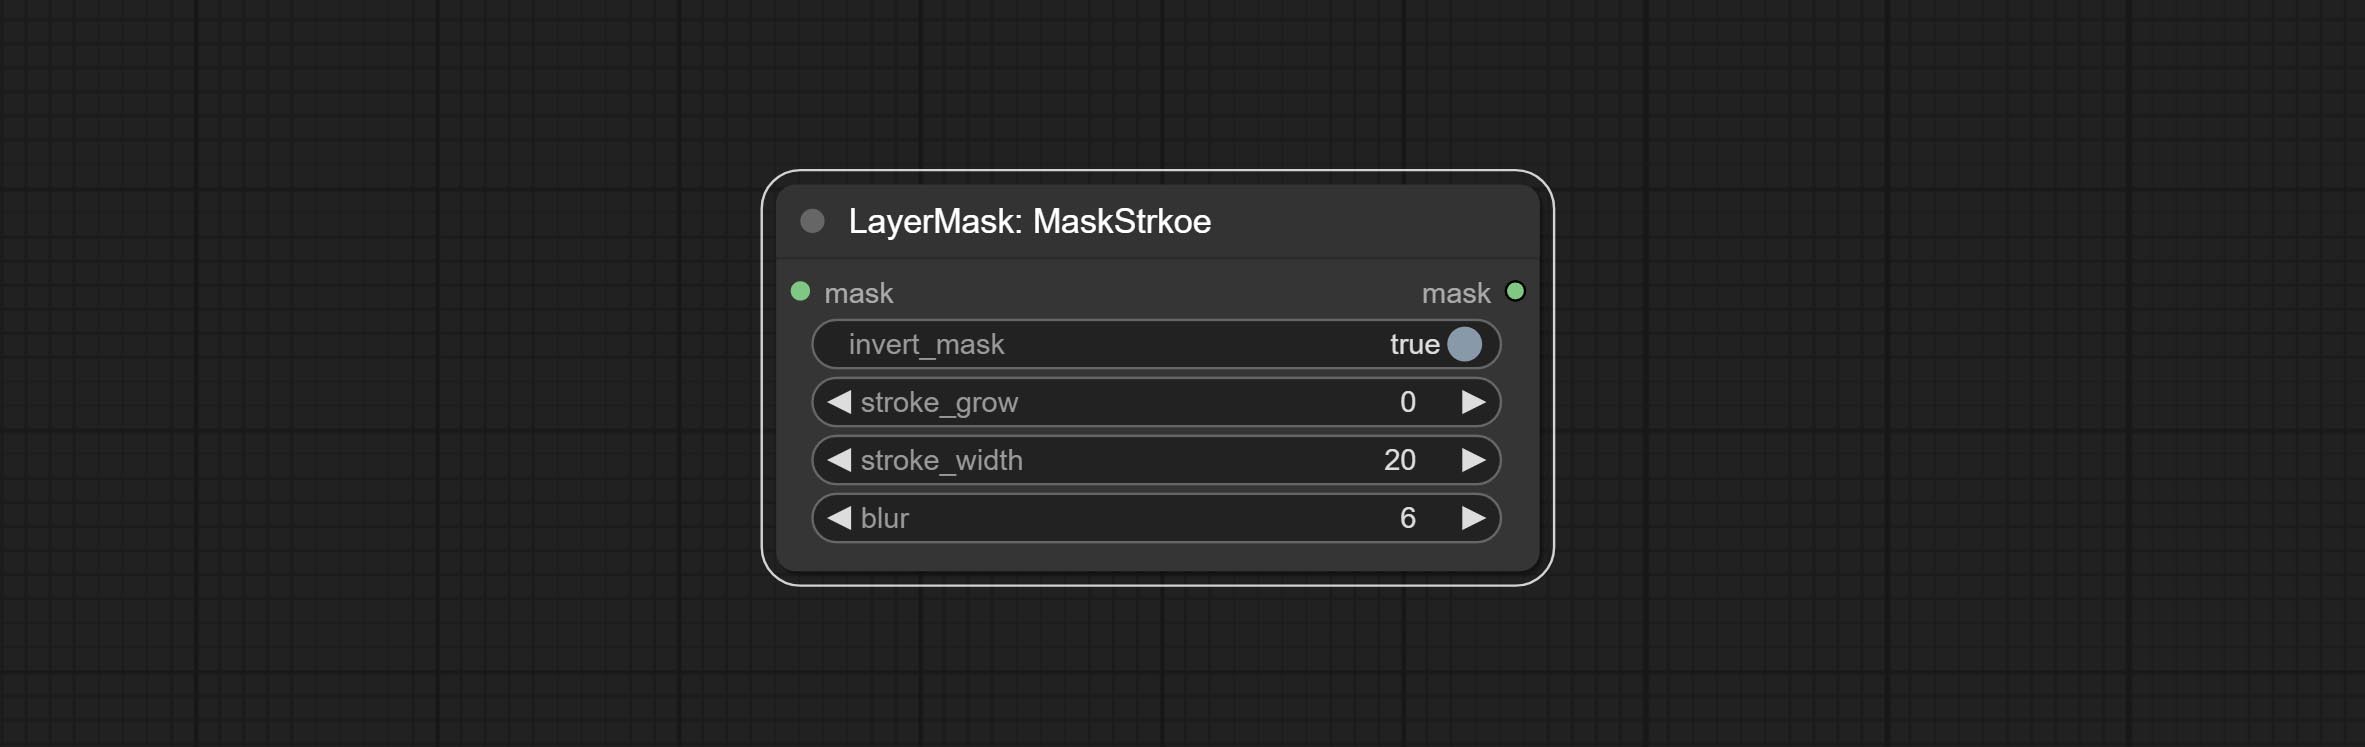
Generates noise for the mask. 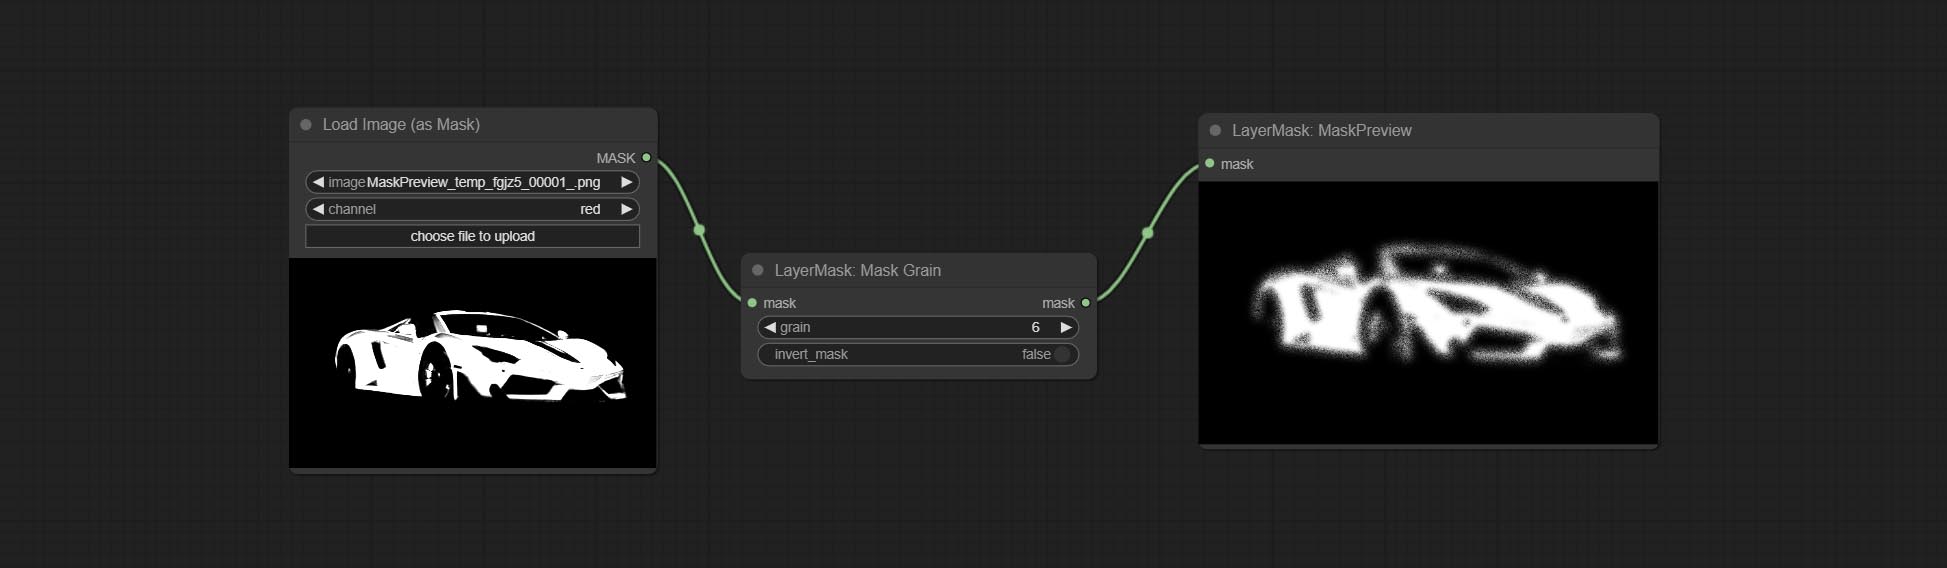
Node Options: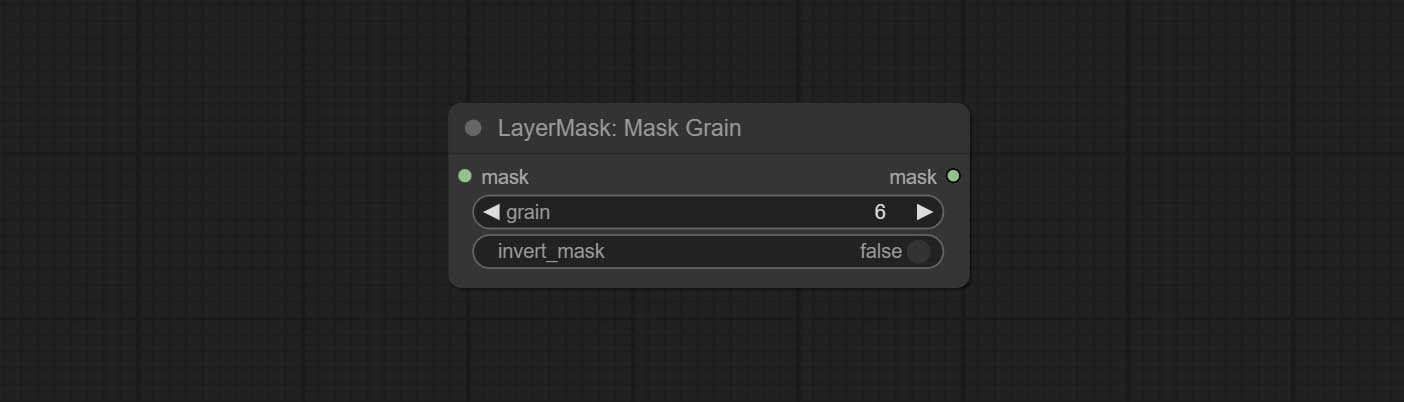
Preview the input mask 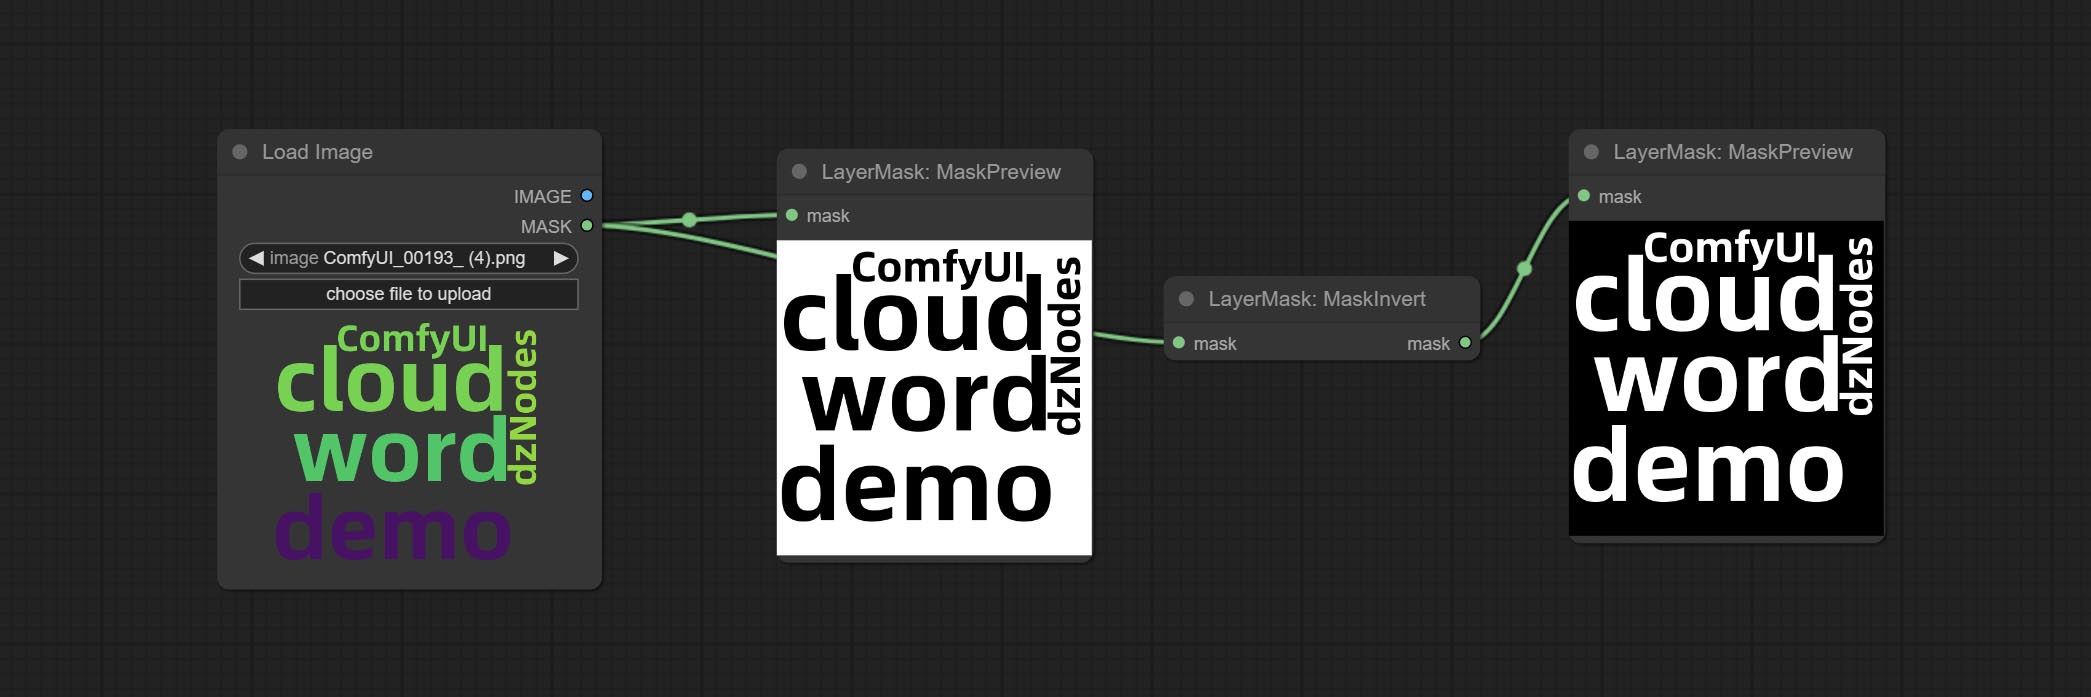
Invert the mask 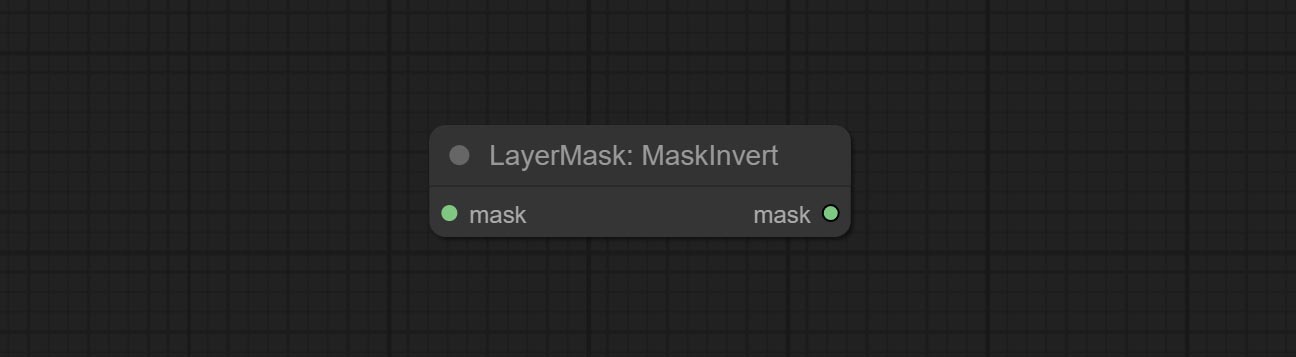
Enhance or smooth out details for image. 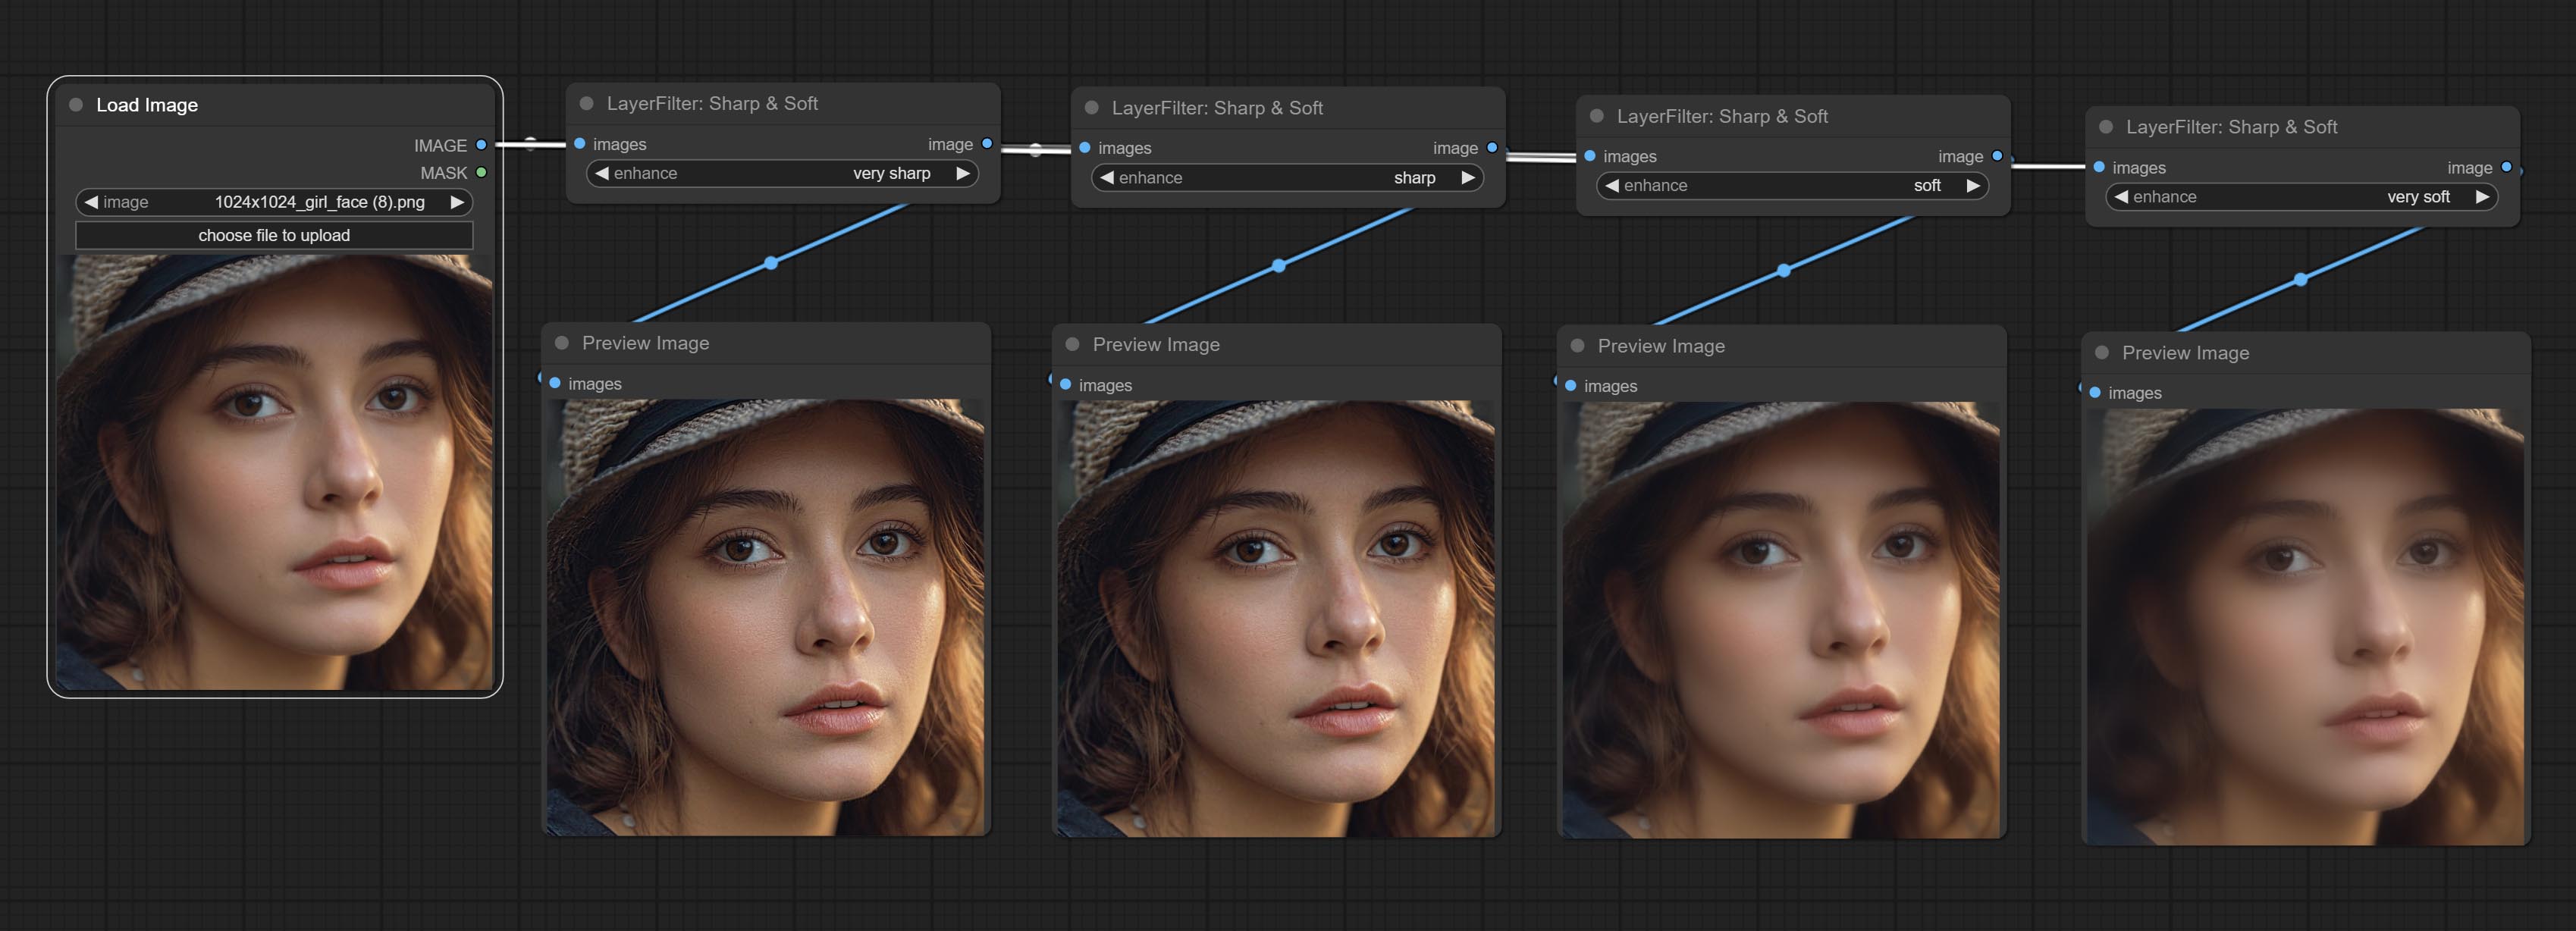
Node options: 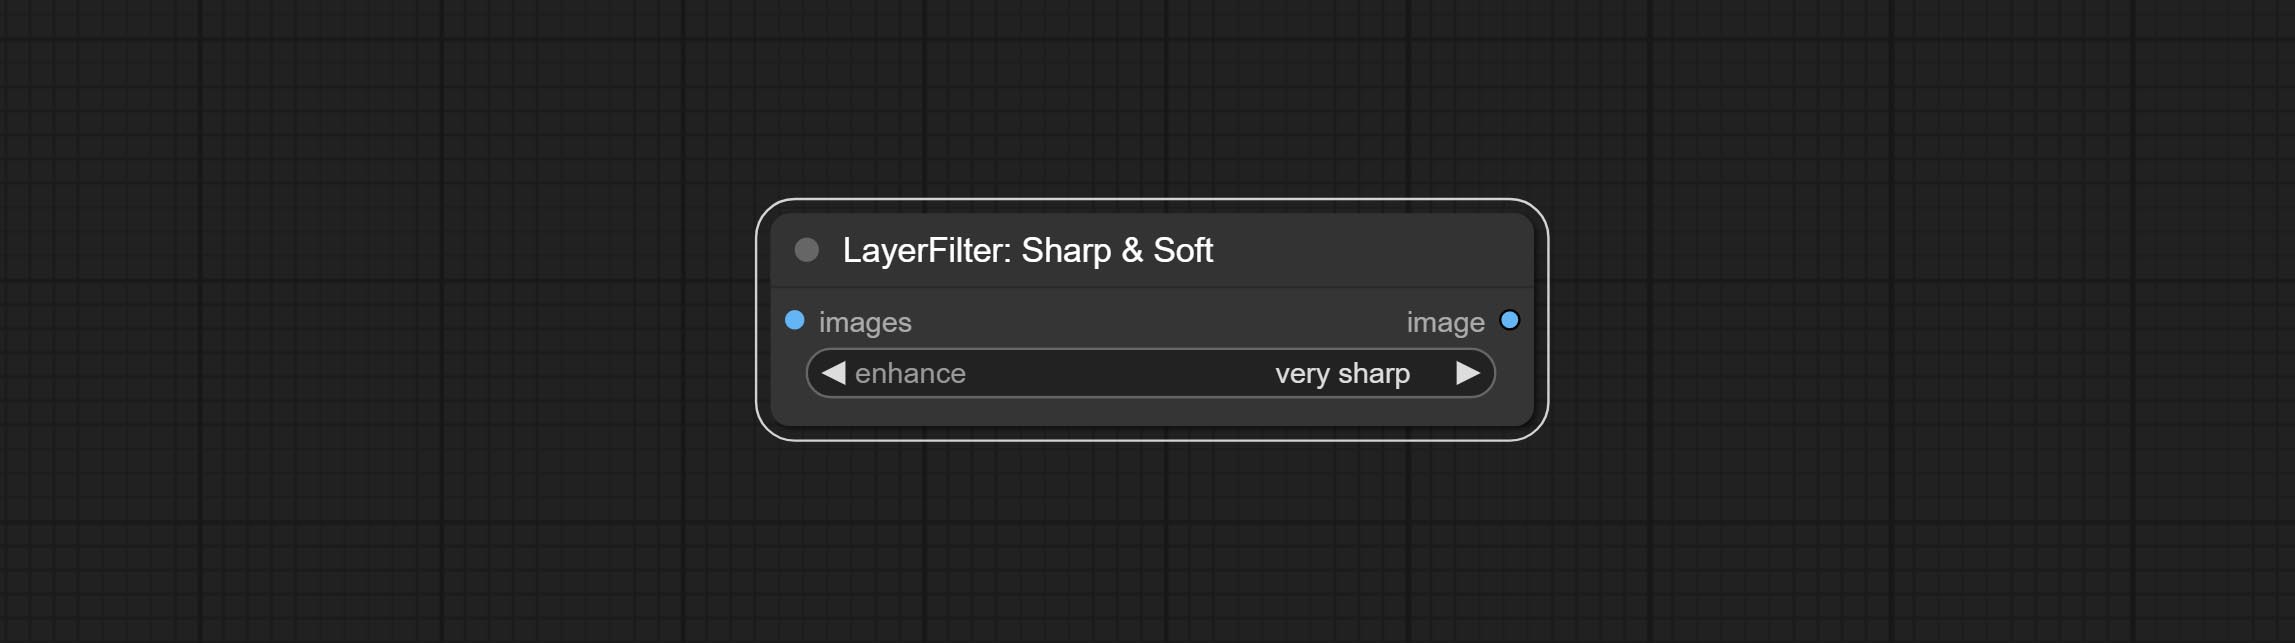
Make the skin look smoother. 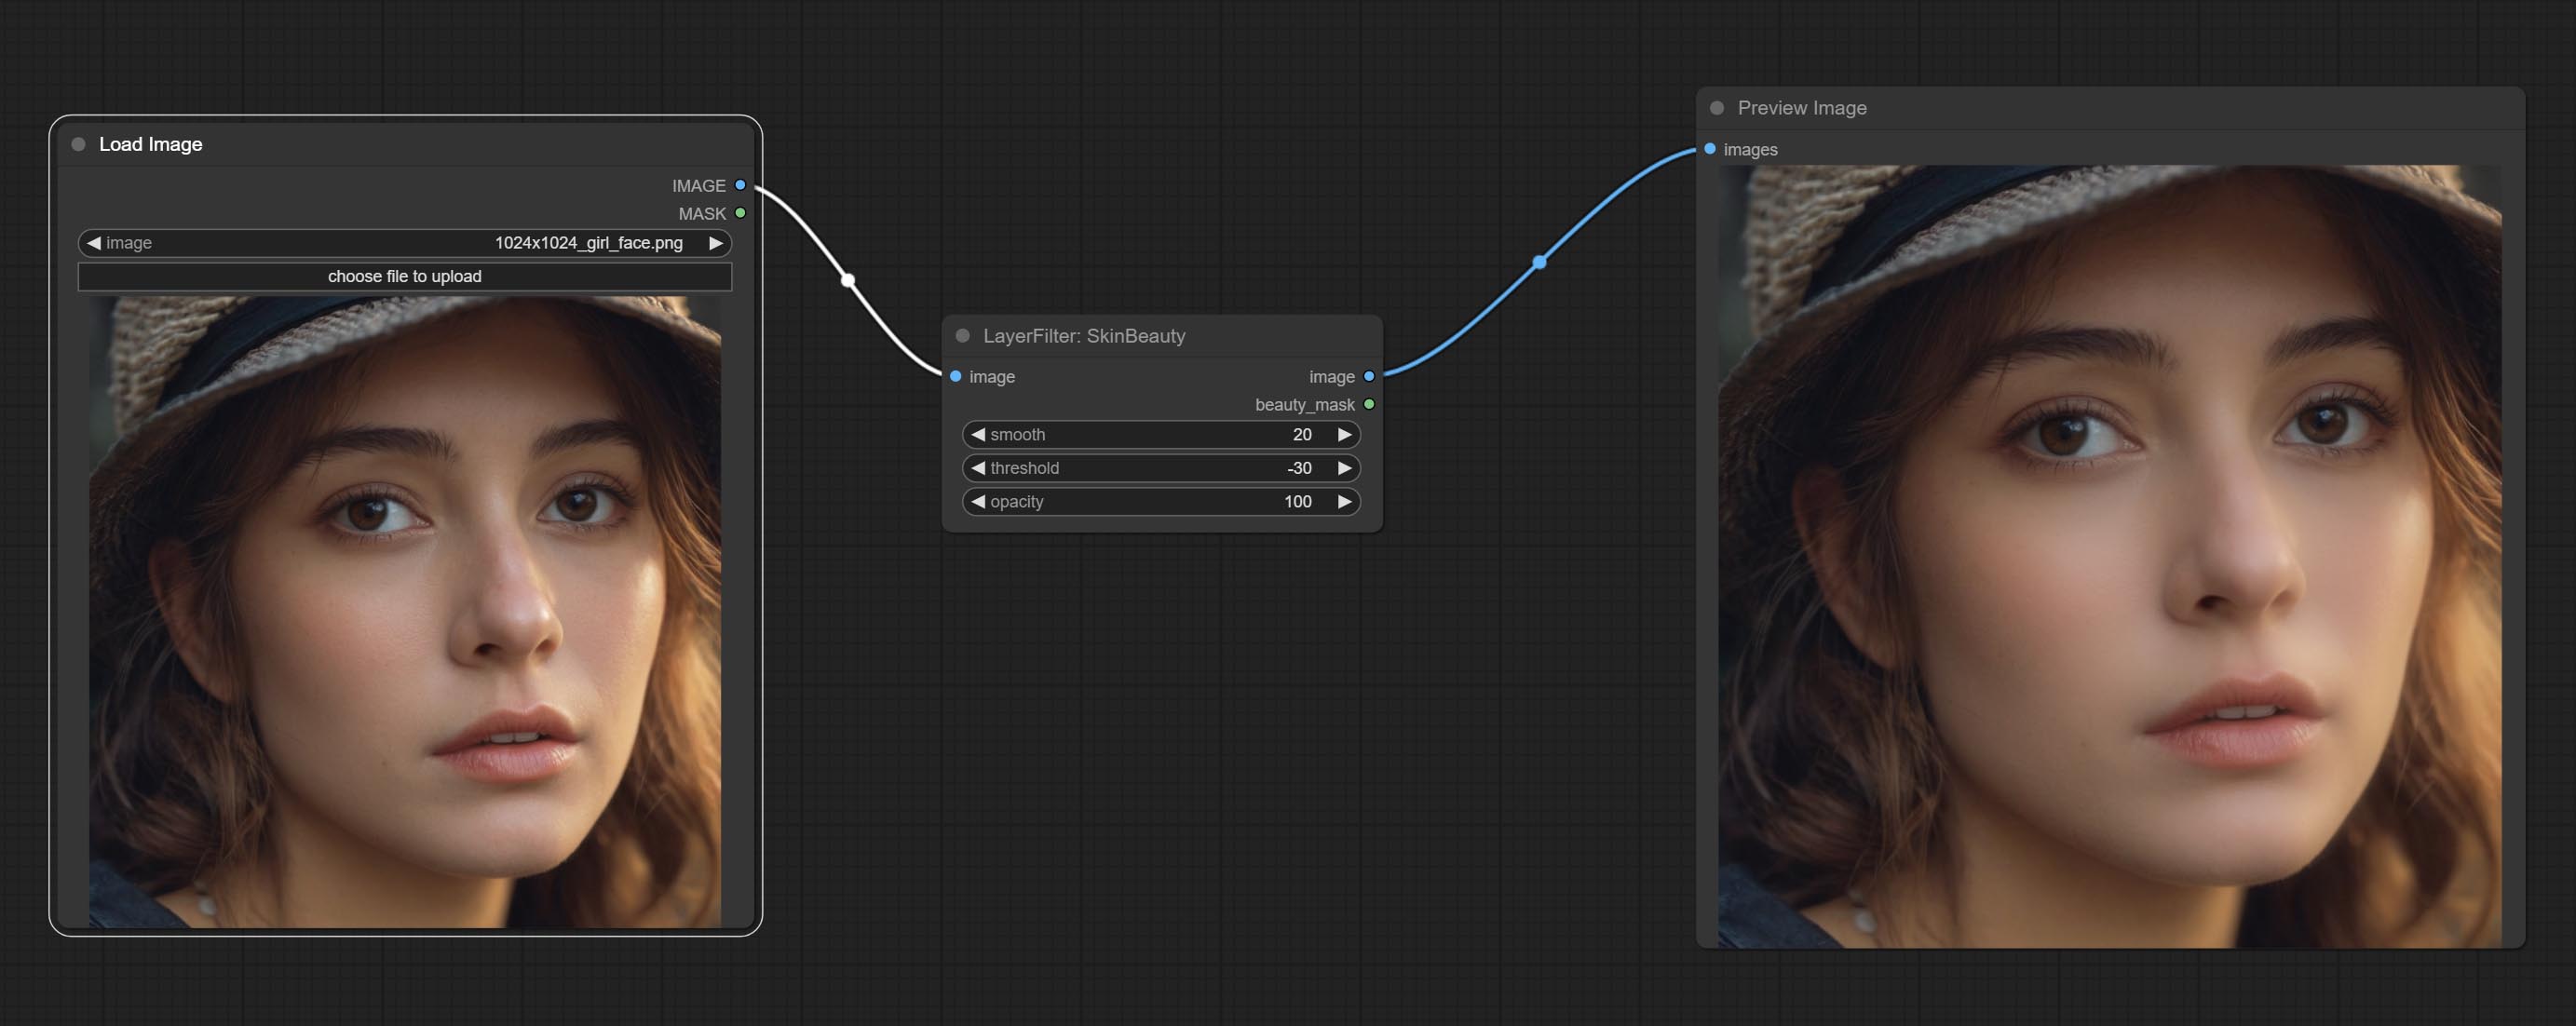
Node options: 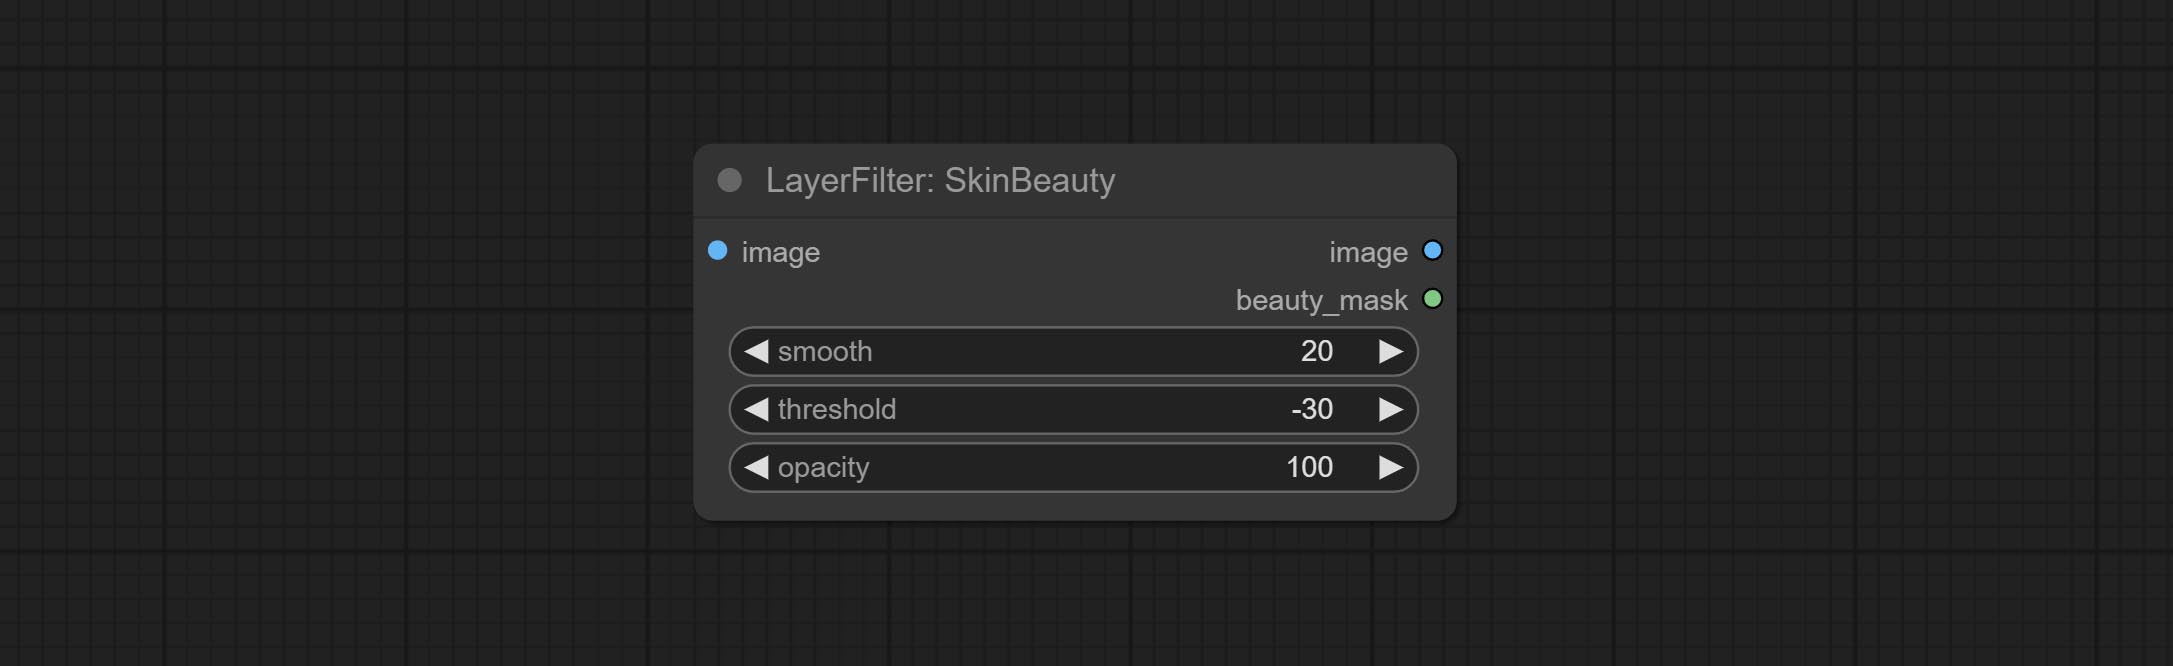
Watercolor painting effect 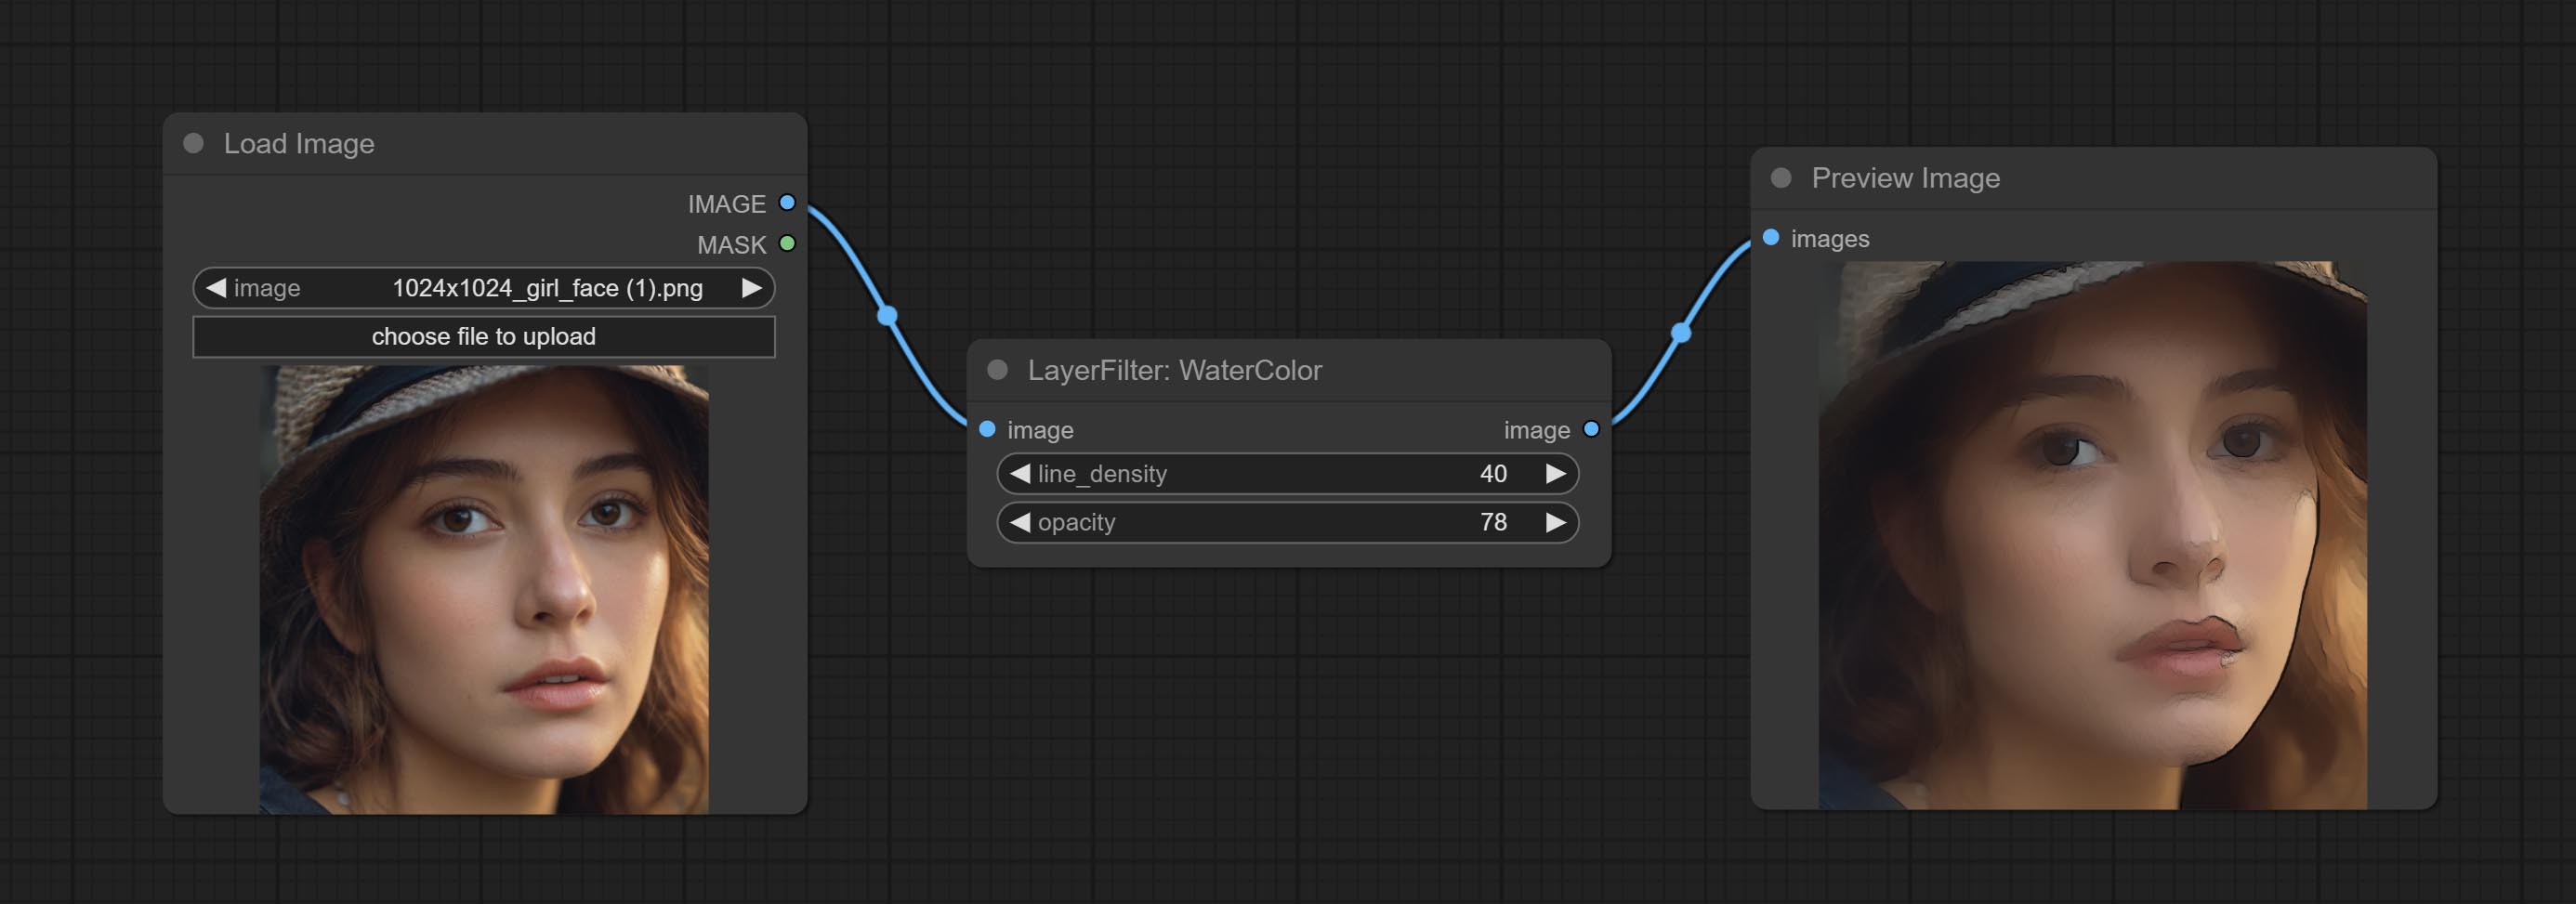
Node option: 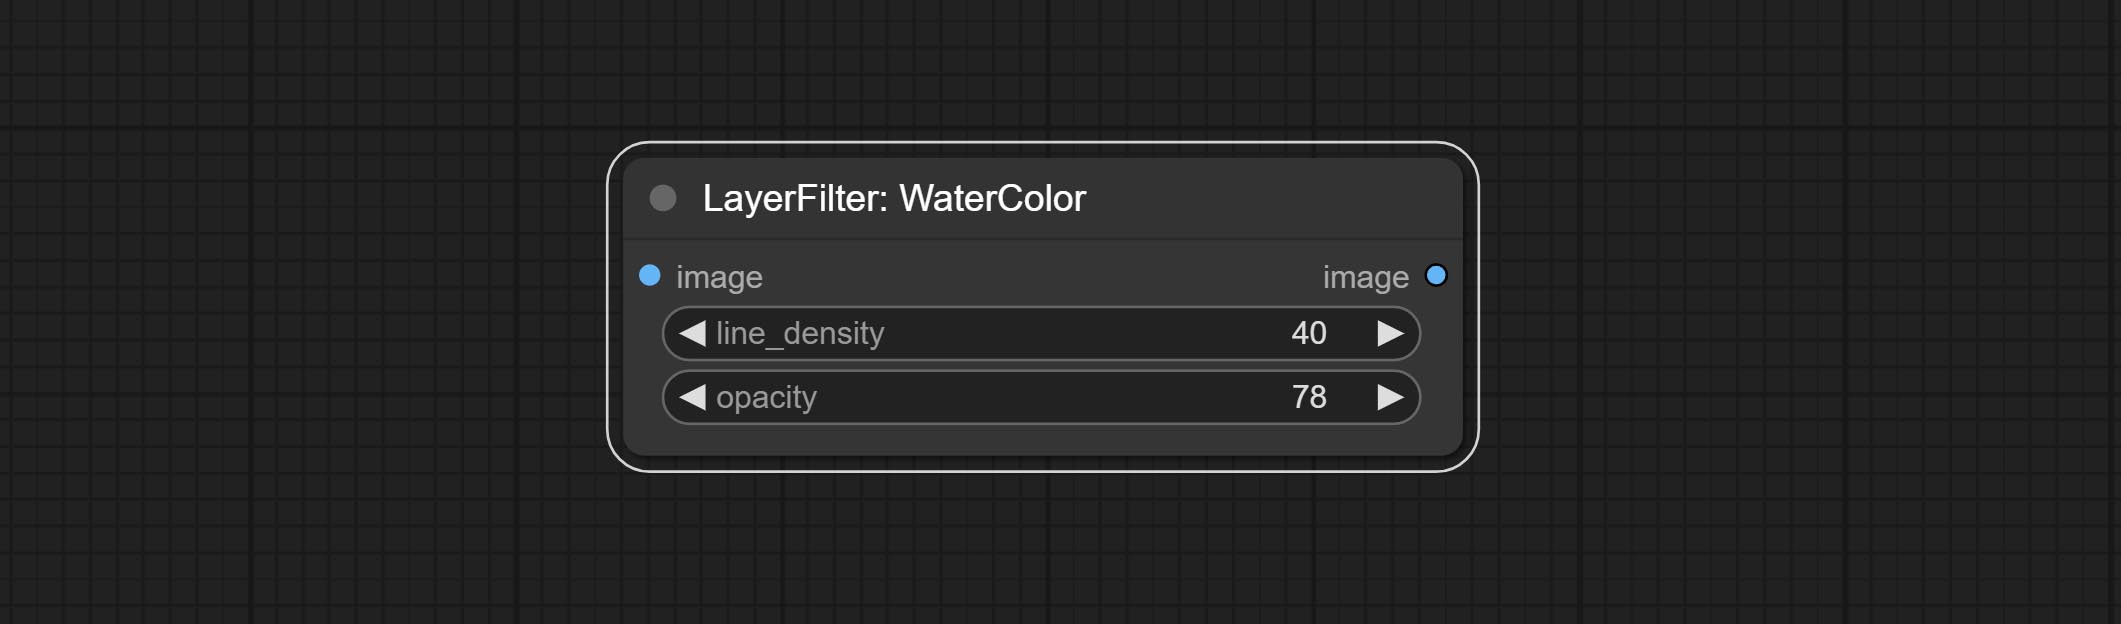
Soft light effect, the bright highlights on the screen appear blurry. 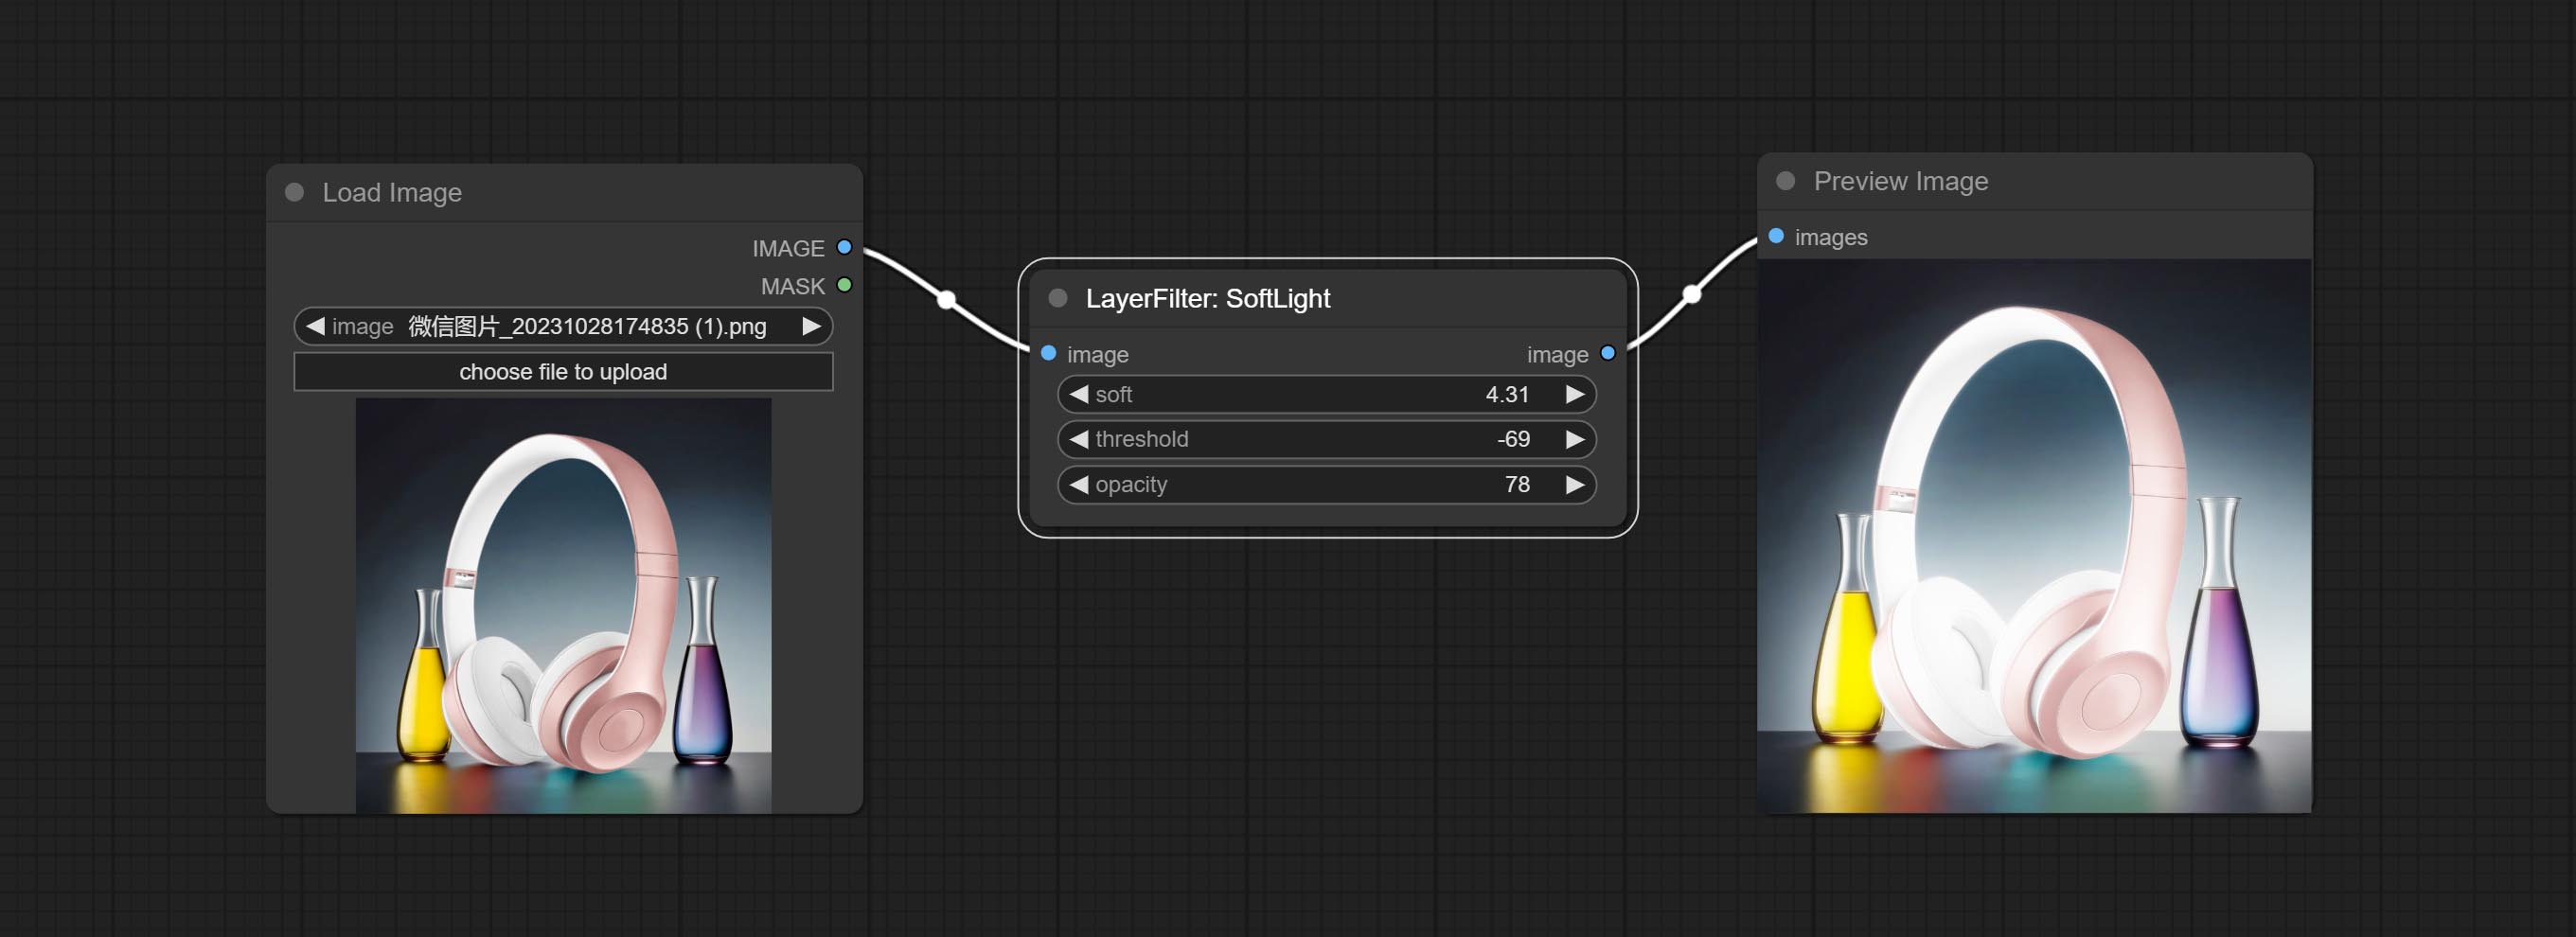
Node options: 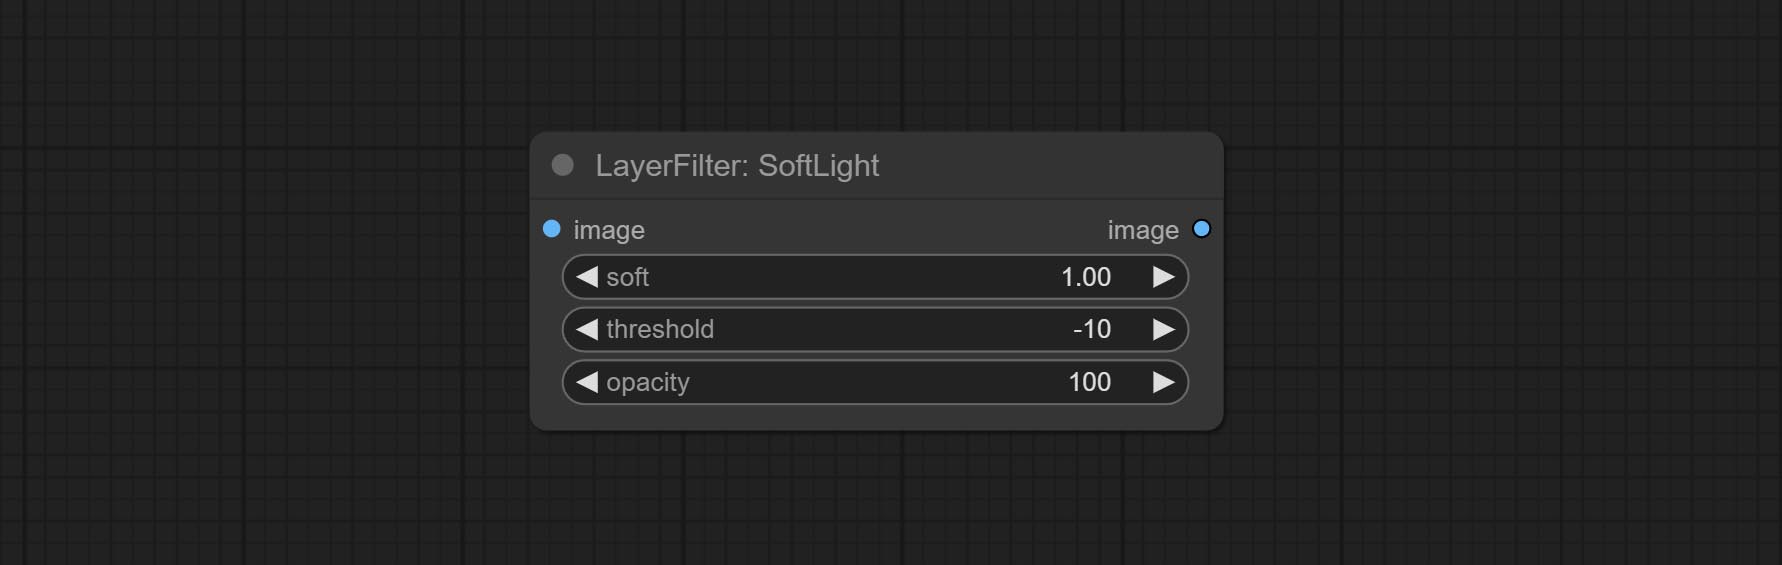
Channel misalignment. similar to the effect of Tiktok logo. 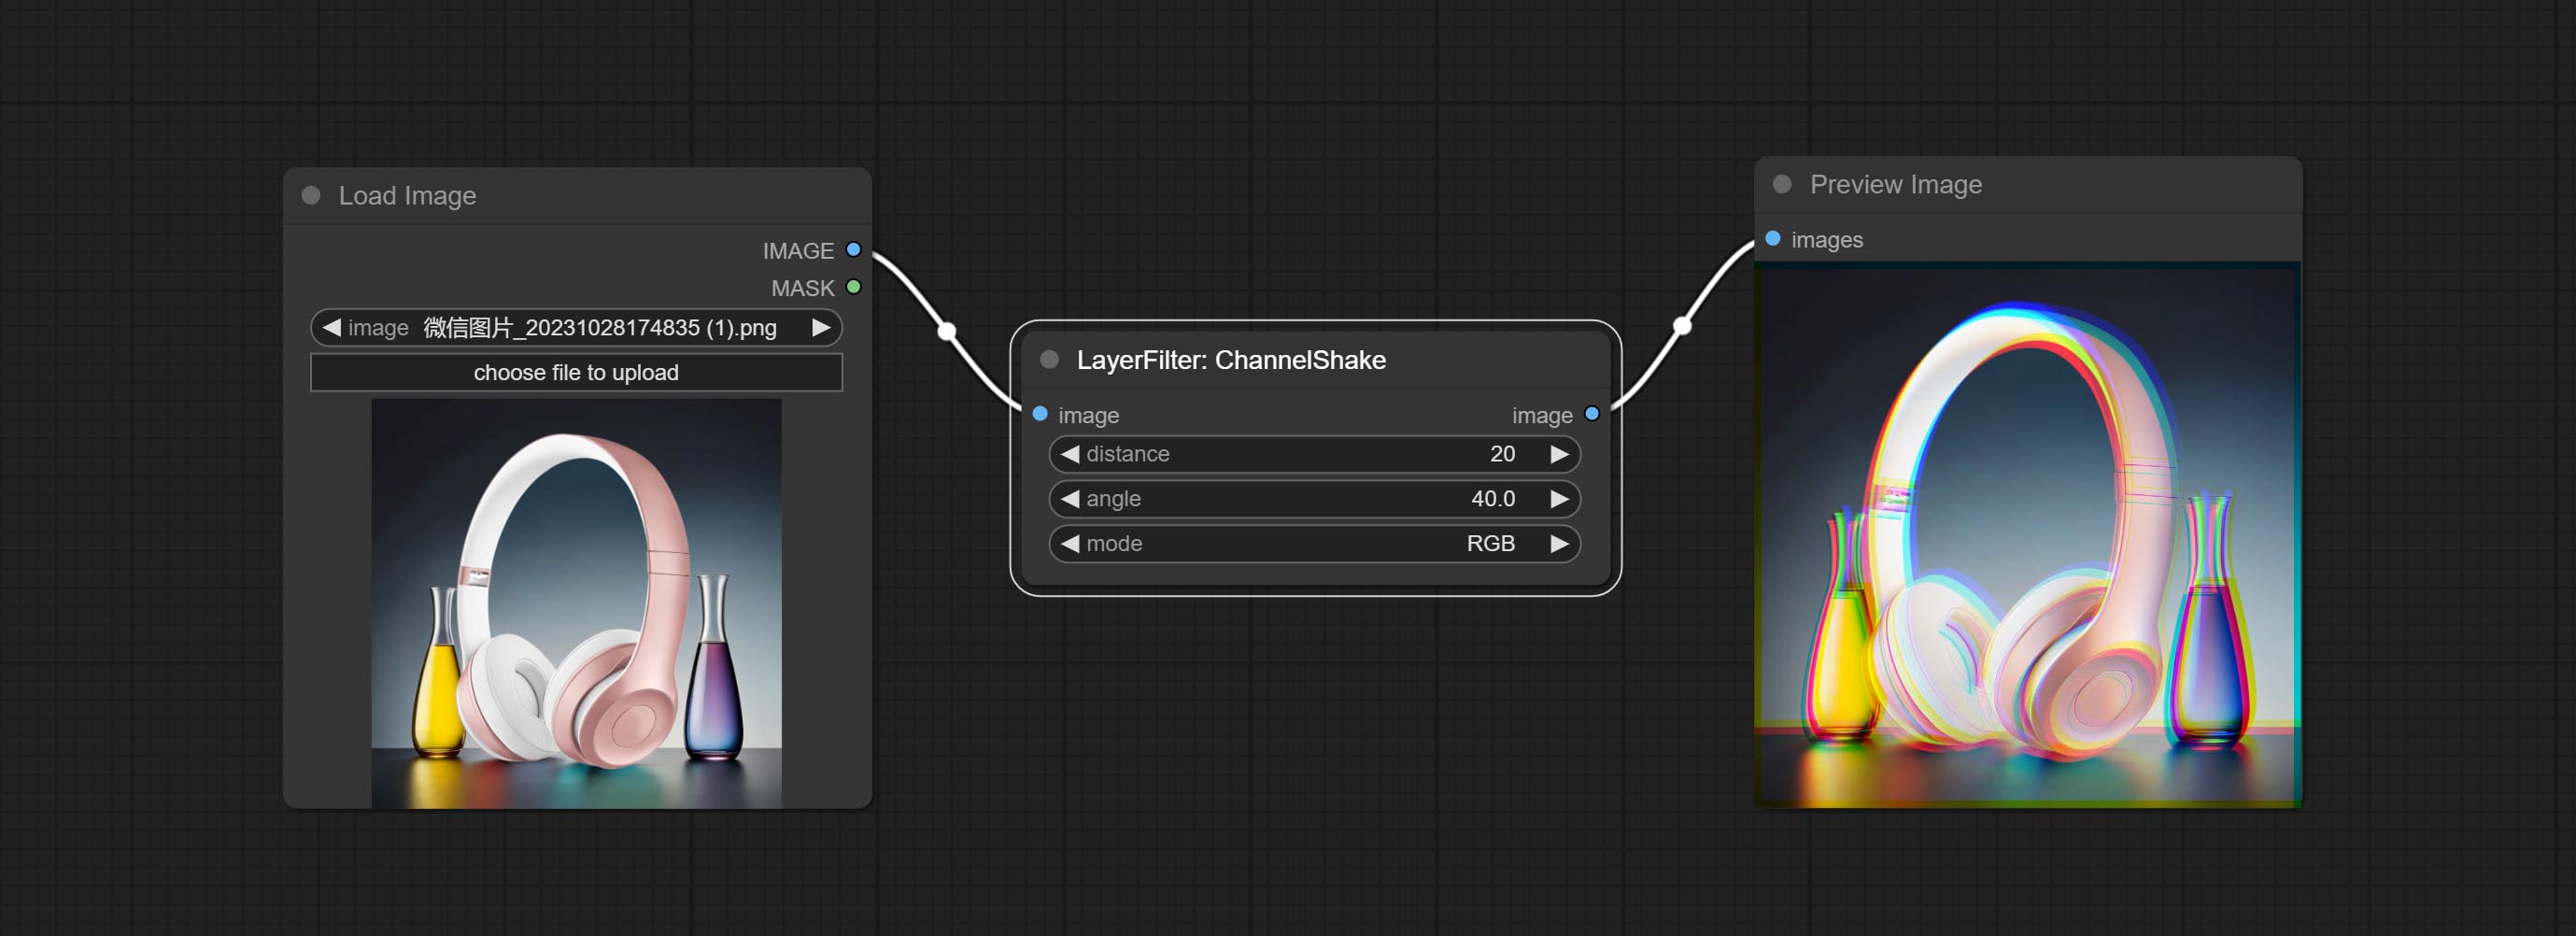
Node options: 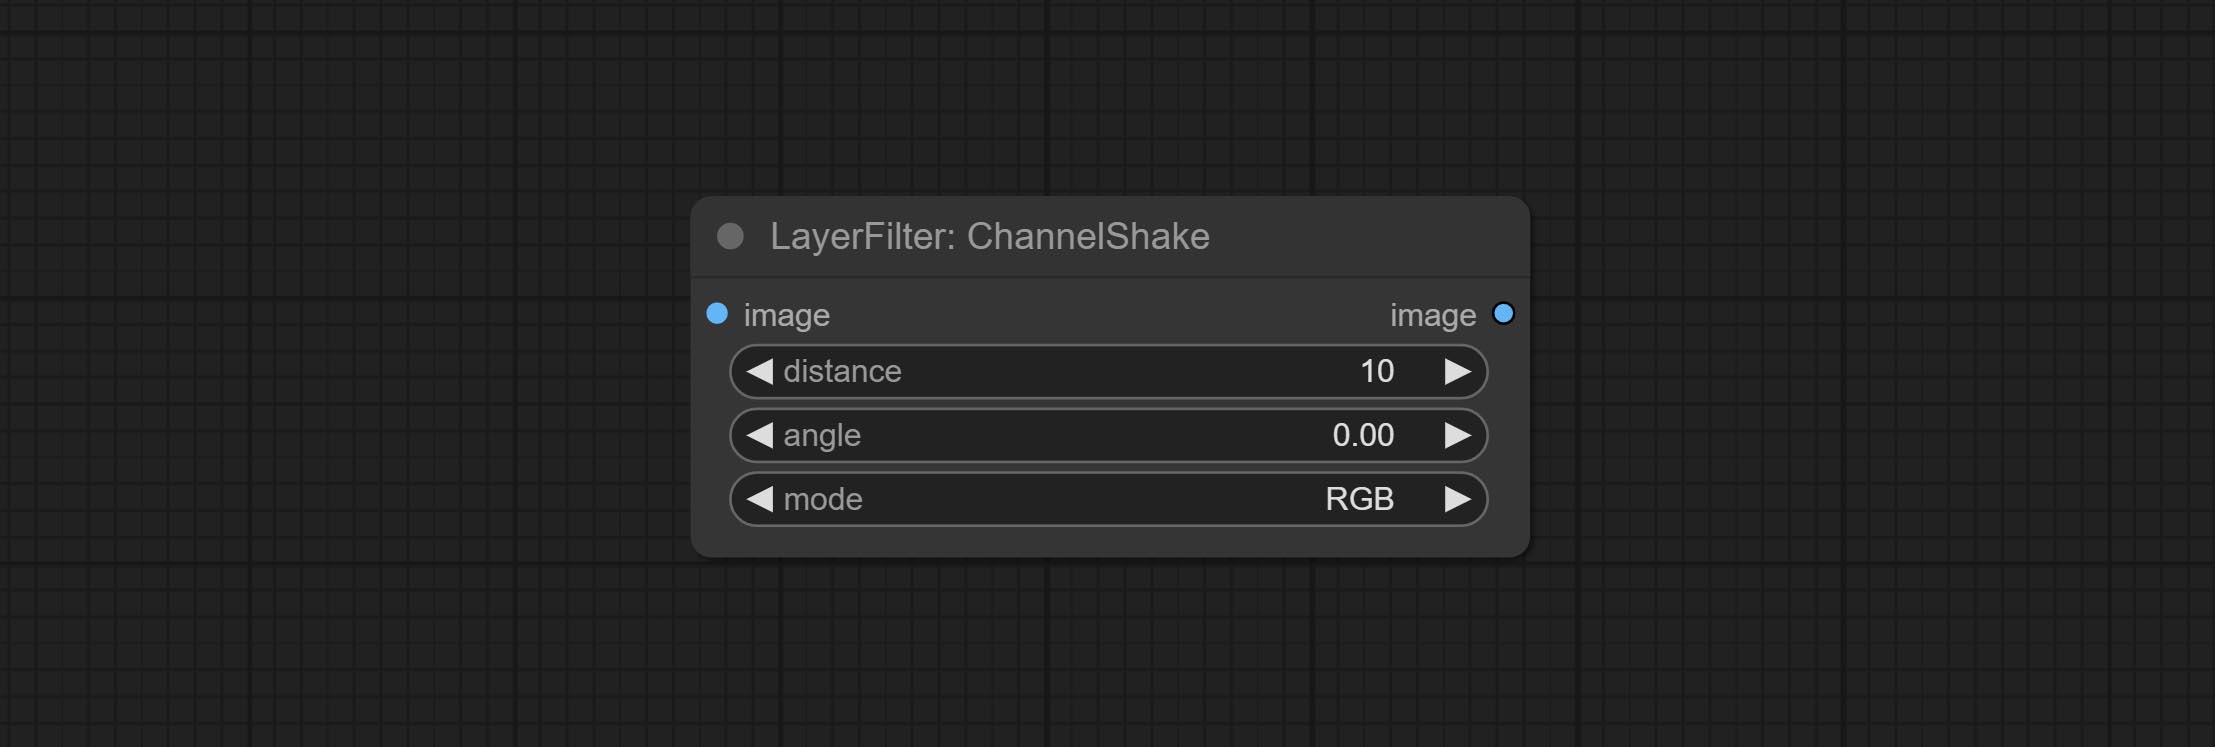
enhances the dynamic range and visual appeal of input images. This node is reorganize and encapsulate of HDR Effects (SuperBeasts.AI), thanks to the original author. 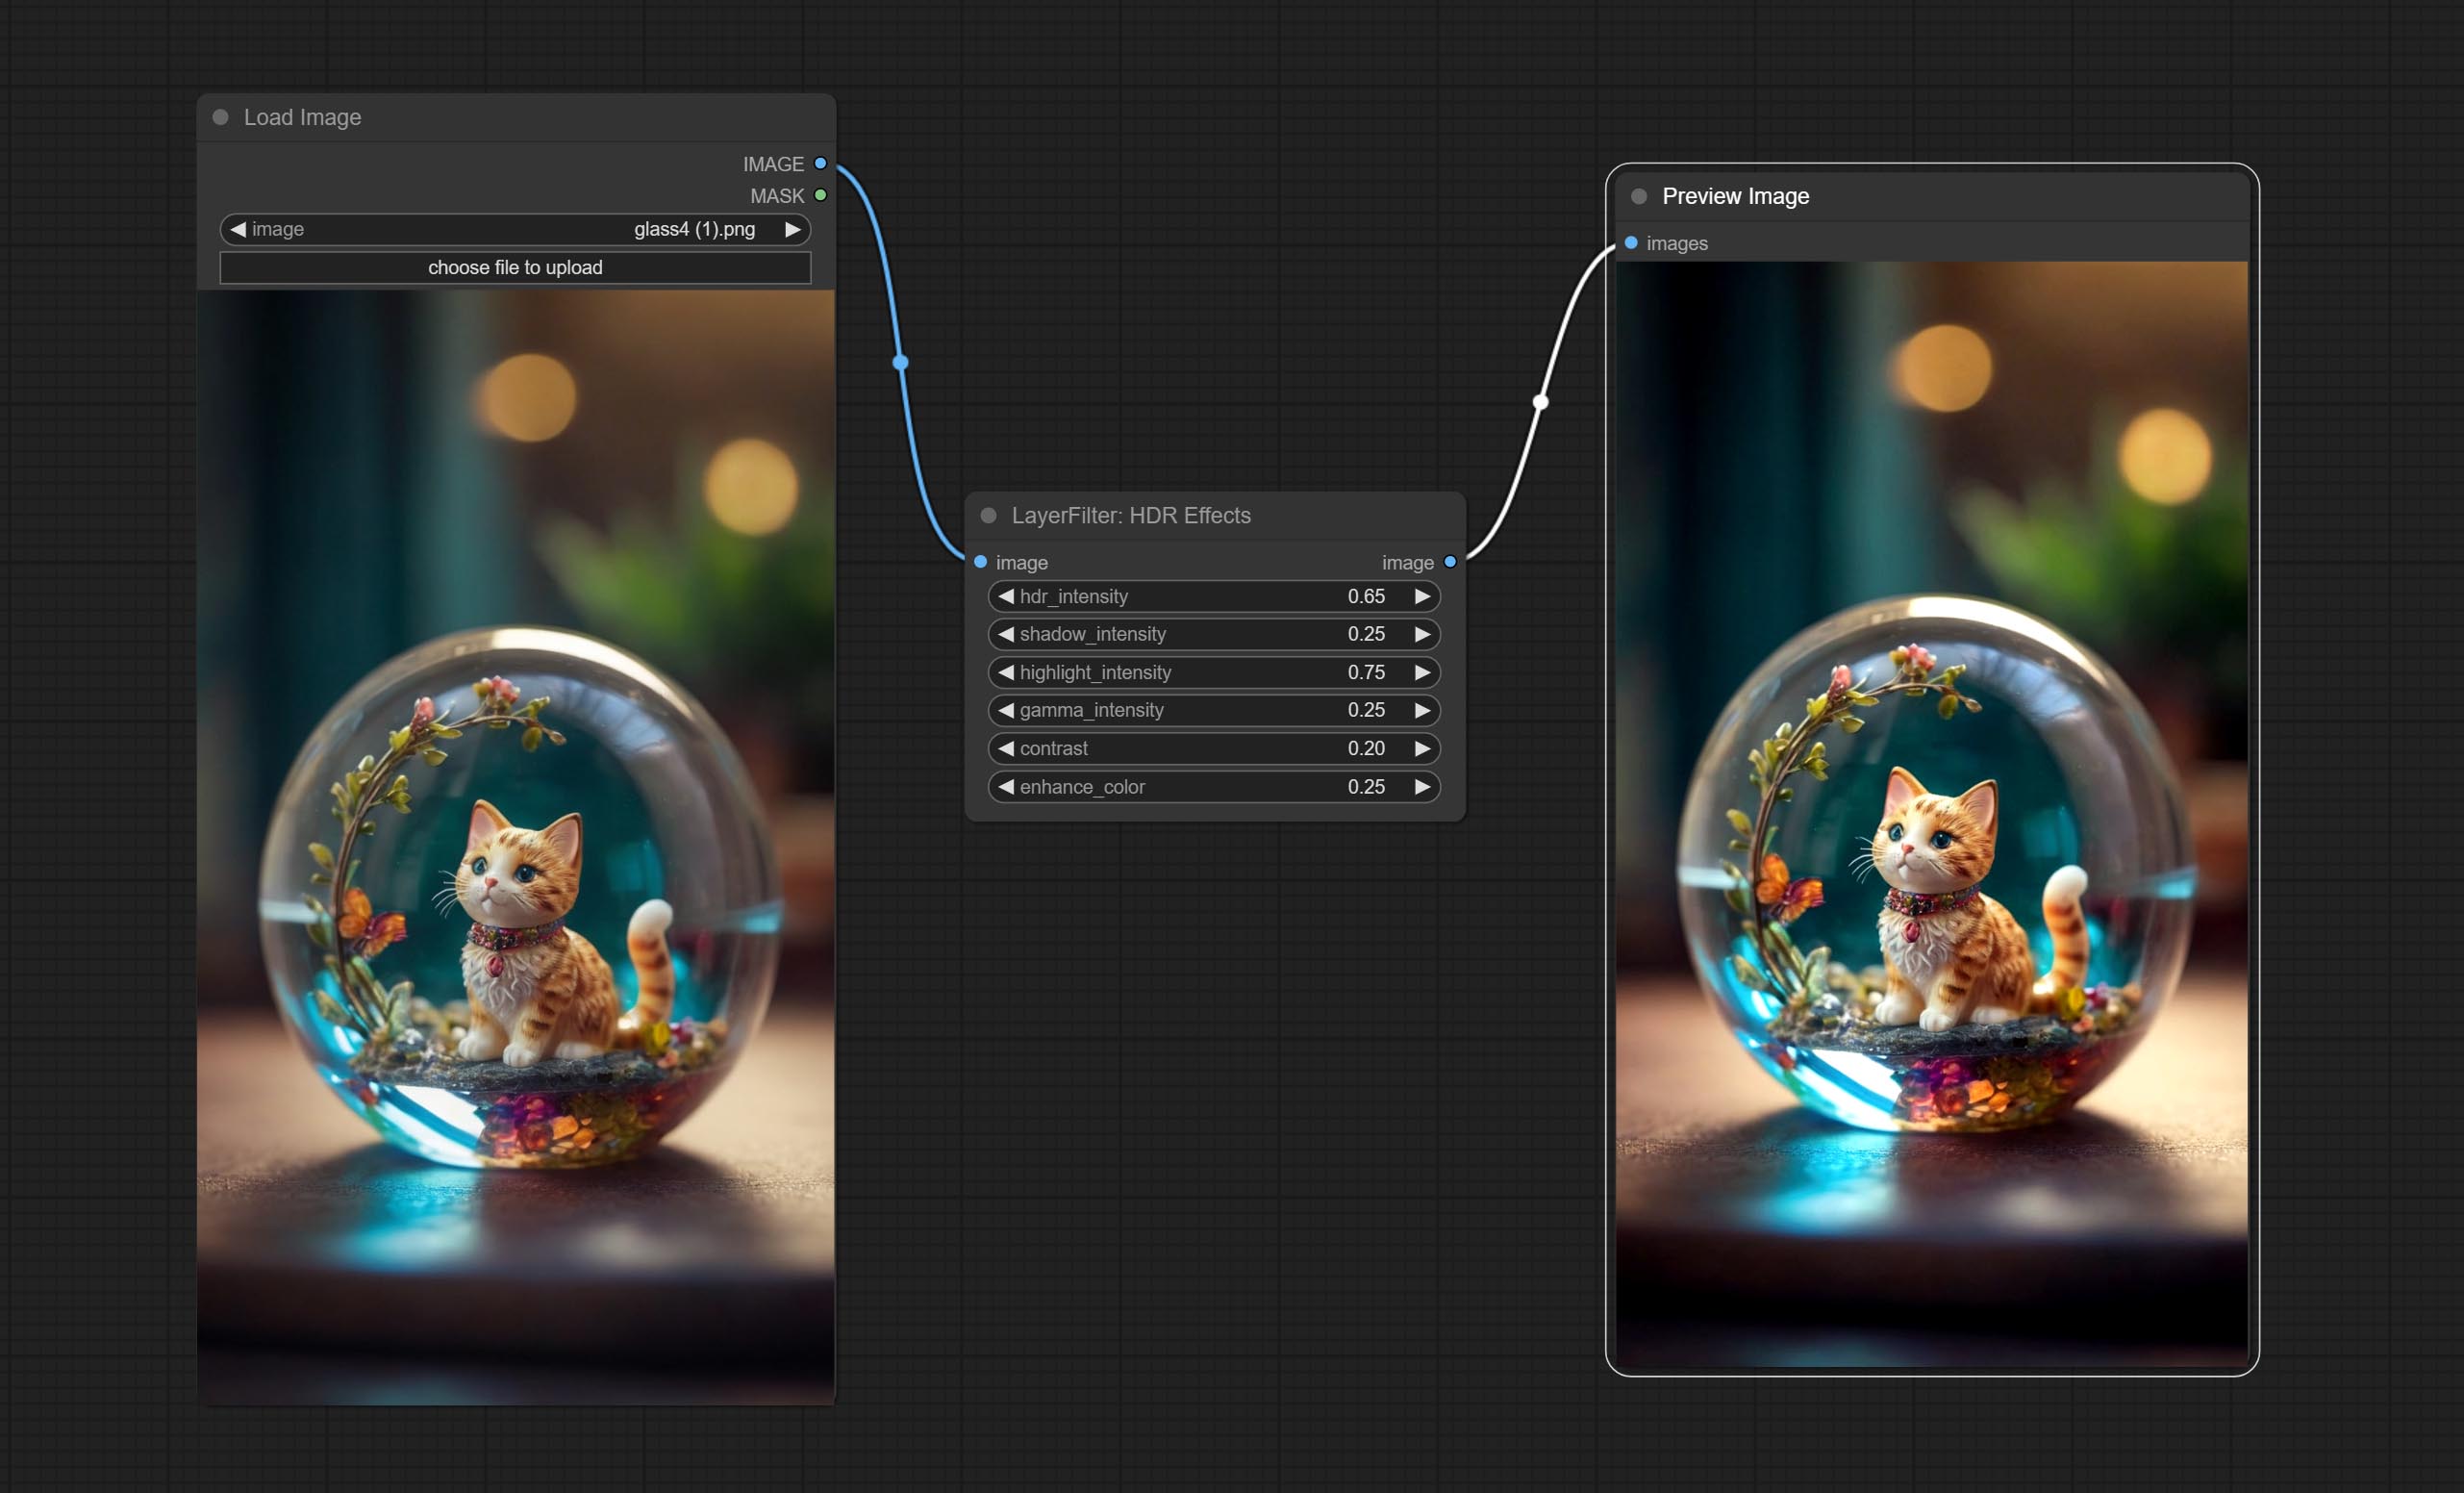
Node options: 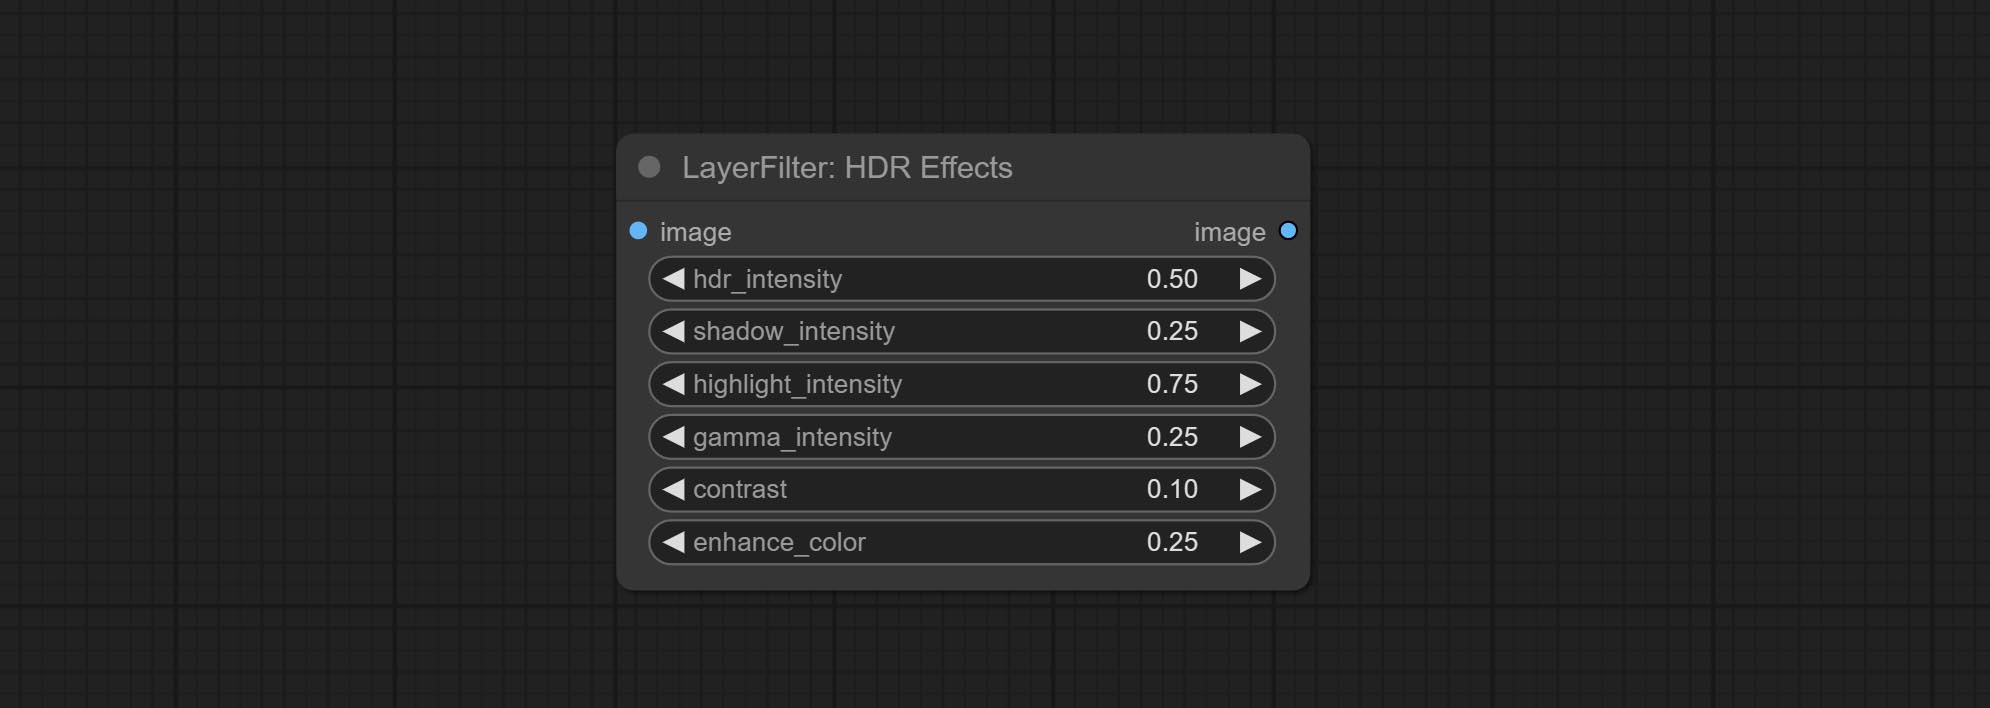
Simulate the grain, dark edge, and blurred edge of the film, support input depth map to simulate defocus.
This node is reorganize and encapsulate of digitaljohn/comfyui-propost, thanks to the original author. 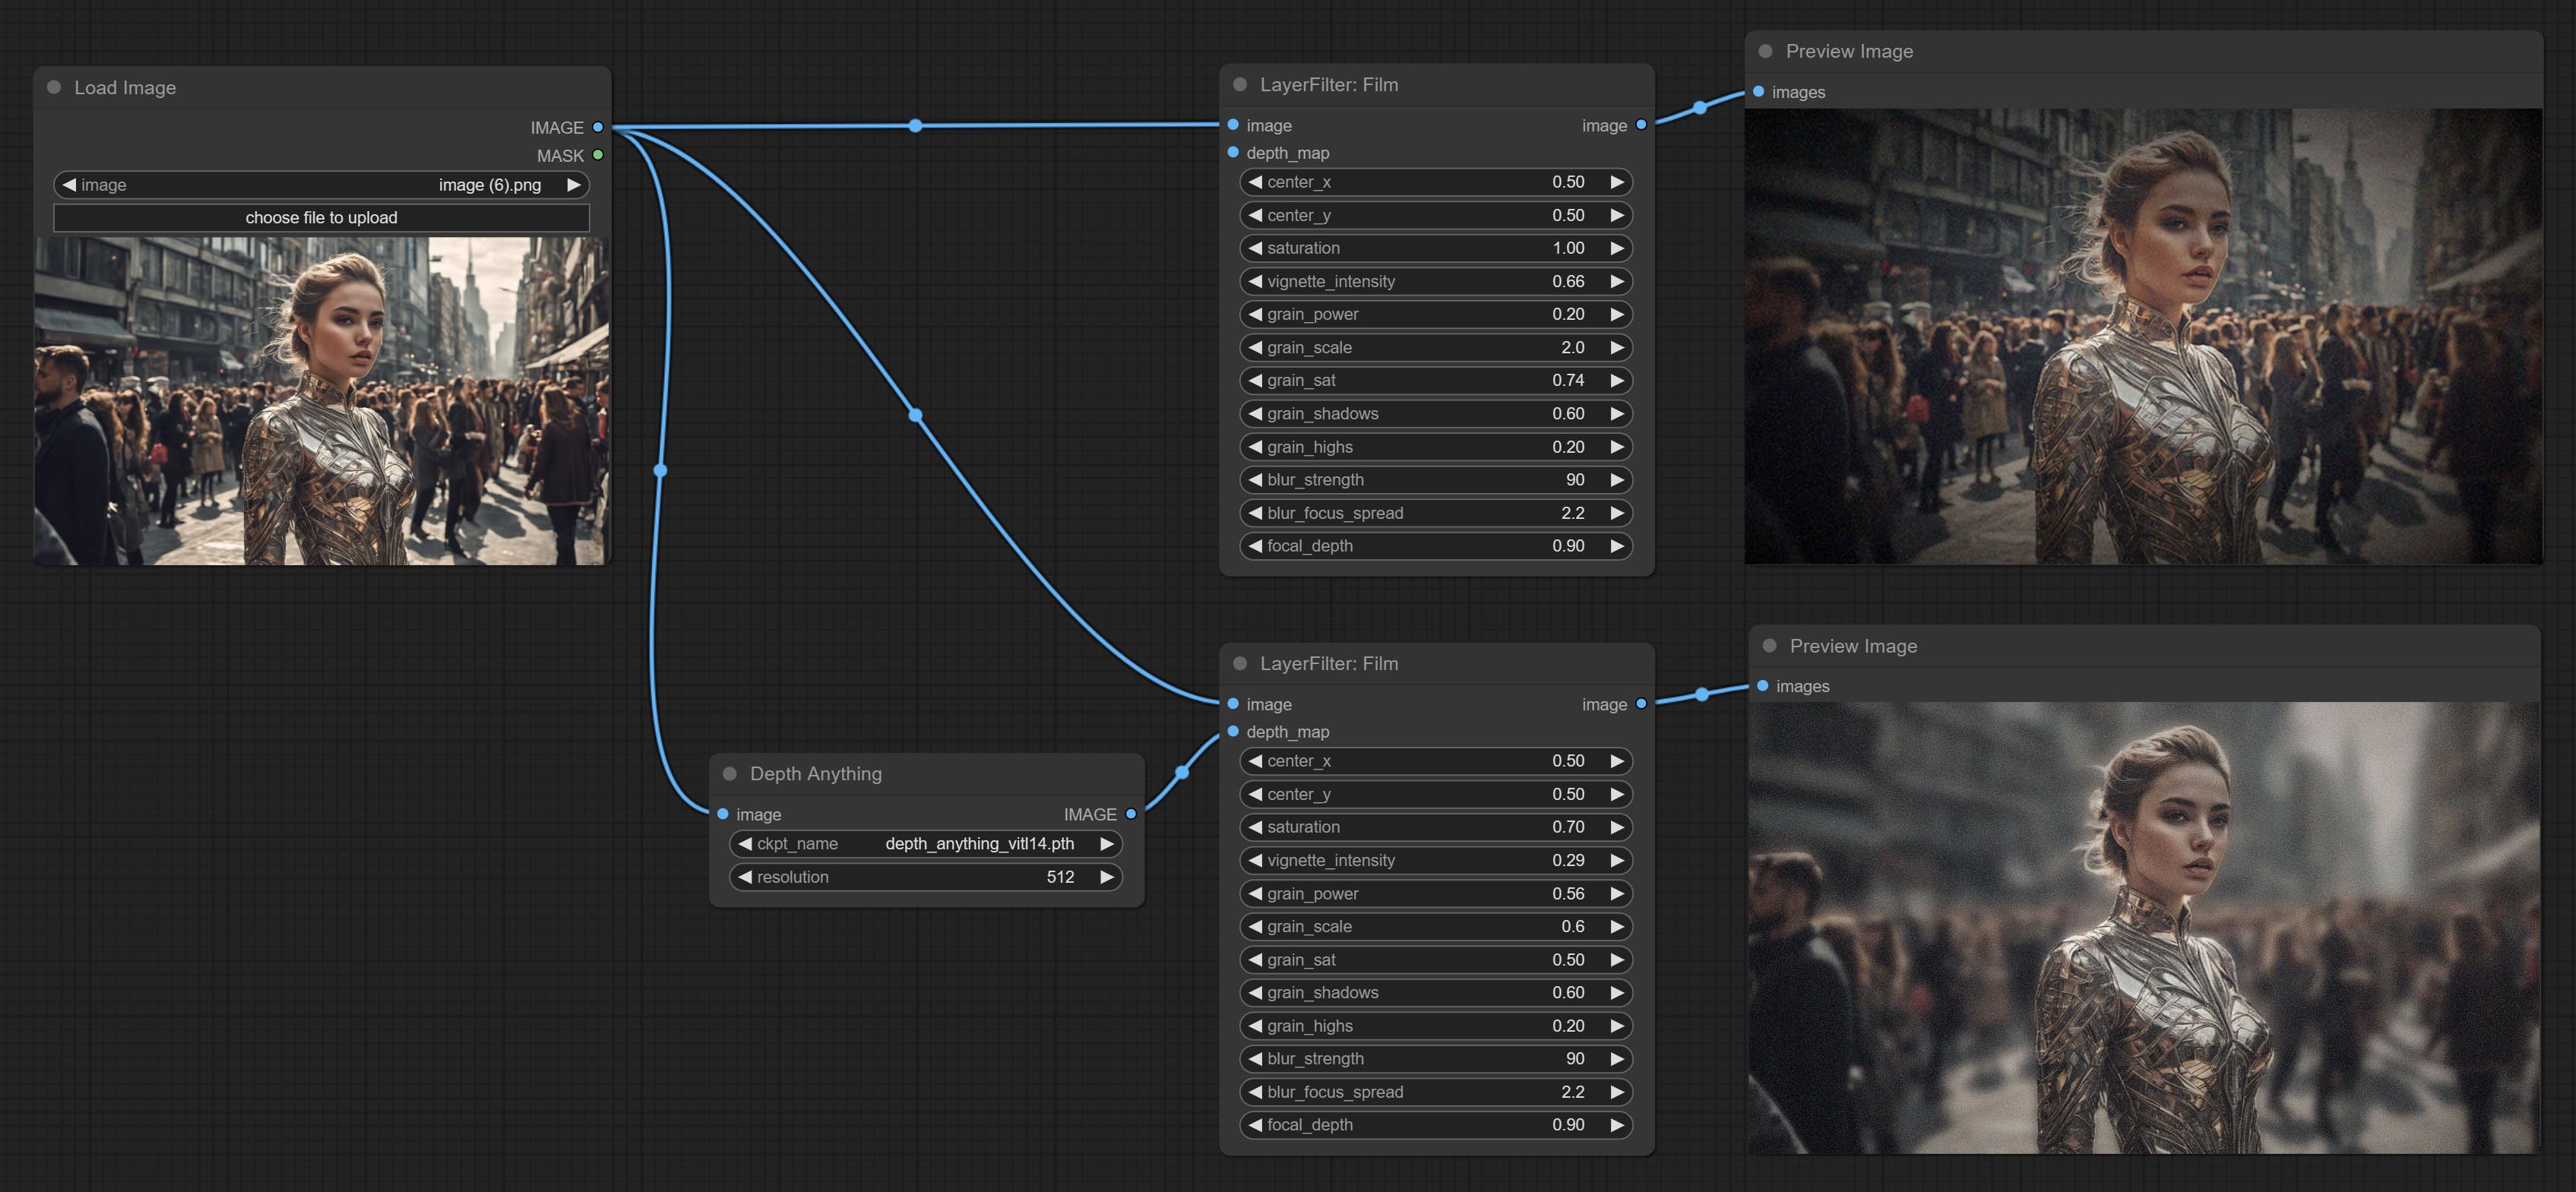
Node options: 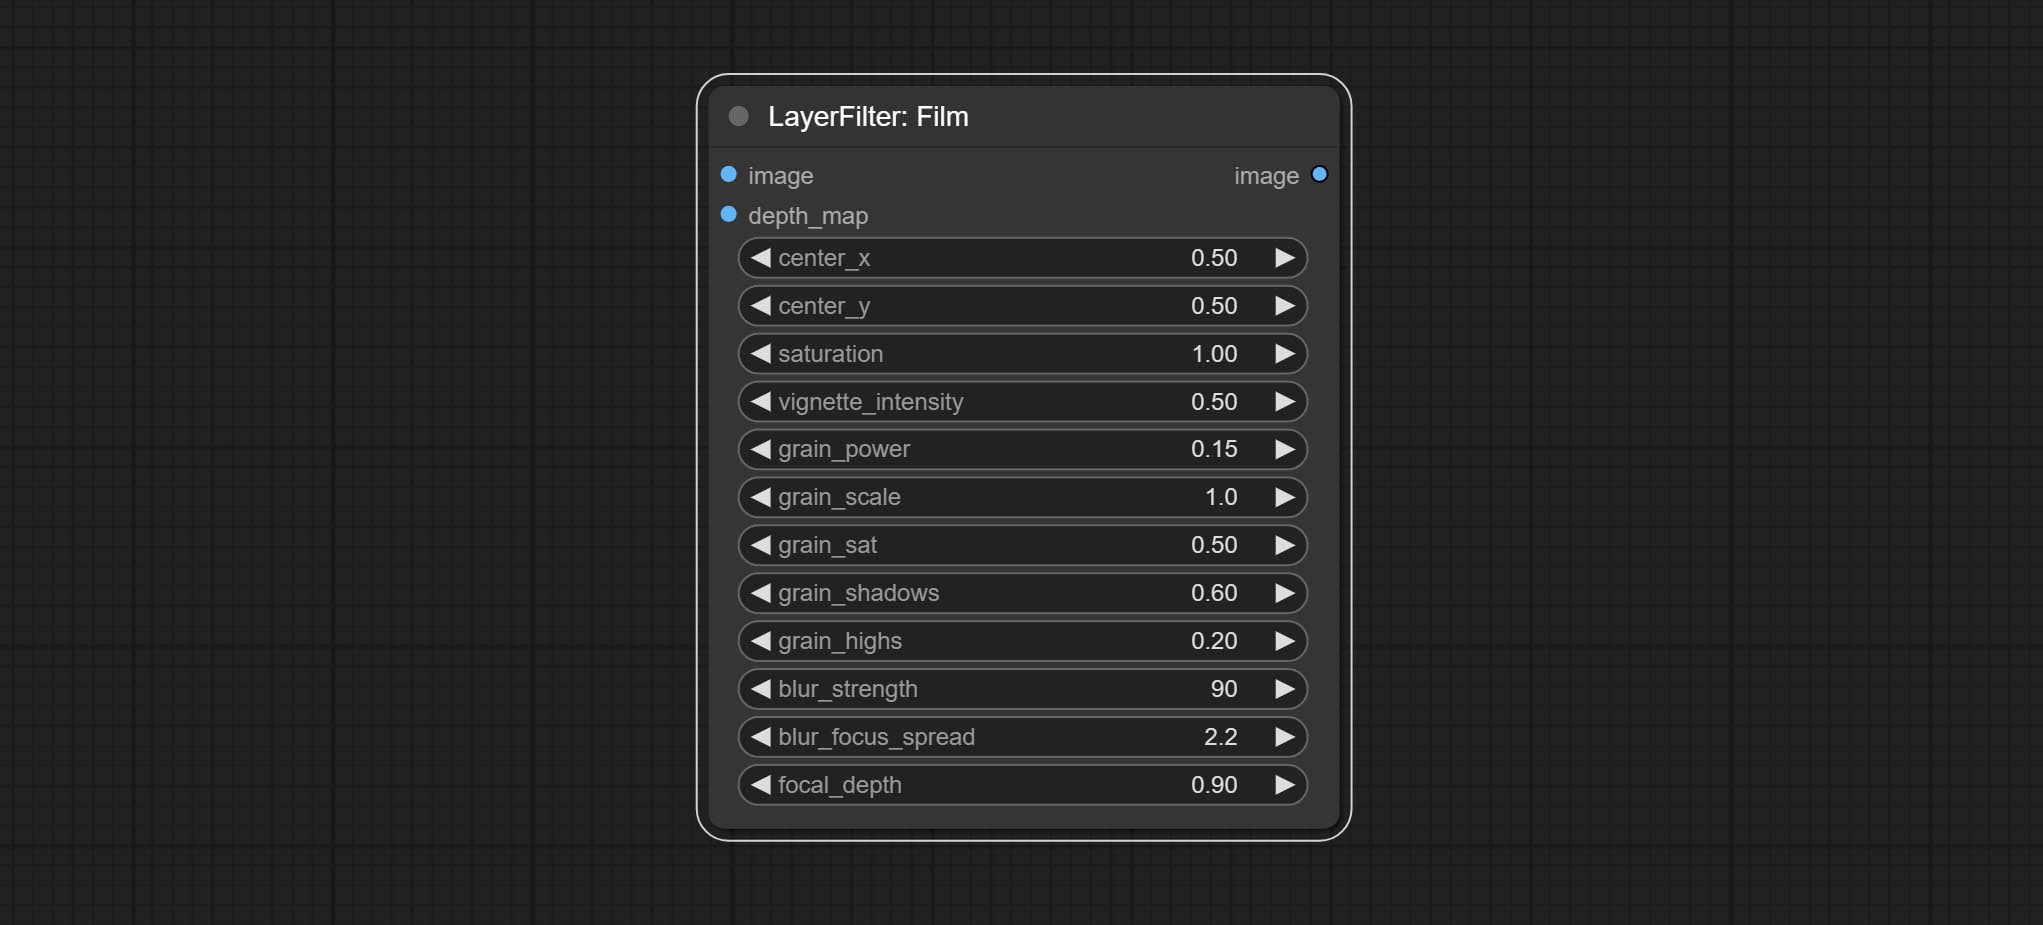
The upgraded version of the Film node adds the fastgrain method on the basis of the previous one, and the speed of generating noise is accelerated by 10 times. The code for fastgrain is from github.com/spacepxl/ComfyUI-Image-Filters BetterFilmGrain node, thanks to the original authors. 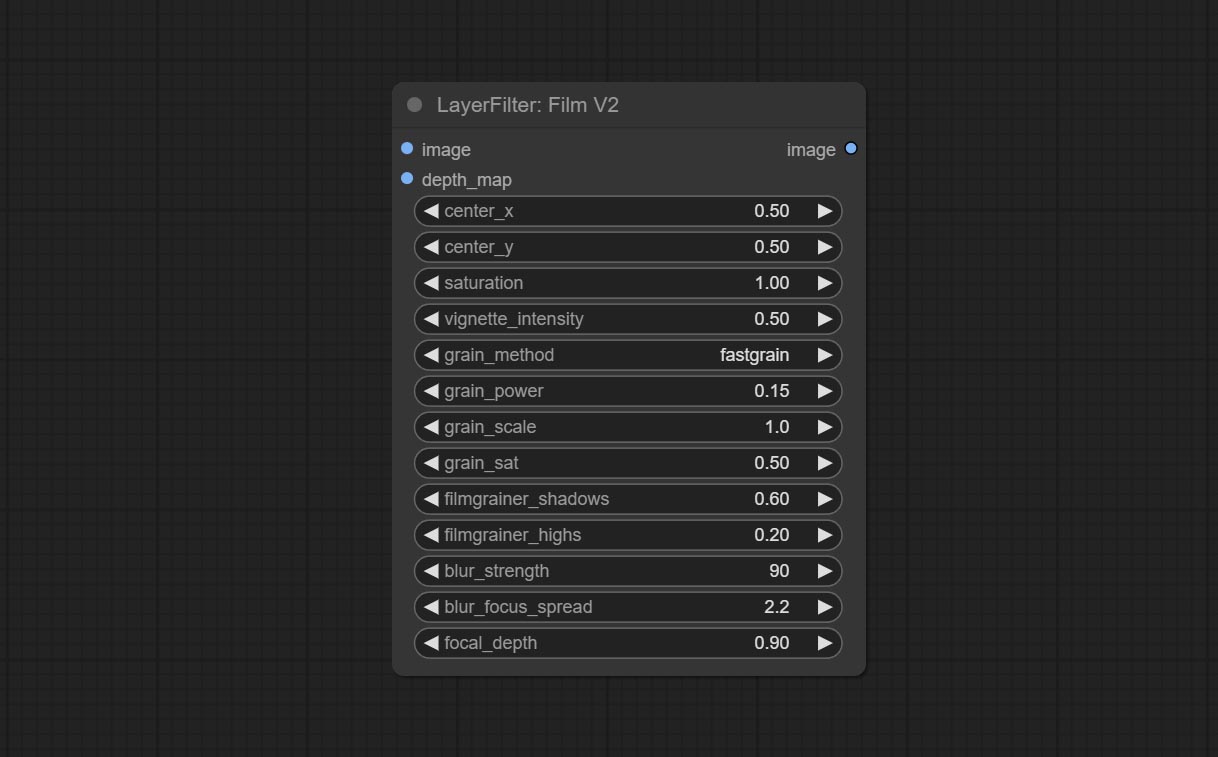
Simulate the light leakage effect of the film. please download model file from Baidu Netdisk or [Google Drive]([light_leak.pkl(Google Drive)(https://drive.google.com/file/d/1DcH2Zkyj7W3OiAeeGpJk1eaZpdJwdCL-/view?usp=sharing)) and copy to ComfyUI/models/layerstyle folder. 
Node options: 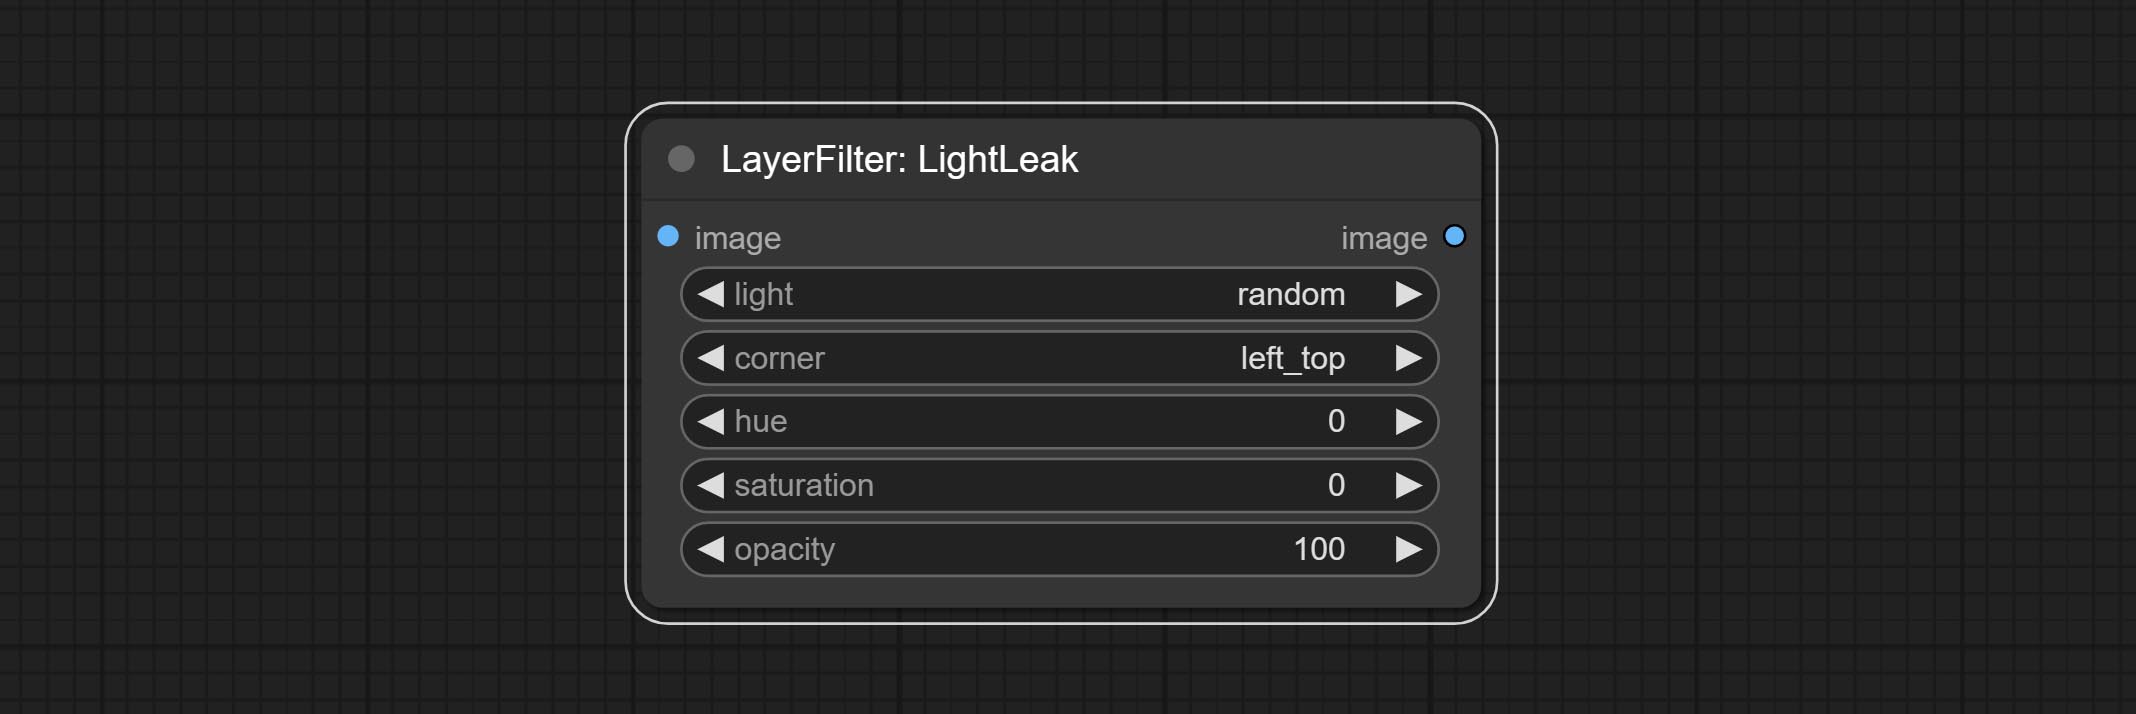
Pseudo color heat map effect. 
Node options: 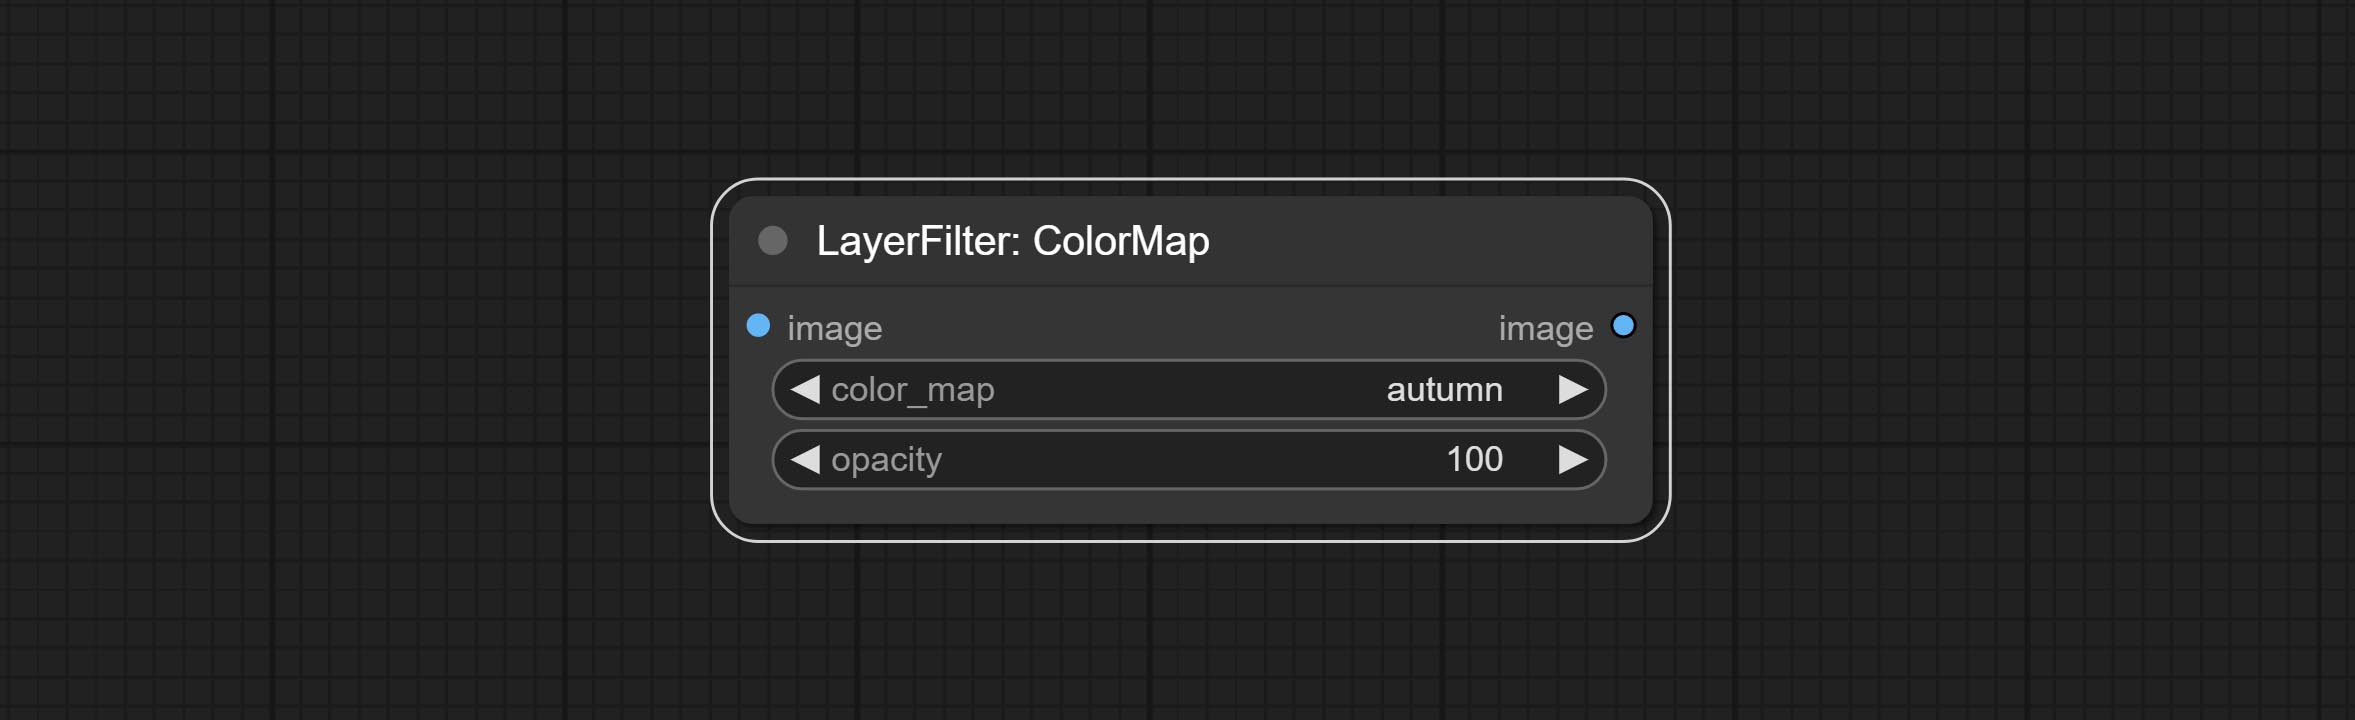
Make the image motion blur 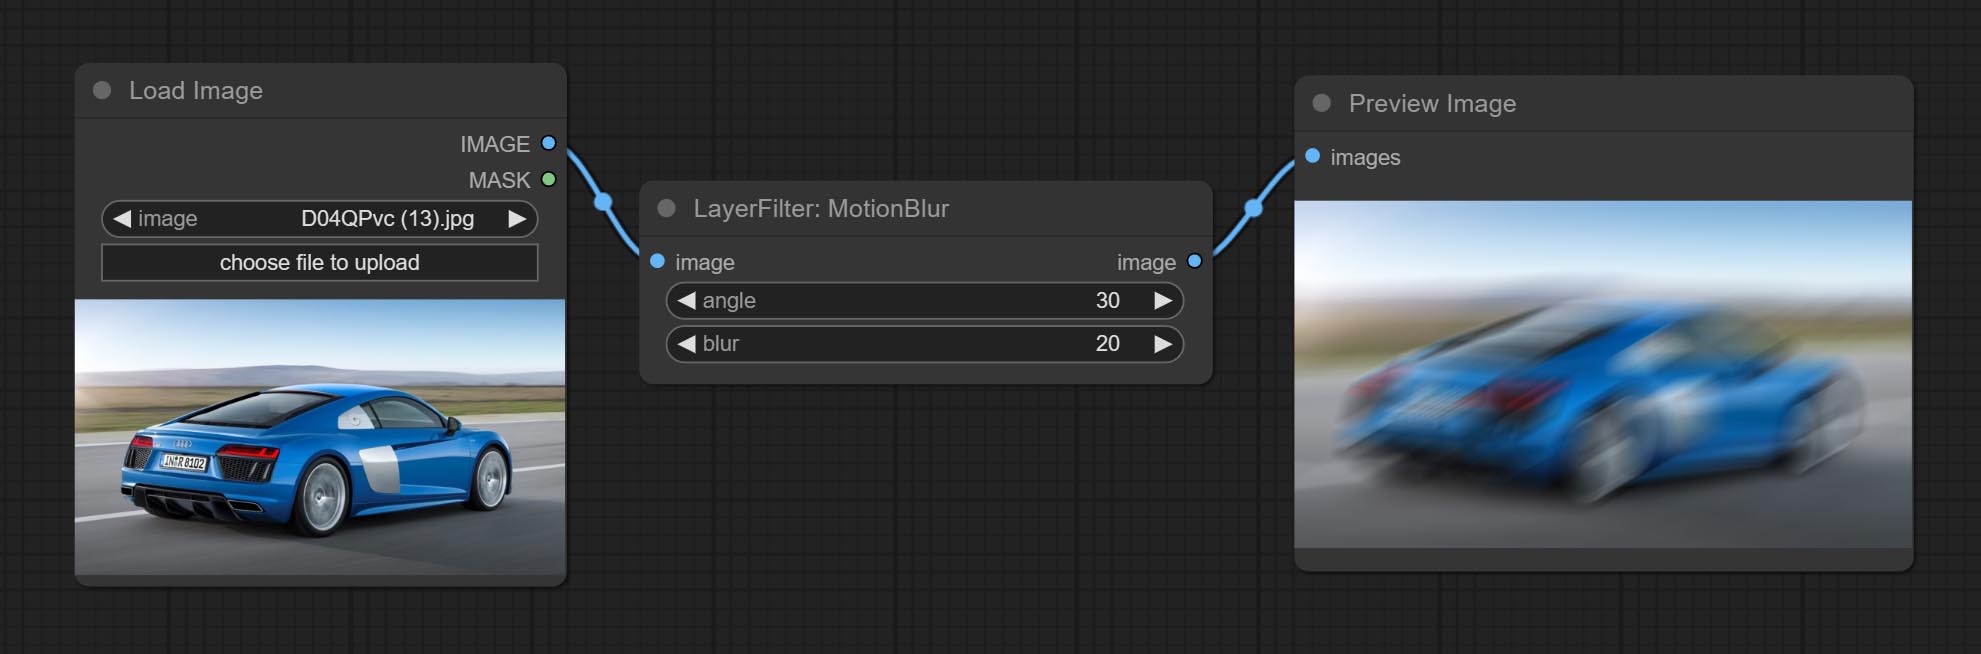
Node options:
Make the image gaussian blur 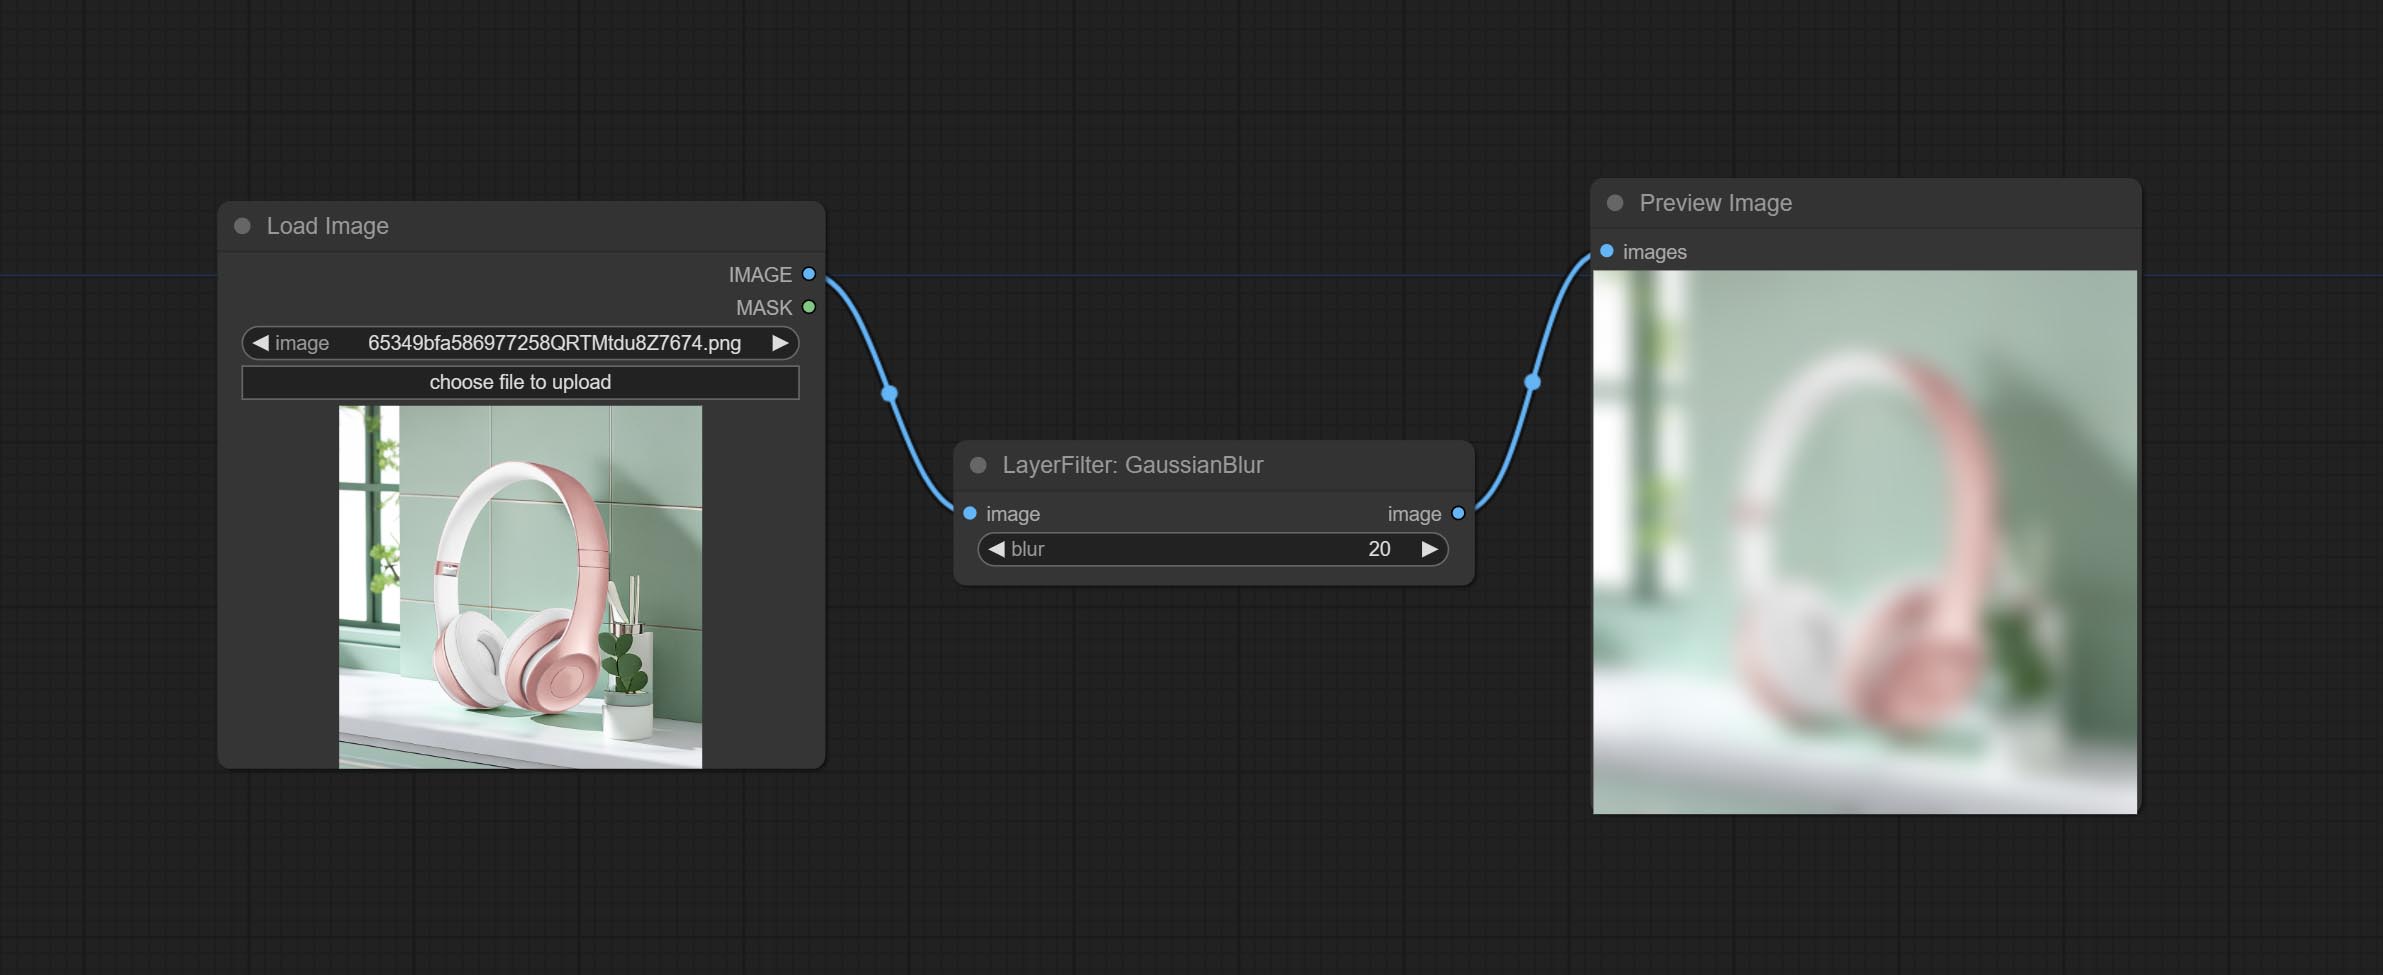
Node options:
Gaussian blur. Change the parameter precision to floating-point number, with a precision of 0.01
Node options: 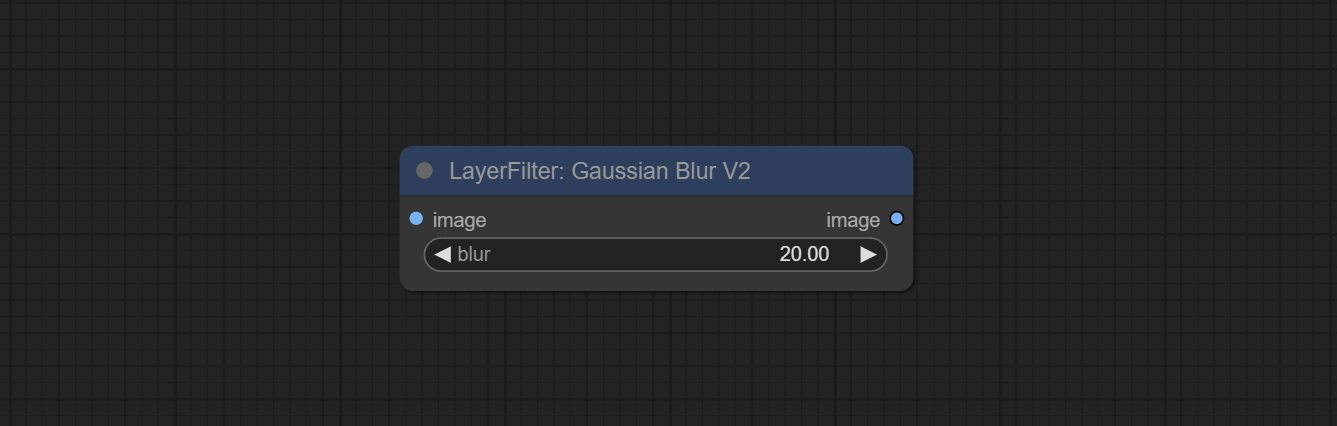
Add noise to the picture. 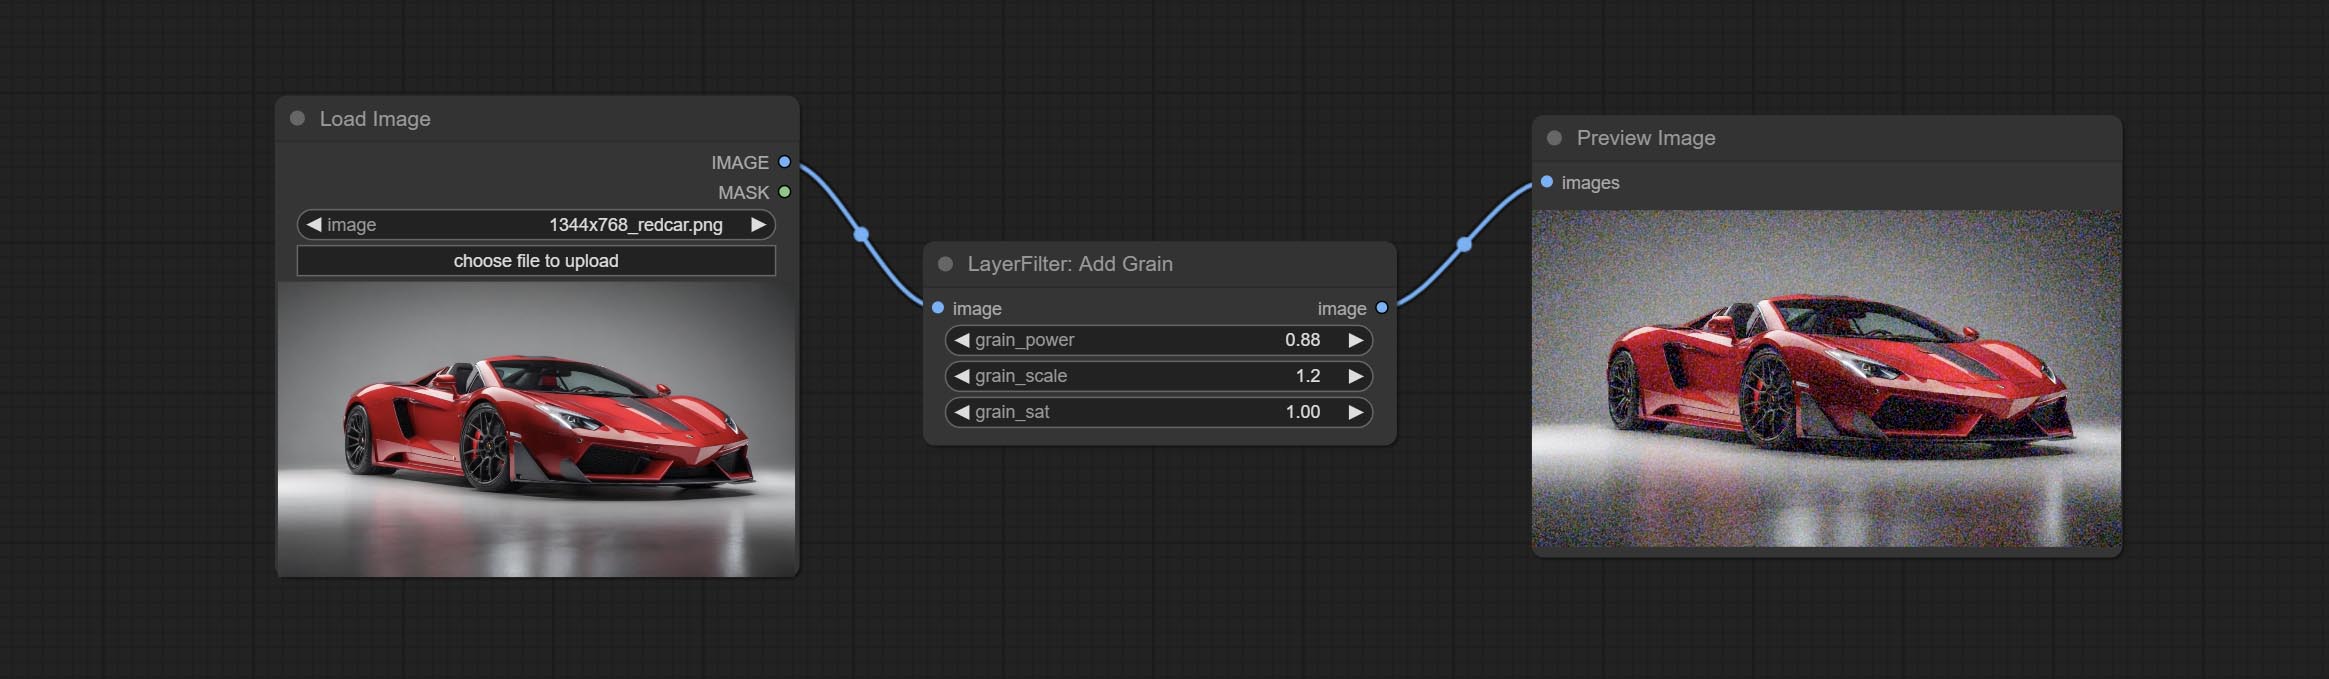
Node Options: 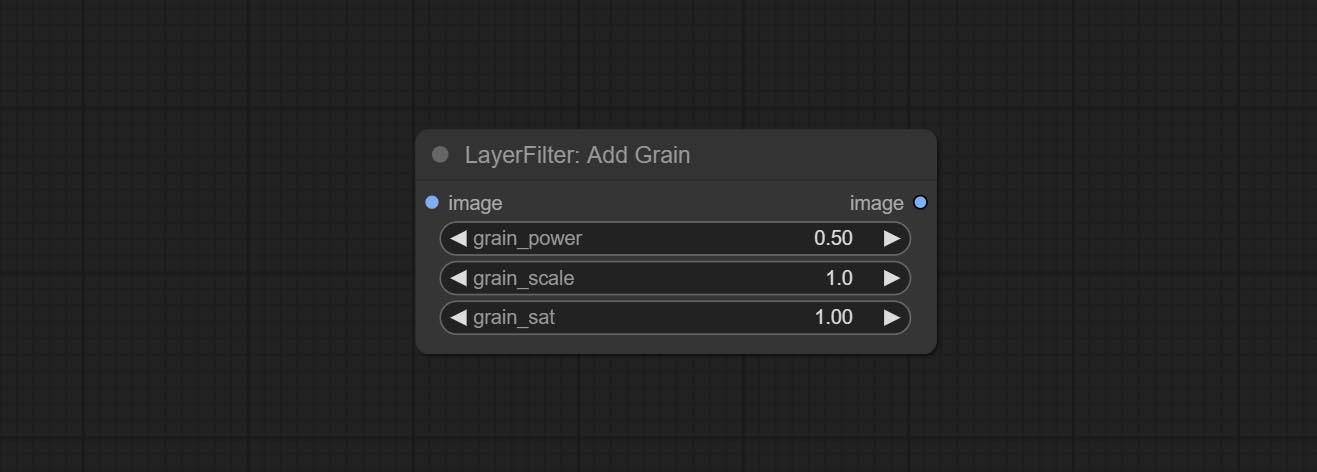
1 The layer_image, layer_mask and the background_image(if have input), These three items must be of the same size.
2 The mask not a mandatory input item. the alpha channel of the image is used by default. If the image input does not include an alpha channel, the entire image's alpha channel will be automatically created. if have masks input simultaneously, the alpha channel will be overwrite by the mask.
3 The Blend Mode include normal, multply, screen, add, subtract, difference, darker, color_burn, color_dodge, linear_burn, linear_dodge, overlay, soft_light, hard_light, vivid_light, pin_light, linear_light, and hard_mix. all of 19 blend modes in total.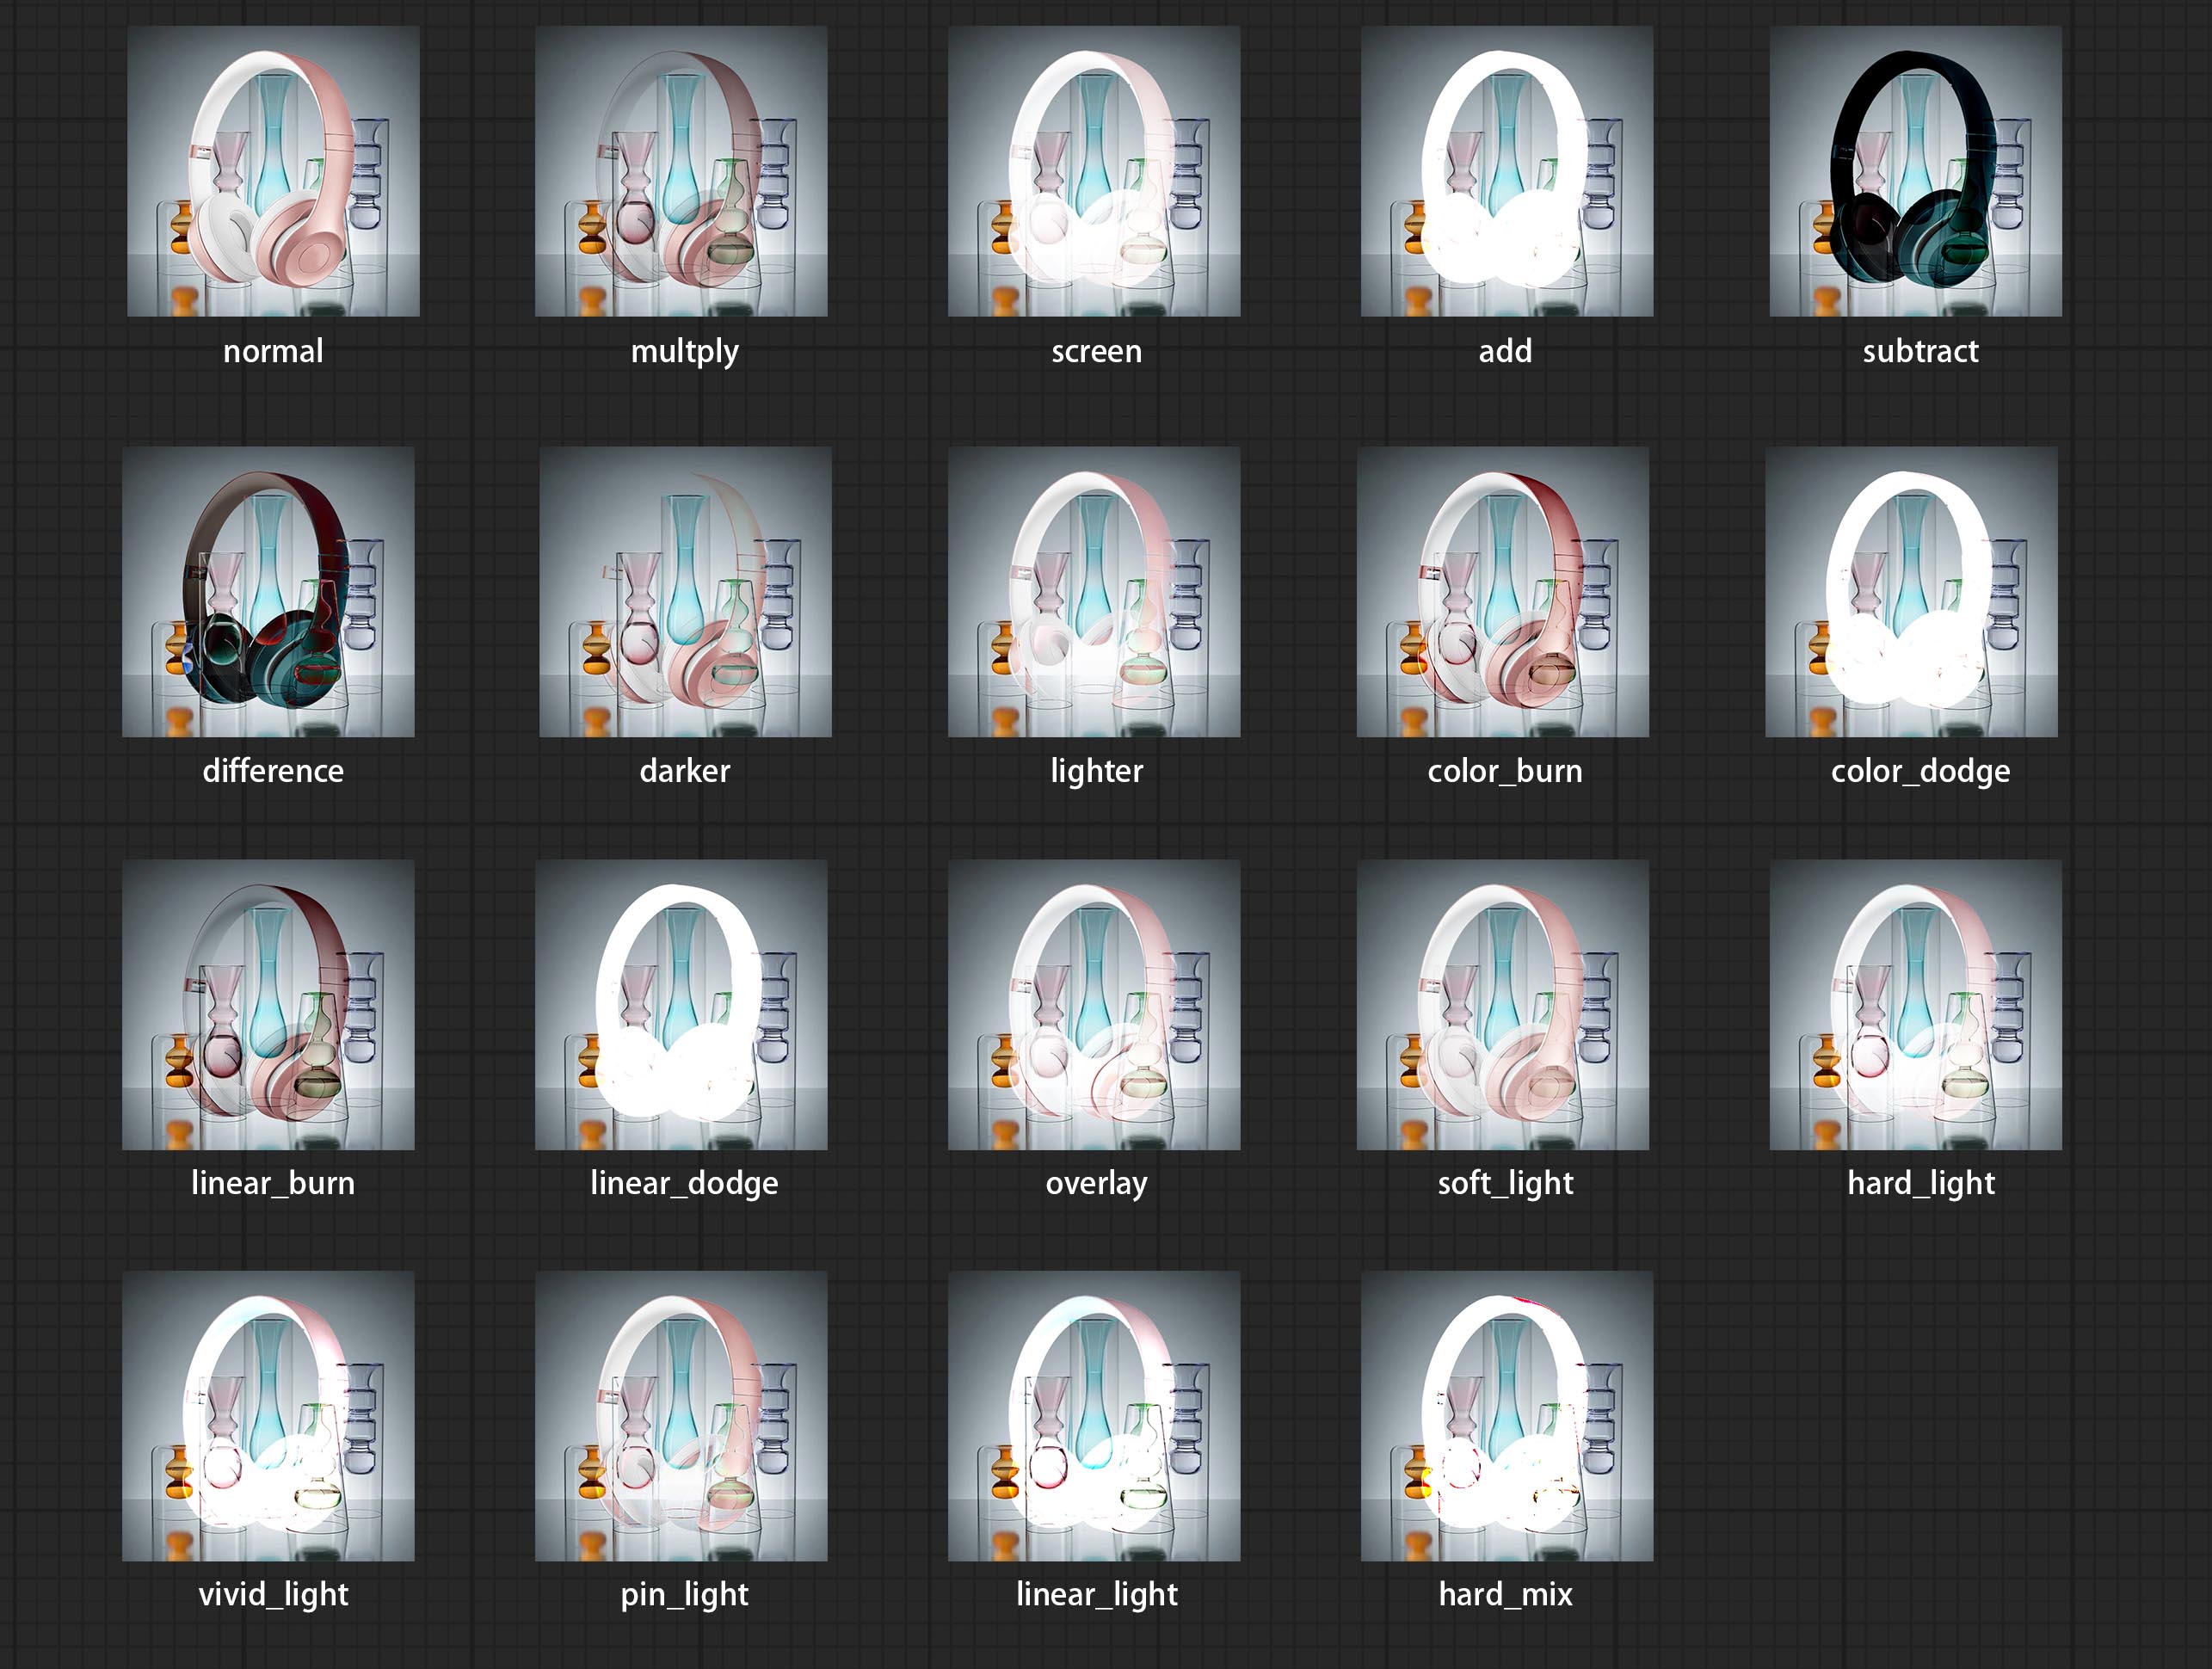
*Preview of the blend mode
3 The BlendModeV2 include normal, dissolve, darken, multiply, color burn, linear burn, darker color, lighten, screen, color dodge, linear dodge(add), lighter color, dodge, overlay, soft light, hard light, vivid light, linear light, pin light, hard mix, difference, exclusion, subtract, divide, hue, saturation, color, luminosity, grain extract, grain merge all of 30 blend modes in total.
Part of the code for BlendMode V2 is from Virtuoso Nodes for ComfyUI. Thanks to the original authors.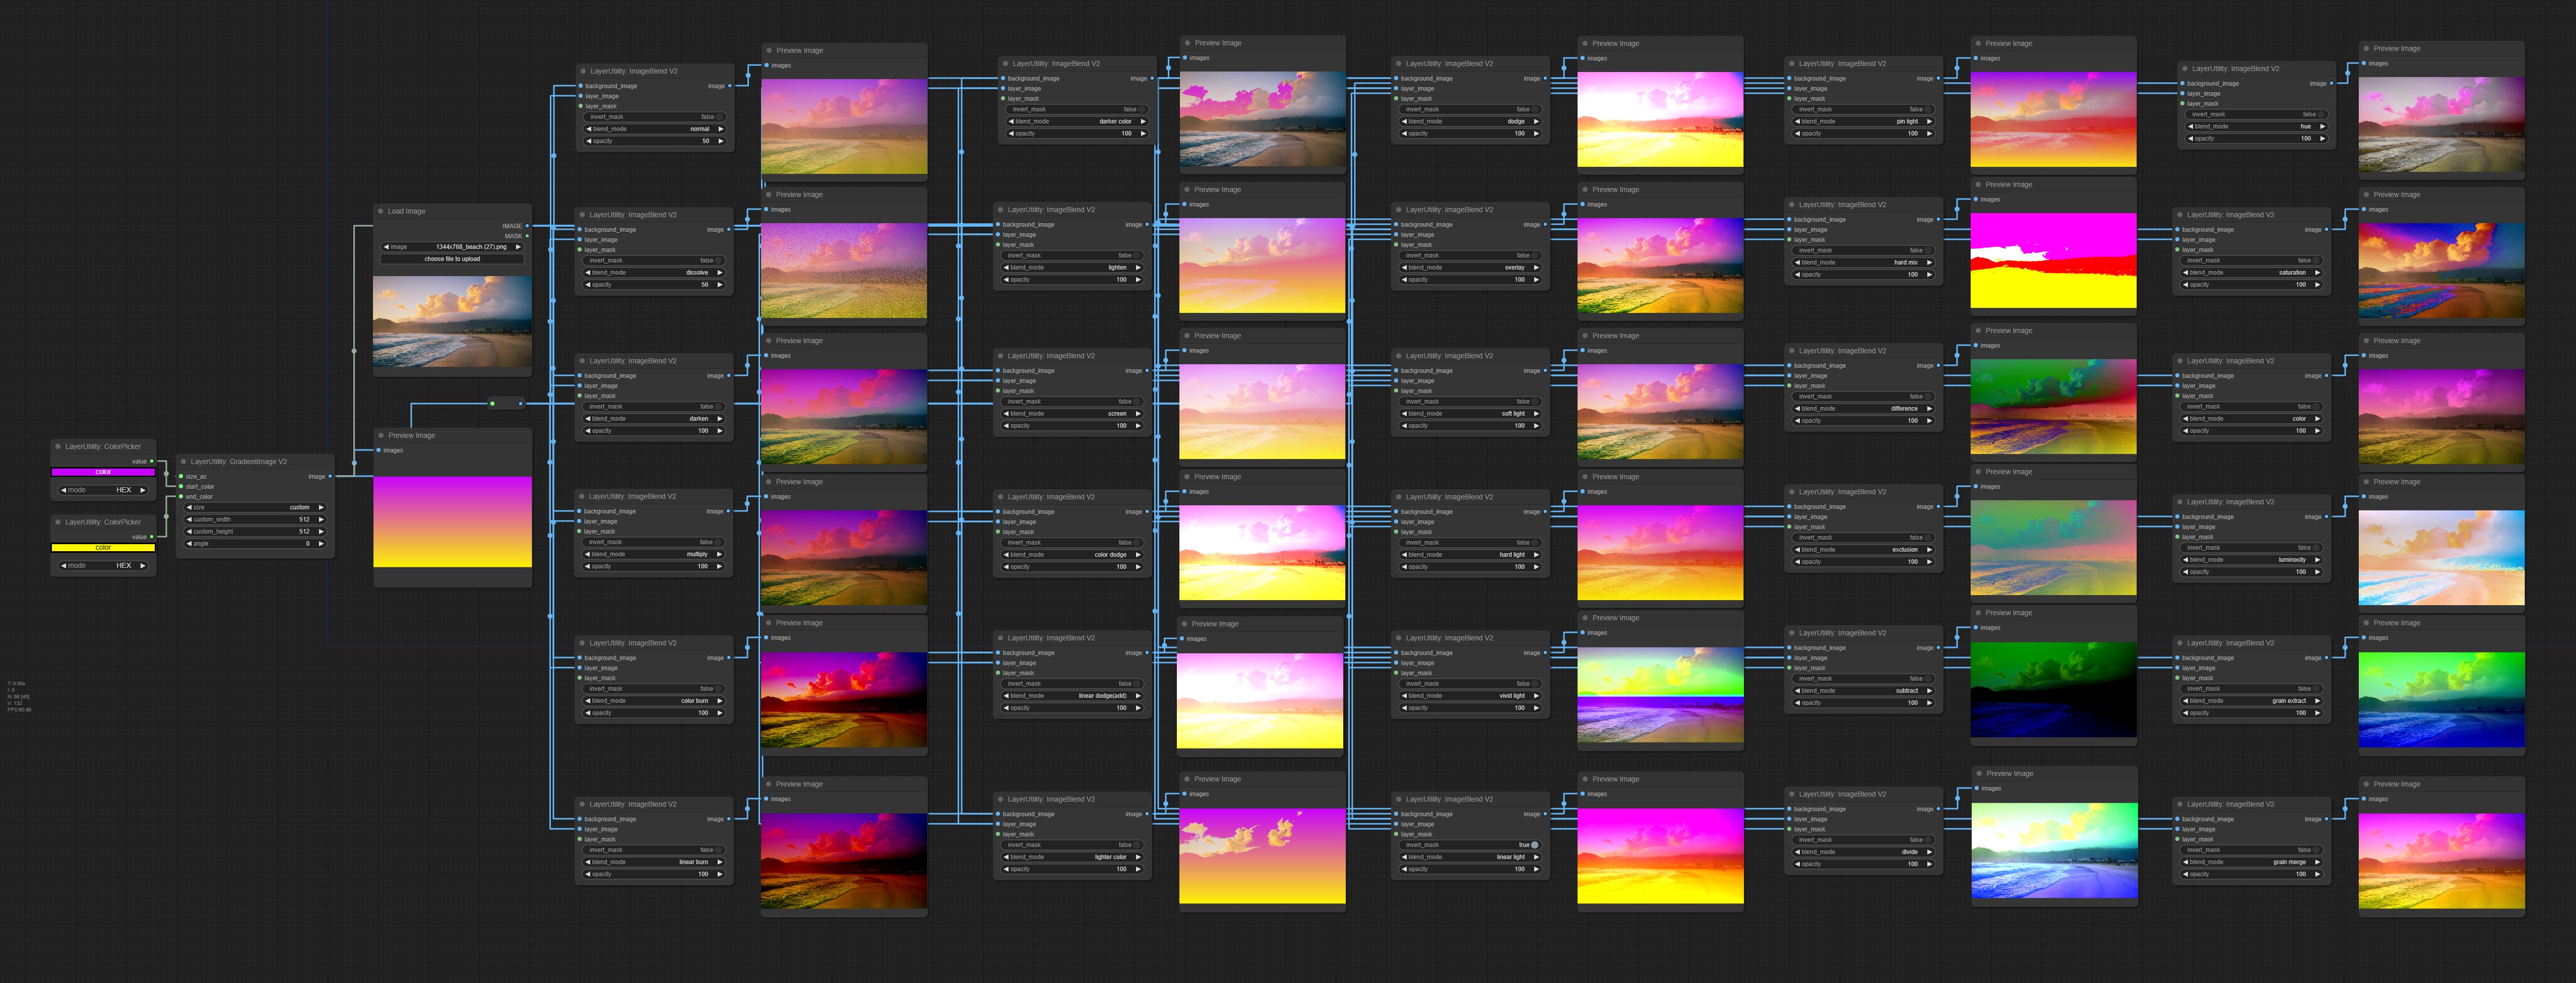
*Preview of the Blend Mode V2
4 The RGB color described by hexadecimal RGB format, like '#FA3D86'.
5 The layer_image and layer_mask must be of the same size.
LayerStyle nodes follows the MIT license, Some of its functional code comes from other open-source projects. Thanks to the original author. If used for commercial purposes, please refer to the original project license to authorization agreement.


