uniflow 、生のドキュメントを抽出および変換するための統合 LLM インターフェイスを提供します。
Uniflow は、ML サイエンティスト向けの LLM トレーニング データを準備する際の 2 つの重要な課題に対処します。
そこで、生のドキュメントを抽出および変換するための統合 LLM インターフェイスである Uniflow を構築しました。
Uniflow は、すべてのデータ サイエンティストが LLM 微調整用にプライバシーが保護されたすぐに使用できる独自のトレーニング データセットを生成できるように支援し、LLM の微調整を誰でも簡単に利用できるようにすることを目指しています:rocket:。
Uniflow の実践的なソリューションを確認してください。
以下の 3 つの手順に従った場合、 uniflowのインストールには約 5 ~ 10 分かかります。
以下を使用して、ターミナル上に conda 環境を作成します。
 conda create -n uniflow python=3.10 -y
conda activate uniflow  # some OS requires `source activate uniflow`
OS に基づいて互換性のある pytorch をインストールします。
nvcc -Vで確認できます。 pip3 install --pre torch --index-url https://download.pytorch.org/whl/nightly/cu121 # cu121 means cuda 12.1
pip3 install torch
uniflowをインストールします。
pip3 install uniflow
(オプション) 次のOpenAIフローのいずれかを実行している場合は、OpenAI API キーを設定する必要があります。これを行うには、ルート uniflow フォルダーに.envファイルを作成します。次に、次の行を.envファイルに追加します。
OPENAI_API_KEY=YOUR_API_KEY
(オプション) HuggingfaceModelFlow実行している場合は、 transformers 、 accelerate 、 bitsandbytes 、 scipyライブラリもインストールする必要があります。
pip3 install transformers accelerate bitsandbytes scipy
(オプション) LMQGModelFlow実行している場合は、 lmqgライブラリとspacyライブラリもインストールする必要があります。
pip3 install lmqg spacy
インストールが完了しました。おめでとうございます。
私たちに貢献することに興味がある場合は、ここにある事前の開発セットアップをご覧ください。
 conda create -n uniflow python=3.10 -y
conda activate uniflow
cd uniflow
pip3 install poetry
poetry install --no-root
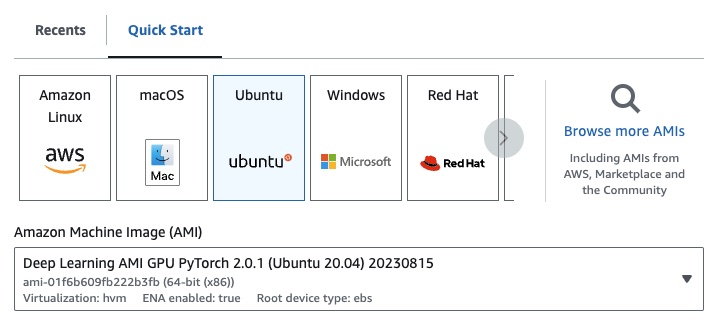
EC2 を使用している場合は、次の構成で GPU インスタンスを起動できます。
g4dn.xlarge (7B パラメータで事前トレーニングされた LLM を実行する場合)

次のOpenAIフローのいずれかを実行している場合は、OpenAI API キーを設定する必要があります。
これを行うには、ルート uniflow フォルダーに.envファイルを作成します。次に、次の行を.envファイルに追加します。
OPENAI_API_KEY=YOUR_API_KEY
uniflow使用するには、次の 3 つの主な手順に従います。
Config選択してください
これにより、LLM とさまざまな構成可能なパラメーターが決まります。
Prompts作成する
モデルにプロンプトを表示するために使用するコンテキストを構築します。 PromptTemplateクラスを使用して、カスタムの手順と例を構成できます。
Flow実行する
入力データに対してフローを実行し、LLM から出力を生成します。
注: 現在、
html、Markdownなどのさまざまなソースからのデータの処理を支援するPreprocessingフローも構築中です。
Config 、どの LLM が使用されるか、および入力データがどのようにシリアル化および逆シリアル化されるかを決定します。 LLM に固有のパラメータもあります。
以下に、使用できるさまざまな事前定義された構成と、それらに対応する LLM の表を示します。
| 構成 | LLM |
|---|---|
| 構成 | gpt-3.5-turbo-1106 |
| OpenAIConfig | gpt-3.5-turbo-1106 |
| ハグフェイス設定 | mistralai/Mistral-7B-Instruct-v0.1 |
| LMQGConfig | lmqg/t5-base-squad-qg-ae |
各設定をデフォルトで実行することも、 temperatureやbatch_sizeなどのカスタムパラメータをユースケースの設定に渡すこともできます。詳細については、高度なカスタム構成セクションを参照してください。
デフォルトでは、 uniflowは渡されたContextに基づいて質問と回答を生成するように設定されています。そのために、LLM をガイドするために使用するデフォルトの命令といくつかのショットの例が用意されています。
デフォルトの命令は次のとおりです。
Generate one question and its corresponding answer based on the last context in the last example. Follow the format of the examples below to include context, question, and answer in the response
デフォルトの数ショットの例は次のとおりです。
    context="The quick brown fox jumps over the lazy brown dog.",
    question="What is the color of the fox?",
    answer="brown."

    context="The quick brown fox jumps over the lazy black dog.",
    question="What is the color of the dog?",
    answer="black."
これらのデフォルトの手順と例を使用して実行するには、 Contextオブジェクトのリストをフローに渡すだけです。次に、 uniflow各Contextオブジェクトの指示といくつかのショットの例を含むカスタム プロンプトを生成し、LLM に送信します。詳細については、「フローの実行」セクションを参照してください。
Contextクラスは、LLM プロンプトのコンテキストを渡すために使用されます。 Context 、テキスト文字列であるcontextプロパティで構成されます。
デフォルトの命令といくつかのショットの例を使用してuniflow実行するには、 Contextオブジェクトのリストをフローに渡すことができます。例えば:
 from uniflow.op.prompt import Context

data = [
    Context(
        context="The quick brown fox jumps over the lazy brown dog.",
    ),
    ...
]

client.run(data)
フローの実行の詳細な概要については、「フローの実行」セクションを参照してください。
カスタム プロンプト命令またはいくつかのショットの例を使用して実行する場合は、 PromptTemplateオブジェクトを使用できます。 instructionとexampleプロパティがあります。
| 財産 | タイプ | 説明 |
|---|---|---|
instruction | str | LLM の詳細な手順 |
examples | リスト[コンテキスト] | 少数のショットの例。 |
必要に応じてデフォルトを上書きできます。
PromptTemplate使用して、カスタムinstruction 、いくつかのショットの例、およびカスタムContextフィールドを使用してuniflow実行して概要を生成する方法の例を確認するには、openai_pdf_source_10k_summary ノートブックを確認してください。
Configとプロンプト戦略を決定したら、入力データに対してフローを実行できます。
uniflow Client 、 Config 、およびContextオブジェクトをインポートします。
 from uniflow.flow.client import TransformClient
from uniflow.flow.config import TransformOpenAIConfig, OpenAIModelConfig
from uniflow.op.prompt import Context
データをチャンクに前処理してフローに渡します。将来的には、このステップを支援するPreprocessingフローが提供される予定ですが、現時点では、pypdf などの任意のライブラリを使用してデータをチャンク化できます。
raw_input_context = ["It was a sunny day and the sky color is blue.", "My name is bobby and I am a talent software engineer working on AI/ML."]
データをフローに渡すためのContextオブジェクトのリストを作成します。
 data = [
    Context(context=c)
    for c in raw_input_context
]
(オプション) カスタマイズされた手順や例を使用する場合は、 PromptTemplateを作成します。
 from uniflow.op.prompt import PromptTemplate

guided_prompt = PromptTemplate(
instruction="Generate a one sentence summary based on the last context below. Follow the format of the examples below to include context and summary in the response",
few_shot_prompt=[
    Context(
        context="When you're operating on the maker's schedule, meetings are a disaster. A single meeting can blow a whole afternoon, by breaking it into two pieces each too small to do anything hard in. Plus you have to remember to go to the meeting. That's no problem for someone on the manager's schedule. There's always something coming on the next hour; the only question is what. But when someone on the maker's schedule has a meeting, they have to think about it.",
        summary="Meetings disrupt the productivity of those following a maker's schedule, dividing their time into impractical segments, while those on a manager's schedule are accustomed to a continuous flow of tasks.",
    ),
],
)
Clientオブジェクトに渡すConfigオブジェクトを作成します。
 config = TransformOpenAIConfig(
    prompt_template=guided_prompt,
    model_config=OpenAIModelConfig(
        response_format={"type": "json_object"}
    ),
)
client = TransformClient(config)
clientオブジェクトを使用して、入力データに対してフローを実行します。
output = client.run(data)
出力データを処理します。デフォルトでは、LLM 出力は、フローに渡されるContextごとに 1 つずつ出力された辞書のリストになります。各辞書には、LLM 応答とエラーを含むresponseプロパティがあります。たとえば、 output[0]['output'][0]次のようになります。
 {
    'response': [{'context': 'It was a sunny day and the sky color is blue.',
    'question': 'What was the color of the sky?',
    'answer': 'blue.'}],
    'error': 'No errors.'
}
その他の例については、サンプル フォルダーを参照してください。
LLM モデル、スレッド数、温度などの特定のパラメーターをさらに調整する場合は、カスタム構成または引数をConfigオブジェクトに渡してフローを構成することもできます。
すべての構成には次のパラメータがあります。
| パラメータ | タイプ | 説明 |
|---|---|---|
prompt_template | PromptTemplate | ガイド付きプロンプトに使用するテンプレート。 |
num_threads | 整数 | フローに使用するスレッドの数。 |
model_config | ModelConfig | モデルに渡す設定。 |
カスタム パラメーターを含むModel Configsの 1 つを渡すことで、 model_configをさらに構成できます。
モデル構成は、基本Configオブジェクトに渡される構成であり、どの LLM モデルが使用されるかを決定し、LLM モデルに固有のパラメーターを持ちます。
基本構成はModelConfigと呼ばれ、次のパラメーターがあります。
| パラメータ | タイプ | デフォルト | 説明 |
|---|---|---|---|
model_name | str | gpt-3.5-ターボ-1106 | OpenAIサイト |
OpenAIModelConfig ModelConfigから継承し、次の追加パラメータがあります。
| パラメータ | タイプ | デフォルト | 説明 |
|---|---|---|---|
num_calls | 整数 | 1 | OpenAI API に対して行う呼び出しの数。 |
temperature | フロート | 1.5 | OpenAI API に使用する温度。 |
response_format | 辞書[str, str] | {"タイプ": "テキスト"} | OpenAI API に使用する応答形式。 「テキスト」または「json」を使用できます |
HuggingfaceModelConfig ModelConfigから継承しますが、デフォルトでmistralai/Mistral-7B-Instruct-v0.1モデルを使用するようにmodel_nameパラメーターをオーバーライドします。
| パラメータ | タイプ | デフォルト | 説明 |
|---|---|---|---|
model_name | str | ミストラライ/Mistral-7B-Instruct-v0.1 | ハグフェイスサイト |
batch_size | 整数 | 1 | Hugging Face API に使用するバッチ サイズ。 |
LMQGModelConfig ModelConfigから継承しますが、デフォルトでlmqg/t5-base-squad-qg-aeモデルを使用するようにmodel_nameパラメーターをオーバーライドします。
| パラメータ | タイプ | デフォルト | 説明 |
|---|---|---|---|
model_name | str | lmqg/t5-base-squad-qg-ae | ハグフェイスサイト |
batch_size | 整数 | 1 | LMQG API に使用するバッチ サイズ。 |
以下は、カスタム構成をClientオブジェクトに渡す方法の例です。
 from uniflow.flow.client import TransformClient
from uniflow.flow.config import TransformOpenAIConfig, OpenAIModelConfig
from uniflow.op.prompt import Context


contexts = ["It was a sunny day and the sky color is blue.", "My name is bobby and I am a talent software engineer working on AI/ML."]

data = [
    Context(
        context=c
    )
    for c in contexts
]

config = OpenAIConfig(
  num_threads=2,
  model_config=OpenAIModelConfig(
    model_name="gpt-4",
    num_calls=2,
    temperature=0.5,
  ),
)
client = TransformClient(config)
output = client.run(data)
ご覧のとおり、必要に応じて、 OpenAIModelConfigのカスタム パラメーターをOpenAIConfig構成に渡しています。