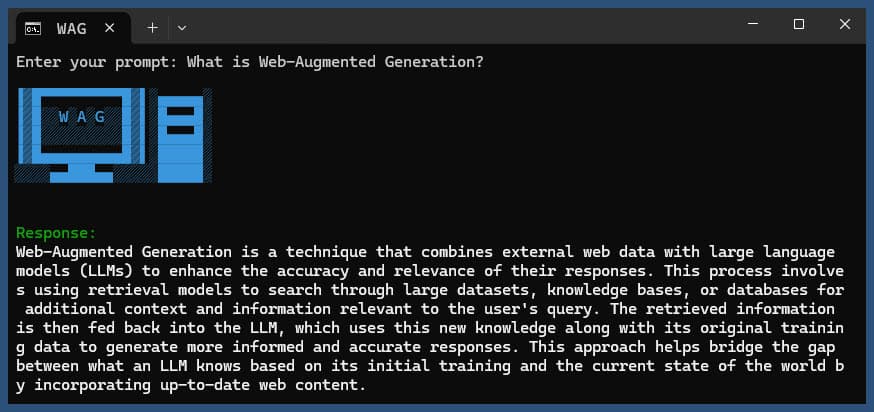
web augmented generation
v1.2.1 - ? Semantic Chunk Matching
この Node.js アプリケーションは、さまざまな LLM プロバイダーと SearXNG からの Web 検索結果を使用して Web 拡張生成を実行します。
リポジトリのクローンを作成します。
 git clone https://github.com/jparkerweb/web-augmented-generation.git
cd web-augmented-generation
依存関係をインストールします。
npm ci
.env.exampleファイルを.envにコピーします。
cp .env.example .env
.envファイルを編集し、必要に応じて値を更新します。
 # #####################
# # General Settings ##
# #####################
NUM_URLS = 10                                                           # Number of URLs to fetch
SEARXNG_URL = https://searx.be/                                         # URL of the SearXNG server
SEARXNG_URL_EXTRA_PARAMETER = "key=optional_auth_key_here&language=en"  # Extra parameter for SearXNG URL
SEARXNG_FORMAT = html                                                   # Format for SearXNG results (html or json)
FETCH_TIMEOUT_MS = 5000                                                 # Timeout for fetching URLs
DISABLE_SSL_VALIDATION = true                                           # Whether to disable SSL validation

# #################
# # LLM Settings ##
# #################
LLM_STREAM_RESPONSE = true                             # Whether to stream the LLM response

# Ollama Local Configuration
LLM_BASE_URL = http://localhost:11434/v1               # Base URL for the LLM API (OpenAI format)
LLM_API_KEY = ollama!!!                                # API key for the LLM (use 'ollama' for Ollama)
LLM_MODEL = llama3.2:1b                                # Model to use with the LLM API

# ###################################
# # Scraped Page Content Settings ##
# ###################################

# Semantic Chunking Settings
CHUNK_CONTENT = true                                   # Enable semantic chunking for better quality answers
CHUNK_CONTENT_USE_HYBRID_FALLBACK = true               # Enable hybrid mode to fallback to summarization if no chunks found
# # The following parameters are only used by the `chunk-match` library (if CHUNK_CONTENT is set to true)
CHUNK_CONTENT_MAX_RESULTS = 10
CHUNK_CONTENT_MIN_SIMILARITY = 0.375
CHUNK_CONTENT_MAX_TOKEN_SIZE = 500
CHUNK_CONTENT_SIMILARITY_THRESHOLD = 0.4
CHUNK_CONTENT_DYNAMIC_THRESHOLD_LOWER_BOUND = 0.3
CHUNK_CONTENT_DYNAMIC_THRESHOLD_UPPER_BOUND = 0.5
CHUNK_CONTENT_NUM_SIMILARITY_SENTENCES_LOOKAHEAD = 3
CHUNK_CONTENT_COMBINE_CHUNKS = true
CHUNK_CONTENT_COMBINE_CHUNKS_SIMILARITY_THRESHOLD = 0.5
CHUNK_CONTENT_ONNX_EMBEDDING_MODEL = " Xenova/all-MiniLM-L6-v2 "
CHUNK_CONTENT_DTYPE = " q8 "

# Raw Content Settings (used when CHUNK_CONTENT=false)
WEB_PAGE_CONTENT_MAX_LENGTH = 1000                     # Maximum length of raw page content to send to LLM
代替の LLM プロバイダー構成:
 # together.ai Configuration
LLM_BASE_URL = https://api.together.xyz/v1
LLM_API_KEY = xxxxxxxxxxxxxxxxxxxxxxxxxxxxxxxxxxxxx
LLM_MODEL = meta-llama/Llama-3.2-3B-Instruct-Turbo

# llama.cpp Configuration
LLM_BASE_URL = http://localhost:8080/v1
LLM_API_KEY = not-needed
LLM_MODEL = not-needed

# OpenRouter Configuration
LLM_BASE_URL = https://openrouter.ai/api/v1
LLM_API_KEY = xxxxxxxxxxxxxxxxxxxxxxxxxxxxxxxxxxxxx
LLM_MODEL = google/gemini-pro-1.5-exp

# Google AI Studio Configuration
LLM_BASE_URL = https://generativelanguage.googleapis.com/v1beta/openai/
LLM_API_KEY = xxxxxxxxxxxxxxxxxxxxxxxxxxxxxxxxxxxxx
LLM_MODEL = gemini-exp-1121
構成には以下が含まれます。
このアプリケーションは、言語モデルの対話に OpenAI API 形式を使用します。 Ollama または他の OpenAI 互換 API と連携するように構成できます。設定方法は次のとおりです。
.envファイルで指定された URL で実行されていることを確認してください。.envファイルに次の変数を設定します。 LLM_BASE_URL=http://localhost:11434/v1
LLM_API_KEY=ollama
LLM_MODEL=llama3.2:1b
llama3.2:1bを、Ollama で使用するモデルの名前に置き換えます。.envファイルに次の変数を設定します。 LLM_BASE_URL=https://api.openai.com/v1
LLM_API_KEY=your_api_key_here
LLM_MODEL=gpt-3.5-turbo
your_api_key_here実際の API キーに置き換え、 gpt-3.5-turbo使用するモデルに置き換えます。アプリケーションはこれらの設定を使用して、クエリの言い換えや応答の生成などのタスクのために言語モデルへの API 呼び出しを行います。
クエリを使用して、またはクエリを使用せずにアプリケーションを実行します。
node main.js "Your question or prompt here"
または、よりインタラクティブなエクスペリエンスを得るには、ask スクリプトを使用します。
node ask.js
クエリを指定しない場合、アプリケーションはクエリの入力を求めるプロンプトを表示します。
アプリケーションは次のことを行います。
log.txtに記録します。生成された応答はコンソールに表示され、ログ ファイルに追加されます。
実行中にエラーが発生した場合は、プロジェクト ディレクトリのerror_log.txtに記録されます。
main.js : メインアプリケーションロジック.env : 設定ファイル ( .env.exampleから作成)log.txt : 各実行の詳細ログerror_log.txt : エラーログ (エラーが発生した場合に作成されます)completion_flag.txt : プロセスが正常に完了したときに作成されますこのアプリケーションは、Web スクレイピングと AI によって生成されたコンテンツを使用します。アクセスしている Web サイトと使用している AI モデルの利用規約を必ず遵守してください。
Docker を使用してローカルで SearXNG を実行する場合は、次の手順に従います。
最新の SeaXNG Docker イメージをプルします。
docker pull searxng/searxng
SearXNG 構成用のディレクトリを作成します。
mkdir searxng-config
searxng-config ディレクトリに settings.yml ファイルを作成します。
touch searxng-config/settings.yml
settings.yml ファイルを編集して、「json」が「formats」リストに含まれていることを確認します。
nano searxng-config/settings.yml
次の行を追加または変更します。
 search :
  formats :
    - html
    - json
SearXNG Docker コンテナを実行します。
 docker run -d
  -v $(pwd)/searxng-config:/etc/searxng
  -p 8787:8080
  -e BASE_URL=http://localhost:8787/
  -e INSTANCE_NAME=my-searxng
  searxng/searxng
http://localhost:8787でローカルの SearXNG インスタンスにアクセスします。
ローカルの SearXNG インスタンスを使用するように .env ファイルを更新します。
SEARXNG_URL=http://localhost:8787
これで、JSON 出力が有効になったポート 8787 でローカルの SearXNG インスタンスが実行され、このアプリケーションで使用できるようになりました。
SEARXNG_URL_EXTRA_PARAMETER : このフィールドを使用すると、SearXNG 検索 URL に追加のパラメータを追加できます。さまざまな目的に使用できます。
key=your_auth_key_herelanguage=en&time_range=year&使用して複数のパラメータを組み合わせることができます。例: key=your_auth_key_here&language=en SEARXNG_FORMAT : このフィールドは、SearXNG 検索結果の形式を決定します。 「html」または「json」のいずれかに設定できます。
.env ファイルでの使用例:
 SEARXNG_URL_EXTRA_PARAMETER="key=abcdef123456&language=en"
SEARXNG_FORMAT=json
これにより、SearXNG 検索 URL に&key=abcdef123456&language=enが追加され、アプリケーションは SearXNG からの JSON 応答を期待して解析します。
DISABLE_SSL_VALIDATION : SSL 証明書の検証を無効にするには、「true」に設定します (デフォルト: false、使用には注意が必要です)
LLM_STREAM_RESPONSE : このフィールドは、LLM 応答をリアルタイムでストリーミングするか、単一の応答として返すかを決定します。
.env ファイルでの使用例:
LLM_STREAM_RESPONSE=true
これにより、LLM 応答のストリーミングが可能になり、よりインタラクティブなエクスペリエンスが提供されます。
(ポート 8787 で SearXNG を提供する例)
    server {
        listen       80 ;
        listen       443 ssl;
        server_name  searxng.acme.org;
        ssl_certificate         C:/some-path/fullchain.pem;
        ssl_certificate_key     C:/some-path/privkey.pem;

        # Define a variable to store the API key
        set $api_key "eXamPle__Key!!!" ;

        # Use a secure cookie to store the key
        set $key_cookie "searxng_key" ;

        # Add resolver directive
        resolver 127.0.0.1 ;

        # Debug logging
        error_log  logs/error.log debug ;

        # Check if the key is valid
        set $key_valid 0 ;
        if ( $arg_key = $api_key ) {
            set $key_valid 1 ;
        }
        if ( $cookie_searxng_key = $api_key ) {
            set $key_valid 1 ;
        }

        # Allow access to static files without key
        location /static/ {
            proxy_pass http://127.0.0.1:8787;
            proxy_buffering off ;
        }

        # Redirect all requests without a valid key to a default error page or login page
        location = / {
            if ( $key_valid = 0) {
                return 403 ;
            }
            proxy_pass http://127.0.0.1:8787;
            proxy_buffering off ;
        }

        location / {
            # Debug headers (always add these for debugging)
            add_header X-Debug-Key-Valid $key_valid always;
            add_header X-Debug-Arg-Key $arg_key always;
            add_header X-Debug-Cookie-Key $cookie_searxng_key always;

            # If the key is not valid, return 403
            if ( $key_valid = 0) {
                return 403 ;
            }

            # Set the cookie if the key is provided in the URL
            if ( $arg_key = $api_key ) {
                add_header Set-Cookie "${key_cookie}= $arg_key ; HttpOnly; Secure; SameSite=Strict; Path=/;" always;
            }

            # Proxy headers
            proxy_set_header Host $host ;
            proxy_set_header X-Real-IP $remote_addr ;
            proxy_set_header X-Forwarded-For $proxy_add_x_forwarded_for ;
            proxy_set_header X-Forwarded-Proto $scheme ;

            # Preserve the key parameter during redirects
            proxy_redirect ~^(https?://[^/]+)(.*)$ $1$2$is_args$args ;

            # Pass the request to the upstream server
            proxy_pass http://127.0.0.1:8787;
            proxy_buffering off ;
        }
}このプロジェクトには、コマンド ラインからアプリケーションを実行するための便利なスクリプトが含まれています。これらのスクリプトはask-scriptsディレクトリにあります。
ask : Unix 系システムおよび Windows 用のユニバーサル スクリプトask.sh : Unix 系システム用の Bash スクリプトask.bat : Windowsコマンドプロンプト用のバッチスクリプトask.ps1 : Windows PowerShell 用の PowerShell スクリプトこれらのスクリプトをグローバルに使用するには、 ask-scriptsディレクトリをシステムの PATH に追加する必要があります。さまざまなオペレーティング システムでの手順は次のとおりです。
ask-scriptsディレクトリへのフルパスを追加します。~/.bashrc 、 ~/.zshrc 、または~/.bash_profile ) を開きます。/path/to/ask-scripts実際のパスに置き換えます。 export PATH="$PATH:/path/to/ask-scripts"
source ~/.bashrc (または編集した適切なファイル) を実行します。ask-scriptsディレクトリを PATH に追加すると、次のように入力するだけでどこからでもアプリケーションを実行できます。
ask
スクリプトにより、質問またはプロンプトを入力するよう求められます。
このコマンドは、システムに適切なスクリプトを自動的に使用します。
質問やプロンプトをコマンドライン引数として指定する必要はありません。スクリプトは対話的に入力を求めます。
これらのスクリプトは、プロジェクト ディレクトリに移動したり、 node main.js毎回手動で実行したりする必要がなく、アプリケーションと対話するための便利な方法を提供します。
Ollama を NGINX リバース プロキシの背後でホストする場合は、開始点として次の構成を使用できます。この設定には、SSL と基本的な API キー認証が含まれます。
 # -------------------------
# -- ollama.yourdomain.com --
# -------------------------
upstream ollama {
    server               127.0.0.1:11434;
}
server {
    listen 80 ;
    listen 443 ssl;
    server_name ollama.yourdomain.com;
    ssl_certificate         C:/Certbot/live/ollama.yourdomain.com/fullchain.pem;
    ssl_certificate_key     C:/Certbot/live/ollama.yourdomain.com/privkey.pem;

    location / {
        # Check if the Authorization header is present and has the correct Bearer token / API Key
        set $token "Bearer MY_PRIVATE_API_KEY" ;
        if ( $http_authorization != $token ) {
            return 401 "Unauthorized" ;
        }

        # The localhost headers are to simulate the forwarded request as coming from localhost
        # so we dont have to set the Ollama origins as *
        proxy_set_header  Host "127.0.0.1" ;
        proxy_set_header  X-Real-IP "127.0.0.1" ;
        proxy_set_header  X-Forwarded-For "127.0.0.1" ;
        proxy_set_header  X-Forwarded-Proto $scheme ;
        proxy_pass        http://ollama;  # Forward request to the actual web service
    }
}
この構成では次のことが行われます。
MY_PRIVATE_API_KEY実際の API キーに置き換えて、SSL 証明書のパスがシステムに対して正しいことを確認してください。
この構成を使用する場合は、NGINX プロキシされた Ollama インスタンスを指すように.envファイルを更新します。
 LLM_BASE_URL=https://ollama.yourdomain.com/v1
LLM_API_KEY=MY_PRIVATE_API_KEY
LLM_MODEL=llama3.2:1b
この設定により、API キー認証によるアクセス制御を維持しながら、Ollama インスタンスをインターネットに安全に公開できます。
このプロジェクトを気に入っていただけましたら、私の仕事をサポートするためにチップを送ることをご検討ください。


