PUG 統計用の Web アプリケーション。
私たちのサポートの不和はここにあります。
B3none - 開発者 / メンテナー
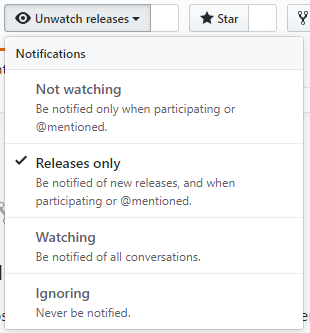
プラグインの最新バージョンを維持するために、リポジトリを監視することをお勧めします

このプロジェクトを気に入っていただけましたら、ぜひリポジトリにスターを付けてください。

以下の手順はすべて、Ubuntu を使用していることを前提に書かれています。
sudo apt install apache2 composer openssl php php-mysql php-json php-simplexml mysql-server zip unzip -y
sudo apt install apache2 composer openssl php7.2 php7.2-mysql php7.2-json php7.2-simplexml mariadb-server zip unzip -y
sudo apt install apache2 composer openssl php7.3 php7.3-mysql php7.3-json php7.3-simplexml mariadb-server zip unzip -y
curl -sL https://deb.nodesource.com/setup_10.x | sudo -E bash -sudo apt-get install nodejsnpm -vnode -vcurl -o- https://raw.githubusercontent.com/nvm-sh/nvm/v0.35.3/install.sh | bashnvm install 10.19nvm use 10.19npm -vnode -vcd /var/www/に変更します。rm -rf html/で html ディレクトリを削除します。sudo a2dissite 000-default.confを無効にします。sudo a2enmod rewriteを有効にします。git clone https://github.com/csgo-league/csgo-league-webcd csgo-league-web/composer installnpm isudo npm i -g gulpgulp buildmysql_secure_installationを実行します。mysql -u root -pを使用して MYSQL にログインします。 CREATE USER 'league'@'%' IDENTIFIED BY '{password}';
CREATE DATABASE panel CHARACTER SET utf8mb4 COLLATE utf8mb4_general_ci;
GRANT ALL PRIVILEGES ON panel.* TO 'league'@'%' WITH GRANT OPTION;
FLUSH PRIVILEGES;
次に、MYSQL Conf を編集して、データベースへの外部接続を許可します。 nano /etc/mysql/mysql.conf.d/mysqld.cnf 、 bind-address 0.0.0.0に変更します。
次に、 sudo service mysql restartを使用して MySQL サービスを再起動します。
次に、データベースを使用し、ボットおよびゲーム サーバーと通信するように Web パネルを構成します。
 cd /var/www/csgo-league-web
cp env.example.php env.php
nano env.php
すべてのフィールドに、MySQL、サーバー、RCON、一意の API キーなどの情報を入力します。 env.phpファイルに提供されているリンクを使用して API キーを生成できます。
完了したら、 ./vendor/bin/phpmig migrate
league CNAME を専用サーバーに向けます。cd /etc/apache2/sites-availablenano csgo-league-web.conf <VirtualHost *:80>
ServerName league.your.domain
DocumentRoot /var/www/csgo-league-web/web
<Directory /var/www/csgo-league-web/web>
Options -Indexes
AllowOverride All
FallbackResource /index.php
</Directory>
</VirtualHost>
sudo a2ensite csgo-league-web.conf最後に、 /csgo-league-webディレクトリでchown -R www-data:www-data appください。
これで準備は完了です。
https://github.com/Rob--W/cors-anywhereまたはgit clone https://github.com/Rob--W/cors-anywhere.gitをダウンロードします。screenまたは代替手段を使用してください cd cors-anywhere
node server.js
/var/www/csgo-league-web/assets/scripts/listeners/steam-profile.jsを編集します。axios.get(`http://{YOUR IP}:8080/https://steamcommunity.com/profiles/${steam}?xml=true`){YOUR IP}サーバーの IP に変更することを忘れないでください。 cd /var/www/csgo-league-web/
gulp build
PS: Web ブラウザのキャッシュを削除することを忘れないでください。
too many redirects場合は、 env.php 'WEBSITE' => '/home'を'WEBSITE' => ''に変更してみてください。