Web ページのレイアウトに CSS を使用する場合、欠かせないものが 1 つあります。それはボックス モデルです。ボックス モデルは、名前が示すように、ボックスは物を保持するために使用され、ボックスに保持されるものは HTML 要素のコンテンツです。言い換えれば、表示されるすべての HTML 要素はボックスであり、以下で説明するボックスは HTML 要素と同等です。ここのボックスはボックスモデルのボックスとは少し異なります。
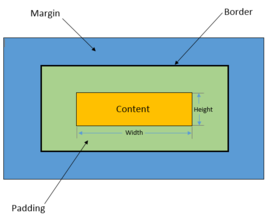
箱の構成
ボックスモデルは、Web デザインでよく使用される思考モデルで、内側から content、padding、border、margin の 4 つの部分で構成され、CSS はこれら 4 つの部分とパフォーマンスに関連する一連のプロパティを提供します。これらのプロパティを設定することで、ボックスの内容を強化できます。
箱のサイズ
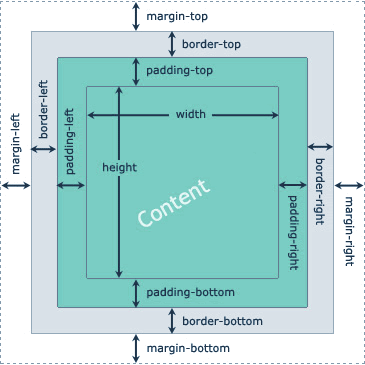
ボックスのサイズとは、ボックスの幅と高さを指します。ほとんどの初心者は、幅と高さを幅と高さのプロパティと誤解しやすいですが、デフォルトでは、幅と高さのプロパティはコンテンツ (コンテンツ) 部分の幅と高さを設定するだけです。ボックスの実際の幅と高さは、次の式に従って計算されます。
ボックスの幅 = コンテンツの幅 + 左パディング + 右パディング + 左境界線 + 右境界線 + 左マージン + 右マージン
ボックスの高さ = コンテンツの高さ + 上のパディング + 下のパディング + 上の境界線 + 下の境界線 + 上のマージン + 下のマージン
属性を含む数式として表現すると、次のようになります。
ボックスの幅 = width + padding-left + padding-right + border-left + border-right + margin-left + margin-right
ボックスの高さ = height + padding-top + padding-bottom + border-top + border-bottom + margin-top + margin-bottom
1.コンテンツエリア(コンテンツ)
コンテンツ領域はボックス モデル全体の中心であり、ボックスの主なコンテンツ (テキスト、画像、その他のリソース) が保存されます。コンテンツ領域には、幅、高さ、オーバーフローの 3 つの属性があります。幅と高さの属性は、コンテンツ情報が多すぎて、コンテンツ領域で設定された範囲を超える場合に使用されます。 overflow 属性を使用して、コンテンツの処理方法を設定できます。overflow 属性には、次の 4 つのオプションの値があります。
(1) hidden: オーバーフロー部分を非表示にすることを示します。
(2)visible:オーバーフロー部分が表示されることを示す(オーバーフロー部分はボックスの外側に表示される)。
(3) スクロール: コンテンツ領域にスクロール バーを追加することを意味します。このスクロール バーをスライドすると、コンテンツ領域のすべてのコンテンツを表示できます。
(4) auto: オーバーフロー部分の処理方法をブラウザが決定することを示します。
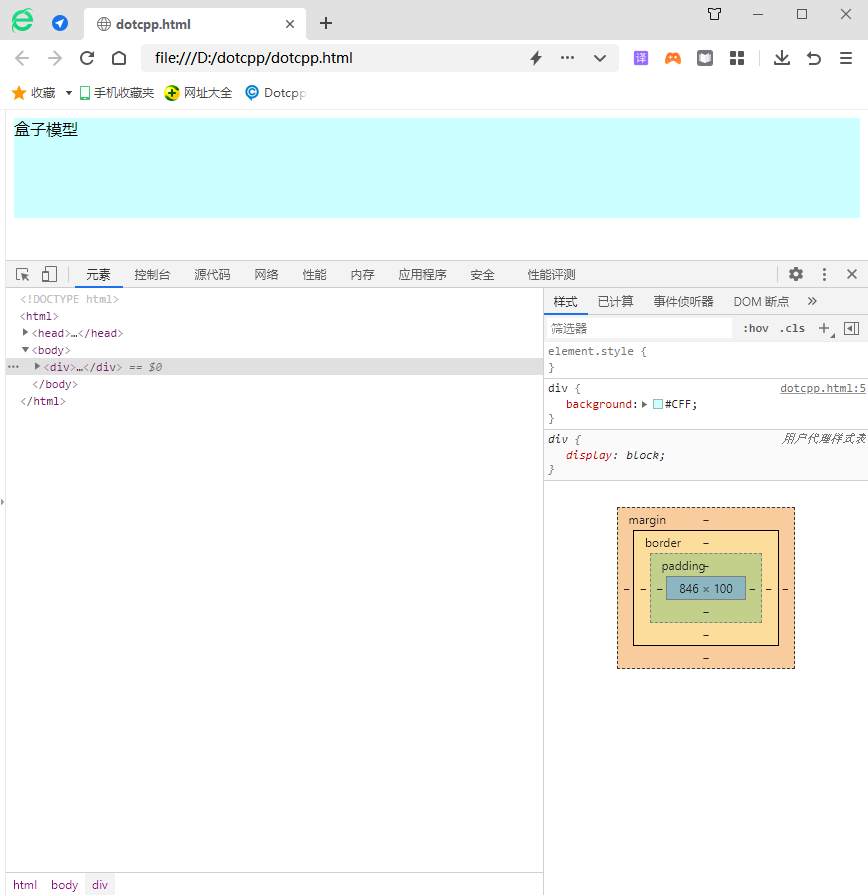
<!DOCTYPEhtml><html><head><style>div{background:#CFF;}div.box-one{width:100px;height:100px;}</style></head><body><div> <divclass=box-one>ボックス モデル</div></div></body></html>実行結果: (ブラウザのデバッグ ツールで表示するには、ショートカット キー F12 で開くか、ページ上でマウスを右クリックしてポップアップ メニューの [検査] オプションを選択します。)
2. パディング
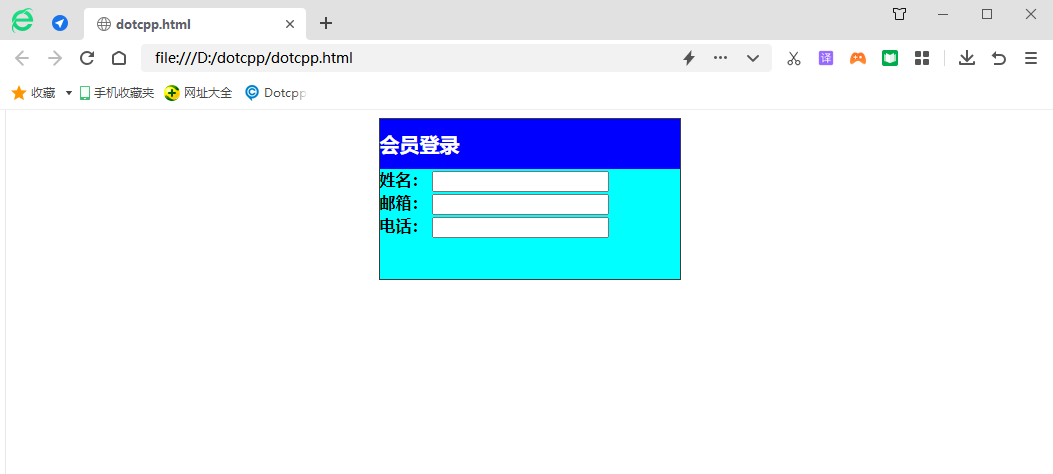
パディングは、コンテンツ領域と境界線の間のスペースであり、padding-top、padding-right、padding-bottom、padding-left およびその省略された属性 padding を使用して、全方向に設定できます。ボックス モデルの背景プロパティを設定する場合、背景プロパティがパディング領域をカバーする可能性があります。
例:
<!DOCTYPEhtml><html><head><metacharset=utf-8><title></title><style>.a{border:1pxsolid#3C3C3C;width:300px;height:160px;margin:auto;}h2 {背景- color:#0000FF;width:300px;height:50px;color:#FFFFFF;line-height:50px;font-size:20px;margin-top:0px;margin-bottom:0px;}form{width:300px;height :110 px;background-color:#00FFFF;}</style></head><body><divclass=a><h2>メンバー ログイン</h2><formaction=#><div><strongclass=name>名前: </strong><inputtype=text/></di v><div><strongclass=name>メール:</strong><inputtype=text/></div><div><strongclass=name>電話:</strong><inputtype=text/></div> </form></div></body></html>実行結果:
3. ボーダー
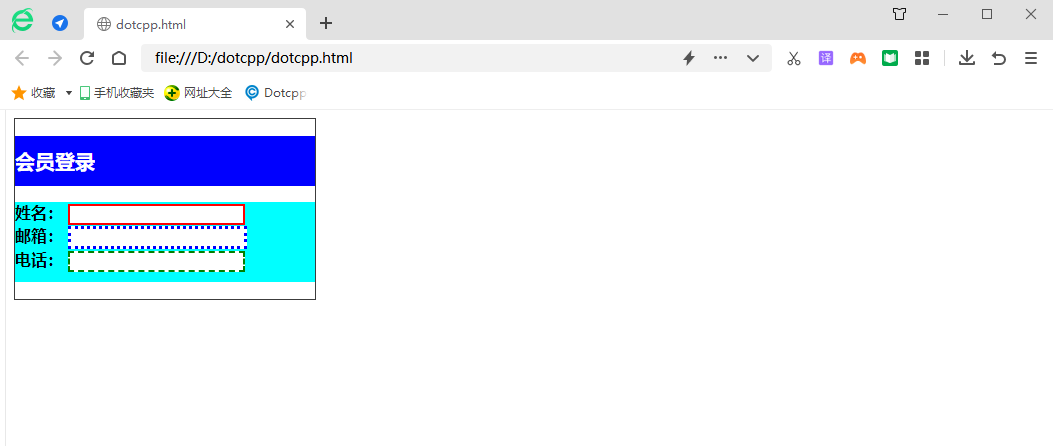
境界線は、コンテンツ領域とパディングを囲む境界線であり、border-style、border-width、border-color、およびそれらの短縮形プロパティ border を使用して境界線をスタイル設定できます。 border-style 属性は、境界線の最も重要な属性です。この属性が設定されていない場合、他の境界線属性は無視されます。
例:
<!DOCTYPEhtml><html><head><metacharset=utf-8><title></title><style>.a{border:1pxsolid#3C3C3C;width:300px;height:180px;}h2{背景色:#0000FF;幅:300ピクセル;高さ:5 0px;color:#FFFFFF;line-height:50px;font-size:20px;}form{background-color:#00FFFF;width:300px;height:80px;}div:nth-of-type(1)input{ border:2pxsolidred;}div:nth-of-type(2) input{border:3pxdottedblue;}div:nth-of-type(3)input{border:2pxdashedgreen;}</style></head><body><divclass=a><h2>メンバー ログイン</h2>< formaction=#><div><strongclass=name>名前:</stron g><inputtype=text/></div><div><strongclass=name>メール:</strong><inputtype=text/></div><div><strongclass=name>電話:</strong> <inputtype=text/></div></form></div></body></html>実行結果:
4. マージン
例:
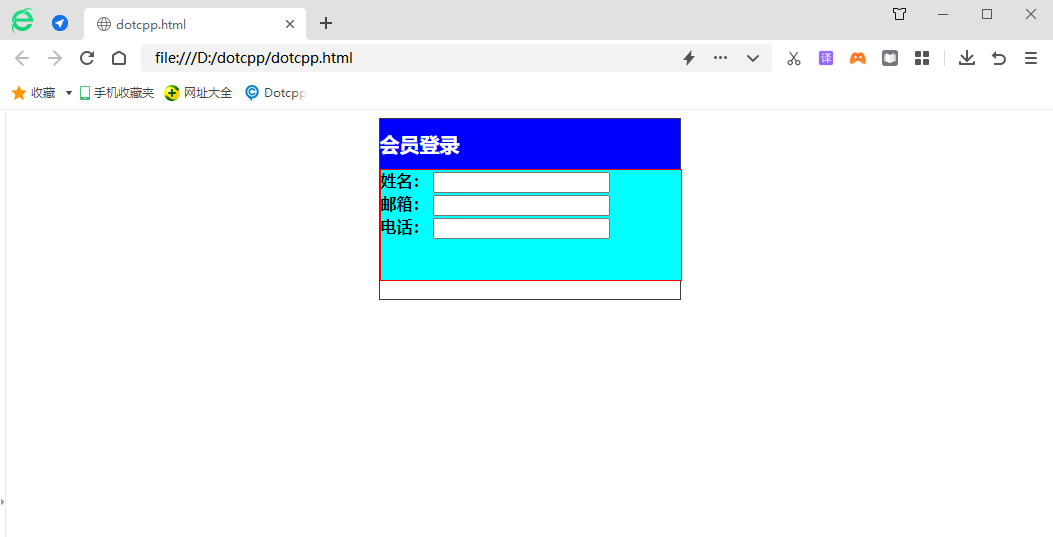
<!DOCTYPEhtml><html><head>metacharset=utf-8><title></title><style>.a{border:1pxsolid#3C3C3C;width:300px;height:180px;margin:auto;}h2{背景色:#0000FF;width:300px;height:50px;color:#FFFFFF;line-height:50px;font-size:20px;margin-top:0px;margin-bottom:0px;}form{border:1pxsolidred;width: 300ピクセル;h Eight:110px;background-color:#00FFFF;}</style></head><body><divclass=a><h2>メンバーログイン</h2><formaction=#><div><strongclass=name>名前:</strong><inputtype=text/ ></div><div><strongclass=name>メール:</strong><inputtype=text/></div><div><strongclass=name>電話:</strong><inputtype=text/>< /div></form></div></body></html>実行結果:
例:
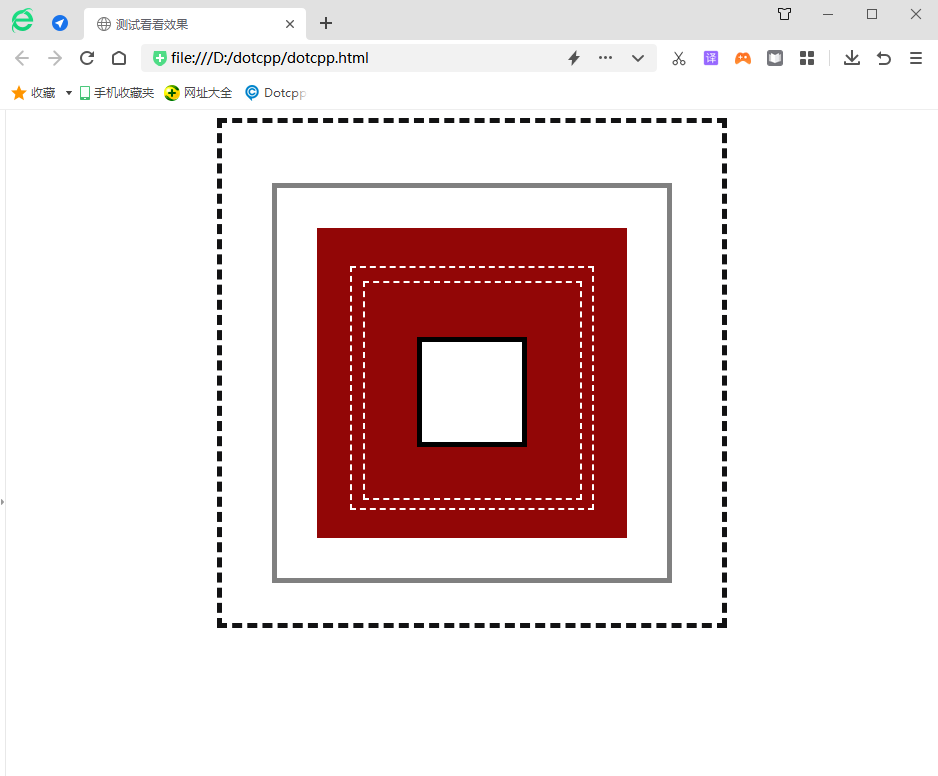
<!DOCTYPEhtml><html><head><metacharset=UTF-8><metahttp-equiv=X-UA-Compatibilitycontent=IE=edge><metaname=viewportcontent=width=device-width,initial-scale=1.0>< title>テストして効果を確認する</title></head><style>#box1{width:400px;height t:400px;background-color:white;/*上下左右の内側の余白を設定*/padding:50px50px;border:5pxdashedrgb(18,18,19);margin:0auto;ma rgin-top:5px;/*margin-left:200px;margin-right:200px;margin-bottom:5px;*/text-align:center;}#box2{width:350p x;height:350px;background-color:white;/*上下左右のパディングを設定します*/padding:20px20px;border:5pxsolidgray;margin:0auto;margi n-top:10px;/*margin-left:20px;margin-right:20px;margin-bottom:20px;*/text-align:center;}#box3{width:300px;h Eight:300px;background-color:rgb(146,6,6);/*上下左右のパディングを設定します*/border:5pxsolidrgb(146,6,6);margin:0auto;/*padding: 5px5px;*/margin-top:20px;/*margin-left:45px;margin-right:45px;margin-bottom:45px;*/text-align:center;}#box4 {width:240px;height:240px;background-color:rgb(146,6,6);/*上下左右のパディングを設定します*//*padding:5px5px;*/border:2pxdashedw hite;margin:0auto;margin-top:33px;/*margin-left:33px;margin-right:33px;margin-bottom:33px;*//*パディングと同じ効果* /text-align:center;}#box5{width:215px;height:215px;background-color:rgb(146,6,6);/*上下左右のパディングを設定します*/border:2pxda shedwhite;margin:0auto;/*padding:2px2px;*/margin-top:12.5px;/*margin-left:12.5px;margin-right:12.5px;margin -bottom:12.5px;*//*パディングと同じ効果*/text-align:center;}#box6{width:100px;height:100px;background-color:white;/ *上下左右のパディングを設定します*/border:5pxsolidblack;margin:0auto;/*padding:20px20px;*/margin-top:54.5px;/*margin-left:54.5px; margin-right:54.5px;margin-bottom:54.5px;*//*パディングと同じ効果*/text-align:center;}</style><body><divid=box1><divid=box2><divid =box3><divid=box4><divid=box5><divid=box6></div></div></div></div></div></div></body></html>実行結果:
