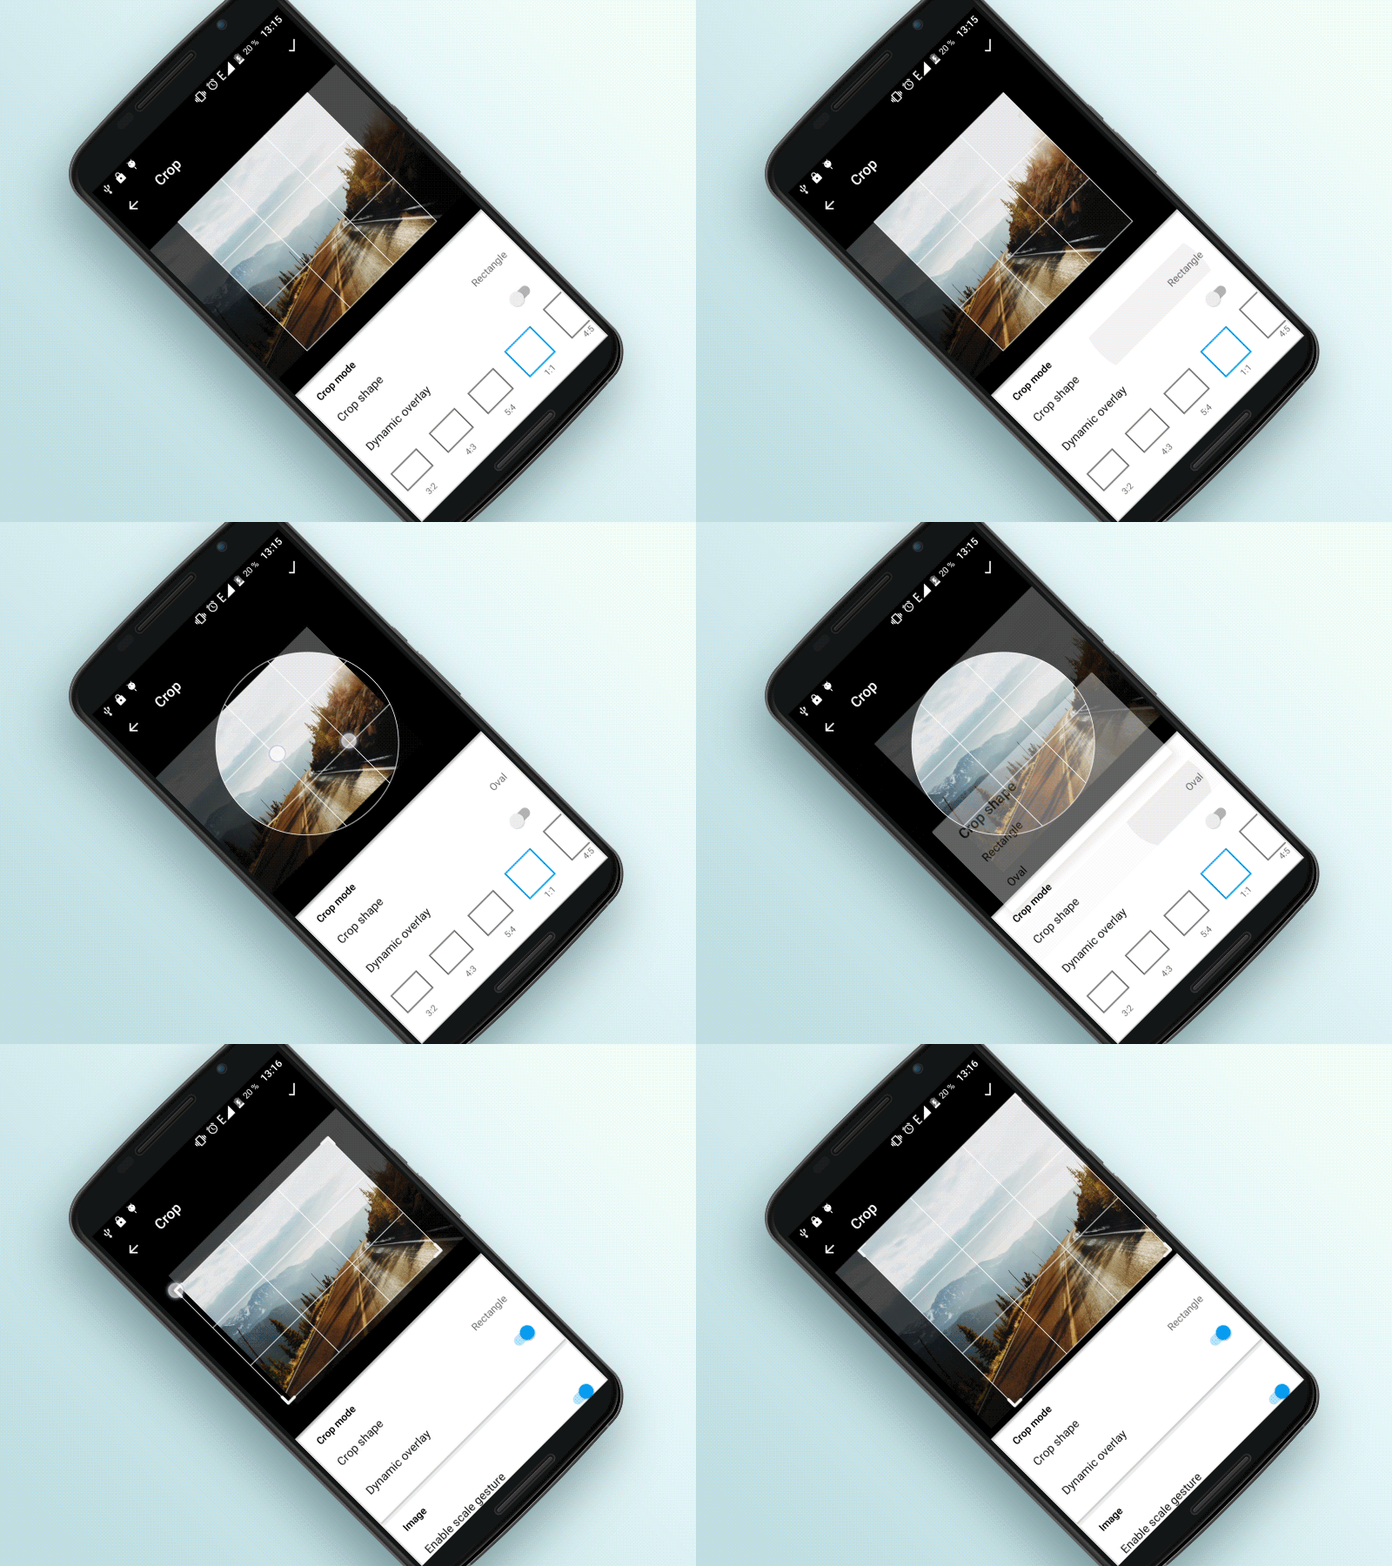
A biblioteca é um widget altamente configurável para corte de imagens.

Adicione isso ao seu bloco de dependências.
compile 'com.steelkiwi:cropiwa:1.0.3'
Consulte o aplicativo de exemplo para obter exemplos de uso da biblioteca.
A biblioteca possui uma arquitetura modular, o que a torna altamente configurável. Para obter informações sobre como configurar CropIwaView consulte as seções abaixo.
Um dos recursos úteis é que você não precisa esperar por um resultado - após a solicitação de corte, basta mudar para outra tela e aguardar o resultado em forma de transmissão.
Adicione CropIwa ao seu xml:
< com .steelkiwi.cropiwa.CropIwaView
  android : id = " @+id/crop_view "
  android : layout_width = " match_parent "
android : layout_height = " match_parent " /> cropView . crop ( new CropIwaSaveConfig . Builder ( destinationUri )
. setCompressFormat ( Bitmap . CompressFormat . PNG )
. setSize ( outWidth , outHeight ) //Optional. If not specified, SRC dimensions will be used
. setQuality ( 100 ) //Hint for lossy compression formats
. build ());Retorno de chamada salvo da região recortada. Quando a solicitação de corte for concluída, uma transmissão será enviada. Você pode ouvi-lo usando a instância CropIwaView
 cropView . setCropSaveCompleteListener ( bitmapUri -> {
  //Do something
});

cropView . setErrorListener ( error -> {
  //Do something
});
ou trabalhe diretamente com um receptor de transmissão. A vantagem é que ele pode ser utilizado em qualquer parte do app, onde você tenha acesso ao Context .
 CropIwaResultReceiver resultReceiver = new CropIwaResultReceiver ();
resultReceiver . setListener ( resultListener );
resultReceiver . register ( context );

//Don't forget to unregister it when you are done
resultReceiver . unregister ( context );
Você pode se inscrever para alterações nas configurações do CropIwaView . Os ouvintes serão notificados sempre que .apply() for chamado.
 cropIwaView . configureOverlay (). addConfigChangeListener ( listener );
cropIwaView . configureImage (). addConfigChangeListener ( listener ) app : ci_dynamic_aspect_ratio = "true|false"
cropView . configureOverlay ()
. setDynamicCrop ( enabled )
. apply (); app : ci_draw_grid = "true|false"
cropView . configureOverlay ()
. setShouldDrawGrid ( draw )
. apply (); app : ci_aspect_ratio_w = "16"
app : ci_aspect_ratio_h = "9"
cropView . configureOverlay ()
. setAspectRatio ( new AspectRatio ( 16 , 9 ))
. setAspectRatio ( AspectRatio . IMG_SRC ) //If you want crop area to be equal to the dimensions of an image
. apply (); app : ci_initial_position = "centerCrop|centerInside"
cropView . configureImage ()
. setImageInitialPosition ( position )
. apply (); //Value is a float from 0.01f to 1
cropIwaView . configureImage ()
. setScale ( scale )
. apply (); app : ci_scale_enabled = "true|false"
cropView . configureImage ()
. setImageScaleEnabled ( enabled )
. apply (); app : ci_translation_enabled = "true|false"
cropView . configureImage ()
. setImageTranslationEnabled ( enabled )
. apply (); app : ci_crop_shape = "rectangle|oval"
cropView . configureOverlay ()
. setCropShape ( new CropIwaRectShape ( cropView . configureOverlay ()))
. setCropShape ( new CropIwaOvalShape ( cropView . configureOverlay ()))
. apply (); app : ci_max_scale = "1f"
cropView . configureImage ()
. setMinScale ( minScale )
. setMaxScale ( maxScale )
. apply (); app : ci_min_crop_width = "40dp"
app : ci_min_crop_height = "40dp"
cropView . configureOverlay ()
. setMinWidth ( dps )
. setMinHeight ( dps )
. apply (); app : ci_border_width = "1dp"
app : ci_corner_width = "1dp"
app : ci_grid_width = "1dp"
cropView . configureOverlay ()
. setBorderStrokeWidth ( dps )
. setCornerStrokeWidth ( dps )
. setGridStrokeWidth ( dps )
. apply (); app : ci_border_color = "#fff"
app : ci_corner_color = "#fff"
app : ci_grid_color = "#fff"
app : ci_overlay_color = "#fff"
cropView . configureOverlay ()
. setBorderColor ( Color . WHITE )
. setCornerColor ( Color . WHITE )
. setGridColor ( Color . WHITE )
. setOverlayColor ( Color . WHITE )
. apply (); Você pode trabalhar diretamente com objetos Paint . Isso permite, por exemplo, desenhar uma grade com efeito tracejado.
 Paint gridPaint = cropView . configureOverlay ()
  . getCropShape ()
  . getGridPaint ();
gridPaint . setPathEffect ( new DashPathEffect ( new float [] { interval , interval }, 0 ));
Você pode obter outros Paint s da mesma maneira.
 CropIwaOverlayConfig config = cropView . configureOverlay ();
CropIwaShape shape = config . getCropShape ();
shape . getGridPaint ();
shape . getBorderPaint ();
shape . getCornerPaint ();
Você também pode criar formas personalizadas de área de corte. Basta estender CropIwaShape (para um exemplo, consulte CropIwaOvalShape) e definir uma instância de sua classe usando:
 cropView . configureOverlay ()
  . setCropShape ( new MyAwesomeShape ())
. apply (); Copyright © 2017 SteelKiwi, http://steelkiwi.com
Licensed under the Apache License, Version 2.0 (the "License");
you may not use this file except in compliance with the License.
You may obtain a copy of the License at
http://www.apache.org/licenses/LICENSE-2.0
Unless required by applicable law or agreed to in writing, software
distributed under the License is distributed on an "AS IS" BASIS,
WITHOUT WARRANTIES OR CONDITIONS OF ANY KIND, either express or implied.
See the License for the specific language governing permissions and
limitations under the License.