Estilo de camada conformável
中文说明点这里
商务合作请联系 E -mail [email protected].
Para cooperação comercial, entre em contato com o email [email protected].
Um conjunto de nós para conformidade que pode compor a camada e máscara para obter a funcionalidade do photoshop.
Ele migra algumas funções básicas do Photoshop para a Comfyui, com o objetivo de centralizar o fluxo de trabalho e reduzir a frequência da troca de software.
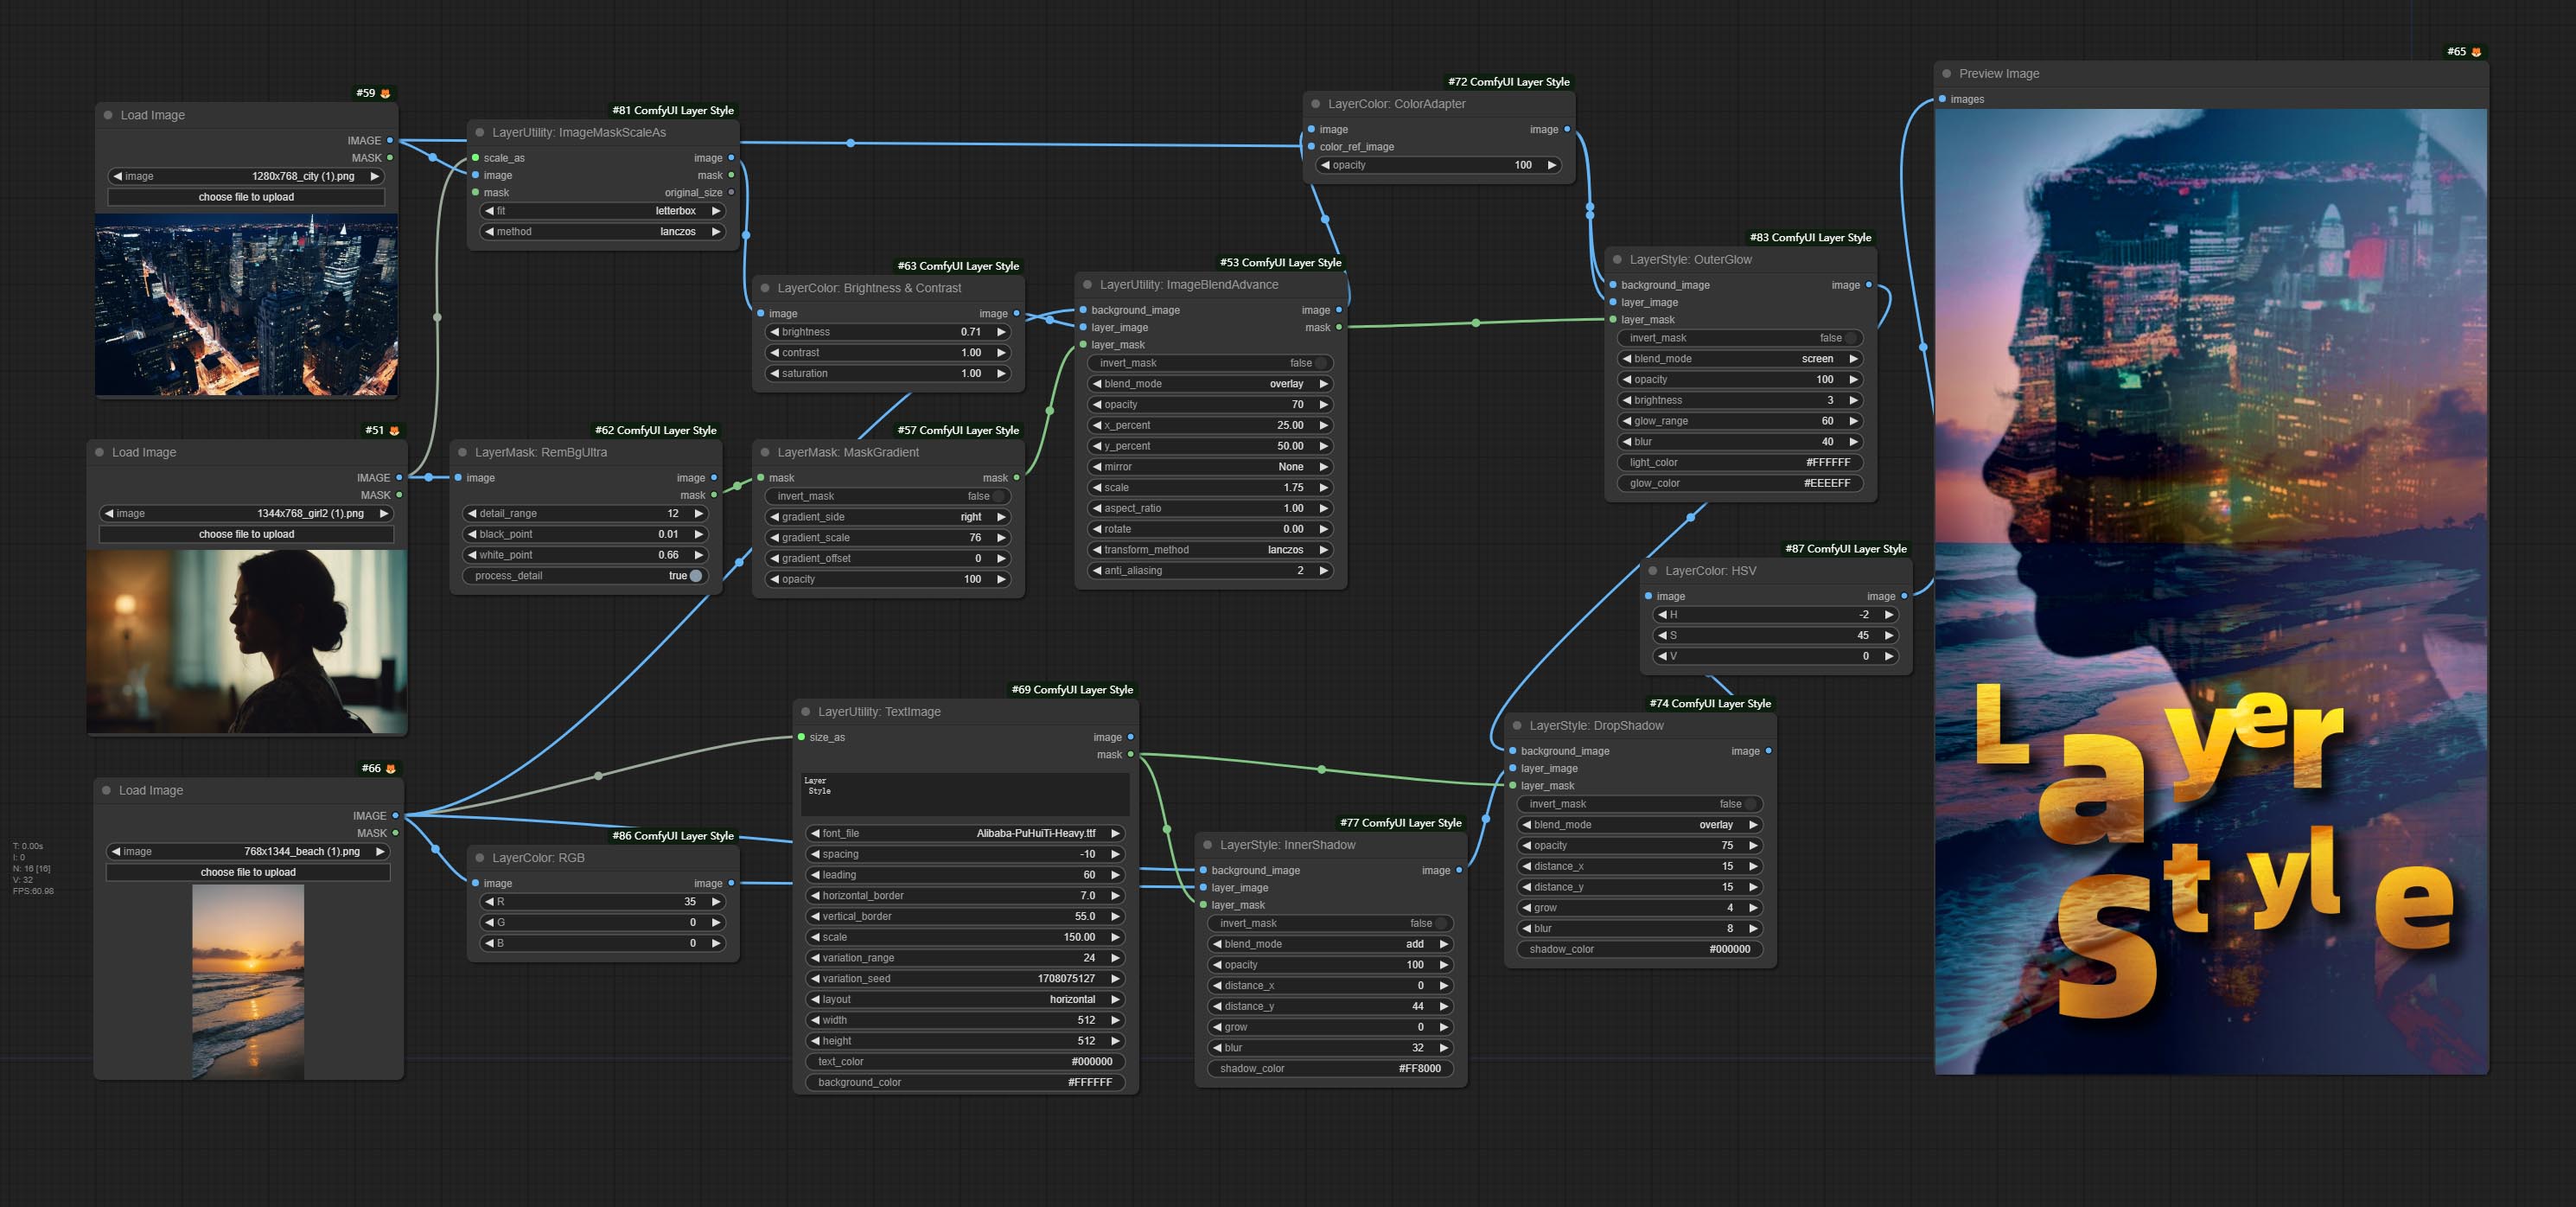
*Este fluxo de trabalho (title_example_workflow.json) está no diretório do fluxo de trabalho.
Exemplo de fluxo de trabalho
Alguns arquivos de fluxo de trabalho JSON no diretório workflow , são exemplos de como esses nós podem ser usados no conformyui.
Como instalar
(Tomando o pacote portátil oficial da Comfyui e o pacote Aki Comfyui como exemplos, modifique o diretório de ambiente de dependência para outros ambientes conformáveis)
Instale o plug -in
Use recomendado Gerenciador Comfyui para instalação.
Ou abra a janela CMD no diretório de plug -in da conformidade, como ComfyUIcustom_nodes
git clone https://github.com/chflame163/ComfyUI_LayerStyle.git
Ou faça o download do arquivo zip e extraído, copie a pasta resultante para ComfyUIcustom_ Nodes
Instale pacotes de dependência
Para o pacote portátil oficial da Comfyui, clique duas vezes no install_requirements.bat no diretório do plug-in, para o pacote AKI Comfyui clique duas vezes no install_requirements_aki.bat no diretório do plug-in e aguarde a conclusão da instalação.
Ou instalar pacotes de dependência, abra a janela CMD no diretório de plug -in confortyui_layerstyle como ComfyUIcustom_ NodesComfyUI_LayerStyle e digite o seguinte comando,
Para pacote portátil oficial da Comfyui, tipo:
 ......python_embededpython.exe -s -m pip install .whldocopt-0.6.2-py2.py3-none-any.whl
......python_embededpython.exe -s -m pip install .whlhydra_core-1.3.2-py3-none-any.whl
......python_embededpython.exe -s -m pip install -r requirements.txt
.repair_dependency.bat
Para pacote Aki Comfyui, tipo:
 ....pythonpython.exe -s -m pip install .whldocopt-0.6.2-py2.py3-none-any.whl
....pythonpython.exe -s -m pip install .whlhydra_core-1.3.2-py3-none-any.whl
....pythonpython.exe -s -m pip install -r requirements.txt
.repair_dependency.bat
Baixar arquivos de modelo
Usuários domésticos chineses de BaidunetDisk e outros usuários de huggingface.co/chflame163/comfyui_layerstyle
Faça o download de todos os arquivos e copie -os para a pasta ComfyUImodels . Este link fornece todos os arquivos de modelo necessários para este plug -in. Ou faça o download do arquivo de modelo de acordo com as instruções de cada nó.
Questões comuns
Se o nó não puder carregar corretamente ou houver erros durante o uso, verifique a mensagem de erro na janela Comfyui Terminal. A seguir, são seguintes erros comuns e suas soluções.
Aviso: xxxx.ini não encontrado, use padrão xxxx ..
Esta mensagem de aviso indica que o arquivo ini não pode ser encontrado e não afeta o uso. Se você não quiser ver esses avisos, modifique todos *.ini.example arquivos no diretório do plug -in para *.ini .
ModuleNotFoundError: nenhum módulo chamado 'psd_tools'
Este erro é que os psd_tools não foram instalados corretamente.
Solução:
- Feche confortyui e abra a janela do terminal no diretório do plug -in e execute o seguinte comando:
../../../python_embeded/python.exe -s -m pip install psd_tools se ocorrer erro durante a instalação de psd_tool, como ModuleNotFoundError: No module named 'docopt' , faça o download do WHL da Docopt e o manual o instale. Execute o seguinte comando na janela do terminal: ../../../python_embeded/python.exe -s -m pip install path/docopt-0.6.2-py2.py3-none-any.whl O path é o nome do caminho do arquivo WHL.
Não é possível importar o nome 'GuidedFilter' de 'cv2.xixgproc'
Este erro é causado por uma versão incorreta do pacote opencv-contrib-python , ou este pacote é substituído por outros pacotes OpenCV.
NomeError: Nome 'GuidedFilter' não está definido
O motivo do problema é o mesmo que acima.
Não é possível importar o nome 'VitmatteImageProcessor' de 'Transformers'
Este erro é causado pela versão baixa do pacote transformers .
Insightface carregando muito lento
Este erro é causado pela versão baixa do pacote protobuf .
Para obter os problemas com os três pacotes de dependência acima, clique duas vezes em repair_dependency.bat (para o oficial com conformidade protable) ou repair_dependency_aki.bat (para conformyui-aki-v1.x) na pasta do plug-in para corrigi-los automaticamente.
OnNxRuntime :: Python :: CreateexecutionProviderInstance CUDA_PATH está definido, mas Cuda não foi capaz de ser carregado. Instale a versão correta do CUDA e CUDNN, conforme mencionado na página de requisitos da GPU
Solução: Reinstale o pacote de dependência onnxruntime .
Erro ao carregar modelo XXX: não conseguimos nos conectar ao huggingface.co ...
Verifique o ambiente de rede. Se você não puder acessar o huggingface.co normalmente na China, tente modificar o pacote huggingface_hub para forçar o uso hf_mirror.
ValueError: o TRIMAP não continha valores de primeiro plano (xxxx ...)
Esse erro é causado pela área da máscara muito grande ou muito pequena ao usar o método PyMatting para lidar com as bordas da máscara.
Solução:
- Ajuste os parâmetros para alterar a área efetiva da máscara. Ou use outros métodos para lidar com as bordas.
Requests.Exceptions.proxyerror: httpsconlectionpool (xxxx ...)
Quando esse erro ocorrer, verifique o ambiente de rede.
UNLIDLOCALError: variável local 'clip_processor' mencionada antes da atribuição
UNLIDLOCALError: variável local 'text_model' mencionada antes da atribuição
Se esse erro ocorrer ao executar o nó JoyCaption2 e foi confirmado que o arquivo do modelo foi colocado no diretório correto, verifique se a versão do pacote de dependência transformers é de pelo menos 4,43.2 ou superior. Se a versão transformers for maior ou igual a 4.45.0 e também tiver uma mensagem de erro:
 Error loading models: De️️scriptors cannot be created directly.
If this call came from a _pb2.py file, your generated code is out of date and must be regenerated with protoc >= 3.19.0.
......
Tente rebaixar o pacote de dependência protobuf para 3.20.3, ou defina variáveis de ambiente: PROTOCOL_BUFFERS_PYTHON_IMPLEMENTATION=python .
Atualizar
** Se o erro do pacote de dependência após a atualização, clique duas vezes em repair_dependency.bat (para o oficial com conformidade protable) ou repair_dependency_aki.bat (para conformyui-aki-v1.x) na pasta do plug-in para reinstalar os pacotes de dependência.
Compromete os nós Benultra e LoadBenModel. Esses dois nós são a implementação do Projeto Pramallc/Ben em Comfyui.
Faça o download do BEN_Base.pth e config.json de huggingface ou baidunetdisk e copie para a pasta ComfyUI/models/BEN .
Merge o PR enviado por Jimlee2048, adicione o nó loadBirefNetModelv2 e suporta o carregamento dos modelos RMBG 2.0.
Faça o download dos arquivos do modelo de Huggingface ou BaidunetDisk e copie para a pasta ComfyUI/models/BiRefNet/RMBG-2.0 .
Os nós de Florence2 suportam base-promptgen-v2.0 e grande e promptgen-v2.0, baixe a pasta base-PromptGen-v2.0 e large-PromptGen-v2.0 da Base de Huggingface ou BaidunetDisk e copie para a pasta ComfyUI/models/florence2 .
Os nós SAM2ULTRA e ObjectDETECTORS suportam o lote de imagem.
Os nós SAM2ULTRA e SAM2VIDEOULTRA adicionam suporte ao modelo SAM2.1, incluindo o modelo FP16 de Kijai. Faça o download de arquivos de modelo de BaidunetDisk ou huggingface.co/kijai/sam2-safetensors e copie para a pasta ComfyUI/models/sam2 .
Commitem os nós do Joycaption2Split e Loadjoycaption2Model, compartilhando o modelo em vários nós Joycaption2 melhora a eficiência.
SegmentanythingUlTra e segmento TILTULTRAV2 Adicione a opção cache_model , fácil de gerenciar com flexibilidade o uso de VRAM.
Devido aos requisitos de versão alta do nó Llamavision para transformers , o que afeta o carregamento de alguns plug-ins de terceiros mais antigos, de modo que o plug-in de LayersTyle reduziu o requisito padrão para 4.43.2. Se você precisar executar a Llamavision, atualize para 4.45.0 ou mais por conta própria.
Compreenda os nós Joycaption2 e Joycaption2extraoptions. Novos pacotes de dependência precisam ser instalados. Use o modelo Joycaption-alfa-two para inferência local. Pode ser usado para gerar palavras rápidas. Este nó é https://huggingface.co/john66666/joy-caption-alpha--bwo-li-mod em conformyui, obrigado ao autor original. Download Os modelos formam BaidunetDisk e BaidunetDisk, ou Huggingface/Orenguteng e Huggingface/Unsloth, depois copie para ComfyUI/models/LLM , baixe modelos de BaidunetDisk ou Huggingface/Google e copie para ComfyUI/models/clip , Donwload The cgrkzexw-599808 BaidunetDisk ou Huggingface/John6666, e copie para ComfyUI/models/Joy_caption 。
Cometer nó Llamavision, use o Modelo de Visão LLAMA 3.2 para a inferência local. Pode ser usado para gerar palavras rápidas. Parte do código para este nó vem de comfyui-pixtralllamamolmoVision, obrigado ao autor original. Para usar esse nó, os transformers precisam atualizar para 4.45.0 ou superior. Faça o download de modelos de BaidunetDisk ou Huggingface/Sanscripts e copie para ComfyUI/models/LLM .
Comprometer o nó RandomEneratorv2, adicione menos faixa aleatória e opções de sementes.
CONFIGURA TEXTJOINV2 NODE, Adicione opções de delimitador no topo do textjion.
Comprometer o nó GaussianBlurv2, a precisão do parâmetro foi aprimorada para 0,01.
CONFIGURA O Nó de UserPromptGeneratortxtImgWithReference.
Comprometer o nó GrayValue, emitir os valores de escala de cinza correspondentes aos valores de cores RGB.
LUT Aplicar, TextImagev2, TextImage, SimpleTextImage nós para apoiar a definição de várias pastas em resource-dir.ini , separadas por vírgulas, semicolons ou espaços. Apoia simultaneamente atualizações refrescantes em tempo real.
LUT Aplicar, TextImagev2, TextImage, SimpleTextImage nós suportam definindo fontes multi-diretório e pastas LUT e suportam atualizações refrescantes e em tempo real.
Comprometo o nó HumanPartsultra, usado para gerar máscaras de peças do corpo humano. É baseado no Warrper de Metal3D/Comfyui_Human_Parts, graças ao autor original. Faça o download do arquivo de modelo de BaidunetDisk ou Huggingface e copie para a pasta ComfyUImodelsonnxhuman-parts .
Os nós ObjectDeTector Adicione a opção de classificação por confiança.
Compreenda o nó DrawBBoxMask, usado para converter a saída Bboxes pelo nó do detector de objeto em uma máscara.
CONMIar os nós do UserPromptGeneratortxtImg e UserPromptGeneratorReplaceword, usados para gerar prompts de texto e imagem e substituir o conteúdo rápido.
Comprometer nó phiprompt, use modelos de texto e visual do Microsoft Phi 3.5 para inferência local. Pode ser usado para gerar palavras imediatas, processar palavras solicitadas ou inferir palavras rápidas das imagens. A execução deste modelo requer pelo menos 16 GB de memória de vídeo.
Faça o download de arquivos do modelo de BaidunetDisk ou Huggingface.co/microsoft/phi-3.5-vision-instruct e huggingface.co/microsoft/phi-3.5-mini-instruct e copie para a pasta ComfyUImodelsLLM .
Comprometer o nó getMaiColors, ele pode obter 5 cores principais da imagem. Comprometer o nó Colorname, ele pode obter o nome de cor do valor da cor de entrada.
Duplique o nó Bleless & Contrast como BLILLENTCONTRASTV2, a cor do nó Shadow & Destact como ColorOfshadowHighlight, e Shadow & Destact Mask to Shadow Destact Mask V2, para evitar erros na análise de fluxo de trabalho confortável causada pelo caractere "&" no nome do nó.
Compromete os nós VQAPROMPT e LOADVQAMODEL.
Faça o download do modelo de BaidunetDisk ou huggingface.co/salesforce/blip-vqa-capfilt-large e huggingface.co/salesforce/blip-vqa-base e copie para a pasta ComfyUImodelsVQA .
FLORENCE2ULTRA, FLORENCE2IMAGE2PROMPT 和 Os nós de Loadflorence2Model suportam os Miaoshouai/Florence-2-Large-Promptgen-V1.5 e Miaoshouai/Florence-2-Base-Promptgen-V1.5.
Baixe arquivos modelo de BaidunetDisk ou huggingface.co/miaoshouai/florence-2-large-promptgen-v1.5 e huggingface.co/miaoshouai/florence-2-base-promptgen-v1.5, copie para ComfyUImodelsflorence2 pasta .
Commitam nós BirefNetulTrav2 e LoadBirefNetModel, que suportam o uso do mais recente modelo BirefNet. Faça o download do arquivo de modelo de BaidunetDisk ou Googledrive chamado BiRefNet-general-epoch_244.pth para a pasta ComfyUI/Models/BiRefNet/pth . Você também pode baixar mais modelos Birefnet e colocá -los aqui.
ExtlendCanvasv2 Suporte a entrada de valor negativo, significa que a imagem será cortada.
A cor do título padrão dos nós é alterada para azul-esverdeado e os nós em LayersTyle, Layercolor, LayerMask, Layerutility e Layerfilter são distinguidos por cores diferentes.
Os nós do detector de objetos adicionaram a opção Bbox, que permite a classificação da esquerda para a direita, de cima para baixo e grande a pequena, tornando a seleção de objetos mais intuitiva e conveniente. Os nós divulgados ontem foram abandonados, substitua manualmente -o pelo novo nó da versão (desculpe).
Commit SAM2ULTRA, SAM2VIDEOULTRA, ObjectDeTectorfl2, ObjectDeTectoryoloCoworld, ObjectDeTectoryolo8, ObjectDeteCTorMask e BboxJoin nós. Faça o download de modelos de BaidunetDisk ou huggingface.co/kijai/sam2-safetetens e copie para a pasta ComfyUI/models/sam2 , baixe modelos de BaidunetDisk ou Googledrive e copie para a pasta ComfyUI/models/yolo-world . Esta atualização apresenta novas dependências, reinstale o pacote de dependência.
Comprometo o nó RandomEnerator, usado para gerar números aleatórios dentro de um intervalo especificado, com saídas de int, flutuação e booleana, suportando a geração de lote de diferentes números aleatórios por lote de imagem.
Comprometer o nó EVF-samultra, é a implementação do EVF-SAM em conformyui. Faça o download dos arquivos de modelo de BaidunetDisk ou Huggingface/EVF-SAM2, Huggingface/EVF-Sam para a pasta ComfyUI/models/EVF-SAM (salve os modelos em seus respectivos subdiretos). Devido à introdução do pacote de novas dependências, após a atualização do plug -in, reinstale os pacotes de dependência.
Comprometo ImageTaggersAve e ImageAutocropv3 nós. Usado para implementar o fluxo de trabalho de corte e marcação automático para o conjunto de treinamento (o fluxo de trabalho image_tagger_save.json está localizado no diretório do fluxo de trabalho).
CONFIGURAÇÃO O NODE CHECKMASKV2, adicionado o método simple para detectar máscaras mais rapidamente.
Comprometo os nós de imagem e imageerel compostos para compor várias imagens em uma tela.
NumberCalCulatorv2 e NumberCalculator Adicione o método min e max .
Otimize a velocidade de carregamento do nó.
FLORENCE2IMAGE2PROMPT Adicione suporte para modelos thwri/CogFlorence-2-Large-Freeze e thwri/CogFlorence-2.1-Large . Faça o download dos arquivos de modelo de BaidunetDisk ou Huggingface/Cogflorence-2-Large-Freeze e Huggingface/Cogflorence-2.1-Large e copie-o para pasta ComfyUI/models/florence2 .
Mesclar ramificar de ClownSharkbatwing "Use GPU para o modo de mistura de cores", a velocidade de algumas camadas combina mais de dez vezes.
Commitem os nós Florence2ultra, Florence2Image2PROMPT e Loadflorence2Model.
Nó transparentbackgroundultra Adicione um novo suporte de modelo. Faça o download do arquivo de modelo de acordo com as instruções.
Commitam nós SegformerulTrav2, SegfromerFashionPiPine e SegformerClothesPipline, usados para segmentação de roupas. Faça o download do arquivo de modelo de acordo com as instruções.
CONFIR install_requirements.bat e install_requirements_aki.bat , uma solução de clique para instalar pacotes de dependência.
Comprometer nó transparentbackgroundultra, ele remove o plano de fundo com base no modelo transparente para trás.
Altere o modelo Vitmatte do Ultra Node para uma chamada local. Faça o download de todos os arquivos do modelo Vitmatte para a pasta ComfyUI/models/vitmatte .
O nó getColortoneV2 Adicione o método mask à opção de seleção de cores, que pode obter com precisão a cor principal e a cor média dentro da máscara.
ImagesCaleByAspectratioV2 Nó Adicione a opção "Background_Color".
LUT Aplicar adicione a opção "Força".
CONMIar o nó Autoadjustv2, adicione entrada opcional de máscara e suporte para vários modos automáticos de ajuste de cores.
Devido à próxima descontinuação dos serviços de visão Gemini-Pro, o PromptTagger e o Prompmbellish adicionaram a API "Gemini-1.5-Flash" para continuar usando.
A Ultra Nodes adicionou a opção de executar VitMatte no dispositivo CUDA, resultando em um aumento de 5 vezes na velocidade de corrida.
Comprometo o nó do Queuestop, usado para encerrar a operação da fila.
Otimize o desempenho do método VitMate para Ultra Nodes ao processar a imagem de tamanho grande.
CropByMaskv2 Adicione a opção para arredondar o tamanho do corte por múltiplos.
Comprometer o nó de máscara de seleção, detecta se a máscara contém áreas eficazes suficientes. CONMIar o nó HSVValue, ele converte valores de cores em valores de HSV.
BooleanOperatorv2, NumberCalCulatorv2, Inteiro, Float, nós booleanos Adicione saída String para produzir o valor como uma string para uso com o SwitchCase.
Comprometer o nó do switchcase, alterna a saída com base na sequência correspondente. Pode ser usado para qualquer tipo de comutação de dados.
CONFIGURAR NODE STRING, usado para emitir uma string. É o nó simplificado da caixa de texto.
Comprometo se o nó , alterna a saída com base na entrada condicional booleana. Pode ser usado para qualquer tipo de comutação de dados.
CONFIGURAÇÃO Nó StringCondition, determina se o texto contém ou não contém uma substring.
Nó de compromete NumberCalCulatorv2 , Adicione a enésima operação raiz. Comprometer o nó booleanOperatorv2, aumentando maior/menor que, maior/menos do que um julgamento lógico igual. Os dois nós podem acessar entradas numéricas e podem inserir valores numéricos no nó. Nota: A entrada numérica tem precedência. Os valores nos nós não serão válidos quando houver entrada.
Comprometer o nó SD3NegativeConditioning, encapsular os quatro nós de condição negativa no SD3 em um nó separado.
Nó da imageremovealpha Adicionar entrada de máscara opcional.
CONMIDE o nó HlfrequencyDetailRestore, usando filtragem de baixa frequência e preservação de alta frequência para restaurar os detalhes da imagem, a fusão é melhor.
Compreenda os nós AddGrain e Maskgrain, adicione ruído a uma imagem ou máscara.
COMITAR FILMV2 NODE, o método Fastgrain é adicionado com base no anterior, e a velocidade de geração de ruído é 10 vezes mais rápida.
Comprometer o nó ImageTOMASK, ele pode ser convertido em máscara. Suporta a conversão de qualquer canal nos modos LAB, RGBA, YUV e HSV em máscaras, fornecendo ajuste em escala de cores. Suporte a entrada da máscara opcional para obter máscaras que incluem apenas peças válidas.
As opções de BlackPoint e Whitepoint em alguns nós foram alteradas para ajuste deslizante para uma tela mais intuitiva. Inclua MaskEdedulTradetailv2, segmento de tudo o que é rmBGULTRAV2 , PersonMaskultrav2 , birefnetultra, segformerb2clothesultra, máscara de mistura e níveis.
ImagesCalerestoreV2 e ImagesCaleByAspectratioV2 Adicione o método total_pixel para dimensionar imagens.
Comprometer o nó MediaPipeFacialSigment, usado para segmentar as características faciais, incluindo sobrancelhas esquerda e direita, olhos, lábios e dentes.
Comprometer o nó BatchSelector , usado para recuperar imagens ou máscaras especificadas de imagens ou máscaras em lote.
O Layerutility cria novos subdiretos, como Systemio, Dados e Prompt. Alguns nós são classificados em subdiretos.
Comprometo o nó MaskByColor, gerar uma máscara com base na cor selecionada.
CONMIar o nó loadpsd, ele leu o formato PSD e as imagens da camada de saída. Observe que este nó requer a instalação do pacote de dependência psd_tools , se ocorrer um erro durante a instalação de PSD_tool, como ModuleNotFoundError: No module named 'docopt' , faça o download do WHL e o manual do DOCOPT.
COMPRIMENTO SEGFORMERB2CLOTHESULTRA Nó, ele costumava segmentar roupas de caracteres. O código de segmentação do modelo é de Starthua, graças ao autor original.
O nó SaveImagePlus adiciona o fluxo de trabalho de saída à função JSON, suporta %date e %time para incorporar a data ou a hora do caminho e o nome do arquivo e adiciona o interruptor de visualização.
CONFIGURAÇÃO SAVEIMAGEPLUS Nó , ele pode personalizar o diretório em que a imagem é salva, adicione um registro de data e hora ao nome do arquivo, selecione o formato Salvar, defina a taxa de compactação de imagem, defina se deve salvar o fluxo de trabalho e, opcionalmente, adicionar marcas d'água invisíveis à imagem.
Compreenda os nós AddBlindwatermark, Showblindwatermark, adicionar marca d'água invisível e marca d'água decodificada à imagem. CONMIar CreateQRCode, DecodeqrCode nós, ele pode gerar imagens de código bidimensional e decodificar códigos bidimensionais.
ImagesCalerestoreV2, ImagesCaleByAspectratiov2, ImageAutocropv2 Adicionar opções para width e height , que podem especificar largura ou altura como valores fixos.
Comprometo o nó do purgevram, limpe o vram e a RAM.
CONFIGURAÇÃO AUTOADJUST NODE, ele pode ajustar automaticamente o contraste da imagem e o equilíbrio de branco.
Compromete o nó RGBValue para produzir o valor da cor como um único valor decimal de r, g, B. Essa idéia é de vxinhao, obrigado.
Comprometo o nó de semente para produzir o valor da semente. O ImageMaskScaleas, ImagesCaleBysPetratio, ImagesCaleBysPectratiov2, ImagesCaleStore, ImagesCalereStoreV2 Os nós aumentam width , a saída height .
Nó de comprometimento Nó, ele pode atingir a mesma função de ajuste dos níveis de cores que o Photoshop.Sharp & Soft Adicione a opção "None".
Comitir BlendifMask Node, este nó coopera com imgaeBlendv2 ou imagemBlendAdvancev2 para obter a mesma mistura se função que o Photoshop.
Comprometo os nós colortemperature e colorida, usados para ajustar a temperatura da cor e o equilíbrio da cor da imagem.
Adicione novos tipos de modo de mistura V2 entre imagens. Agora suporta até 30 modos de mistura. O novo modo de mistura está disponível para todas as versões V2 que suportam nós de modo misto, incluindo ImageBlend V2, ImageBlendAdvance V2, DropShadow V2, InnersHadow V2, Outerglow V2, Innerglow V2, AVC V2, ColorOverlay V2, GradientOverlay V2.
Parte do código do BlendMode V2 é de nós virtuosos para conformamente. Graças aos autores originais.
Comprometer o nó YOLOV8DETECT.
COMIT QWENIMAGE2PROMPT Nó, este nó é reembalagem do UForm-Gen2 Qwen Node da Comfyui_vlm_nodes, graças ao autor original.
Comprometer booleanOperator, NumberCalculator, TextBox, Integer, Float, BooleanNodes. Esses nós podem executar operações matemáticas e lógicas.
Comprometer estendCanvasv2 nó , suporta entrada de valor de cor.
Comprometo o nó Autobrightness, ele pode ajustar automaticamente o brilho da imagem.
CreateGradientMask Node Add center Option.
Comprometer o nó getColortonev2, pode selecionar as cores principais e médias para o fundo ou o corpo.
Comprometer o nó do Filter de ImageWarward, pode filtrar imagens de baixa qualidade.
Ultra nós Adicionar o método VITMatte(local) , você pode escolher esse método para evitar acessar o huggingface.co se já baixou o modelo antes.
Comprometer o nó de efeito hdr, ele aprimora a faixa dinâmica e o apelo visual das imagens de entrada. Este nó é reembalagem dos efeitos de HDR (Superbeast.ai).
CONFIGURAR CROPBOXRESOLVE NODE.
Comprometo o nó birefnetultra, ele usando o modelo Birefnet para remover o fundo tem melhor capacidade de reconhecimento e detalhes de borda ultra-alta.
Comprometer o nó ImageAutocropv2, ele pode optar por não remover o plano de fundo, suportar a entrada da máscara e escalar por tamanho lateral longo ou curto.
Confirmar o nó ImageHub, suporta até 9 conjuntos de saída de imagem e comutação de máscara e suporta saída aleatória.
Comprometer o nó TextJoin.
Comprometer o Nó Prompt Recoflish. Ele produziu palavras rápidas polidas e suporta a entrada de imagens como referências.
Os nós dos Ultra foram totalmente atualizados para a versão V2, com a adição do método de processamento de borda Vitmatte, que é adequado para lidar com áreas semi -transparentes. Inclua os nós do MaskEdedulTradetailv2, segmento de tudo o que o rMBGULTRAV2 e o pessoal do pessoal.
Comprometer a cor do nó de sombra e destaque, ele pode ajustar a cor das partes escuras e brilhantes separadamente. Comprometer o nó de máscara de sombra e destaque, ele pode gerar máscara para áreas escuras e brilhantes.
Comprometer o nó CropByMaskv2, com base no nó original, ele suporta a entrada crop_box , tornando conveniente cortar camadas do mesmo tamanho.
CONMIar o nó SimpleTextImage, ele gera imagens e máscaras simples de tipógrafos a partir do texto. Este nó faz referência a algumas das funcionalidades e código de zho-zho-zho/conforfyui-text_image-compósito.
COMPRIMENTO Nó de prompt Tagge , Inferência Os avisos com base na imagem. e pode substituir a palavra -chave para o prompt (precisa se candidatar à chave da API do Google Studio). Atualize o ColorImagev2 e GradientImagev2 , Suporte ao usuário Personalize os tamanhos de predefinição e a entrada size_as.
Cometer nó Lama, ele pode apagar objetos da imagem com base na máscara. Este nó é reembalagem do IOPAINT.
Commitem os nós Imageremovealpha e ImageCombinealpha, o canal alfa da imagem pode ser removido ou mesclado.
CONFIGURA PERAGESCALERESTOREV2 e ImagesCaleByAspectratioV2 nós, suporta dimensões de imagens para tamanhos de borda longa ou curta especificados.
Compromete o nó de máscara de pessoa, gera máscaras para o rosto, cabelo, pele do corpo, roupas ou acessórios do retrato. O código do modelo para este nó vem do A-Person-Mask-Generator.
Comprometer nó LightLeak, este filtro simula o efeito de vazamento de luz do filme.
Comprometer nó de filme, este filtro simular o grão, a borda escura e a borda borrada do filme, suporta o mapa de profundidade de entrada para simular o desfocagem. É reorganizar e encapsular de Digitaljohn/Comfyui-Propost.
Compreenda o nó ImageAutocrop, projetado para gerar materiais de imagem para modelos de treinamento.
Comprometer o nó ImagesCaleByAspectratio, ele pode ser dimensionado de imagem ou máscara de acordo com a proporção de quadros.
Corrija o bug da gradação de cores no LUT Aplique a renderização do nó, e este nó agora suporta o espaço de cores do log. *Carregue o arquivo LUT de log dedicado para a imagem do espaço de cores do log.
Comprometer o nó CreateGradientMask. Compreenda os nós do LayerimageTransform e LayerMasktransform.
COMITAR Nó MaskEdgeulTradetail, processa máscaras ásperas em arestas ultra finas. Nó de exposição ao compensação.
Cometer nó nítido e suave, ele pode aprimorar ou suavizar os detalhes da imagem. COMITAR Nó MaskByDiFferent, compara duas imagens e produz uma máscara. COMPRIMENTO SEGENSONAL TIMPOLTRA, Melhore a qualidade das bordas da máscara. *Se o segmento não estiver instalado, você precisará baixar manualmente o modelo.
Todos os nós têm imagens em lote totalmente suportadas, proporcionando conveniência para a criação de vídeos. (O nó CropByMask suporta apenas cortes do mesmo tamanho. Se um lote mask_for_crop inserido, os dados da primeira folha serão usados.)
Comprometer os nós RembGultra e PixelsPread melhoraram significativamente a qualidade da máscara. *REMBGULTRA Requer download do modelo manual.
Comprometer nó textimage, ele gera imagens e máscaras de texto.
Adicione novos tipos de modo de mistura entre imagens. Agora suporta até 19 modos de mistura. Adicione color_burn, color_dodge, linear_burn, linear_dodge, sobreposição, soft_light, hard_light, vivid_light, pin_light, linear_light e hard_mix . O modo de mistura recém -adicionado é aplicável a todos os nós que suportam o modo de mistura.
Compromete o nó do filtro de mapa colorido para criar um efeito pseudo -colorido de mapa de calor.
Comprometer nós de aquarela e de pele de pele - esses são filtros de imagem que geram efeitos de suavidade em aquarela e pele.
COMPRIMENTO O NODE DE IMAGESHIFT Para mudar a imagem e produzir uma máscara de costura de deslocamento, tornando conveniente criar texturas contínuas.
Comprometo o nó ImageMaskScaleas para ajustar a imagem ou o tamanho da máscara com base na imagem de referência.
Comprometo o nó ImagesCaleRestore para trabalhar com o CropByMask para trabalhos de luxo e reparo locais.
Compreenda os nós CropByMask e RestoreCropBox. A combinação desses dois pode cortar e redesenhar parcialmente a imagem antes de restaurá -la.
Comprometer o nó ColorAdapter, que pode ajustar automaticamente o tom de cor da imagem.
Comprometer o nó Maskstroke, ele pode gerar traços de contorno de máscara.
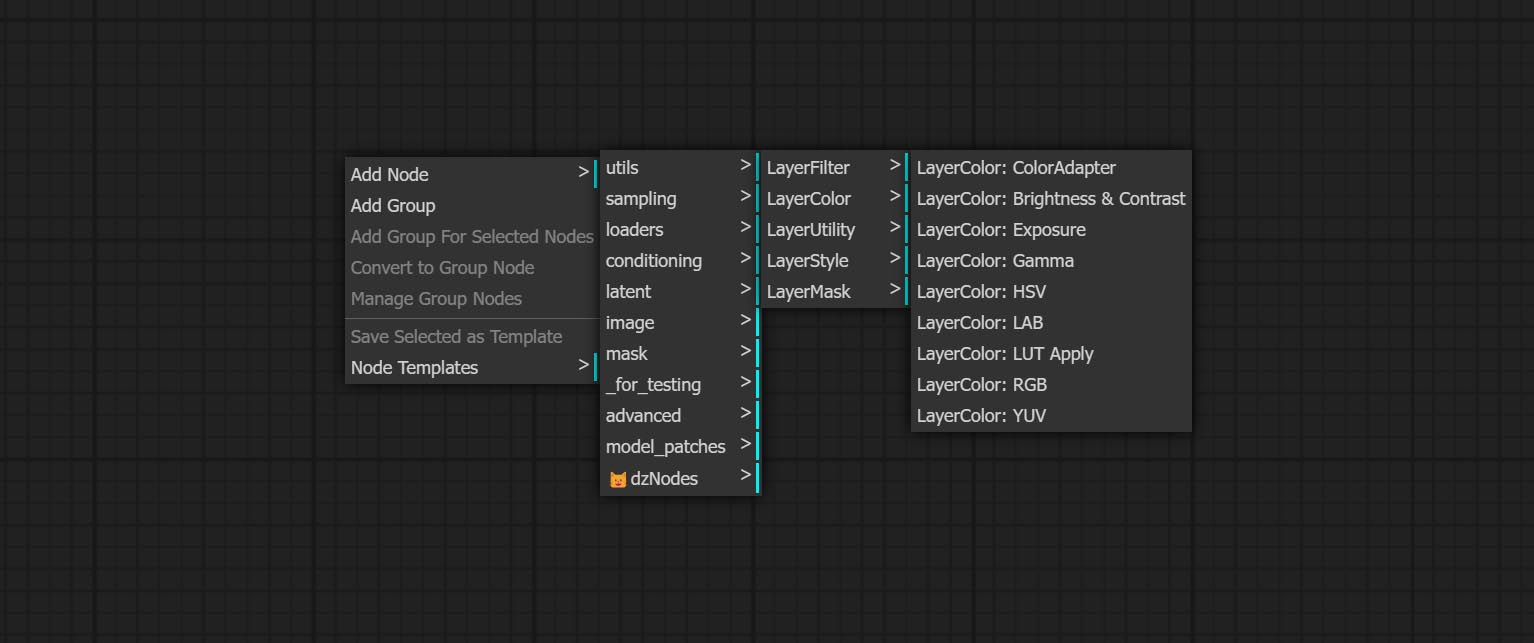
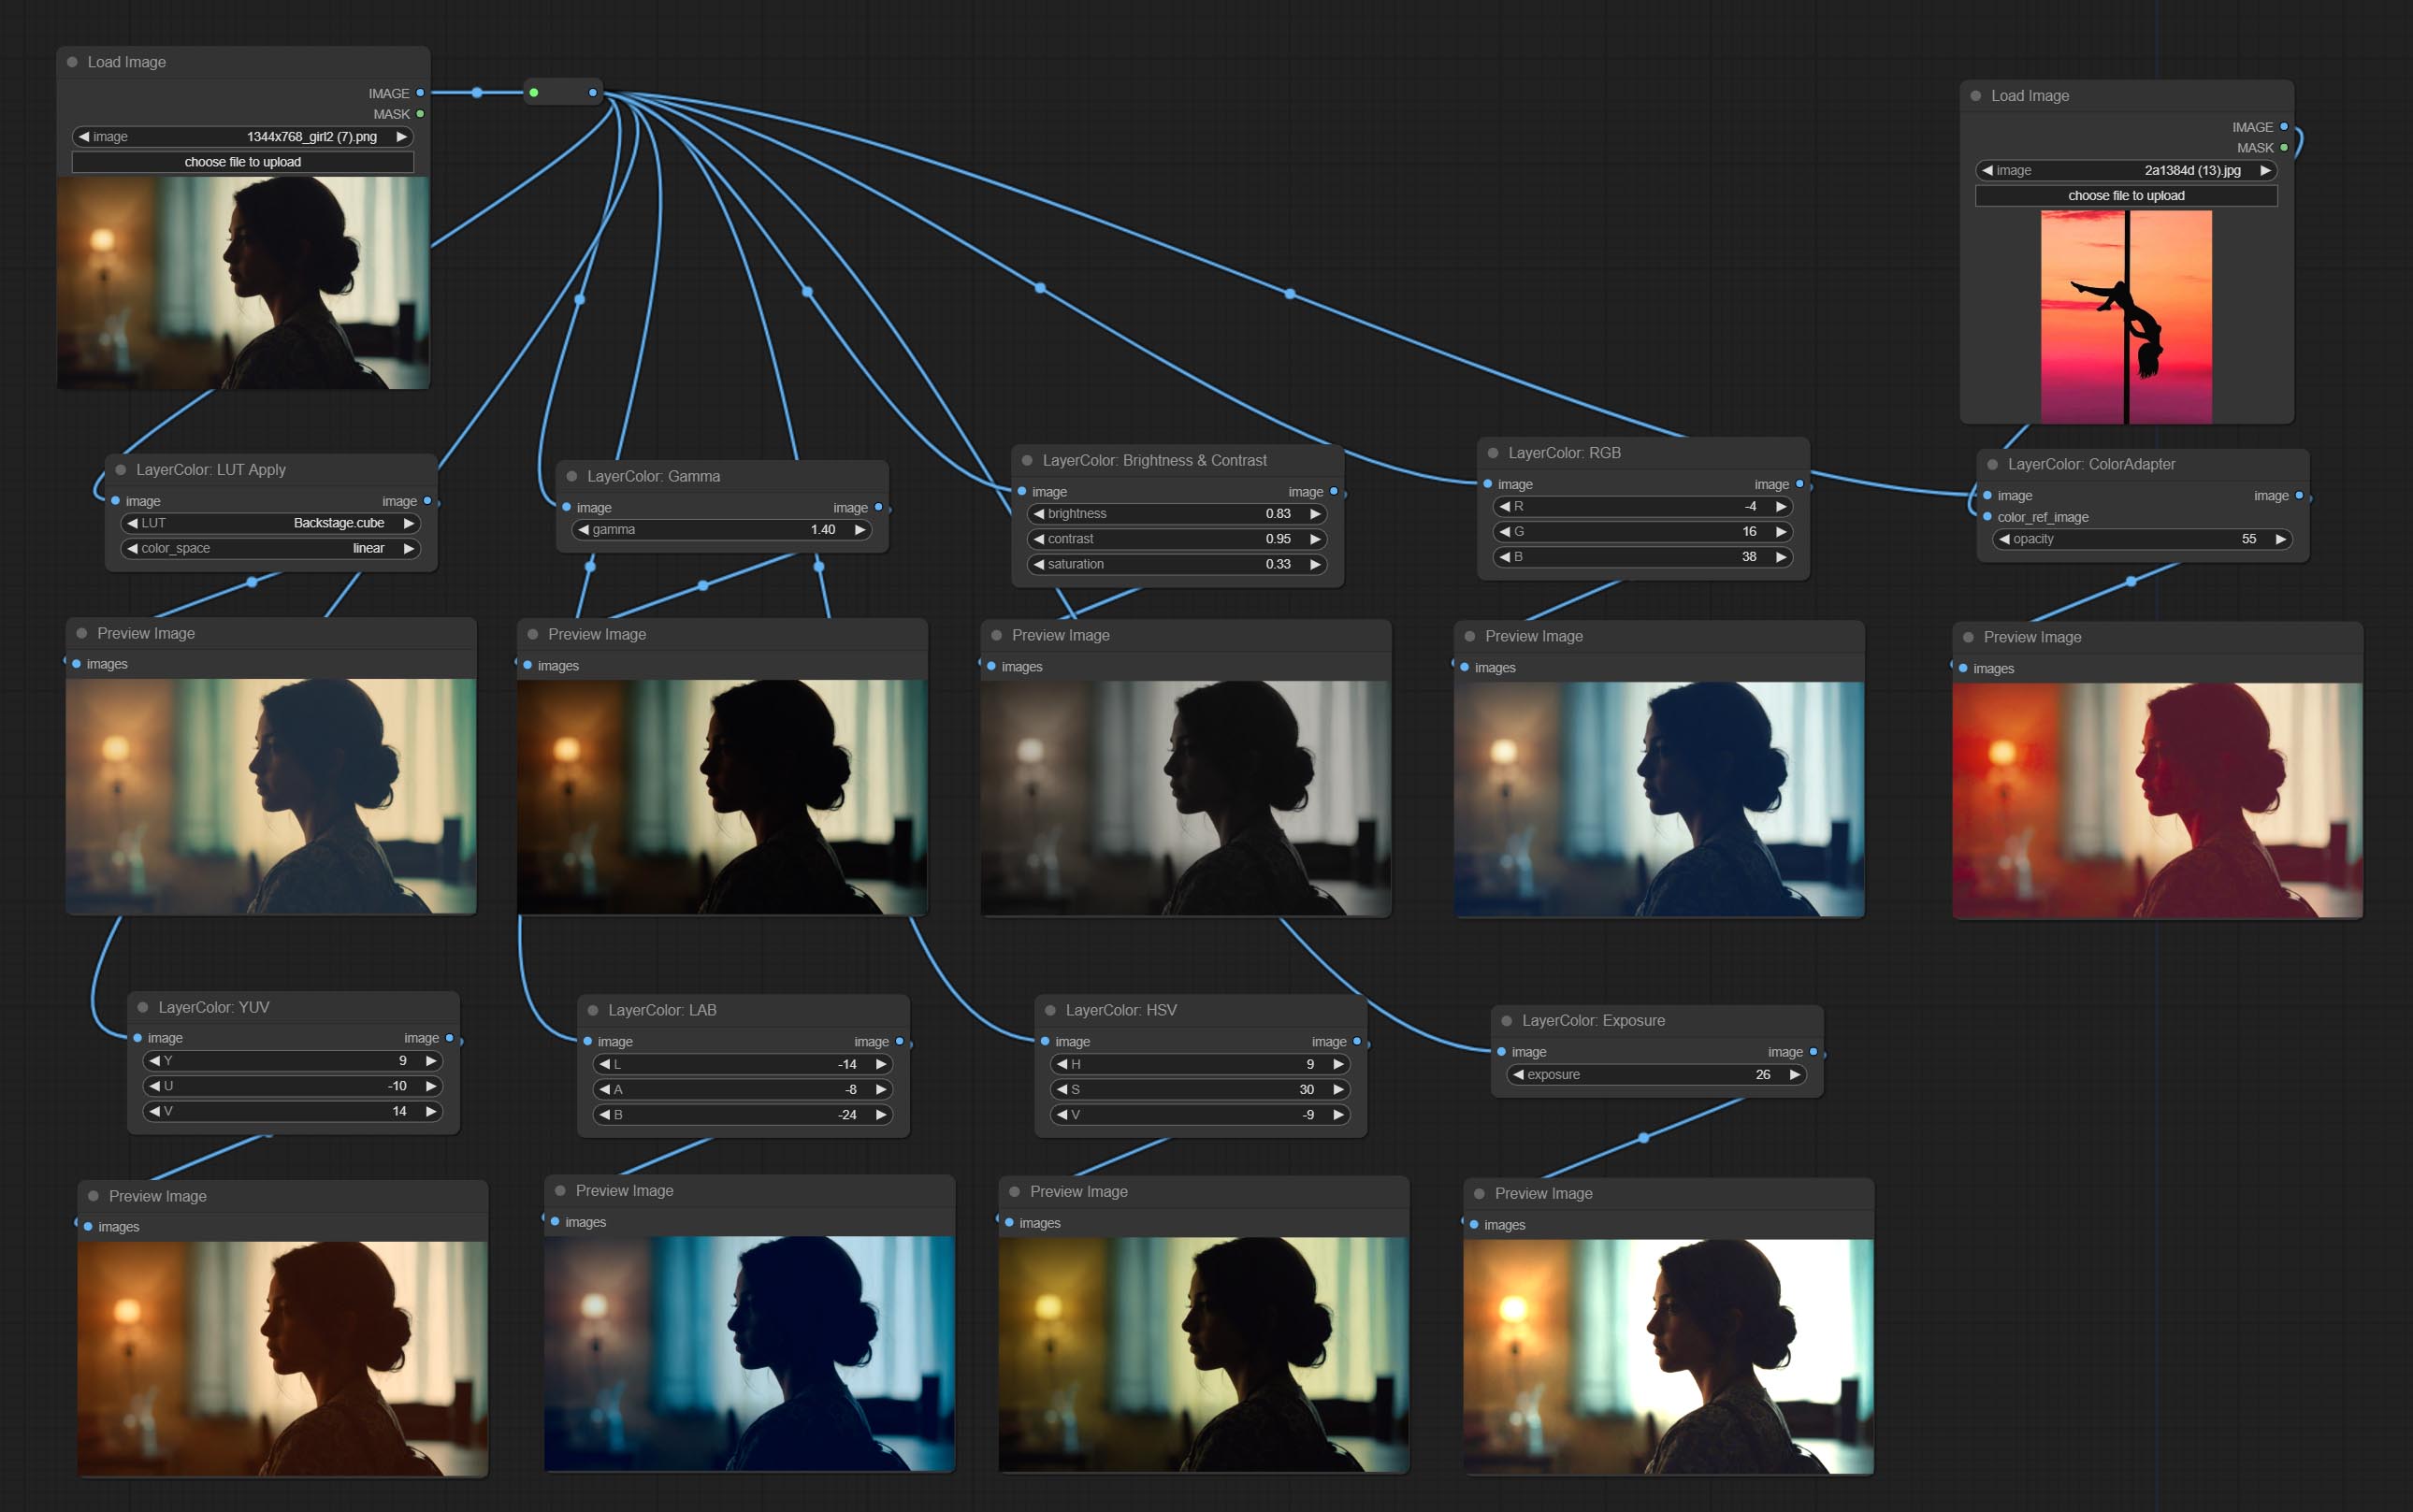
Adicione o grupo LayerColor Node, usado para ajustar a cor da imagem. Inclui LUT Aplicar, gama, brilho e contraste, RGB, YUV, LAB ADN HSV.
Compreenda os nós ImageChannelsplit e ImageChannelMerge.
CONFIGURAÇÃO Nó MaskMotionBlur.
Comprometer o nó Softlight.
O nó de cometer canal -shake, que é filtro, pode produzir efeito de deslocamento de canal semelhante ao logotipo do Tiktok.
COMITAR O NODE MASCADORIA, pode criar um gradiente na máscara.
Comprometer o nó getColortone, pode obter a cor principal ou a cor média da imagem. Comprometa os nós MaskGrow e Maskedgeshrink.
CONFIGURAÇÃO O NODE MASCOBOTDETECT, que pode detectar automaticamente a posição através da máscara e gerá -la para o nó composto. Compreenda o nó XY a porcentagem para converter coordenadas absolutas em porcentagem de coordenadas. Comprometer nó GaussianBlur. Compreenda o nó getImagesize.
Comprometo o nó ExtendCanvas.
CONFIGURA IMAGEBLENDADVANCE NODE. Este nó permite a síntese de imagens e camadas de fundo de tamanhos diferentes, proporcionando uma experiência de síntese mais livre. Compreenda o nó PrintInfo como um auxílio de depuração do fluxo de trabalho.
Confirme nós ColorImage e GradientImage, usados para gerar imagens coloridas sólidas e gradientes.
Comprometer nós GradientOverlay e ColorOverlay. Adicione o julgamento de entrada da máscara inválida e ignore -o quando a máscara inválida estiver inserida.
Comprometer nós Innerglow, Innershadow e MotionBlur.
Renomeando todos os nós concluídos, os nós são divididos em 4 grupos: LayersTyle, LayerMask, Layerutility, Layerfilter. Os fluxos de trabalho que contêm nós de versão antigos precisam ser substituídos manualmente por novos nós de versão.
O nó OutergLow passou por modificações significativas adicionando opções de brilho , Light_Color e GLOW_COLOR .
Comprometo o nó de maskinvert.
Comprometer o Nó do Colorpick.
Cometer nó de golpe.
CONFIGURAÇÃO NODE MASSKPREVIEW.
Comprometer o nó ImageOpacity.
O Layer_mask não é uma entrada obrigatória agora. É permitido usar camadas e máscaras com formas diferentes, mas o tamanho deve ser consistente.
Comprometer o nó ImageBlend.
Compromete o nó externo.
Comprometo o nó DropShadow.
Descrição
Os nós são divididos em 5 grupos de acordo com suas funções: LayersTyle, Layercolor, LayerMask, Layerutility e Layerfilter.
- Os nós do LayersTyle fornecem estilos de camada que imitam o Adobe Photoshop.

- O grupo LayColor Node fornece funcionalidade de ajuste de cores.
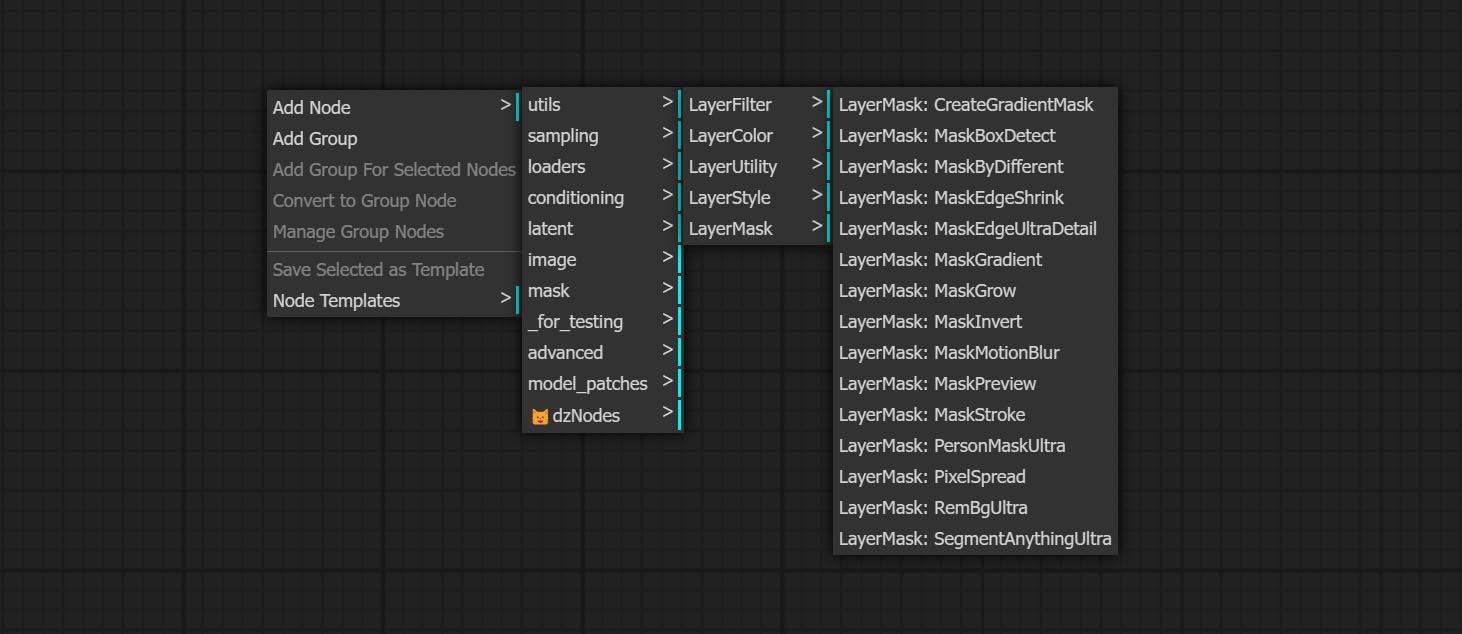
- Os nós do LayerMask fornece ferramentas de assistência de máscara.
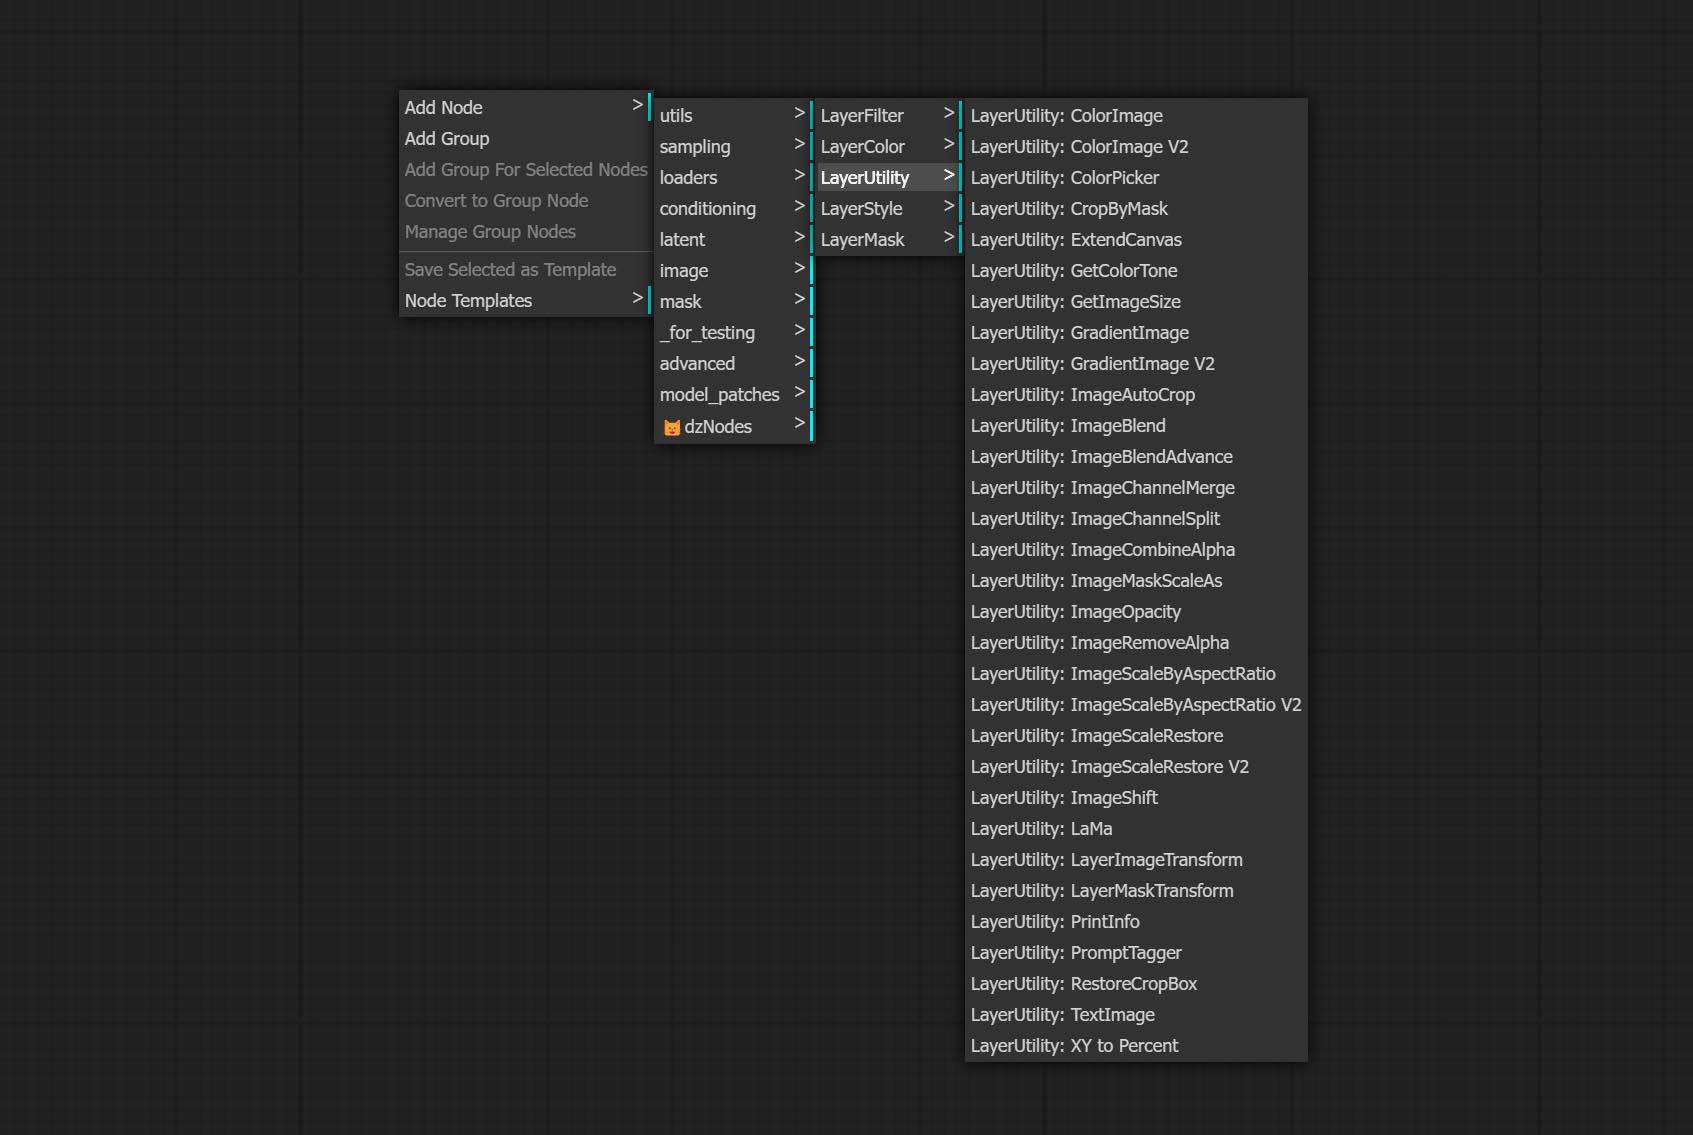
- Os nós de camada fornece nós auxiliares relacionados a ferramentas de composição de camadas e fluxos de trabalho.
- Os nós do LayerFilter fornece filtros de efeito de imagem.
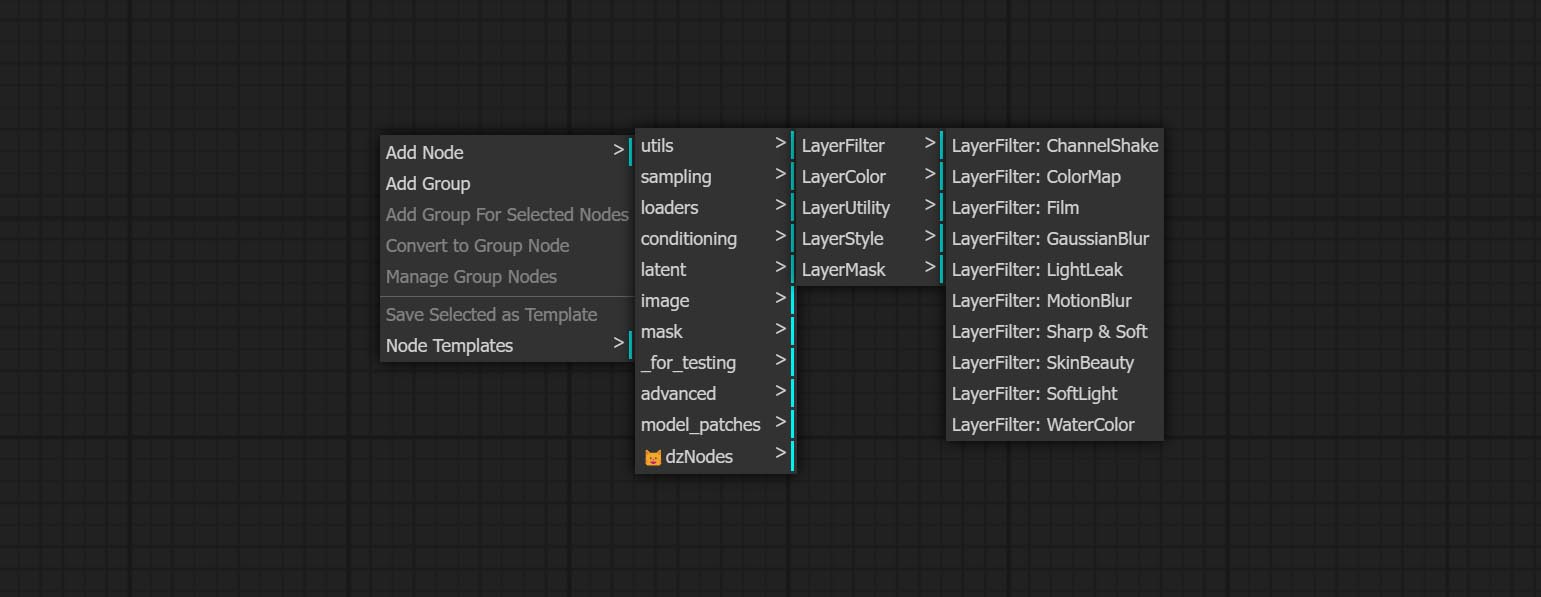
LayersTyle
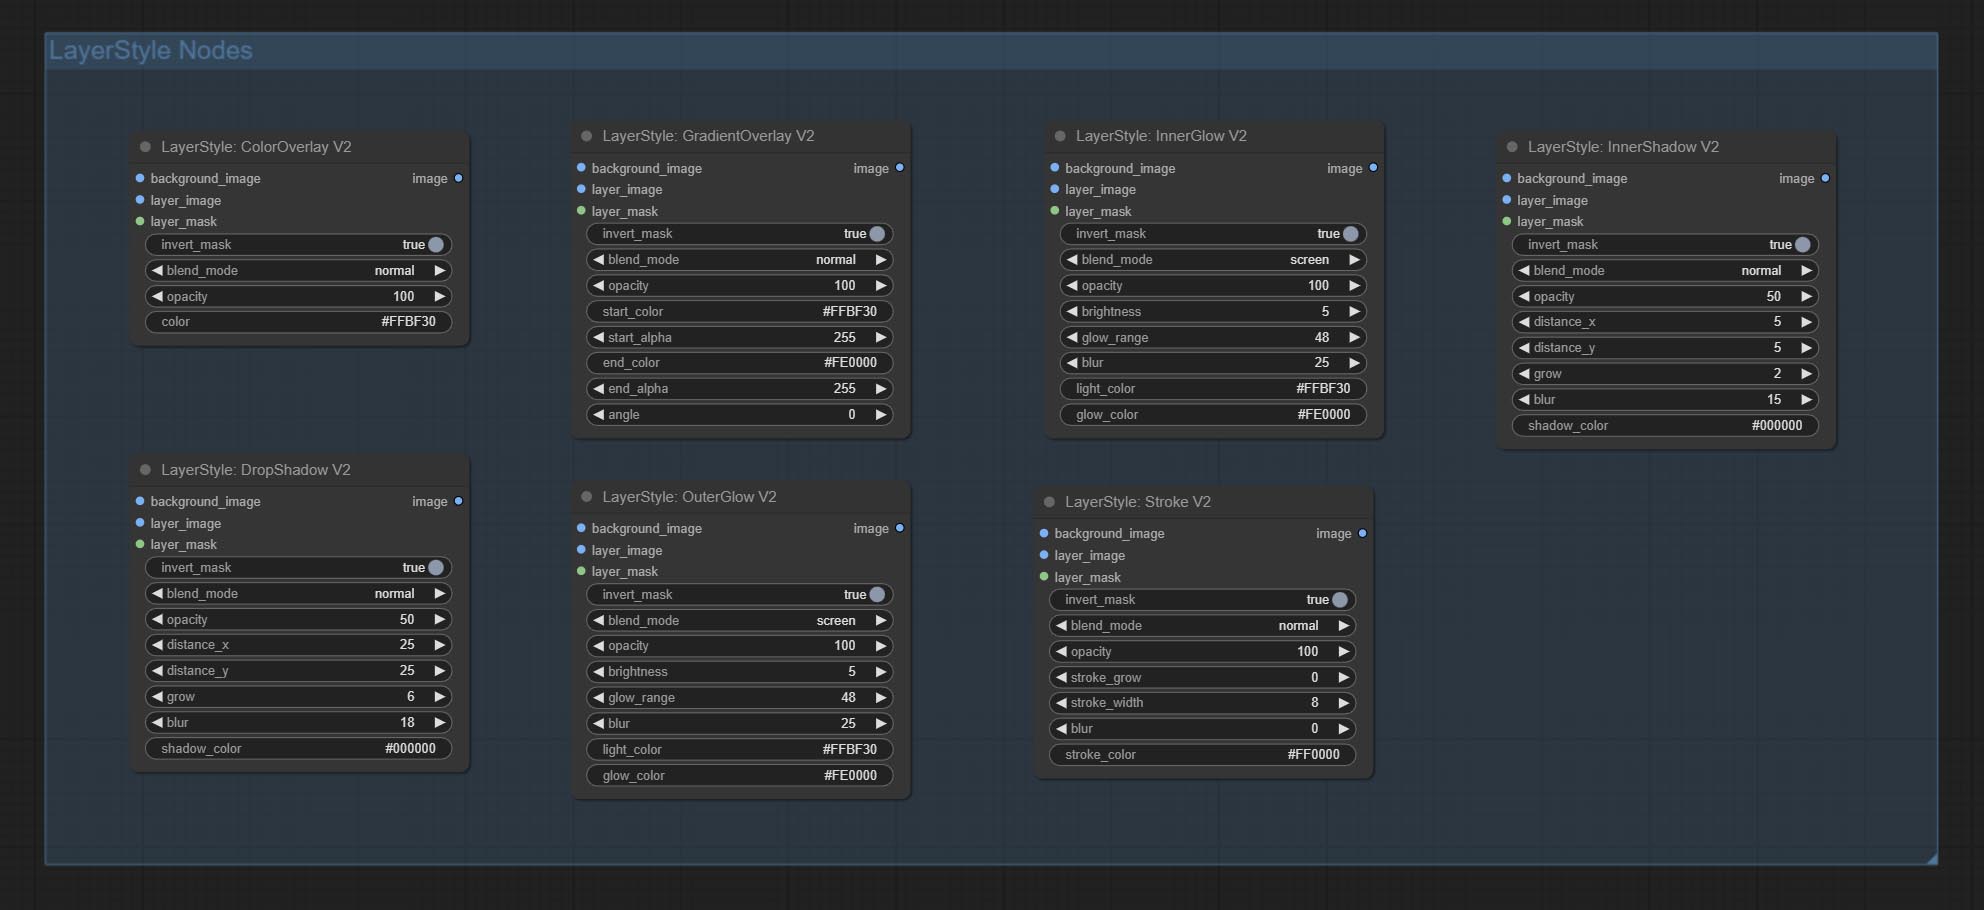
Dropshadow
Gerar sombra 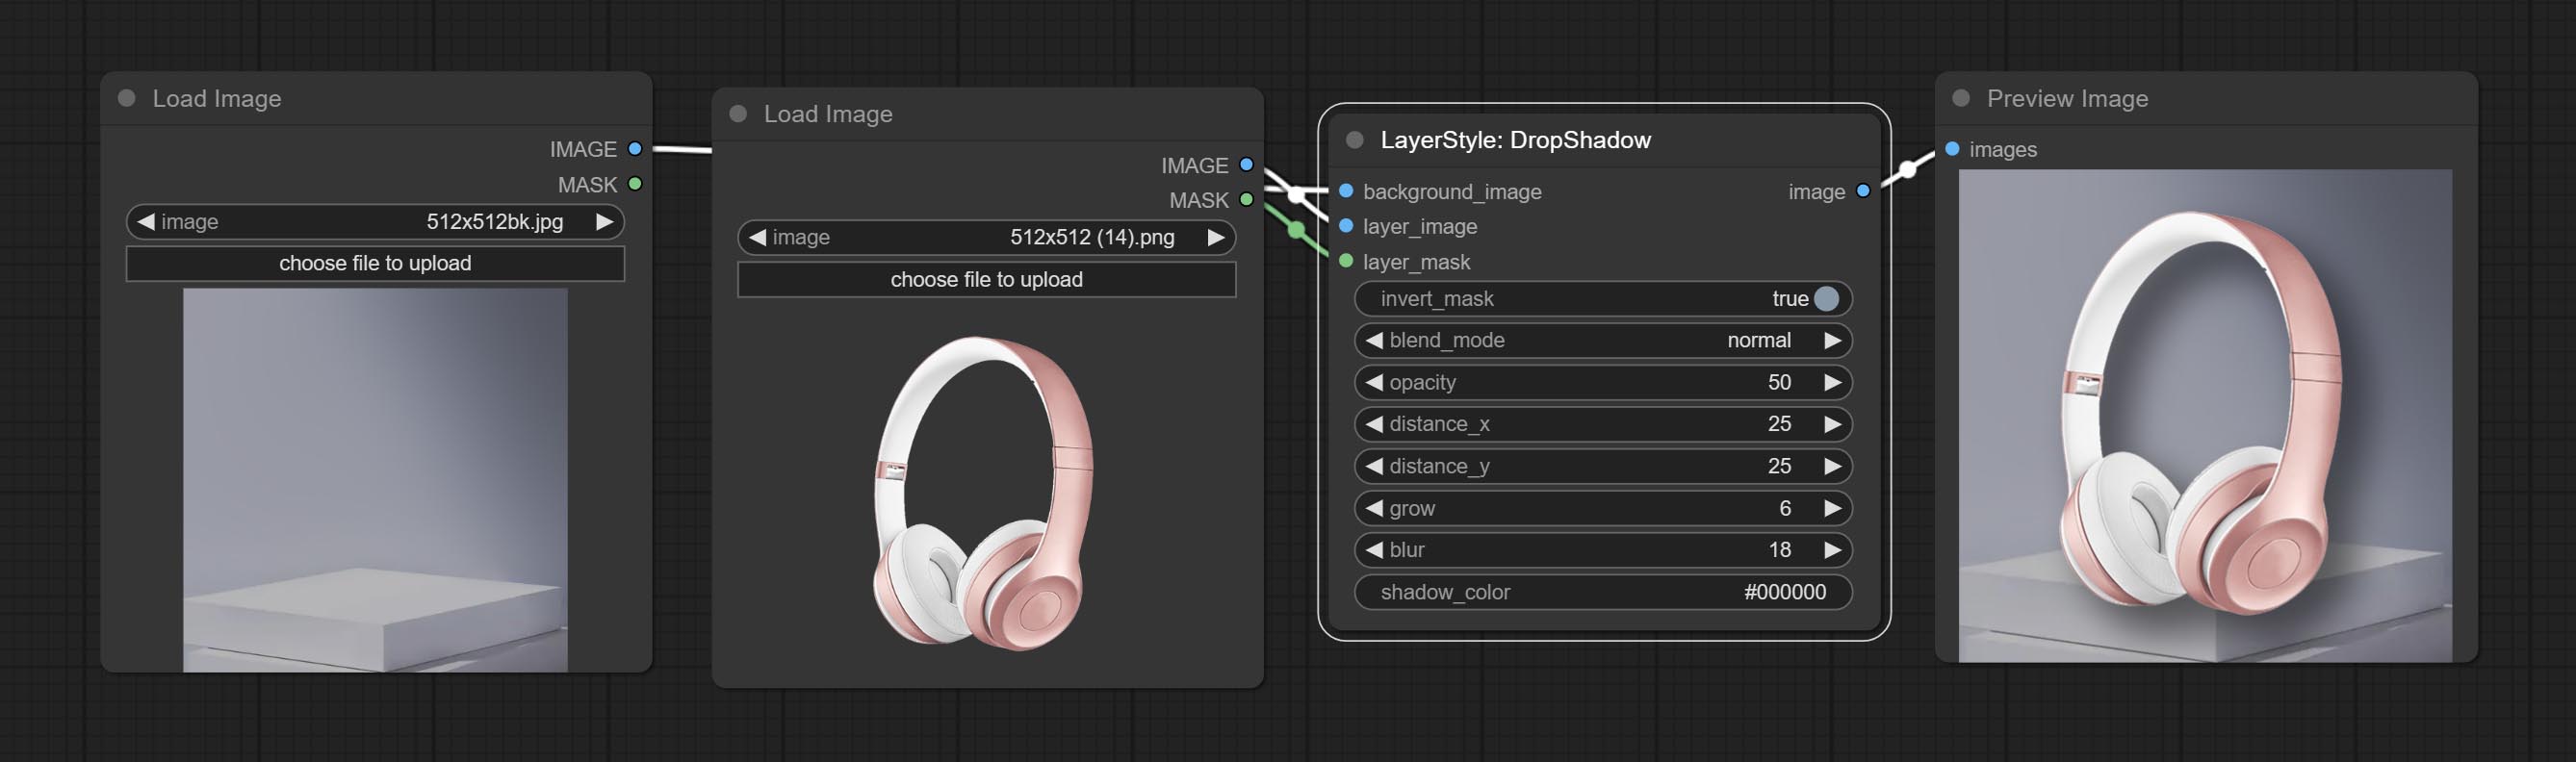
Opções do nó: 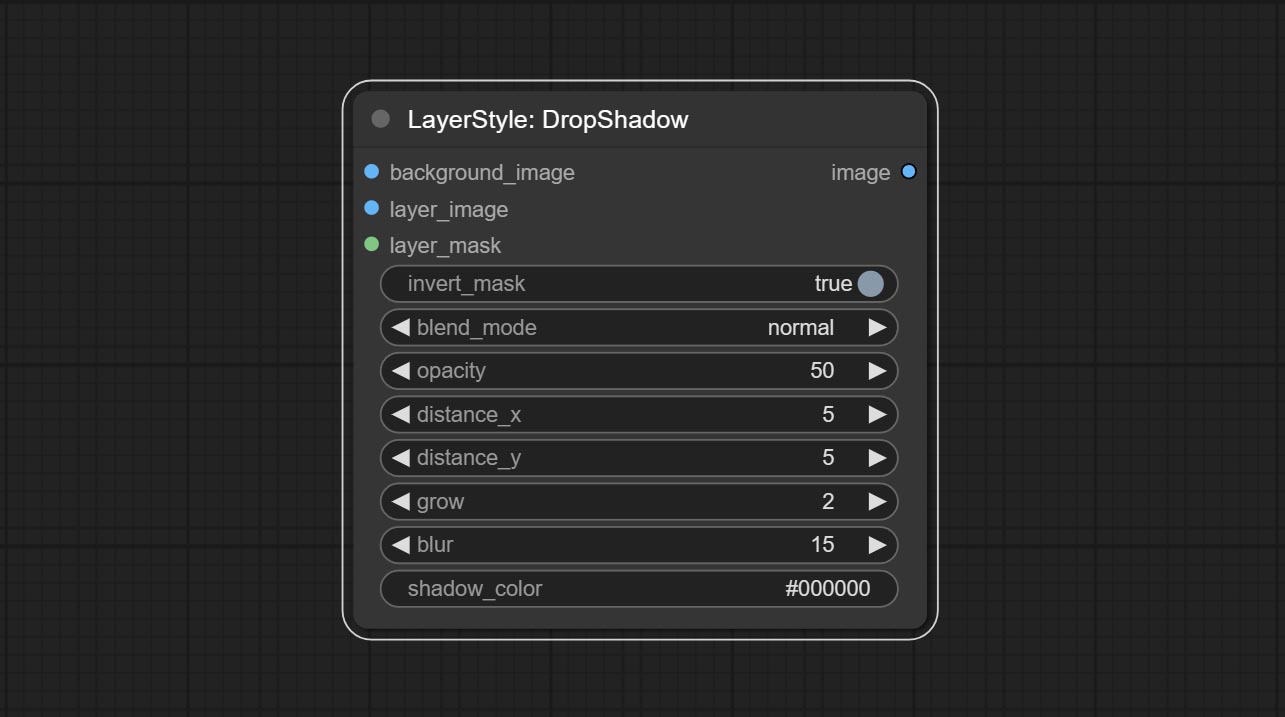
- Background_Image 1 : A imagem de fundo.
- Layer_image 1 : imagem da camada para composto.
- Layer_Mask 1,2 : Máscara para Layer_image, as sombras são geradas de acordo com sua forma.
- Invert_mask: se deve reverter a máscara.
- Blend_mode 3 : Modo de mistura de sombras.
- Opacidade: opacidade da sombra.
- Distance_x: deslocamento horizontal da sombra.
- Distance_Y: deslocamento vertical da sombra.
- Crescer: amplitude de expansão de sombra.
- Blur: Nível de desfoque de sombra.
- Shadow_color 4 : Cor da sombra.
- observação
Exterterglow
Gerar brilho externo 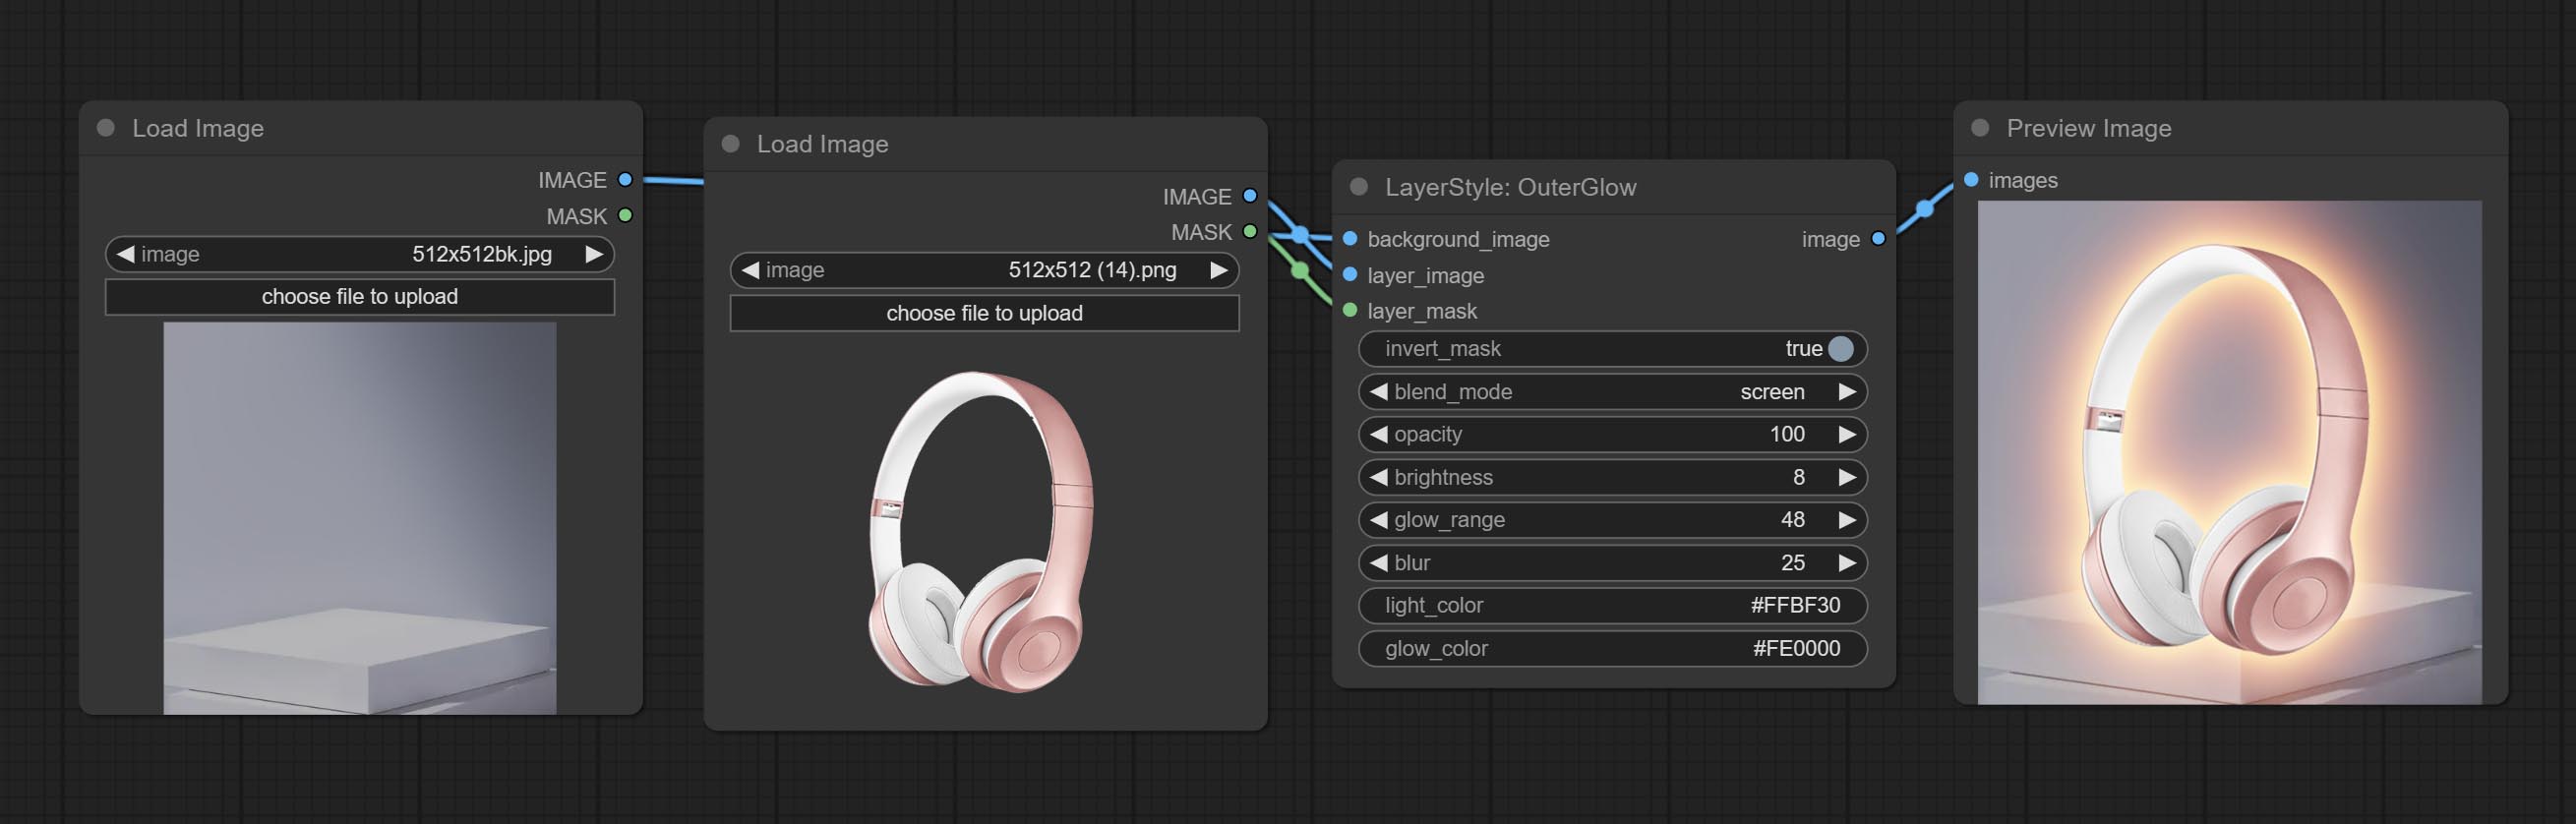
Opções do nó: 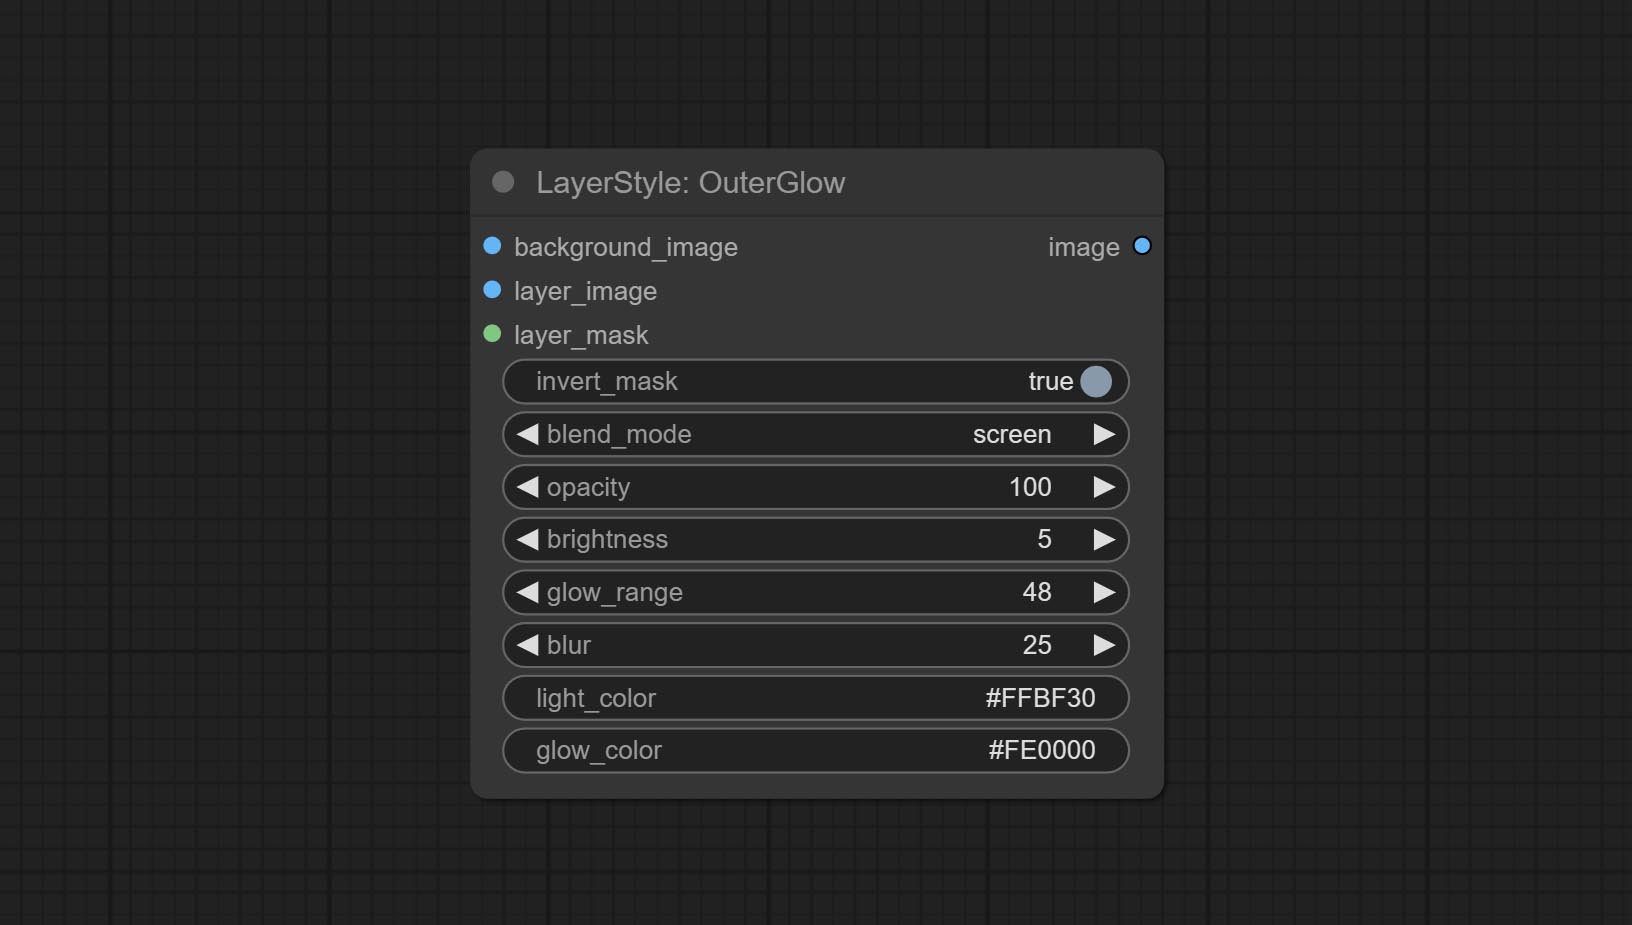
- Background_Image 1 : A imagem de fundo.
- Layer_image 1 : imagem da camada para composto.
- Layer_Mask 1,2 : Máscara para Layer_image, Grow são gerados de acordo com sua forma.
- Invert_mask: se deve reverter a máscara.
- Blend_mode 3 : Modo de mistura de brilho.
- Opacidade: Opacidade do brilho.
- Brilho: Luminância da luz.
- GLOW_RANGE: Faixa de brilho.
- Blur: Blur of Glow.
- Light_color 4 : Centro Parte da parte do brilho.
- GLOW_COLOR 4 : cor da parte da borda da cor do brilho.
- observação
Innershadow
Gerar sombra interior 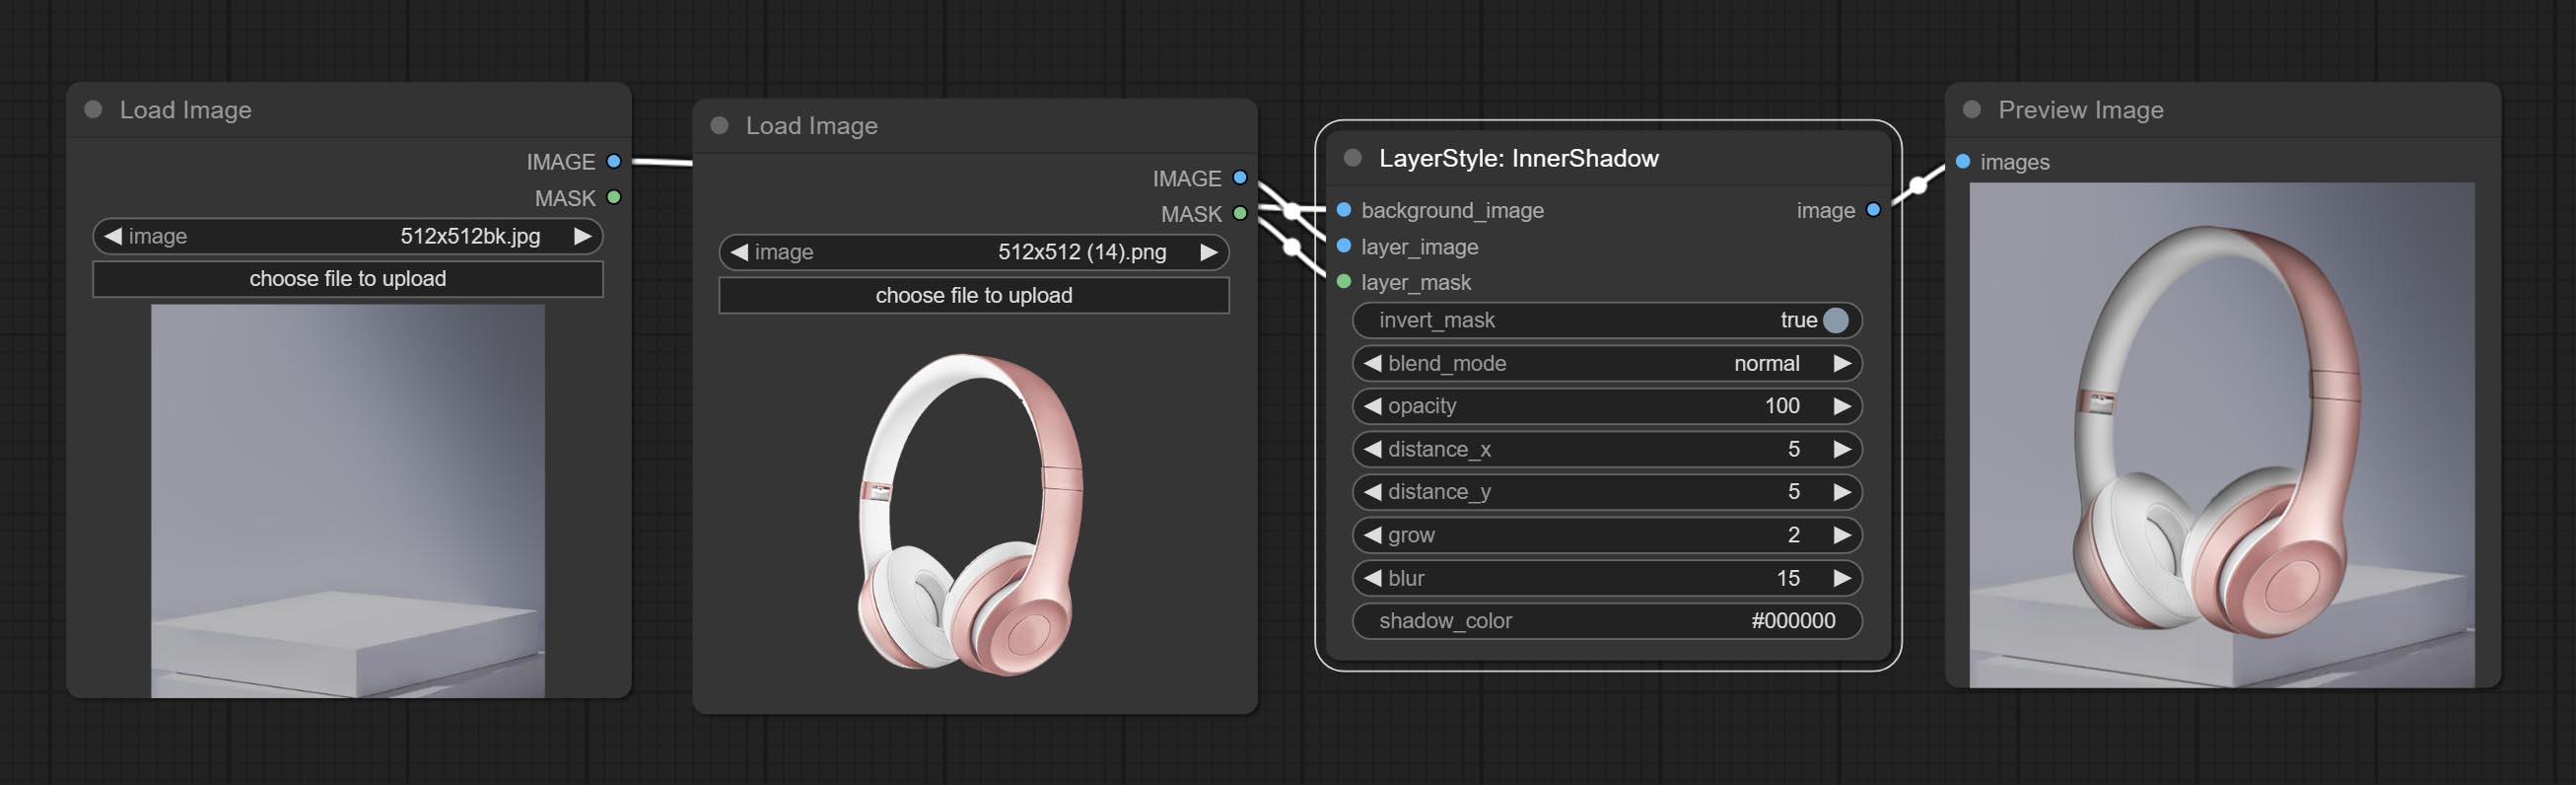
Opções do nó: 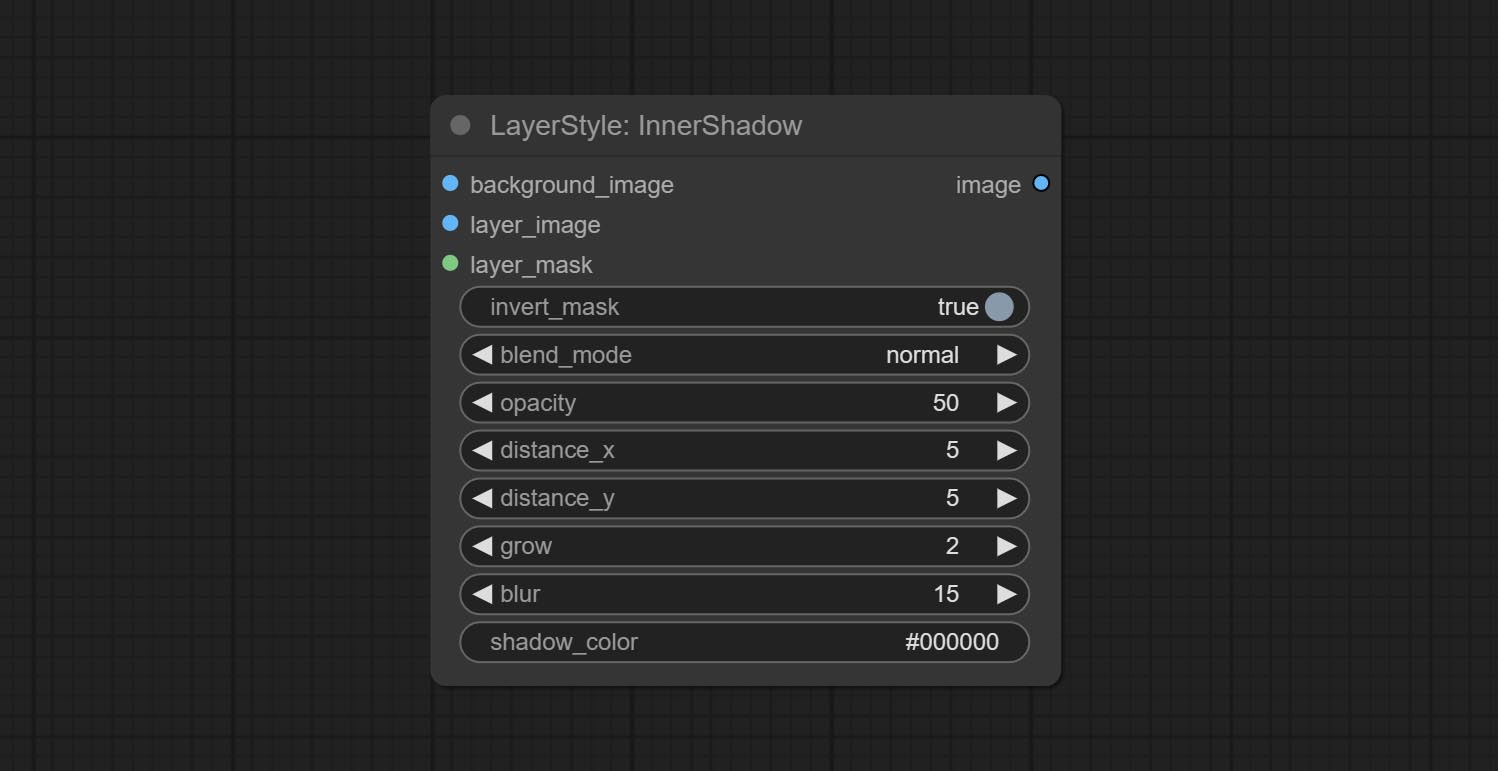
- Background_Image 1 : A imagem de fundo.
- Layer_image 1 : imagem da camada para composto.
- Layer_Mask 1,2 : Máscara para Layer_image, as sombras são geradas de acordo com sua forma.
- Invert_mask: se deve reverter a máscara.
- Blend_mode 3 : Modo de mistura de sombras.
- Opacidade: opacidade da sombra.
- Distance_x: deslocamento horizontal da sombra.
- Distance_Y: deslocamento vertical da sombra.
- Crescer: amplitude de expansão de sombra.
- Blur: Nível de desfoque de sombra.
- Shadow_color 4 : Cor da sombra.
- observação
Innerglow
Gerar brilho interno 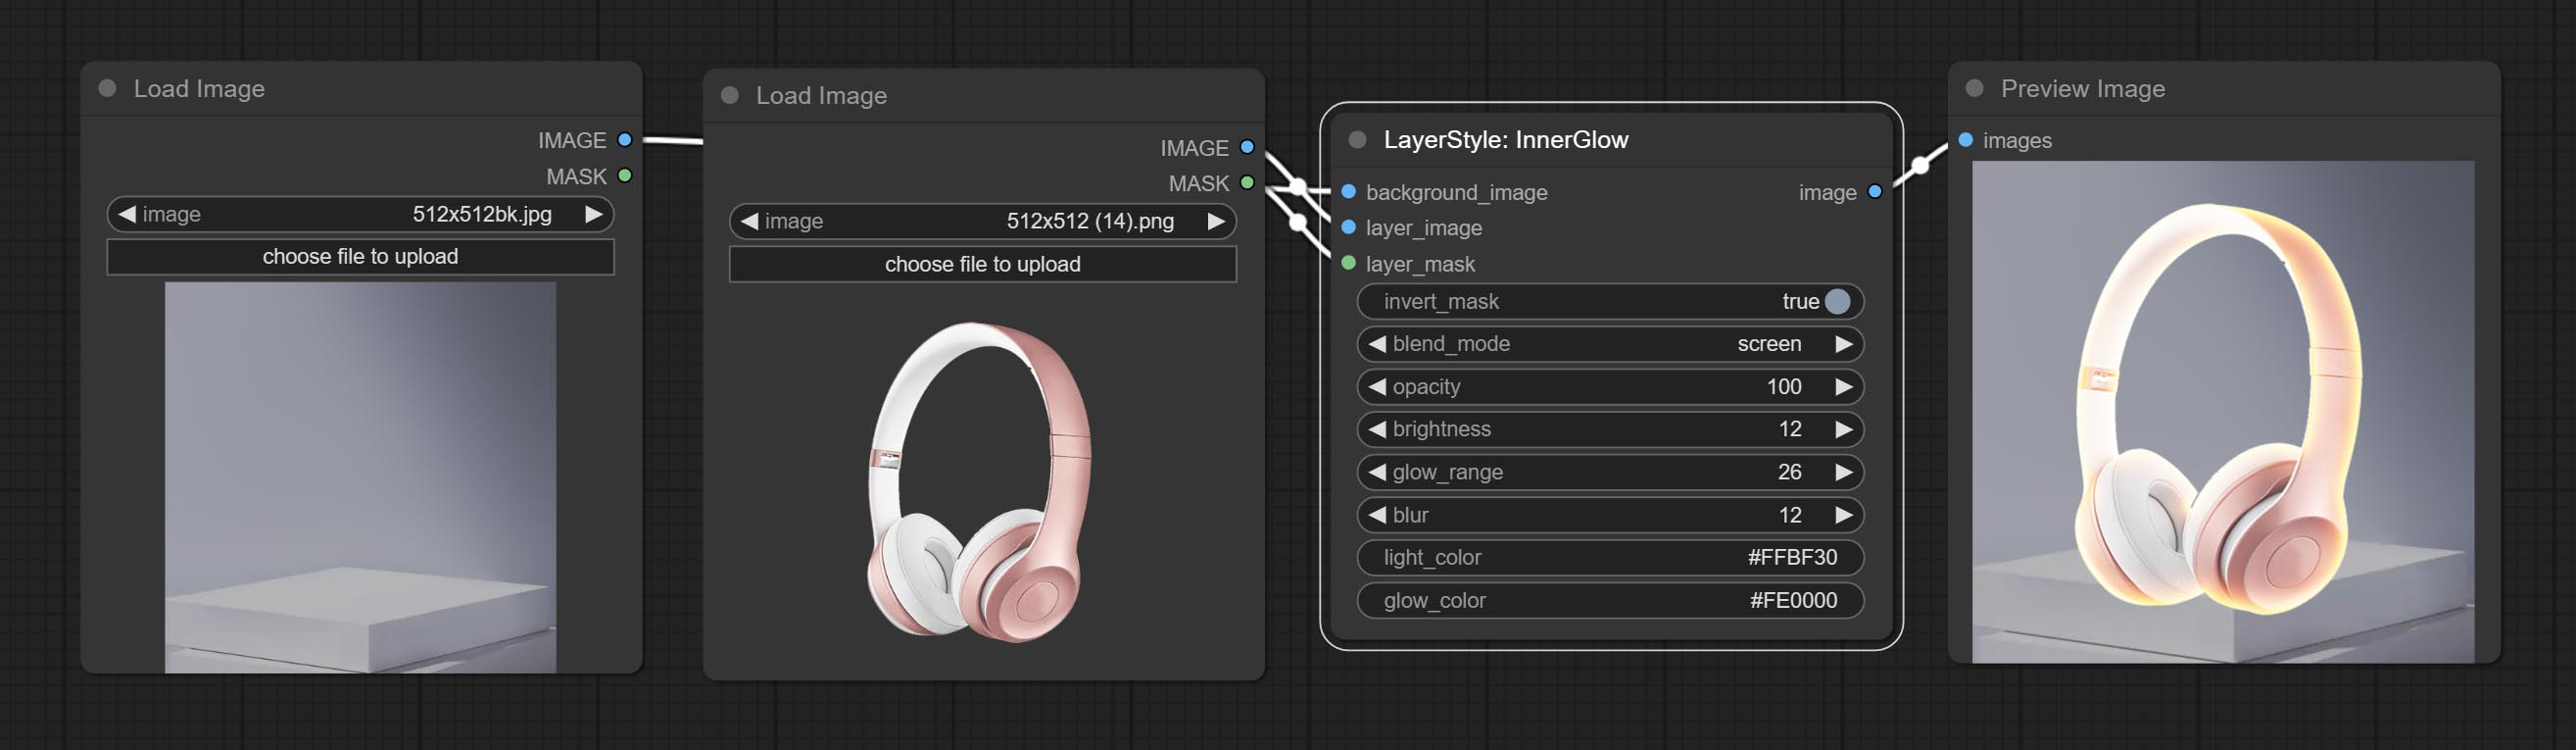
Opções do nó:
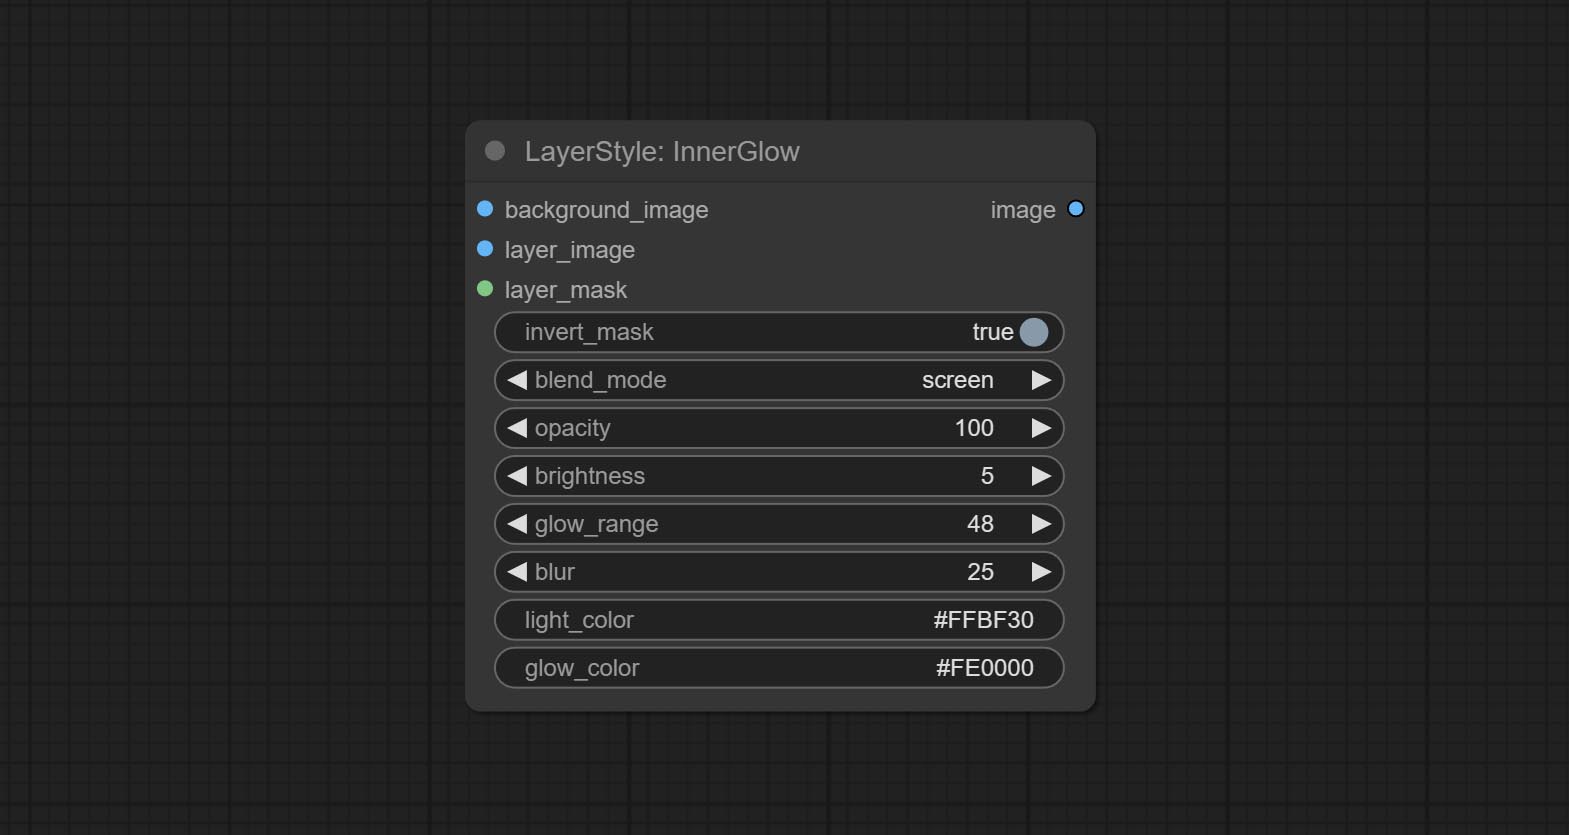
- Background_Image 1 : A imagem de fundo.
- Layer_image 1 : imagem da camada para composto.
- Layer_Mask 1,2 : Máscara para Layer_image, Grow são gerados de acordo com sua forma.
- Invert_mask: se deve reverter a máscara.
- Blend_mode 3 : Modo de mistura de brilho.
- Opacidade: Opacidade do brilho.
- Brilho: Luminância da luz.
- GLOW_RANGE: Faixa de brilho.
- Blur: Blur of Glow.
- Light_color 4 : Centro Parte da parte do brilho.
- GLOW_COLOR 4 : cor da parte da borda da cor do brilho.
- observação
AVC
Gerar um golpe de camada。 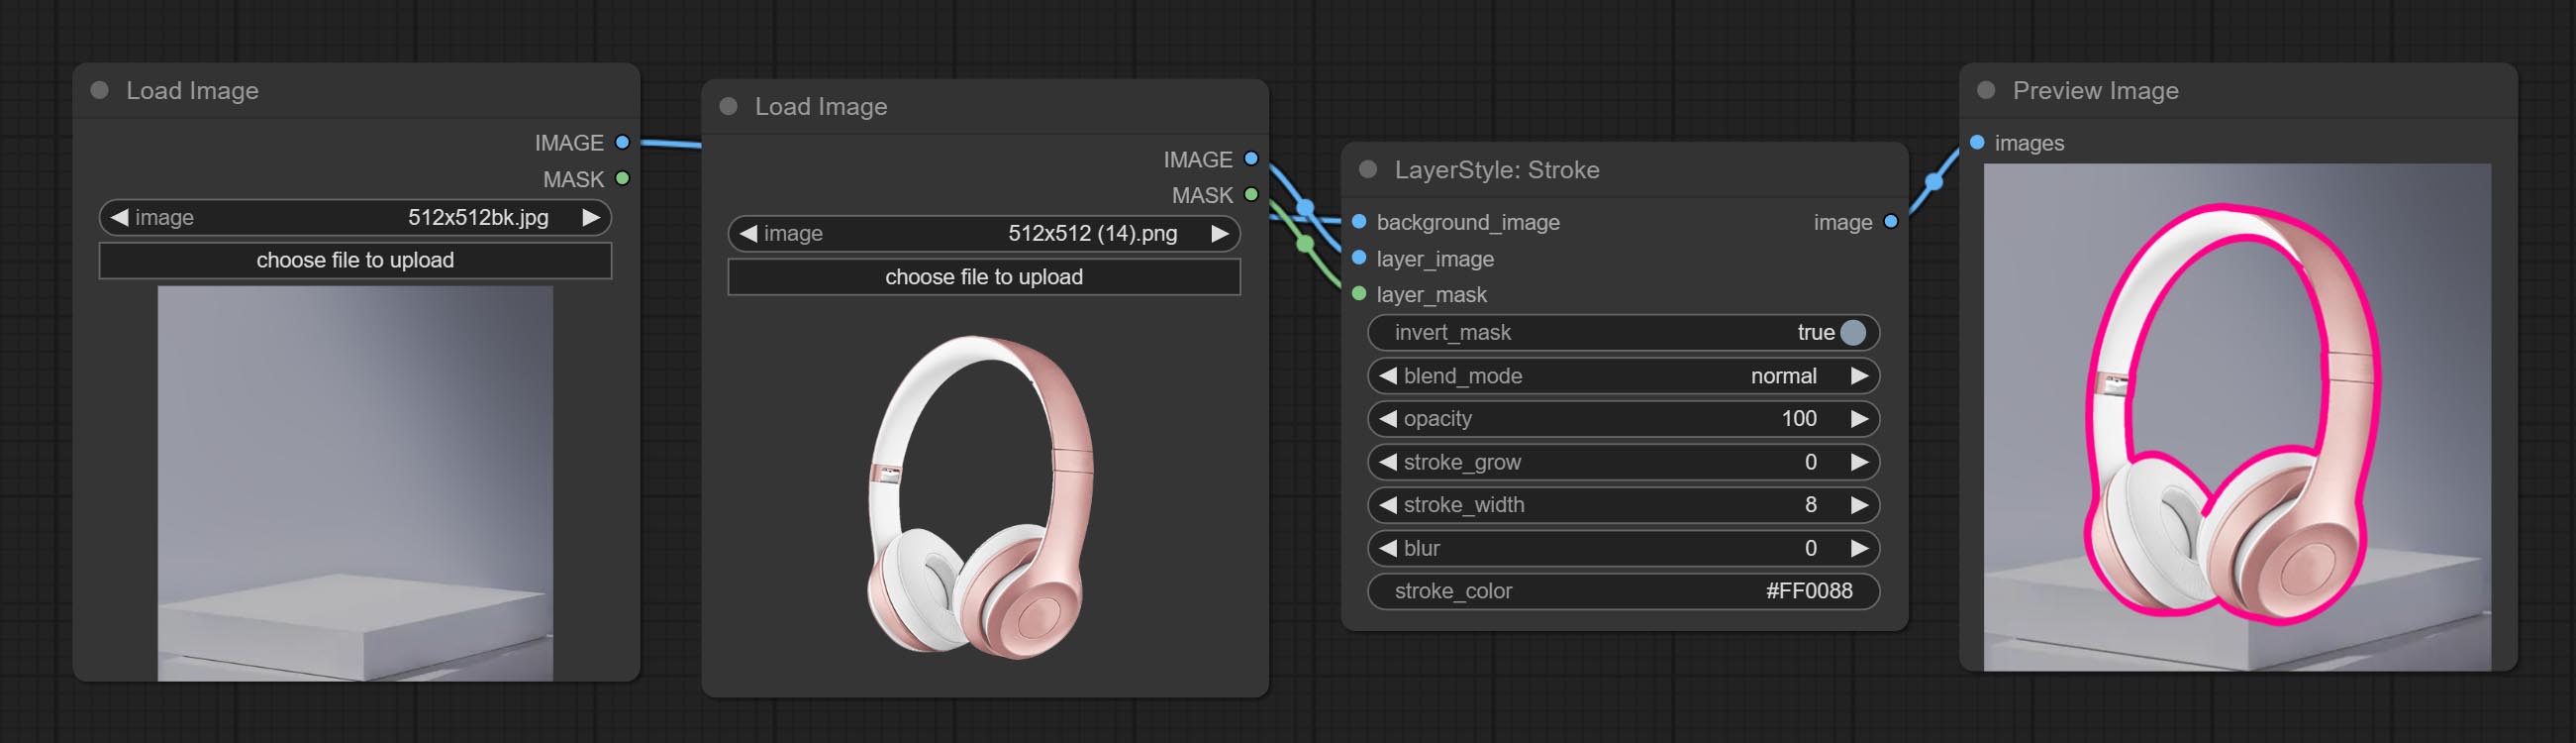
Opções do nó:
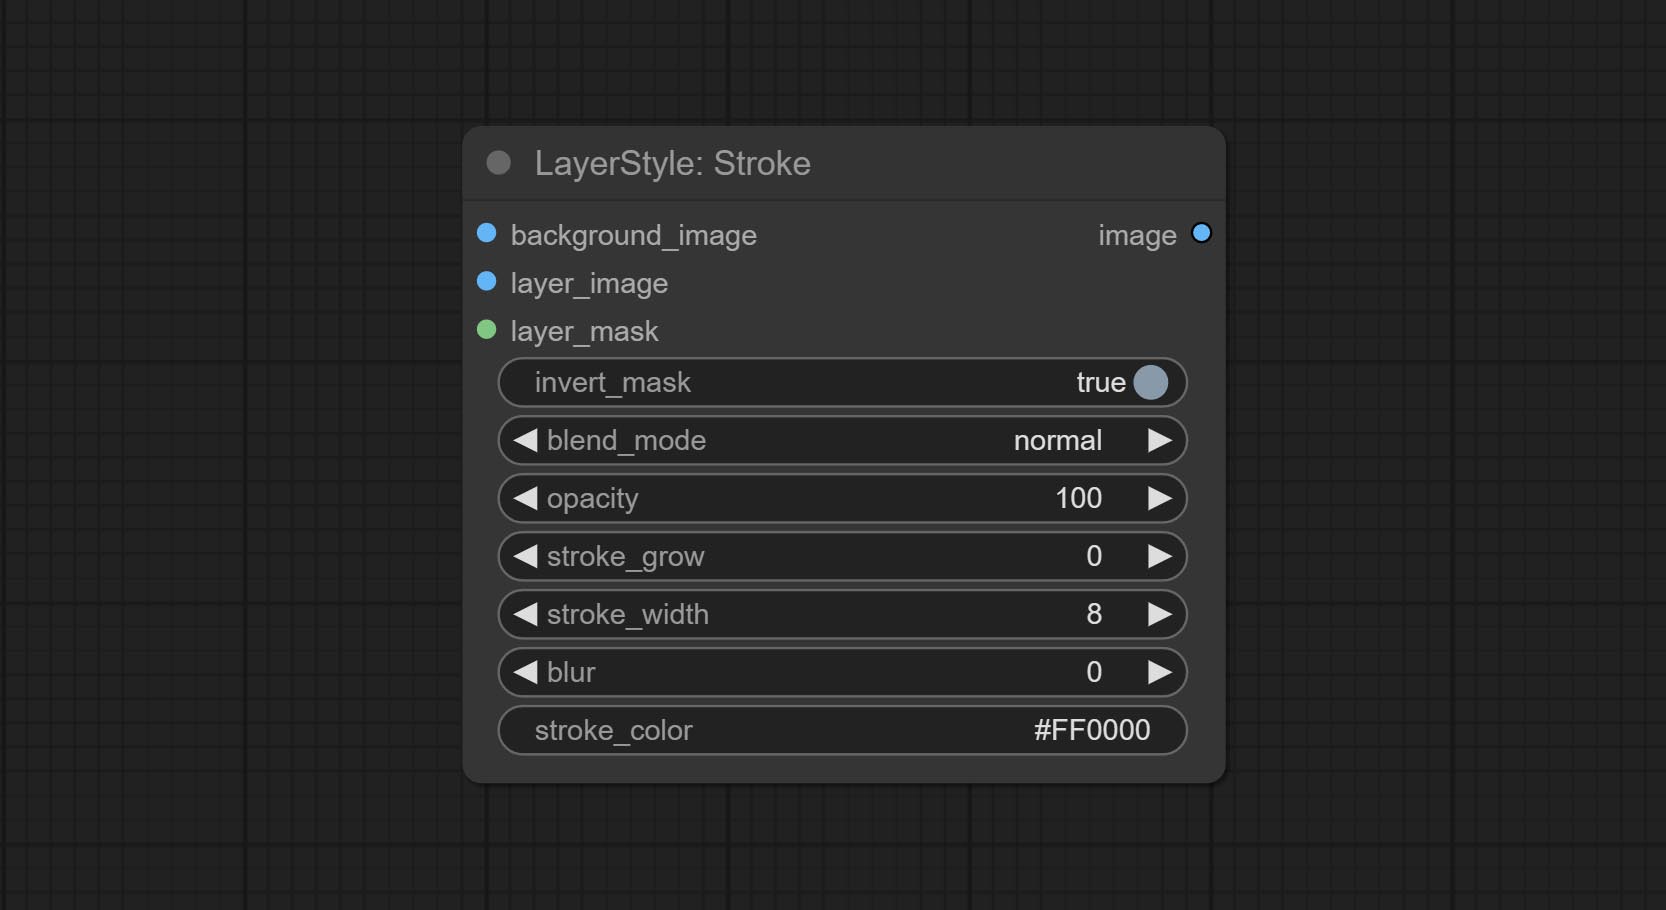
- Background_Image 1 : A imagem de fundo.
- Layer_image 1 : imagem da camada para composto.
- Layer_Mask 1,2 : Máscara para Layer_image, o AVC é gerado de acordo com sua forma.
- Invert_mask: se deve reverter a máscara.
- Blend_mode 3 : Modo de mistura de AVC.
- Opacidade: opacidade do derrame.
- AVC_GROW: amplitude de expansão/contração do AVC, valores positivos indicam expansão e valores negativos indicam contração.
- Stroke_width: Largura do AVC.
- Blur: Blur de golpe.
- Stroke_color 4 : cor do traço, descrito no formato RGB hexadecimal.
- observação
GradientOverlay
Gerar sobreposição de gradiente 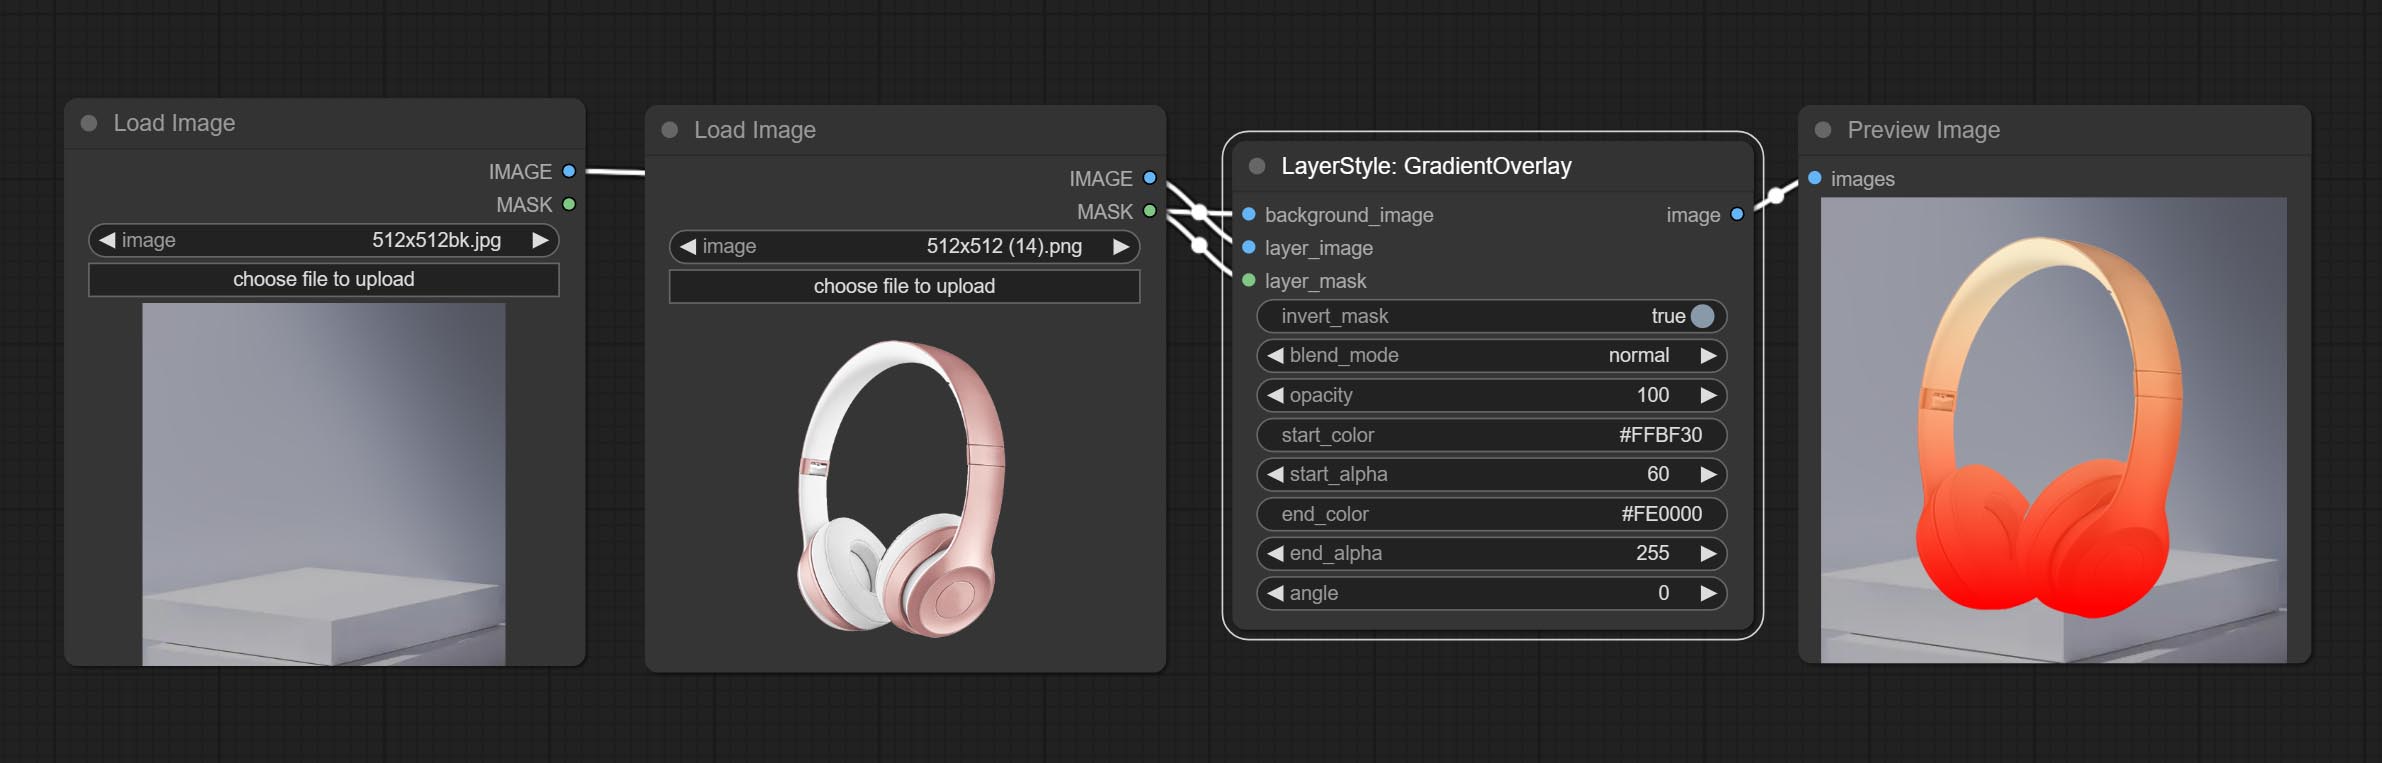
Opções do nó:
- Background_Image 1 : A imagem de fundo.
- Layer_image 1 : imagem da camada para composto.
- Layer_Mask 1,2 : Máscara para Layer_image.
- invert_mask: Whether to reverse the mask.
- blend_mode 3 : Blending mode of gradient.
- opacity: Opacity of stroke.
- start_color: Color at the beginning of the gradient.
- start_alpha: Transparency at the beginning of the gradient.
- end_color: Color at the end of the gradient.
- end_alpha: Transparency at the end of the gradient.
- angle: Gradient rotation angle.
- observação
ColorOverlay
Generate color overlay 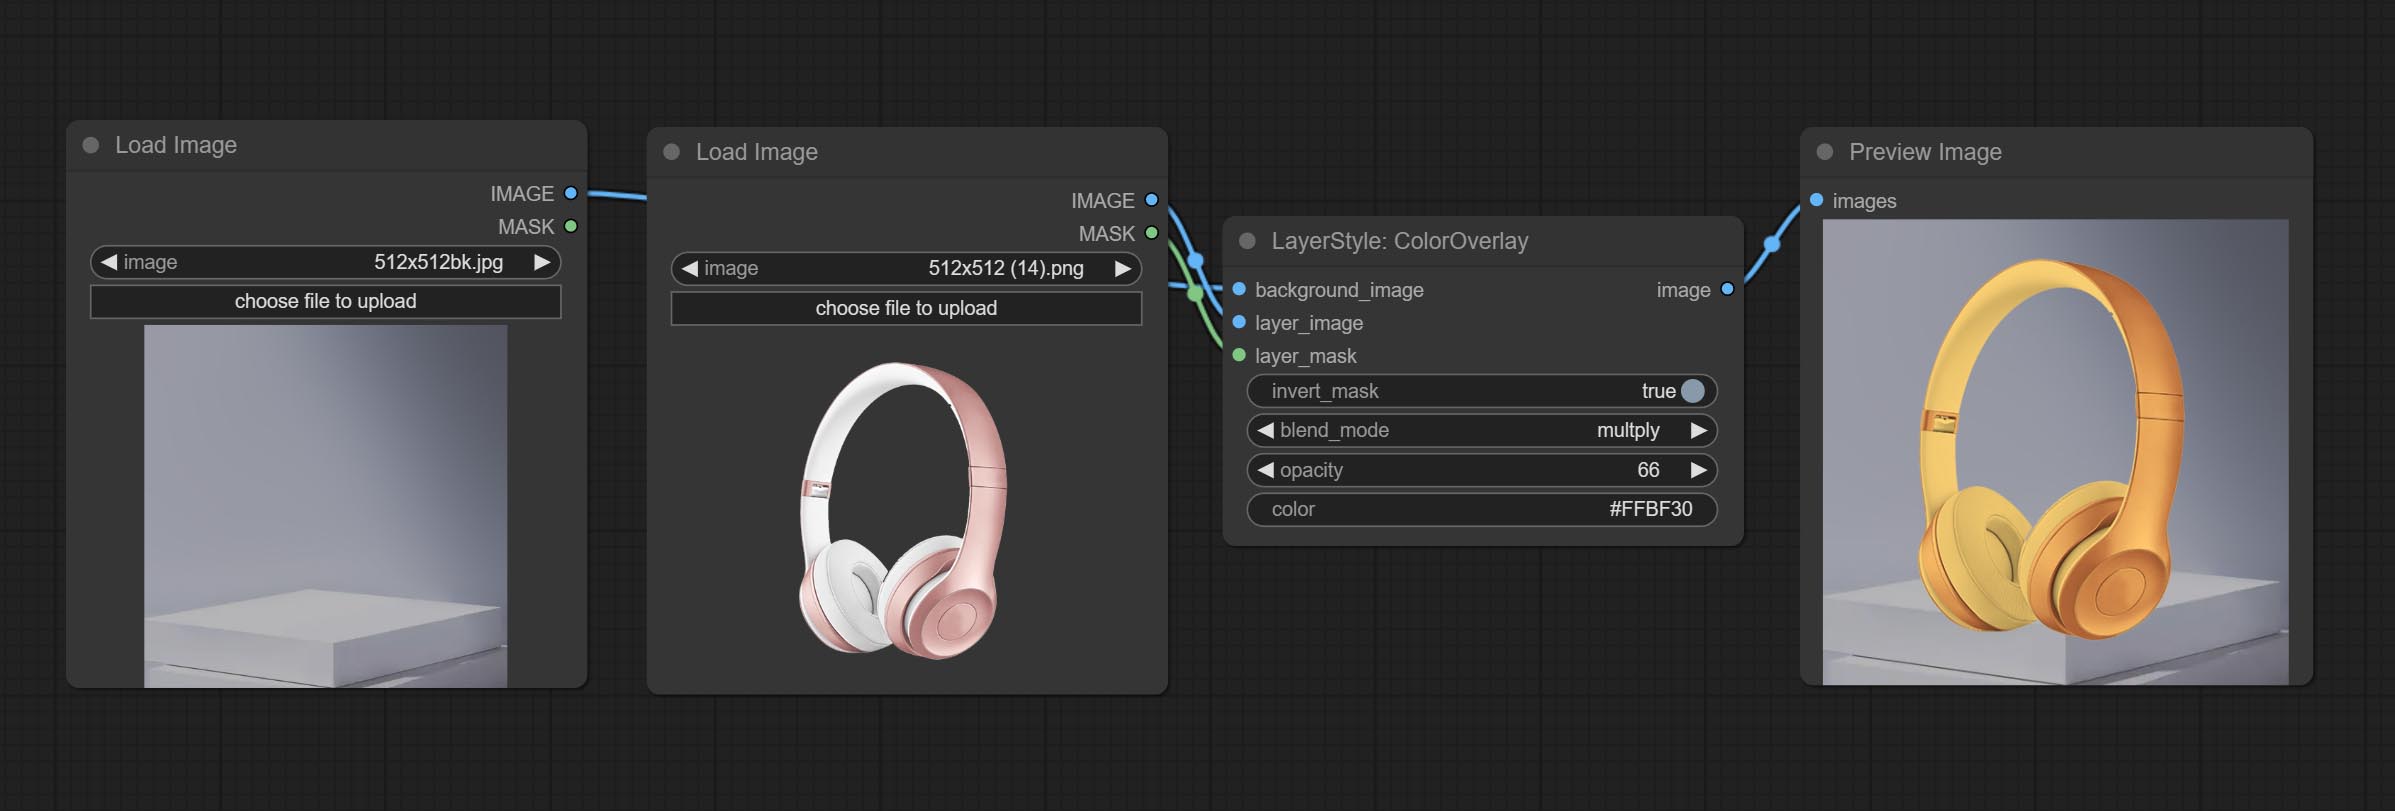
Node options: 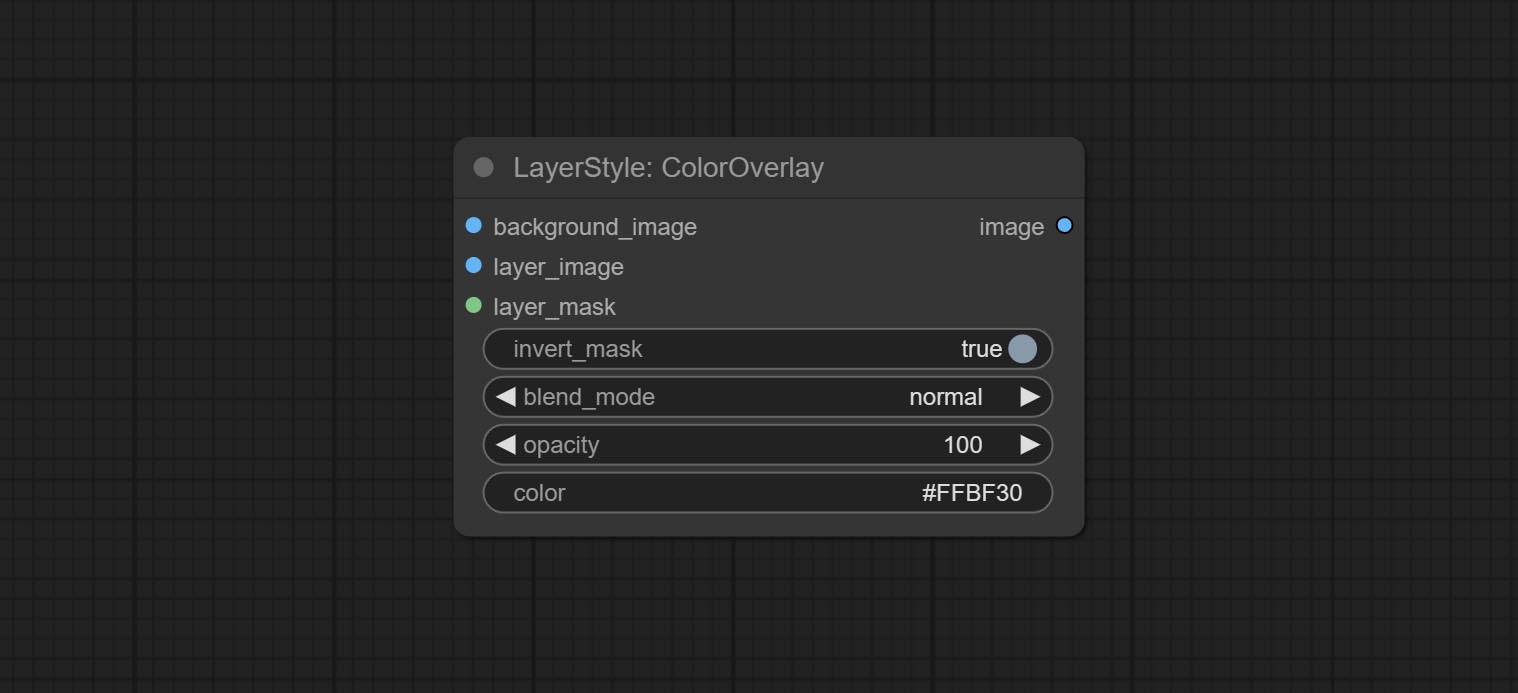
- background_image 1 : The background image.
- layer_image 1 : Layer image for composite.
- layer_mask 1,2 : Mask for layer_image.
- invert_mask: Whether to reverse the mask.
- blend_mode 3 : Blending mode of color.
- opacity: Opacity of stroke.
- color: Color of overlay.
- observação
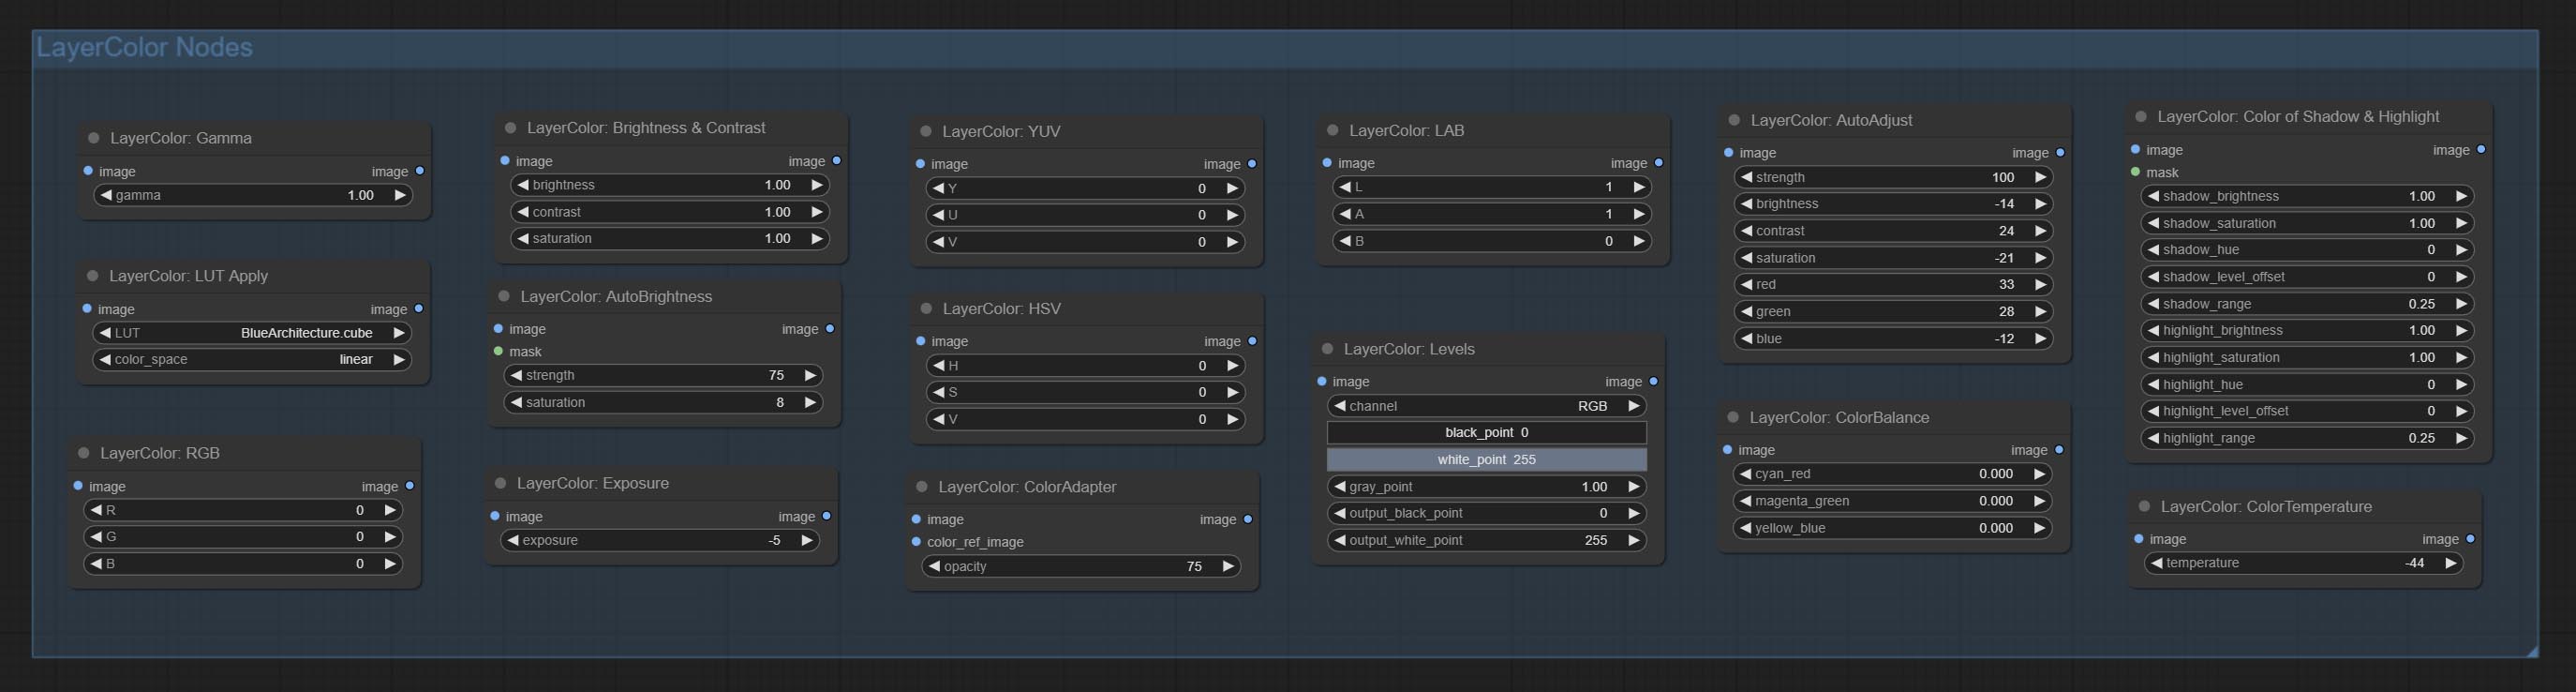
LayerColor
LUT Apply
Apply LUT to the image. only supports .cube format. 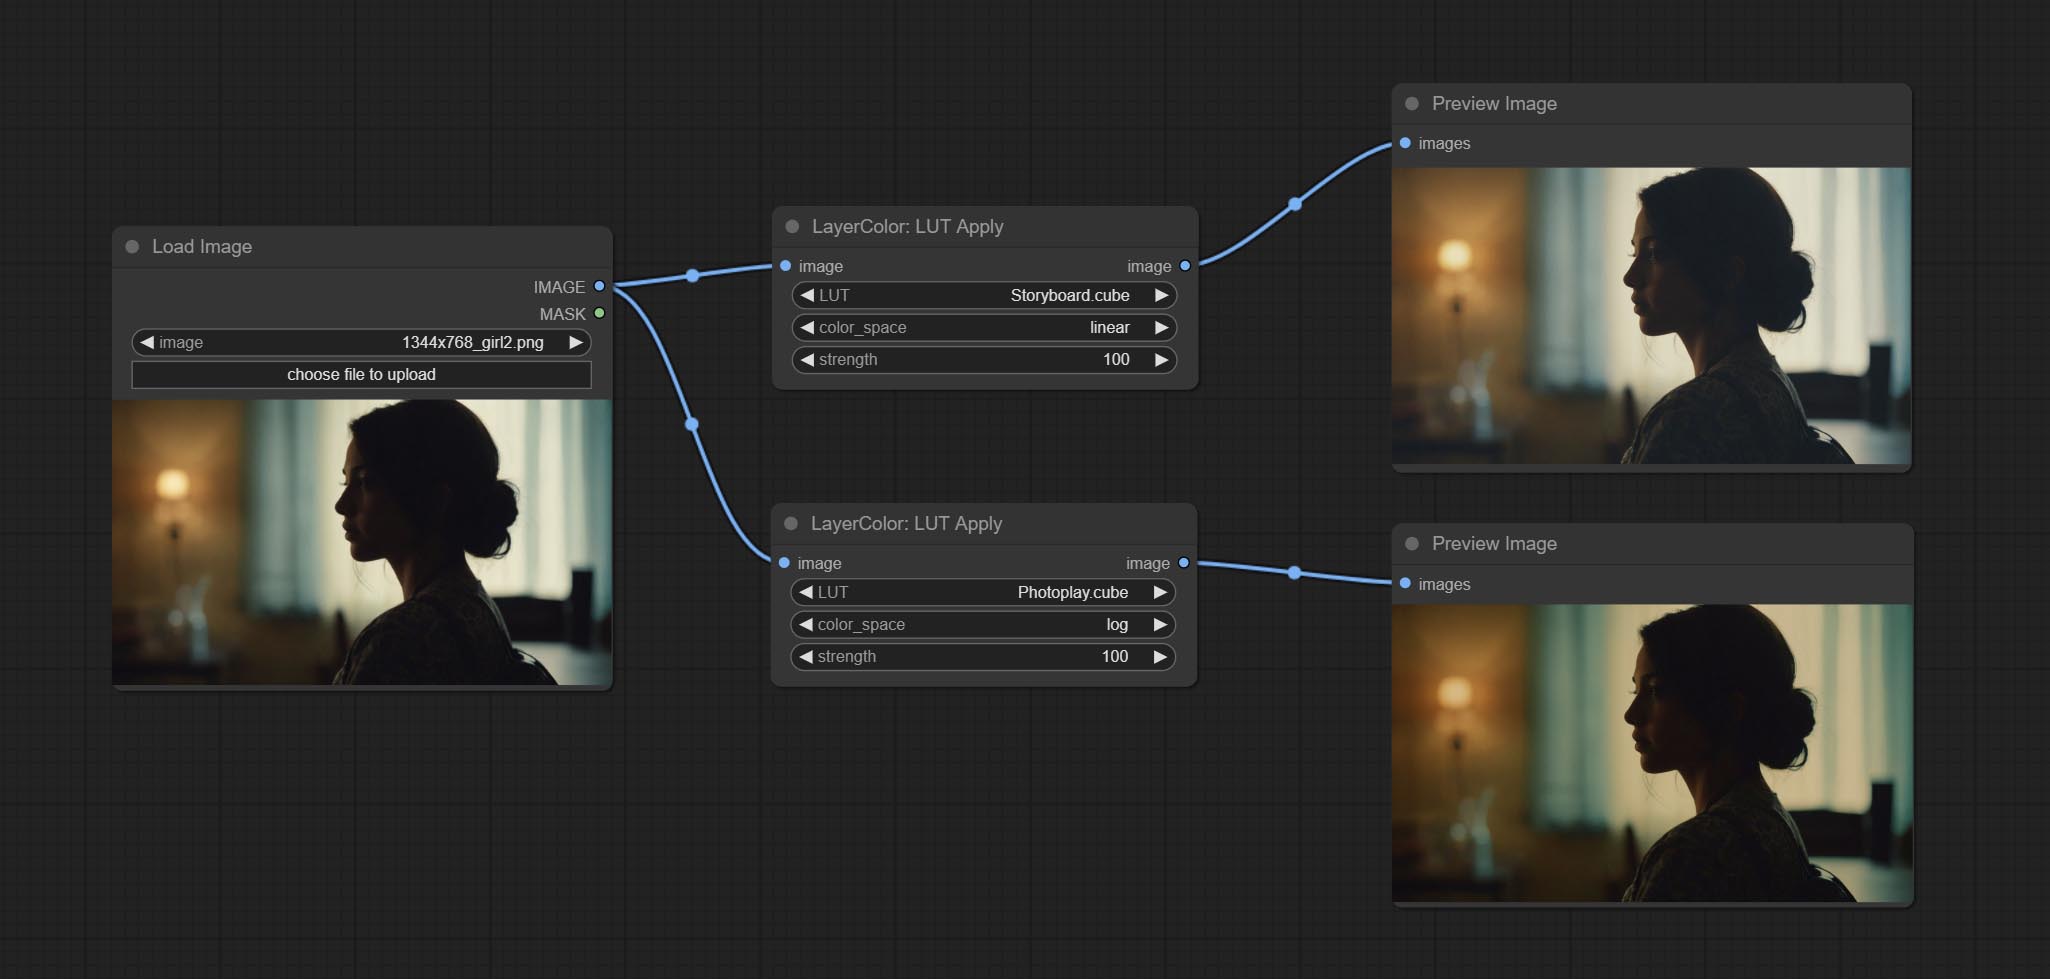
Node options:
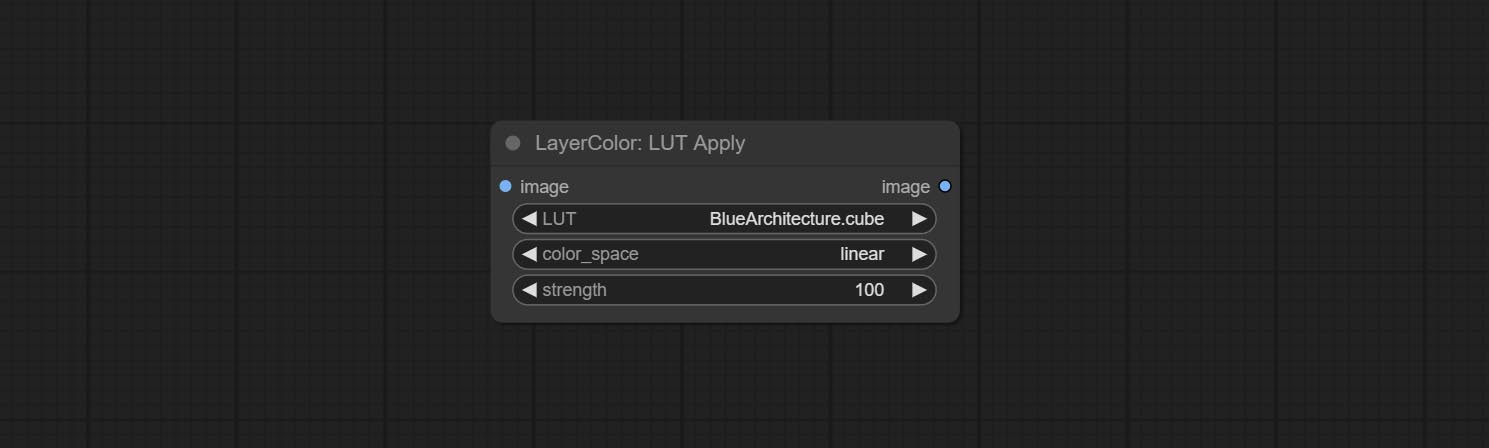
- LUT * : Here is a list of available. cube files in the LUT folder, and the selected LUT files will be applied to the image.
- color_space: For regular image, please select linear, for image in the log color space, please select log.
- strength: Range 0~100, LUT application strength. The larger the value, the greater the difference from the original image, and the smaller the value, the closer it is to the original image.
* LUT folder is defined in resource_dir.ini , this file is located in the root directory of the plug-in, and the default name is resource_dir.ini.example . to use this file for the first time, you need to change the file suffix to .ini . Open the text editing software and find the line starting with "LUT_dir=", after "=", enter the custom folder path name. support defining multiple folders in resource-dir.ini , separated by commas, semicolons, or spaces. all .cube files in this folder will be collected and displayed in the node list during ComfyUI initialization. If the folder set in ini is invalid, the LUT folder that comes with the plugin will be enabled.
AutoAdjust
Automatically adjust the brightness, contrast, and white balance of the image. Provide some manual adjustment options to compensate for the shortcomings of automatic adjustment. 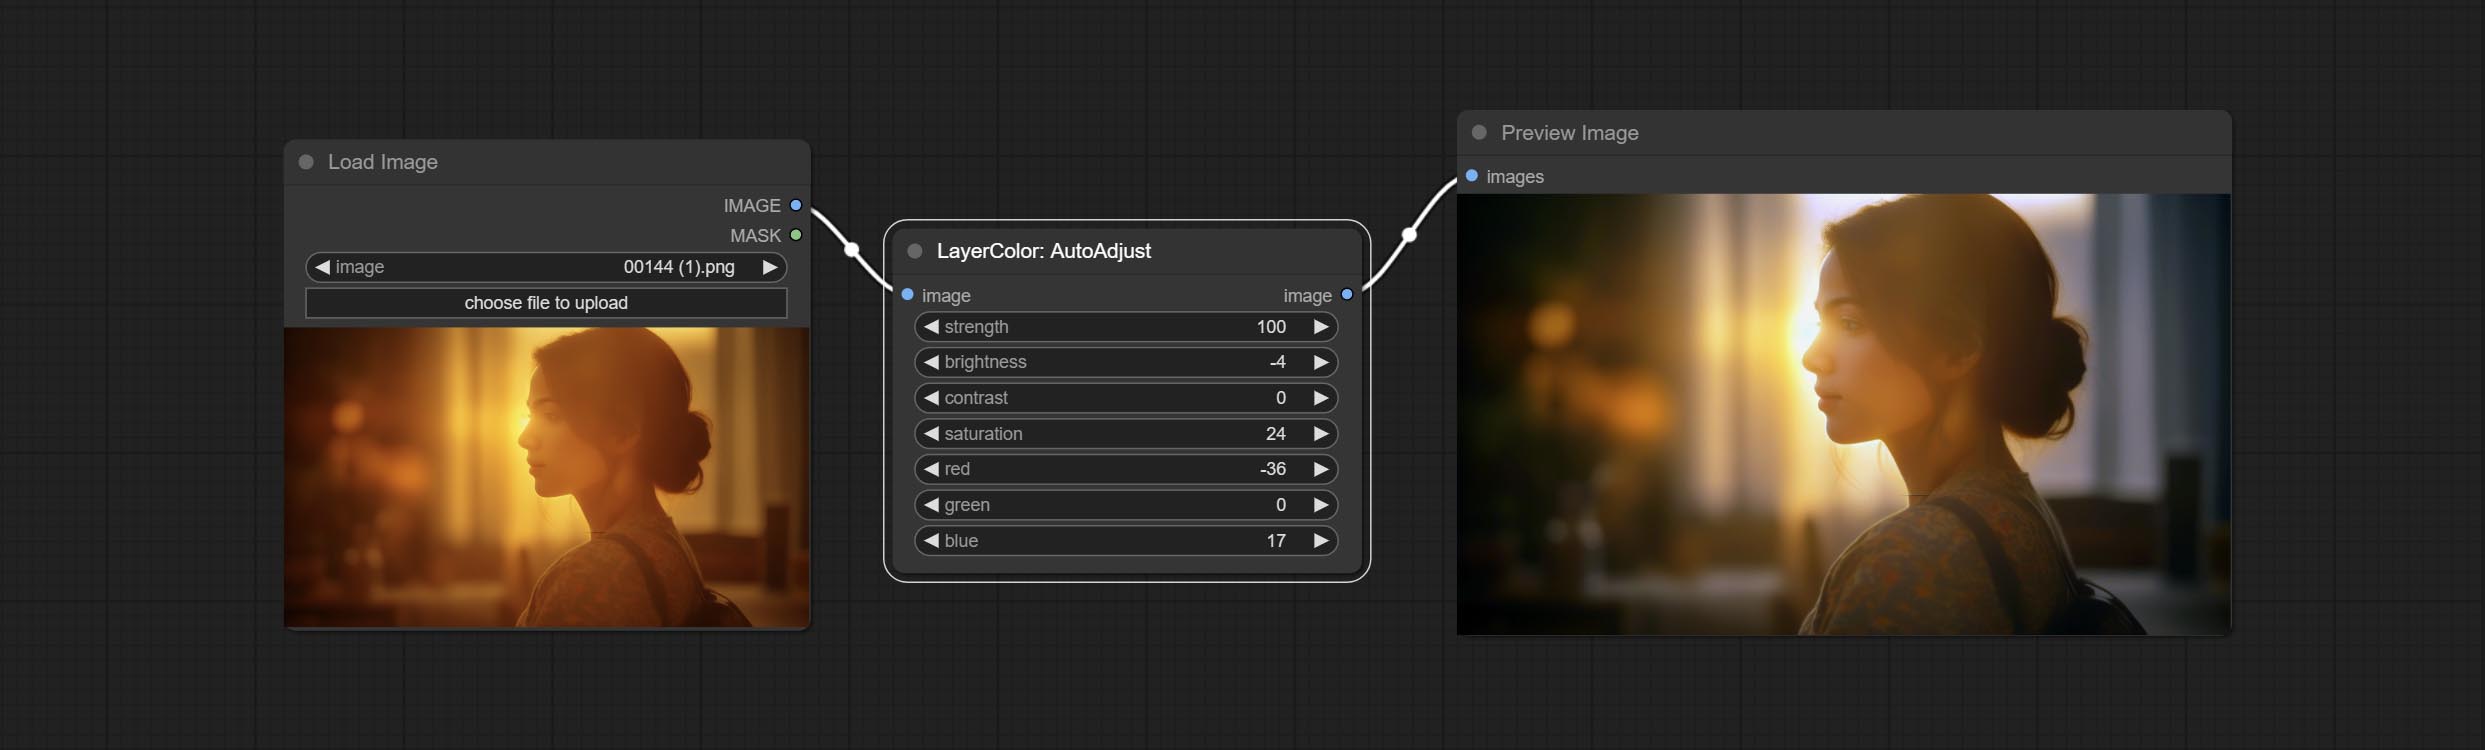
Node Options:
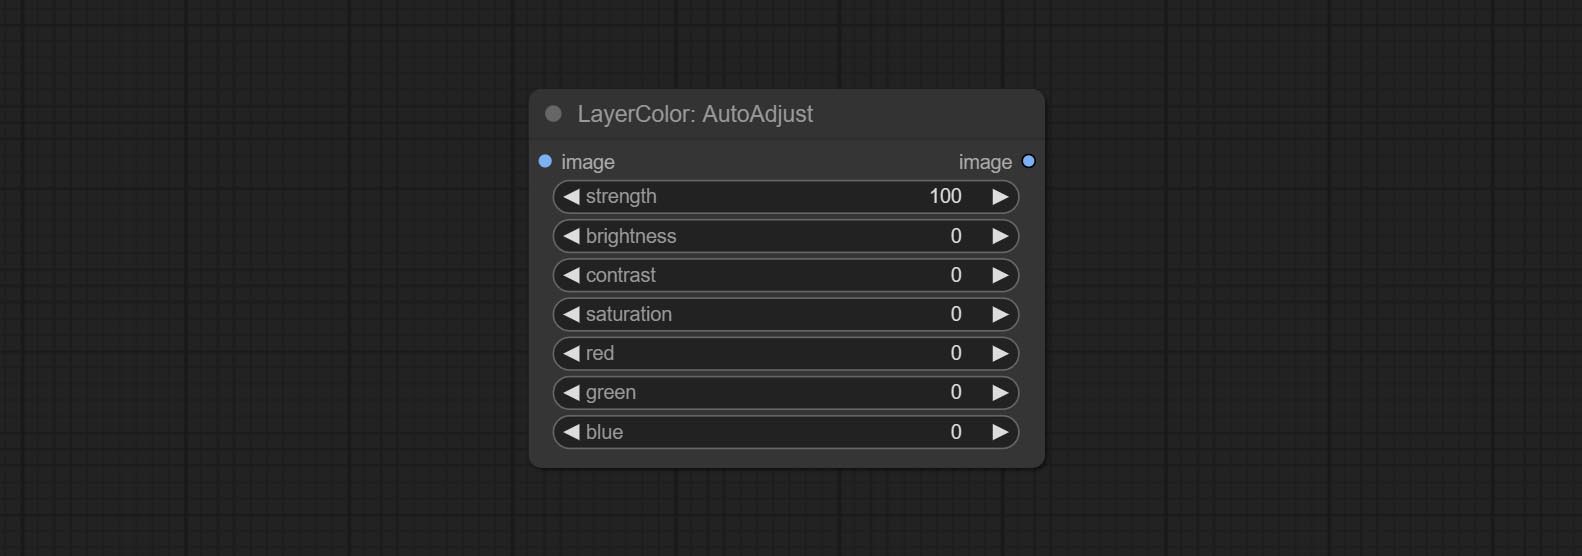
- strength: Strength of adjust. The larger the value, the greater the difference from the original image.
- brightness: Manual adjustment of brightness.
- contrast: Manual adjustment of contrast.
- saturation: Manual adjustment of saturation.
- red: Manual adjustment of the red channel.
- green: Manual adjustment of the green channel.
- blue: Manual adjustment of the blue channel.
AutoAdjustV2
On the basis of AutoAdjust, add mask input and only calculate the content inside the mask for automatic color adjustment. Add multiple automatic adjustment modes. 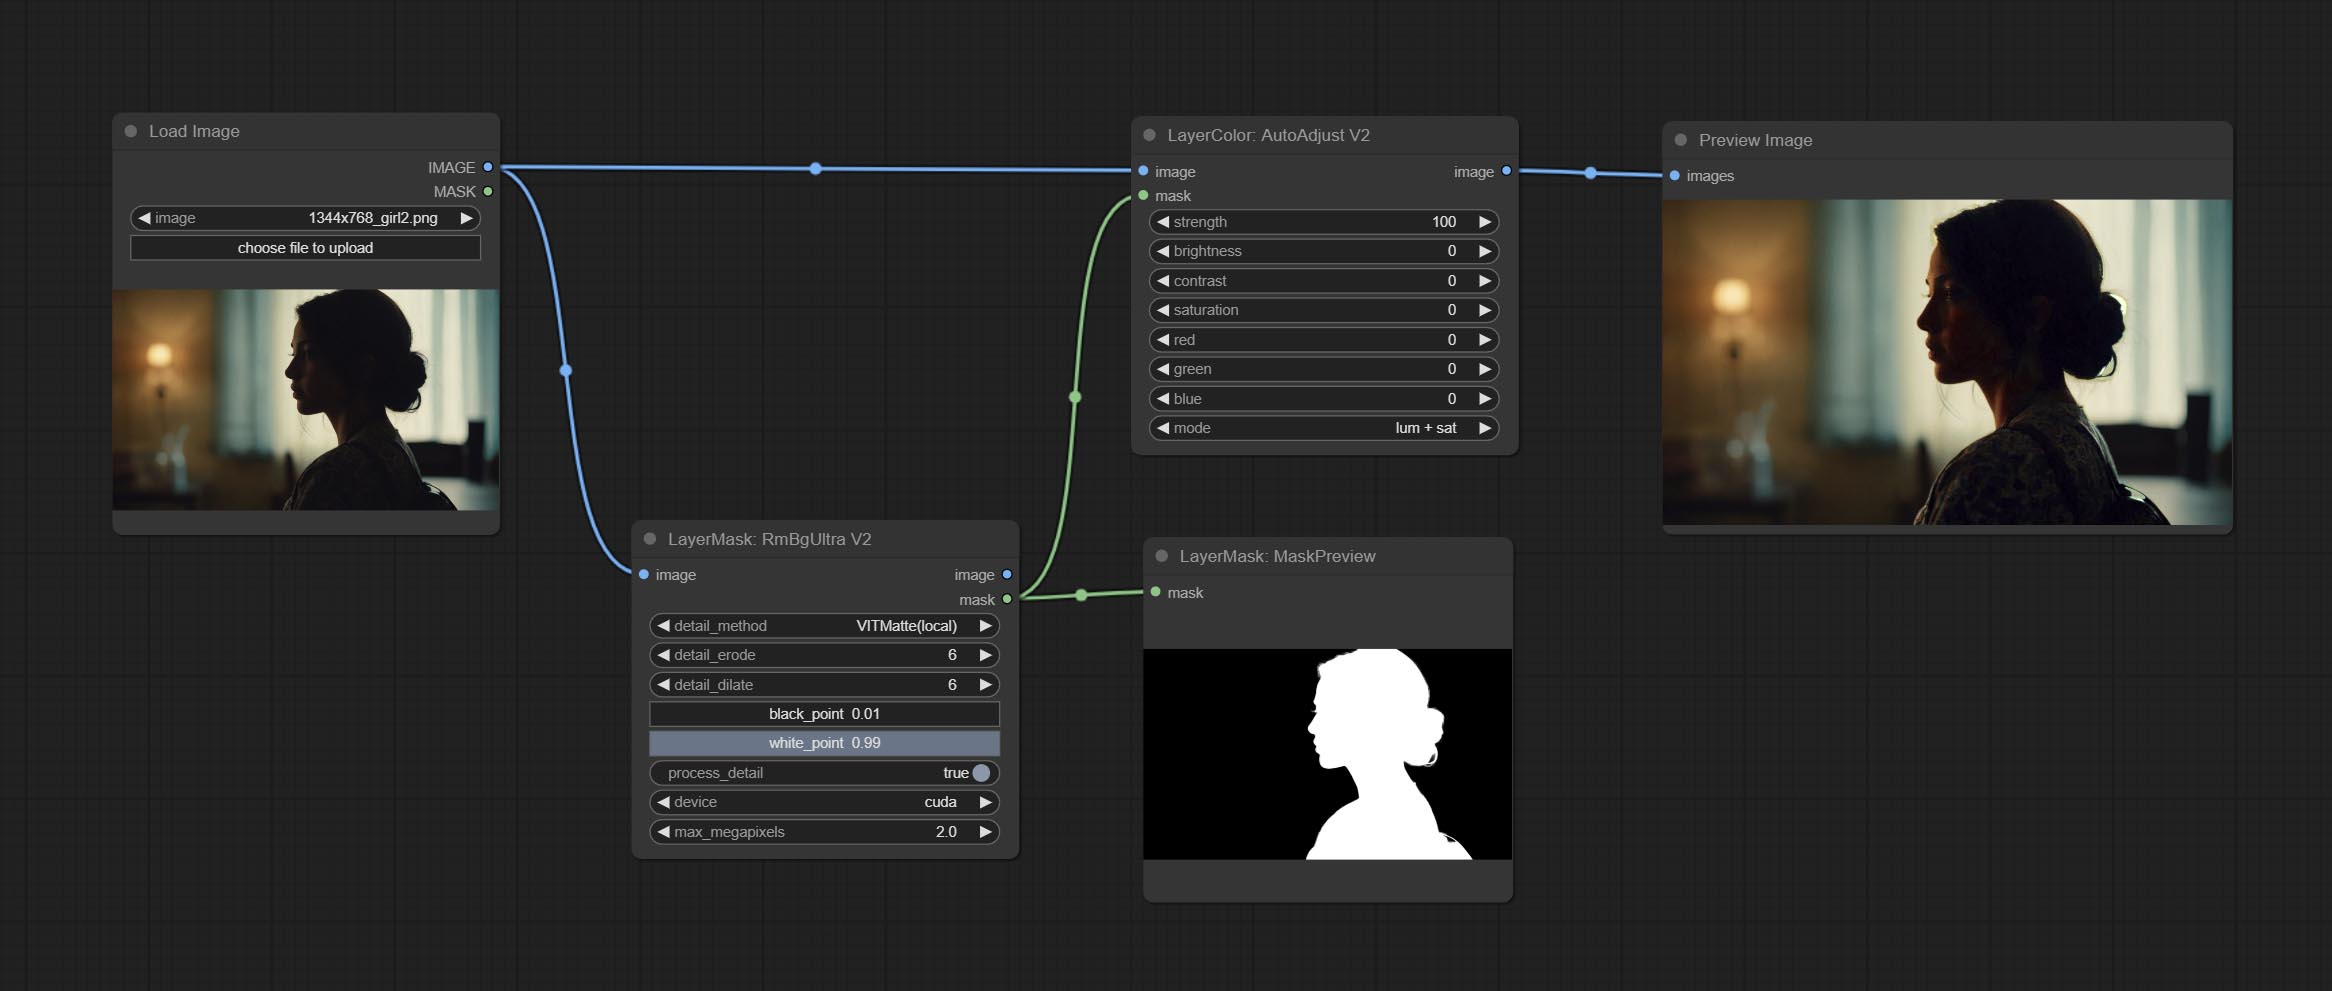
The following changes have been made based on AutoAdjust: 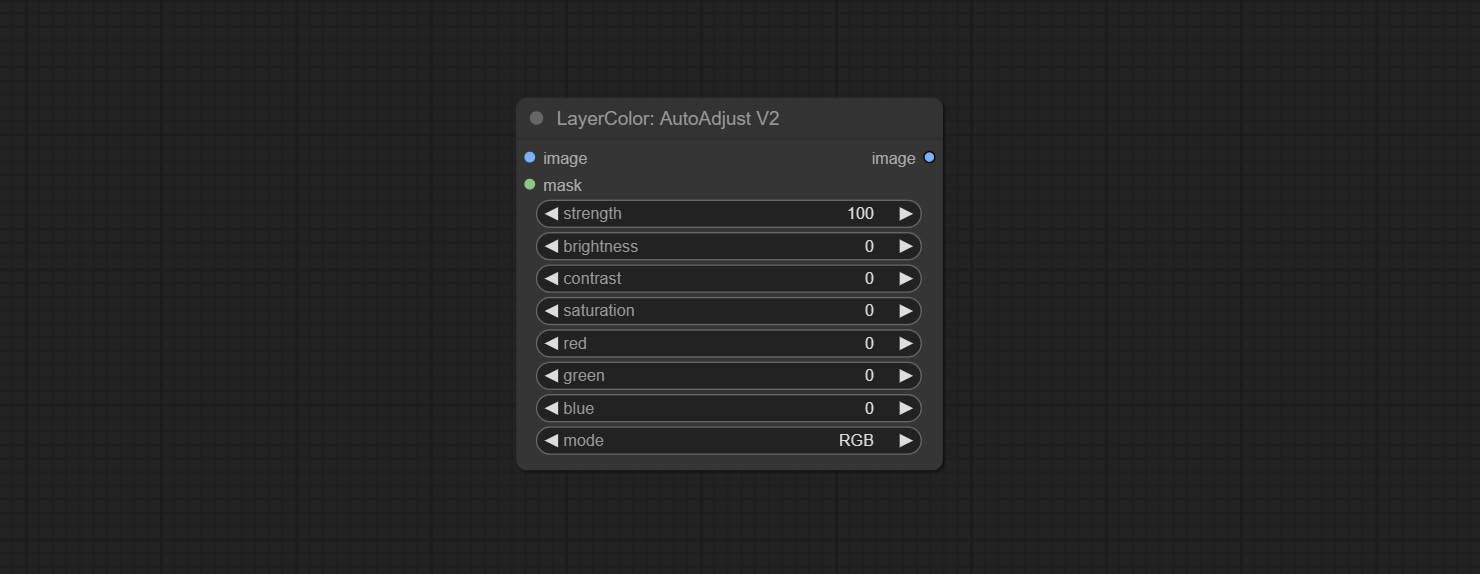
- mask: Optional mask input.
- mode: Automatic adjustment mode. "RGB" automatically adjusts according to the three channels of RGB, "lum + sat"automatically adjusts according to luminance and saturation, "luminance" automatically adjusts according to luminance, "saturation" automatically adjusts according to saturation, and "mono" automatically adjusts according to grayscale and outputs monochrome.
AutoBrightness
Automatically adjust too dark or too bright image to moderate brightness, and support mask input. When mask input, only the content of the mask part is used as the data source of the automatic brightness. The output is still the whole adjusted image. 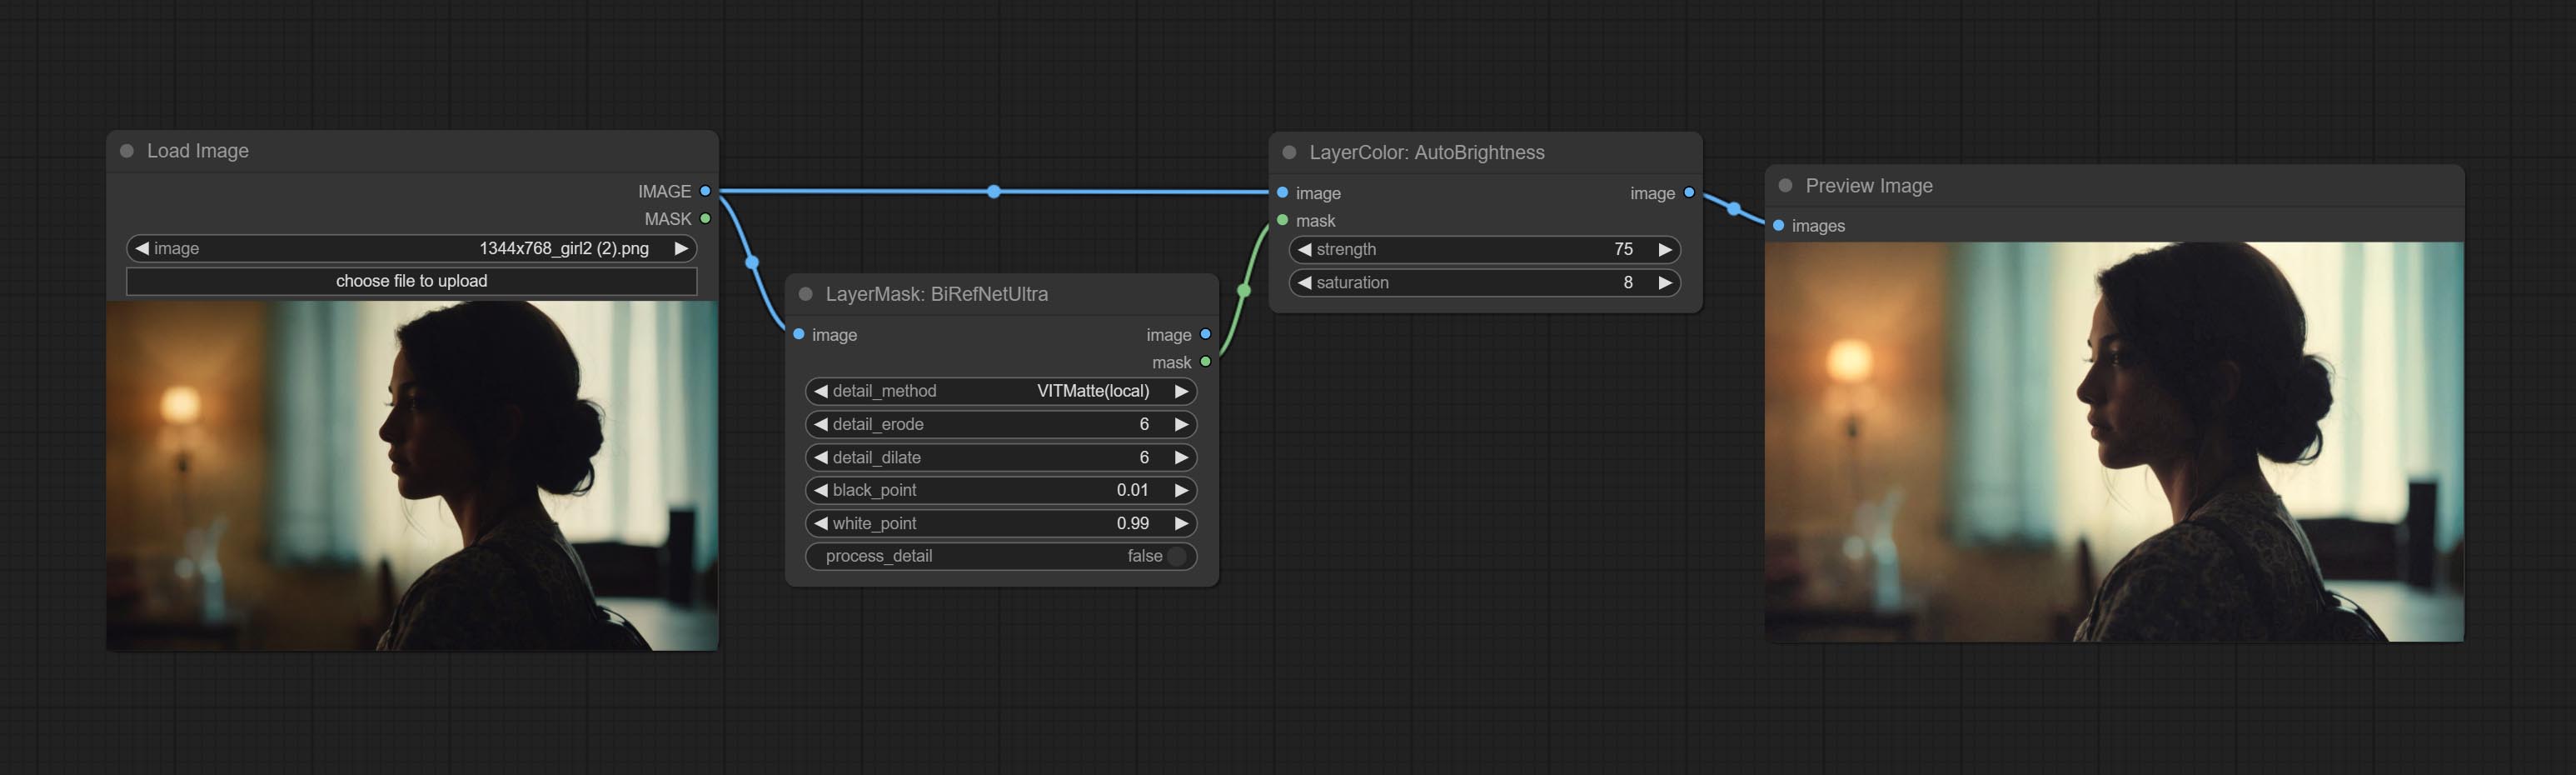
Node options:
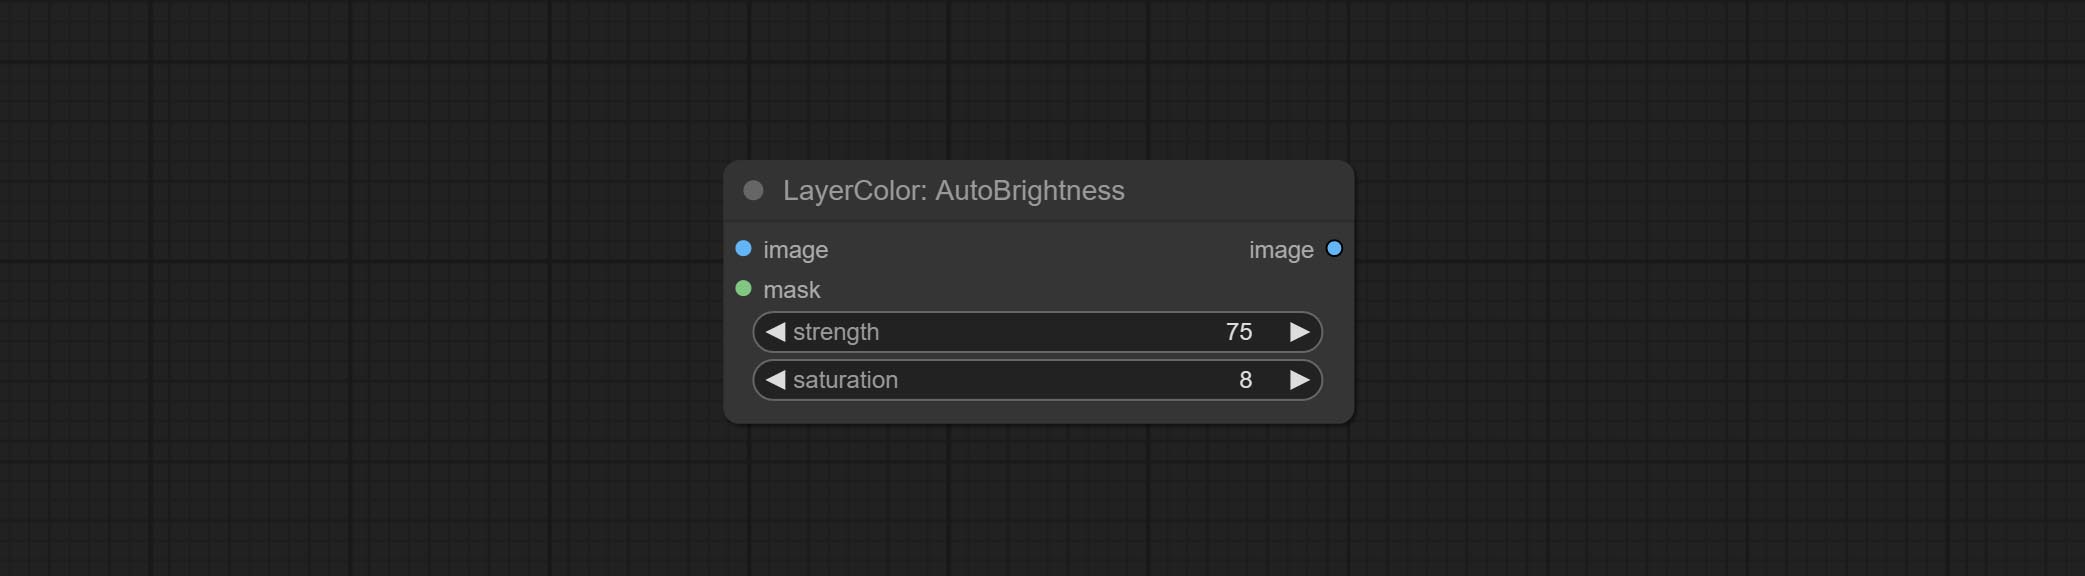
- strength: Automatically adjust the intensity of the brightness. The larger the value, the more biased towards the middle value, the greater the difference from the original picture.
- saturation: Color saturation. Changes in brightness usually result in changes in color saturation, where appropriate compensation can be adjusted.
ColorAdapter
Auto adjust the color tone of the image to resemble the reference image. 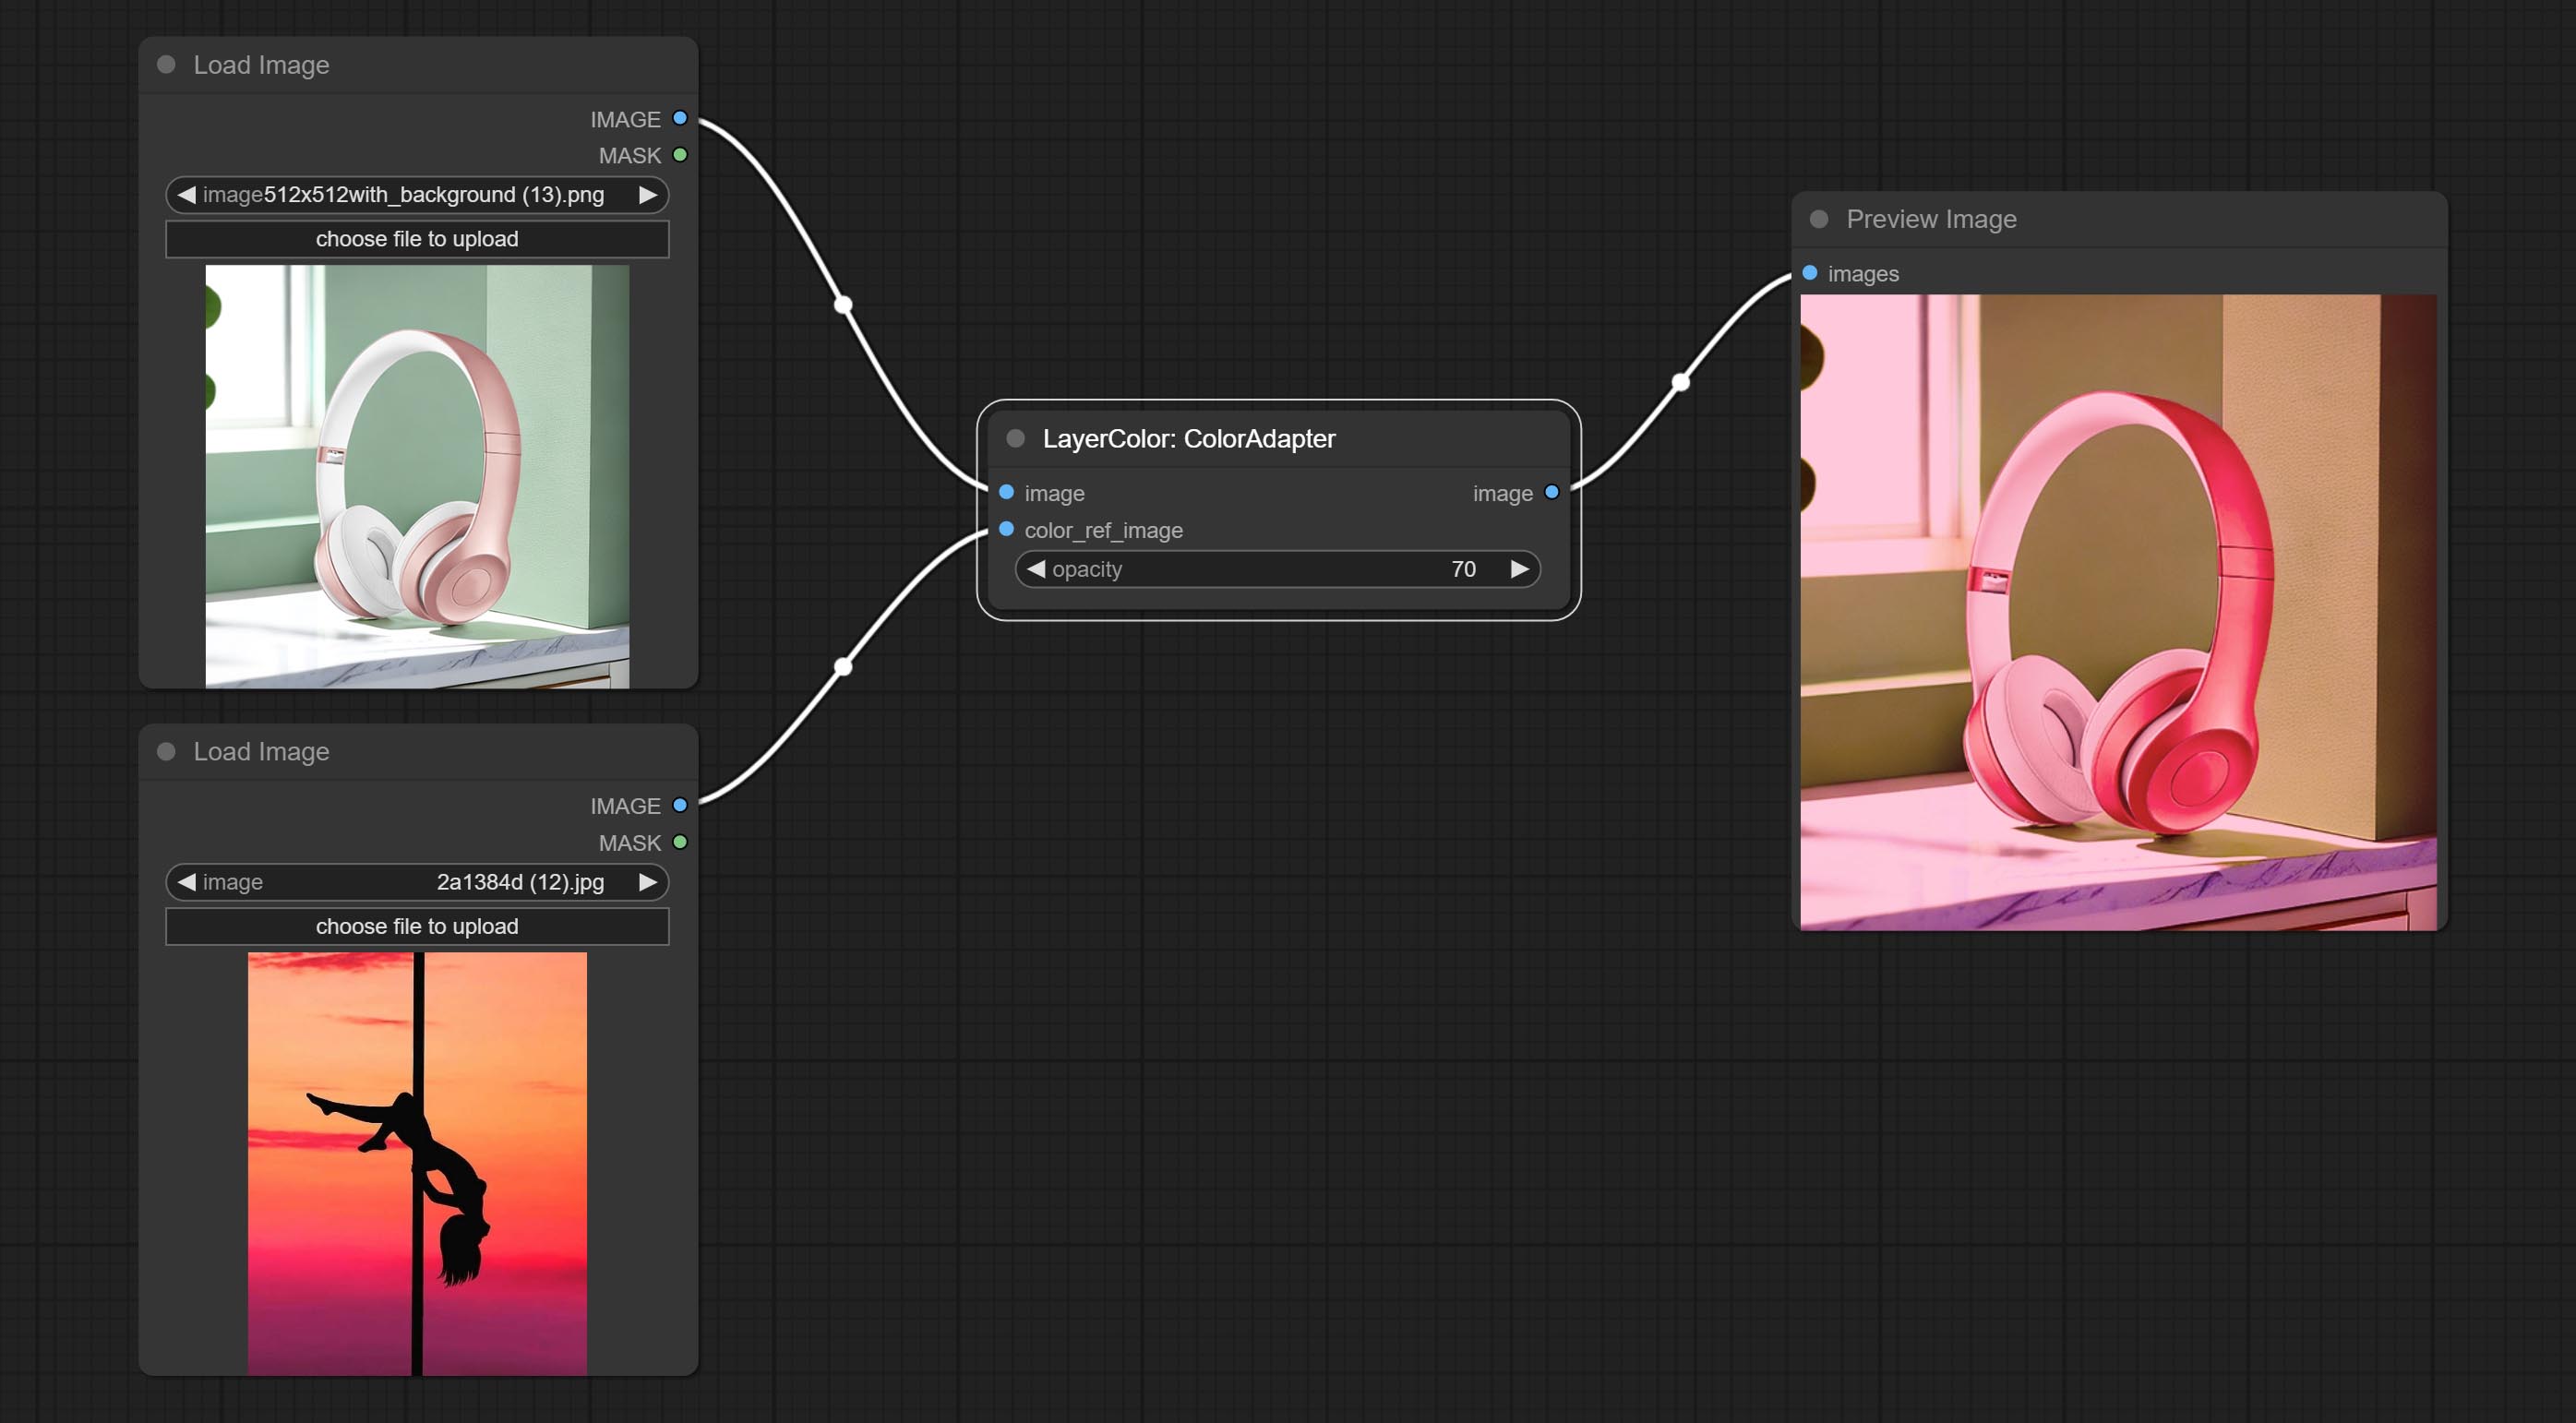
Node options:
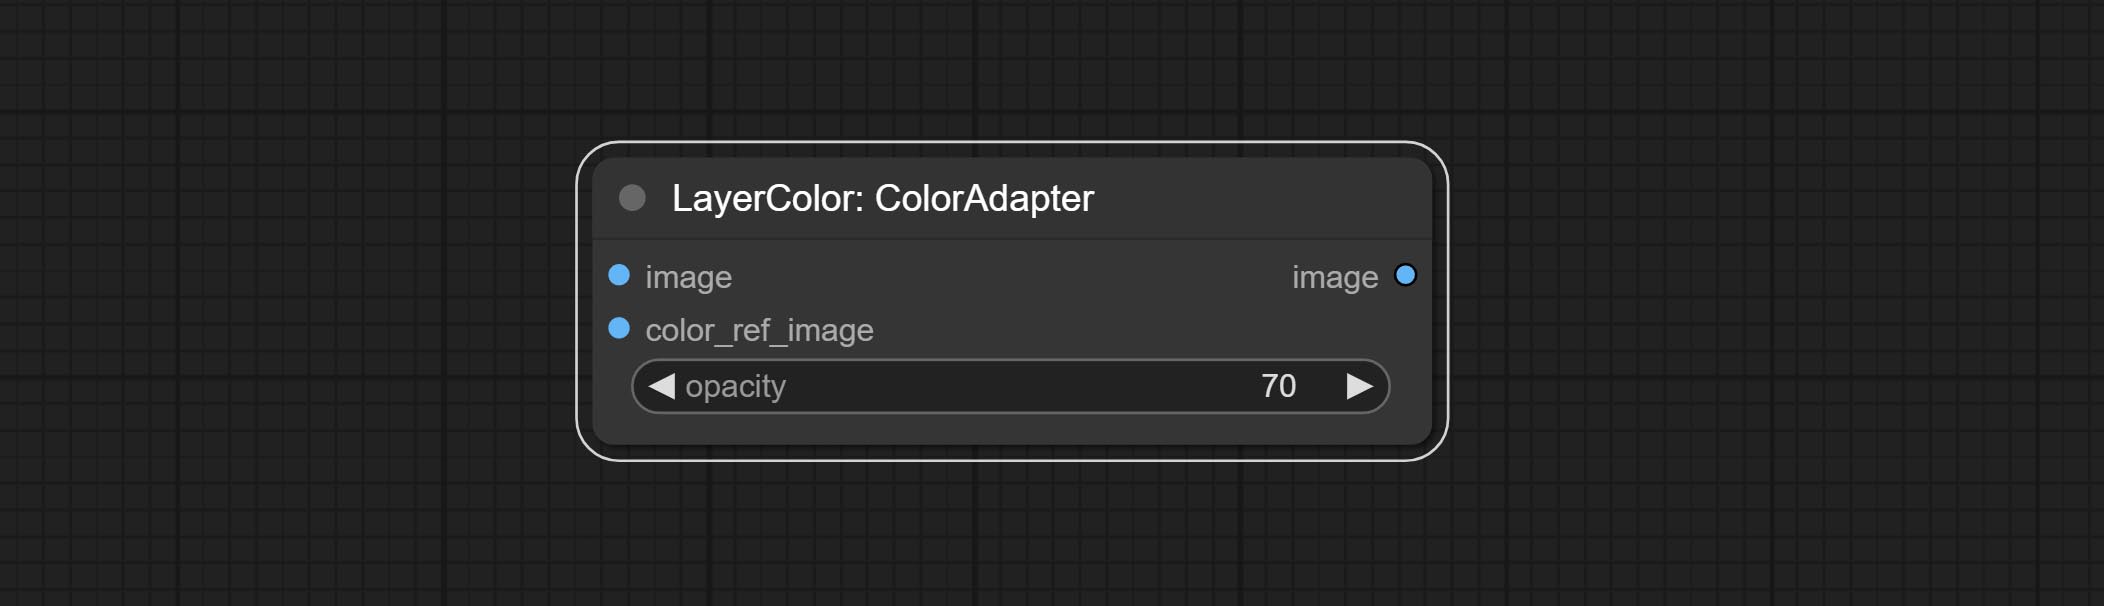
- opacity: The opacity of an image after adjusting its color tone.
Exposição
Change the exposure of the image. 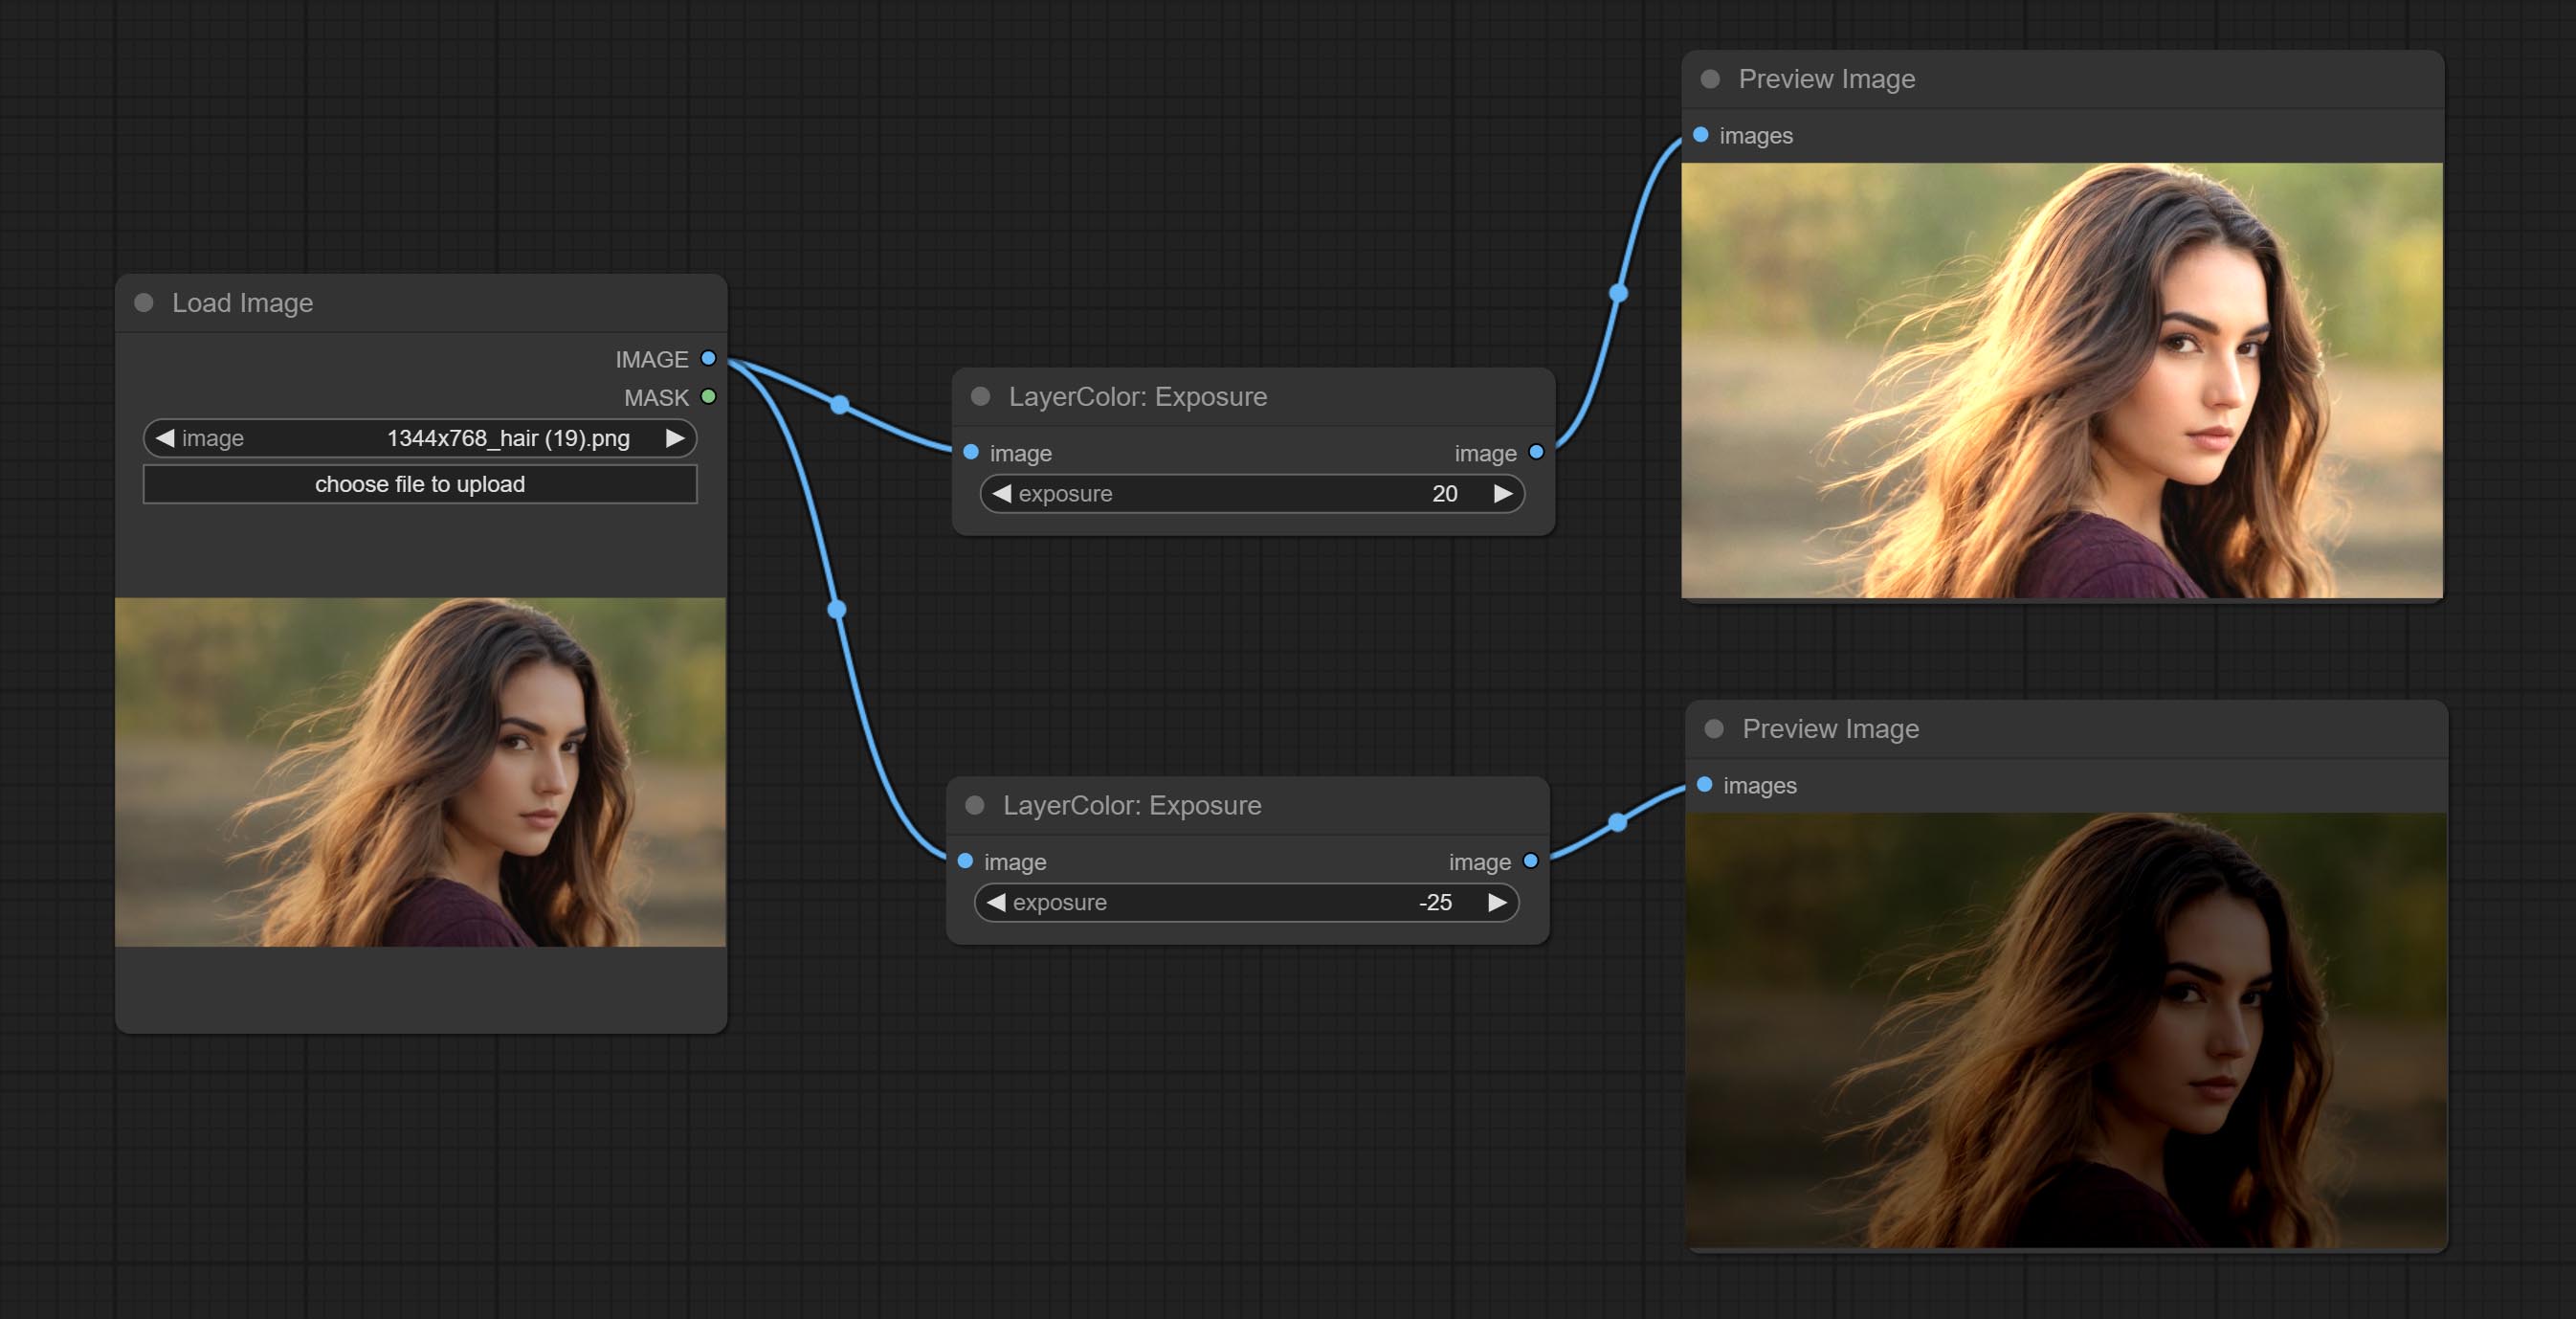
Color of Shadow & Highlight
Adjust the color of the dark and bright parts of the image. 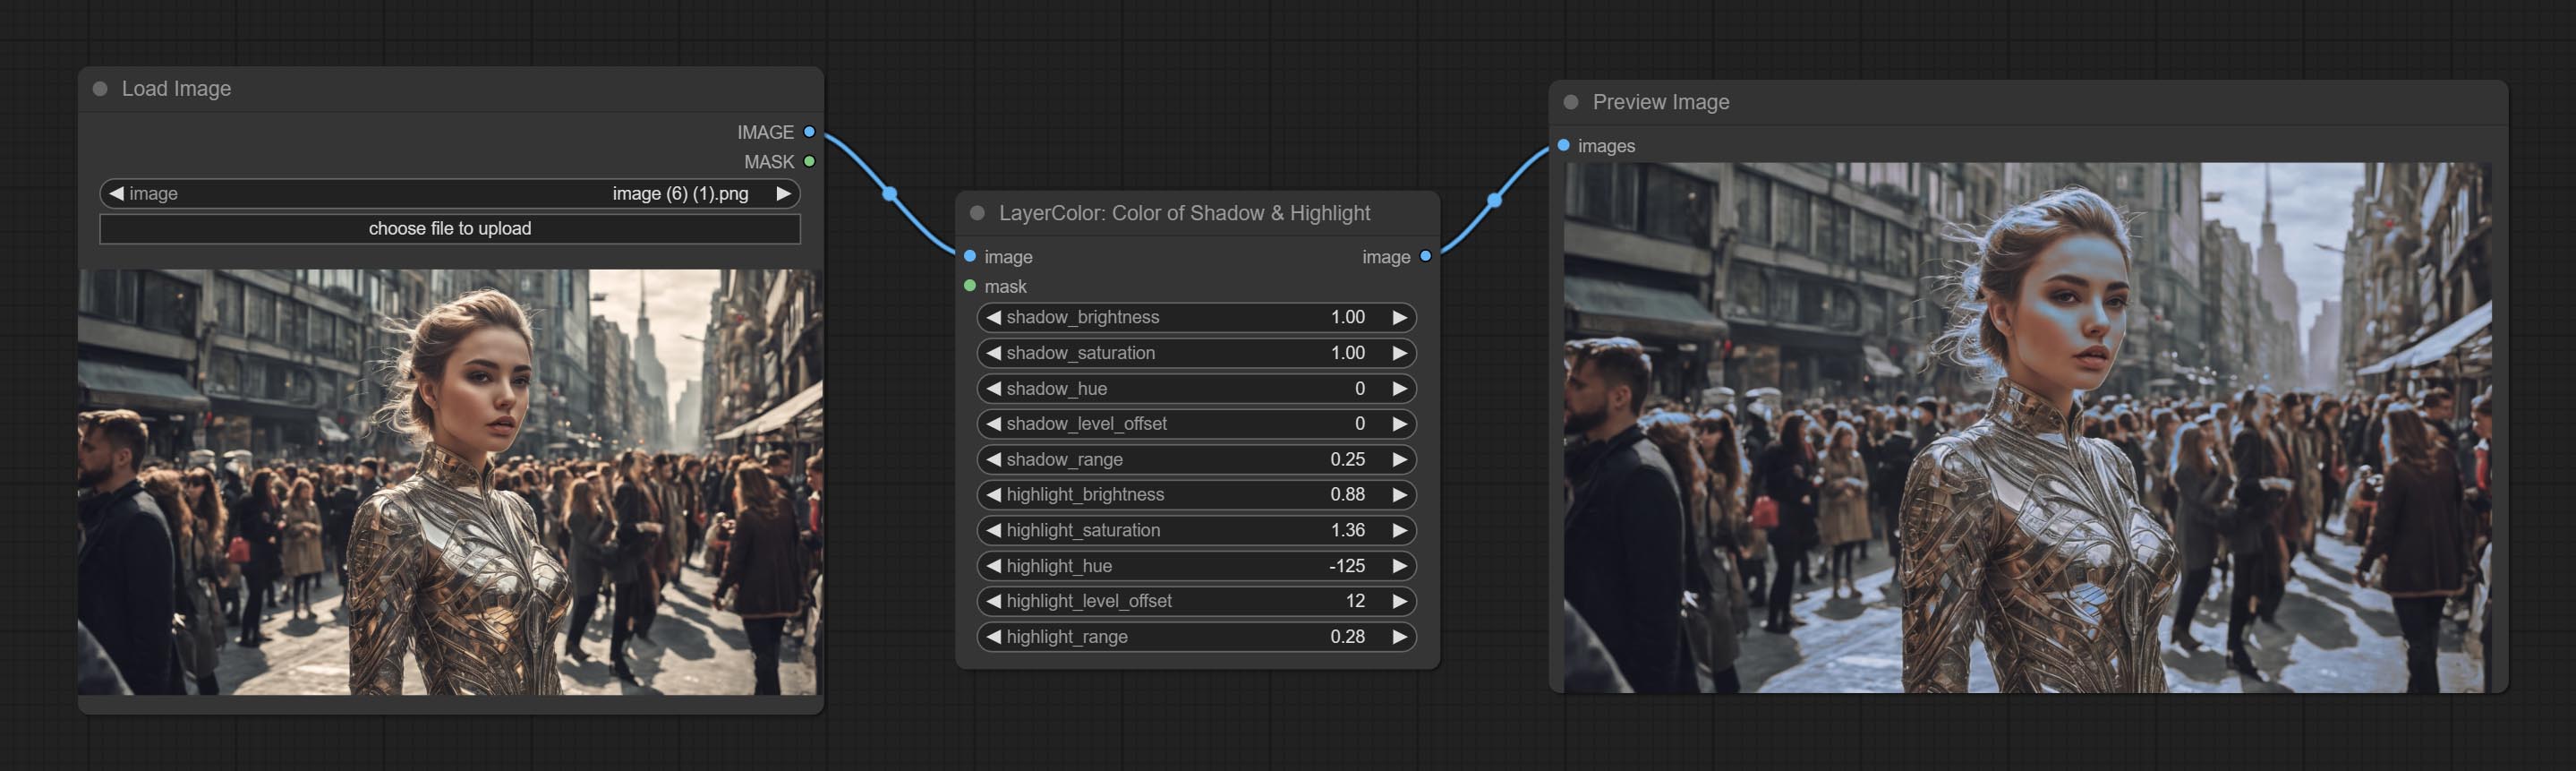
Node options:
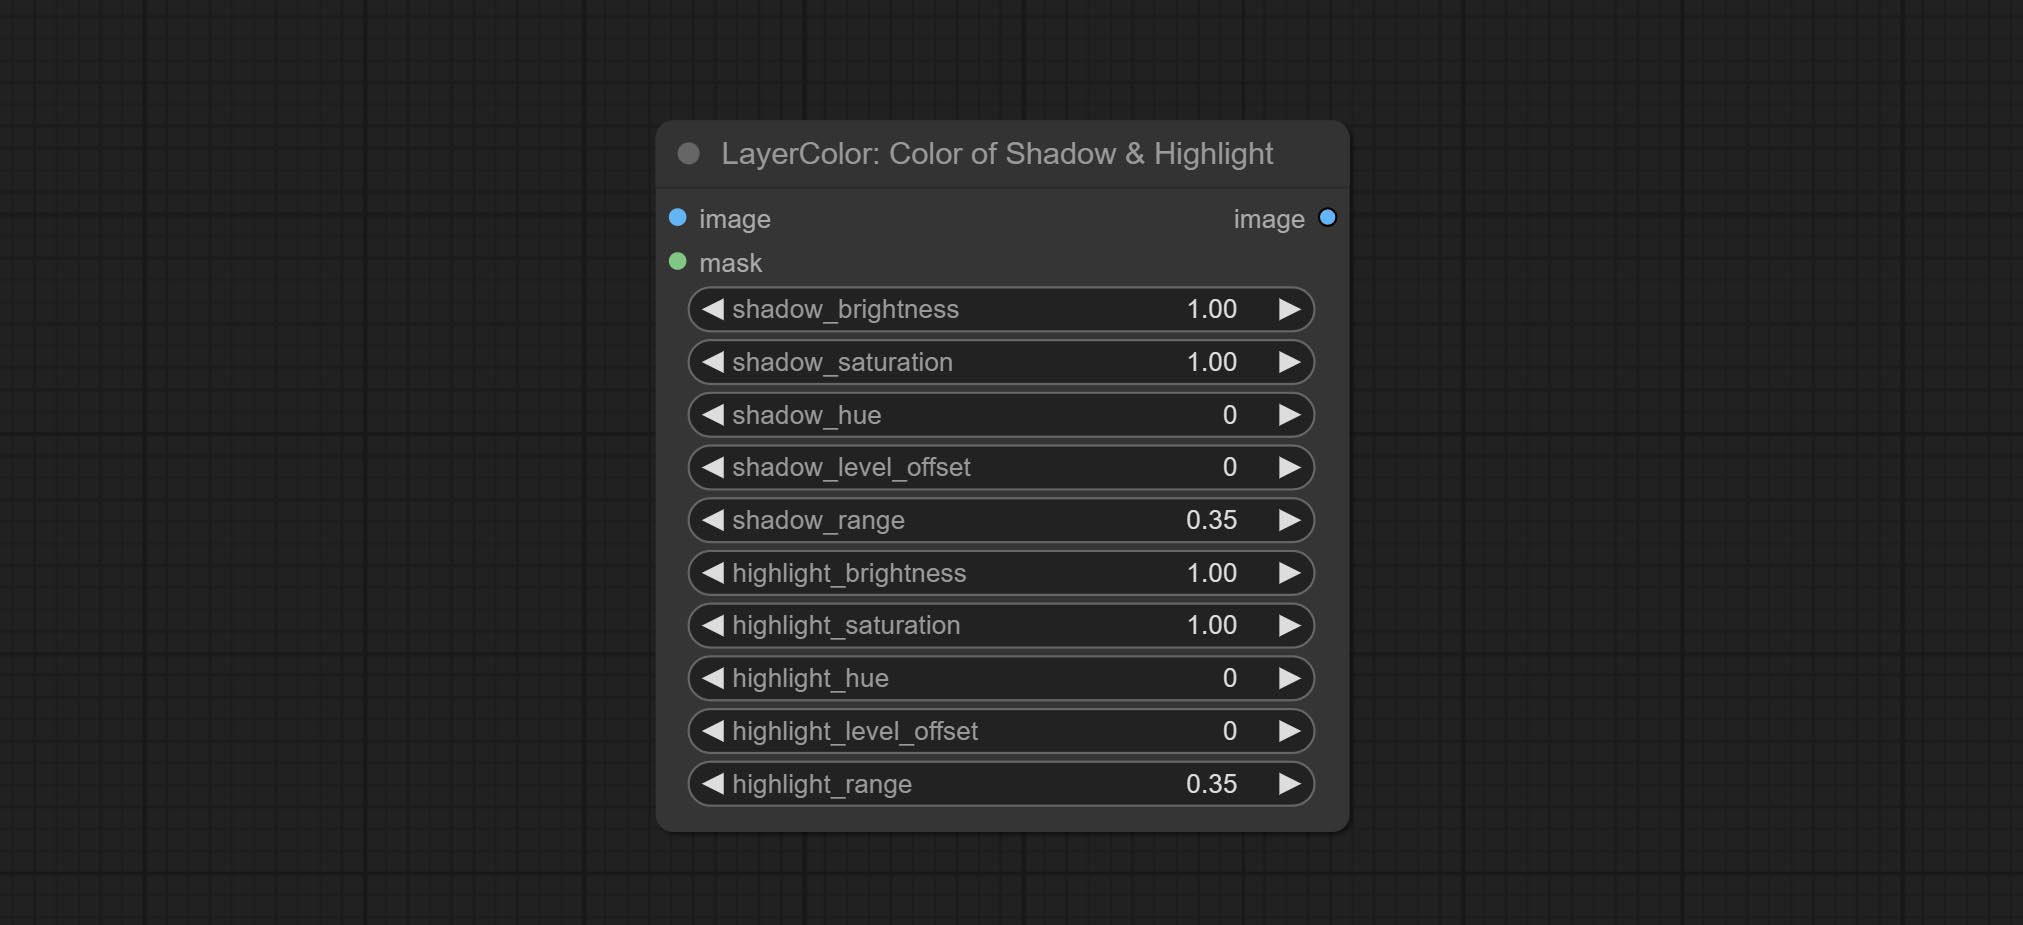
- image: The input image.
- mask: Optional input. if there is input, only the colors within the mask range will be adjusted.
- shadow_brightness: The brightness of the dark area.
- shadow_saturation: The color saturation in the dark area.
- shadow_hue: The color hue in the dark area.
- shadow_level_offset: The offset of values in the dark area, where larger values bring more areas closer to the bright into the dark area.
- shadow_range: The transitional range of the dark area.
- highlight_brightness: The brightness of the highlight area.
- highlight_saturation: The color saturation in the highlight area.
- highlight_hue: The color hue in the highlight area.
- highlight_level_offset: The offset of values in the highlight area, where larger values bring more areas closer to the dark into the highlight area.
- highlight_range: The transitional range of the highlight area.
Node option:
- exposure: Exposure value. Higher values indicate brighter image.
Color of Shadow HighlightV2
A replica of the Color of Shadow & Highlight node, with the "&" character removed from the node name to avoid ComfyUI workflow parsing errors.
ColorTemperature

Change the color temperature of the image.
Node Options:
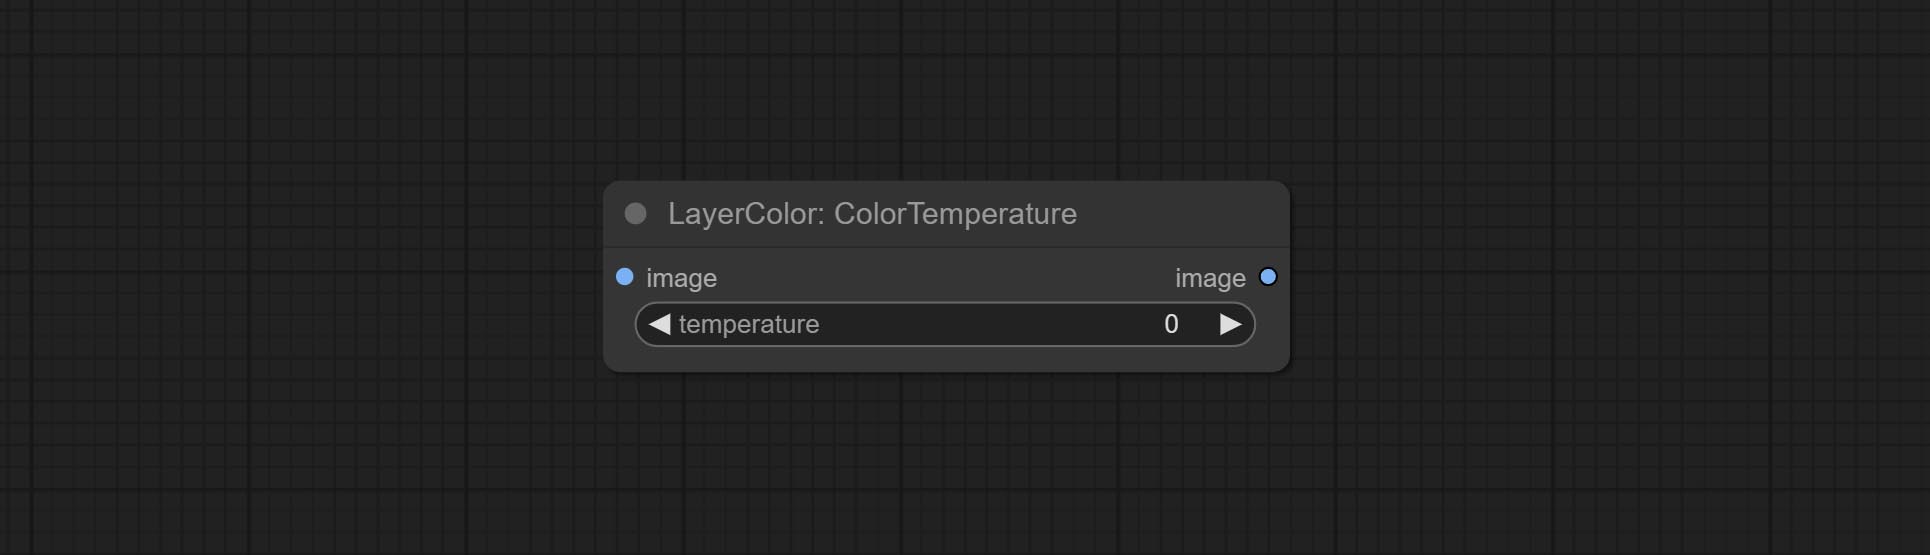
- temperature: Color temperature value. Range between-100 and 100. The higher the value, the higher the color temperature (bluer); The lower the color temperature, the lower the color temperature (yellowish).
Levels
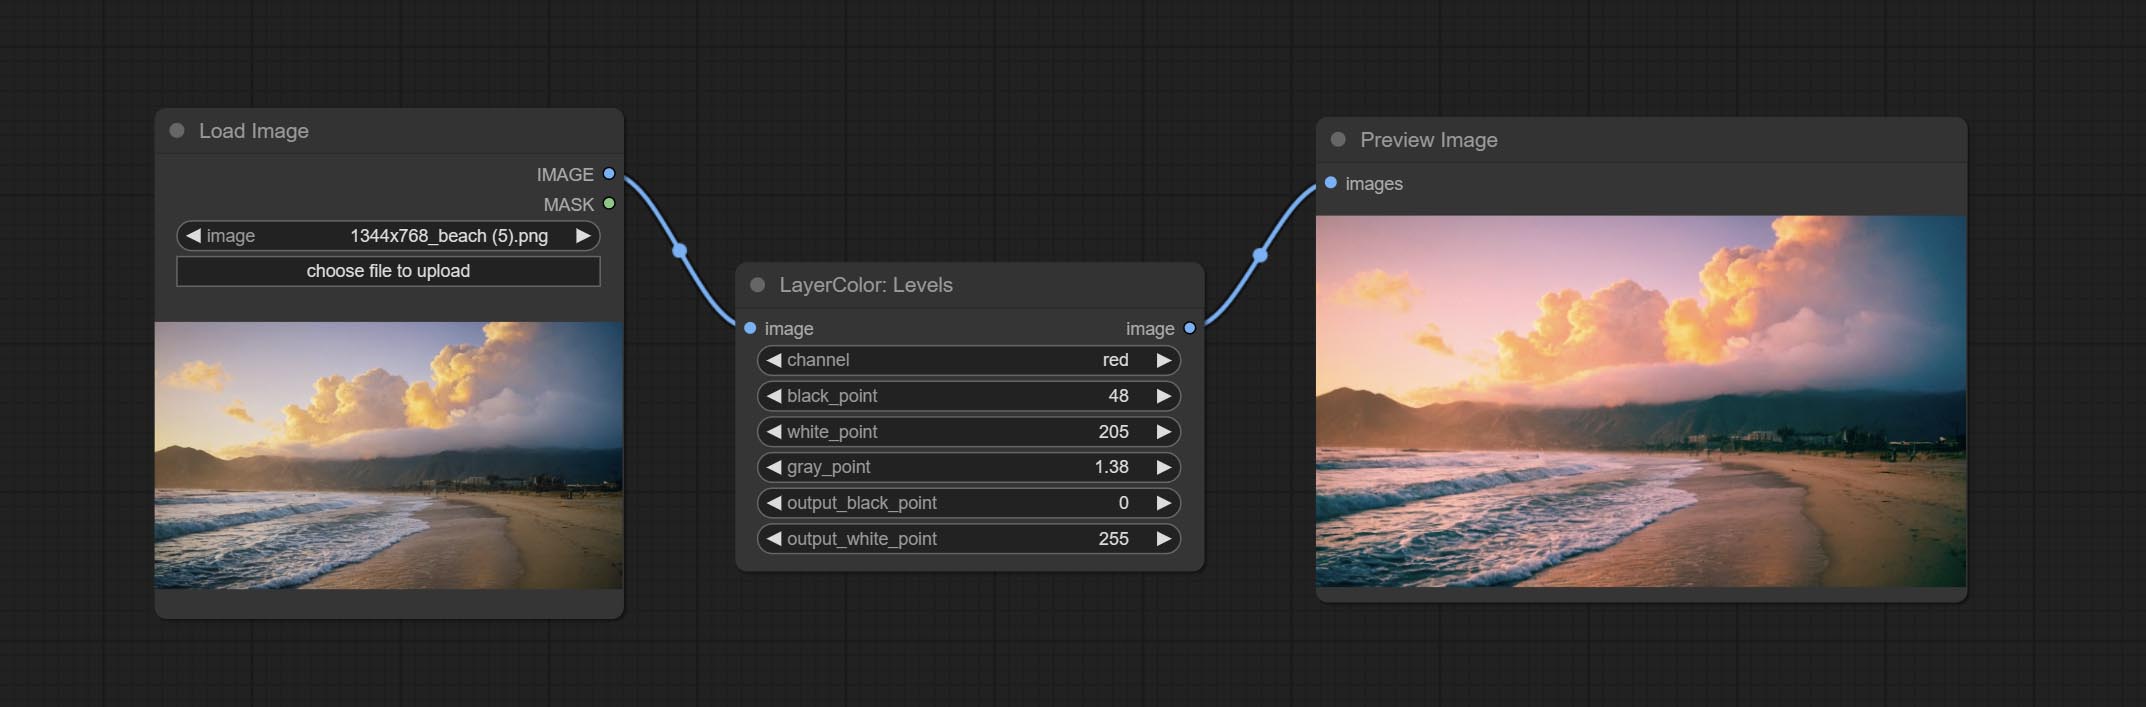
Change the levels of image.
Node Options:
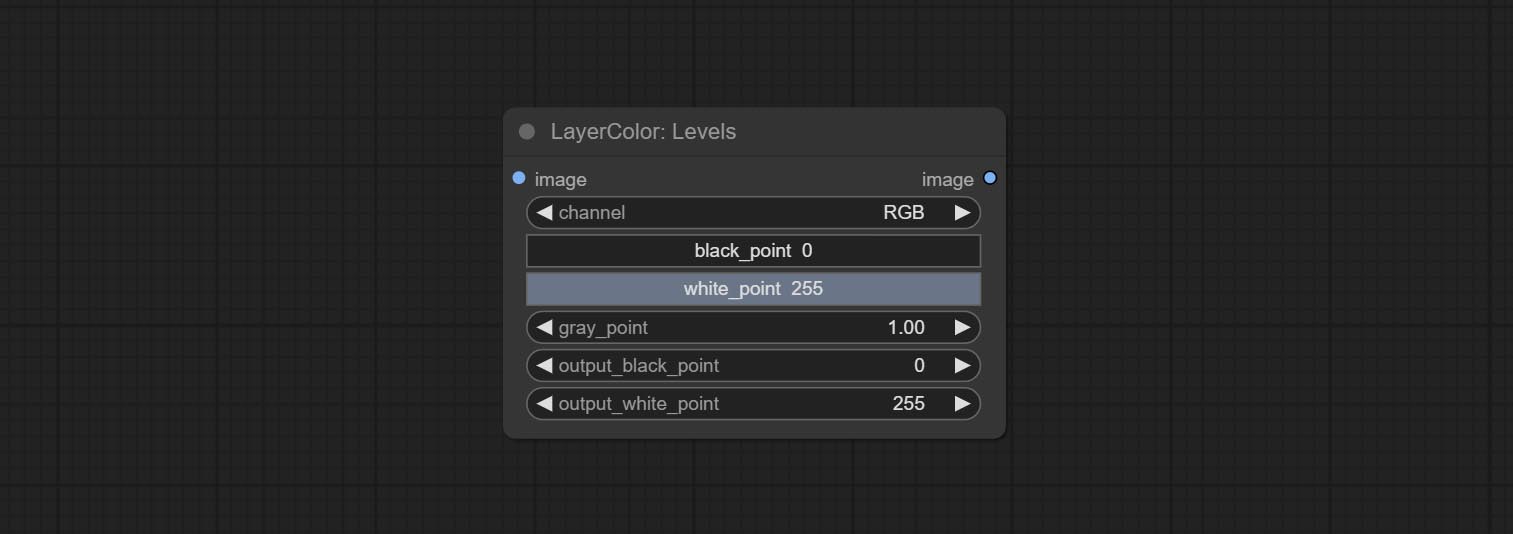
- channel: Select the channel you want to adjust. Available in RGB, red, green, blue.
- black_point * : Input black point value. Value range 0-255, default 0.
- white_point * : Input white point value. Value range 0-255, default 255.
- gray_point: Input grey point values. Value range 0.01-9.99, default 1.
- output_black_point * : Output black point value. Value range 0-255, default 0.
- output_white_point * : Output white point value. Value range 0-255, default 255.
* If the black_point or output_black_point value is greater than white_point or output_white_point, the two values are swapped, with the larger value used as white_point and the smaller value used as black_point.
ColorBalance
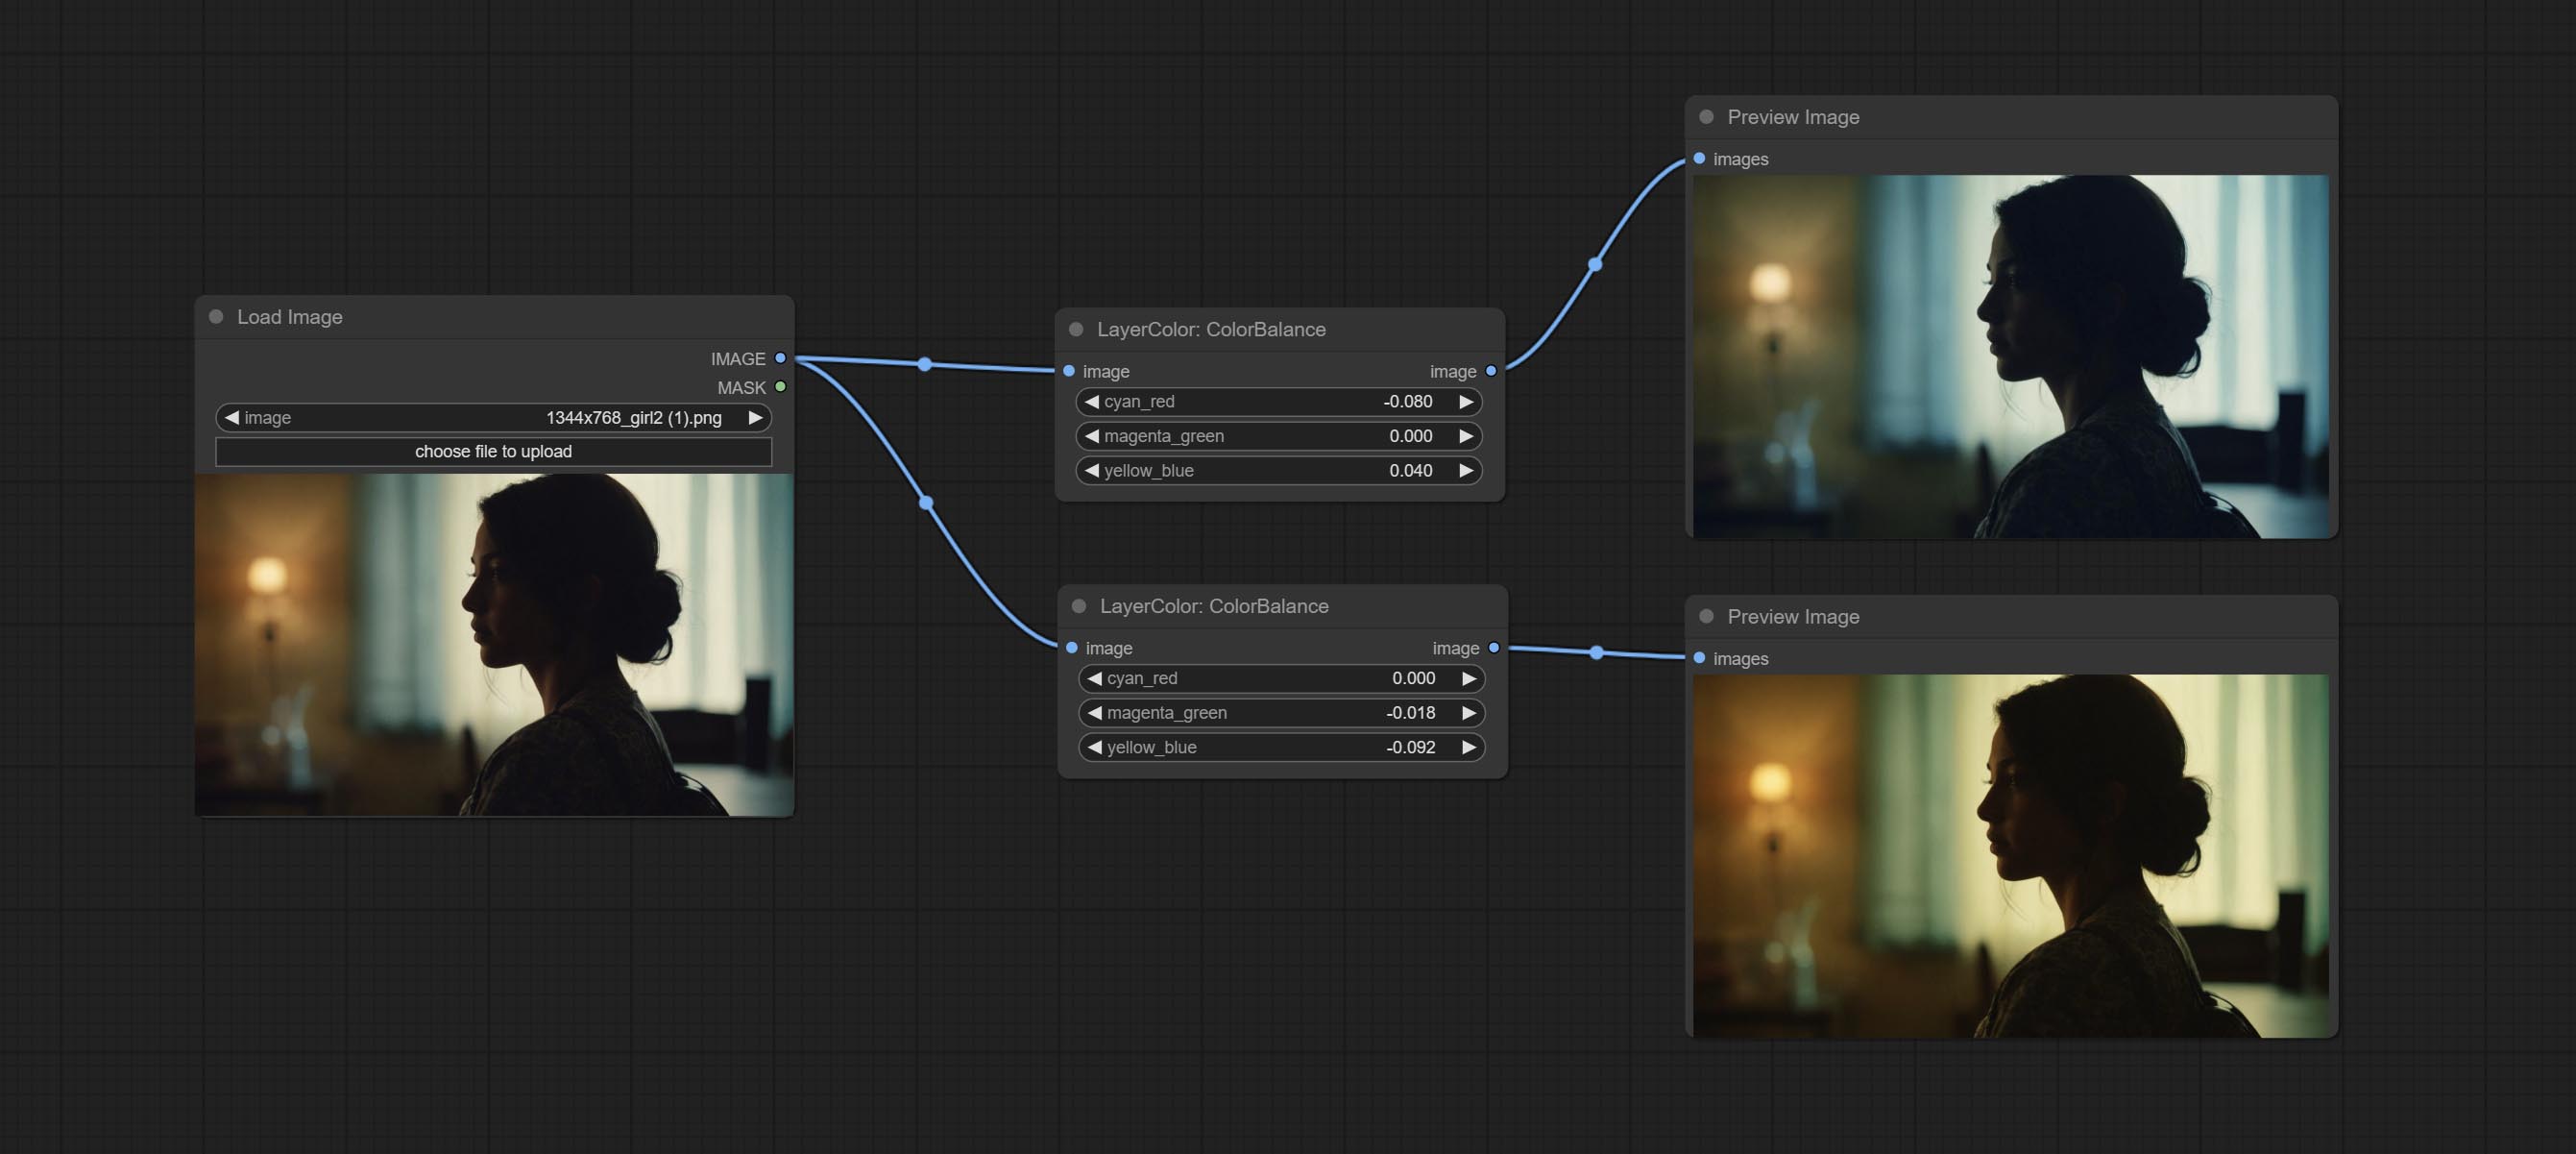
Change the color balance of an image.
Node Options:
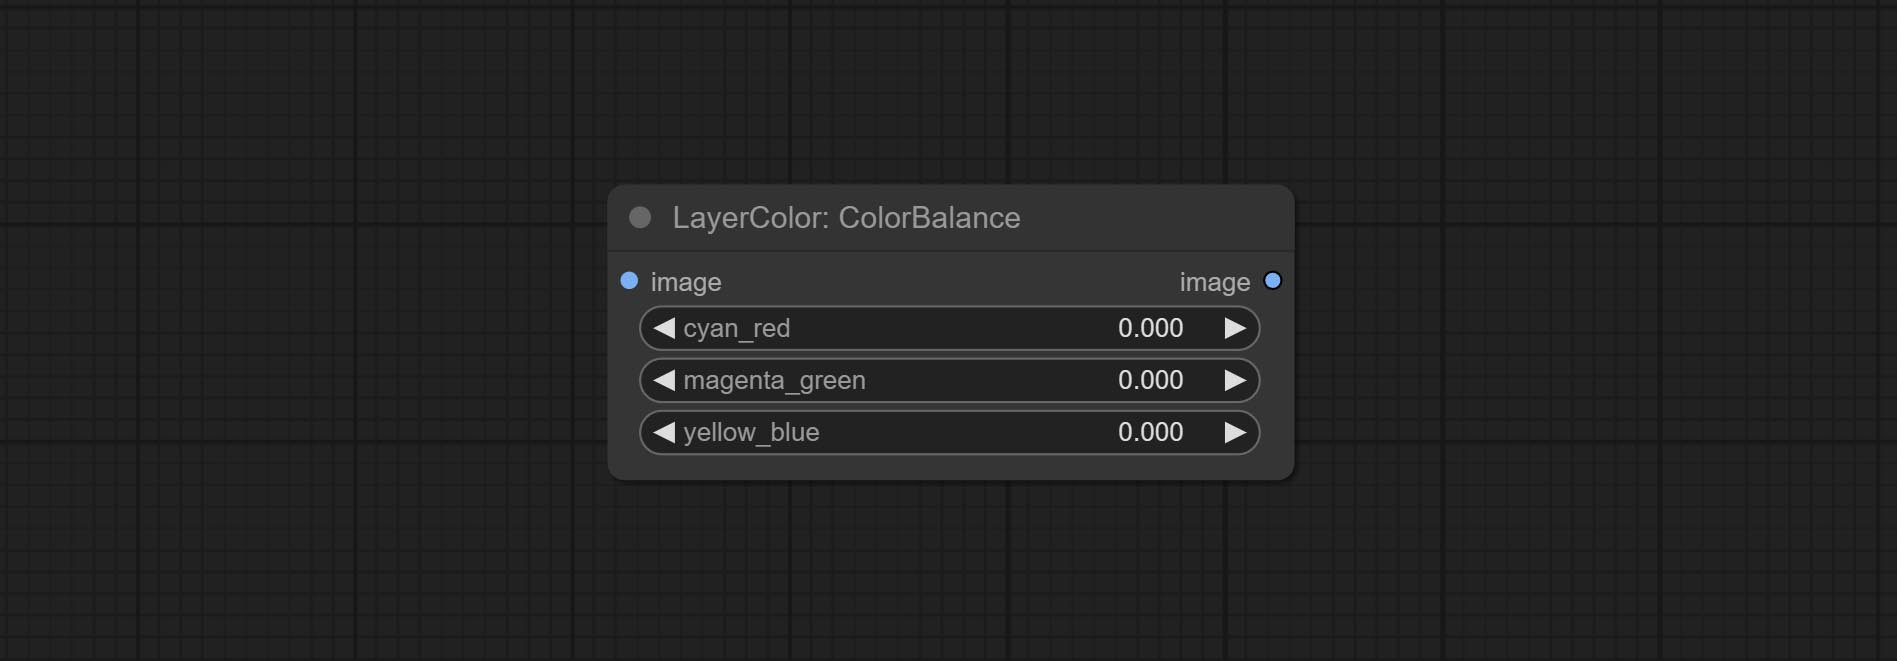
- cyan_red: Cyan-Red balance. negative values are leaning cyan, positive values are leaning red.
- magenta_green: Megenta-Green balance. negative values are leaning megenta, positive values are leaning green.
- yellow_blue: Yellow-Blue balance. negative values are leaning yellow, positive values are leaning blue.
Gama
Change the gamma value of the image.
Node options:
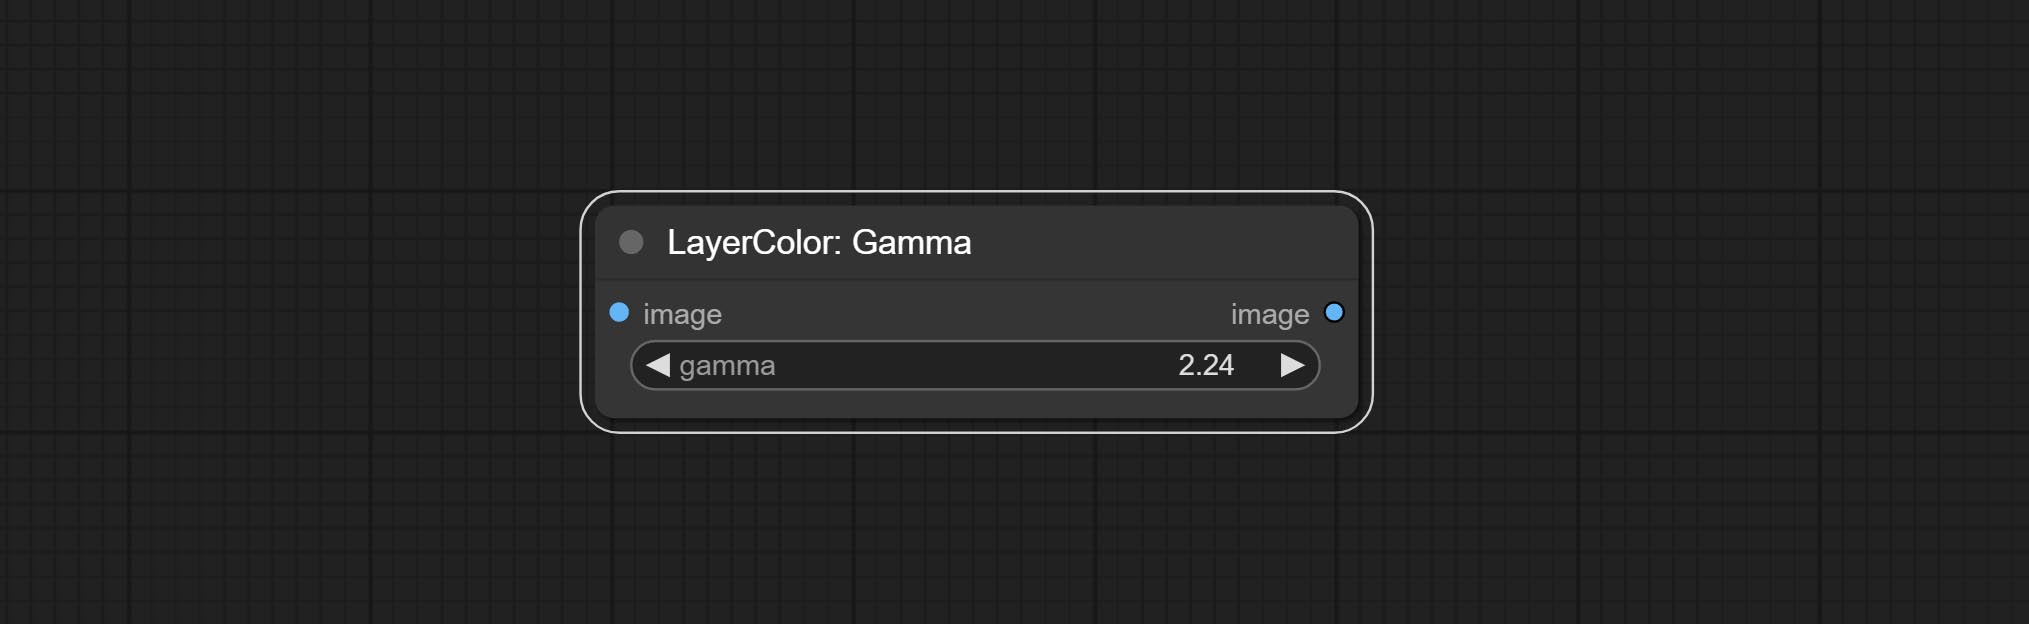
- gamma: Value of the Gamma.
Brightness & Contrast
Change the brightness, contrast, and saturation of the image.
Node options:
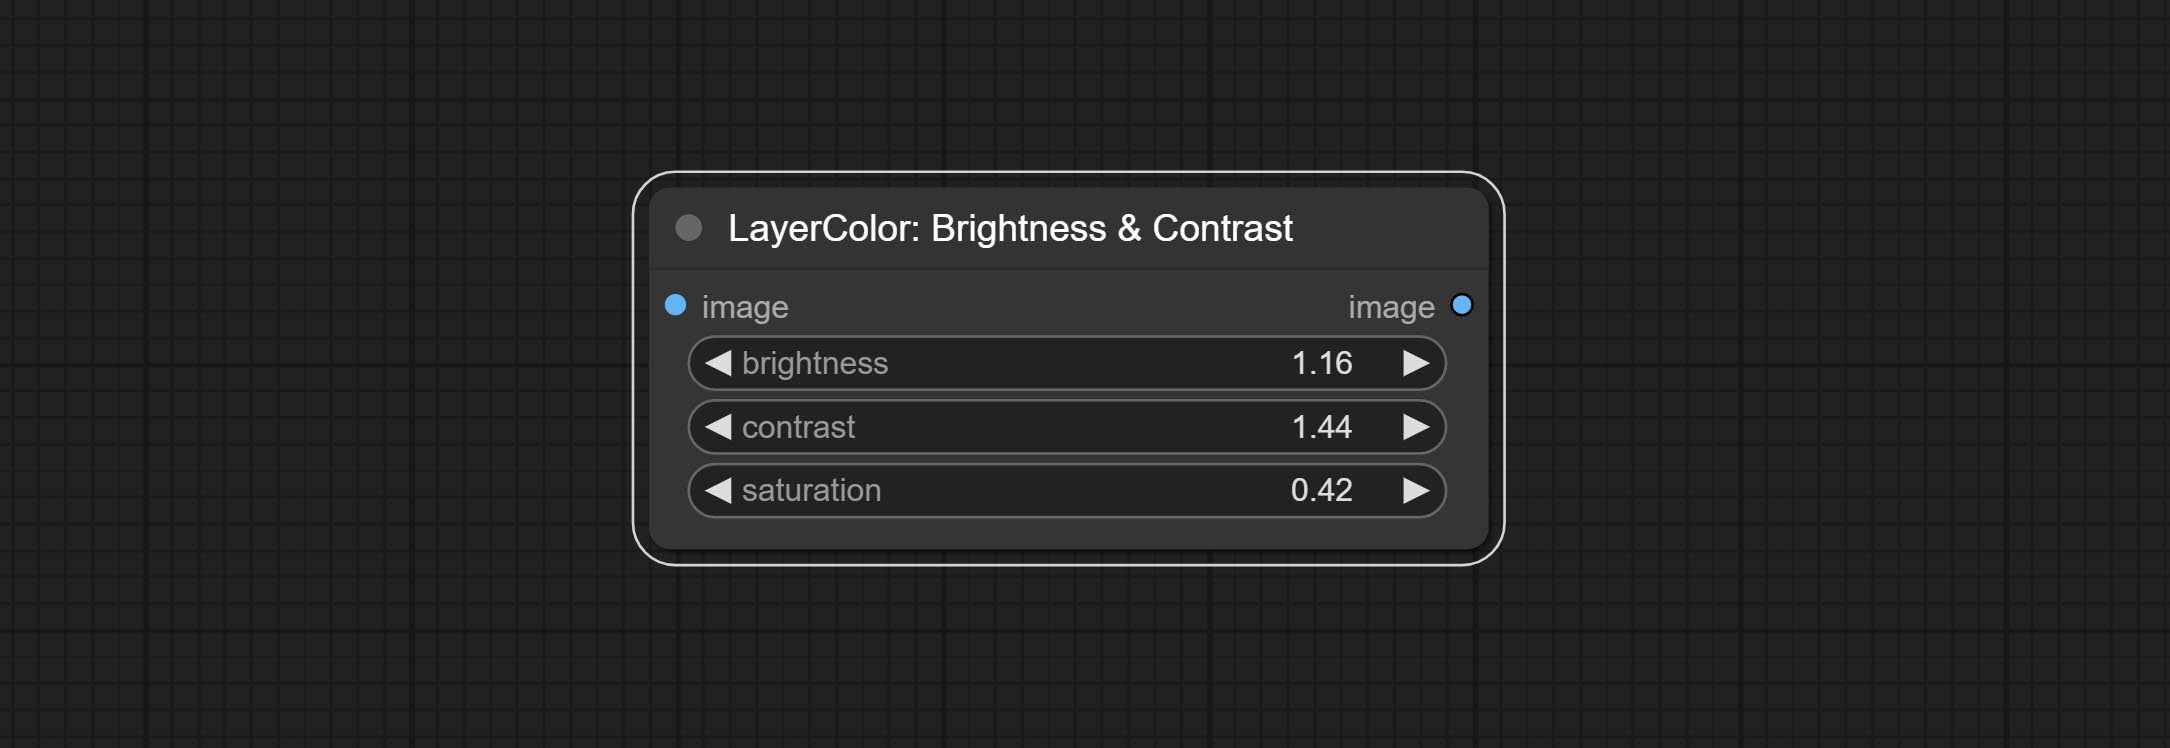
- brightness: Value of brightness.
- contrast: Value of contrast.
- saturation: Value of saturation.
BrightnessContrastV2
A replica of the Brightness & Contrast node, with the "&" character removed from the node name to avoid ComfyUI workflow parsing errors.
RGB
Adjust the RGB channels of the image.
Node options:
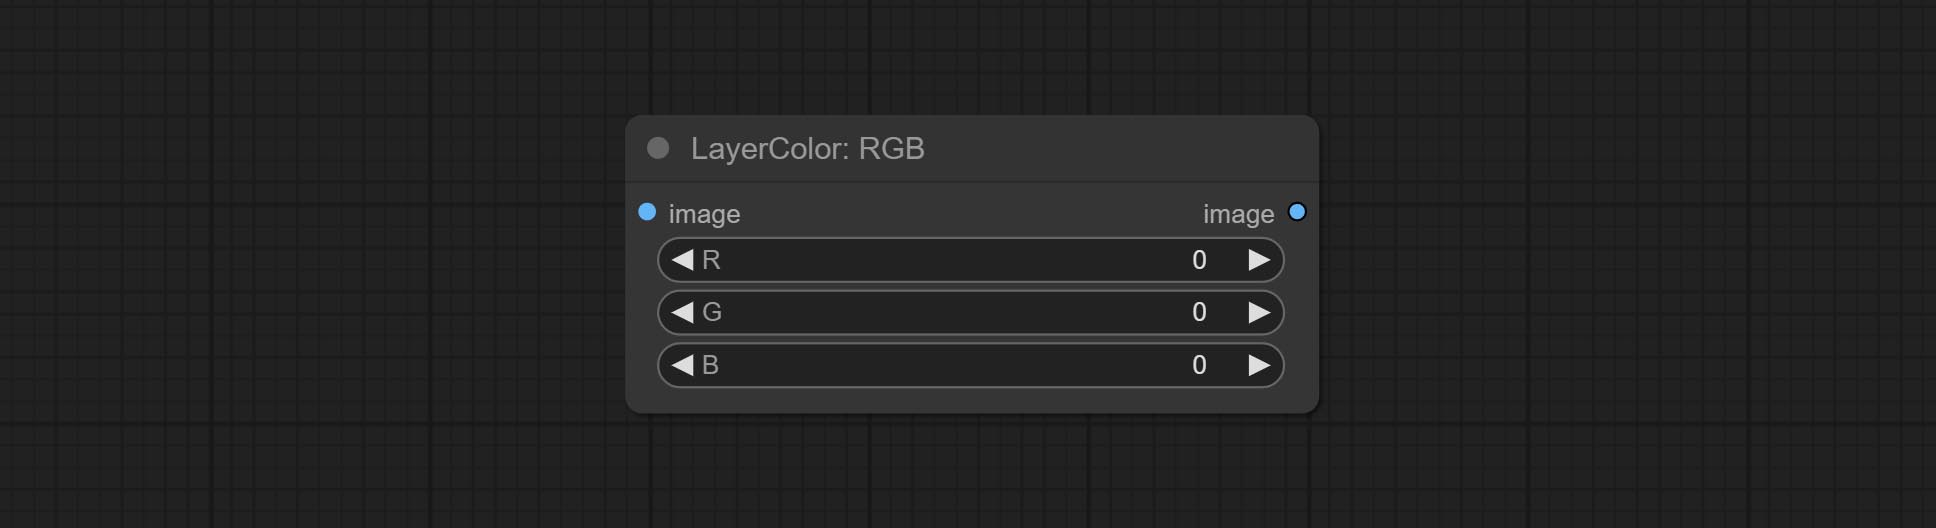
- R: R channel.
- G: G channel.
- B: B channel.
YUV
Adjust the YUV channels of the image.
Node options:
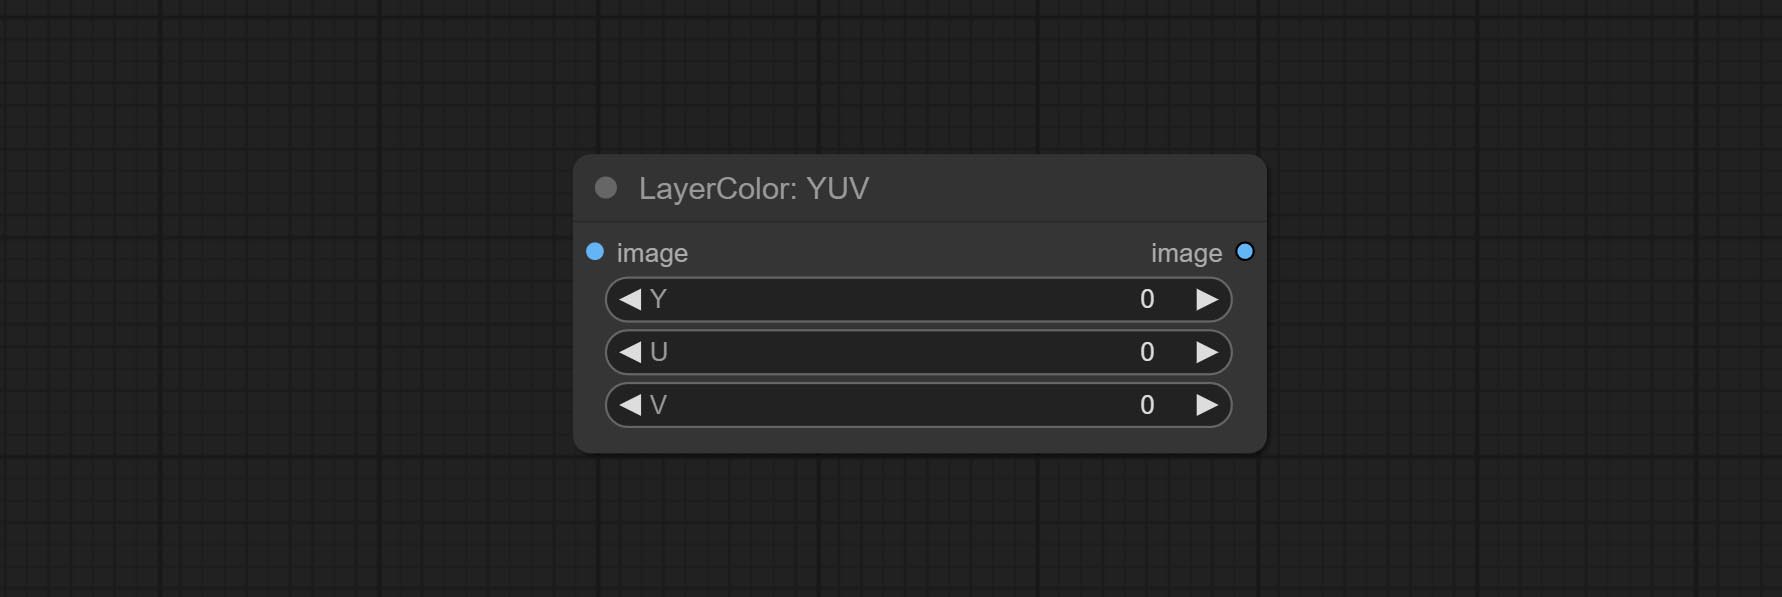
- Y: Y channel.
- U: U channel.
- V: V channel.
LAB
Adjust the LAB channels of the image.
Node options:
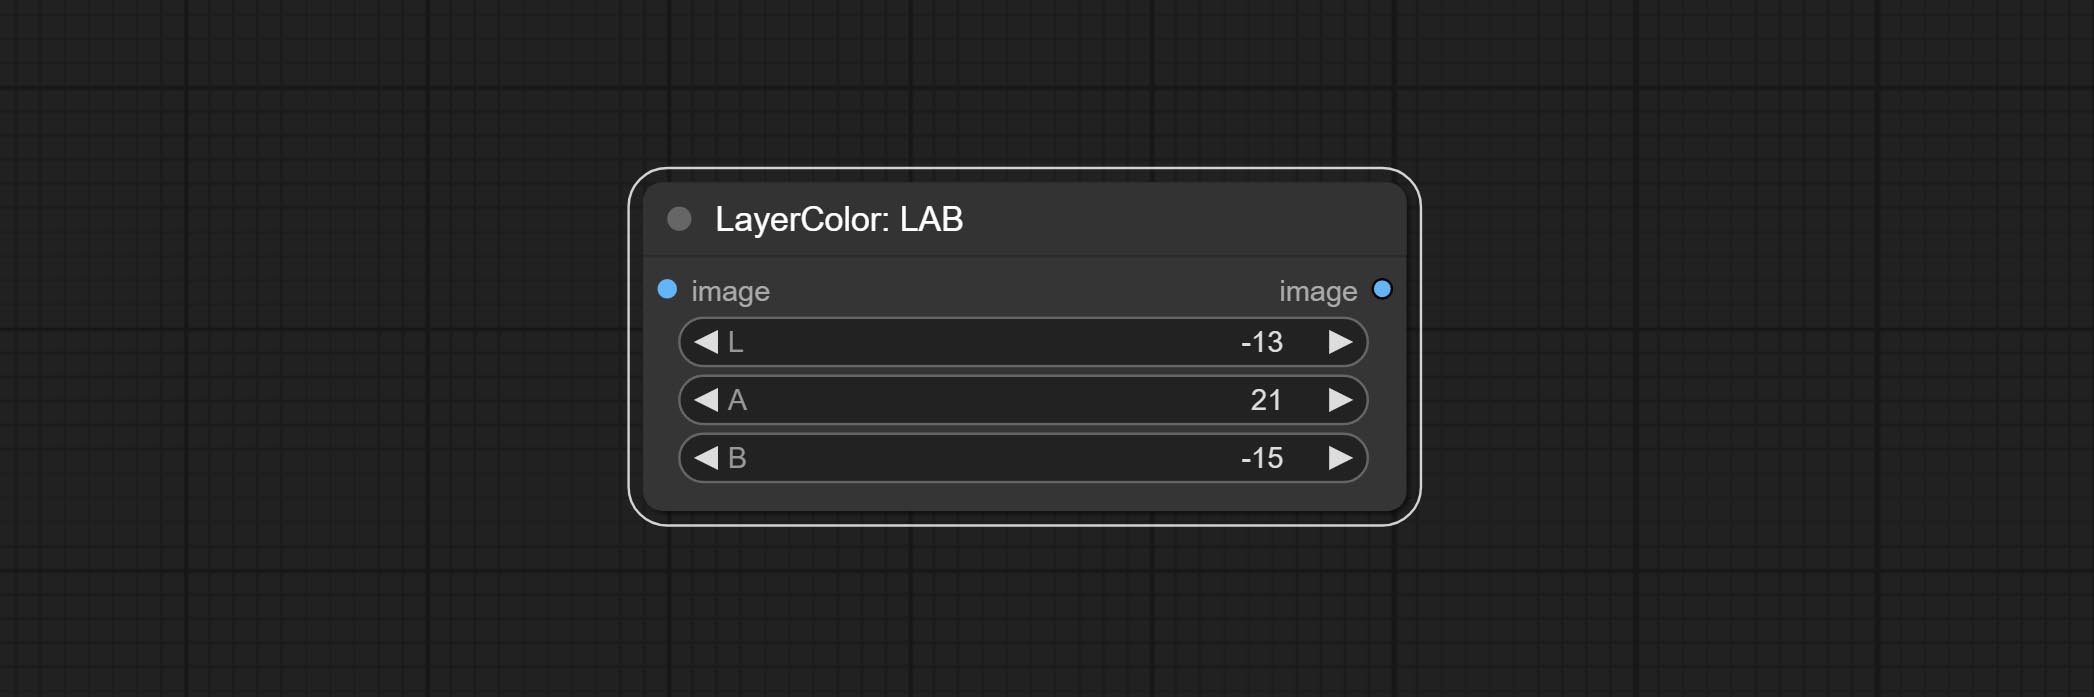
- L: L channel.
- A: A channel.
- B: B channel.
HSV
Adjust the HSV channels of the image.
Node options:
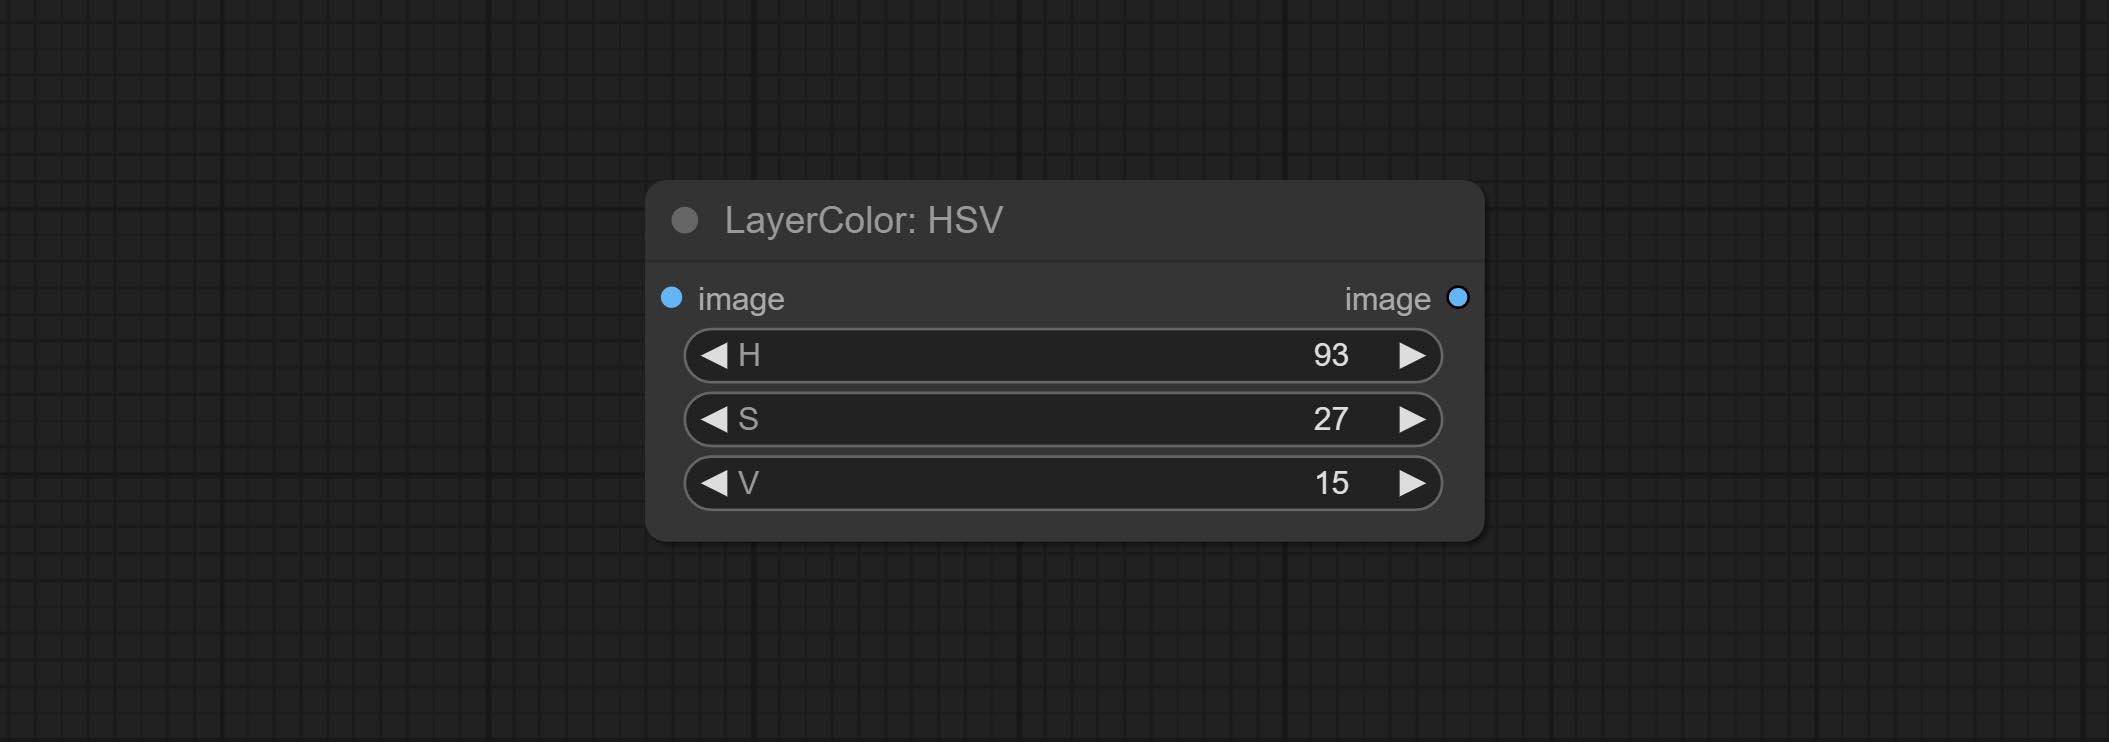
- H: H channel.
- S: S channel.
- V: V channel.
LayerUtility
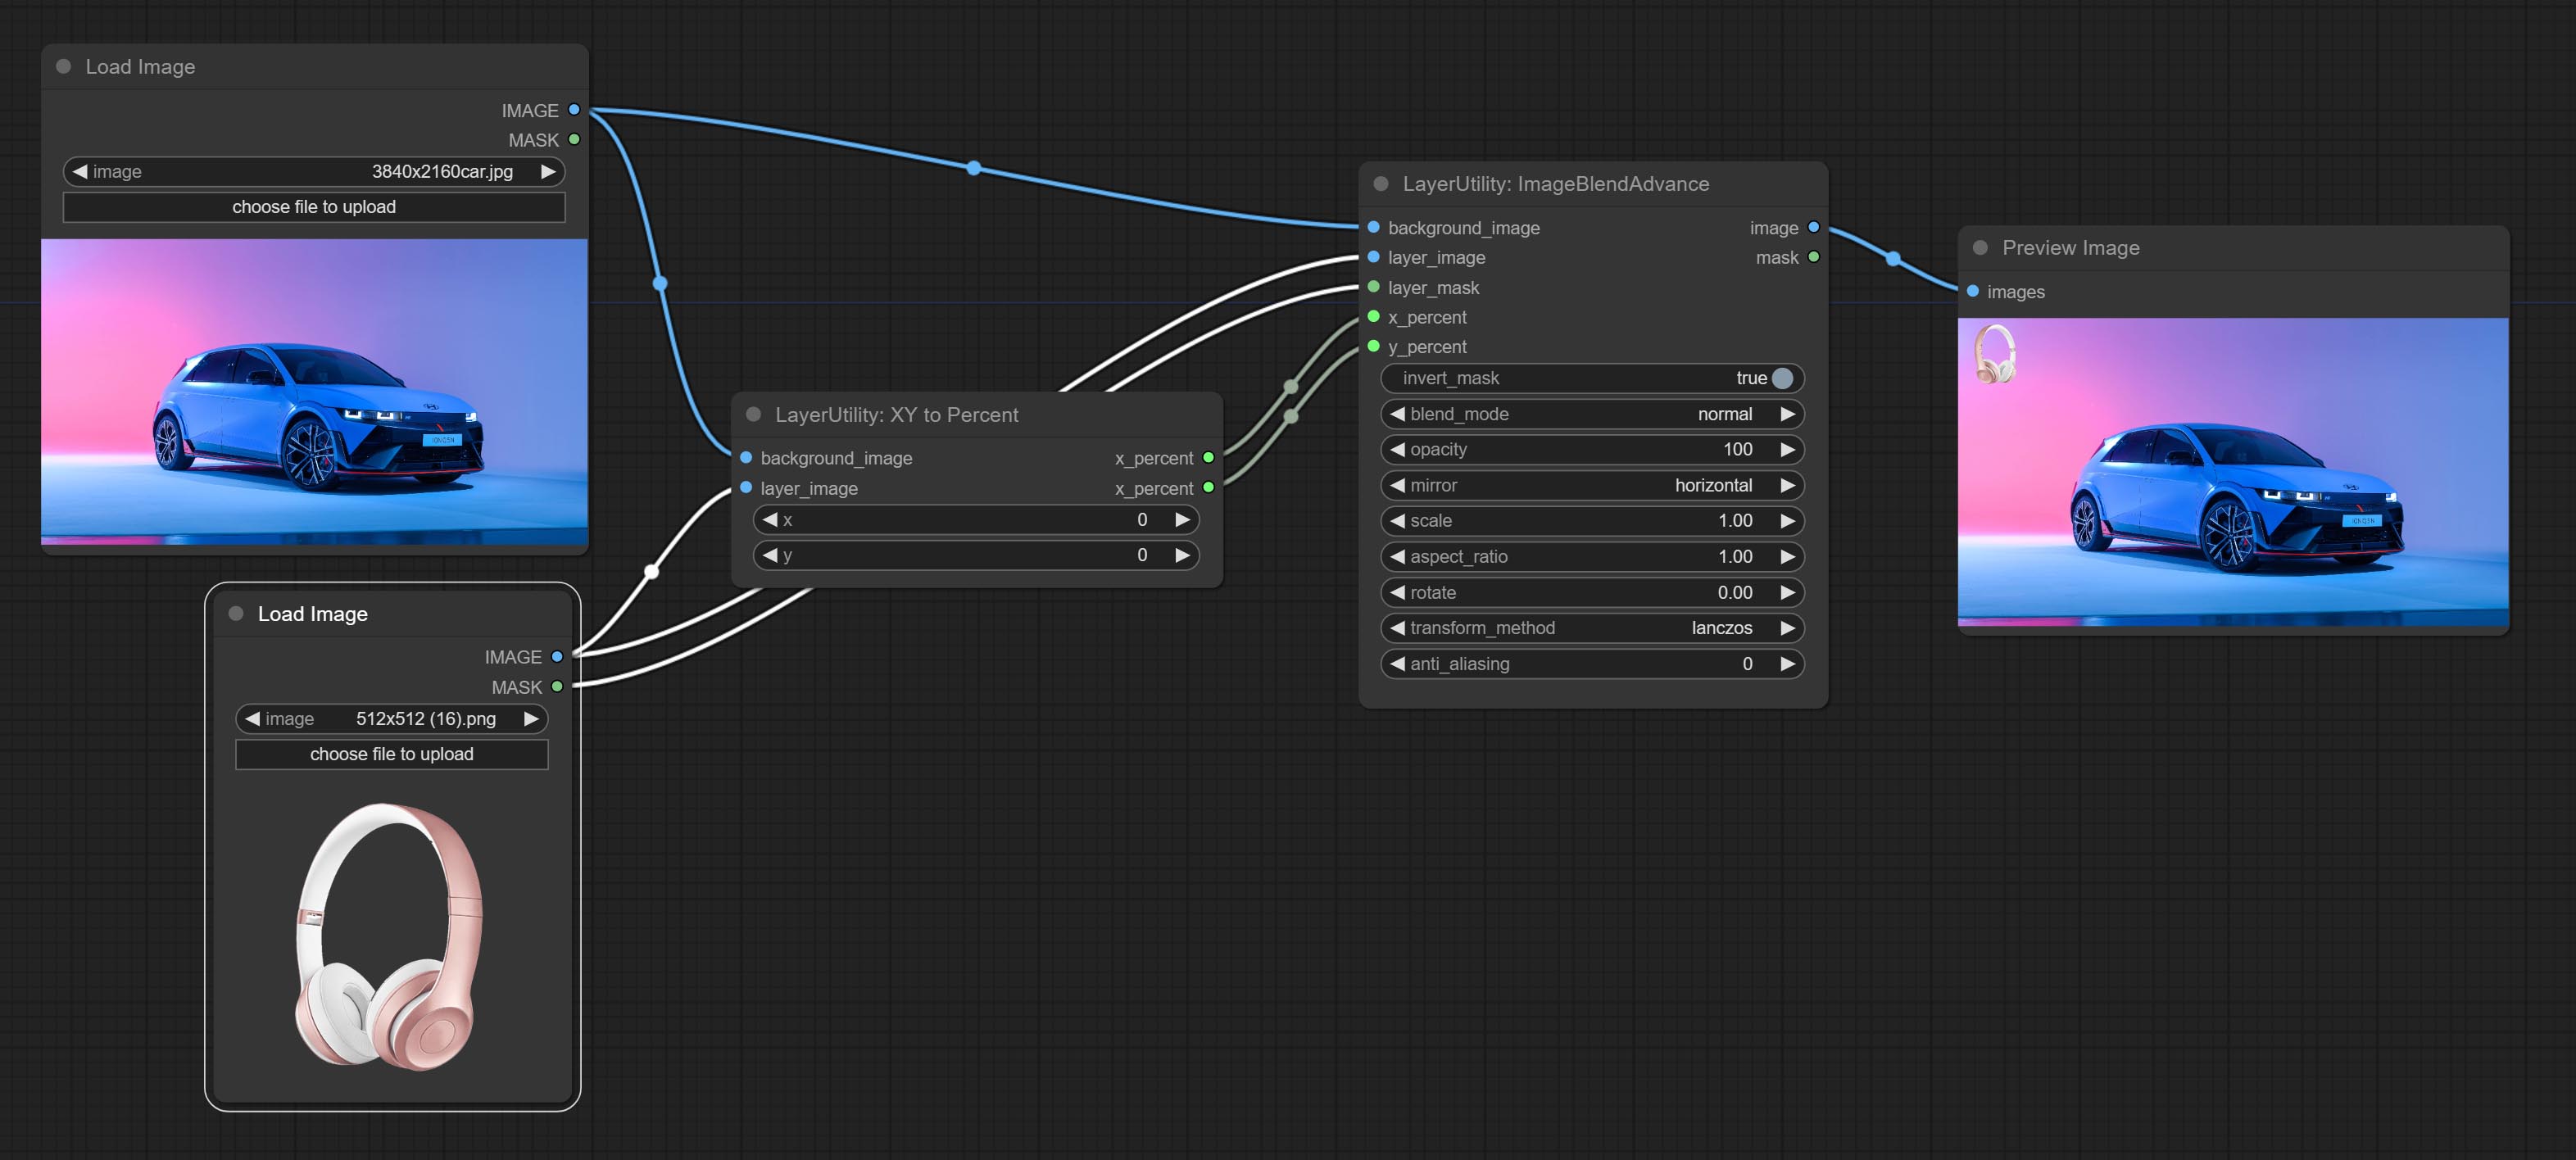
ImageBlendAdvance
Used for compositing layers, allowing for compositing layer images of different sizes on the background image, and setting positions and transformations. multiple mixing modes are available for selection, and transparency can be set.
The node provide layer transformation_methods and anti_aliasing options. helps improve the quality of synthesized images.
The node provides mask output that can be used for subsequent workflows. 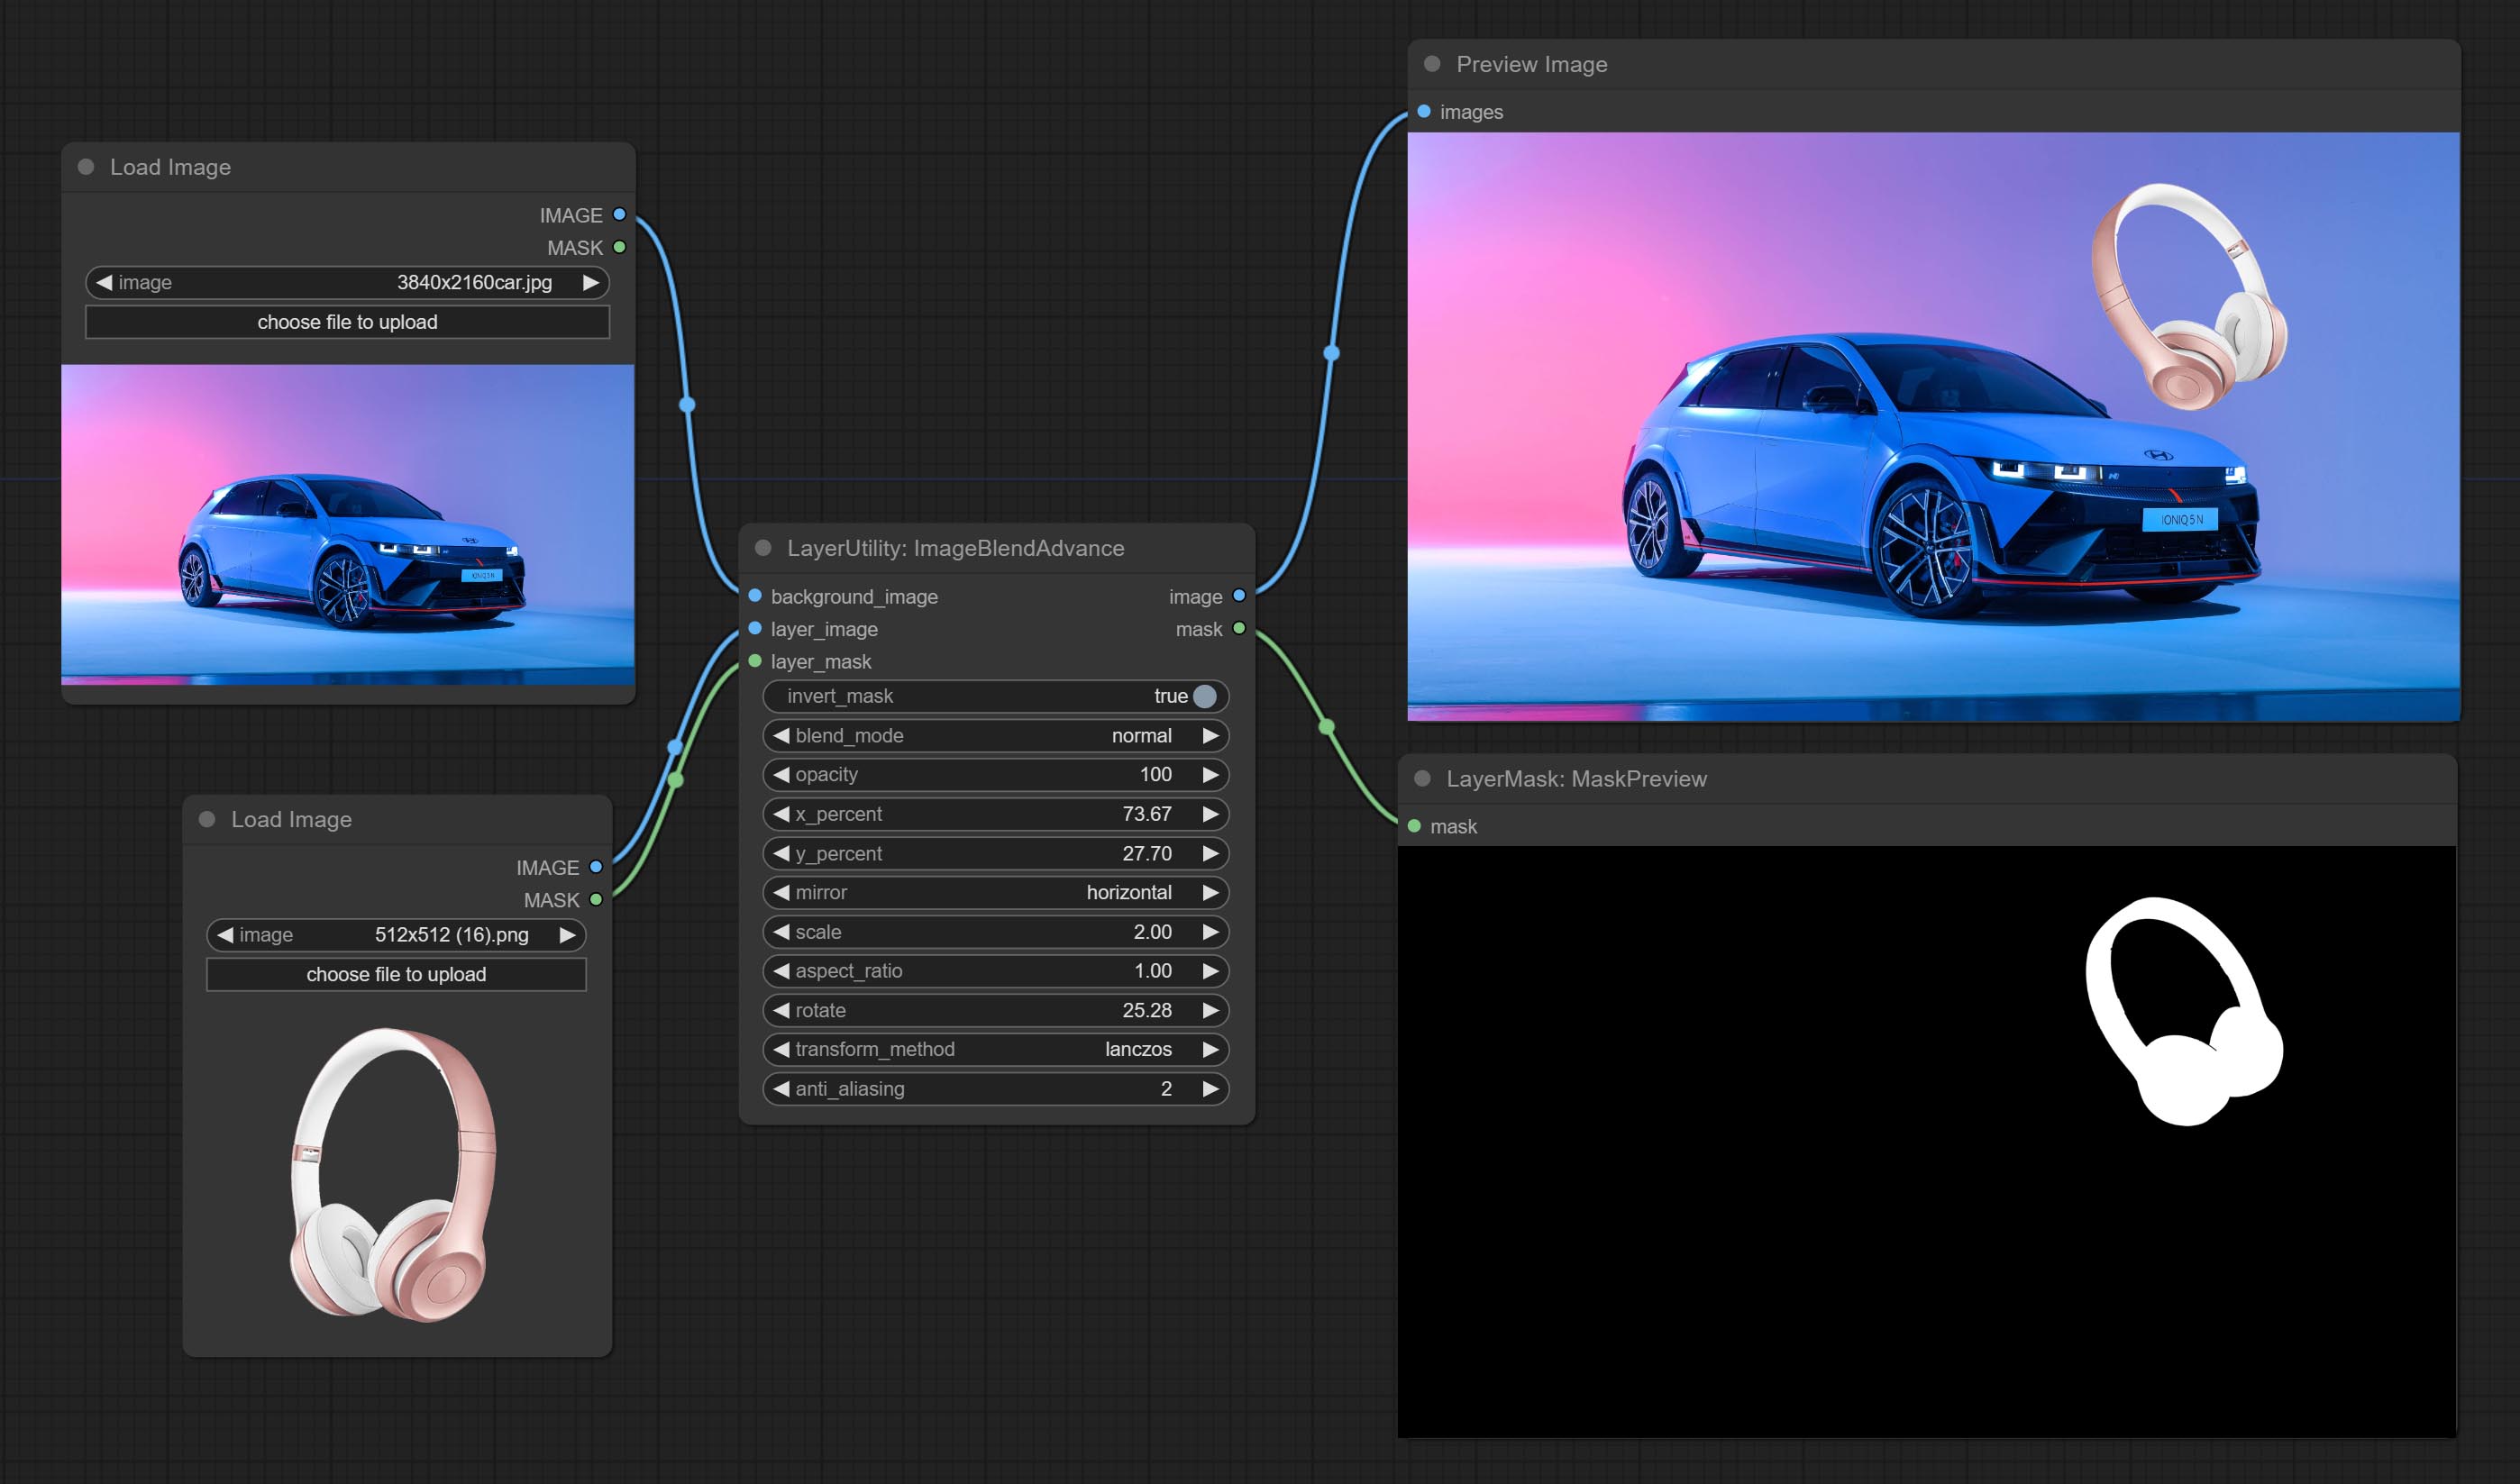
Node options:
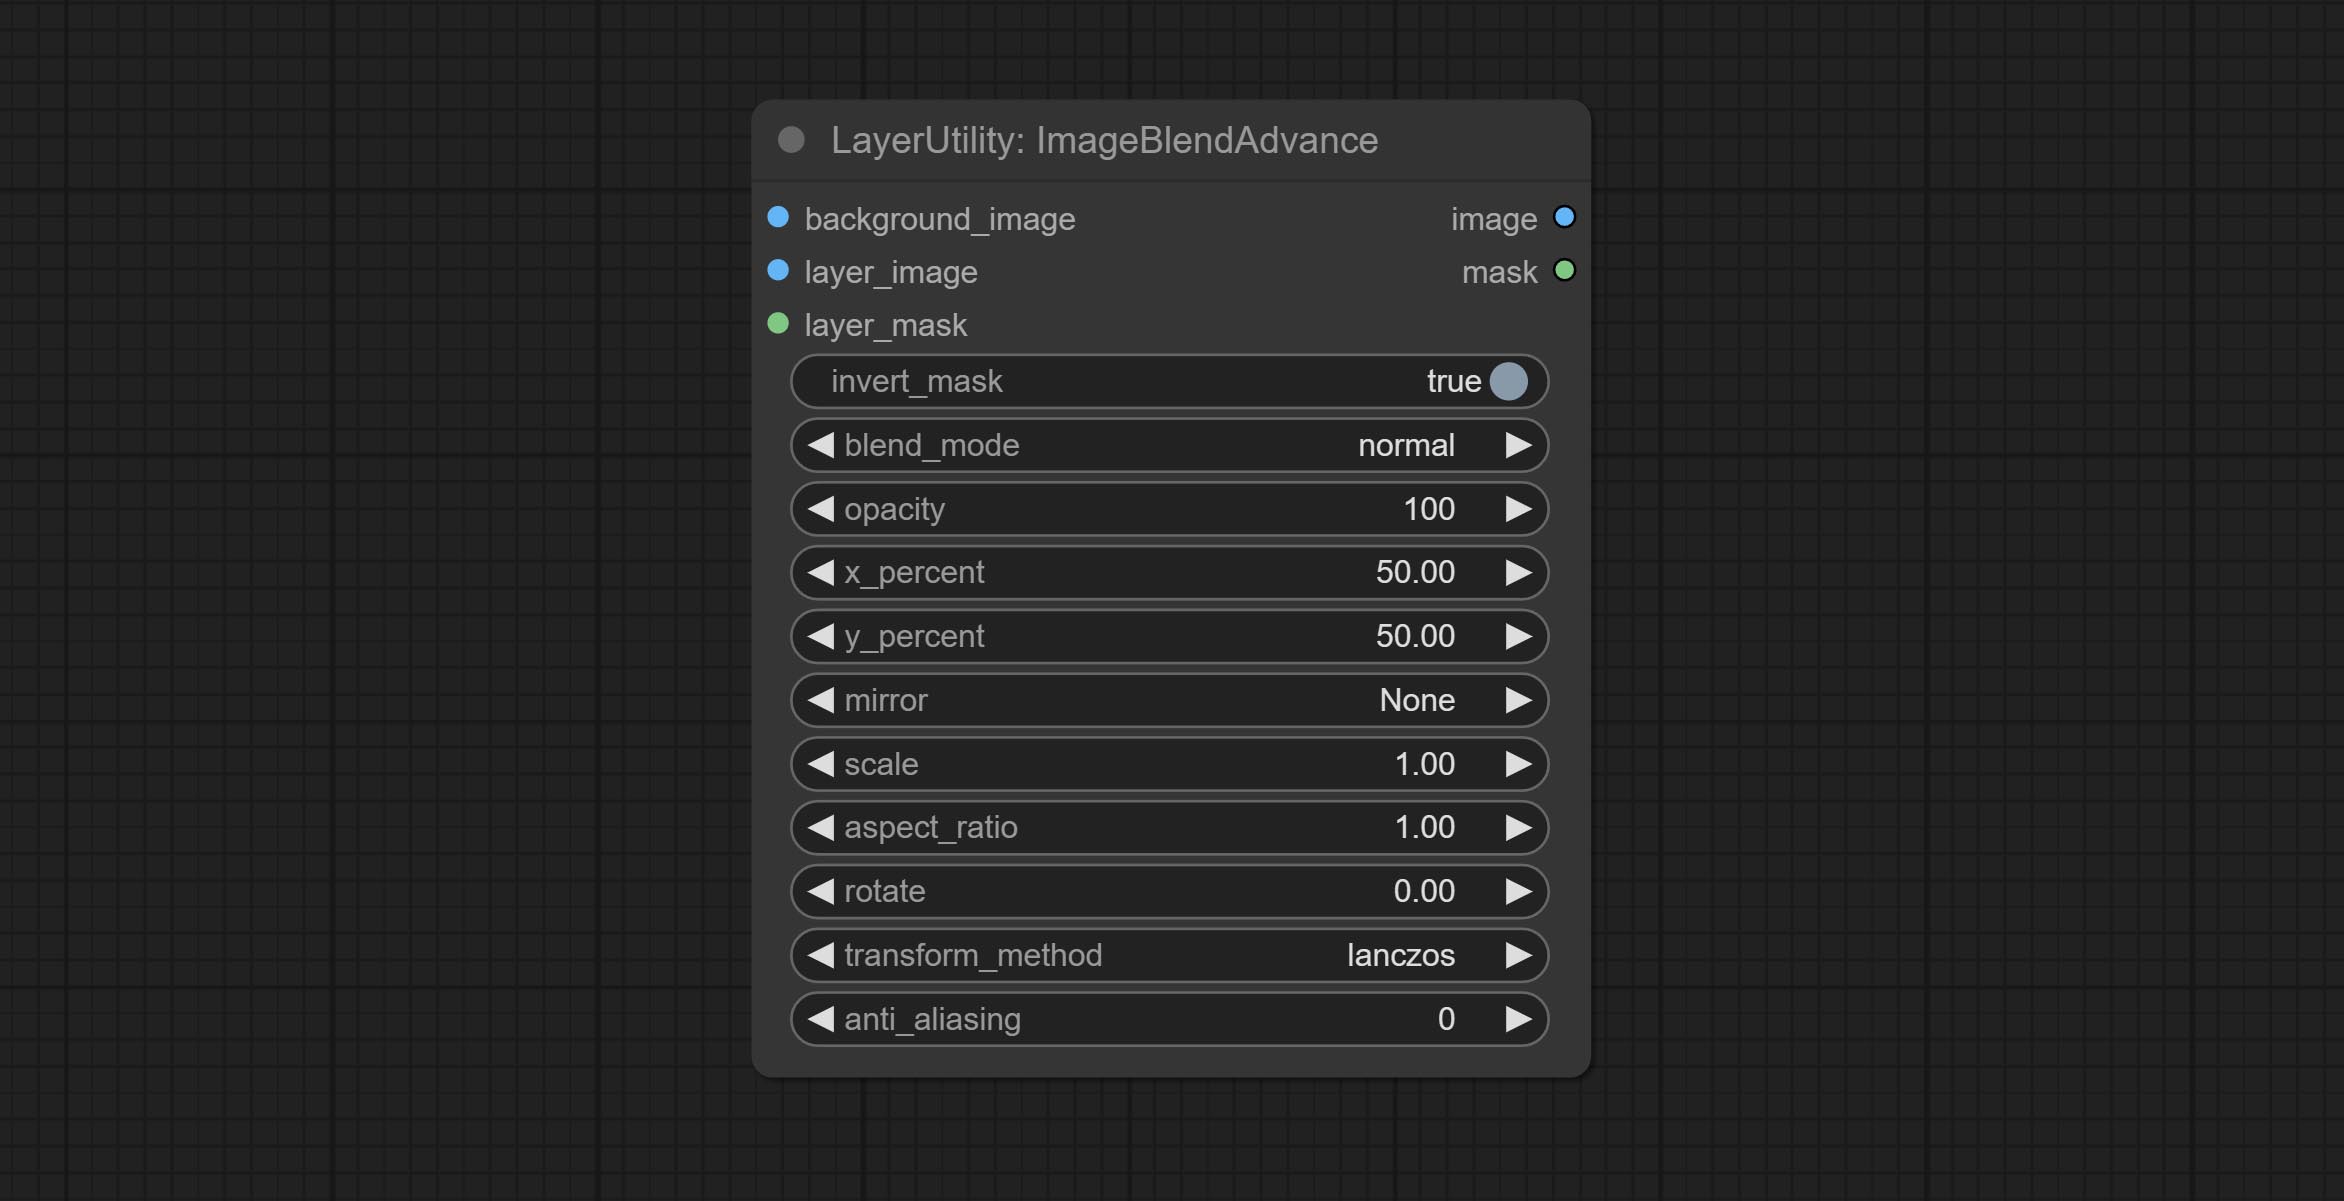
- background_image: The background image.
- layer_image 5 : Layer image for composite.
- layer_mask 2,5 : Mask for layer_image.
- invert_mask: Whether to reverse the mask.
- blend_mode 3 : Blending mode.
- opacity: Opacity of blend.
- x_percent: Horizontal position of the layer on the background image, expressed as a percentage, with 0 on the far left and 100 on the far right. It can be less than 0 or more than 100, indicating that some of the layer's content is outside the screen.
- y_percent: Vertical position of the layer on the background image, expressed as a percentage, with 0 on the top and 100 on the bottom. For example, setting it to 50 indicates vertical center, 20 indicates upper center, and 80 indicates lower center.
- mirror: Mirror flipping. Provide two flipping modes, horizontal flipping and vertical flipping.
- scale: Layer magnification, 1.0 represents the original size.
- aspect_ratio: Layer aspect ratio. 1.0 is the original ratio, a value greater than this indicates elongation, and a value less than this indicates flattening.
- rotate: Layer rotation degree.
- Sampling methods for layer enlargement and rotation, including lanczos, bicubic, hamming, bilinear, box and nearest. Different sampling methods can affect the image quality and processing time of the synthesized image.
- anti_aliasing: Anti aliasing, ranging from 0 to 16, the larger the value, the less obvious the aliasing. An excessively high value will significantly reduce the processing speed of the node.
- observação
CropByMask
Crop the image according to the mask range, and set the size of the surrounding borders to be retained. This node can be used in conjunction with the RestoreCropBox and ImageScaleRestore nodes to crop and modify upscale parts of image, and then paste them back in place. 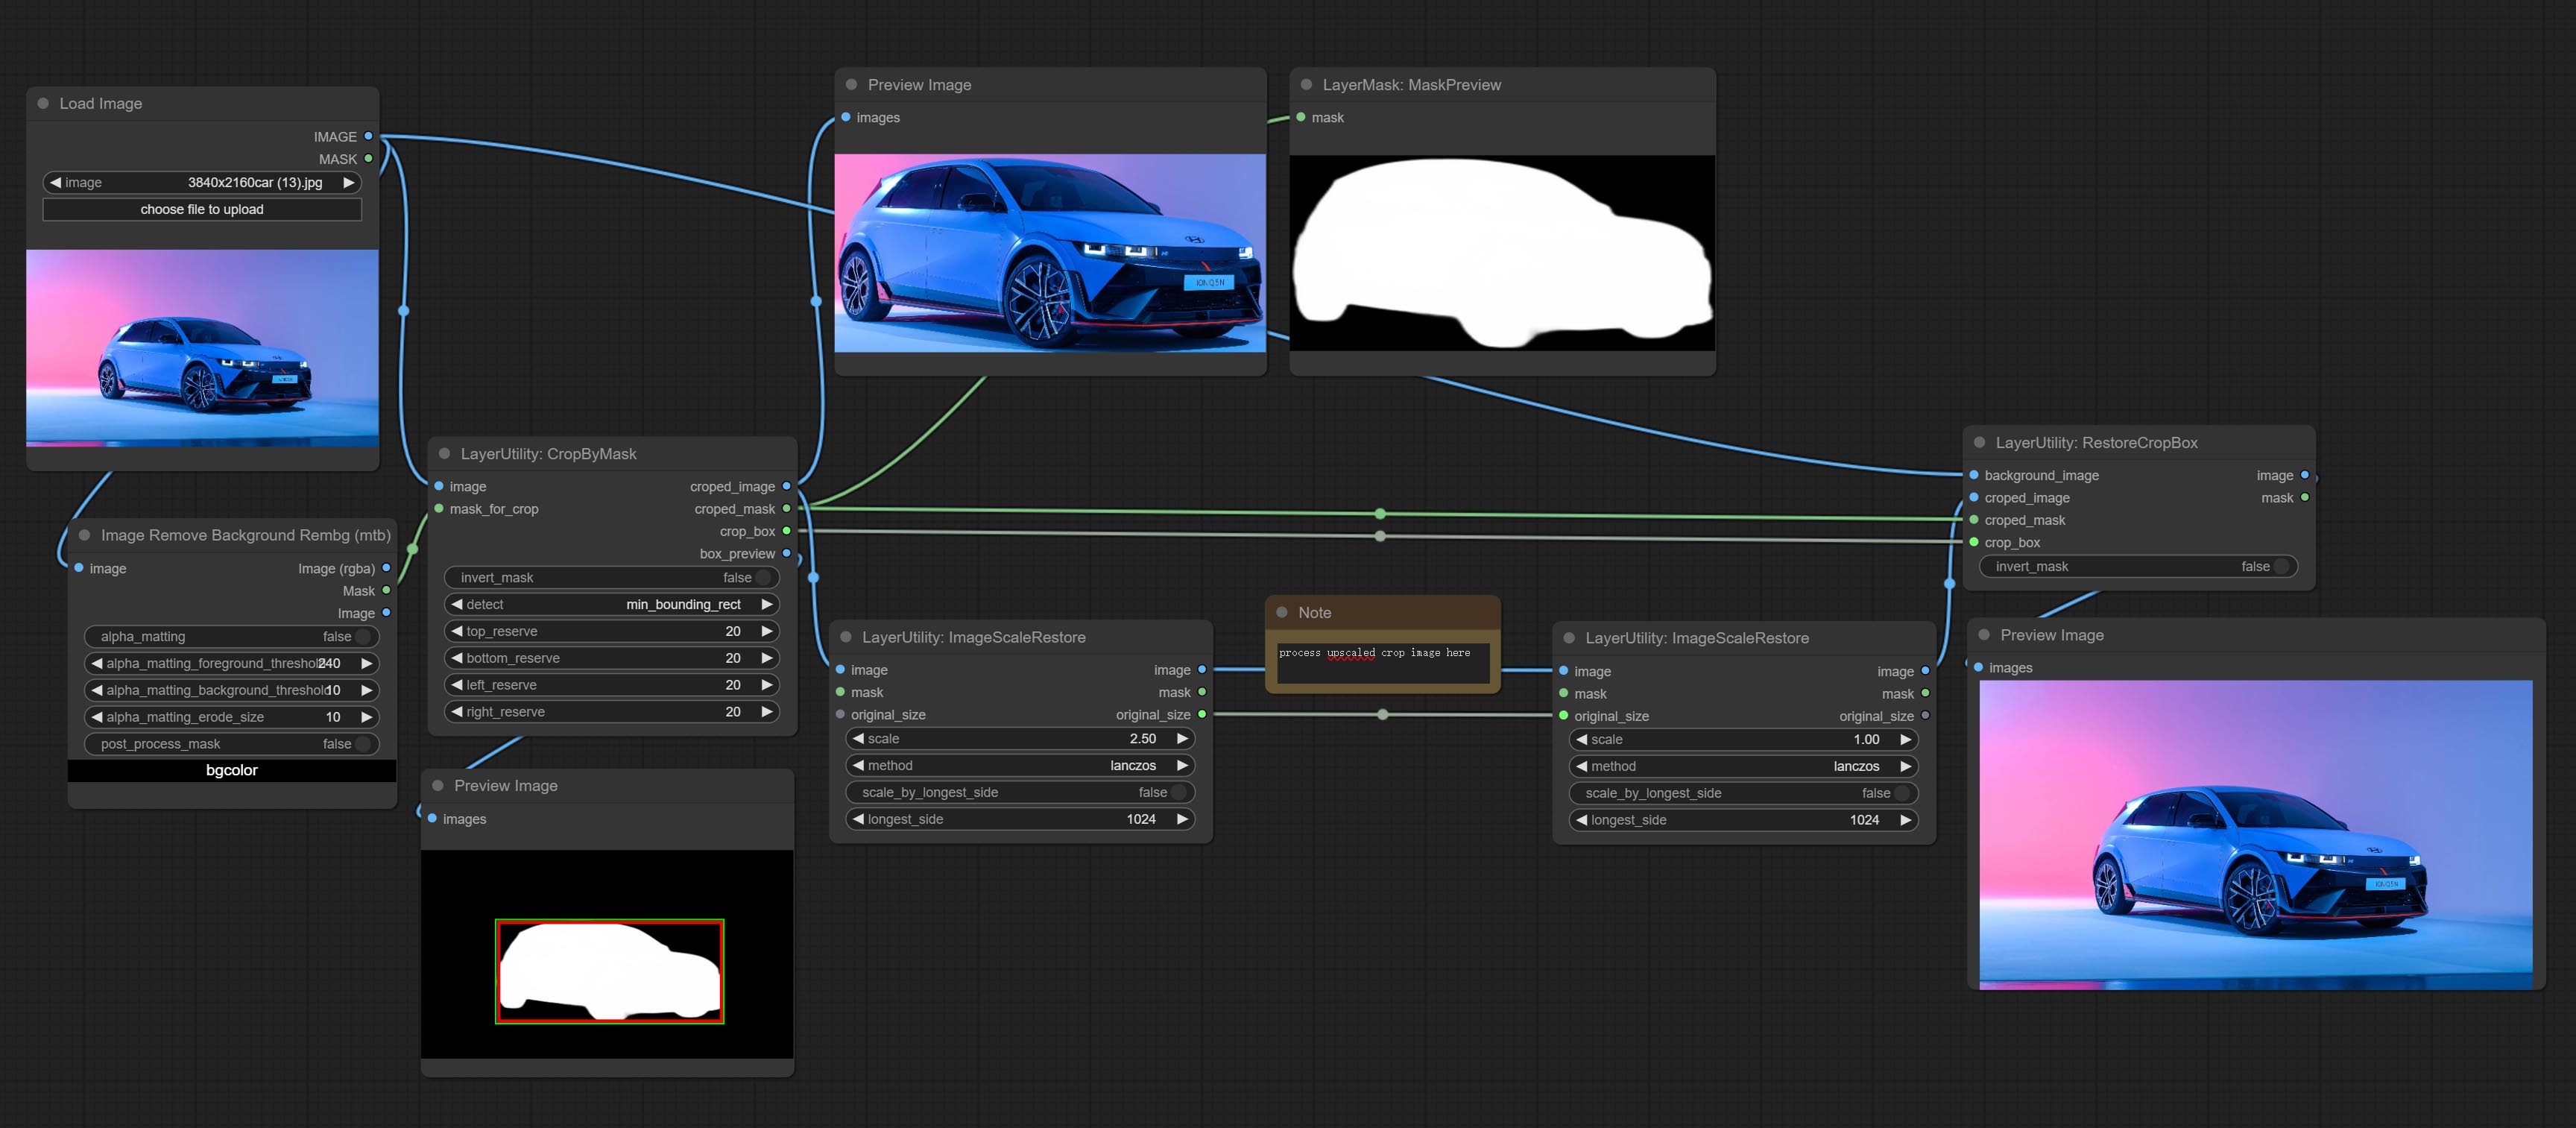
Node options:
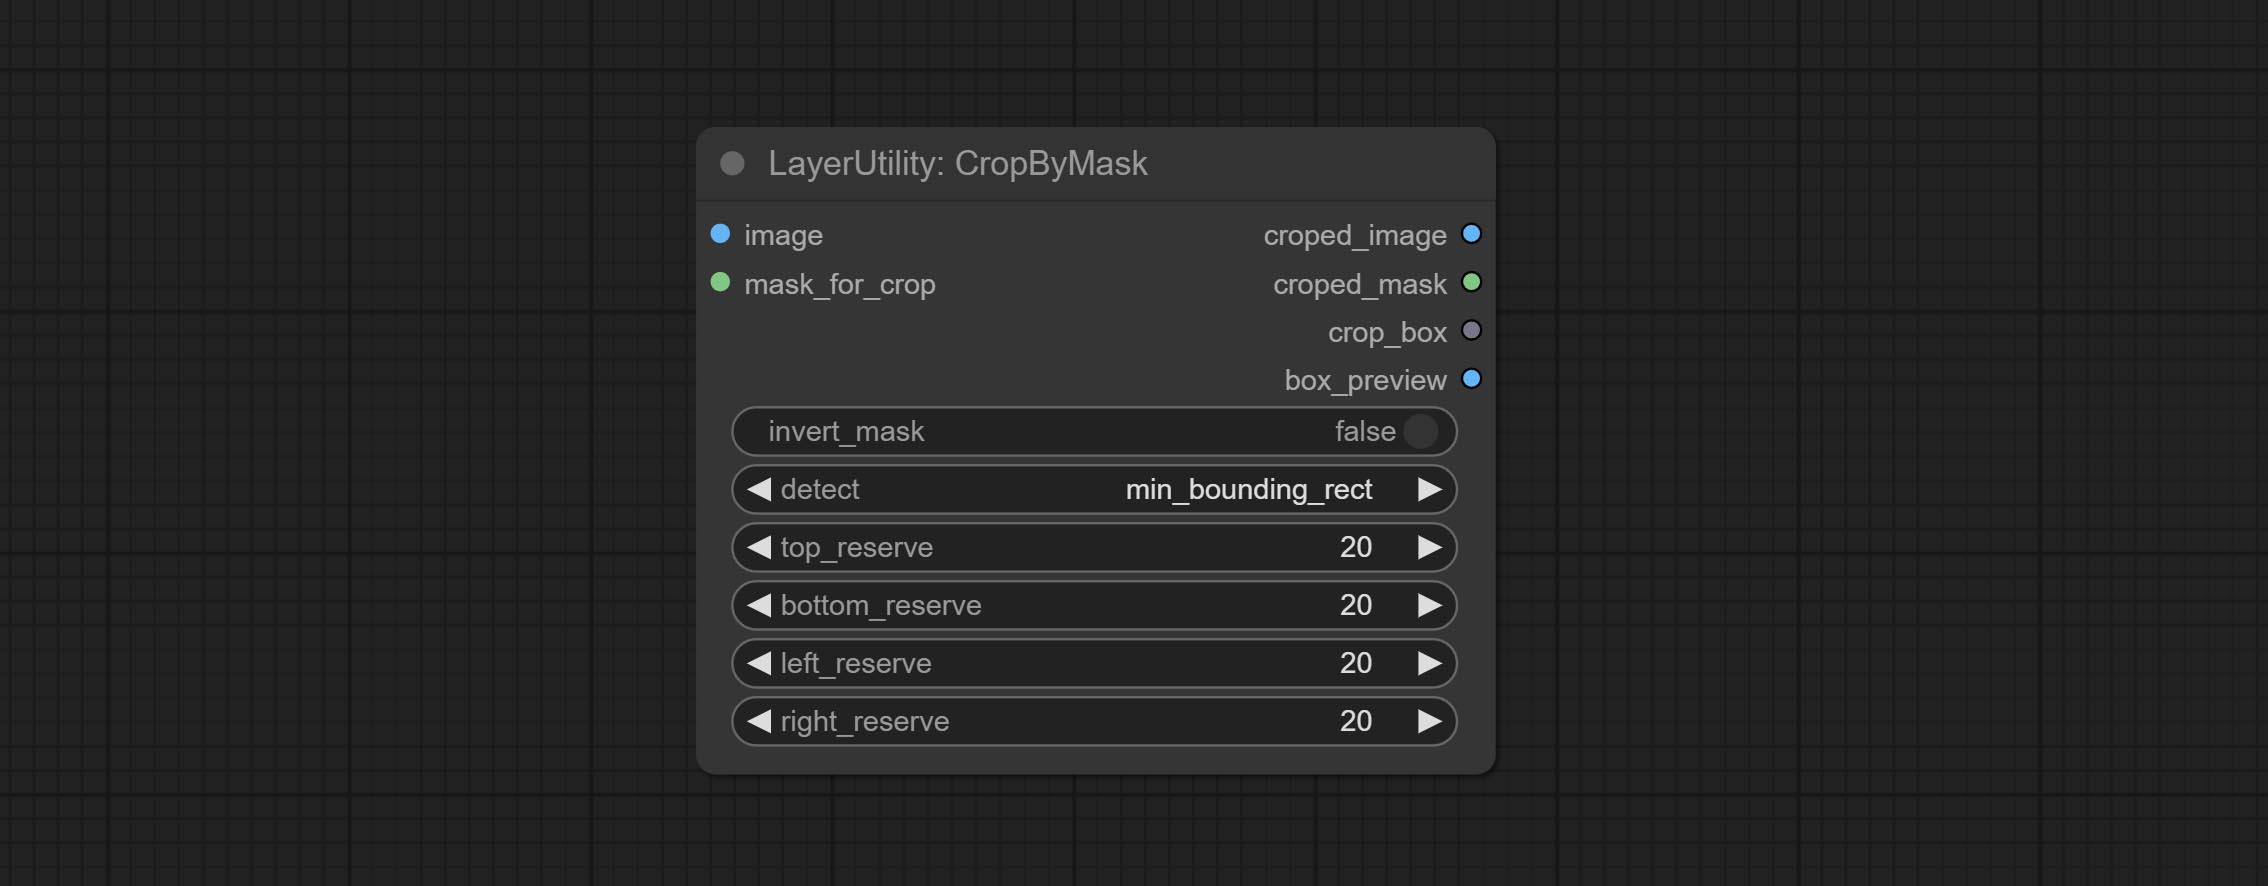
- image 5 : The input image.
- mask_for_crop 5 : Mask of the image, it will automatically be cut according to the mask range.
- invert_mask: Whether to reverse the mask.
- detect: Detection method,
min_bounding_rect is the minimum bounding rectangle of block shape, max_inscribed_rect is the maximum inscribed rectangle of block shape, and mask-area is the effective area for masking pixels. - top_reserve: Cut the top to preserve size.
- bottom_reserve: Cut the bottom to preserve size.
- left_reserve: Cut the left to preserve size.
- right_reserve: Cut the right to preserve size.
- observação
Saída:
- croped_image: The image after crop.
- croped_mask: The mask after crop.
- crop_box: The trimmed box data is used when restoring the RestoreCropBox node.
- box_preview: Preview image of cutting position, red represents the detected range, and green represents the cutting range after adding the reserved border.
CropByMaskV2
The V2 upgraded version of CropByMask. Supports crop_box input, making it easy to cut layers of the same size.
The following changes have been made based on CropByMask: 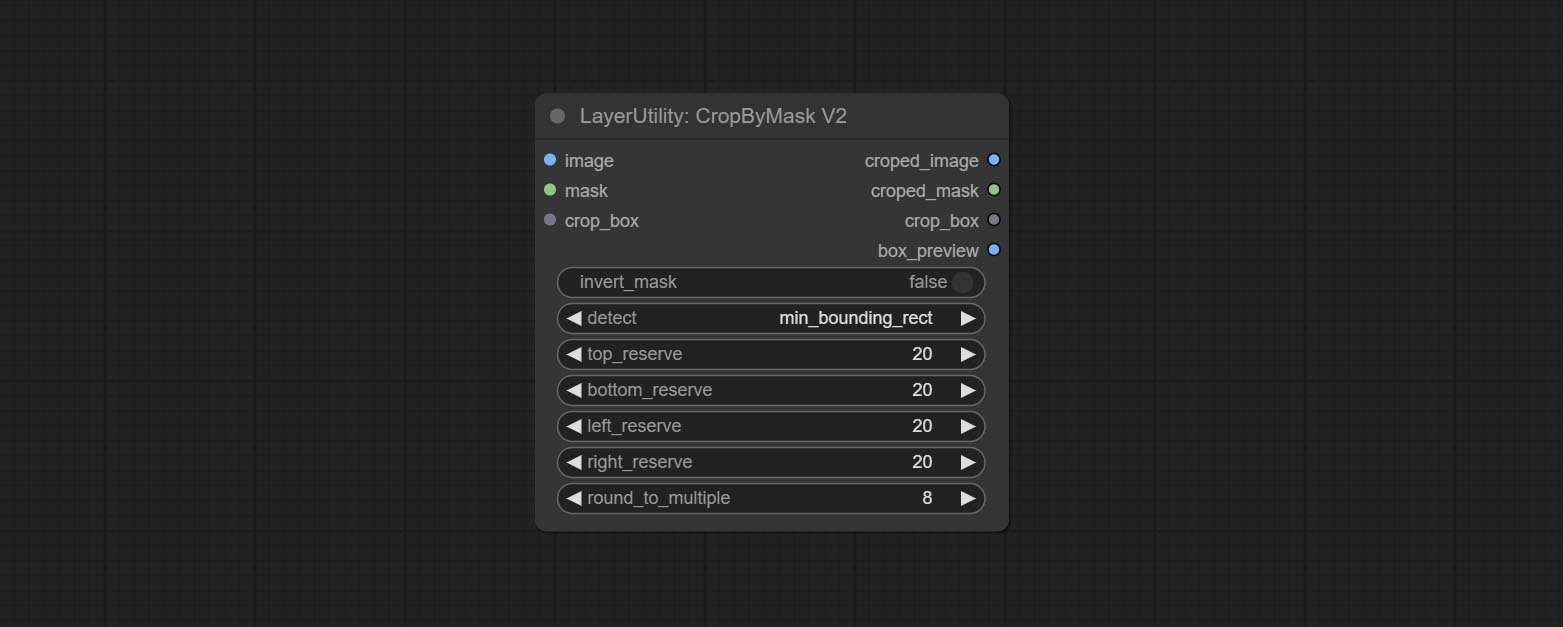
- The input
mask_for_crop reanme to mask 。 - Add optional inputs to the
crop_box . If there are inputs here, mask detection will be ignored and this data will be directly used for cropping. - Add the option
round_to_multiple to round the trimming edge length multiple. For example, setting it to 8 will force the width and height to be multiples of 8.
RestoreCropBox
Restore the cropped image to the original image by CropByMask.
Node options:
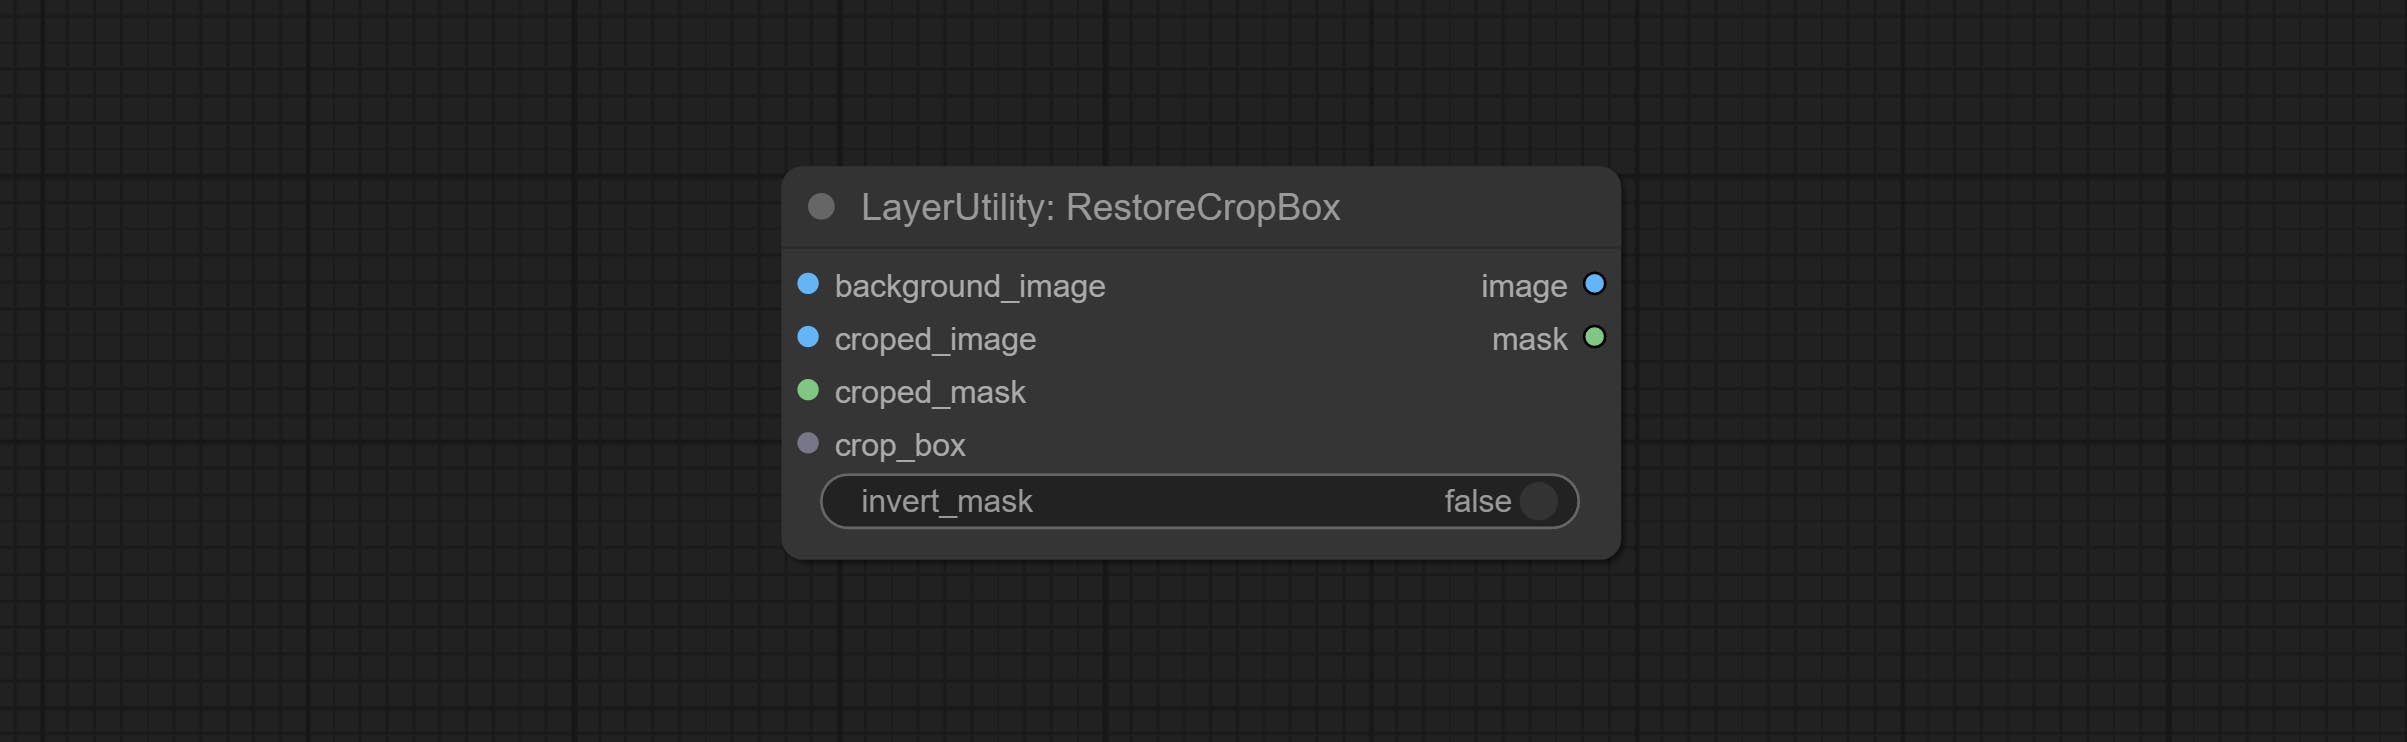
- background_image: The original image before cutting.
- croped_image 5 : The cropped image. If the middle is enlarged, the size needs to be restored before restoration.
- croped_mask 5 : The cut mask.
- crop_box: Box data during cutting.
- invert_mask: Whether to reverse the mask.
- observação
CropBoxResolve
Parsing the corp_box to x , y , width , height . 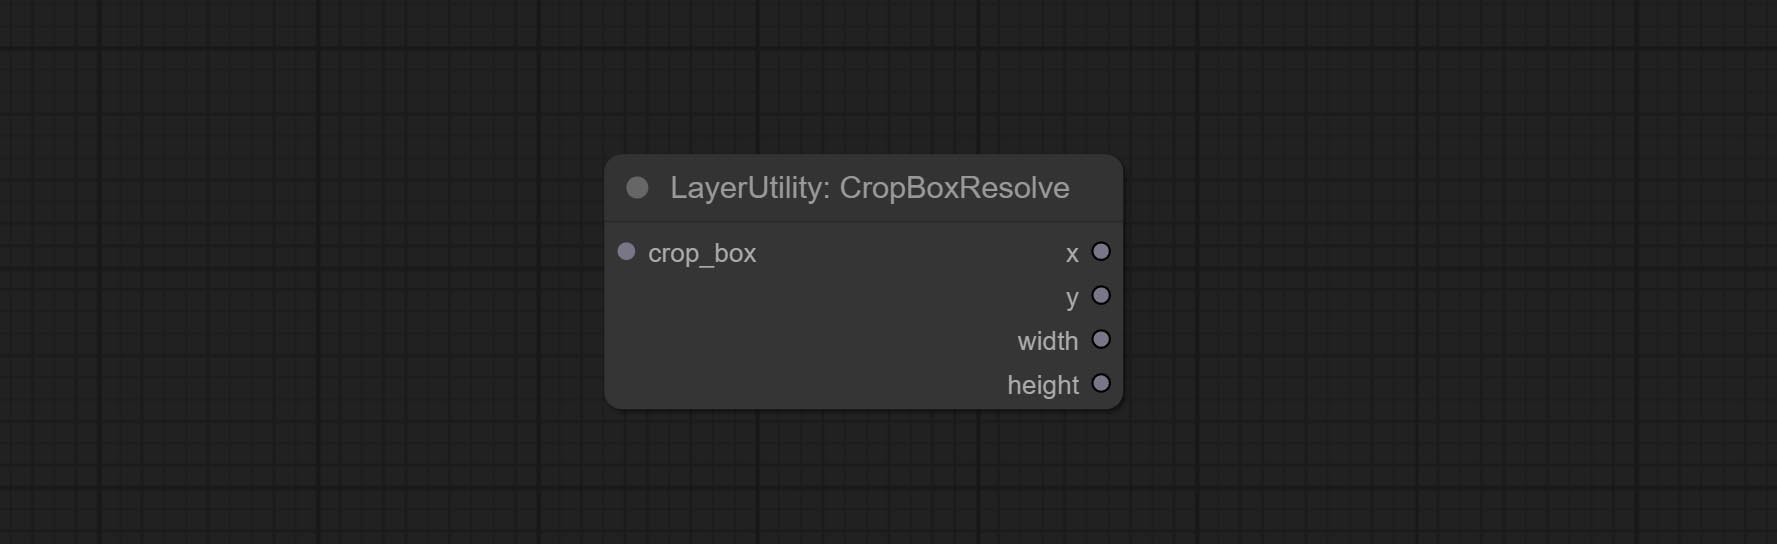
ImageScaleRestore
Image scaling. when this node is used in pairs, the image can be automatically restored to its original size on the second node. 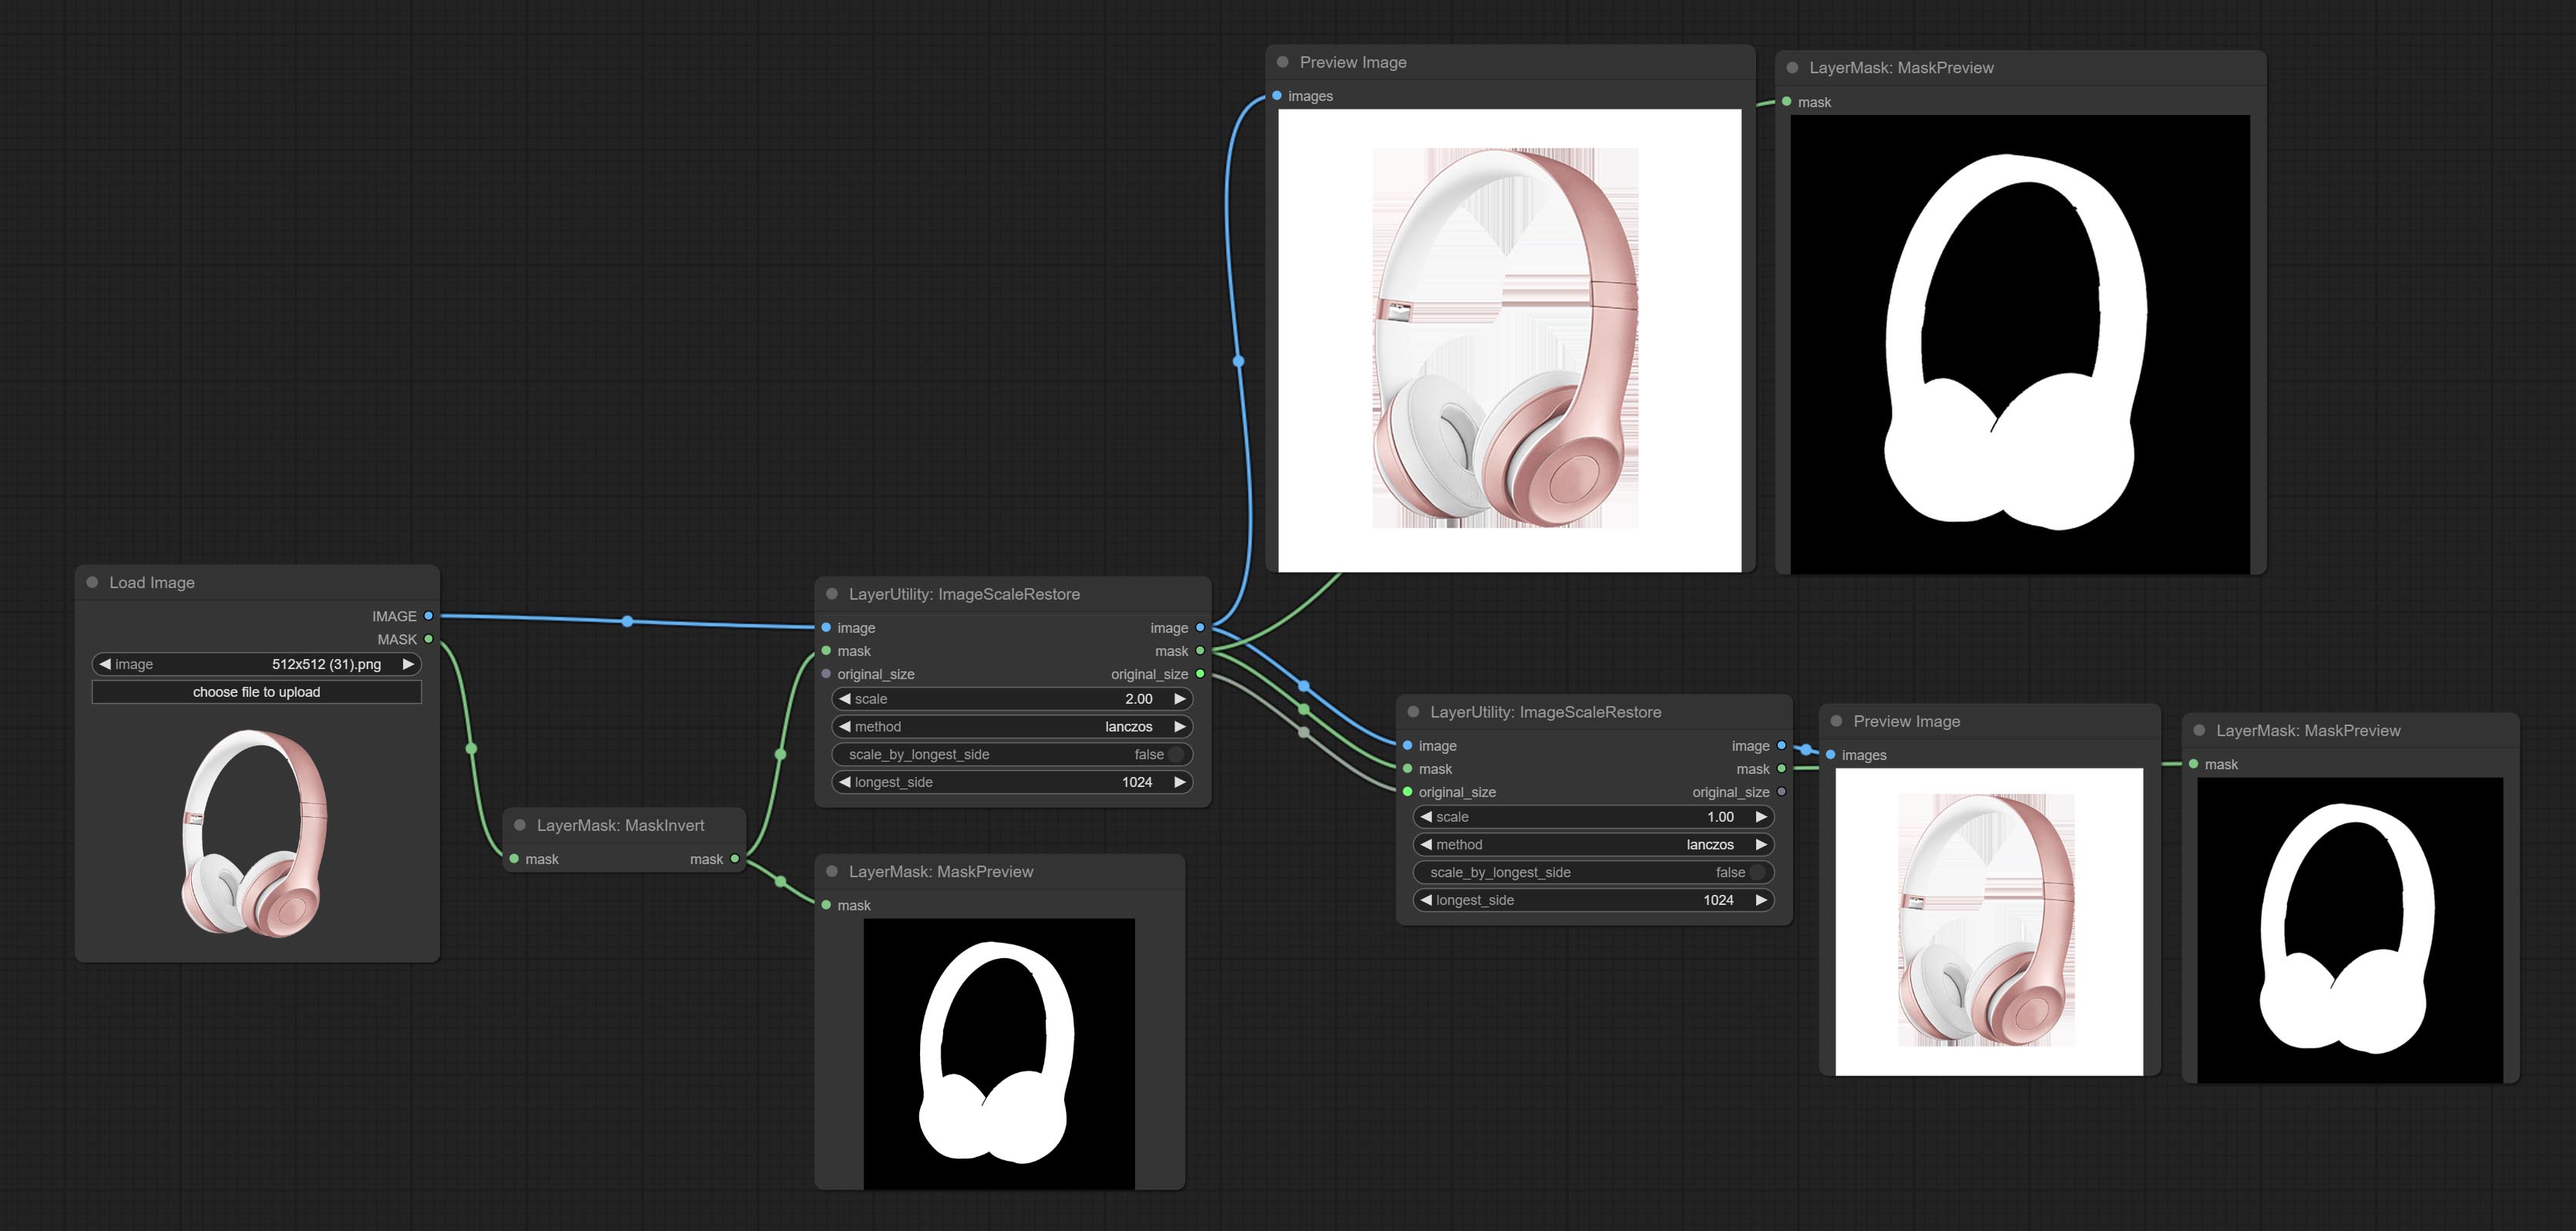
Node options:
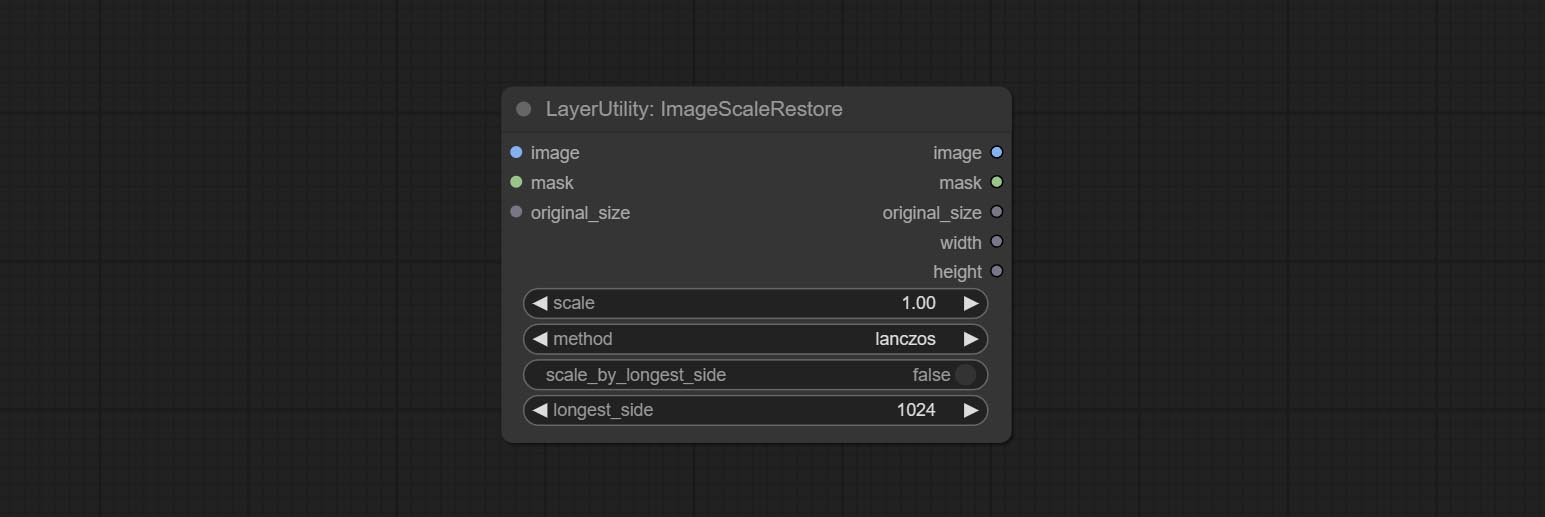
- image 5 : The input image.
- mask 2,5 : Mask of image.
- original_size: Optional input, used to restore the image to its original size.
- scale: Scale ratio. when the original_size have input, or scale_ by_longest_side is set to True, this setting will be ignored.
- scale_by_longest_side: Allow scaling by long edge size.
- longest_side: When the scale_by_longest_side is set to True, this will be used this value to the long edge of the image. when the original_size have input, this setting will be ignored.
Outputs:
- image: The scaled image.
- mask: If have mask input, the scaled mask will be output.
- original_size: The original size data of the image is used for subsequent node recovery.
- width: The output image's width.
- height: The output image's height.
ImageScaleRestoreV2
The V2 upgraded version of ImageScaleRestore.
Node options:
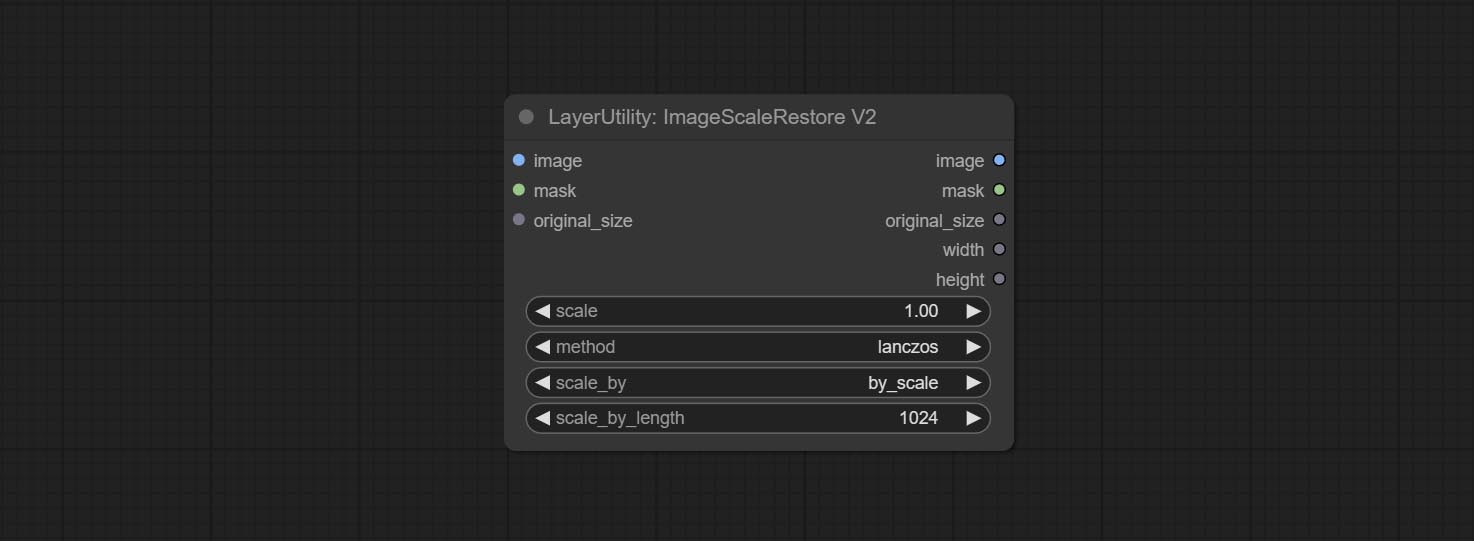
The following changes have been made based on ImageScaleRestore:
- scale_by: Allow scaling by specified dimensions for long, short, width, height, or total pixels. When this option is set to by_scale, use the scale value, and for other options, use the scale_by_length value.
- scale_by_length: The value here is used as
scale_by to specify the length of the edge.
ImageMaskScaleAs
Scale the image or mask to the size of the reference image (or reference mask). 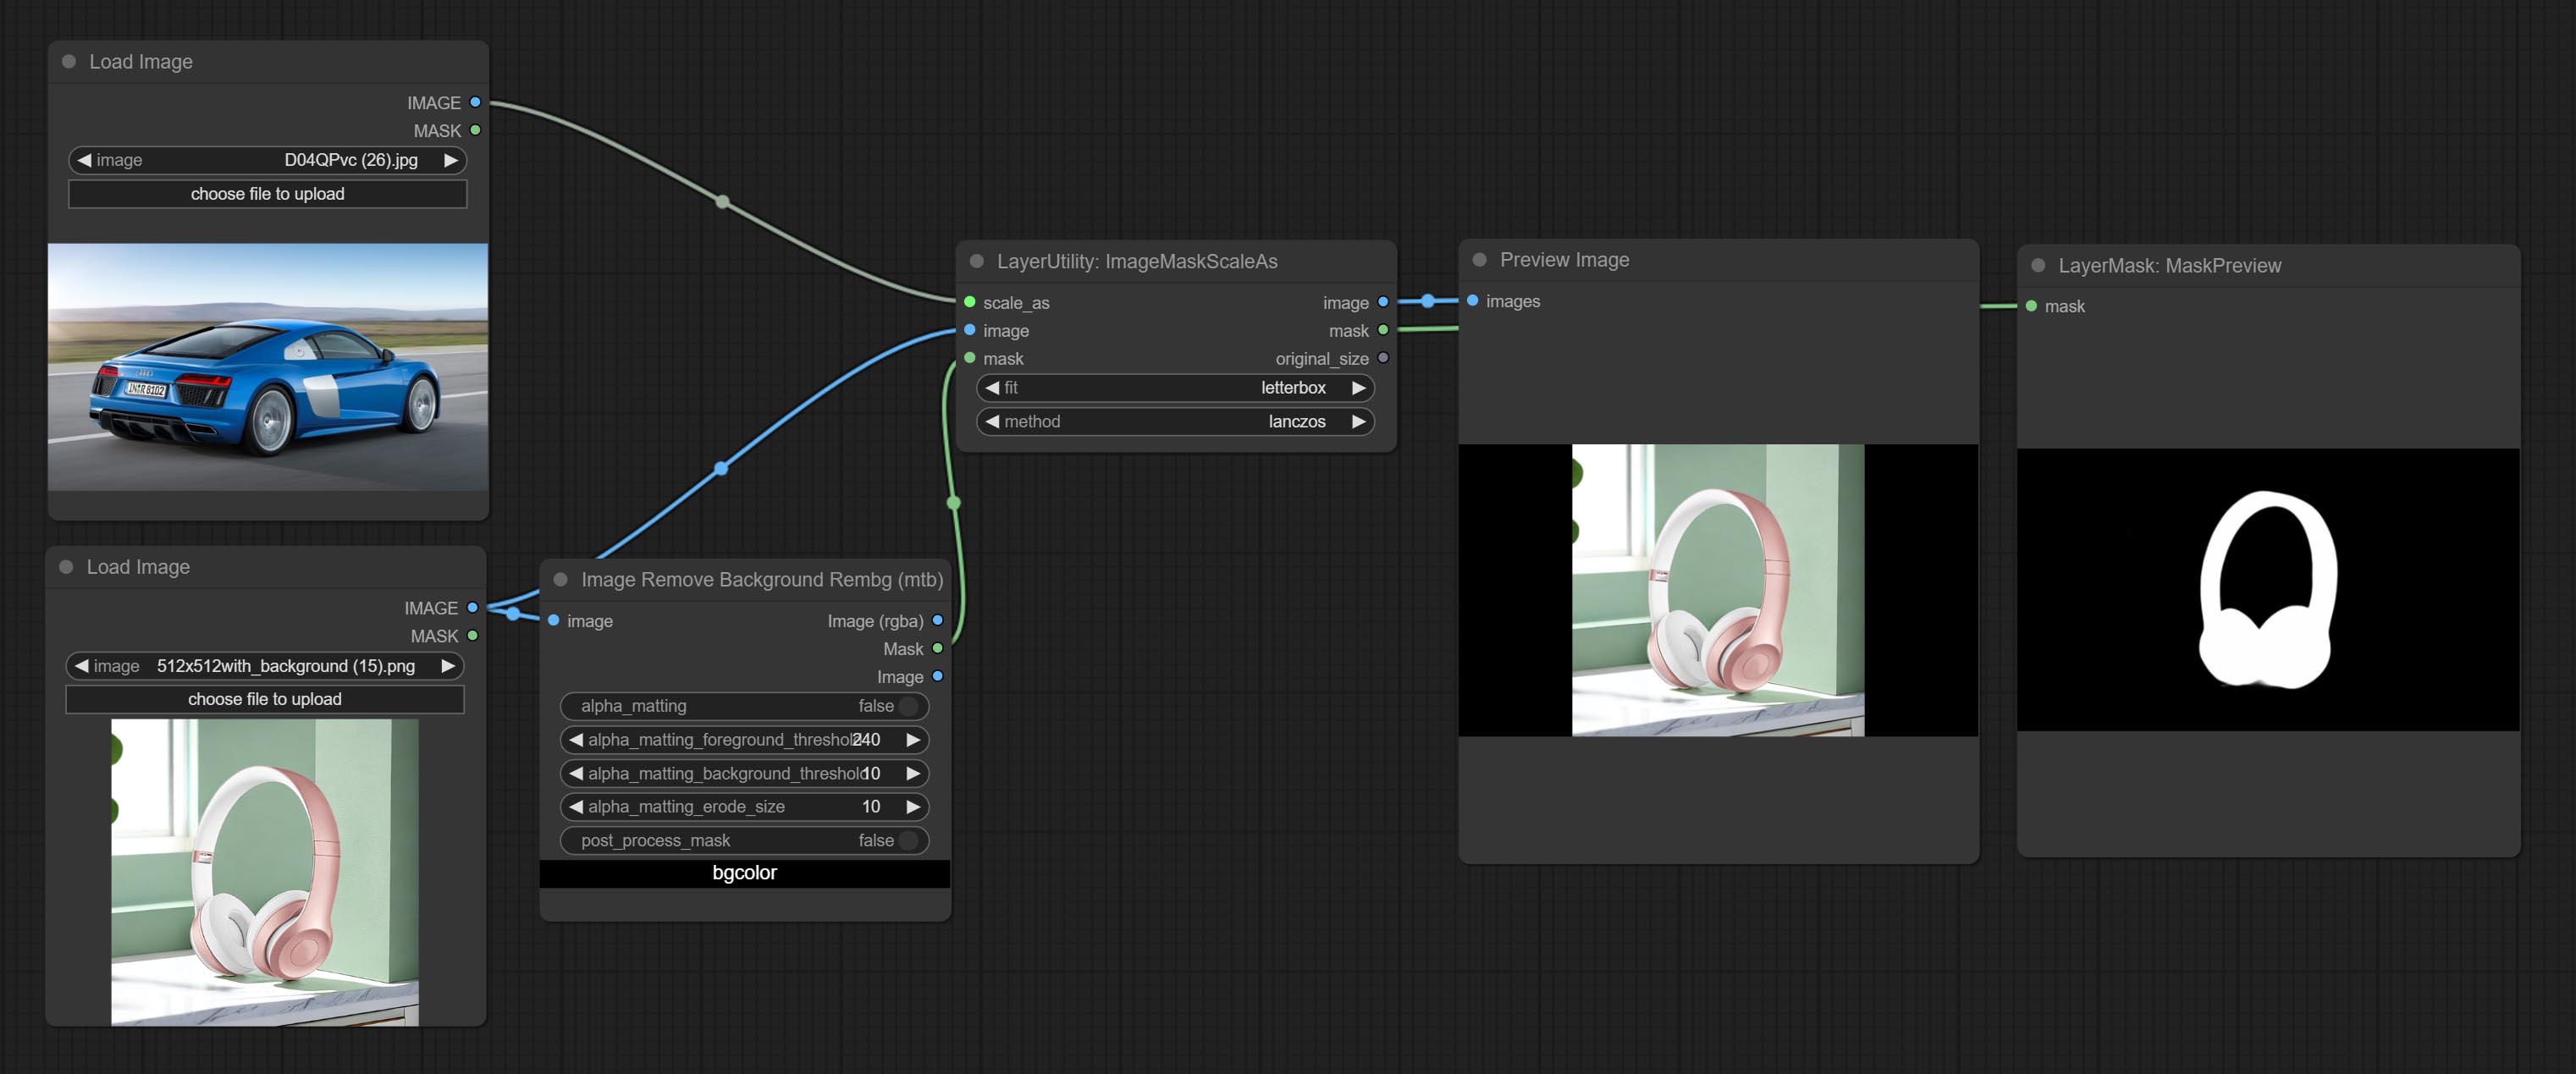
Node options: 
- scale_as * : Reference size. It can be an image or a mask.
- image: Image to be scaled. this option is optional input. if there is no input, a black image will be output.
- mask: Mask to be scaled. this option is optional input. if there is no input, a black mask will be output.
- fit: Scale aspect ratio mode. when the width to height ratio of the original image does not match the scaled size, there are three modes to choose from, The letterbox mode retains the complete frame and fills in the blank spaces with black; The crop mode retains the complete short edge, and any excess of the long edge will be cut off; The fill mode does not maintain frame ratio and fills the screen with width and height.
- method: Scaling sampling methods, including lanczos, bicubic, hamming, bilinear, box, and nearest.
* Only limited to input images and masks. forcing the integration of other types of inputs will result in node errors.
Outputs:
- image: If there is an image input, the scaled image will be output.
- mask: If there is a mask input, the scaled mask will be output.
- original_size: The original size data of the image is used for subsequent node recovery.
- width: The output image's width.
- height: The output image's height.
ImageScaleByAspectRatio
Scale the image or mask by aspect ratio. the scaled size can be rounded to a multiple of 8 or 16, and can be scaled to the long side size. 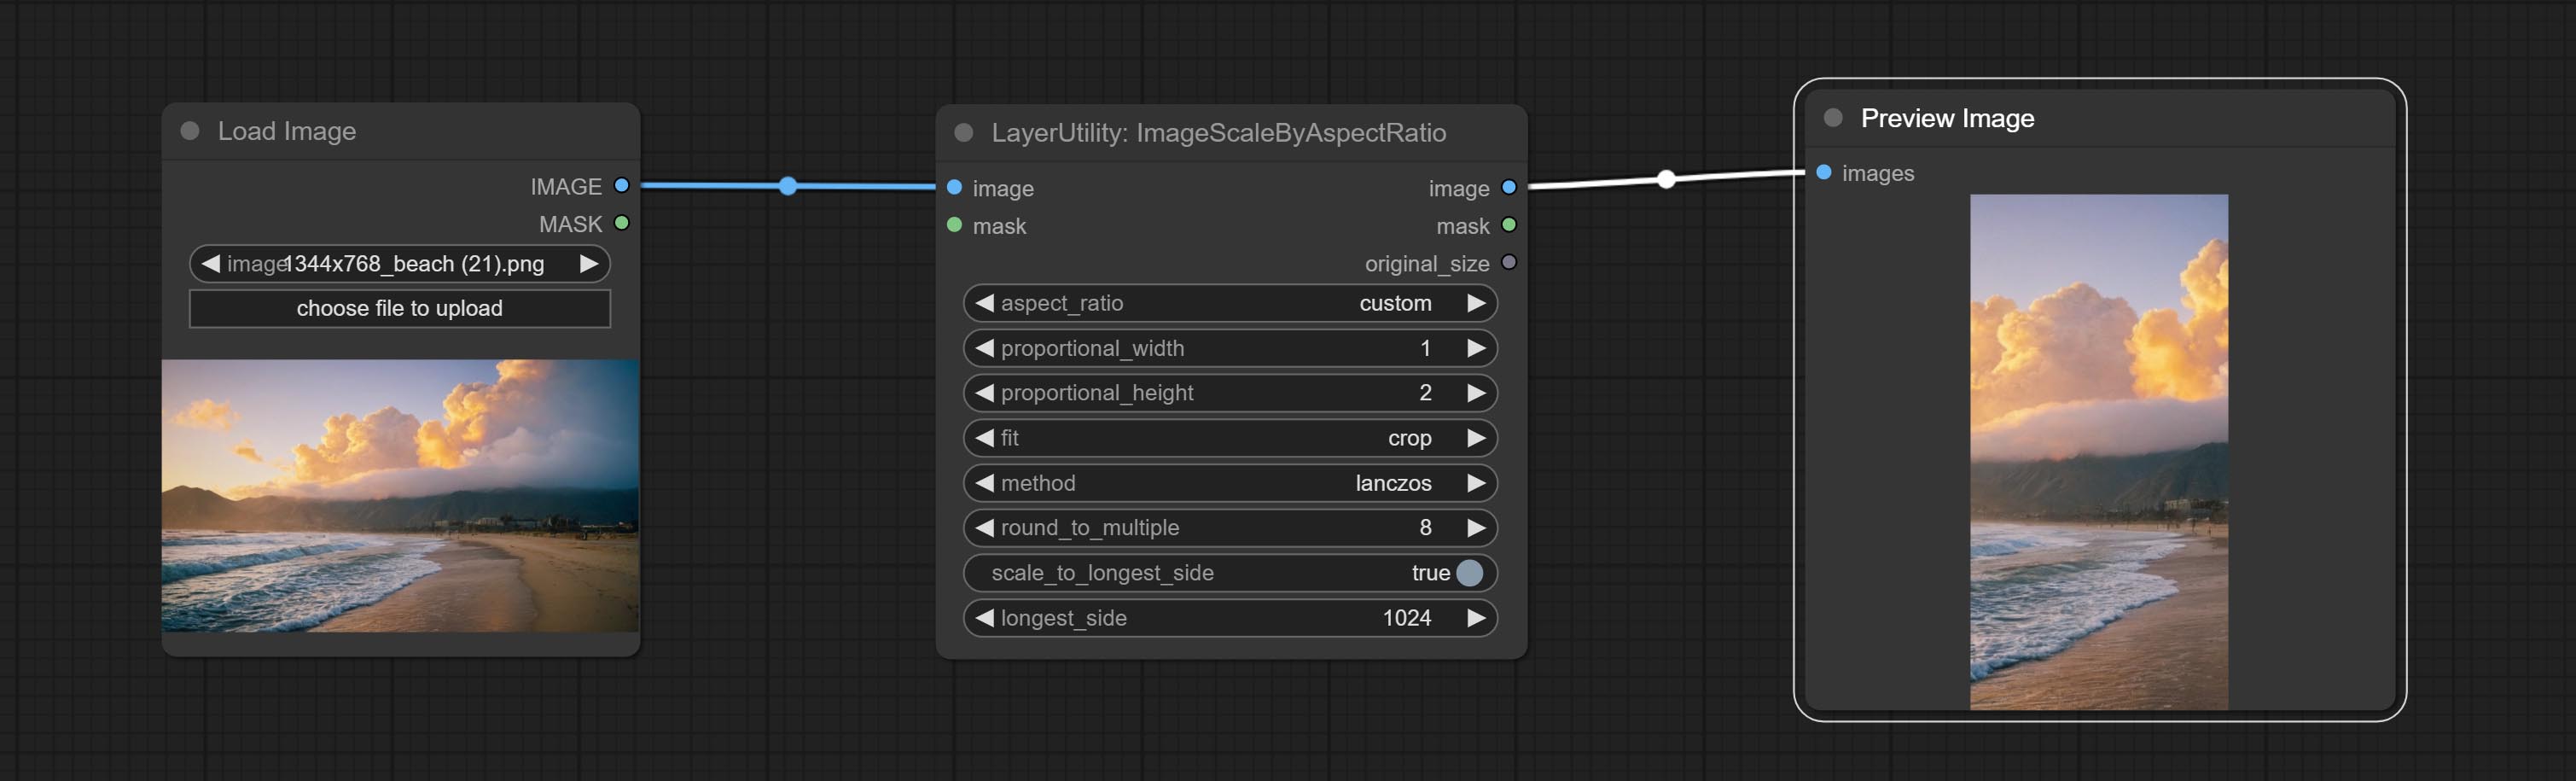
Node options:
- aspect_ratio: Here are several common frame ratios provided. alternatively, you can choose "original" to keep original ratio or customize the ratio using "custom".
- proportional_width: Proportional width. if the aspect ratio option is not "custom", this setting will be ignored.
- proportional_height: Proportional height. if the aspect ratio option is not "custom", this setting will be ignored.
- fit: Scale aspect ratio mode. when the width to height ratio of the original image does not match the scaled size, there are three modes to choose from, The letterbox mode retains the complete frame and fills in the blank spaces with black; The crop mode retains the complete short edge, and any excess of the long edge will be cut off; The fill mode does not maintain frame ratio and fills the screen with width and height.
- method: Scaling sampling methods, including lanczos, bicubic, hamming, bilinear, box, and nearest.
- round_to_multiple: Round multiples. for example, setting it to 8 will force the width and height to be multiples of 8.
- scale_by_longest_side: Allow scaling by long edge size.
- longest_side: When the scale_by_longest_side is set to True, this will be used this value to the long edge of the image. when the original_size have input, this setting will be ignored.
Outputs:
- image: If have image input, the scaled image will be output.
- mask: If have mask input, the scaled mask will be output.
- original_size: The original size data of the image is used for subsequent node recovery.
- width: The output image's width.
- height: The output image's height.
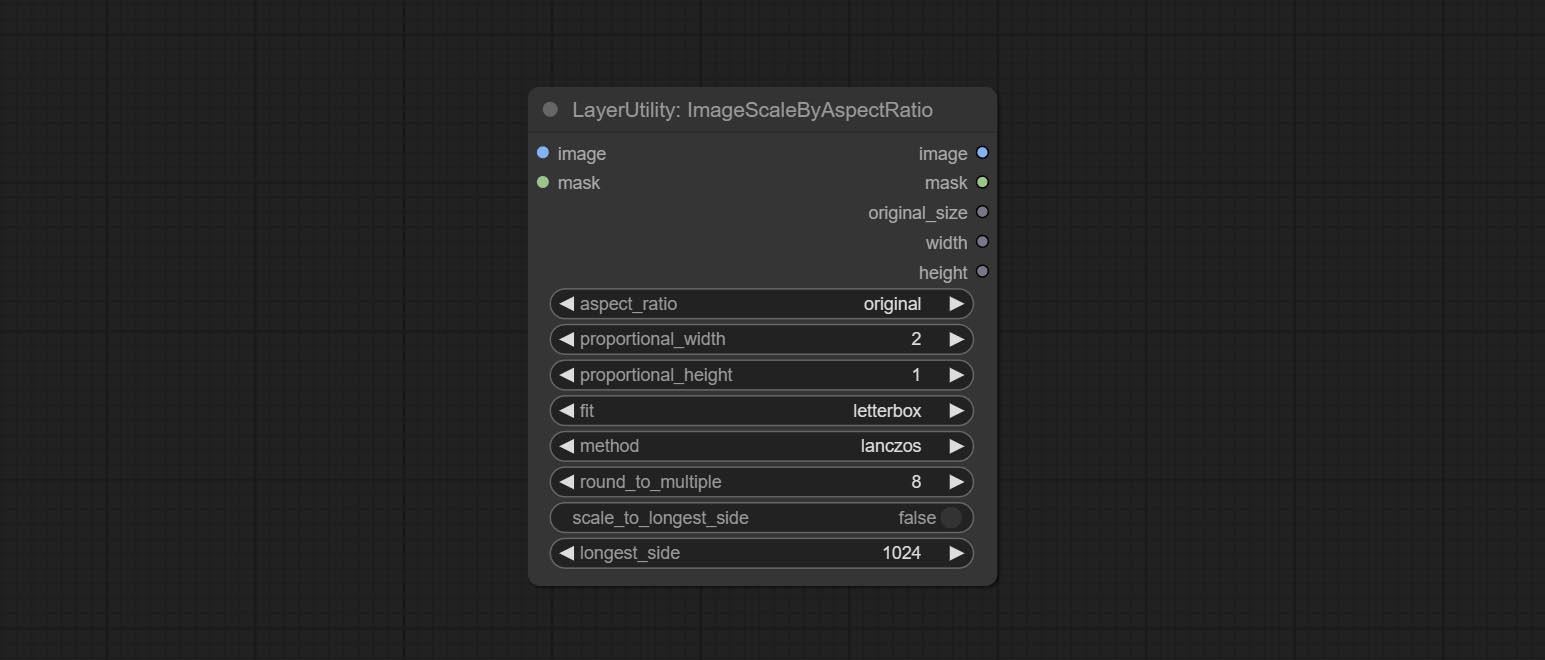
ImageScaleByAspectRatioV2
V2 Upgraded Version of ImageScaleByAspectRatio
Node options:
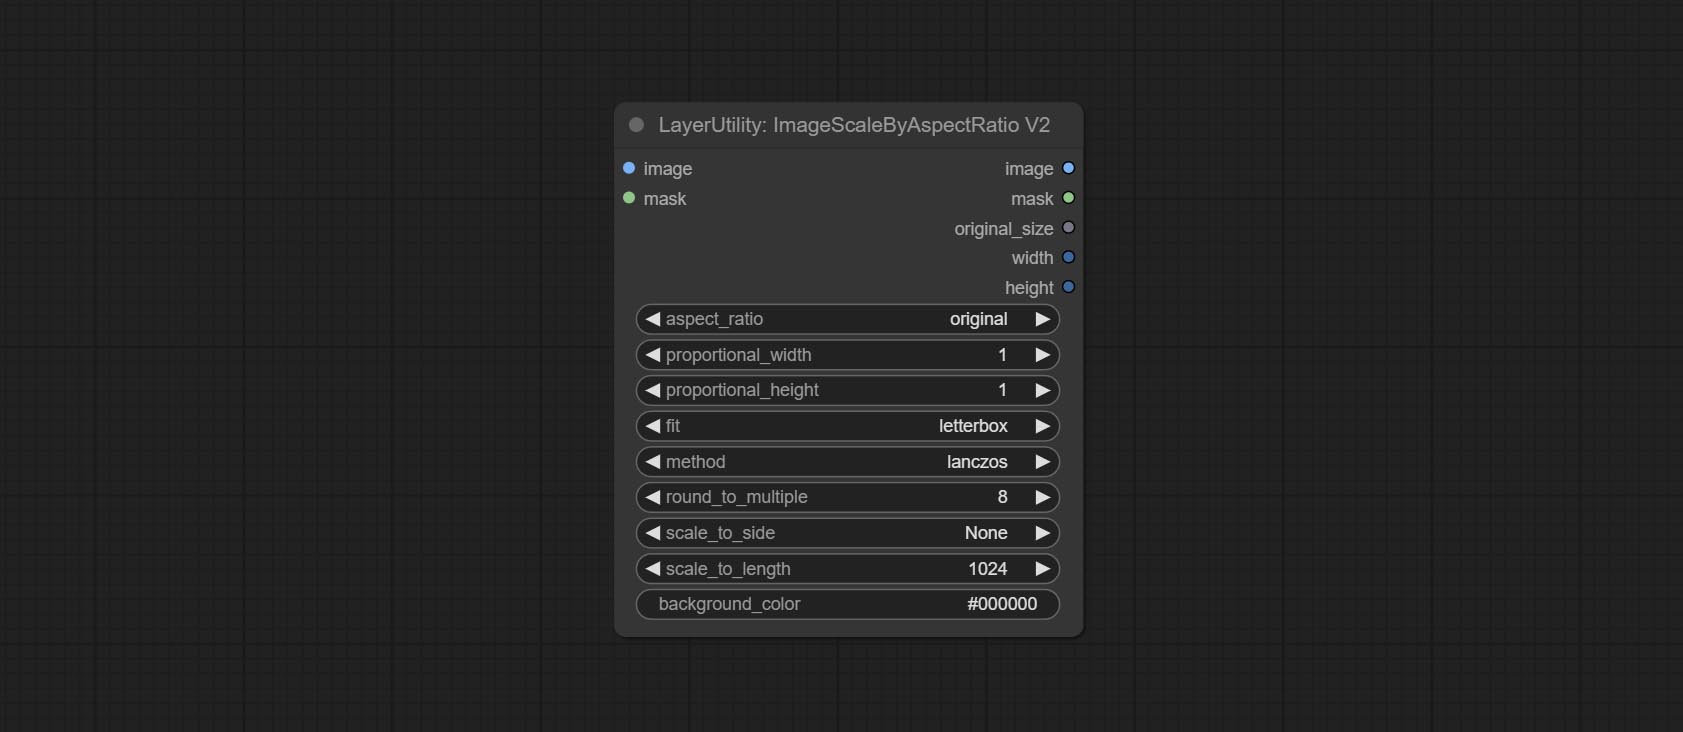
The following changes have been made based on ImageScaleByAspectRatio:
- scale_to_side: Allow scaling by specified dimensions for long, short, width, height, or total pixels.
- scale_to_length: The numerical value here serves as the length of the specified edge or the total pixels (kilo pixels) for scale_to_side.
- background_color 4 : The color of the background.
QWenImage2Prompt
Inference the prompts based on the image. this node is repackage of the ComfyUI_VLM_nodes's UForm-Gen2 Qwen Node , thanks to the original author. Download model files from huggingface or Baidu Netdisk to ComfyUI/models/LLavacheckpoints/files_for_uform_gen2_qwen folder.
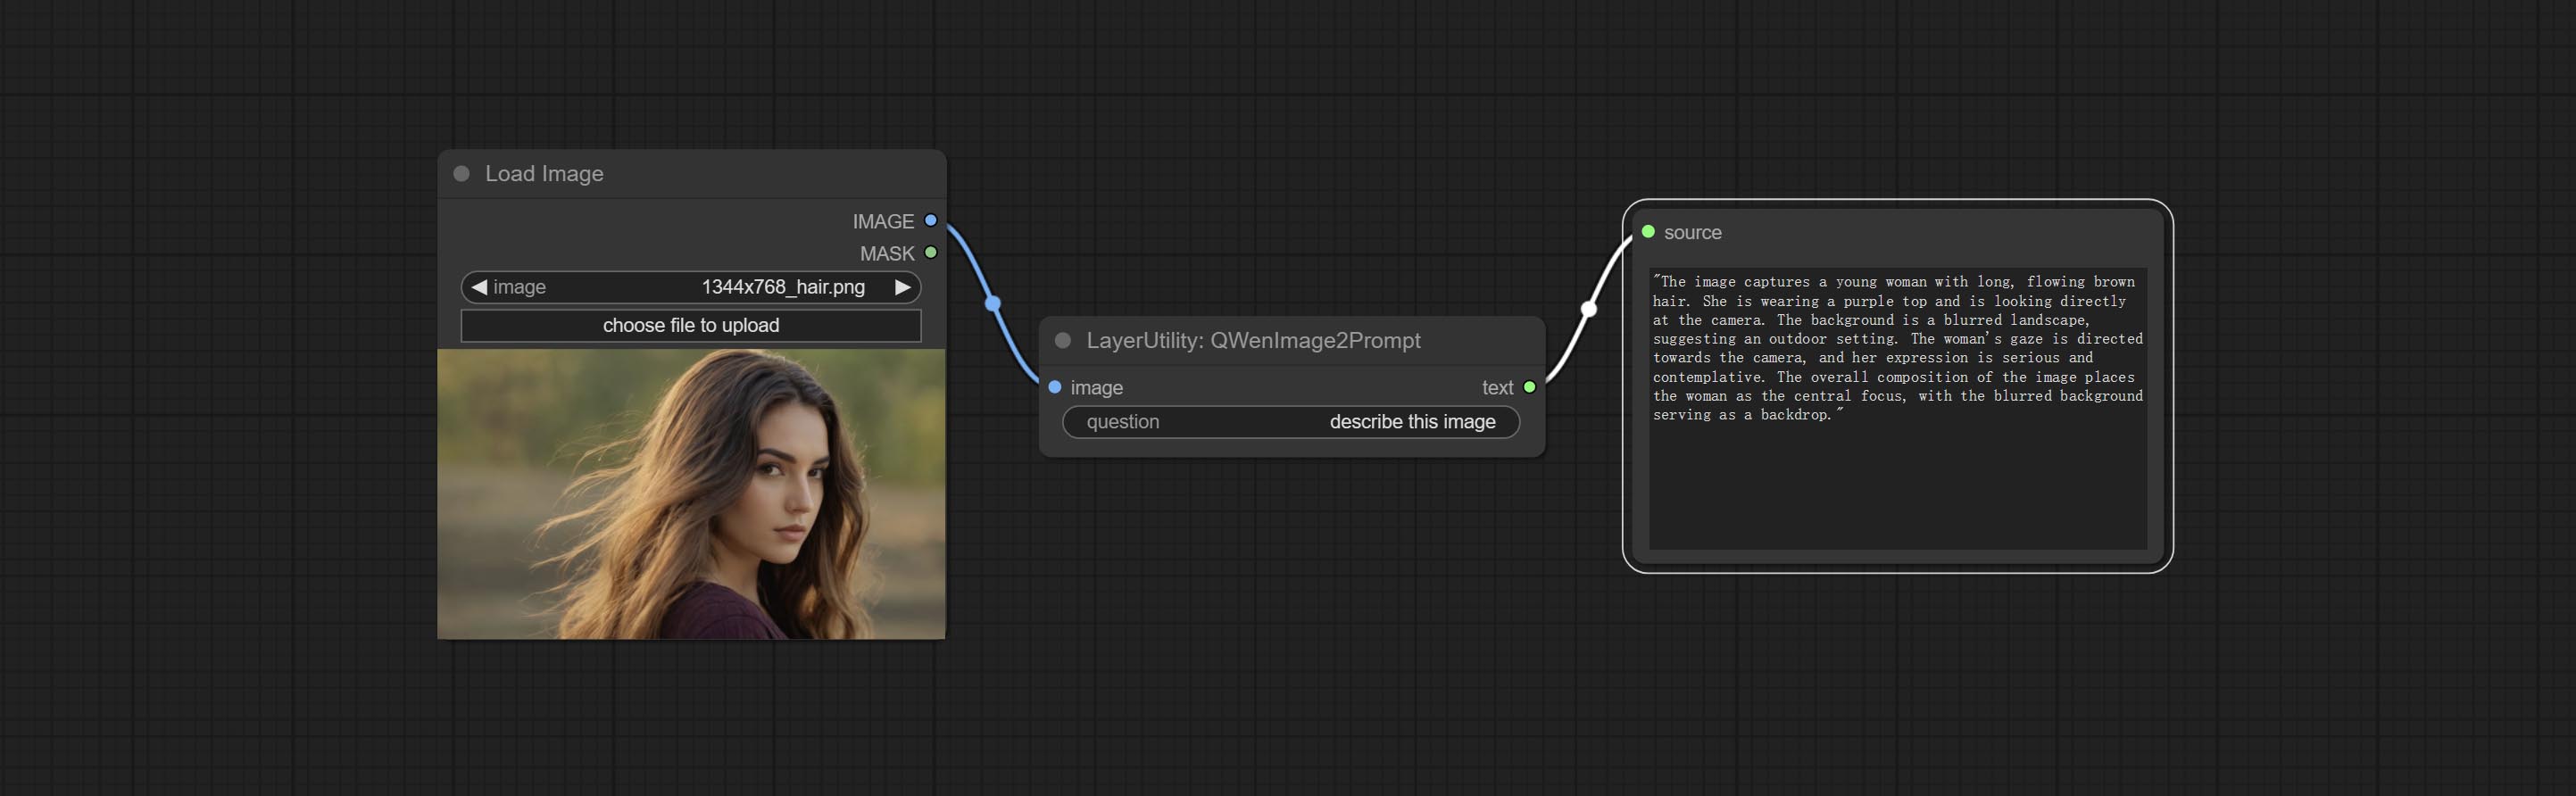
Node Options:
- question: Prompt of UForm-Gen-QWen model.
LlamaVision
Use the Llama 3.2 vision model for local inference. Can be used to generate prompt words. part of the code for this node comes from ComfyUI-PixtralLlamaMolmoVision, thank you to the original author. To use this node, the transformers need upgraded to 4.45.0 or higher. Download models from BaiduNetdisk or huggingface/SeanScripts , and copy to ComfyUI/models/LLM . 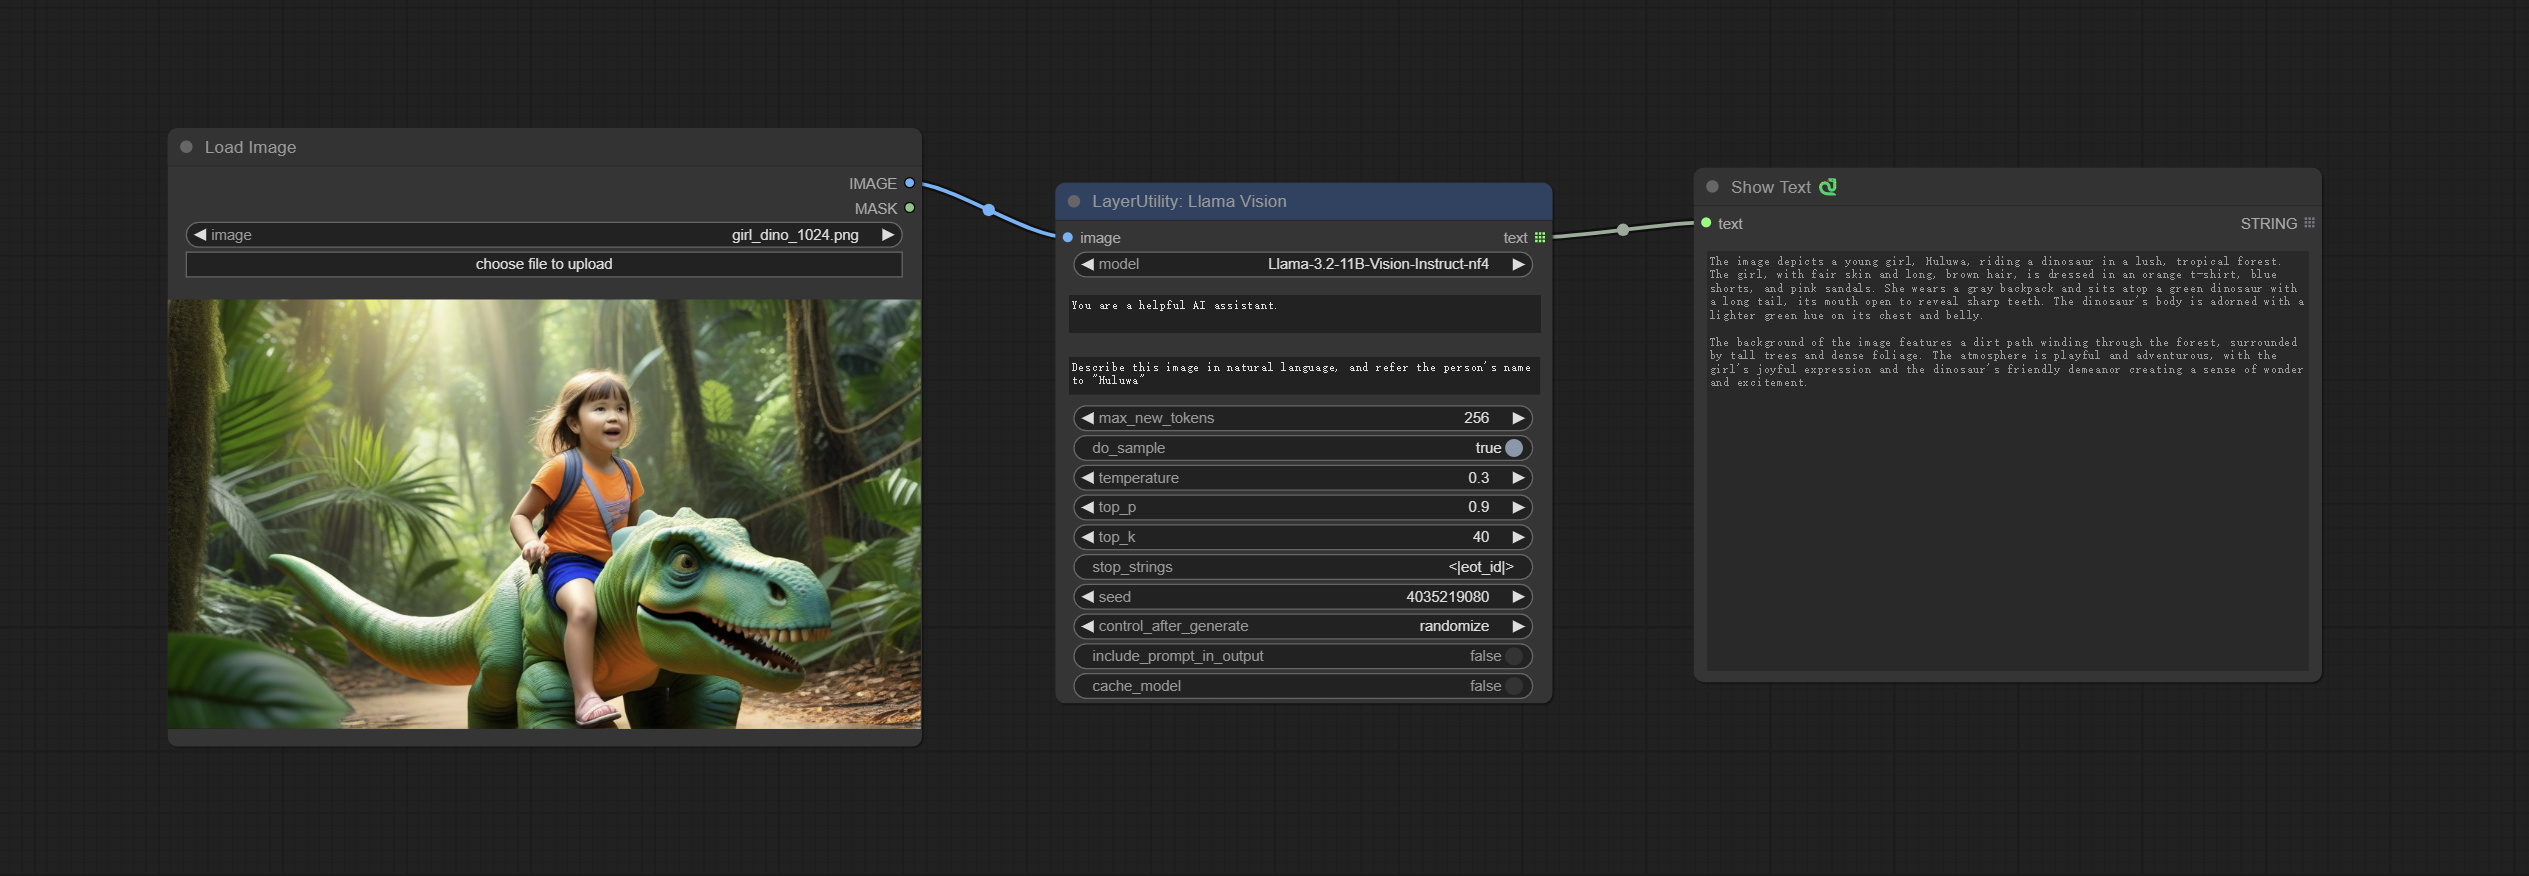
Node Options:
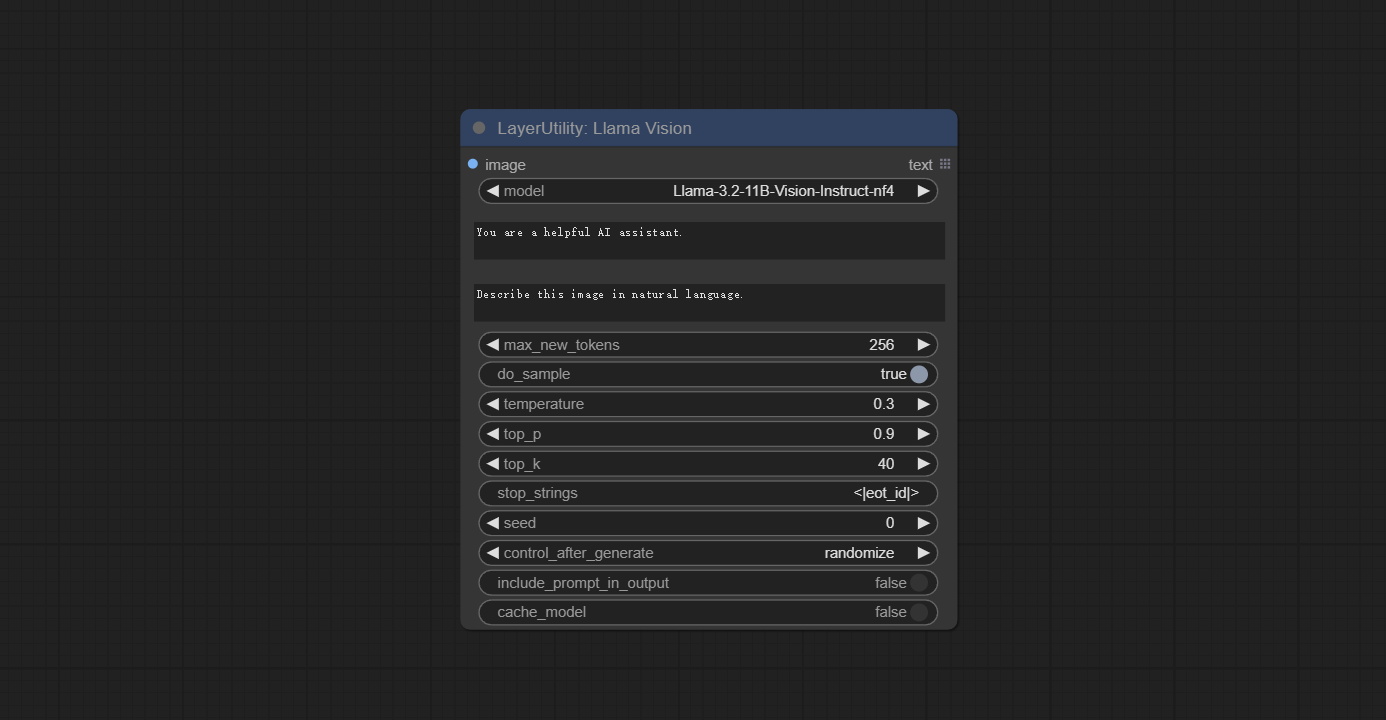
- image: Image input.
- model: Currently, only the "Llama-3.2-11B-Vision-Instruct-nf4" is available.
- system_prompt: System prompt words for LLM model.
- user_prompt: User prompt words for LLM model.
- max_new_tokens: max_new_tokens for LLM model.
- do_sample: do_sample for LLM model.
- top-p: top_p for LLM model.
- top_k: top_k for LLM model.
- stop_strings: The stop strings.
- seed: The seed of random number.
- control_after_generate: Seed change options. If this option is fixed, the generated random number will always be the same.
- include_prompt_in_output: Does the output contain prompt words.
- cache_model: Whether to cache the model.
JoyCaption2
Use the JoyCaption-alpha-two model for local inference. Can be used to generate prompt words. this node is https://huggingface.co/John6666/joy-caption-alpha-two-cli-mod Implementation in ComfyUI, thank you to the original author. Download models form BaiduNetdisk and BaiduNetdisk , or huggingface/Orenguteng and huggingface/unsloth , then copy to ComfyUI/models/LLM , Download models from BaiduNetdisk or huggingface/google , and copy to ComfyUI/models/clip , Donwload the cgrkzexw-599808 folder from BaiduNetdisk or huggingface/John6666 , and copy to ComfyUI/models/Joy_caption 。 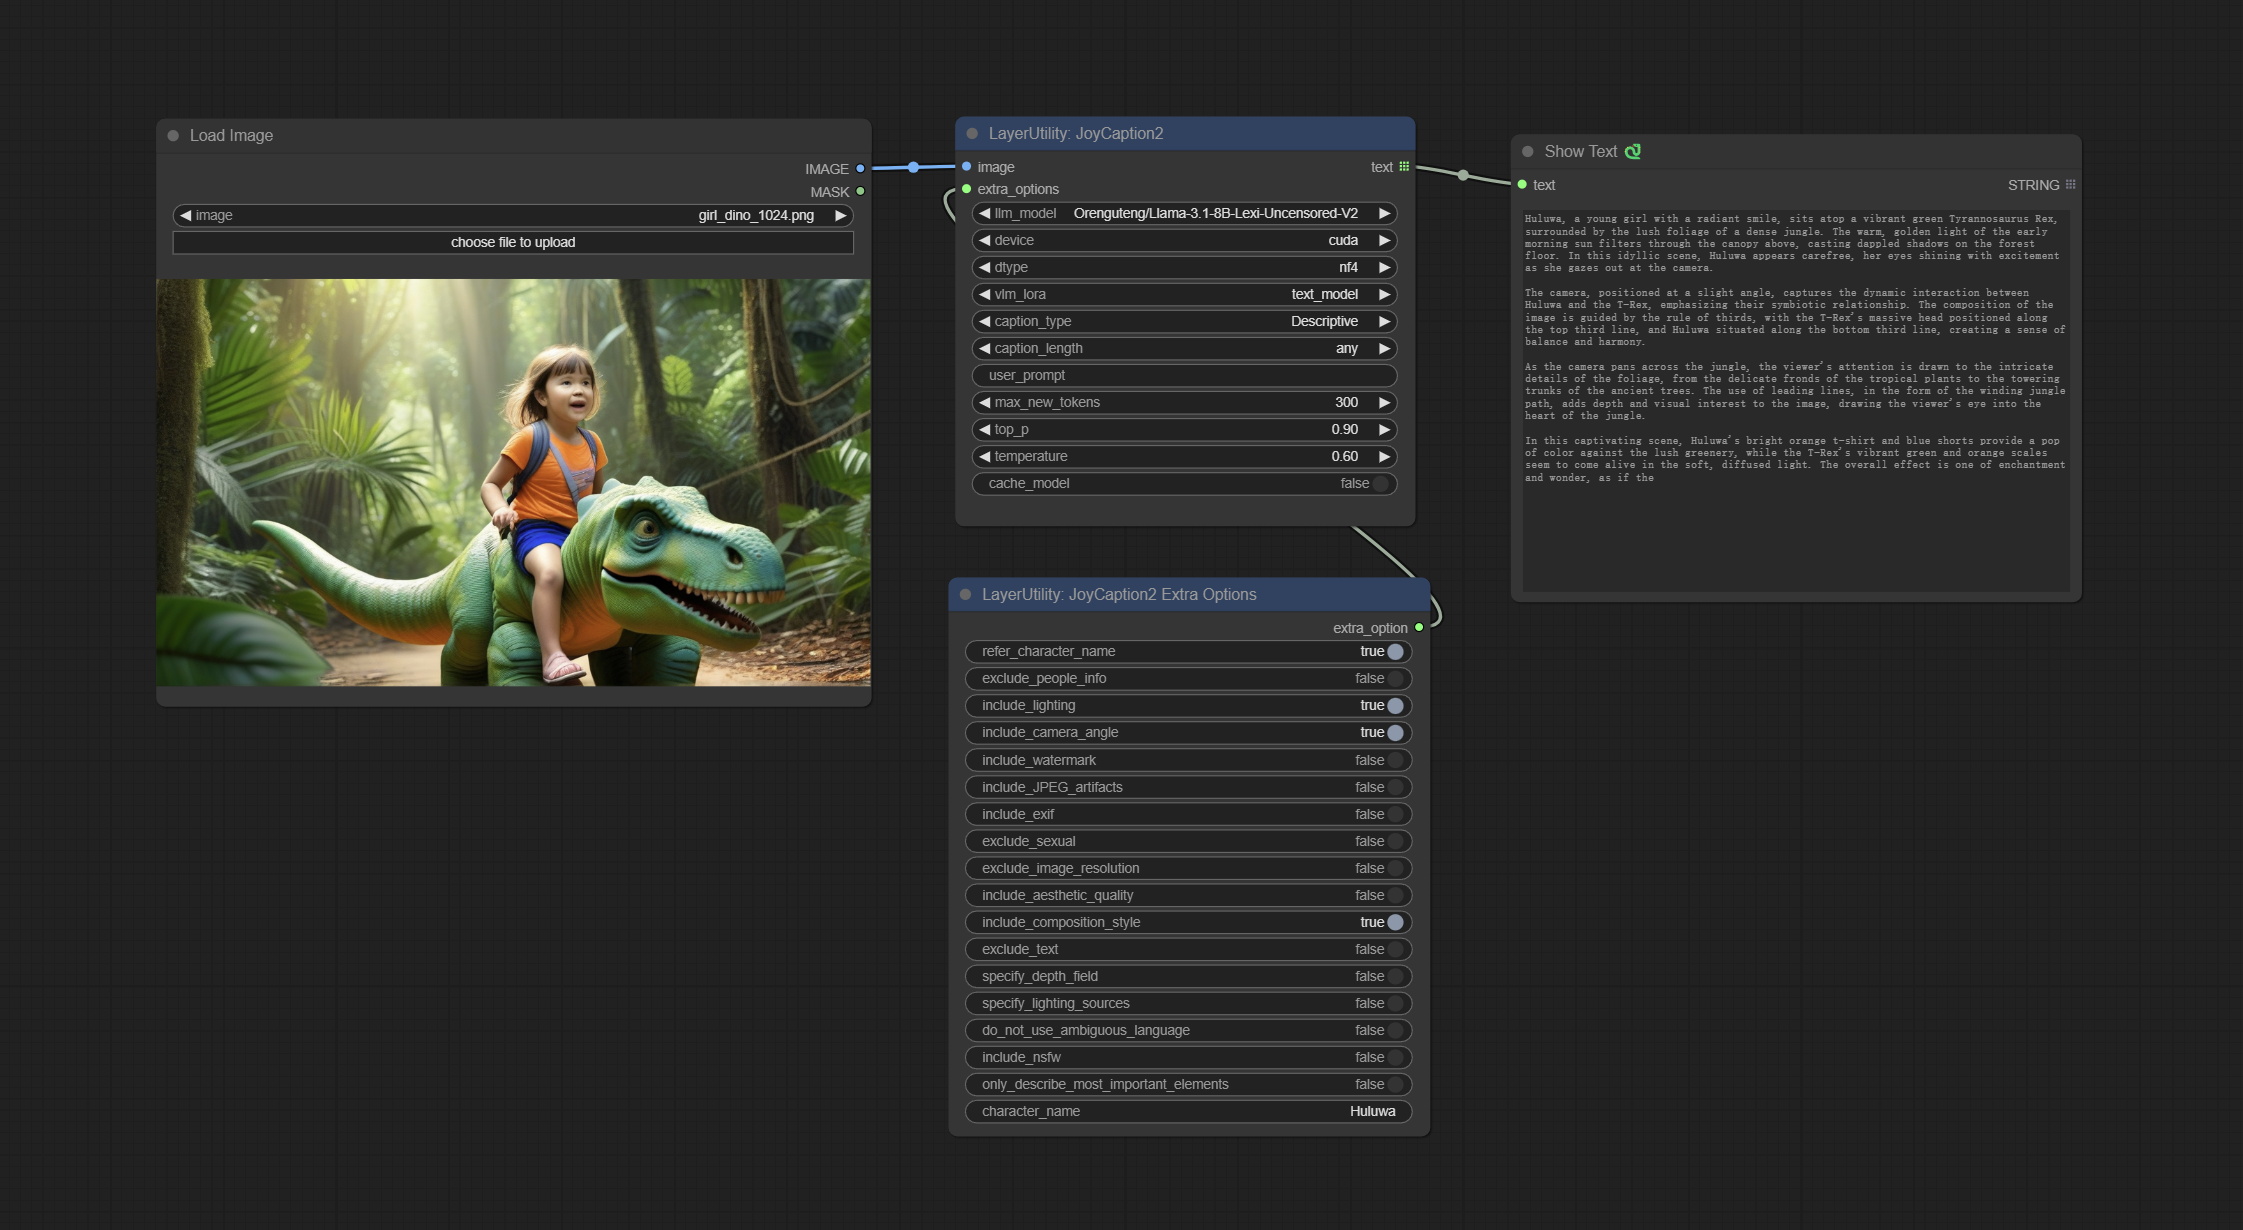
Node Options:

- image: Image input.
- extra_options: Input the extra_options.
- llm_model: There are two LLM models to choose, Orenguteng/Llama-3.1-8B-Lexi-Uncensored-V2 and unsloth/Meta-Llama-3.1-8B-Instruct.
- device: Model loading device. Currently, only CUDA is supported.
- dtype: Model precision, nf4 and bf16.
- vlm_lora: Whether to load text_madel.
- caption_type: Caption type options, including: "Descriptive", "Descriptive (Informal)", "Training Prompt", "MidJourney", "Booru tag list", "Booru-like tag list", "Art Critic", "Product Listing", "Social Media Post".
- caption_length: The length of caption.
- user_prompt: User prompt words for LLM model. If there is content here, it will overwrite all the settings for caption_type and extra_options.
- max_new_tokens: The max_new_token parameter of LLM.
- do_sample: The do_sample parameter of LLM.
- top-p: The top_p parameter of LLM.
- temperature: The temperature parameter of LLM.
- cache_model: Whether to cache the model.
JoyCaption2Split
The node of JoyCaption2 separate model loading and inference, and when multiple JoyCaption2 nodes are used, the model can be shared to improve efficiency.
Node Options:
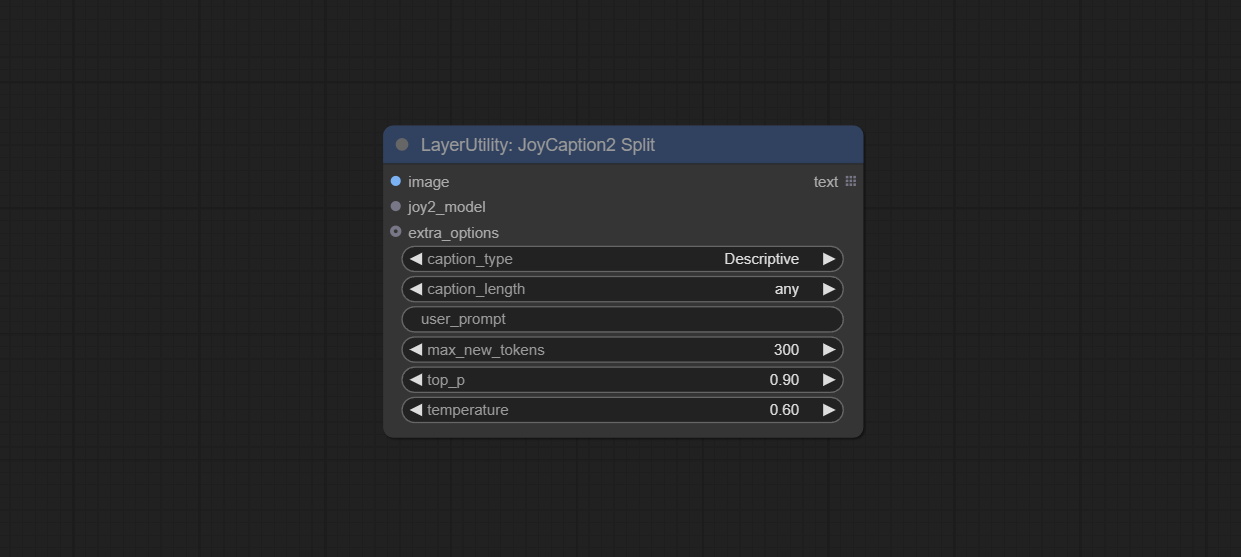
- image: Image input.。
- joy2_model: The JoyCaption model input.
- extra_options: Input the extra_options.
- caption_type: Caption type options, including: "Descriptive", "Descriptive (Informal)", "Training Prompt", "MidJourney", "Booru tag list", "Booru-like tag list", "Art Critic", "Product Listing", "Social Media Post".
- caption_length: The length of caption.
- user_prompt: User prompt words for LLM model. If there is content here, it will overwrite all the settings for caption_type and extra_options.
- max_new_tokens: The max_new_token parameter of LLM.
- do_sample: The do_sample parameter of LLM.
- top-p: The top_p parameter of LLM.
- temperature: The temperature parameter of LLM.
LoadJoyCaption2Model
JoyCaption2's model loading node, used in conjunction with JoyCaption2Split.
Node Options:
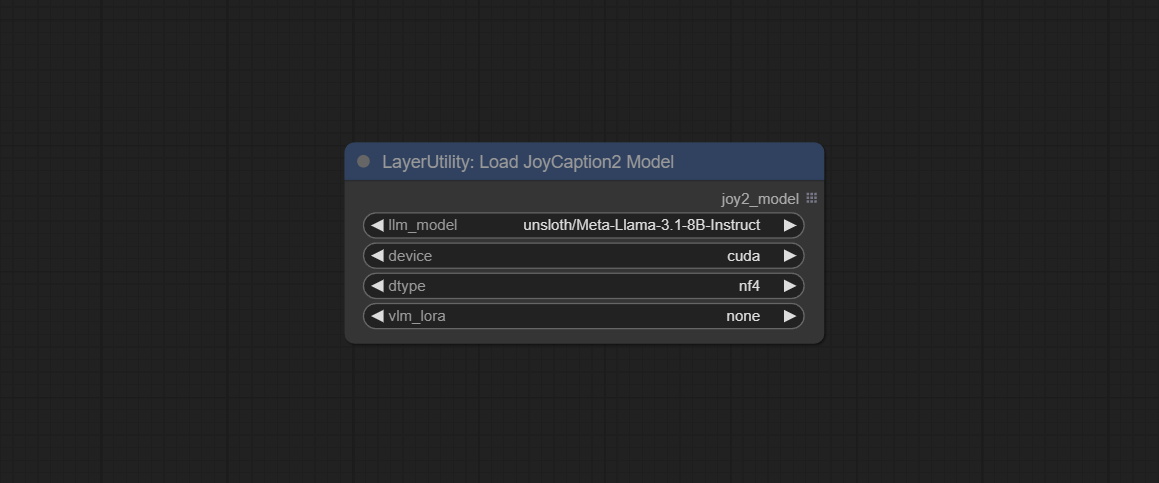
- llm_model: There are two LLM models to choose, Orenguteng/Llama-3.1-8B-Lexi-Uncensored-V2 and unsloth/Meta-Llama-3.1-8B-Instruct.
- device: Model loading device. Currently, only CUDA is supported.
- dtype: Model precision, nf4 and bf16.
- vlm_lora: Whether to load text_madel.
JoyCaption2ExtraOptions
The extra_options parameter node of JoyCaption2.
Node Options:
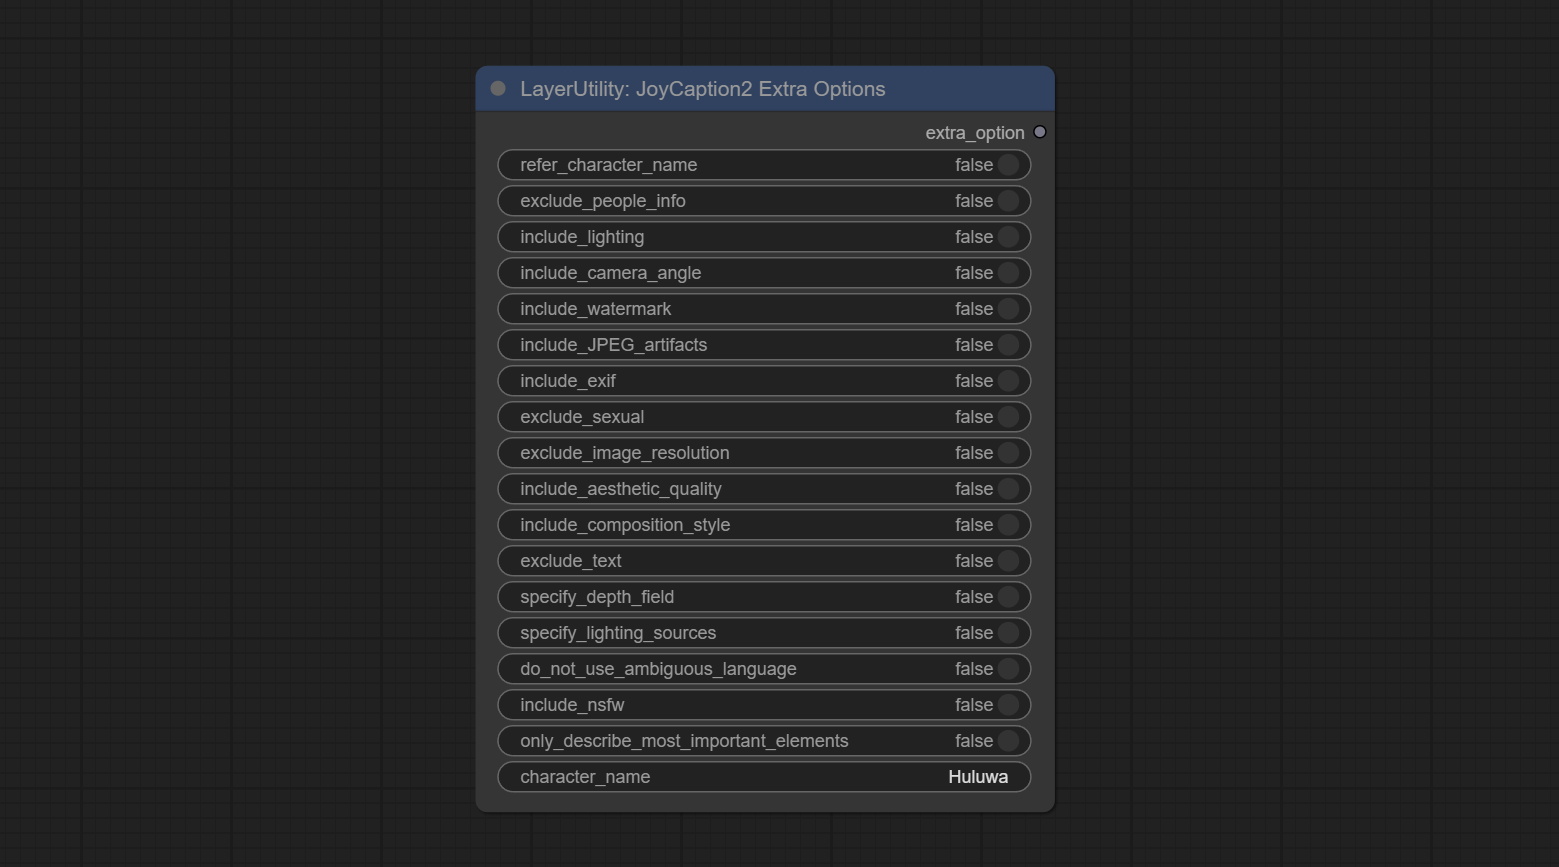
- refer_character_name: If there is a person/character in the image you must refer to them as {name}.
- exclude_people_info: Do NOT include information about people/characters that cannot be changed (like ethnicity, gender, etc), but do still include changeable attributes (like hair style).
- include_lighting: Include information about lighting.
- include_camera_angle: Include information about camera angle.
- include_watermark: Include information about whether there is a watermark or not.
- include_JPEG_artifacts: Include information about whether there are JPEG artifacts or not.
- include_exif: If it is a photo you MUST include information about what camera was likely used and details such as aperture, shutter speed, ISO, etc.
- exclude_sexual: Do NOT include anything sexual; keep it PG.
- exclude_image_resolution: Do NOT mention the image's resolution.
- include_aesthetic_quality: You MUST include information about the subjective aesthetic quality of the image from low to very high.
- include_composition_style: Include information on the image's composition style, such as leading lines, rule of thirds, or symmetry.
- exclude_text: Do NOT mention any text that is in the image.
- specify_depth_field: Specify the depth of field and whether the background is in focus or blurred.
- specify_lighting_sources: If applicable, mention the likely use of artificial or natural lighting sources.
- do_not_use_ambiguous_language: Do NOT use any ambiguous language.
- include_nsfw: Include whether the image is sfw, suggestive, or nsfw.
- only_describe_most_important_elements: ONLY describe the most important elements of the image.
- character_name: Person/Character Name, if choice
refer_character_name .
PhiPrompt
Use Microsoft Phi 3.5 text and visual models for local inference. Can be used to generate prompt words, process prompt words, or infer prompt words from images. Running this model requires at least 16GB of video memory. Download model files from BaiduNetdisk or huggingface.co/microsoft/Phi-3.5-vision-instruct and huggingface.co/microsoft/Phi-3.5-mini-instruct and copy to ComfyUImodelsLLM folder. 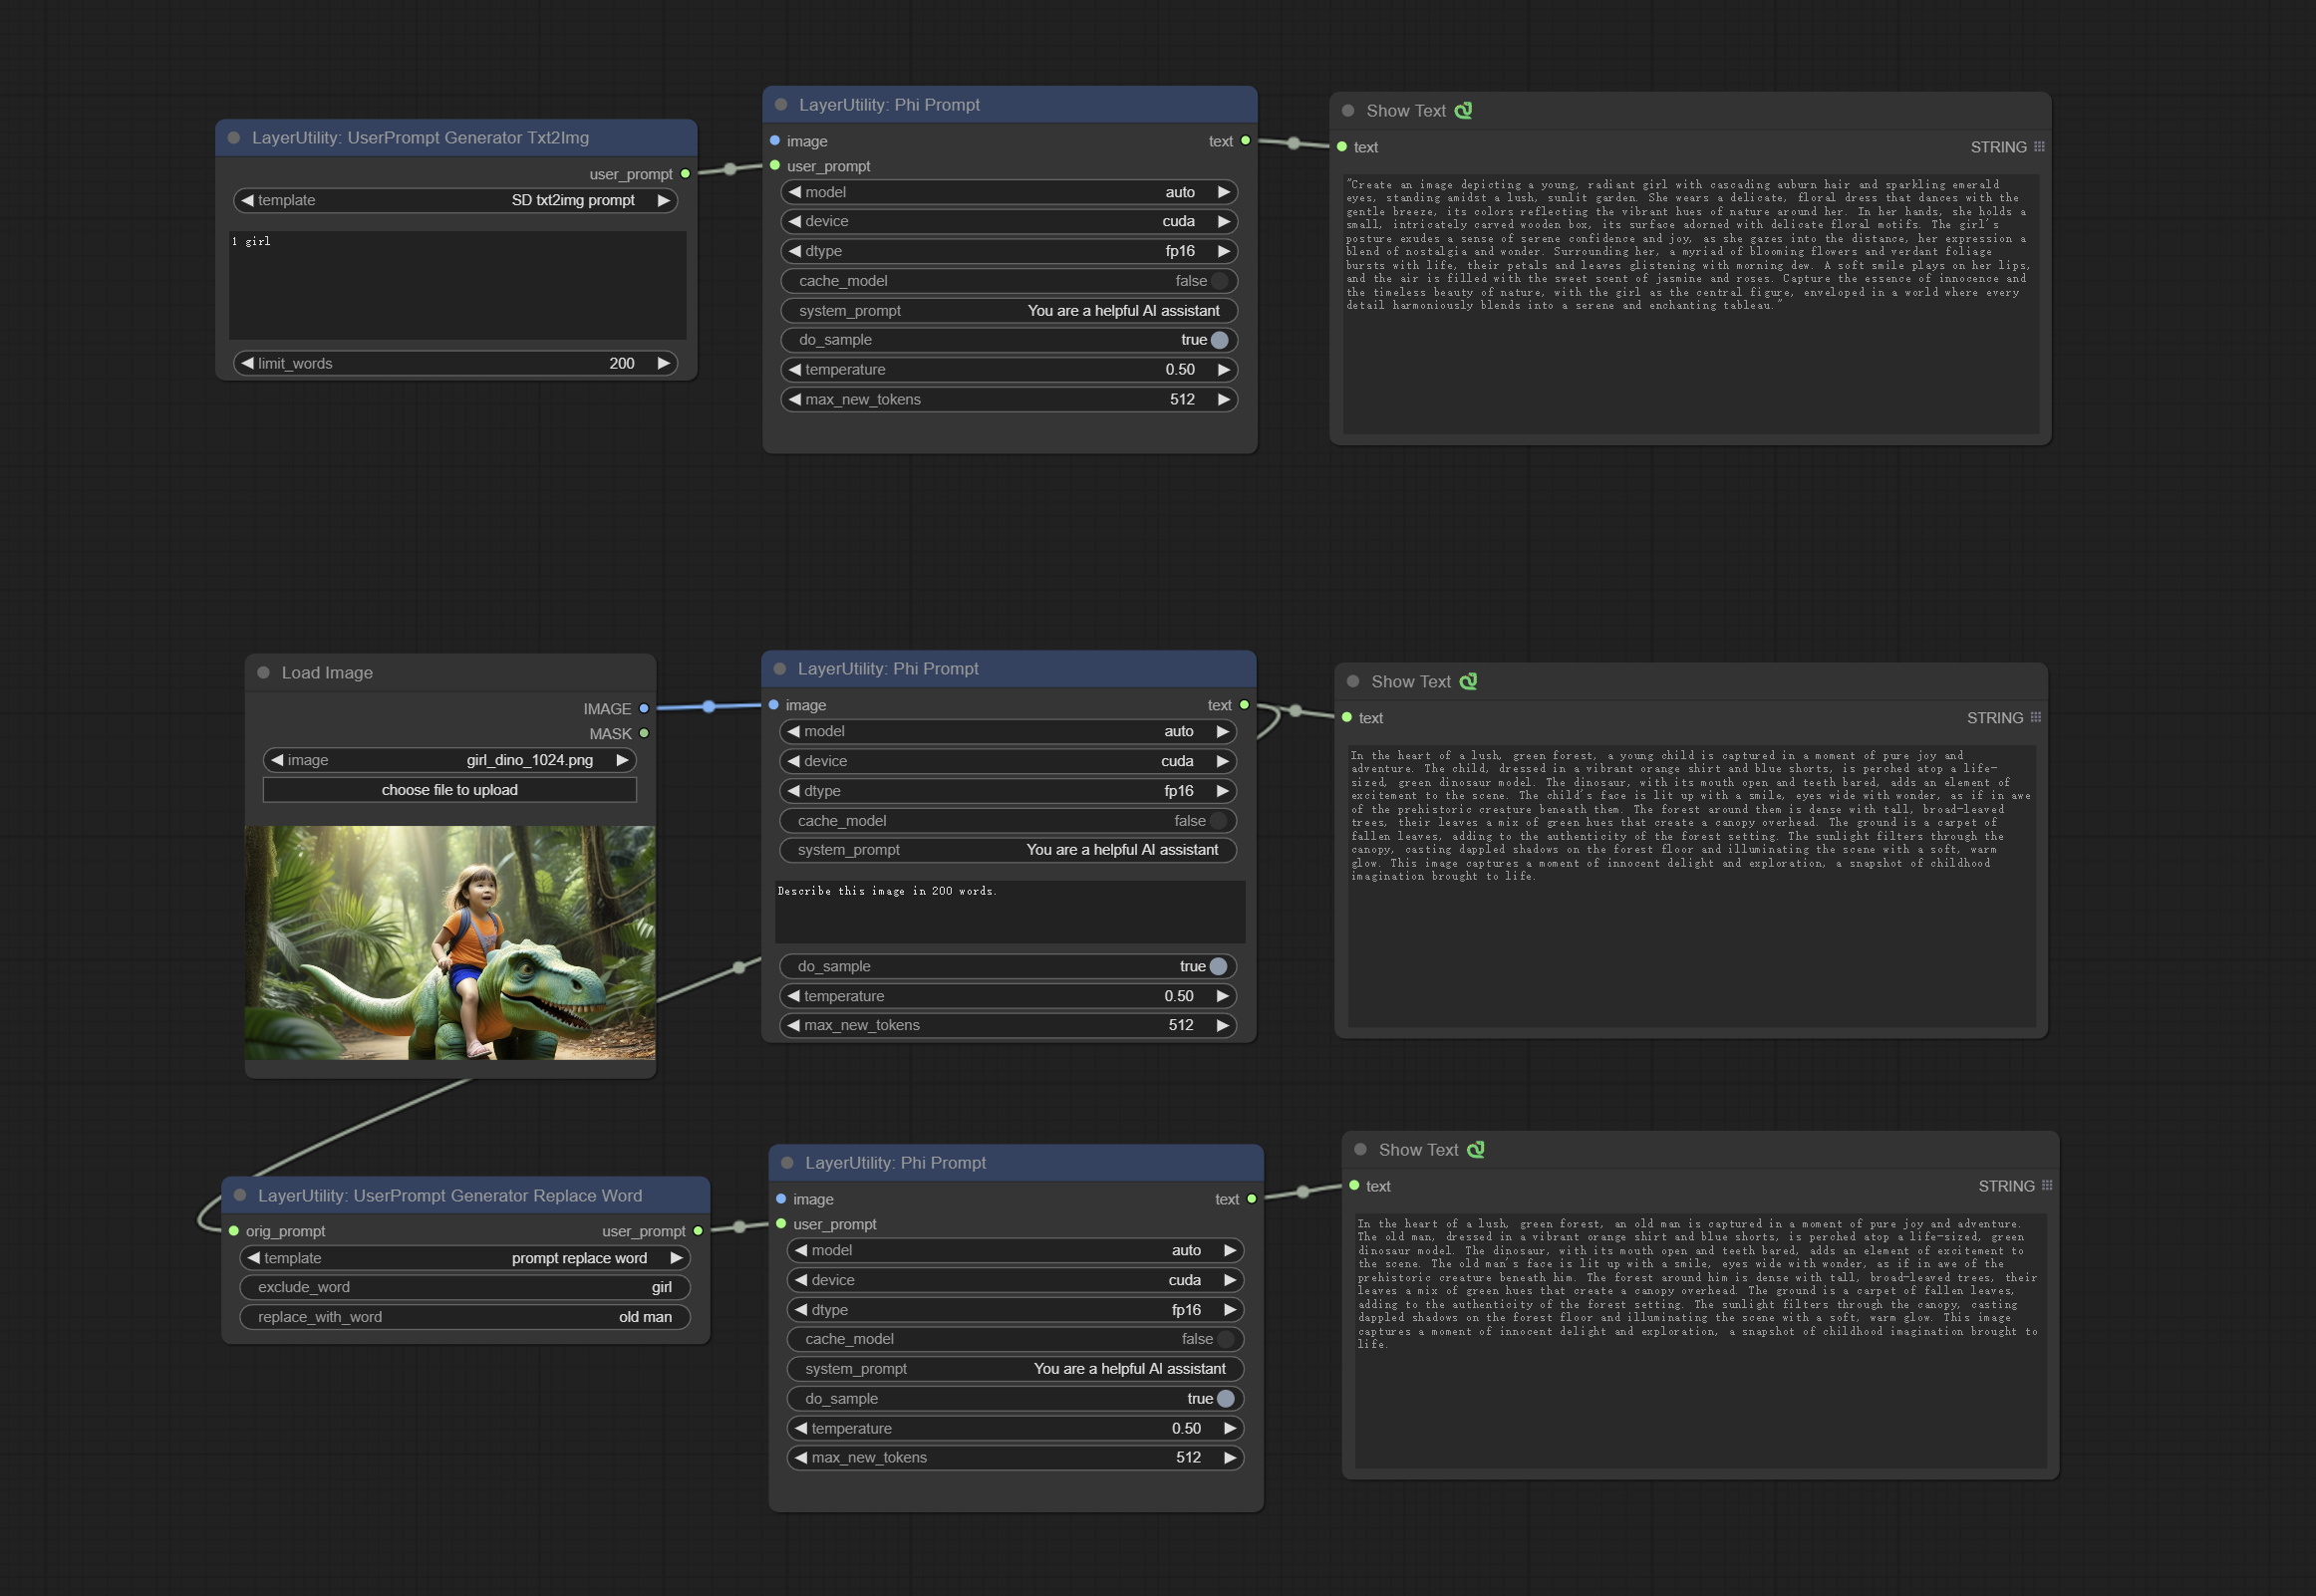
Node Options:
- image: Optional input. The input image will serve as the input for Phi-3.5-vision-instruct.
- model: Selectable to load Phi-3.5-vision-instruct or Phi-3.5-mini-instruct model. The default value of auto will automatically load the corresponding model based on whether there is image input.
- device: Model loading device. Supports CPU and CUDA.
- dtype: The model loading accuracy has three options: fp16, bf16, and fp32.
- cache_model: Whether to cache the model.
- system_prompt: The system prompt of Phi-3.5-mini-instruct.
- user_prompt: User prompt words for LLM model.
- do_sample: The do_Sample parameter of LLM defaults to True.
- temperature: The temperature parameter of LLM defaults to 0.5.
- max_new_tokens: The max_new_token parameter of LLM defaults to 512.
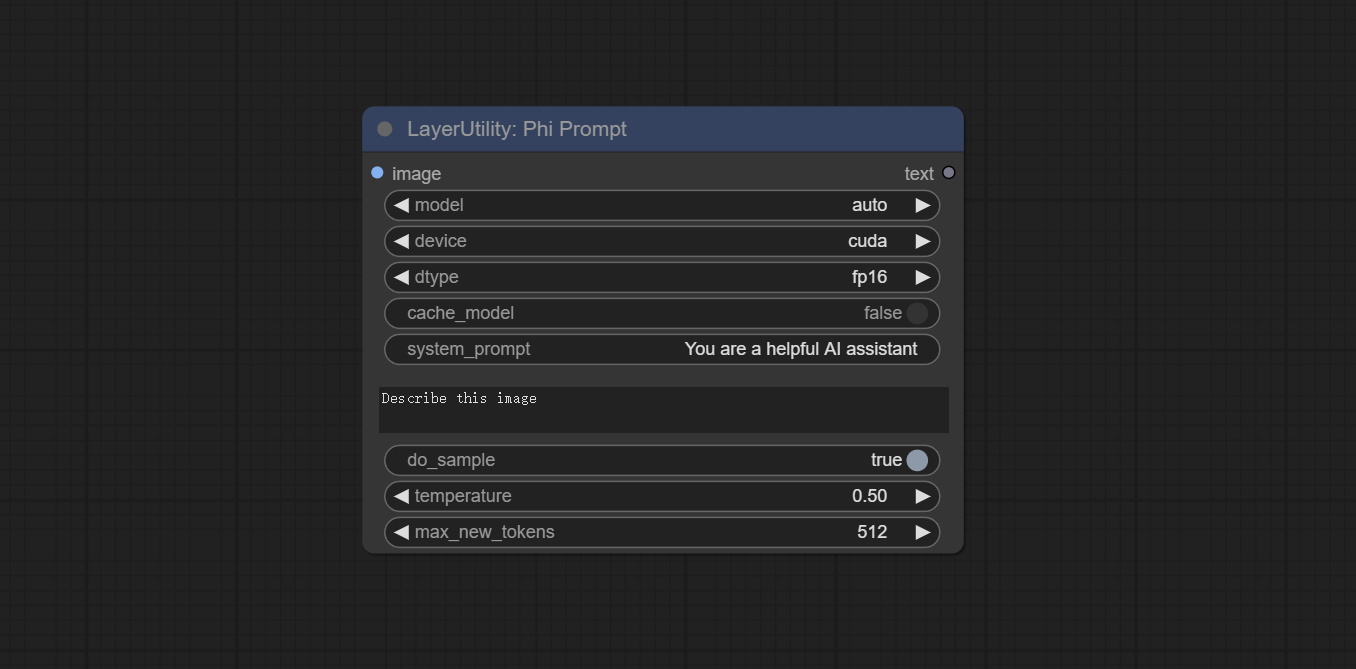
UserPromptGeneratorTxtImg
UserPrompt preset for generating SD text to image prompt words.
Node options:
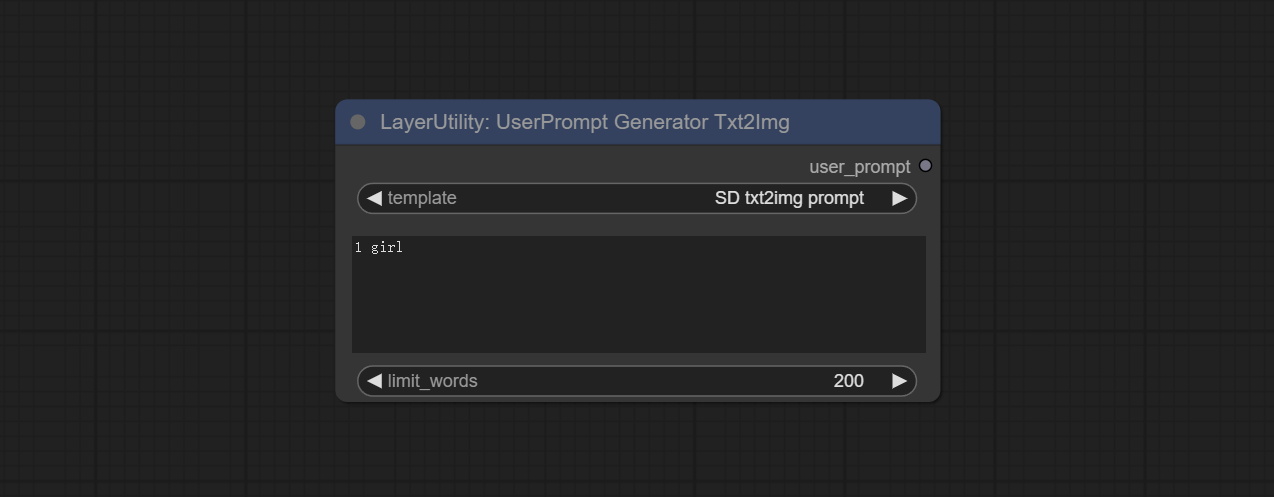
- template: Prompt word template. Currently, only the 'SD txt2img prompt' is available.
- describe: Prompt word description. Enter a simple description here.
- limit_word: Maximum length limit for output prompt words. For example, 200 means that the output text will be limited to 200 words.
UserPromptGeneratorTxtImgWithReference
UserCompt preset for generating SD text to image prompt words based on input content.
Node options:
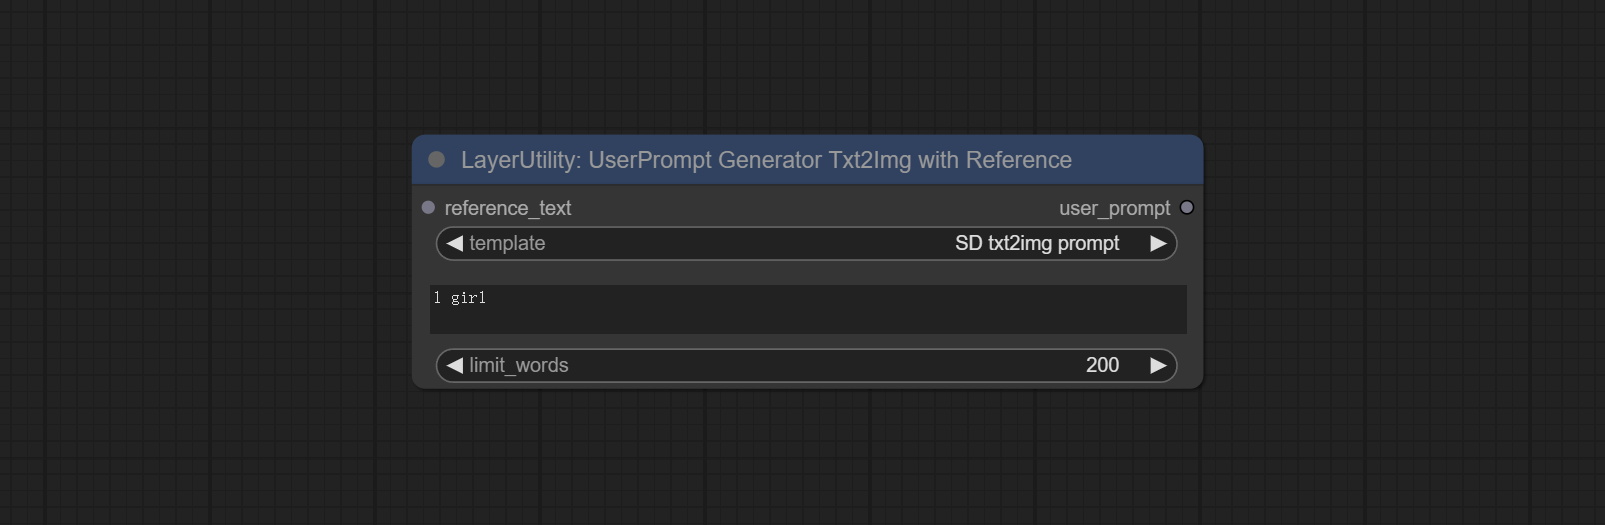
- reference_text: Reference text input. Usually it is a style description of the image.
- template: Prompt word template. Currently, only the 'SD txt2img prompt' is available.
- describe: Prompt word description. Enter a simple description here.
- limit_word: Maximum length limit for output prompt words. For example, 200 means that the output text will be limited to 200 words.
UserPromptGeneratorReplaceWord
UserPrompt preset used to replace a keyword in text with different content. This is not only a simple replacement, but also a logical sorting of the text based on the context of the prompt words to achieve the rationality of the output content.
Node options:
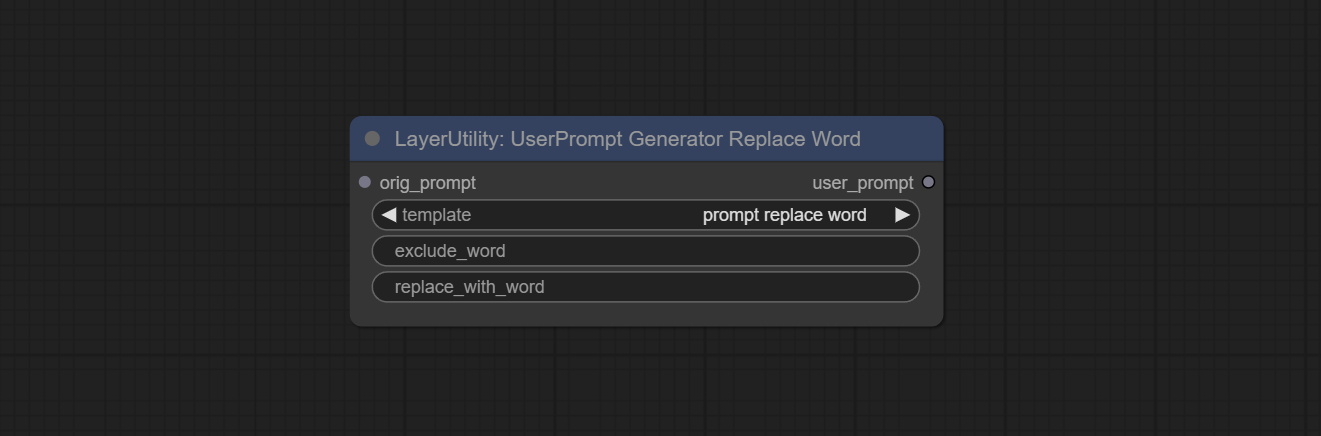
- orig_prompt: Original prompt word input.
- template: Prompt word template. Currently, only 'prompt replace word' is available.
- exclude_word: Keywords that need to be excluded.
- replace_with_word: That word will replace the exclude_word.
PromptTagger
Inference the prompts based on the image. it can replace key word for the prompt. This node currently uses Google Gemini API as the backend service. Please ensure that the network environment can use Gemini normally. Please apply for your API key on Google AI Studio, And fill it in api_key.ini , this file is located in the root directory of the plug-in, and the default name is api_key.ini.example . to use this file for the first time, you need to change the file suffix to .ini . Open it using text editing software, fill in your API key after google_api_key= and save it. 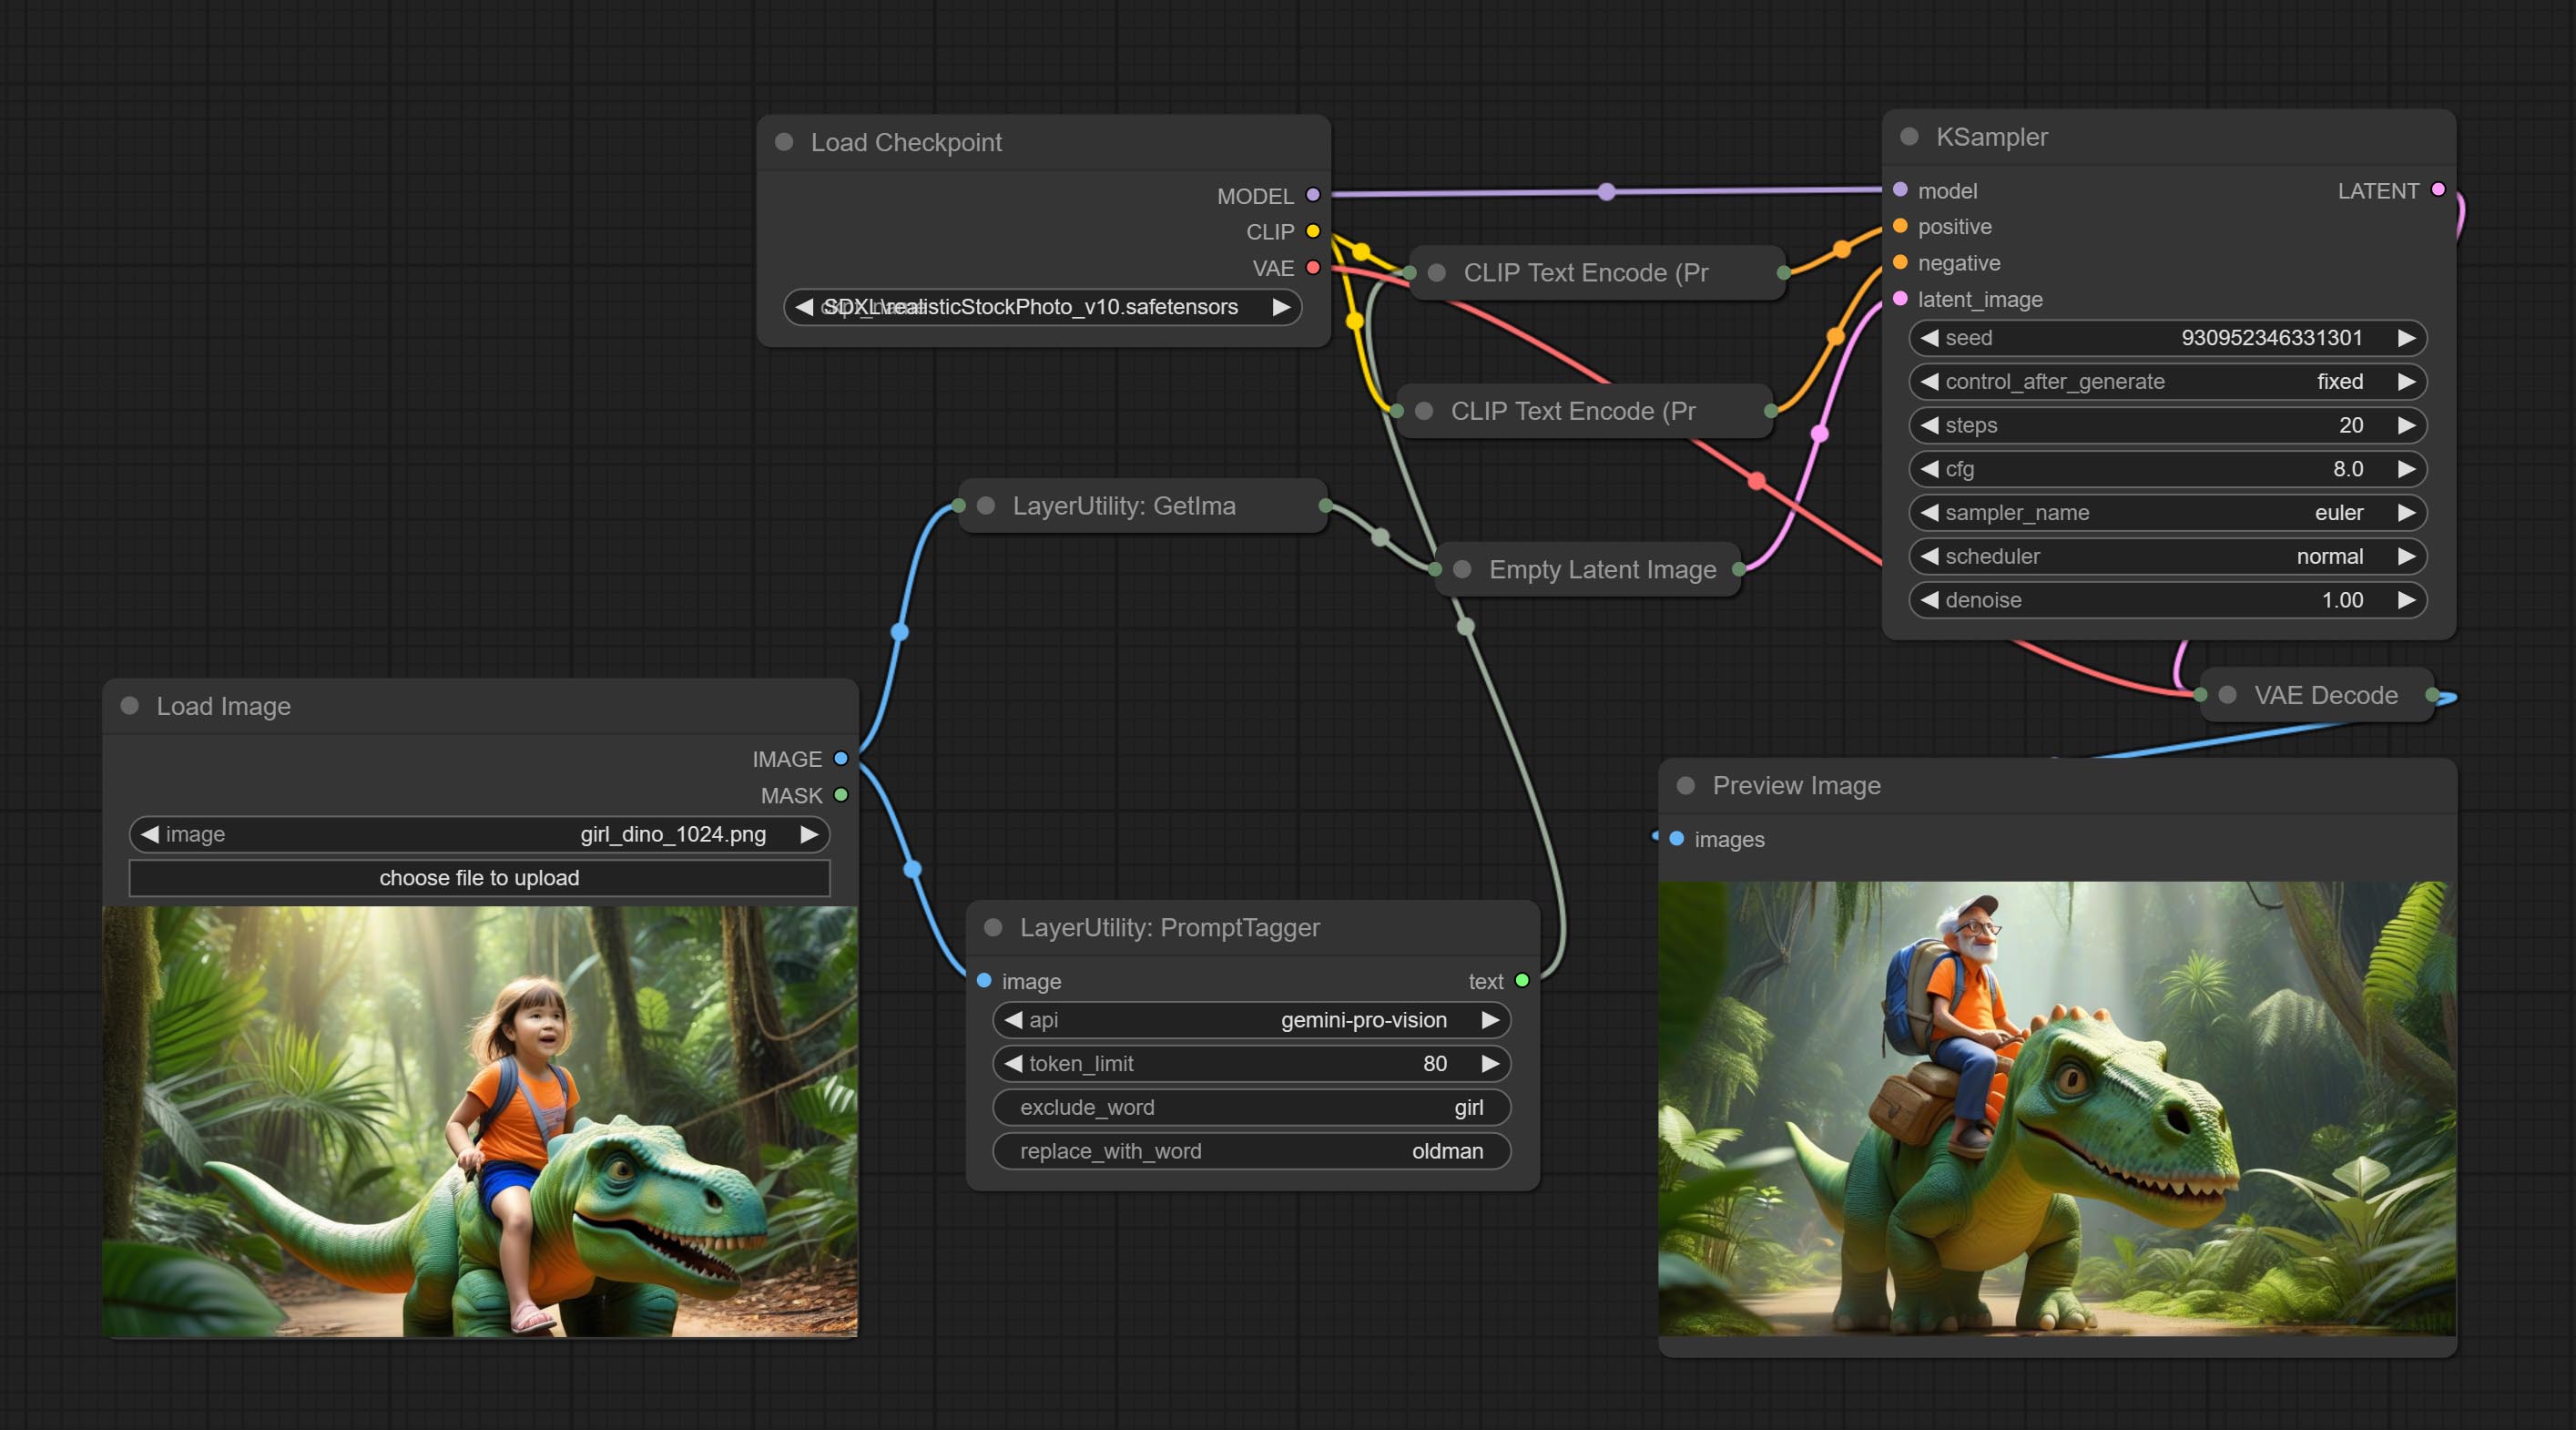
Node options:
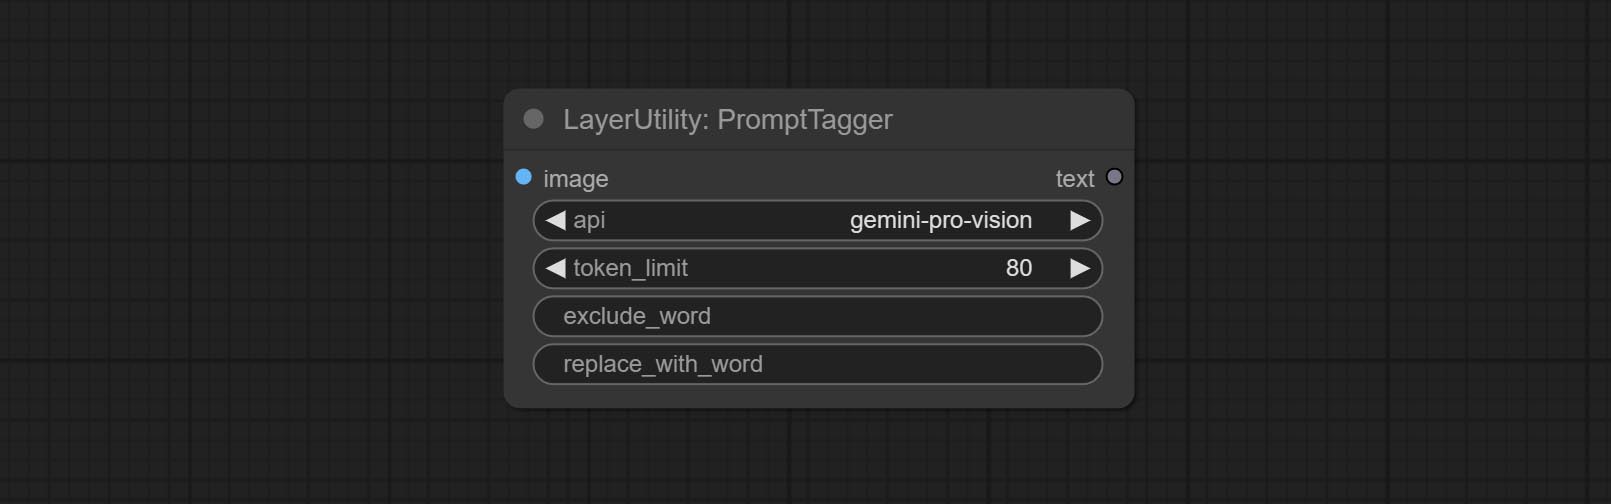
- api: The Api used. At present, there are two options "gemini-1. 5-flash" and "google-gemini".
- token_limit: The maximum token limit for generating prompt words.
- exclude_word: Keywords that need to be excluded.
- replace_with_word: That word will replace the exclude_word.
PromptEmbellish
Enter simple prompt words, output polished prompt words, and support inputting images as references, and support Chinese input. This node currently uses Google Gemini API as the backend service. Please ensure that the network environment can use Gemini normally. Please apply for your API key on Google AI Studio, And fill it in api_key.ini , this file is located in the root directory of the plug-in, and the default name is api_key.ini.example . to use this file for the first time, you need to change the file suffix to .ini . Open it using text editing software, fill in your API key after google_api_key= and save it. 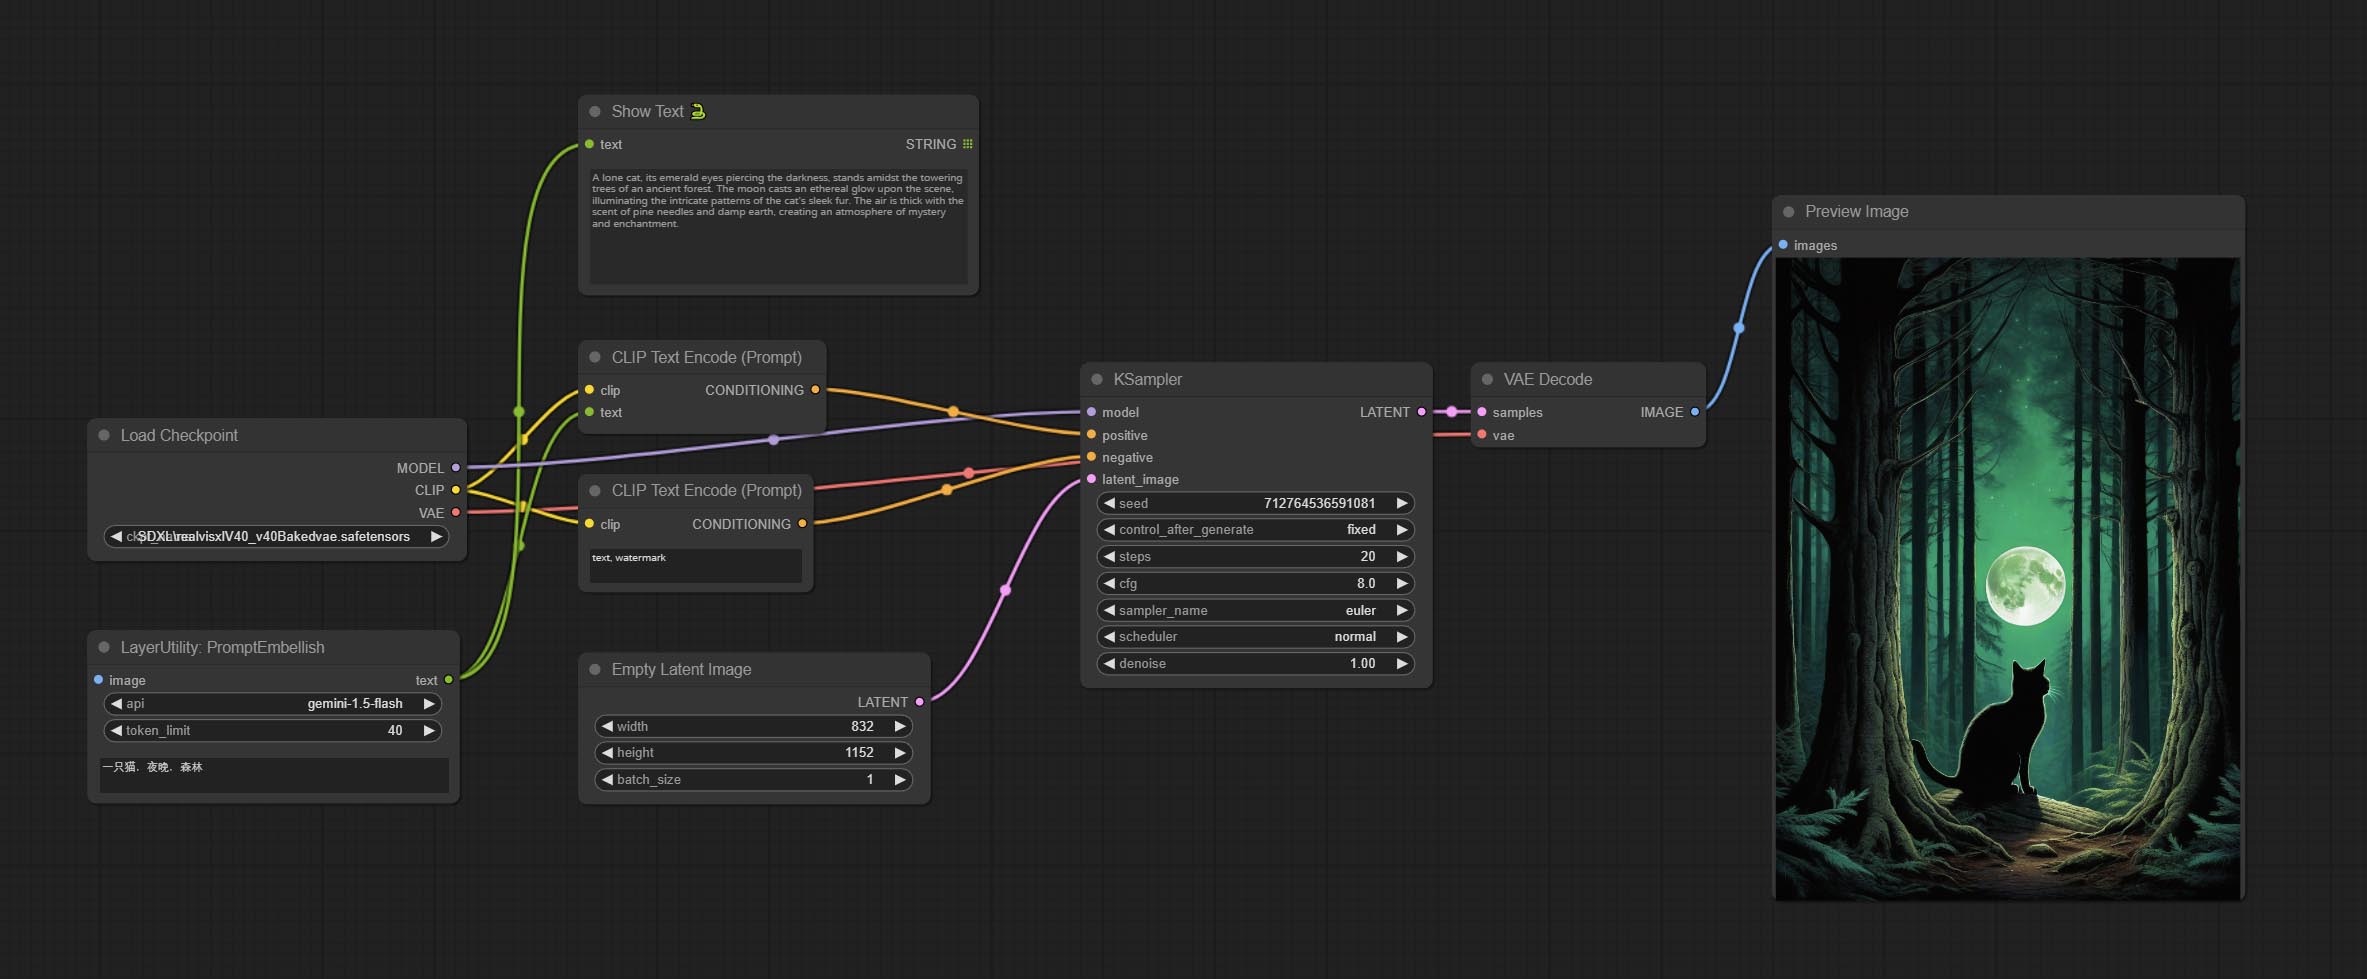
Node options:
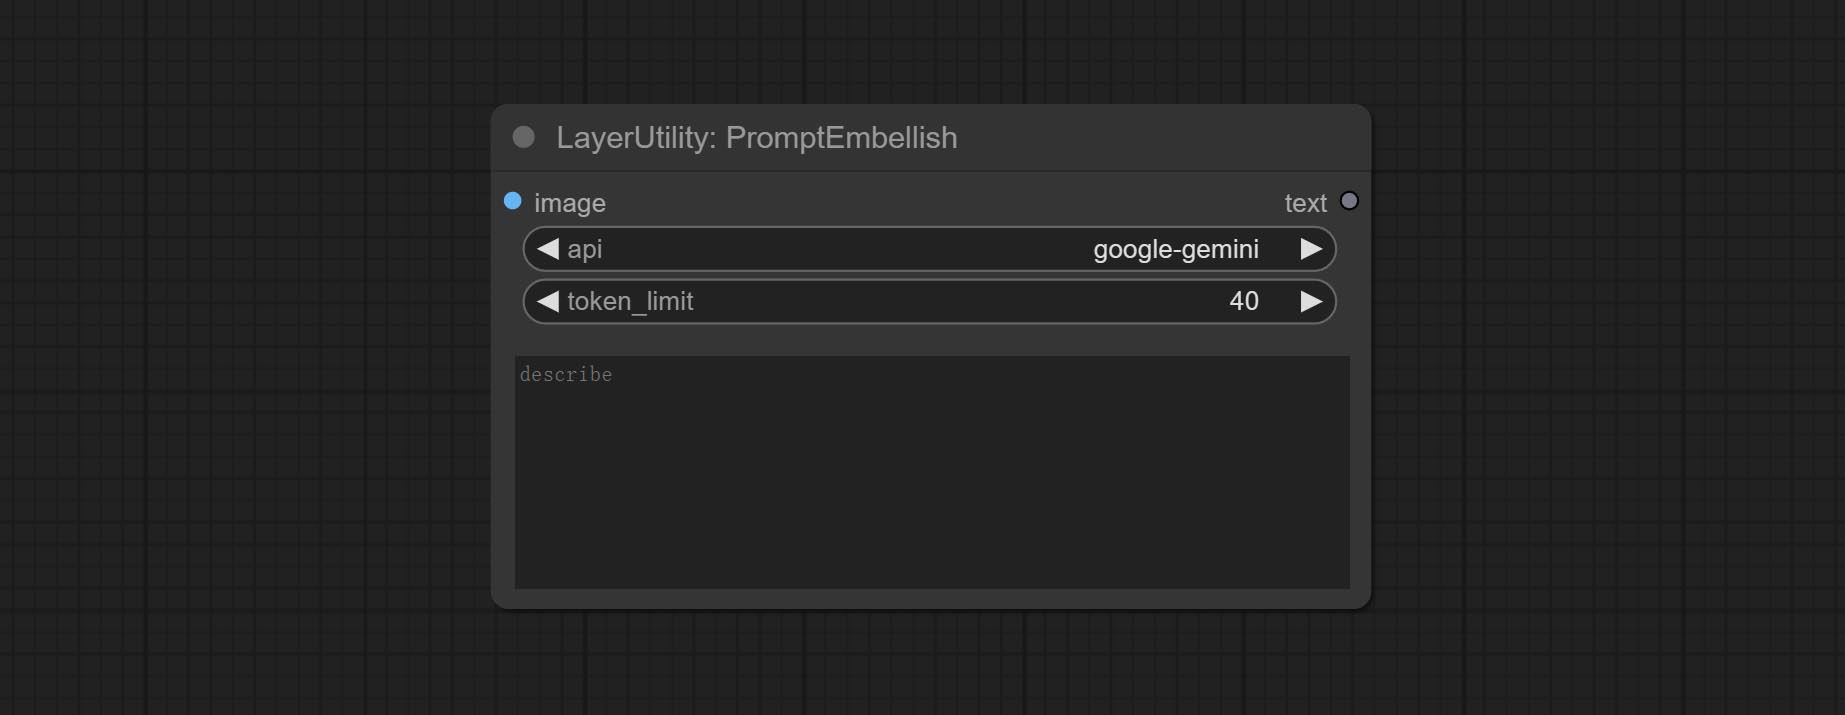
- image: Optional, input image as a reference for prompt words.
- api: The Api used. At present, there are two options "gemini-1. 5-flash" and "google-gemini".
- token_limit: The maximum token limit for generating prompt words.
- discribe: Enter a simple description here. supports Chinese text input.
Florence2Image2Prompt
Use the Florence 2 model to infer prompt words. The code for this node section is fromyiwangsimple/florence_dw, thanks to the original author. *When using it for the first time, the model will be automatically downloaded. You can also download the model file from BaiduNetdisk to ComfyUI/models/florence2 folder. 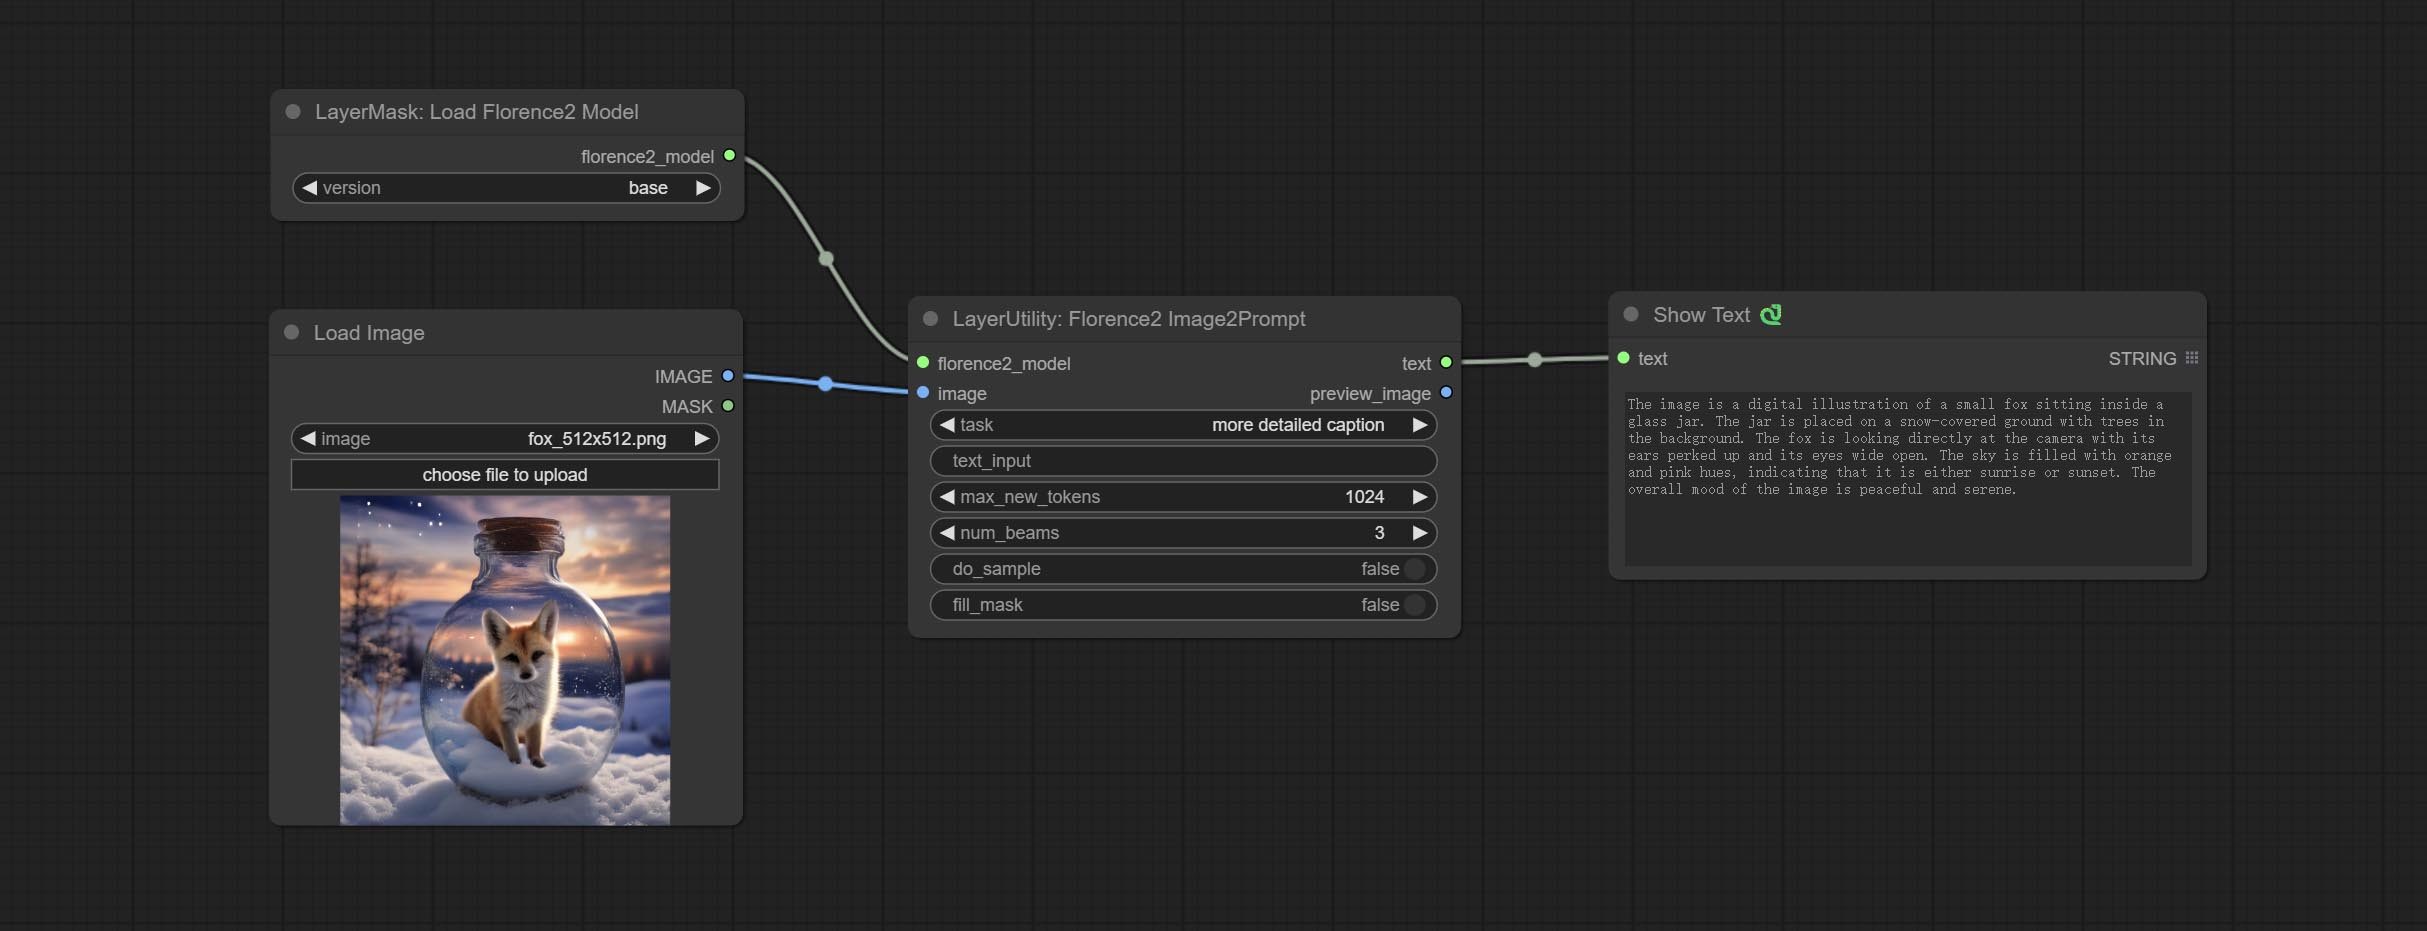
Node Options: 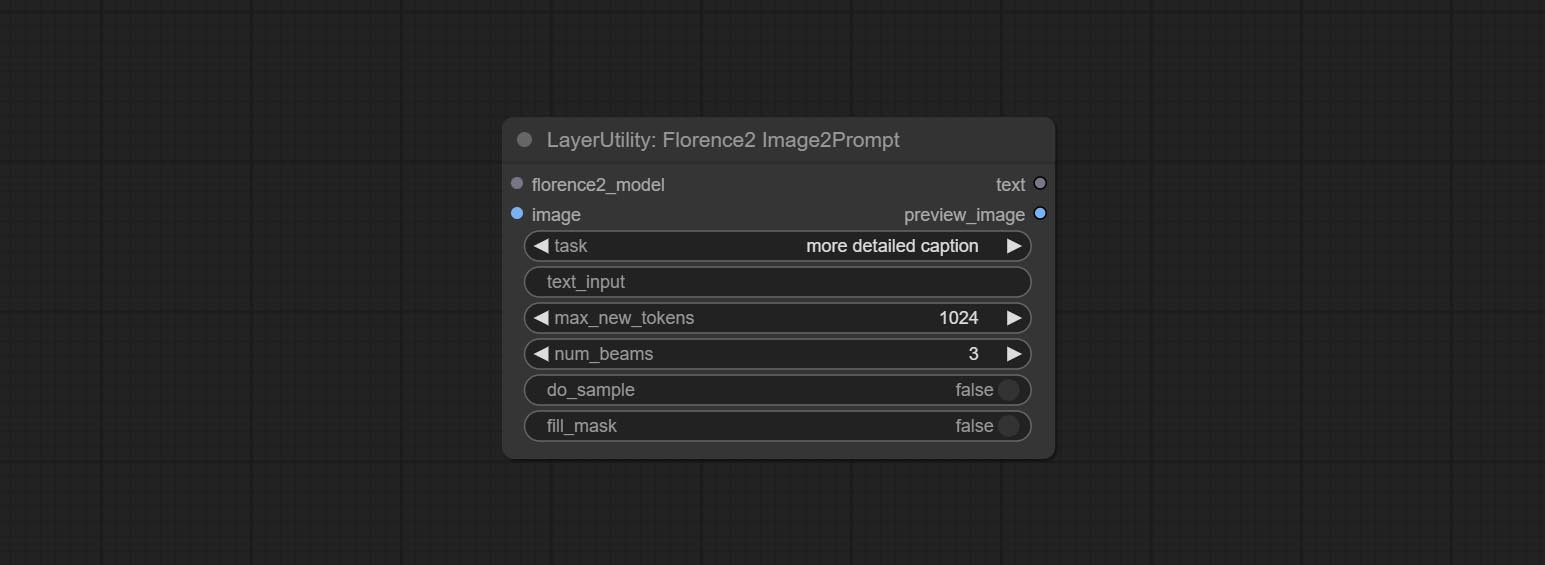
- florence2_model: Florence2 model input.
- image: Image input.
- task: Select the task for florence2.
- text_input: Text input for florence2.
- max_new_tokens: The maximum number of tokens for generating text.
- num_beams: The number of beam searches that generate text.
- do_sample: Whether to use text generated sampling.
- fill_mask: Whether to use text marker mask filling.
VQAPrompt
Use the blip-vqa model for visual question answering. Part of the code for this node is referenced from celoron/ComfyUI-VisualQueryTemplate, thanks to the original author.
*Download model files from BaiduNetdisk or huggingface.co/Salesforce/blip-vqa-capfilt-large and huggingface.co/Salesforce/blip-vqa-base and copy to ComfyUImodelsVQA folder.
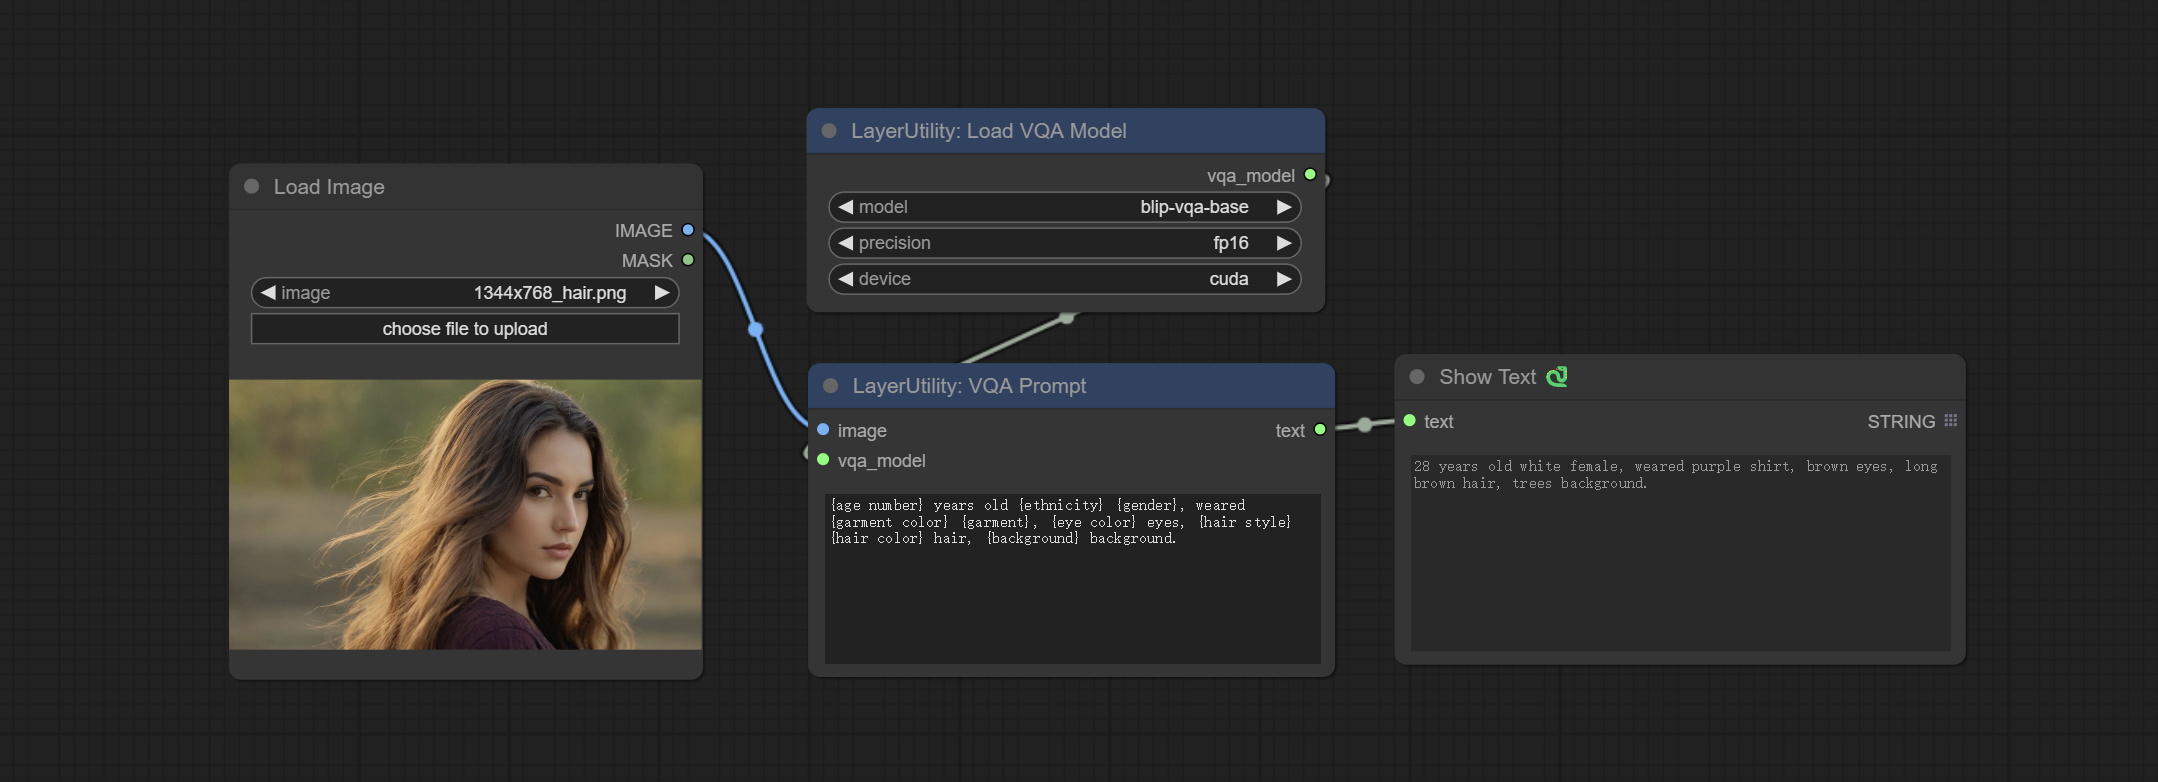
Node Options: 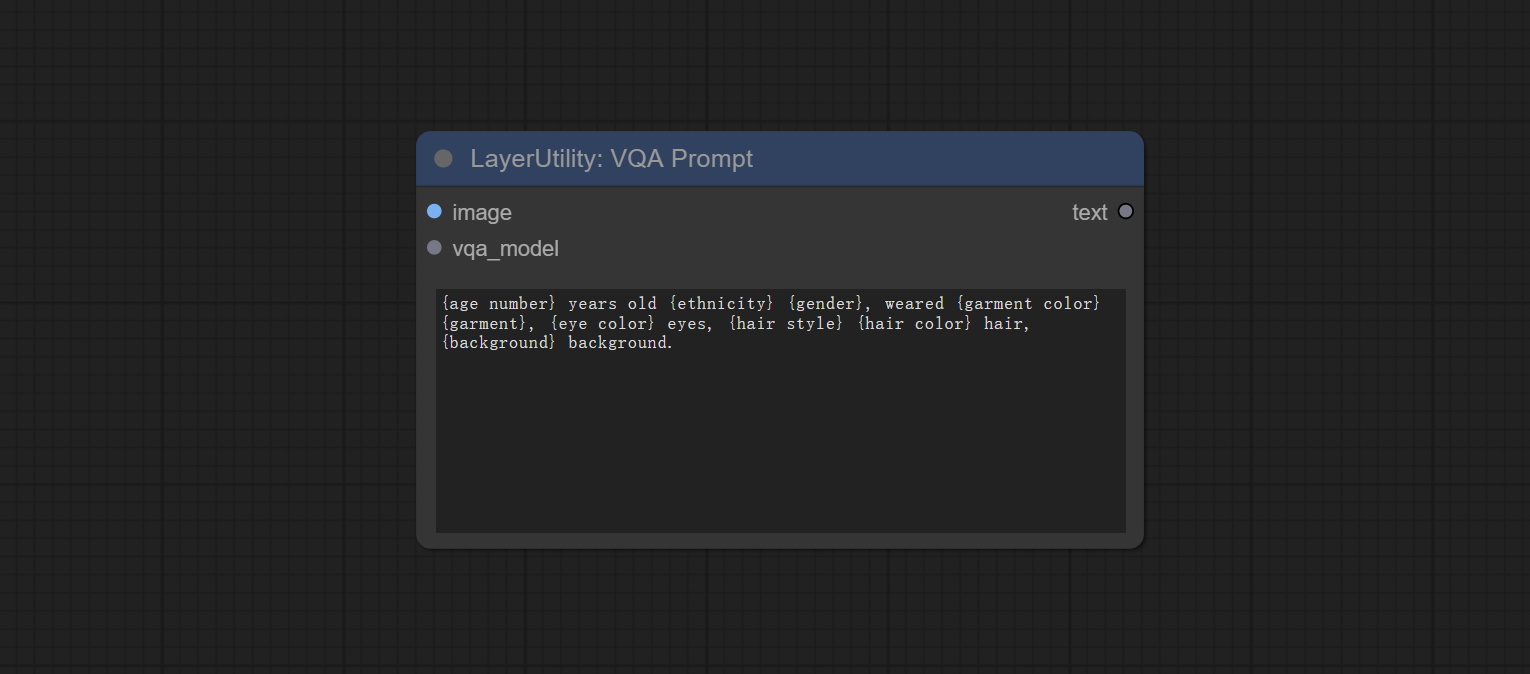
- image: The image input.
- vqa_model: The vqa model input, it from LoadVQAModel node.
- question: Task text input. A single question is enclosed in curly braces "{}", and the answer to the question will be replaced in its original position in the text output. Multiple questions can be defined using curly braces in a single Q&A. For example, for a picture of an item placed in a scene, the question is:"{object color} {object} on the {scene}".
LoadVQAModel
Load the blip-vqa model.
Node Options: 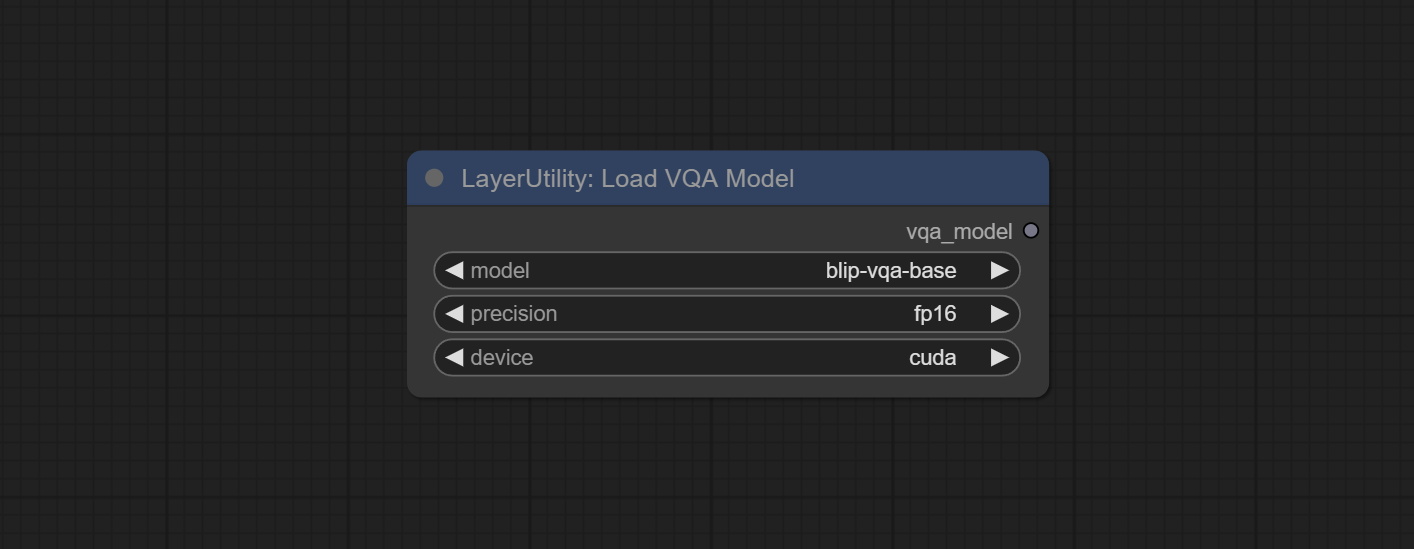
- model: There are currently two models to choose from "blip-vqa-base" and "blip-vqa-capfilt-large".
- precision: The model accuracy has two options: "fp16" and "fp32".
- device: The model running device has two options: "cuda" and "cpu".
ImageShift
Shift the image. this node supports the output of displacement seam masks, making it convenient to create continuous textures. 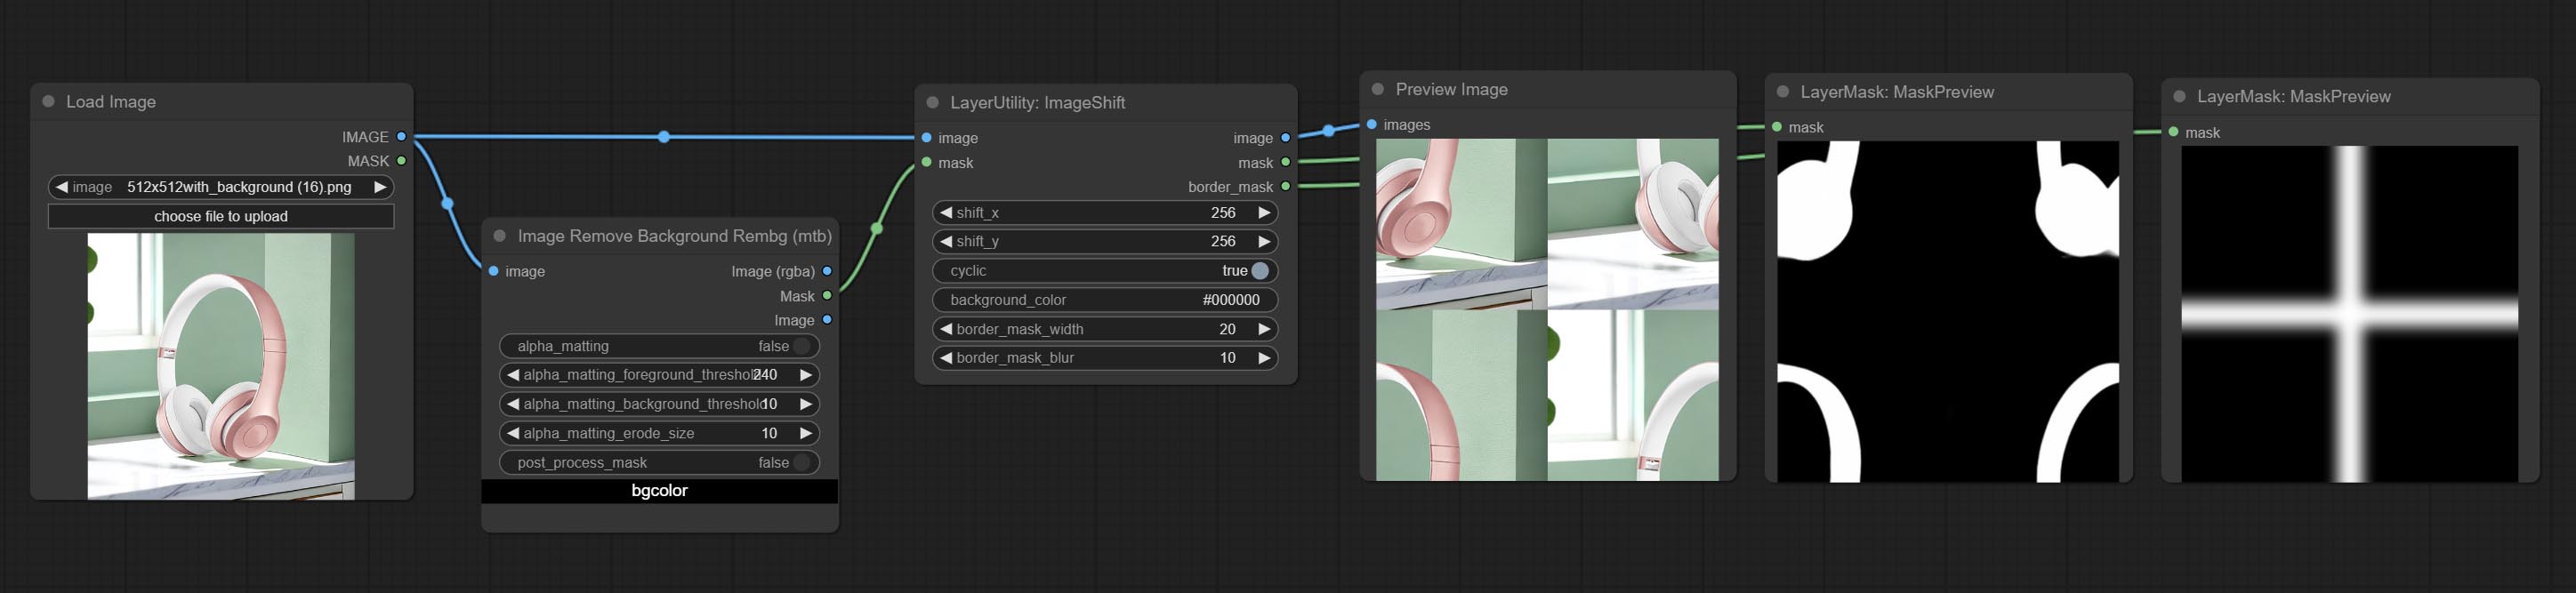
Node options:
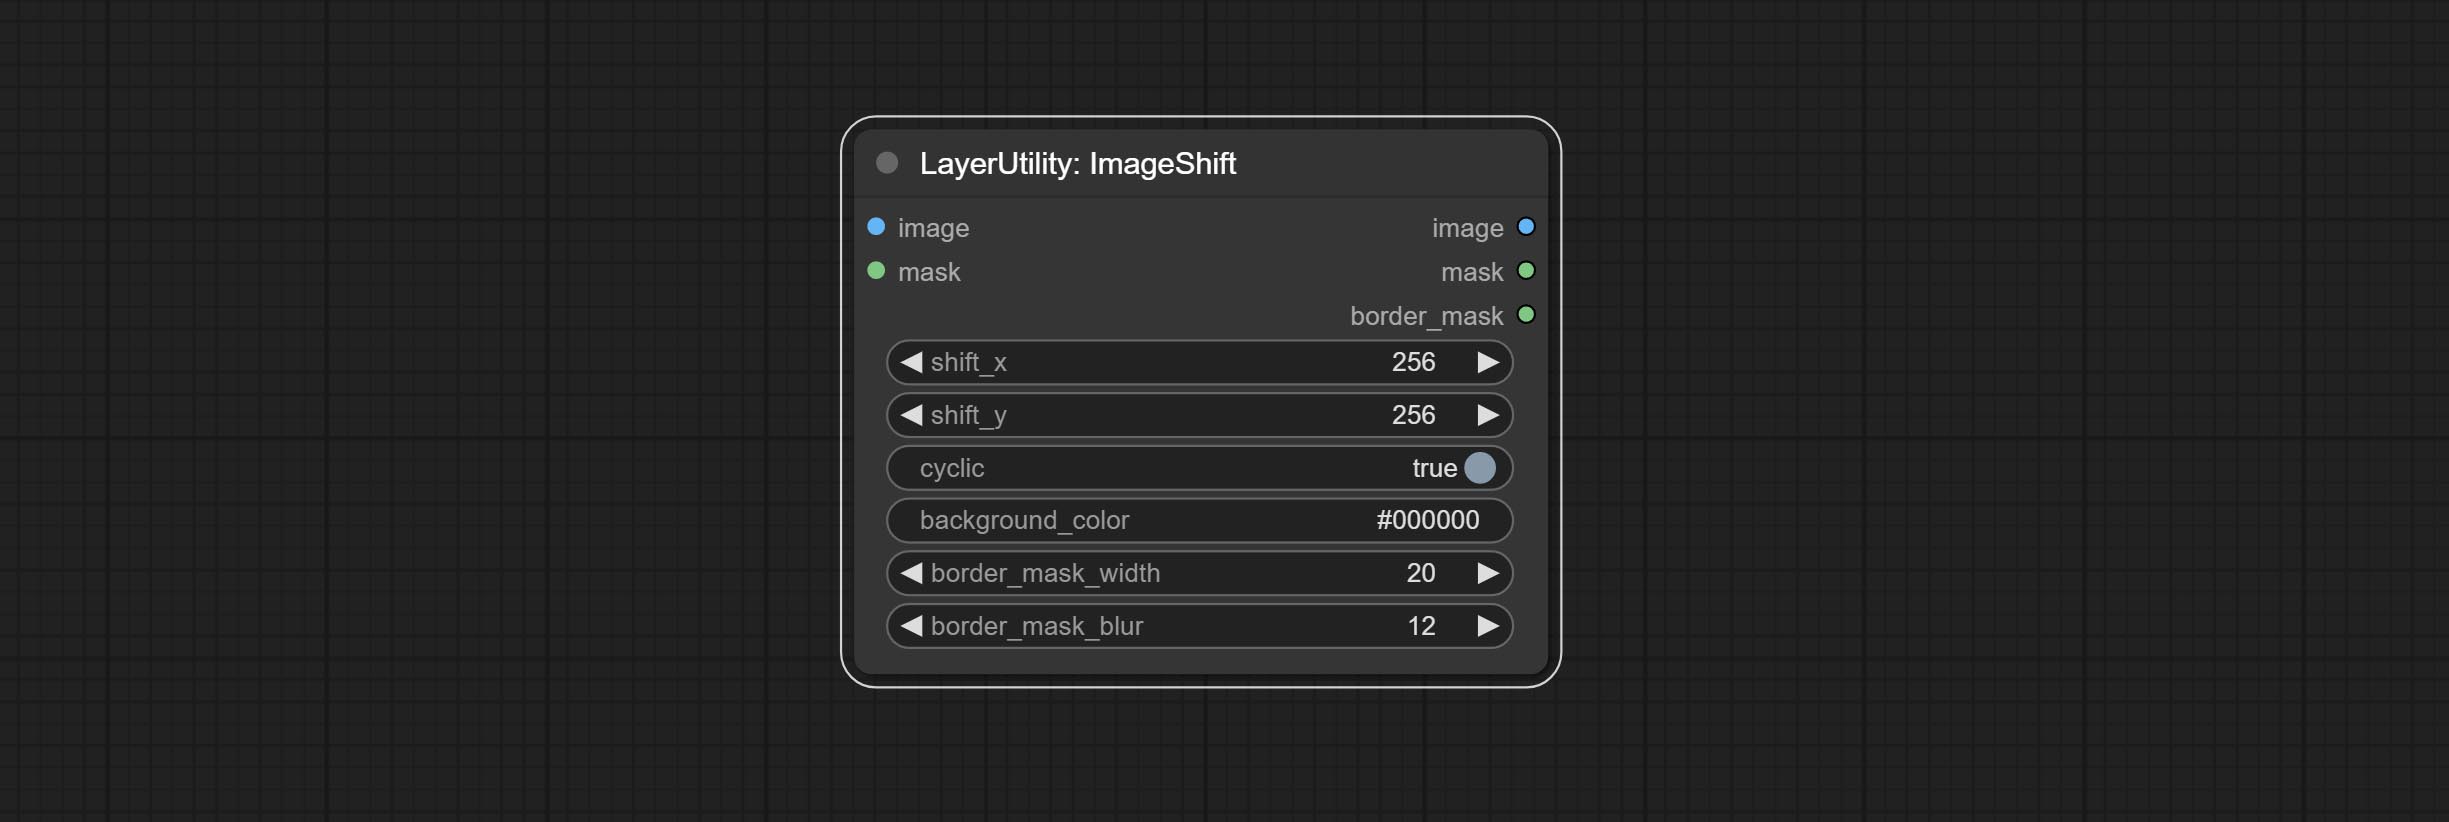
- image 5 : The input image.
- mask 2,5 : The mask of image.
- shift_x: Horizontal distance of shift.
- shift_y: Vertical distance of shift.
- cyclic: Is the part of displacement that is out of bounds cyclic.
- background_color 4 : Background color. if cyclic is set to False, the setting here will be used as the background color.
- border_mask_width: Border mask width.
- border_mask_blur: Border mask blur.
- observação
ImageBlend
A simple node for composit layer image and background image, multiple blend modes are available for option, and transparency can be set. 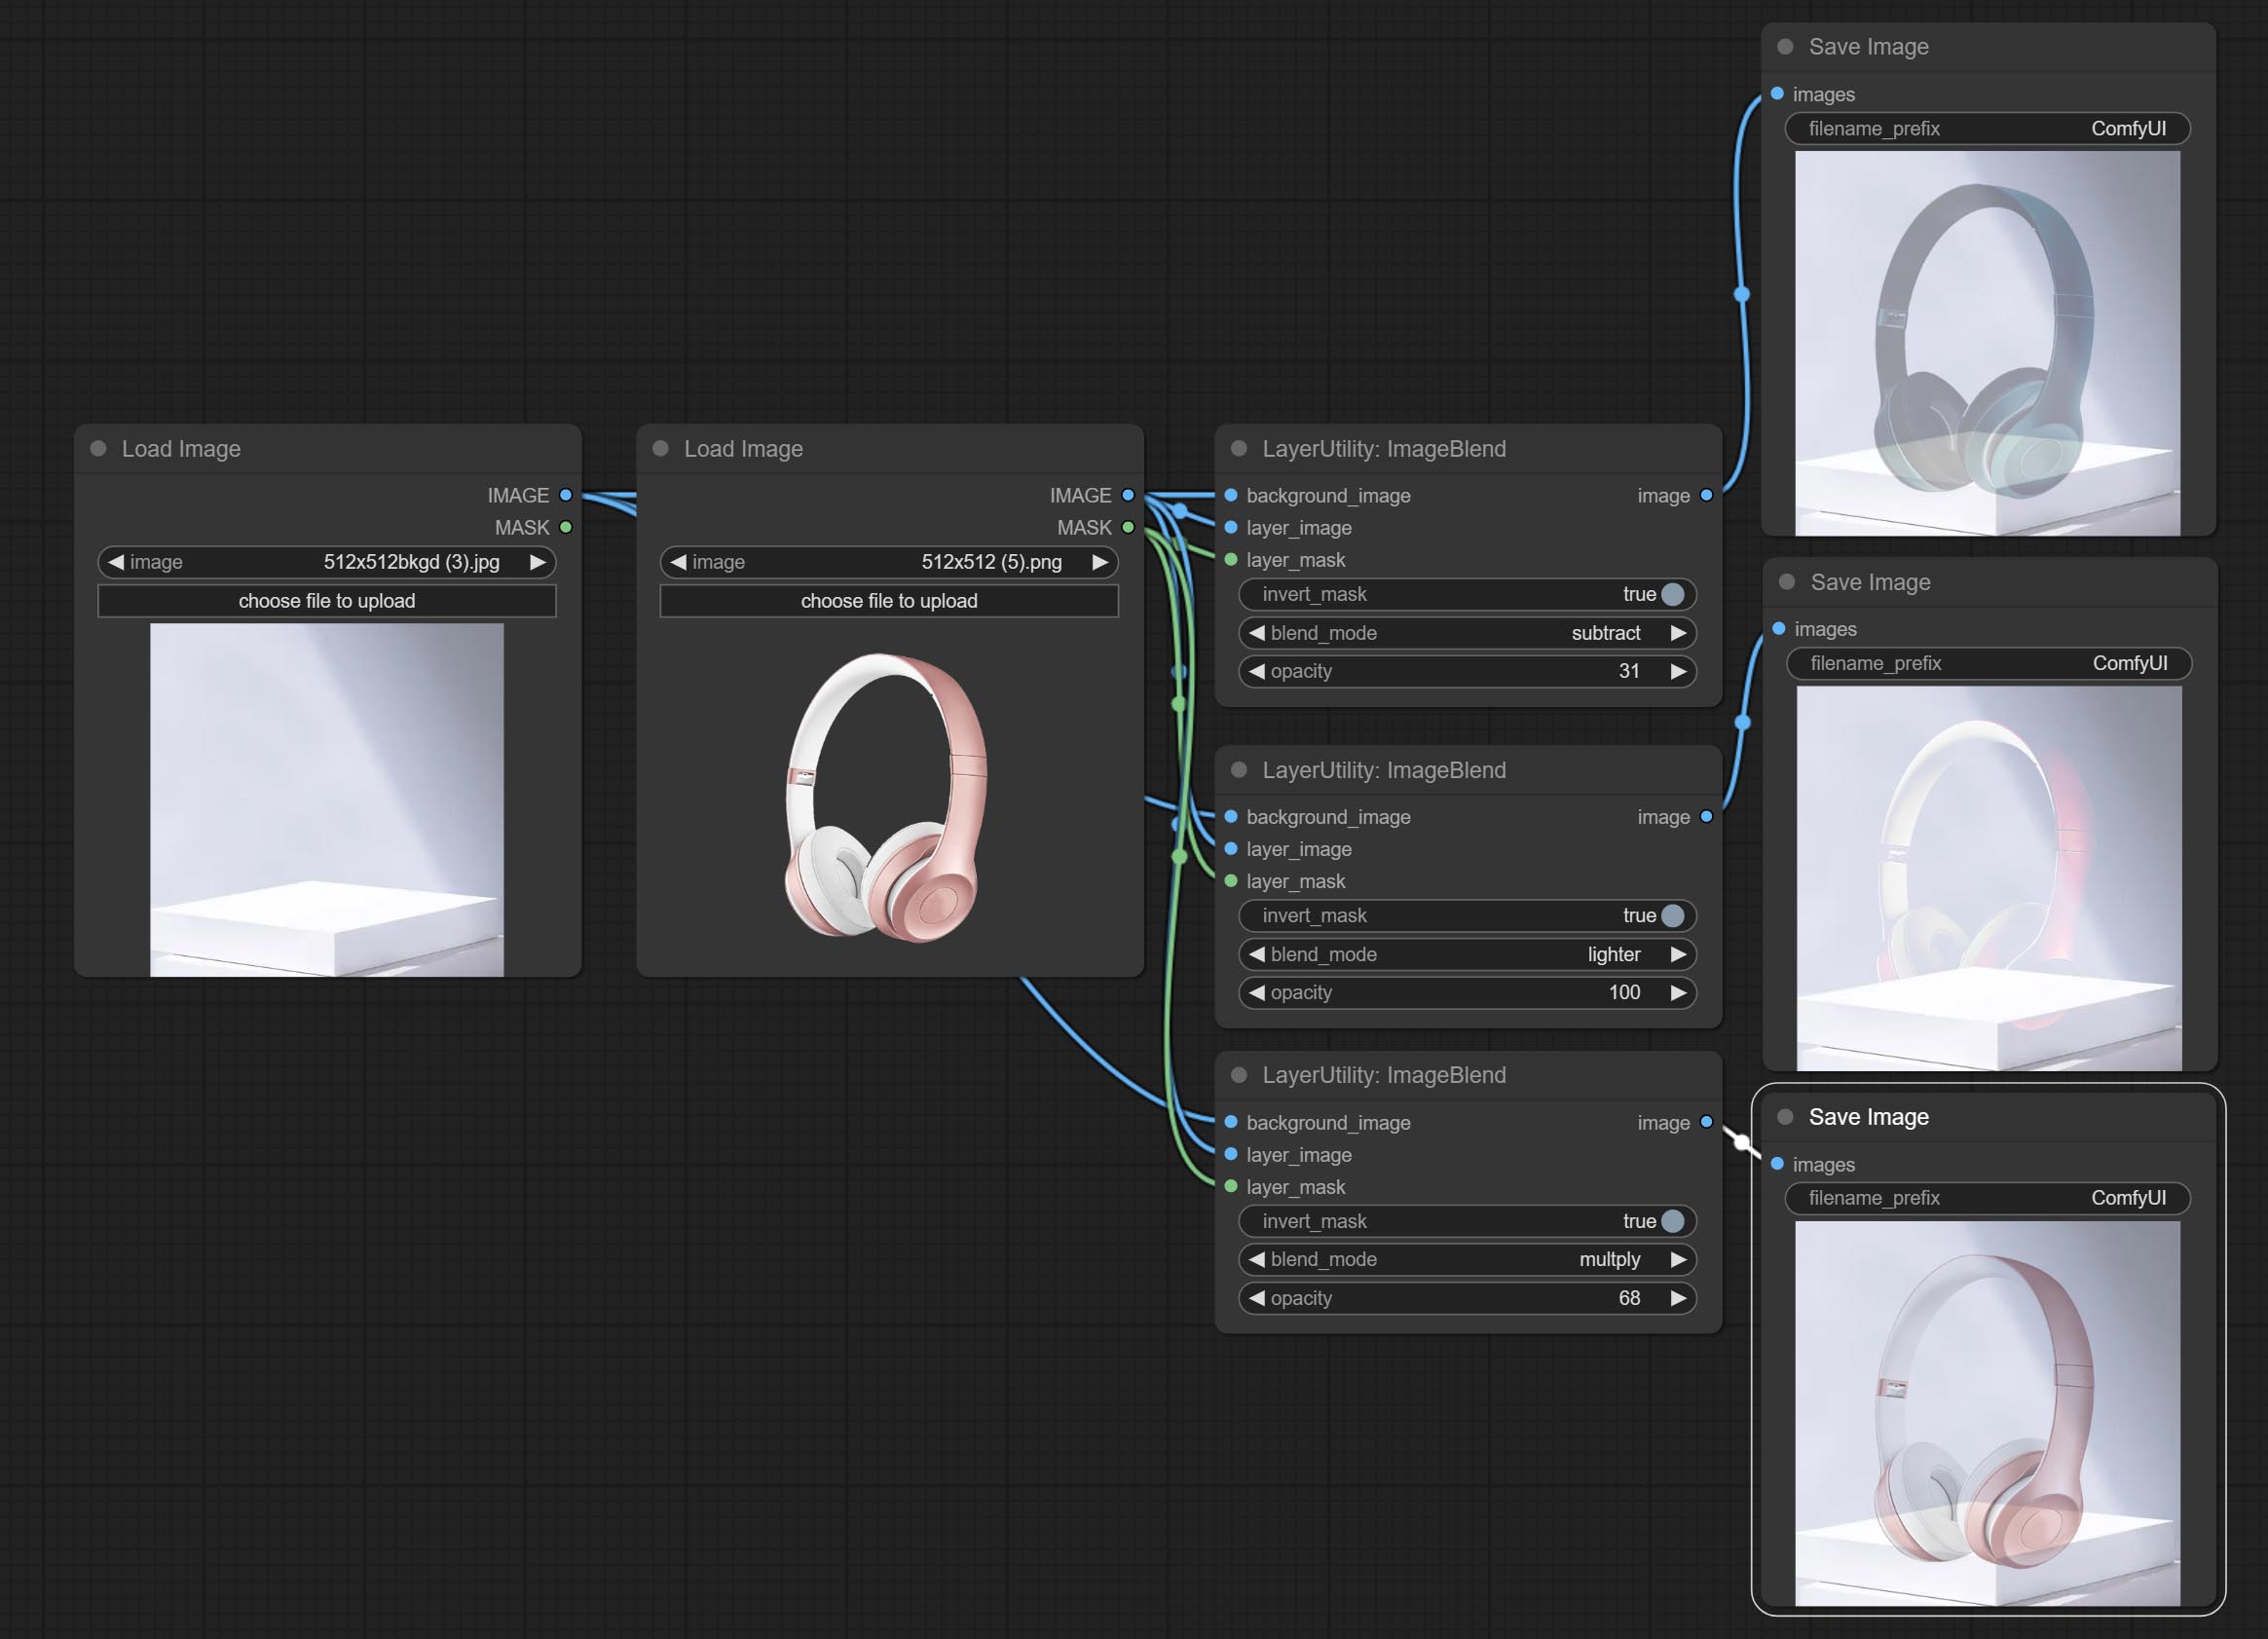
Node options: 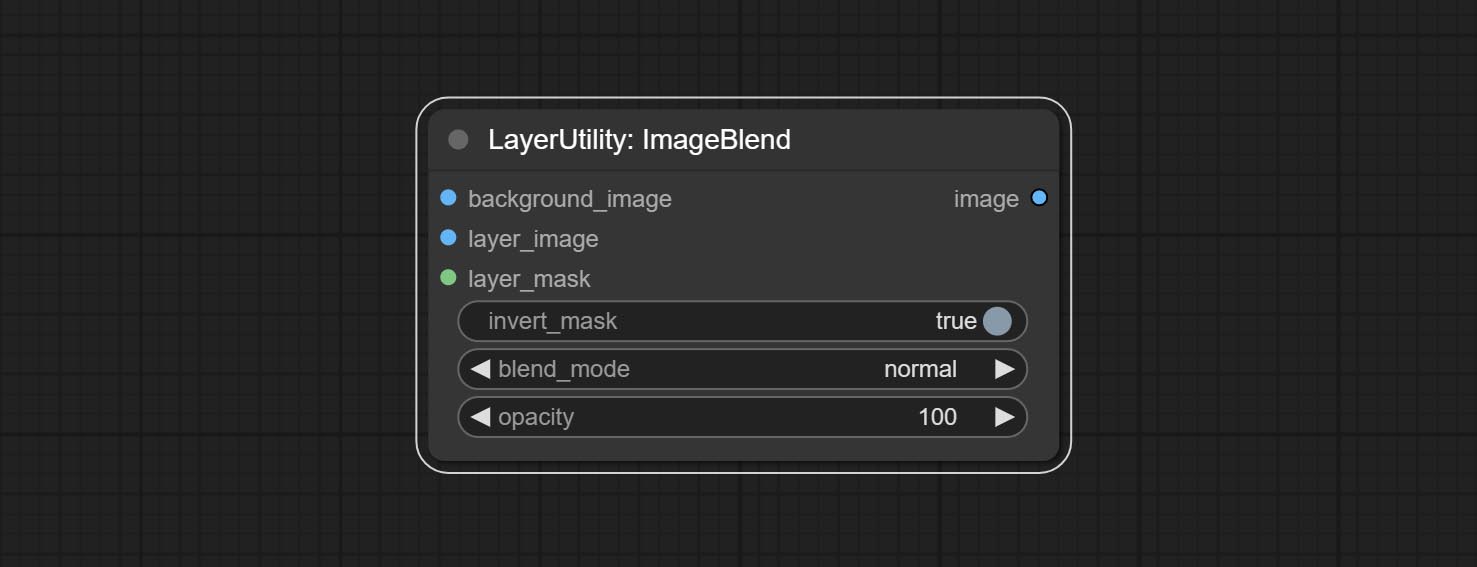
- background_image 1 : The background image.
- layer_image 1 : Layer image for composite.
- layer_mask 1,2 : Mask for layer_image.
- invert_mask: Whether to reverse the mask.
- blend_mode 3 : Blending mode.
- opacity: Opacity of blend.
- observação
ImageReel
Display multiple images in one reel. Text annotations can be added to each image in the reel. By using the ImageReelComposite node, multiple reel can be combined into one image. 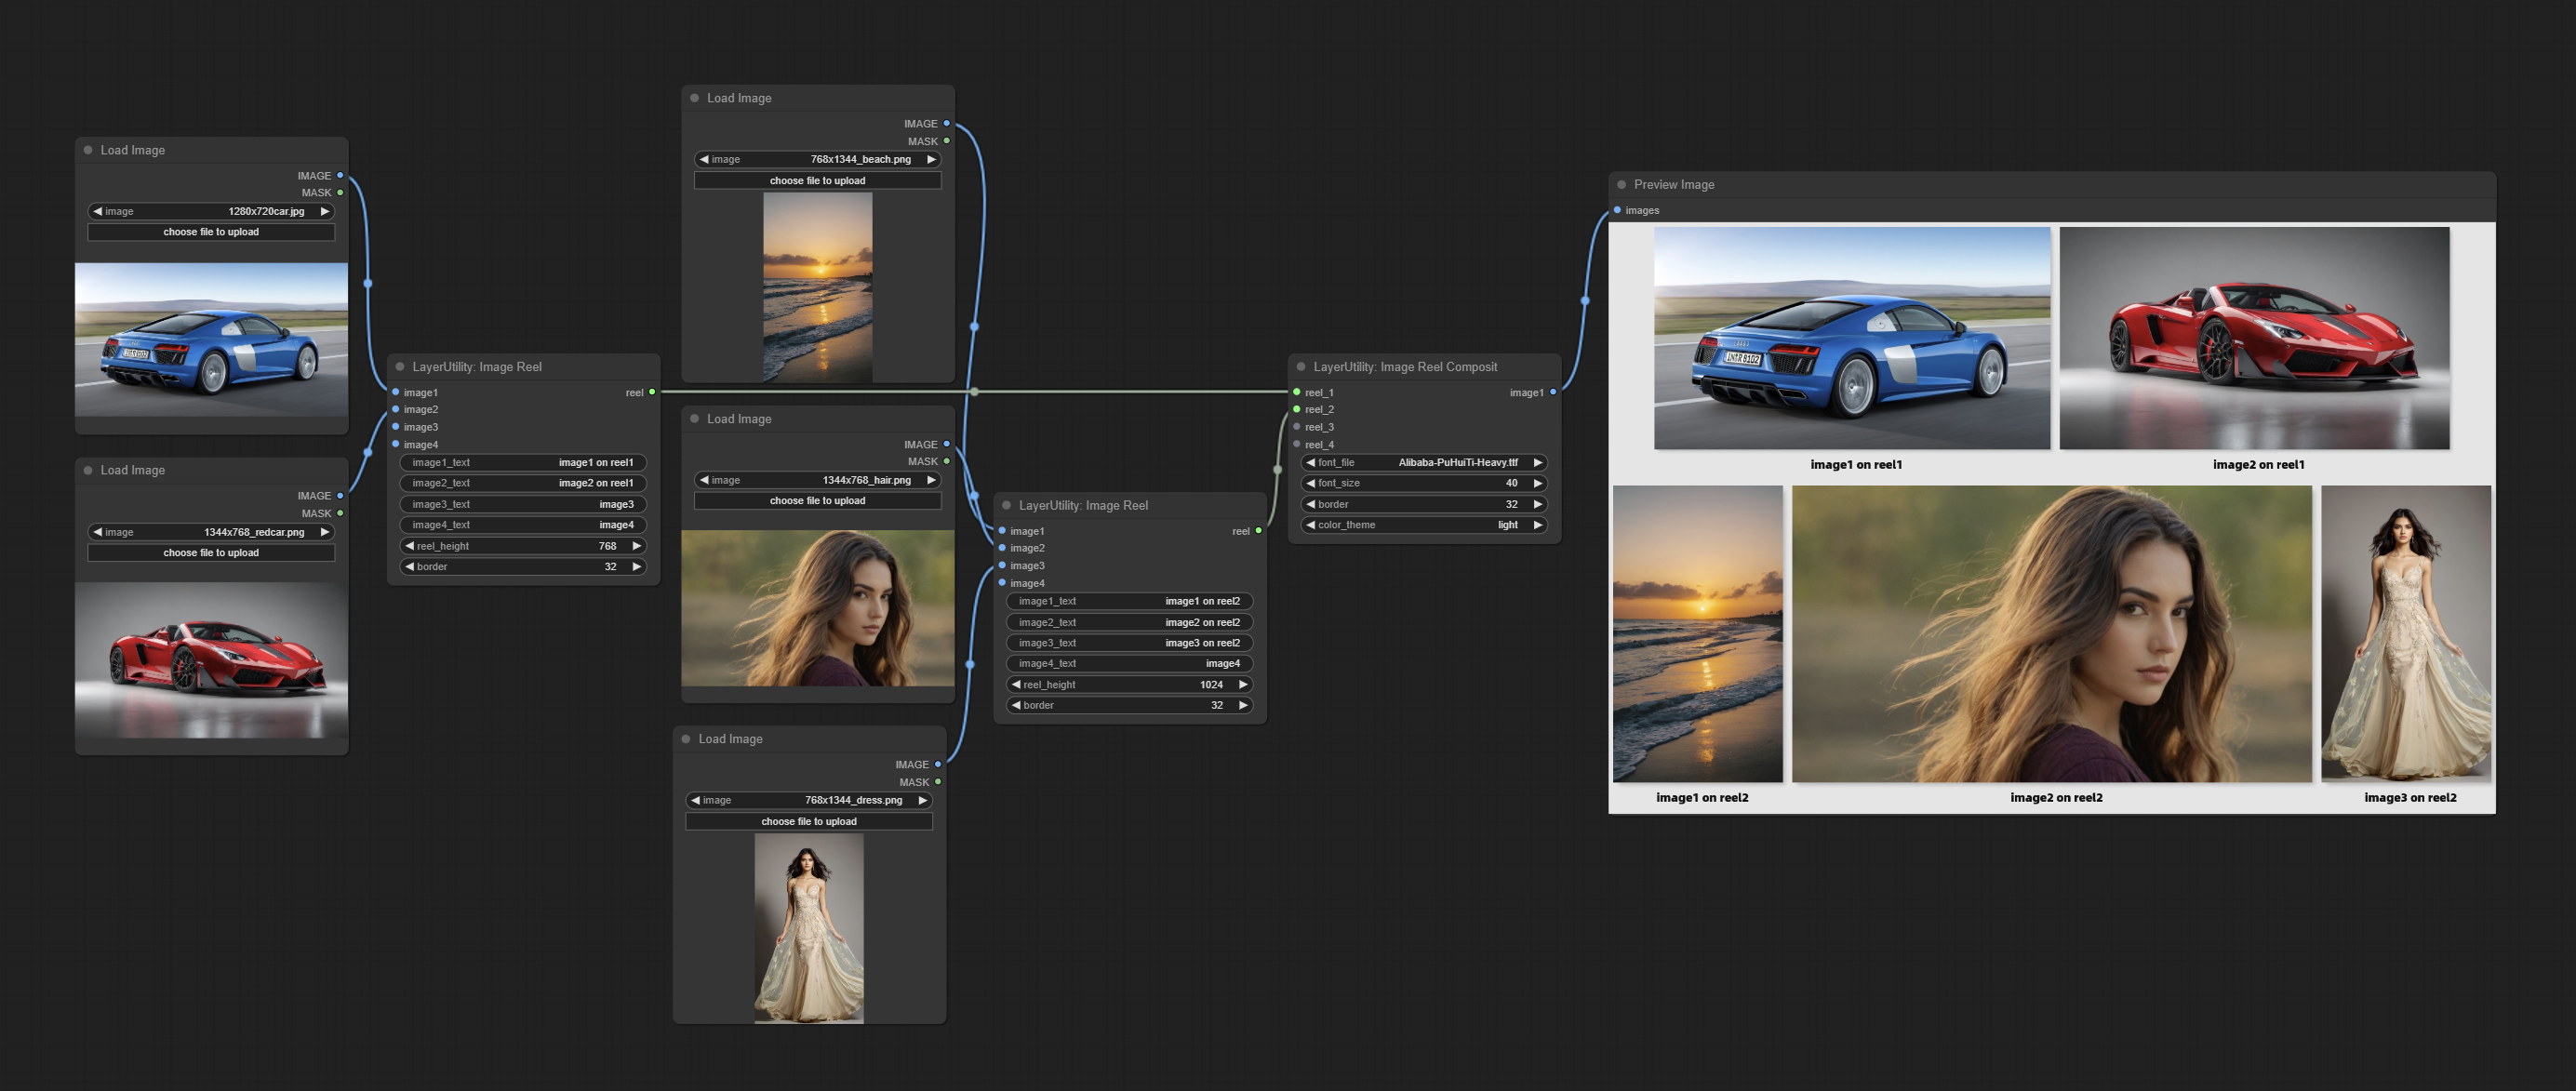
Node Options:
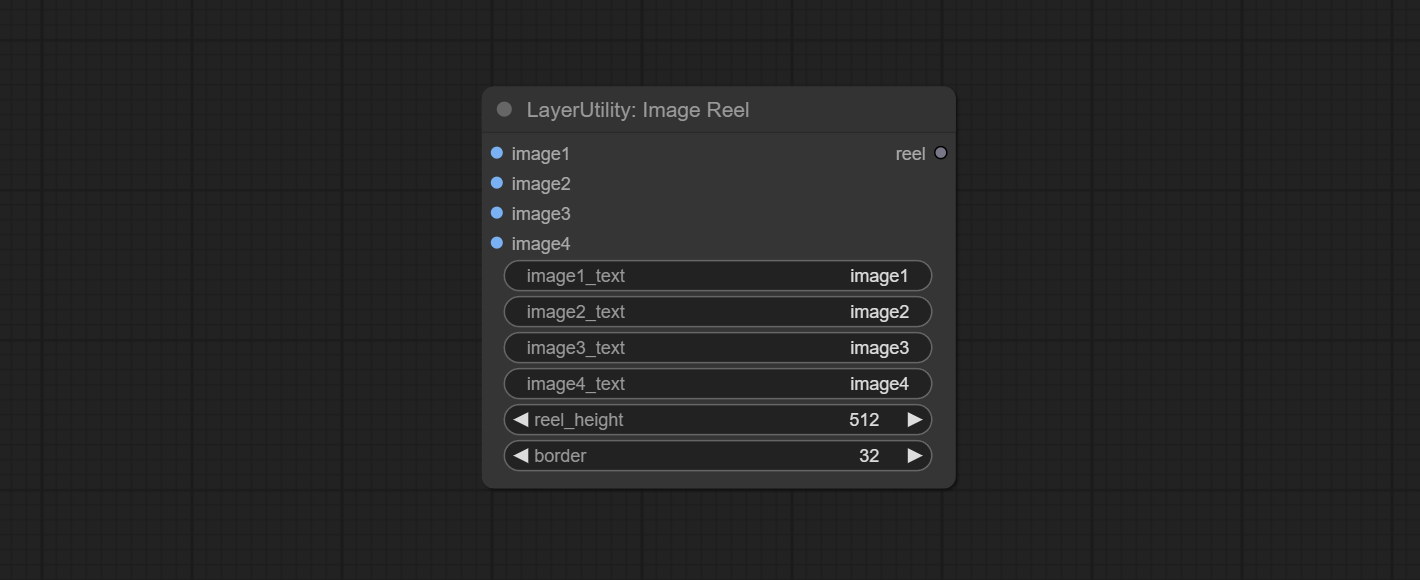
- image1: The first image. it must be input.
- image2: The second image. optional input.
- image3: The third image. optional input.
- image4: The fourth image. optional input.
- image1_text: Text annotation for the first image.
- image2_text: Text annotation for the second image.
- image3_text: Text annotation for the third image.
- image4_text: Text annotation for the fourth image.
- reel_height: The height of reel.
- border: The border width of the image in the reel.
Saída:
- reel: The reel of ImageReelComposite node input.
ImageReelComposite
Combine multiple reel into one image.
Node Options: 
- reel_1: The first reel. it must be input.
- reel_2: The second reel. optional input.
- reel_3: The third reel. optional input.
- reel_4: The fourth reel. optional input.
- font_file ** : Here is a list of available font files in the font folder, and the selected font files will be used to generate images.
- border: The border width of the reel.
- color_theme: Theme color for the output image.
* The font folder is defined in resource_dir.ini , this file is located in the root directory of the plug-in, and the default name is resource_dir.ini.example . to use this file for the first time, you need to change the file suffix to .ini . Open the text editing software and find the line starting with "FONT_dir=", after "=", enter the custom folder path name. support defining multiple folders in resource-dir.ini , separated by commas, semicolons, or spaces. all font files in this folder will be collected and displayed in the node list during ComfyUI initialization. If the folder set in ini is invalid, the font folder that comes with the plugin will be enabled.
ImageOpacity
Adjust image opacity 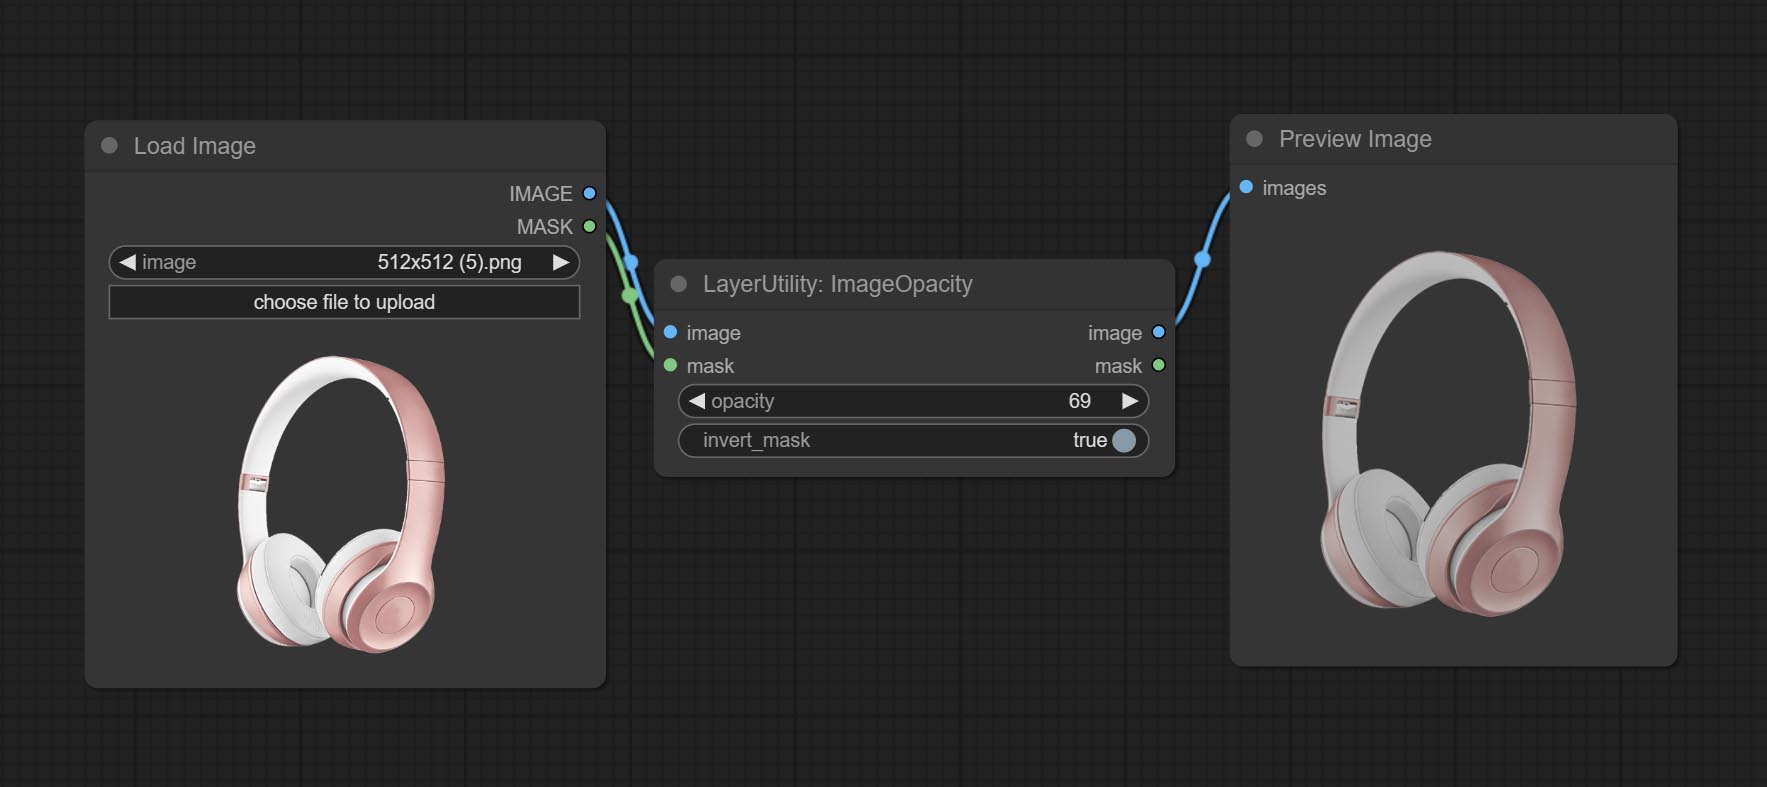
Node option:
- image 5 : Image input, supporting RGB and RGBA. if is RGB, the alpha channel of the entire image will be automatically added.
- mask 2,5 : Mask input.
- invert_mask: Whether to reverse the mask.
- opacity: Opacity of image.
- observação
ColorPicker
Modify web extensions from mtb nodes. Select colors on the color palette and output RGB values, thanks to the original author. 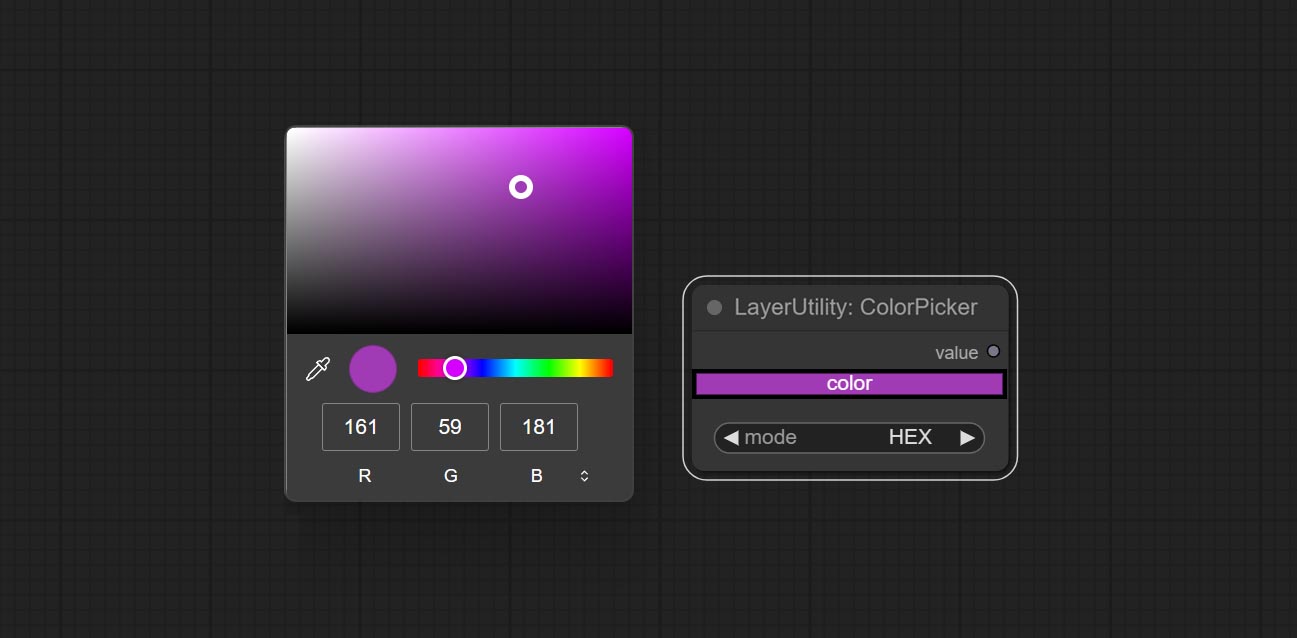
Node options:
- mode: The output format is available in hexadecimal (HEX) and decimal (DEC).
Output type:
RGBValue
Output the color value as a single R, G, B three decimal values. Supports HEX and DEC formats for ColorPicker node output.
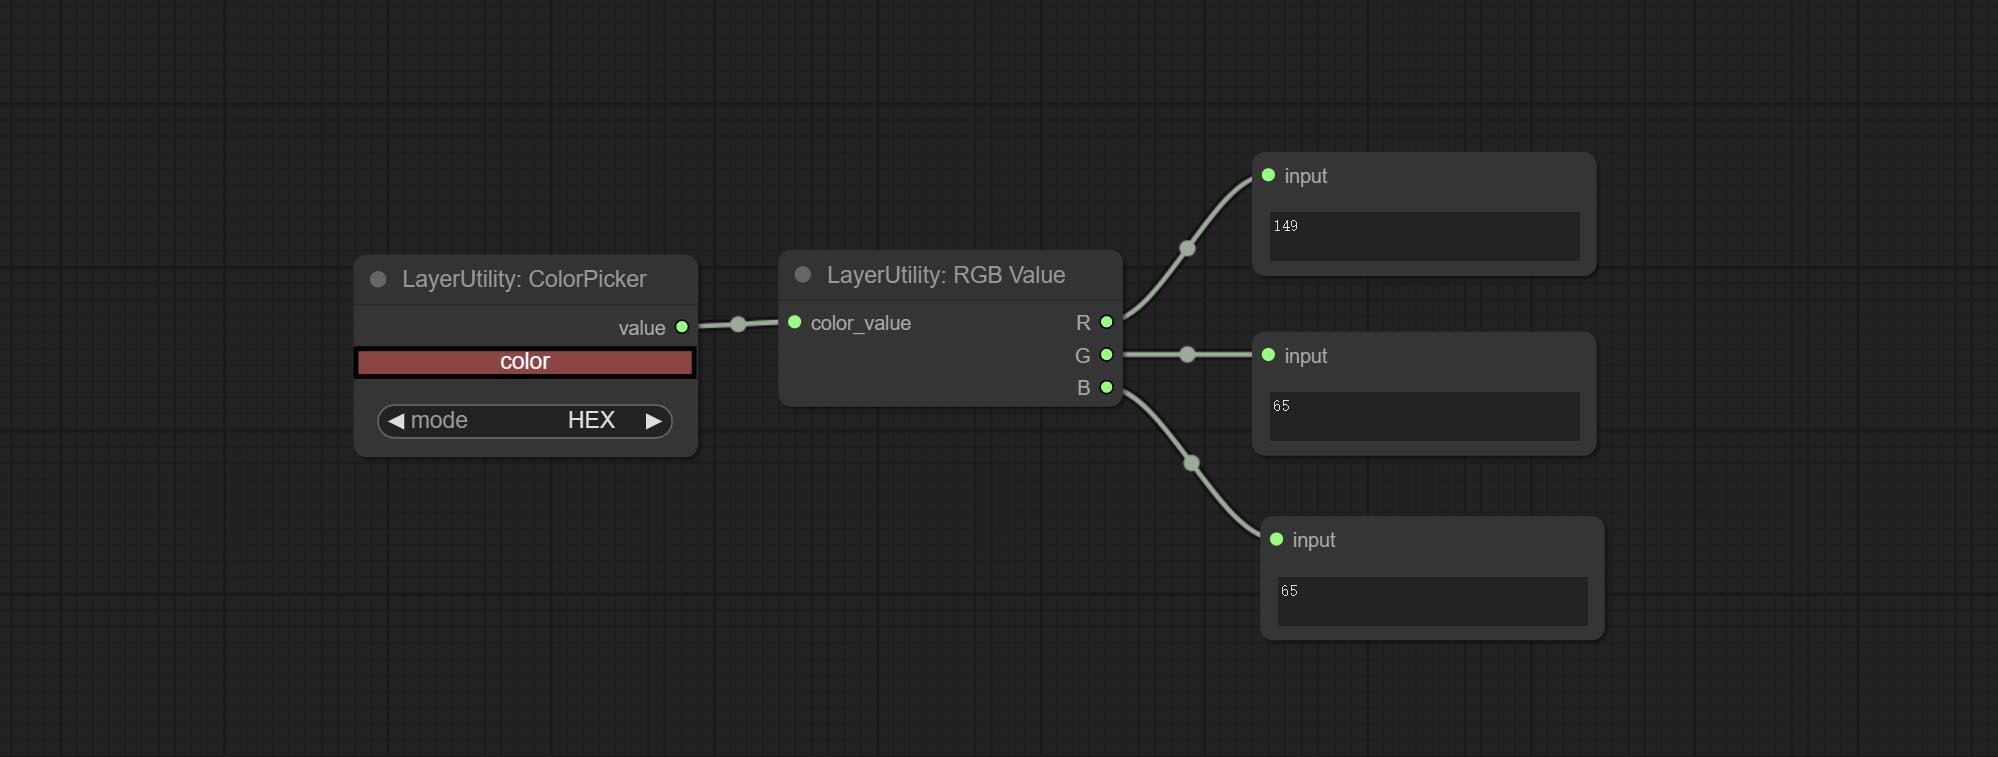
Node Options:
- color_value: Supports hexadecimal (HEX) or decimal (DEC) color values and should be of string or tuple type. Forcing in other types will result in an error.
HSVValue
Output color values as individual decimal values of H, S, and V (maximum value of 255). Supports HEX and DEC formats for ColorPicker node output. 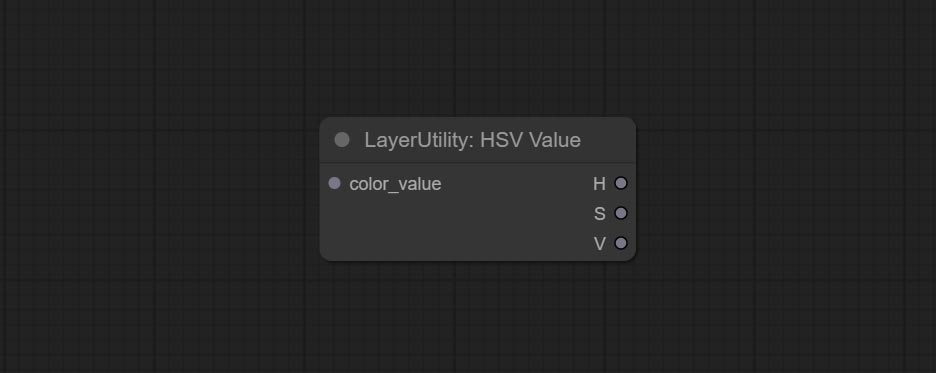
Node Options:
- color_value: Supports hexadecimal (HEX) or decimal (DEC) color values and should be of string or tuple type. Forcing in other types will result in an error.
GrayValue
Output grayscale values based on color values. Supports outputting 256 level and 100 level grayscale values. 
Node Options:
- color_value: Supports hexadecimal (HEX) or decimal (DEC) color values and should be of string or tuple type. Forcing in other types will result in an error.
Outputs:
- gray(256_level): 256 level grayscale value. Integer type, range 0~255.
- gray(100_level): 100 level grayscale value. Integer type, range 0~100.
GetColorTone
Obtain the main color or average color from the image and output RGB values. 
Node options: 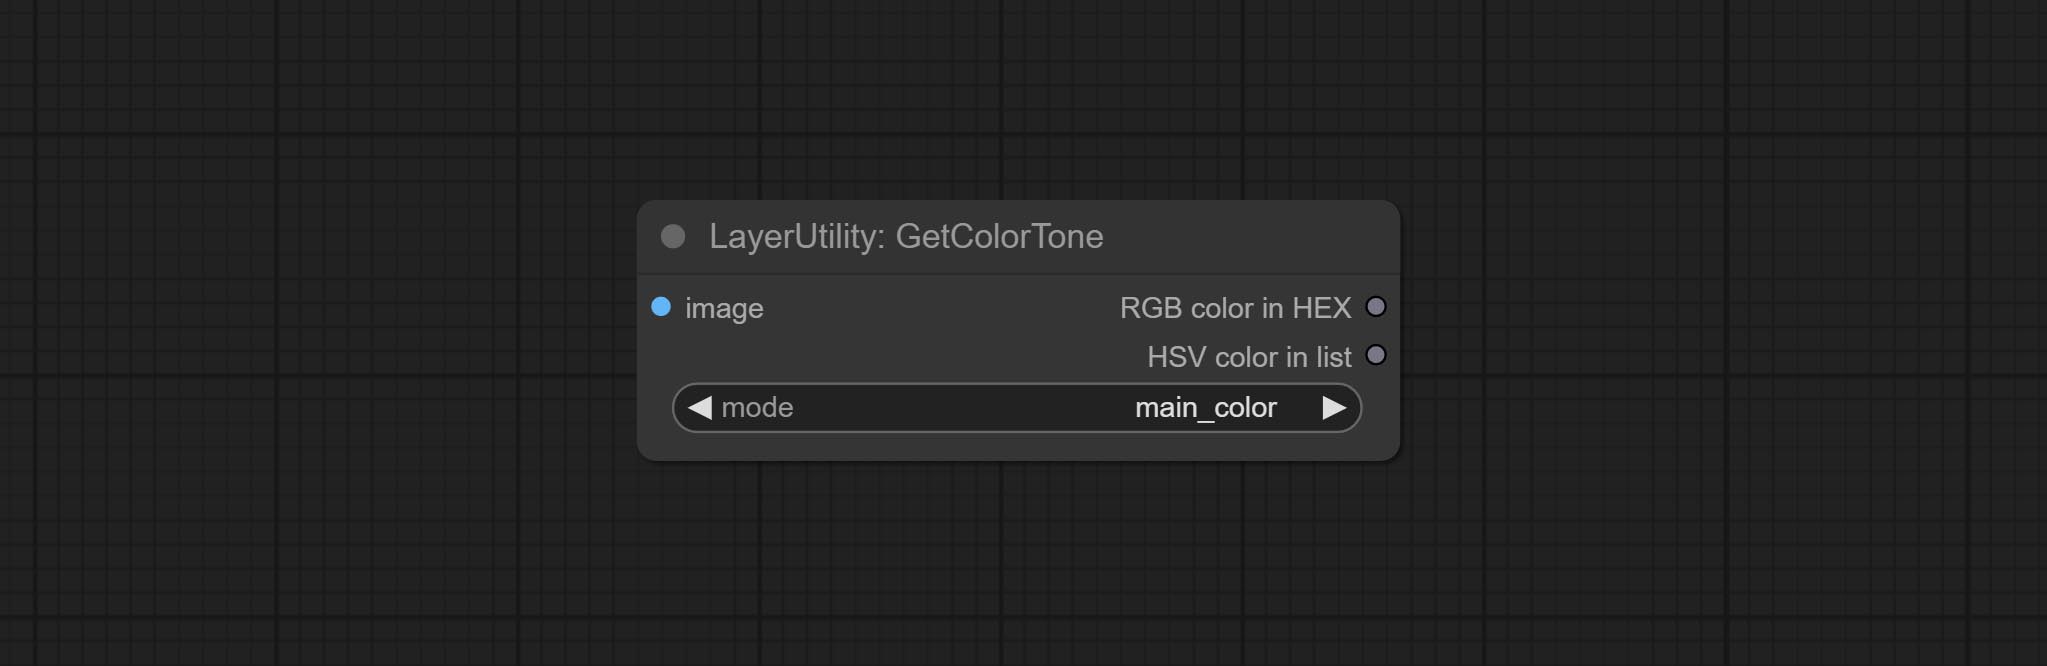
- mode: There are two modes to choose from, with the main color and average color.
Output type:
- RGB color in HEX: The RGB color described by hexadecimal RGB format, like '#FA3D86'.
- HSV color in list: The HSV color described by python's list data format.
GetColorToneV2
V2 upgrade of GetColorTone. You can specify the dominant or average color to get the body or background. 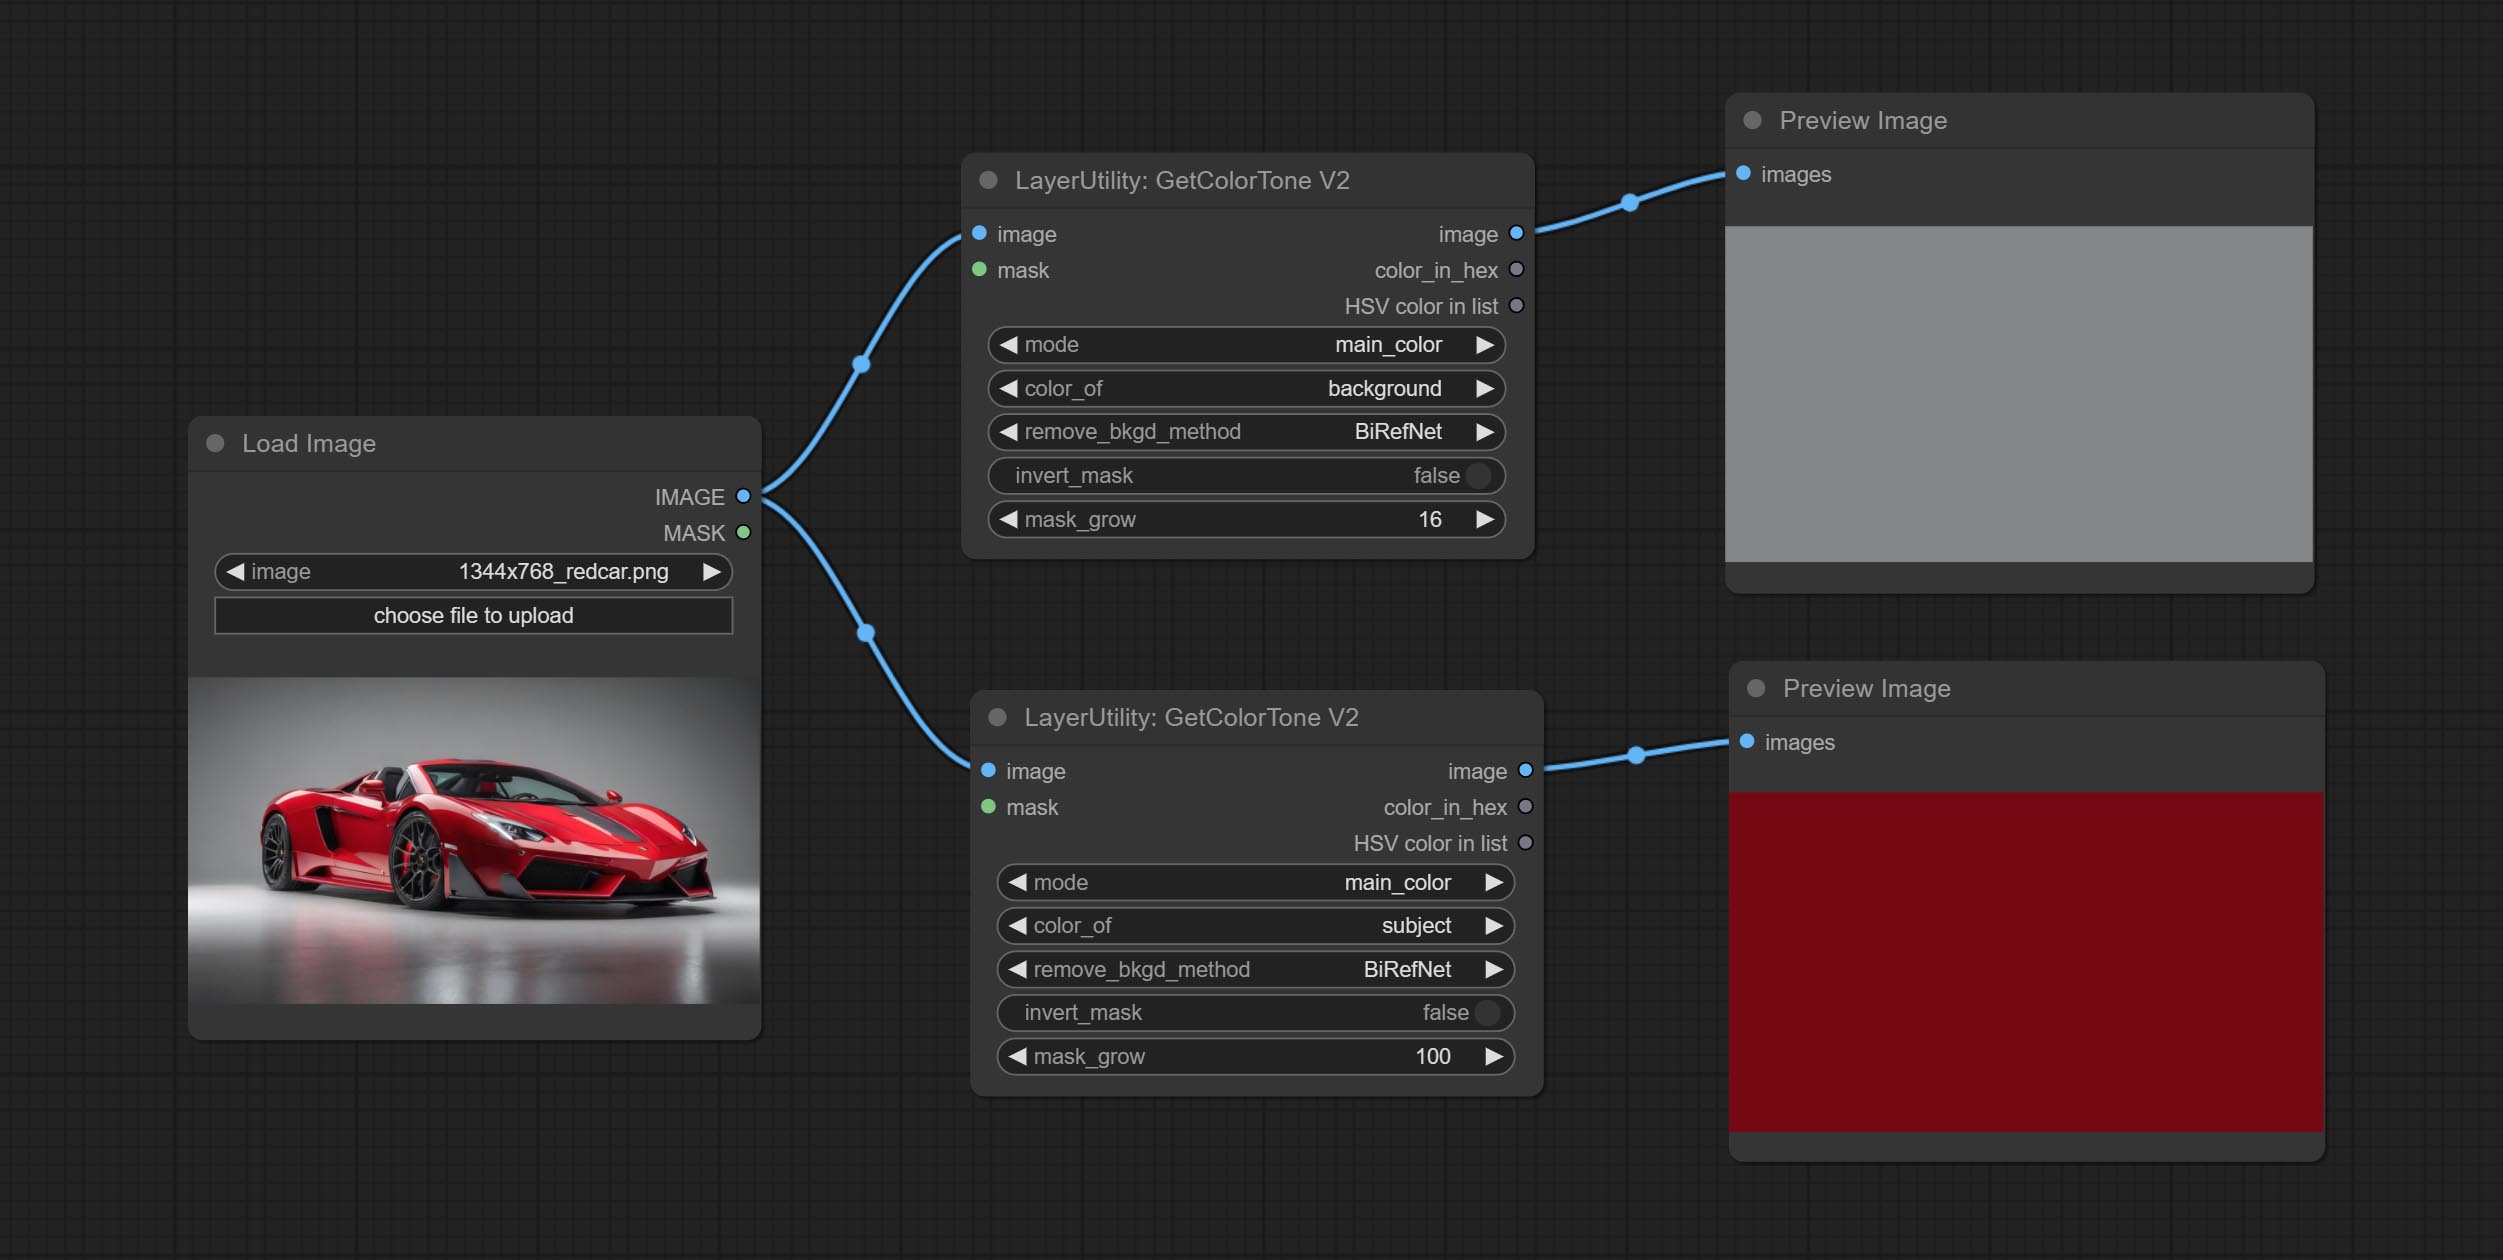
The following changes have been made on the basis of GetColorTong: 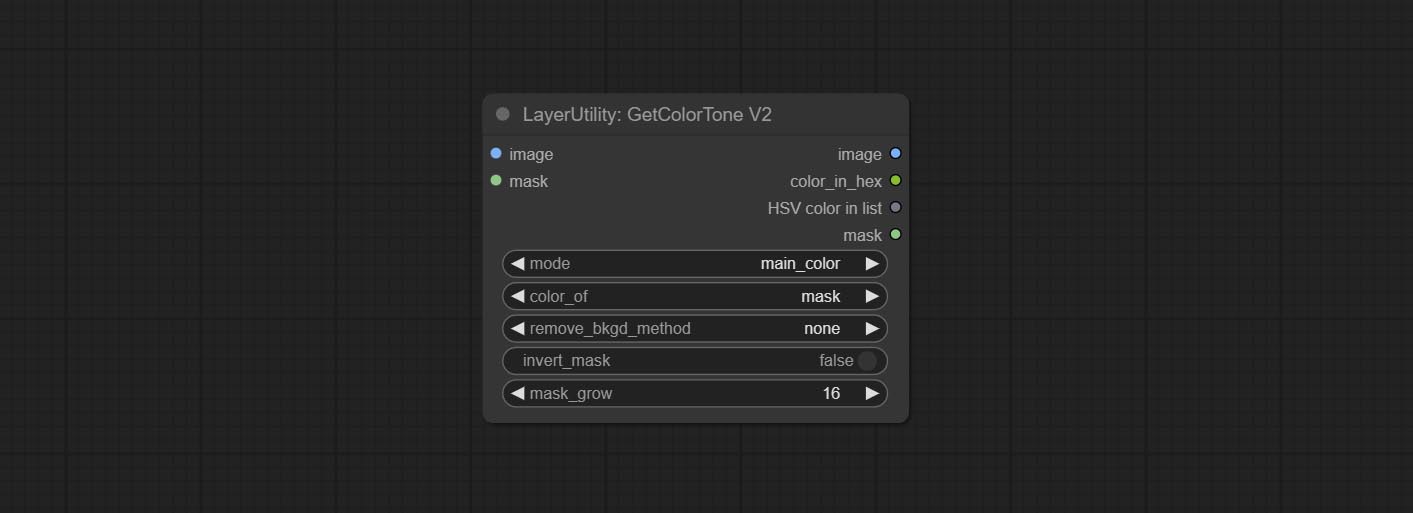
- color_of: Provides 4 options, mask, entire, background, and subject, to select the color of the mask area, entire picture, background, or subject, respectively.
- remove_background_method: There are two methods of background recognition: BiRefNet and RMBG V1.4.
- invert_mask: Whether to reverse the mask.
- mask_grow: Mask expansion. For subject, a larger value brings the obtained color closer to the color at the center of the body.
Saída:
- image: Solid color picture output, the size is the same as the input picture.
- mask: Mask output.
GetMainColors
Obtain the main color of the image. You can obtain 5 colors. 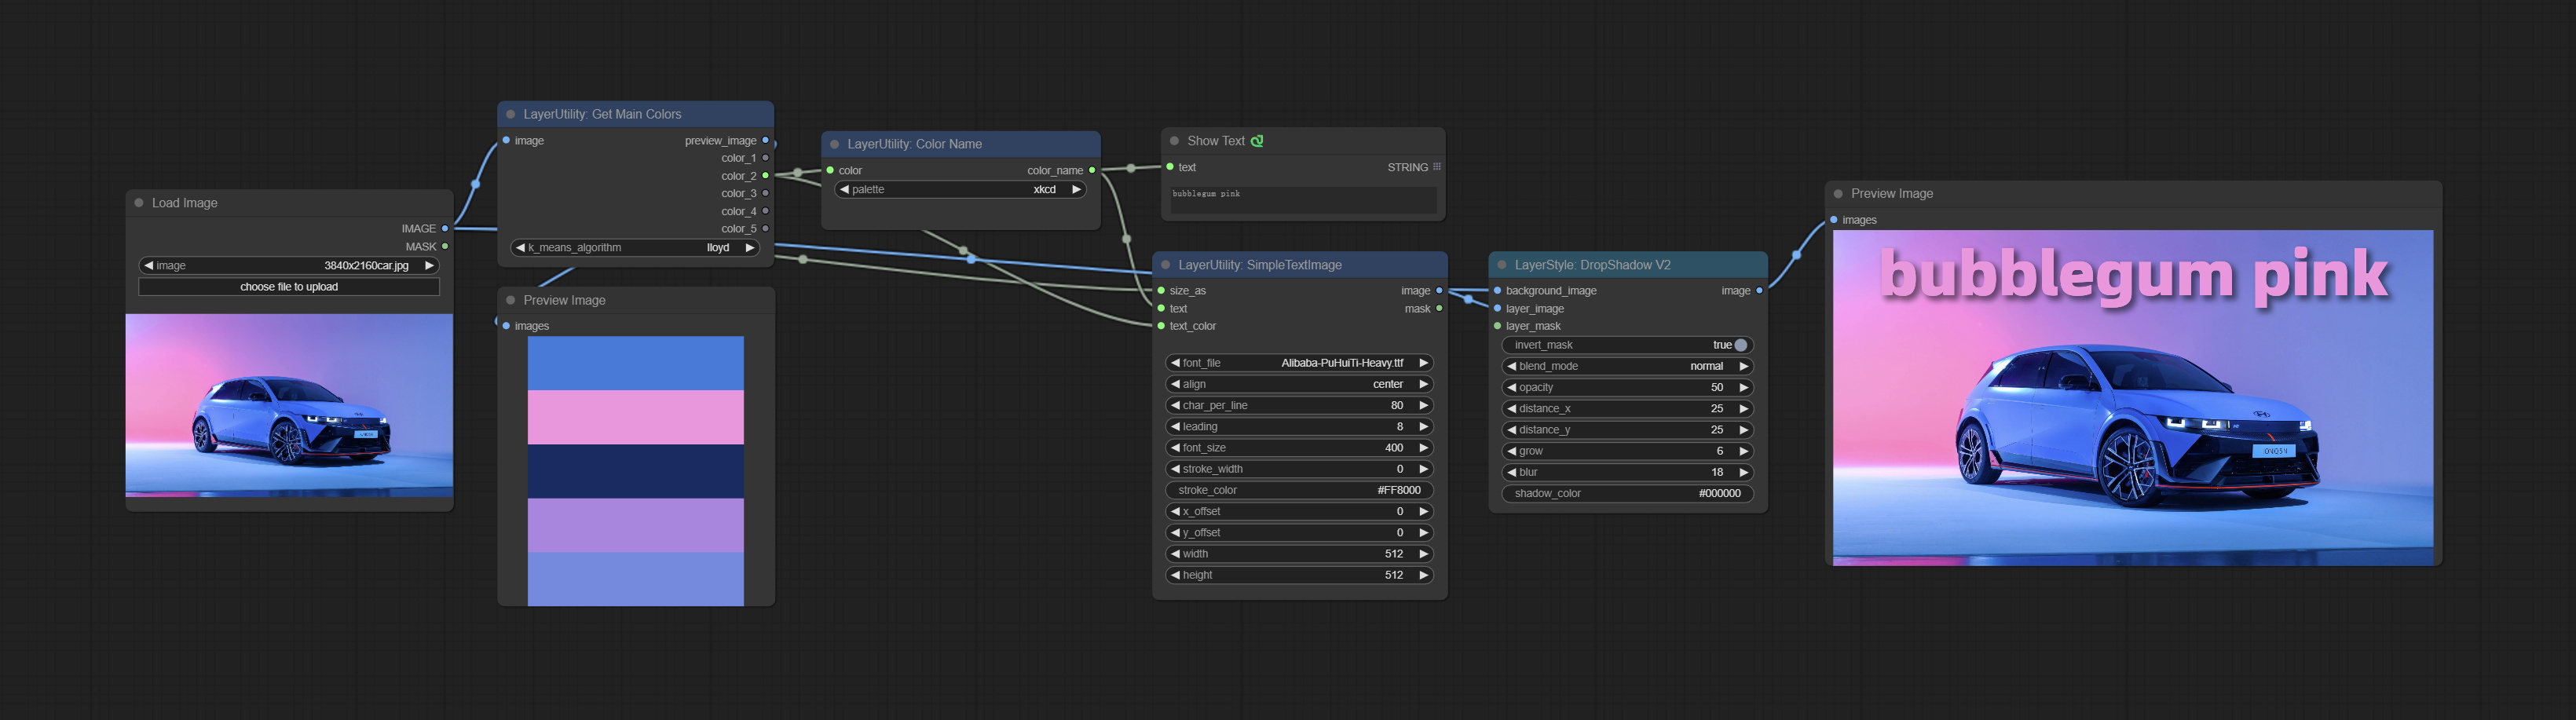
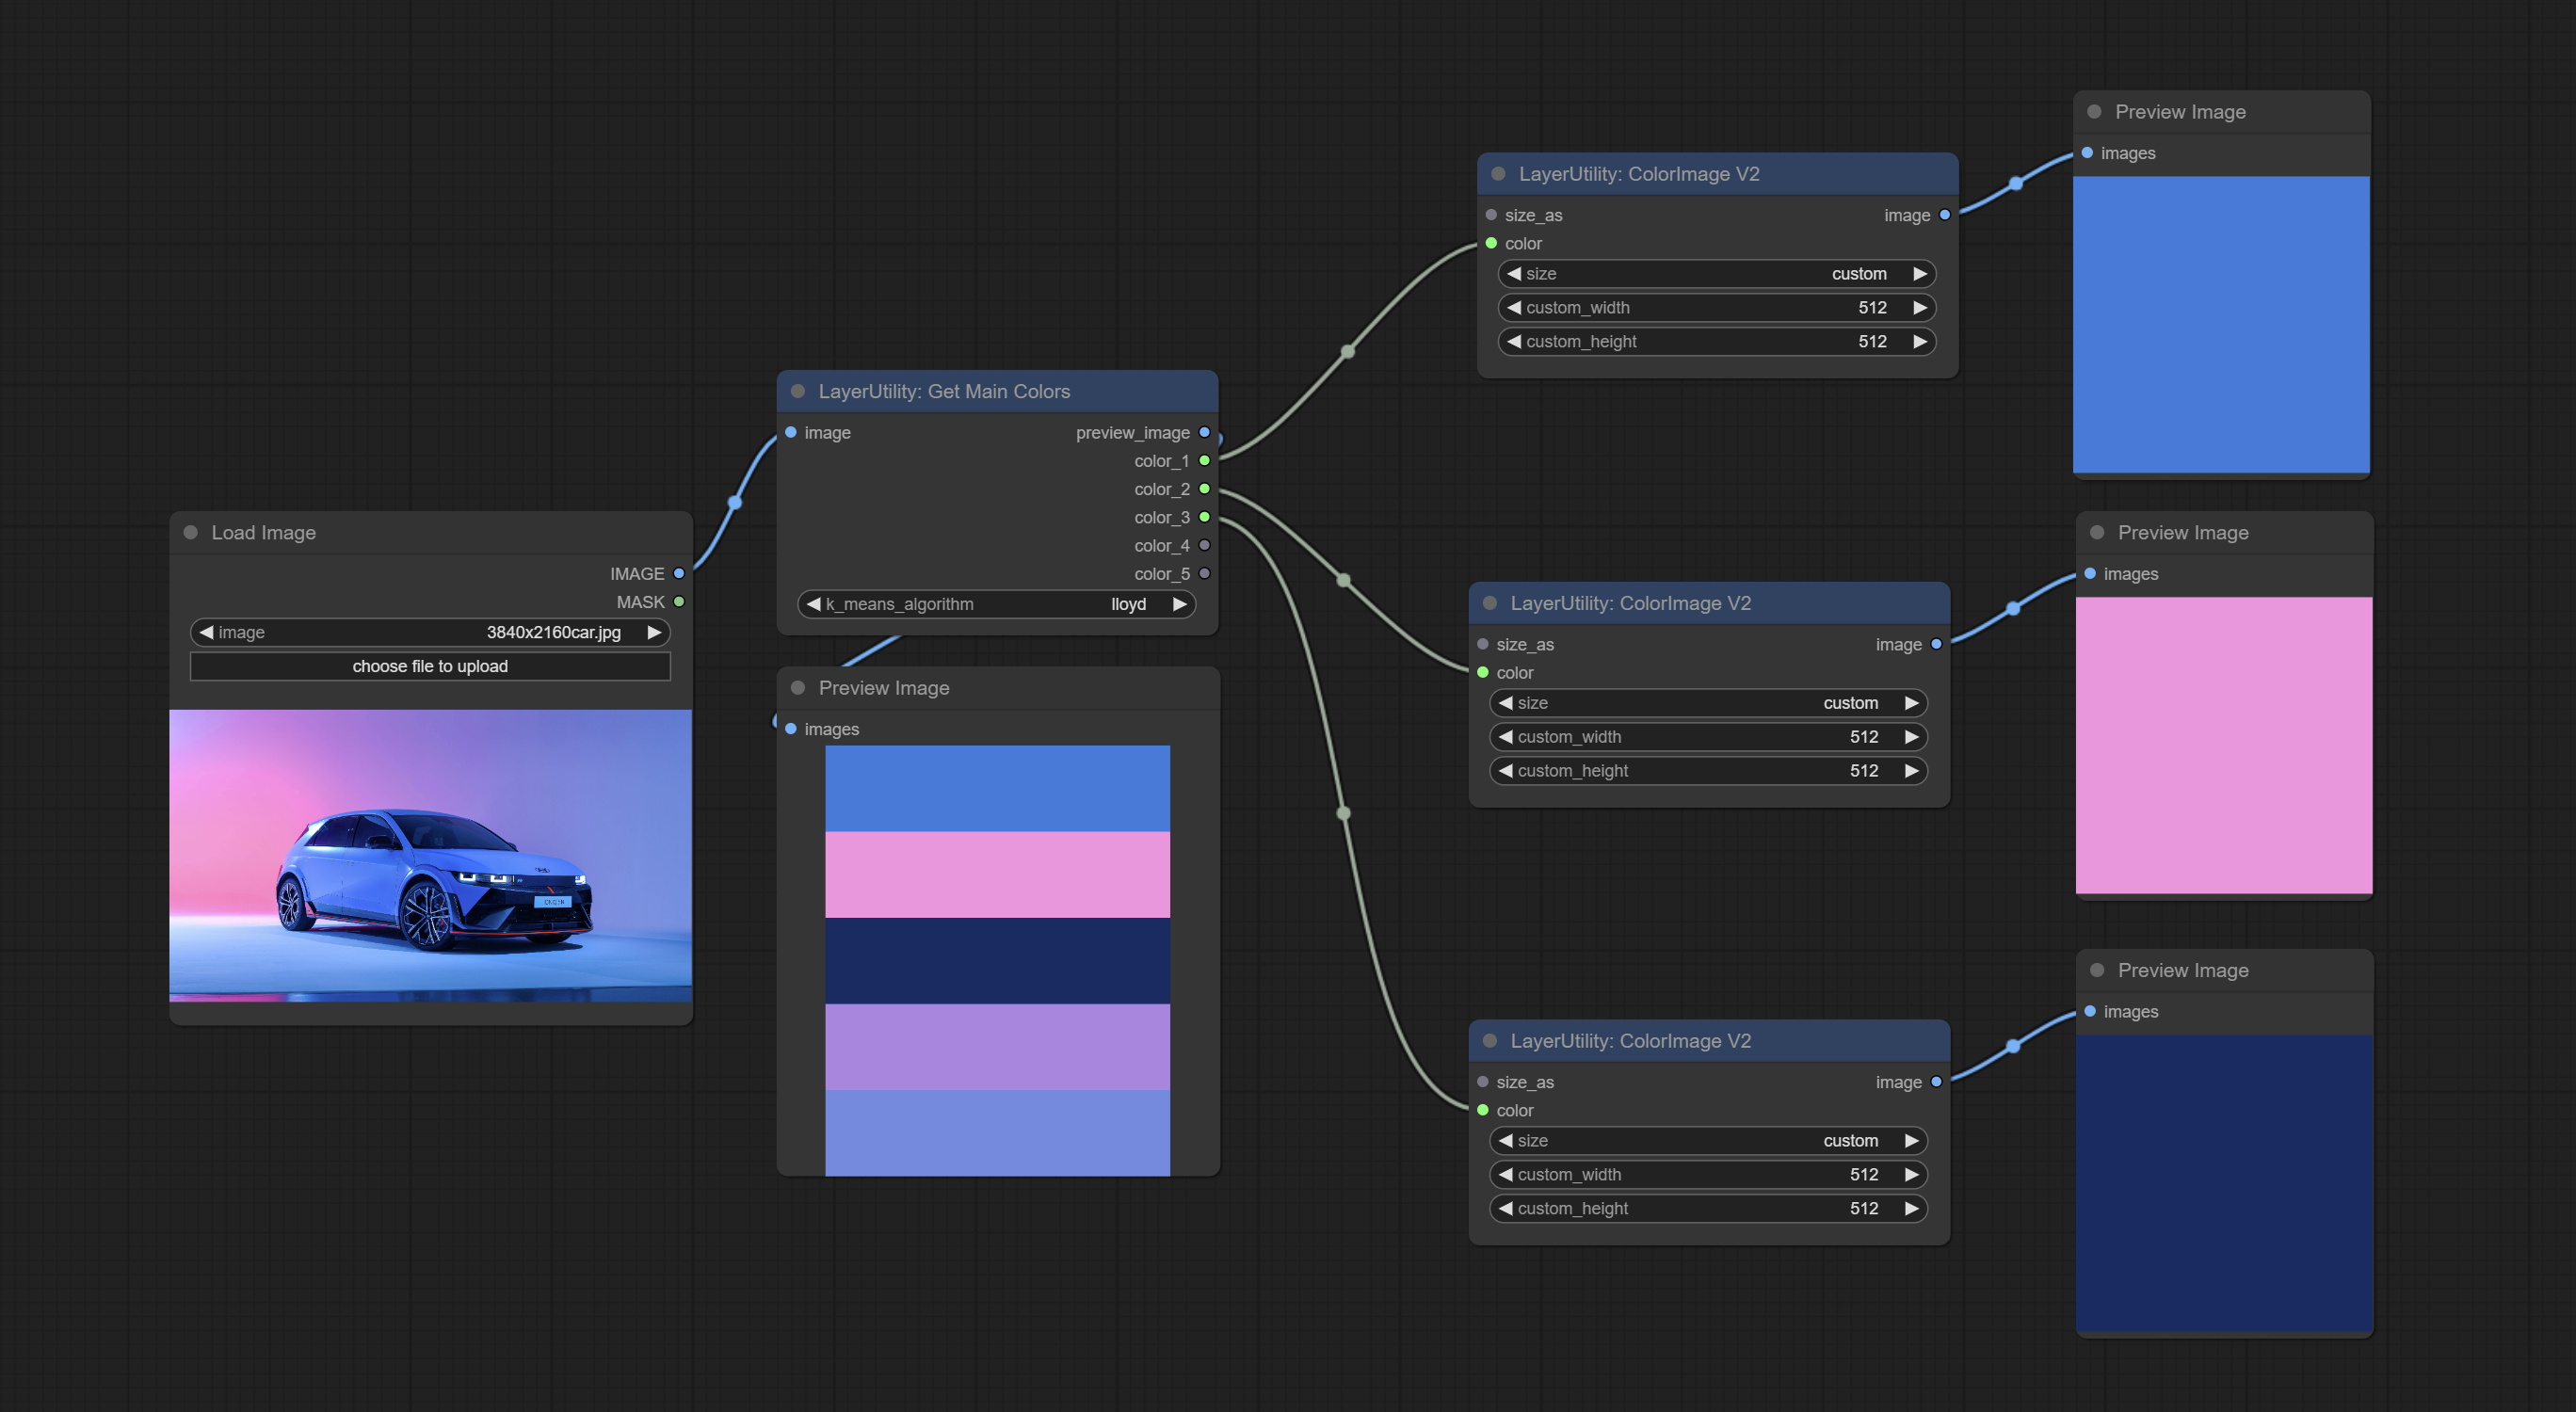
Node Options: 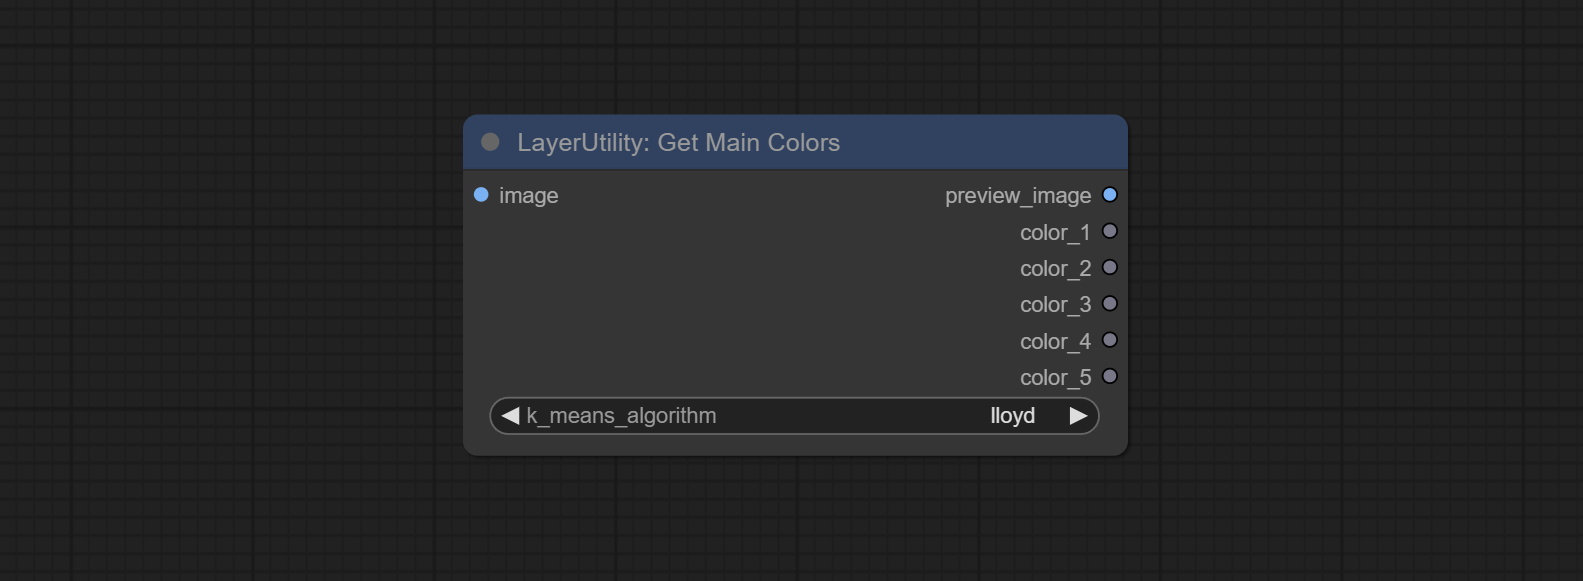
- image: The image input.
- k_means_algorithm:K-Means algorithm options. "lloyd" is the standard K-Means algorithm, while "elkan" is the triangle inequality algorithm, suitable for larger images.
Outputs:
- preview_image: 5 main color preview images.
- color_1~color_5: Color value output. Output an RGB string in HEX format.
ColorName
Output the most similar color name in the color palette based on the color value. 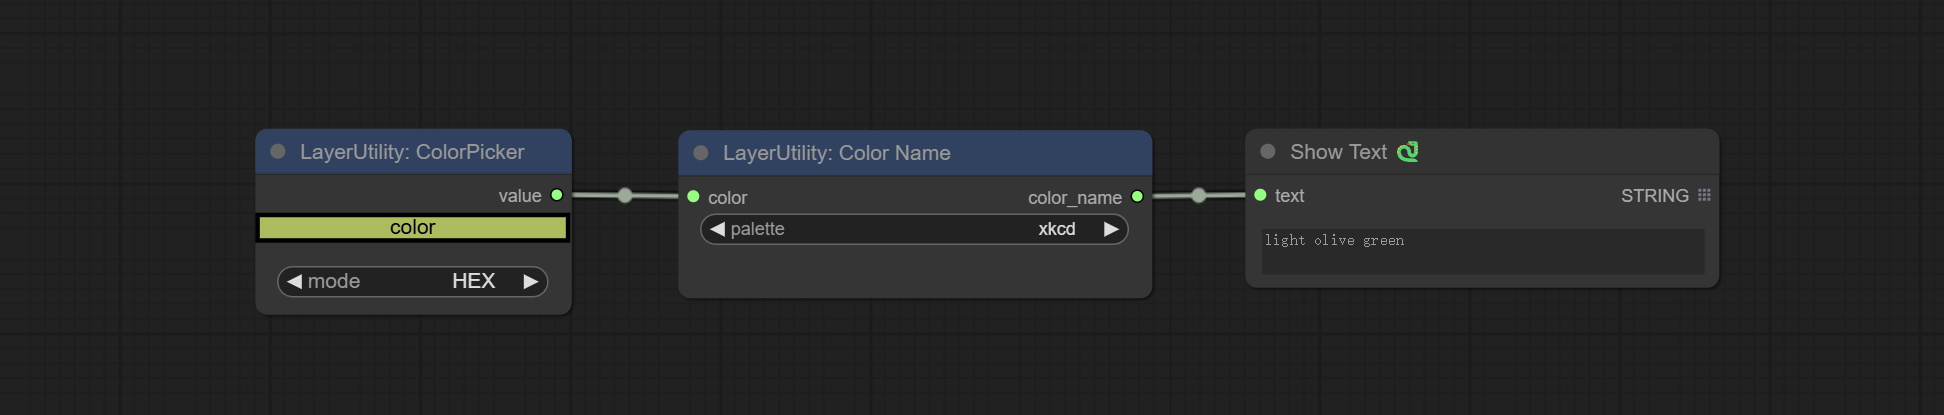
Node Options: 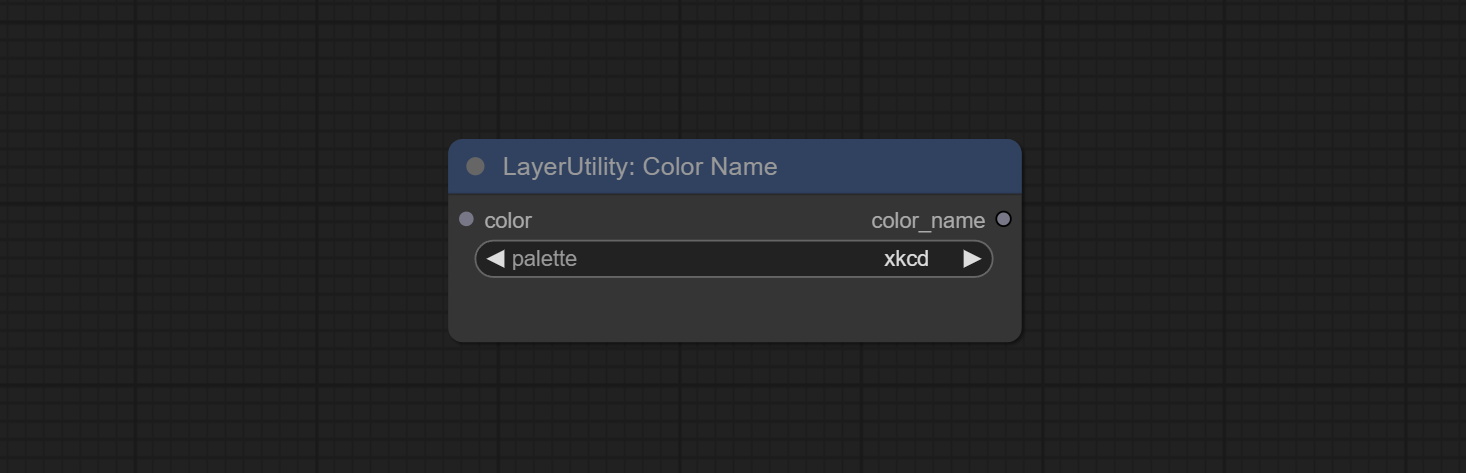
- color: Color value input, in HEX format RGB string format.
- palette: Color palette.
xkcd includes 949 colors, css3 includes 147 colors, and html4 includes 16 colors.
Saída:
- color_name: Color name in string.
ExtendCanvas
Extend the canvas 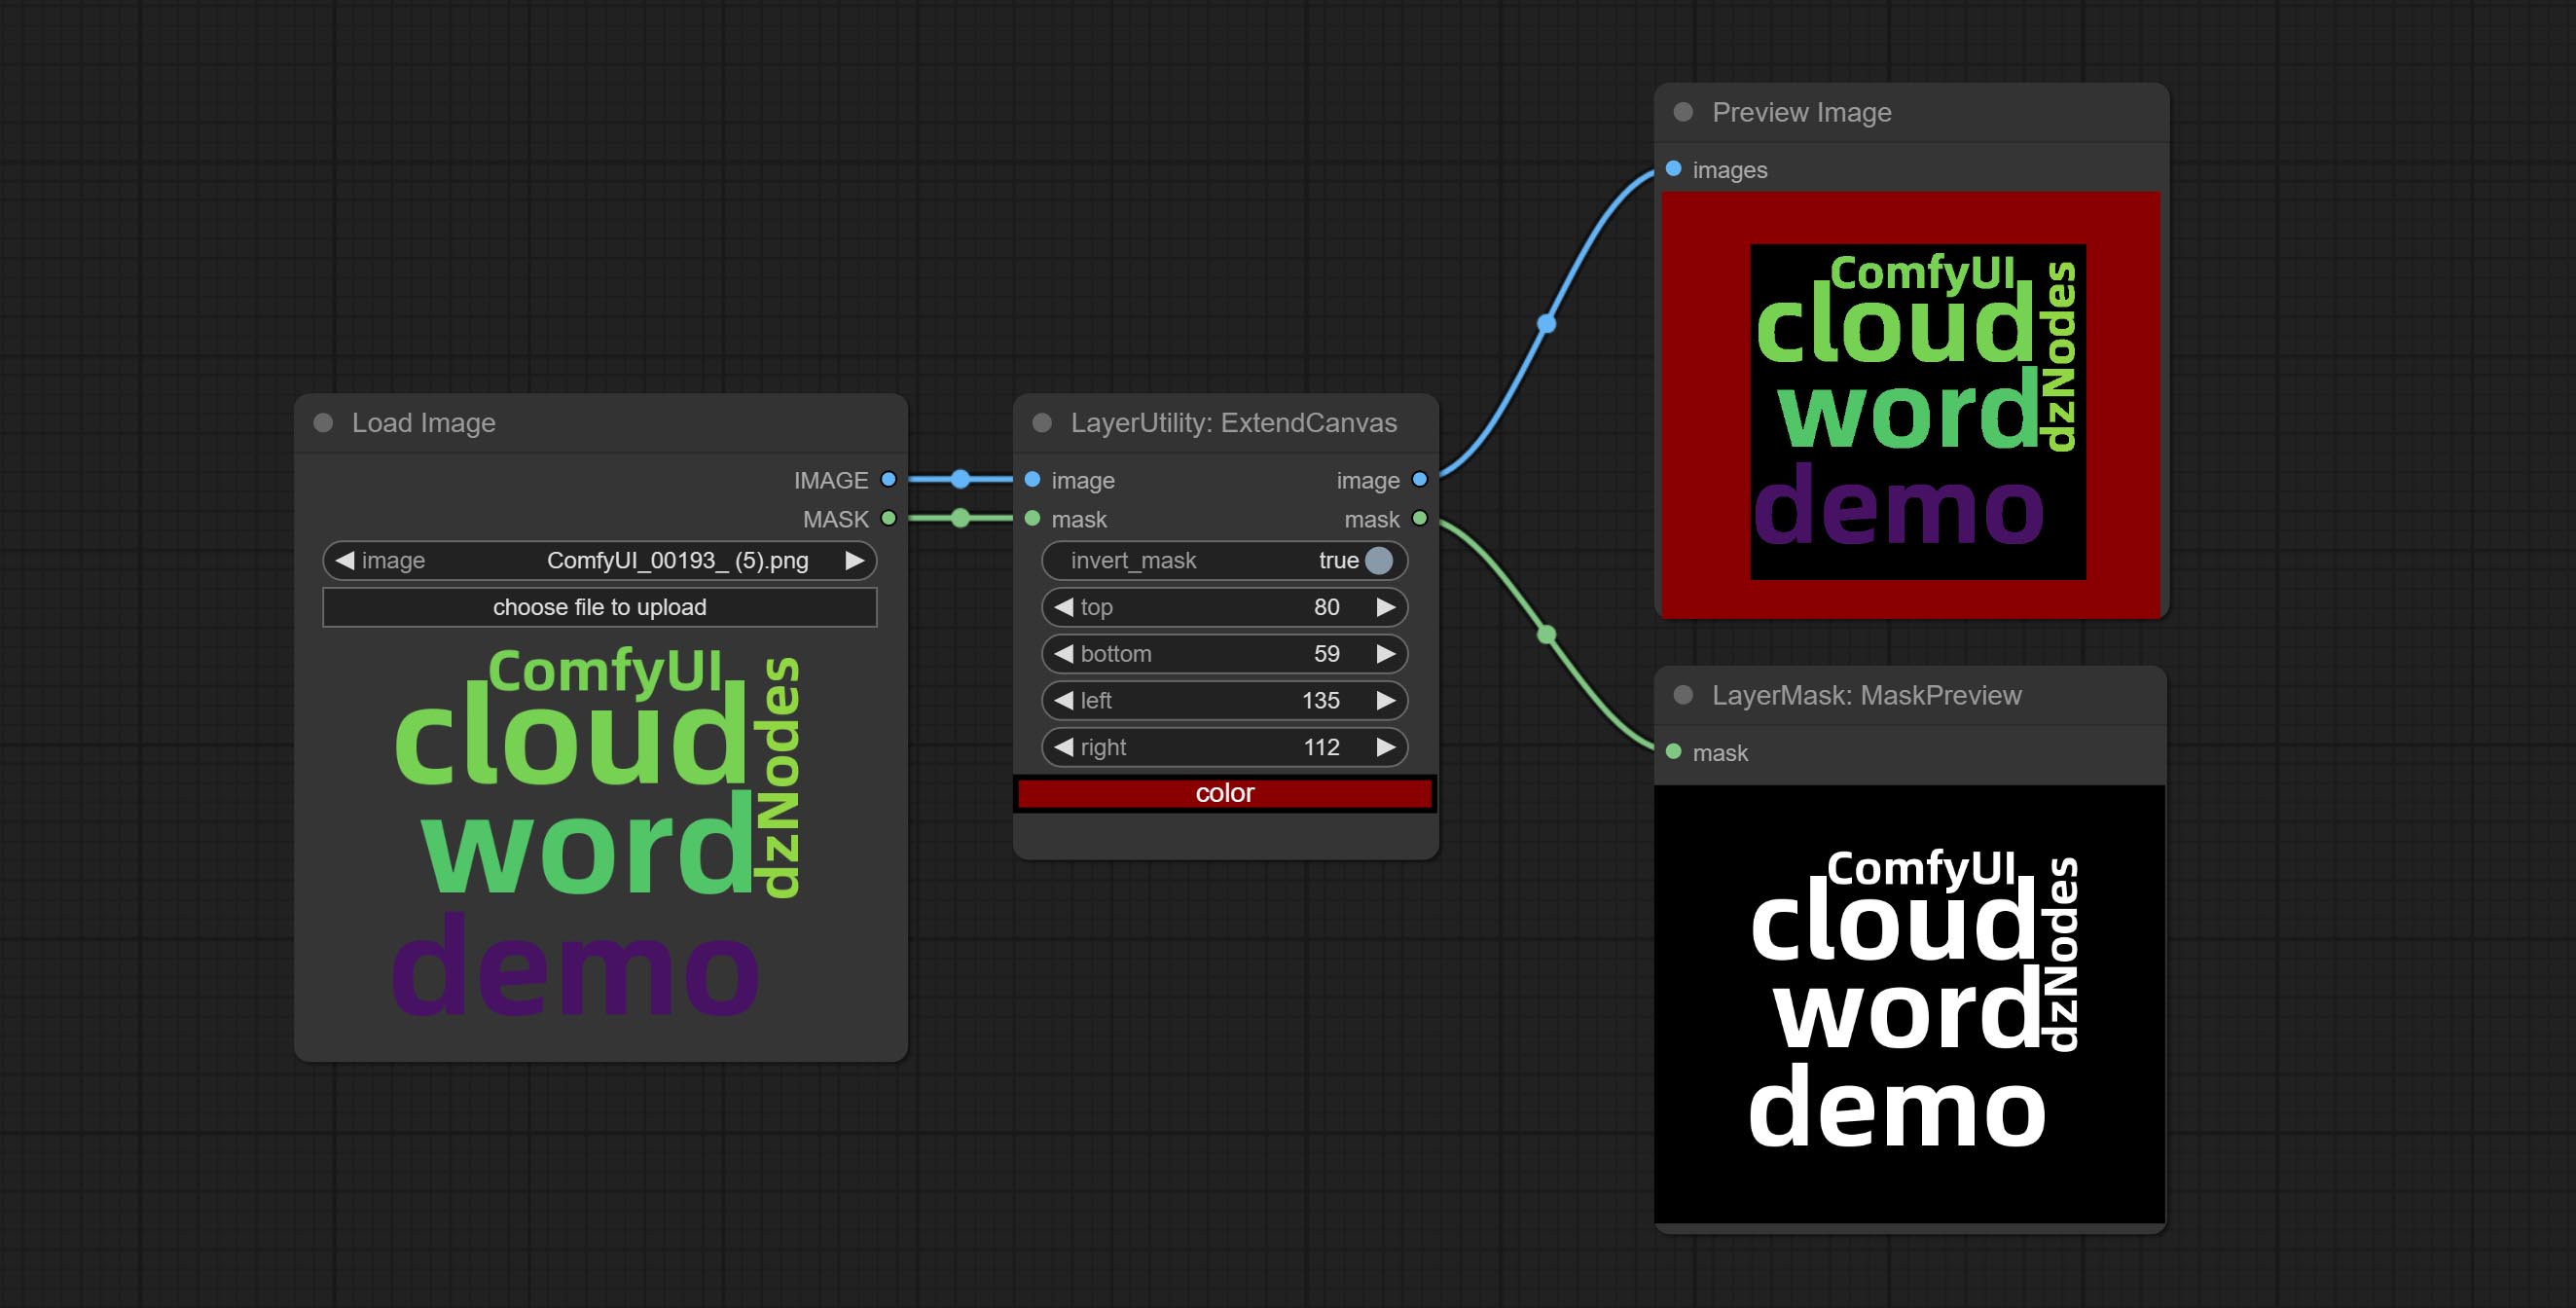
Node options: 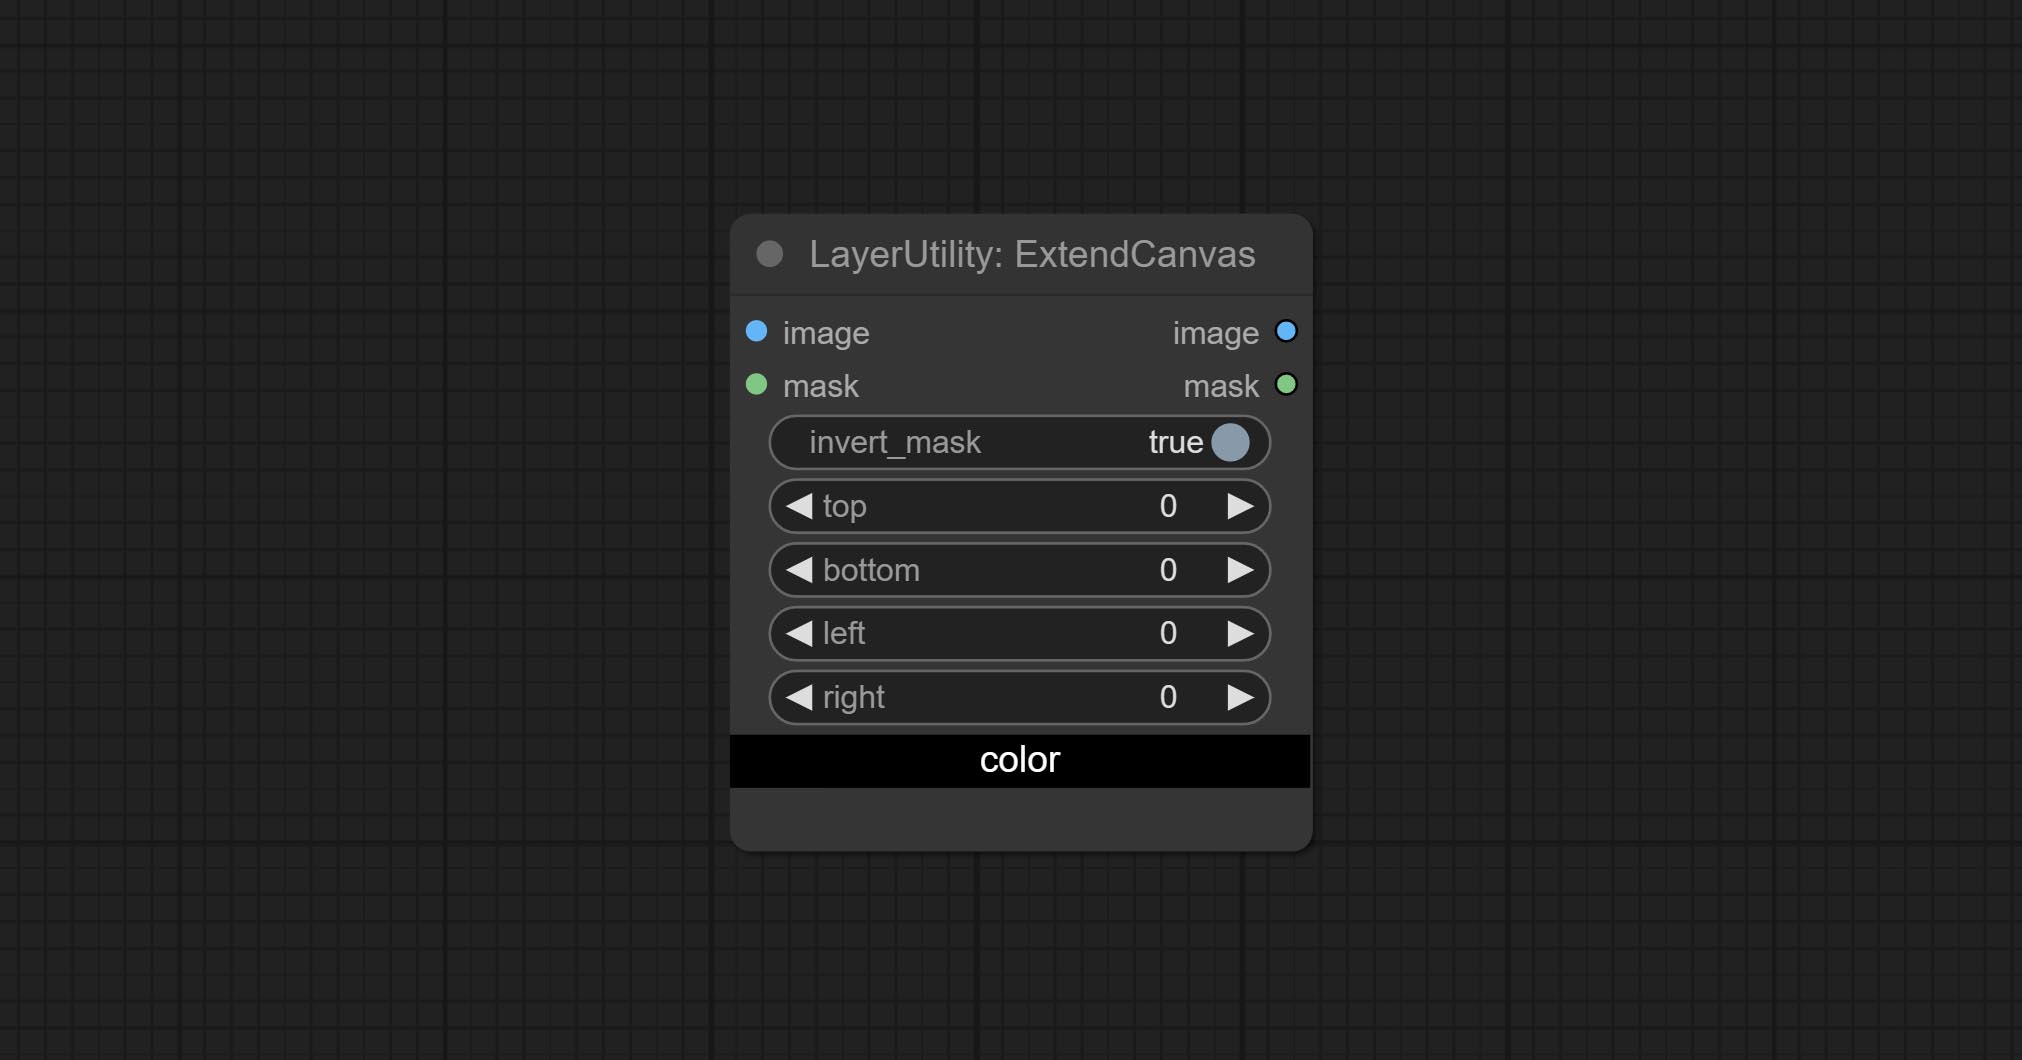
- invert_mask: Whether to reverse the mask.
- top: Top extension value.
- bottom: Bottom extension value.
- left: Left extension value.
- right: Right extension value.
- cor; Color of canvas.
ExtendCanvasV2
V2 upgrade to ExtendCanvas.
Based on ExtendCanvas, color is modified to be a string type, and it supports external ColorPicker input, Support negative value input, it means image will be cropped. 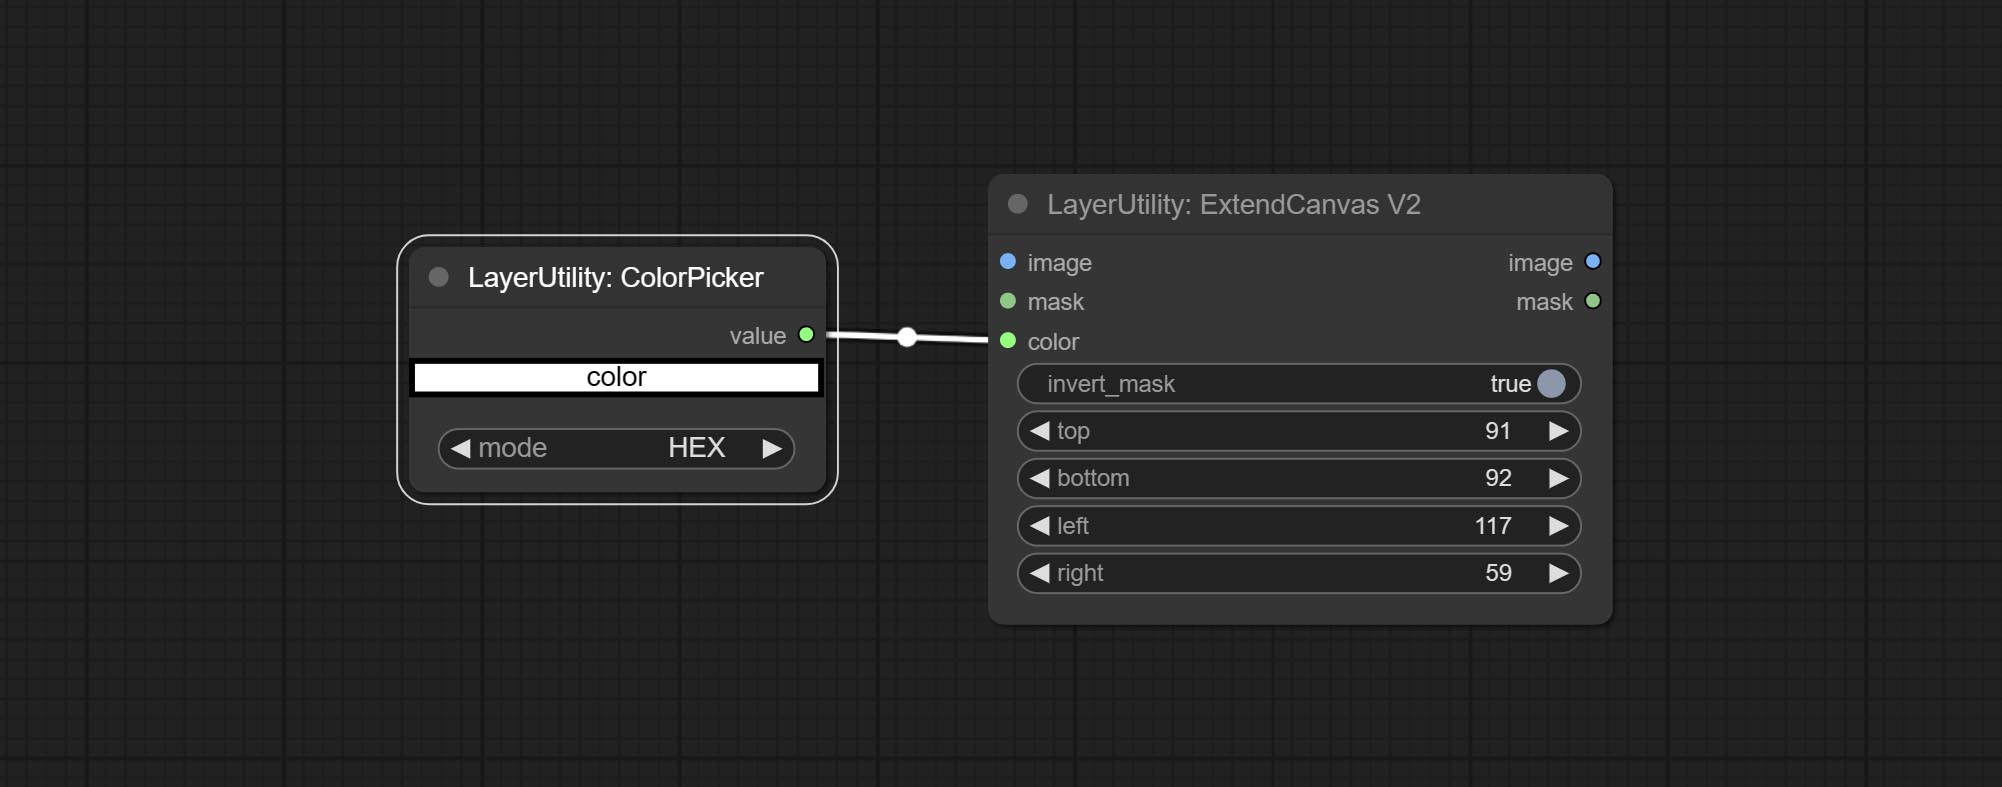
XY to Percent
Convert absolute coordinates to percentage coordinates.
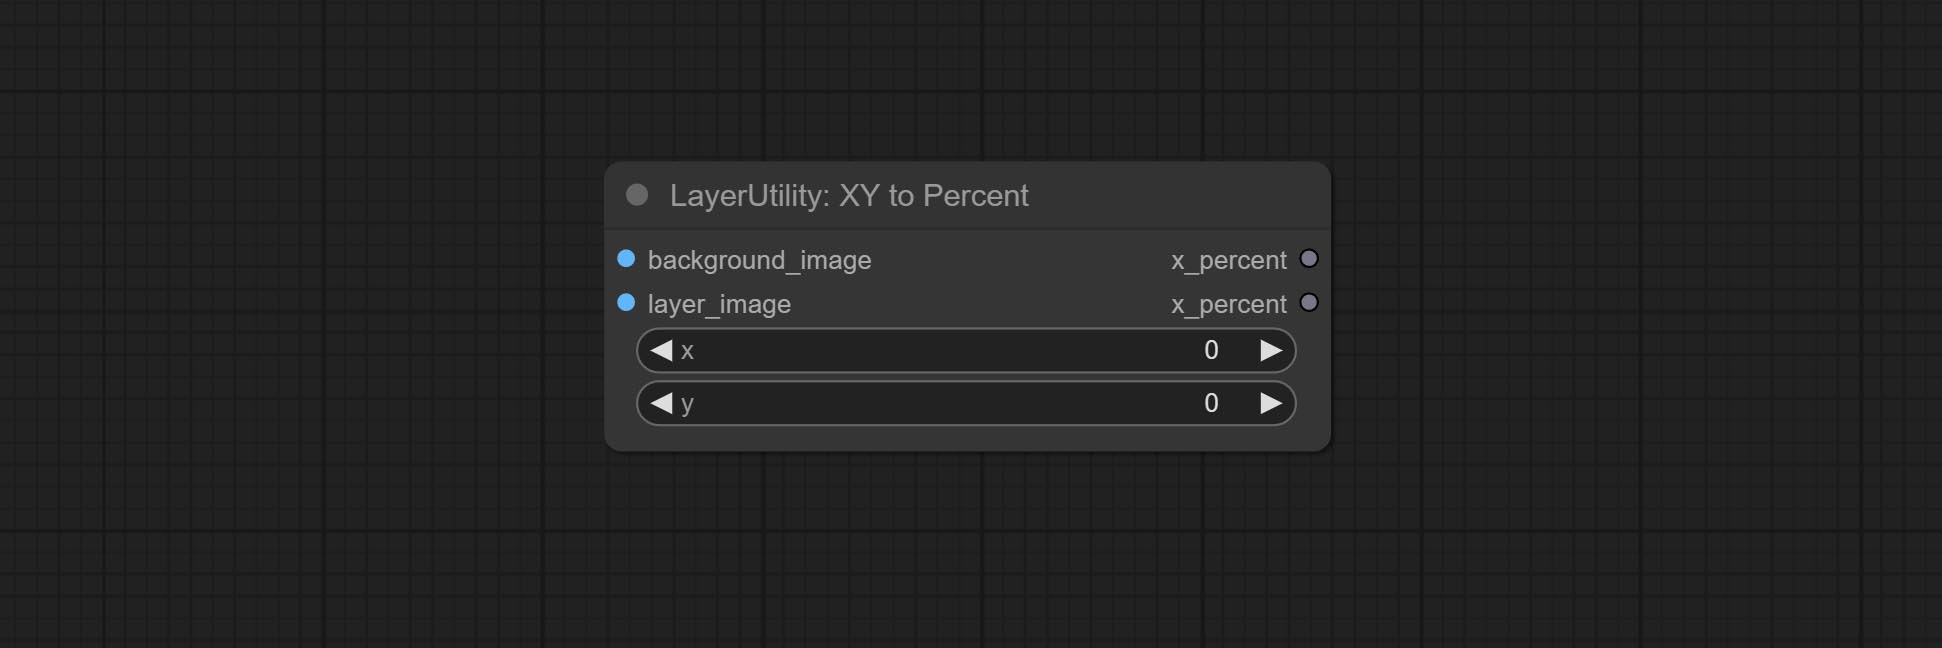
Node options:
- x: Value of X.
- y: Value of Y.
LayerImageTransform
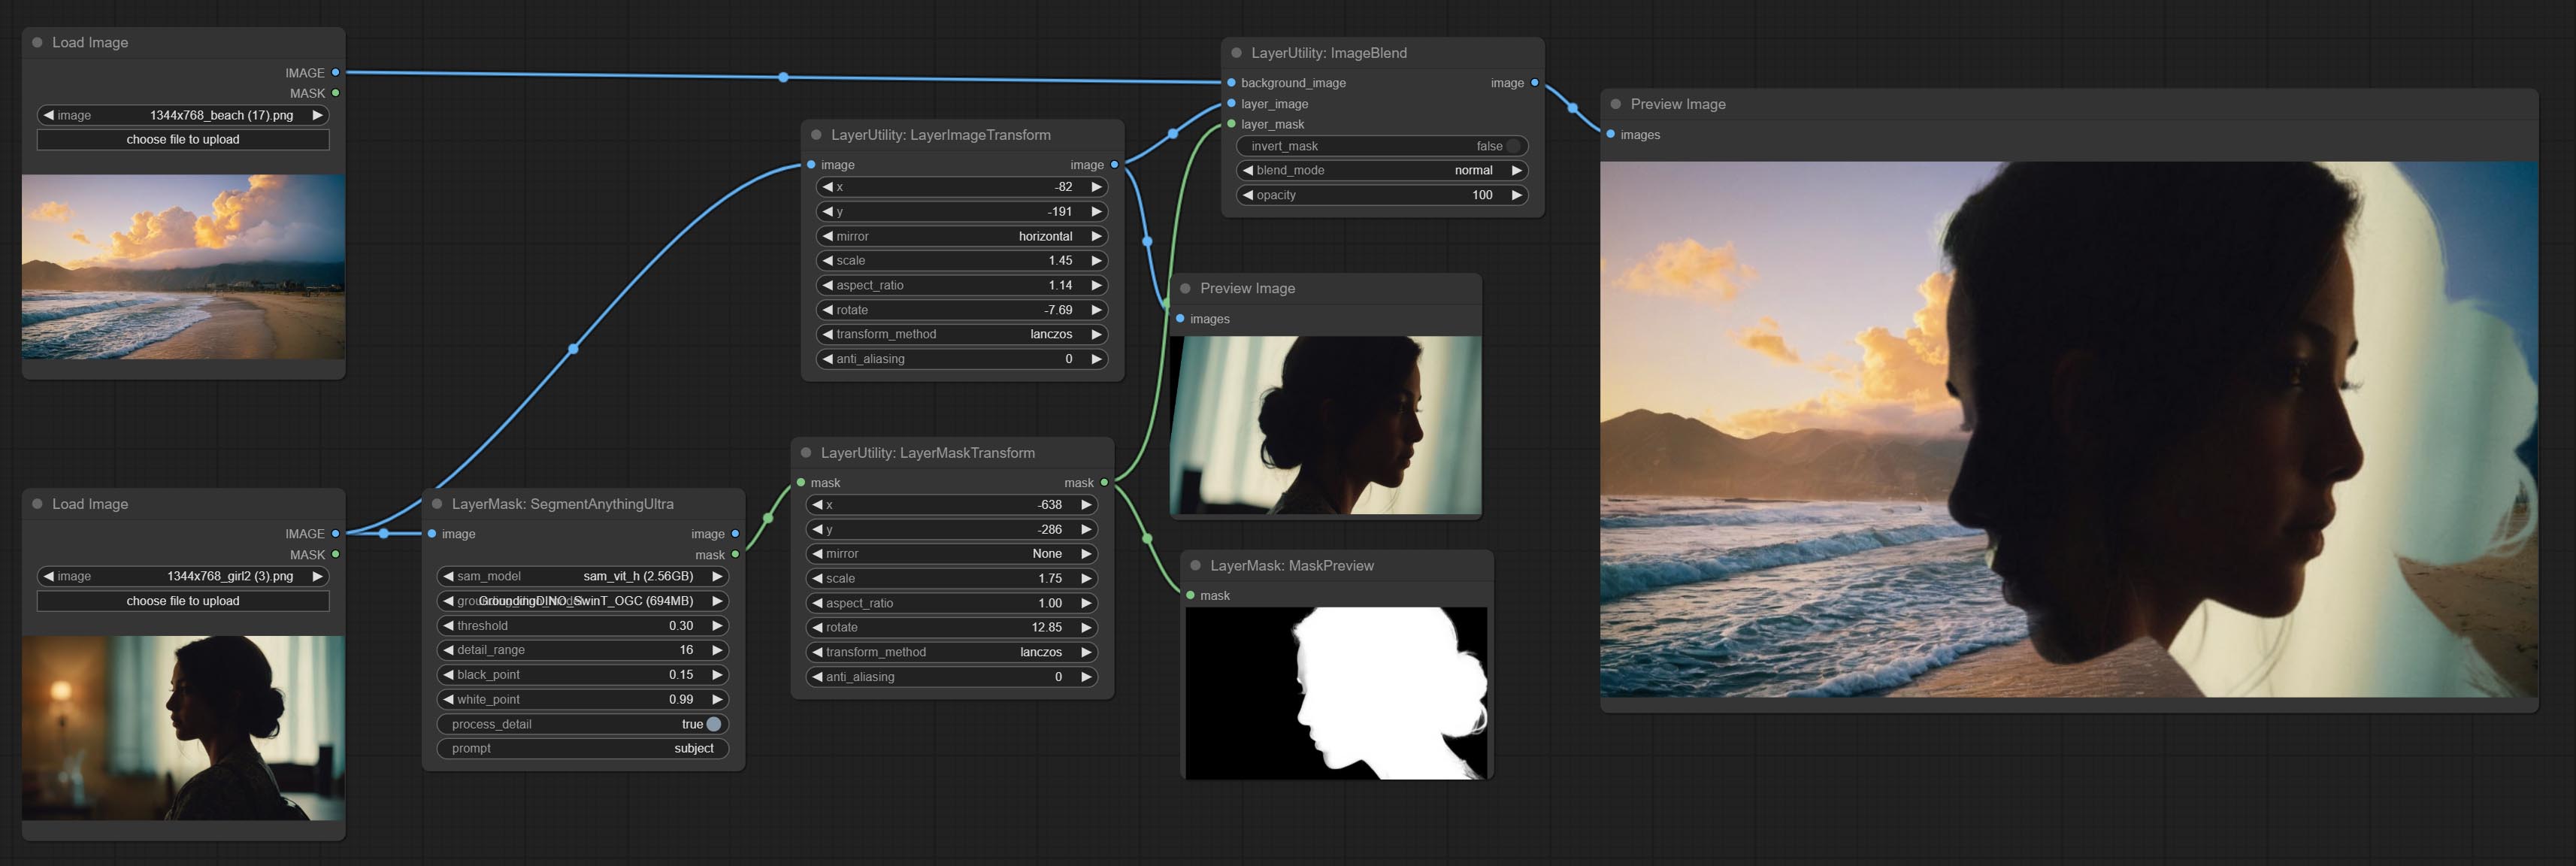
This node is used to transform layer_image separately, which can change size, rotation, aspect ratio, and mirror flip without changing the image size.
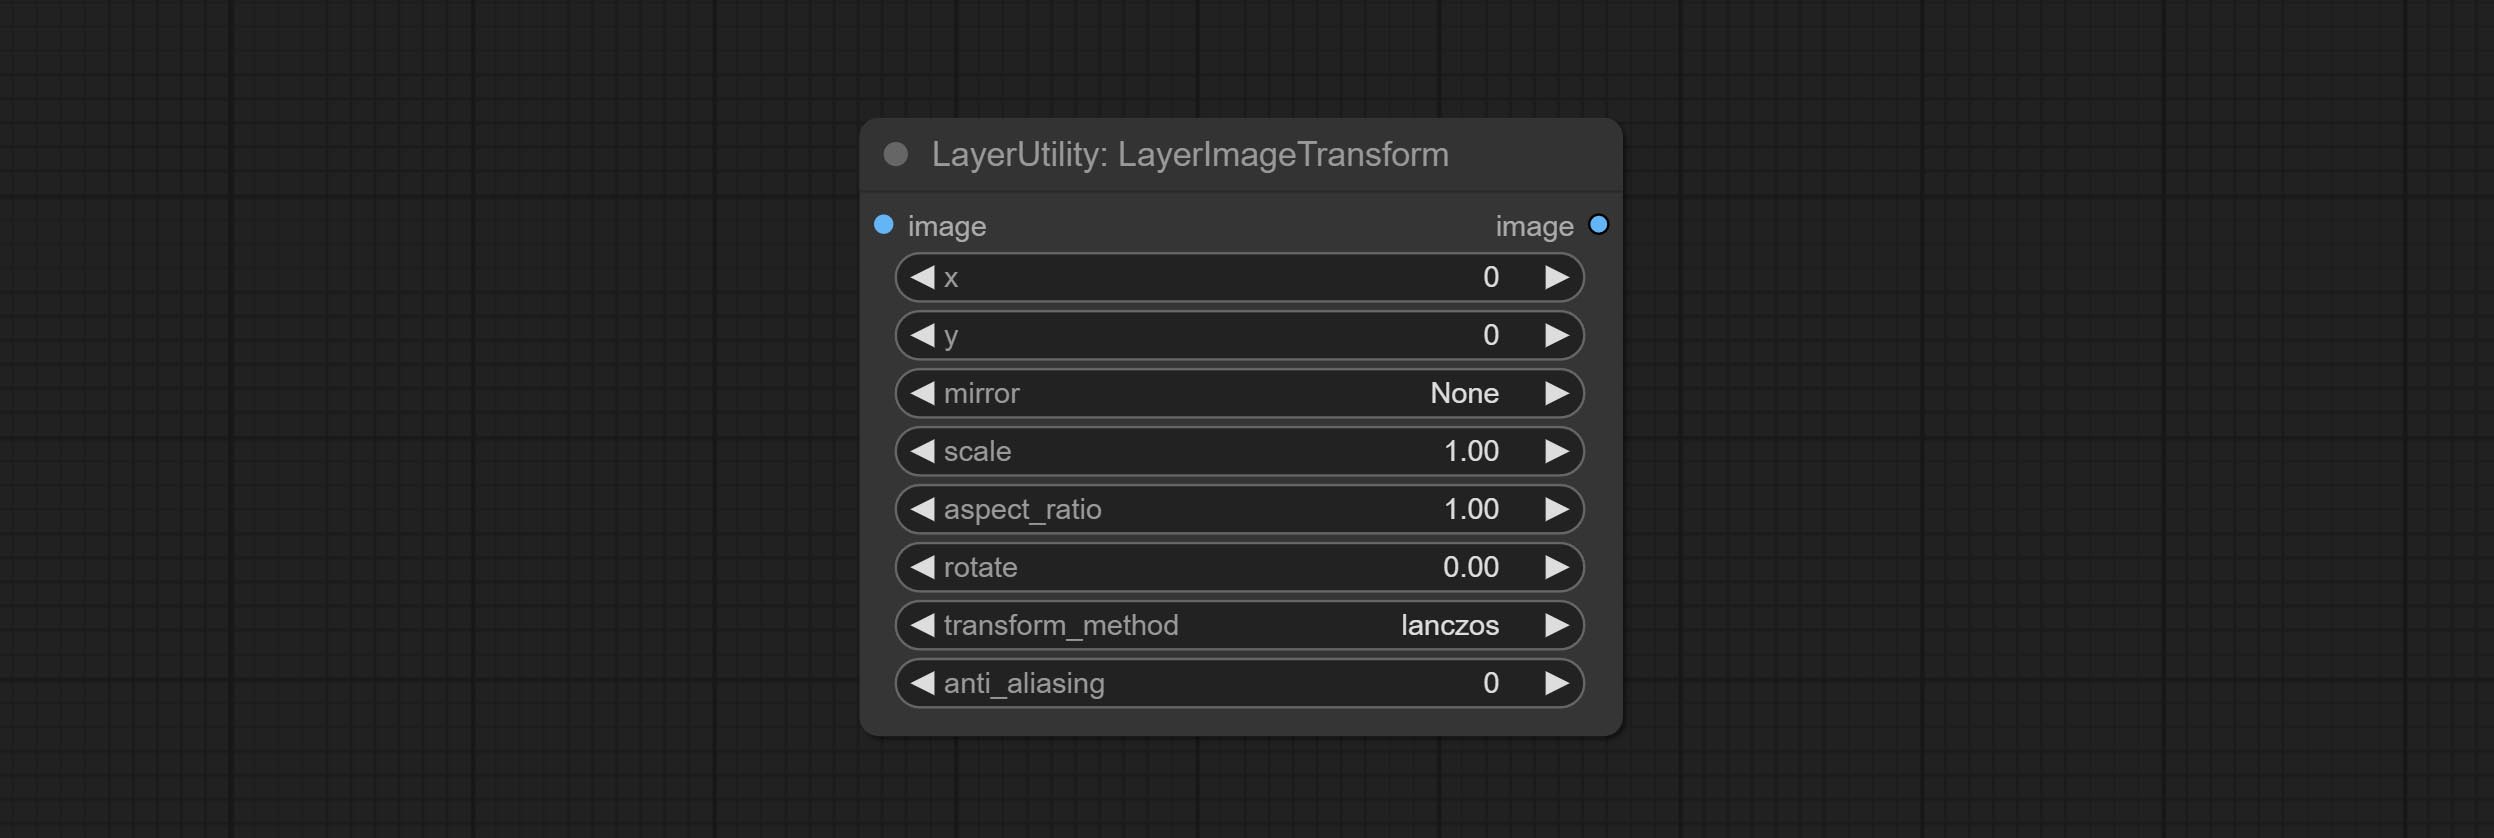
Node options:
- x: Value of X.
- y: Value of Y.
- mirror: Mirror flipping. Provide two flipping modes, horizontal flipping and vertical flipping.
- scale: Layer magnification, 1.0 represents the original size.
- aspect_ratio: Layer aspect ratio. 1.0 is the original ratio, a value greater than this indicates elongation, and a value less than this indicates flattening.
- rotate: Layer rotation degree.
- Sampling methods for layer enlargement and rotation, including lanczos, bicubic, hamming, bilinear, box and nearest. Different sampling methods can affect the image quality and processing time of the synthesized image.
- anti_aliasing: Anti aliasing, ranging from 0 to 16, the larger the value, the less obvious the aliasing. An excessively high value will significantly reduce the processing speed of the node.
LayerMaskTransform
Similar to LayerImageTransform node, this node is used to transform the layer_mask separately, which can scale, rotate, change aspect ratio, and mirror flip without changing the mask size.
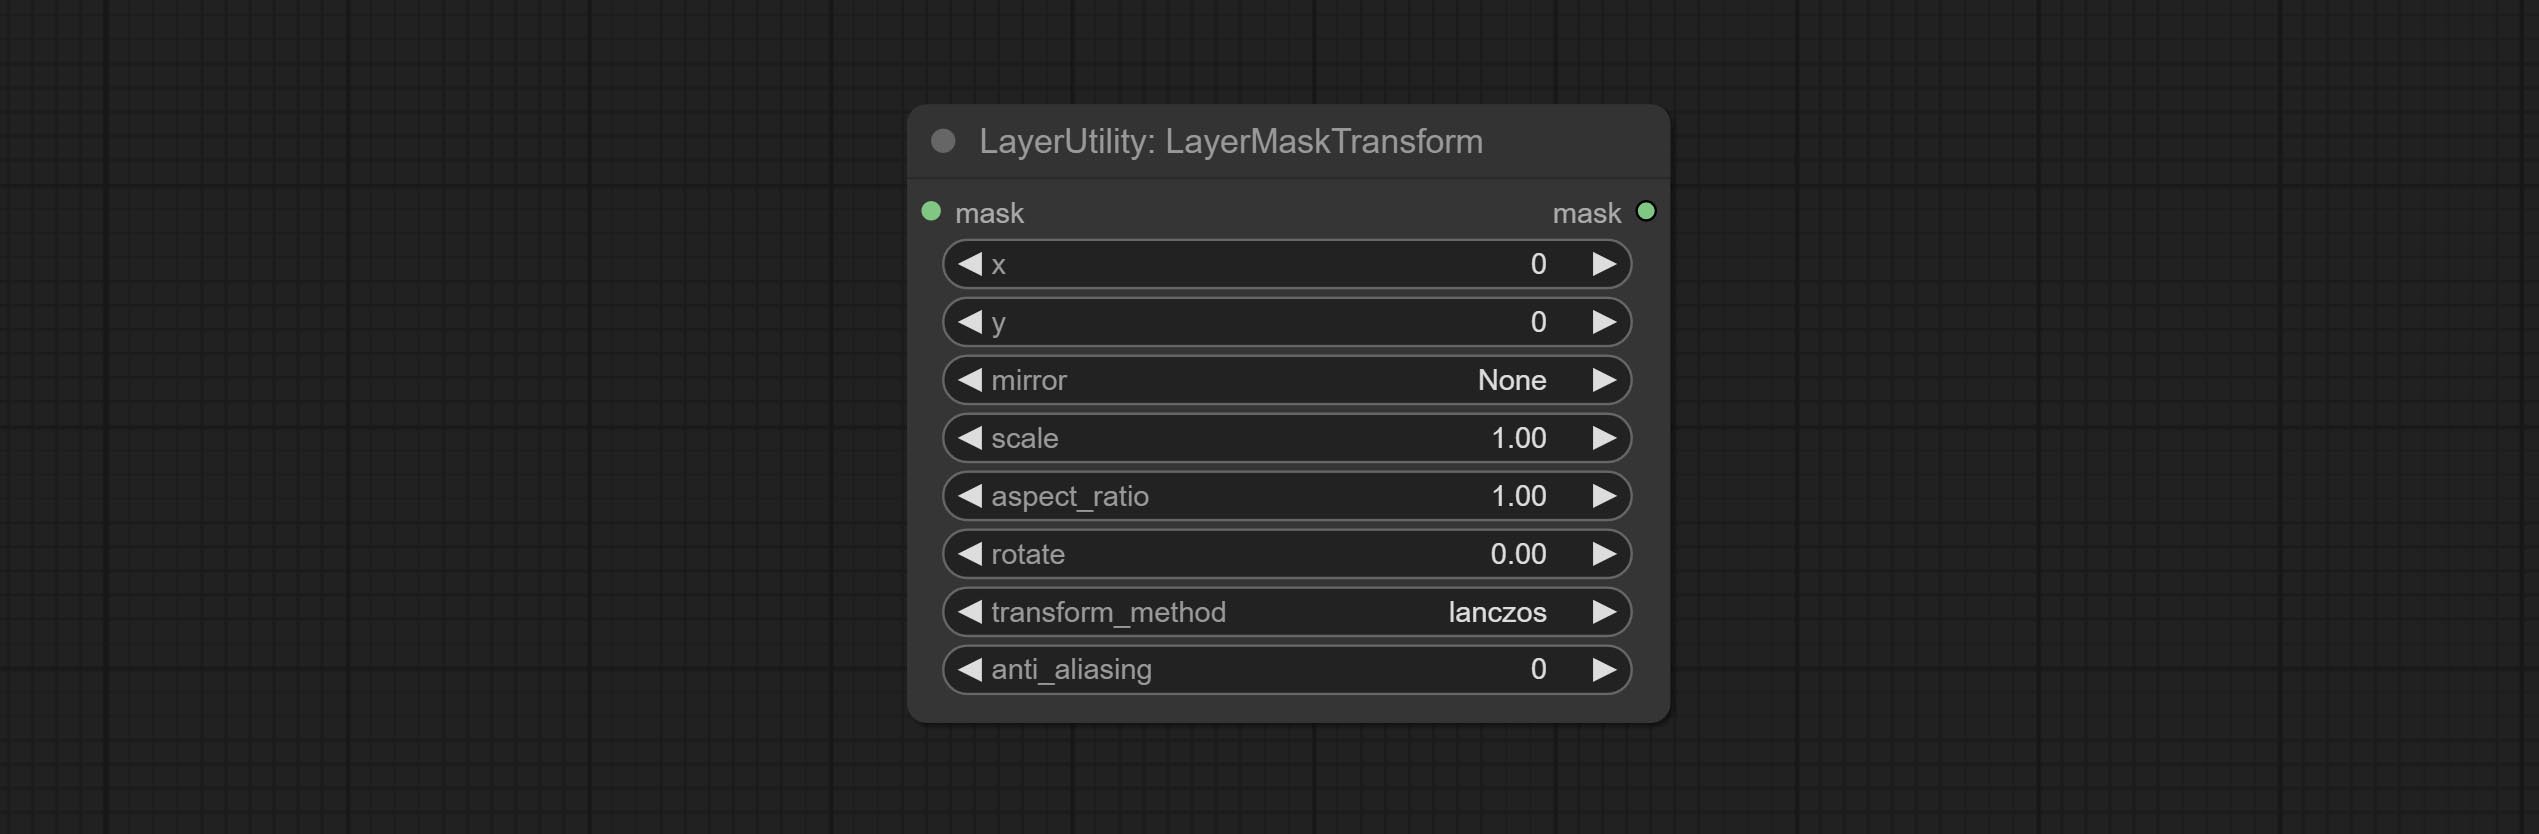
Node options:
- x: Value of X.
- y: Value of Y.
- mirror: Mirror flipping. Provide two flipping modes, horizontal flipping and vertical flipping.
- scale: Layer magnification, 1.0 represents the original size.
- aspect_ratio: Layer aspect ratio. 1.0 is the original ratio, a value greater than this indicates elongation, and a value less than this indicates flattening.
- rotate: Layer rotation degree.
- Sampling methods for layer enlargement and rotation, including lanczos, bicubic, hamming, bilinear, box and nearest. Different sampling methods can affect the image quality and processing time of the synthesized image.
- anti_aliasing: Anti aliasing, ranging from 0 to 16, the larger the value, the less obvious the aliasing. An excessively high value will significantly reduce the processing speed of the node.
ColorImage
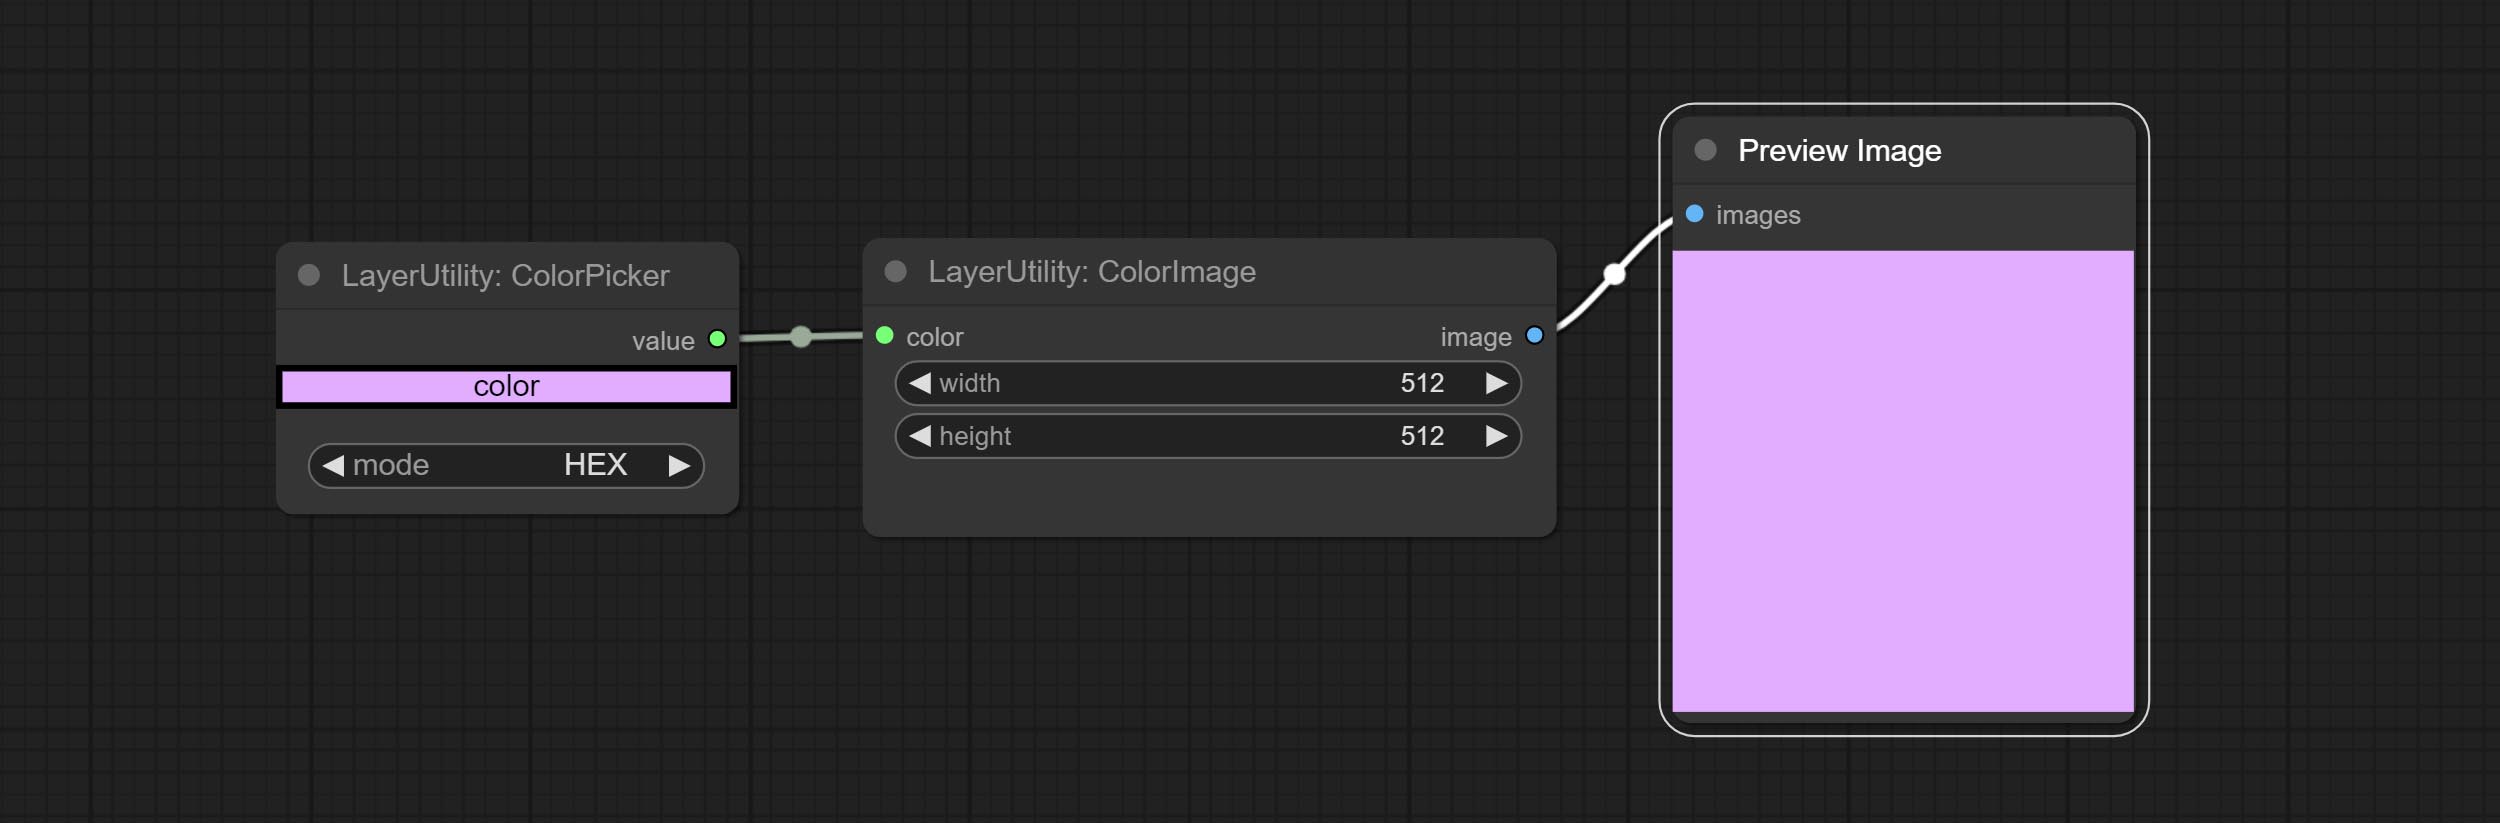
Generate an image of a specified color and size.

Node options:
- width: Width of the image.
- height: Height of the image.
- color 4 : Color of the image.
ColorImageV2
The V2 upgraded version of ColorImage.
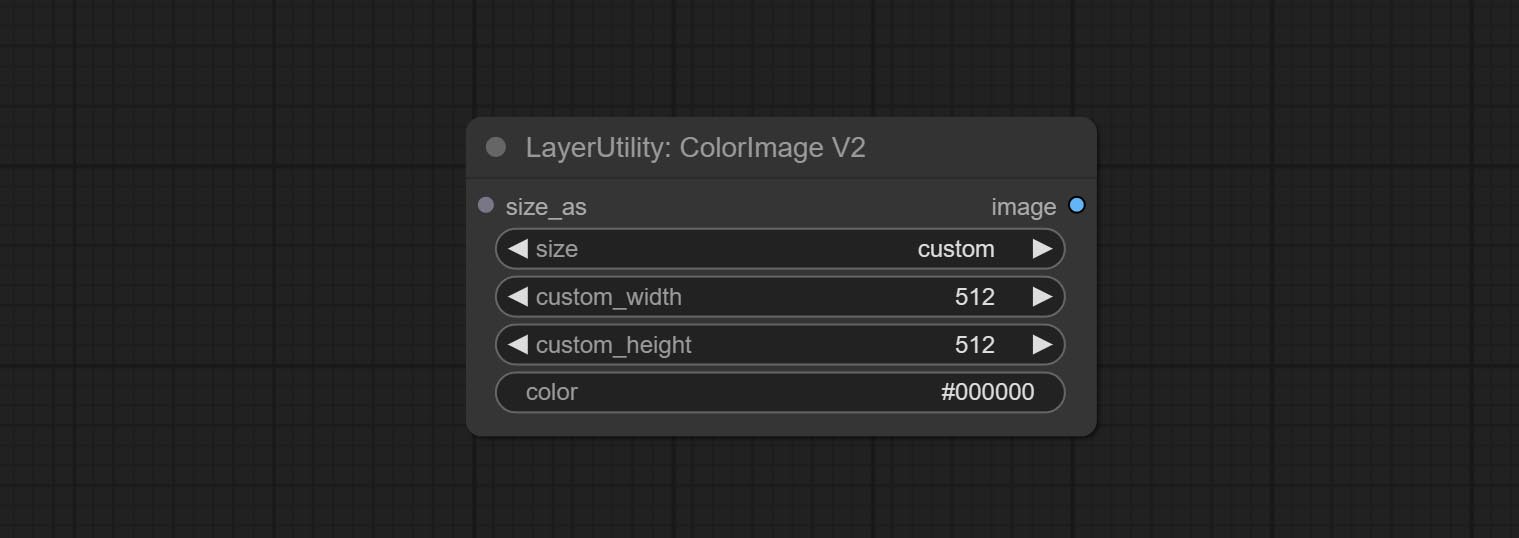
The following changes have been made based on ColorImage:
- size_as * : Input image or mask here to generate image according to its size. Note that this input takes priority over other size settings.
- size ** : Size preset. the preset can be customized by the user. if have size_as input, this option will be ignored.
- custom_width: Image width. it valid when size is set to "custom". if have size_as input, this option will be ignored.
- custom_height: Image height. it valid when size is set to "custom". if have size_as input, this option will be ignored.
* Only limited to input images and masks. forcing the integration of other types of inputs will result in node errors. ** The preset size is defined in custom_size.ini , this file is located in the root directory of the plug-in, and the default name is custom_size.ini.example . to use this file for the first time, you need to change the file suffix to .ini . Open with text editing software. Each row represents a size, with the first value being width and the second being height, separated by a lowercase "x" in the middle. To avoid errors, please do not enter extra characters.
GradientImage
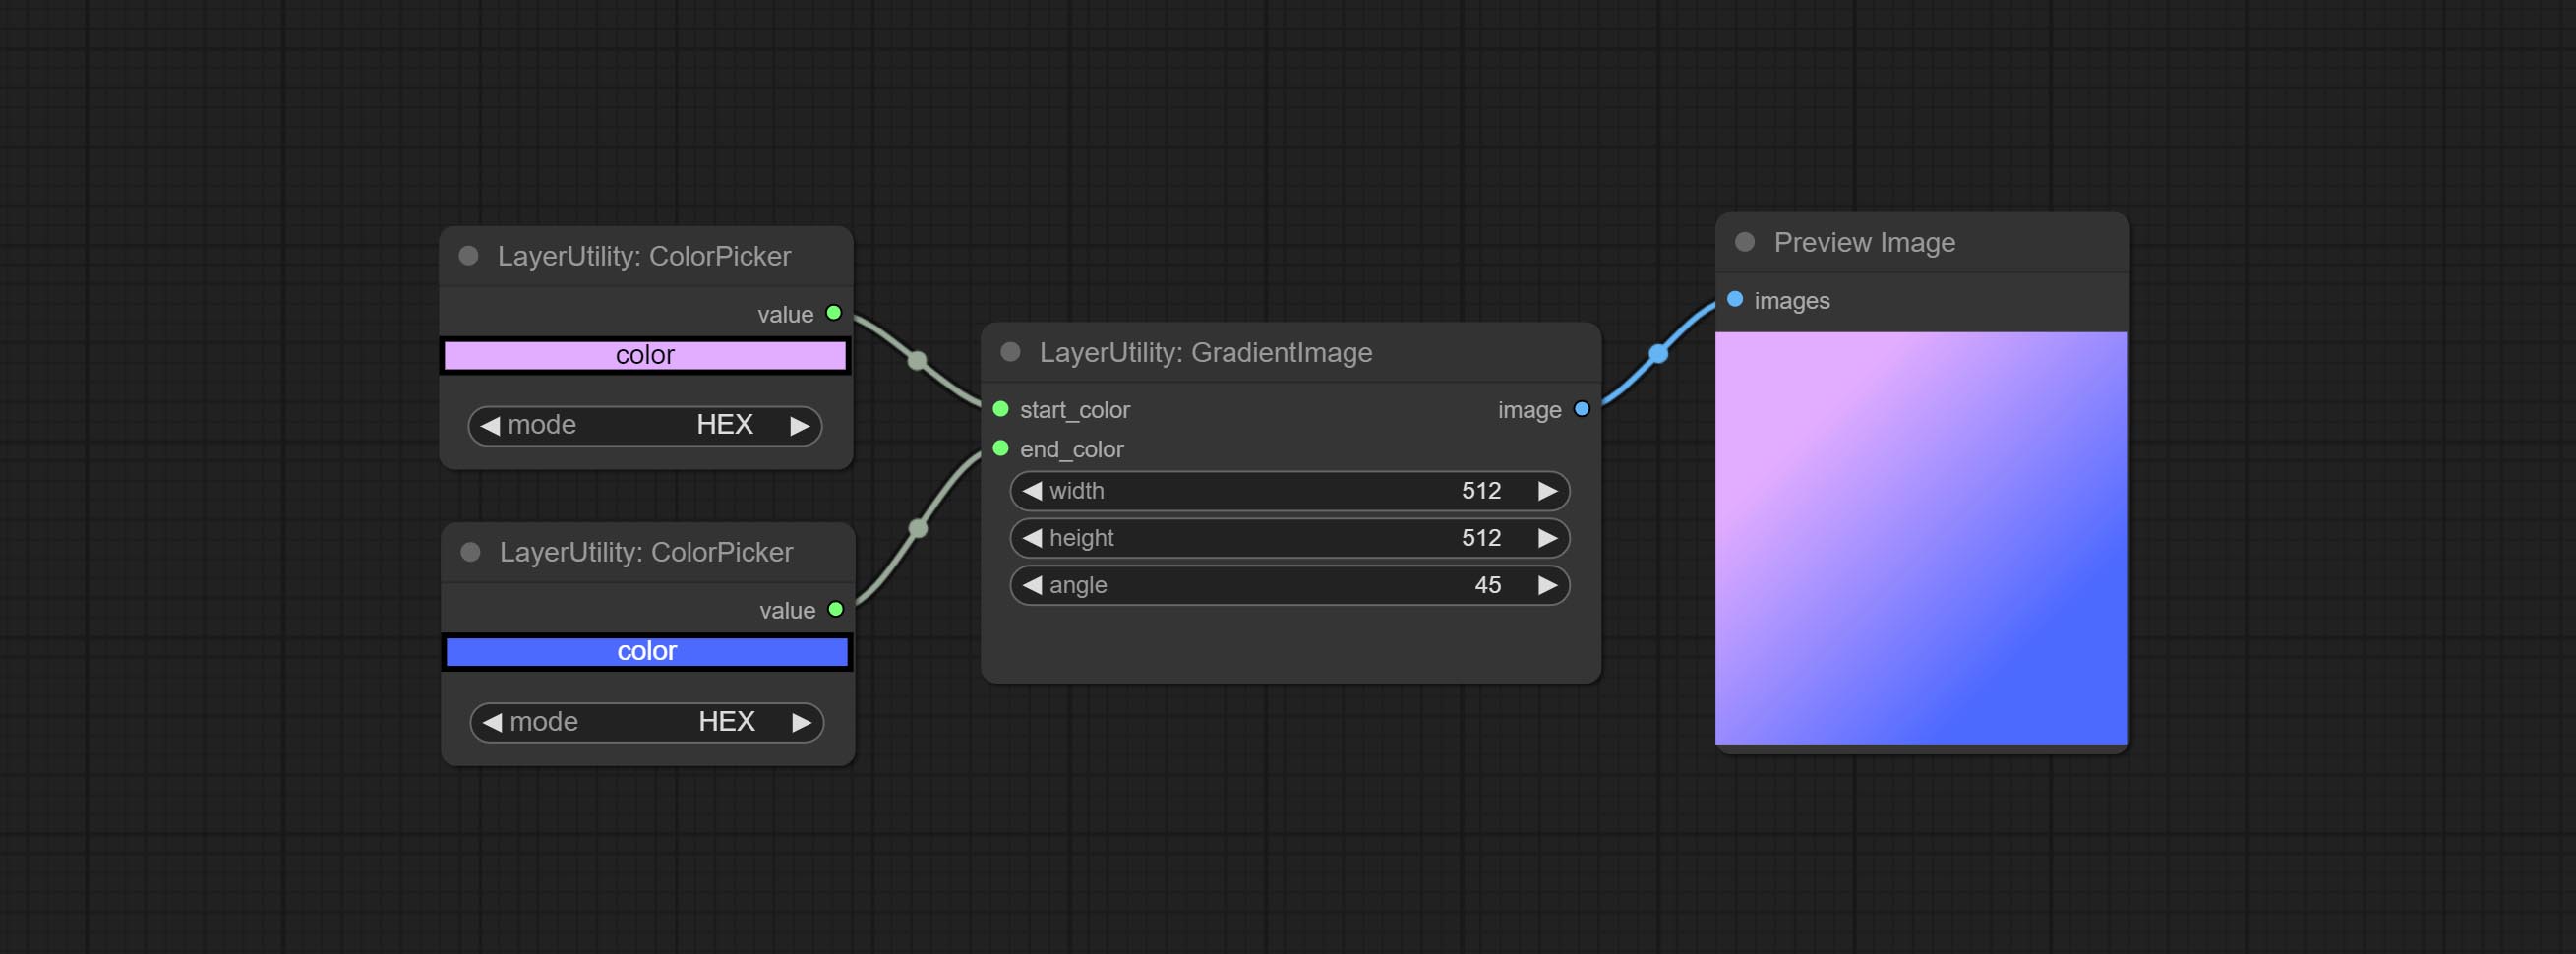
Generate an image with a specified size and color gradient.
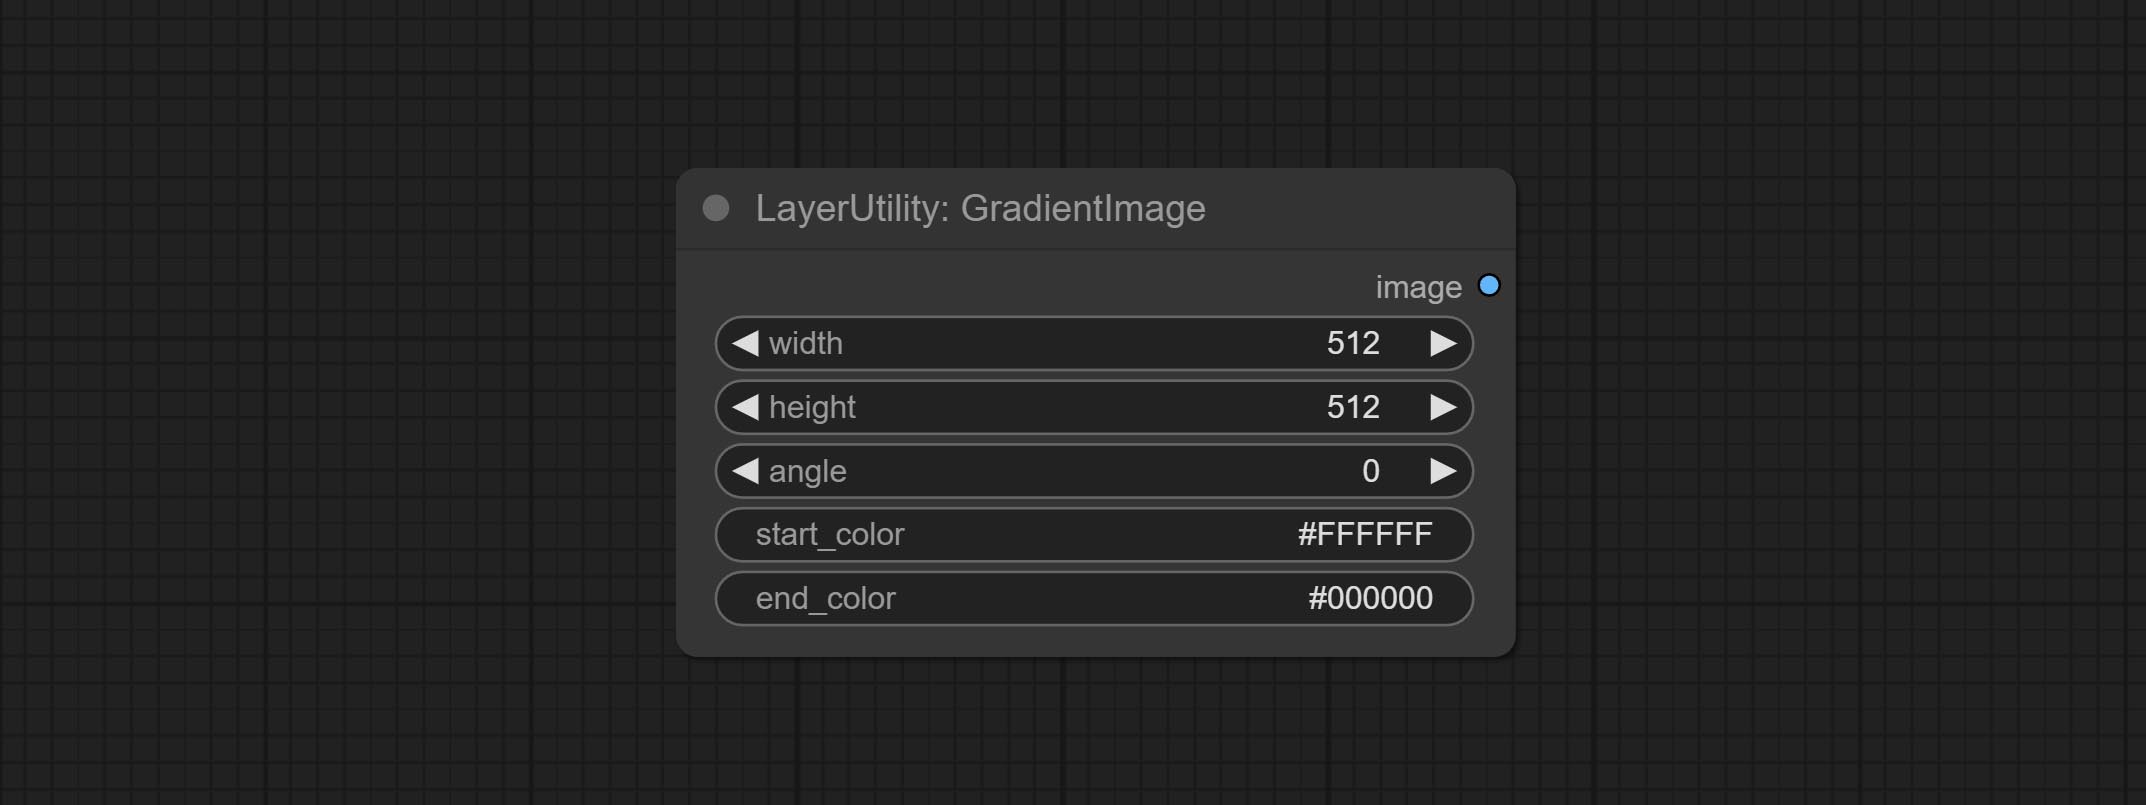
Node options:
- width: Width of the image.
- height: Height of the image.
- angle: Angle of gradient.
- start_color 4 : Color of the begging.
- end_color 4 : Color of the ending.
GradientImageV2
The V2 upgraded version of GradientImage.
The following changes have been made based on GradientImage:
- size_as * : Input image or mask here to generate image according to its size. Note that this input takes priority over other size settings.
- size ** : Size preset. the preset can be customized by the user. if have size_as input, this option will be ignored.
- custom_width: Image width. it valid when size is set to "custom". if have size_as input, this option will be ignored.
- custom_height: Image height. it valid when size is set to "custom". if have size_as input, this option will be ignored.
* Only limited to input images and masks. forcing the integration of other types of inputs will result in node errors. ** The preset size is defined in custom_size.ini , this file is located in the root directory of the plug-in, and the default name is custom_size.ini.example . to use this file for the first time, you need to change the file suffix to .ini . Open with text editing software. Each row represents a size, with the first value being width and the second being height, separated by a lowercase "x" in the middle. To avoid errors, please do not enter extra characters.
ImageRewardFilter
Rating bulk pictures and outputting top-ranked pictures. it used [ImageReward] (https://github.com/THUDM/ImageReward) for image scoring, thanks to the original authors.
Node options:
- prompt: Optional input. Entering prompt here will be used as a basis to determine how well it matches the picture.
- output_nun: Number of pictures outputted. This value should be less than the picture batch.
Outputs:
- images: Bulk pictures output from high to low in order of rating.
- obsolete_images: Knockout pictures. Also output in order of rating from high to low.
SimpleTextImage
Generate simple typesetting images and masks from text. This node references some of the functionalities and code of ZHO-ZHO-ZHO/ComfyUI-Text_Image-Composite, thanks to the original author.
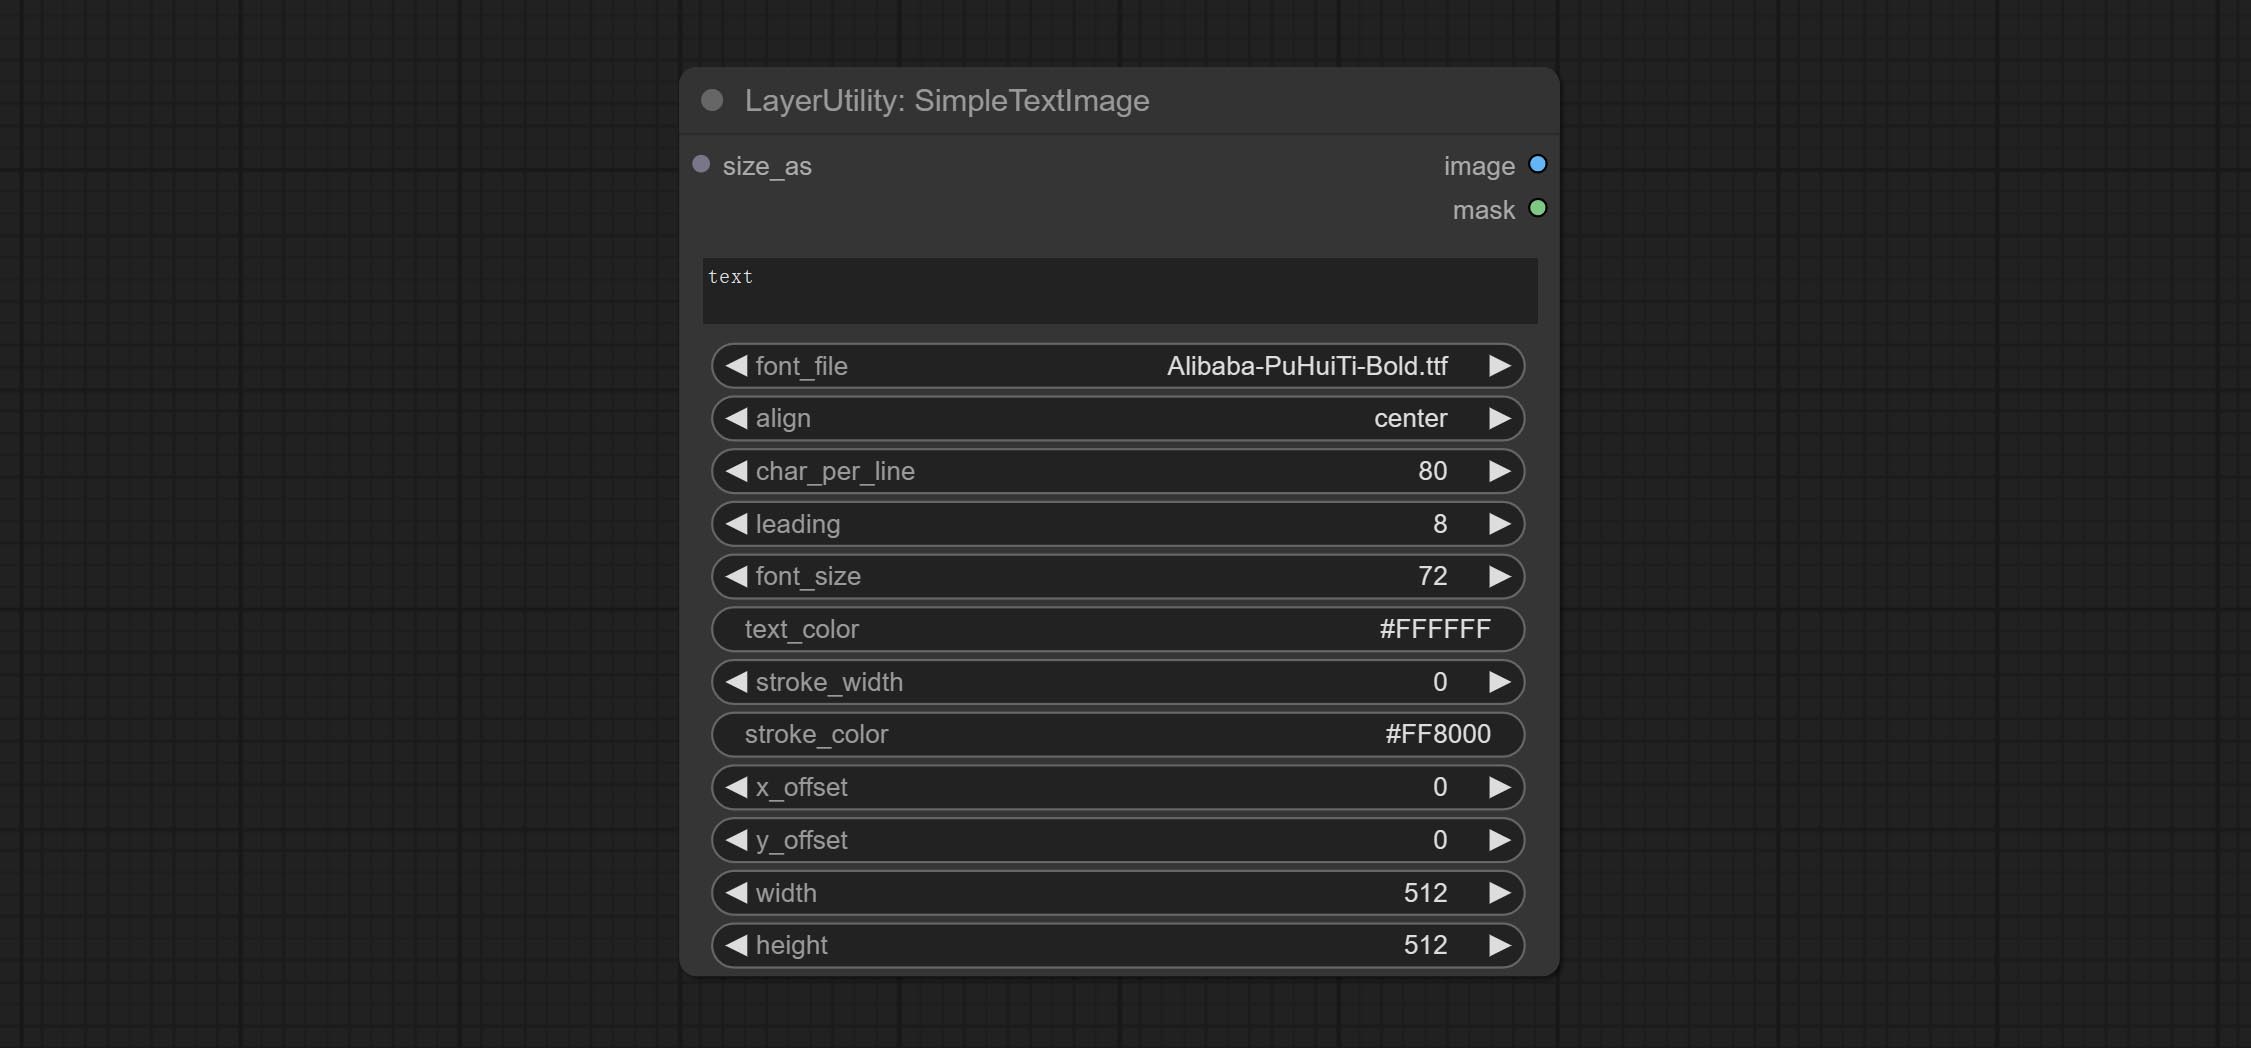
Node options:
- size_as * : The input image or mask here will generate the output image and mask according to their size. this input takes priority over the width and height below.
- font_file ** : Here is a list of available font files in the font folder, and the selected font files will be used to generate images.
- align: Alignment options. There are three options: center, left, and right.
- char_per_line: The number of characters per line, any excess will be automatically wrapped.
- leading: The leading space.
- font_size: The size of font.
- text_color: The color of text.
- stroke_width: The width of stroke.
- stroke_color: The color of stroke.
- x_offset: The horizontal offset of the text position.
- y_offset: The vertical offset of the text position.
- width: Width of the image. If there is a size_as input, this setting will be ignored.
- height: Height of the image. If there is a size_as input, this setting will be ignored.
* Only limited to input image and mask. forcing the integration of other types of inputs will result in node errors.
** The font folder is defined in resource_dir.ini , this file is located in the root directory of the plug-in, and the default name is resource_dir.ini.example . to use this file for the first time, you need to change the file suffix to .ini . Open the text editing software and find the line starting with "FONT_dir=", after "=", enter the custom folder path name. support defining multiple folders in resource-dir.ini , separated by commas, semicolons, or spaces. all font files in this folder will be collected and displayed in the node list during ComfyUI initialization. If the folder set in ini is invalid, the font folder that comes with the plugin will be enabled.
TextImage
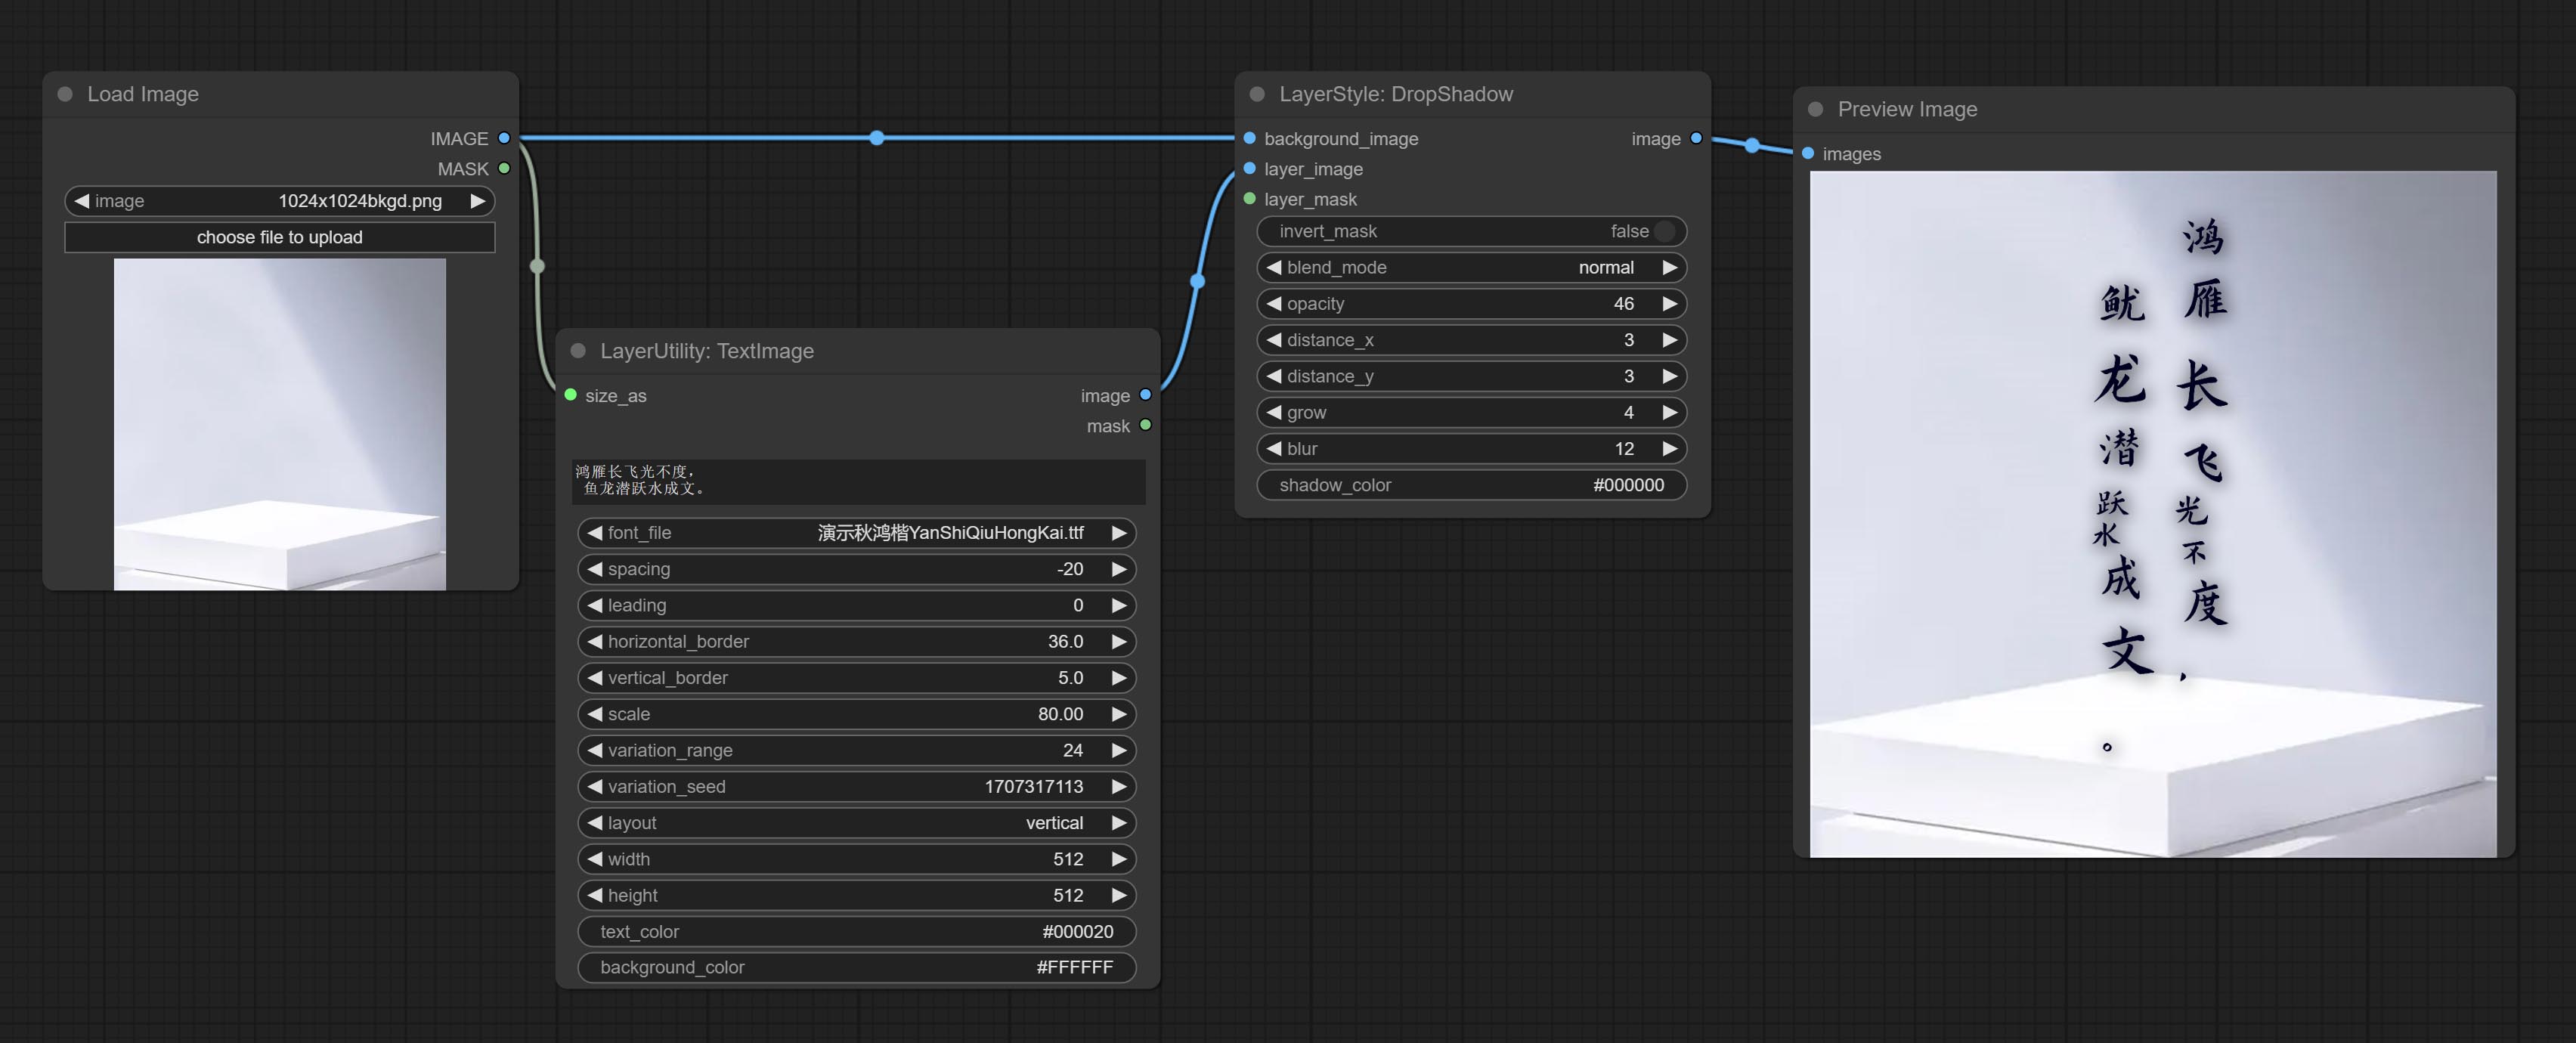
Generate images and masks from text. support for adjusting the spacing between words and lines, horizontal and vertical adjustments, it can set random changes in each character, including size and position.
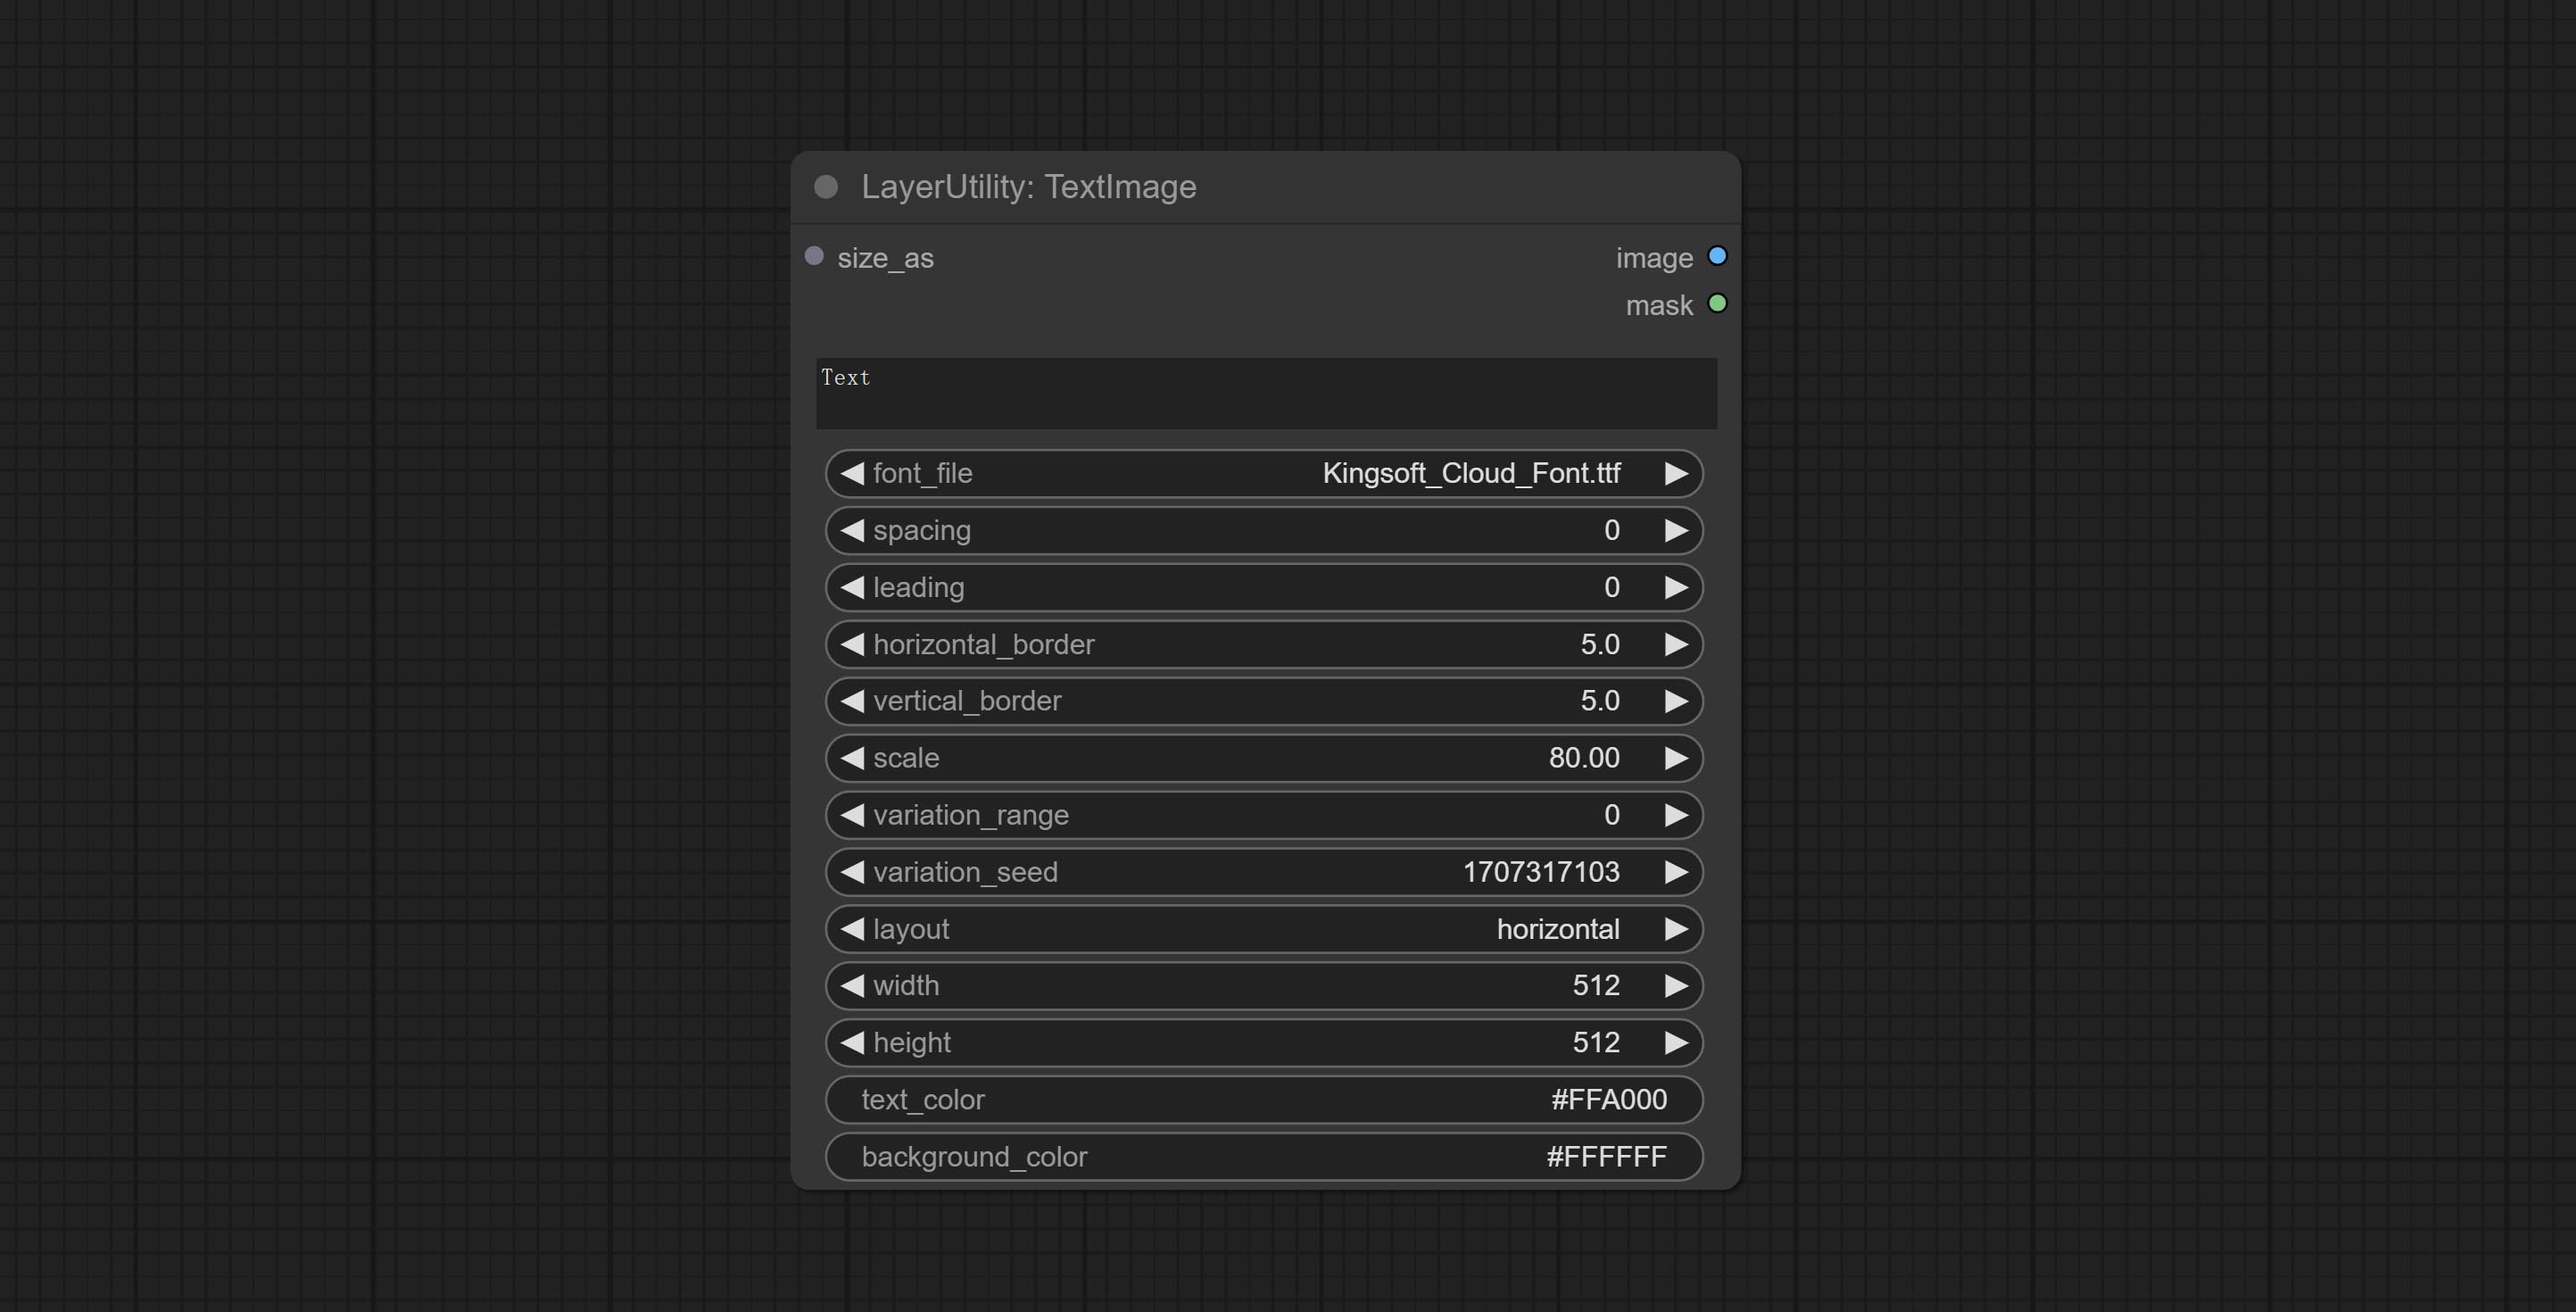
Node options:
- size_as * : The input image or mask here will generate the output image and mask according to their size. this input takes priority over the width and height below.
- font_file ** : Here is a list of available font files in the font folder, and the selected font files will be used to generate images.
- spacing: Word spacing.this value is in pixels.
- leading: Row leading.this value is in pixels.
- horizontal_border: Side margin. If the text is horizontal, it is the left margin, and if it is vertical, it is the right margin. this value is represents a percentage, for example, 50 indicates that the starting point is located in the center on both sides.
- vertical_border: Top margin. this value is represents a percentage, for example, 10 indicates that the starting point is located 10% away from the top.
- scale: The overall size of the text. the initial size of text is automatically calculated based on the screen size and text content, with the longest row or column by default adapting to the image width or height. adjusting the value here will scale the text as a whole. this value is represents a percentage, for example, 60 represents scaling to 60%.
- variation_range: The range of random changes in characters. when this value is greater than 0, the character will undergo random changes in size and position, and the larger the value, the greater the magnitude of the change.
- variation_seed: The seed for randomly. fix this value to individual characters changes generated each time will not change.
- layout: Text layout. there are horizontal and vertical options to choose from.
- width: Width of the image. If there is a size_as input, this setting will be ignored.
- height: Height of the image. If there is a size_as input, this setting will be ignored.
- text_color: The color of text.
- background_color 4 : The color of background.
* Only limited to input image and mask. forcing the integration of other types of inputs will result in node errors.
** The font folder is defined in resource_dir.ini , this file is located in the root directory of the plug-in, and the default name is resource_dir.ini.example . to use this file for the first time, you need to change the file suffix to .ini . Open the text editing software and find the line starting with "FONT_dir=", after "=", enter the custom folder path name. support defining multiple folders in resource-dir.ini , separated by commas, semicolons, or spaces. all font files in this folder will be collected and displayed in the node list during ComfyUI initialization. If the folder set in ini is invalid, the font folder that comes with the plugin will be enabled.
TextImageV2
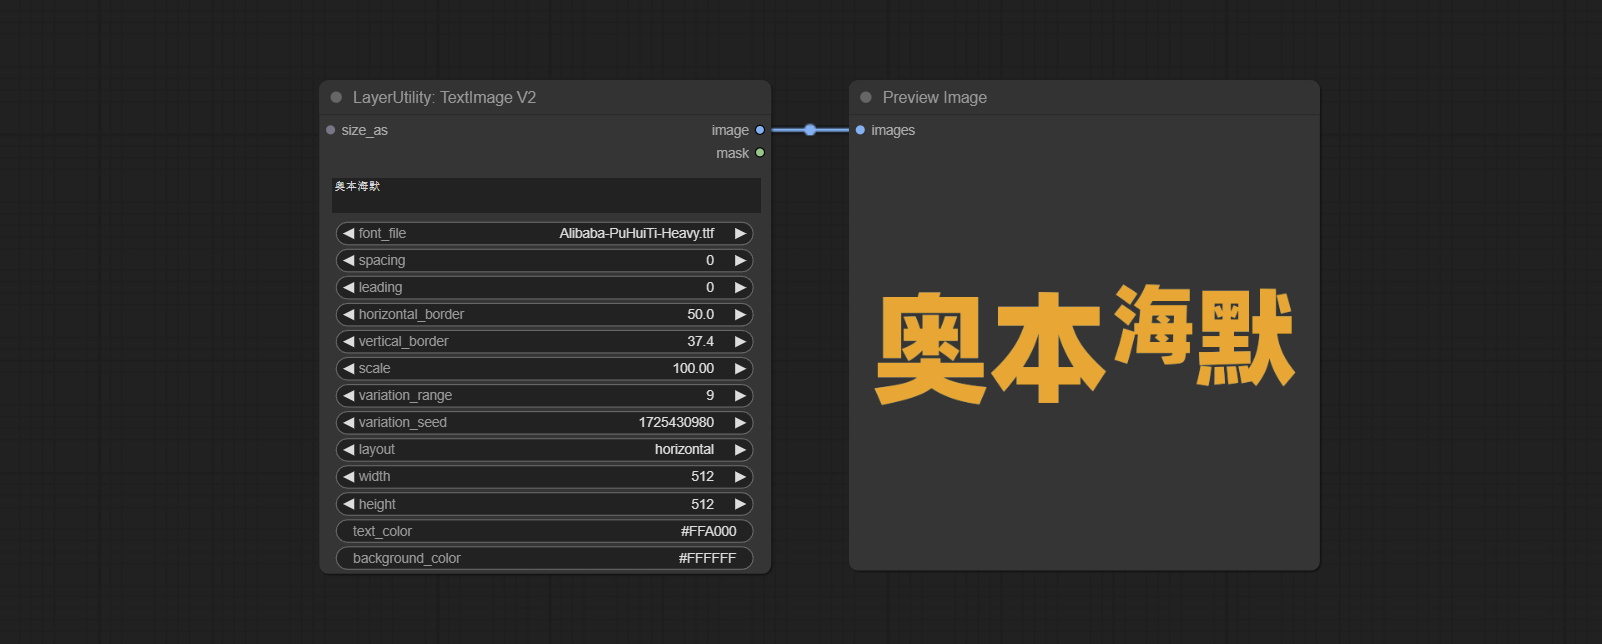
This node is merged from heshengtao. The PR modifies the scaling of the image text node based on the TextImage node. The font spacing follows the scaling, and the coordinates are no longer based on the top left corner of the text, but on the center point of the entire line of text. Thank you for the author's contribution.
Lama
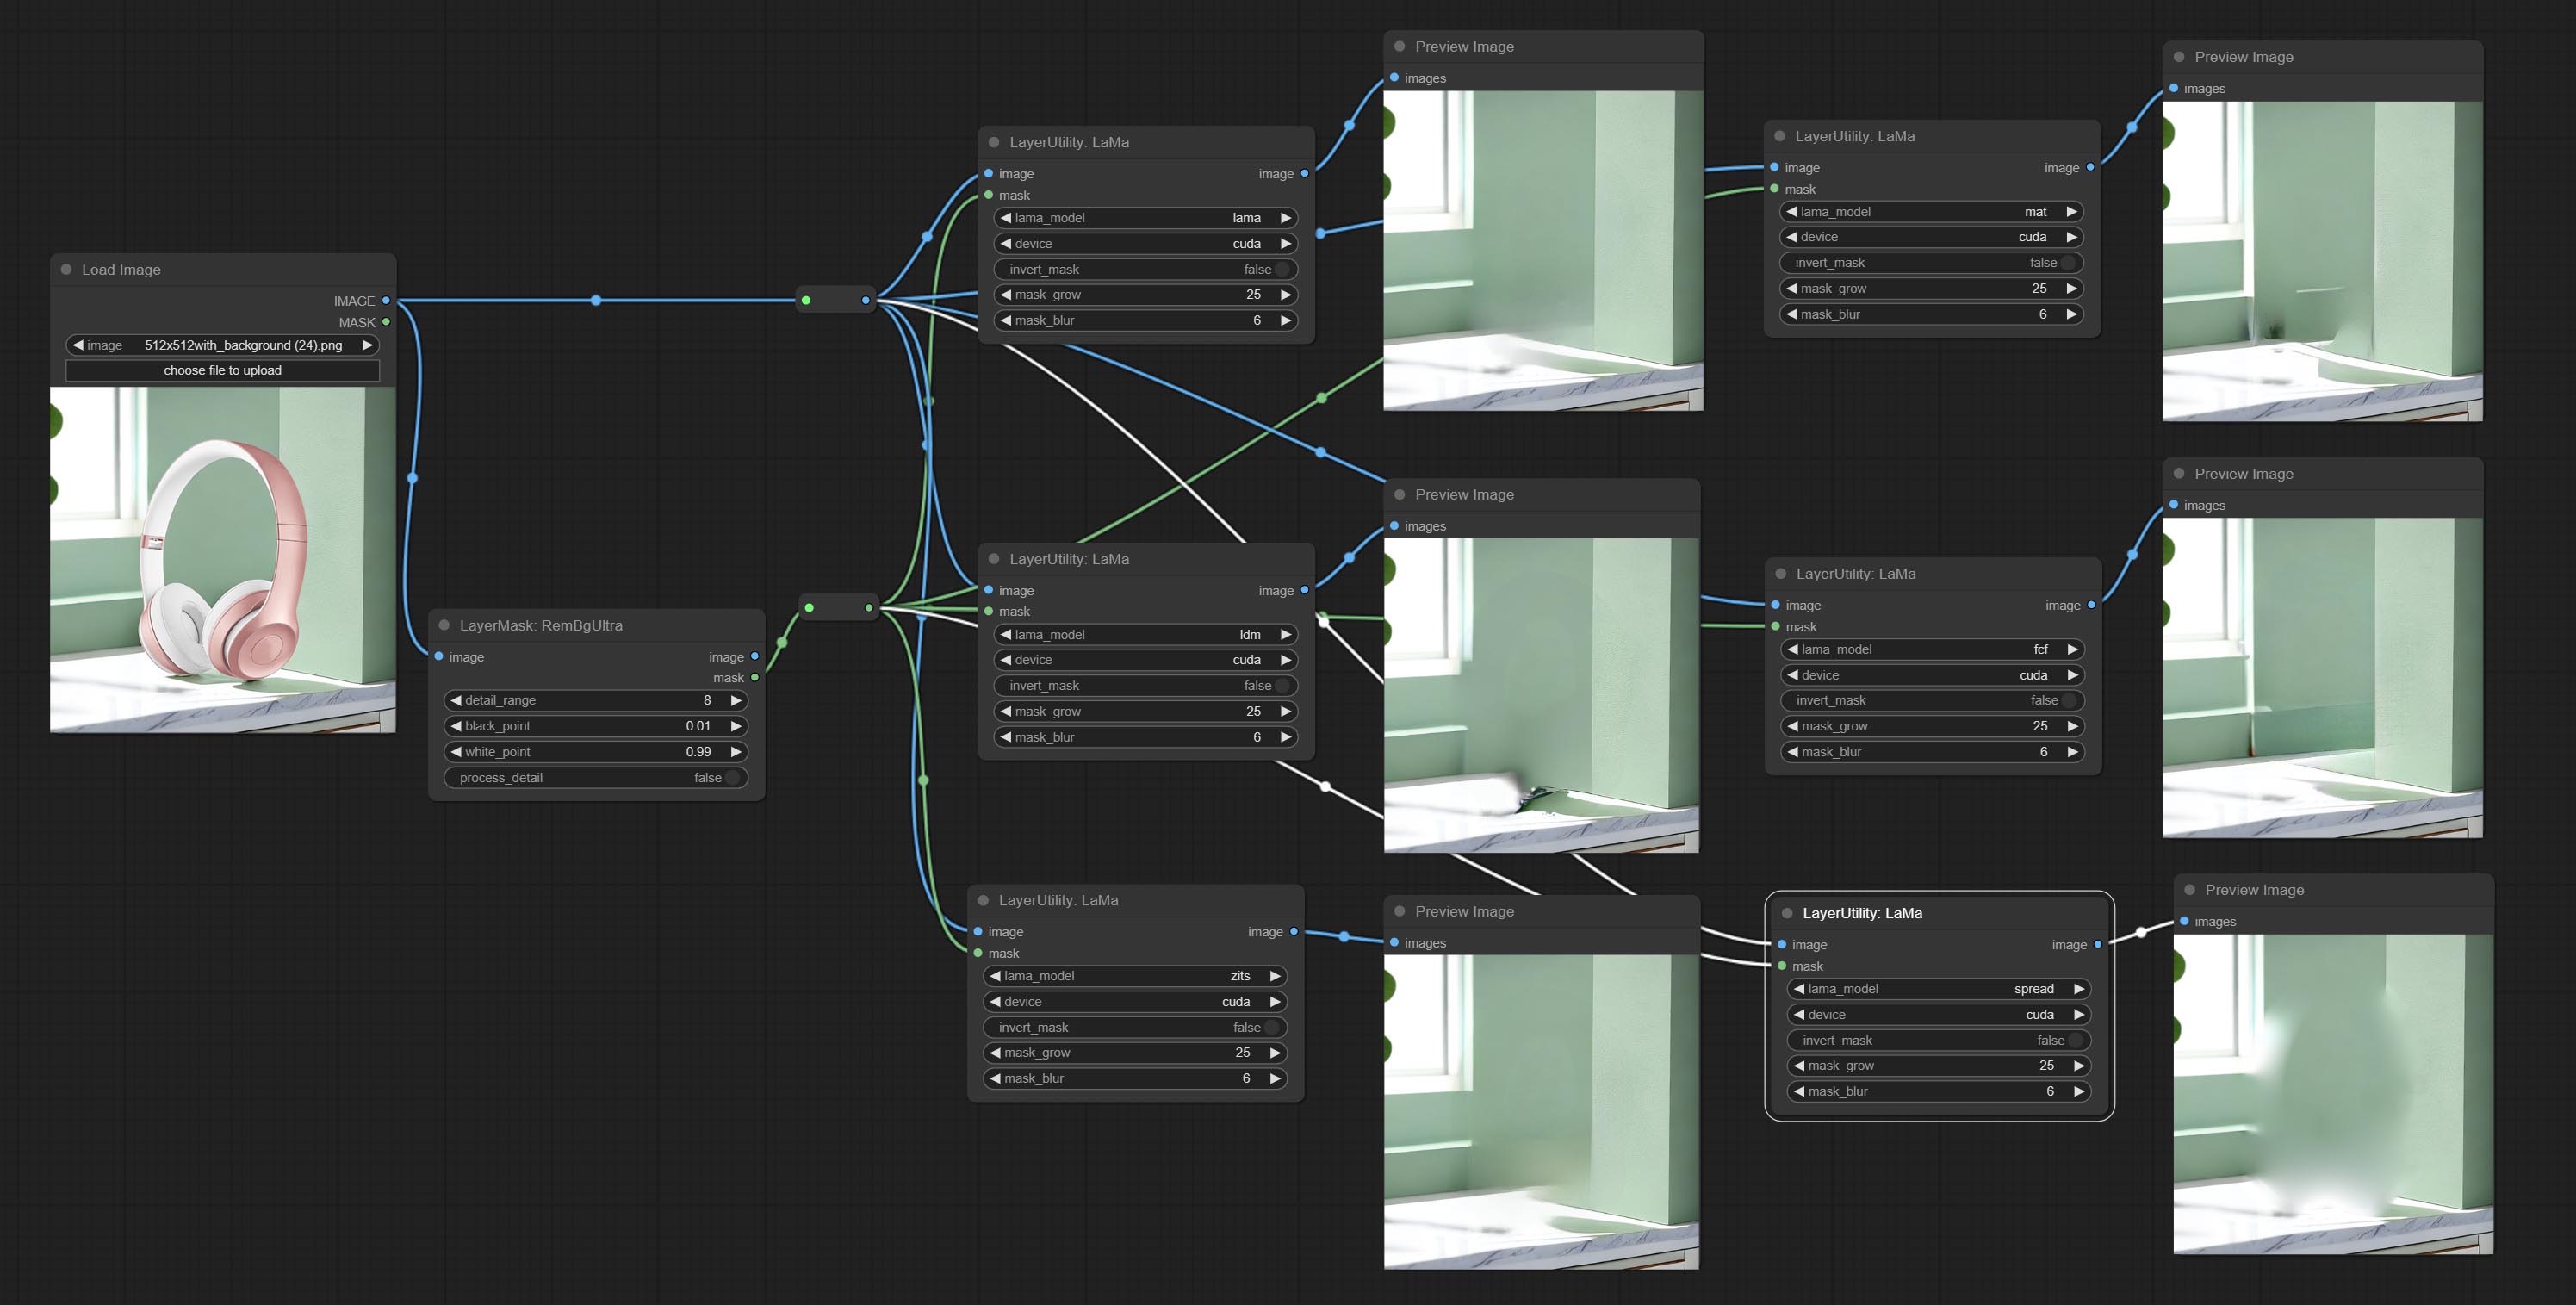
Erase objects from the image based on the mask. this node is repackage of IOPaint, powered by state-of-the-art AI models, thanks to the original author.
It is have LaMa, LDM, ZITS,MAT, FcF, Manga models and the SPREAD method to erase. Please refer to the original link for the introduction of each model.
Please download the model files from lama models(BaiduNetdisk) or lama models(Google Drive) to ComfyUI/models/lama folder.
Node optons: 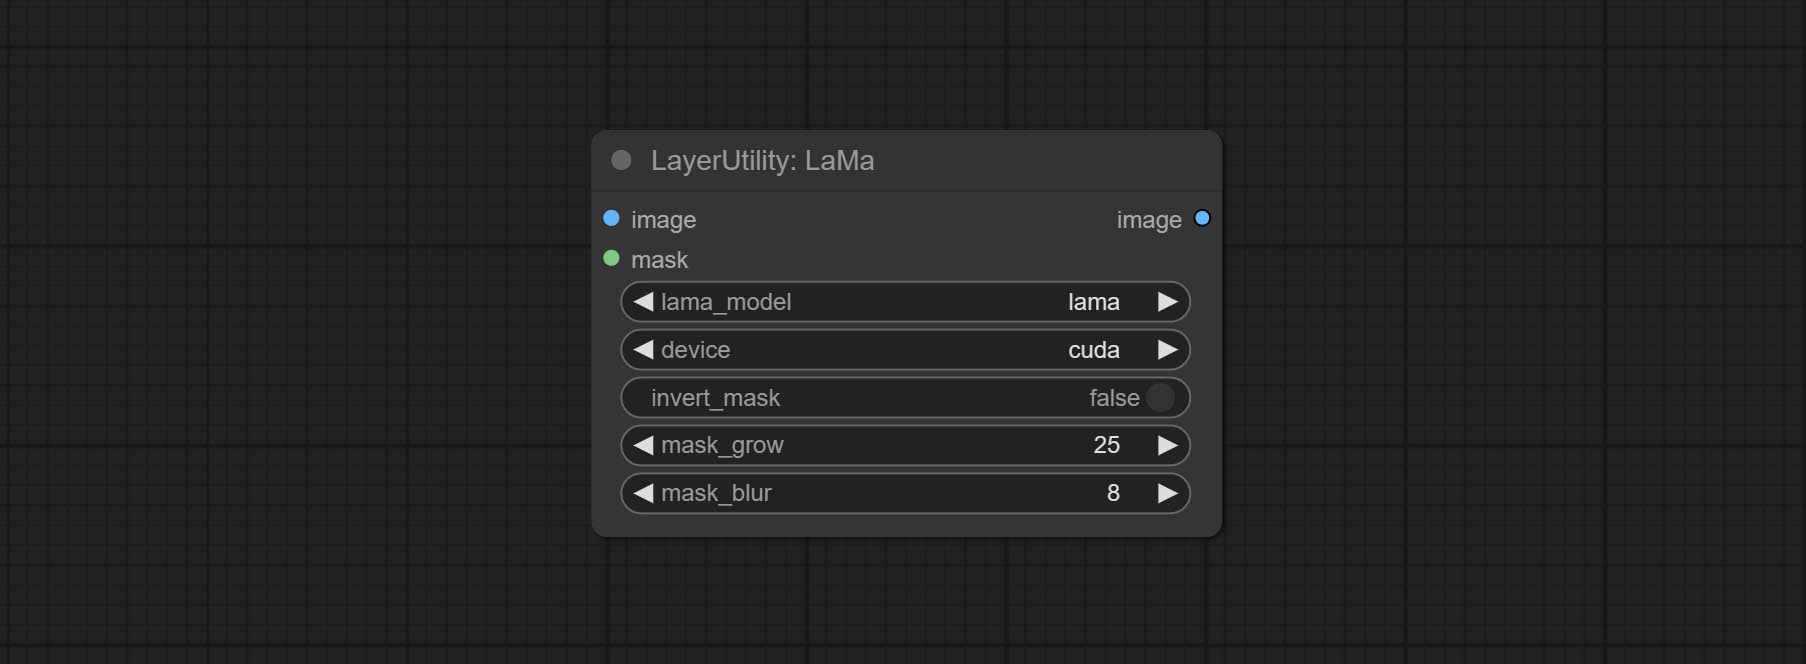
- lama_model: Choose a model or method.
- device: After correctly installing Torch and Nvidia CUDA drivers, using cuda will significantly improve running speed.
- invert_mask: Whether to reverse the mask.
- grow: Positive values expand outward, while negative values contract inward.
- blur: Blur the edge.
ImageChannelSplit
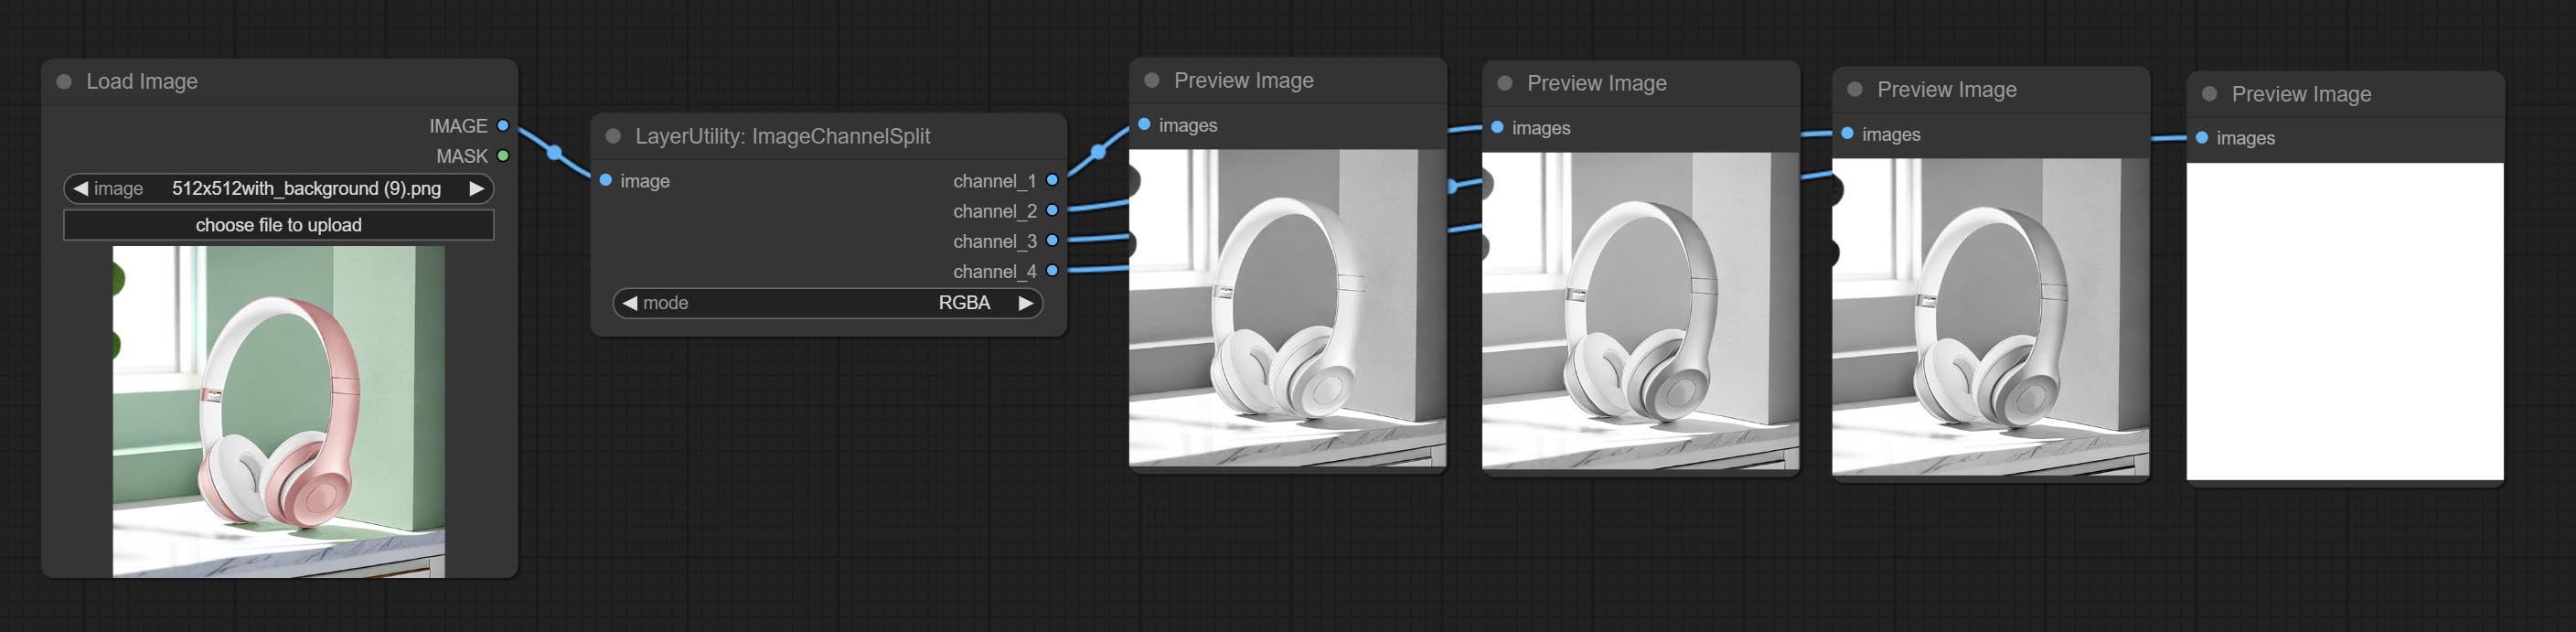
Split the image channel into individual images.
Node options: 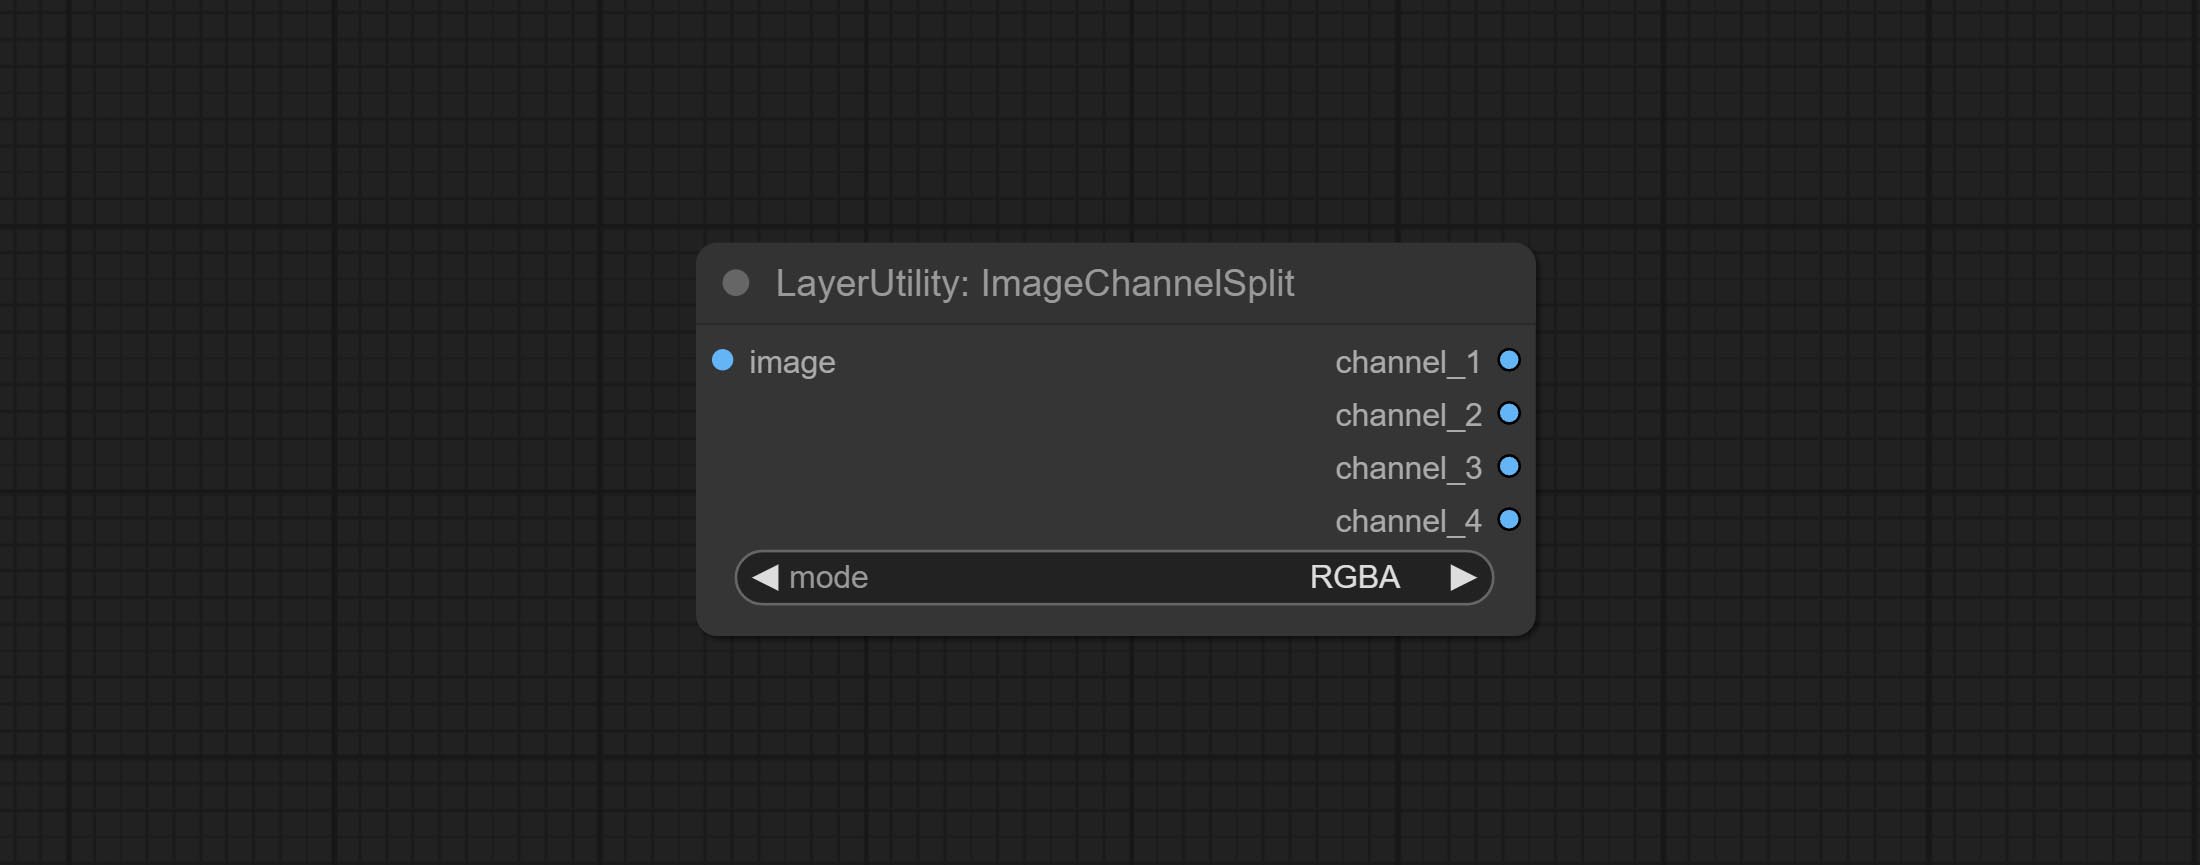
- mode: Channel mode, include RGBA, YCbCr, LAB adn HSV.
ImageChannelMerge
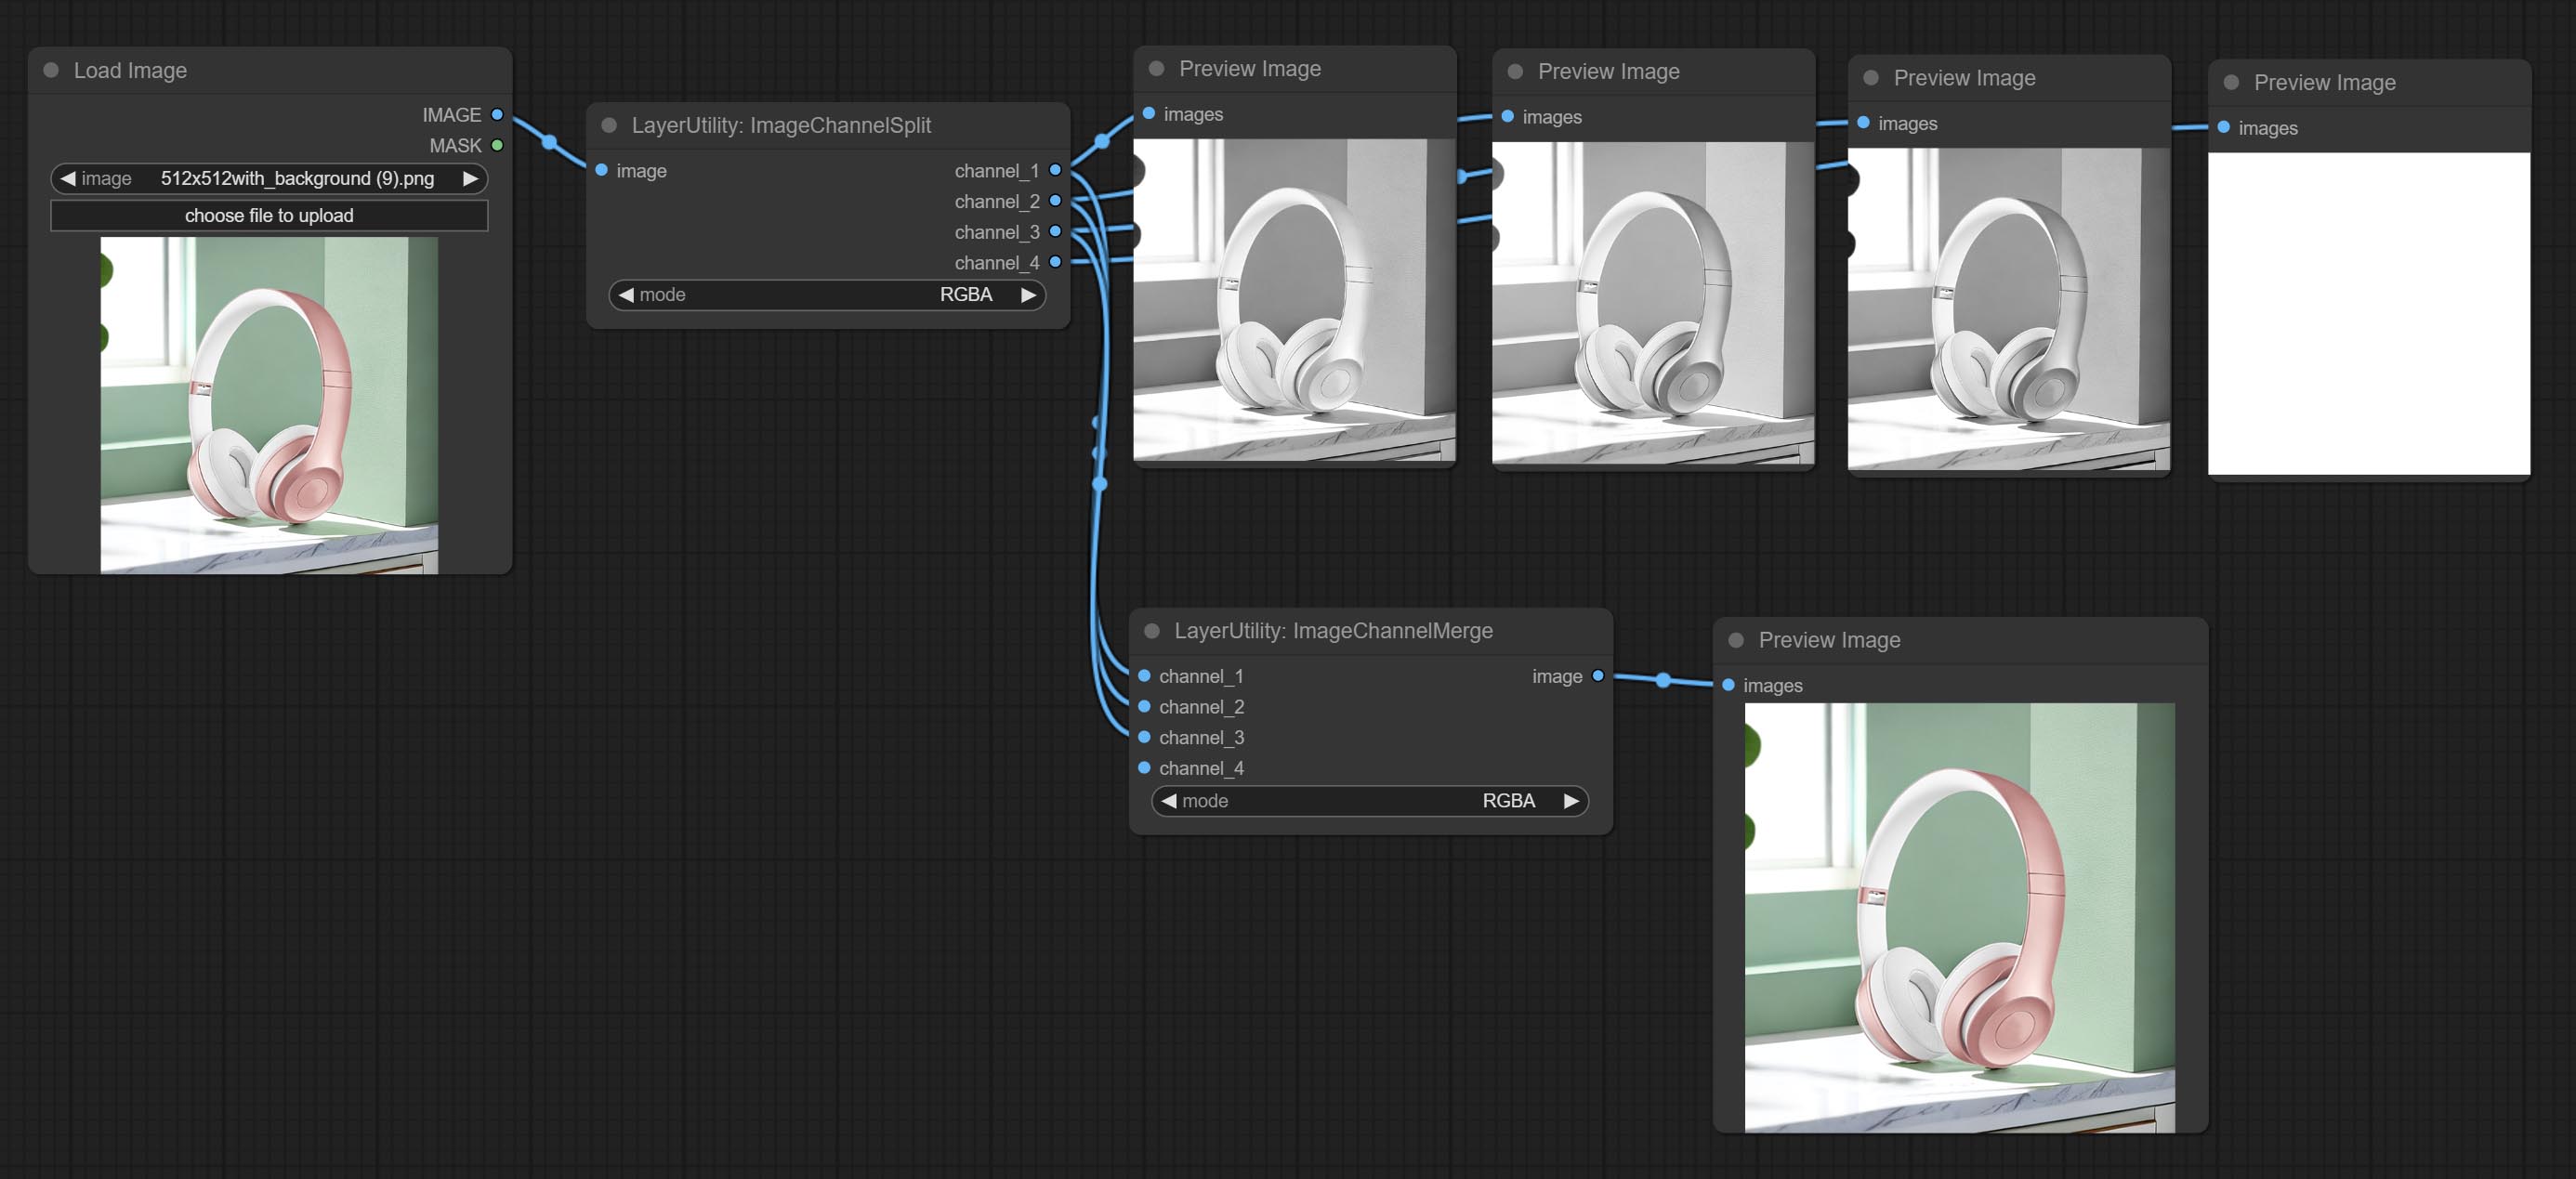
Merge each channel image into one image.
Node options: 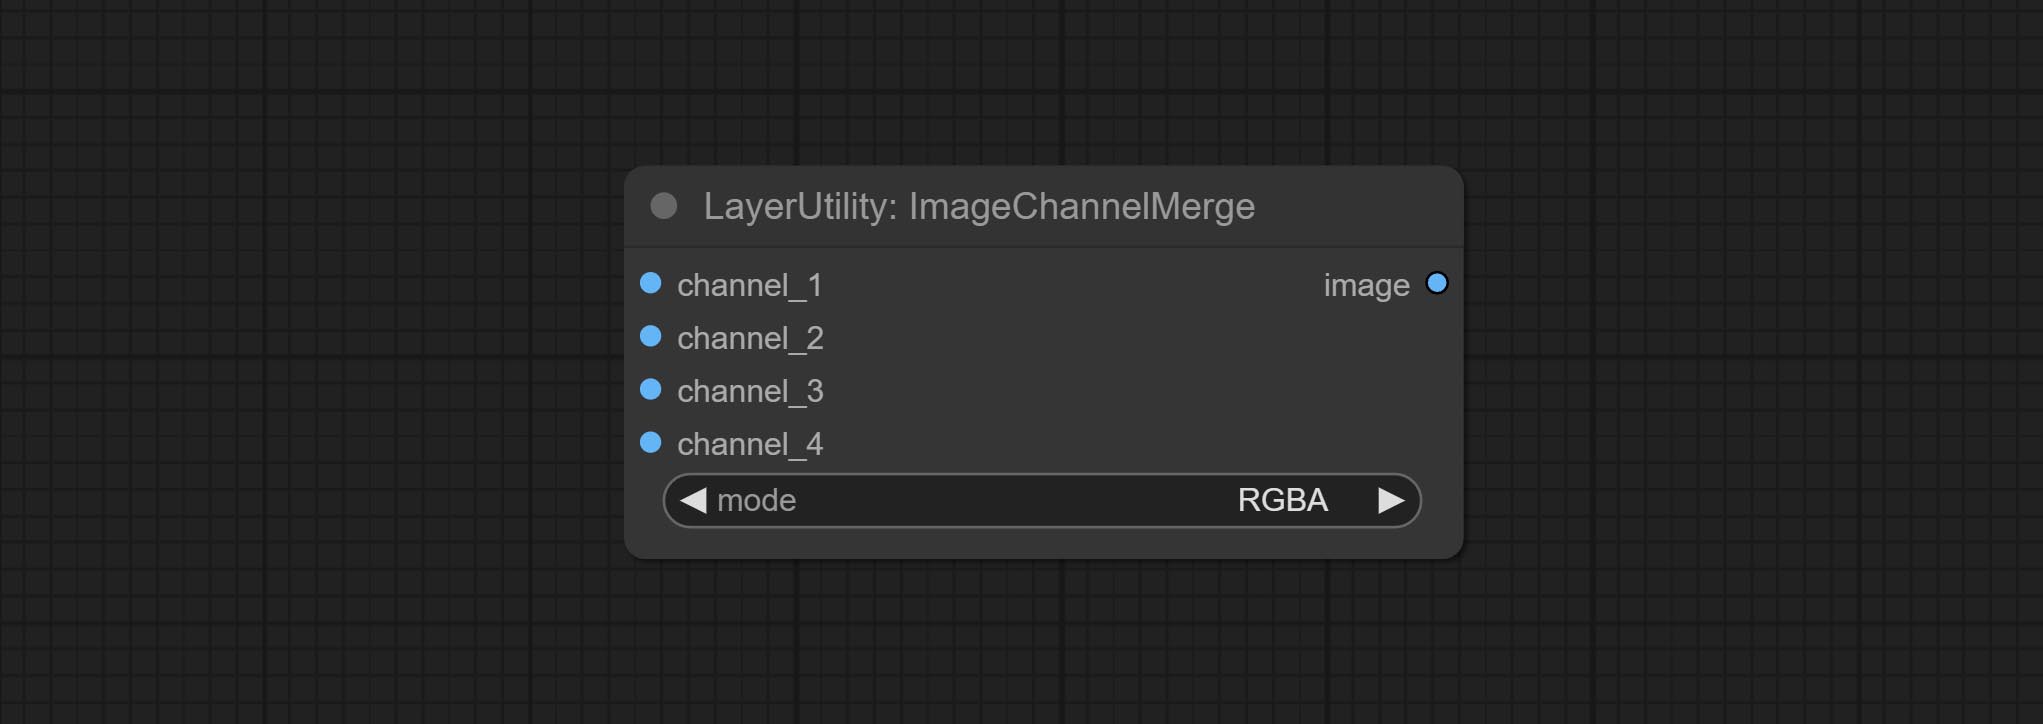
- mode: Channel mode, include RGBA, YCbCr, LAB adn HSV.
ImageRemoveAlpha
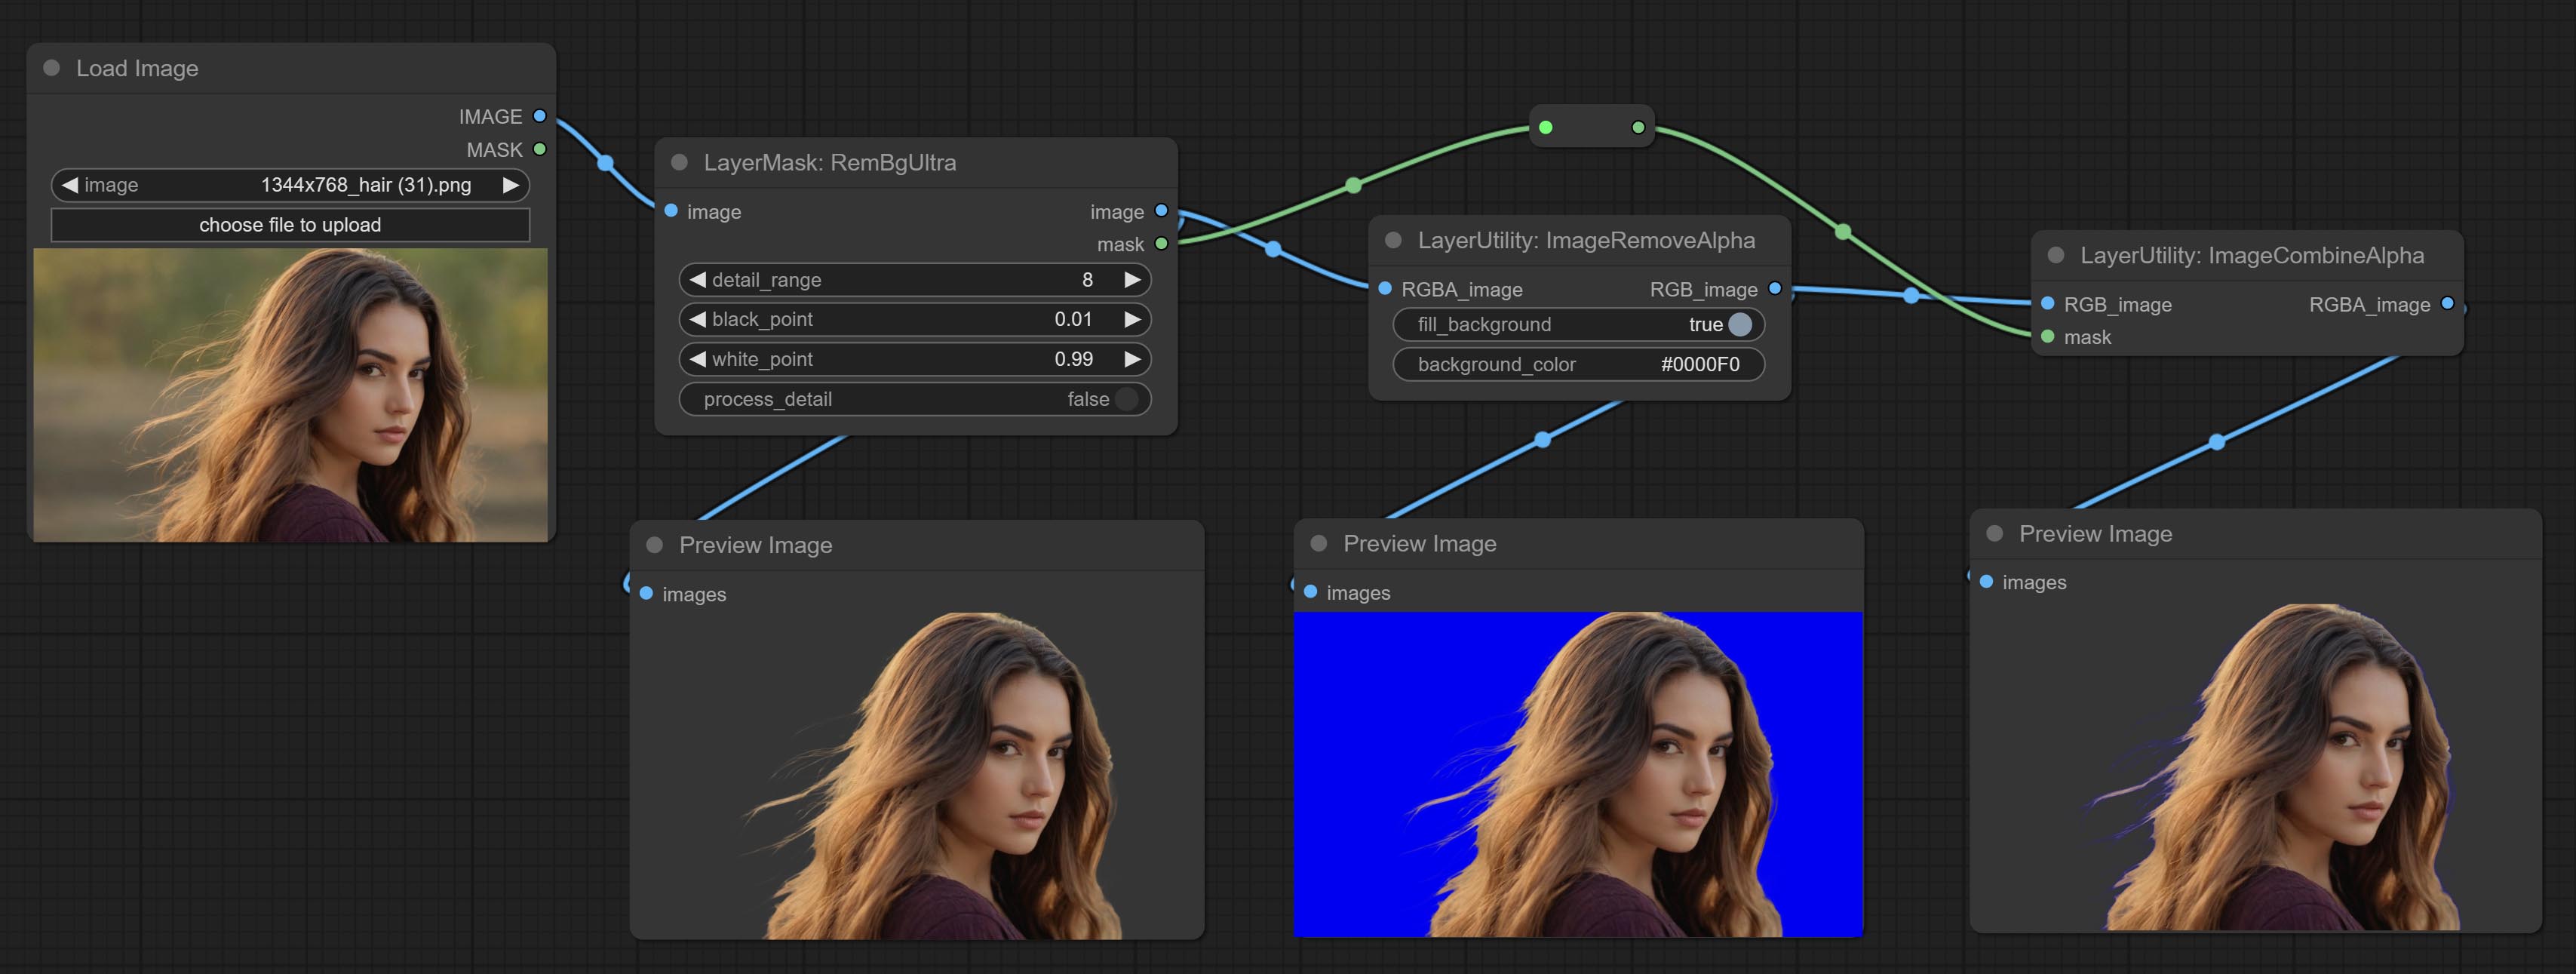
Remove the alpha channel from the image and convert it to RGB mode. you can choose to fill the background and set the background color.
Node options: 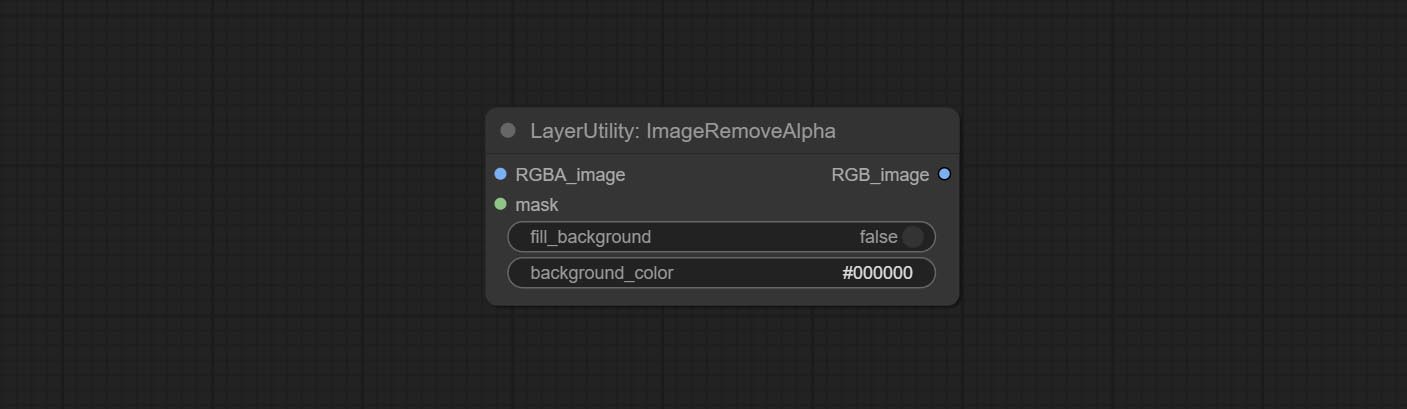
- RGBA_image: The input image supports RGBA or RGB modes.
- mask: Optional input mask. If there is an input mask, it will be used first, ignoring the alpha that comes with RGBA_image.
- fill_background: Whether to fill the background.
- background_color 4 : Color of background.
ImageCombineAlpha
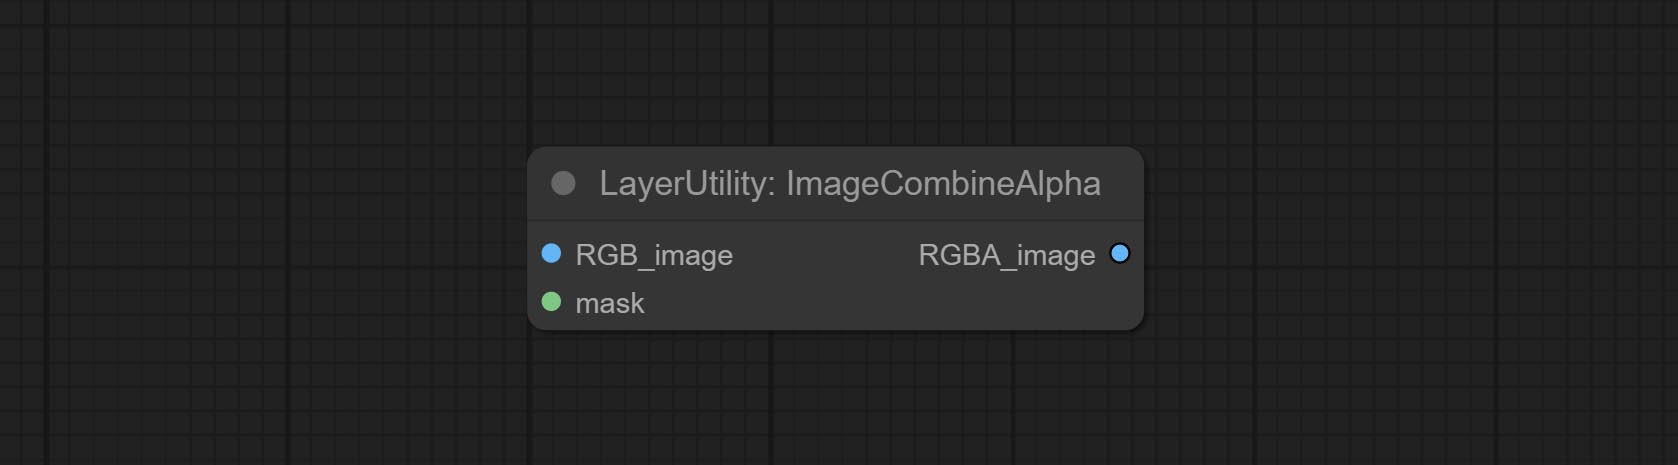
Merge the image and mask into an RGBA mode image containing an alpha channel.
ImageAutoCrop
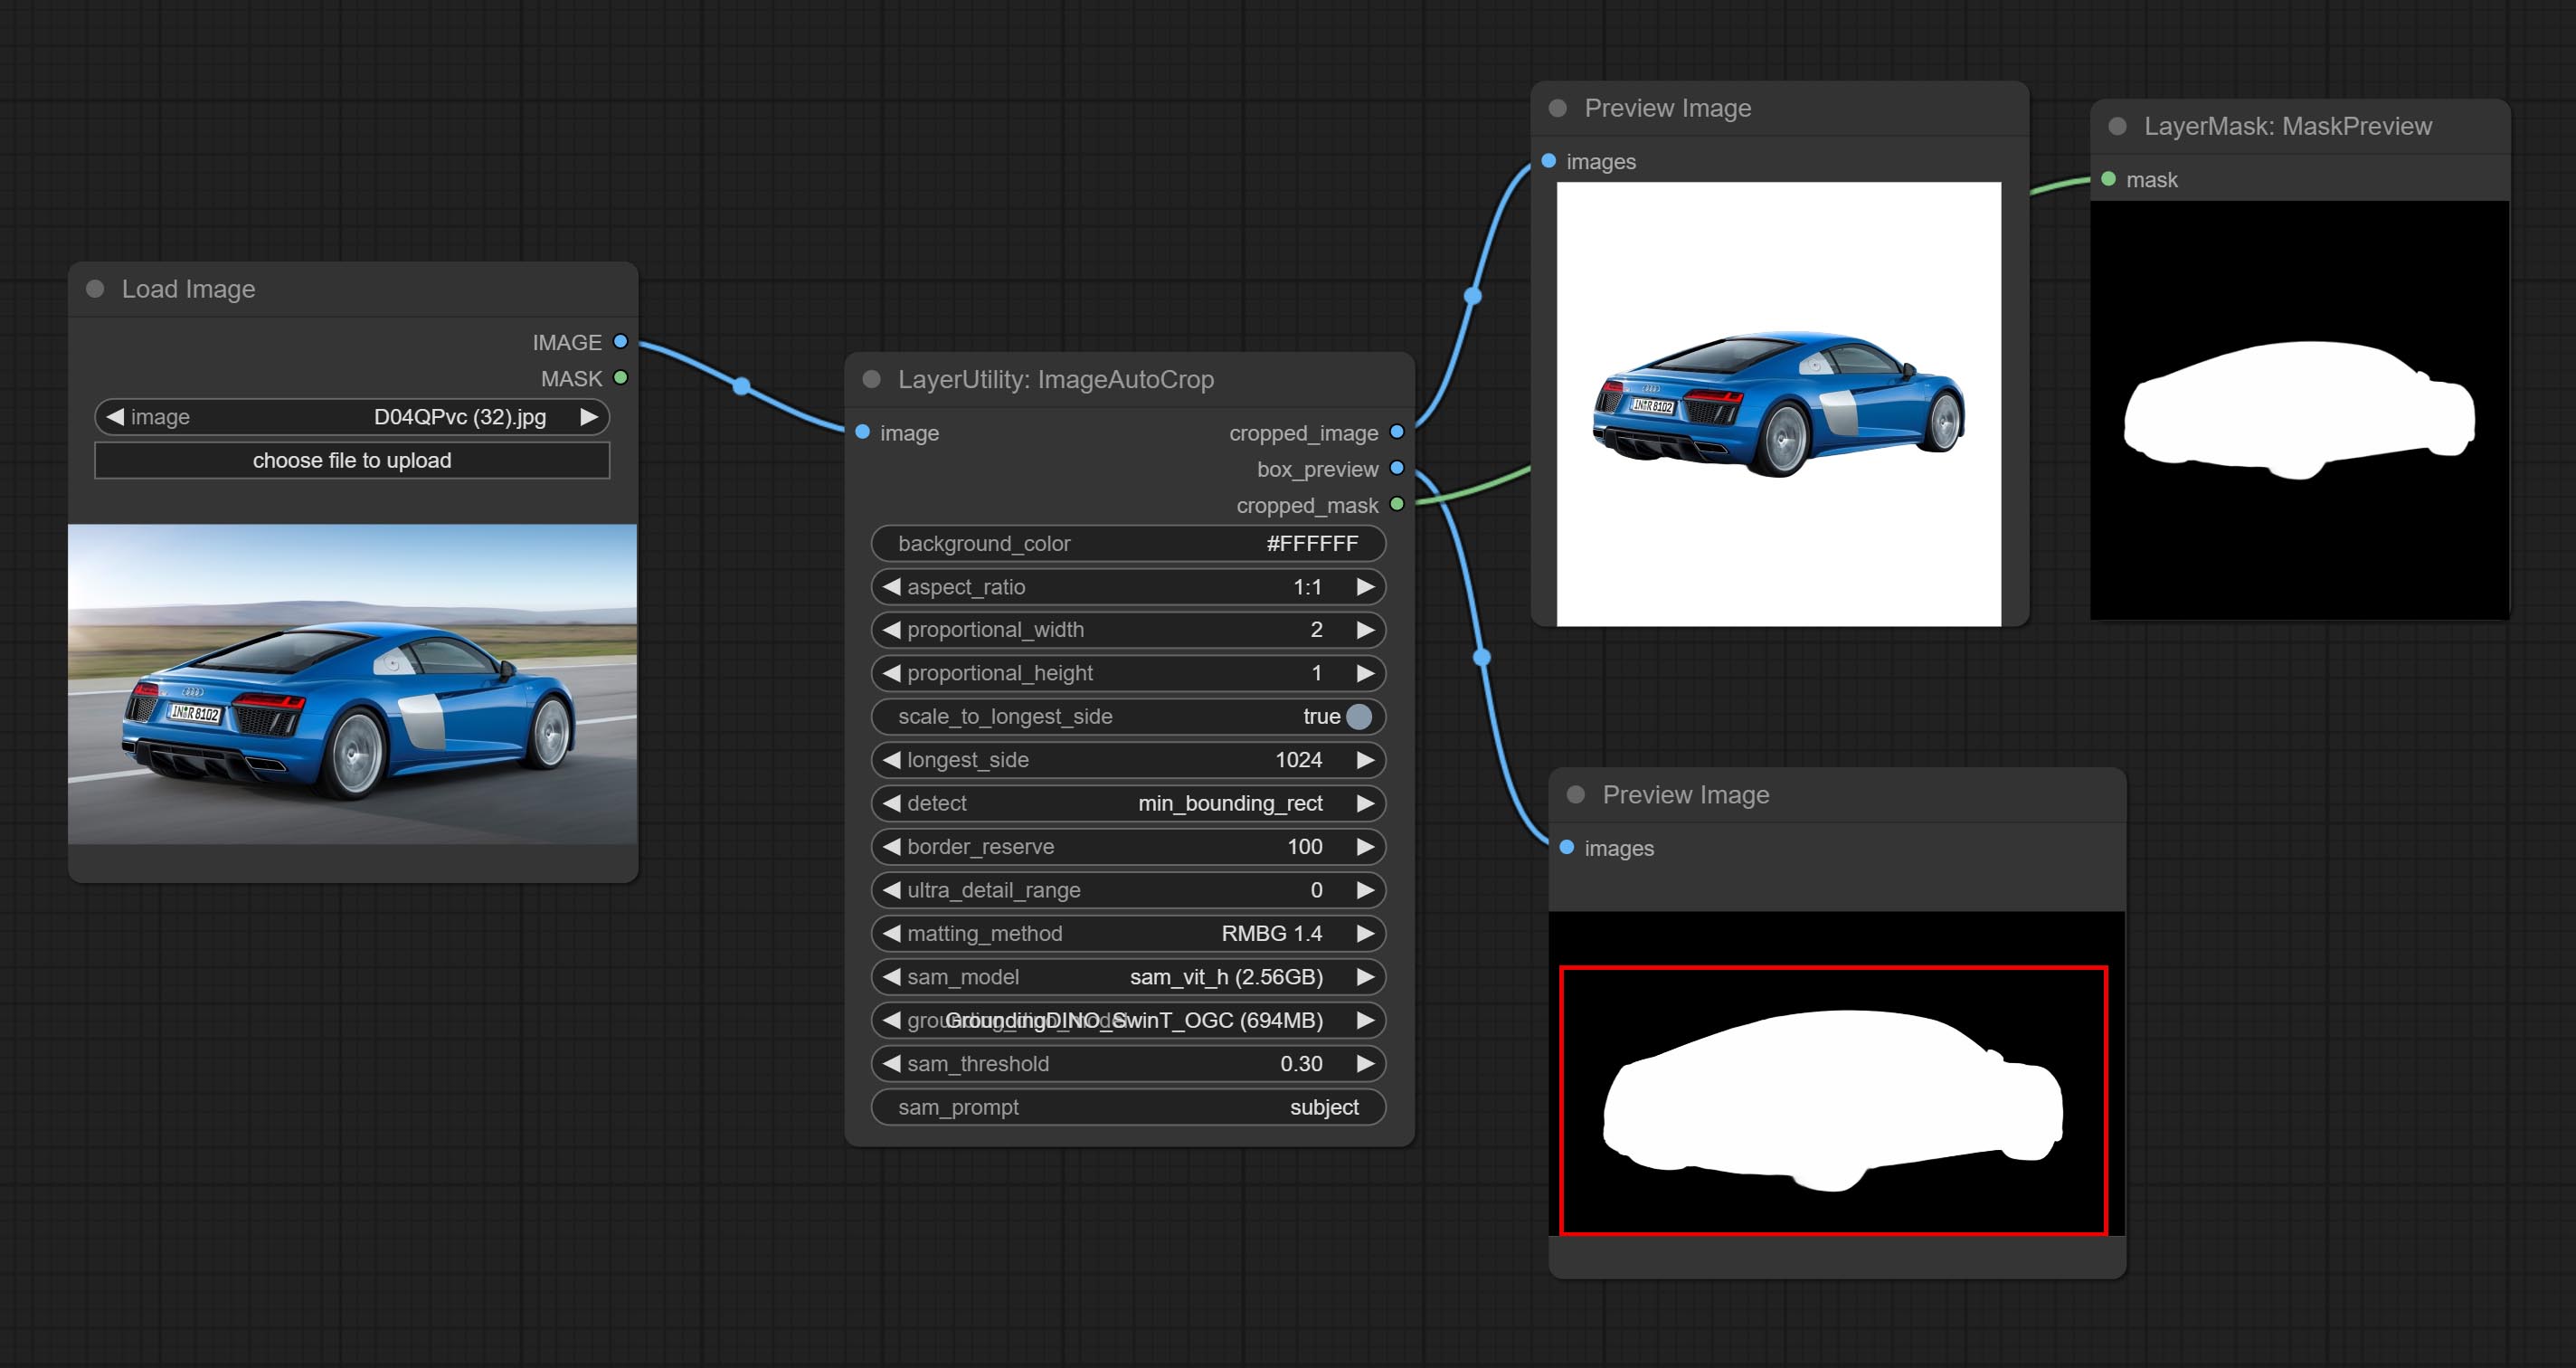
Automatically cutout and crop the image according to the mask. it can specify the background color, aspect ratio, and size for output image. this node is designed to generate the image materials for training models.
*Please refer to the model installation methods for SegmentAnythingUltra and RemBgUltra.
Node options: 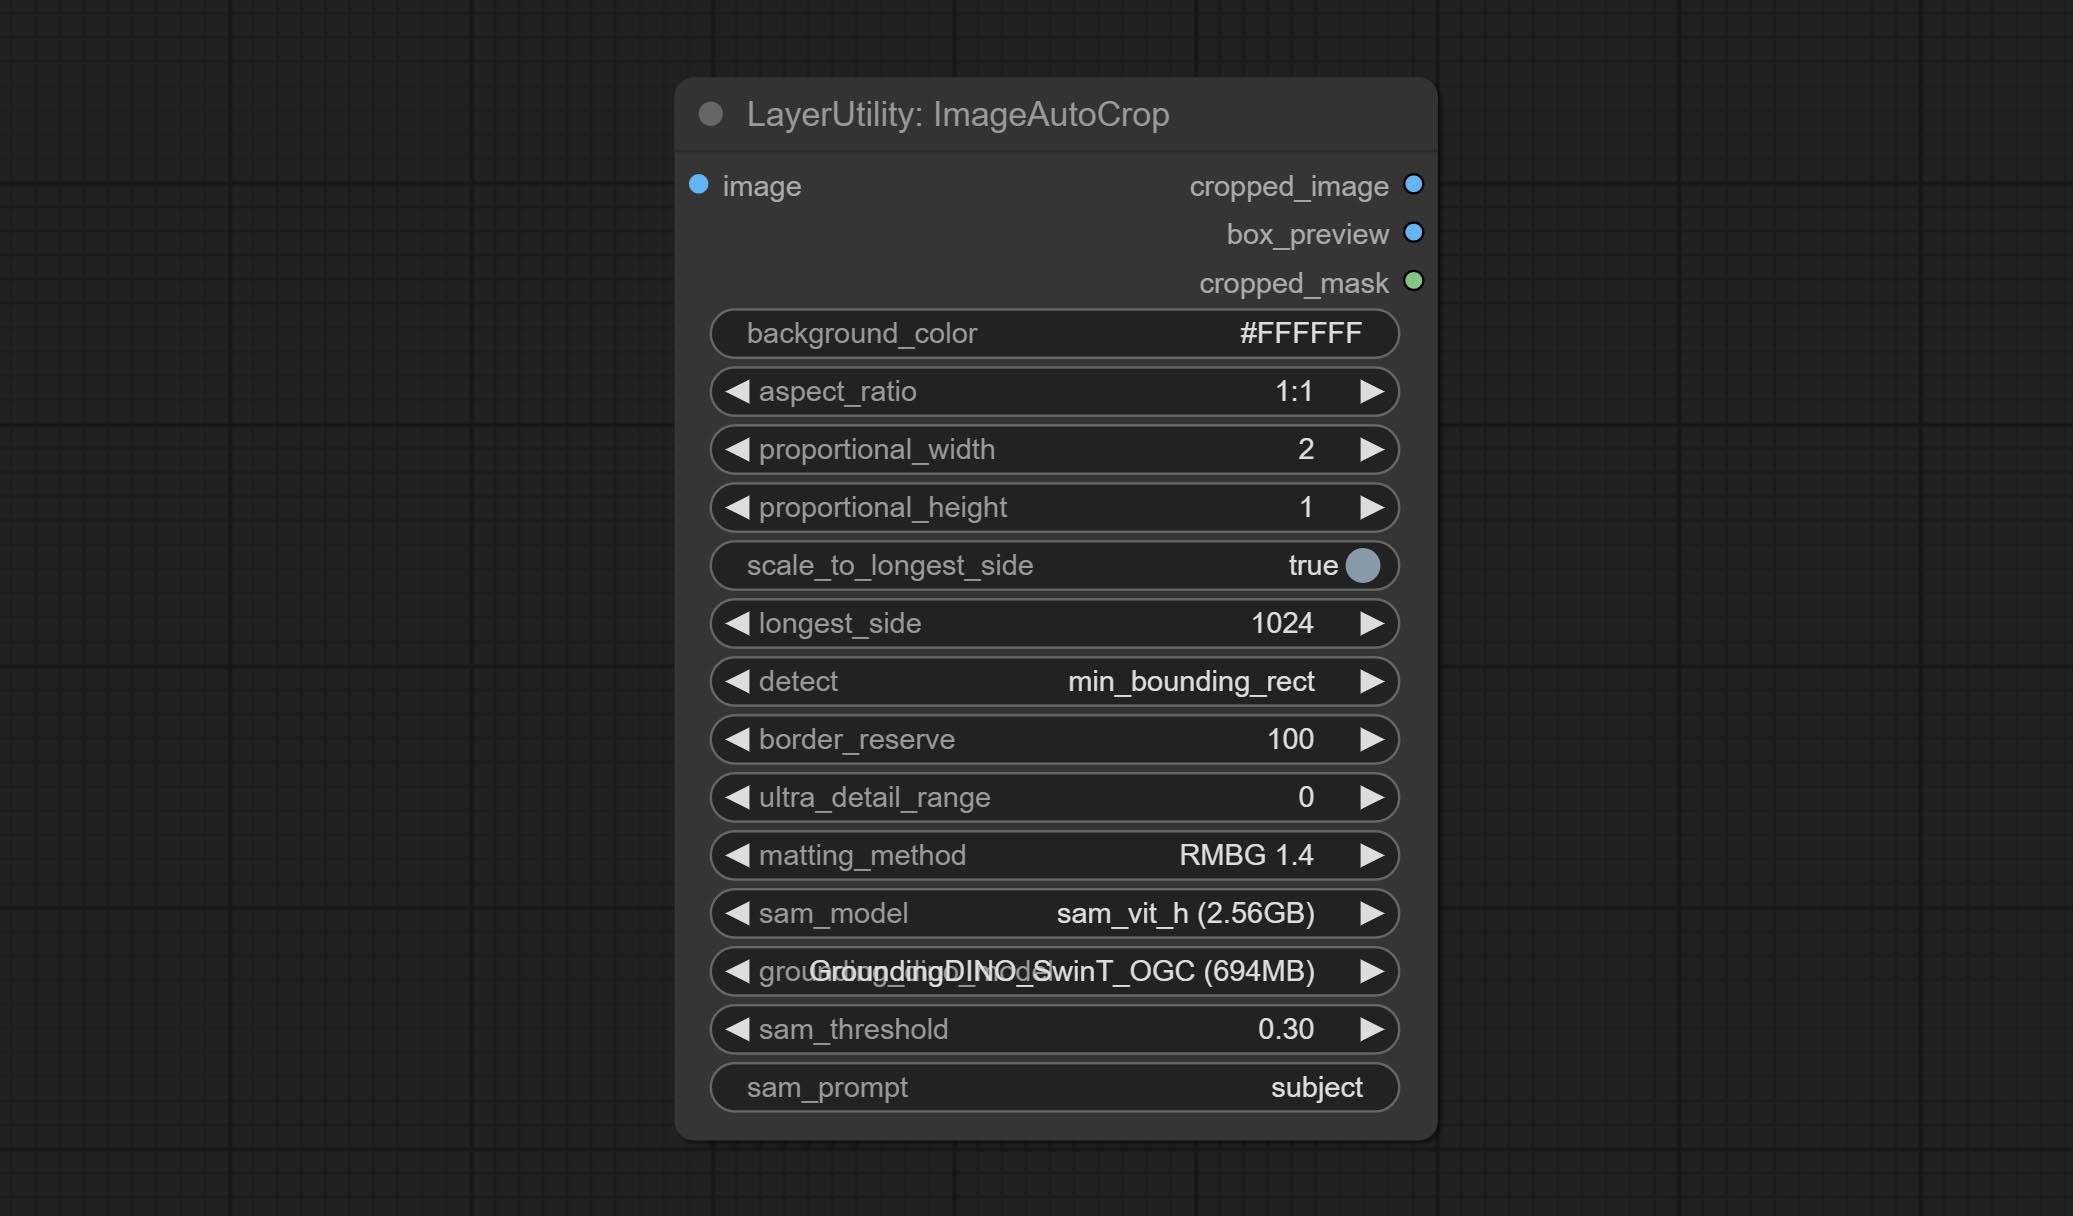
- background_color 4 : The background color.
- aspect_ratio: Here are several common frame ratios provided. alternatively, you can choose "original" to keep original ratio or customize the ratio using "custom".
- proportional_width: Proportional width. if the aspect ratio option is not "custom", this setting will be ignored.
- proportional_height: Proportional height. if the aspect ratio option is not "custom", this setting will be ignored.
- scale_by_longest_side: Allow scaling by long edge size.
- longest_side: When the scale_by_longest_side is set to True, this will be used this value to the long edge of the image. when the original_size have input, this setting will be ignored.
- detect: Detection method, min_bounding_rect is the minimum bounding rectangle, max_inscribed_rect is the maximum inscribed rectangle.
- border_reserve: Keep the border. expand the cutting range beyond the detected mask body area.
- ultra_detail_range: Mask edge ultra fine processing range, 0 is not processed, which can save generation time.
- matting_method: The method of generate masks. There are two methods available: Segment Anything and RMBG 1.4. RMBG 1.4 runs faster.
- sam_model: Select the SAM model used by Segment Anything here.
- grounding_dino_model: Select the Grounding_Dino model used by Segment Anything here.
- sam_threshold: The threshold for Segment Anything.
- sam_prompt: The prompt for Segment Anything.
Output: cropped_image: Crop and replace the background image. box_preview: Crop position preview. cropped_mask: Cropped mask.
ImageAutoCropV2
The V2 upgrad version of ImageAutoCrop , it has made the following changes based on the previous version: 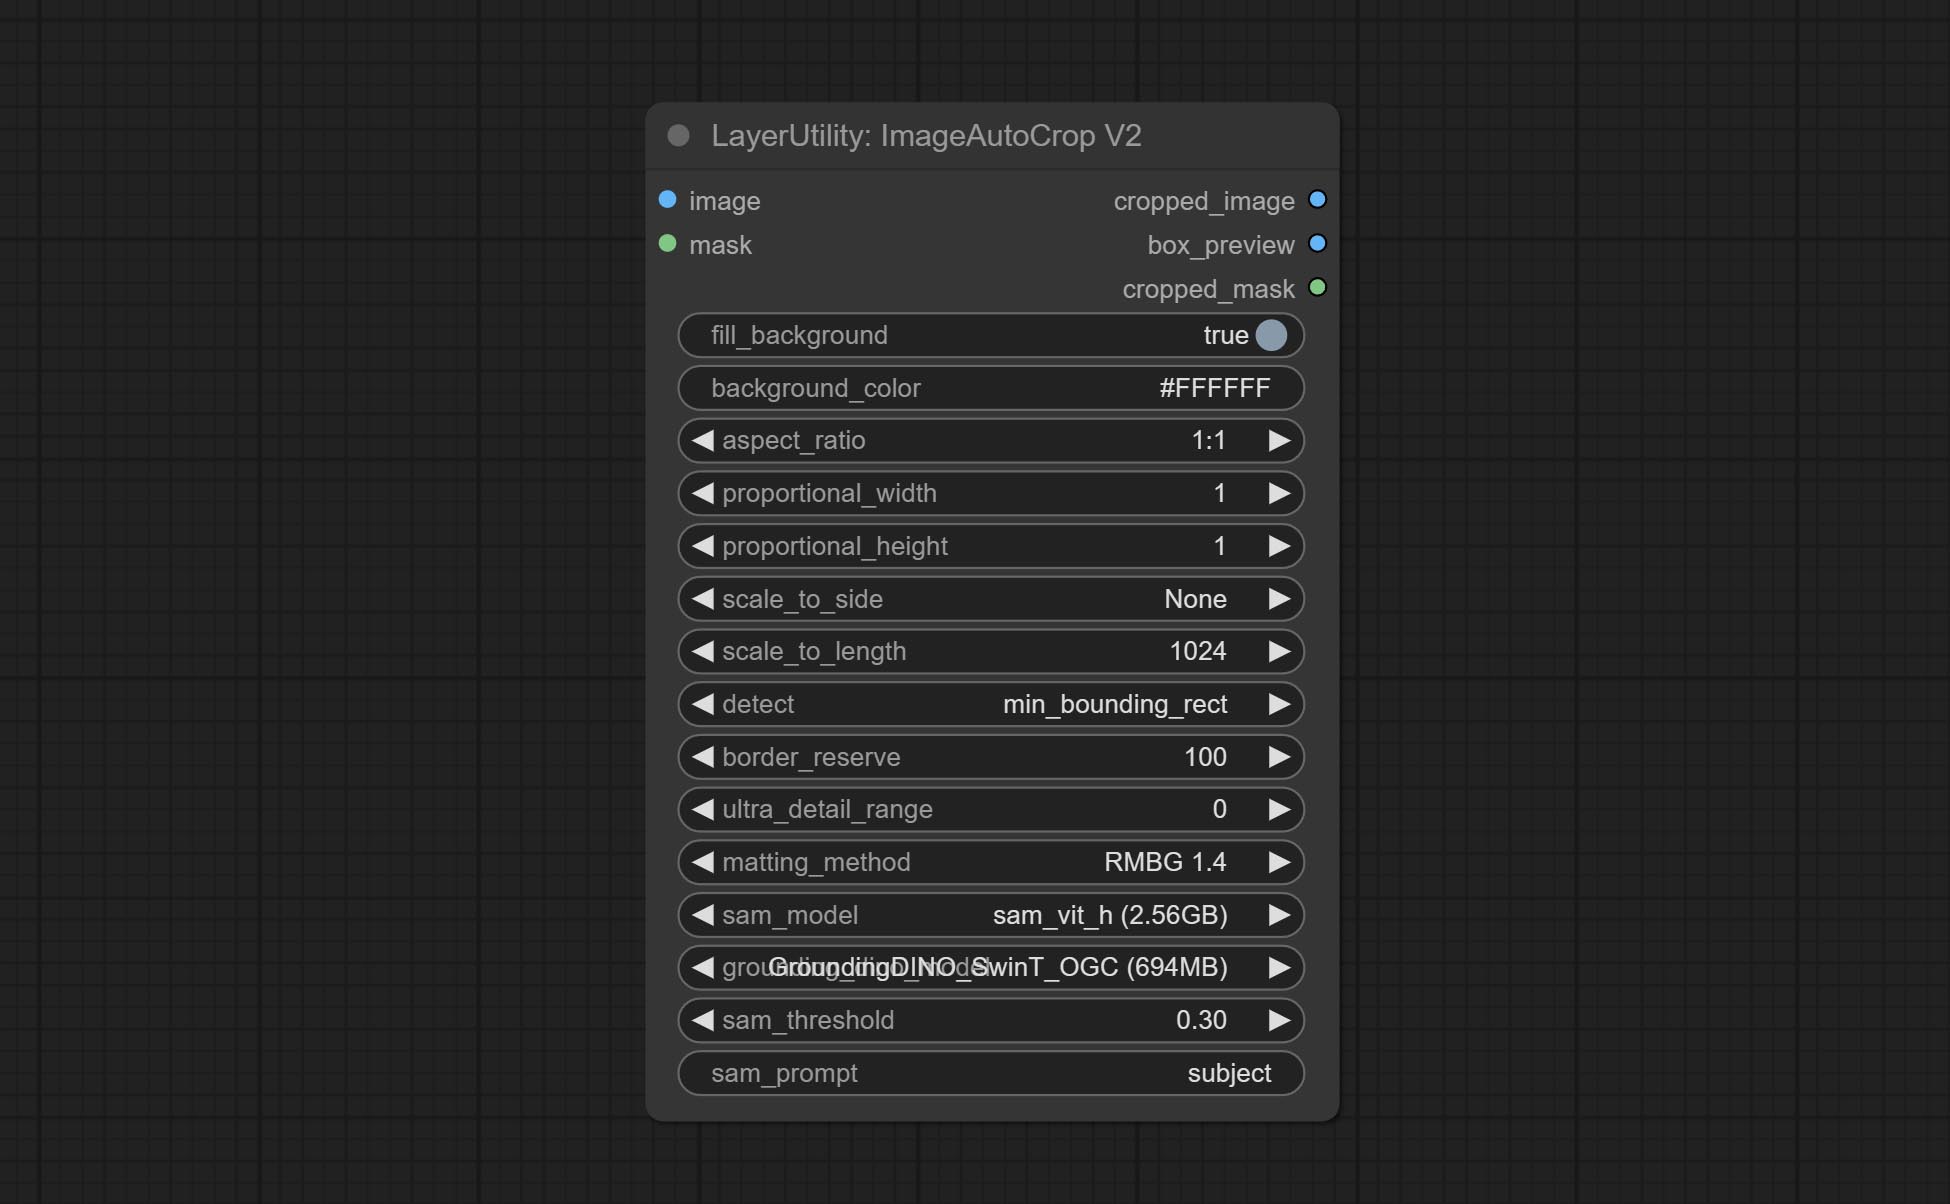
- Add optional input for mask. when there is a mask input, use that input directly to skip the built-in mask generation.
- Add
fill_background . When set to False, the background will not be processed and any parts beyond the frame will not be included in the output range. -
aspect_ratio adds the original option. - scale_by: Allow scaling by specified dimensions for longest, shortest, width, or height.
- scale_by_length: The value here is used as
scale_by to specify the length of the edge.
ImageAutoCropV3
Automatically crop the image to the specified size. You can input a mask to preserve the specified area of the mask. This node is designed to generate image materials for training the model.
Node Options: 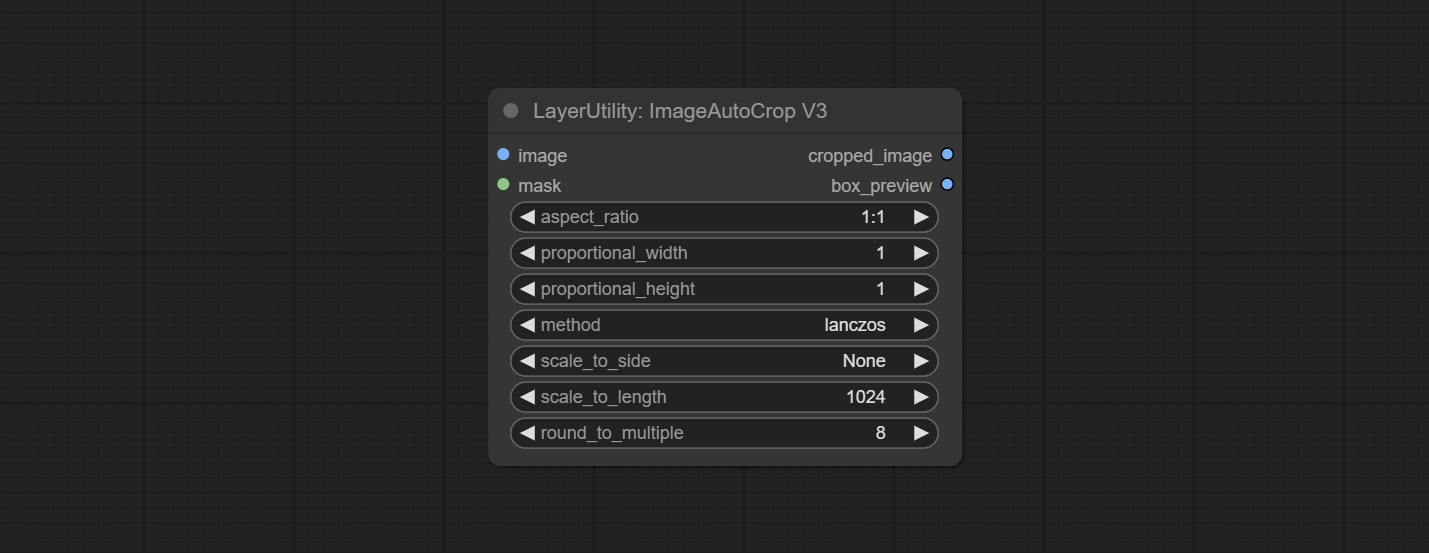
- image: The input image.
- mask: Optional input mask. The masking part will be preserved within the range of the cutting aspect ratio.
- aspect_ratio: The aspect ratio of the output. Here are common frame ratios provided, with "custom" being the custom ratio and "original" being the original frame ratio.
- proportional_width: Proportionally wide. If the aspect_ratio option is not 'custom', this setting will be ignored.
- proportional_height: High proportion. If the aspect_ratio option is not 'custom', this setting will be ignored.
- method: Scaling sampling methods include Lanczos, Bicubic, Hamming, Bilinear, Box, and Nearest.
- scale_to_side: Allow scaling to be specified by long side, short side, width, height, or total pixels.
- scale_to_length: The value here is used as the scale_to-side to specify the length of the edge or the total number of pixels (kilo pixels).
- round_to_multiple: Multiply to the nearest whole. For example, if set to 8, the width and height will be forcibly set to multiples of 8.
Outputs: cropped_image: The cropped image. box_preview: Preview of cutting position.
HLFrequencyDetailRestore
Using low frequency filtering and retaining high frequency to recover image details. Compared to kijai's DetailTransfer, this node is better integrated with the environment while retaining details. 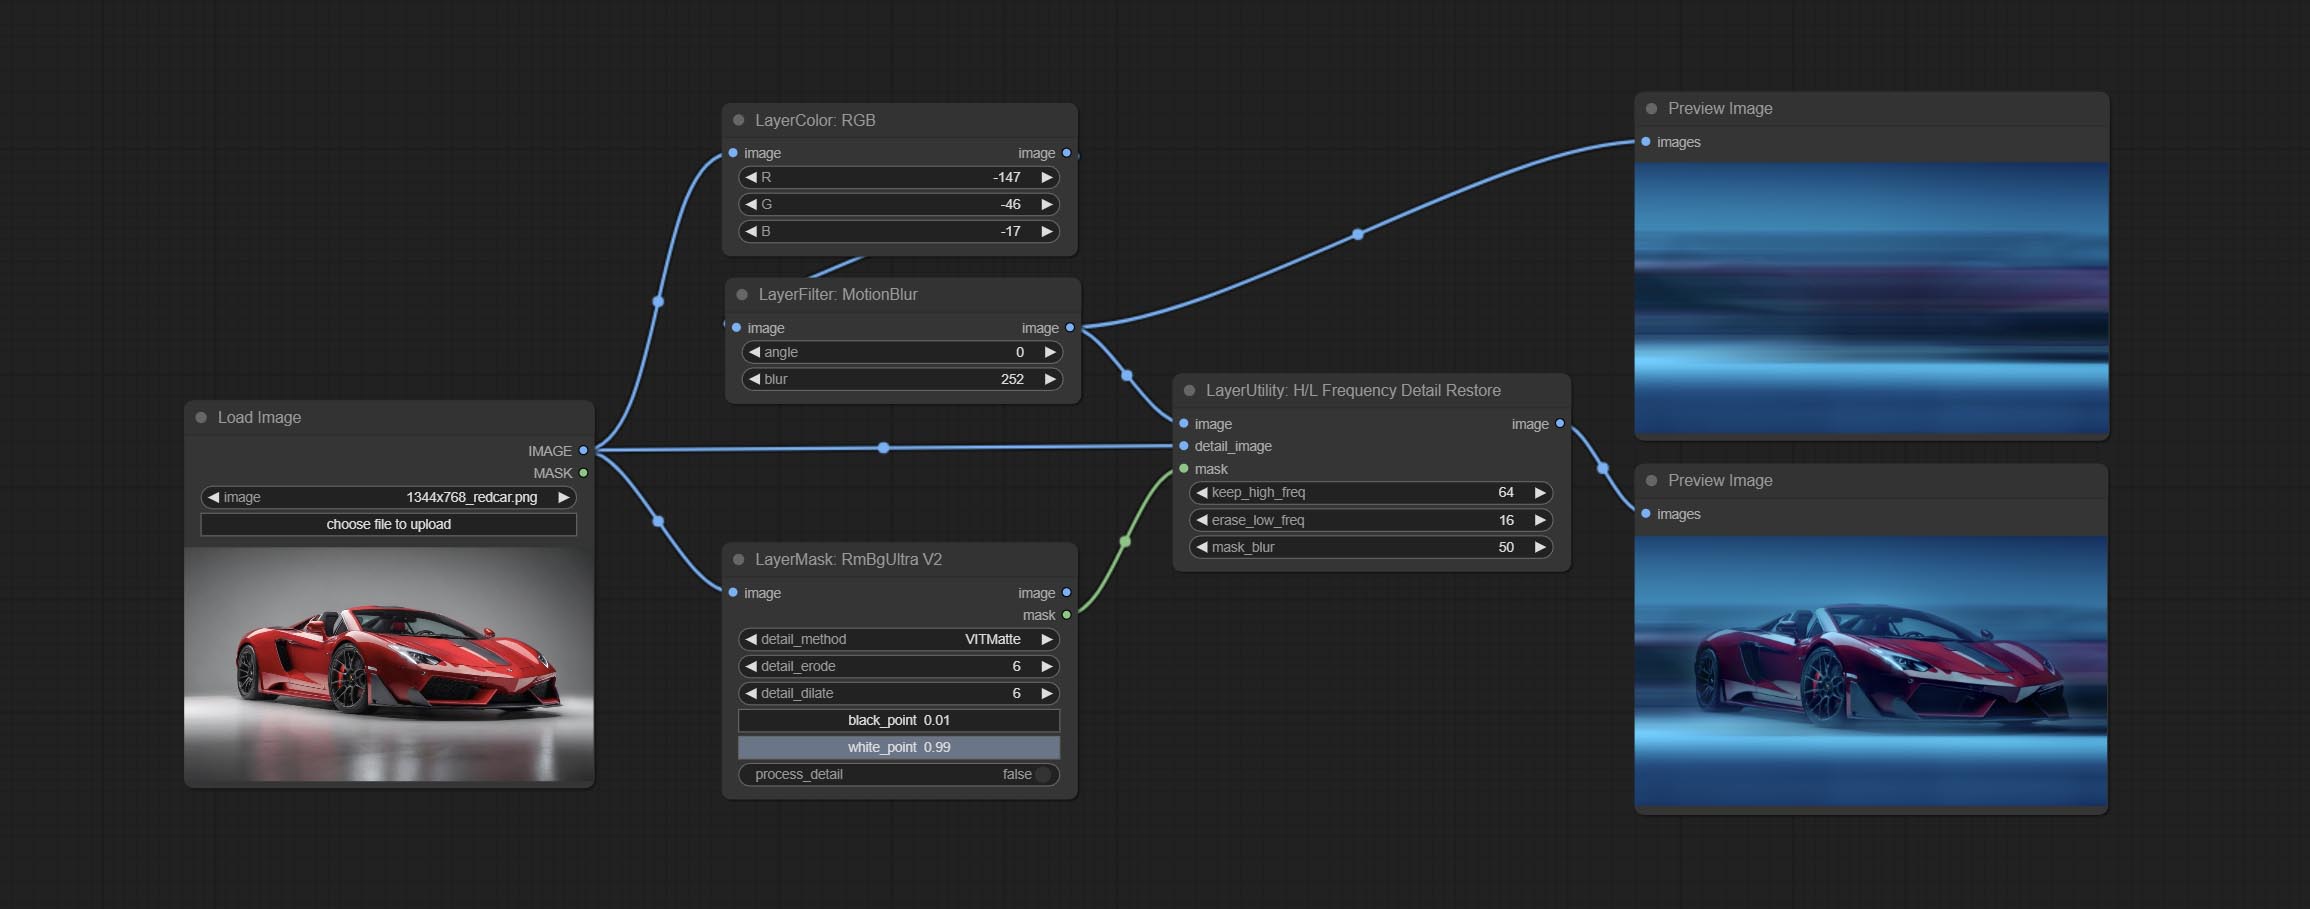
Node Options:
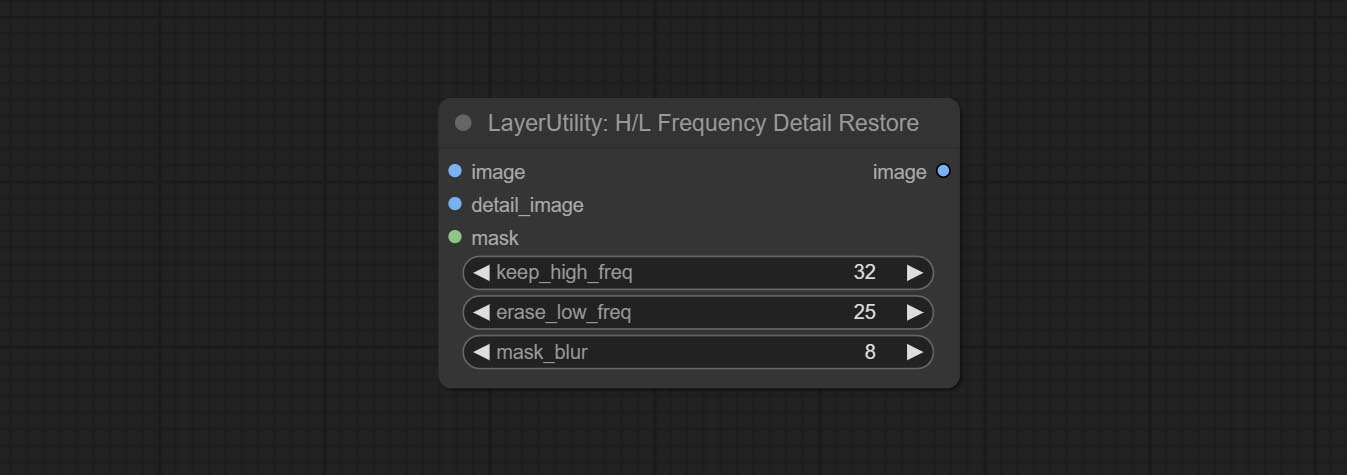
- image: Background image input.
- detail_image: Detail image input.
- mask: Optional input, if there is a mask input, only the details of the mask part are restored.
- keep_high_freq: Reserved range of high frequency parts. The larger the value, the richer the retained high-frequency details.
- erase_low_freq: The range of low frequency parts of the erasure. The larger the value, the more the low frequency range of the erasure.
- mask_blur: Mask edge blur. Valid only if there is masked input.
GetImageSize
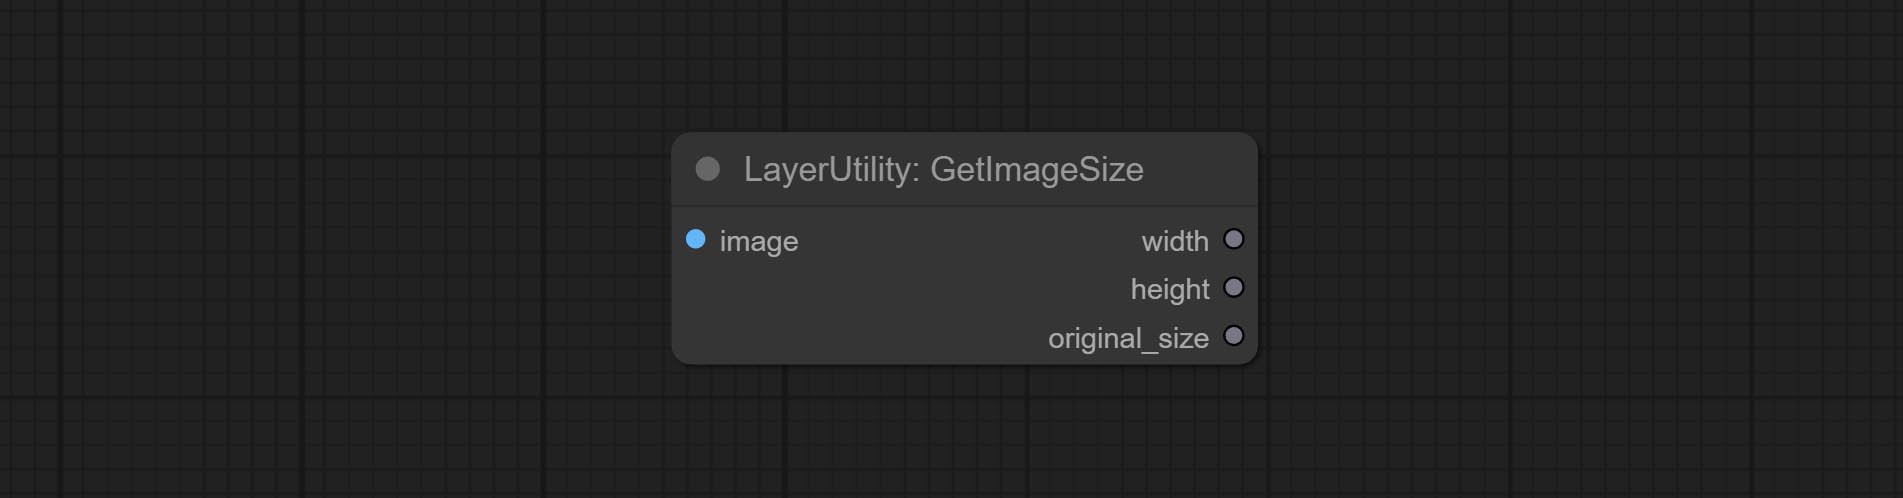
Obtain the width and height of the image.
Saída:
- width: The width of image.
- height: The height of image.
- original_size: The original size data of the image is used for subsequent node recovery.
ImageHub
Switch output from multiple input images and masks, supporting 9 sets of inputs. All input items are optional. if there is only image or mask in a set of input, the missing item will be output as None. 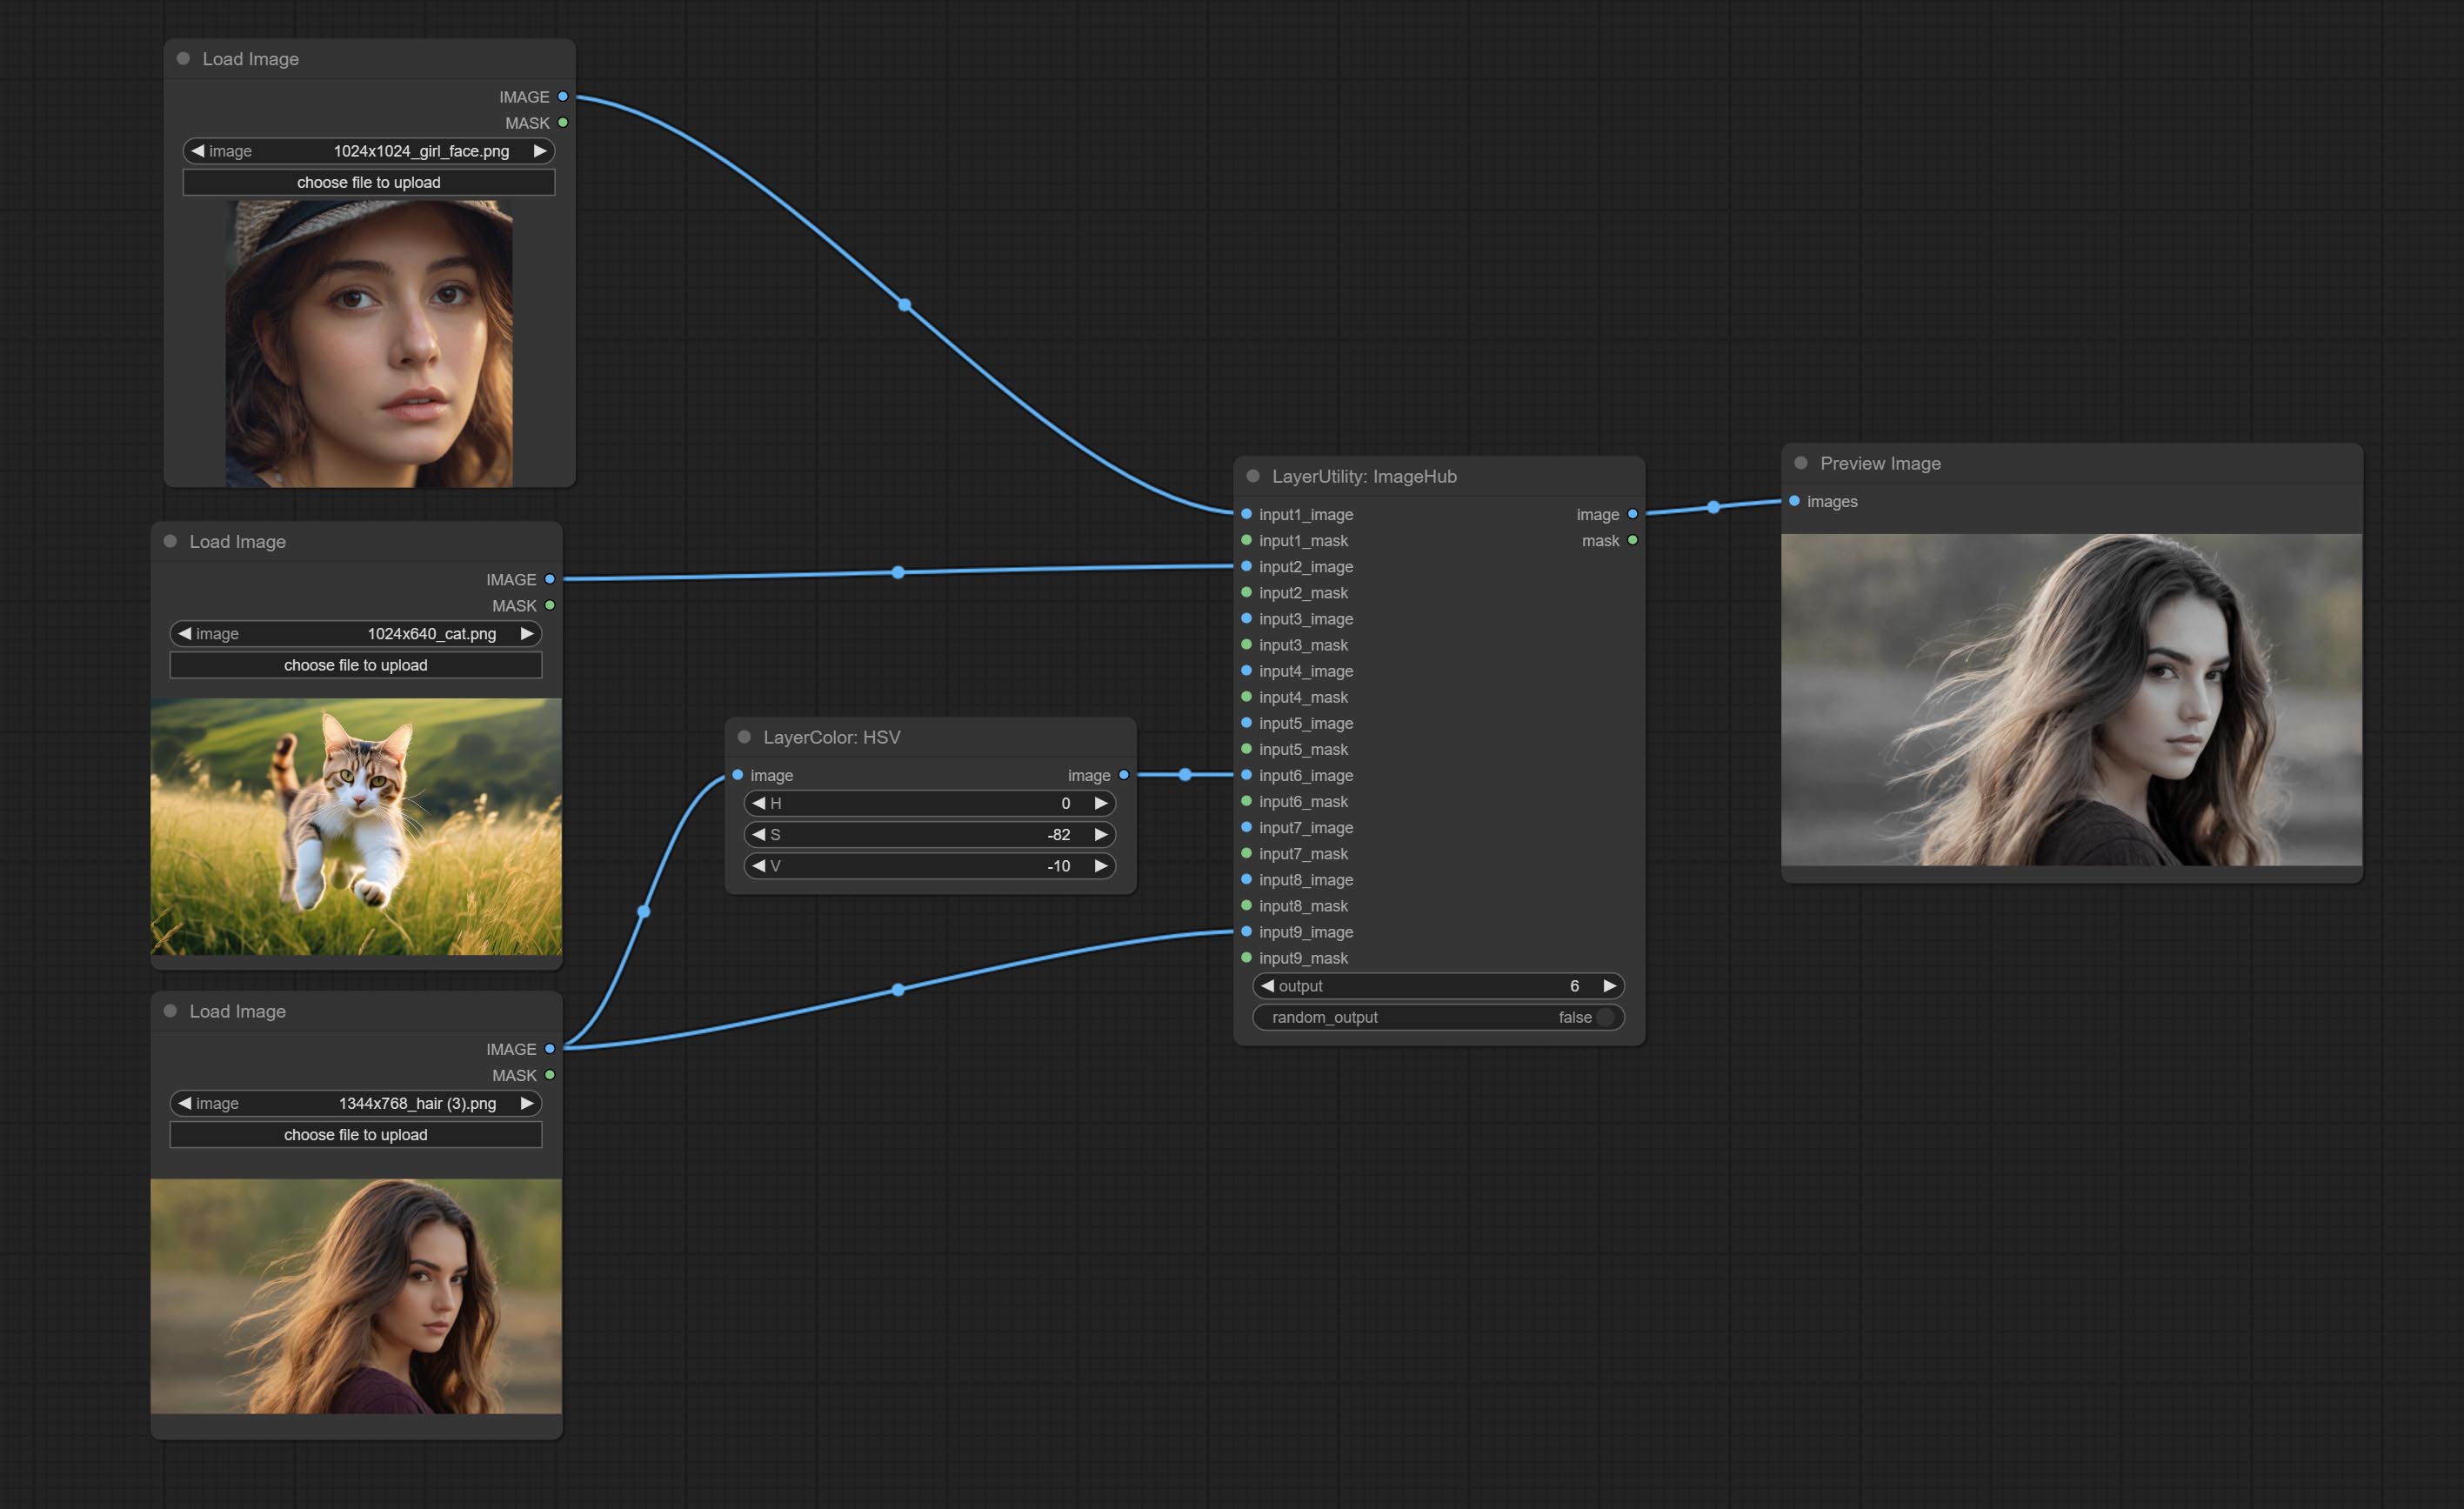
Node options:
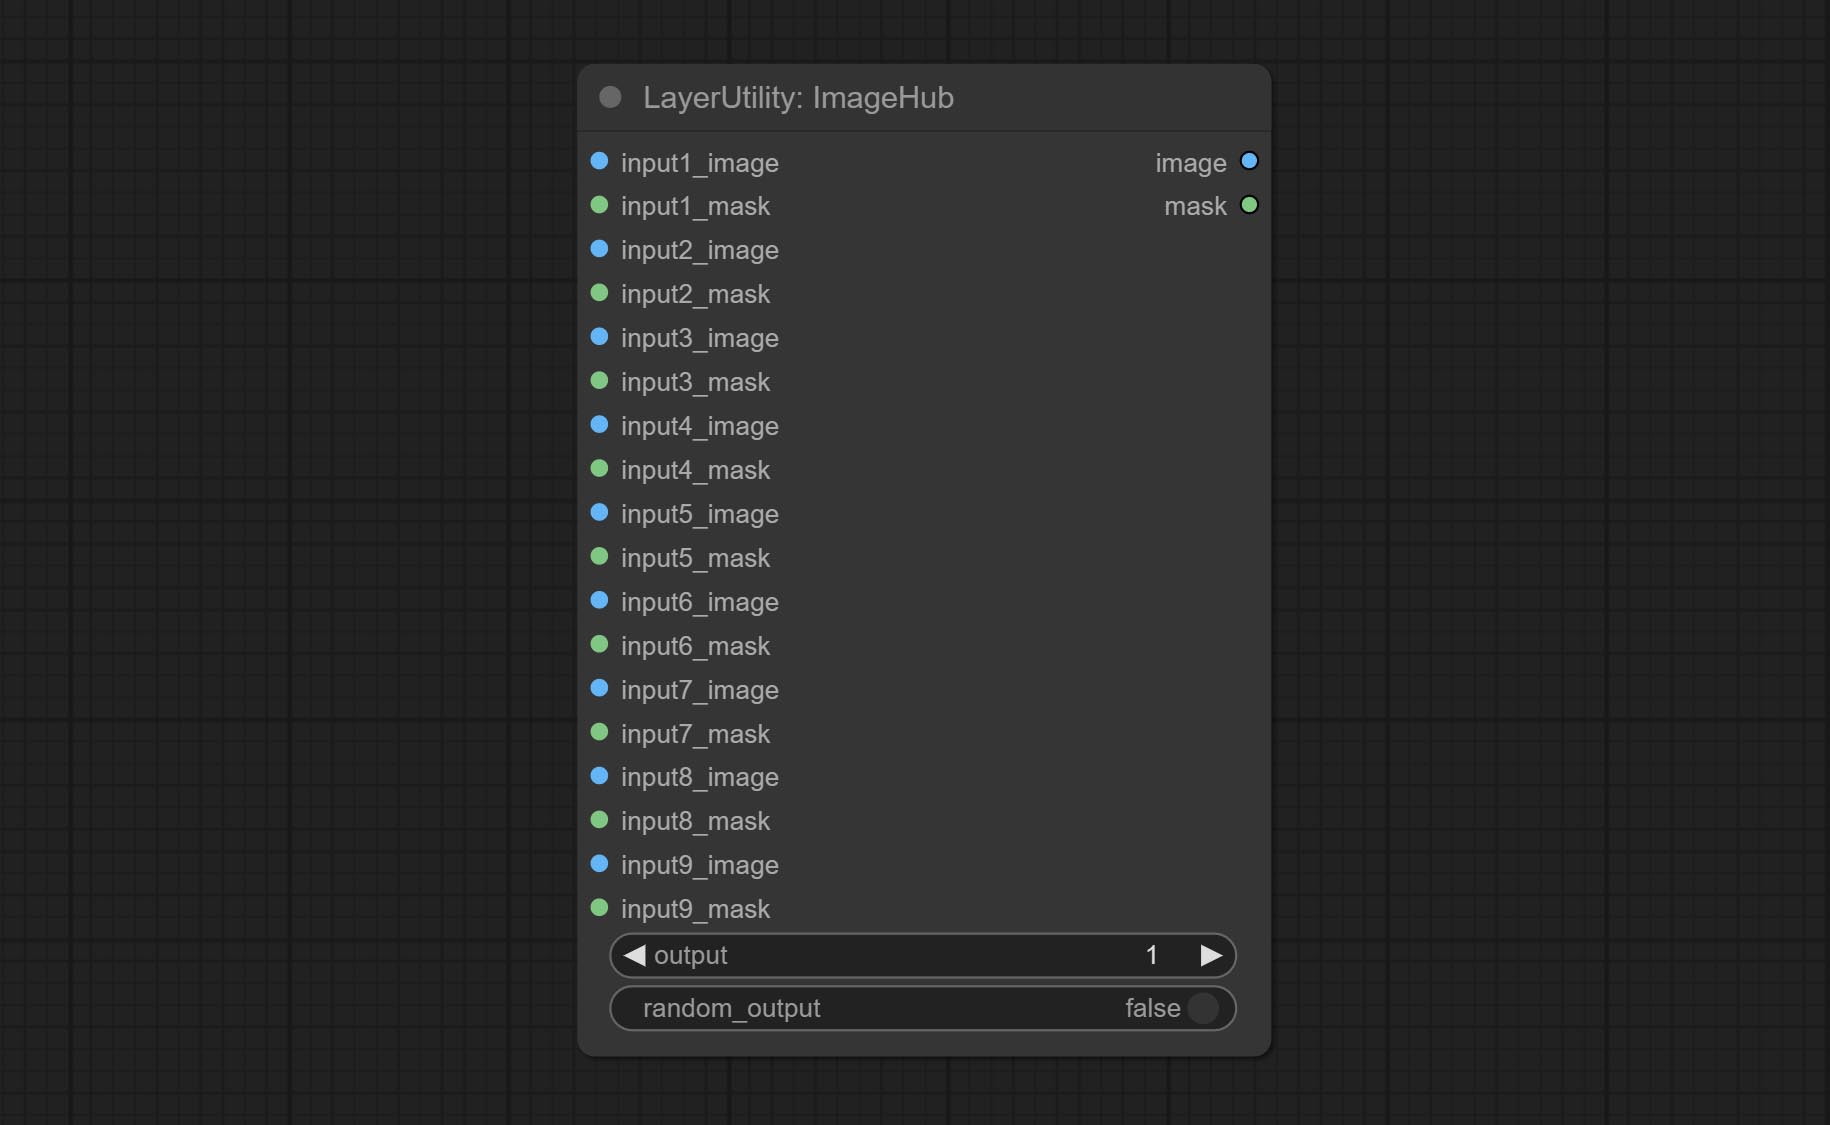
- output: Switch output. the value is the corresponding input group. when the
random-output option is True, this setting will be ignored. - random_output: When this is true, the
output setting will be ignored and a random set will be output among all valid inputs.
BatchSelector
Retrieve specified images or masks from batch images or masks. 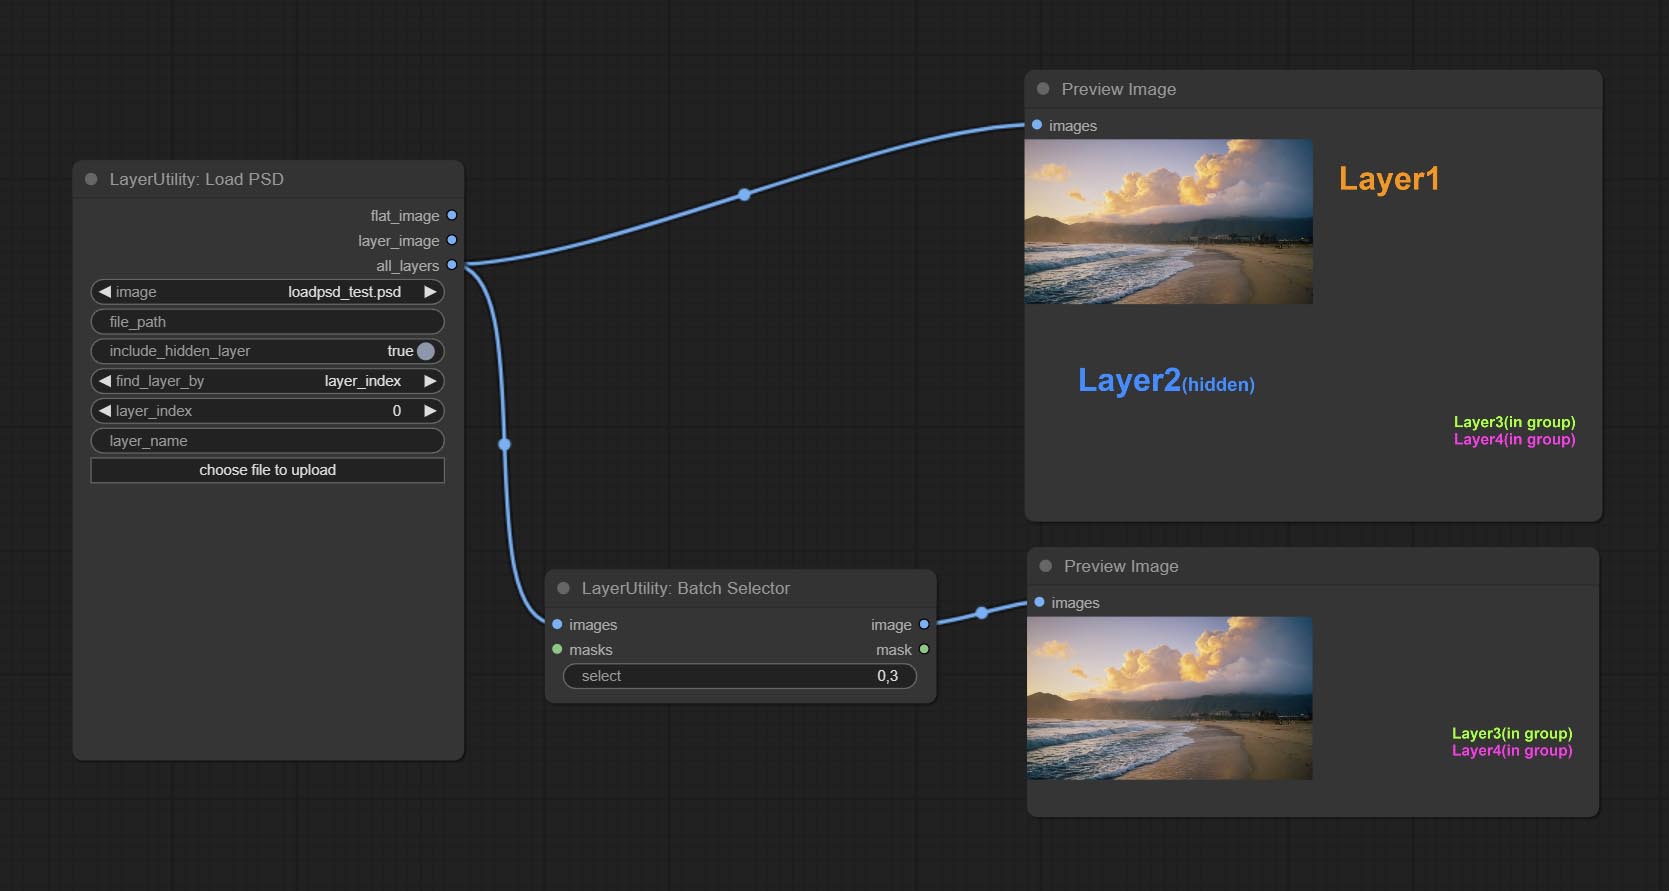
Node Options:
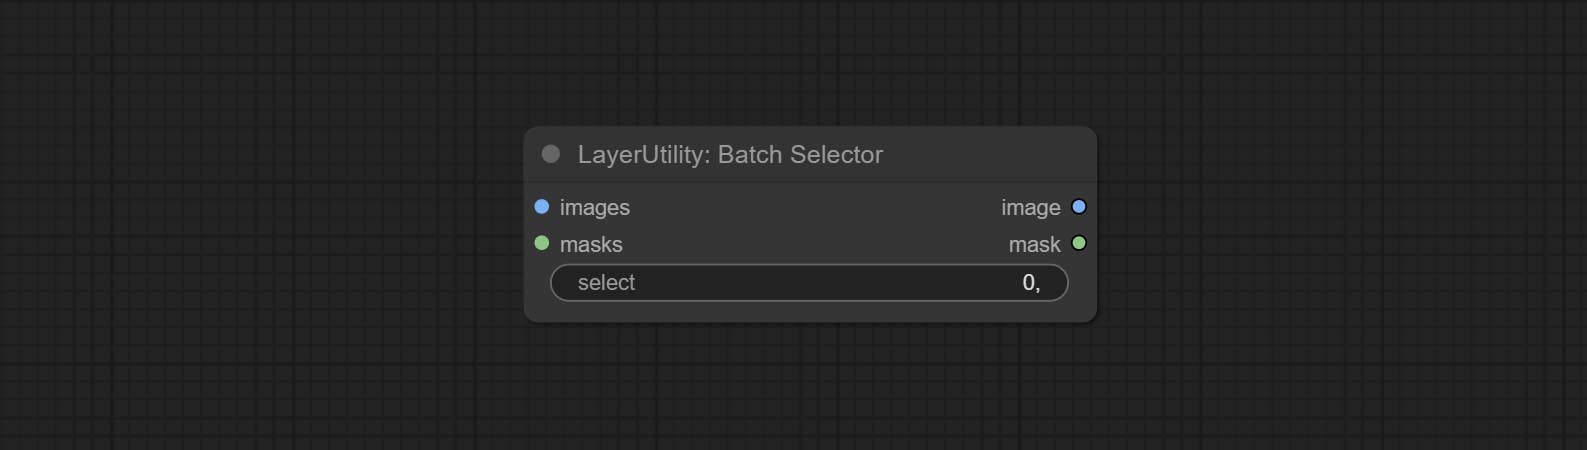
- images: Batch images input. This input is optional.
- masks: Batch masks input. This input is optional.
- select: Select the output image or mask at the batch index value, where 0 is the first image. Multiple values can be entered, separated by any non numeric character, including but not limited to commas, periods, semicolons, spaces or letters, and even Chinese characters. Note: If the value exceeds the batch size, the last image will be output. If there is no corresponding input, an empty 64x64 image or a 64x64 black mask will be output.
TextJoin
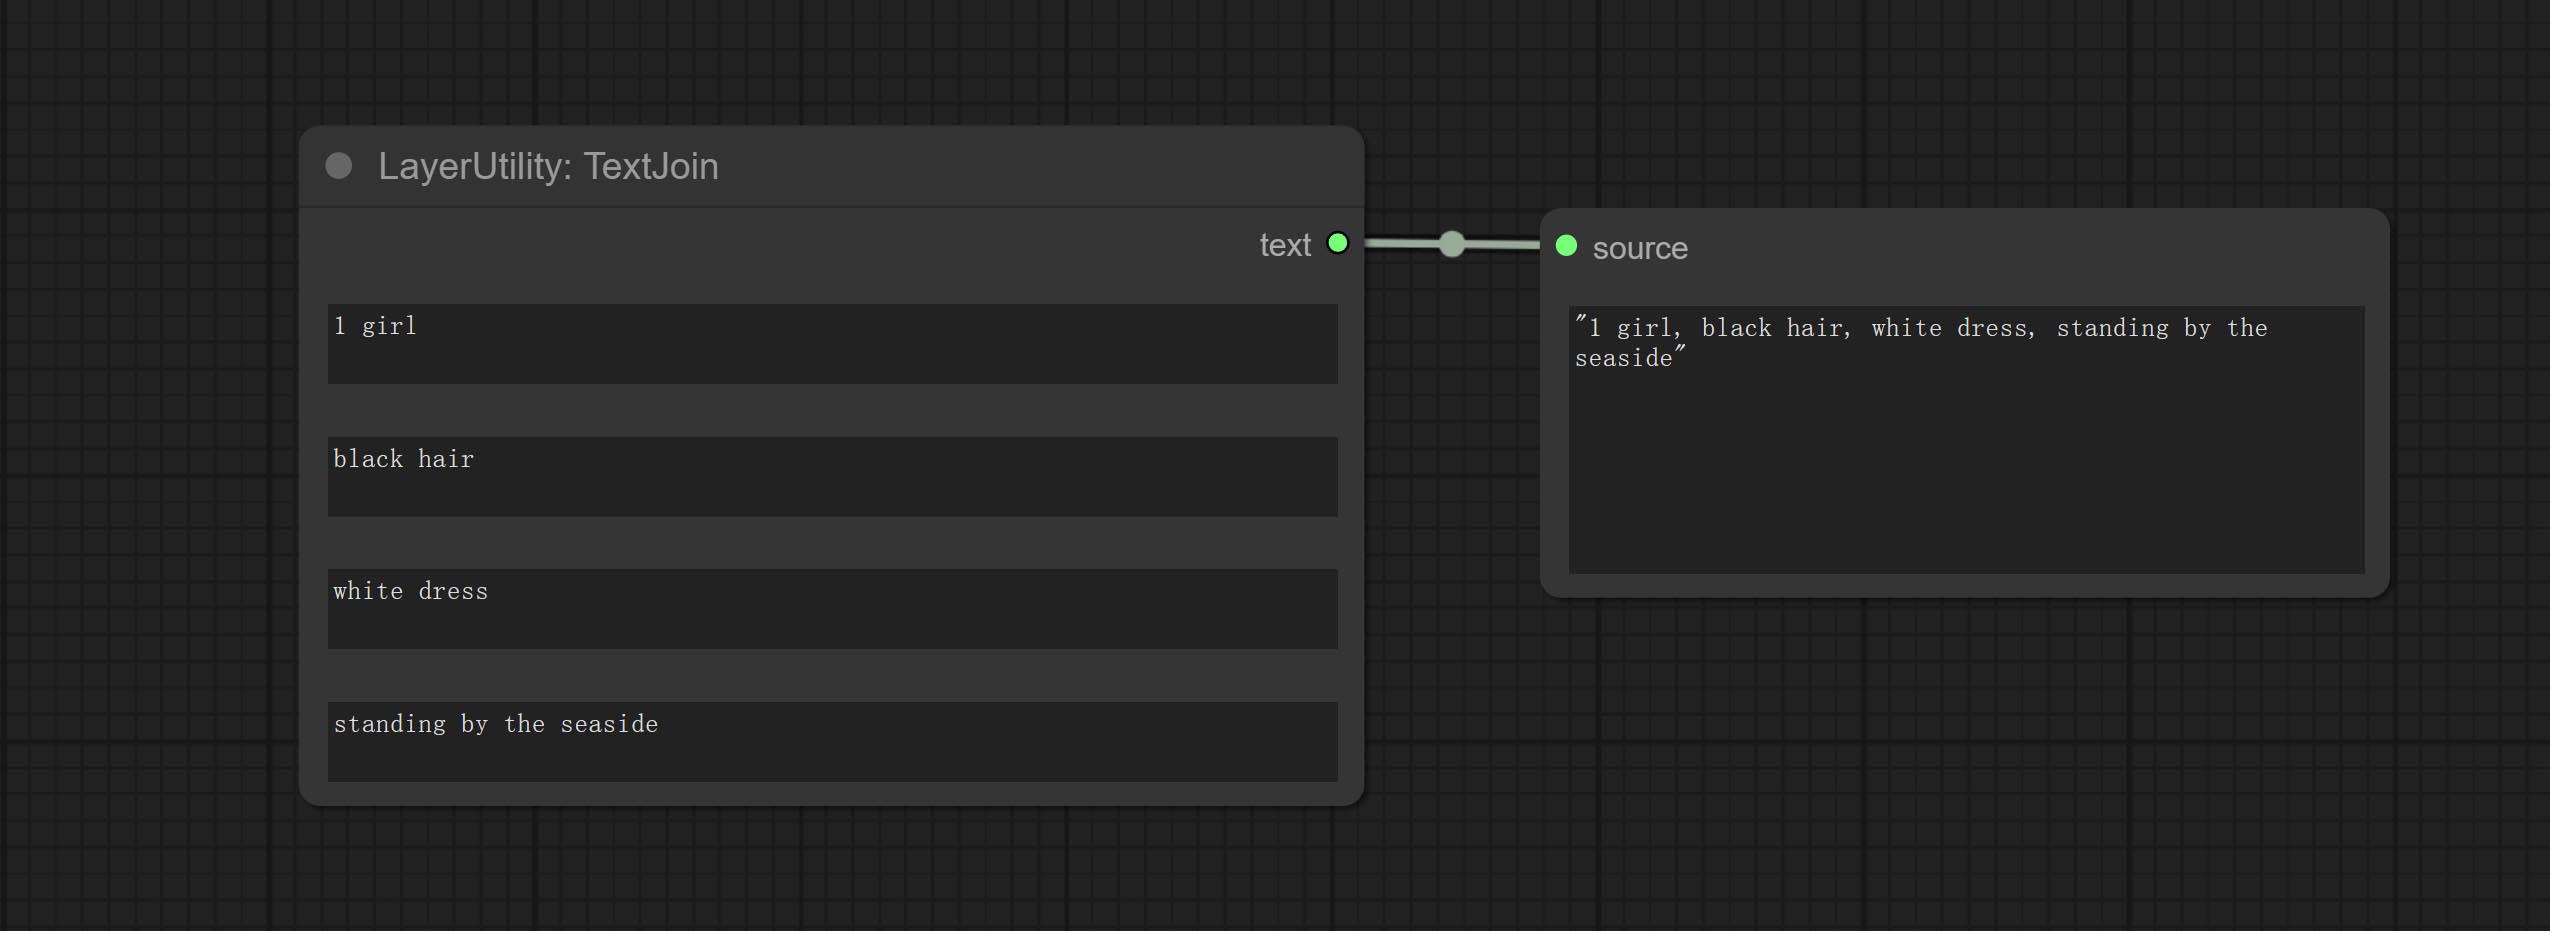
Combine multiple paragraphs of text into one.
TextJoinV2
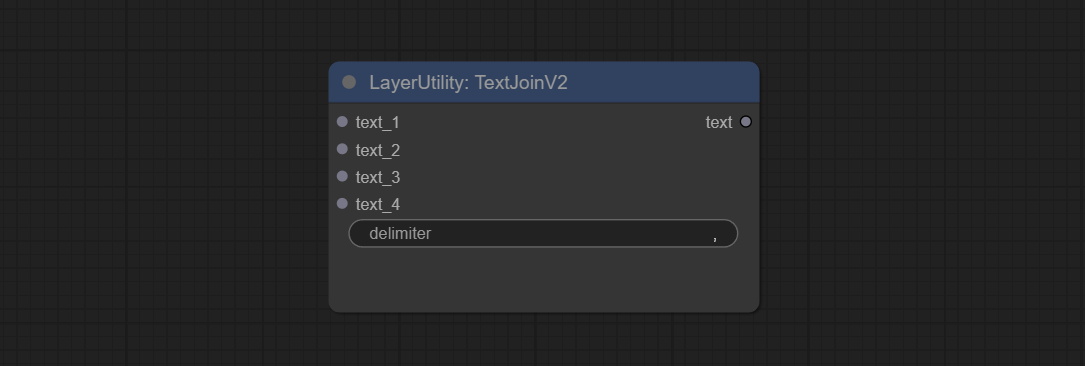
Added delimiter options on the basis of TextJoin.
PrintInfo
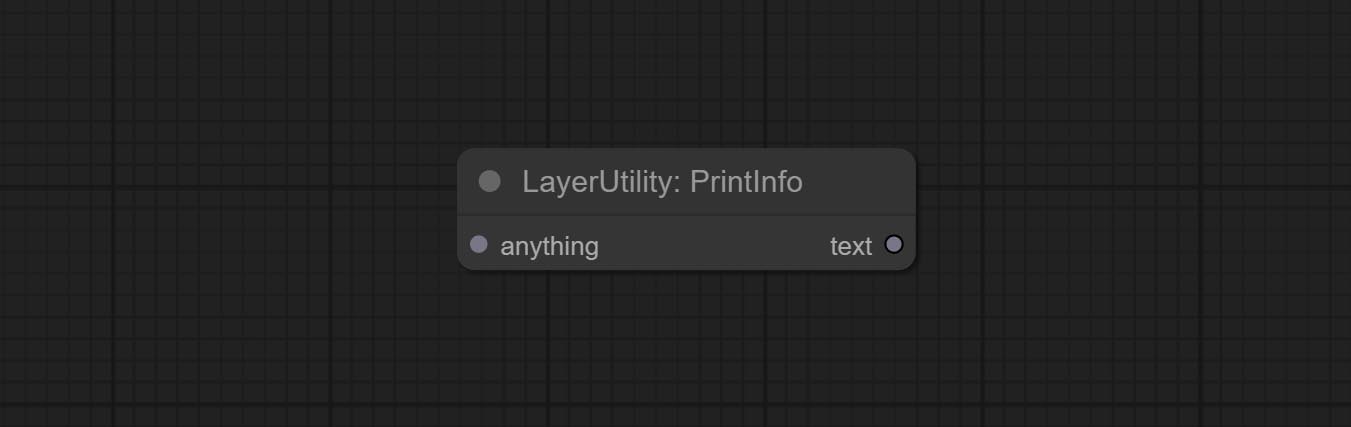
Used to provide assistance for workflow debugging. When running, the properties of any object connected to this node will be printed to the console.
This node allows any type of input.
Caixa de texto
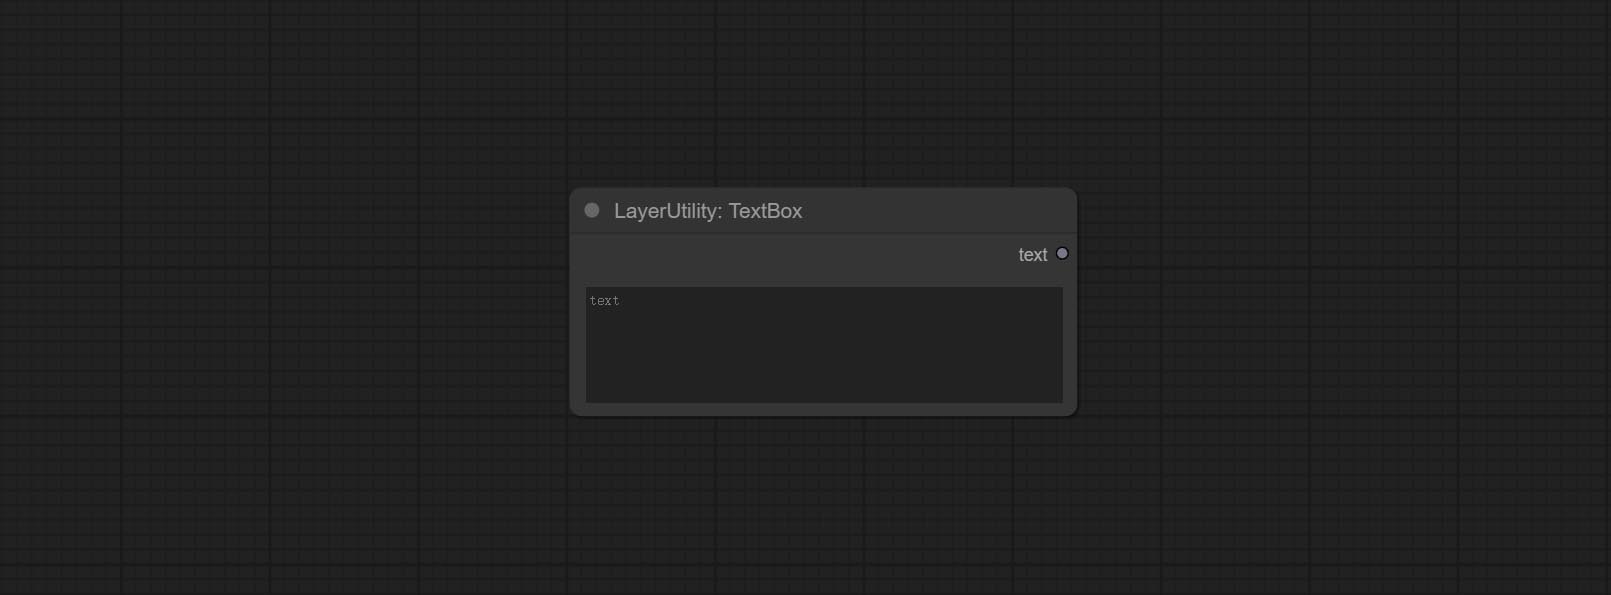
Output a string.
Corda
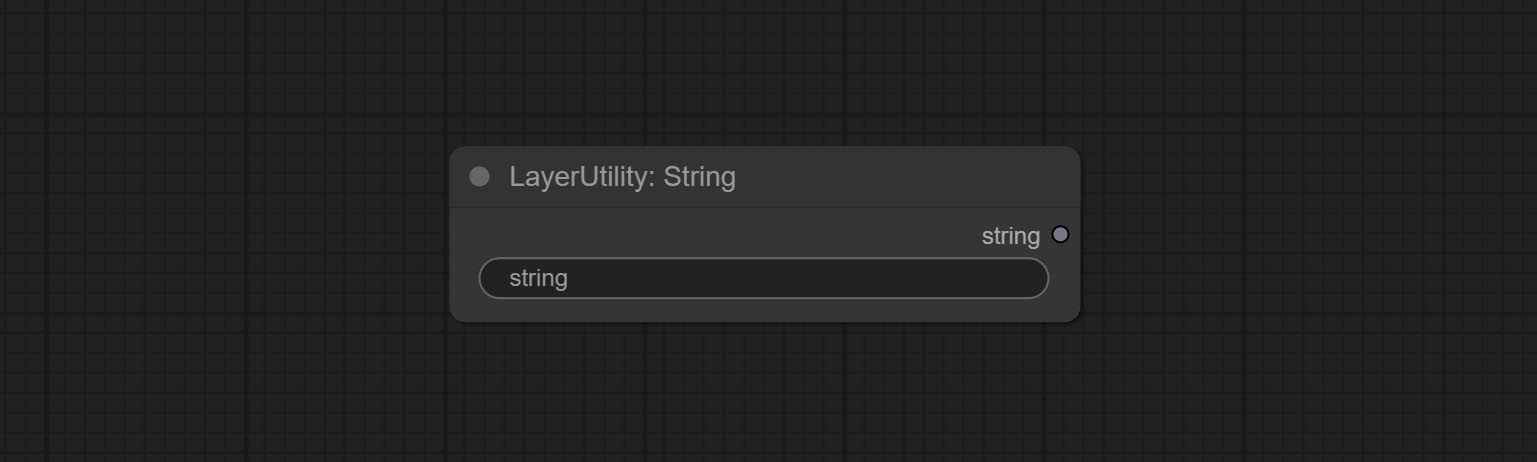
Output a string. same as TextBox.
Inteiro
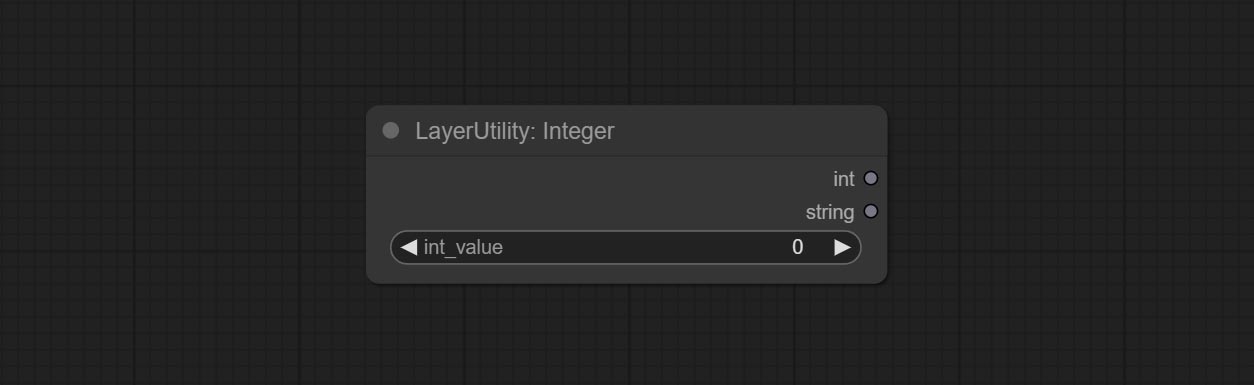
Output a integer value.
Flutuador
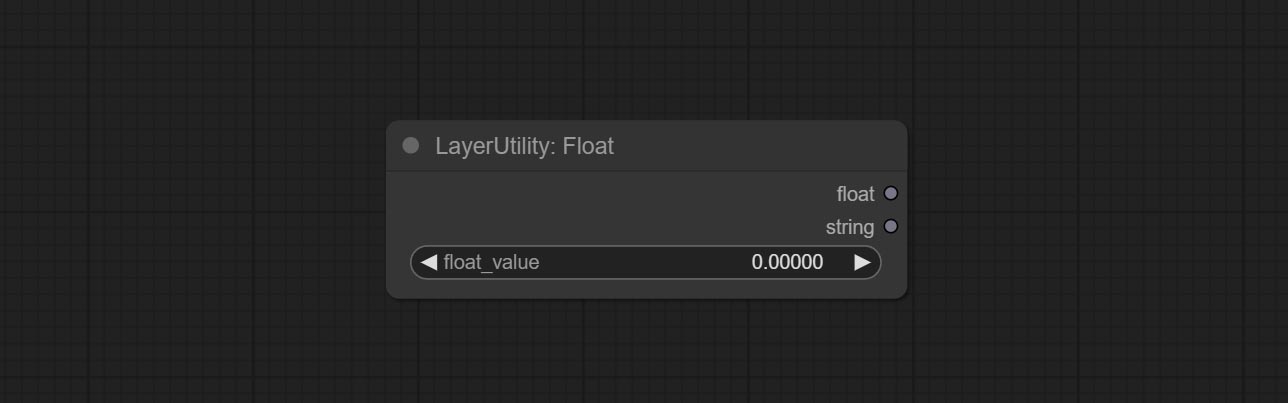
Output a floating-point value with a precision of 5 decimal places.
Booleano

Output a boolean value.
RandomGenerator
Used to generate random value within a specified range, with outputs of int, float, and boolean. Supports batch and list generation, and supports batch generation of a set of different random number lists based on image batch. 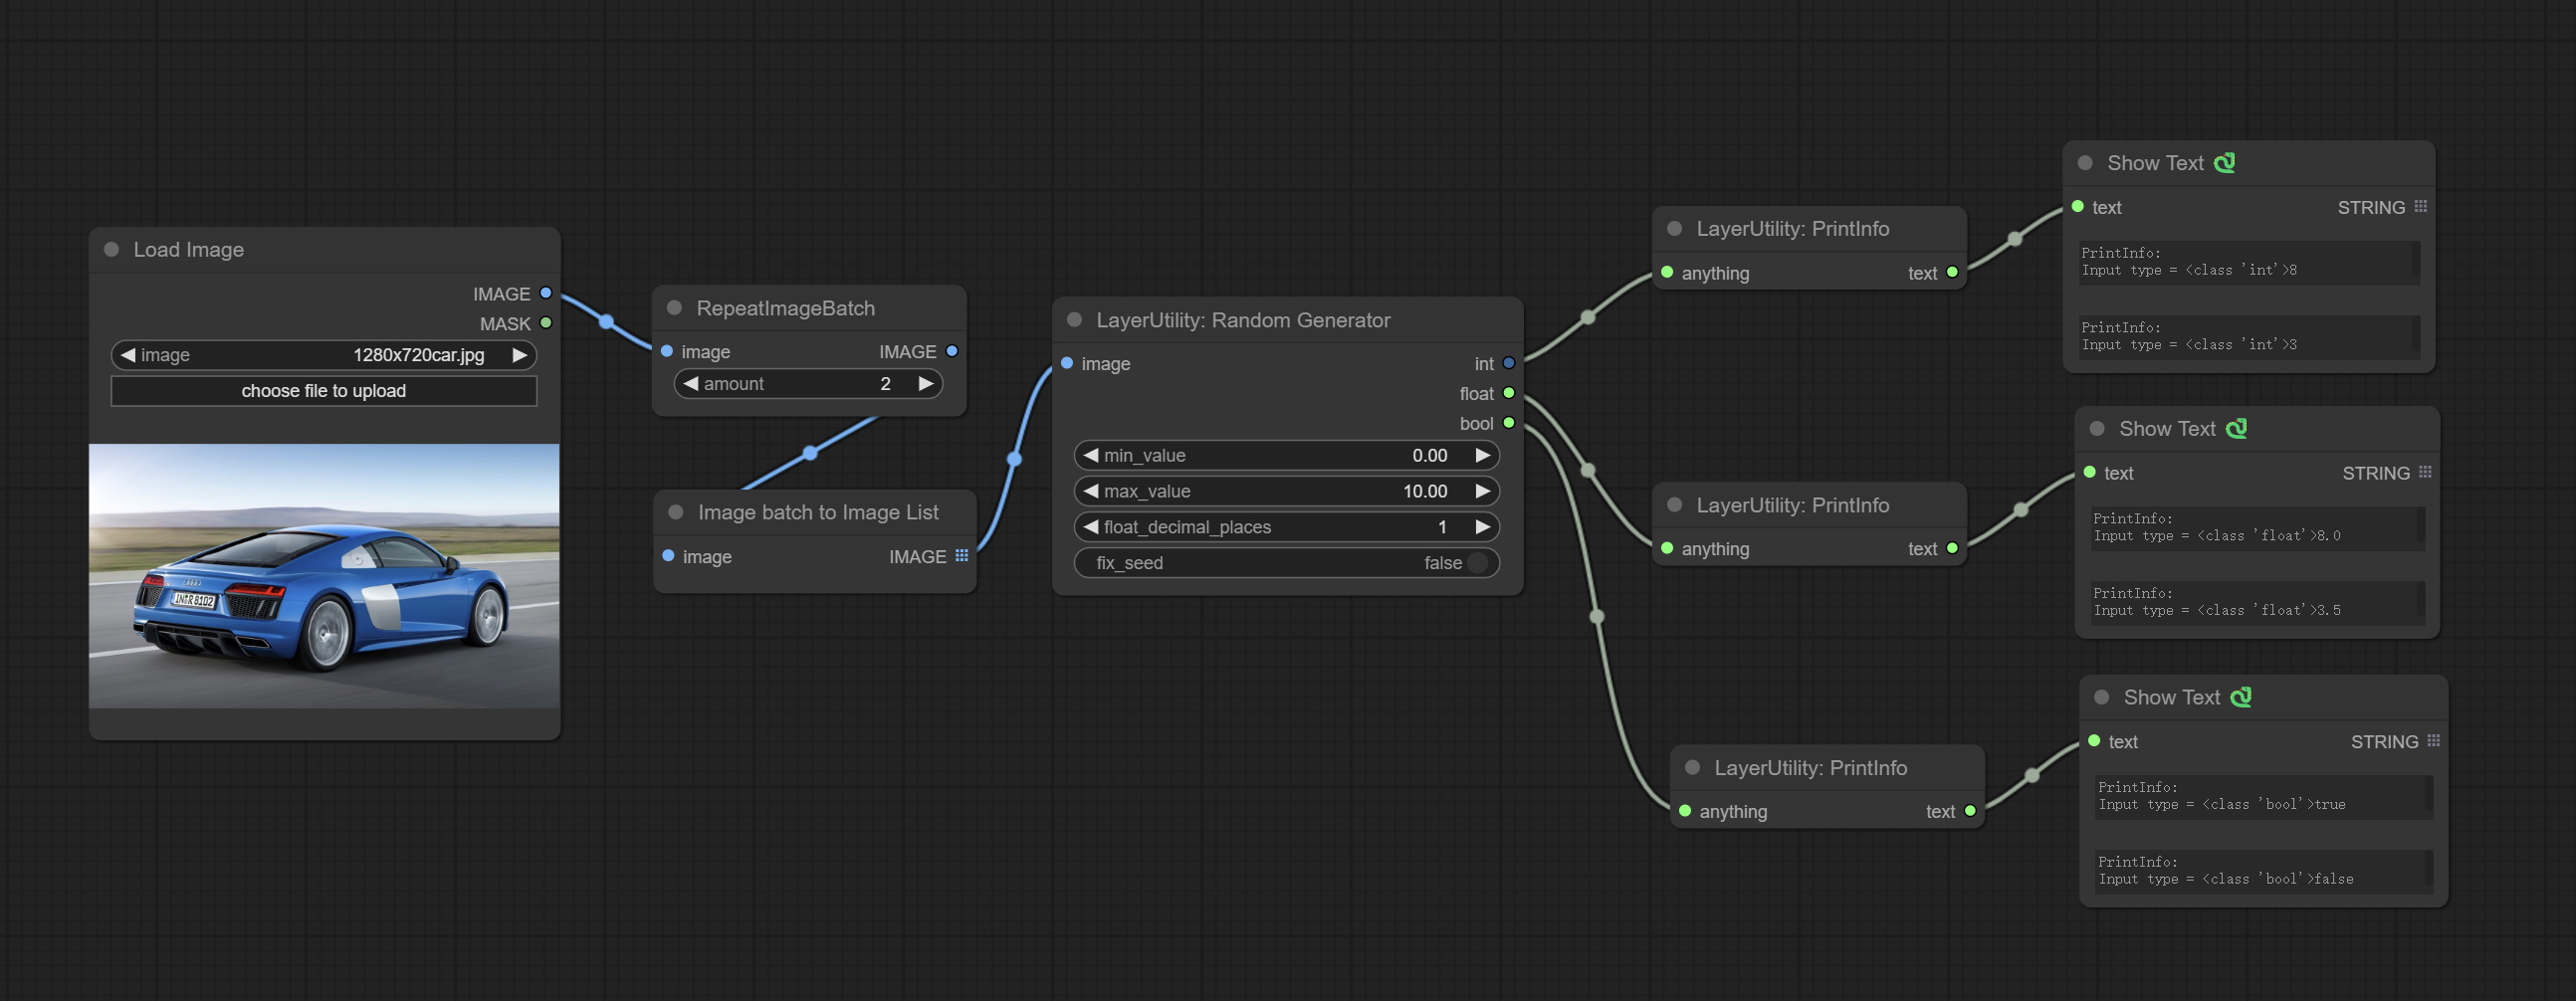
Node Options: 
- image: Optional input, generate a list of random numbers that match the quantity in batches according to the image.
- min_value: Minimum value. Random numbers will randomly take values from the minimum to the maximum.
- max_value: Maximum value. Random numbers will randomly take values from the minimum to the maximum.
- float_decimal_places: Precision of float value.
- fix_seed:Is the random number seed fixed. If this option is fixed, the generated random number will always be the same.
Outputs: int: Integer random number. float: Float random number. bool: Boolean random number.
RandomGeneratorV2
On the based of RandomGenerator, add the least random range and seed options.
Node Options: 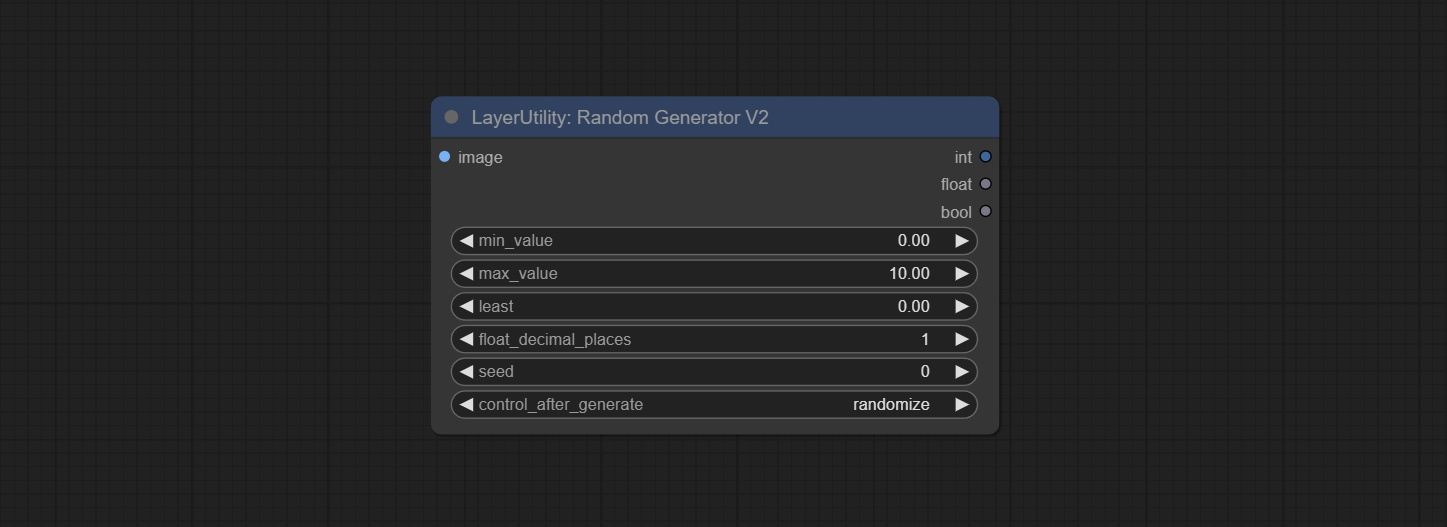
- image: Optional input, generate a list of random numbers that match the quantity in batches according to the image.
- min_value: Minimum value. Random numbers will randomly take values from the minimum to the maximum.
- max_value: Maximum value. Random numbers will randomly take values from the minimum to the maximum.
- least: Minimum random range. Random numbers will randomly at least take this value.
- float_decimal_places: Precision of float value.
- seed: The seed of random number.
- control_after_generate: Seed change options. If this option is fixed, the generated random number will always be the same.
Outputs: int: Integer random number. float: Float random number. bool: Boolean random number.
NumberCalculator
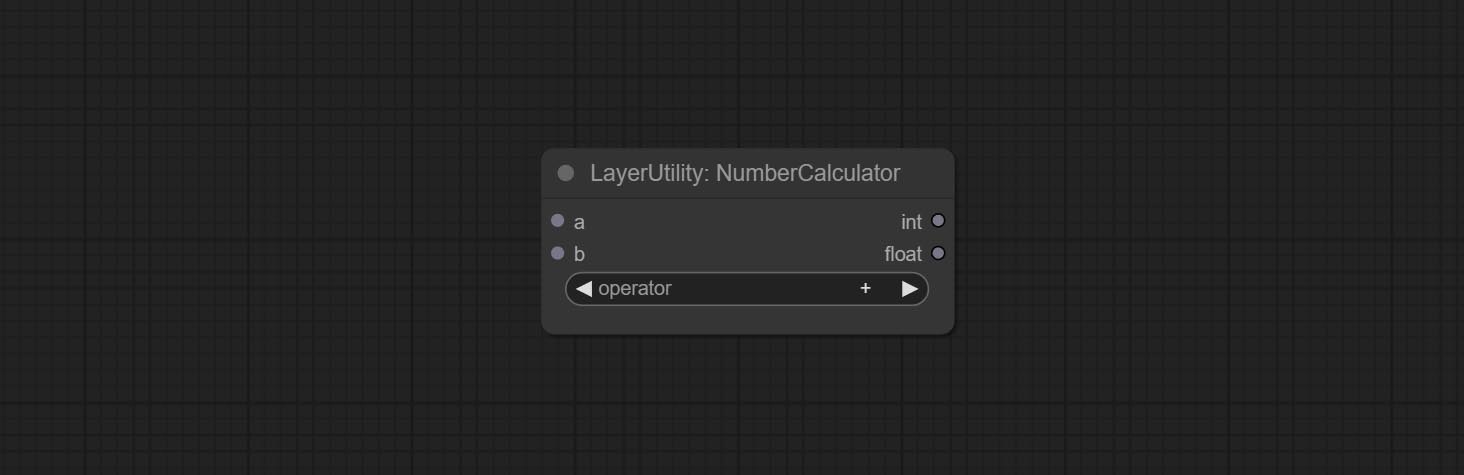
Performs mathematical operations on two numeric values and outputs integer and floating point results * . Supported operations include + , - , * , / , ** , // , % .
* The input only supports boolean, integer, and floating point numbers, forcing in other data will result in error.
NumberCalculatorV2
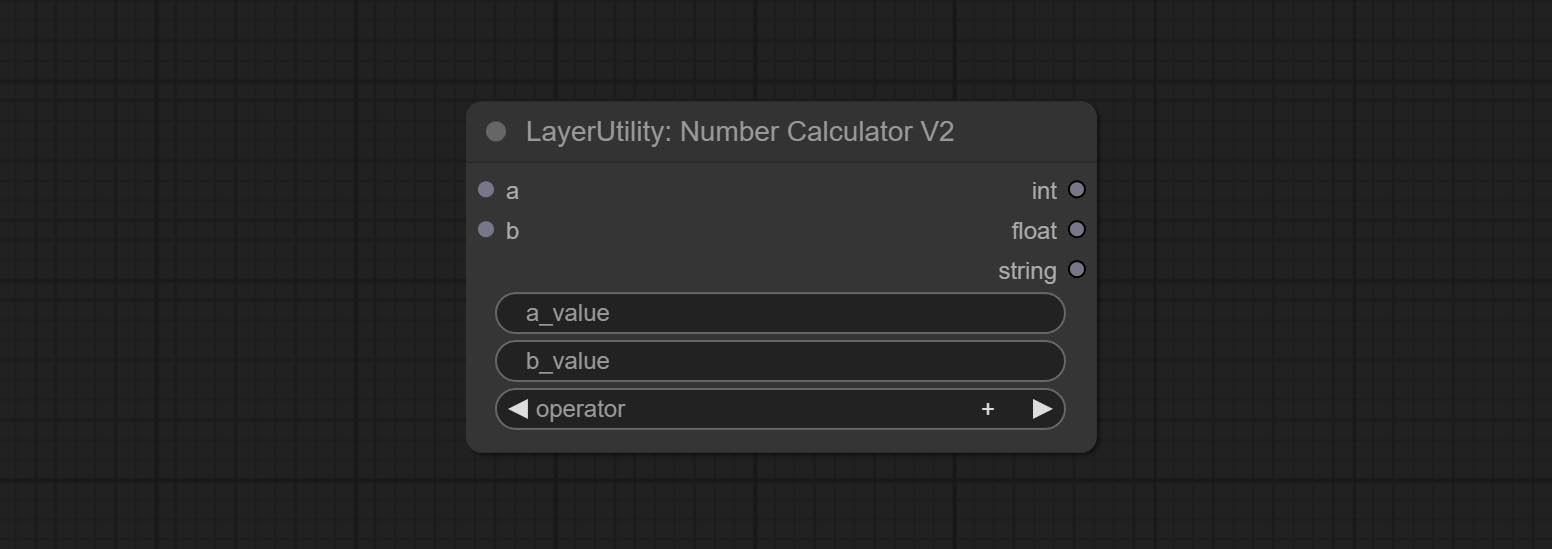
The upgraded version of NumberCalculator has added numerical inputs within nodes and square root operations. The square root operation option is nth_root Note: The input takes priority, and when there is input, the values within the node will be invalid.
BooleanOperator

Perform a Boolean operation on two numeric values and output the result * . Supported operations include == , != , and , or , xor , not , min , max .
* The input only supports boolean, integer, and floating point numbers, forcing in other data will result in error. The and operation between the values outputs a larger number, and the or operation outputs a smaller number.
BooleanOperatorV2

The upgraded version of Boolean Operator has added numerical inputs within nodes and added judgments for greater than, less than, greater than or equal to, and less than or equal to. Note: The input takes priority, and when there is input, the values within the node will be invalid.
StringCondition
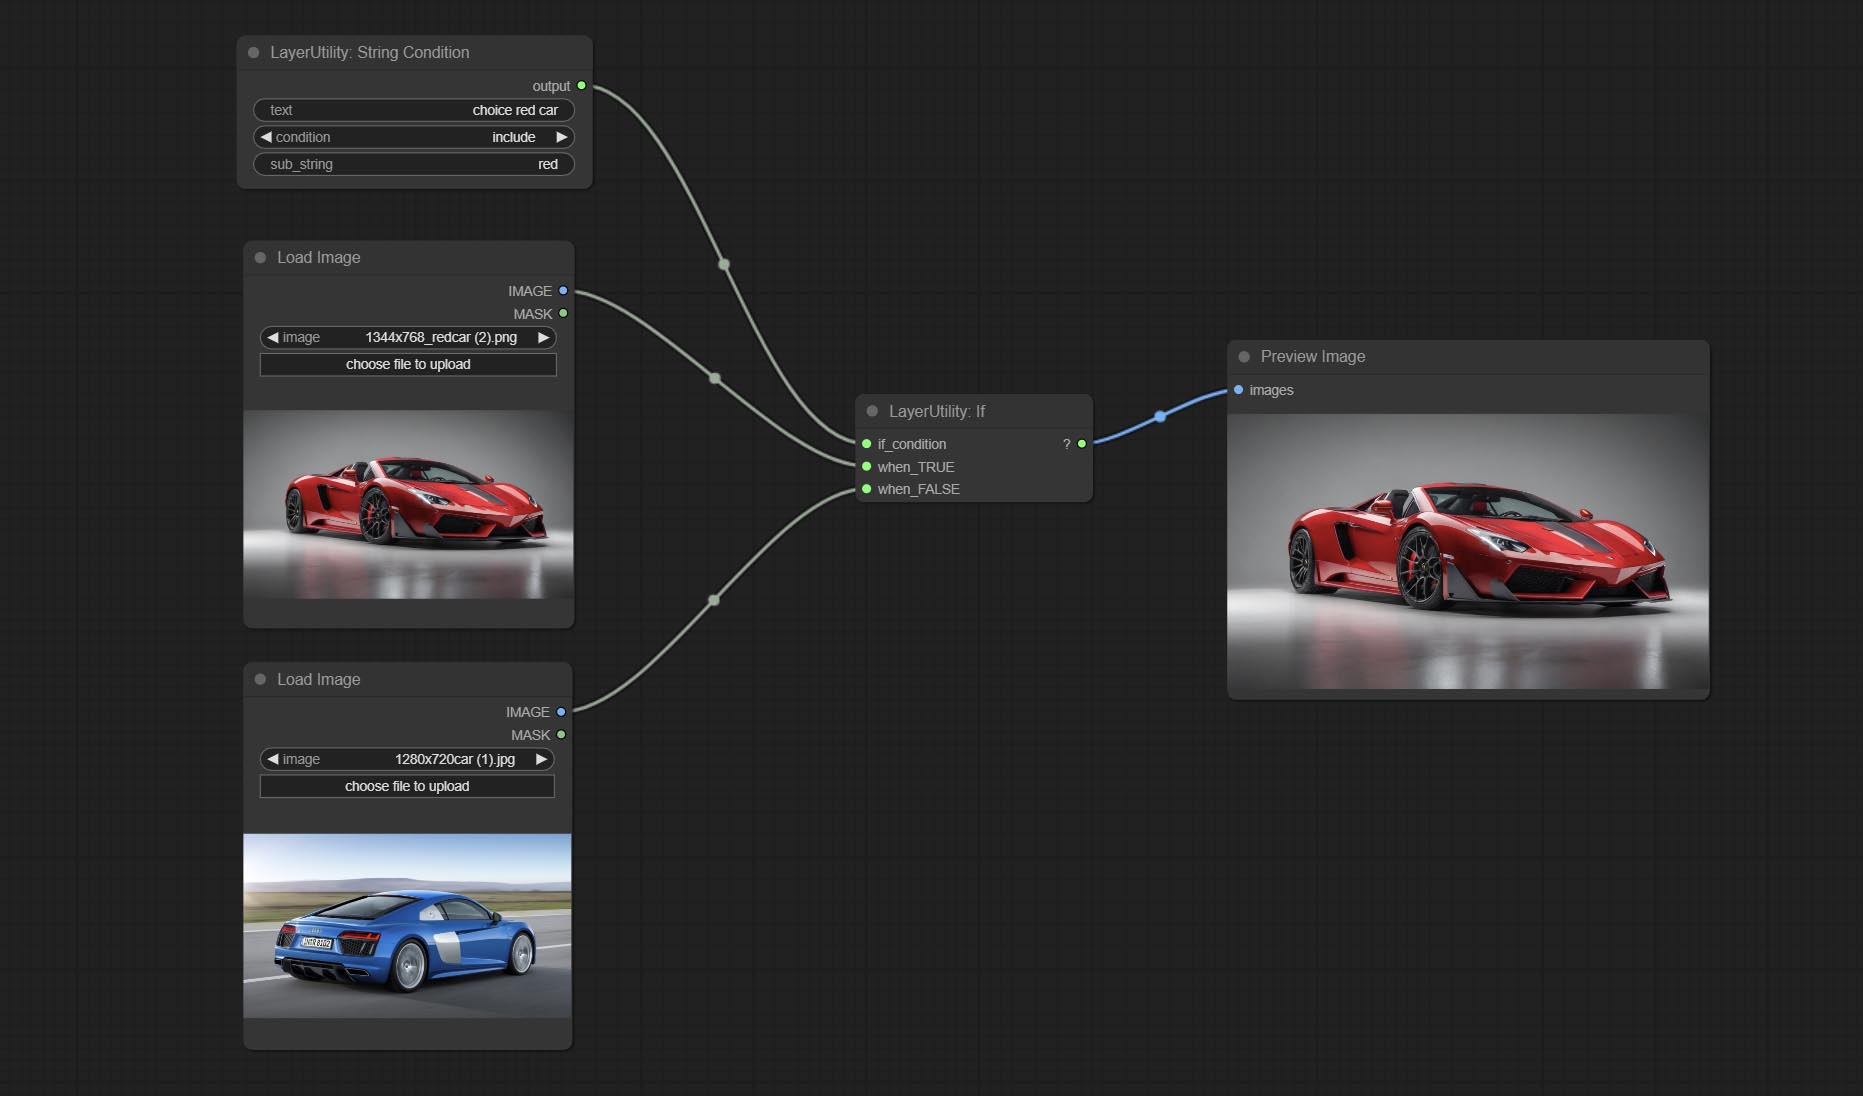
Determine whether the text contains or does not contain substrings, and output a Boolean value.
Node Options:
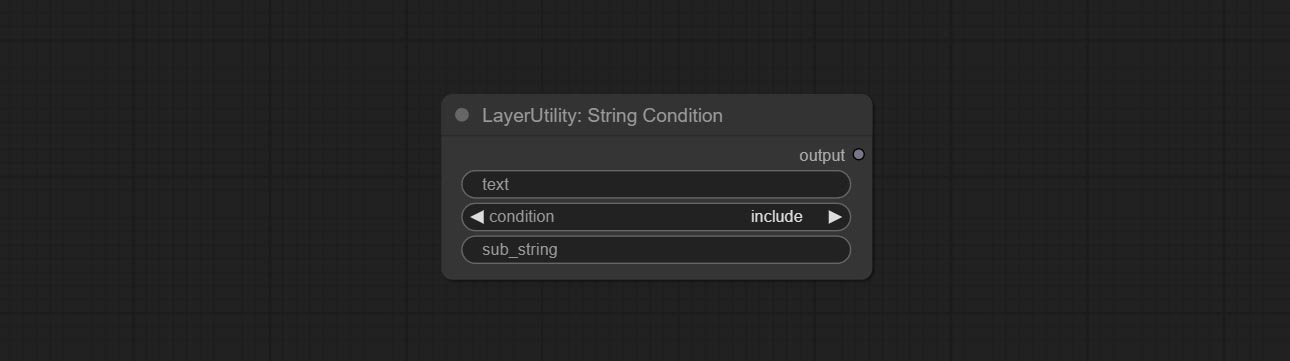
- text: Input text.
- condition: Judgment conditions.
include determines whether it contains a substring, and exclude determines whether it does not. - sub_string: Substring.
CheckMask
Check if the mask contains enough valid areas and output a Boolean value.
Node Options:

- white_point: The white point threshold used to determine whether the mask is valid is considered valid if it exceeds this value.
- area_percent: The percentage of effective areas. If the proportion of effective areas exceeds this value, output True.
CheckMaskV2
On the basis of CheckMask, the method option has been added, which allows for the selection of different detection methods. The area_percent is changed to a floating point number with an accuracy of 2 decimal places, which can detect smaller effective areas.
Node Options:
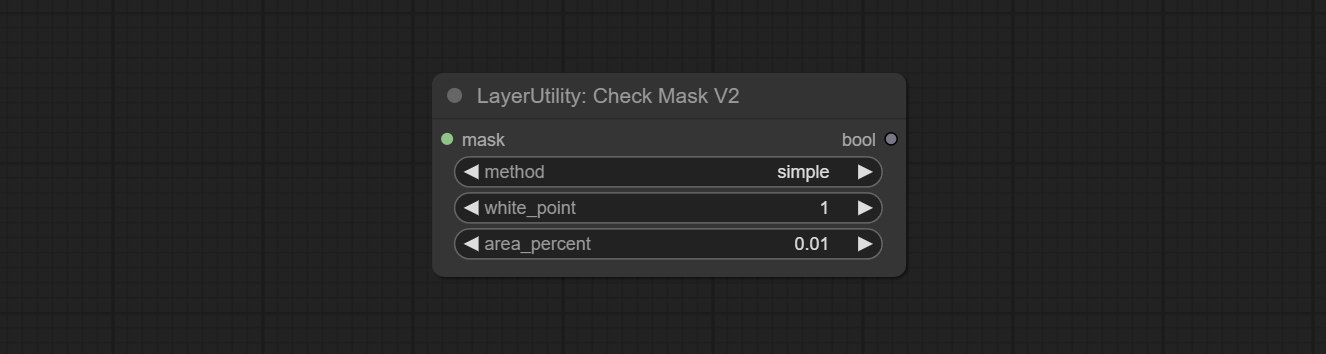
- method: There are two detection methods, which are
simple and detectability . The simple method only detects whether the mask is completely black, while the detect_percent method detects the proportion of effective areas.
Se
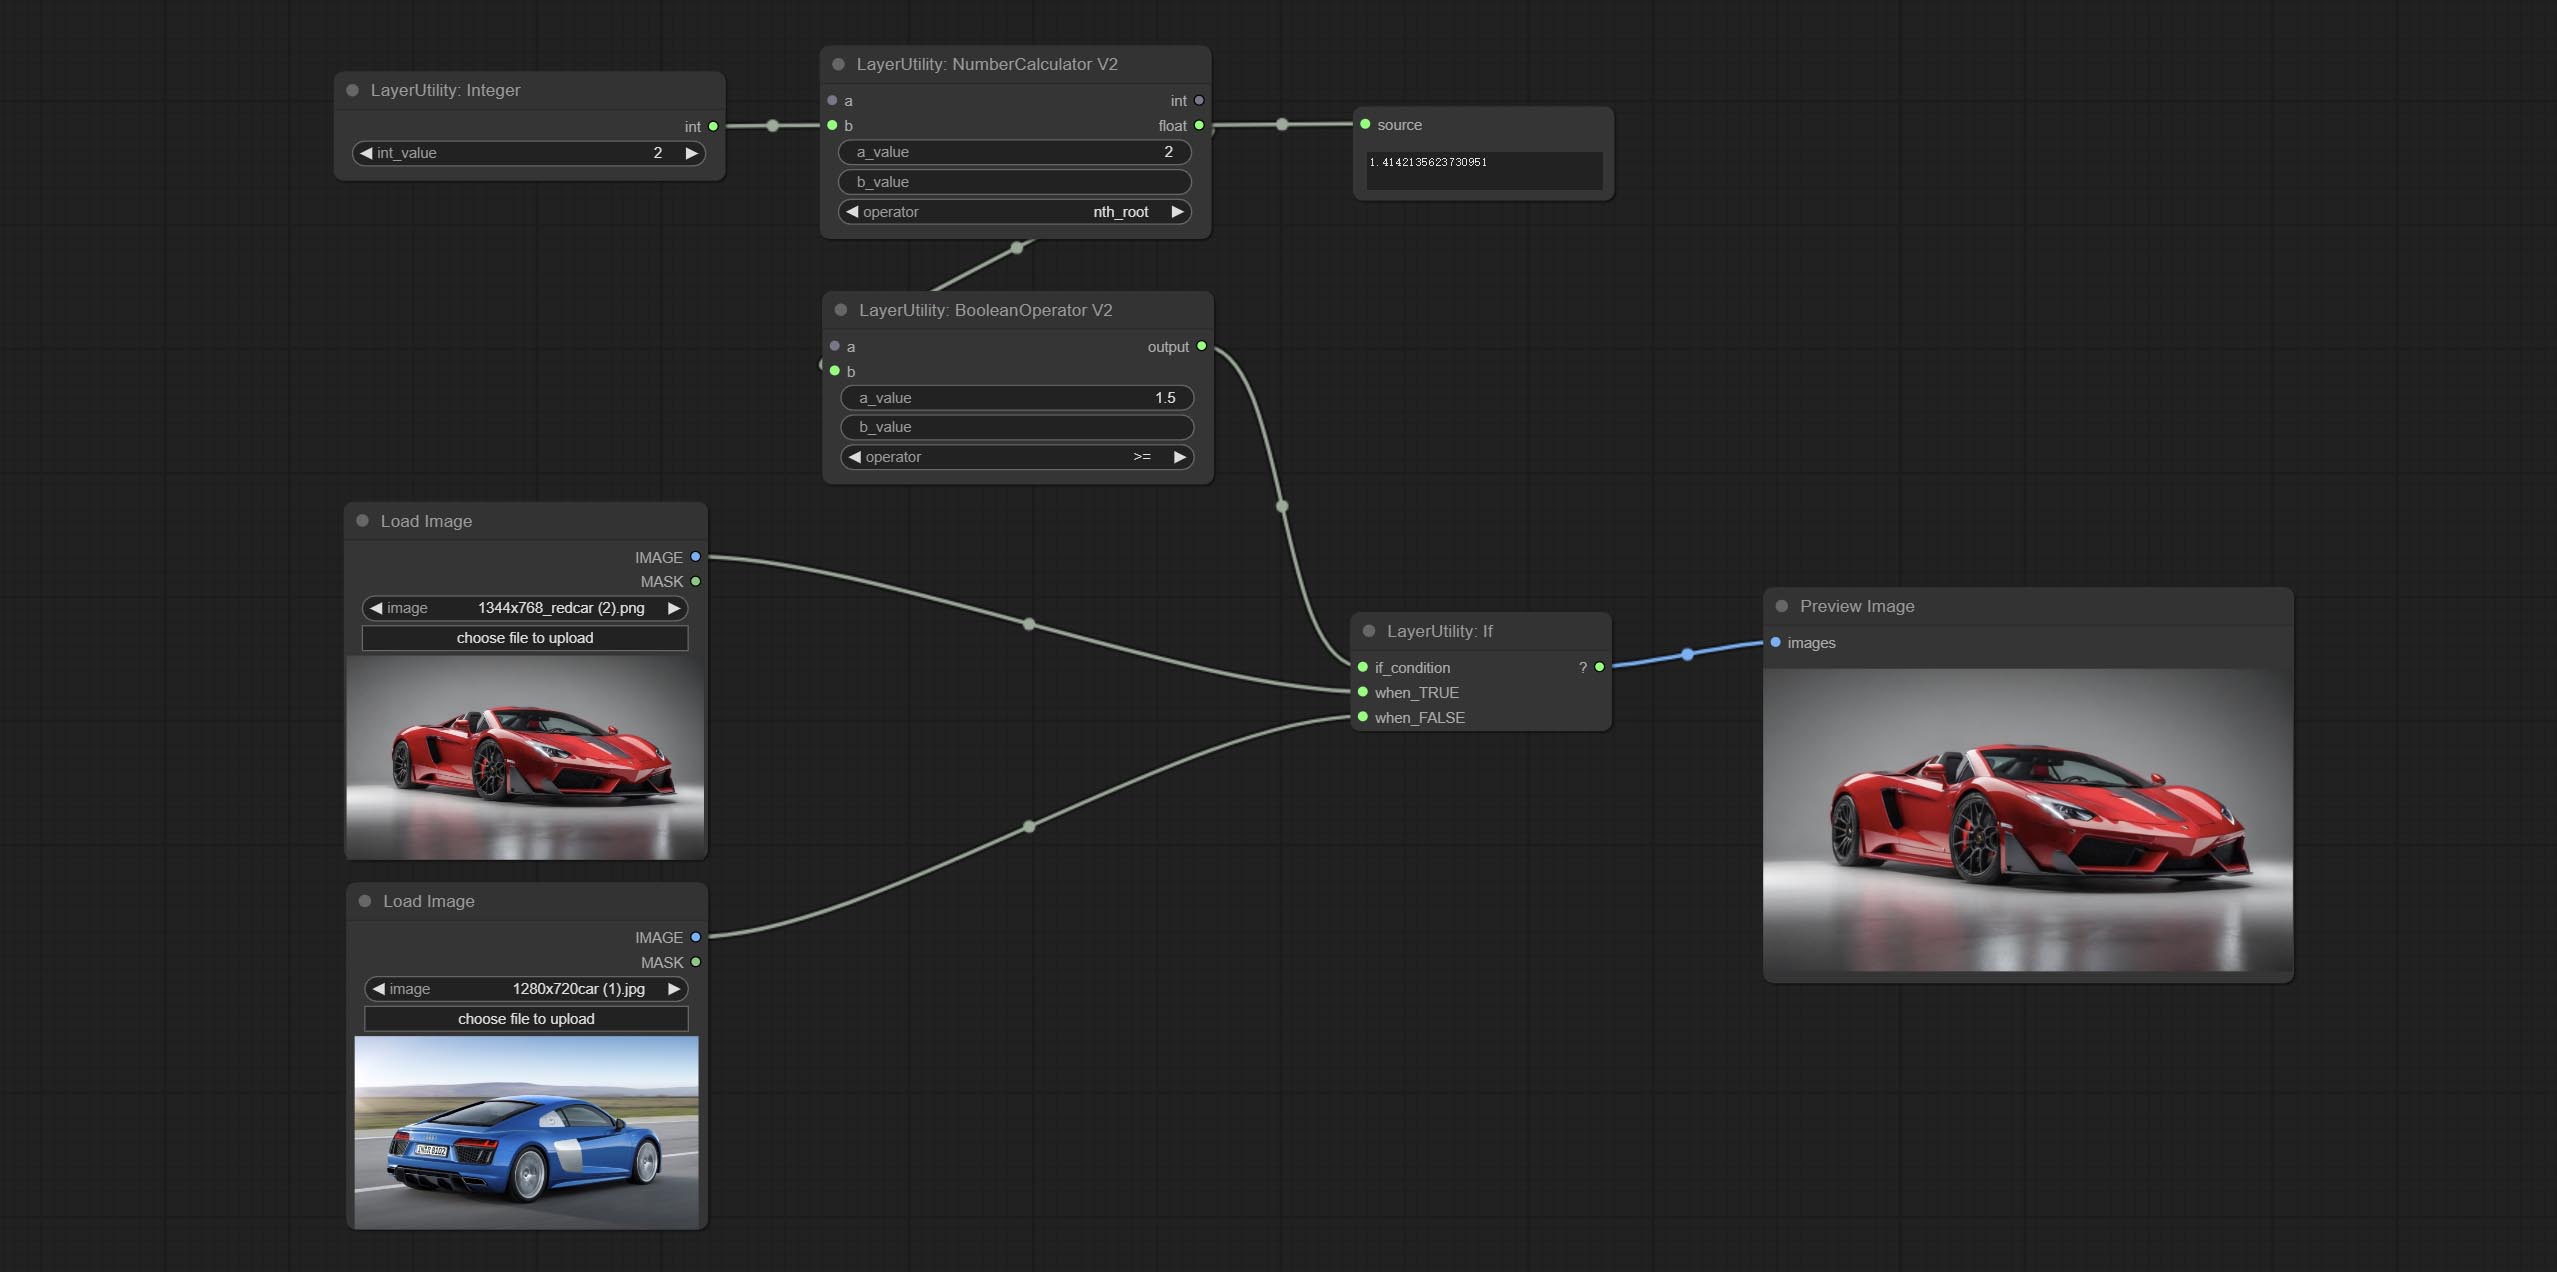
Switches output based on Boolean conditional input. It can be used for any type of data switching, including but not limited to numeric values, strings, pictures, masks, models, latent, pipe pipelines, etc.
Node Options:
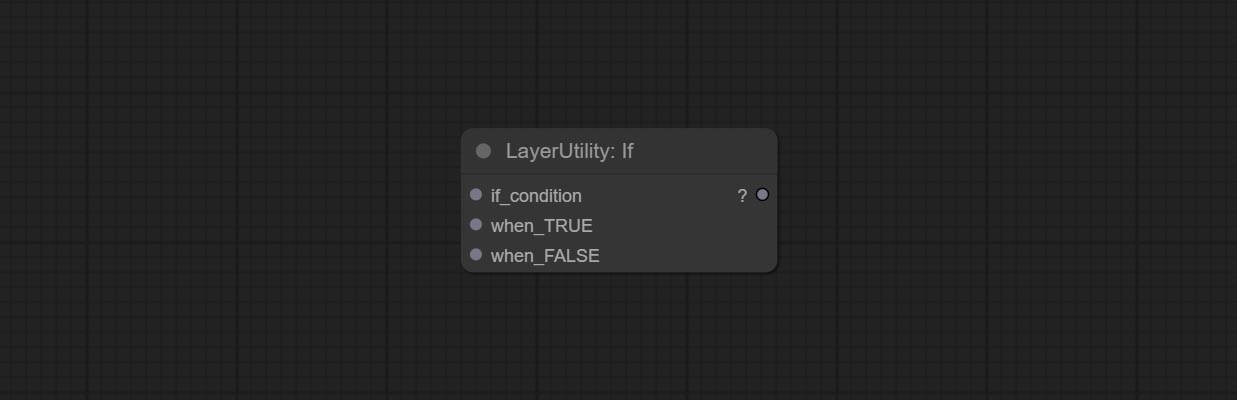
- if_condition: Conditional input. Boolean, integer, floating point, and string inputs are supported. When entering a value, 0 is judged to be False; When a string is entered, an empty string is judged as Flase.
- when_True: This item is output when the condition is True.
- when_False: This item is output when the condition is False.
SwitchCase

Switches the output based on the matching string. It can be used for any type of data switching, including but not limited to numeric values, strings, pictures, masks, models, latent, pipe pipelines, etc. Supports up to 3 sets of case switches. Compare case to switch_condition , if the same, output the corresponding input. If there are the same cases, the output is prioritized in order. If there is no matching case, the default input is output. Note that the string is case sensitive and Chinese and English full-width and half-width.
Node Options:
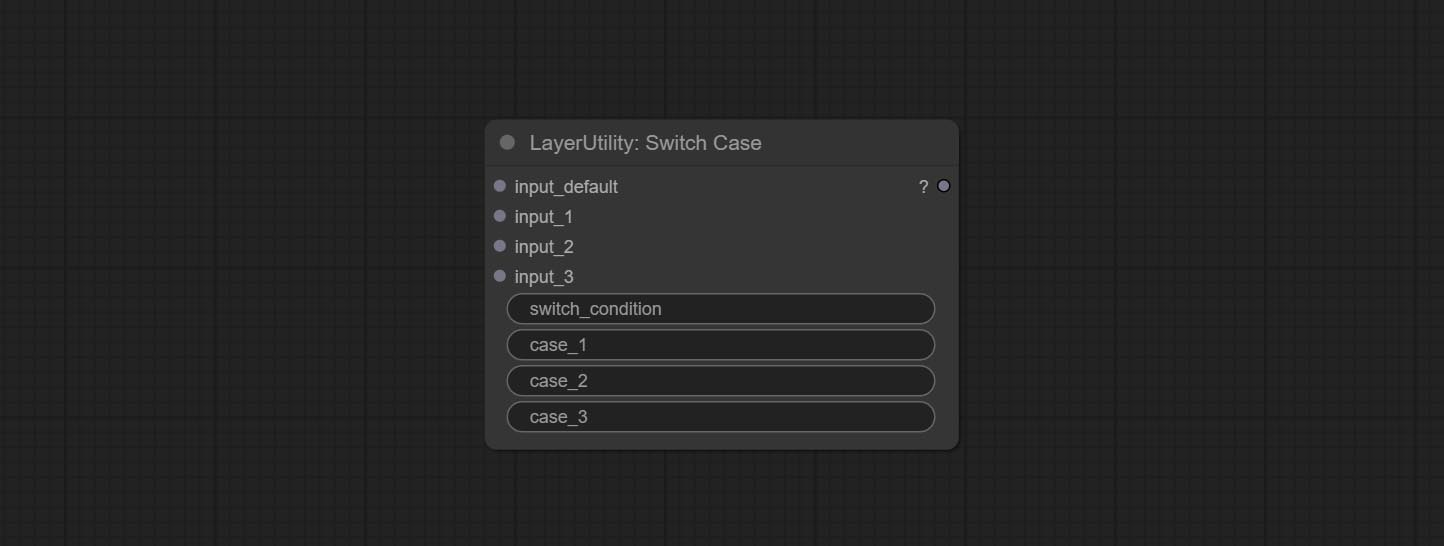
- input_default: Input entry for default output. This input is required.
- input_1: Input entry used to match
case_1 . This input is optional. - input_2: Input entry used to match
case_2 . This input is optional. - input_3: Input entry used to match
case_3 . This input is optional. - switch_condition: String used to judge with case.
- case_1: case_1 string.
- case_2: case_2 string.
- case_3: case_3 string.
QueueStop
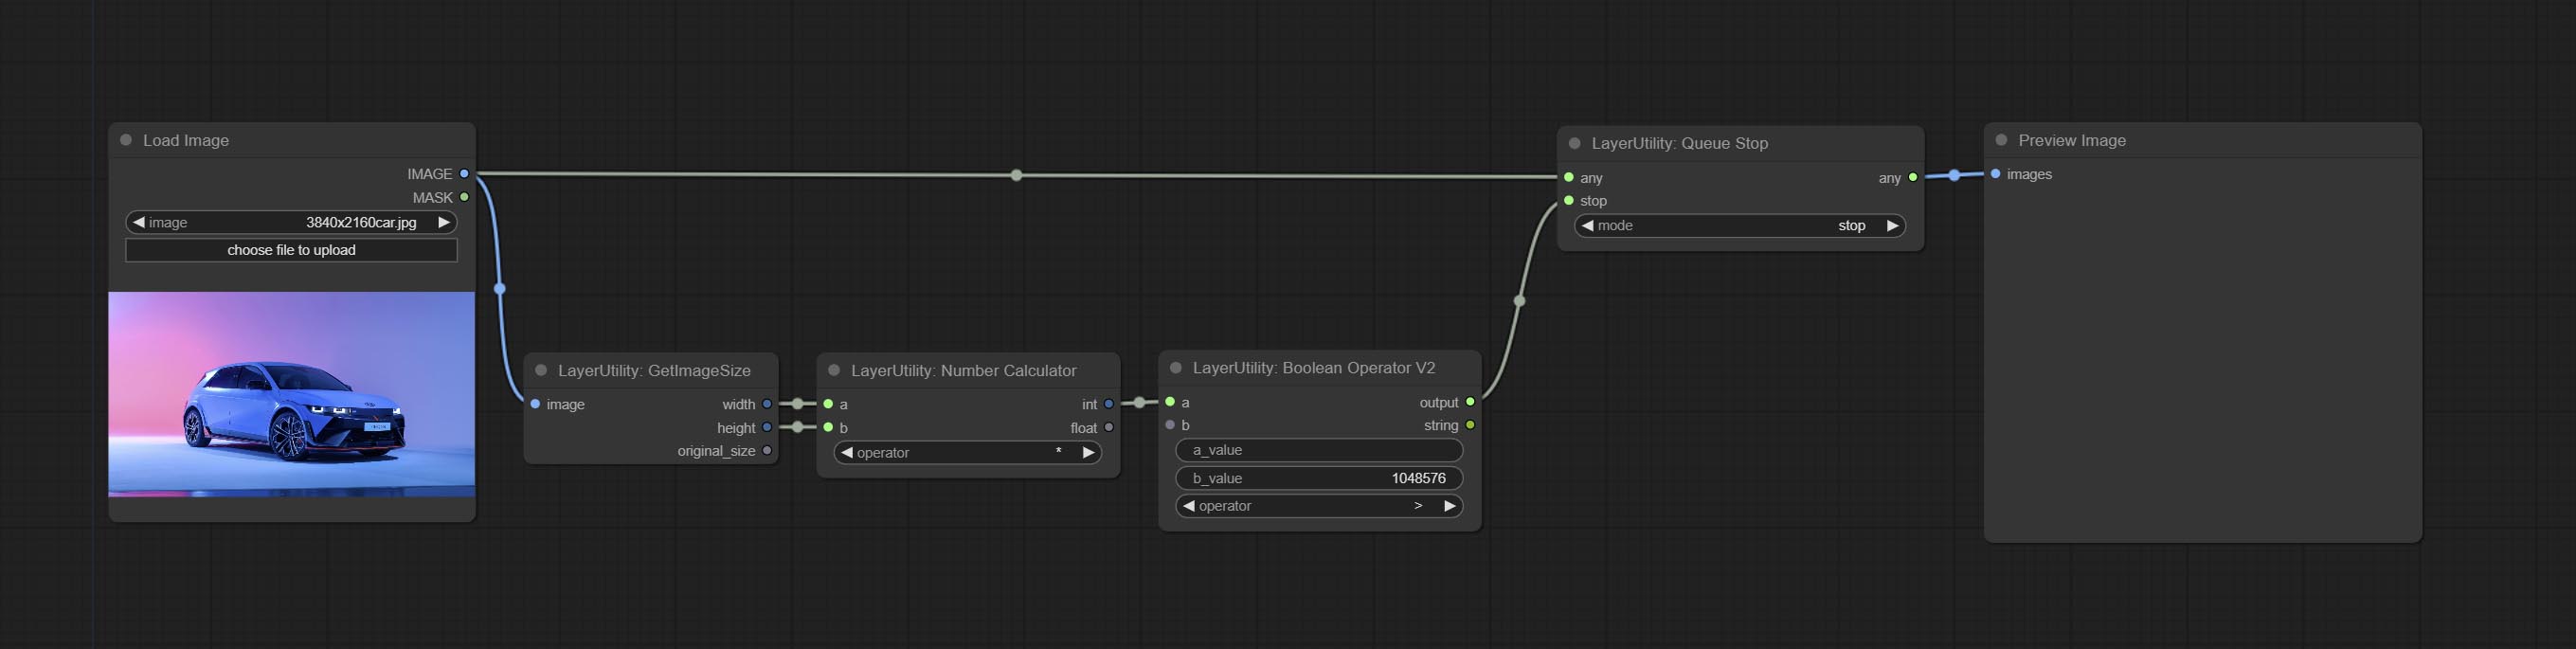
Stop the current queue. When executed at this node, the queue will stop. The workflow diagram above illustrates that if the image is larger than 1Mega pixels, the queue will stop executing.
Node Options:
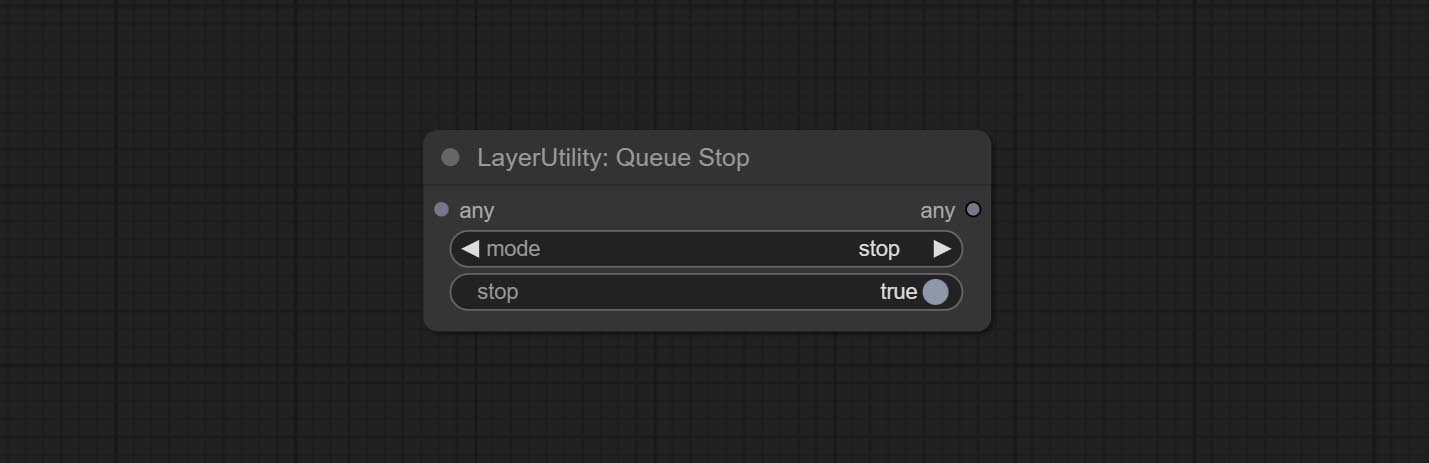
- mode: Stop mode. If you choose
stop , it will be determined whether to stop based on the input conditions. If you choose continue , ignore the condition to continue executing the queue. - stop: If true, the queue will stop. If false, the queue will continue to execute.
PurgeVRAM
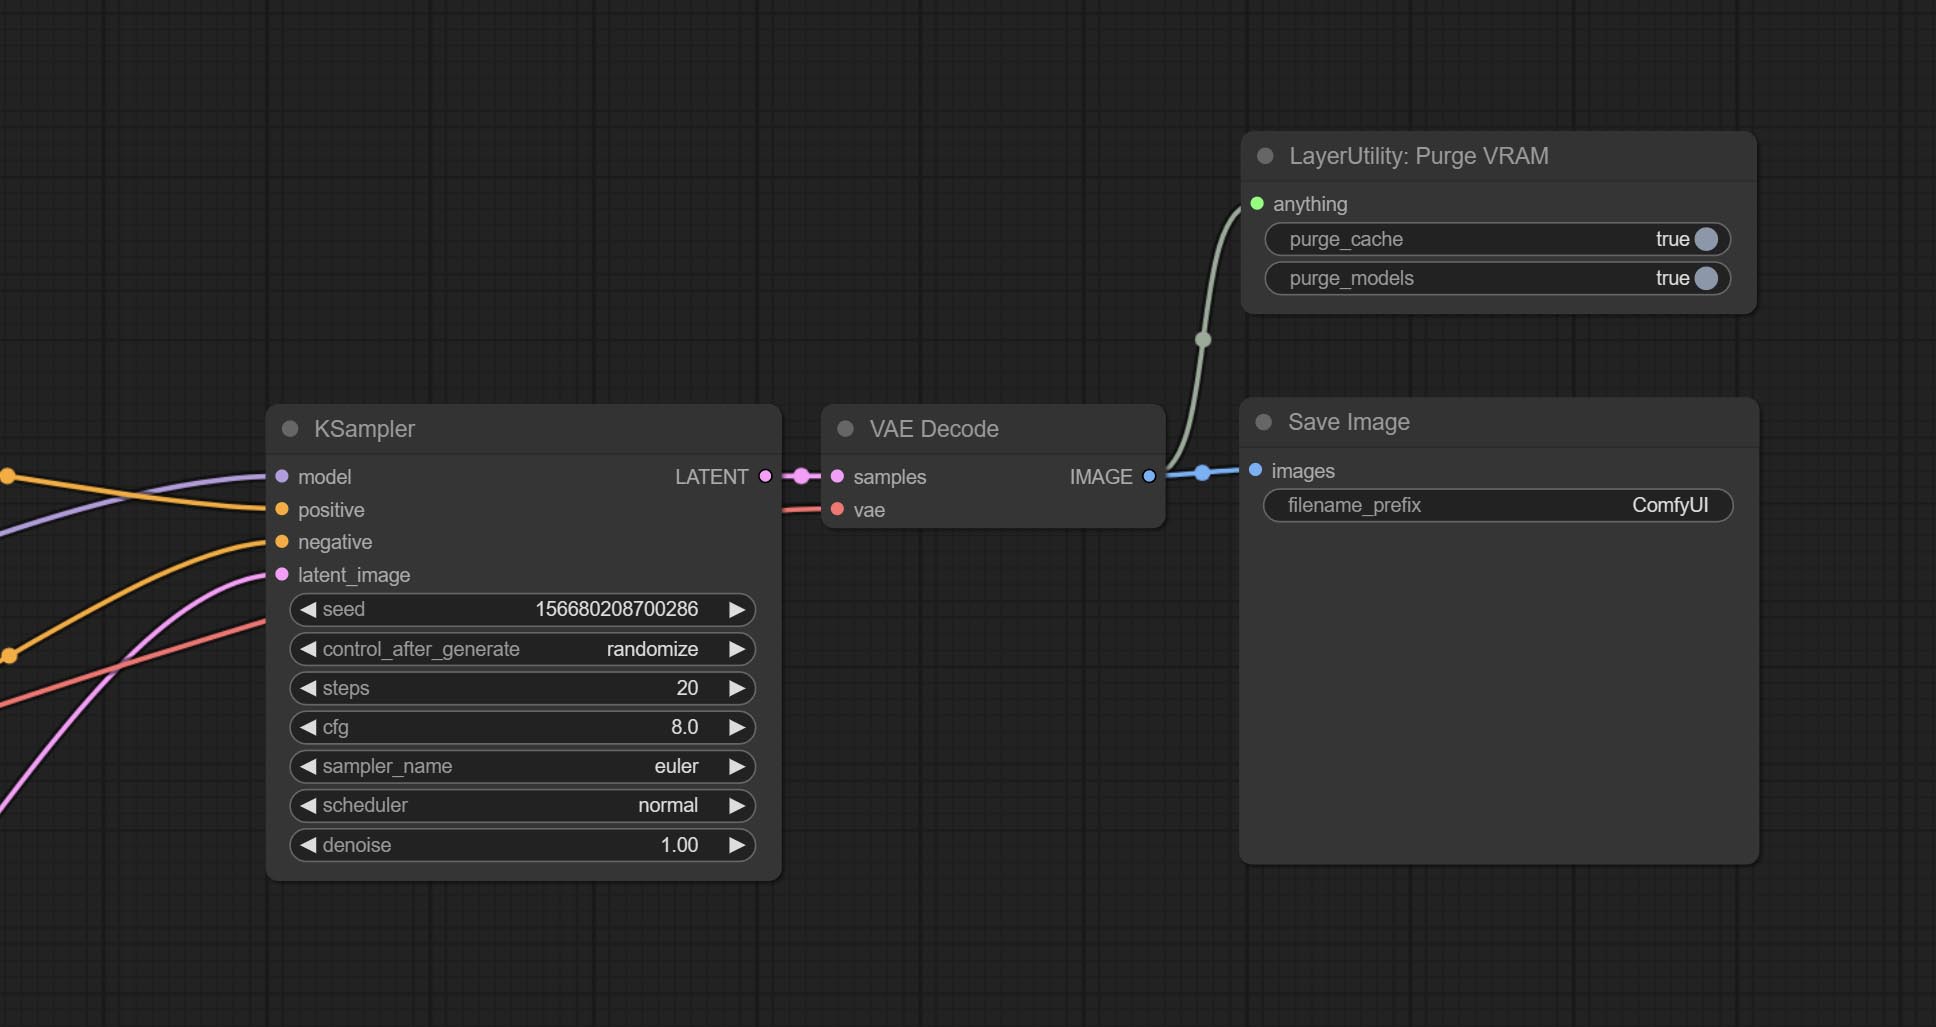
Clean up GPU VRAM and system RAM. any type of input can be accessed, and when executed to this node, the VRAM and garbage objects in the RAM will be cleaned up. Usually placed after the node where the inference task is completed, such as the VAE Decode node.
Node Options:
- purge_cache: Clean up cache。
- purge_models: Unload all loaded models。
SaveImagePlus
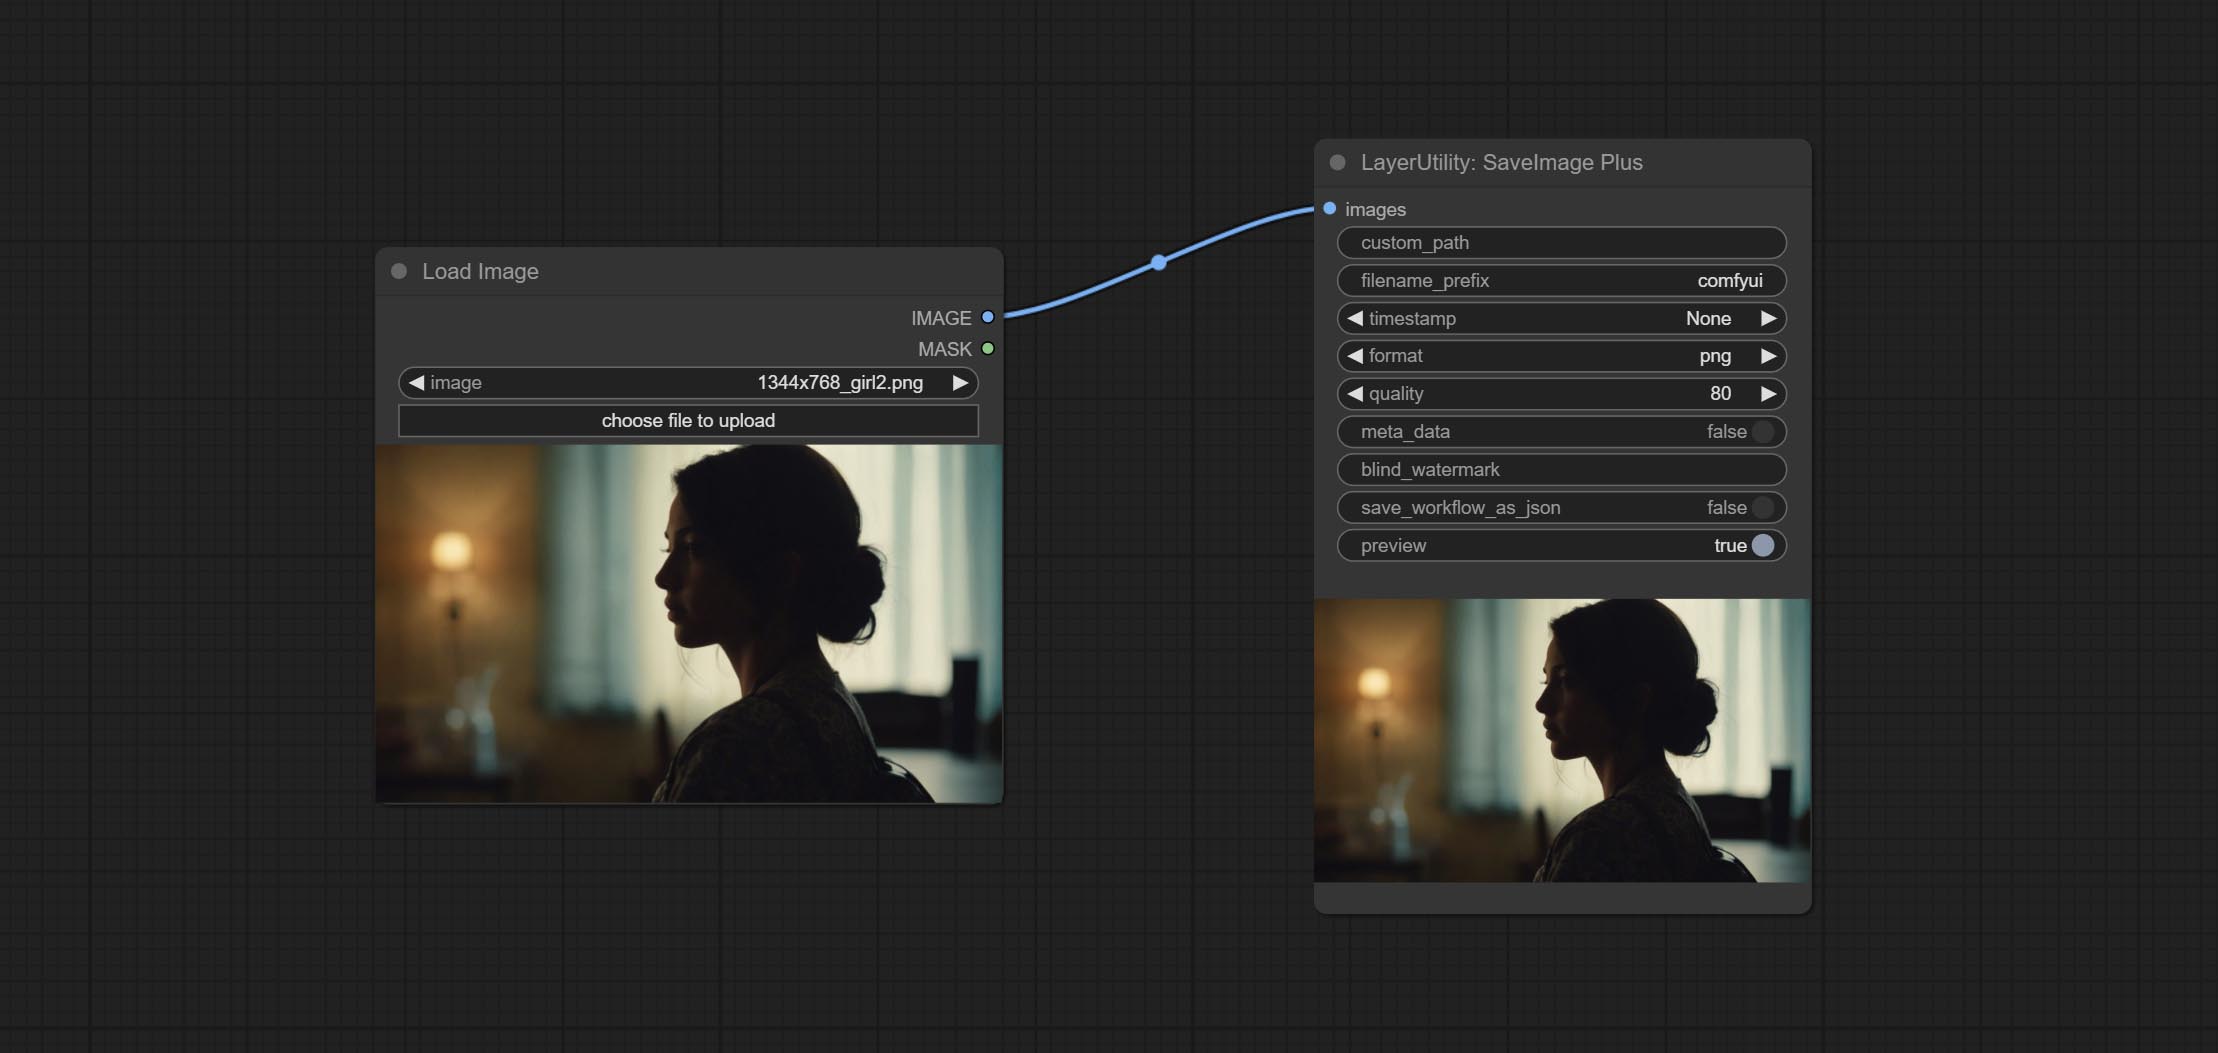
Enhanced save image node. You can customize the directory where the picture is saved, add a timestamp to the file name, select the save format, set the image compression rate, set whether to save the workflow, and optionally add invisible watermarks to the picture. (Add information in a way that is invisible to the naked eye, and use the ShowBlindWaterMark node to decode the watermark). Optionally output the json file of the workflow.
Node Options: 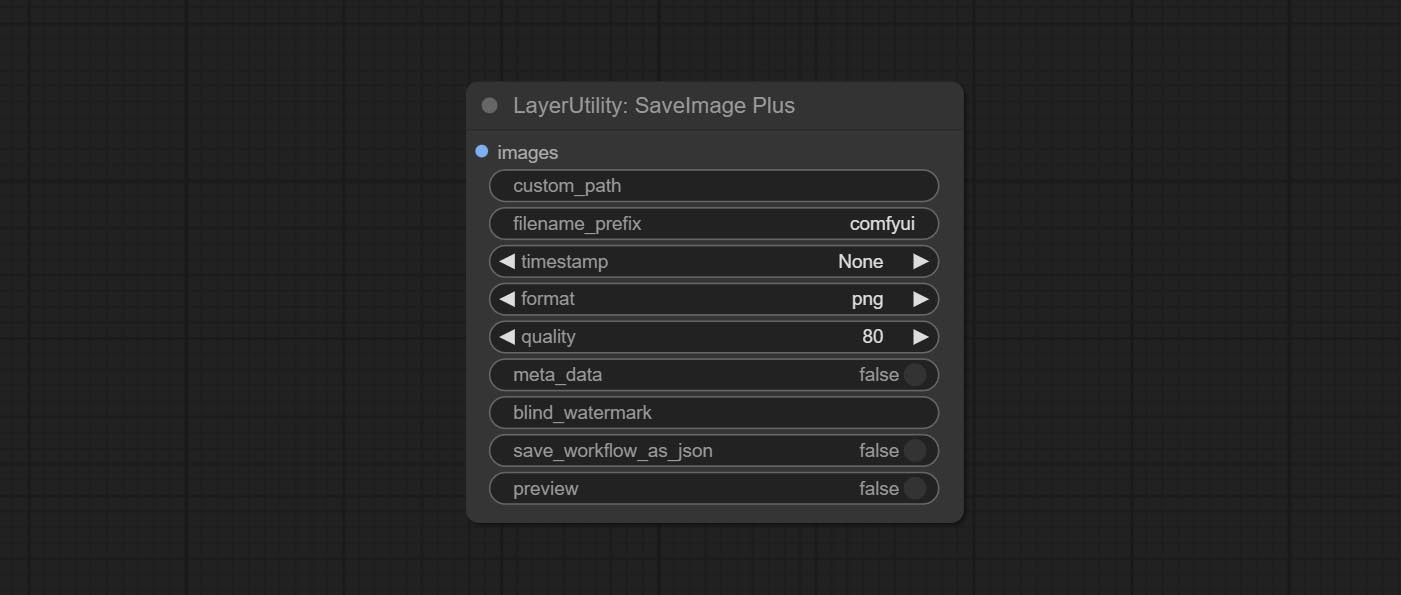
- iamge: The input image.
- custom_path * : User-defined directory, enter the directory name in the correct format. If empty, it is saved in the default output directory of ComfyUI.
- filename_prefix * : The prefix of file name.
- timestamp: Timestamp the file name, opting for date, time to seconds, and time to milliseconds.
- format: The format of image save. Currently available in
png and jpg . Note that only png format is supported for RGBA mode pictures. - quality: Image quality, the value range 10-100, the higher the value, the better the picture quality, the volume of the file also correspondingly increases.
- meta_data: Whether to save metadata to png file, that is workflow information. Set this to false if you do not want the workflow to be leaked.
- blind_watermark: The text entered here (does not support multilingualism) will be converted into a QR code and saved as an invisible watermark. Use
ShowBlindWaterMark node can decode watermarks. Note that pictures with watermarks are recommended to be saved in png format, and lower-quality jpg format will cause watermark information to be lost. - save_workflow_as_json: Whether the output workflow is a json file at the same time (the output json is in the same directory as the picture).
- preview: Preview switch.
* Enter %date for the current date (YY-mm-dd) and %time for the current time (HH-MM-SS). You can enter / for subdirectories. For example, %date/name_%tiem will output the image to the YY-mm-dd folder, with name_HH-MM-SS as the file name prefix.
ImageTaggerSave
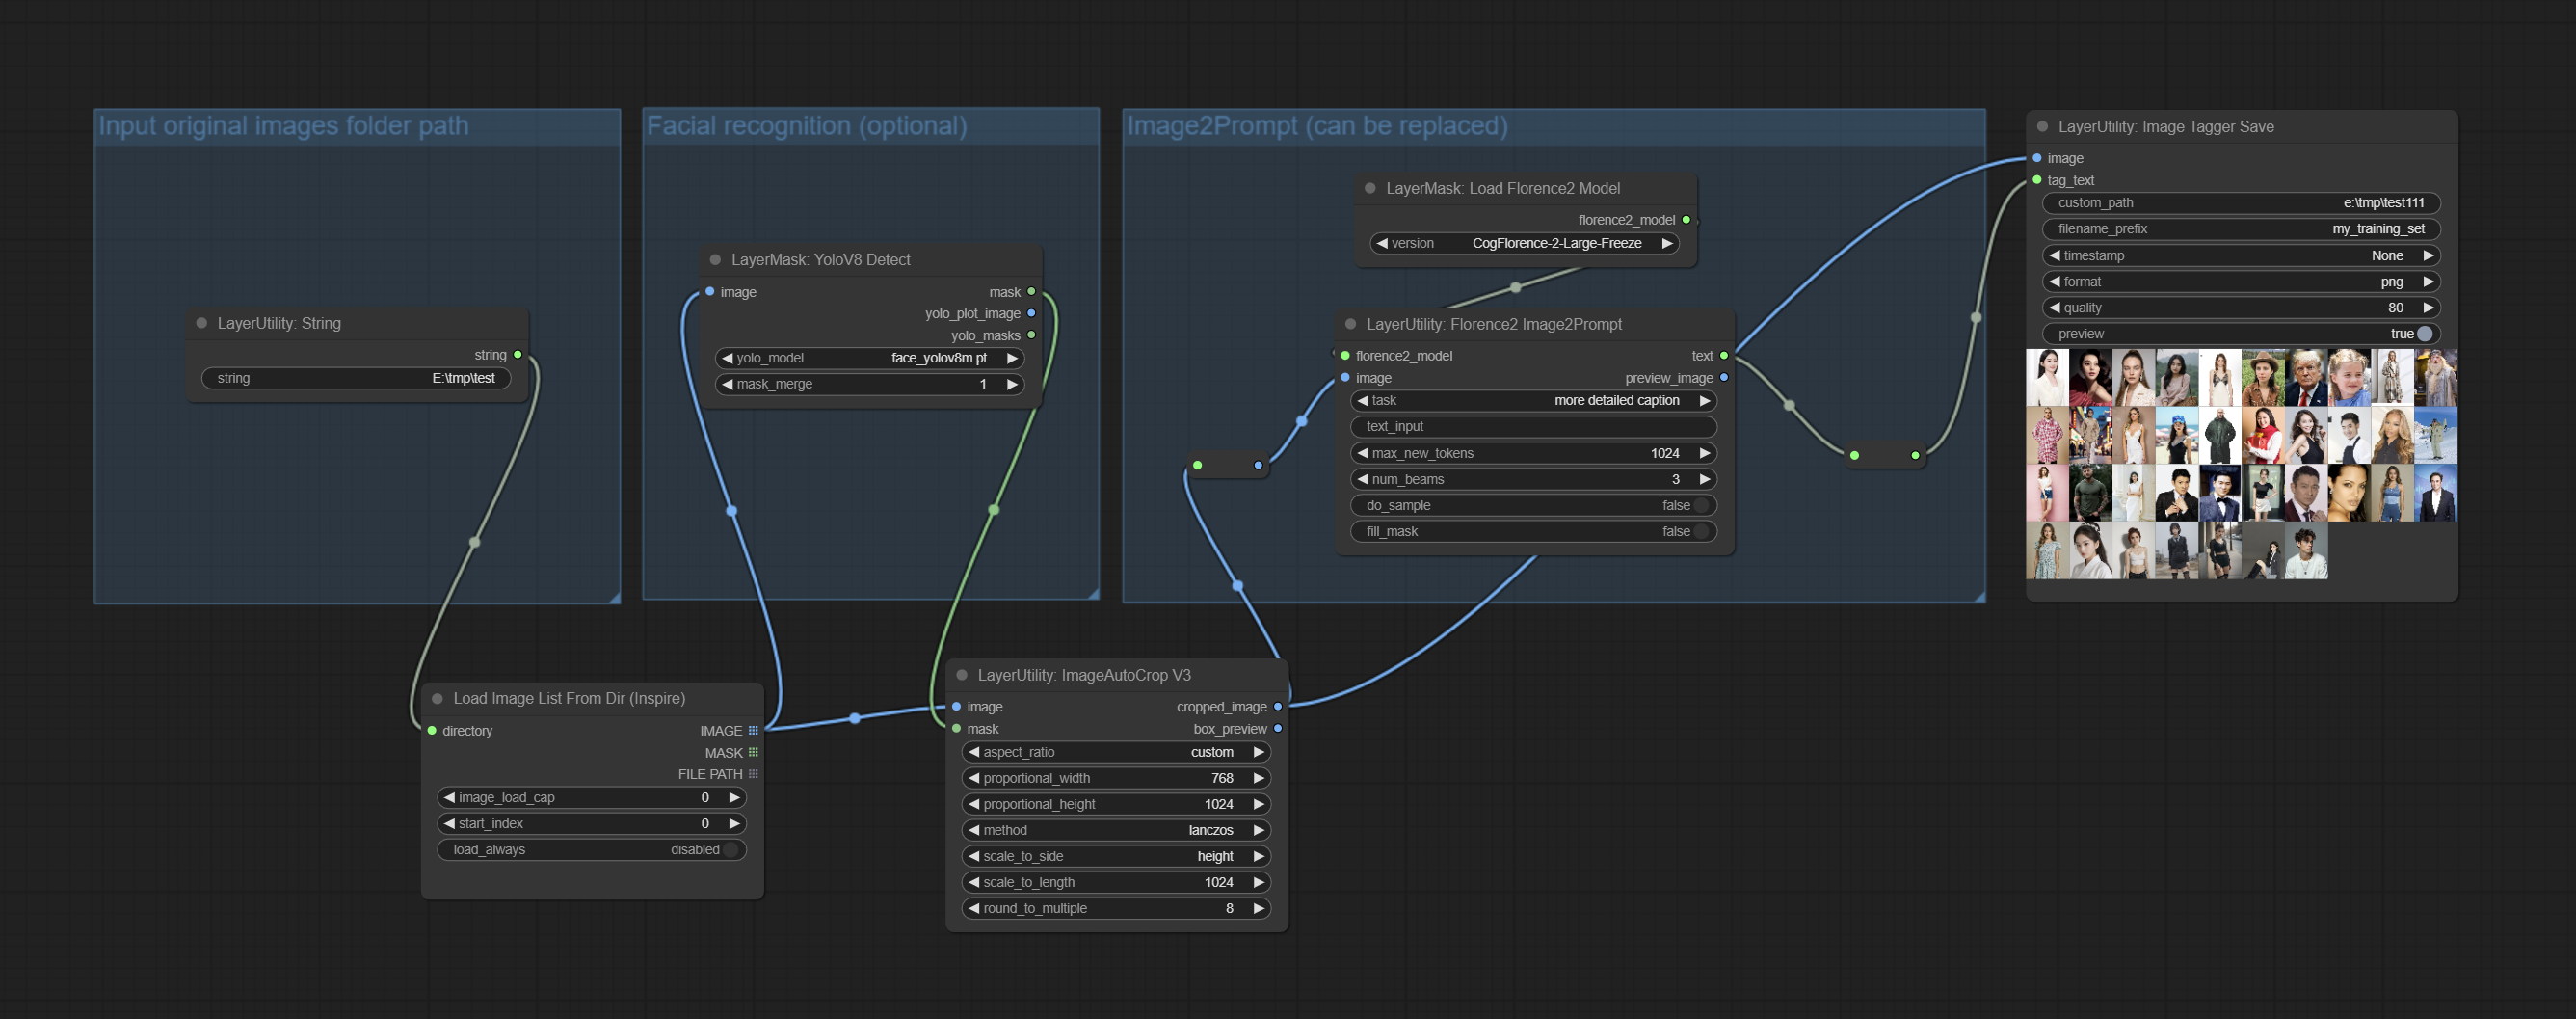
The node used to save the training set images and their text labels, where the image files and text label files have the same file name. Customizable directory for saving images, adding timestamps to file names, selecting save formats, and setting image compression rates. *The workflow image_tagger_stave.exe is located in the workflow directory.
Node Options: 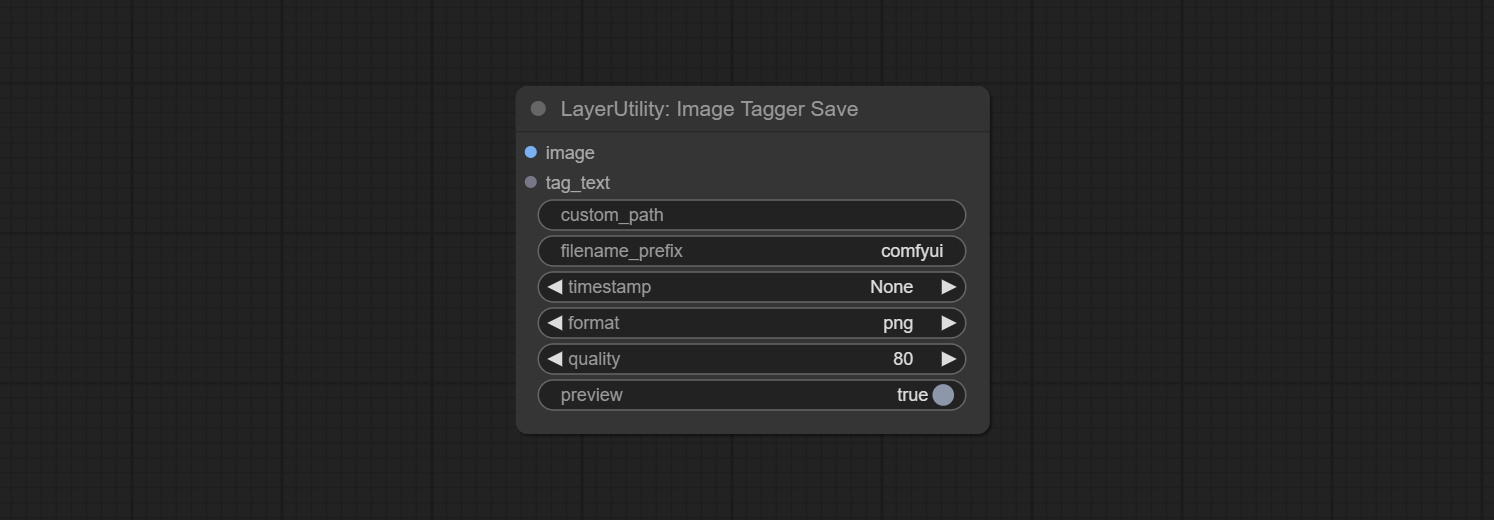
- iamge: The input image.
- tag_text: Text label of image.
- custom_path * : User-defined directory, enter the directory name in the correct format. If empty, it is saved in the default output directory of ComfyUI.
- filename_prefix * : The prefix of file name.
- timestamp: Timestamp the file name, opting for date, time to seconds, and time to milliseconds.
- format: The format of image save. Currently available in
png and jpg . Note that only png format is supported for RGBA mode pictures. - quality: Image quality, the value range 10-100, the higher the value, the better the picture quality, the volume of the file also correspondingly increases.
- preview: Preview switch.
* Enter %date for the current date (YY-mm-dd) and %time for the current time (HH-MM-SS). You can enter / for subdirectories. For example, %date/name_%tiem will output the image to the YY-mm-dd folder, with name_HH-MM-SS as the file name prefix.
AddBlindWaterMark
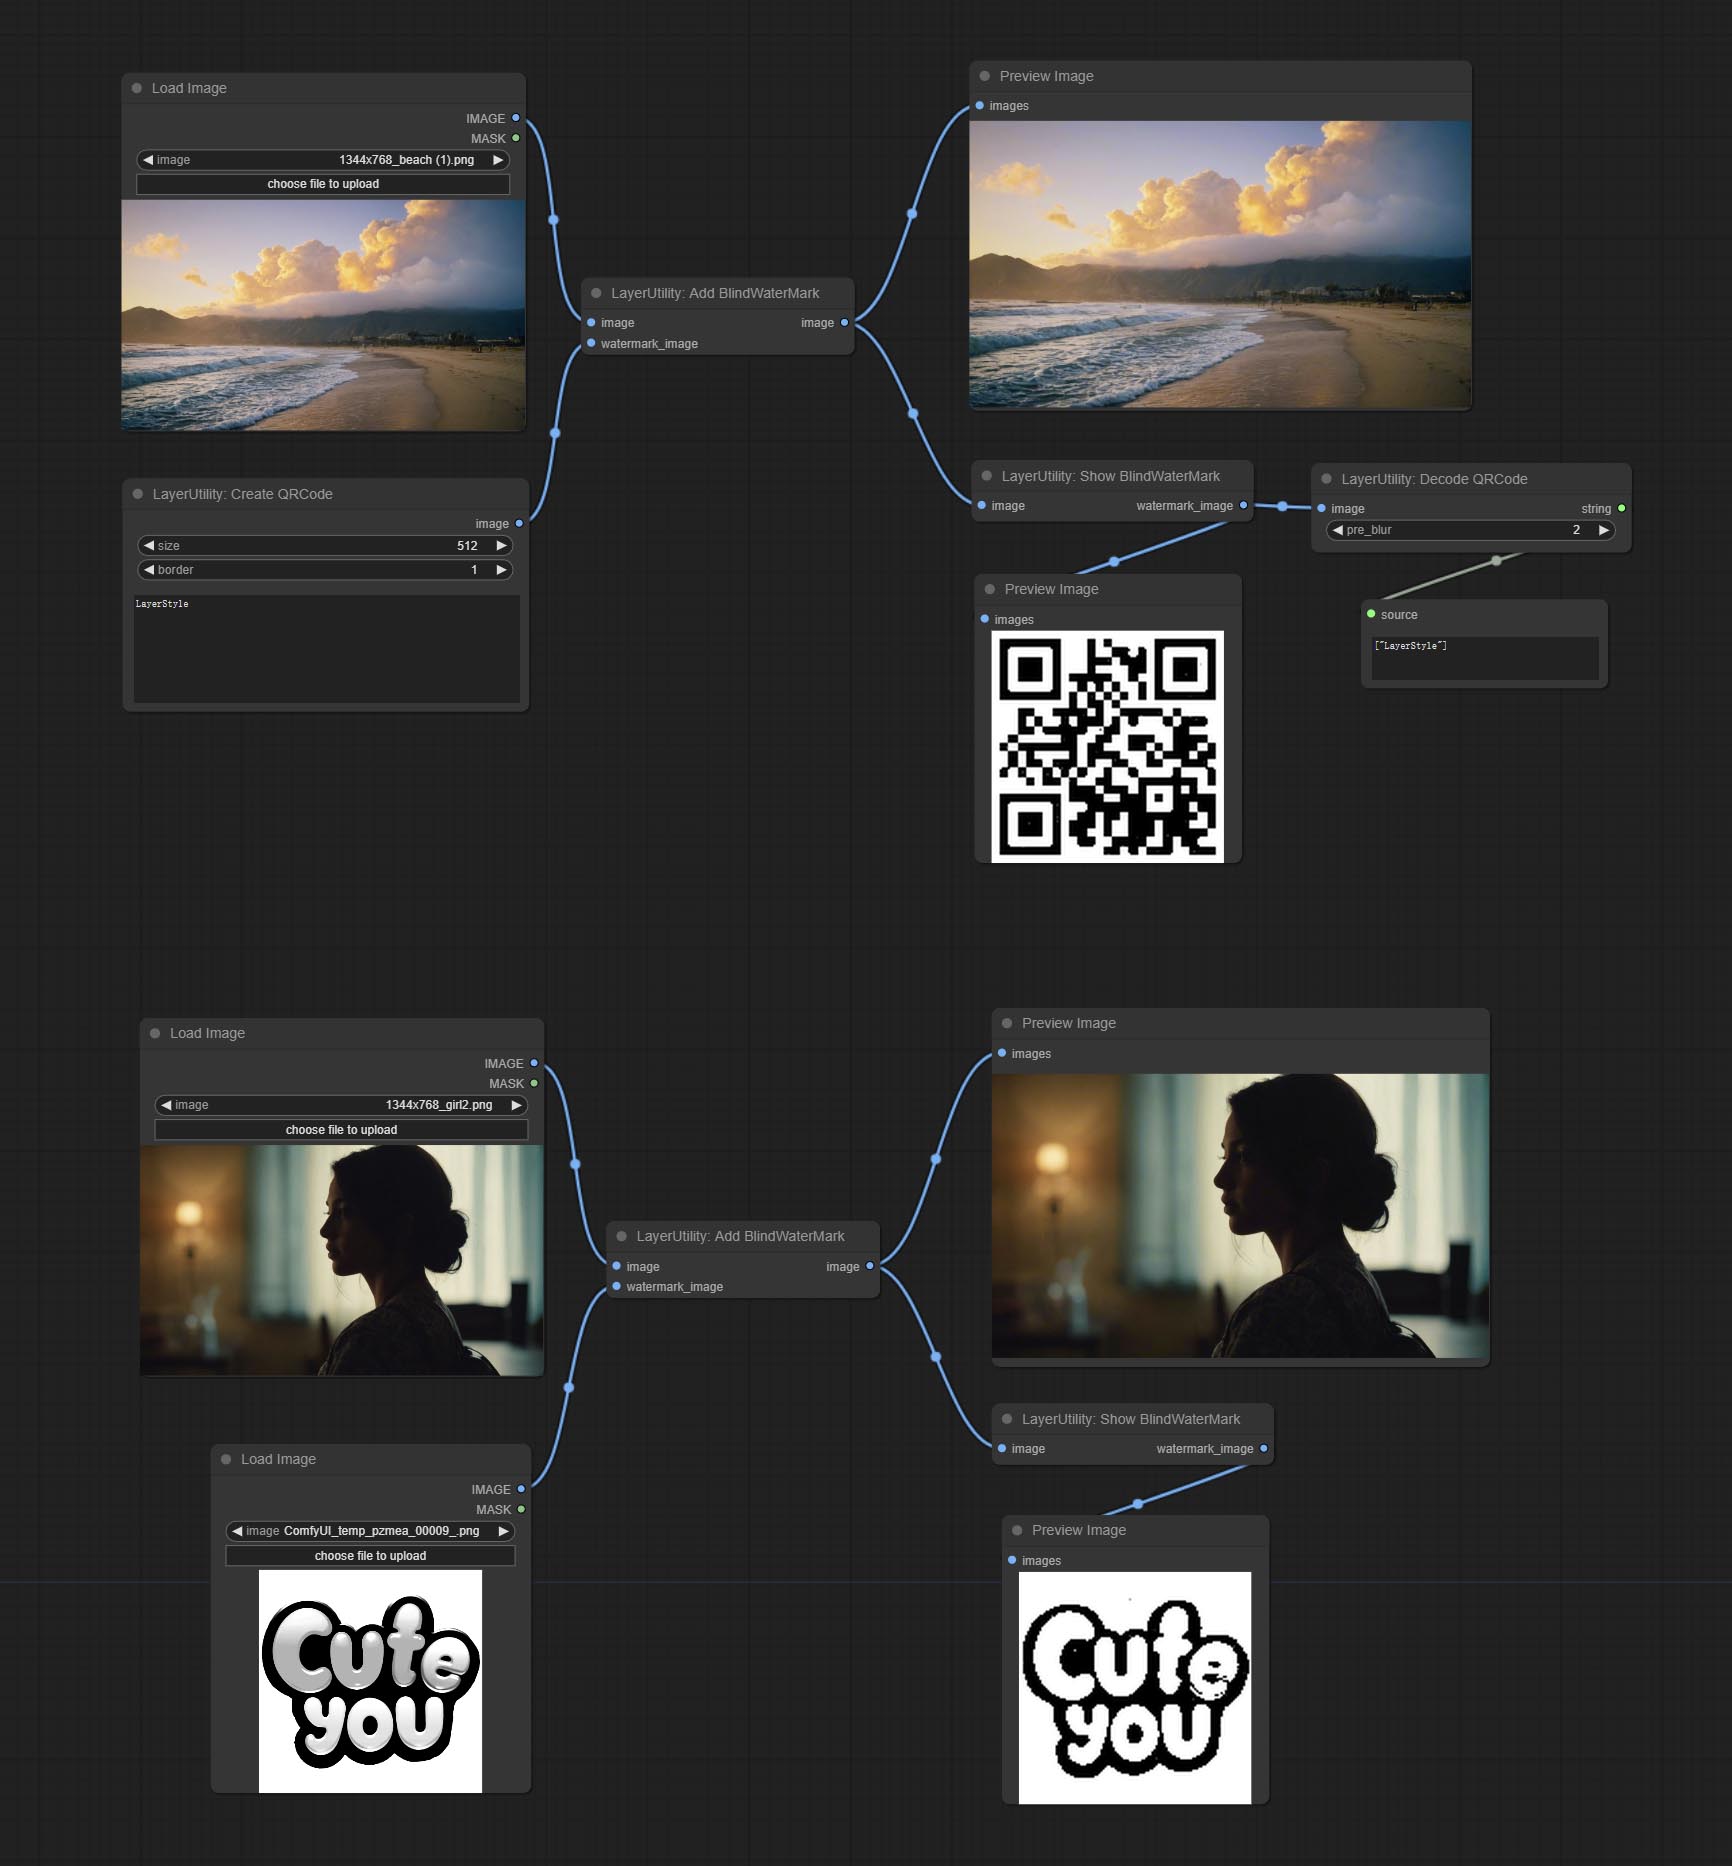
Add an invisible watermark to a picture. Add the watermark image in a way that is invisible to the naked eye, and use the ShowBlindWaterMark node to decode the watermark.
Node Options: 
- iamge: The input image.
- watermark_image: Watermark image. The image entered here will automatically be converted to a square black and white image as a watermark. It is recommended to use a QR code as a watermark.
ShowBlindWaterMark
Decoding the invisible watermark added to the AddBlindWaterMark and SaveImagePlus nodes. 
CreateQRCode
Generate a square QR code picture.
Node Options:

- size: The side length of image.
- border: The size of the border around the QR code, the larger the value, the wider the border.
- text: Enter the text content of the QR code here, and multi-language is not supported.
DecodeQRCode
Decoding the QR code.
Node Options:

- image: The input QR code image.
- pre_blur: Pre-blurring, you can try to adjust this value for QR codes that are difficult to identify.
LoadPSD
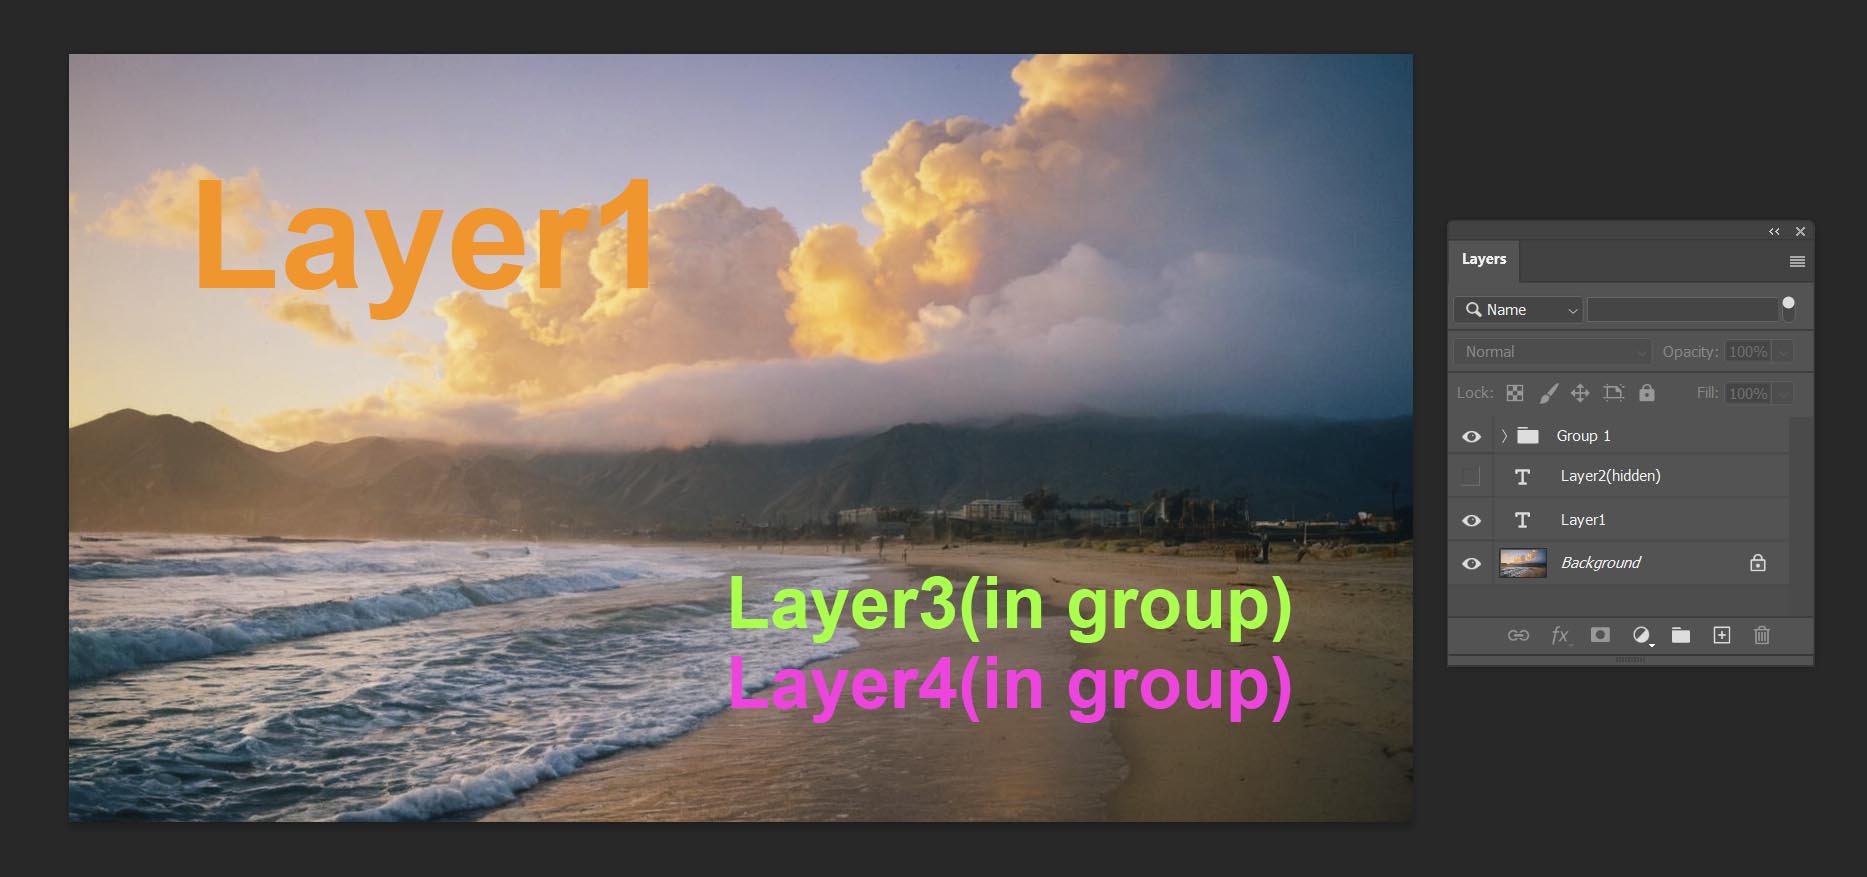
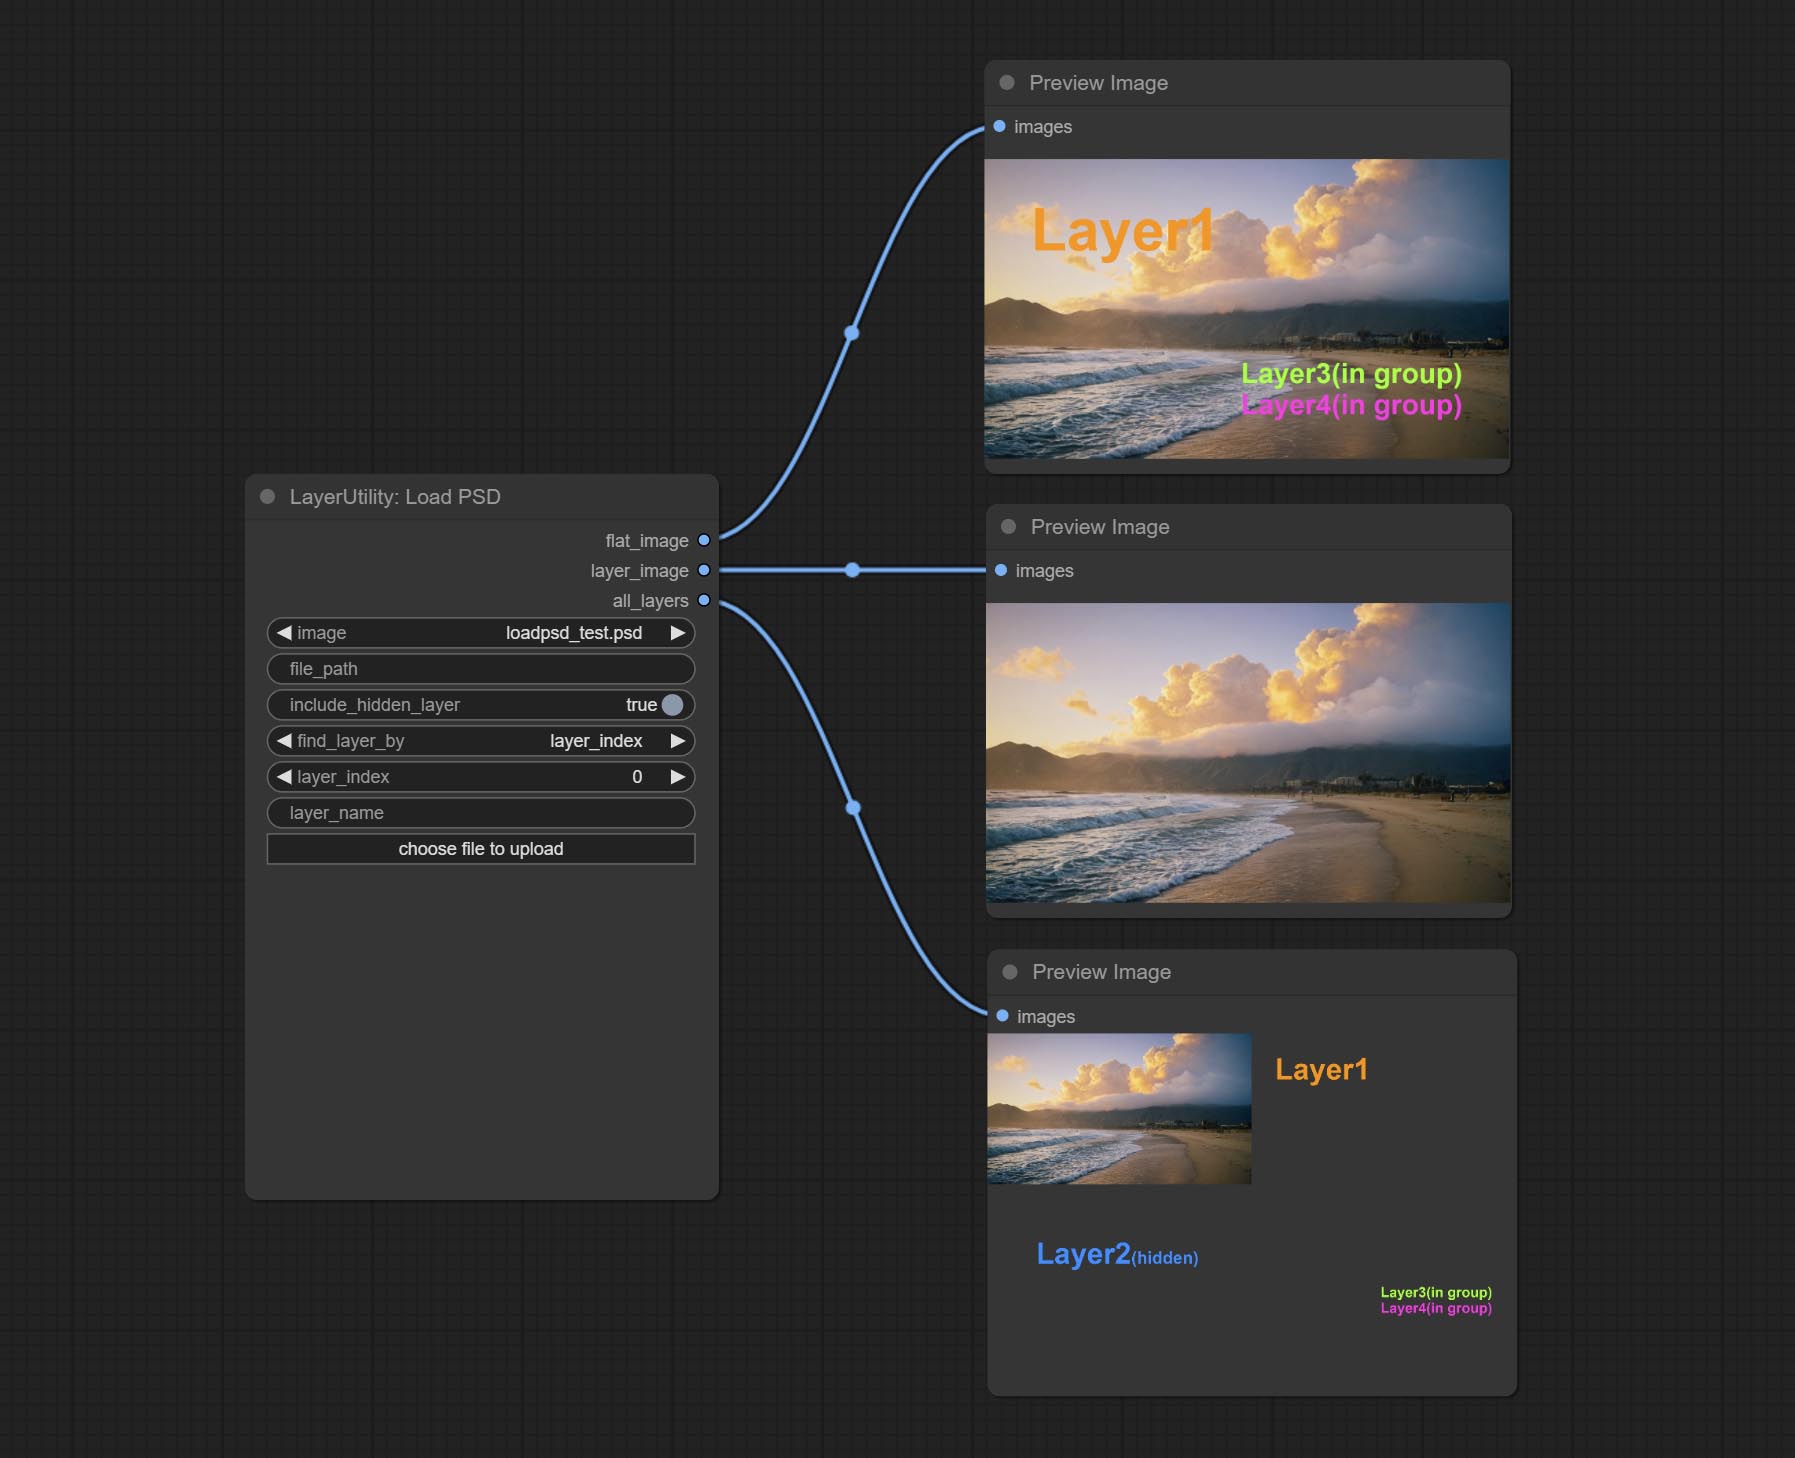
Load the PSD format file and export the layers. Note that this node requires the installation of the psd_tools dependency package, If error occurs during the installation of psd_tool, such as ModuleNotFoundError: No module named 'docopt' , please download docopt's whl and manual install it.
Node Options:
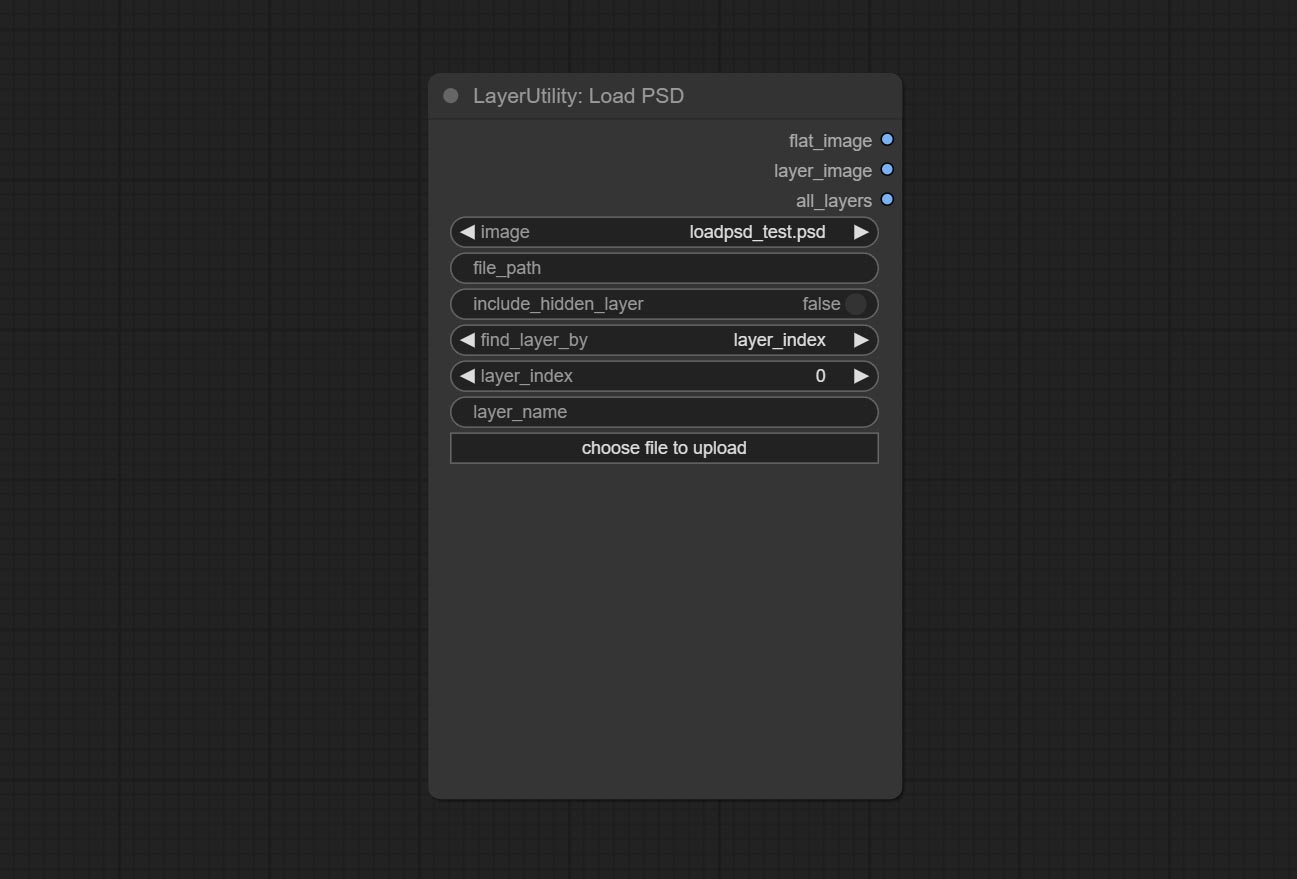
- image: Here is a list of *.psd files under
ComfyUI/input , where previously loaded psd images can be selected. - file_path: The complete path and file name of the psd file.
- include_hidden_layer: whether include hidden layers.
- find_layer_by: The method for finding layers can be selected by layer key number or layer name. Layer groups are treated as one layer.
- layer_index: The layer key number, where 0 is the bottom layer, is incremented sequentially. If include_hiddenlayer is set to false, hidden layers are not counted. Set to -1 to output the top layer.
- layer_name: Layer name. Note that capitalization and punctuation must match exactly.
Outputs: flat_image: PSD preview image. layer_iamge: Find the layer output. all_layers: Batch images containing all layers.
SD3NegativeConditioning
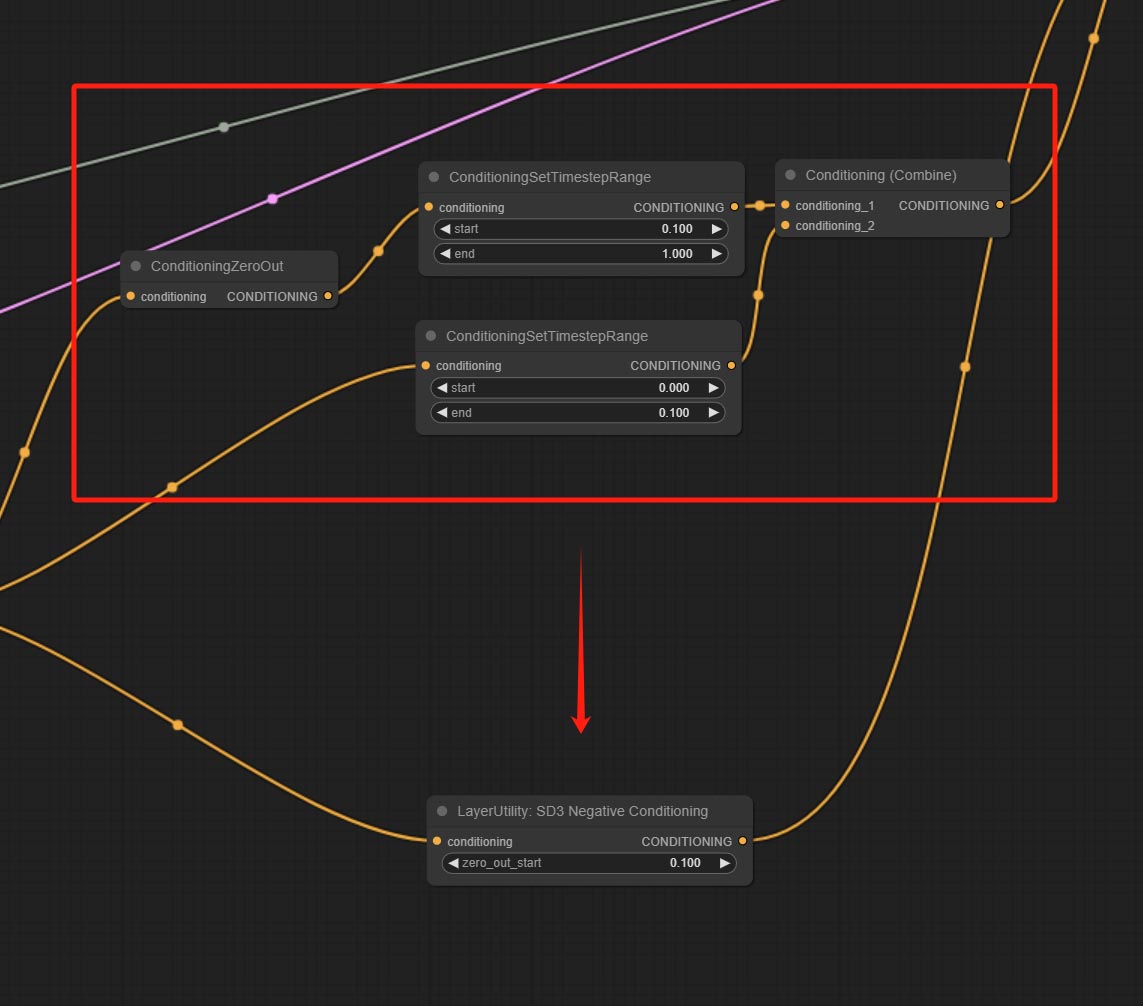
Encapsulate the four nodes of Negative Condition in SD3 into a separate node.
Node Options:
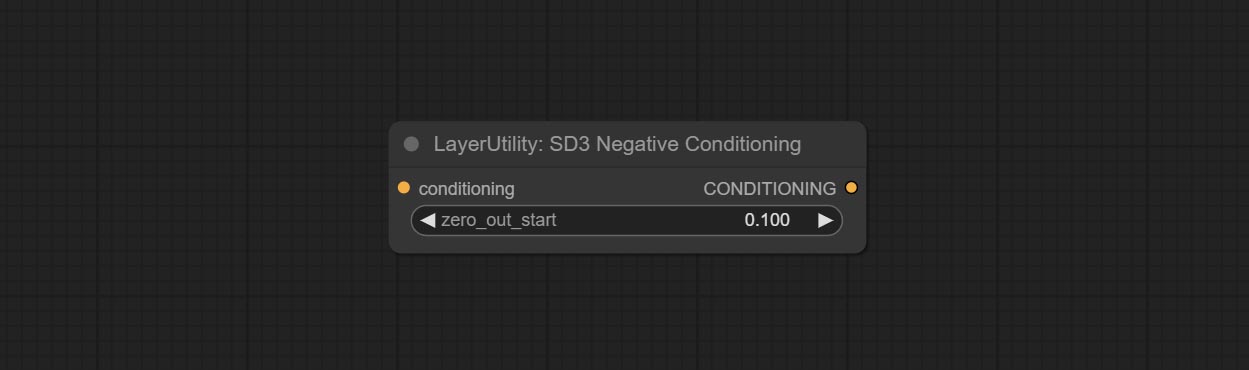
- zero_out_start: Set the ConditioningSetTimestepRange start value for Negative ConditioningZeroOut, which is the same as the ConditioningSetTimestepRange end value for Negative.
LayerMask
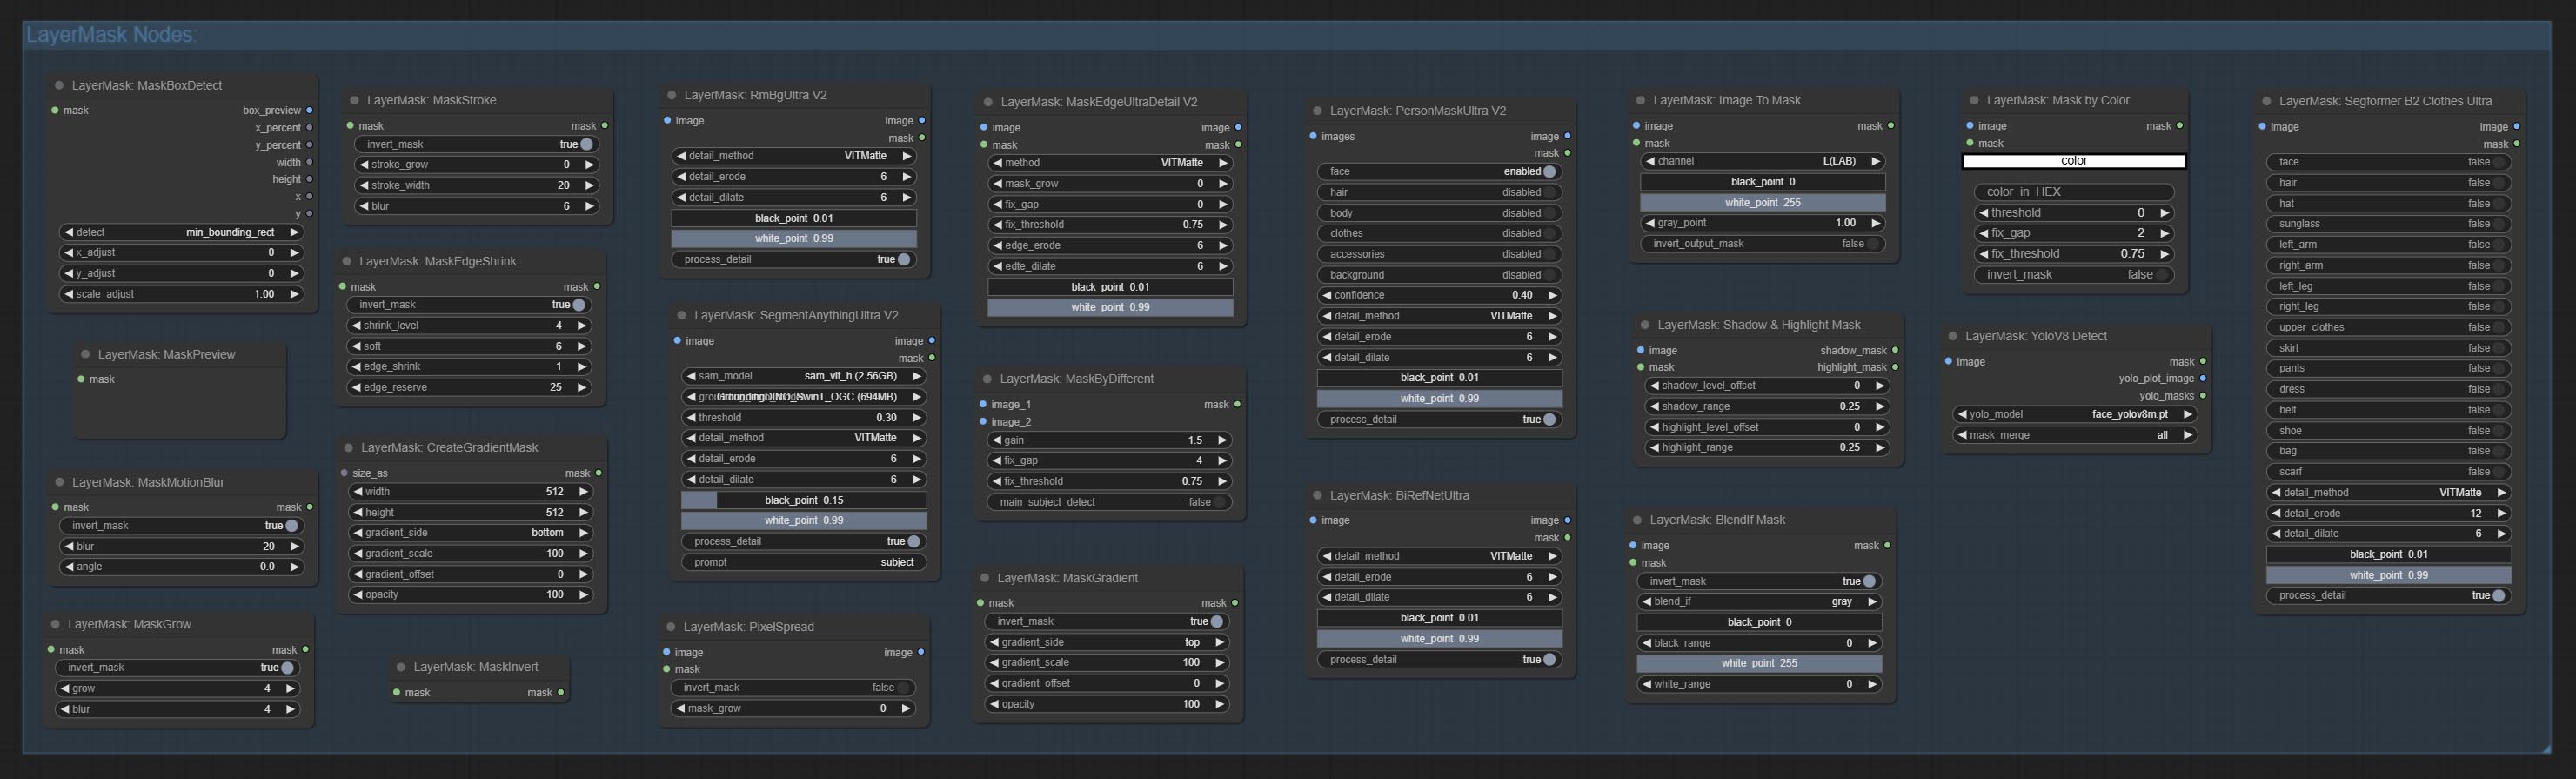
BlendIfMask
Reproduction of Photoshop's layer Style - Blend If function. This node outputs a mask for layer composition on the ImageBlend or ImageBlendAdvance nodes. mask is an optional input, and if you enter a mask here, it will act on the output. 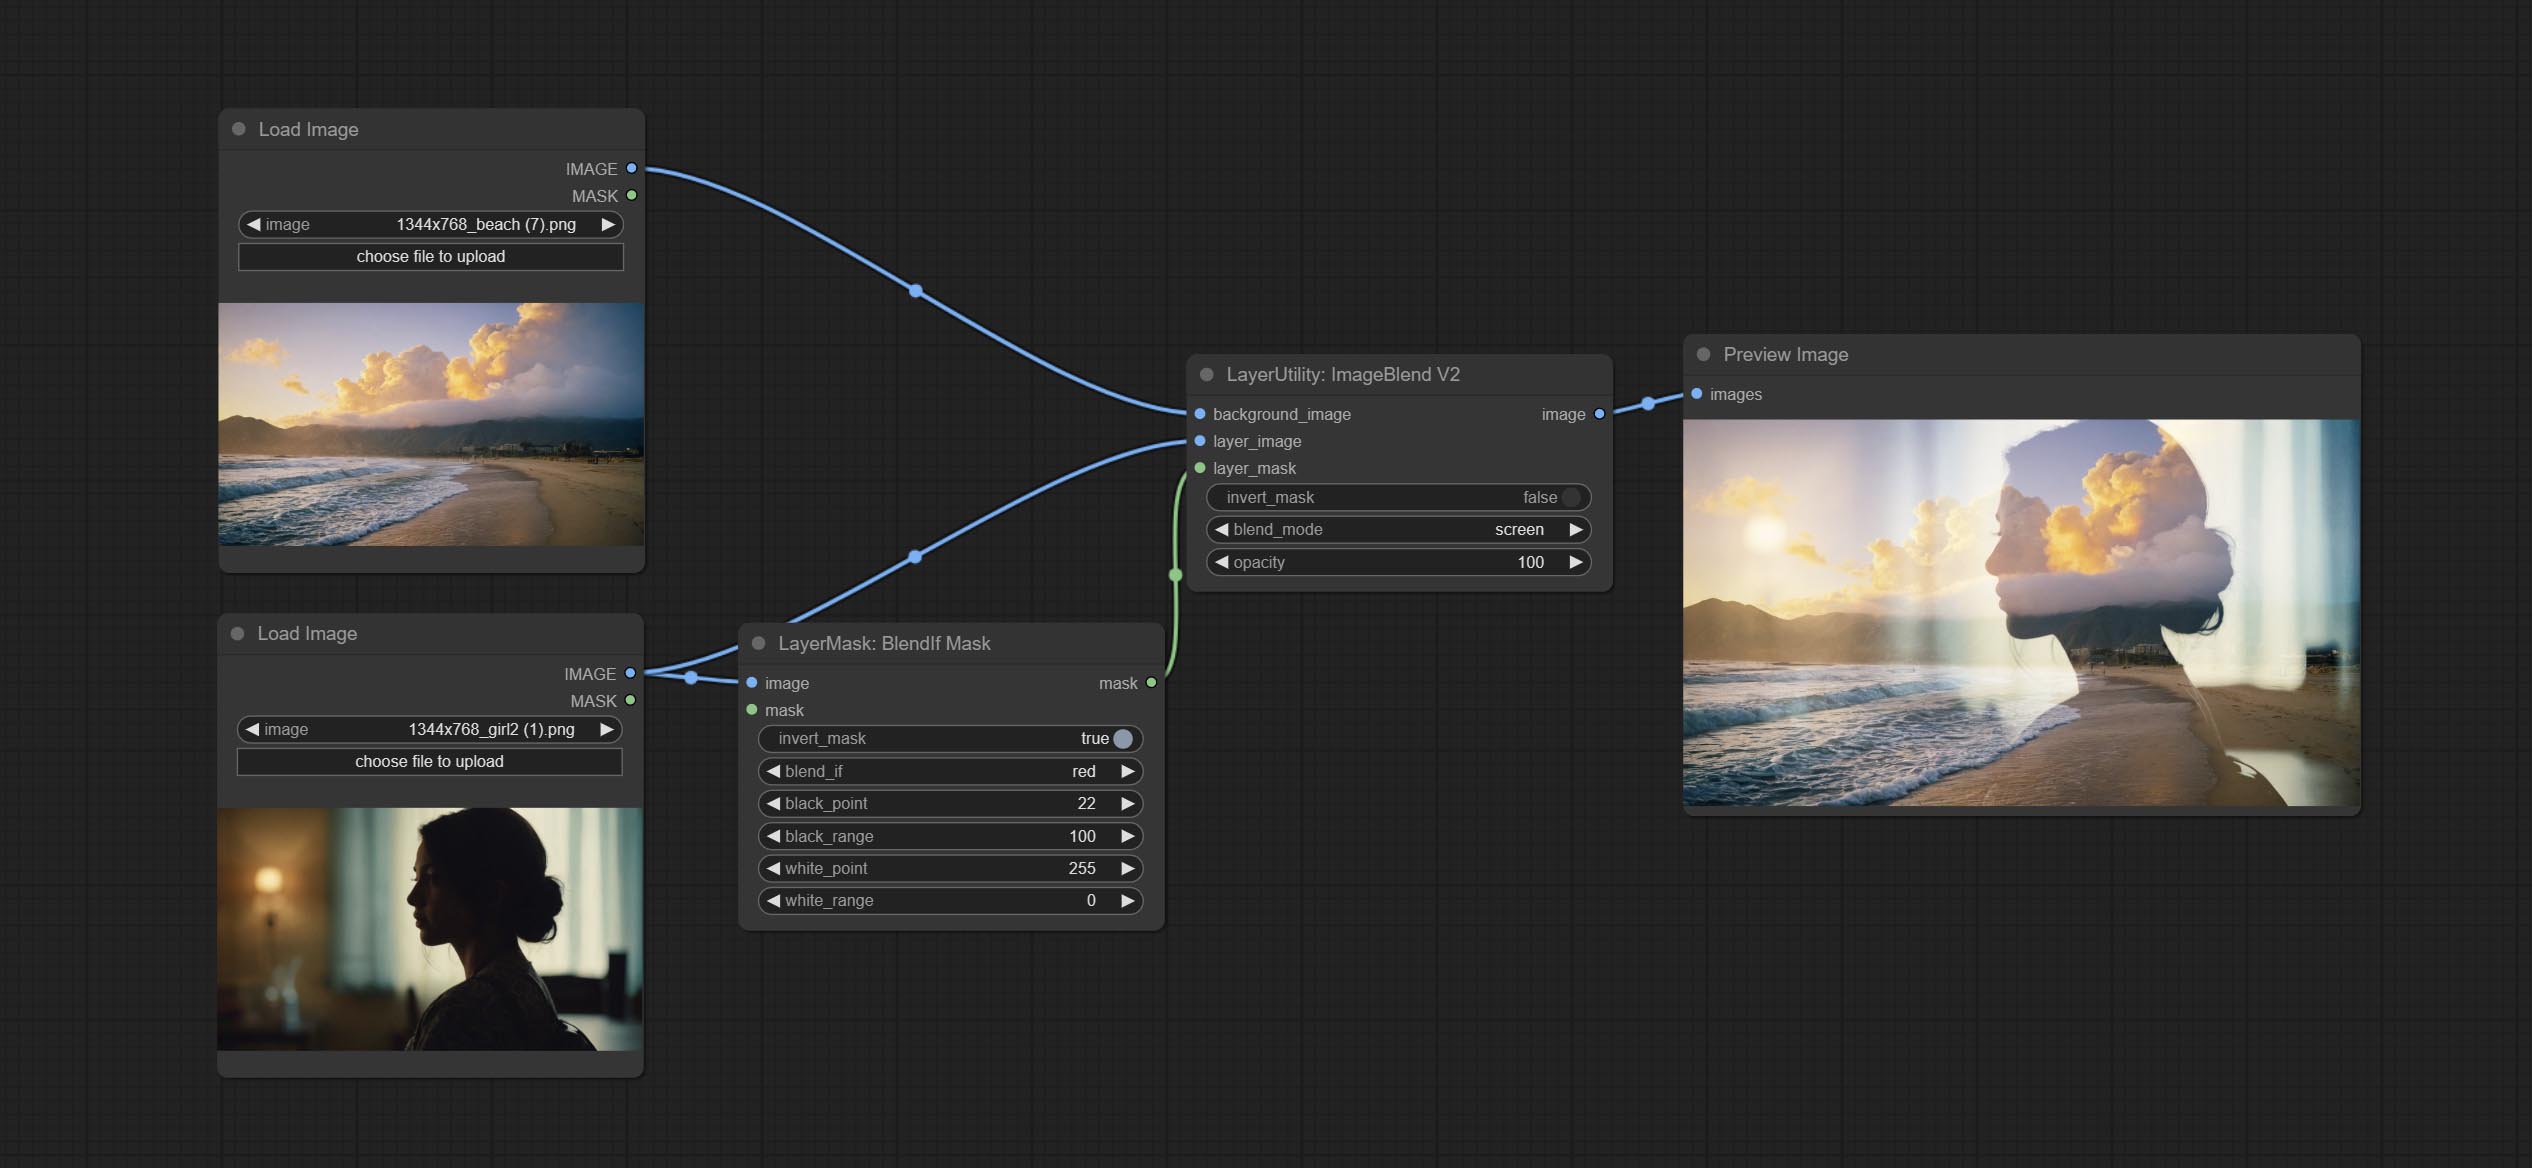
Node Options:
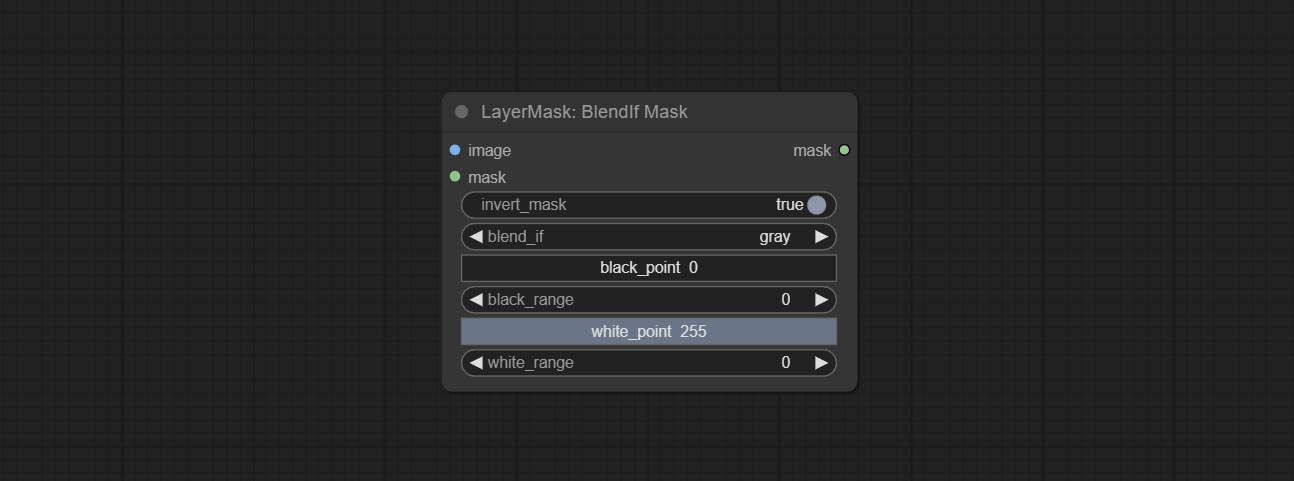
- invert_mask: Whether to reverse the mask.
- blend_if: Channel selection for Blend If. There are four options:
gray , red , green , and blue . - black_point: Black point values, ranging from 0-255.
- black_range: Dark part transition range. The larger the value, the richer the transition level of the dark part mask.
- white_point: White point values, ranging from 0-255.
- white_range: Brightness transition range. The larger the value is, the richer the transition level of the bright part mask is.
MaskBoxDetect
Detect the area where the mask is located and output its position and size. 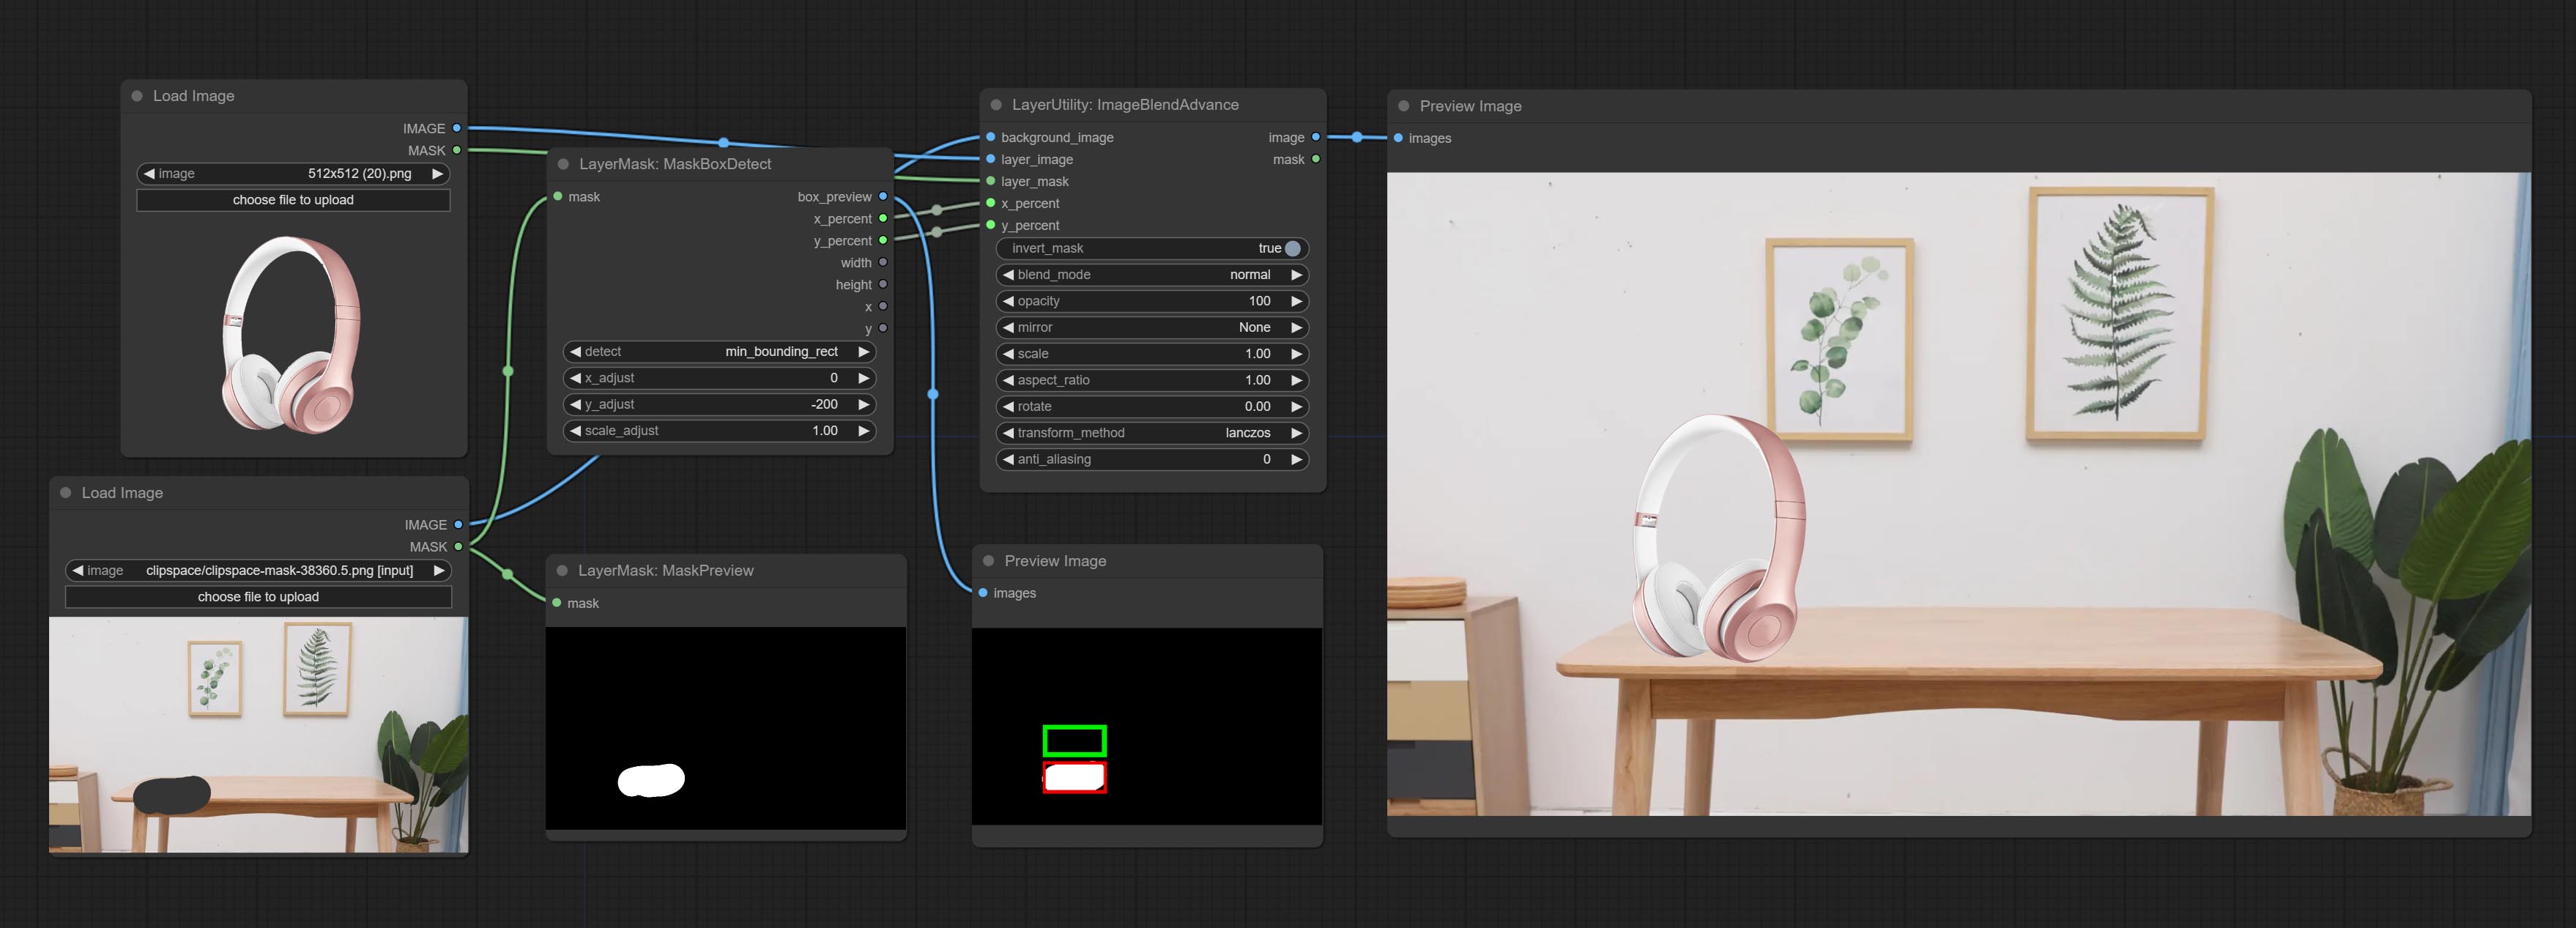
Node options:
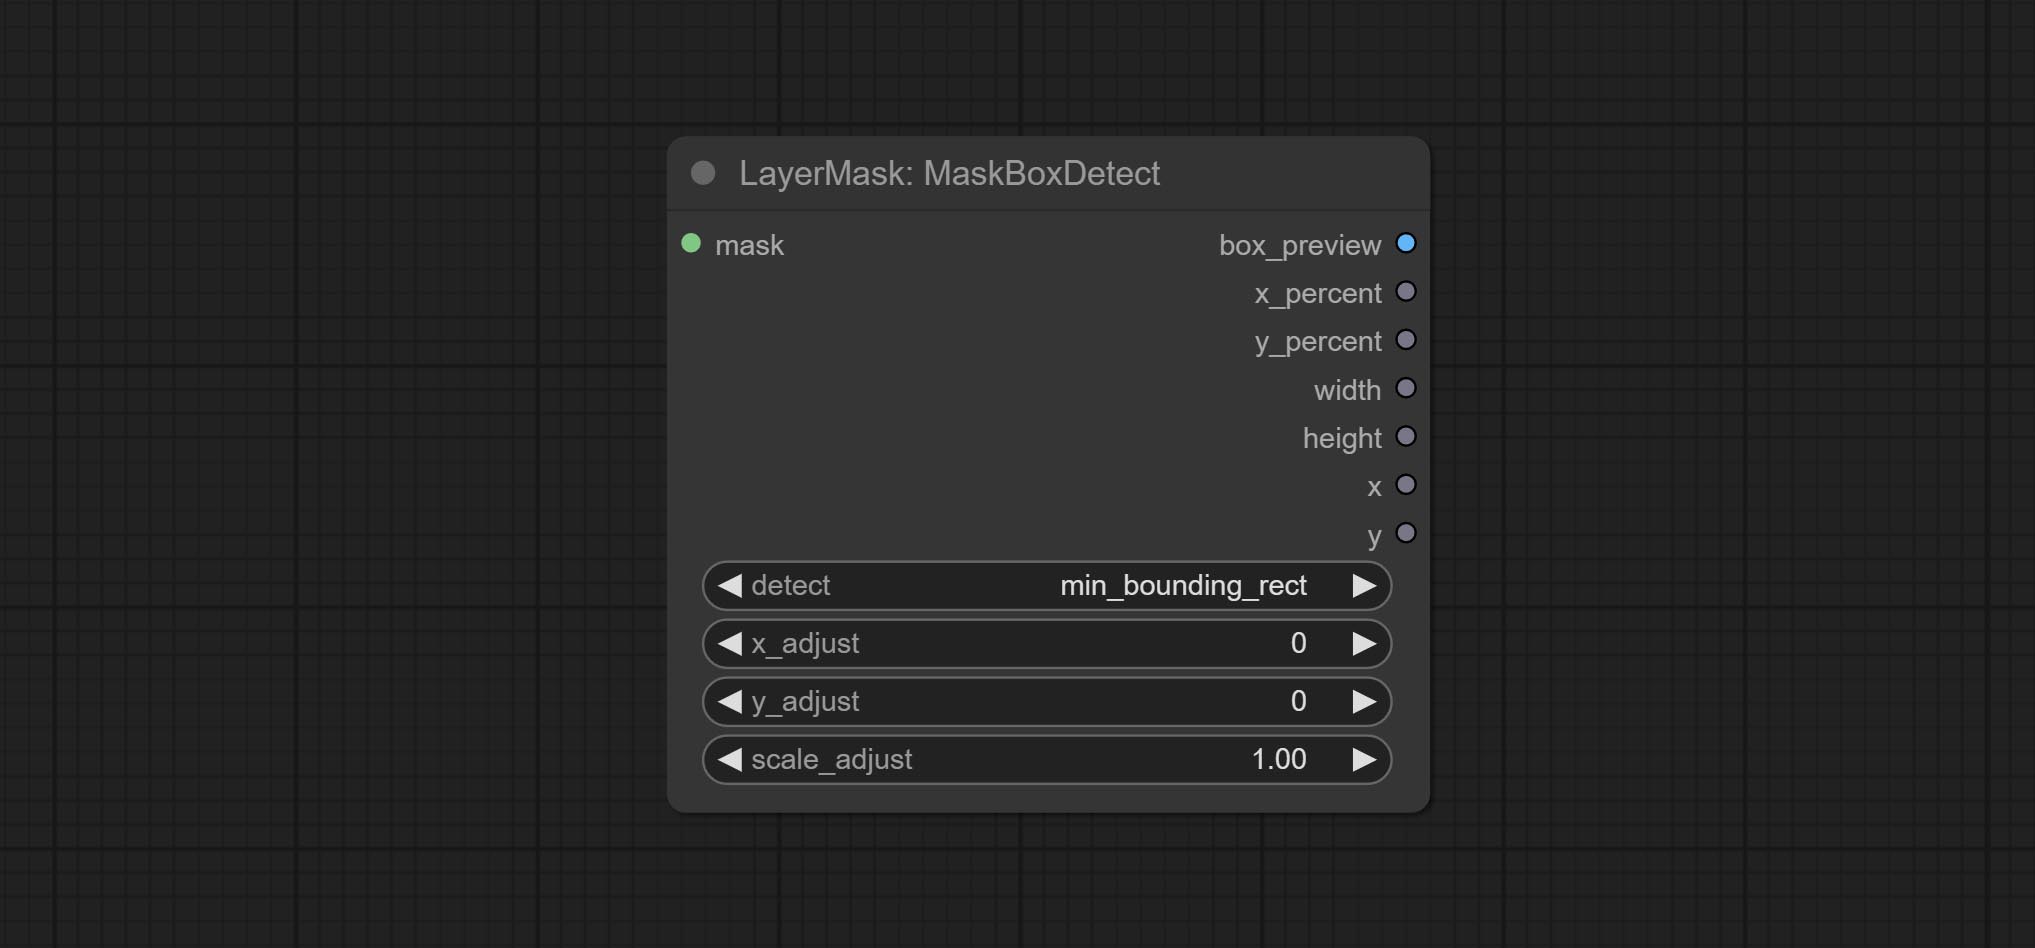
- detect: Detection method,
min_bounding_rect is the minimum bounding rectangle of block shape, max_inscribed_rect is the maximum inscribed rectangle of block shape, and mask-area is the effective area for masking pixels. - x_adjust: Adjust of horizontal deviation after detection.
- y_adjust: Adjust of vertical offset after detection.
- scale_adjust: Adjust the scaling offset after detection.
Saída:
- box_preview: Preview image of detection results. Red represents the detected result, and green represents the adjust output result.
- x_percent: Horizontal position output in percentage.
- y_percent: Vertical position output in percentage.
- width: Width.
- height: Height.
- x: The x-coordinate of the top left corner position.
- y: The y-coordinate of the top left corner position.
Ultra Nodes
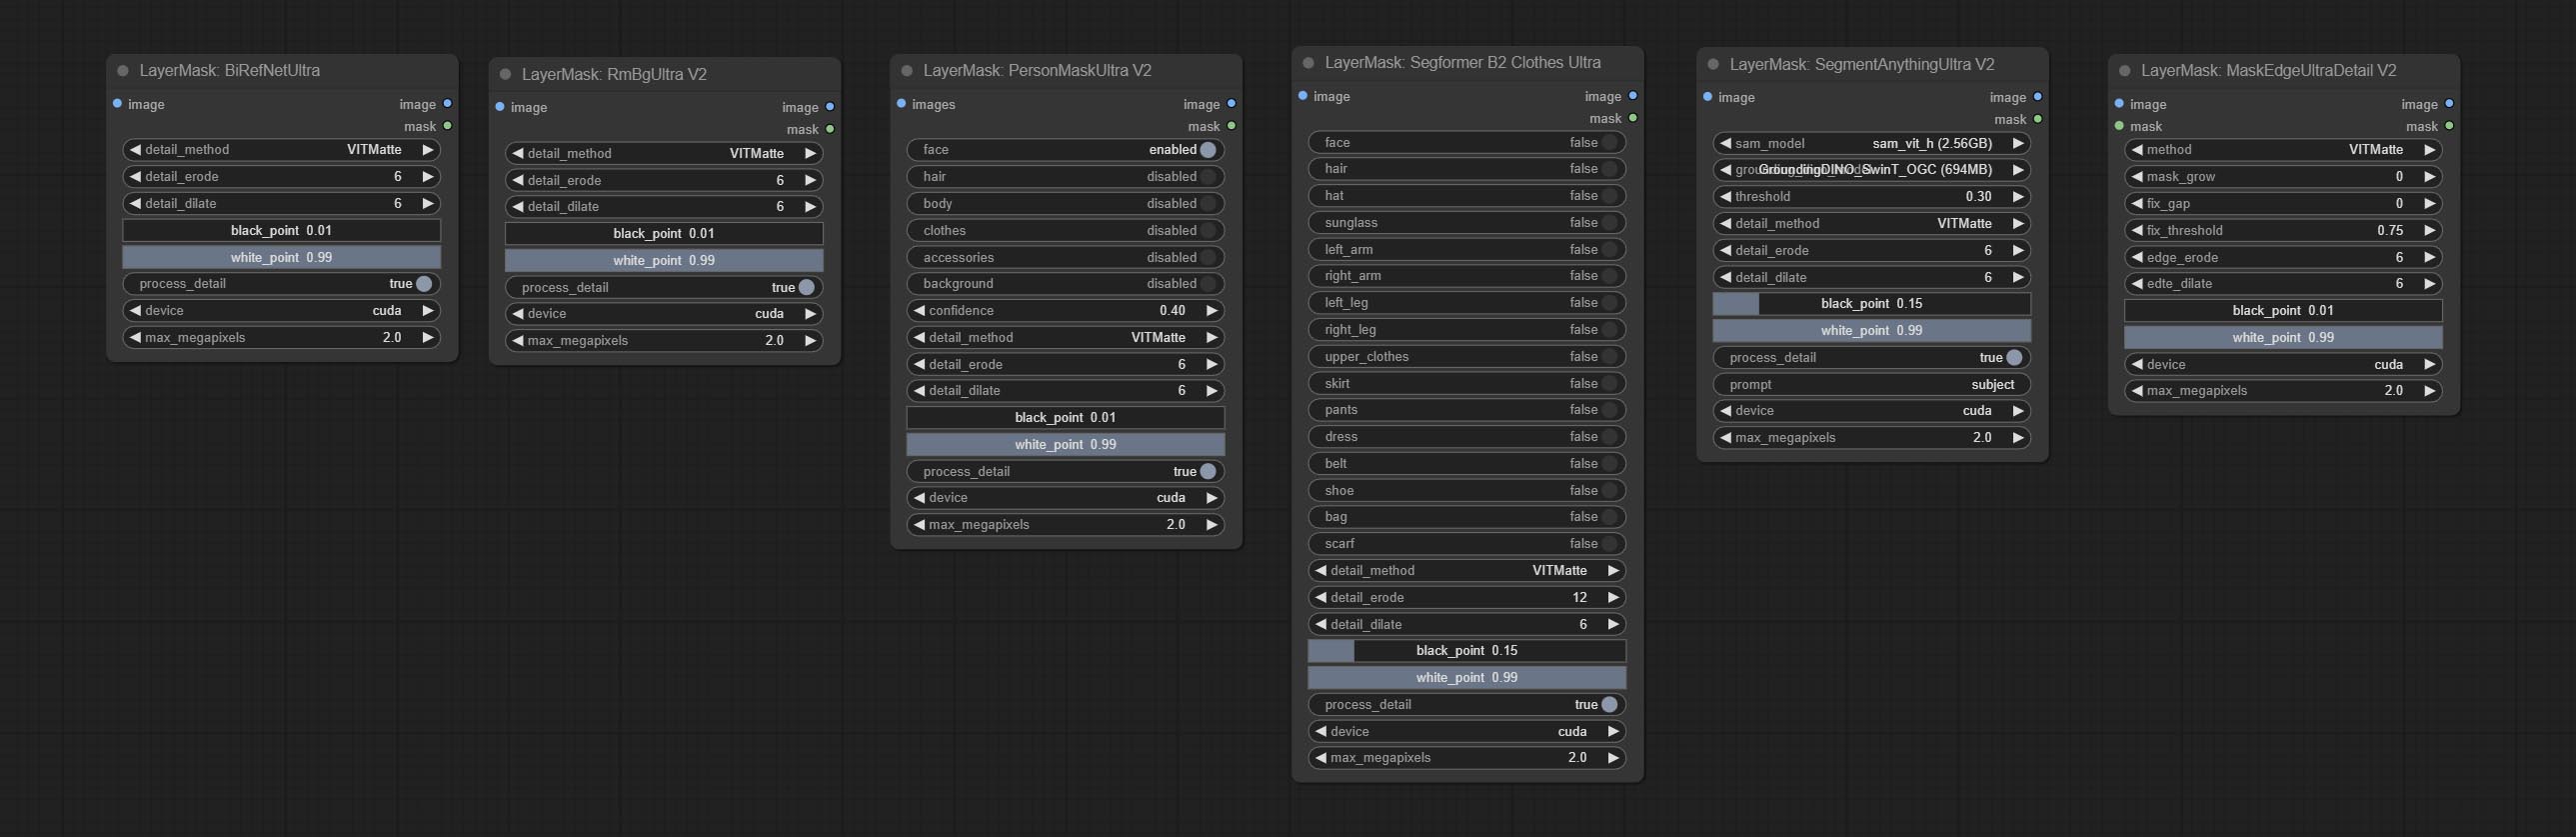
Nodes that use ultra fine edge masking processing methods, the latest version of nodes includes: SegmentAnythingUltraV2, RmBgUltraV2, BiRefNetUltra, PersonMaskUltraV2, SegformerB2ClothesUltra and MaskEdgeUltraDetailV2. There are three edge processing methods for these nodes:
-
PyMatting optimizes the edges of the mask by using a closed form matching to mask trimap. -
GuideFilter uses opencv guidedfilter to feather edges based on color similarity, and performs best when edges have strong color separation.
The code for the above two methods is from the ComfyUI-Image-Filters in spacepxl's Alpha Matte, thanks to the original author. -
VitMatte uses the transformer vit model for high-quality edge processing, preserving edge details and even generating semi transparent masks. Note: When running for the first time, you need to download the vitmate model file and wait for the automatic download to complete. If the download cannot be completed, you can run the command huggingface-cli download hustvl/vitmatte-small-composition-1k to manually download. After successfully downloading the model, you can use VITMatte(local) without accessing the network. - VitMatte's options:
device set whether to use CUDA for vitimate operations, which is about 5 times faster than CPU. max_megapixels set the maximum image size for vitmate operation, and oversized images will be reduced in size. For 16G VRAM, it is recommended to set it to 3.
*Download all model files from BaiduNetdisk or Huggingface to ComfyUI/models/vitmatte folder.
The following figure is an example of the difference in output between three methods. 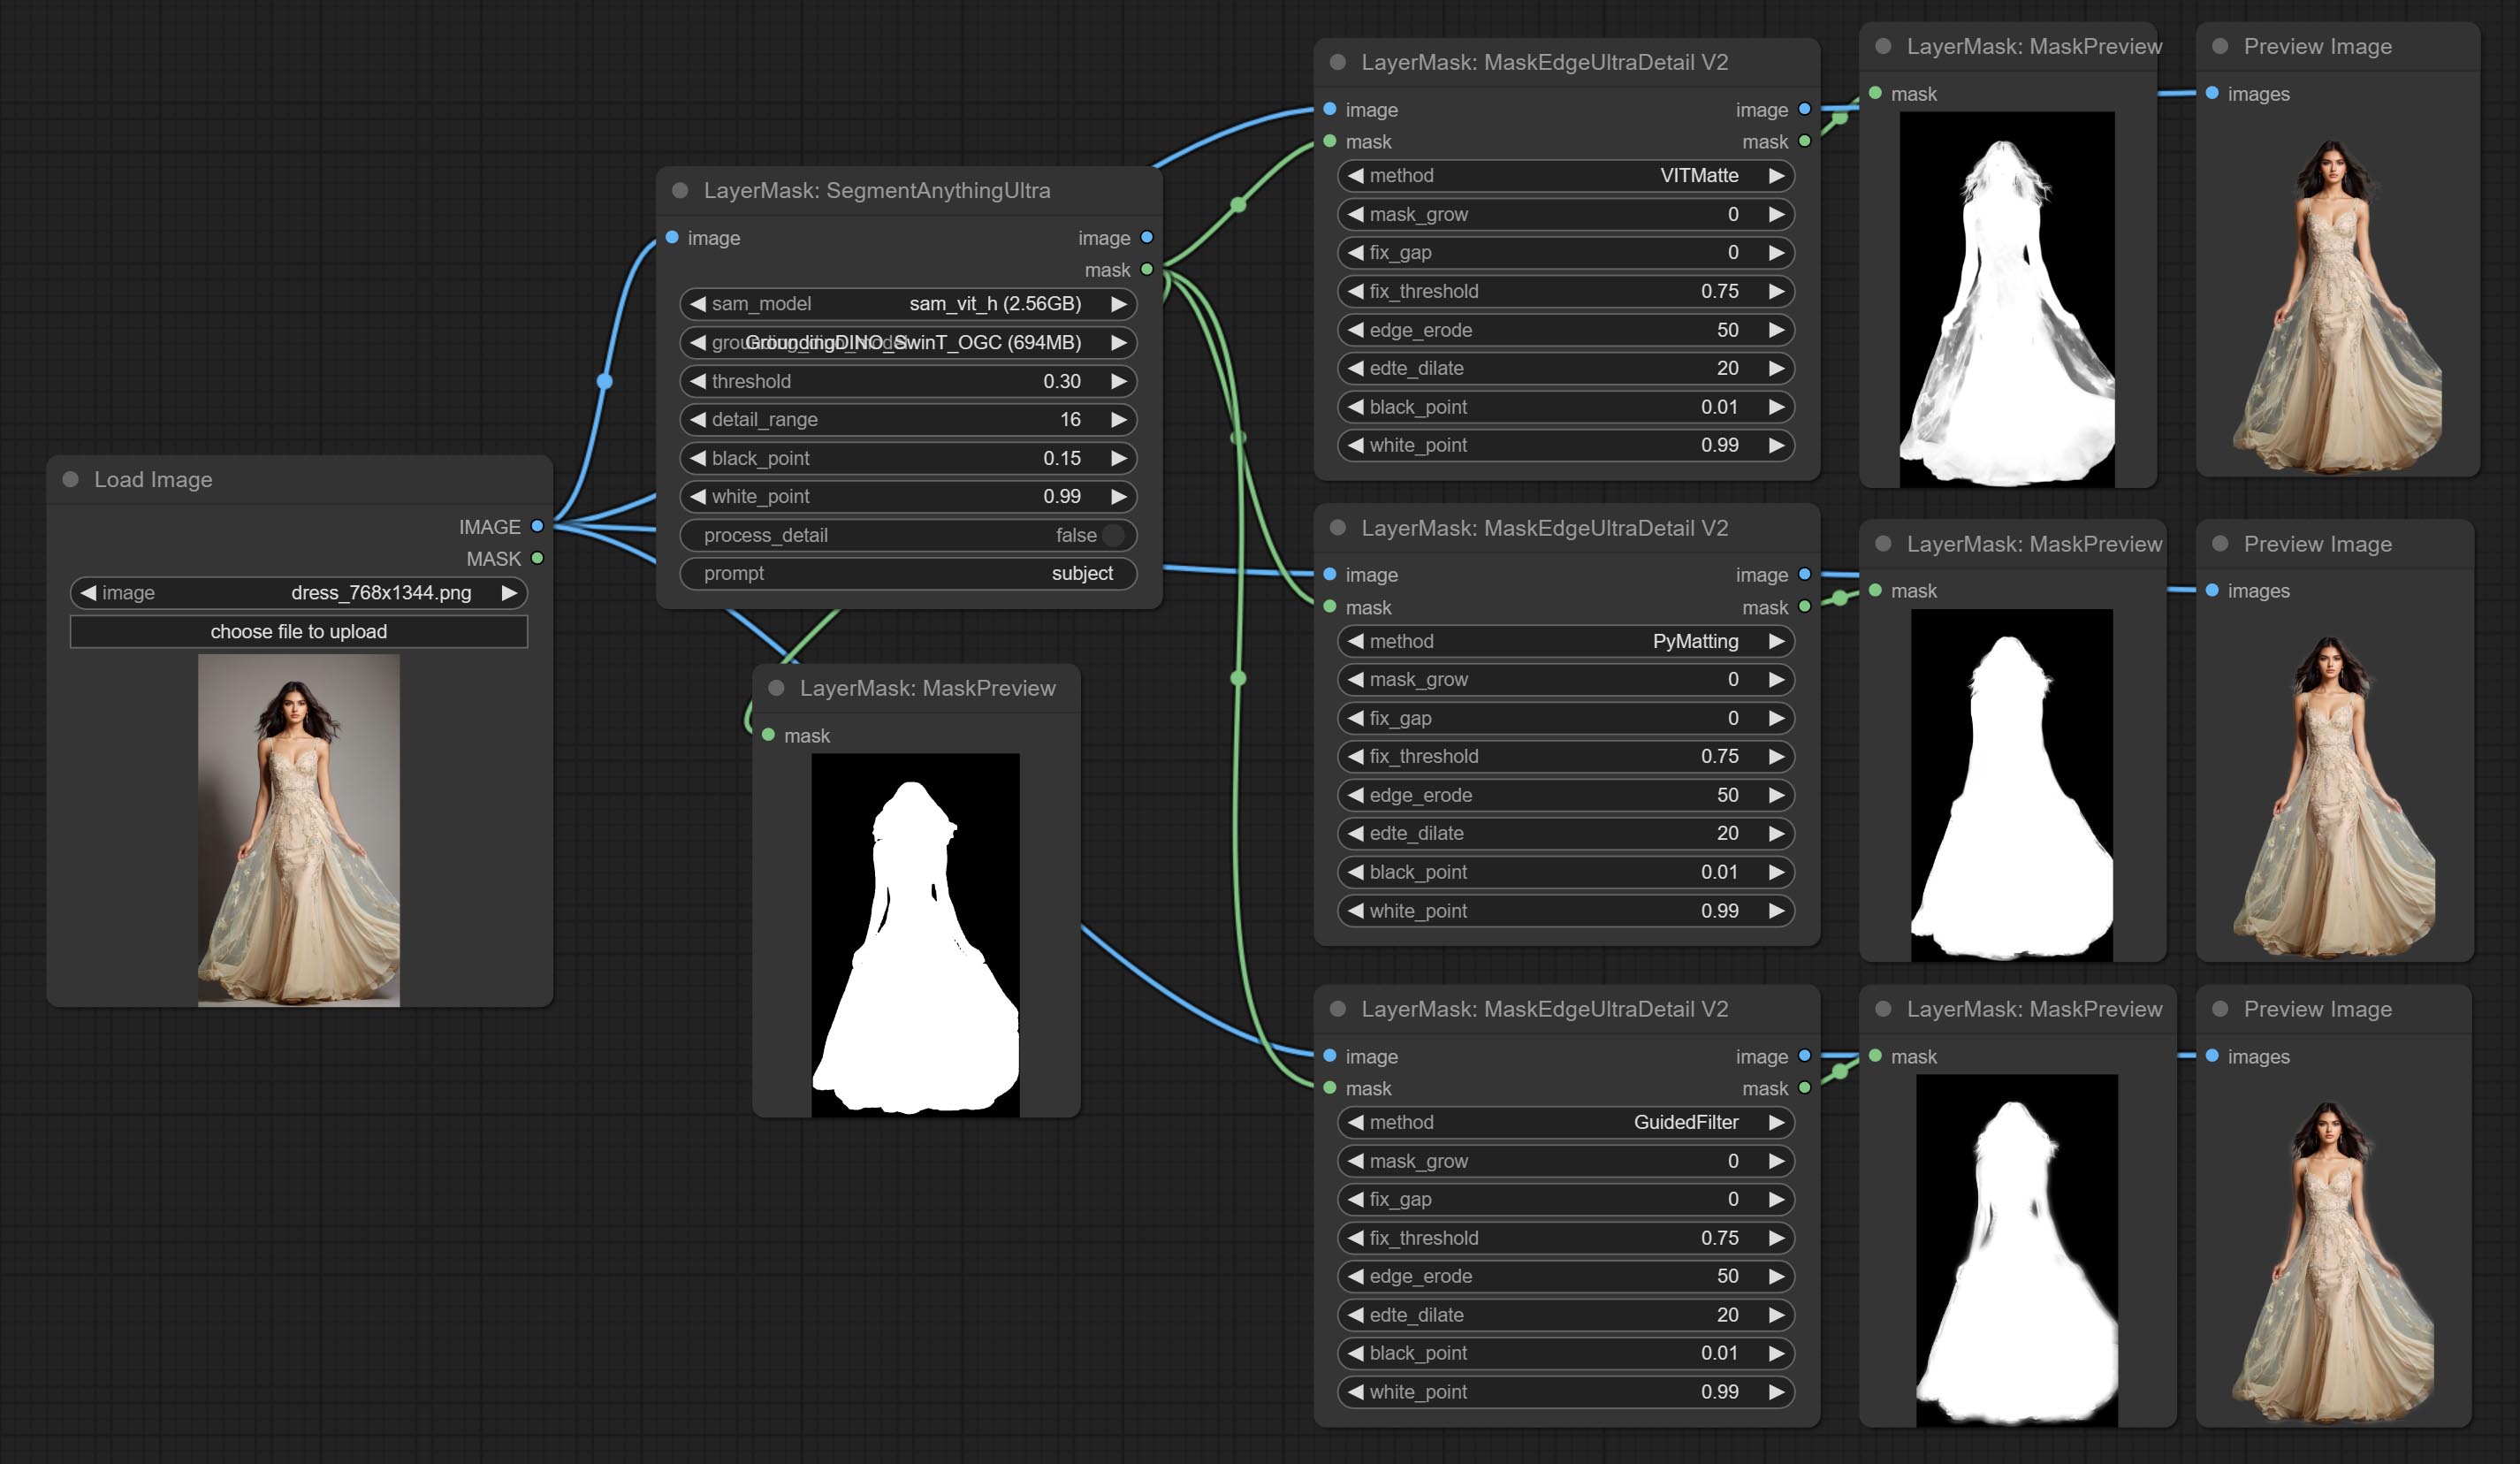
SegmentAnythingUltra
Improvements to ComfyUI Segment Anything, thanks to the original author.
*Please refer to the installation of ComfyUI Segment Anything to install the model. If ComfyUI Segment Anything has been correctly installed, you can skip this step.
- From here download the config.json,model.safetensors,tokenizer_config.json,tokenizer.json and vocab.txt 5 files to
ComfyUI/models/bert-base-uncased folder. - Download GroundingDINO_SwinT_OGC config file, GroundingDINO_SwinT_OGC model, GroundingDINO_SwinB config file, GroundingDINO_SwinB model to
ComfyUI/models/grounding-dino folder. - Download sam_vit_h,sam_vit_l, sam_vit_b, sam_hq_vit_h, sam_hq_vit_l, sam_hq_vit_b, mobile_sam to
ComfyUI/models/sams folder. *Or download them from GroundingDino models on BaiduNetdisk and SAM models on BaiduNetdisk . 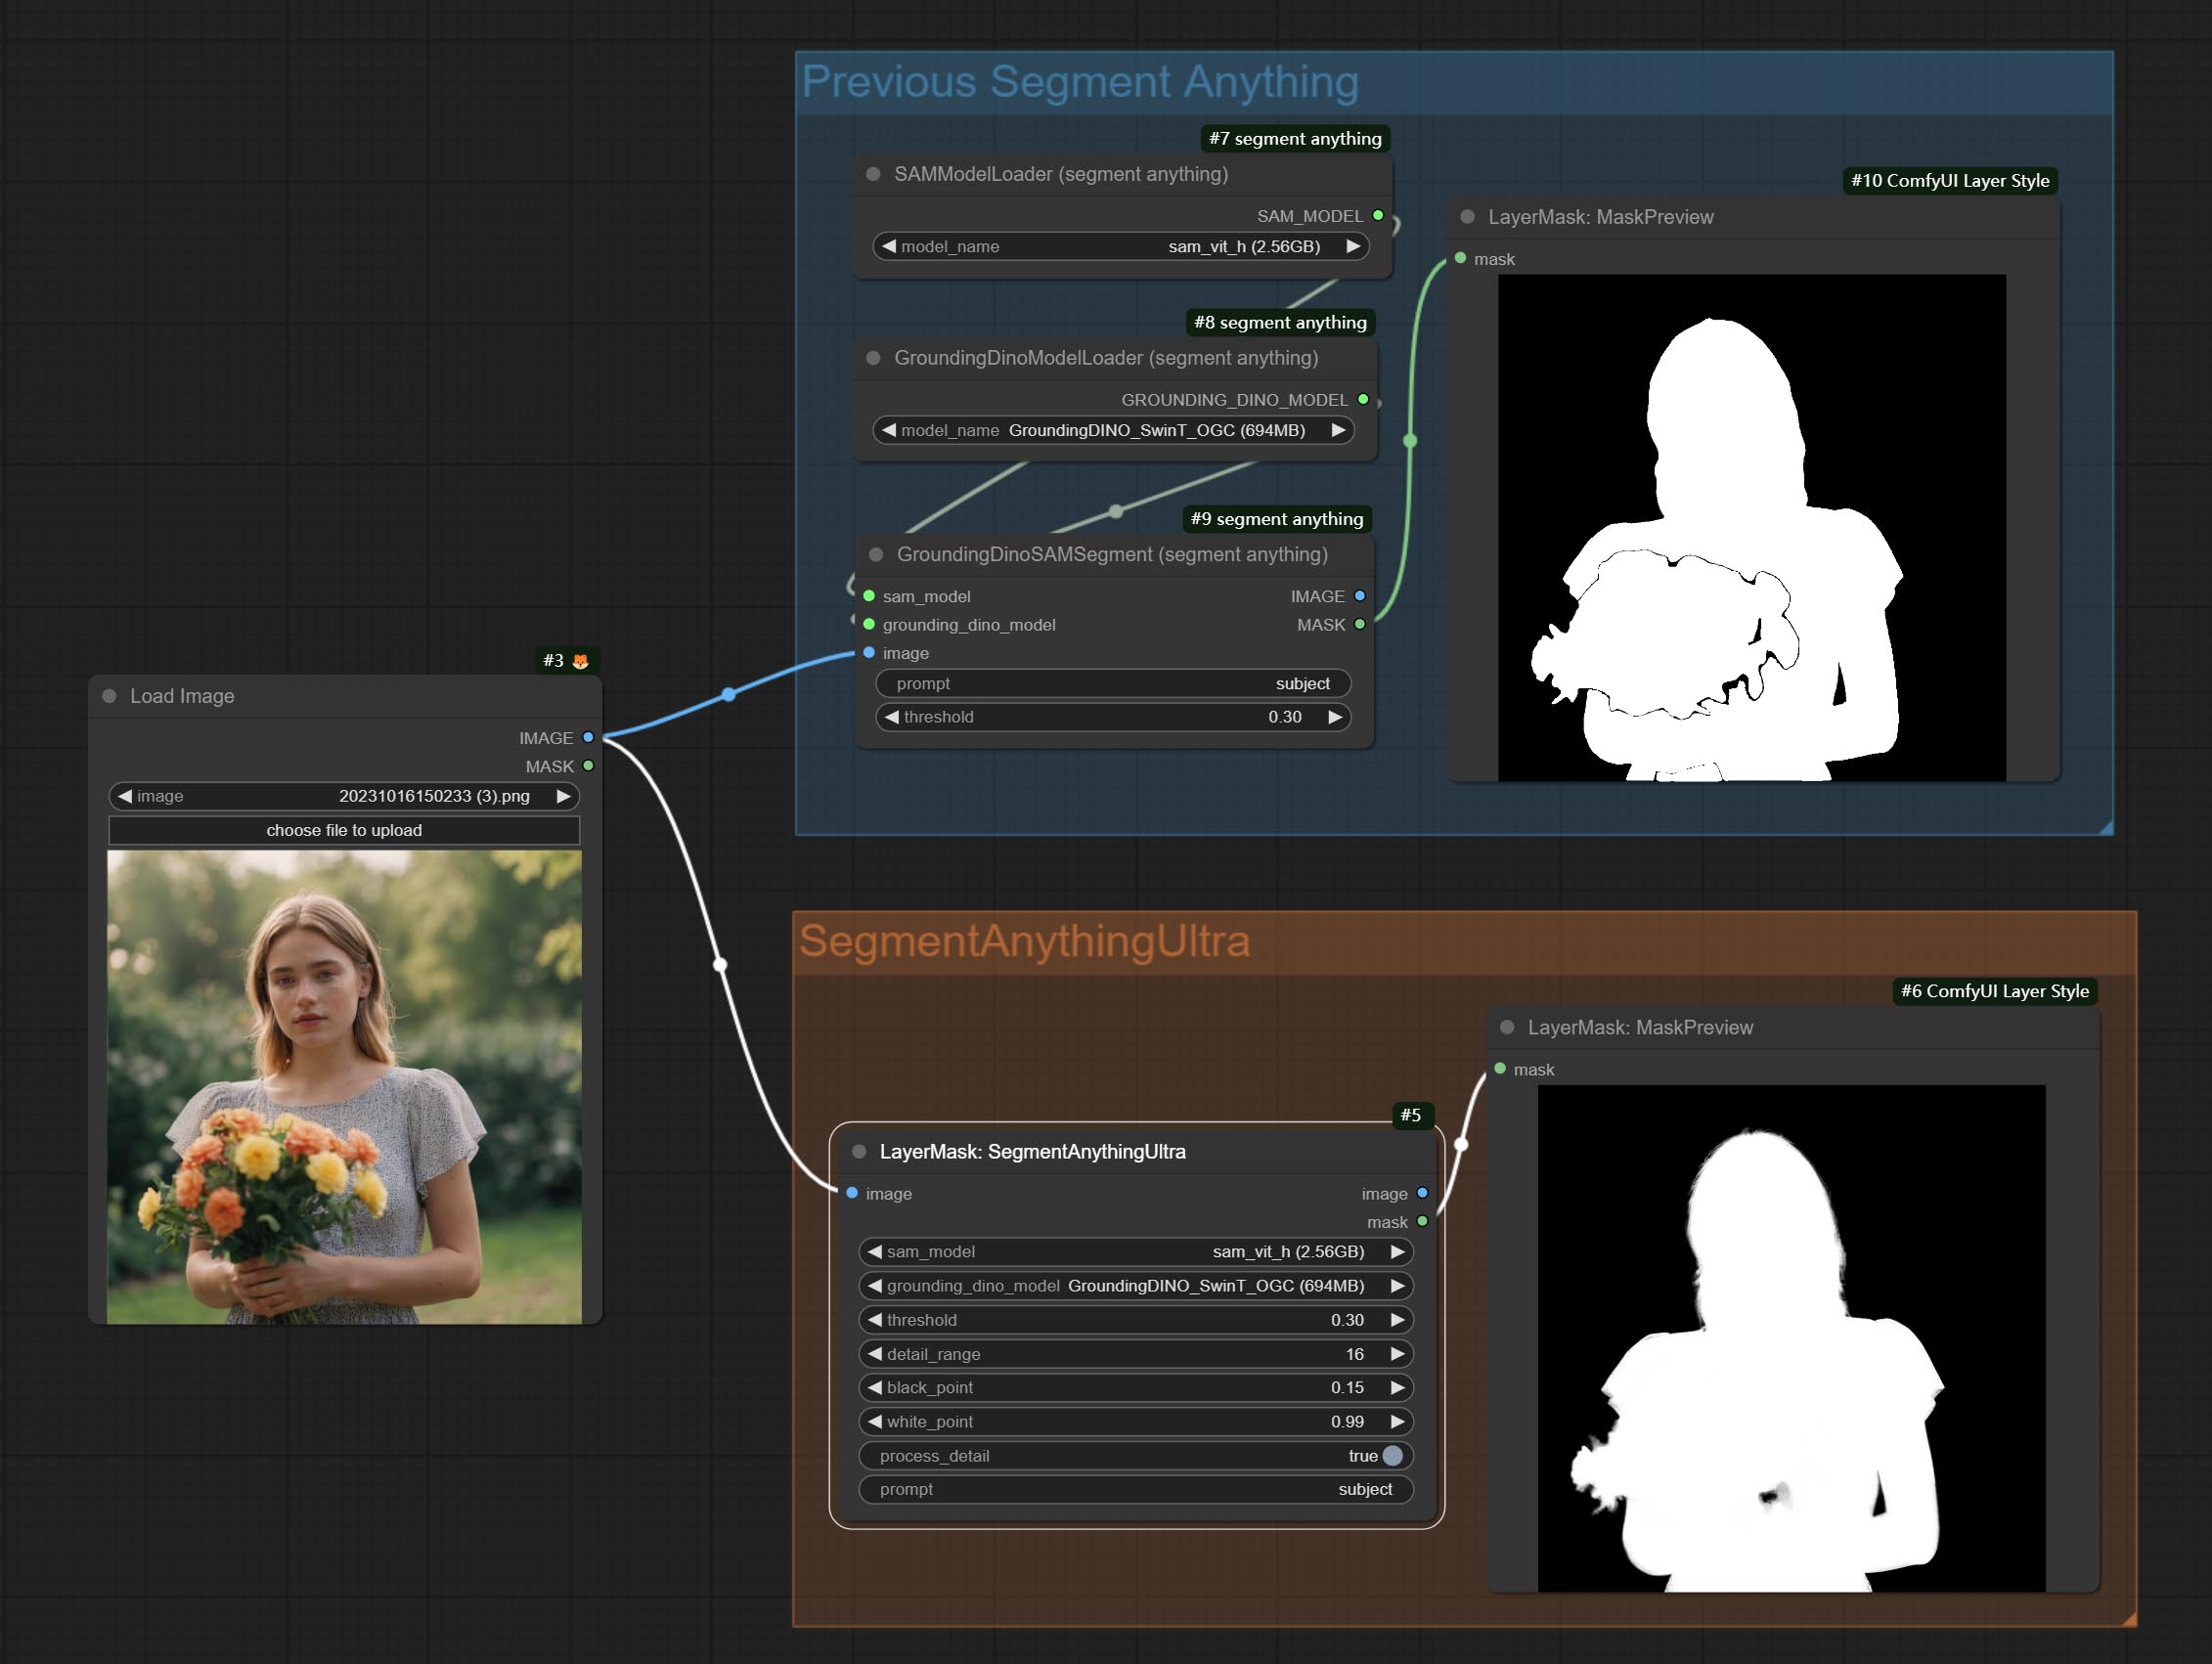
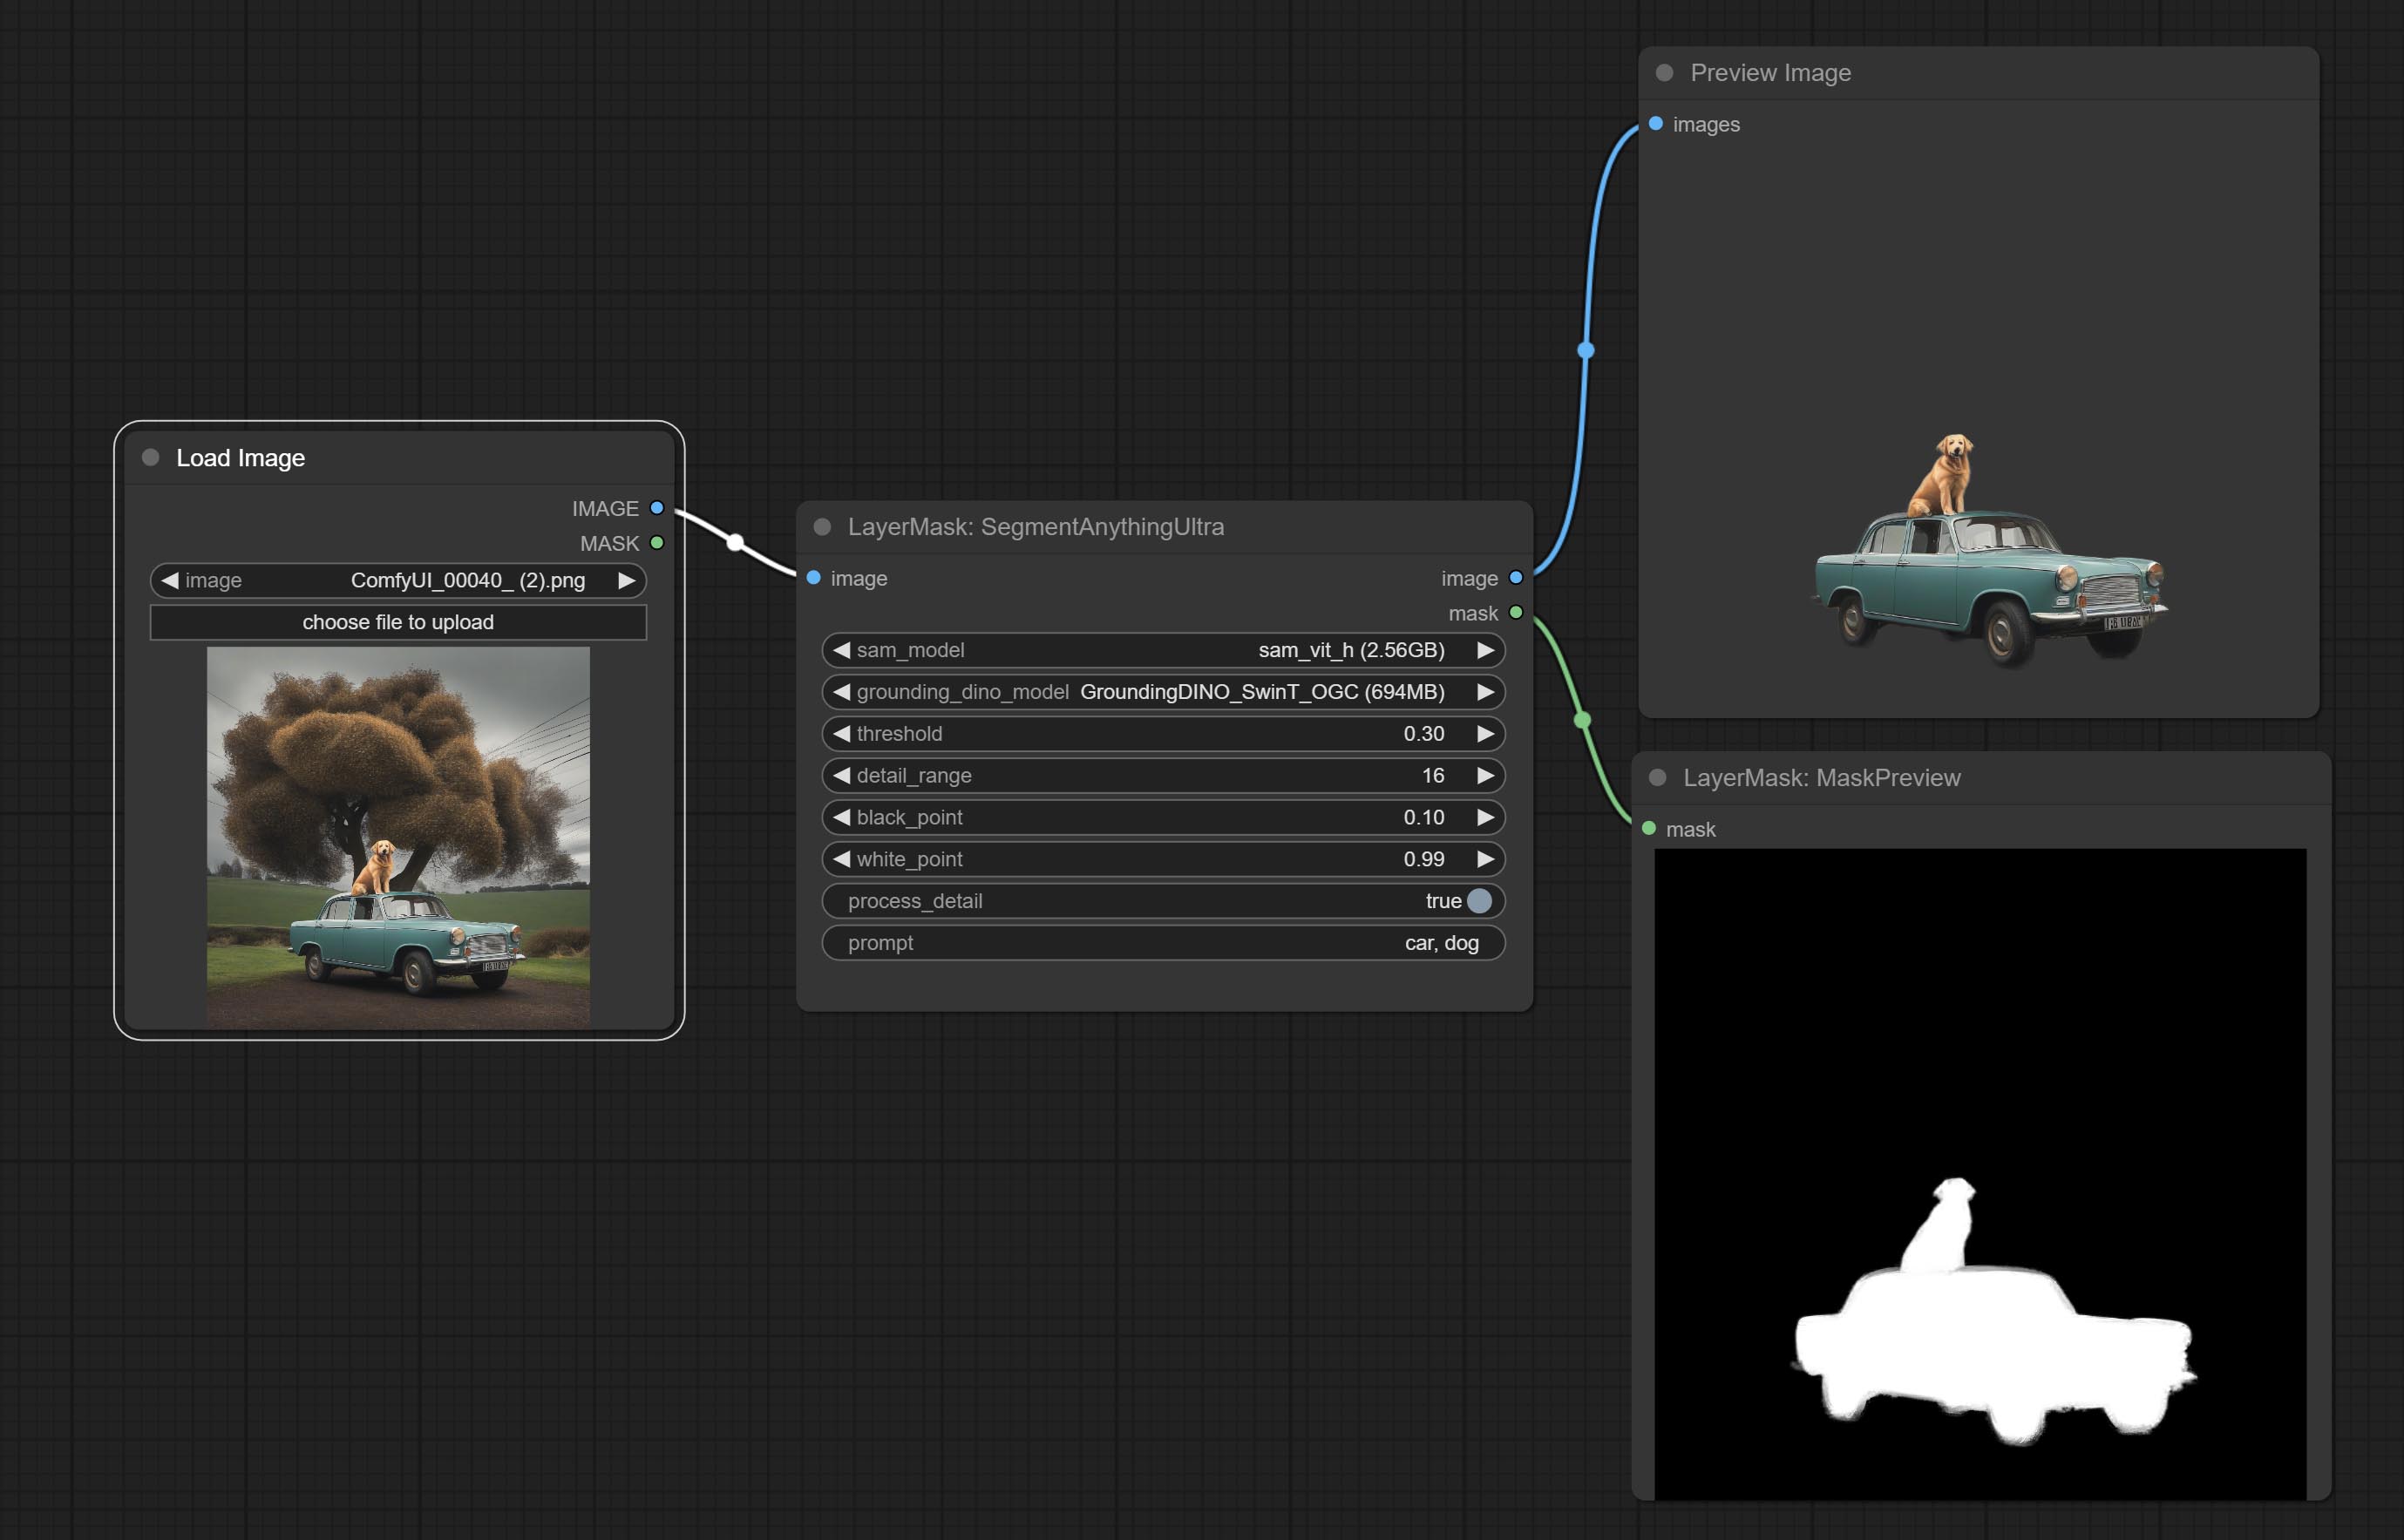
Node options:

- sam_model: Select the SAM model.
- ground_dino_model: Select the Grounding DINO model.
- threshold: The threshold of SAM.
- detail_range: Edge detail range.
- black_point: Edge black sampling threshold.
- white_point: Edge white sampling threshold.
- process_detail: Set to false here will skip edge processing to save runtime.
- prompt: Input for SAM's prompt.
- cache_model: Set whether to cache the model.
SegmentAnythingUltraV2
The V2 upgraded version of SegmentAnythingUltra has added the VITMatte edge processing method.(Note: Images larger than 2K in size using this method will consume huge memory) 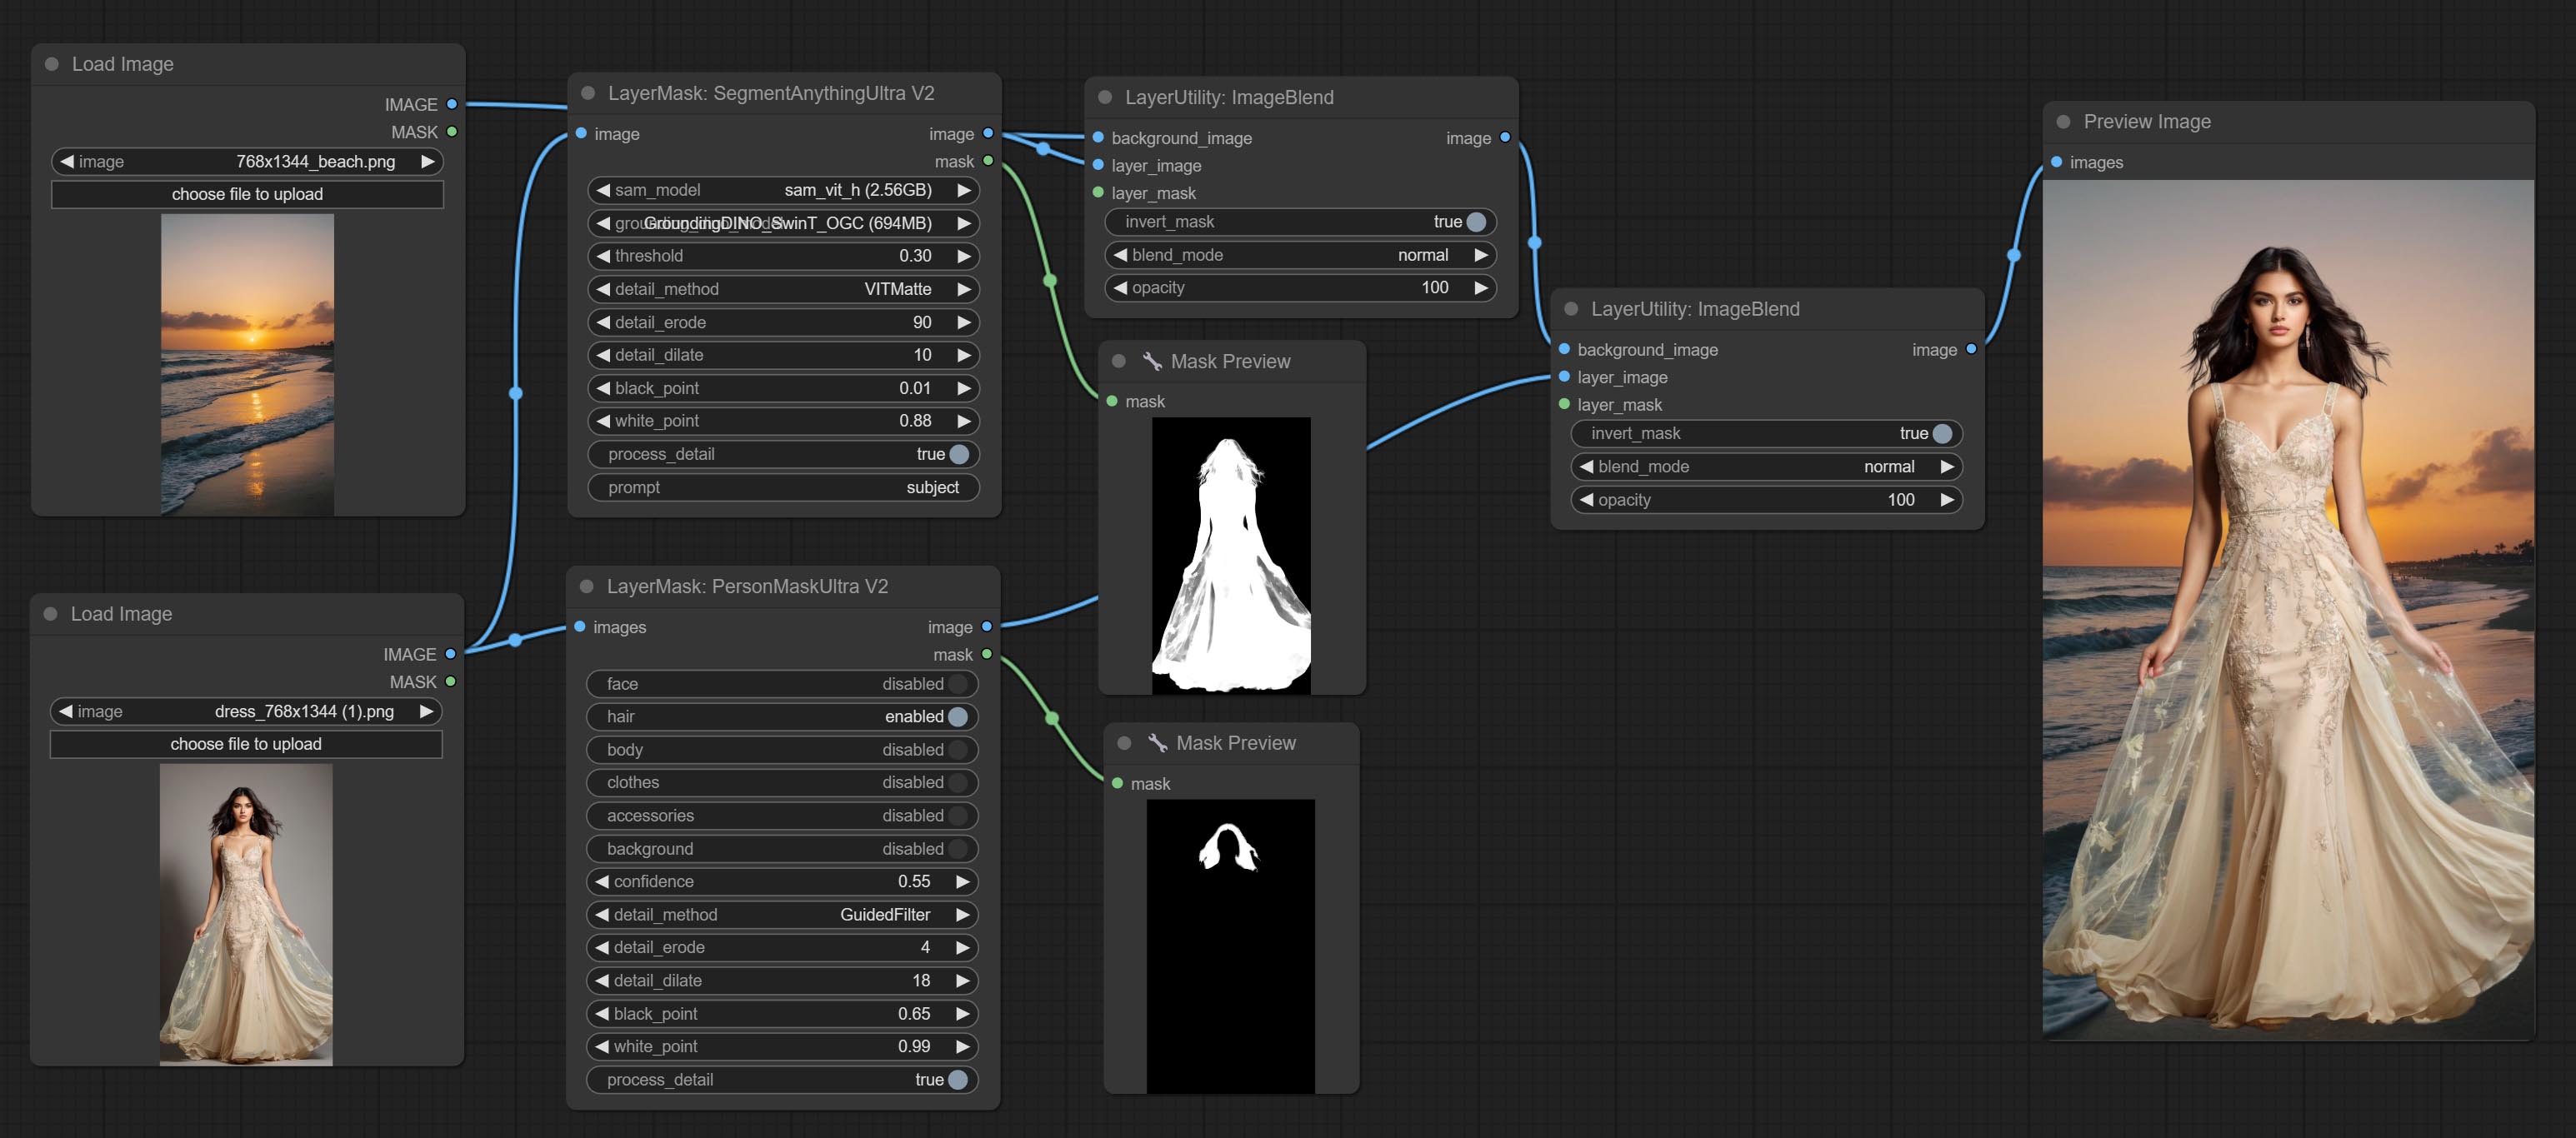
On the basis of SegmentAnythingUltra, the following changes have been made: 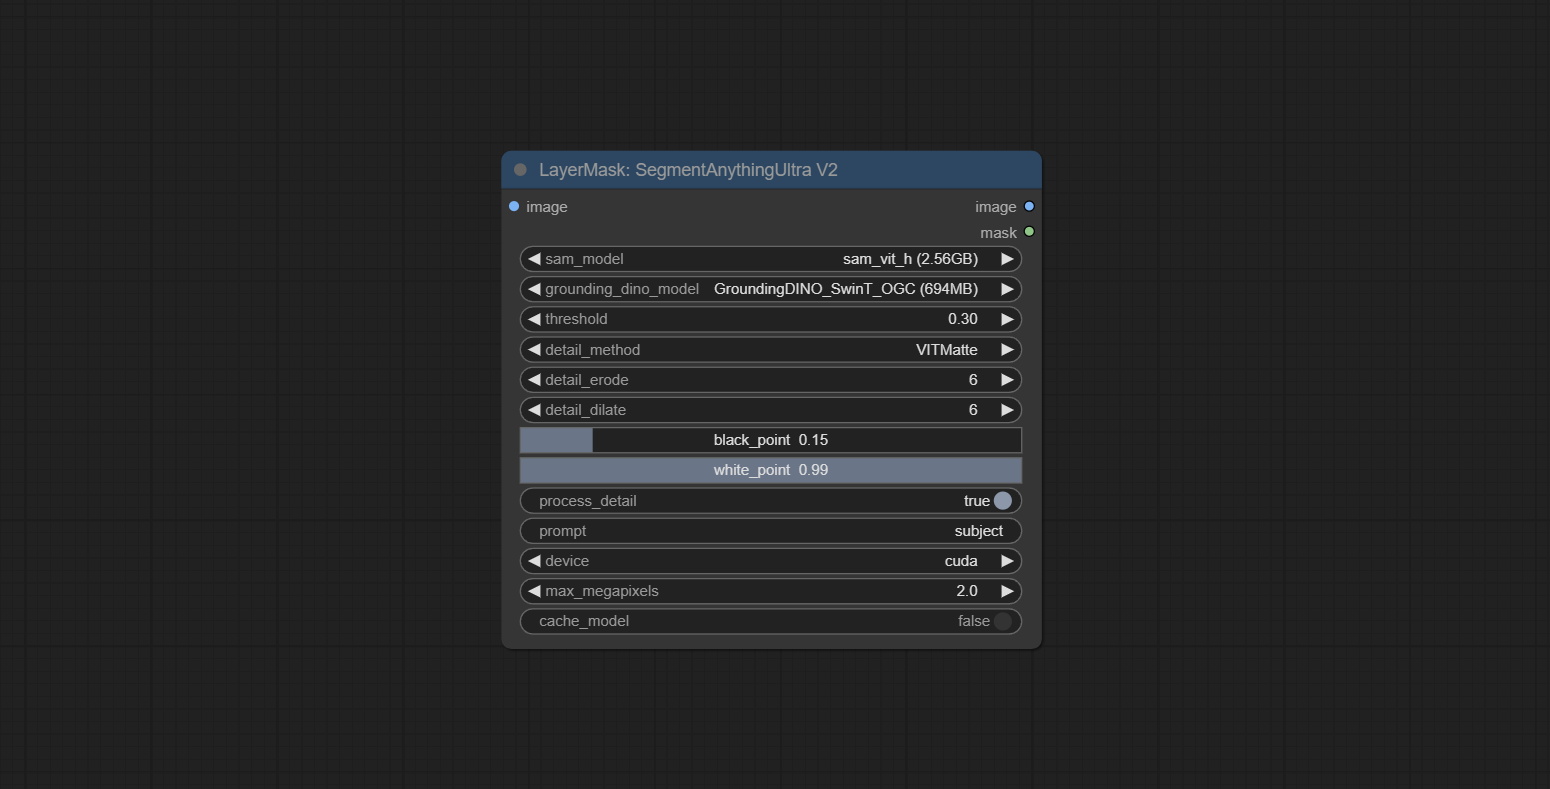
- detail_method: Edge processing methods. provides VITMatte, VITMatte(local), PyMatting, GuidedFilter. If the model has been downloaded after the first use of VITMatte, you can use VITMatte (local) afterwards.
- detail_erode: Mask the erosion range inward from the edge. the larger the value, the larger the range of inward repair.
- detail_dilate: The edge of the mask expands outward. the larger the value, the wider the range of outward repair.
- device: Set whether the VitMatte to use cuda.
- max_megapixels: Set the maximum size for VitMate operations.
SAM2Ultra
This node is modified from kijai/ComfyUI-segment-anything-2. Thank to kijai for making significant contributions to the Comfyui community.
SAM2 Ultra node only support single image. If you need to process multiple images, please first convert the image batch to image list.
*Download models from BaiduNetdisk or huggingface.co/Kijai/sam2-safetensors and copy to ComfyUI/models/sam2 folder.
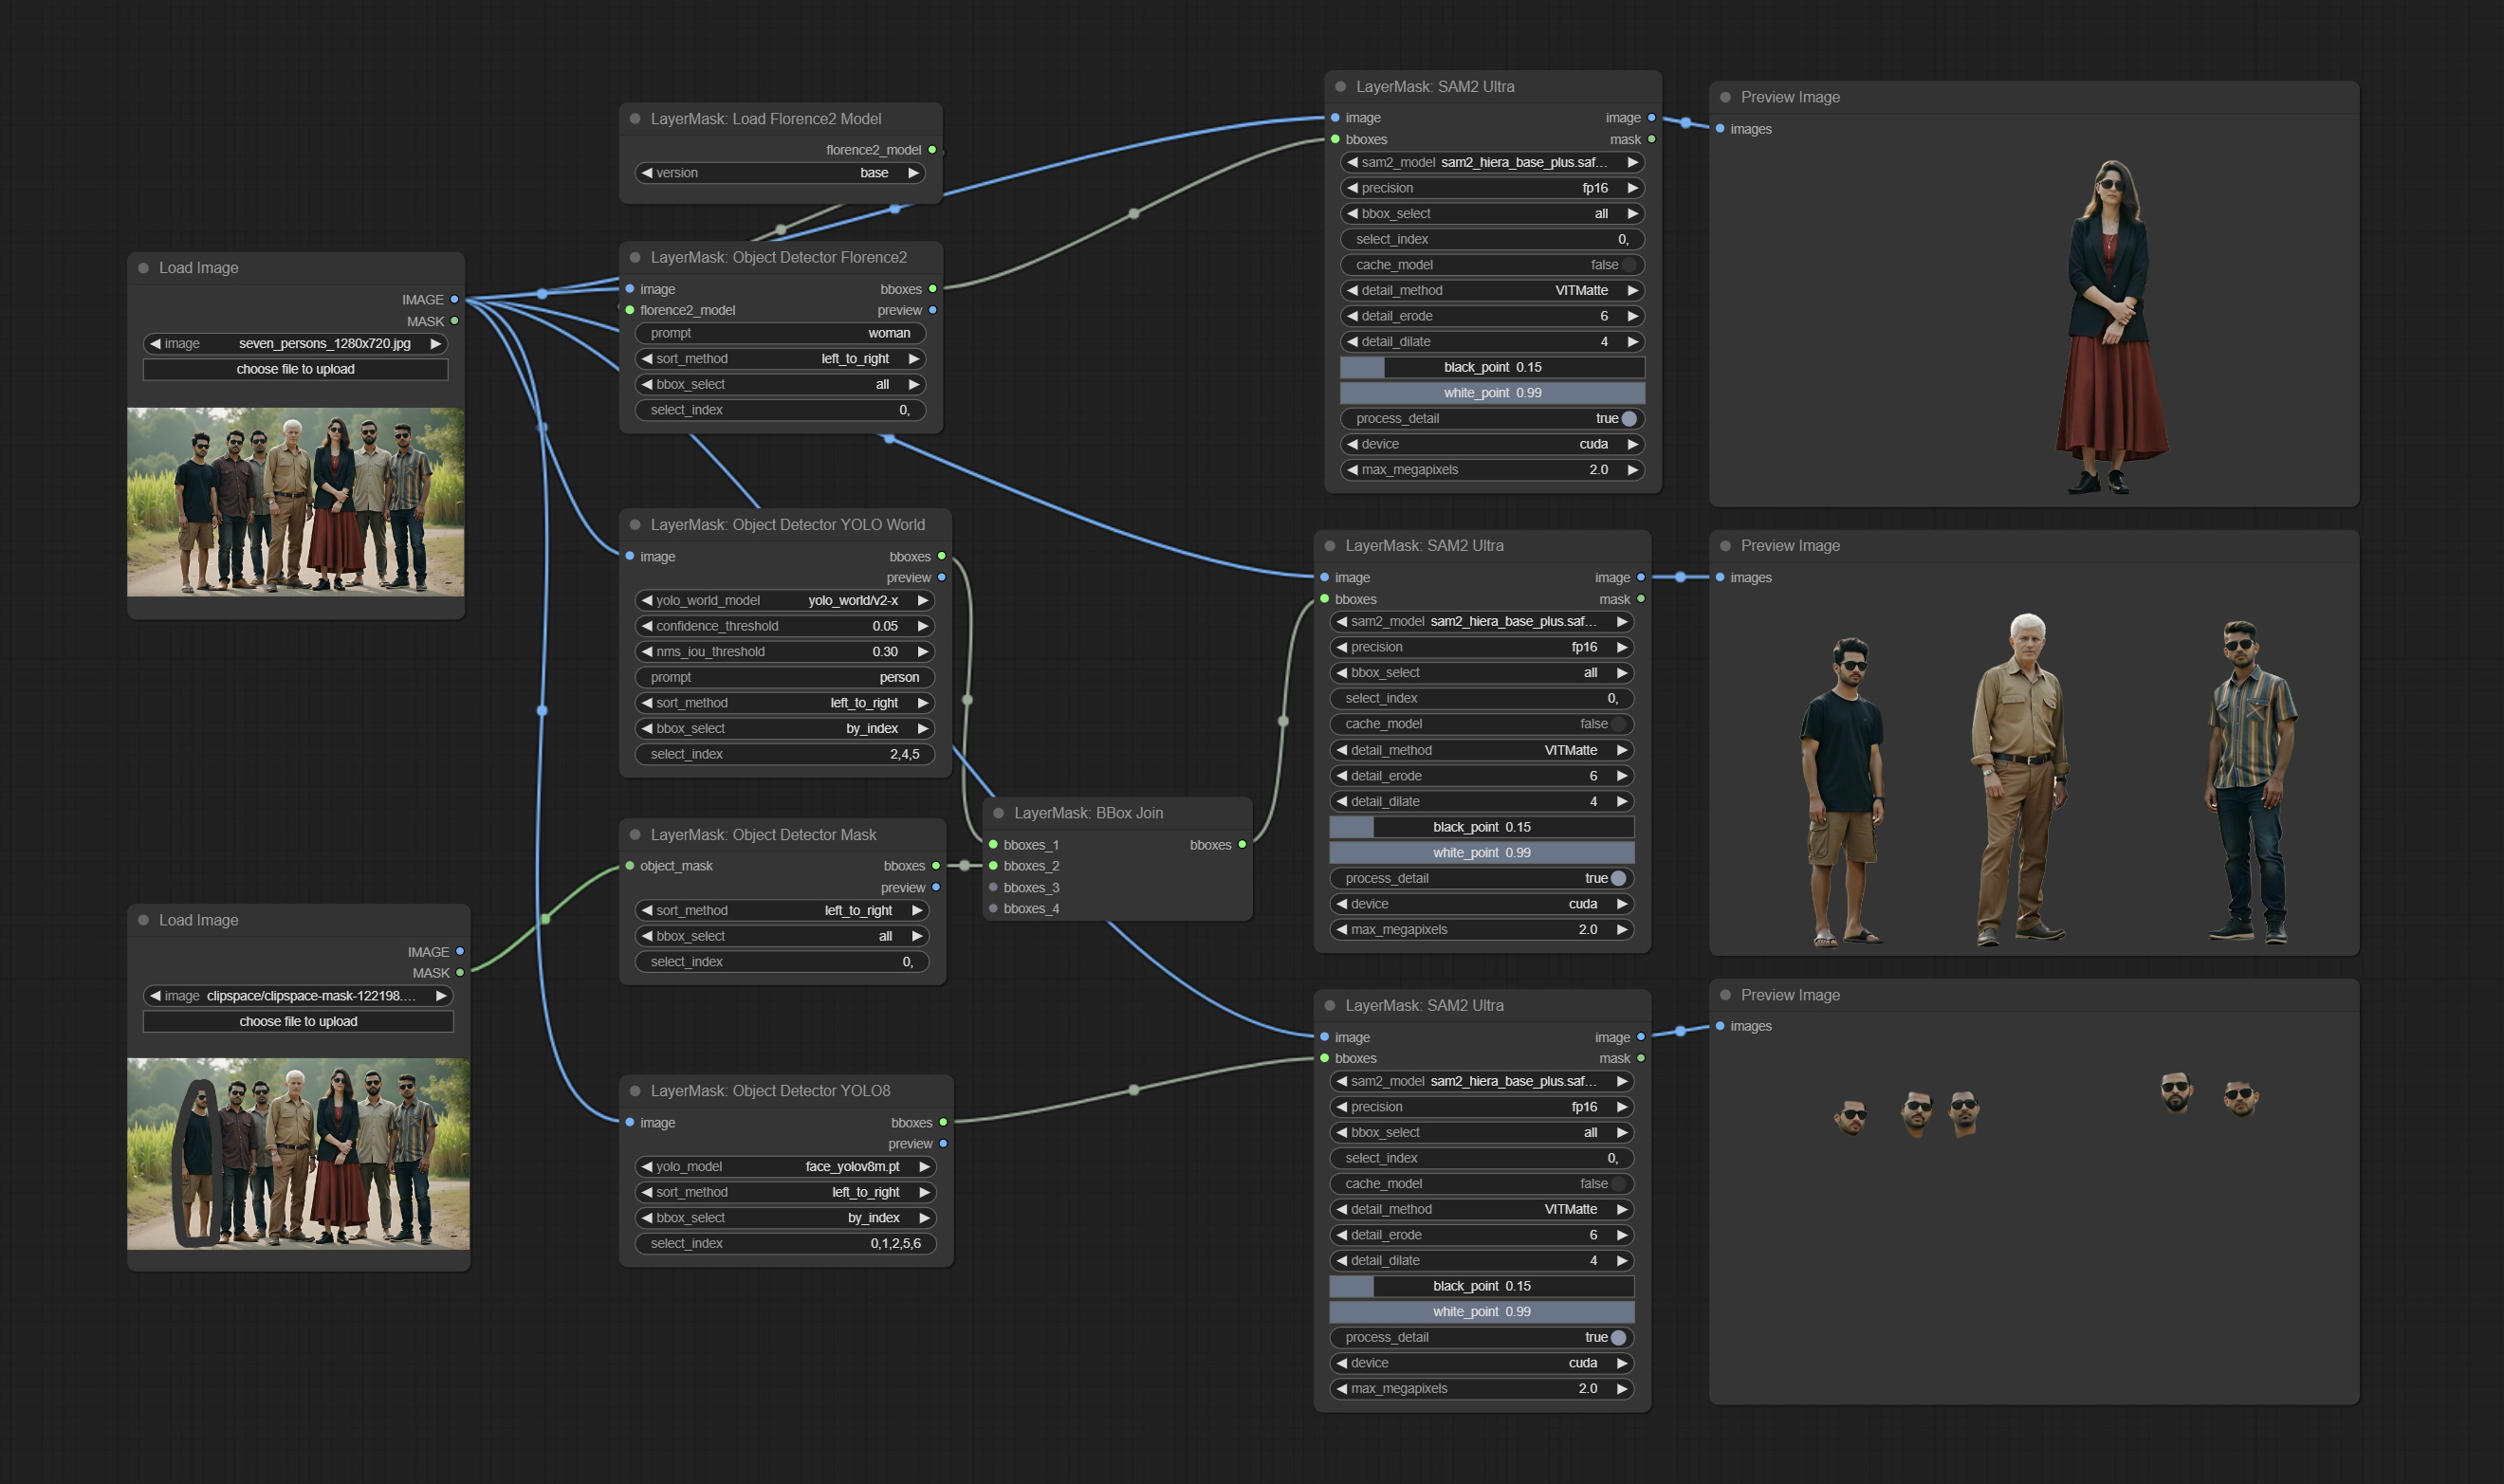
Node Options:
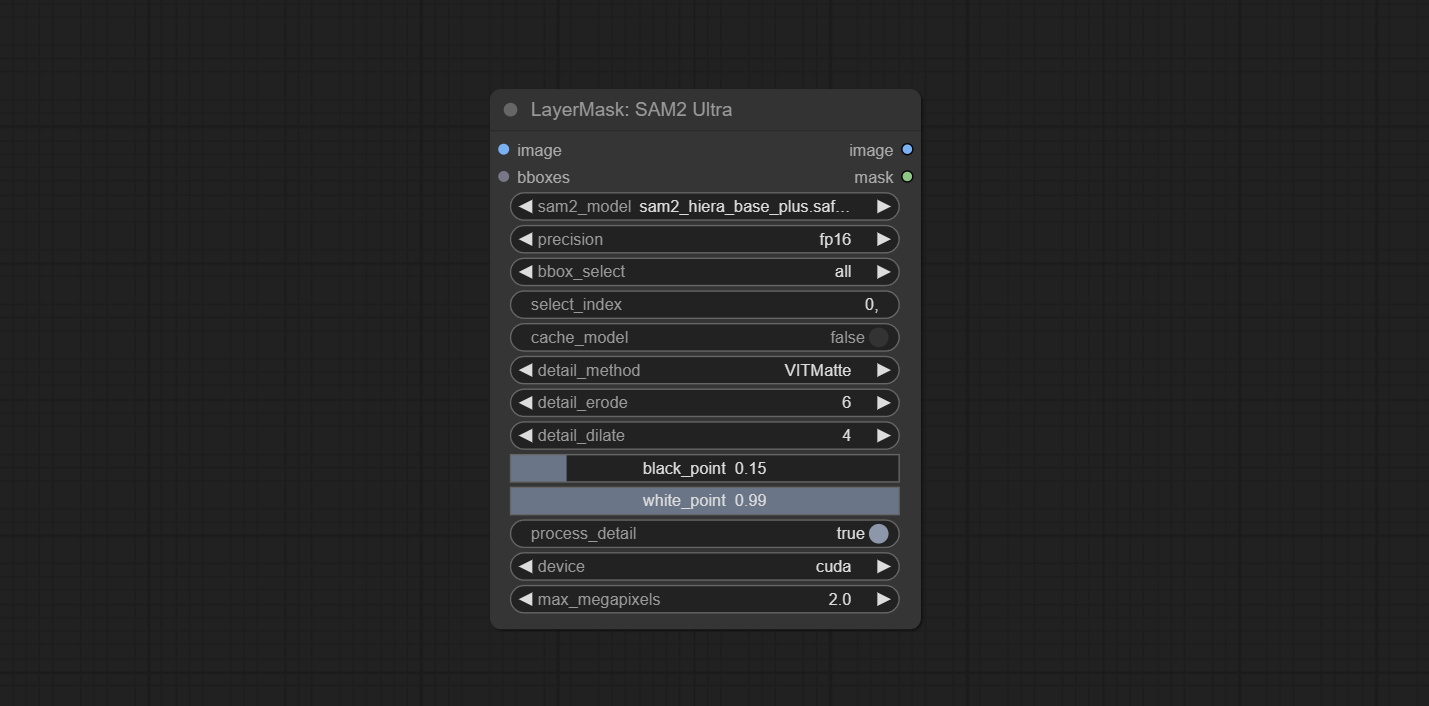
- image: The image to segment.
- bboxes: Input recognition box data.
- sam2_model: Select the SAM2 model.
- presicion: Model's persicion. can be selected from fp16, bf16, and fp32.
- bbox_select: Select the input box data. There are three options: "all" to select all, "first" to select the box with the highest confidence, and "by_index" to specify the index of the box.
- select_index: This option is valid when bbox_delect is 'by_index'. 0 is the first one. Multiple values can be entered, separated by any non numeric character, including but not limited to commas, periods, semicolons, spaces or letters, and even Chinese.
- cache_model: Whether to cache the model. After caching the model, it will save time for model loading.
- detail_method: Edge processing methods. provides VITMatte, VITMatte(local), PyMatting, GuidedFilter. If the model has been downloaded after the first use of VITMatte, you can use VITMatte (local) afterwards.
- detail_erode: Mask the erosion range inward from the edge. the larger the value, the larger the range of inward repair.
- detail_dilate: The edge of the mask expands outward. the larger the value, the wider the range of outward repair.
- black_point: Edge black sampling threshold.
- white_point: Edge white sampling threshold.
- process_detail: Set to false here will skip edge processing to save runtime.
- device: Set whether the VitMatte to use cuda.
- max_megapixels: Set the maximum size for VitMate operations.
SAM2VideoUltra
SAM2 Video Ultra node support processing multiple frames of images or video sequences. Please define the recognition box data in the first frame of the sequence to ensure correct recognition.
sam2_video_ultra_example.mp4
2024-09-03.152625.mp4
Node Options:
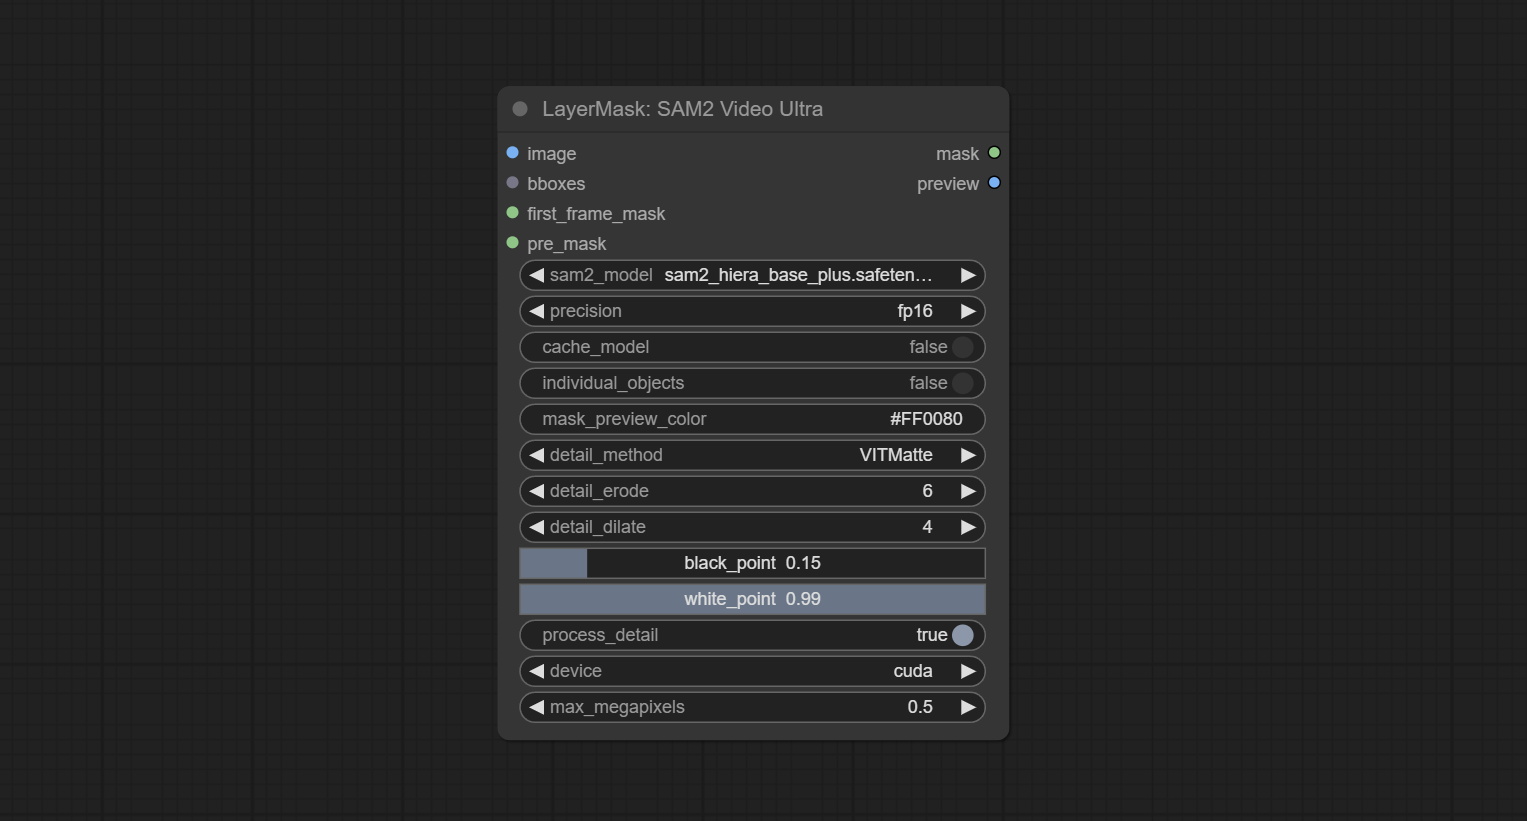
- image: The image to segment.
- bboxes: Optional input of recognition bbox data.
bboxes and first_frame_mask must have least one input. If first_frame_mask inputed, bbboxes will be ignored. - first_frame_mask: Optional input of the first frame mask. The mask will be used as the first frame recognition object.
bboxes and first_frame_mask must have least one input. If first_frame_mask inputed, bbboxes will be ignored. - pre_mask: Optional input mask, which will serve as a propagation focus range limitation and help improve recognition accuracy.
- sam2_model: Select the SAM2 model.
- presicion: Model's persicion. can be selected from fp16 and bf16.
- cache_model: Whether to cache the model. After caching the model, it will save time for model loading.
- individual_object: When set to True, it will focus on identifying a single object. When set to False, attempts will be made to generate recognition boxes for multiple objects.
- mask_preview_color: Display the color of non masked areas in the preview output.
- detail_method: Edge processing methods. Only VITMatte method can be used.
- detail_erode: Mask the erosion range inward from the edge. the larger the value, the larger the range of inward repair.
- detail_dilate: The edge of the mask expands outward. the larger the value, the wider the range of outward repair.
- black_point: Edge black sampling threshold.
- white_point: Edge white sampling threshold.
- process_detail: Set to false here will skip edge processing to save runtime.
- device: Only cuda can be used.
- max_megapixels: Set the maximum size for VitMate operations.A larger size will result in finer mask edges, but it will lead to a significant decrease in computation speed.
ObjectDetectorFL2
Use the Florence2 model to identify objects in images and output recognition box data.
*Download models from BaiduNetdisk and copy to ComfyUI/models/florence2 folder.
Node Options:
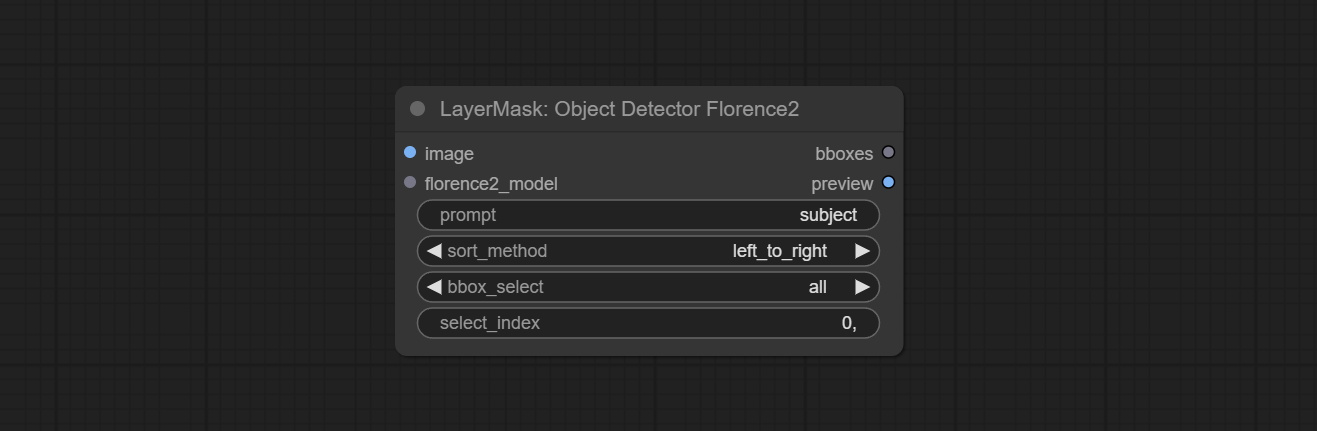
- image: The image to segment.
- florence2_model: Florence2 model, it from LoadFlorence2Model node.
- prompt: Describe the object that needs to be identified.
- sort_method: The selection box sorting method has 4 options: "left_to_right", "top_to_bottom", "big_to_small" and "confidence".
- bbox_select: Select the input box data. There are three options: "all" to select all, "first" to select the box with the highest confidence, and "by_index" to specify the index of the box.
- select_index: This option is valid when bbox_delect is 'by_index'. 0 is the first one. Multiple values can be entered, separated by any non numeric character, including but not limited to commas, periods, semicolons, spaces or letters, and even Chinese.
ObjectDetectorYOLOWorld
Use the YOLO-World model to identify objects in images and output recognition box data.
*Download models from BaiduNetdisk or GoogleDrive and copy to ComfyUI/models/yolo-world folder.
Node Options:
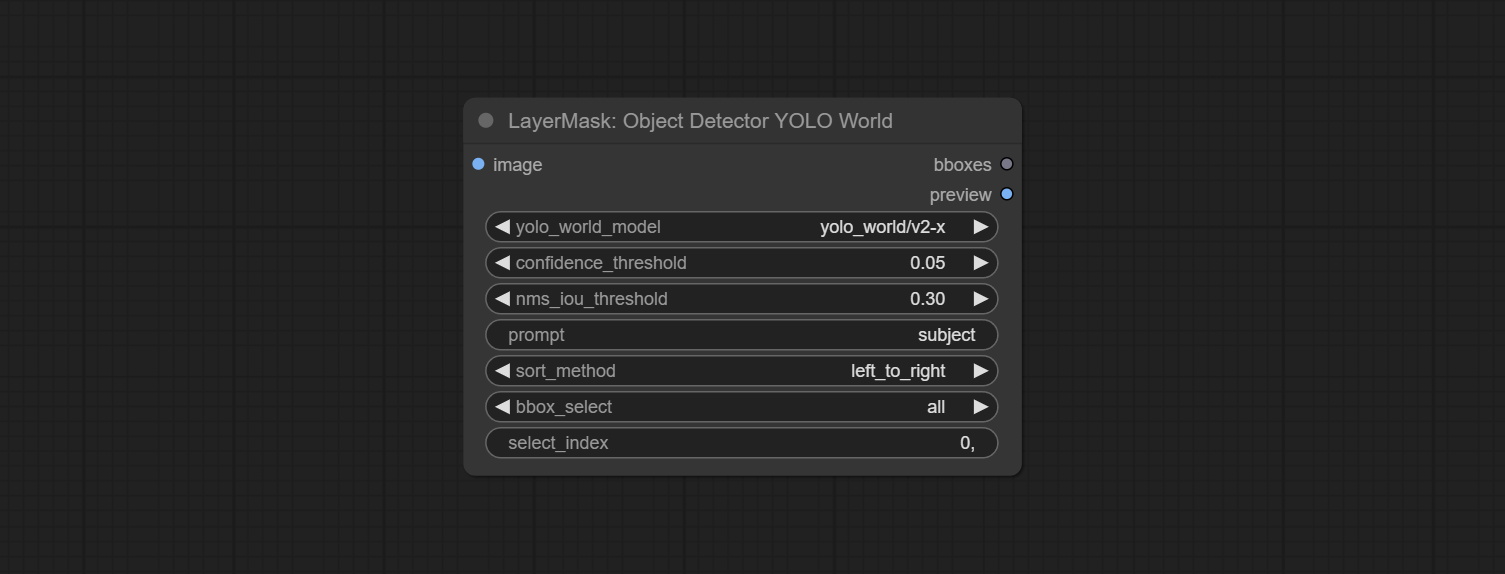
- image: The image to segment.
- confidence_threshold: The threshold of confidence.
- nms_iou_threshold: The threshold of Non-Maximum Suppression.
- prompt: Describe the object that needs to be identified.
- sort_method: The selection box sorting method has 4 options: "left_to_right", "top_to_bottom", "big_to_small" and "confidence".
- bbox_select: Select the input box data. There are three options: "all" to select all, "first" to select the box with the highest confidence, and "by_index" to specify the index of the box.
- select_index: This option is valid when bbox_delect is 'by_index'. 0 is the first one. Multiple values can be entered, separated by any non numeric character, including but not limited to commas, periods, semicolons, spaces or letters, and even Chinese.
ObjectDetectorYOLO8
Use the YOLO-8 model to identify objects in images and output recognition box data.
*Download models from GoogleDrive or BaiduNetdisk and copy to ComfyUI/models/yolo folder.
Node Options:
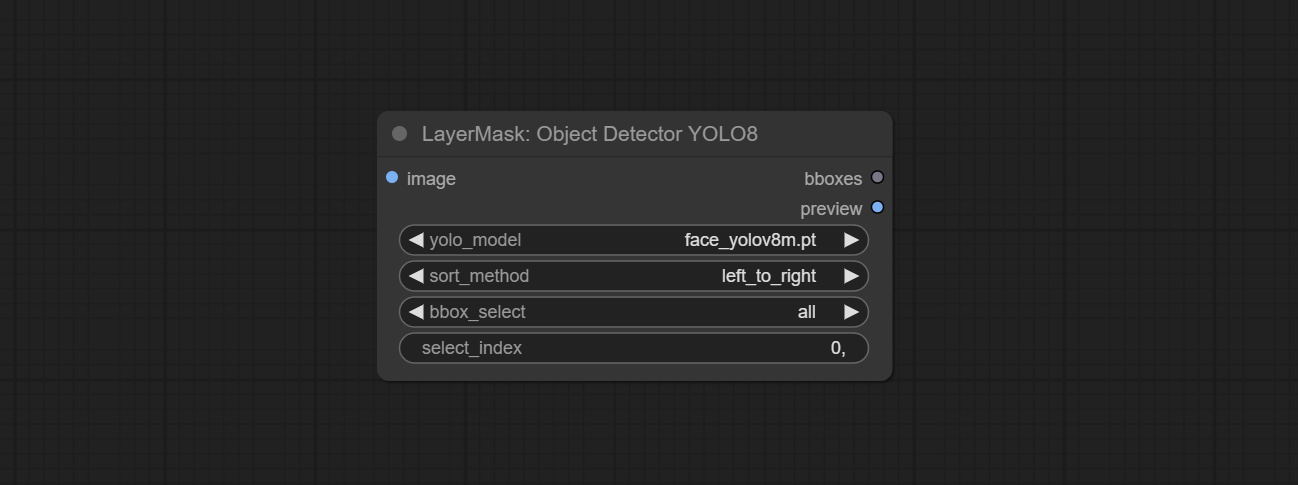
- image: The image to segment.
- yolo_model: Choose the yolo model.
- sort_method: The selection box sorting method has 4 options: "left_to_right", "top_to_bottom", "big_to_small" and "confidence".
- bbox_select: Select the input box data. There are three options: "all" to select all, "first" to select the box with the highest confidence, and "by_index" to specify the index of the box.
- select_index: This option is valid when bbox_delect is 'by_index'. 0 is the first one. Multiple values can be entered, separated by any non numeric character, including but not limited to commas, periods, semicolons, spaces or letters, and even Chinese.
ObjectDetectorMask
Use mask as recognition box data. All areas surrounded by white areas on the mask will be recognized as an object. Multiple enclosed areas will be identified separately.
Node Options:
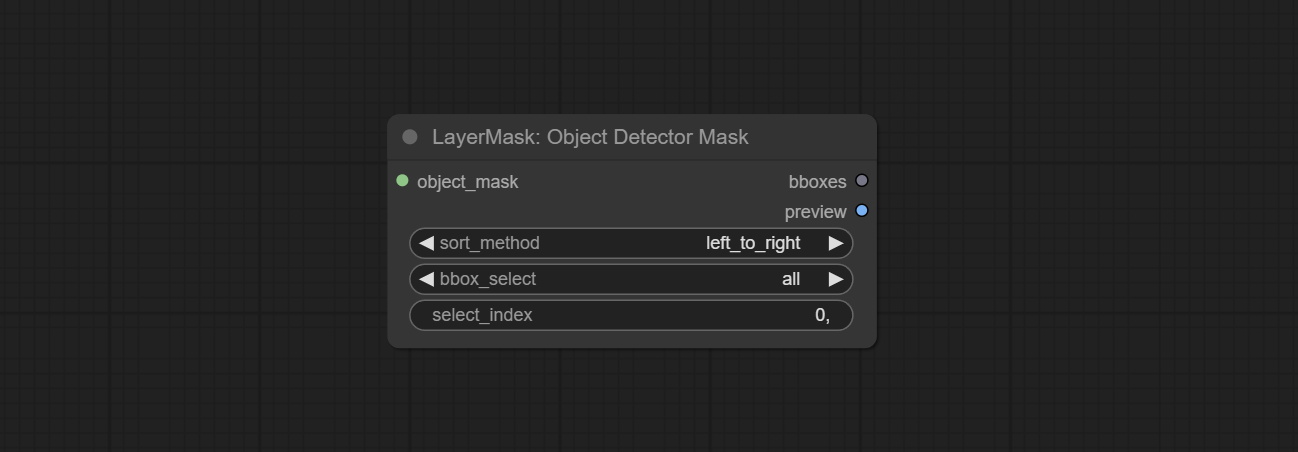
- object_mask: The mask input.
- sort_method: The selection box sorting method has 4 options: "left_to_right", "top_to_bottom", "big_to_small" and "confidence".
- bbox_select: Select the input box data. There are three options: "all" to select all, "first" to select the box with the highest confidence, and "by_index" to specify the index of the box.
- select_index: This option is valid when bbox_delect is 'by_index'. 0 is the first one. Multiple values can be entered, separated by any non numeric character, including but not limited to commas, periods, semicolons, spaces or letters, and even Chinese.
BBoxJoin
Merge recognition box data.
Node Options:

- bboxes_1: Required input. The first set of identification boxes.
- bboxes_2: Optional input. The second set of identification boxes.
- bboxes_3: Optional input. The third set of identification boxes.
- bboxes_4: Optional input. The fourth set of identification boxes.
DrawBBoxMask
Draw the recognition BBoxes data output by the Object Detector node as a mask.
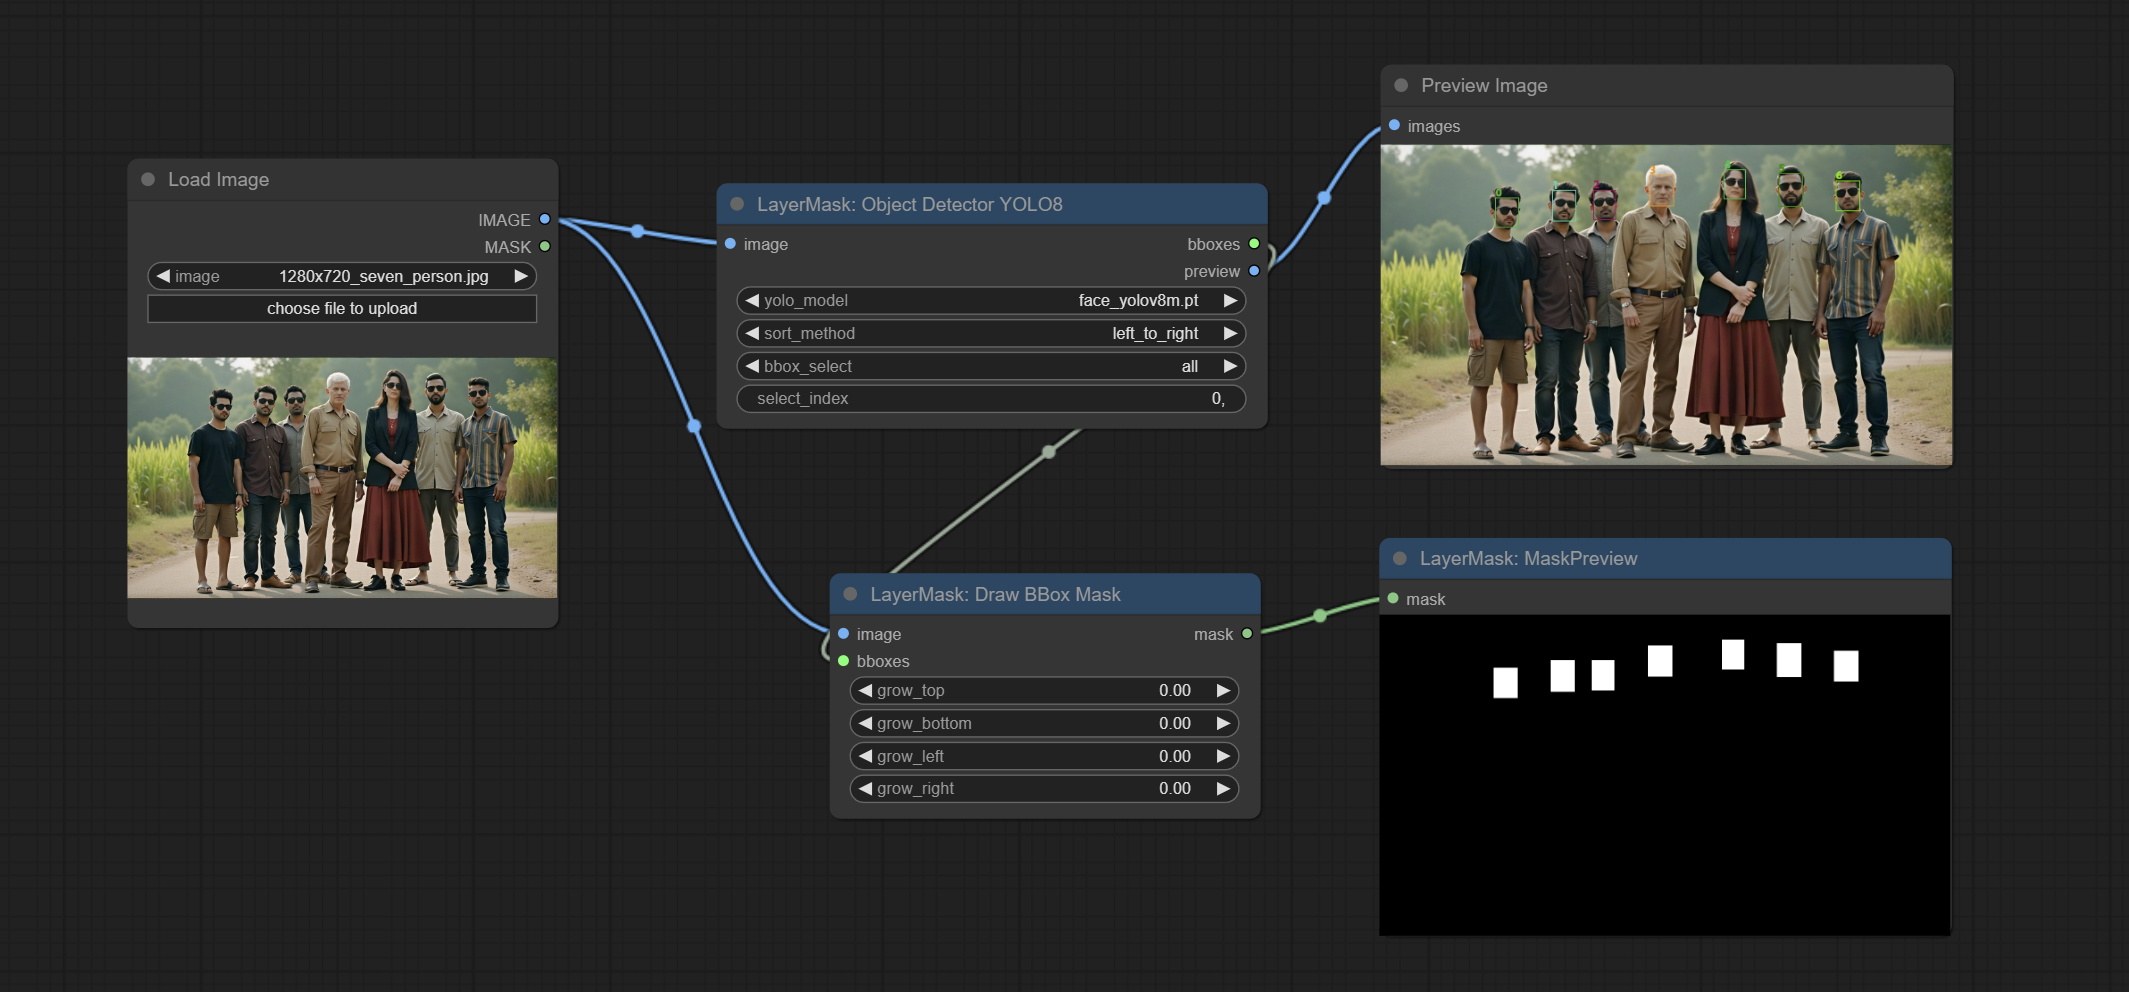
Node Options:
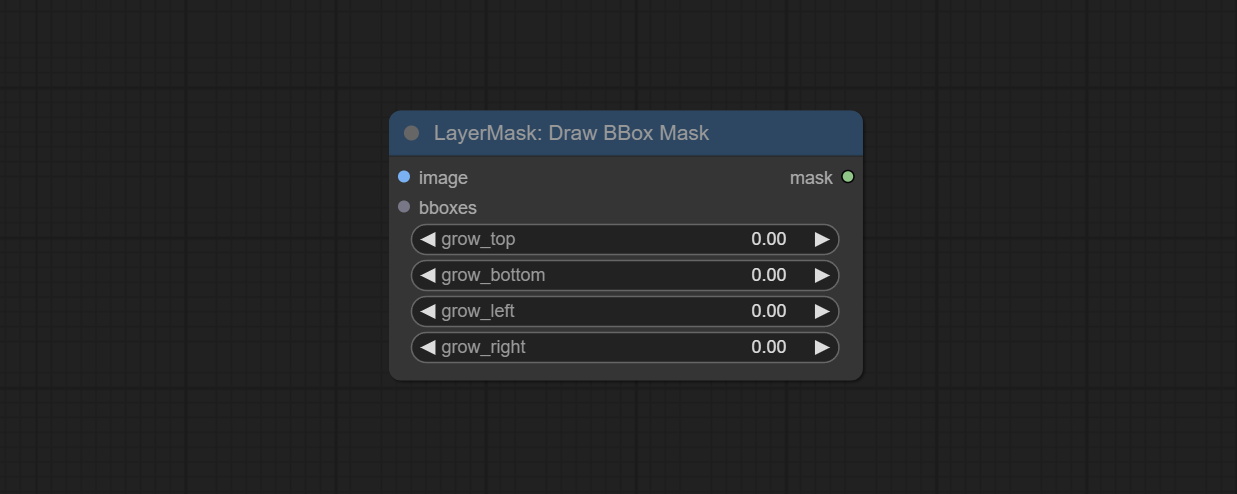
- image: Image input. It must be consistent with the image recognized by the Object Detector node.
- bboxes: Input recognition BBoxes data.
- grow_top: Each BBox expands upwards as a percentage of its height, positive values indicate upward expansion and negative values indicate downward expansion.
- grow_bottom: Each BBox expands downwards as a percentage of its height, positive values indicating downward expansion and negative values indicating upward expansion.
- grow_left: Each BBox expands to the left as a percentage of its width, positive values expand to the left and negative values expand to the right.
- grow_right: Each BBox expands to the right as a percentage of its width, positive values indicate expansion to the right and negative values indicate expansion to the left.
EVF-SAMUltra
This node is implementation of EVF-SAM in ComfyUI.
*Please download model files from BaiduNetdisk or huggingface/EVF-SAM2, huggingface/EVF-SAM to ComfyUI/models/EVF-SAM folder(save the models in their respective subdirectories). 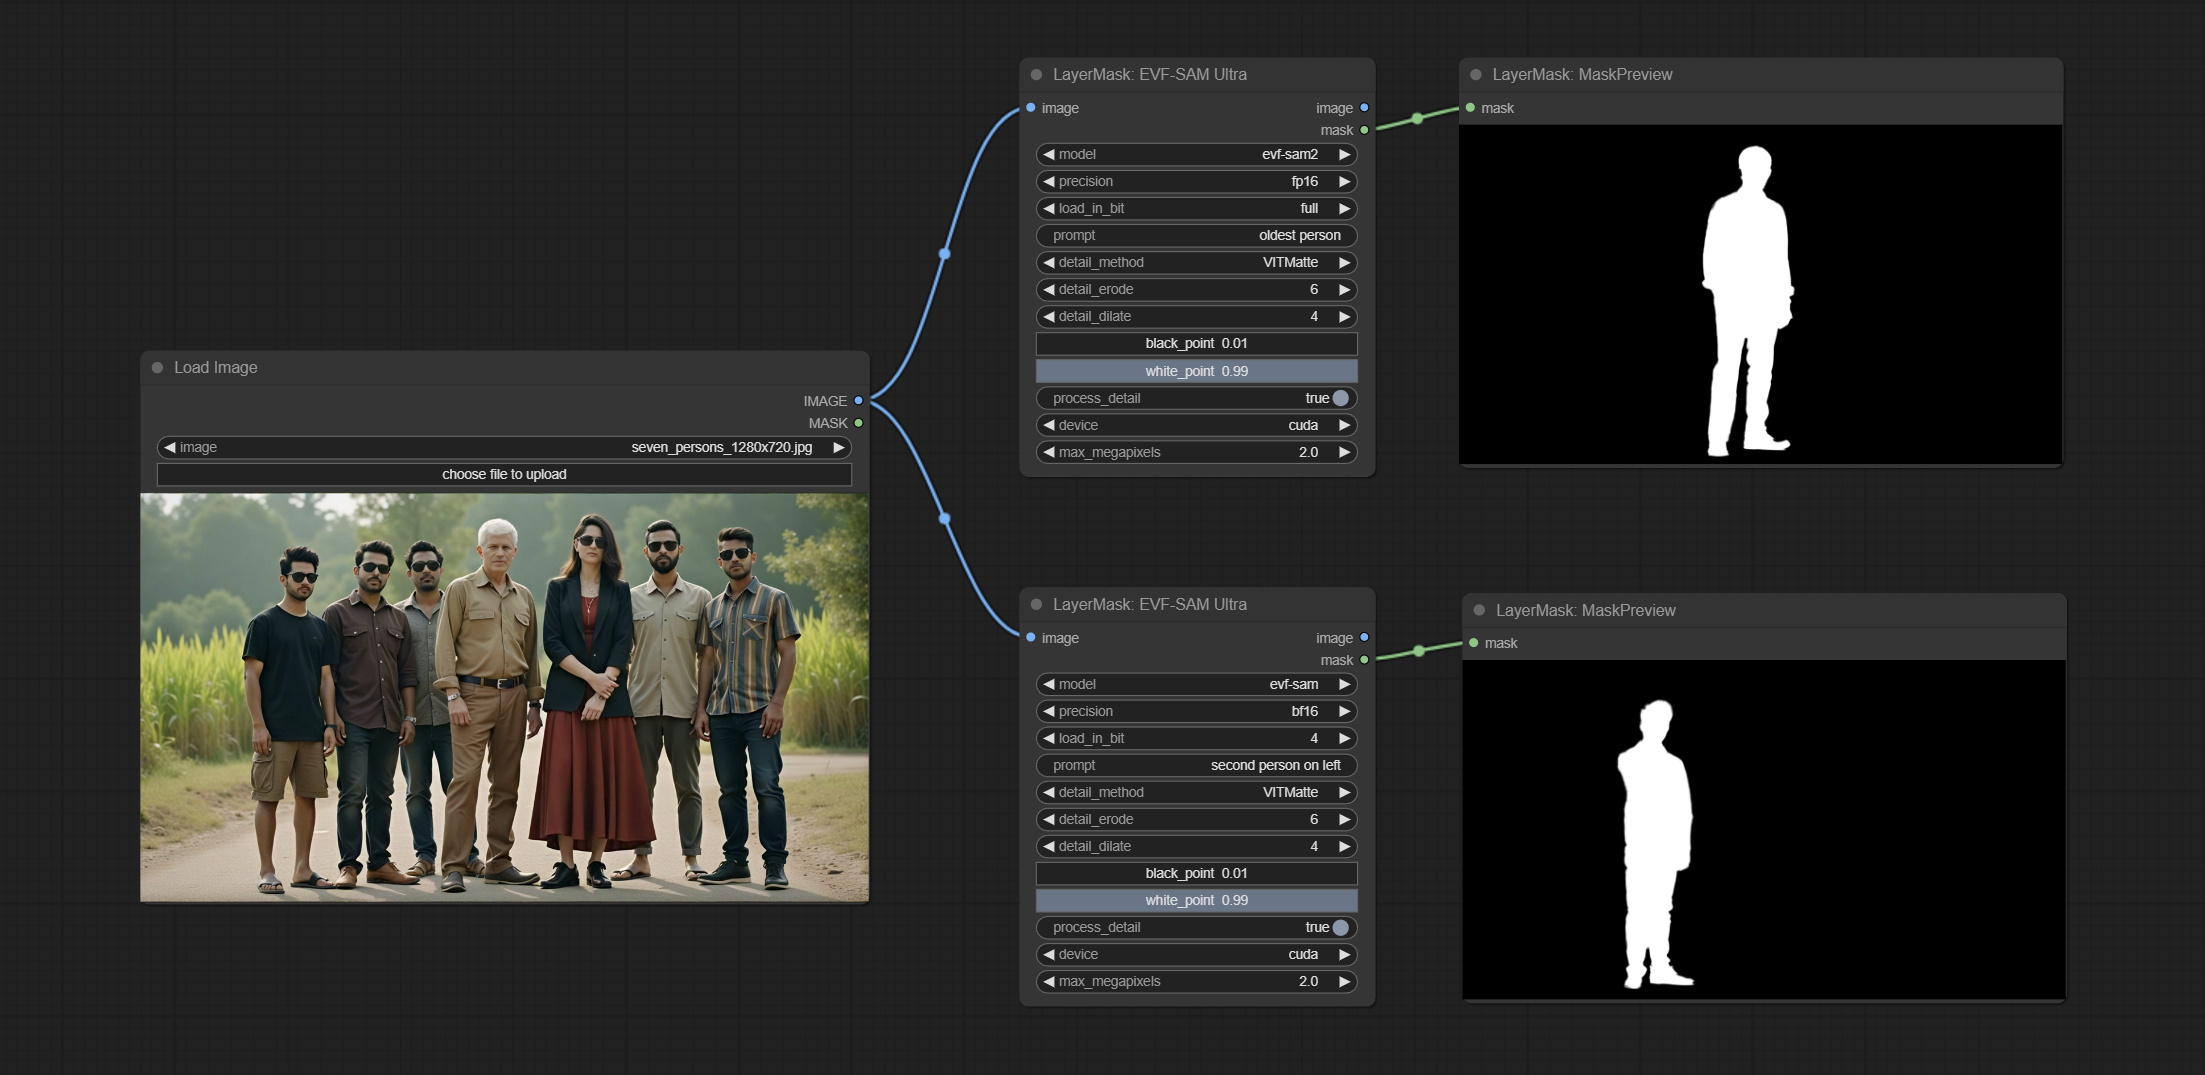
Node Options:
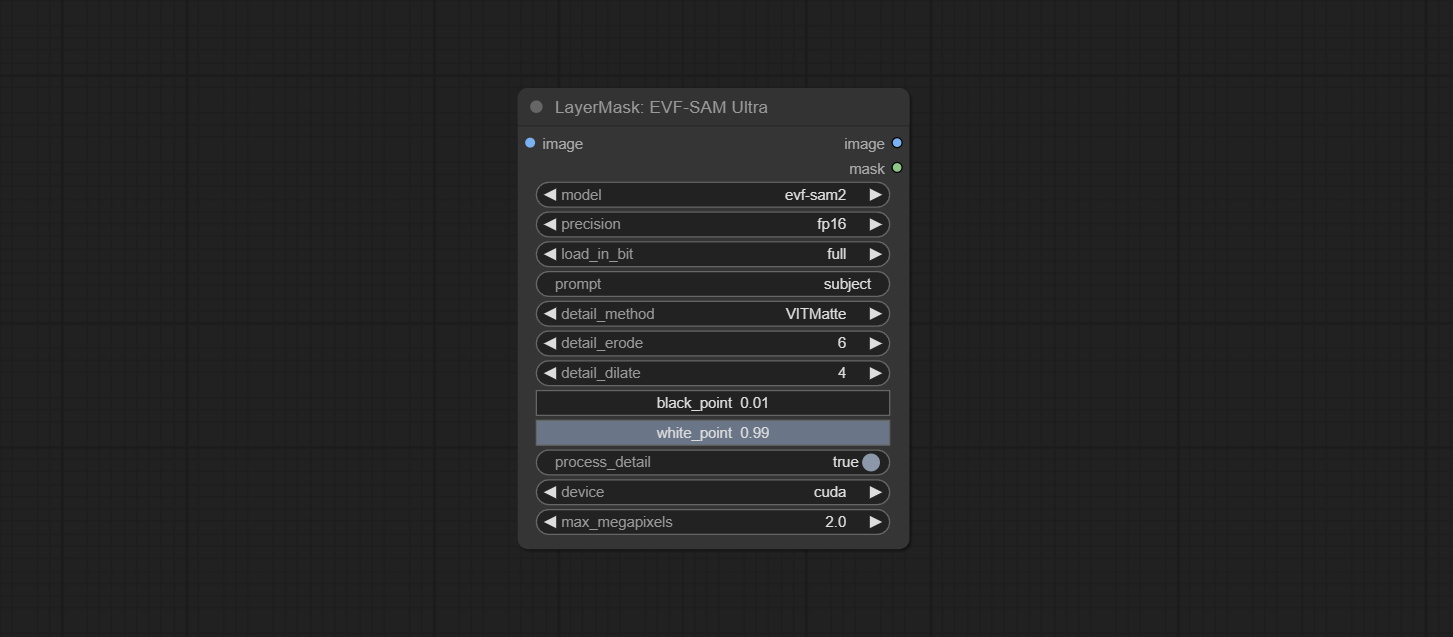
- image: The input image.
- model: Select the model. Currently, there are options for evf-sam2 and evf sam.
- presicion: Model accuracy can be selected from fp16, bf16, and fp32.
- load_in_bit: Load the model with positional accuracy. You can choose from full, 8, and 4.
- pormpt: Prompt words used for segmentation.
- detail_method: Edge processing methods. provides VITMatte, VITMatte(local), PyMatting, GuidedFilter. If the model has been downloaded after the first use of VITMatte, you can use VITMatte (local) afterwards.
- detail_erode: Mask the erosion range inward from the edge. the larger the value, the larger the range of inward repair.
- detail_dilate: The edge of the mask expands outward. the larger the value, the wider the range of outward repair.
- black_point: Edge black sampling threshold.
- white_point: Edge white sampling threshold.
- process_detail: Set to false here will skip edge processing to save runtime.
- device: Set whether the VitMatte to use cuda.
- max_megapixels: Set the maximum size for VitMate operations.
Florence2Ultra
Using the segmentation function of the Florence2 model, while also having ultra-high edge details. The code for this node section is from spacepxl/ComfyUI-Florence-2, thanks to the original author. *Download the model files from BaiduNetdisk to ComfyUI/models/florence2 folder.
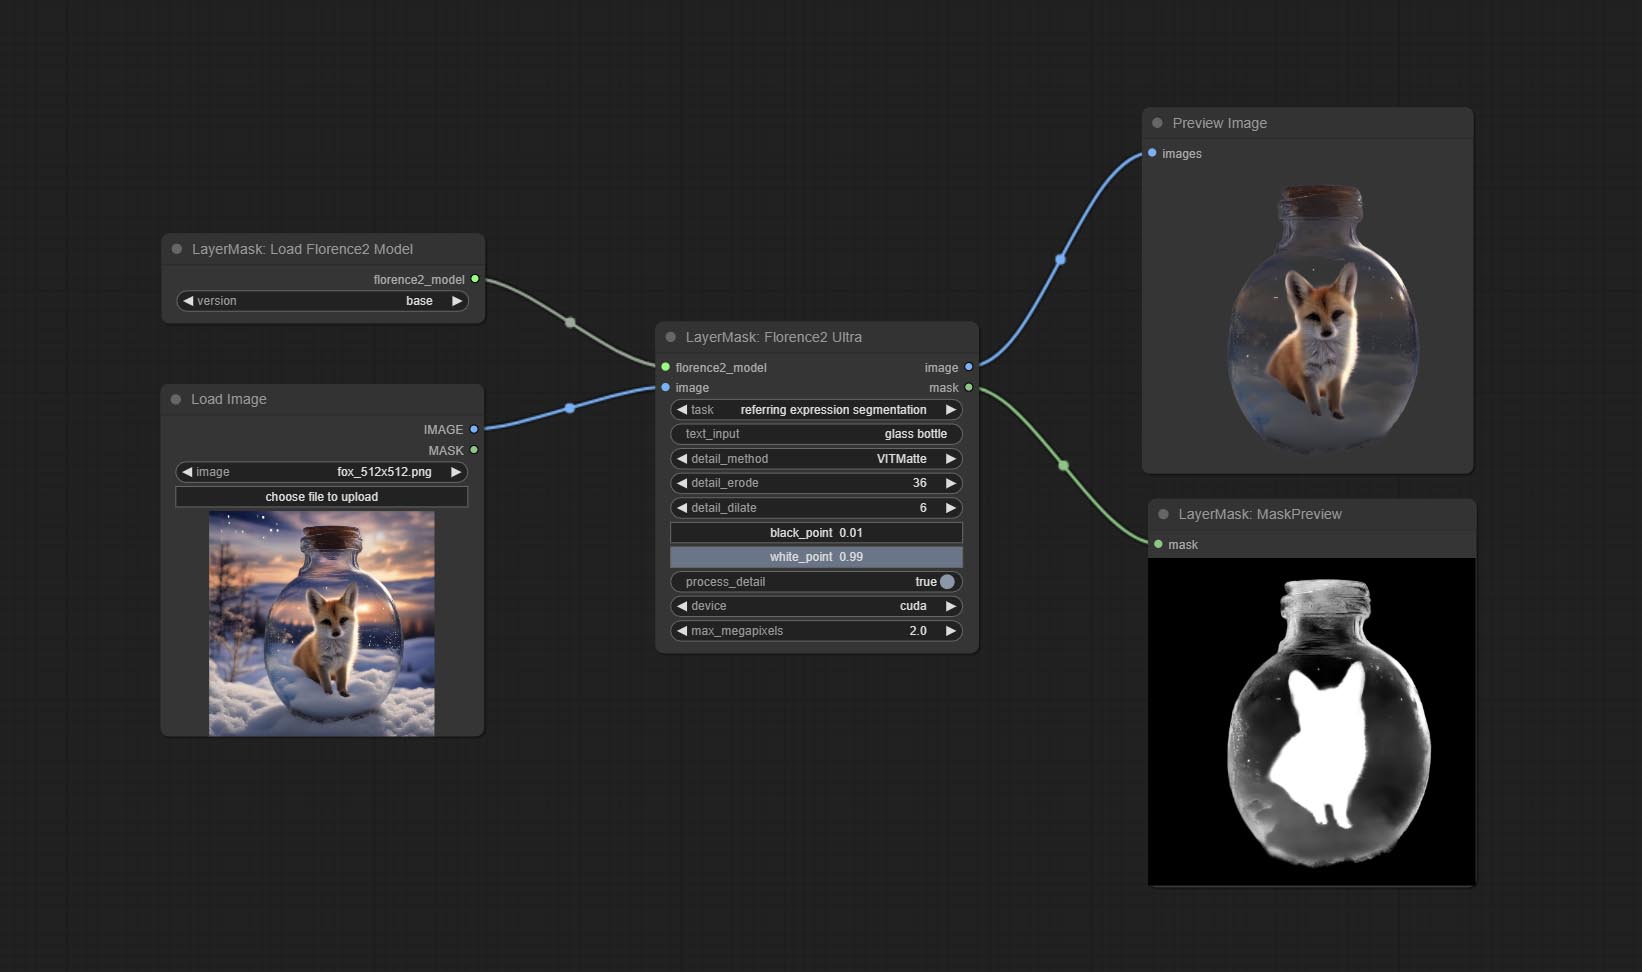
Node Options:
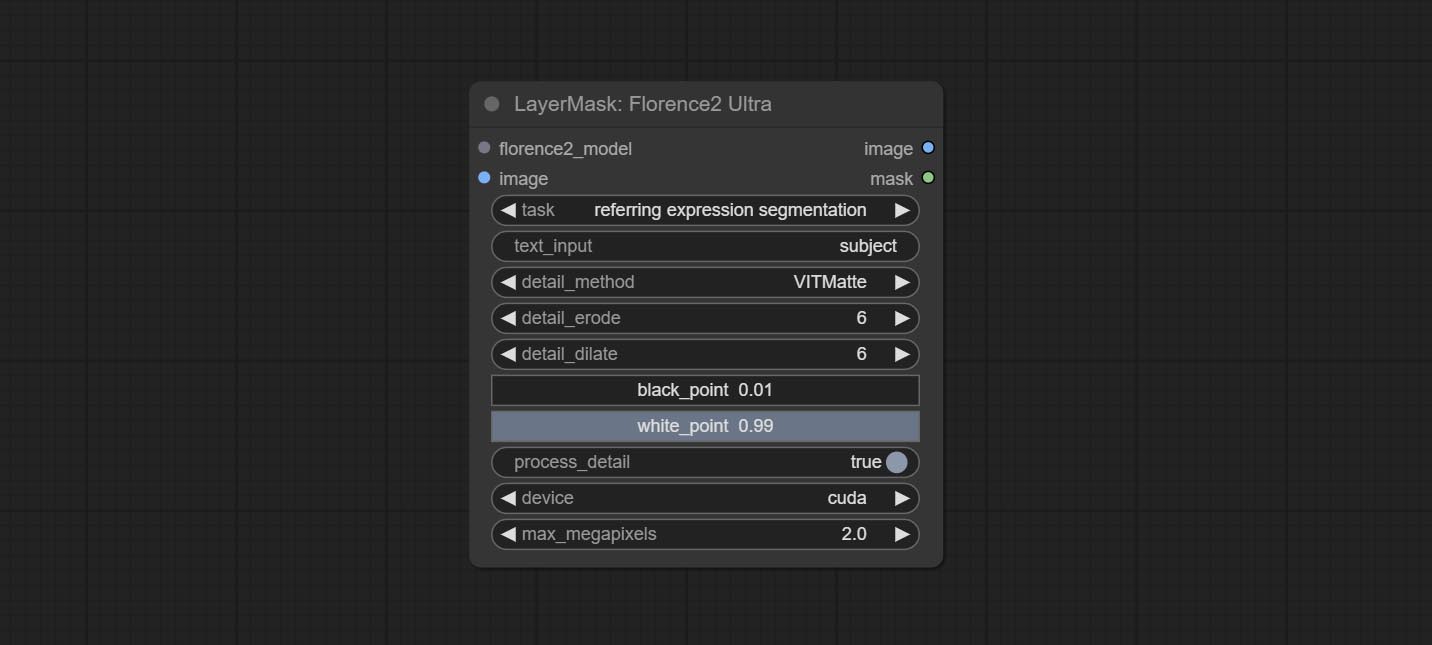
- florence2_model: Florence2 model input.
- image: Image input.
- task: Select the task for florence2.
- text_input: Text input for florence2.
- detail_method: Edge processing methods. provides VITMatte, VITMatte(local), PyMatting, GuidedFilter. If the model has been downloaded after the first use of VITMatte, you can use VITMatte (local) afterwards.
- detail_erode: Mask the erosion range inward from the edge. the larger the value, the larger the range of inward repair.
- detail_dilate: The edge of the mask expands outward. the larger the value, the wider the range of outward repair.
- black_point: Edge black sampling threshold.
- white_point: Edge white sampling threshold.
- process_detail: Set to false here will skip edge processing to save runtime.
- device: Set whether the VitMatte to use cuda.
- max_megapixels: Set the maximum size for VitMate operations.
LoadFlorence2Model
Florence2 model loader. *When using it for the first time, the model will be automatically downloaded.
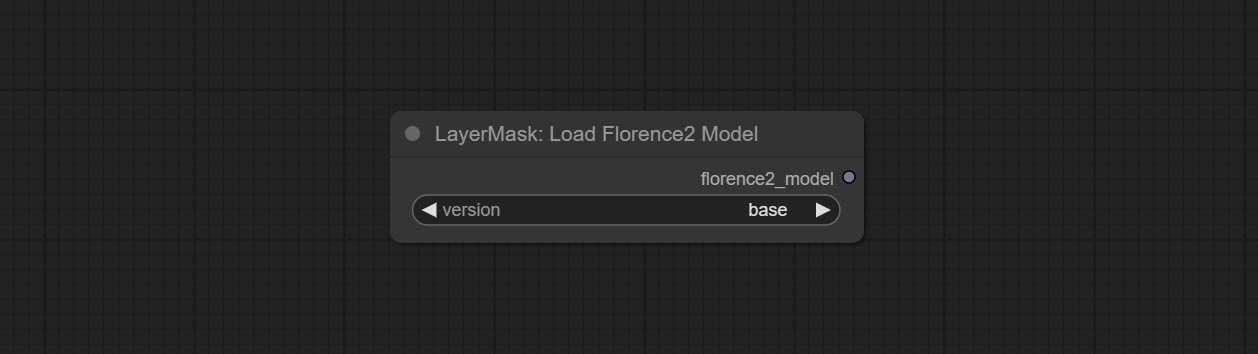
At present, there are base, base-ft, large, large-ft, DocVQA, SD3-Captioner and base-PromptGen models to choose from.
RemBgUltra
Remove background. compared to the similar background removal nodes, this node has ultra-high edge details.
This node combines the Alpha Matte node of Spacepxl's ComfyUI-Image-Filters and the functionality of ZHO-ZHO-ZHO's ComfyUI-BRIA_AI-RMBG, thanks to the original author.
*Download model files from BRIA Background Removal v1.4 or BaiduNetdisk to ComfyUI/models/rmbg/RMBG-1.4 folder. This model can be used for non-commercial purposes.
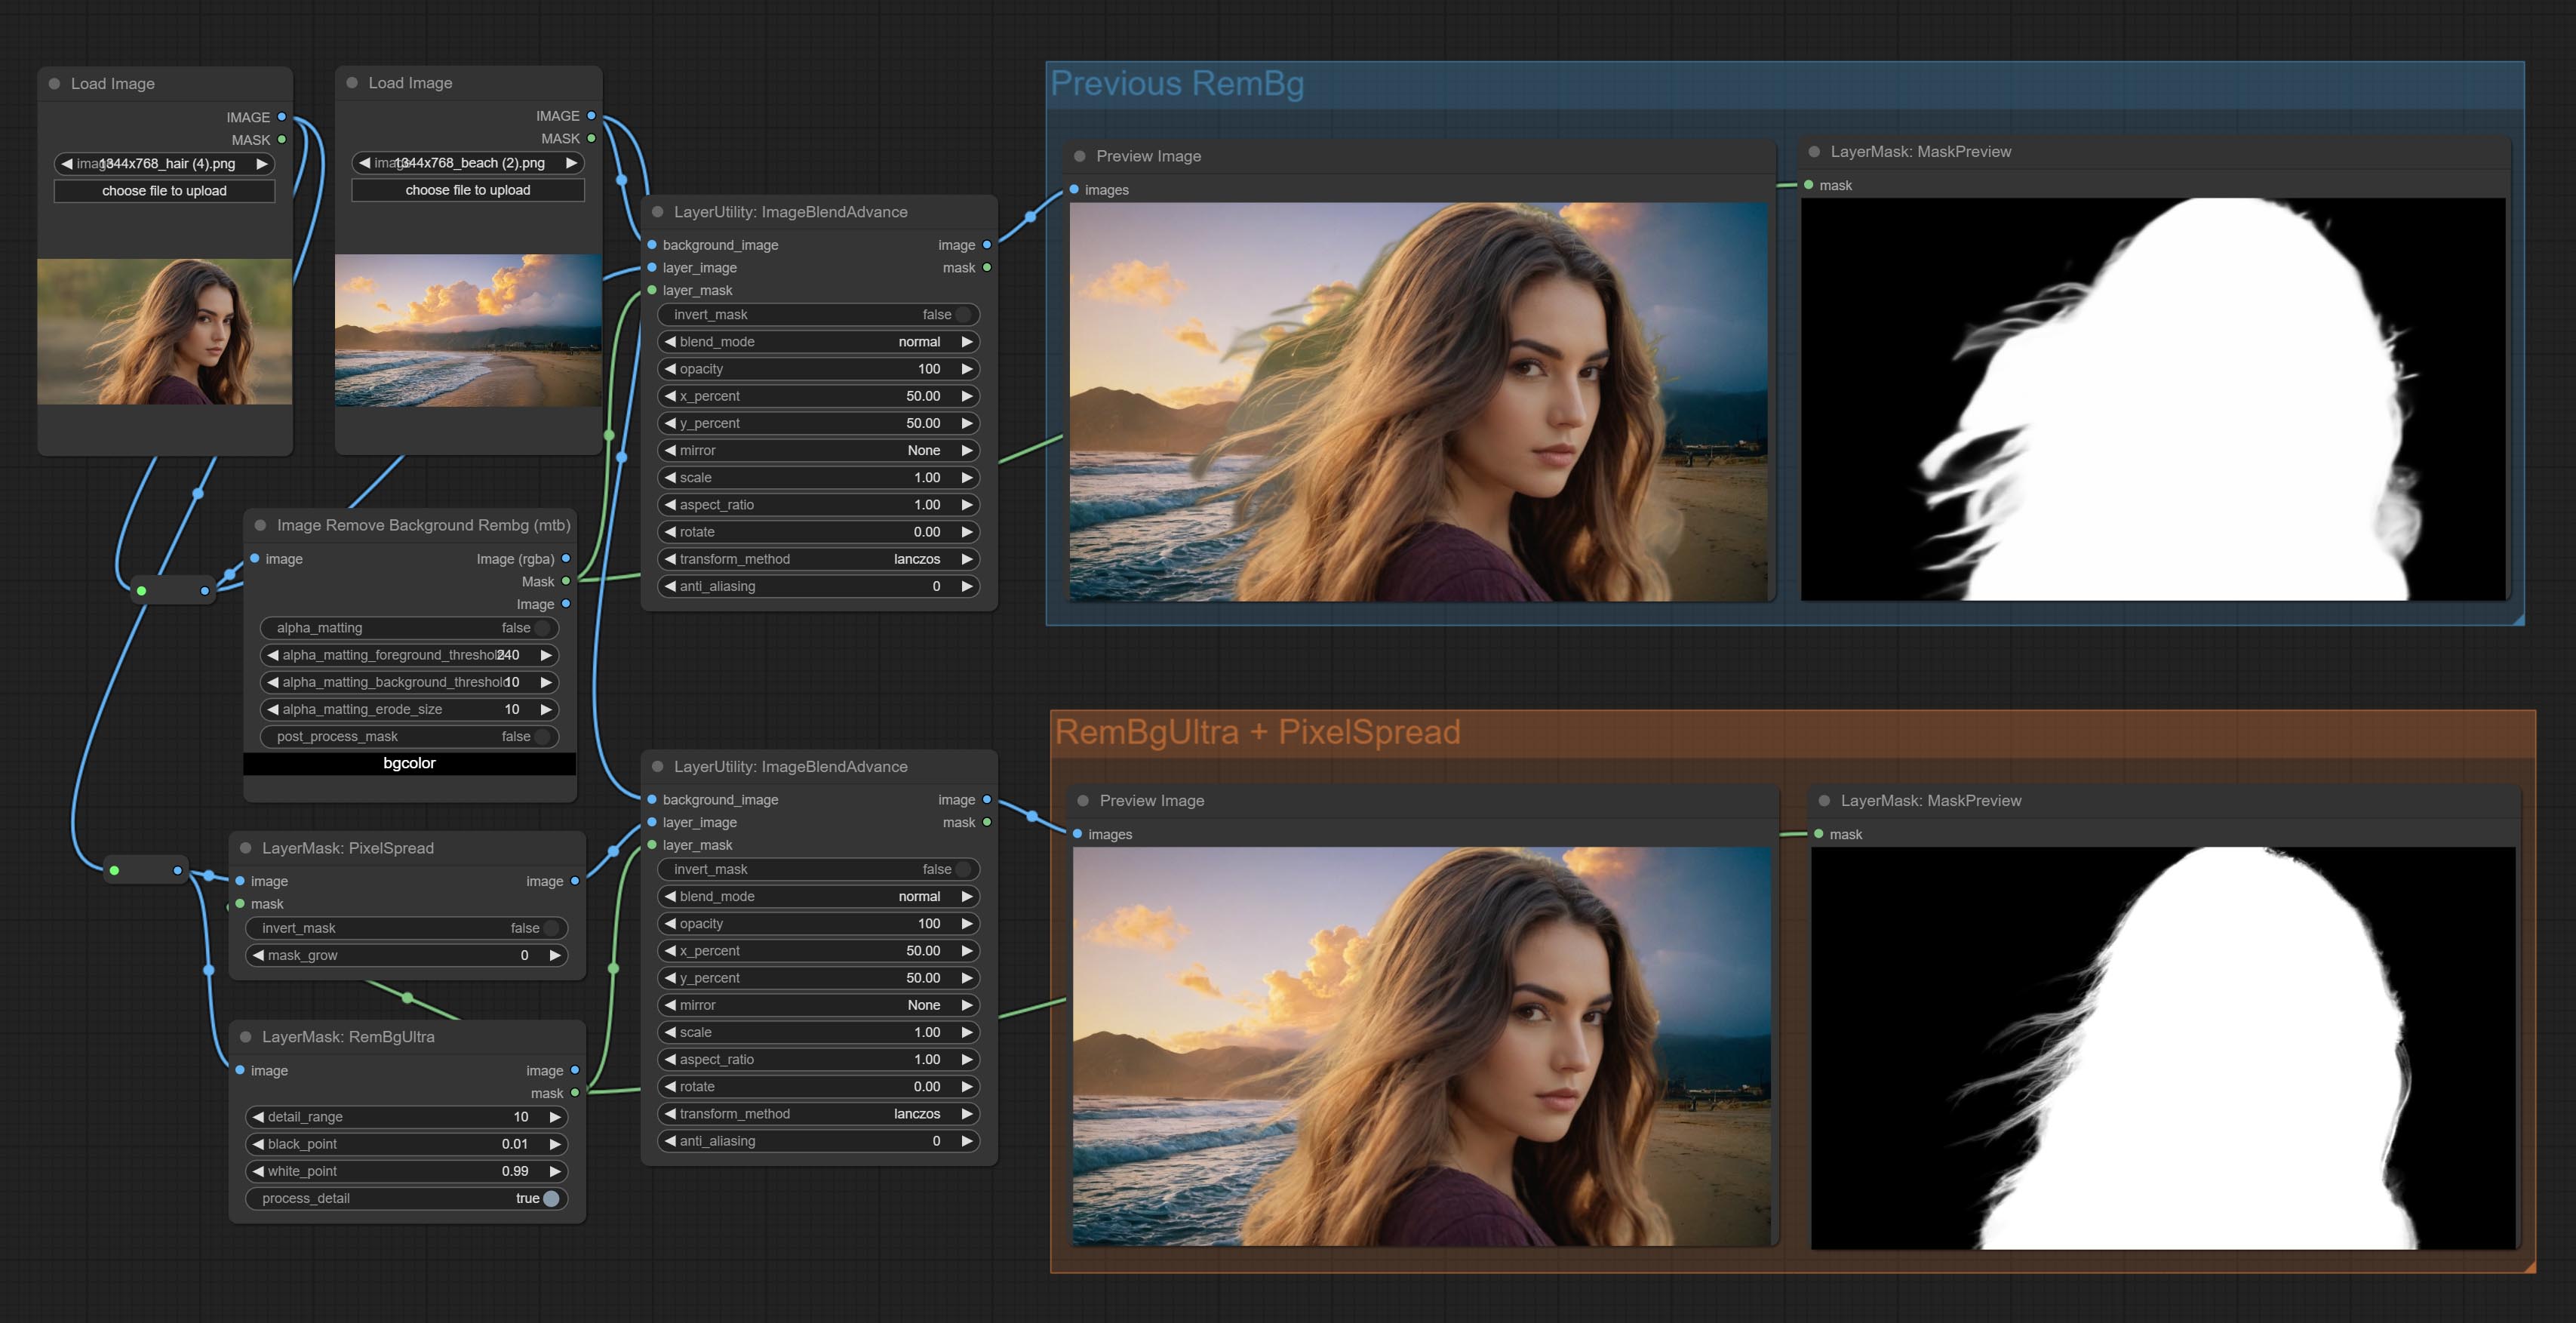
Node options:
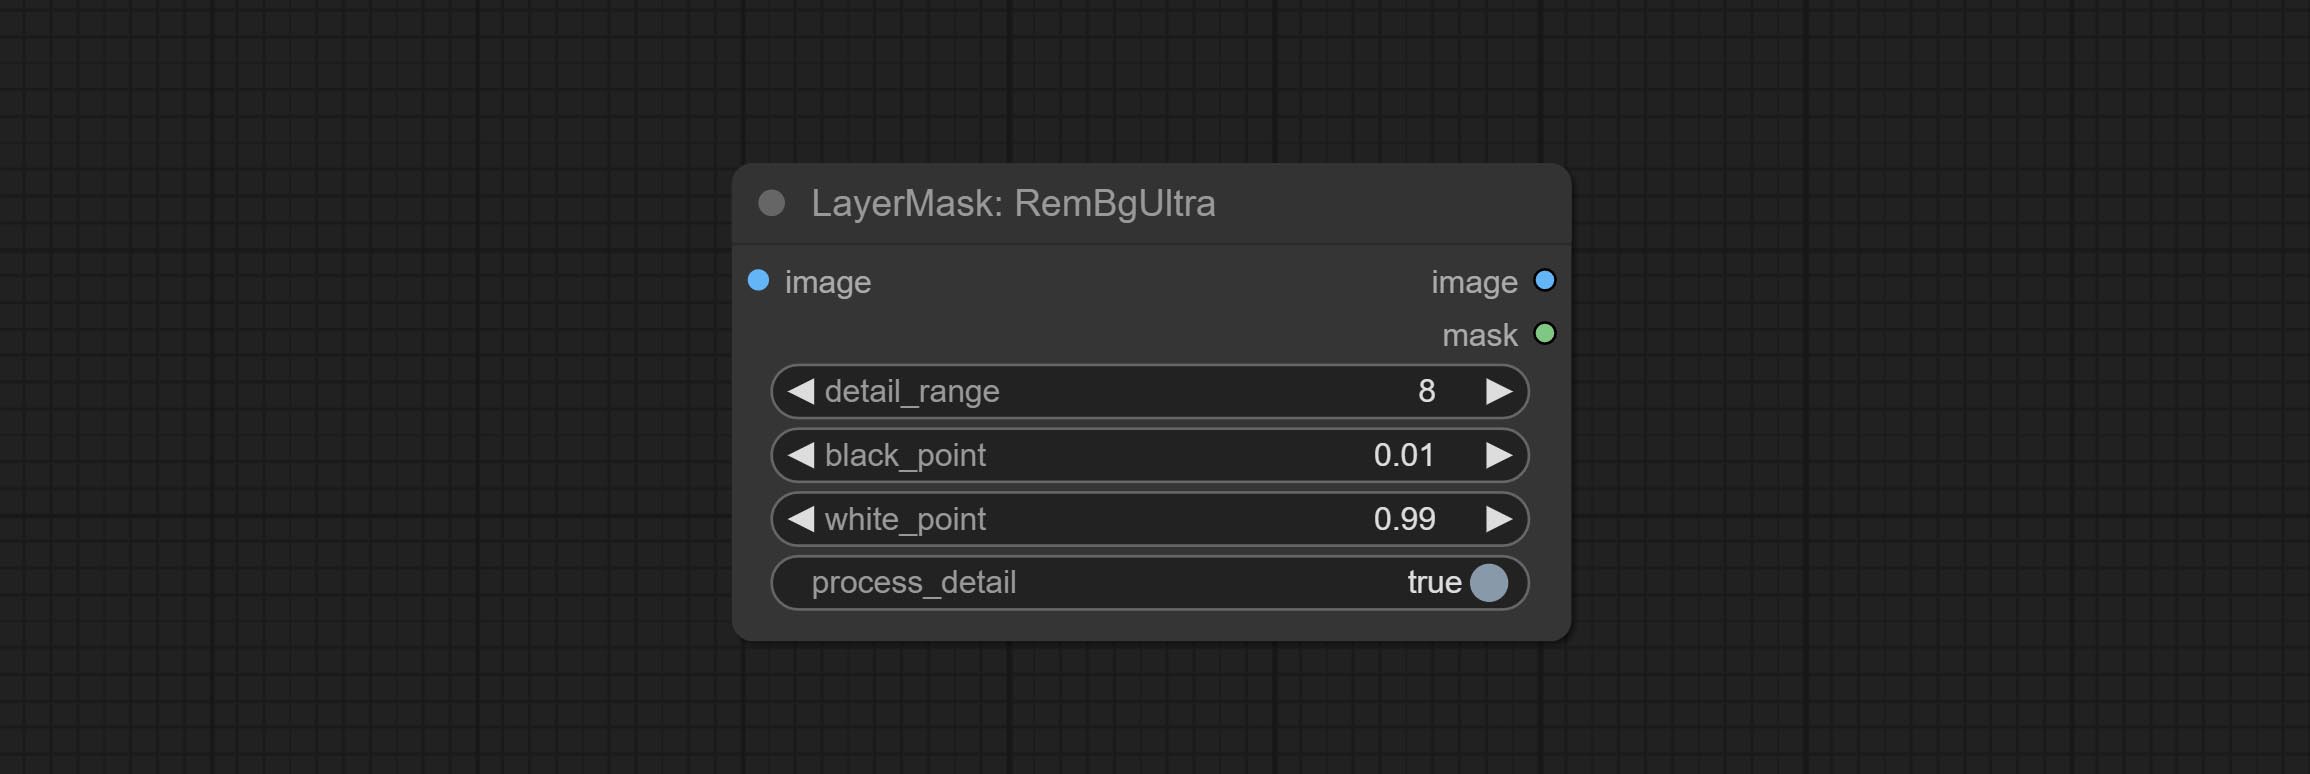
- detail_range: Edge detail range.
- black_point: Edge black sampling threshold.
- white_point: Edge white sampling threshold.
- process_detail: Set to false here will skip edge processing to save runtime.
RmBgUltraV2
The V2 upgraded version of RemBgUltra has added the VITMatte edge processing method.(Note: Images larger than 2K in size using this method will consume huge memory)
On the basis of RemBgUltra, the following changes have been made: 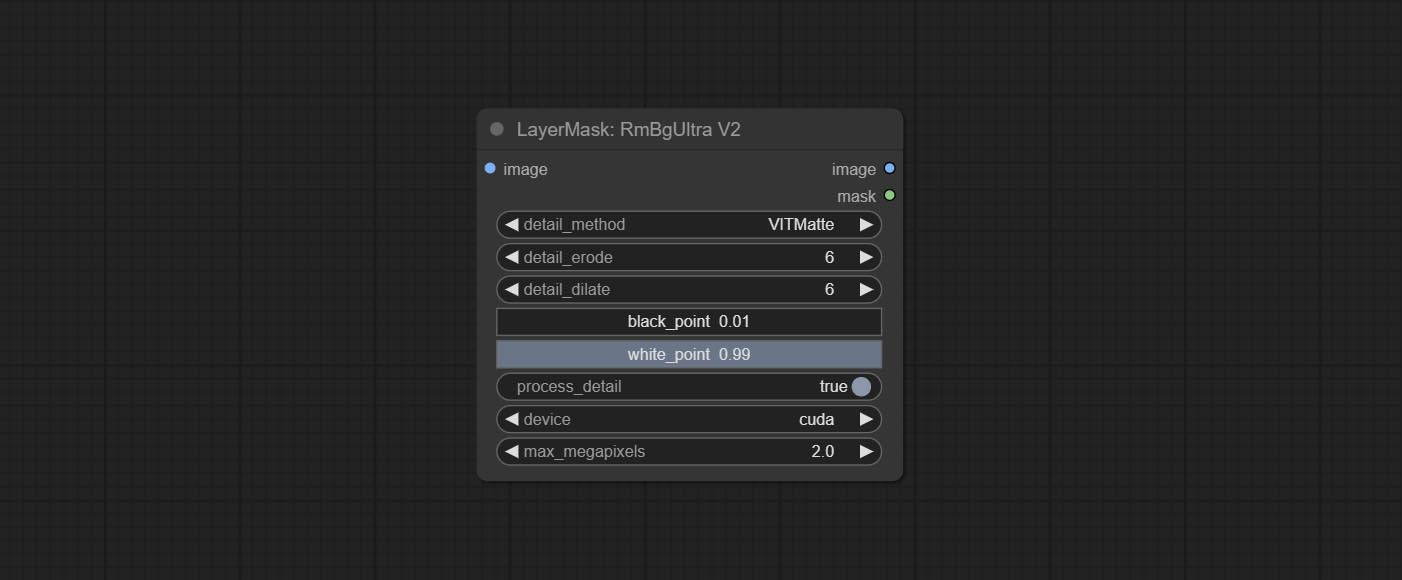
- detail_method: Edge processing methods. provides VITMatte, VITMatte(local), PyMatting, GuidedFilter. If the model has been downloaded after the first use of VITMatte, you can use VITMatte (local) afterwards.
- detail_erode: Mask the erosion range inward from the edge. the larger the value, the larger the range of inward repair.
- detail_dilate: The edge of the mask expands outward. the larger the value, the wider the range of outward repair.
- device: Set whether the VitMatte to use cuda.
- max_megapixels: Set the maximum size for VitMate operations.
BenUltra
It is the implementation of PramaLLC/BEN project in ComfyUI. Thank you to the original author.
Download the BEN_Base.pth and config.json from huggingface or BaiduNetdisk and copy to ComfyUI/models/BEN folder.
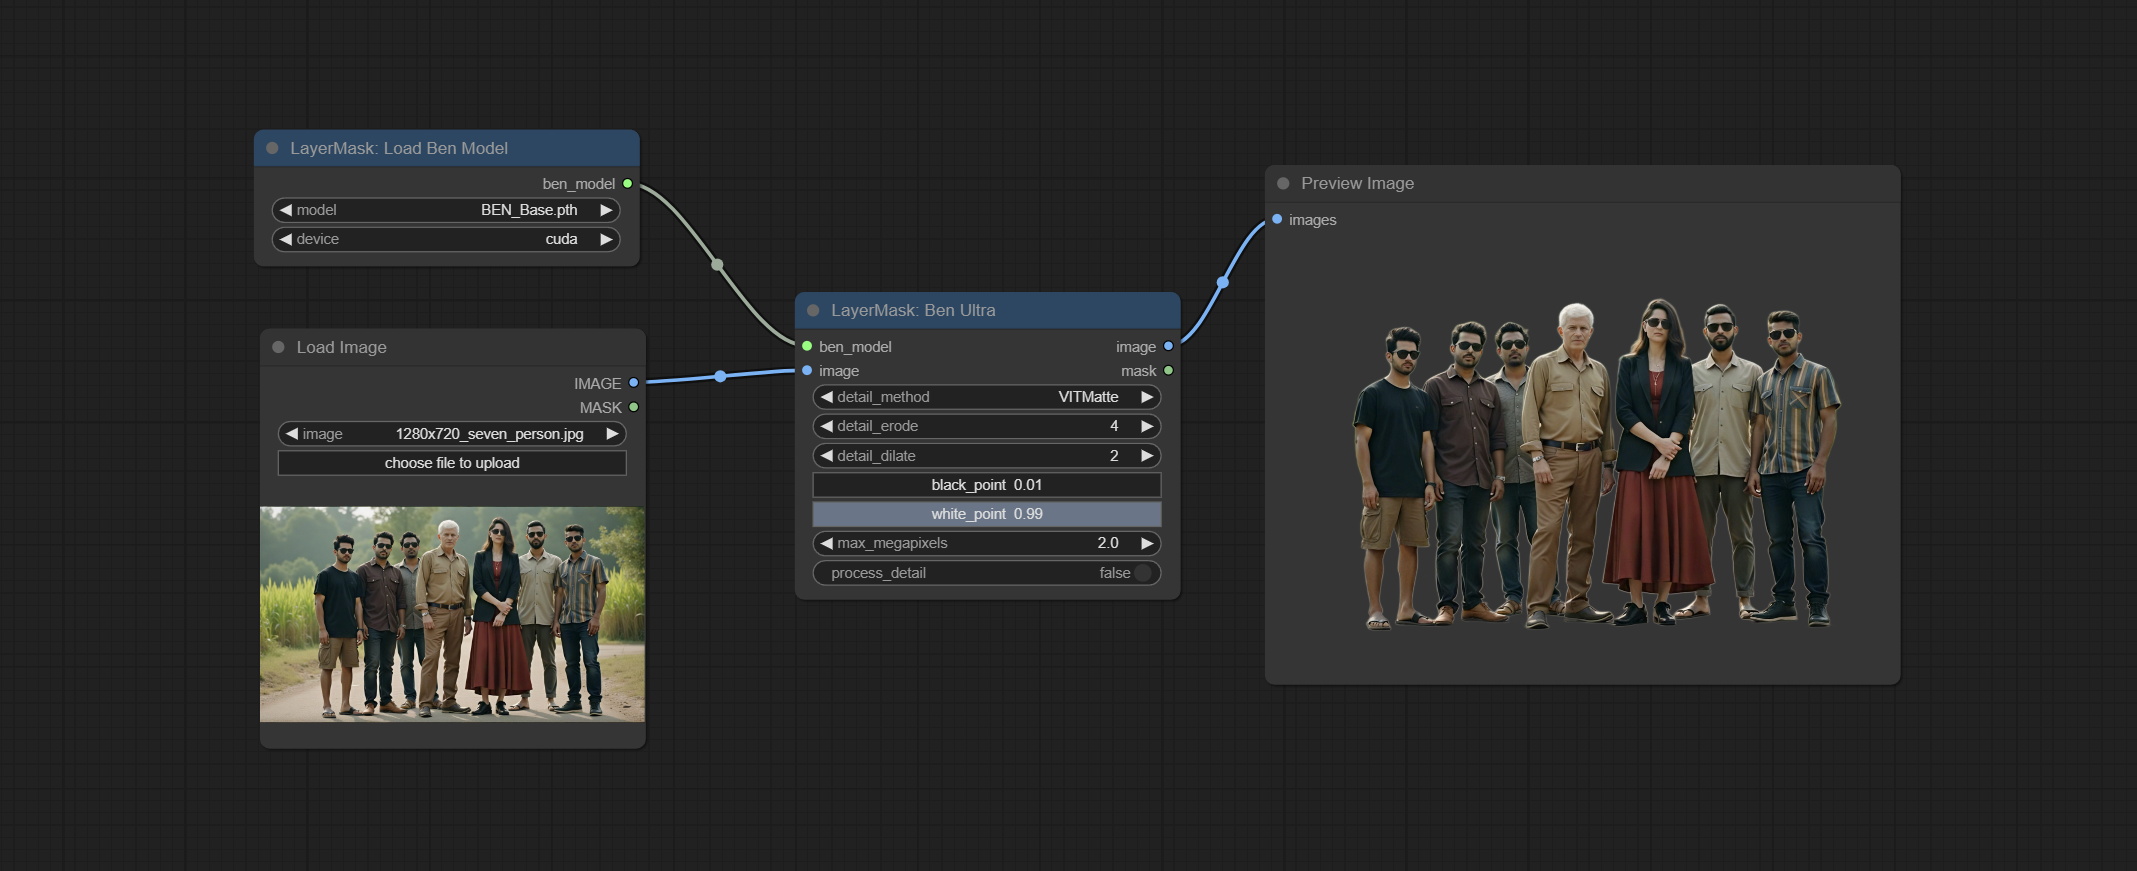
Node Options: 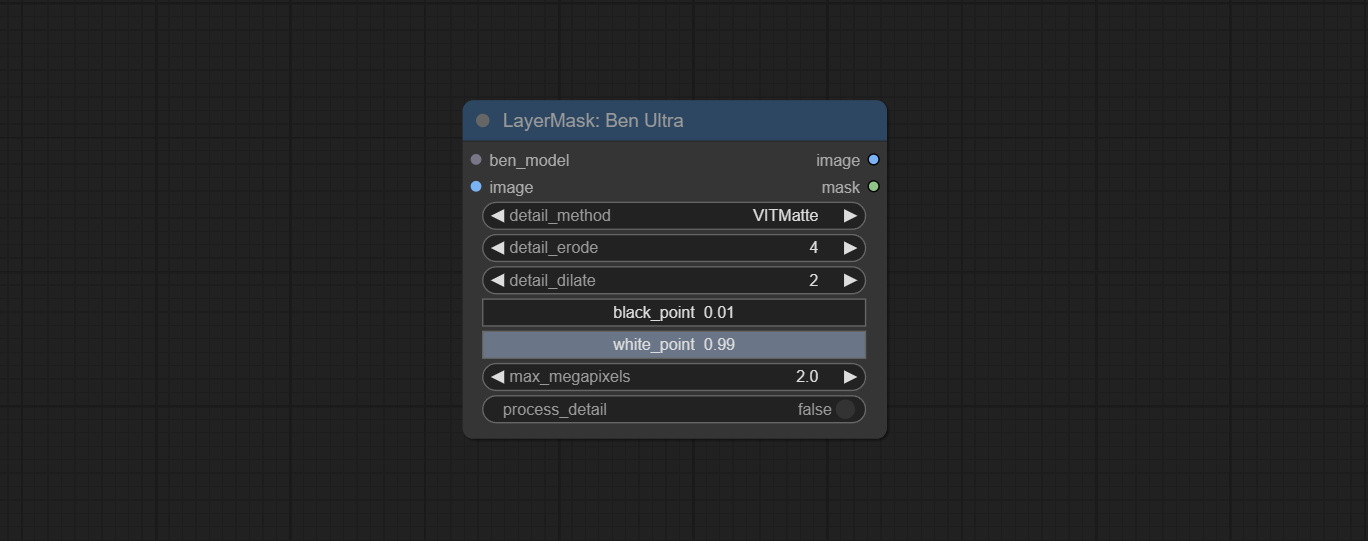
- ben_model: Ben model input.
- image: Image input.
- detail_method: Edge processing methods. provides VITMatte, VITMatte(local), PyMatting, GuidedFilter. If the model has been downloaded after the first use of VITMatte, you can use VITMatte (local) afterwards.
- detail_erode: Mask the erosion range inward from the edge. the larger the value, the larger the range of inward repair.
- detail_dilate: The edge of the mask expands outward. the larger the value, the wider the range of outward repair.
- black_point: Edge black sampling threshold.
- white_point: Edge white sampling threshold.
- process_detail: Set to false here will skip edge processing to save runtime.
- max_megapixels: Set the maximum size for VitMate operations.
LoadBenModel
Load the BEN model.
Node Options:
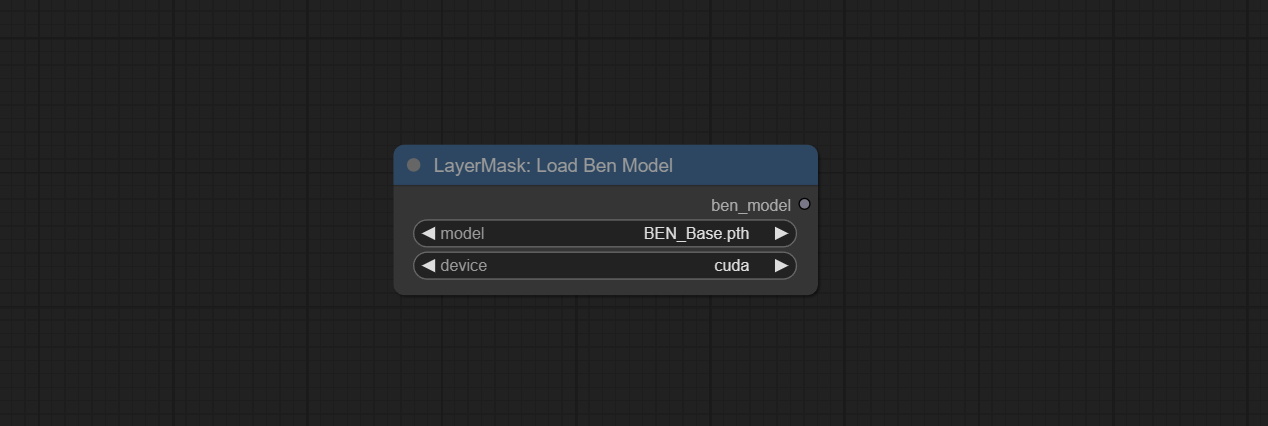
- model: Select the model. Currently, only the Ben_Sase model is available for selection.
BiRefNetUltra
Using the BiRefNet model to remove background has better recognition ability and ultra-high edge details. The code for the model part of this node comes from Viper's ComfyUI-BiRefNet,thanks to the original author.
*From https://huggingface.co/ViperYX/BiRefNet or BaiduNetdisk download the BiRefNet-ep480.pth , pvt_v2_b2.pth , pvt_v2_b5.pth , swin_base_patch4_window12_384_22kto1k.pth , swin_large_patch4_window12_384_22kto1k.pth 5 files to ComfyUI/models/BiRefNet folder.
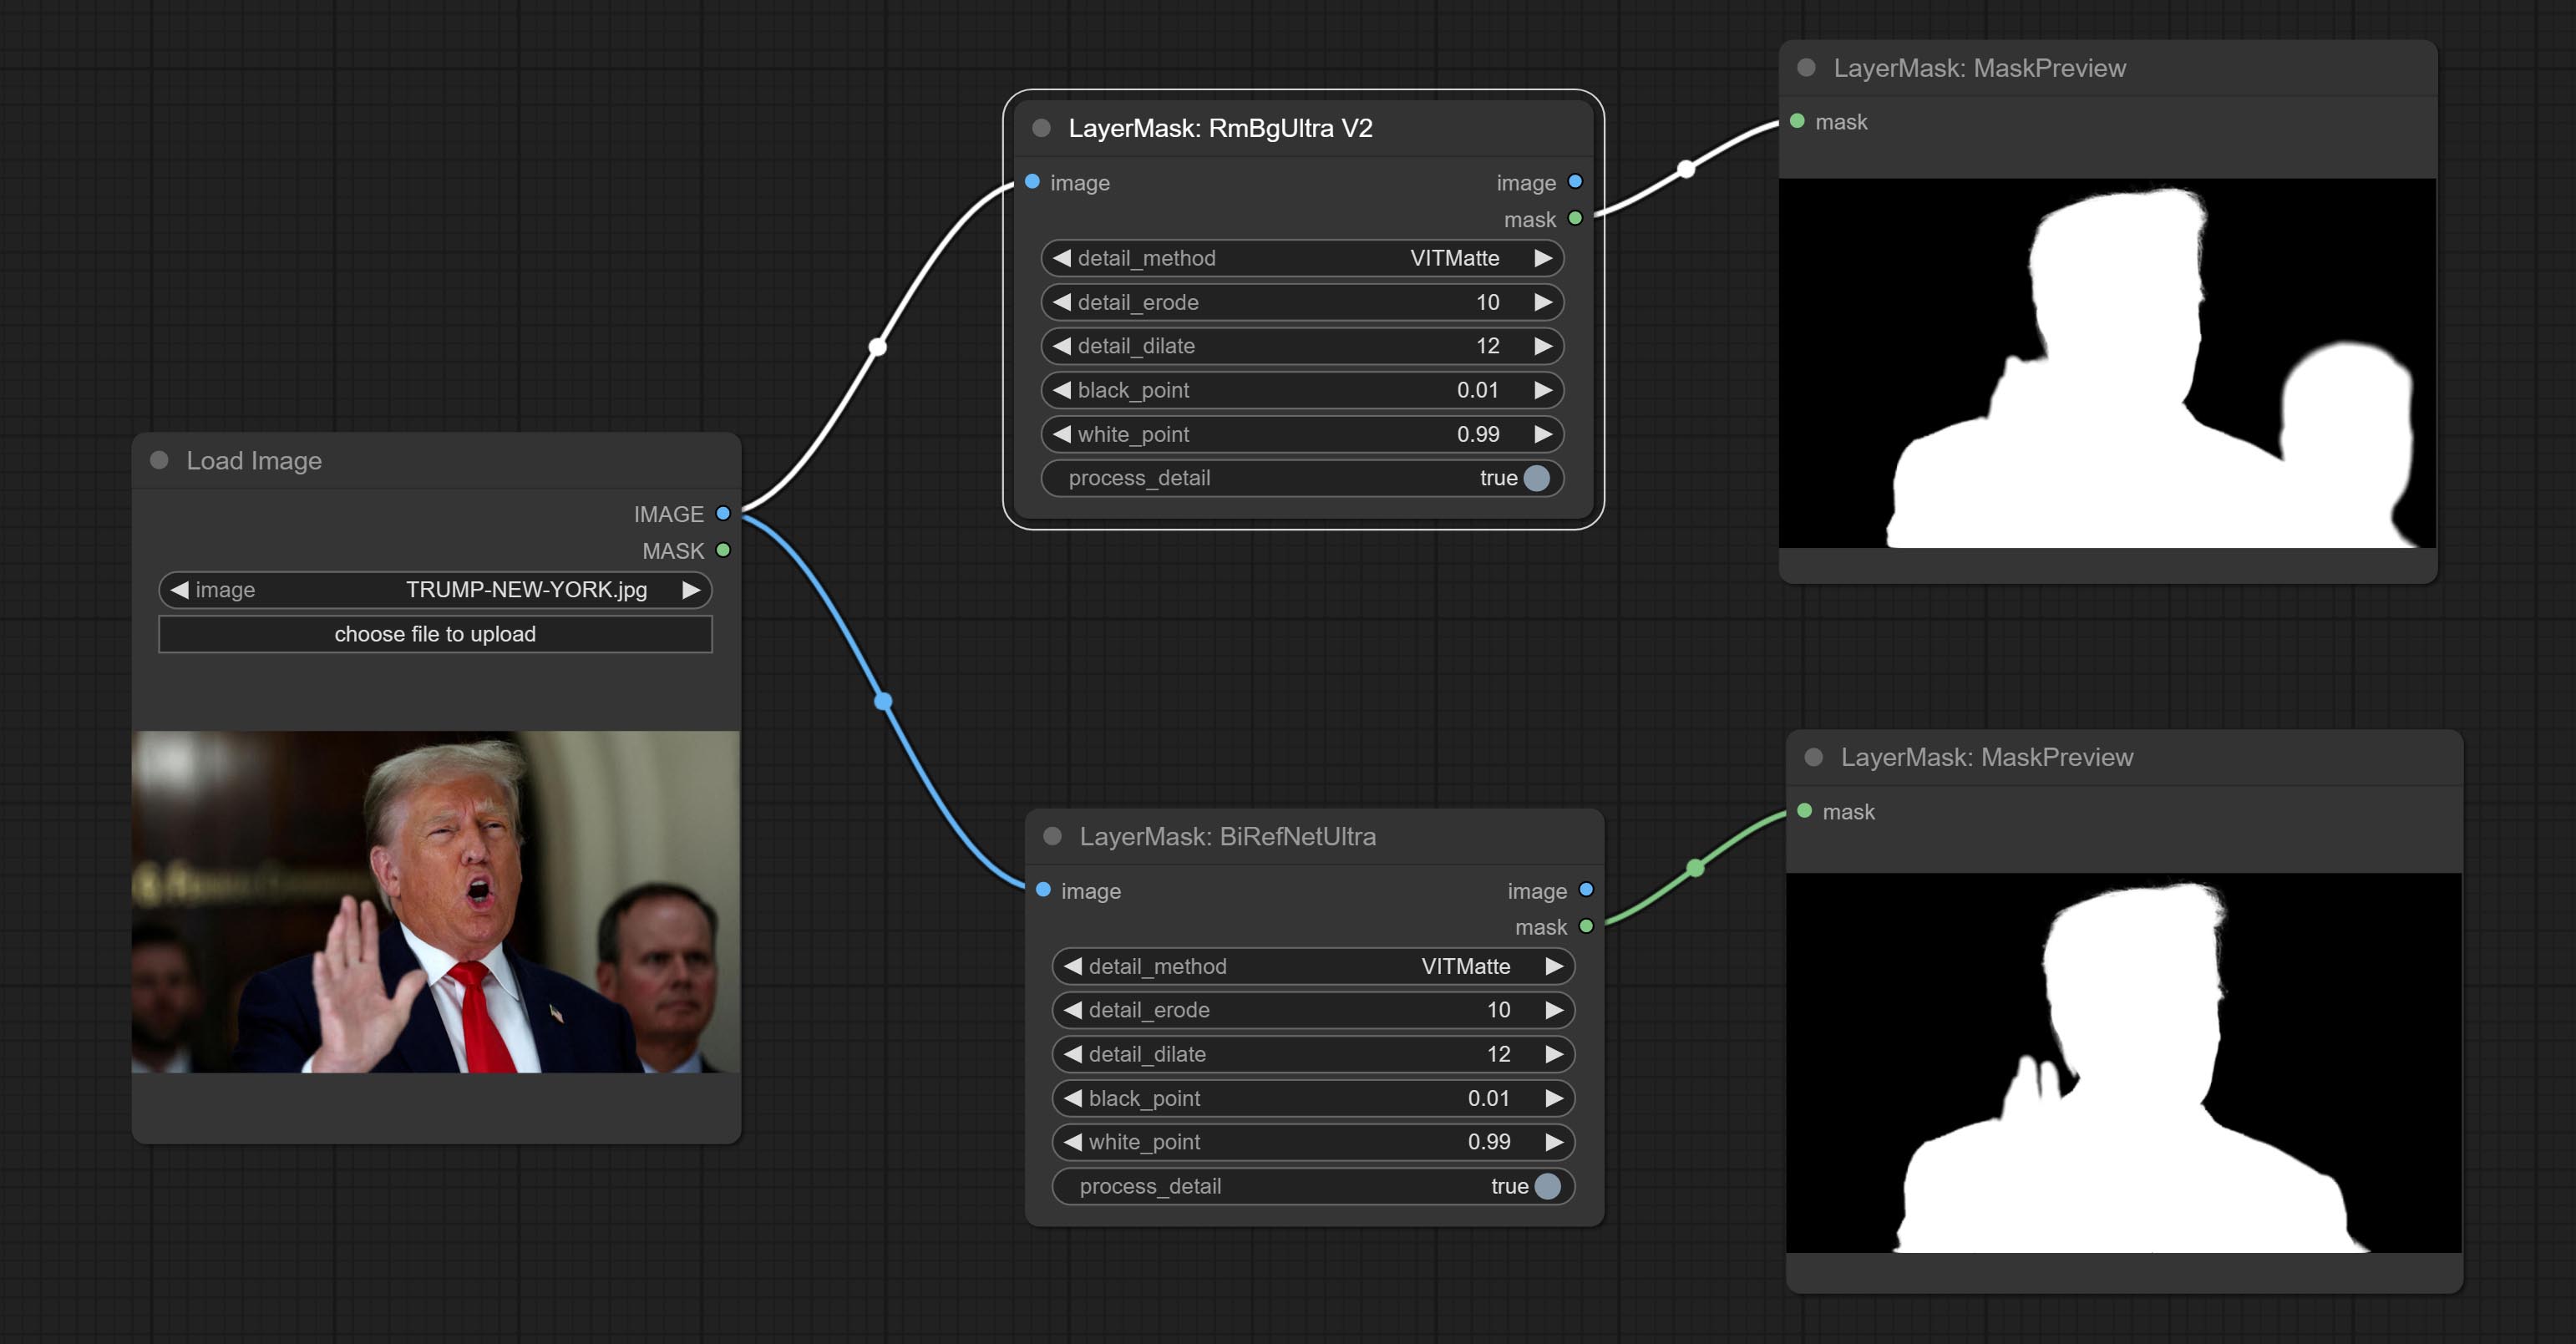
Node options:
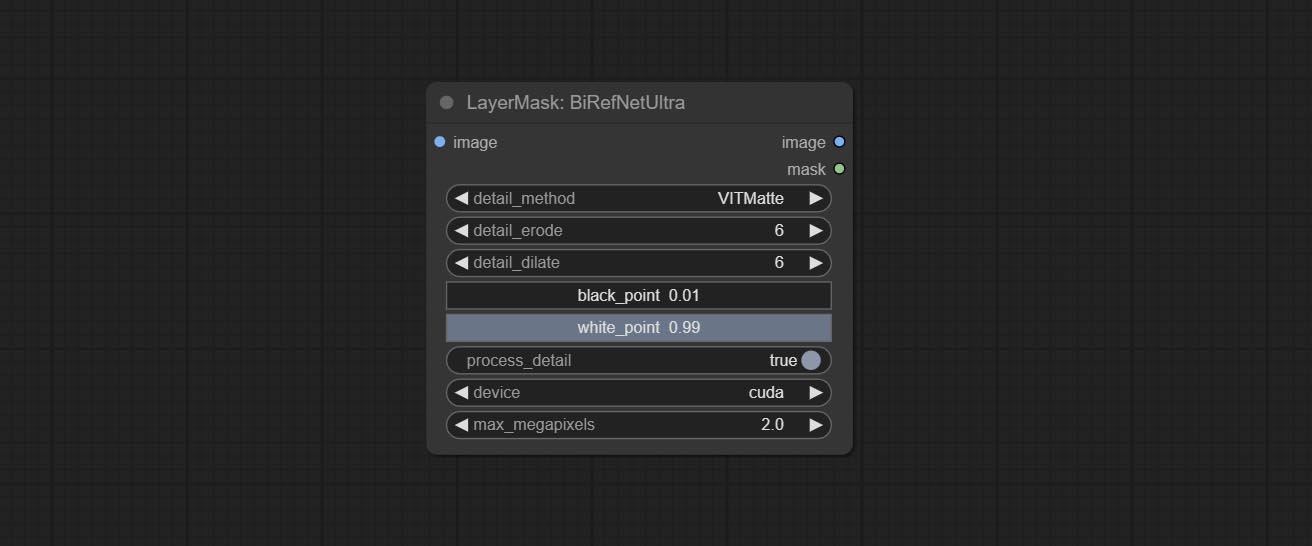
- detail_method: Edge processing methods. provides VITMatte, VITMatte(local), PyMatting, GuidedFilter. If the model has been downloaded after the first use of VITMatte, you can use VITMatte (local) afterwards.
- detail_erode: Mask the erosion range inward from the edge. the larger the value, the larger the range of inward repair.
- detail_dilate: The edge of the mask expands outward. the larger the value, the wider the range of outward repair.
- black_point: Edge black sampling threshold.
- white_point: Edge white sampling threshold.
- process_detail: Set to false here will skip edge processing to save runtime.
- device: Set whether the VitMatte to use cuda.
- max_megapixels: Set the maximum size for VitMate operations.
BiRefNetUltraV2
This node supports the use of the latest BiRefNet model. *Download model file from BaiduNetdisk or GoogleDrive named BiRefNet-general-epoch_244.pth to ComfyUI/Models/BiRefNet/pth folder. You can also download more BiRefNet models and put them here.
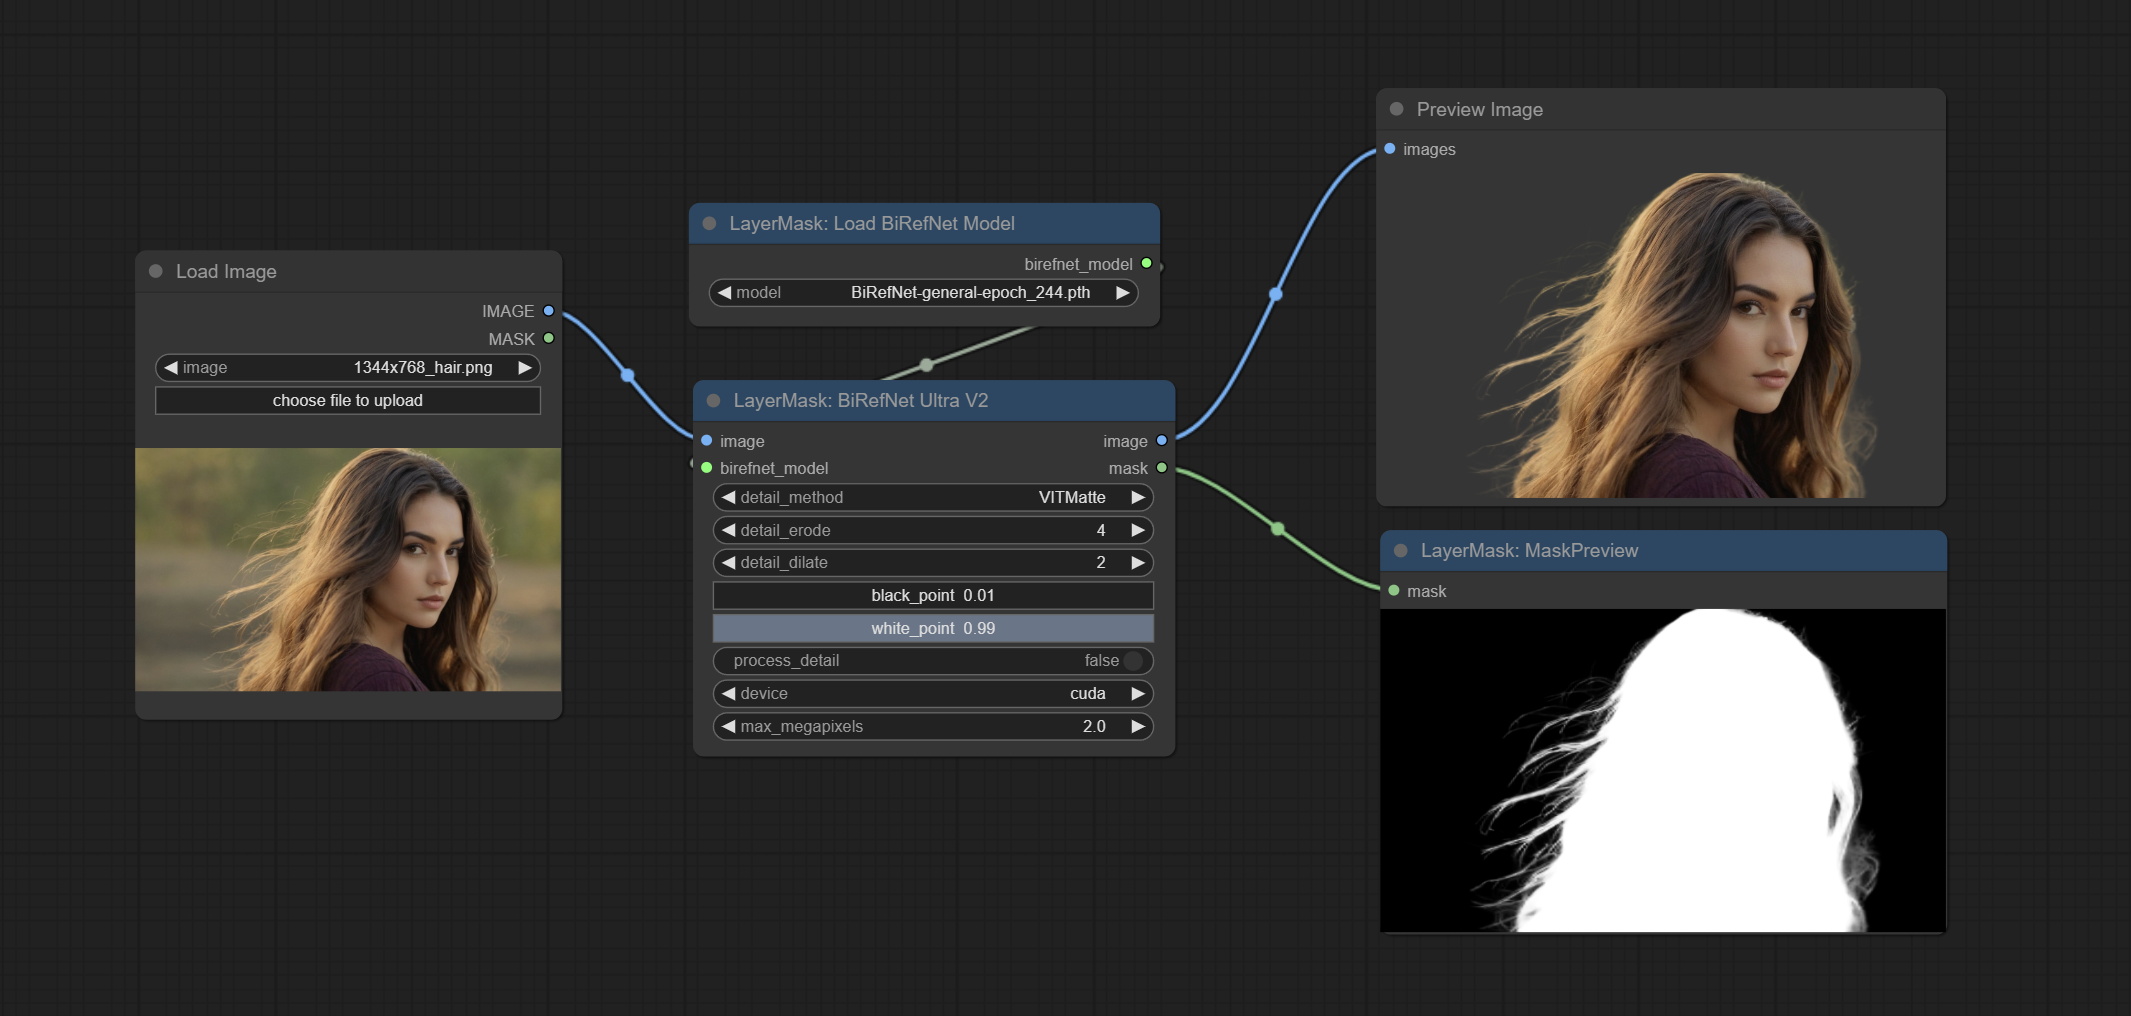
Node Options:
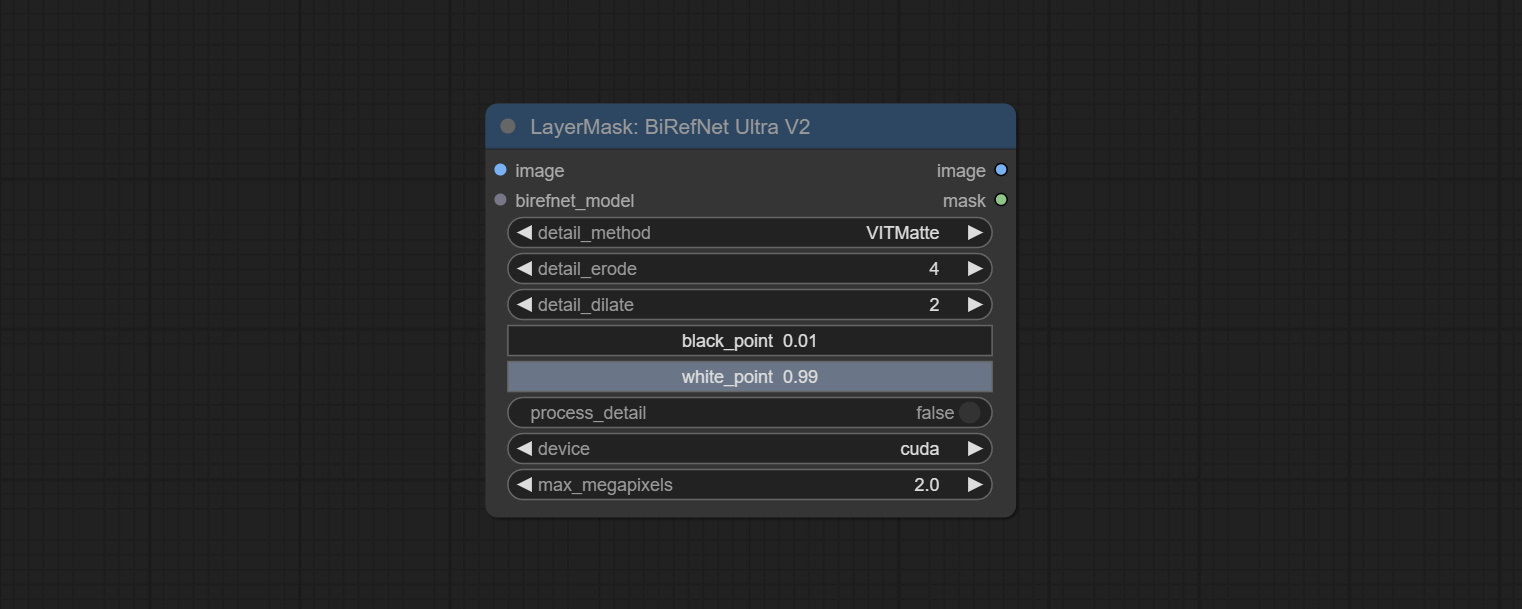
- image: The input image.
- birefnet_model: The BiRefNet model is input and it is output from the LoadBiRefNetModel node.
- detail_method: Edge processing methods. provides VITMatte, VITMatte(local), PyMatting, GuidedFilter. If the model has been downloaded after the first use of VITMatte, you can use VITMatte (local) afterwards.
- detail_erode: Mask the erosion range inward from the edge. the larger the value, the larger the range of inward repair.
- detail_dilate: The edge of the mask expands outward. the larger the value, the wider the range of outward repair.
- black_point: Edge black sampling threshold.
- white_point: Edge white sampling threshold.
- process_detail: Due to the excellent edge processing of BiRefNet, it is set to False by default here.
- device: Set whether the VitMatte to use cuda.
- max_megapixels: Set the maximum size for VitMate operations.
LoadBiRefNetModel
Load the BiRefNet model.
Node Options:

- model: Select the model. List the files in the
CoomfyUI/models/BiRefNet/pth folder for selection.
LoadBiRefNetModelV2
This node is a PR submitted by jimlee2048 and supports loading RMBG-2.0 models.
Download model files from huggingface or 百度网盘 and copy to ComfyUI/models/BiRefNet/RMBG-2.0 folder.
Node Options:
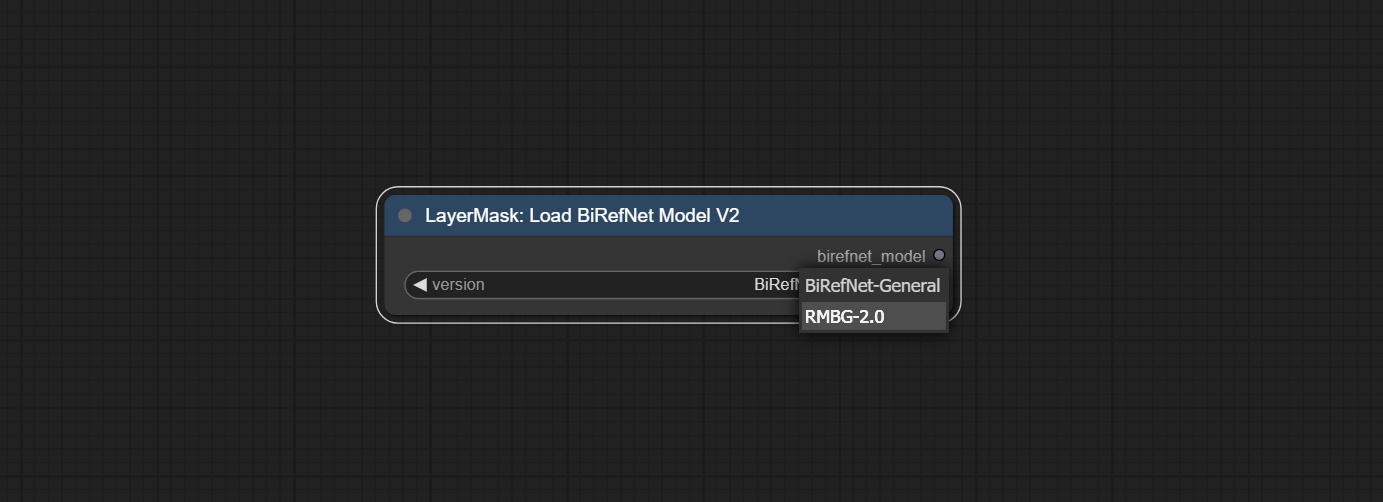
- model: Select the model. There are two options,
BiRefNet-General and RMBG-2.0 .
TransparentBackgroundUltra
Using the transparent-background model to remove background has better recognition ability and speed, while also having ultra-high edge details.
*From googledrive or BaiduNetdisk download all files to ComfyUI/models/transparent-background folder.
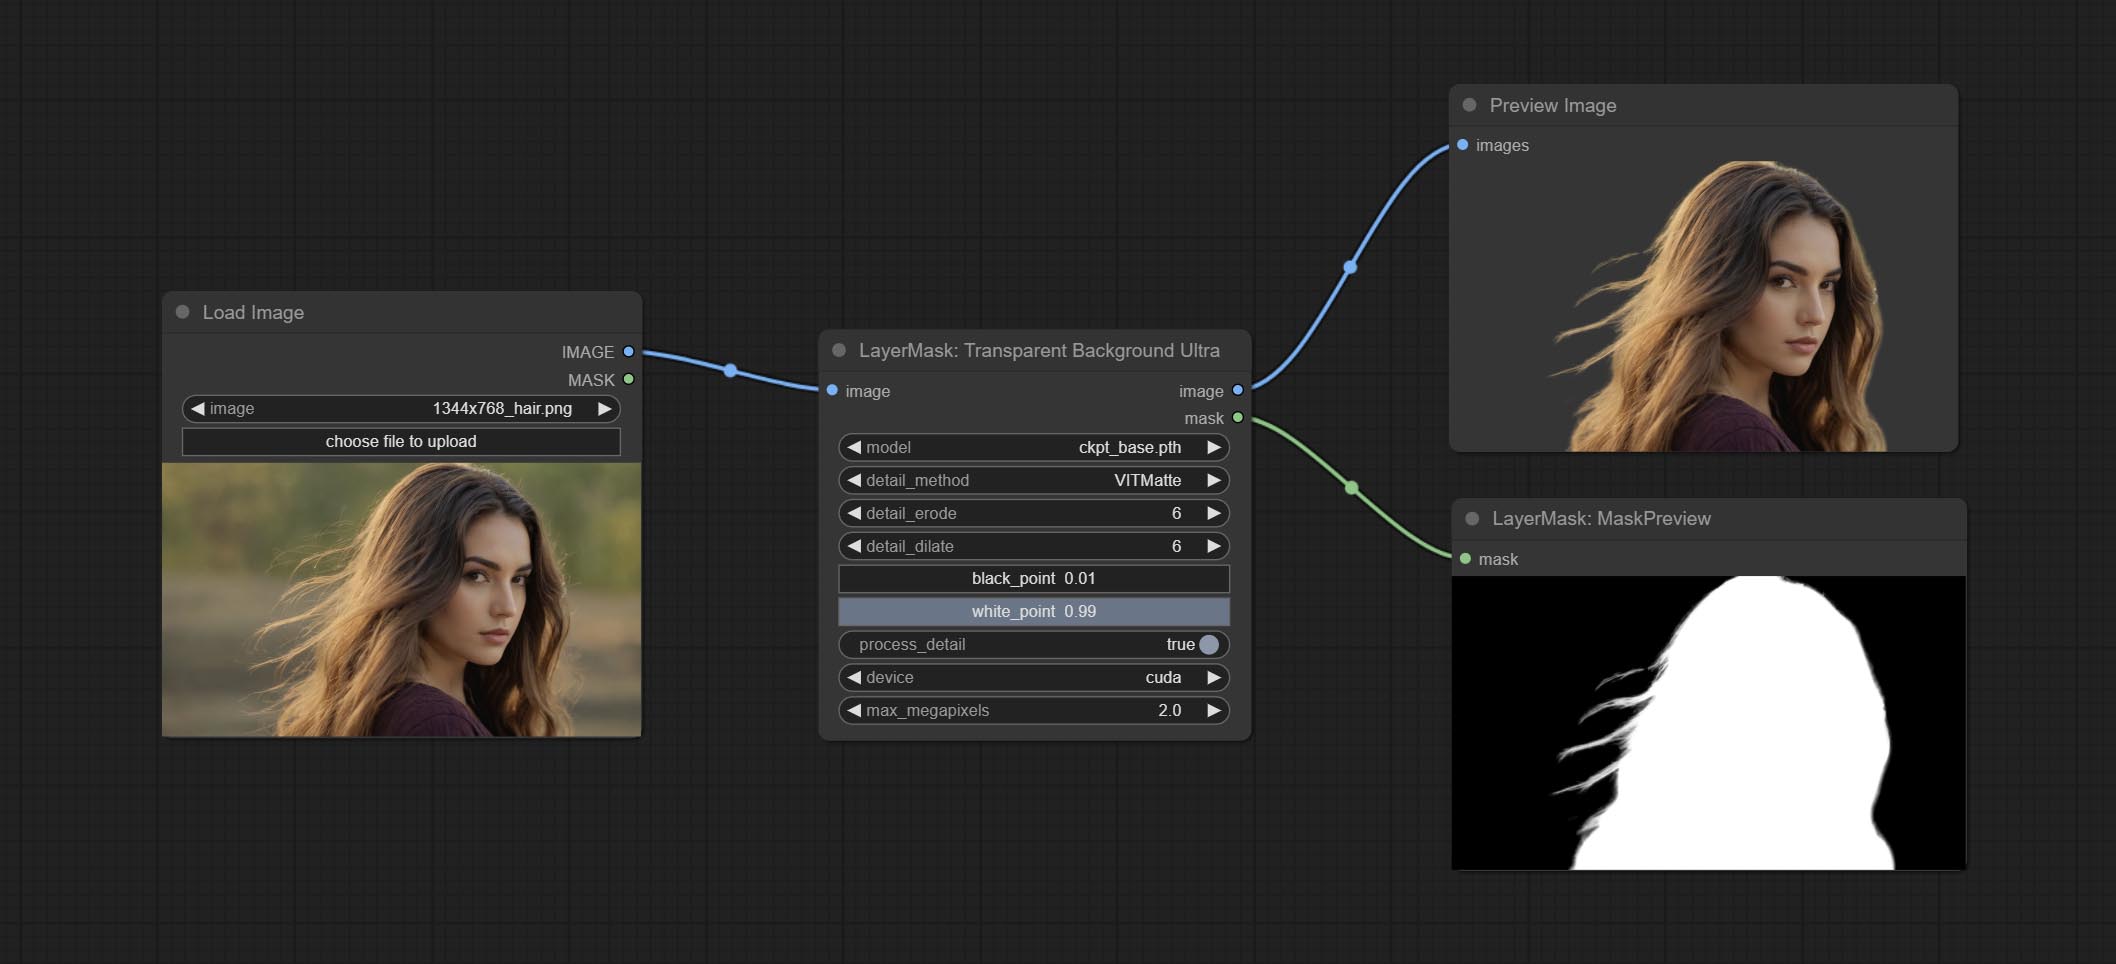
Node Options:
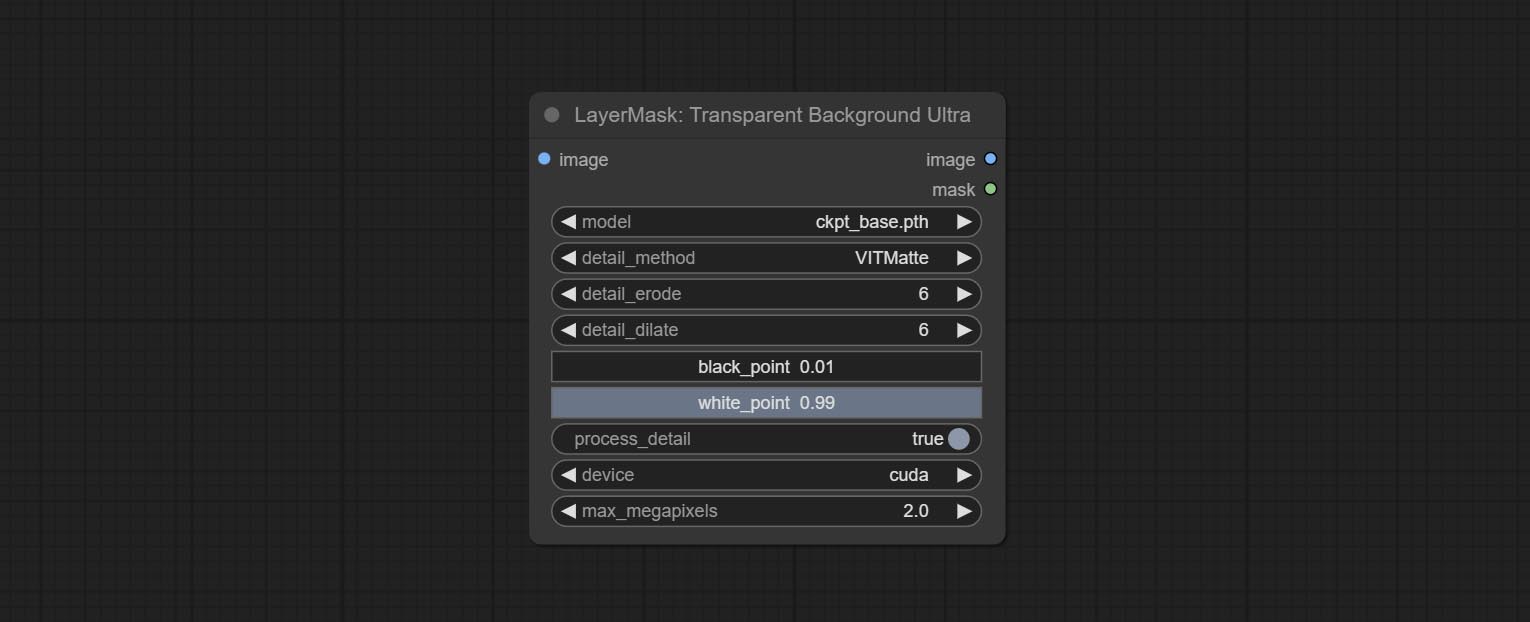
- model: Select the model.
- detail_method: Edge processing methods. provides VITMatte, VITMatte(local), PyMatting, GuidedFilter. If the model has been downloaded after the first use of VITMatte, you can use VITMatte (local) afterwards.
- detail_erode: Mask the erosion range inward from the edge. the larger the value, the larger the range of inward repair.
- detail_dilate: The edge of the mask expands outward. the larger the value, the wider the range of outward repair.
- black_point: Edge black sampling threshold.
- white_point: Edge white sampling threshold.
- process_detail: Set to false here will skip edge processing to save runtime.
- device: Set whether the VitMatte to use cuda.
- max_megapixels: Set the maximum size for VitMate operations.
PersonMaskUltra
Generate masks for portrait's face, hair, body skin, clothing, or accessories. Compared to the previous A Person Mask Generator node, this node has ultra-high edge details. The model code for this node comes from a-person-mask-generator, edge processing code from ComfyUI-Image-Filters,thanks to the original author. *Download model files from BaiduNetdisk to ComfyUI/models/mediapipe folder.
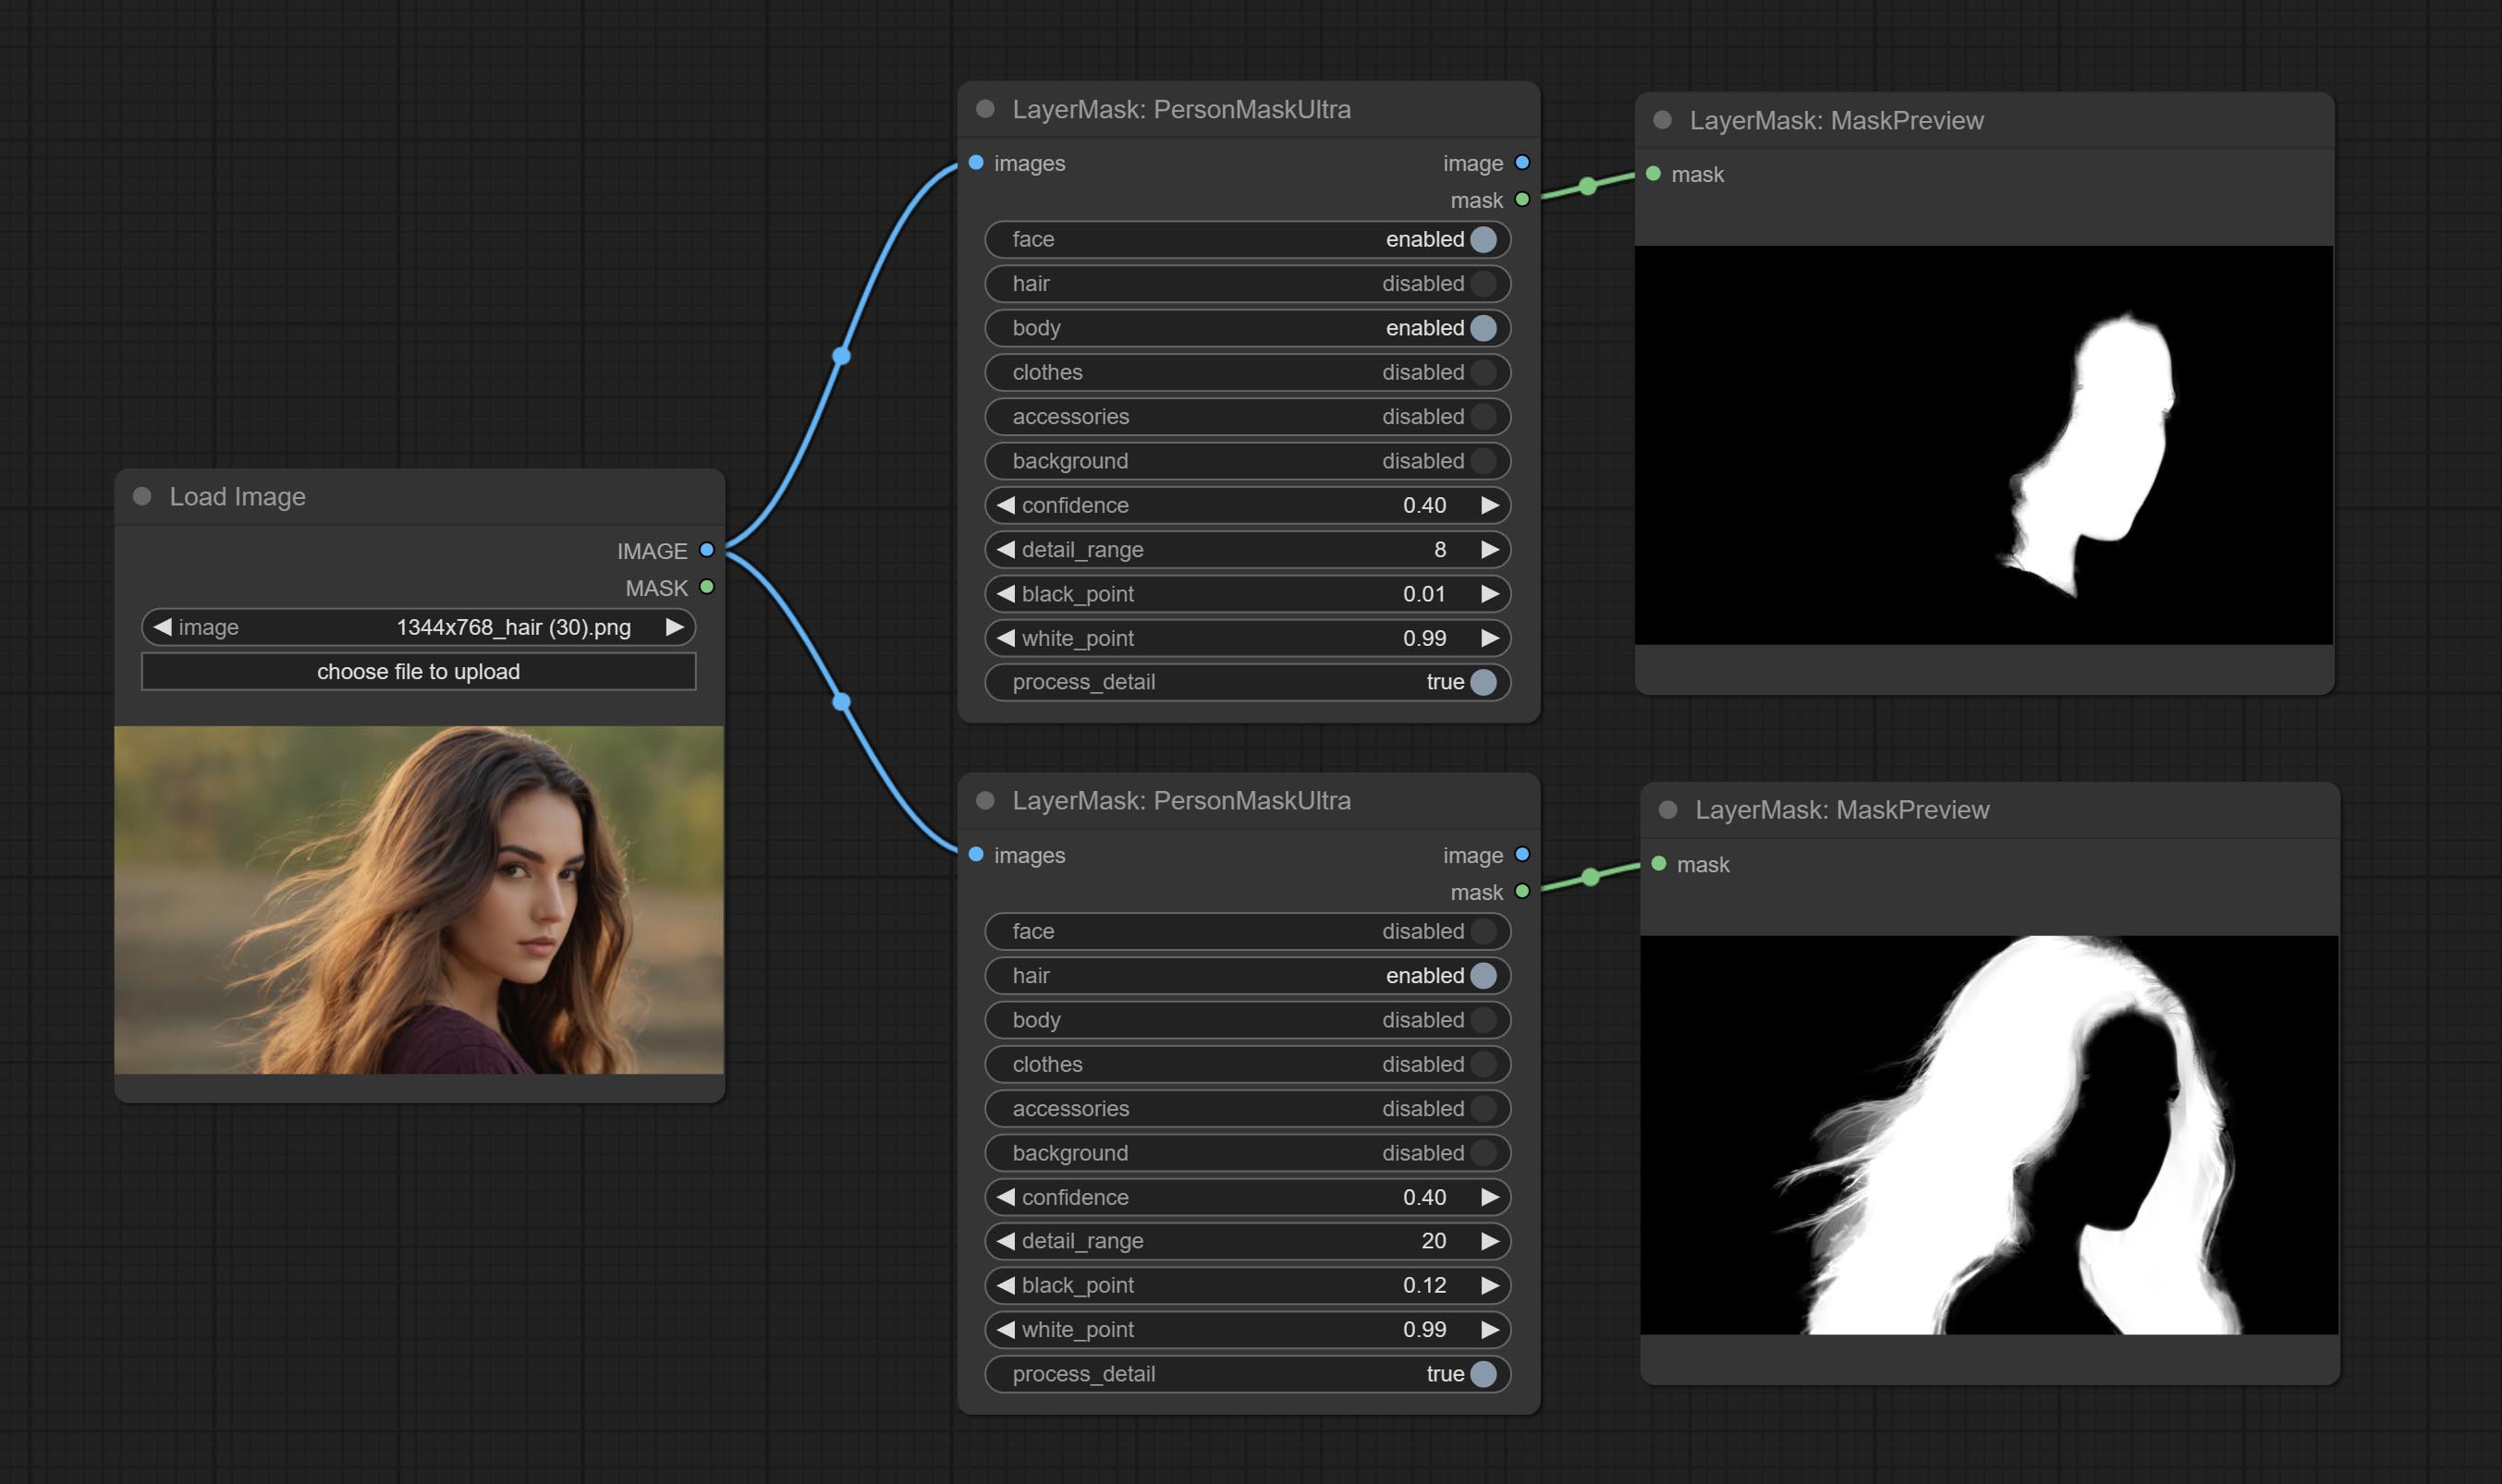
Node options:
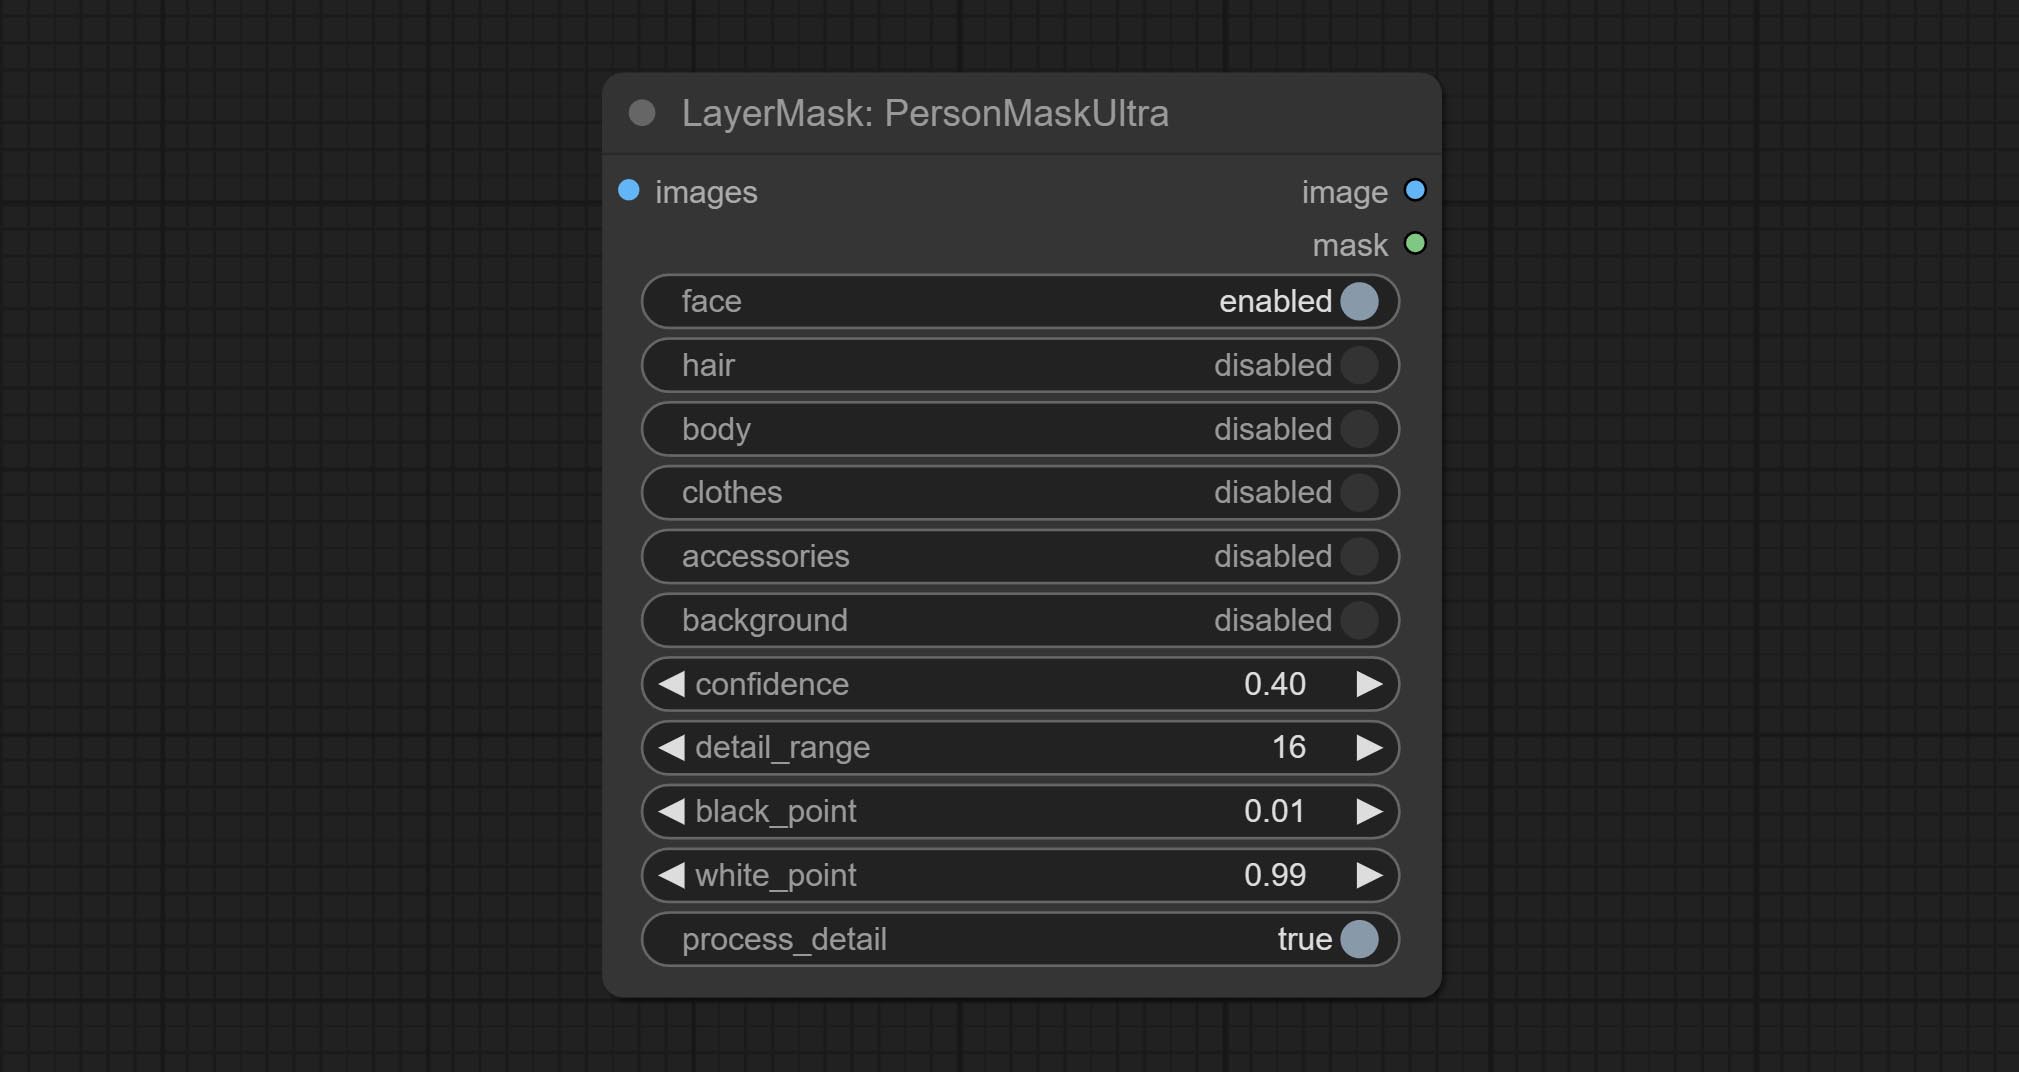
- face: Face recognition.
- hair: Hair recognition.
- body: Body skin recognition.
- clothes: Clothing recognition.
- accessories: Identification of accessories (such as backpacks).
- background: Background recognition.
- confidence: Recognition threshold, lower values will output more mask ranges.
- detail_range: Edge detail range.
- black_point: Edge black sampling threshold.
- white_point: Edge white sampling threshold.
- process_detail: Set to false here will skip edge processing to save runtime.
PersonMaskUltraV2
The V2 upgraded version of PersonMaskUltra has added the VITMatte edge processing method.(Note: Images larger than 2K in size using this method will consume huge memory)
On the basis of PersonMaskUltra, the following changes have been made: 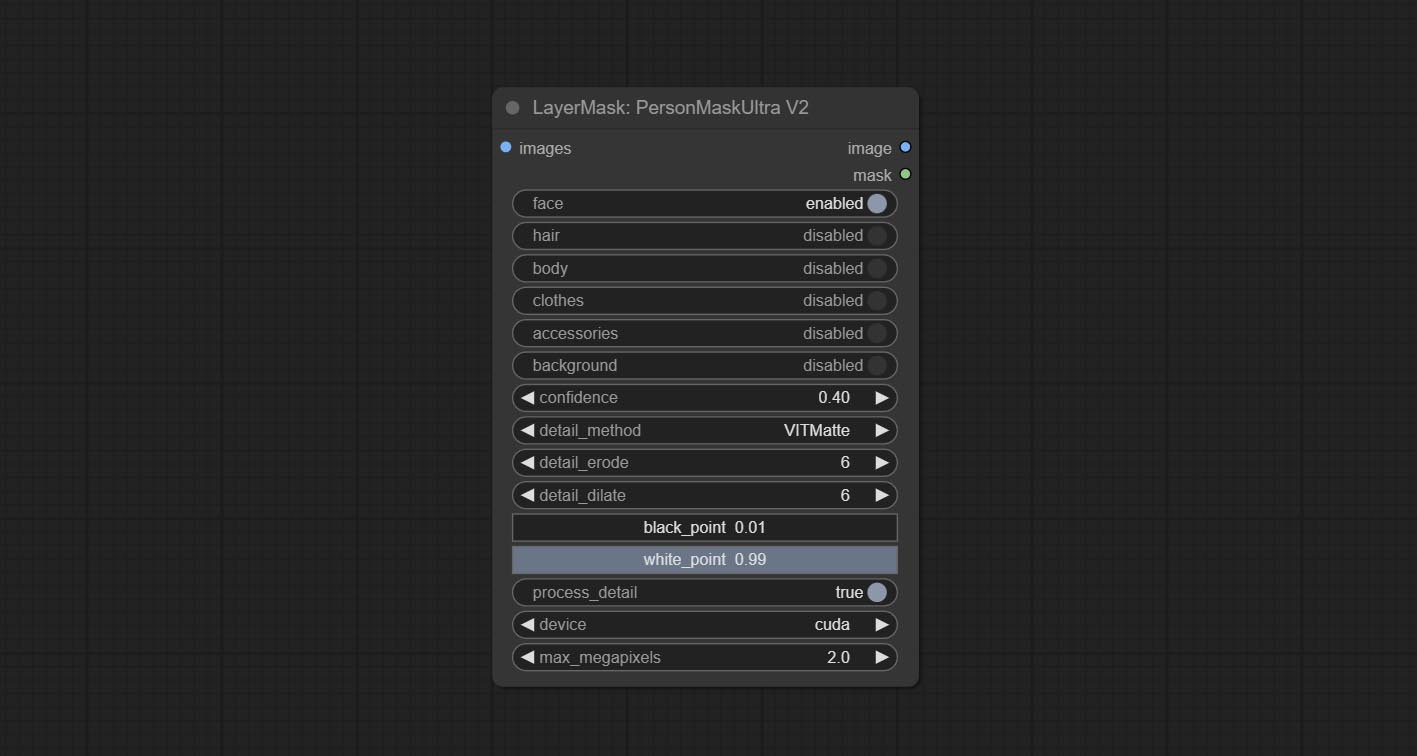
detail_method: Edge processing methods. provides VITMatte, VITMatte(local), PyMatting, GuidedFilter. If the model has been downloaded after the first use of VITMatte, you can use VITMatte (local) afterwards.
detail_erode: Mask the erosion range inward from the edge. the larger the value, the larger the range of inward repair.
detail_dilate: The edge of the mask expands outward. the larger the value, the wider the range of outward repair.
device: Set whether the VitMatte to use cuda.
max_megapixels: Set the maximum size for VitMate operations.
SegformerB2ClothesUltra

Generate masks for characters' faces, hair, arms, legs, and clothing, mainly used for segmenting clothing. The model segmentation code is fromStartHua,thanks to the original author. Compared to the comfyui_segformer_b2_clothes, this node has ultra-high edge details. (Note: Generating images with edges exceeding 2K in size using the VITMatte method will consume a lot of memory)
*Download all model files from huggingface or BaiduNetdisk to ComfyUI/models/segformer_b2_clothes folder.
Node Options:
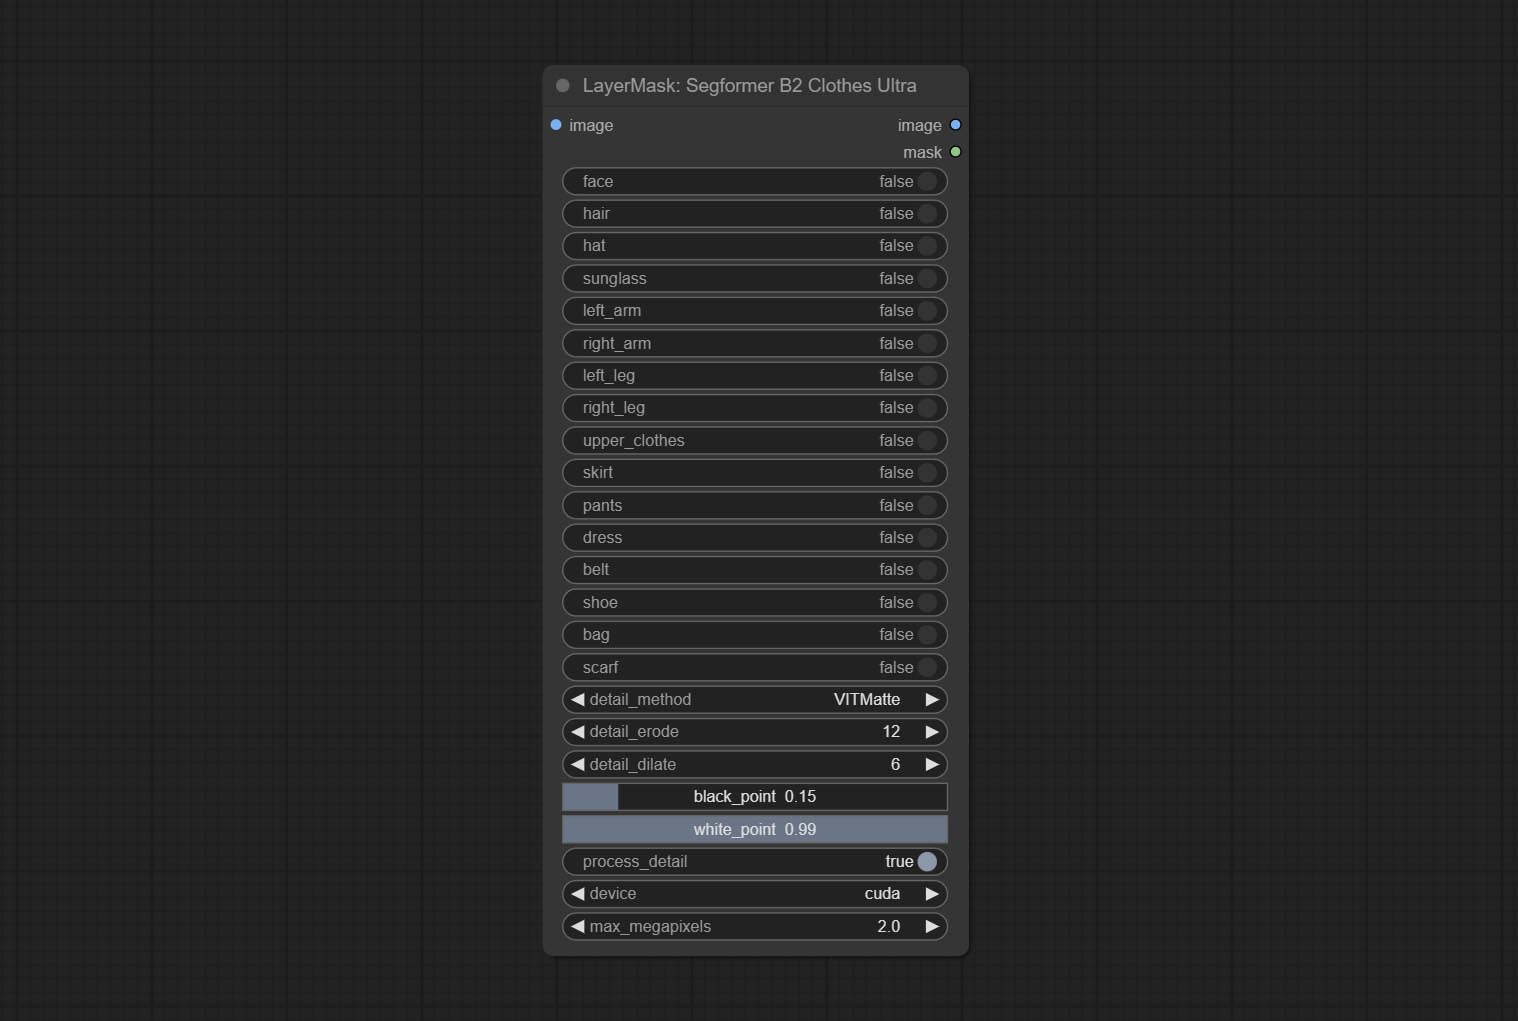
- face: Facial recognition switch.
- hair: Hair recognition switch.
- hat: Hat recognition switch.
- sunglass: Sunglass recognition switch.
- left_arm: Left arm recognition switch.
- right_arm: Right arm recognition switch.
- left_leg: Left leg recognition switch.
- right_leg: Right leg recognition switch.
- skirt: Skirt recognition switch.
- pants: Pants recognition switch.
- dress: Dress recognition switch.
- belt: Belt recognition switch.
- shoe: Shoes recognition switch.
- bag: Bag recognition switch.
- scarf: Scarf recognition switch.
- detail_method: Edge processing methods. provides VITMatte, VITMatte(local), PyMatting, GuidedFilter. If the model has been downloaded after the first use of VITMatte, you can use VITMatte (local) afterwards.
- detail_erode: Mask the erosion range inward from the edge. the larger the value, the larger the range of inward repair.
- detail_dilate: The edge of the mask expands outward. the larger the value, the wider the range of outward repair.
- black_point: Edge black sampling threshold.
- white_point: Edge white sampling threshold.
- process_detail: Set to false here will skip edge processing to save runtime.
- device: Set whether the VitMatte to use cuda.
- max_megapixels: Set the maximum size for VitMate operations.
SegformerUltraV2
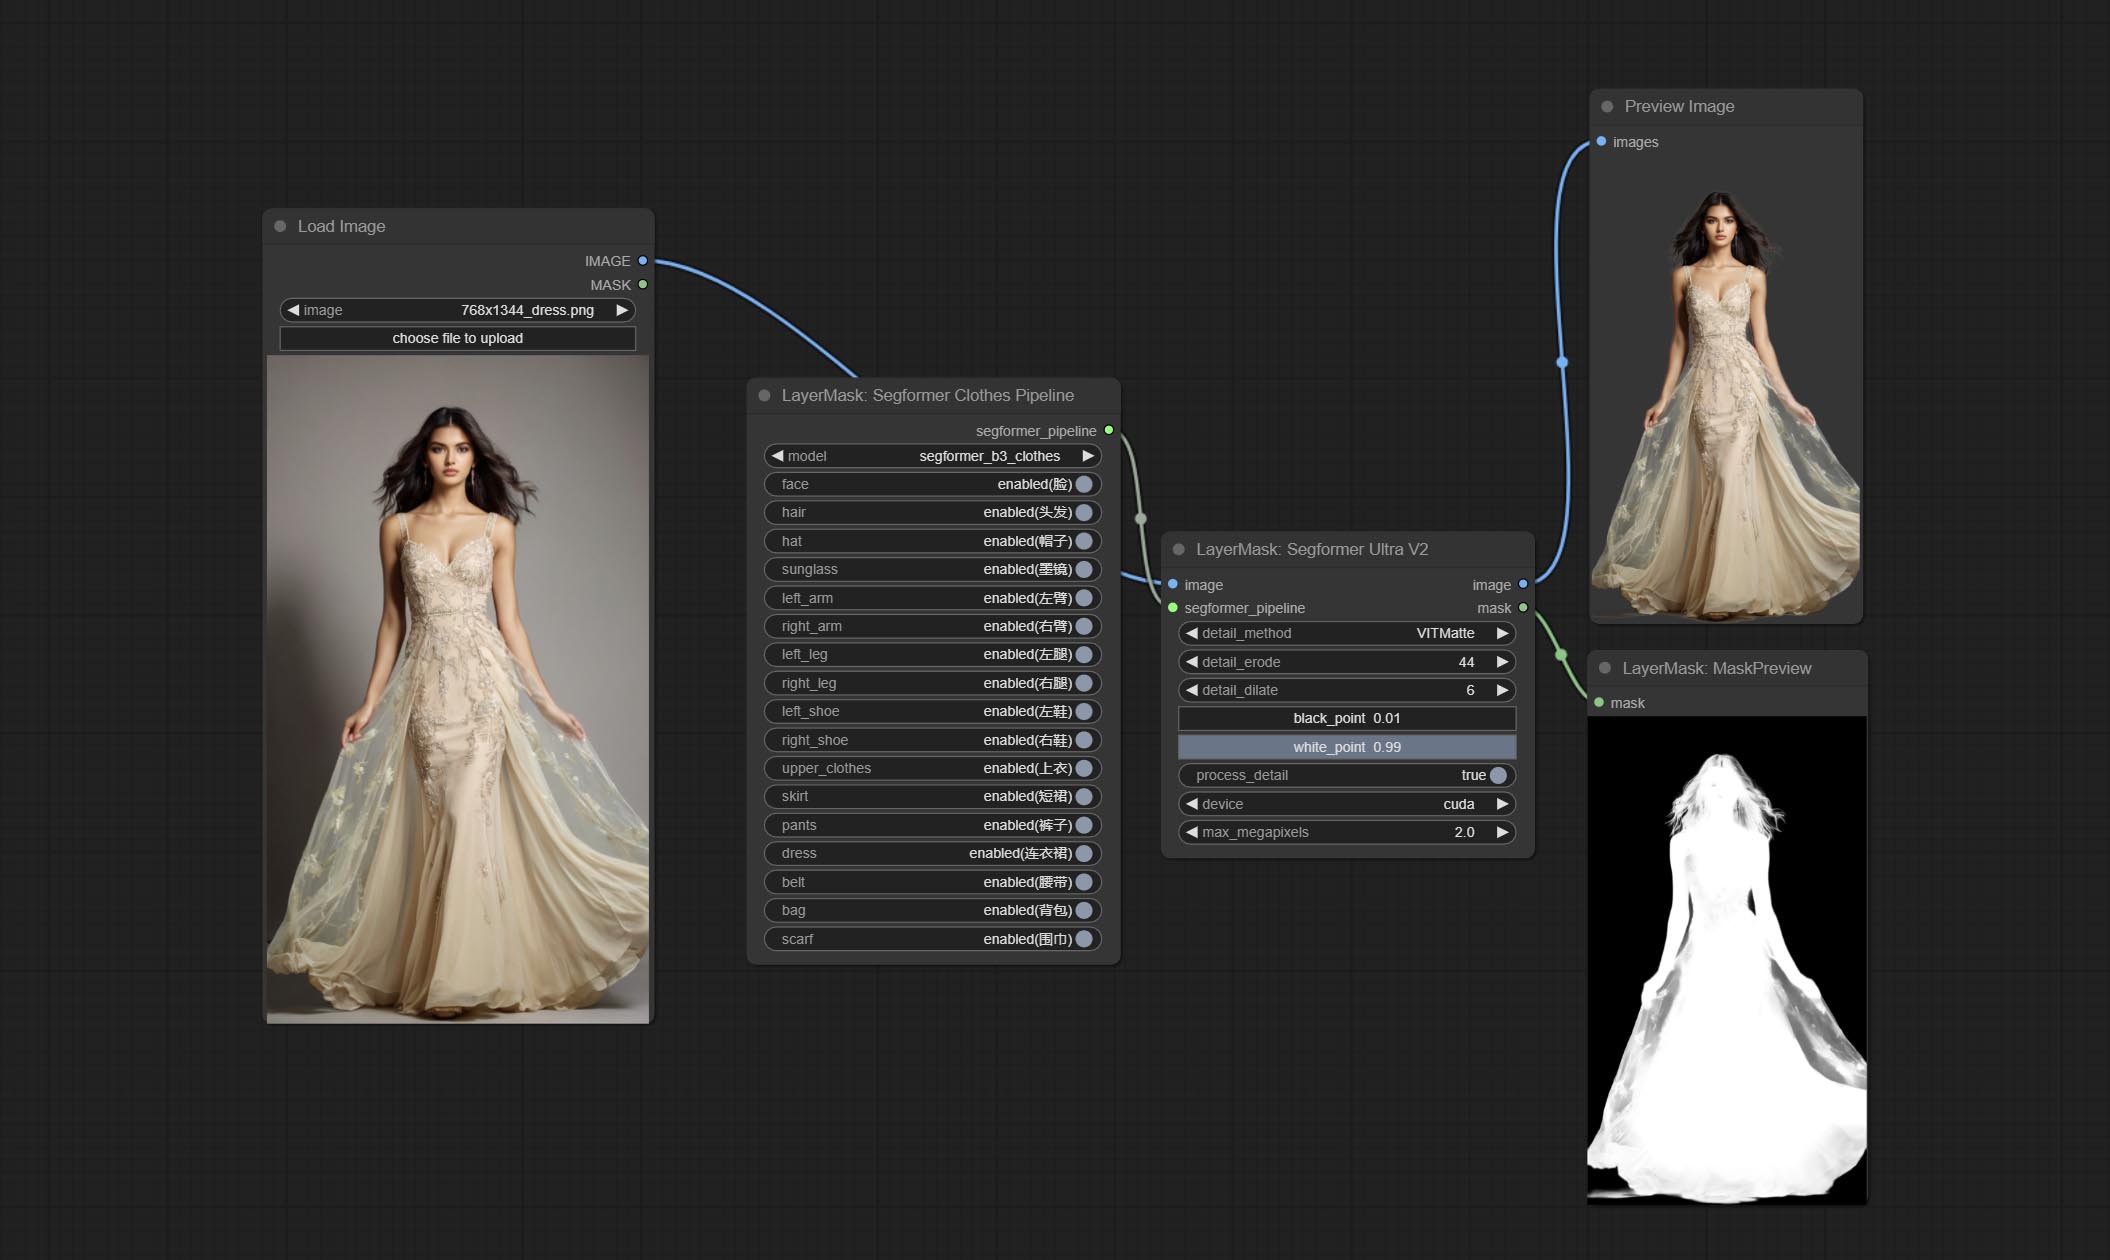
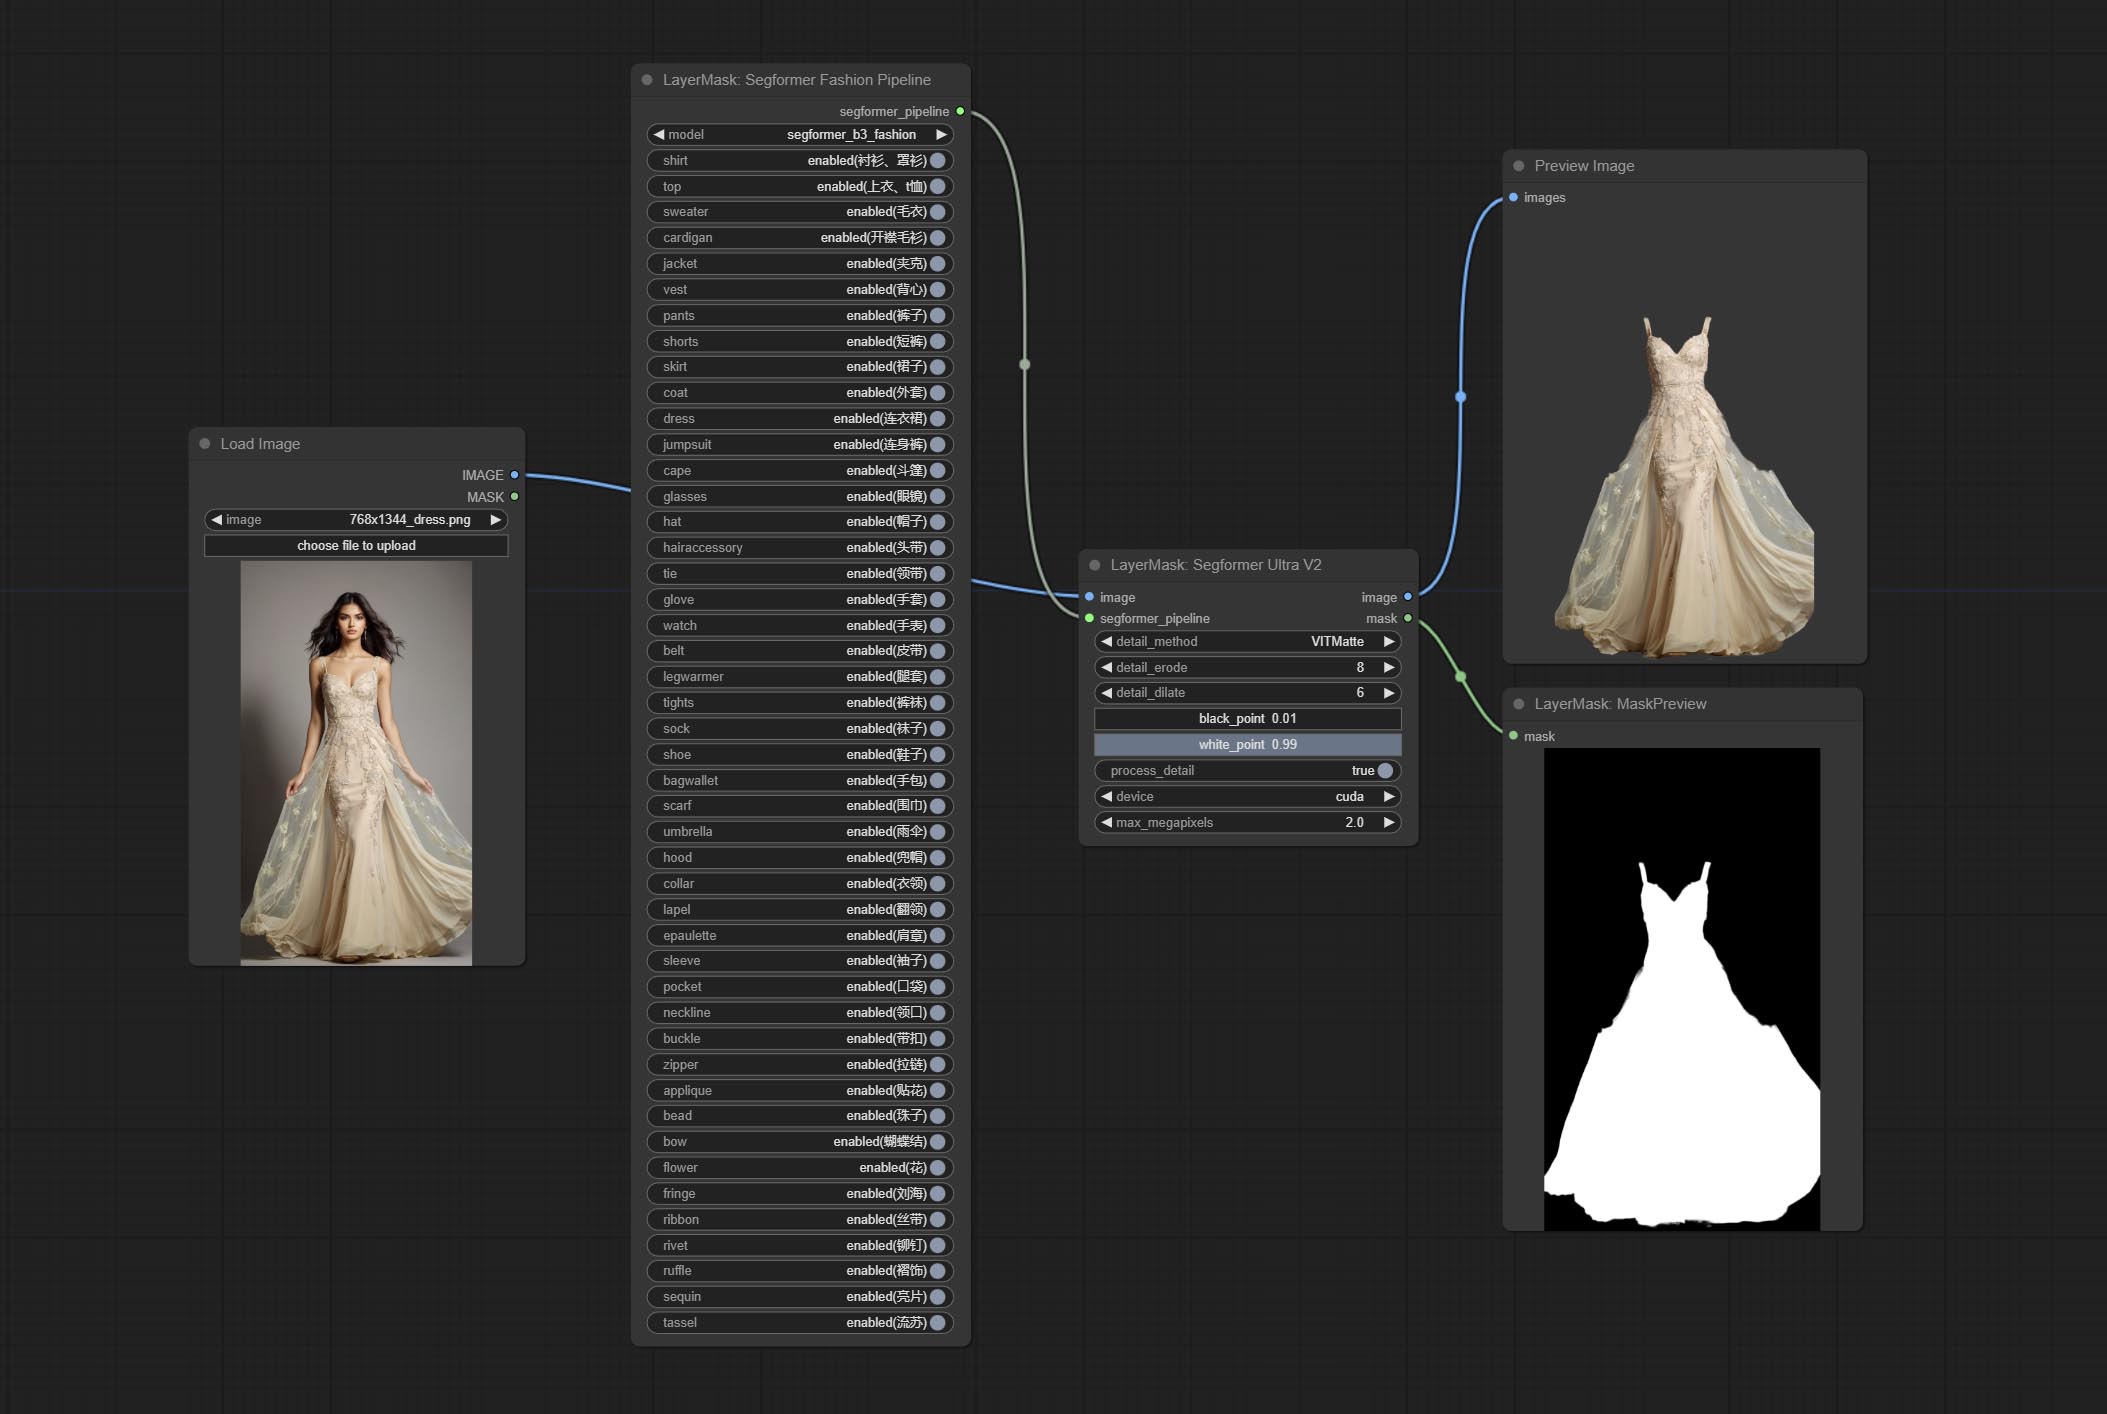
Using the segformer model to segment clothing with ultra-high edge details. Currently supports segformer b2 clothes, segformer b3 clothes and segformer b3 fashion。
*Download modelfiles from huggingface or BaiduNetdisk to ComfyUI/models/segformer_b2_clothes folder.
*Download modelfiles from huggingface or BaiduNetdisk to ComfyUI/models/segformer_b3_clothes folder.
*Download modelfiles from huggingface or BaiduNetdisk to ComfyUI/models/segformer_b3_fashion folder.
Node Options:
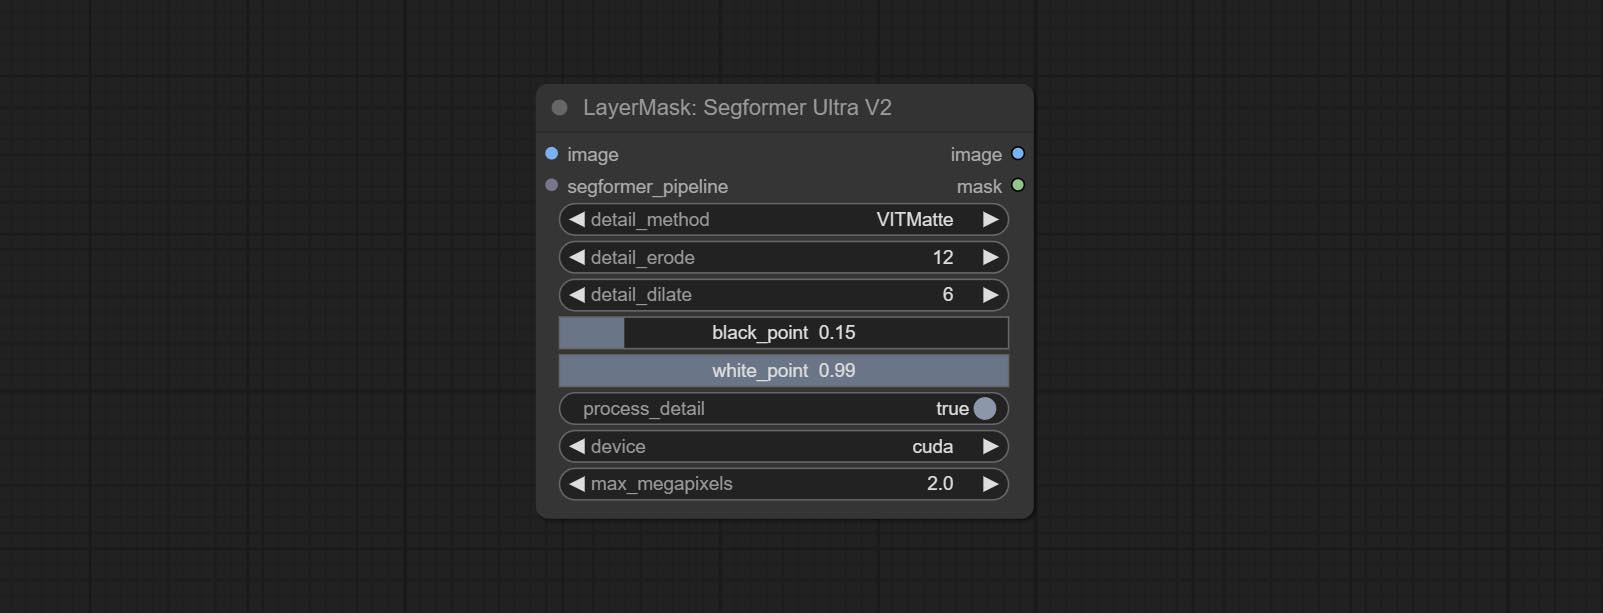
- image: The input image.
- segformer_pipeline: Segformer pipeline input. The pipeline is output by SegformerClottesPipeline and SegformerFashionPipeline node.
- detail_method: Edge processing methods. provides VITMatte, VITMatte(local), PyMatting, GuidedFilter. If the model has been downloaded after the first use of VITMatte, you can use VITMatte (local) afterwards.
- detail_erode: Mask the erosion range inward from the edge. the larger the value, the larger the range of inward repair.
- detail_dilate: The edge of the mask expands outward. the larger the value, the wider the range of outward repair.
- black_point: Edge black sampling threshold.
- white_point: Edge white sampling threshold.
- process_detail: Set to false here will skip edge processing to save runtime.
- device: Set whether the VitMatte to use cuda.
- max_megapixels: Set the maximum size for VitMate operations.
SegformerClothesPipiline
Select the segformer clothes model and choose the segmentation content.
Node Options:

- model: Model selection. There are currently two models available to choose from for segformer b2 clothes and segformer b3 clothes.
- face: Facial recognition switch.
- hair: Hair recognition switch.
- hat: Hat recognition switch.
- sunglass: Sunglass recognition switch.
- left_arm: Left arm recognition switch.
- right_arm: Right arm recognition switch.
- left_leg: Left leg recognition switch.
- right_leg: Right leg recognition switch.
- left_shoe: Left shoe recognition switch.
- right_shoe: Right shoe recognition switch.
- skirt: Skirt recognition switch.
- pants: Pants recognition switch.
- dress: Dress recognition switch.
- belt: Belt recognition switch.
- bag: Bag recognition switch.
- scarf: Scarf recognition switch.
SegformerFashionPipiline
Select the segformer fashion model and choose the segmentation content.
Node Options:
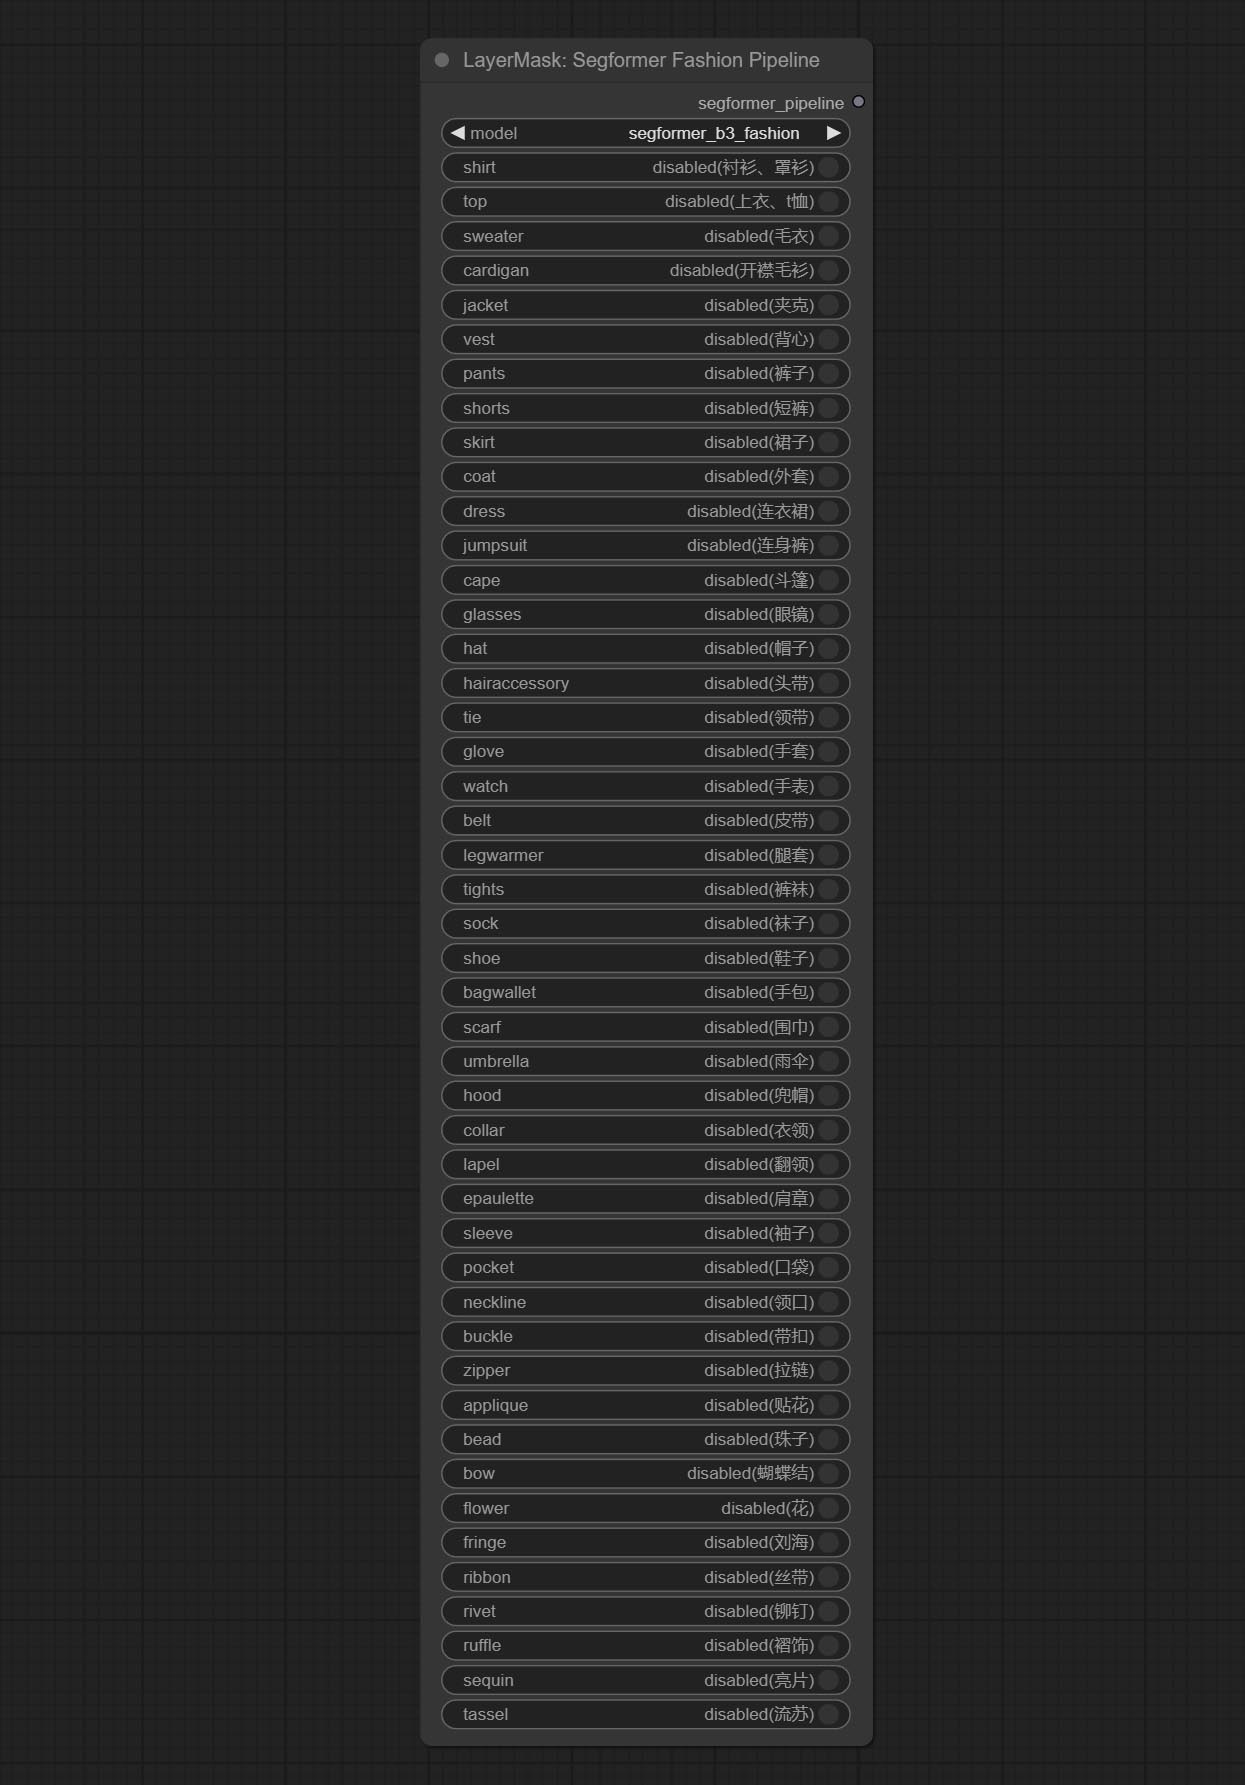
- model: Model selection. Currently, there is only one model available for selection: segformer b3 fashion。
- shirt: shirt and blouse switch.
- top: top, t-shirt, sweatshirt switch.
- sweater: sweater switch.
- cardigan: cardigan switch.
- jacket: jacket switch.
- vest: vest switch.
- pants: pants switch.
- shorts: shorts switch.
- skirt: skirt switch.
- coat: coat switch.
- dress: dress switch.
- jumpsuit: jumpsuit switch.
- cape: cape switch.
- glasses: glasses switch.
- hat: hat switch.
- hairaccessory: headband, head covering, hair accessory switch.
- tie: tie switch.
- glove: glove switch.
- watch: watch switch.
- belt: belt switch.
- legwarmer: leg warmer switch.
- tights: tights and stockings switch.
- sock: sock switch.
- shoe: shoes switch.
- bagwallet: bag and wallet switch.
- scarf: scarf switch.
- umbrella: umbrella switch.
- hood: hood switch.
- collar: collar switch.
- lapel: lapel switch.
- epaulette: epaulette switch.
- sleeve: sleeve switch.
- pocket: pocket switch.
- neckline: neckline switch.
- buckle: buckle switch.
- zipper: zipper switch.
- applique: applique switch.
- bead: bead switch.
- bow: bow switch.
- flower: flower switch.
- fringe: fringe switch.
- ribbon: ribbon switch.
- rivet: rivet switch.
- ruffle: ruffle switch.
- sequin: sequin switch.
- tassel: tassel switch.
HumanPartsUltra
Used for generate human body parts masks, it is based on the warrper of metal3d/ComfyUI_Human_Parts, thank the original author. This node has added ultra-fine edge processing based on the original work. Download model file from BaiduNetdisk or huggingface and copy to ComfyUImodelsonnxhuman-parts folder. 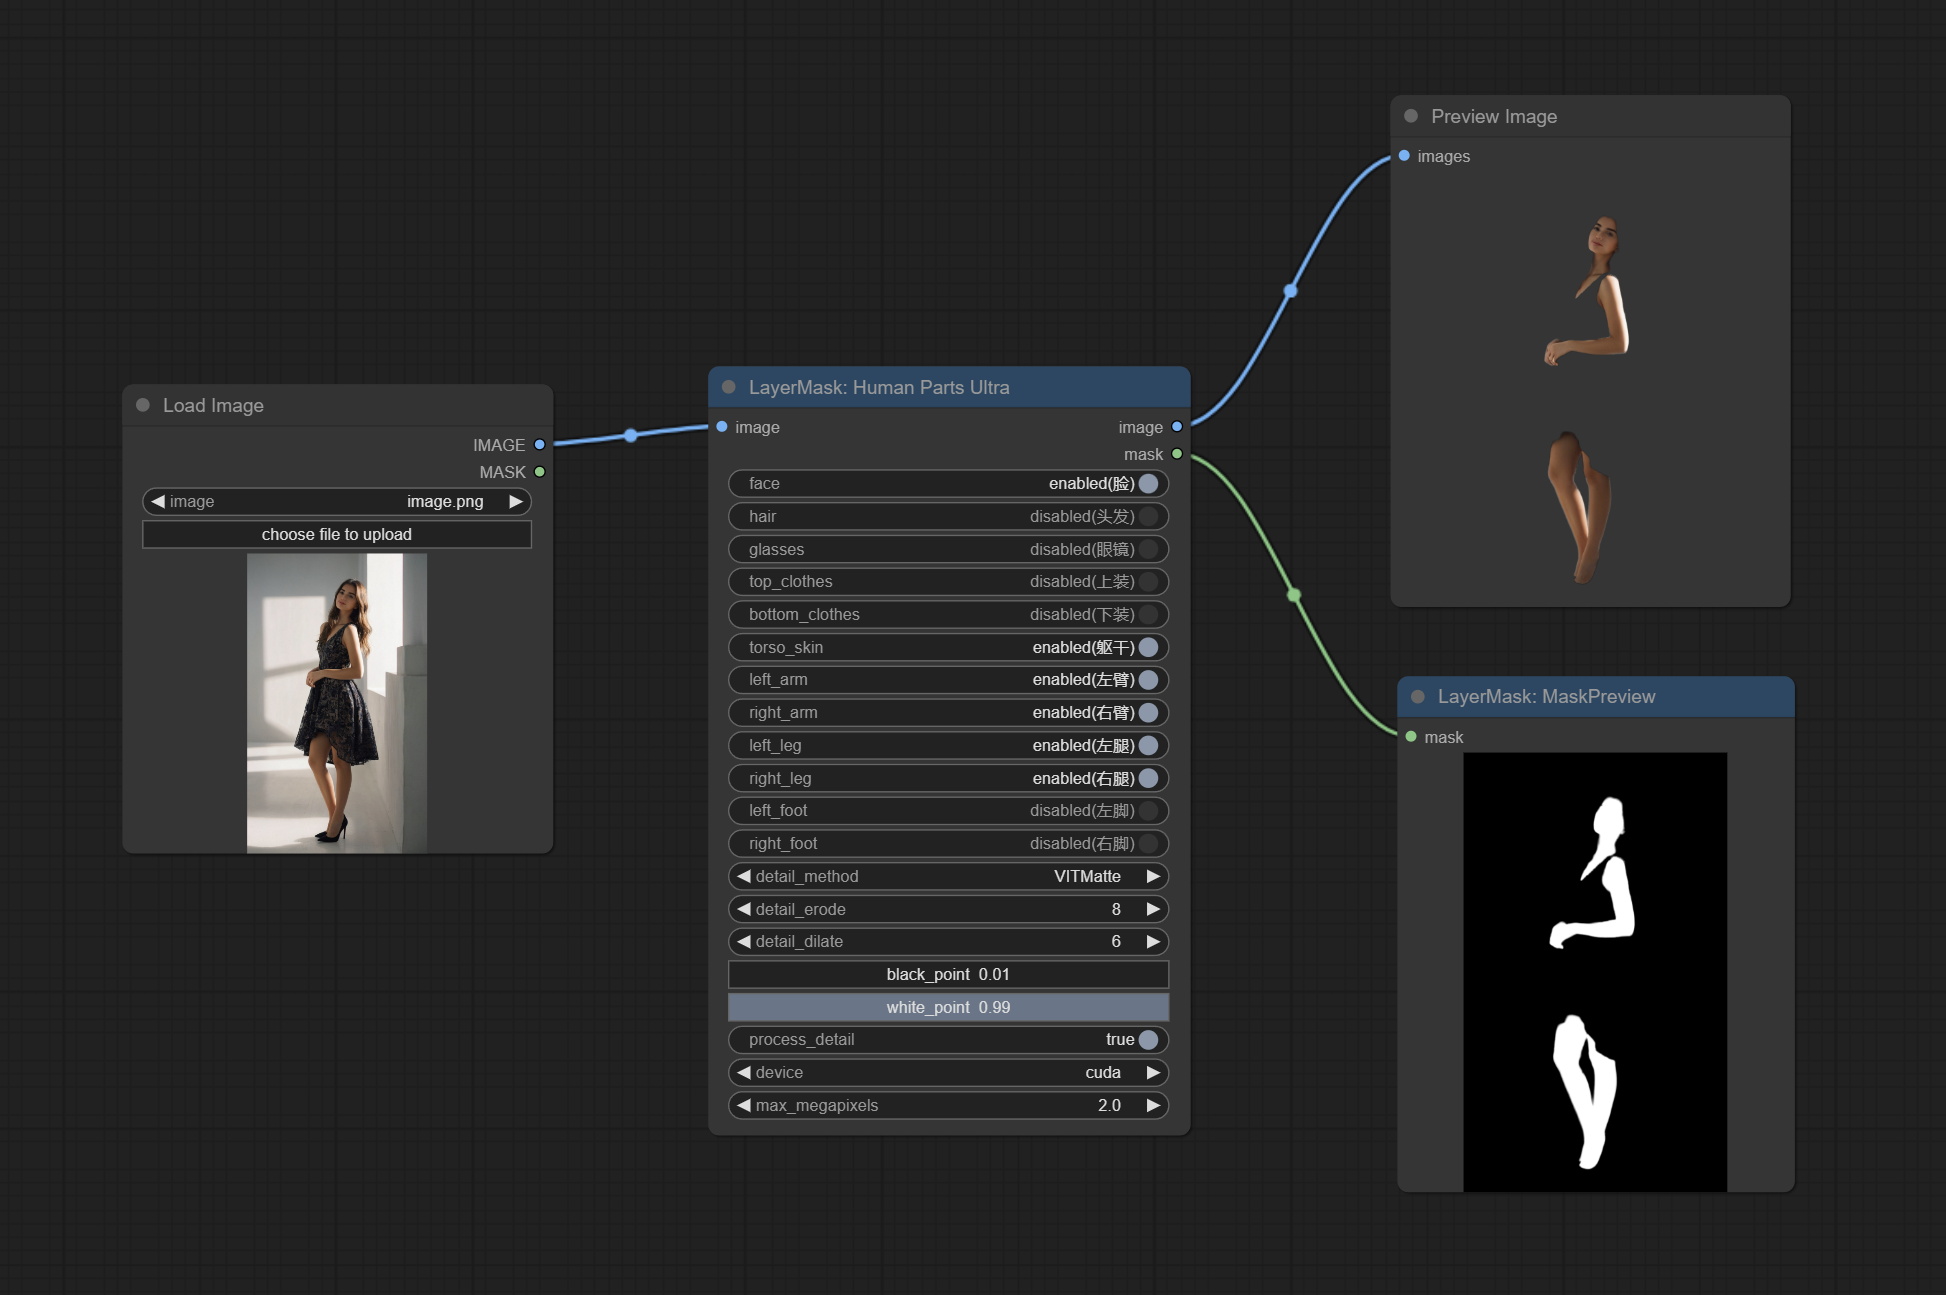
Node Options:
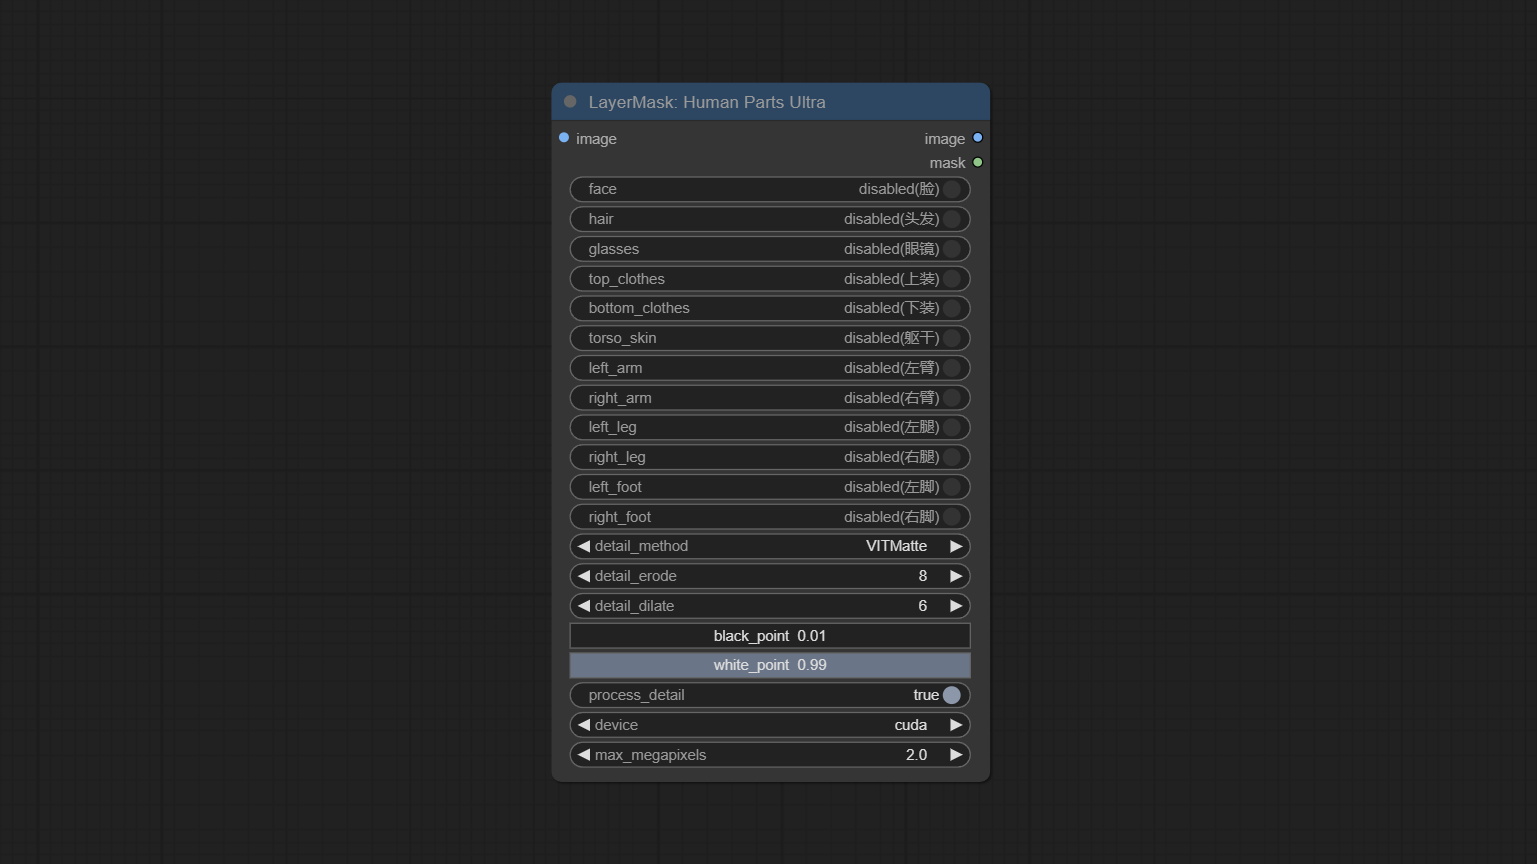
- image: The input image.
- face: Recognize face switch.
- hair: Recognize hair switch.
- galsses: Recognize glasses switch.
- top_clothes: Recognize top clothes switch.
- bottom_clothes: Recognize bottom clothes switch.
- torso_skin: Recognize torso skin switch.
- left_arm: Recognize left arm switch.
- right_arm: Recognize right arm switch.
- left_leg: Recognize left leg switch.
- right_leg: Recognize right leg switch.
- left_foot: Recognize left foot switch.
- right_foot: Recognize right foot switch.
- detail_method: Edge processing methods. provides VITMatte, VITMatte(local), PyMatting, GuidedFilter. If the model has been downloaded after the first use of VITMatte, you can use VITMatte (local) afterwards.
- detail_erode: Mask the erosion range inward from the edge. the larger the value, the larger the range of inward repair.
- detail_dilate: The edge of the mask expands outward. the larger the value, the wider the range of outward repair.
- black_point: Edge black sampling threshold.
- white_point: Edge white sampling threshold.
- process_detail: Set to false here will skip edge processing to save runtime.
- device: Set whether the VitMatte to use cuda.
- max_megapixels: Set the maximum size for VitMate operations.
MaskEdgeUltraDetail
Process rough masks to ultra fine edges. This node combines the Alpha Matte and the Guided Filter Alpha nodes functions of Spacepxl's ComfyUI-Image-Filters, thanks to the original author. 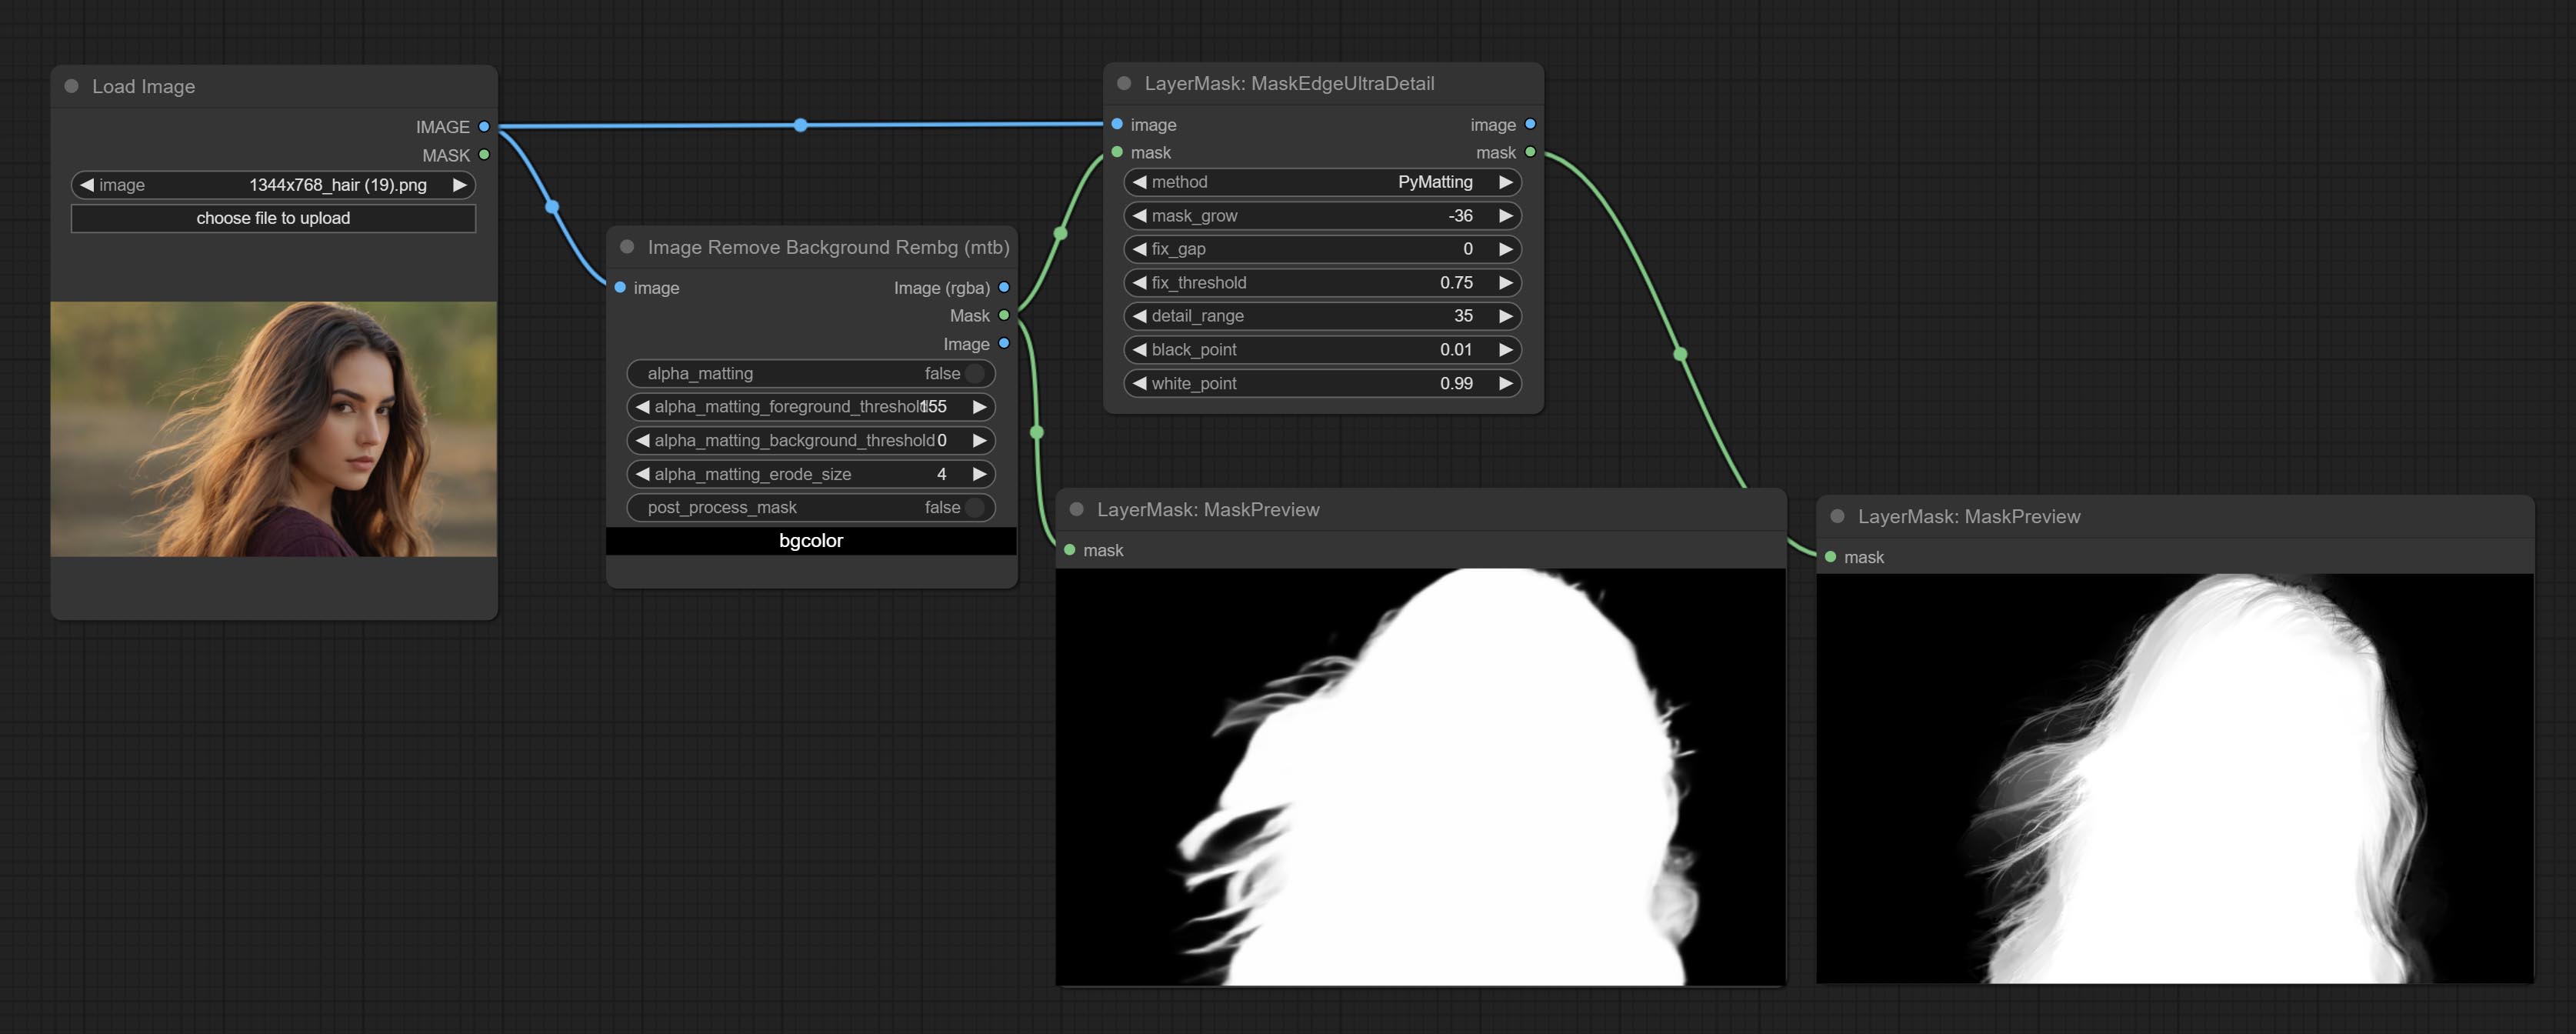
Node options:
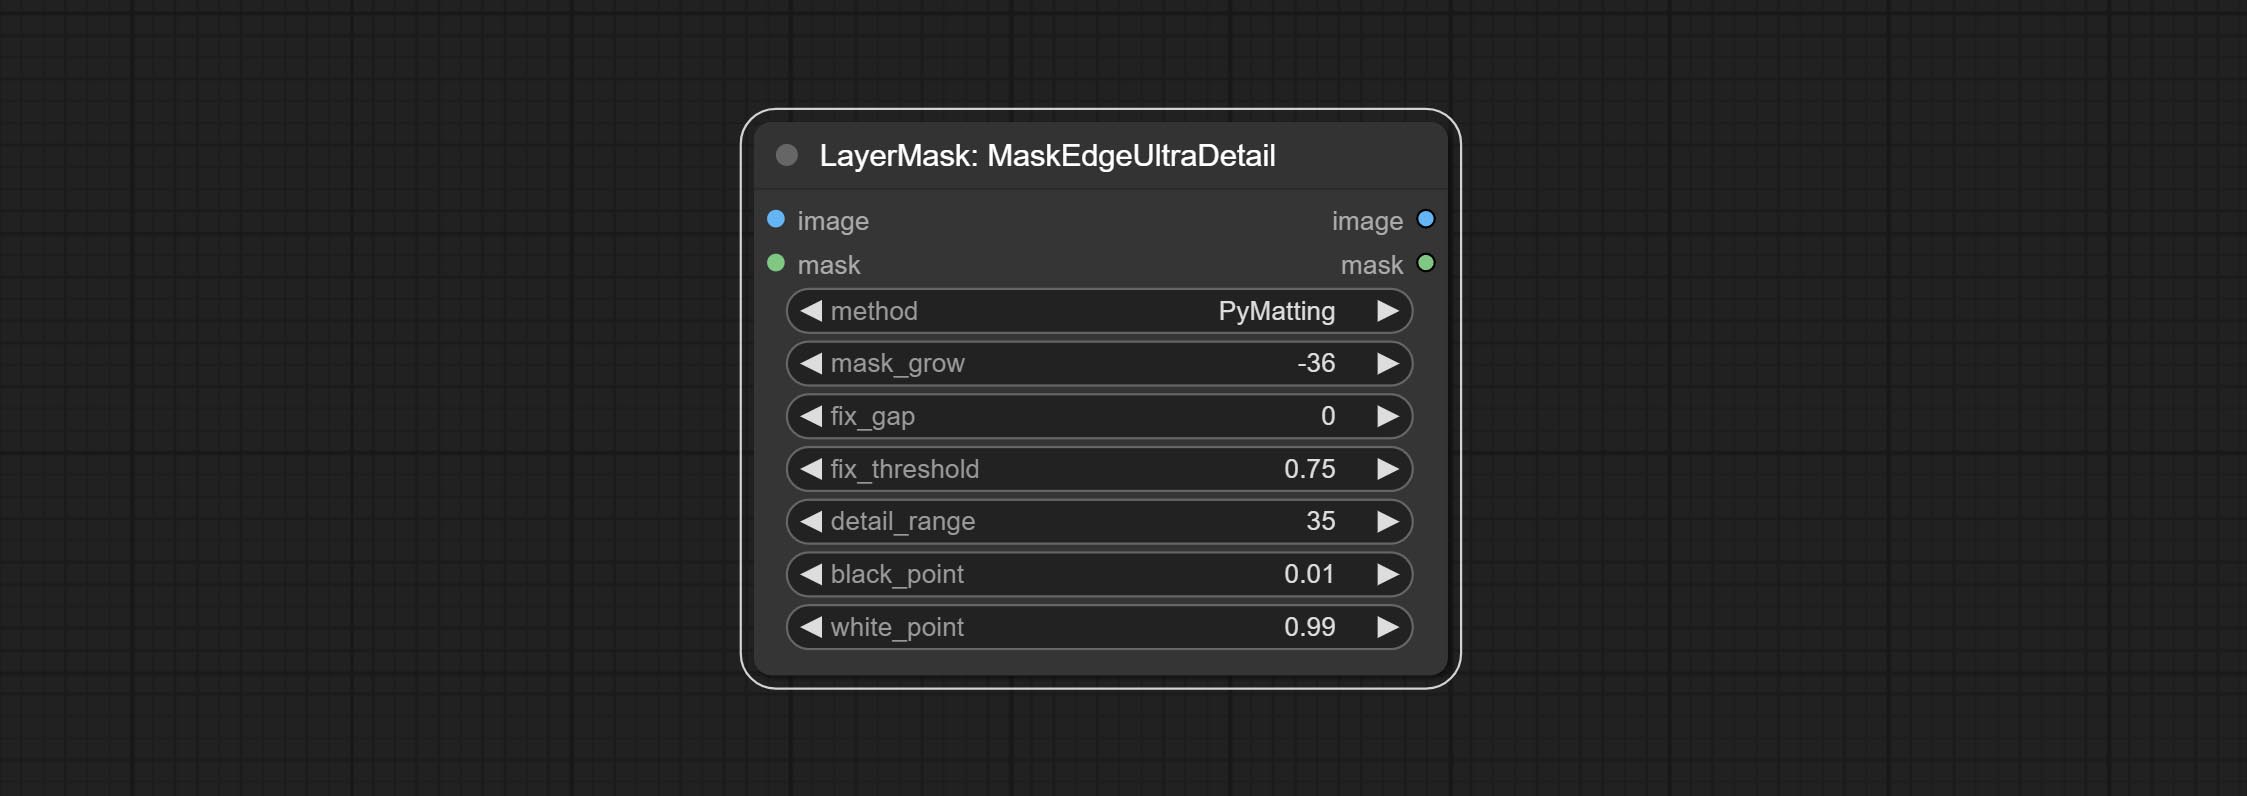
- method: Provide two methods for edge processing: PyMatting and OpenCV-GuidedFilter. PyMatching has a slower processing speed, but for video, it is recommended to use this method to obtain smoother mask sequences.
- mask_grow: Mask expansion amplitude. positive values expand outward, while negative values contract inward. For rougher masks, negative values are usually used to shrink their edges for better results.
- fix_gap: Repair the gaps in the mask. if obvious gaps in the mask, increase this value appropriately.
- fix_threshold: The threshold of fix_gap.
- detail_range: Edge detail range.
- black_point: Edge black sampling threshold.
- white_point: Edge white sampling threshold.
MaskEdgeUltraDetailV2
The V2 upgraded version of MaskEdgeUltraDetail has added the VITMatte edge processing method.(Note: Images larger than 2K in size using this method will consume huge memory)
This method is suitable for handling semi transparent areas.
On the basis of MaskEdgeUltraDetail, the following changes have been made: 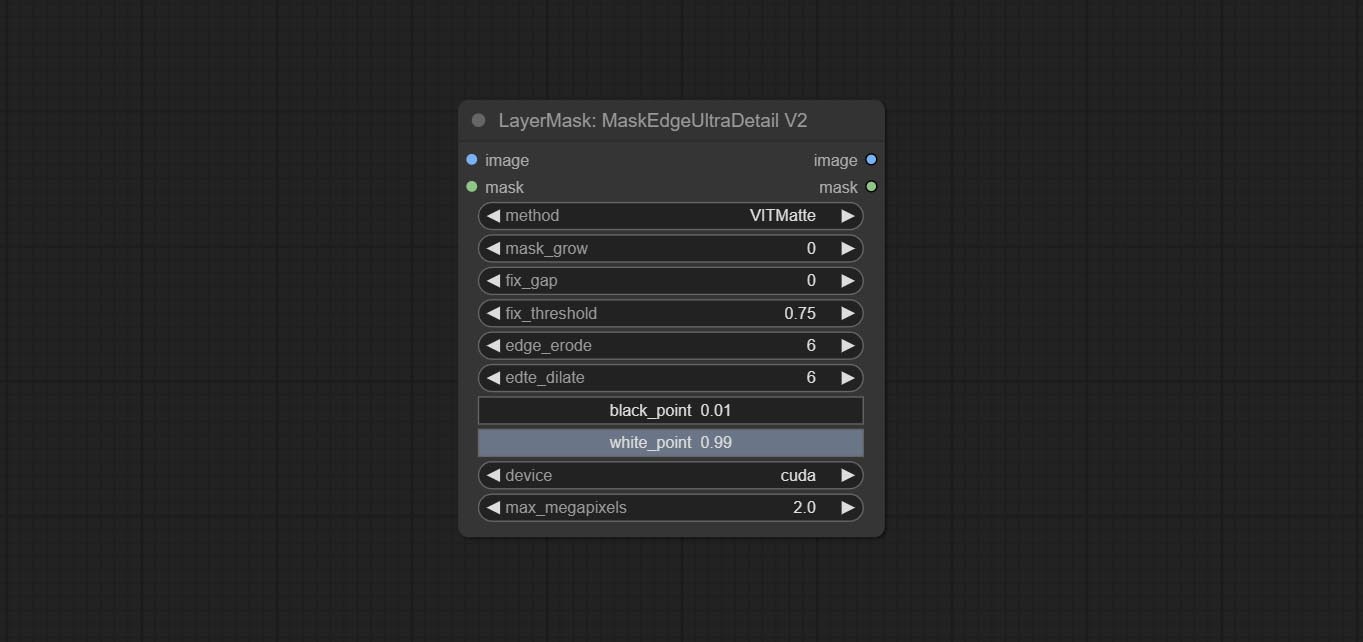
- method: Edge processing methods. provides VITMatte, VITMatte(local), PyMatting, GuidedFilter. If the model has been downloaded after the first use of VITMatte, you can use VITMatte (local) afterwards.
- edge_erode: Mask the erosion range inward from the edge. the larger the value, the larger the range of inward repair.
- edge_dilate: The edge of the mask expands outward. the larger the value, the wider the range of outward repair.
- device: Set whether the VitMatte to use cuda.
- max_megapixels: Set the maximum size for VitMate operations.
YoloV8Detect
Use the YoloV8 model to detect faces, hand box areas, or character segmentation. Supports the output of the selected number of channels. Download the model files from GoogleDrive or BaiduNetdisk to ComfyUI/models/yolo folder.
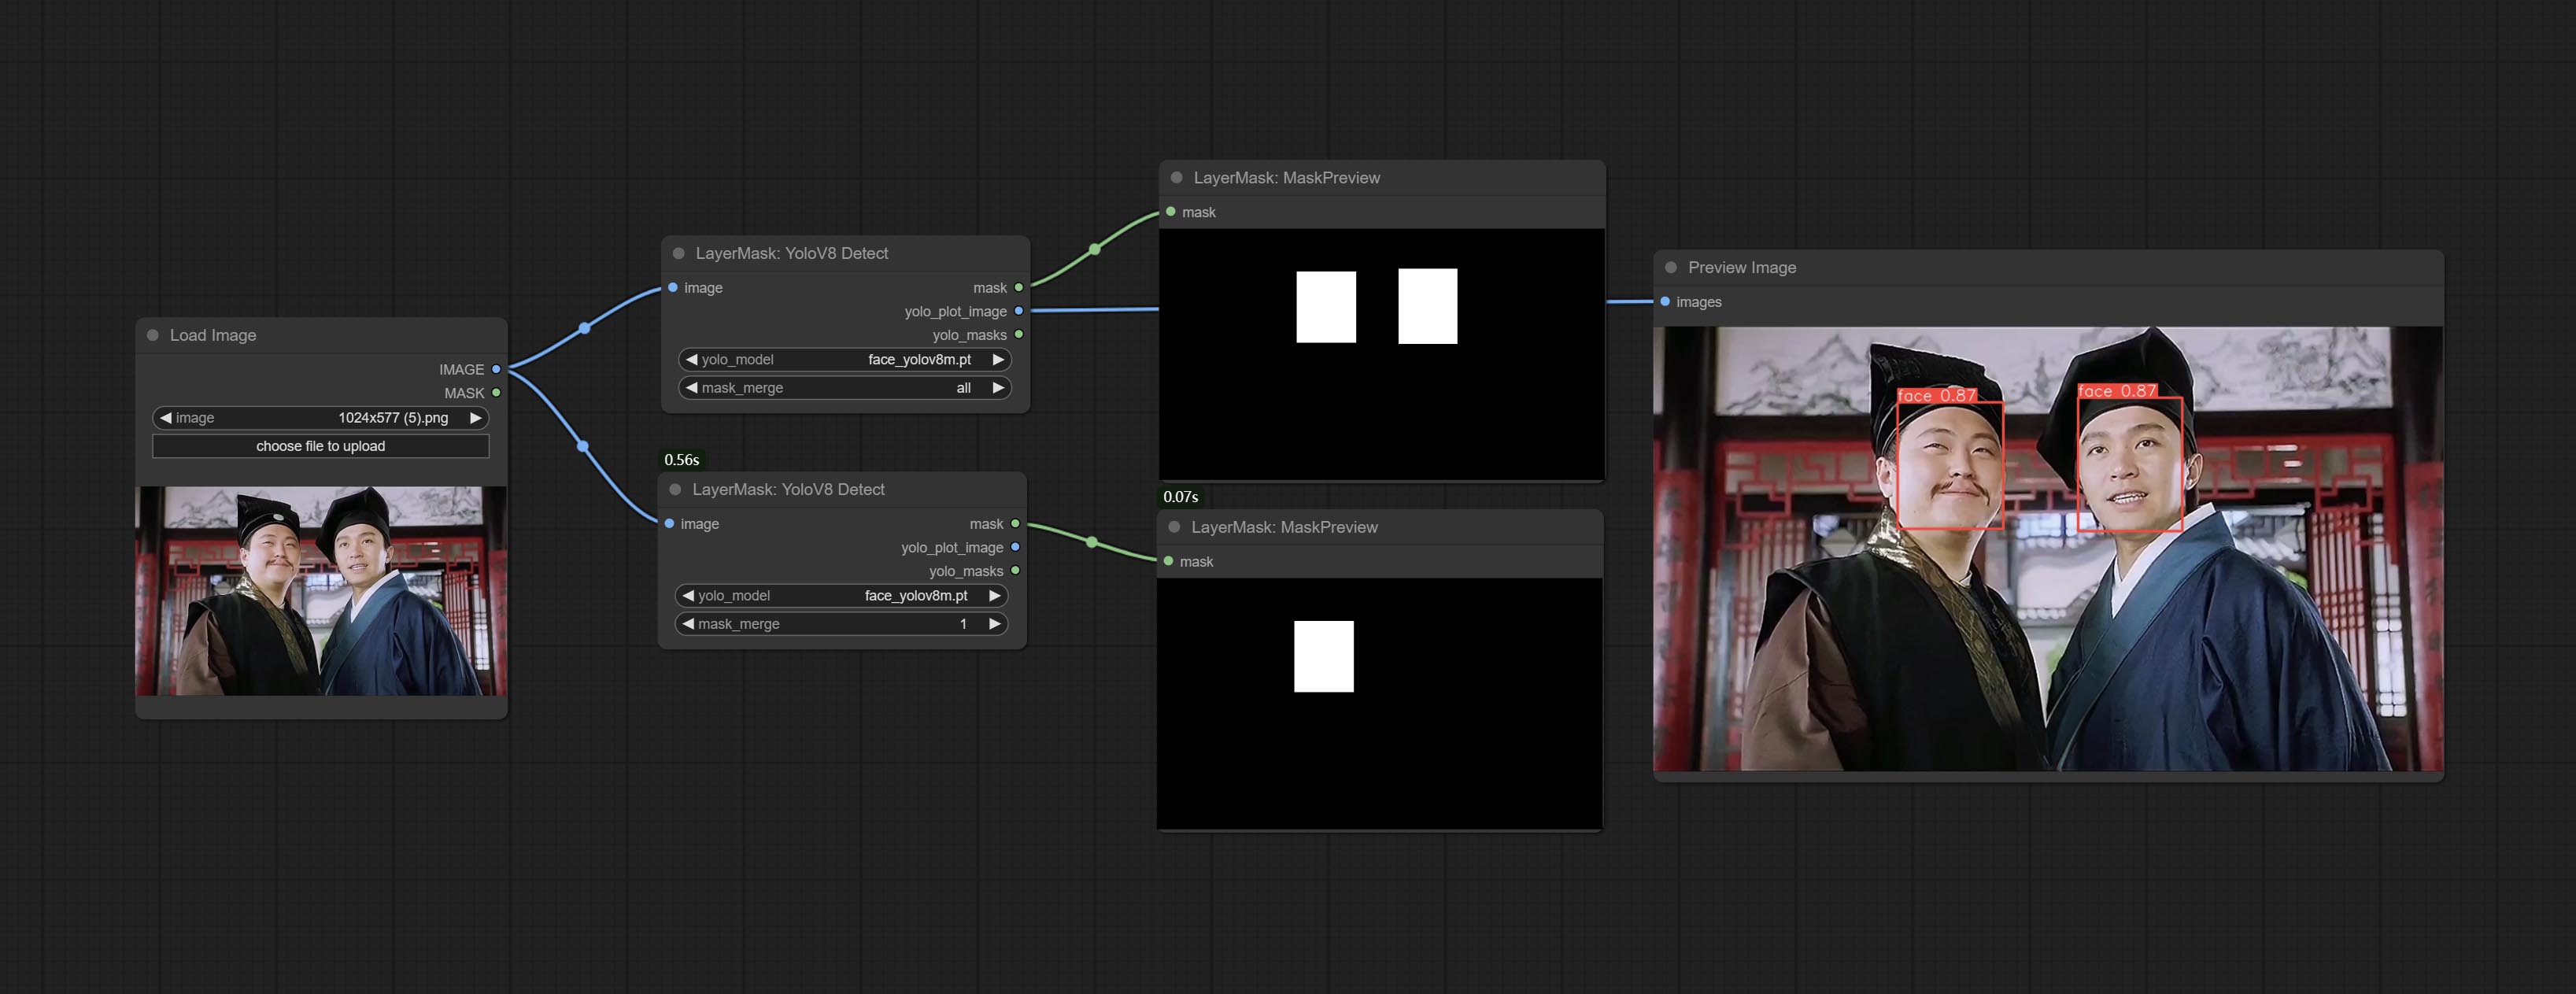
Node Options:
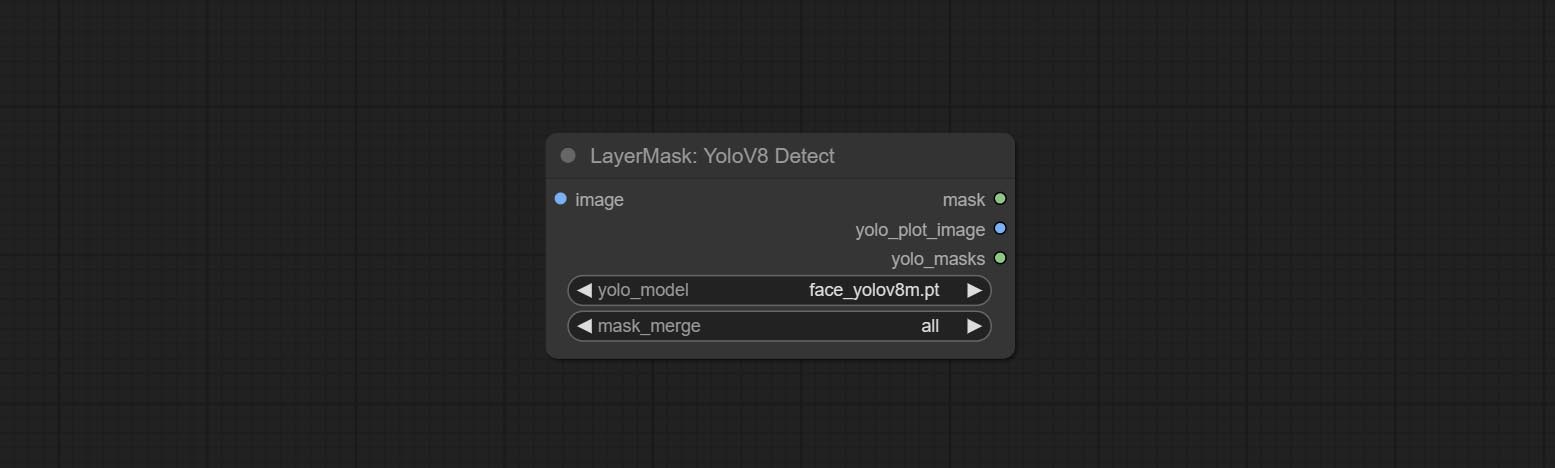
- yolo_model: Yolo model selection. the model with
seg name can output segmented masks, otherwise they can only output box masks. - mask_merge: Select the merged mask.
all is to merge all mask outputs. The selected number is how many masks to output, sorted by recognition confidence to merge the output.
Outputs:
- mask: The output mask.
- yolo_plot_image: Preview of yolo recognition results.
- yolo_masks: For all masks identified by yolo, each individual mask is output as a mask.
MediapipeFacialSegment
Use the Mediapipe model to detect facial features, segment left and right eyebrows, eyes, lips, and tooth. *Download the model files from BaiduNetdisk to ComfyUI/models/mediapipe folder.
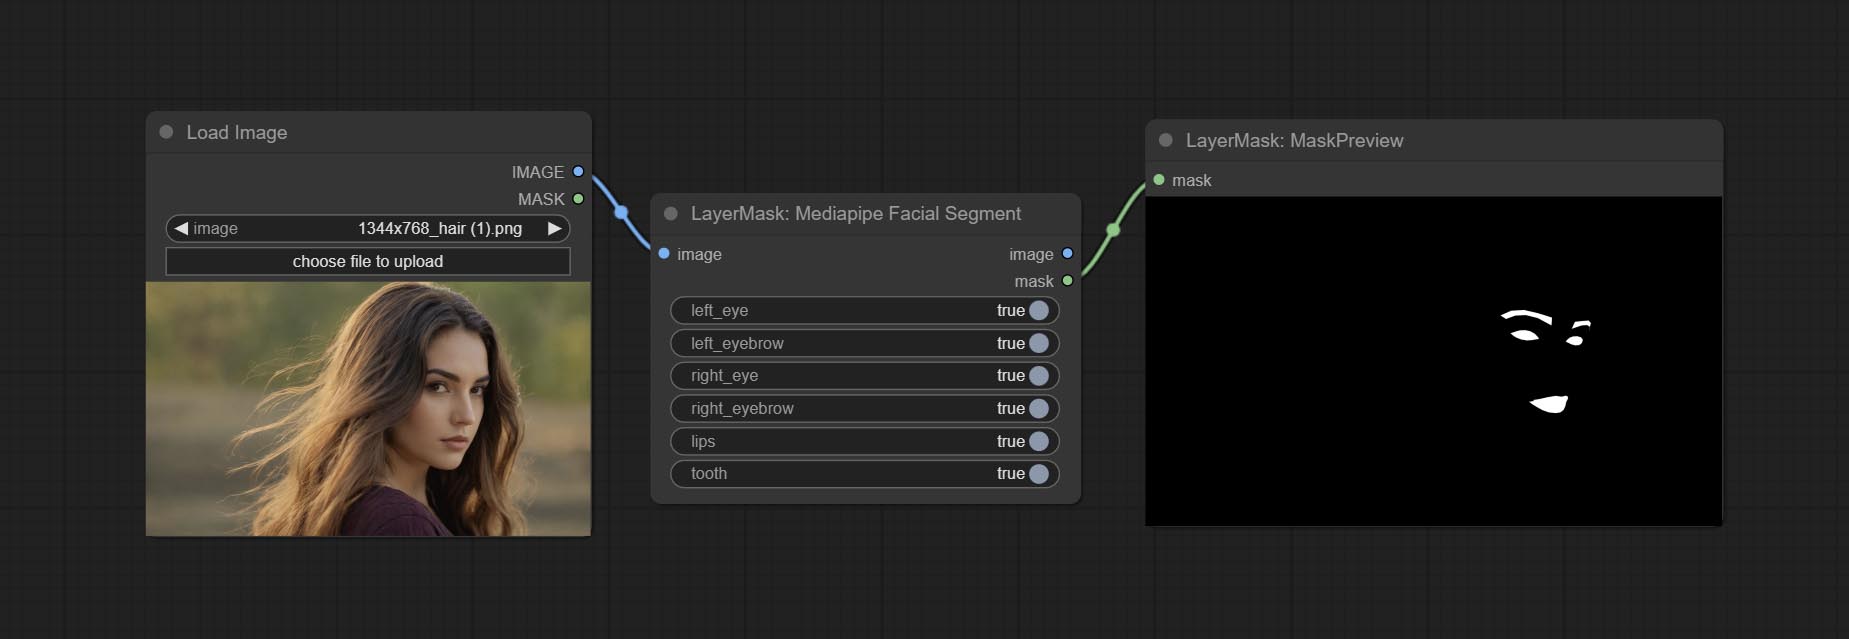
Node Options:
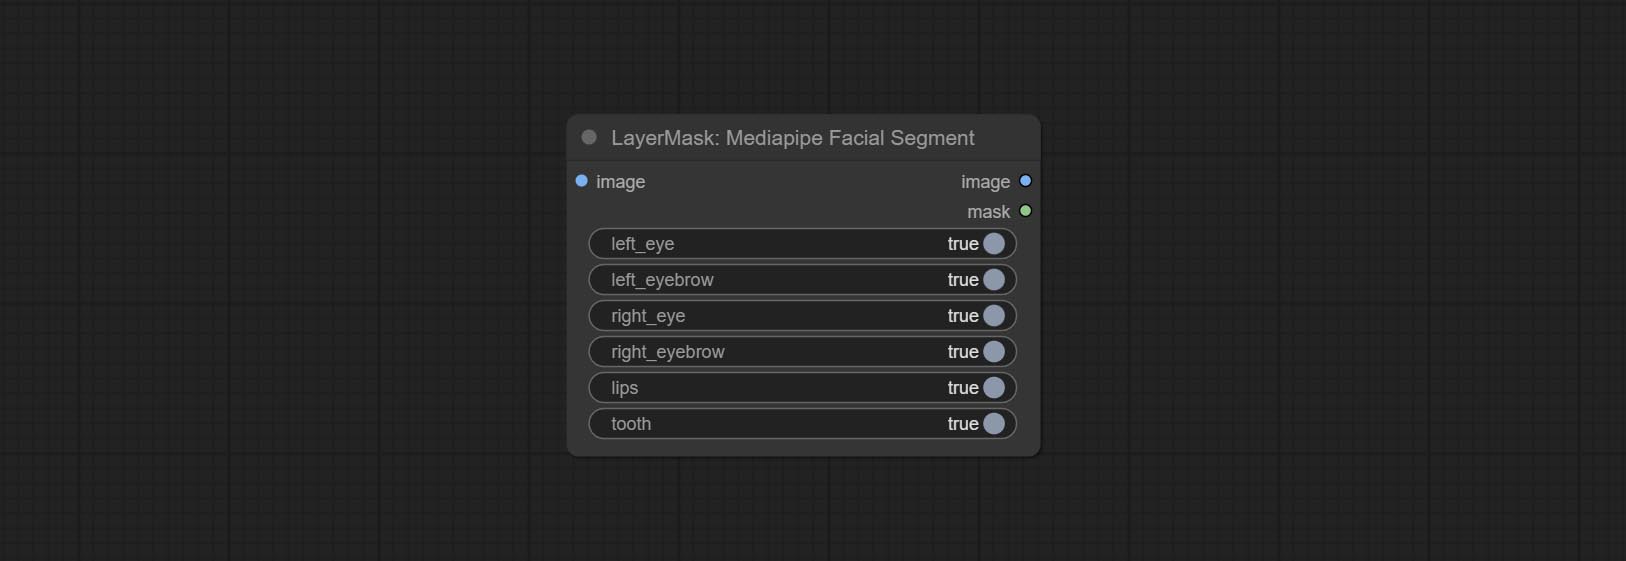
- left_eye: Recognition switch of left eye.
- left_eyebrow: Recognition switch of left eyebrow.
- right_eye: Recognition switch of right eye.
- right_eyebrow: Recognition switch of right eyebrow.
- lips: Recognition switch of lips.
- tooth: Recognition switch of tooth.
MaskByColor
Generate a mask based on the selected color. 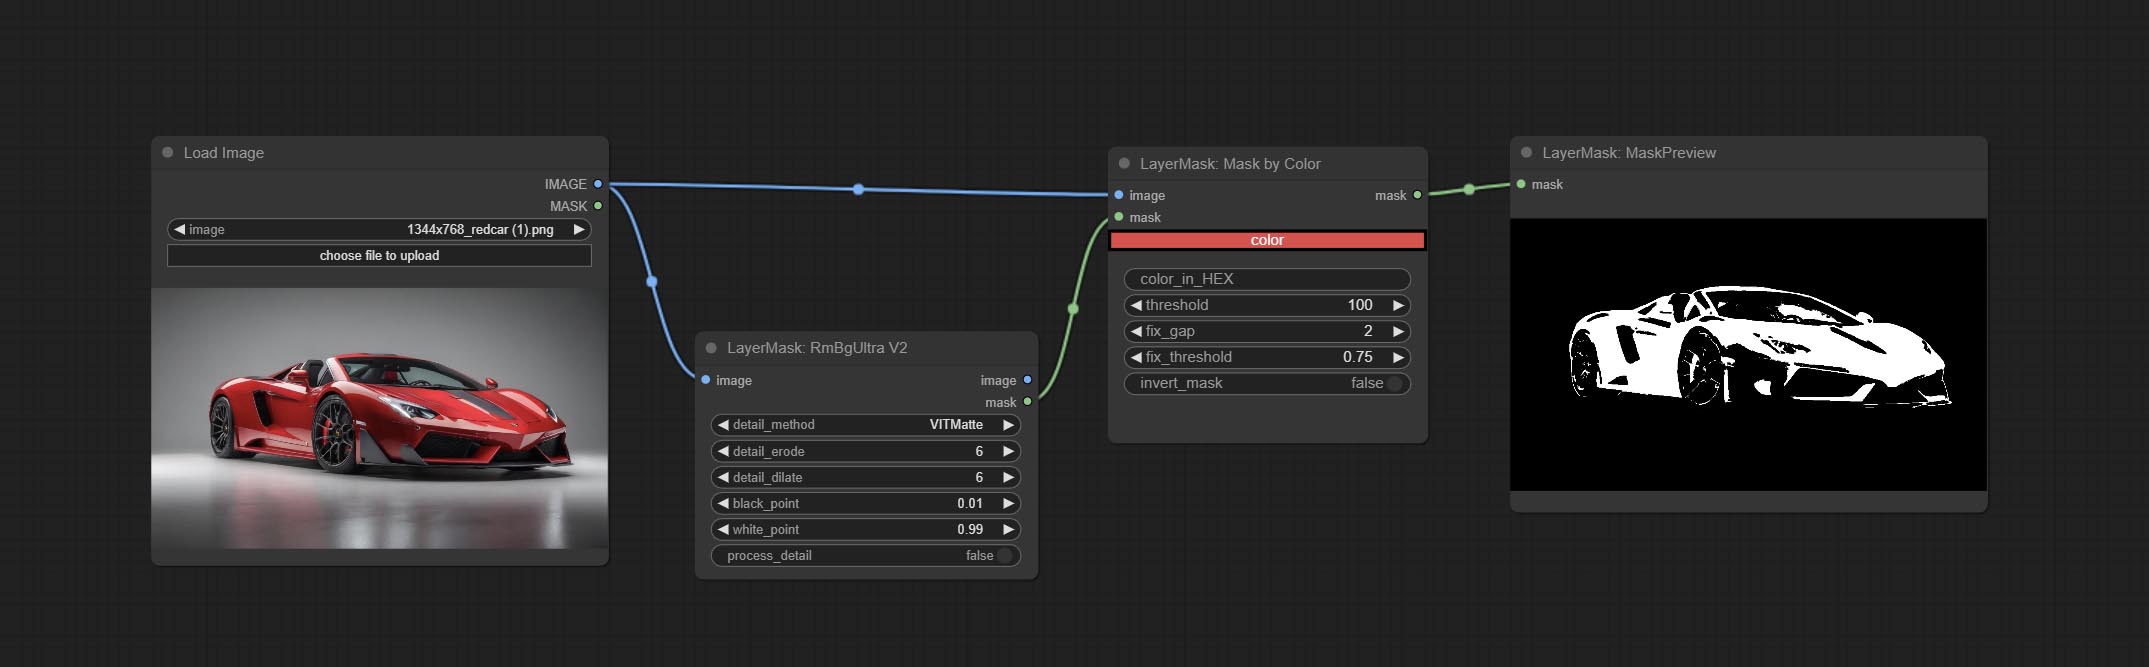
Node Options:
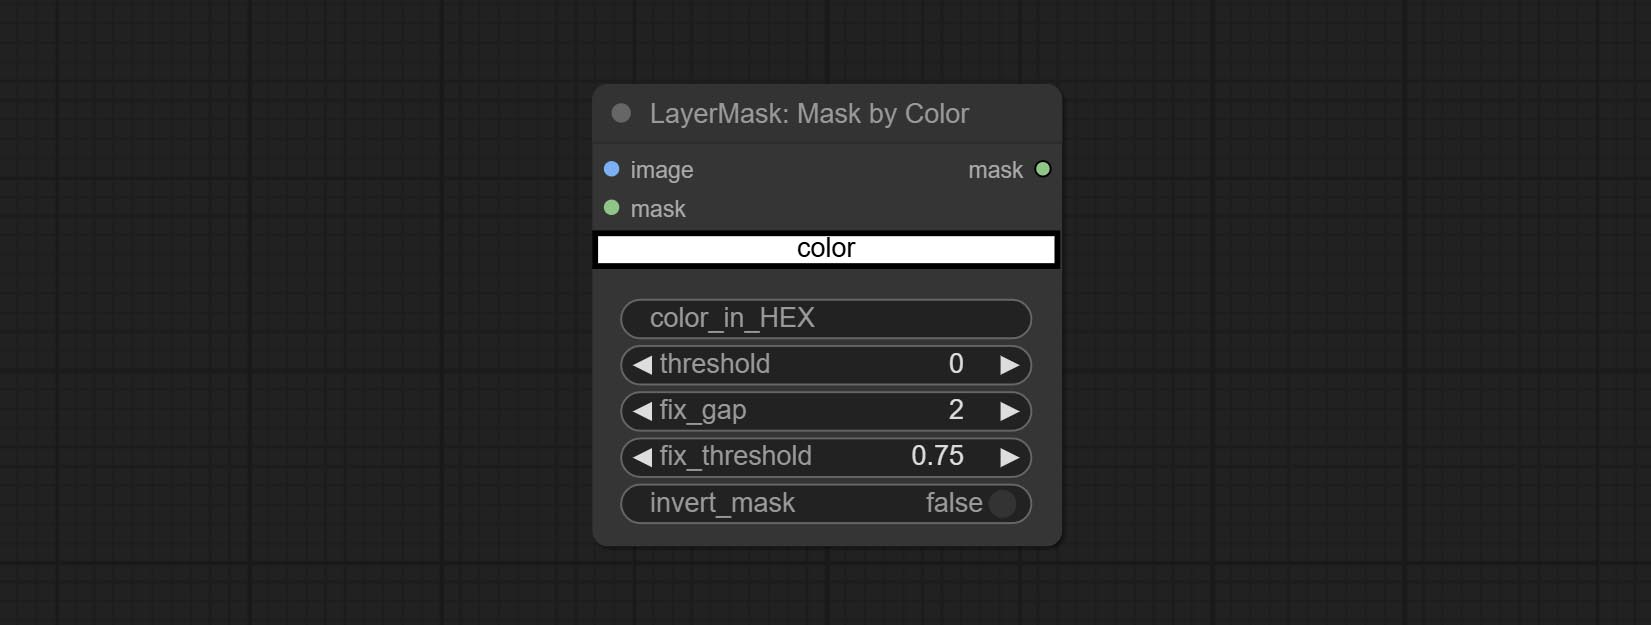
- image: Input image.
- mask: This input is optional, if there is a mask, only the colors inside the mask are included in the range.
- color: Color selector. Click on the color block to select a color, and you can use the straws on the color picker panel to pick up the screen color. Note: When using straws, maximize the browser window.
- color_in_HEX 4 : Enter color values. If this item has input, it will be used first, ignoring the color selected by the
color . - threshold: Mask range threshold, the larger the value, the larger the mask range.
- fix_gap: Repair the gaps in the mask. If there are obvious gaps in the mask, increase this value appropriately.
- fix_threshold: The threshold for repairing masks.
- invert_mask: Whether to reverse the mask.
ImageToMask
Convert the image to a mask. Supports converting any channel in LAB, RGBA, YUV, and HSV modes into masks, while providing color scale adjustment. Support mask optional input to obtain masks that only include valid parts. 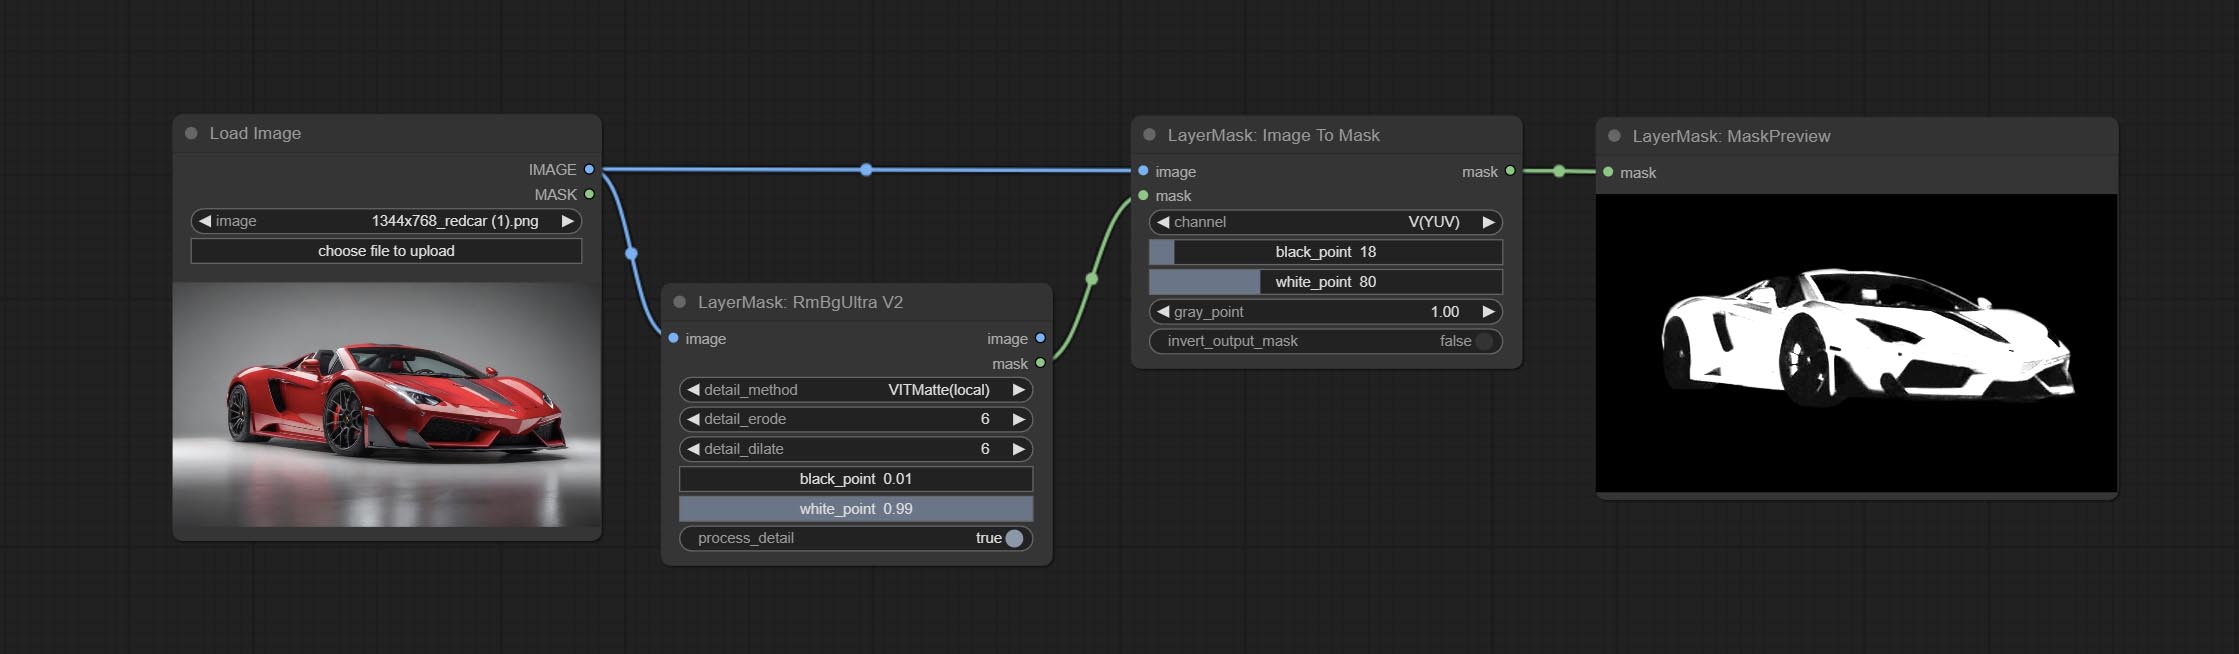
Node Options:
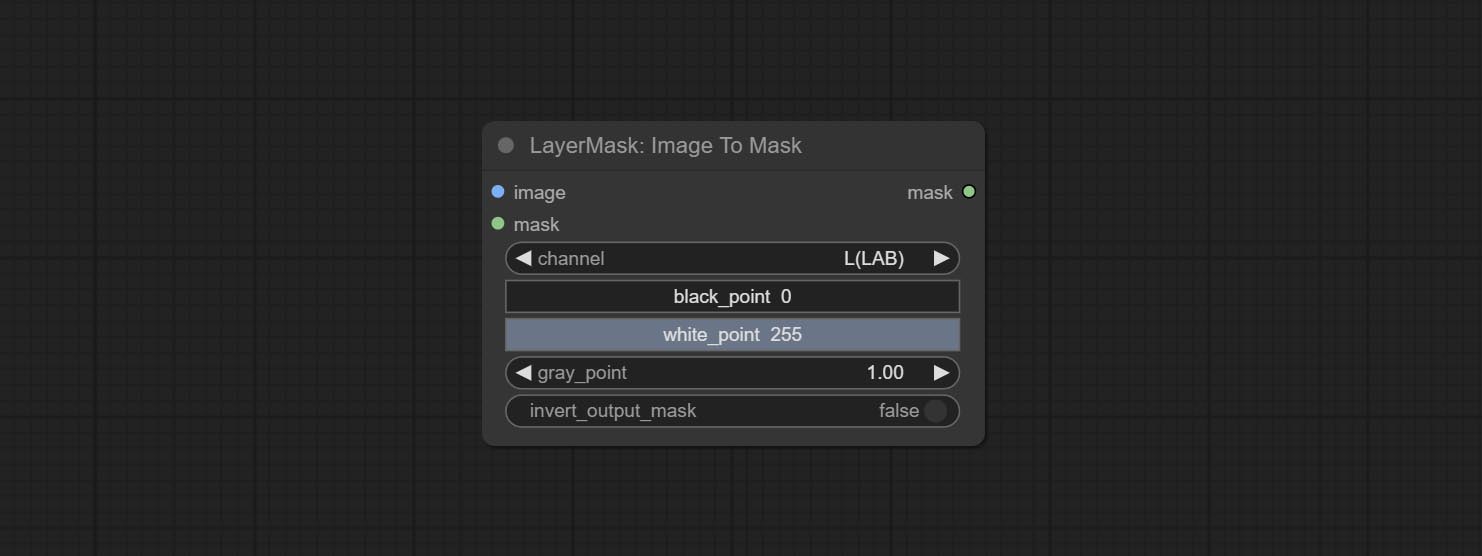
- image: Input image.
- mask: This input is optional, if there is a mask, only the colors inside the mask are included in the range.
- channel: Channel selection. You can choose any channel of LAB, RGBA, YUV, or HSV modes.
- black_point * : Black dot value for the mask. The value range is 0-255, with a default value of 0.
- white_point * : White dot value for the mask. The value range is 0-255, with a default value of 255.
- gray_point: Gray dot values for the mask. The value range is 0.01-9.99, with a default of 1.
- invert_output_mask: Whether to reverse the mask.
* If the black_point or output_black_point value is greater than white_point or output_white_point, the two values are swapped, with the larger value used as white_point and the smaller value used as black_point.
Shadow & Highlight Mask
Generate masks for the dark and bright parts of the image. 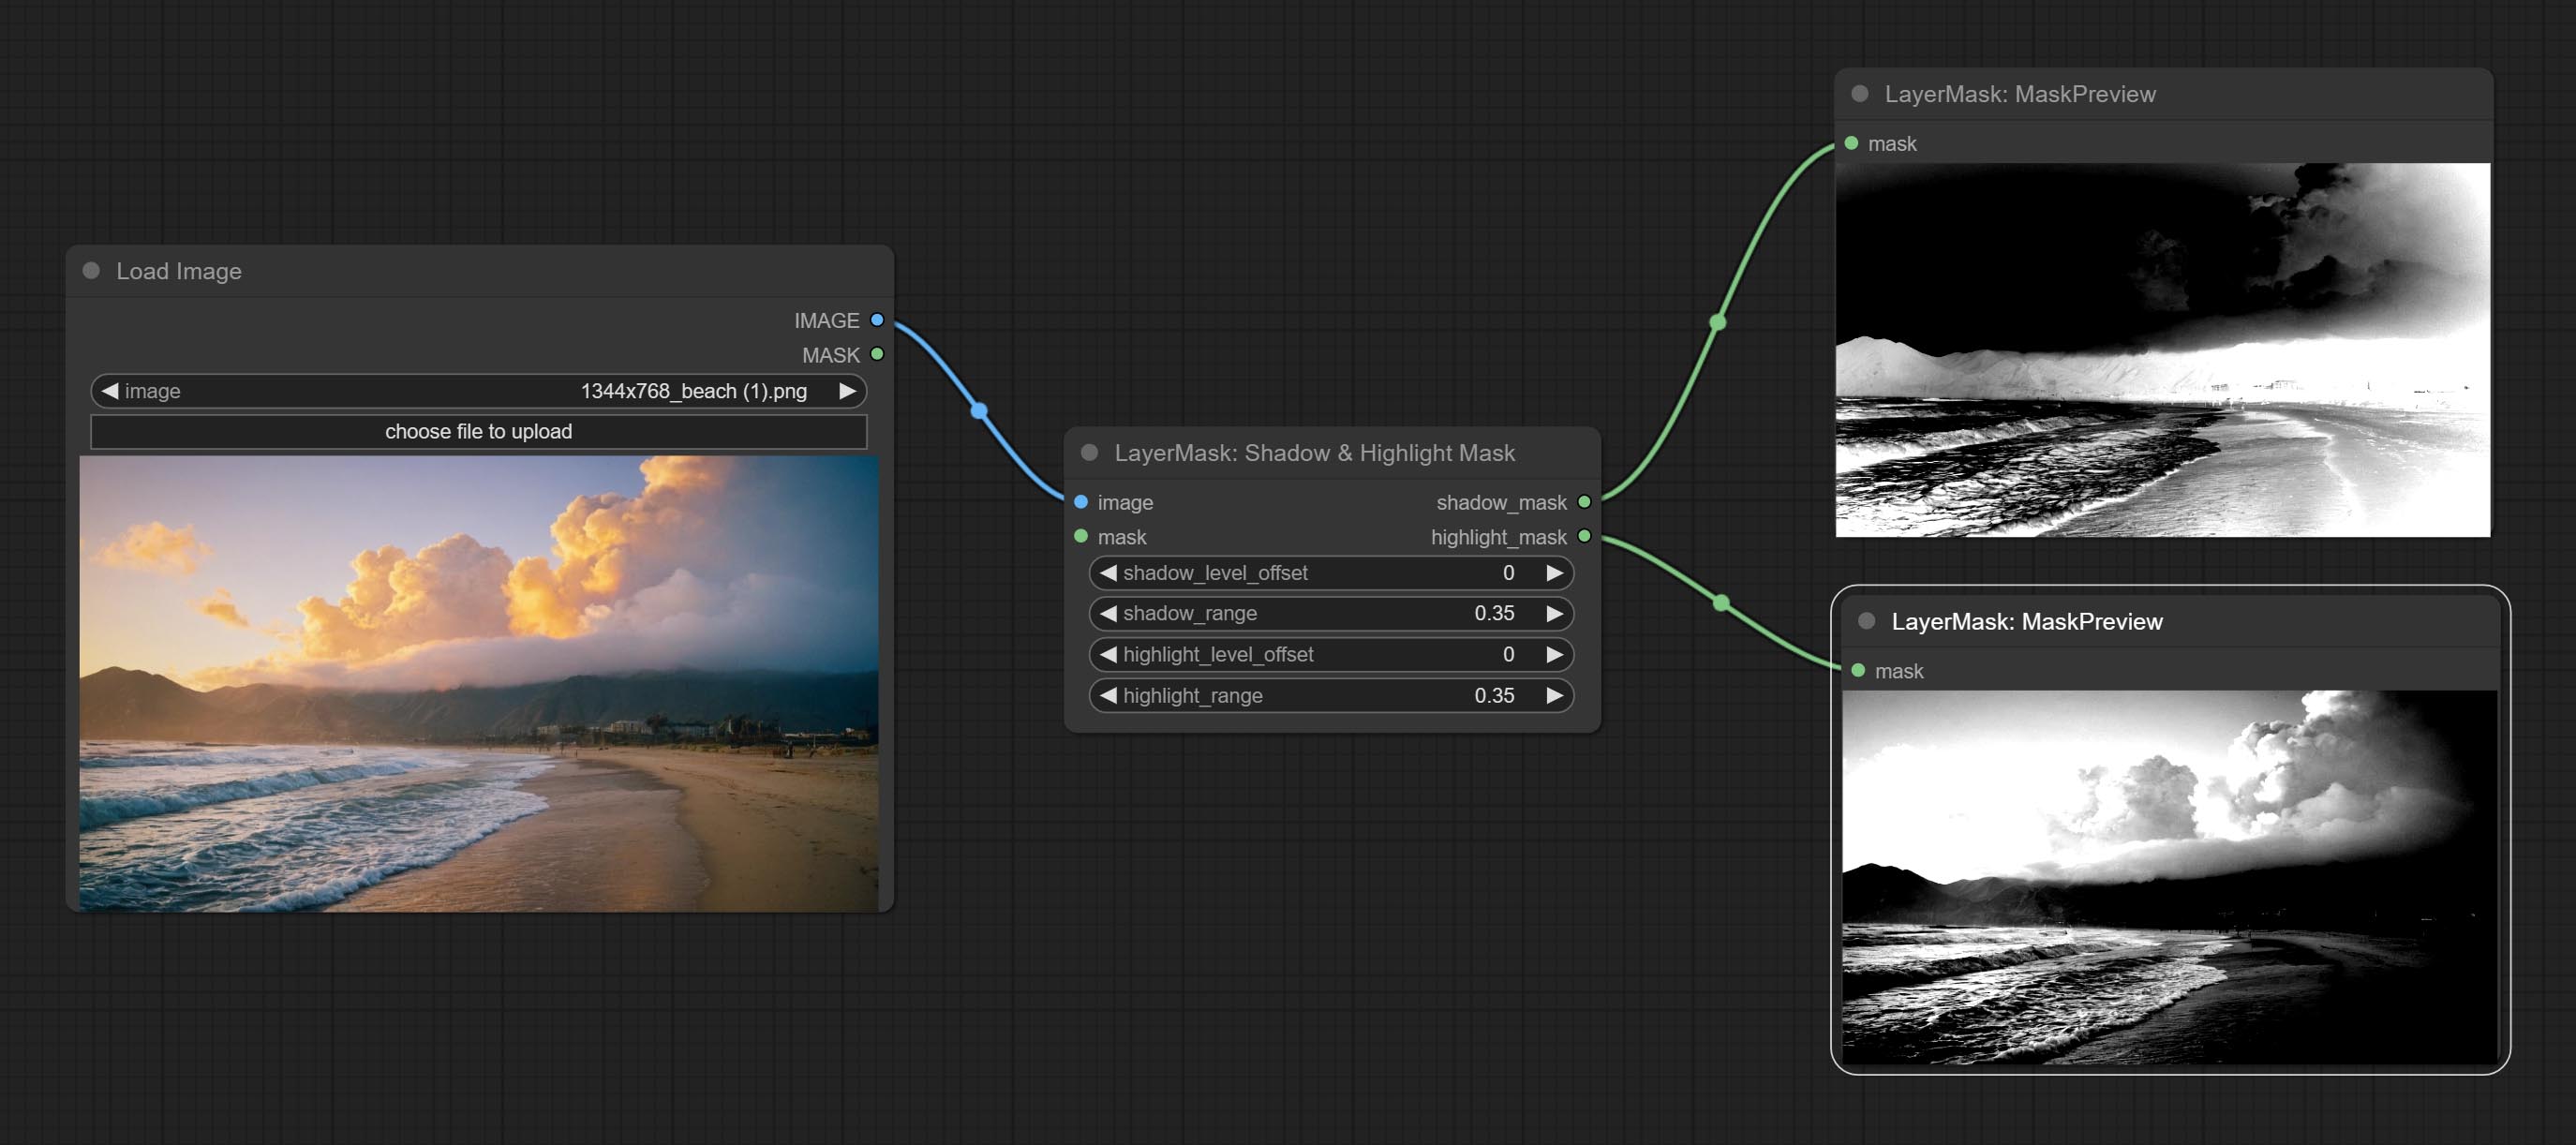
Node options:
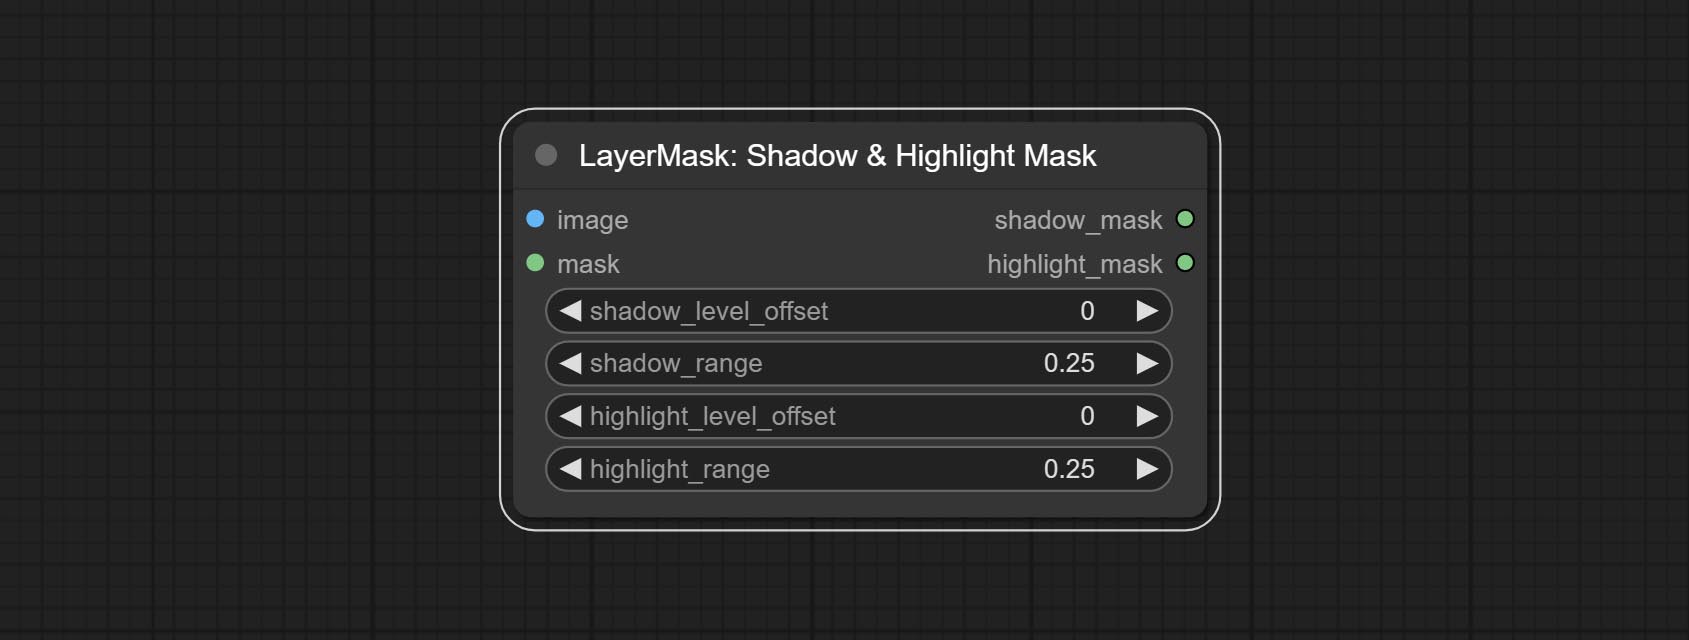
- image: The input image.
- mask: Optional input. if there is input, only the colors within the mask range will be adjusted.
- shadow_level_offset: The offset of values in the dark area, where larger values bring more areas closer to the bright into the dark area.
- shadow_range: The transitional range of the dark area.
- highlight_level_offset: The offset of values in the highlight area, where larger values bring more areas closer to the dark into the highlight area.
- highlight_range: The transitional range of the highlight area.
Shadow Highlight Mask V2
A replica of the Shadow & Highlight Mask node, with the "&" character removed from the node name to avoid ComfyUI workflow parsing errors.
PixelSpread
Pixel expansion preprocessing on the masked edge of an image can effectively improve the edges of image composit. 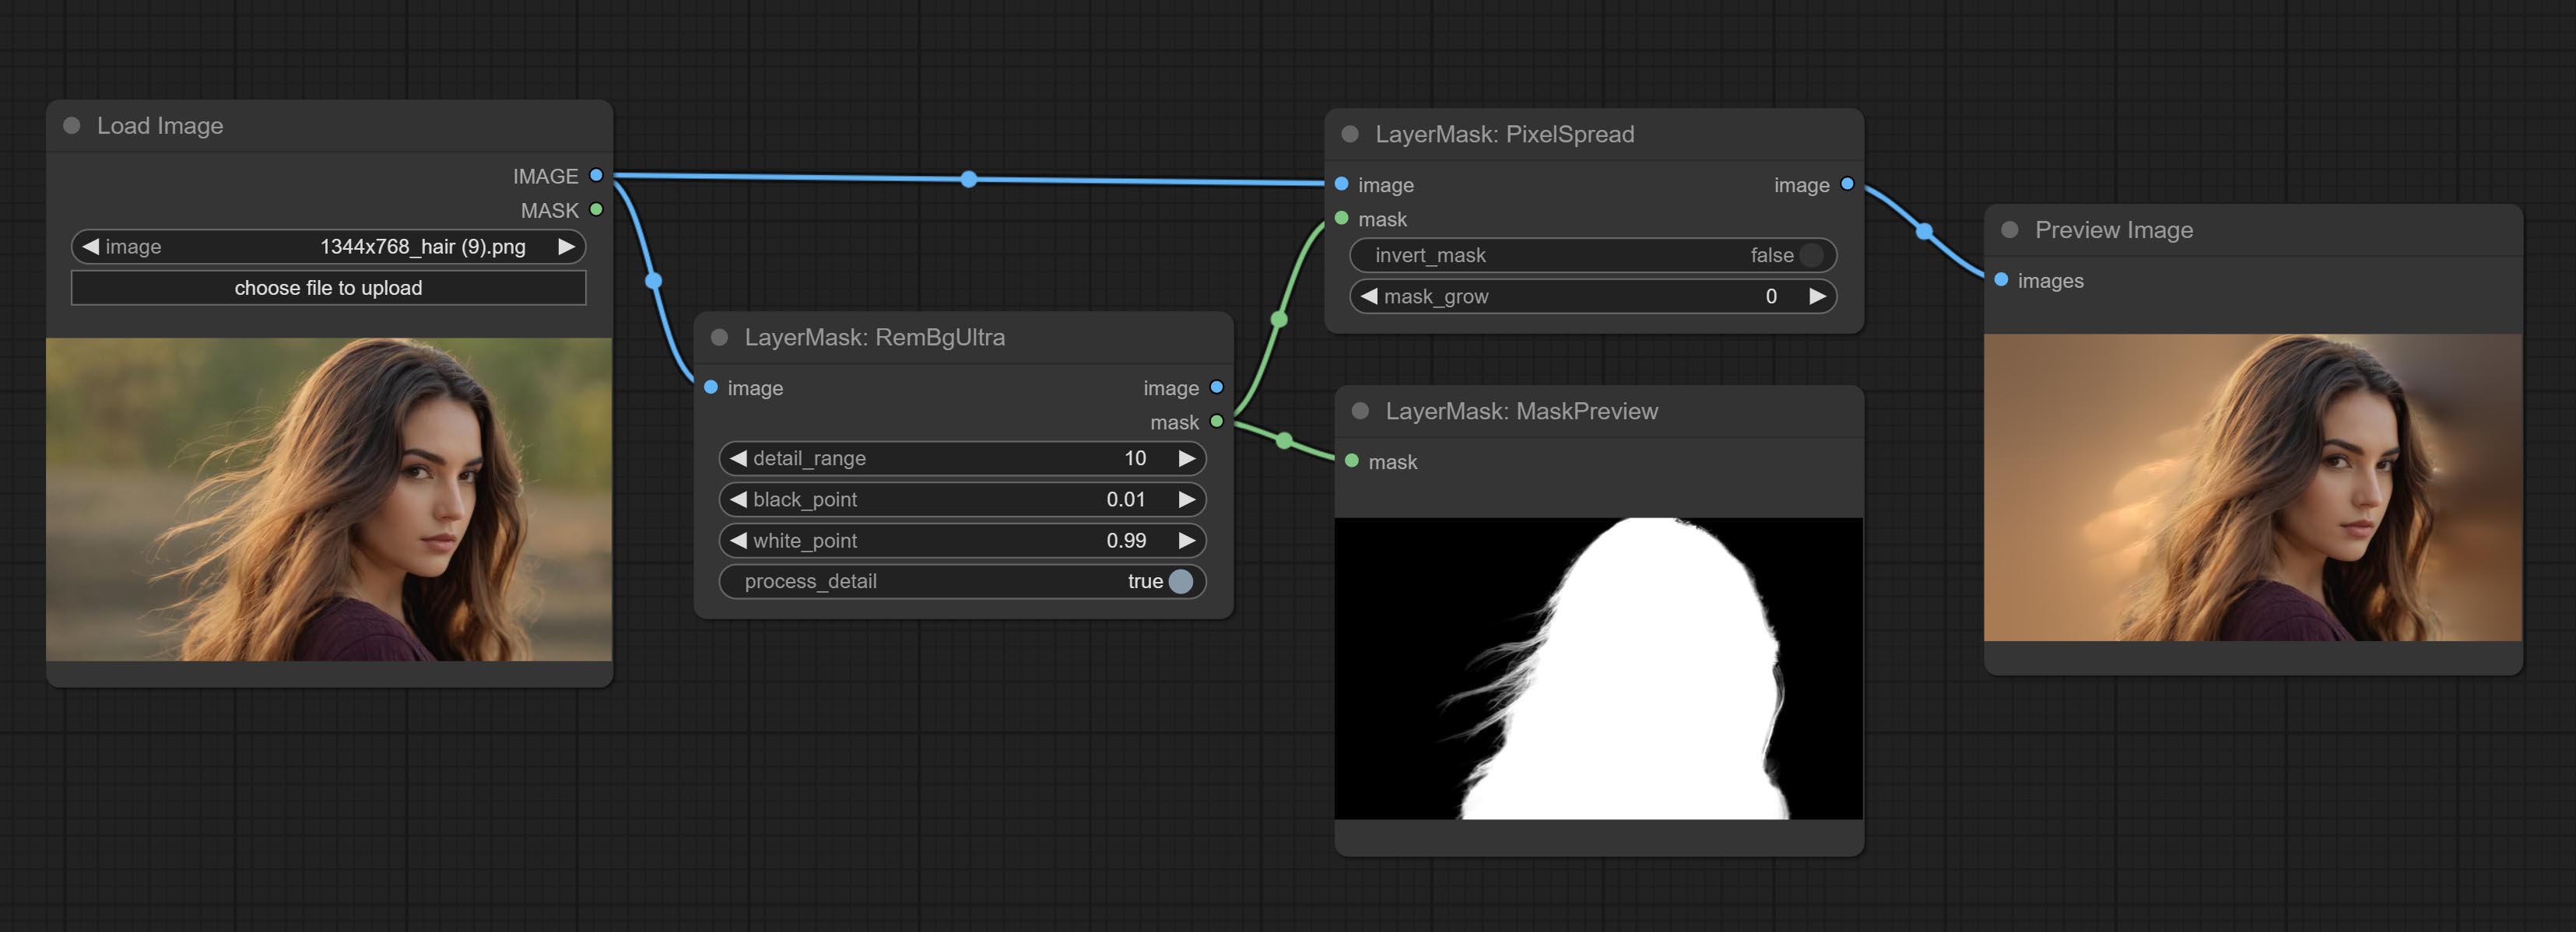
Node options:
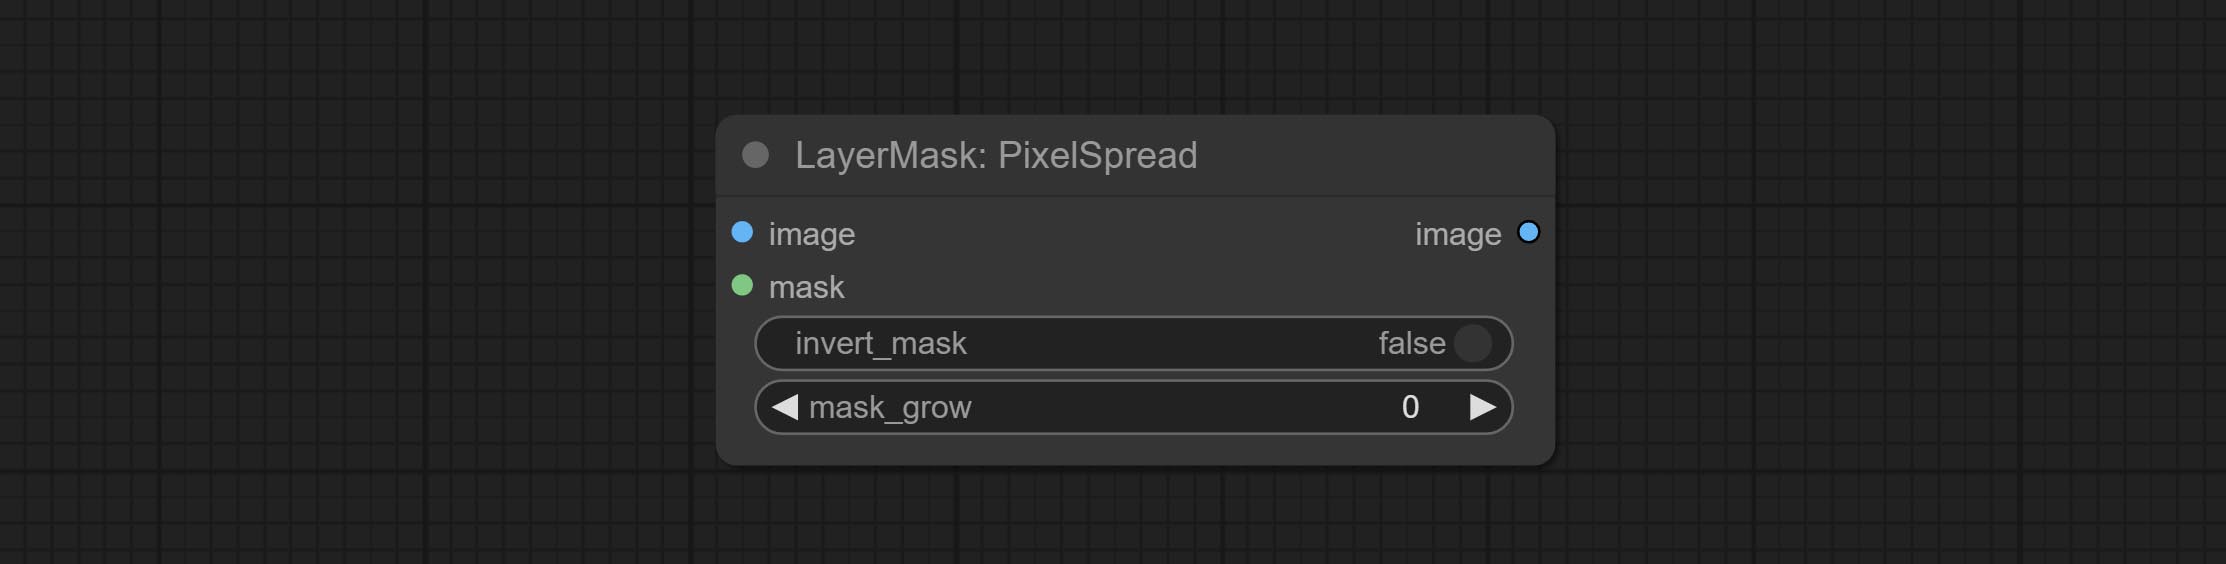
- invert_mask: Whether to reverse the mask.
- mask_grow: Mask expansion amplitude.
MaskByDifferent
Calculate the differences between two images and output them as mask. 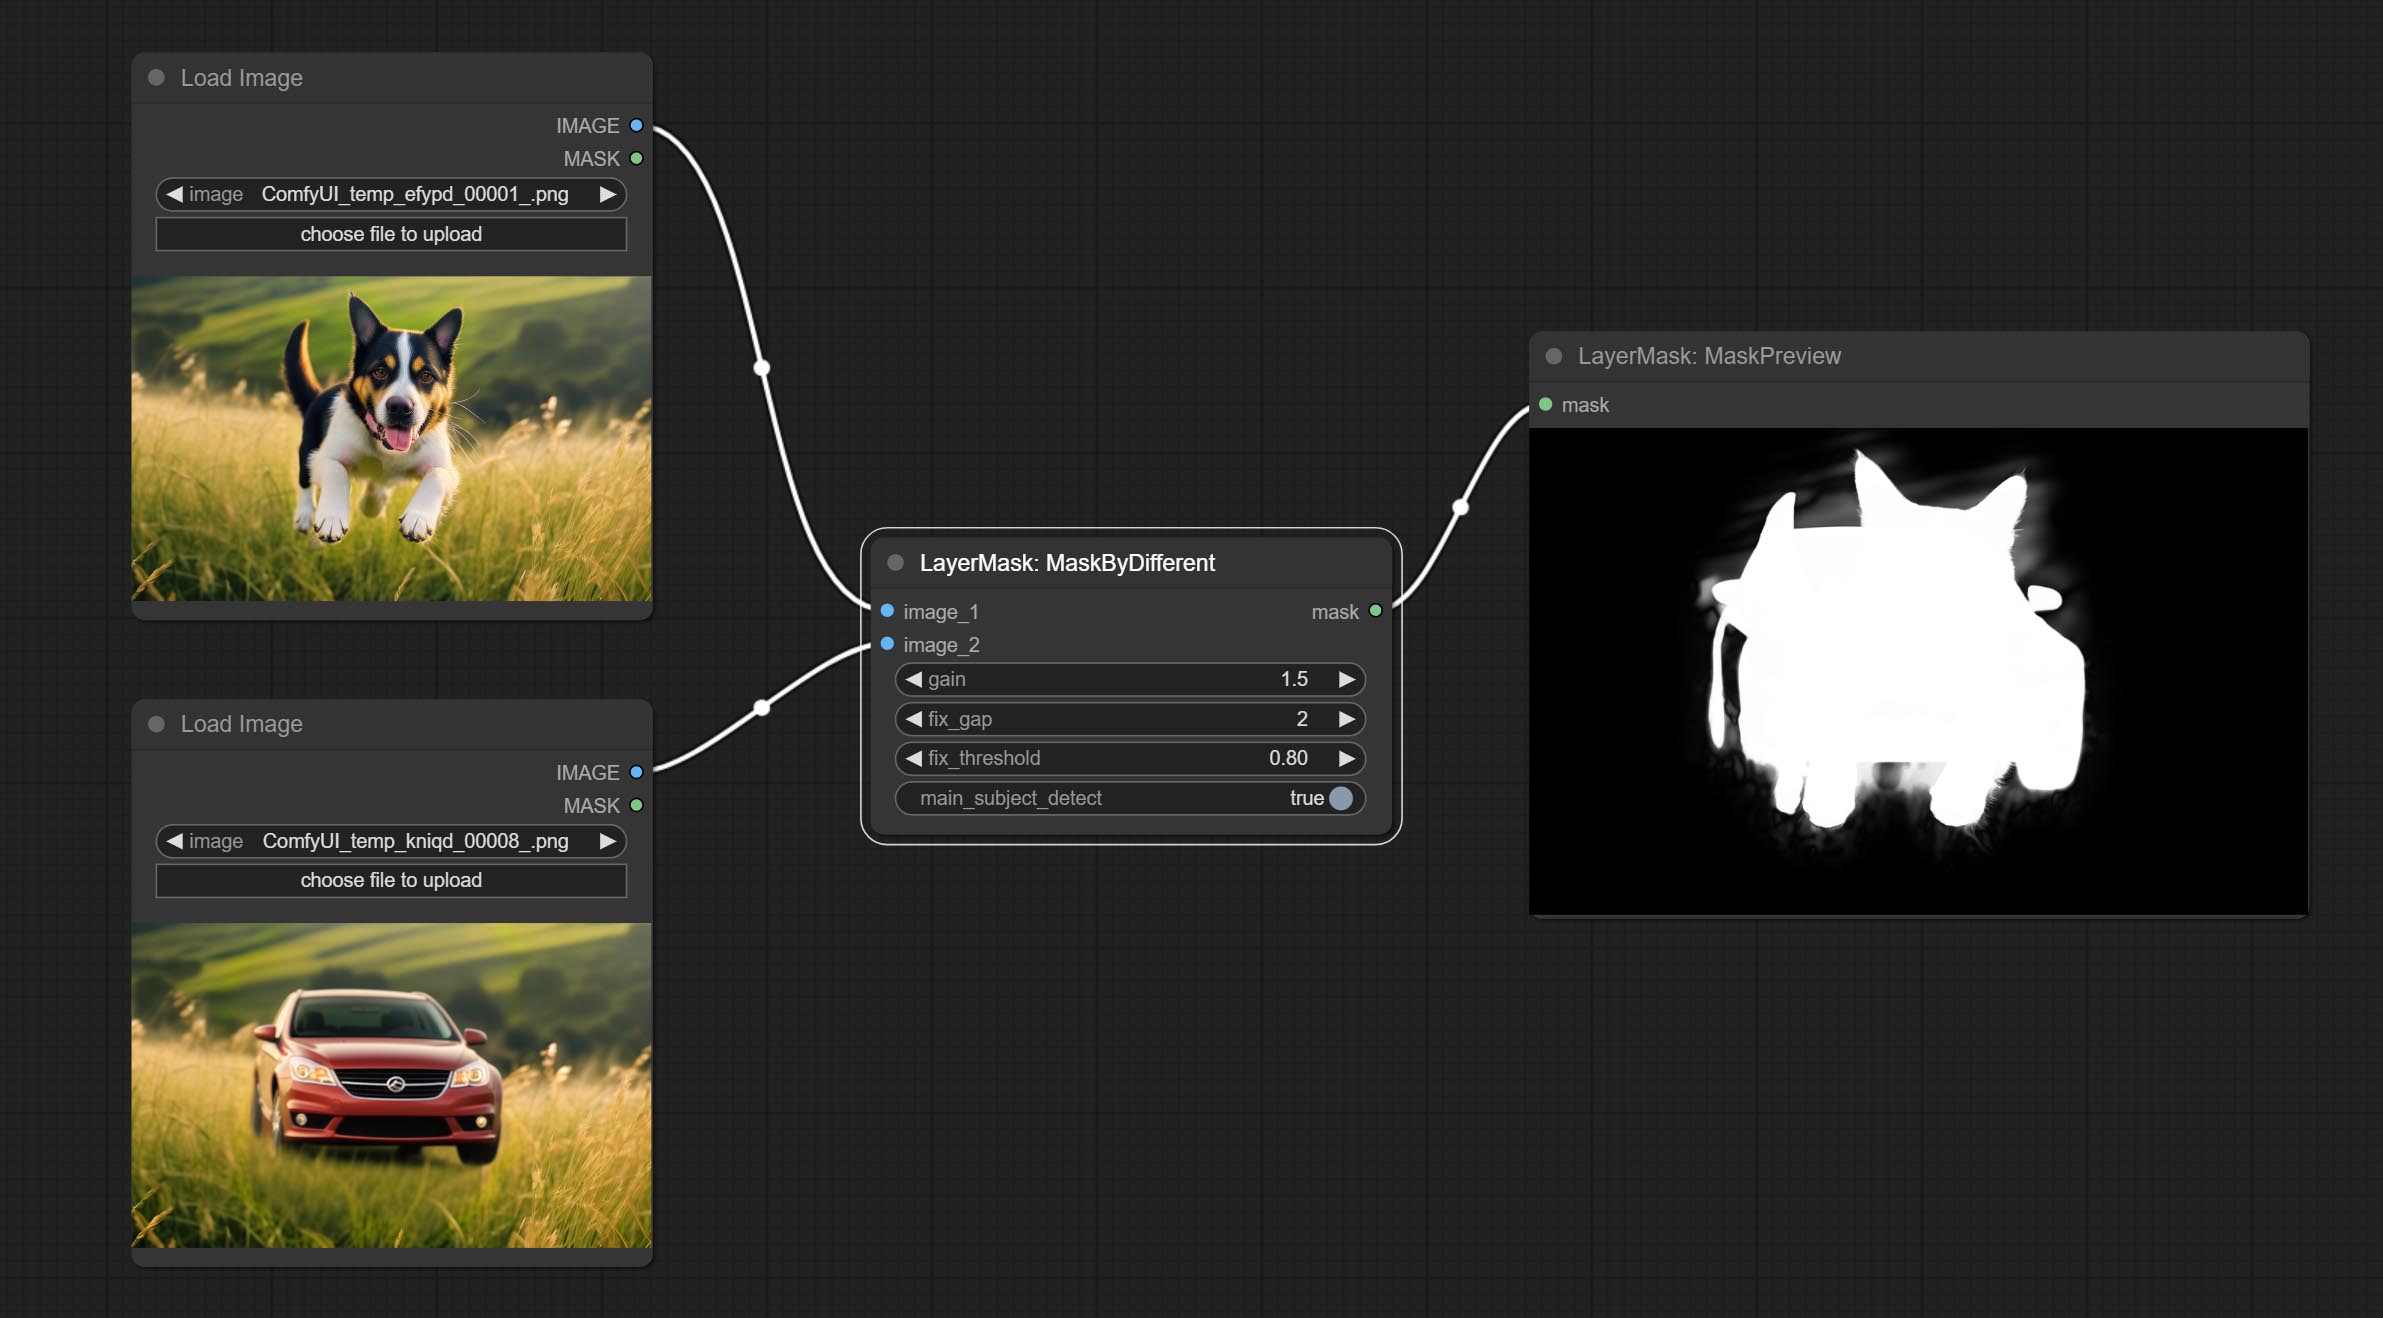
Node options:
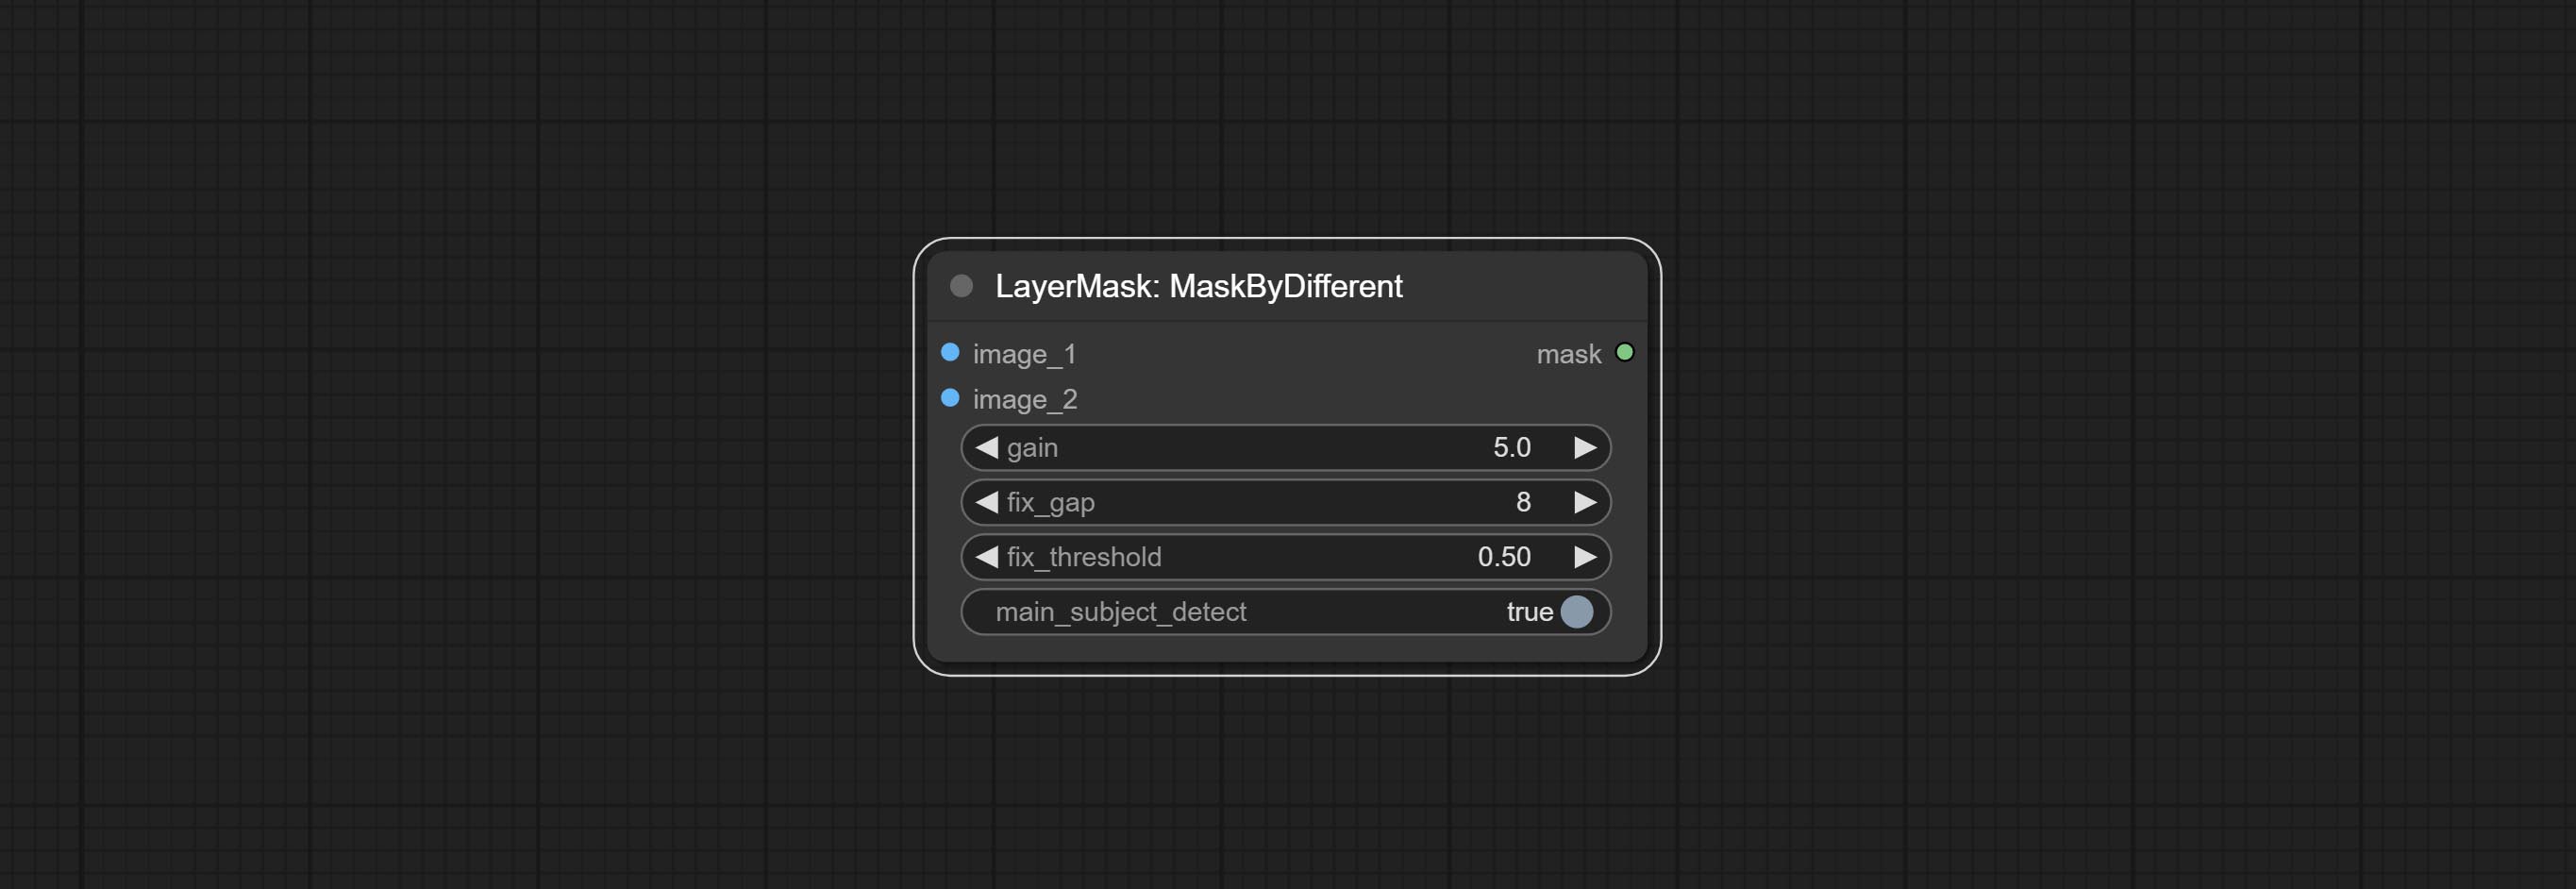
- gain: The gain of difference calculate. higher value will result in a more significant slight difference.
- fix_gap: Fix the internal gaps of the mask. higher value will repair larger gaps.
- fix_threshold: The threshold for fix_gap.
- main_subject_detect: Setting this to True will enable subject detection, ignoring differences outside of the subject.
MaskGrow
Grow and shrink edges and blur the mask 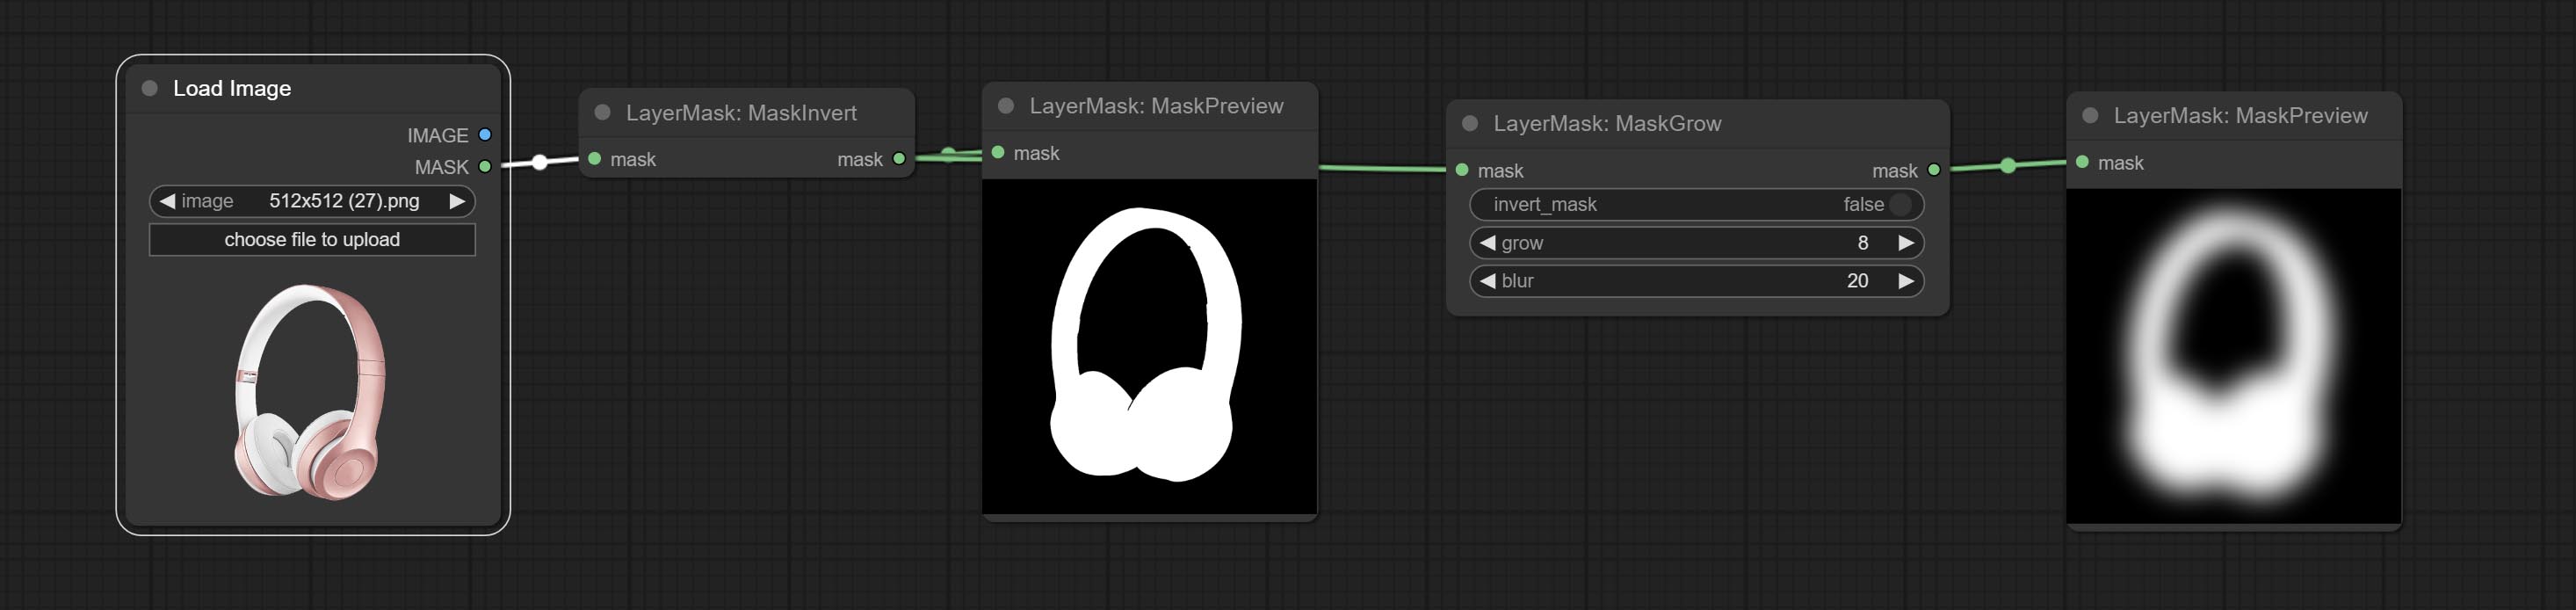
Node options: 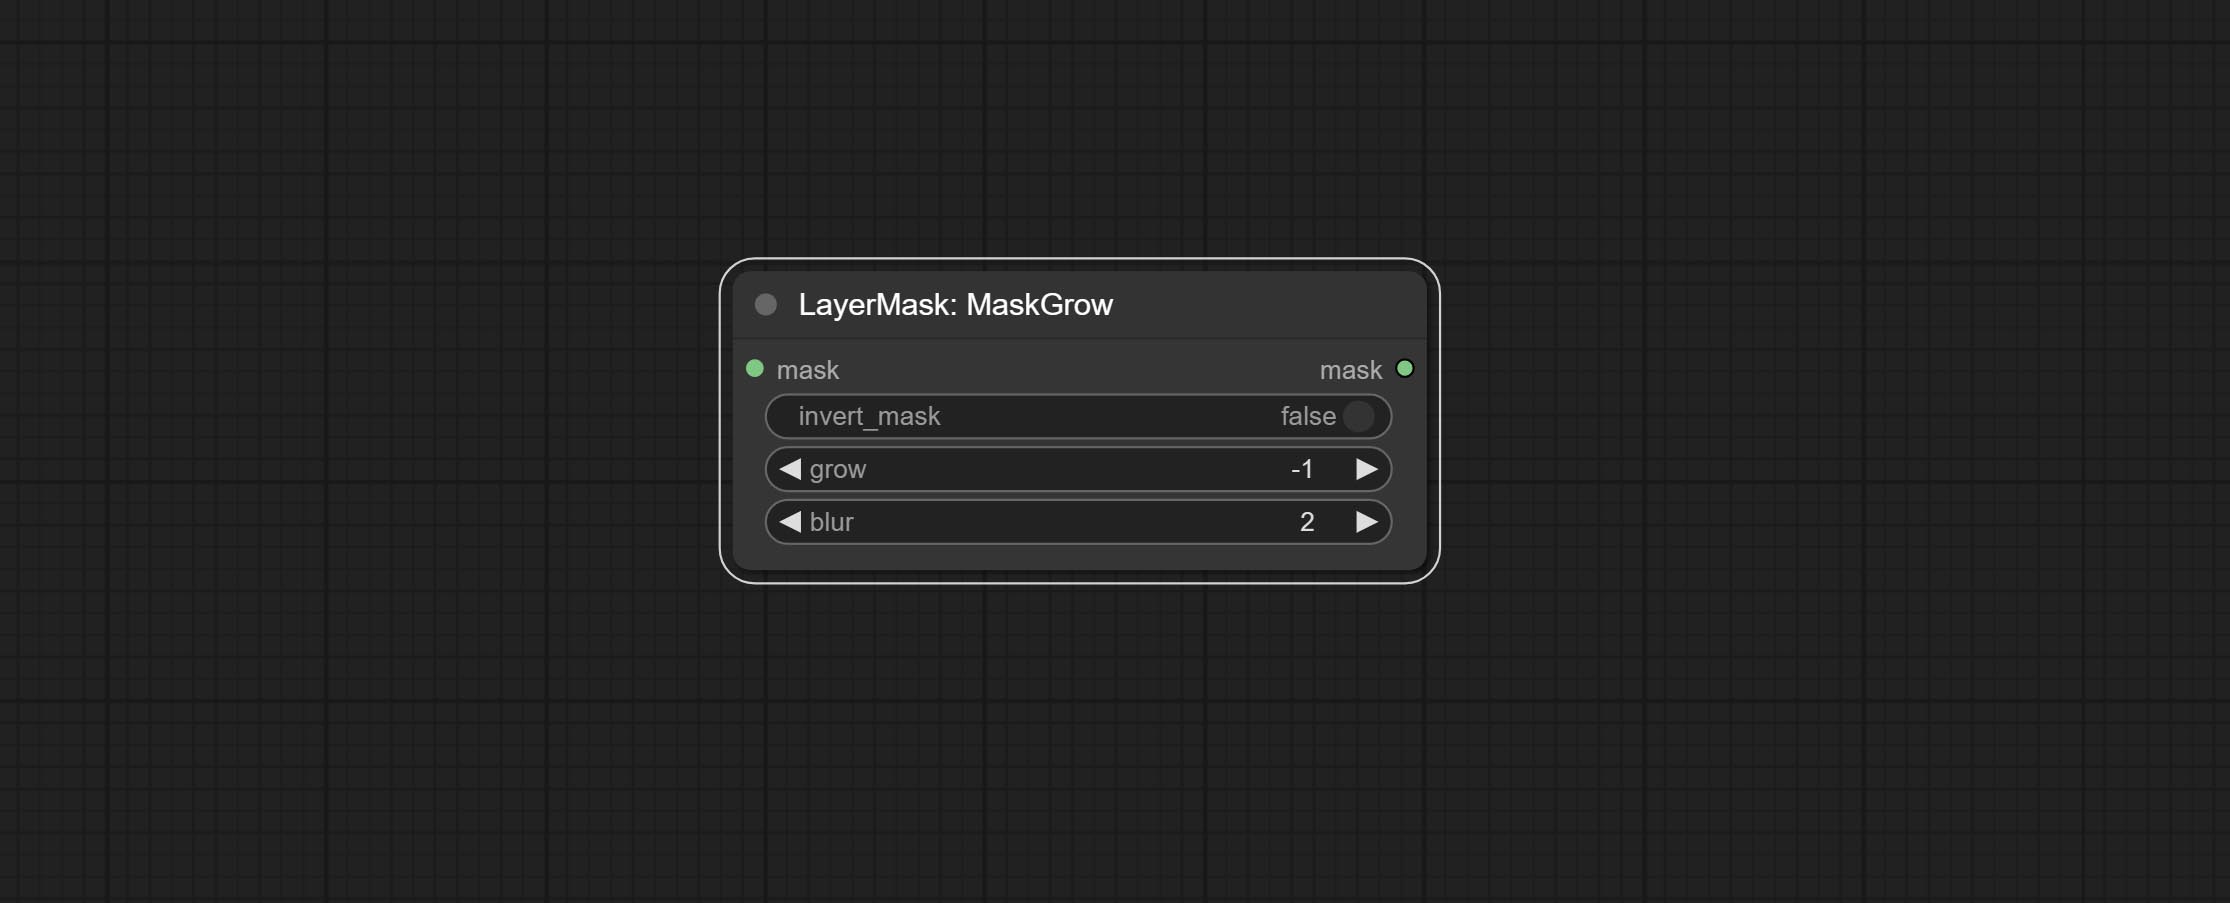
- invert_mask: Whether to reverse the mask.
- grow: Positive values expand outward, while negative values contract inward.
- blur: Blur the edge.
MaskEdgeShrink
Smooth transition and shrink the mask edges while preserving edge details. 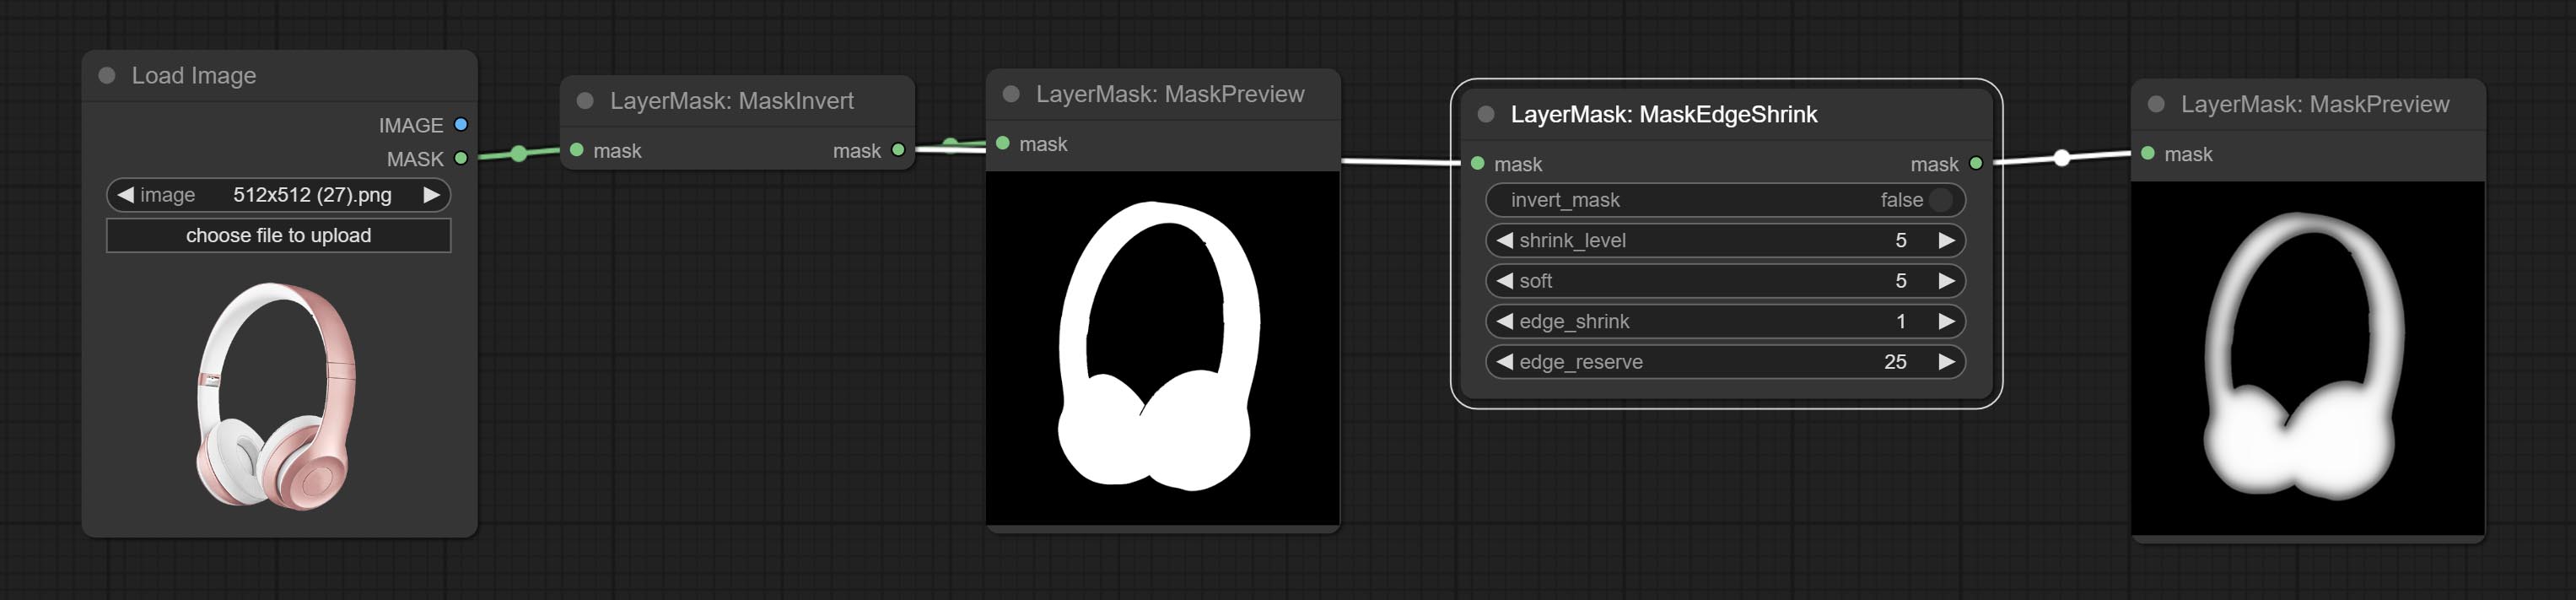
Node options: 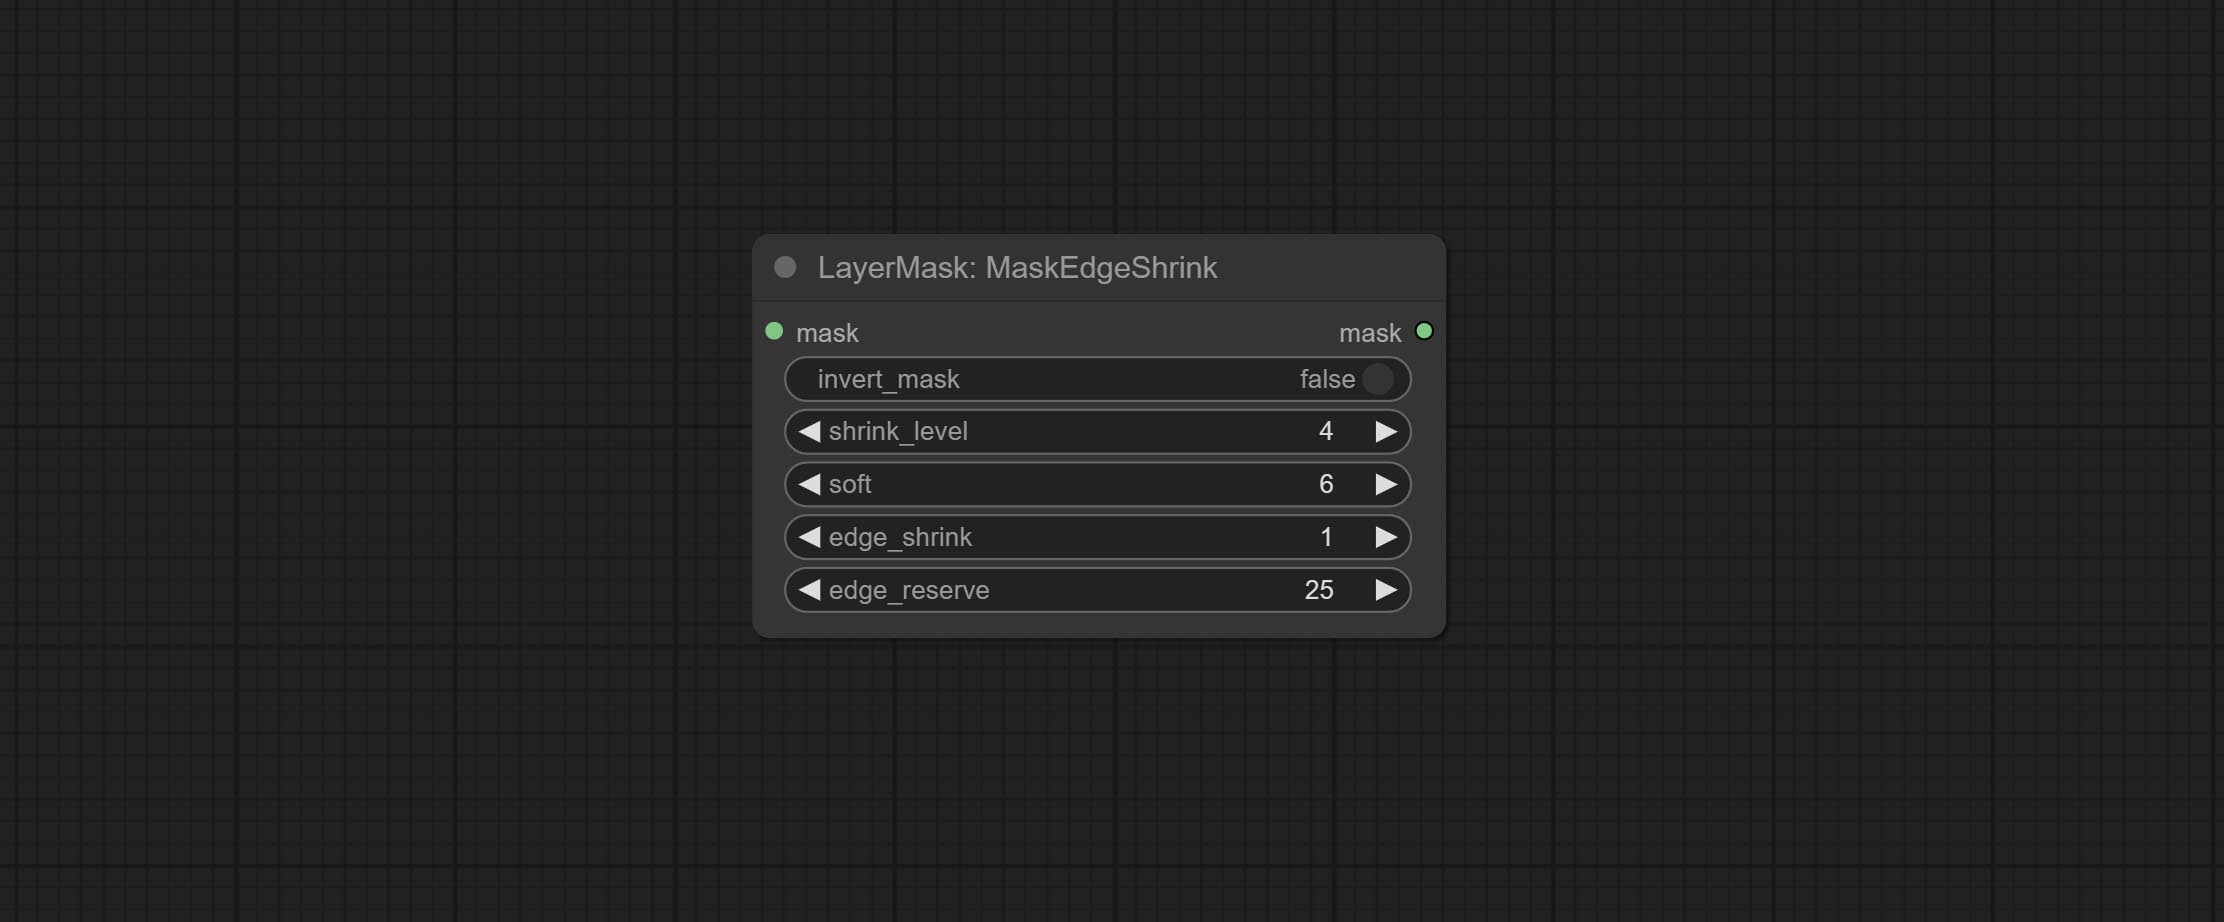
- invert_mask: Whether to reverse the mask.
- shrink_level: Shrink the smoothness level.
- soft: Smooth amplitude.
- edge_shrink: Edge shrinkage amplitude.
- edge_reserve: Preserve the amplitude of edge details, 100 represents complete preservation, and 0 represents no preservation at all.
Comparison of MaskGrow and MaskEdgeShrink 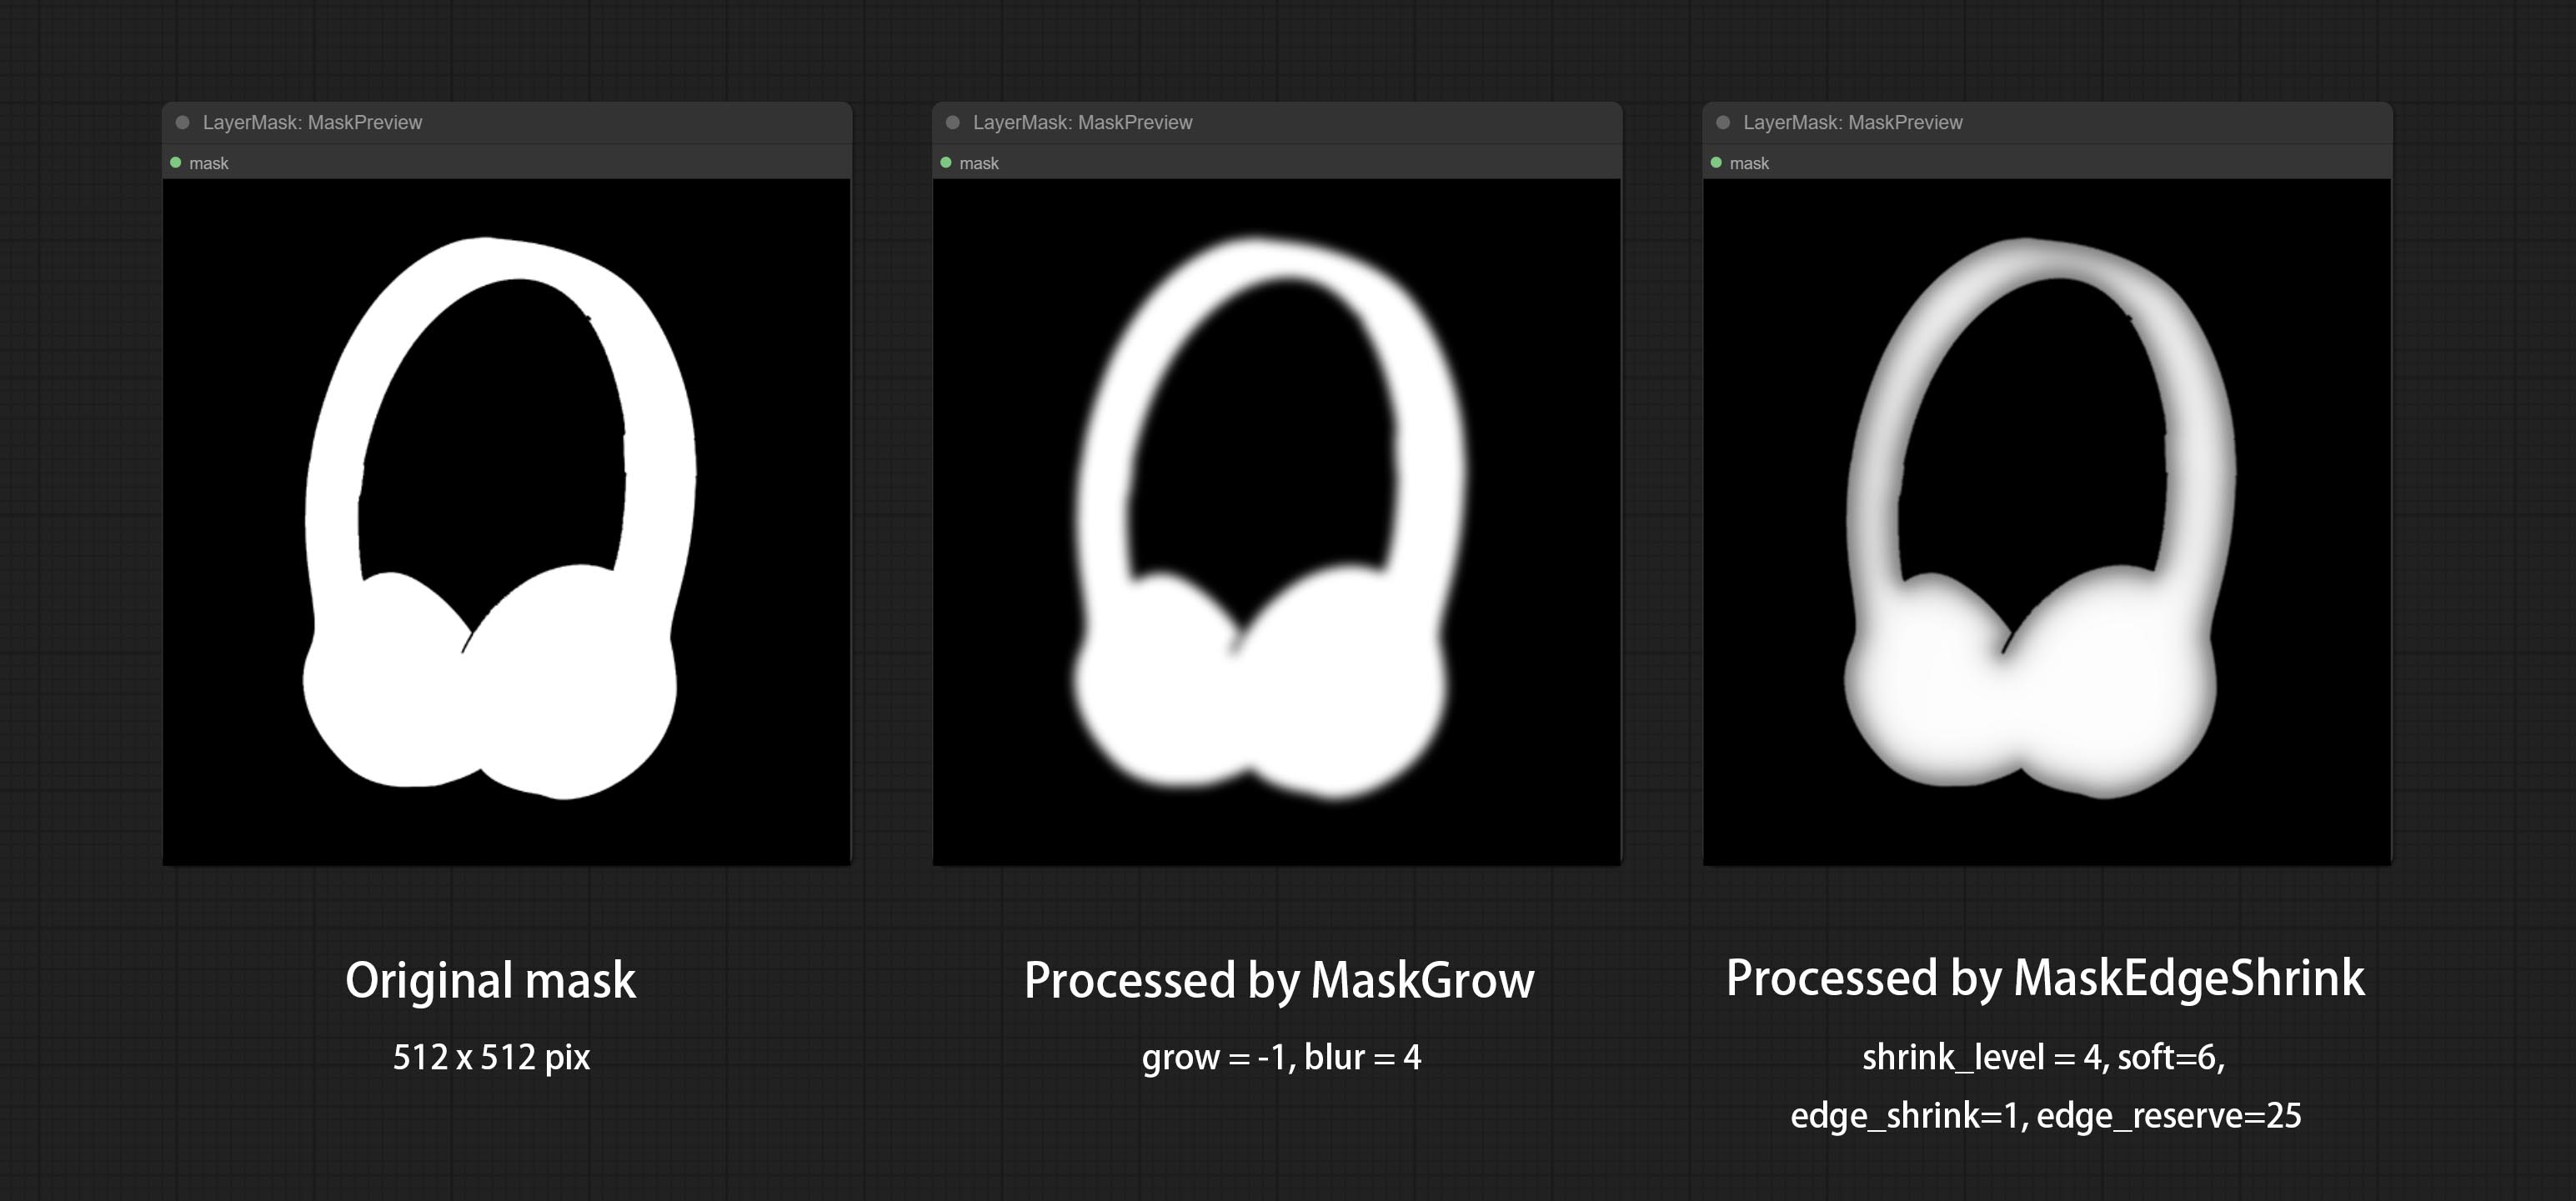
MaskMotionBlur
Create motion blur on the mask. 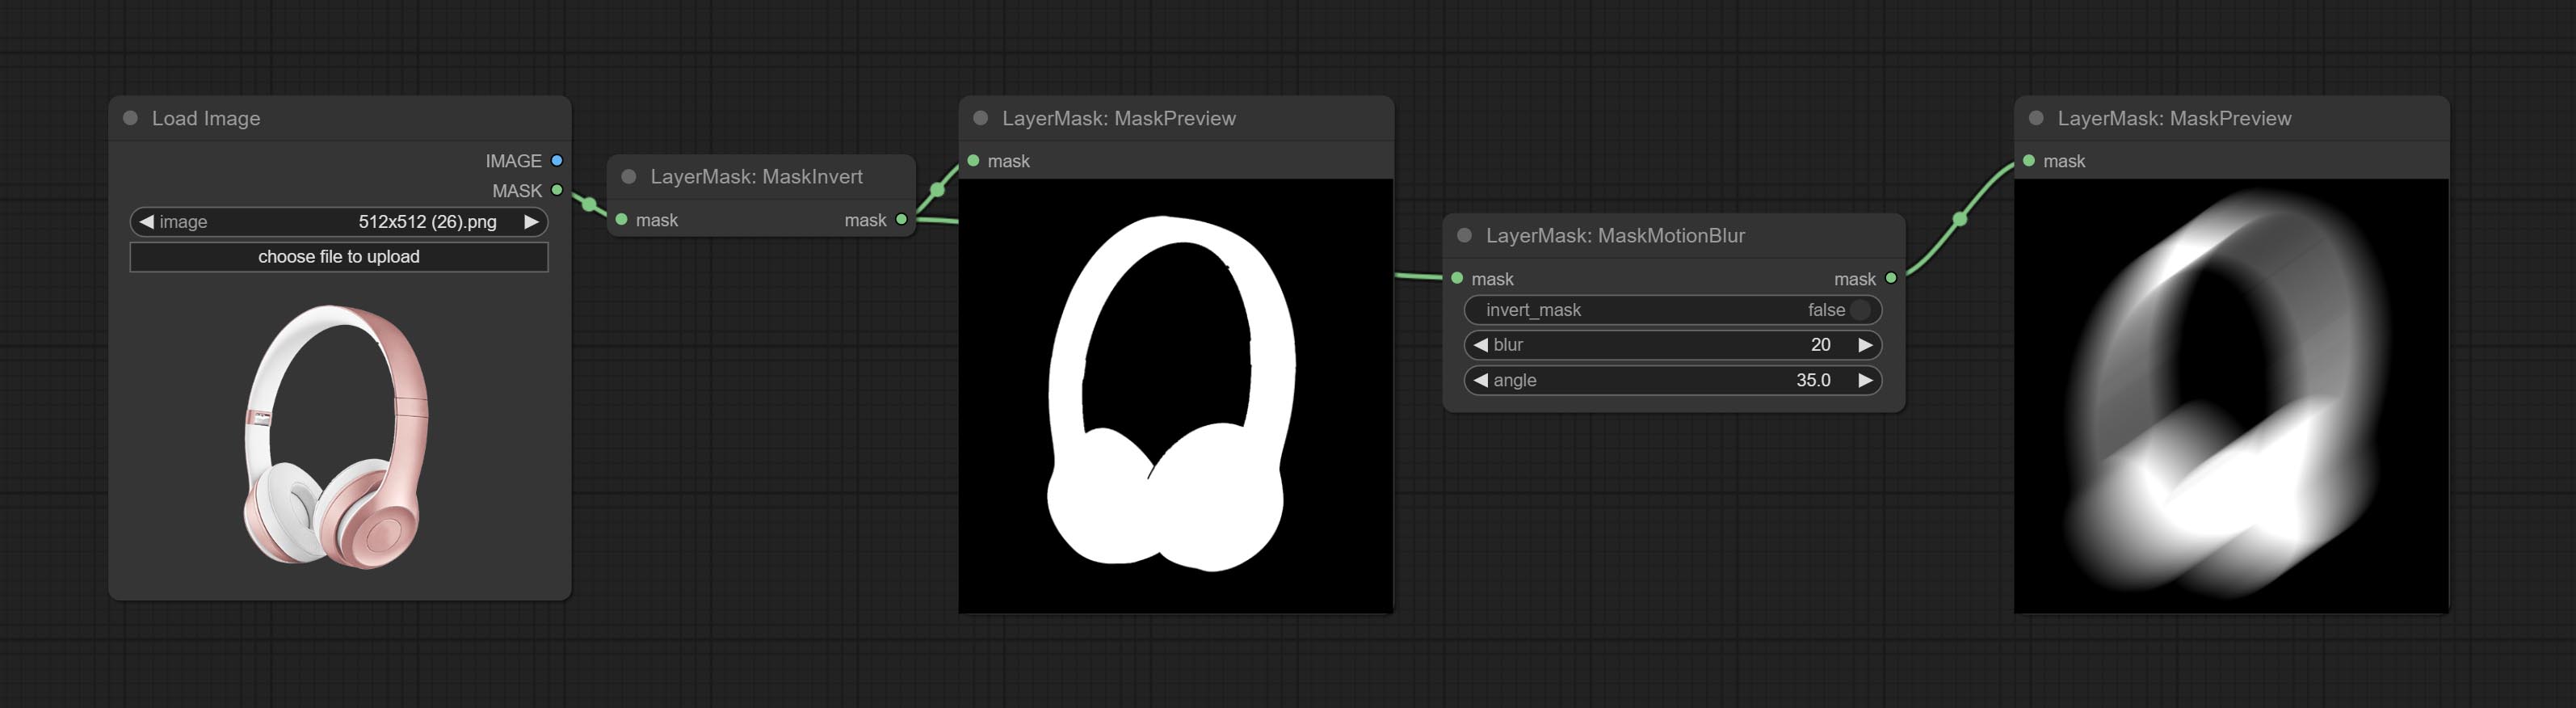
Node options:
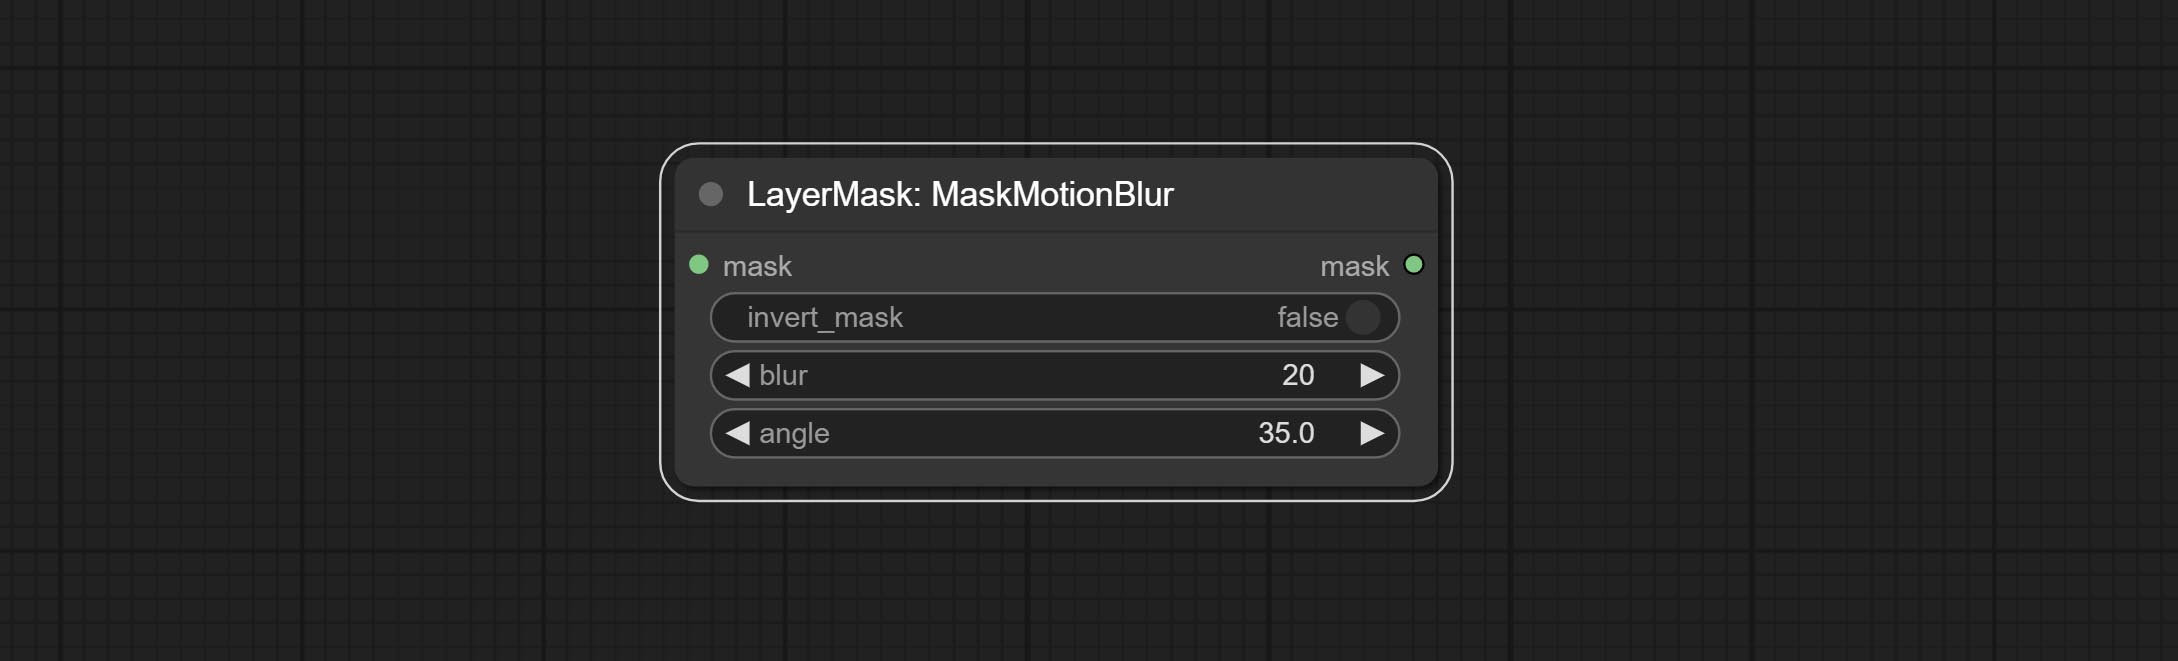
- invert_mask: Whether to reverse the mask.
- blur: The size of blur.
- angle: The angle of blur.
MaskGradient
Create a gradient for the mask from one side. please note the difference between this node and the CreateGradientMask node. 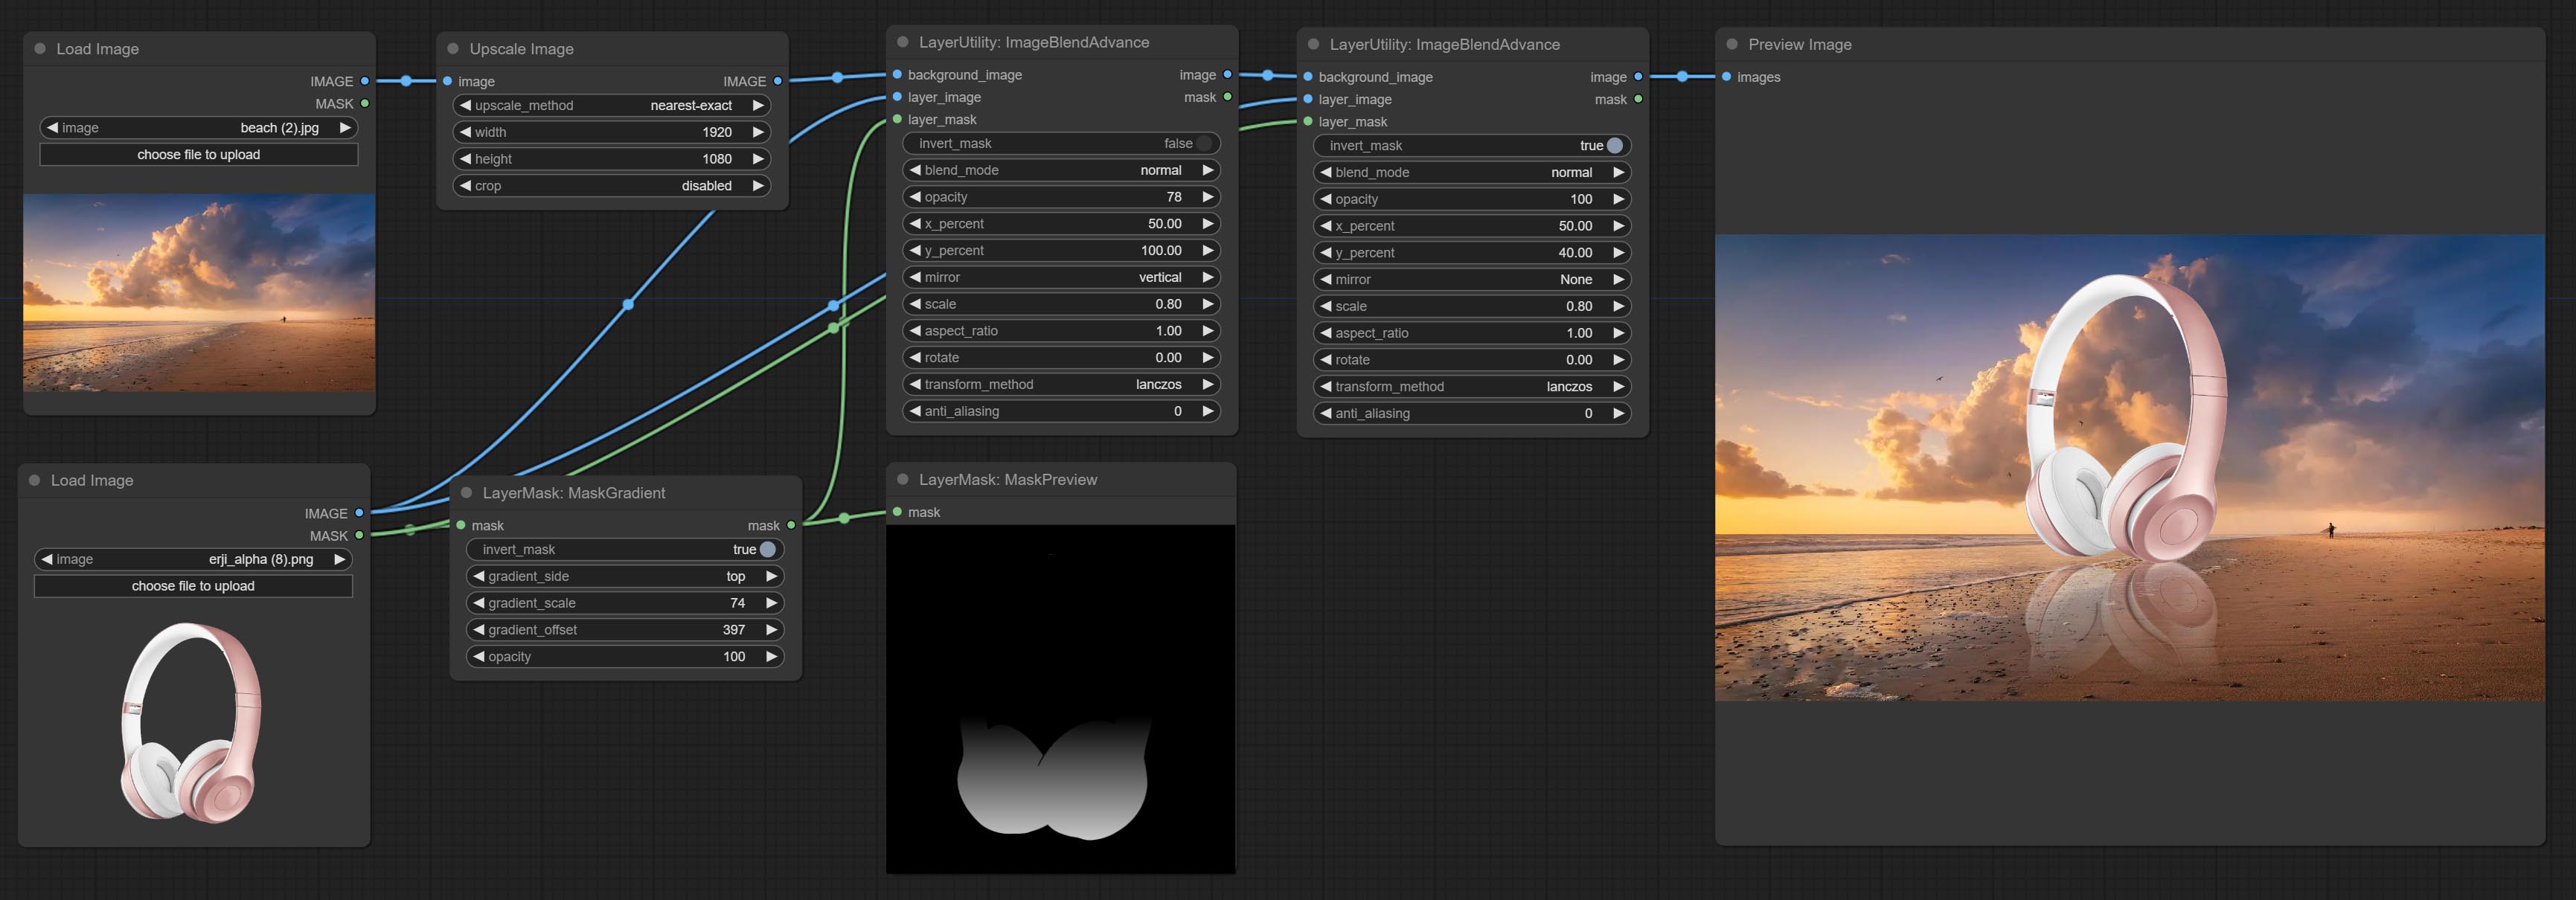
Node options: 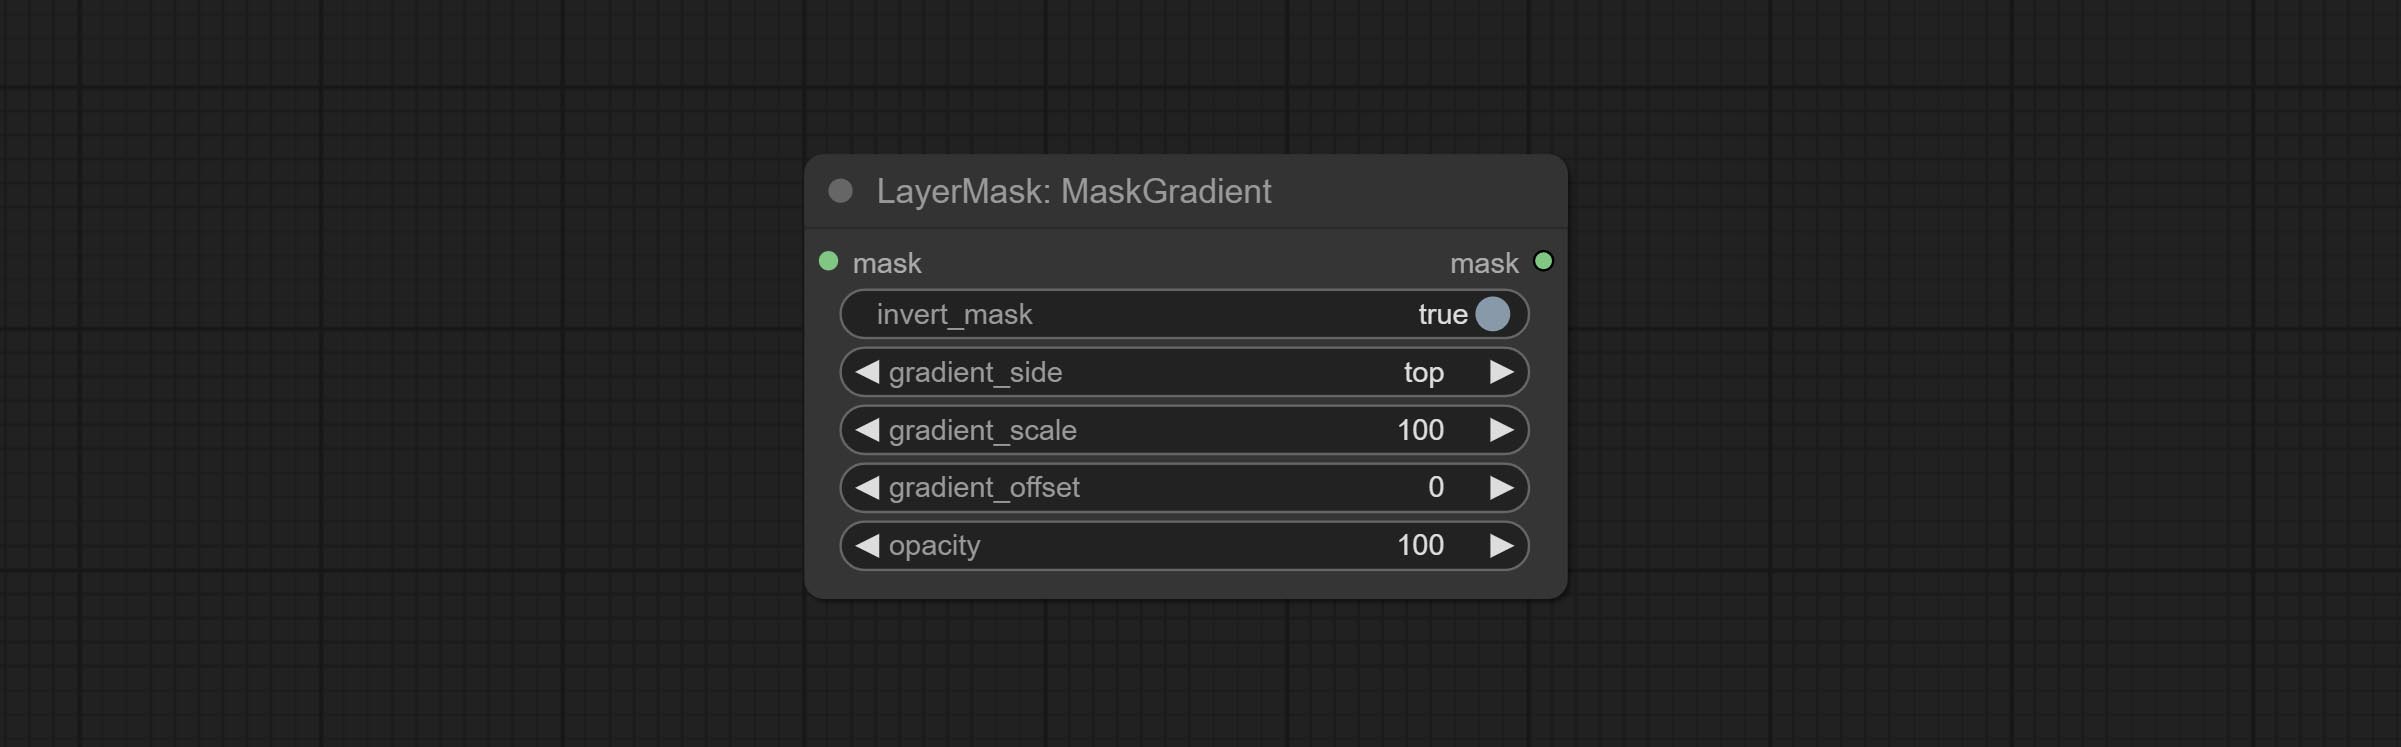
- invert_mask: Whether to reverse the mask.
- gradient_side: Generate gradient from which edge. There are four directions: top, bottom, left and right.
- gradient_scale: Gradient distance. The default value of 100 indicates that one side of the gradient is completely transparent and the other side is completely opaque. The smaller the value, the shorter the distance from transparent to opaque.
- gradient_offset: Gradient position offset.
- opacity: The opacity of the gradient.
CreateGradientMask
Create a gradient mask. please note the difference between this node and the MaskGradient node. 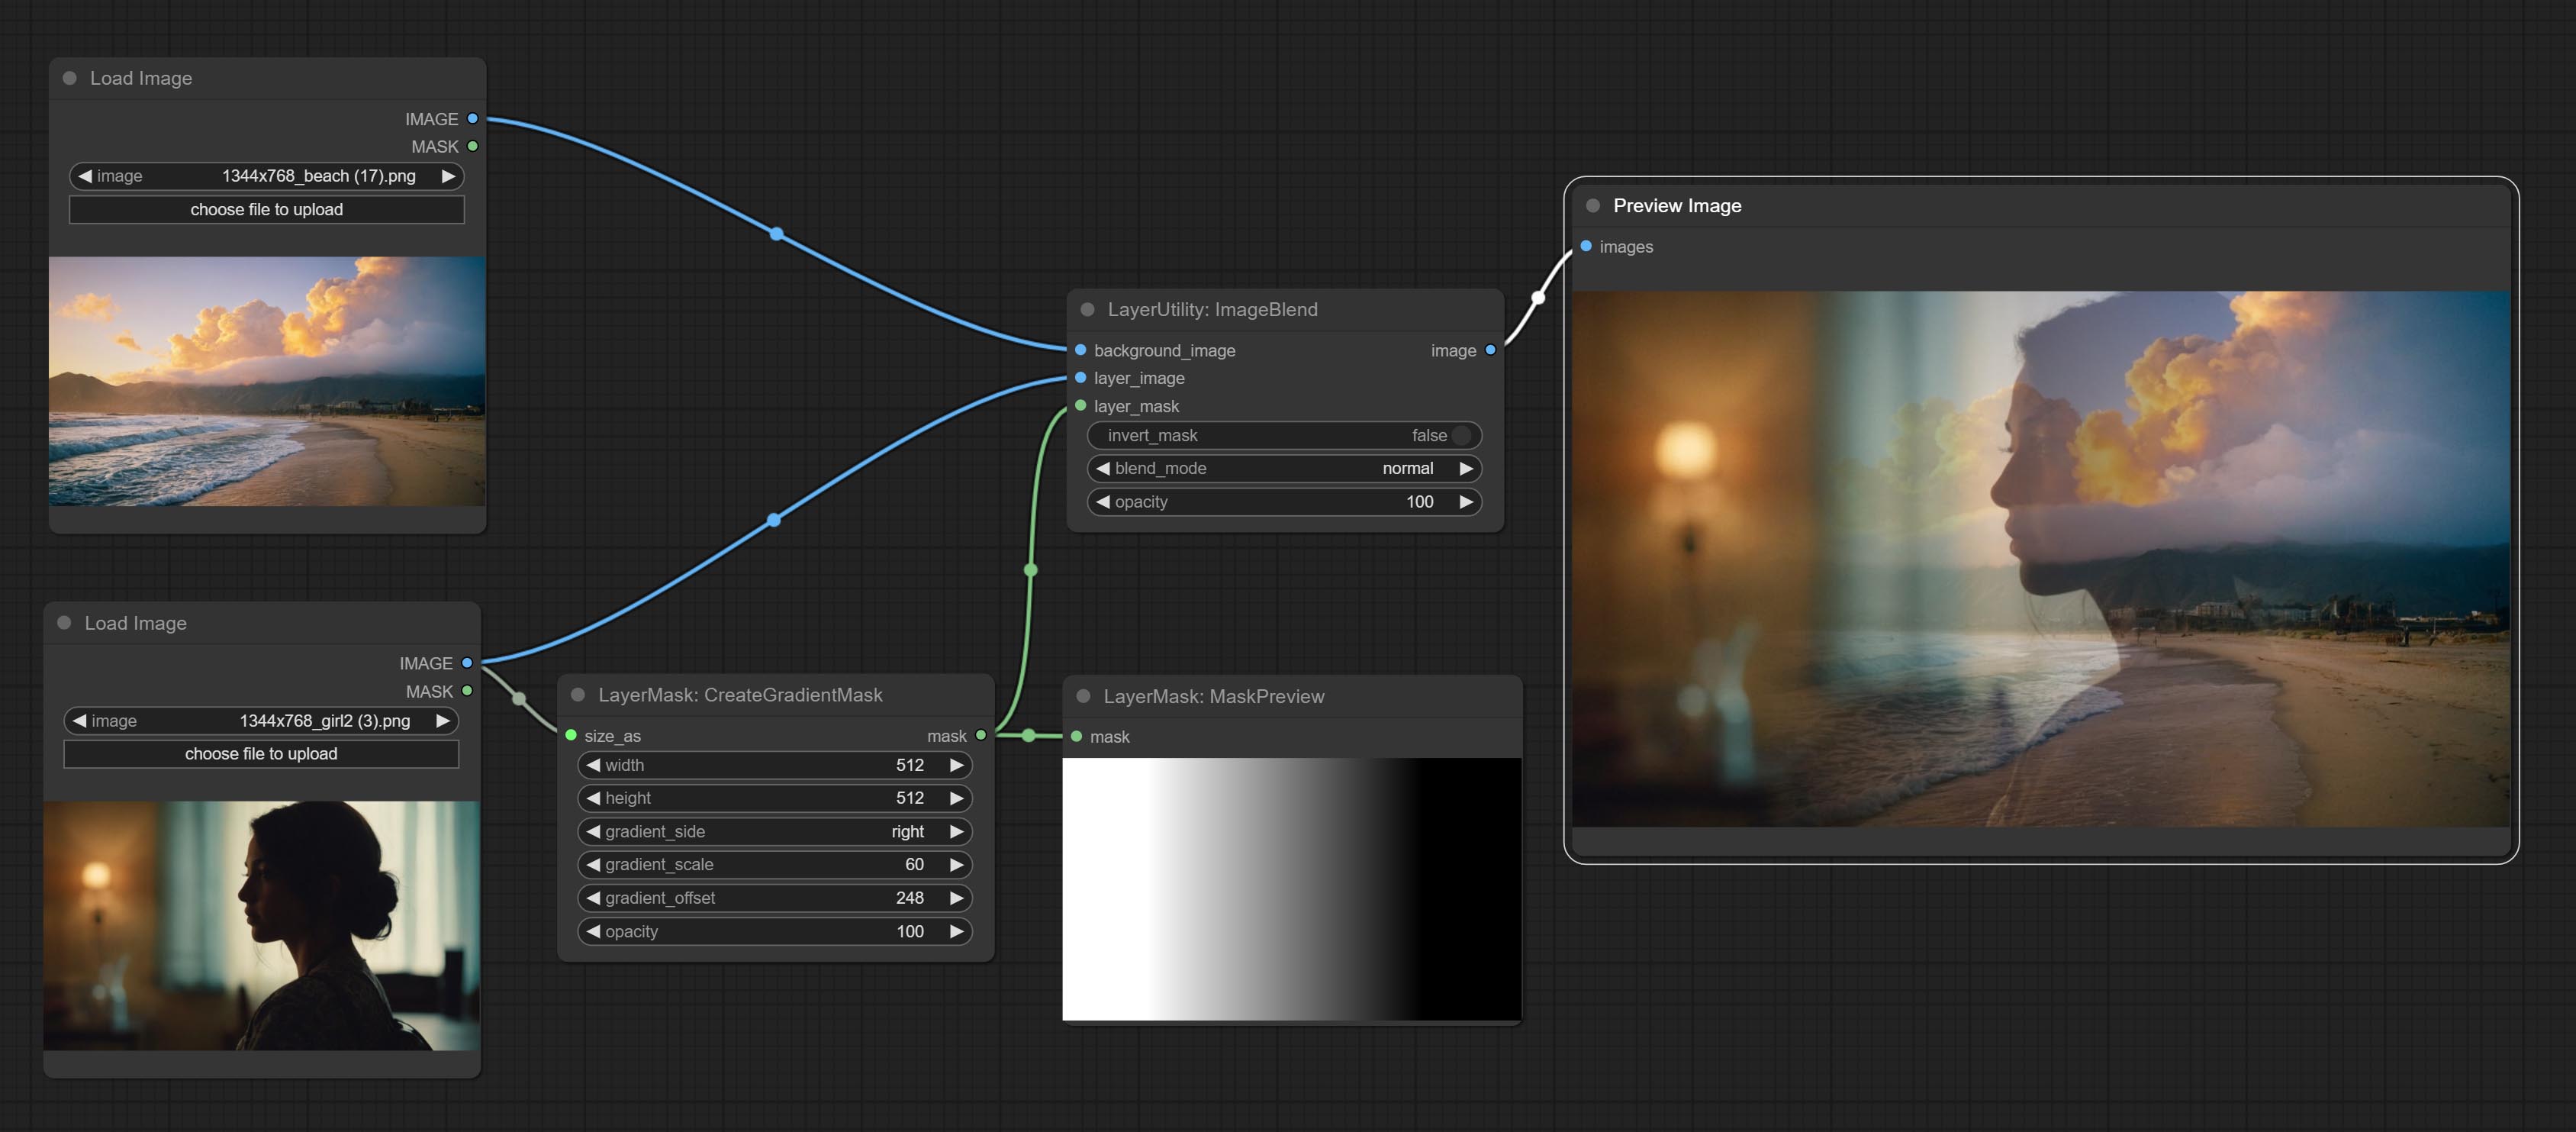
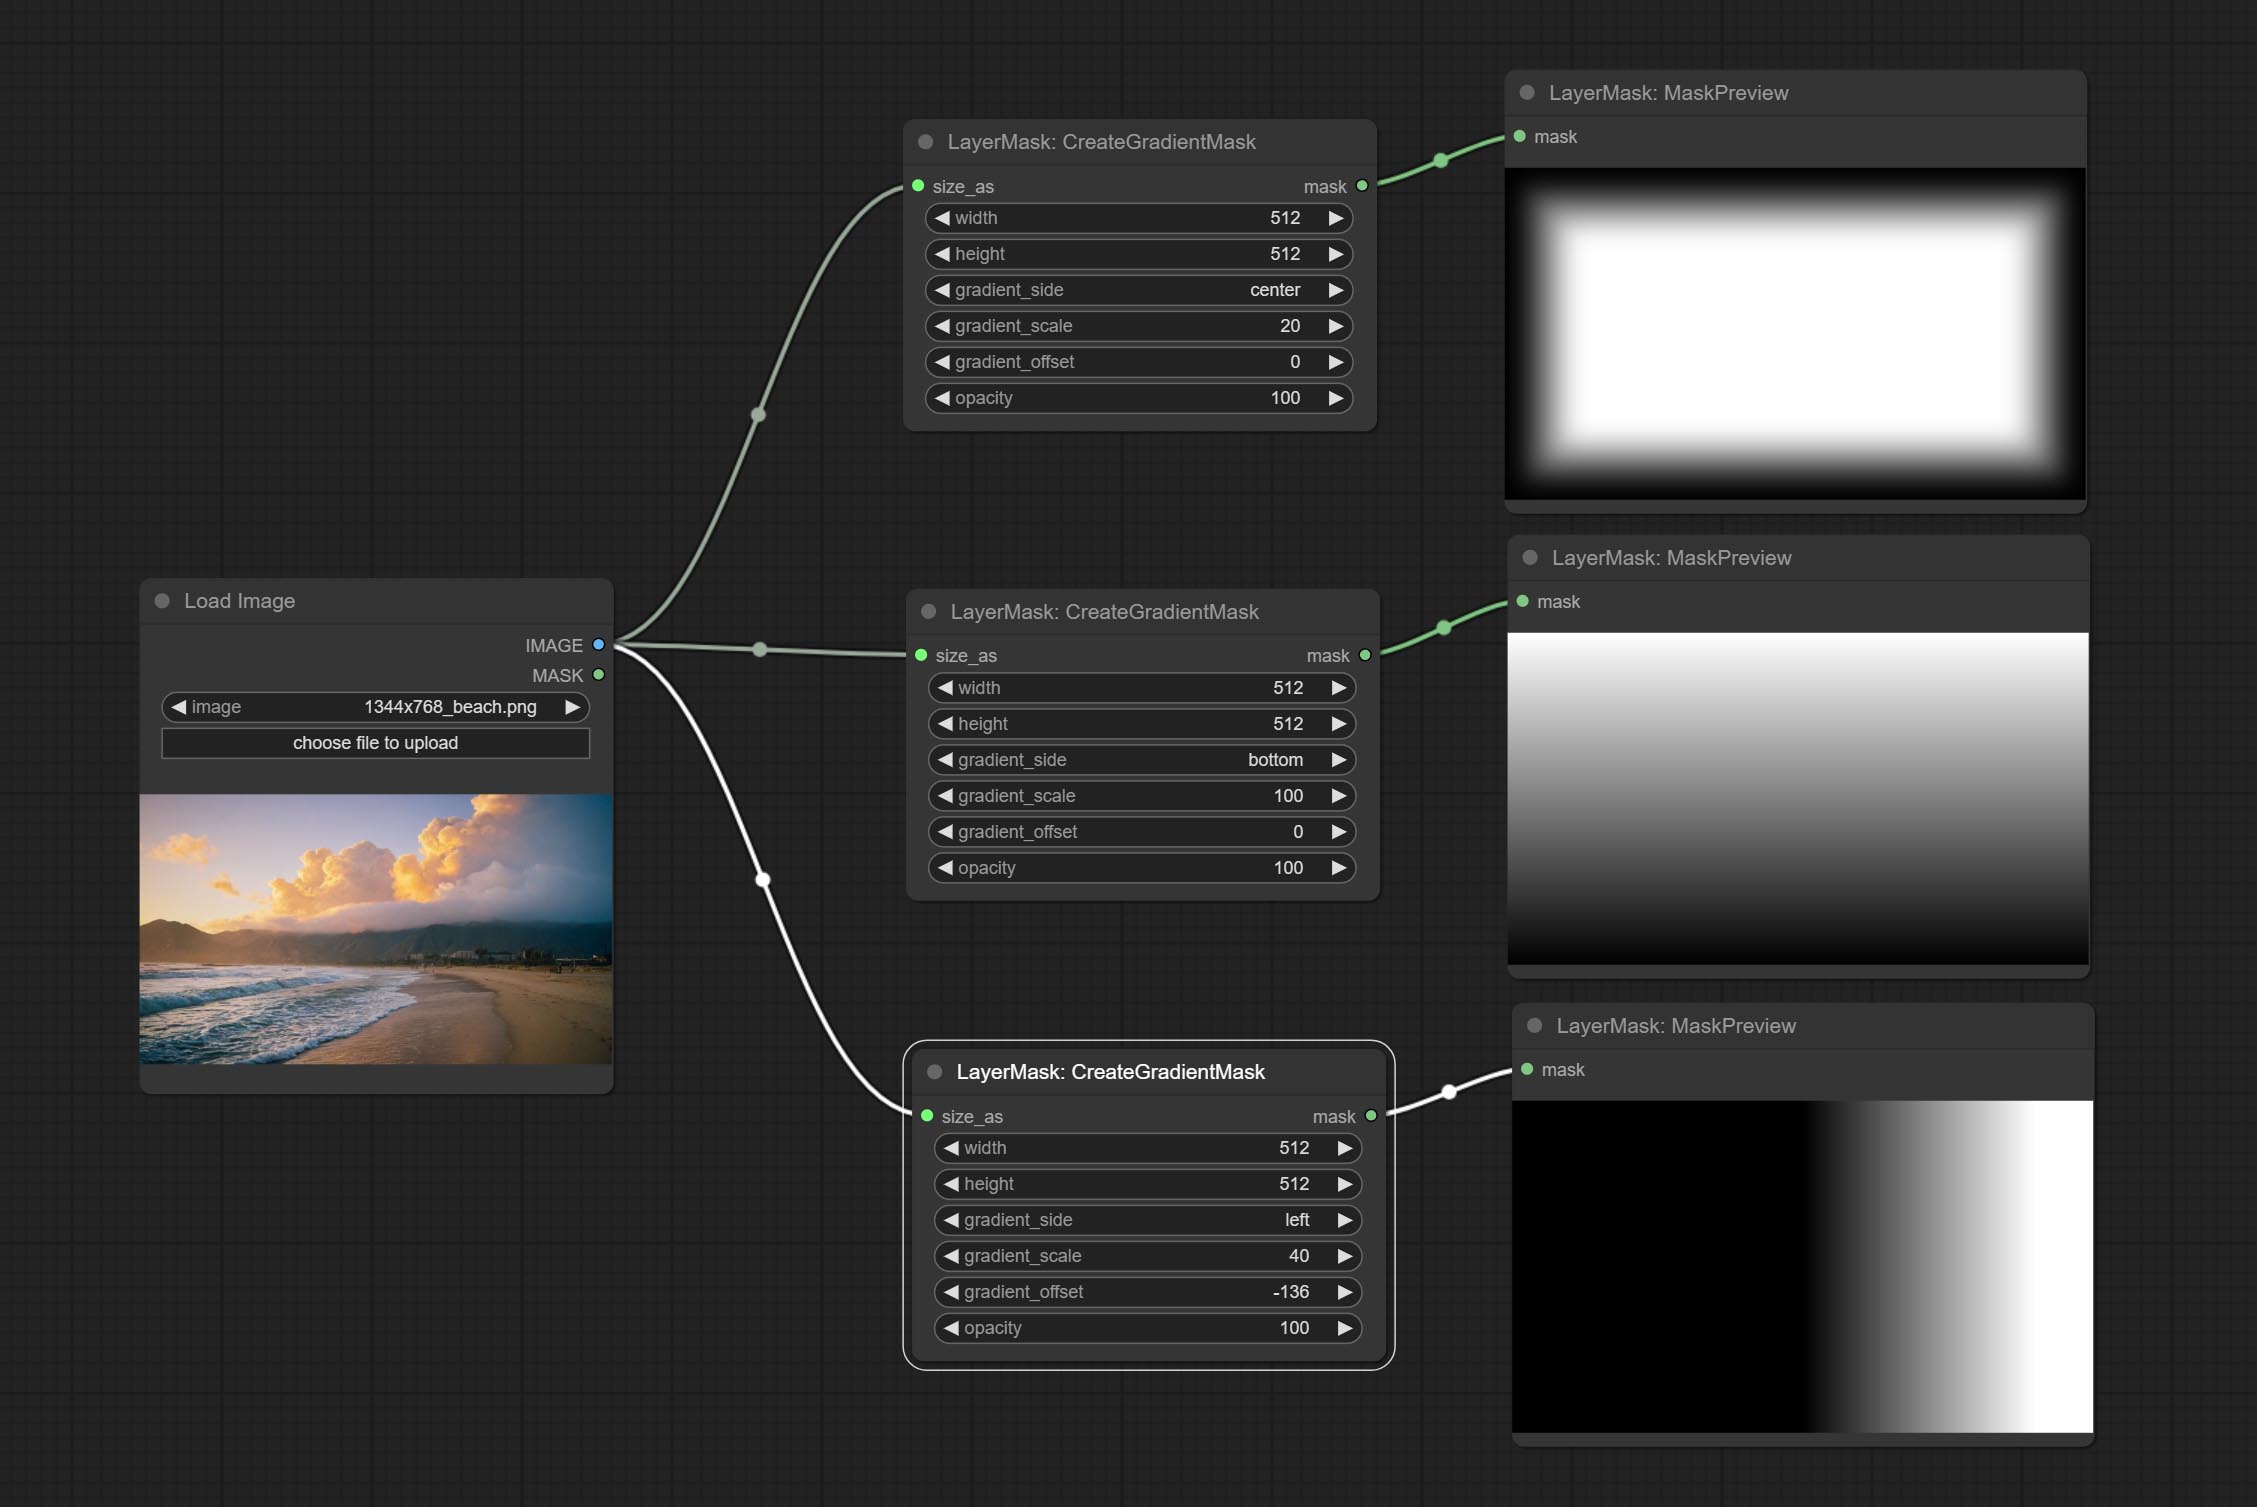
Node options:

- size_as * : The input image or mask here will generate the output image and mask according to their size. this input takes priority over the width and height below.
- width: Width of the image. If there is a size_as input, this setting will be ignored.
- height: Height of the image. If there is a size_as input, this setting will be ignored.
- gradient_side: Generate gradient from which edge. There are five directions: top, bottom, left, right and center.
- gradient_scale: Gradient distance. The default value of 100 indicates that one side of the gradient is completely transparent and the other side is completely opaque. The smaller the value, the shorter the distance from transparent to opaque.
- gradient_offset: Gradient position offset. When
gradient_side is center, the size of the gradient area is adjusted here, positive values are smaller, and negative values are enlarged. - opacity: The opacity of the gradient.
* Only limited to input image and mask. forcing the integration of other types of inputs will result in node errors.
MaskStroke
Generate mask contour strokes. 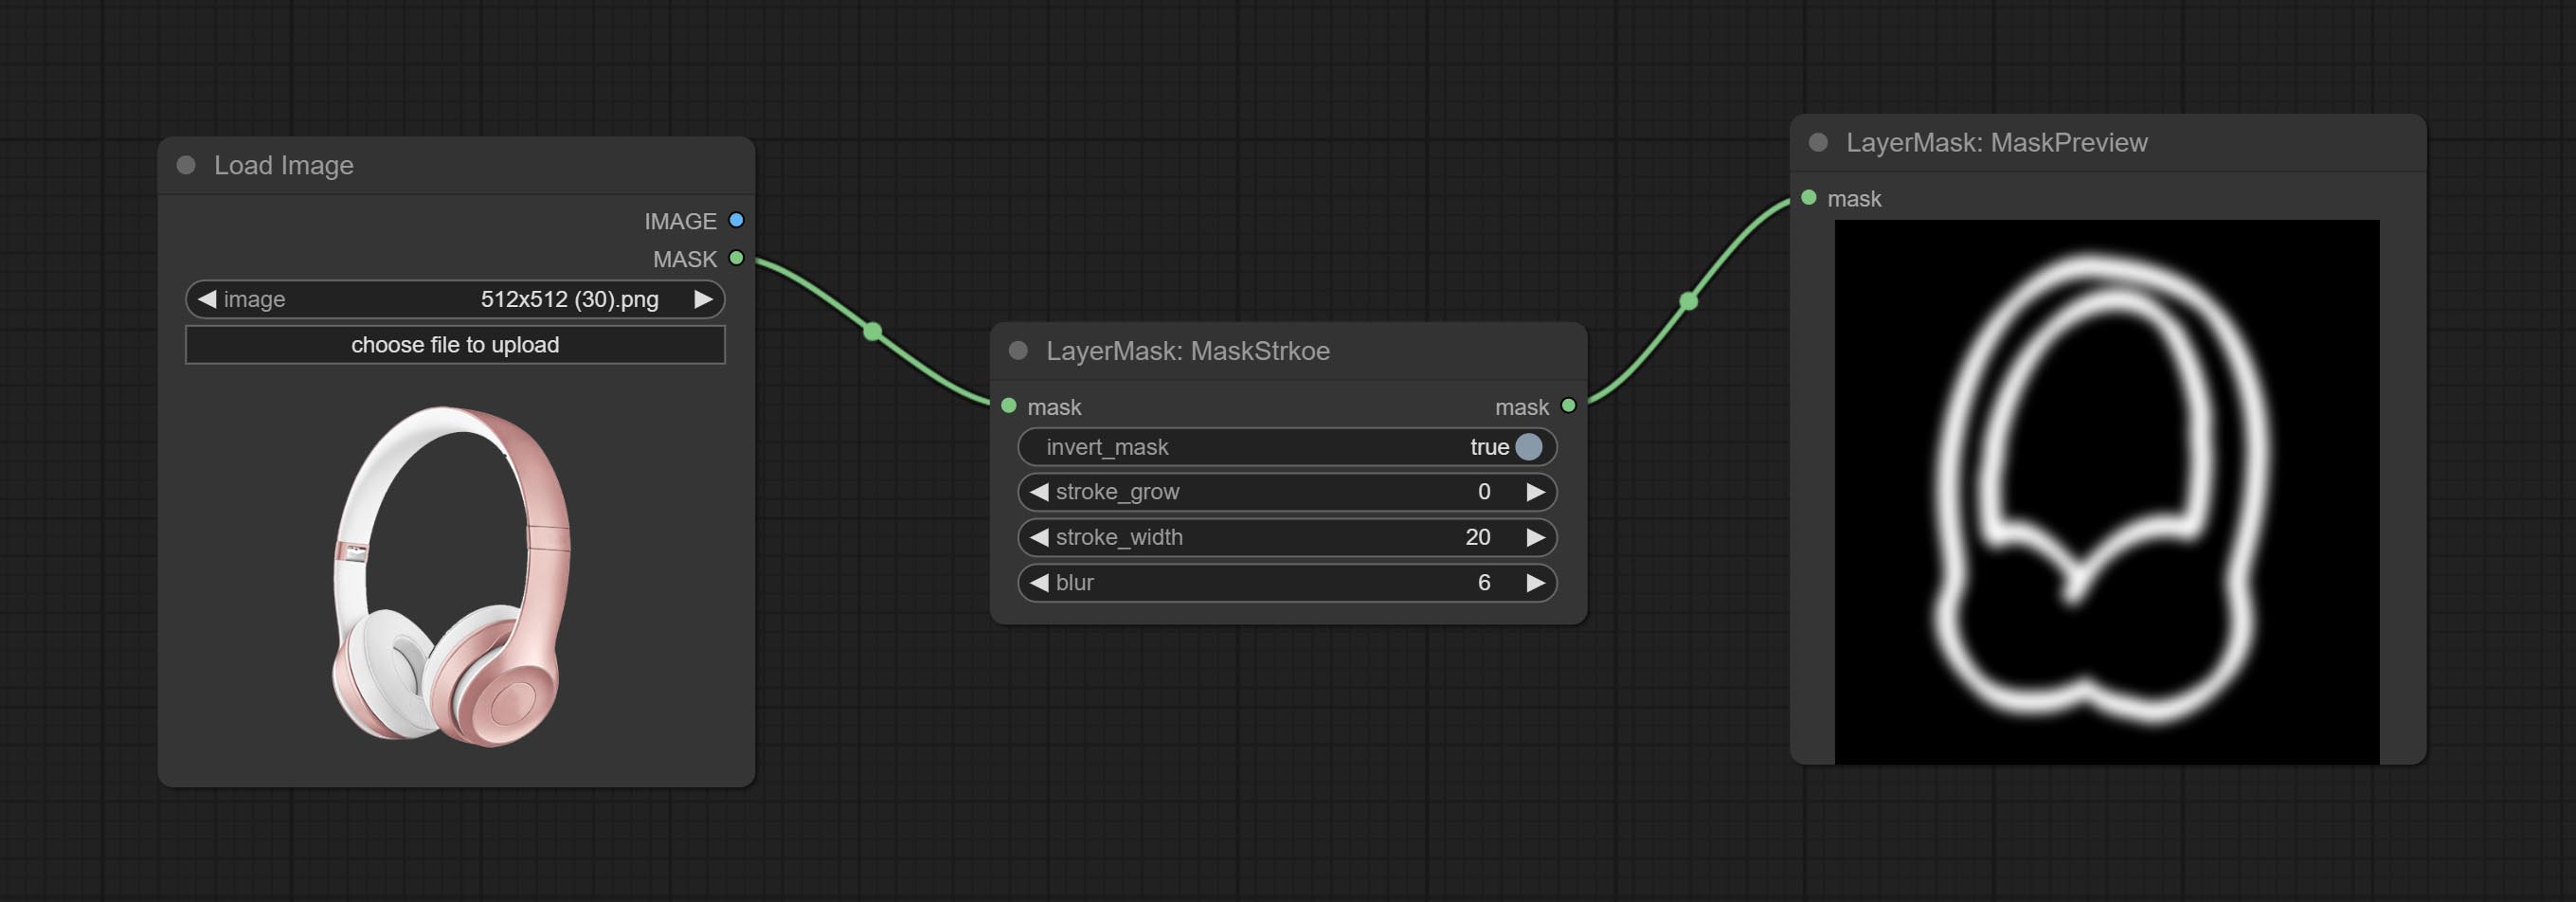
Node options:
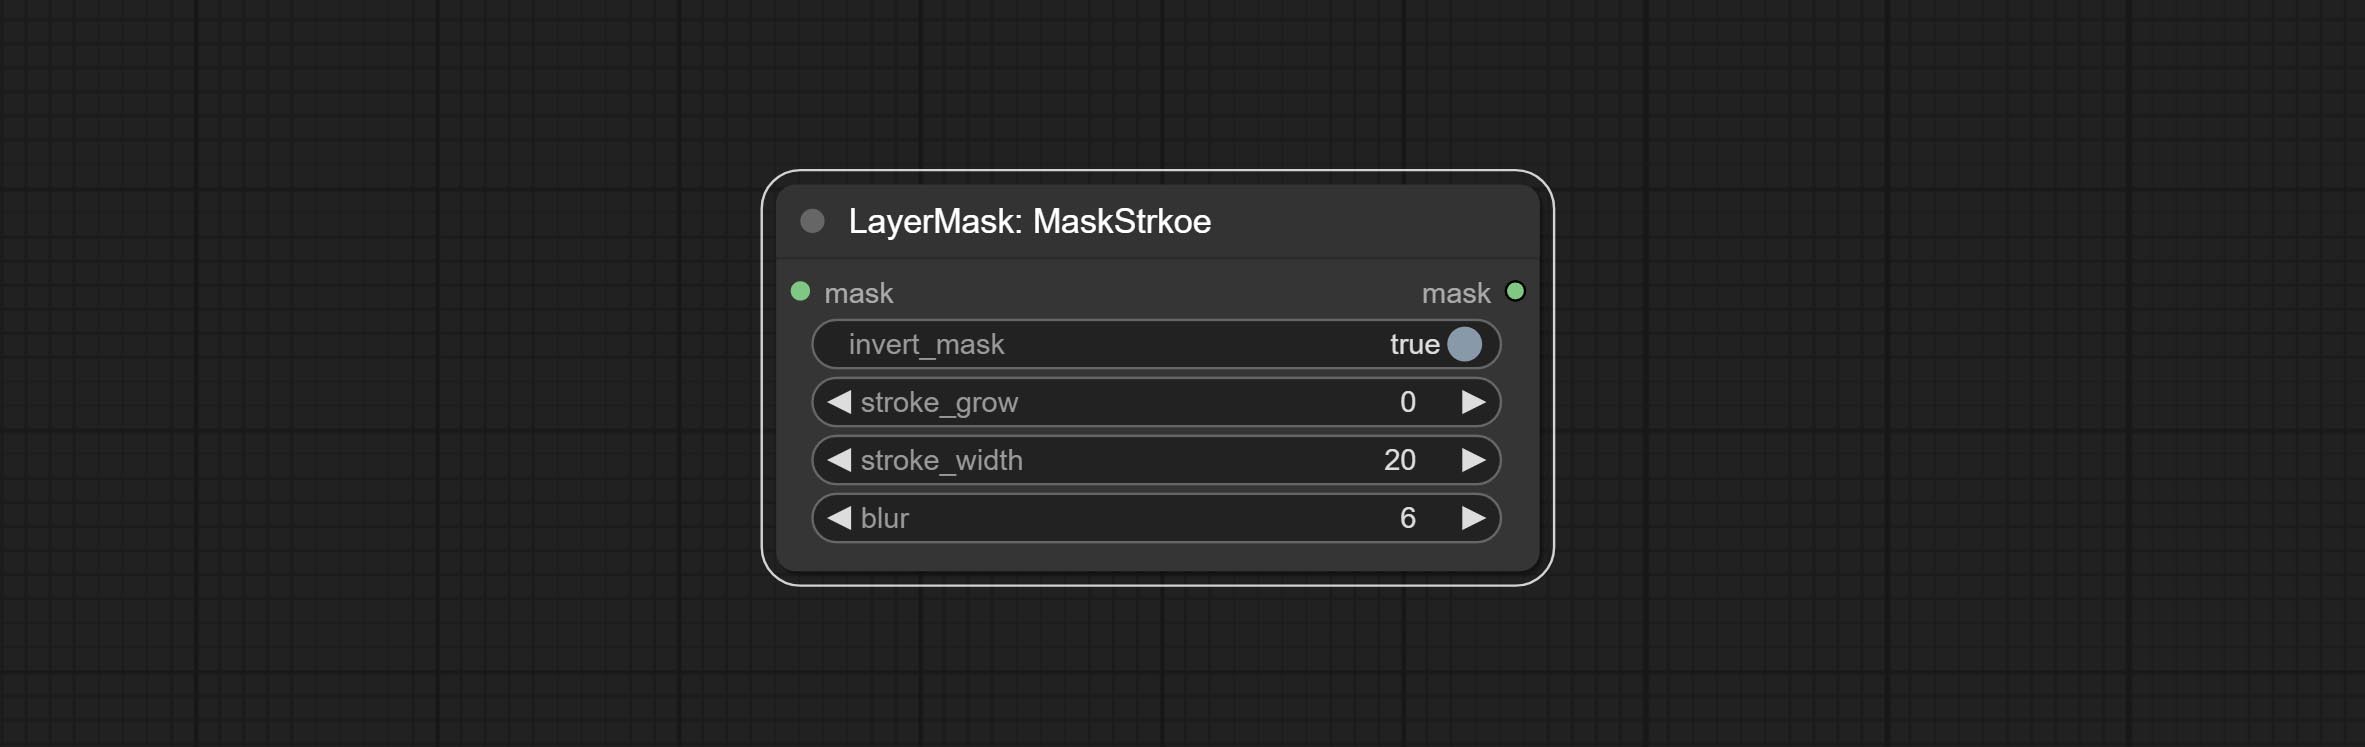
- invert_mask: Whether to reverse the mask.
- stroke_grow: Stroke expansion/contraction amplitude, positive values indicate expansion and negative values indicate contraction.
- stroke_width: Stroke width.
- blur: Blur of stroke.
MaskGrain
Generates noise for the mask. 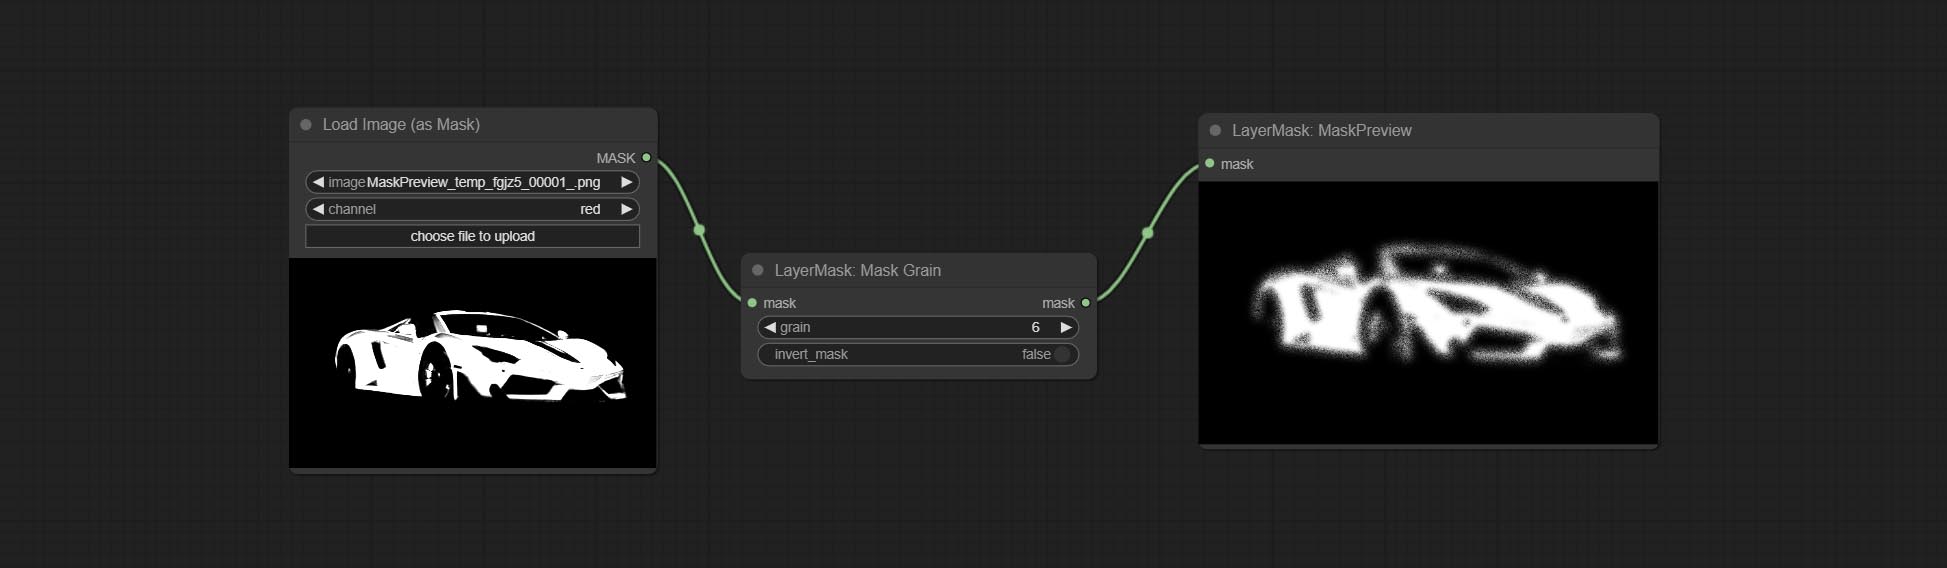
Node Options:
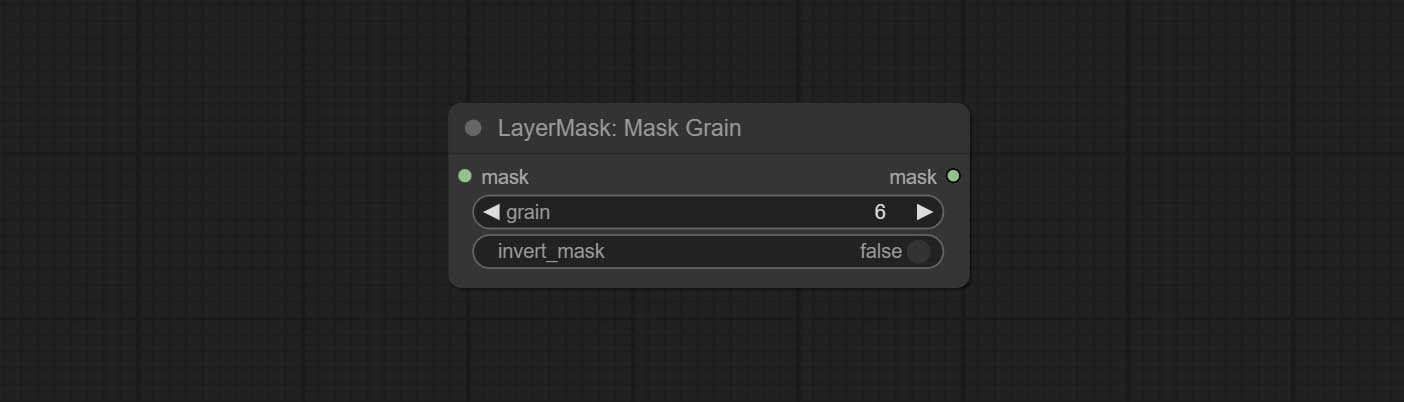
- grain: Noise intensity.
- invert_mask: Whether to reverse the mask.
MaskPreview
Preview the input mask 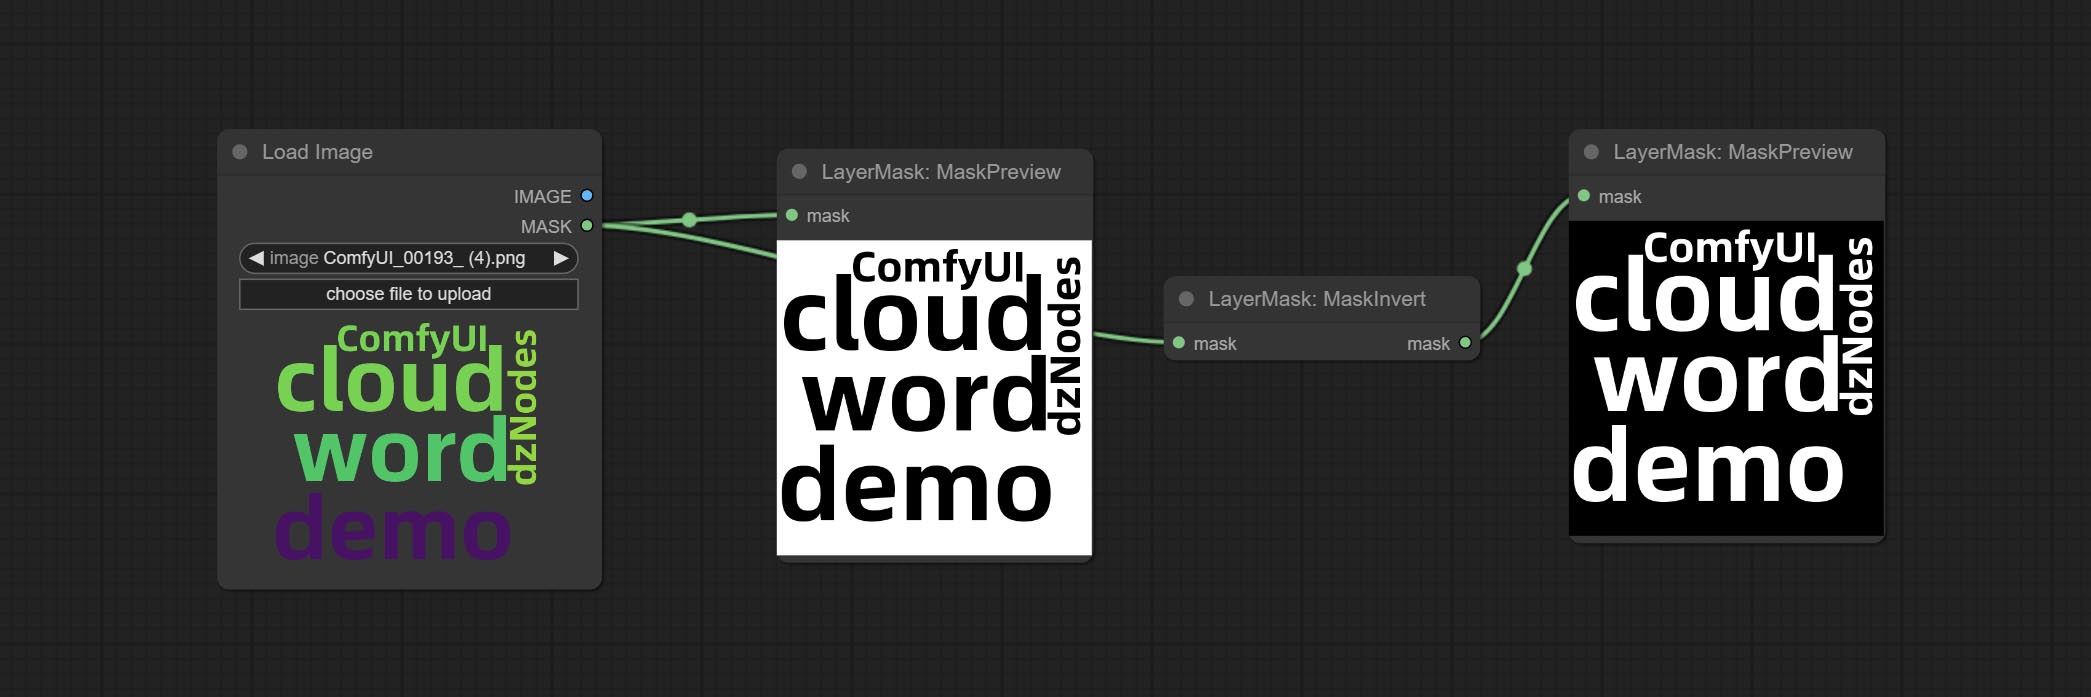
MaskInvert
Invert the mask 
LayerFilter
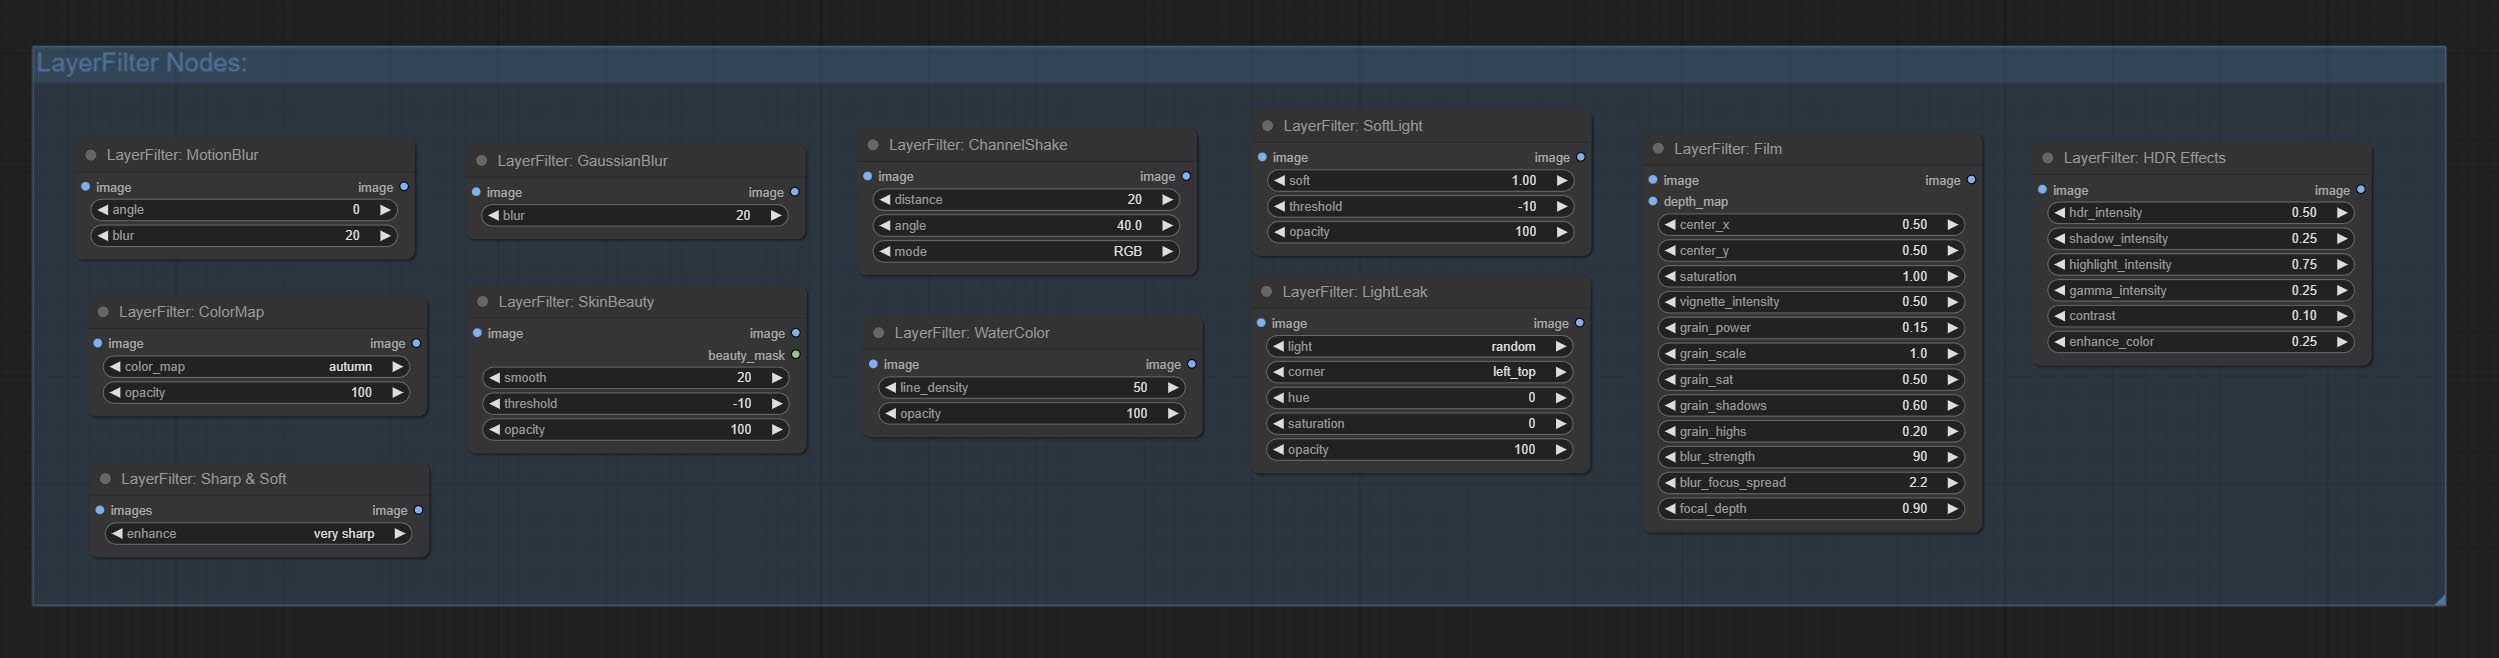
Sharp & Soft
Enhance or smooth out details for image. 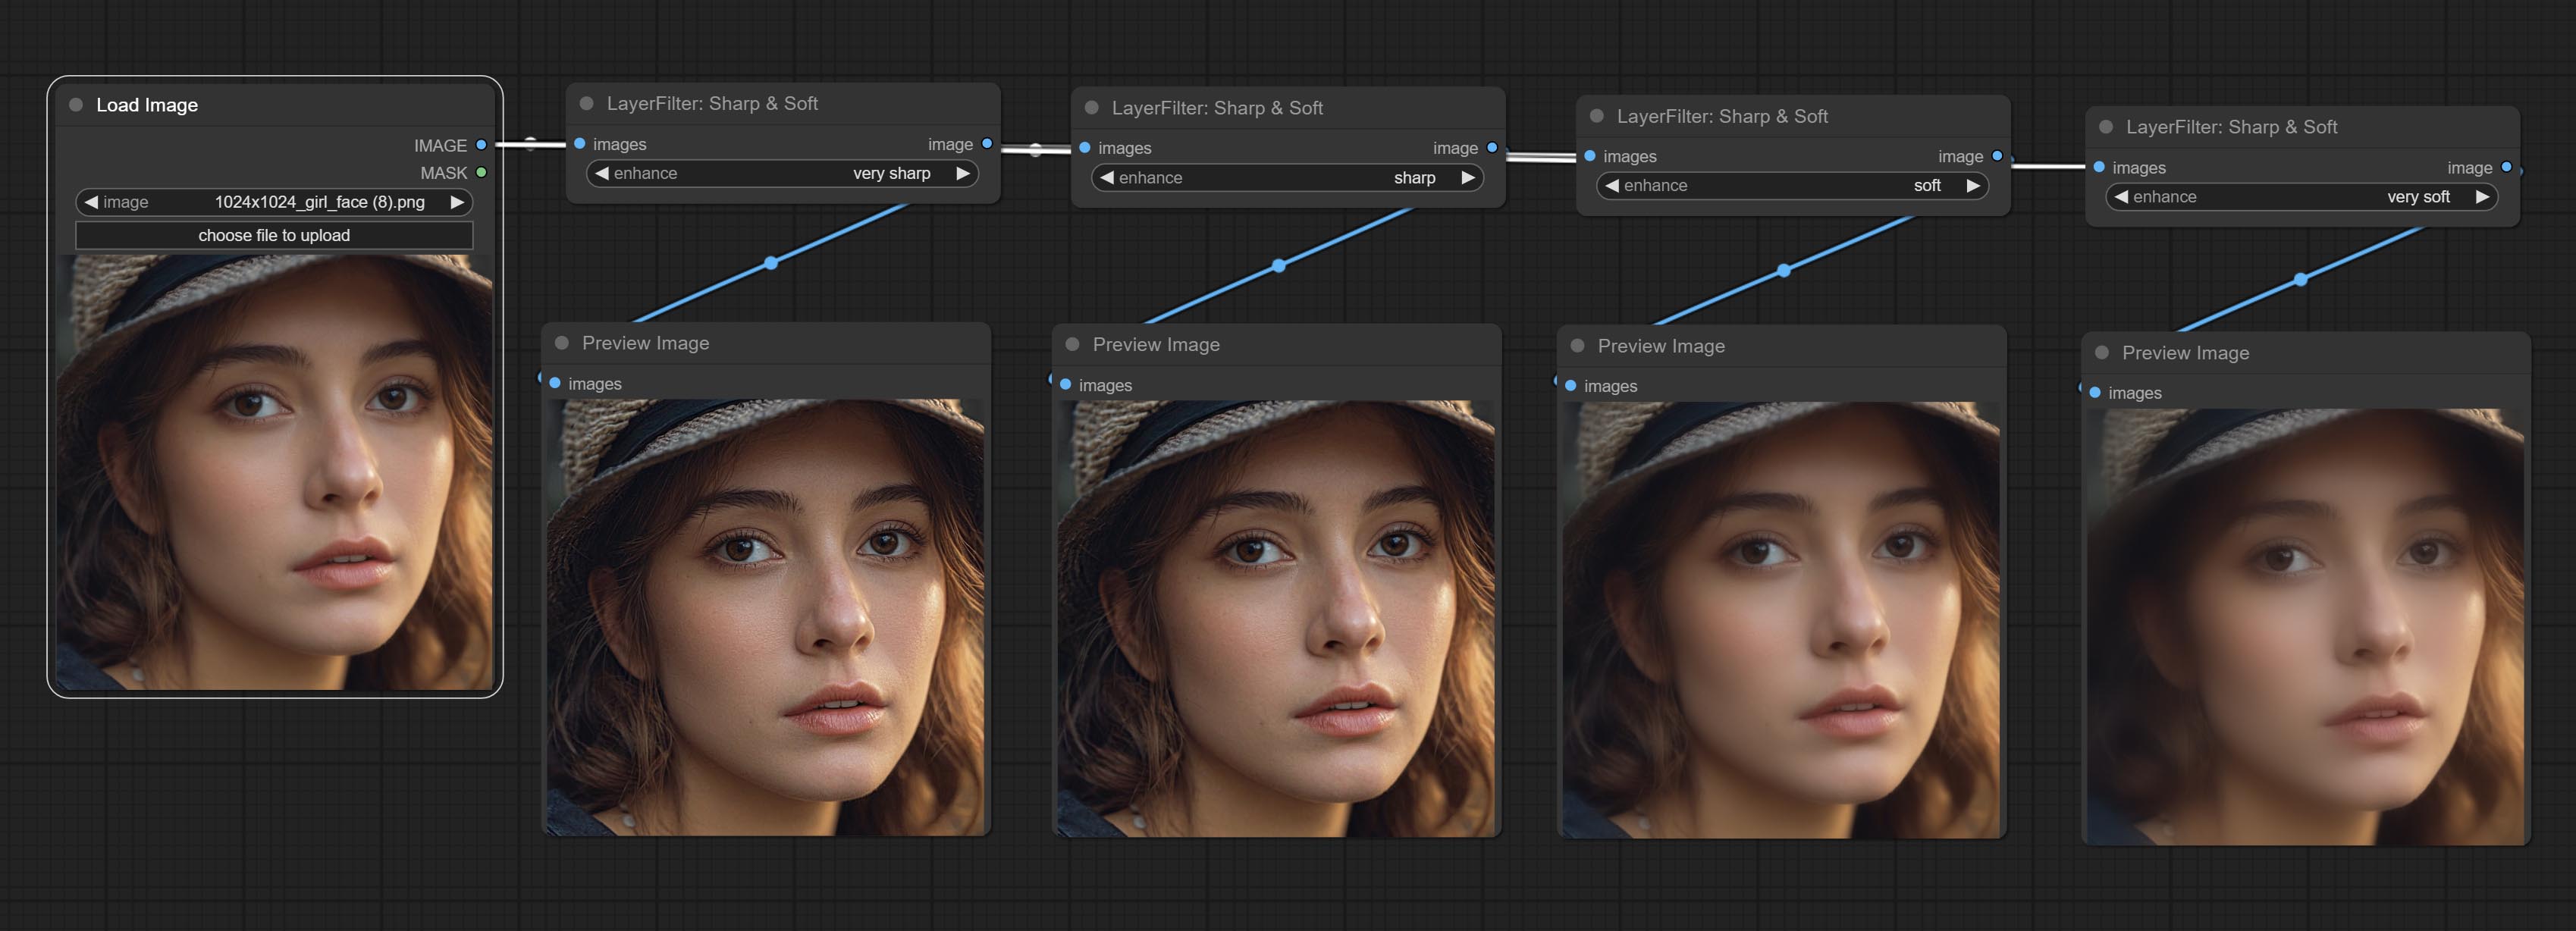
Node options: 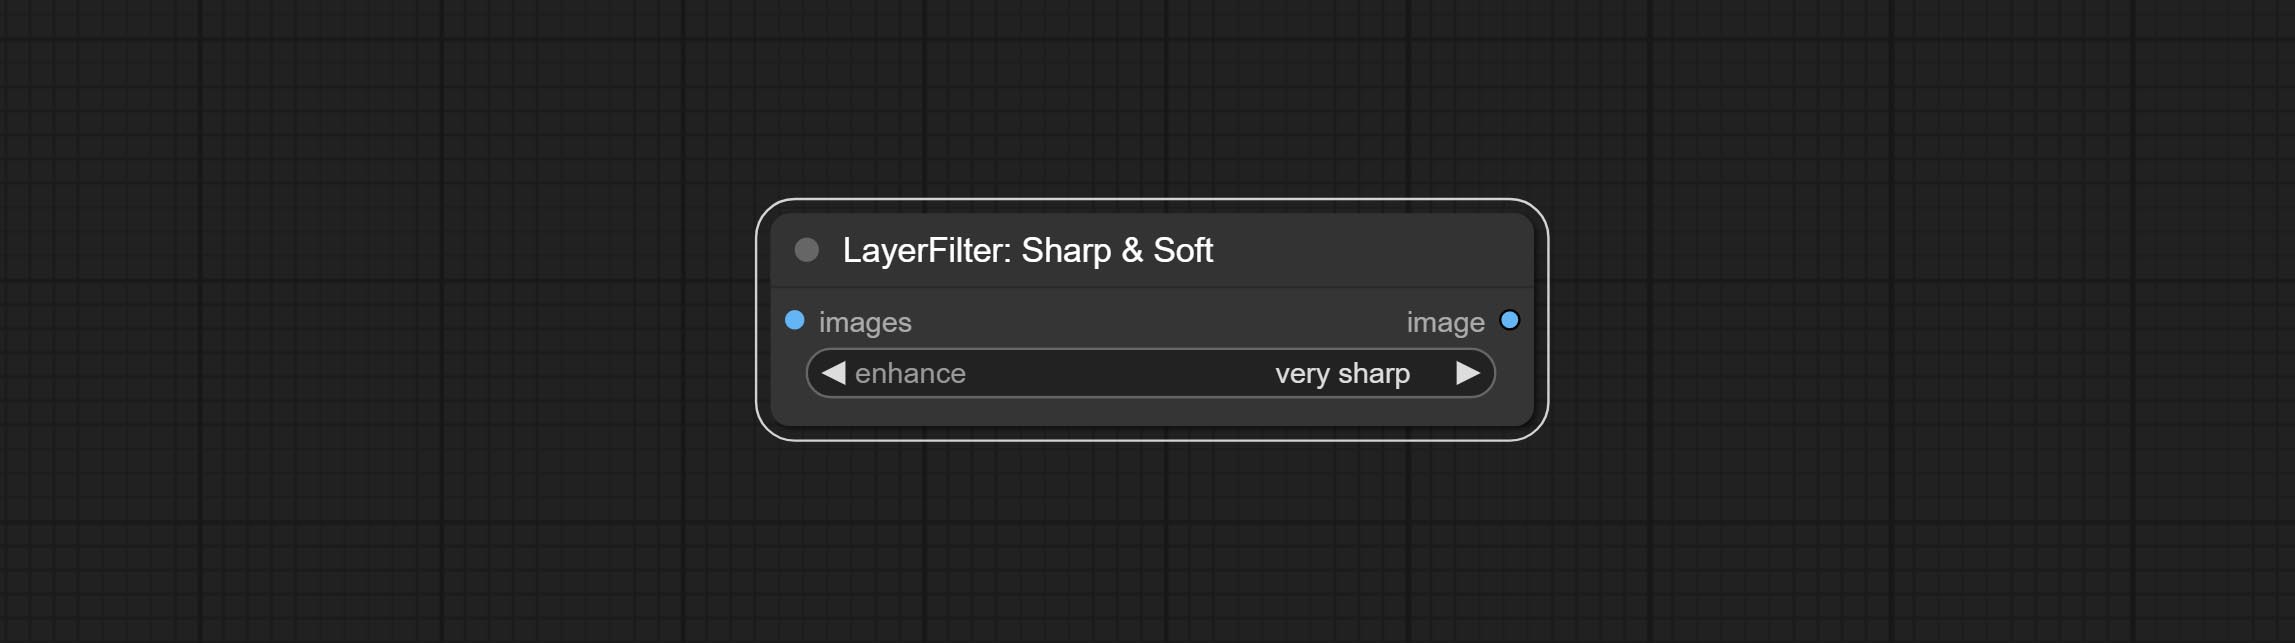
- enhance: Provide 4 presets, which are very sharp, sharp, soft and very soft. If you choose None, you will not do any processing.
SkinBeauty
Make the skin look smoother. 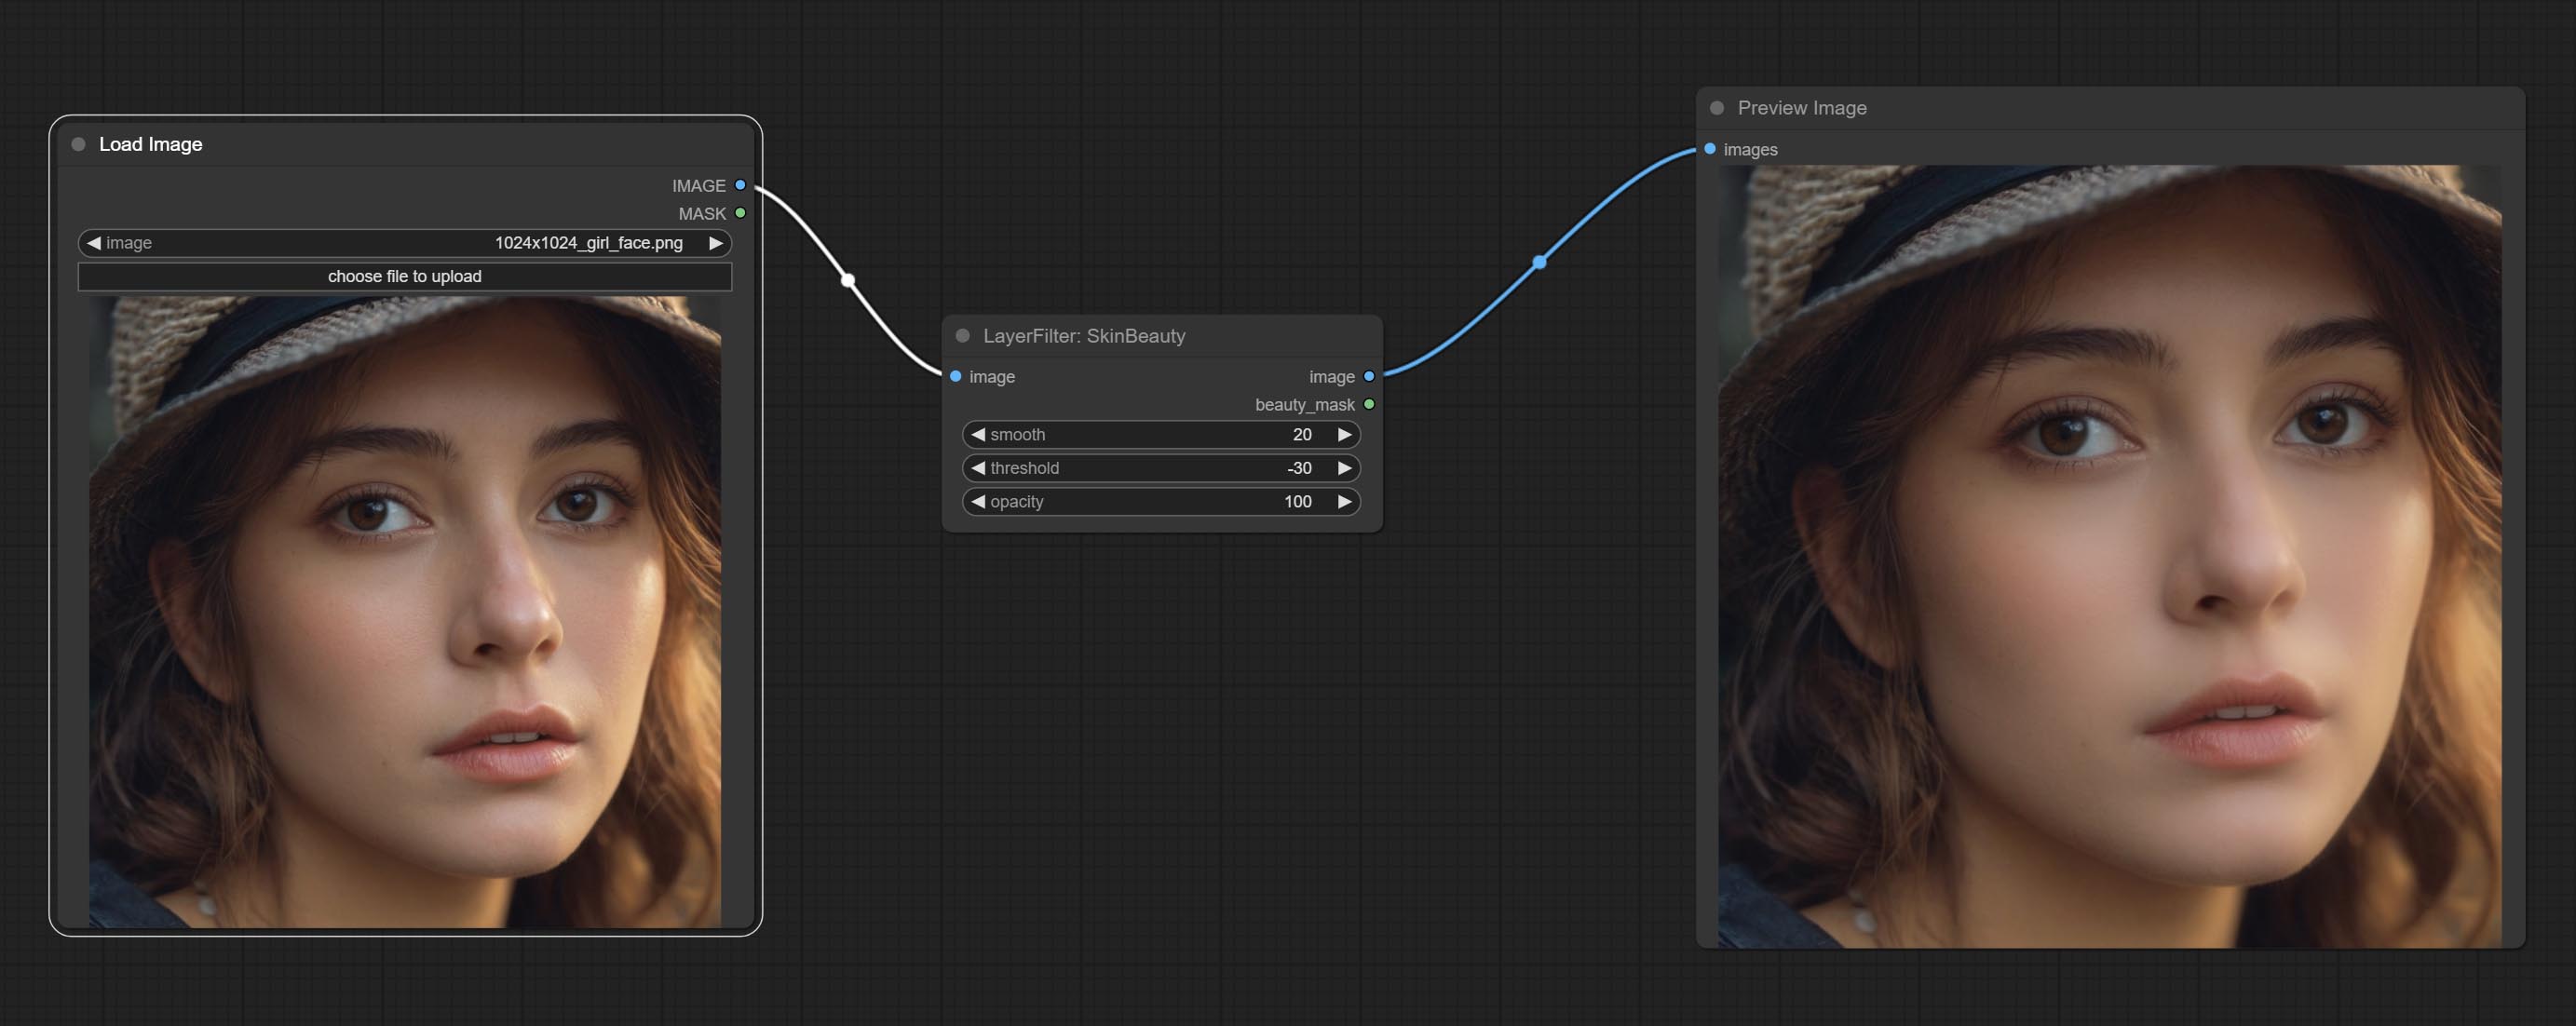
Node options: 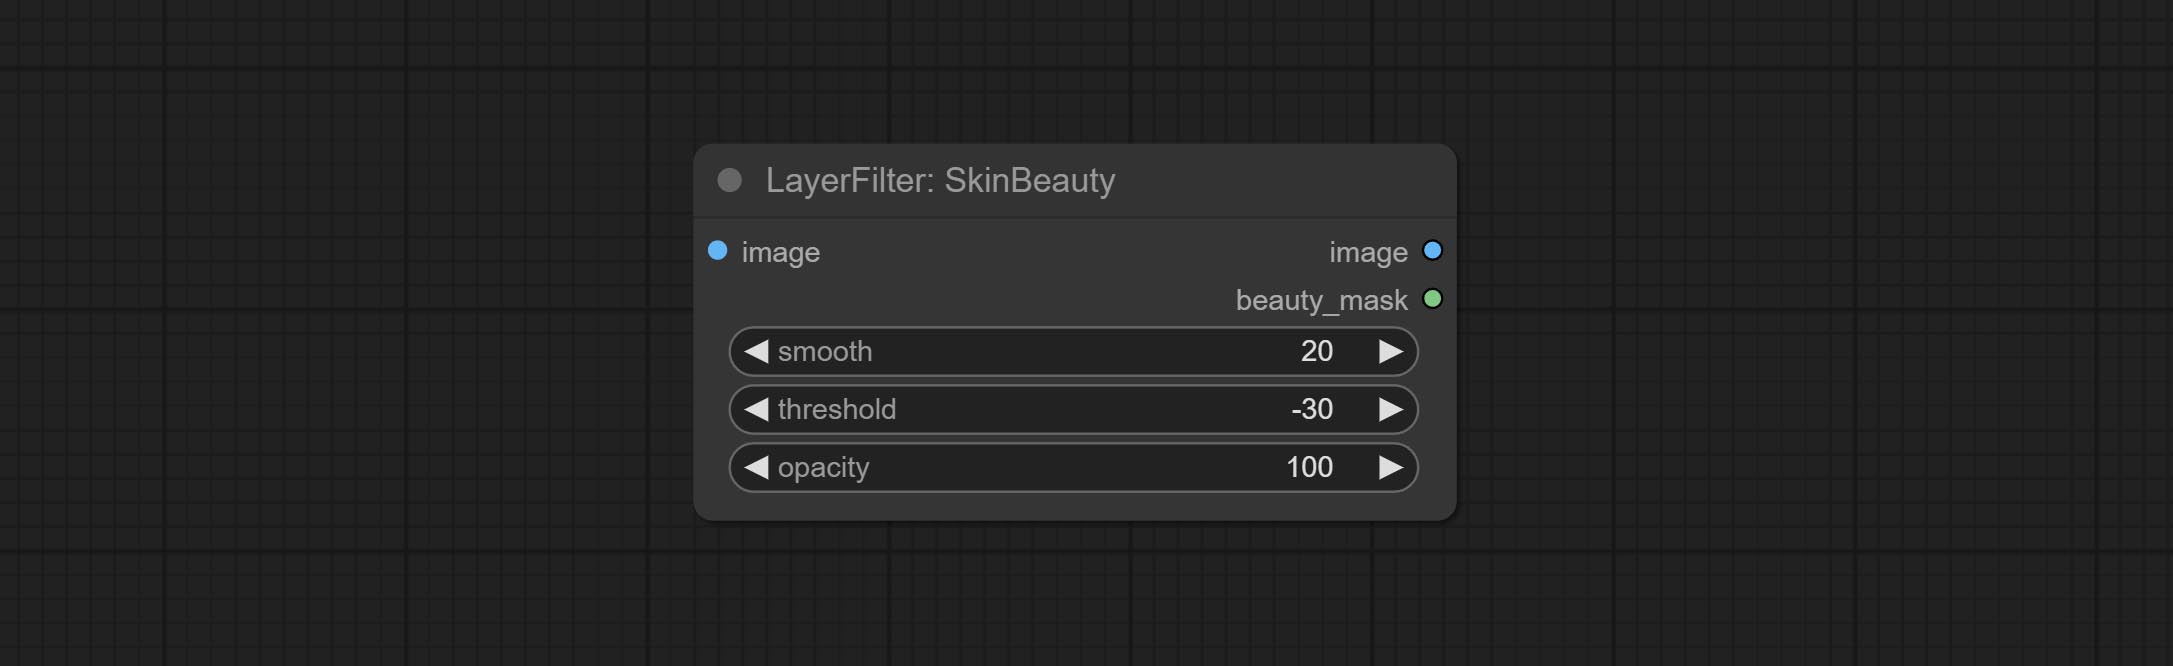
- smooth: Skin smoothness.
- threshold: Smooth range. the larger the range with the smaller value.
- opacity: The opacity of the smoothness.
WaterColor
Watercolor painting effect 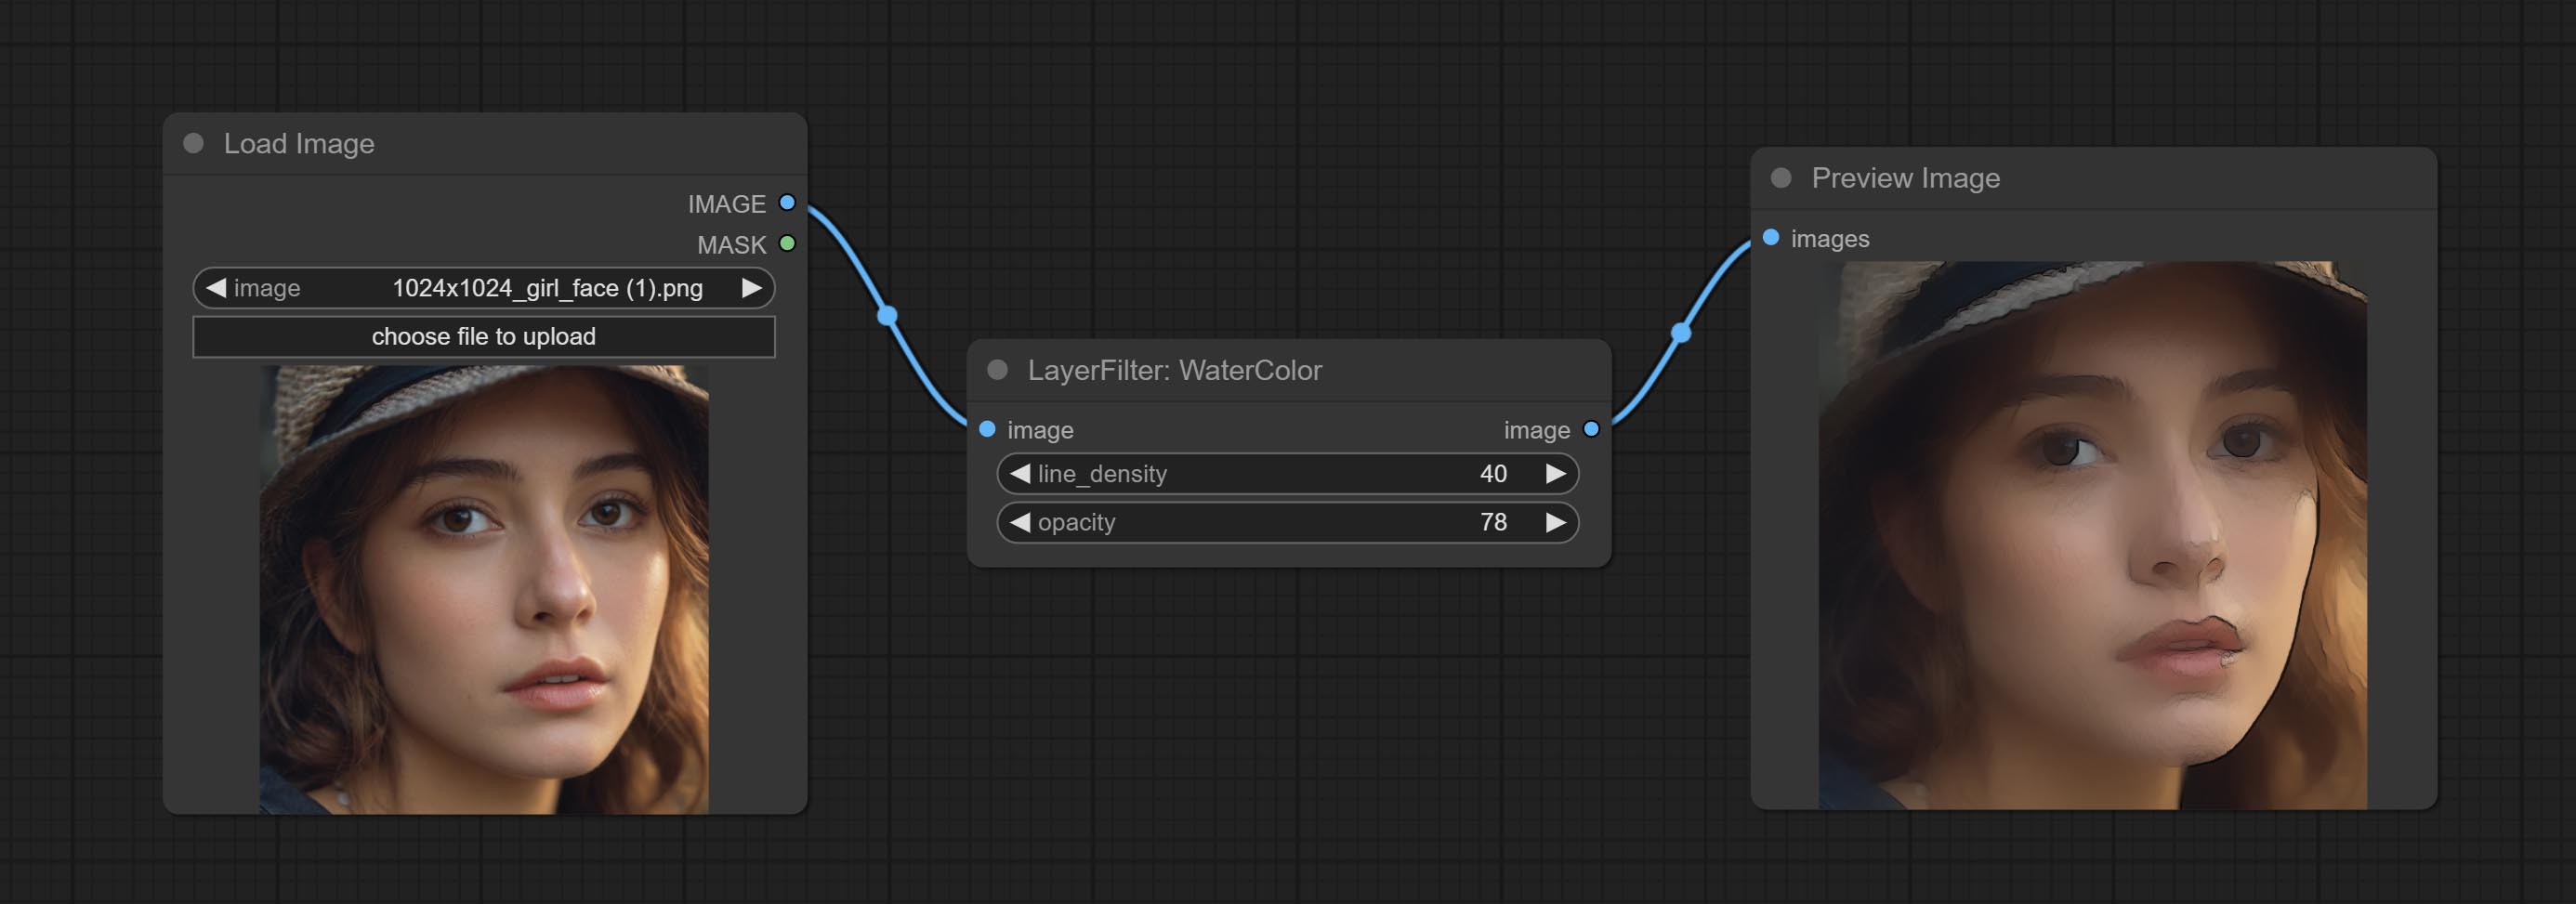
Node option: 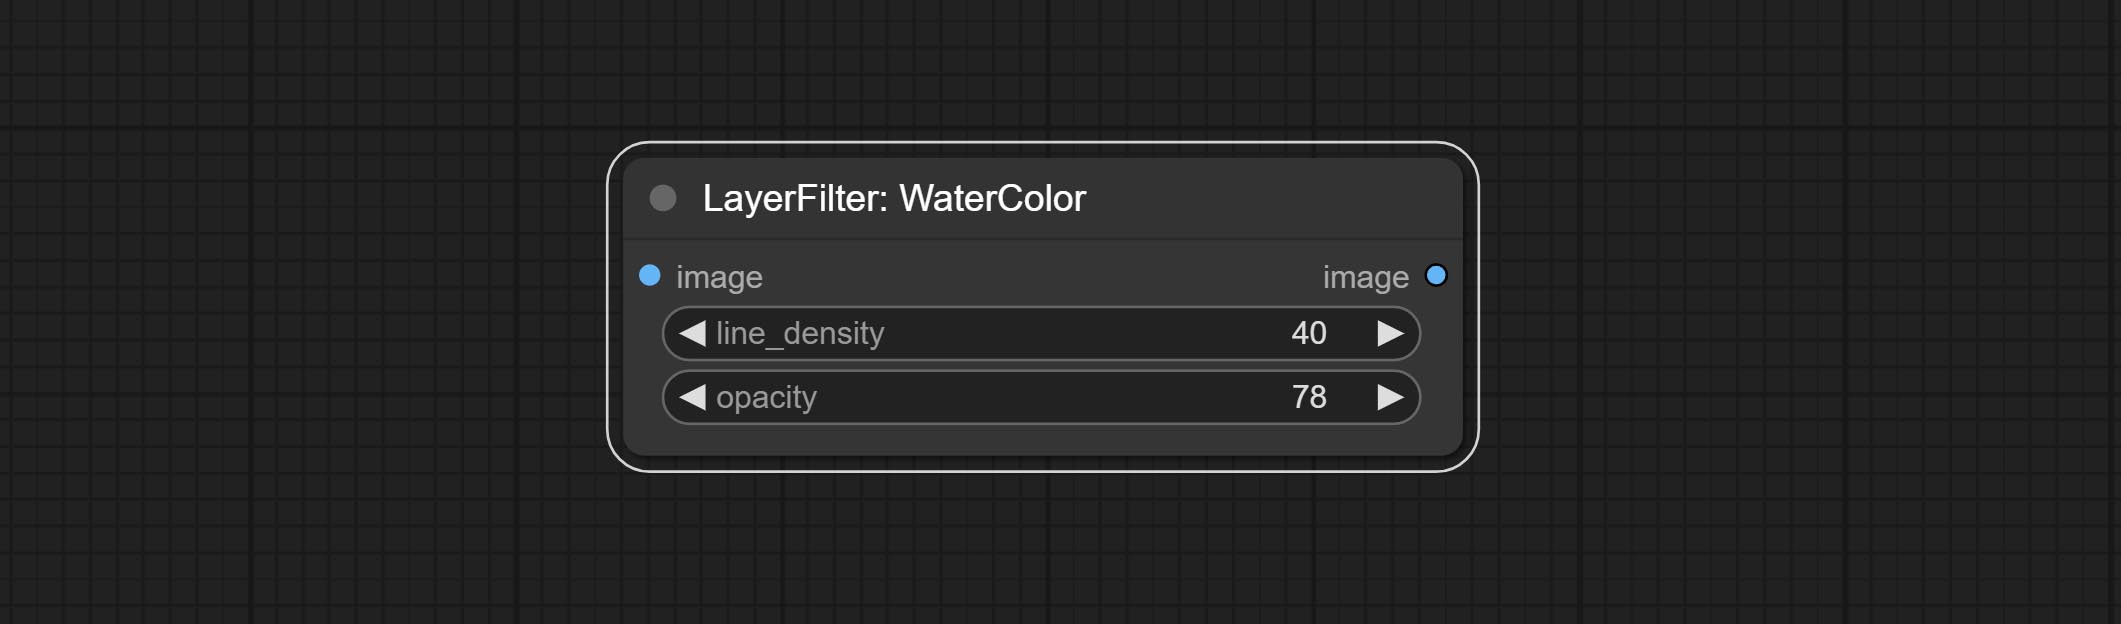
- line_density: The black line density.
- opacity: The opacity of watercolor effects.
SoftLight
Soft light effect, the bright highlights on the screen appear blurry. 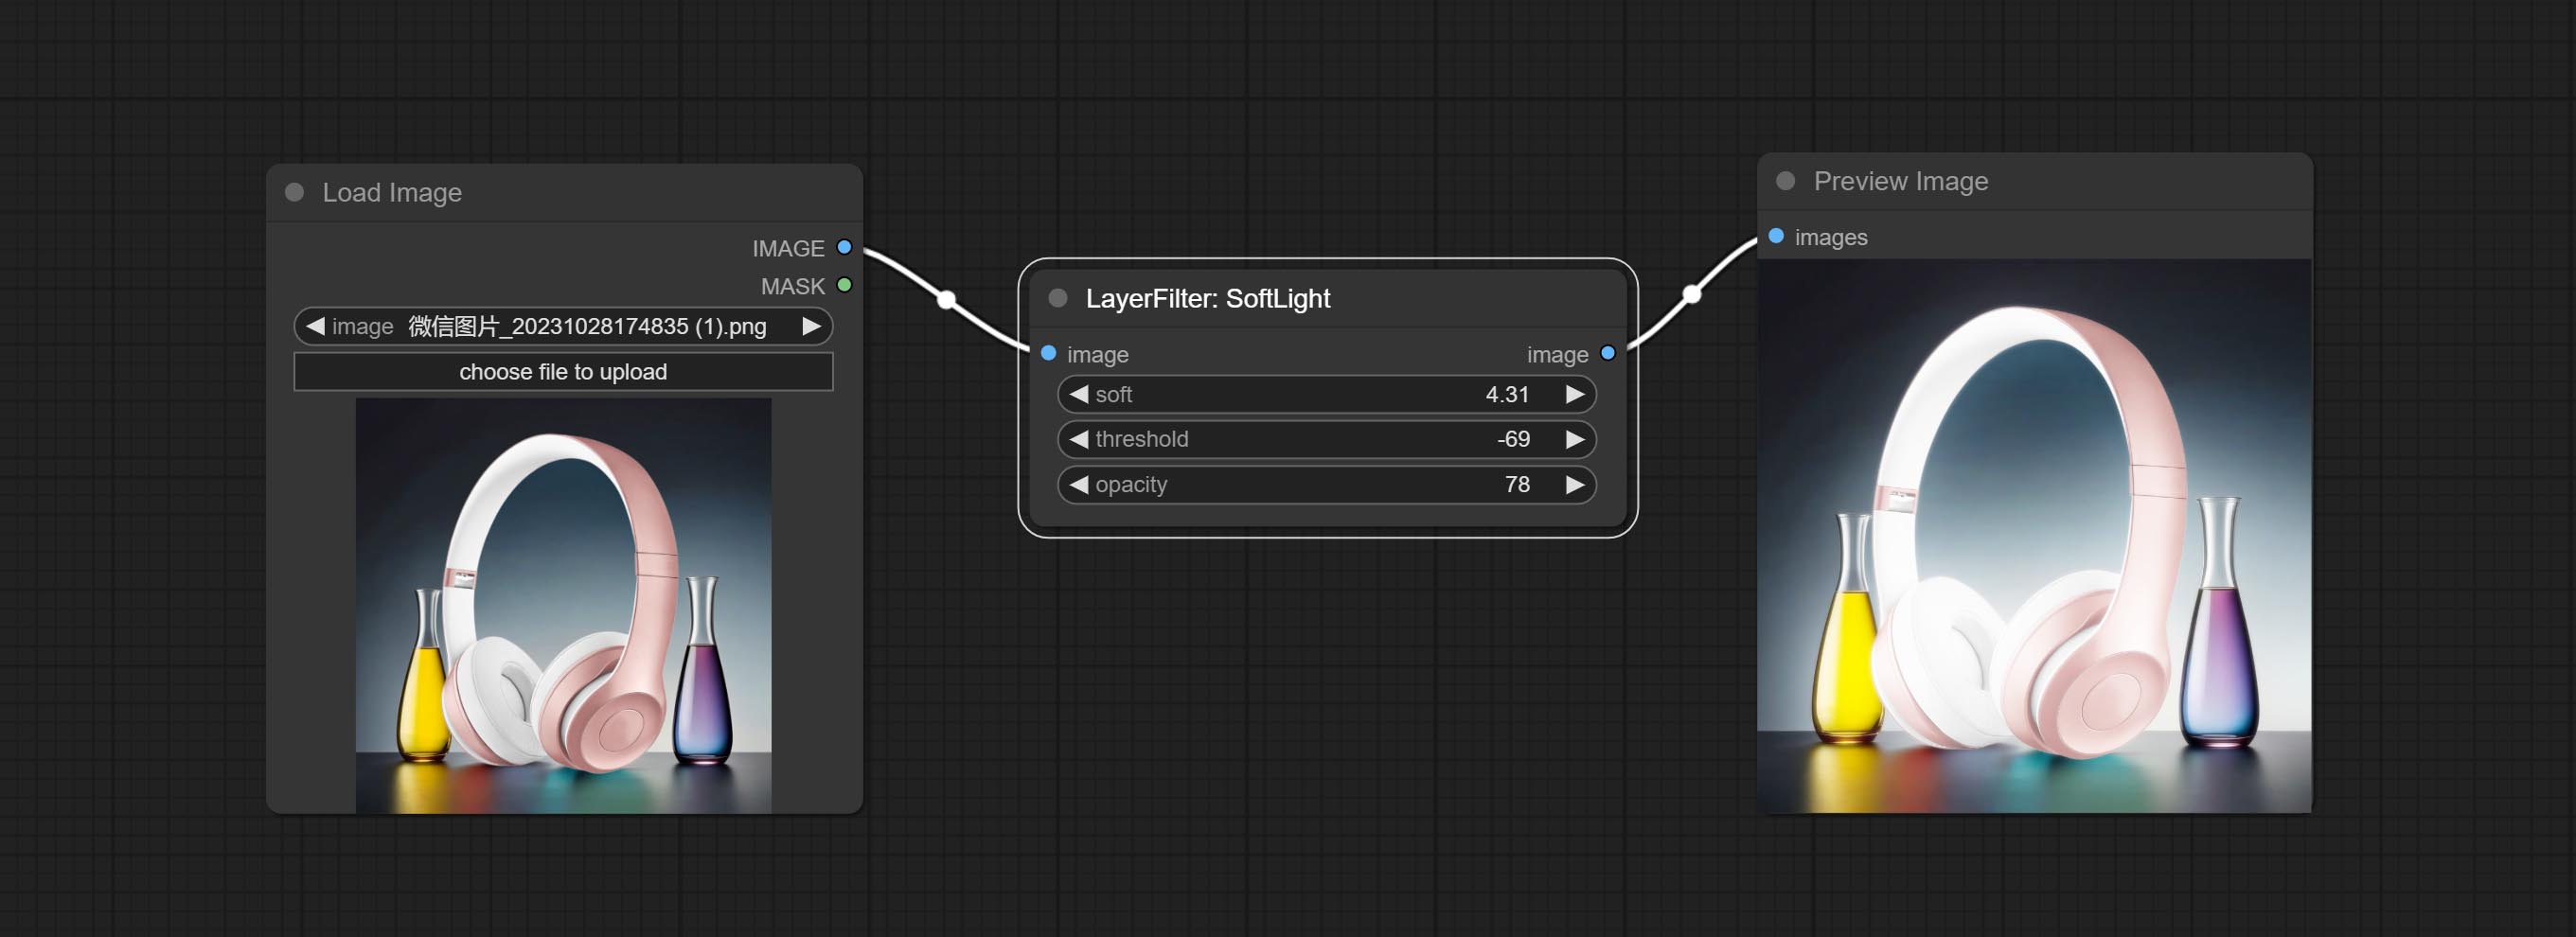
Node options: 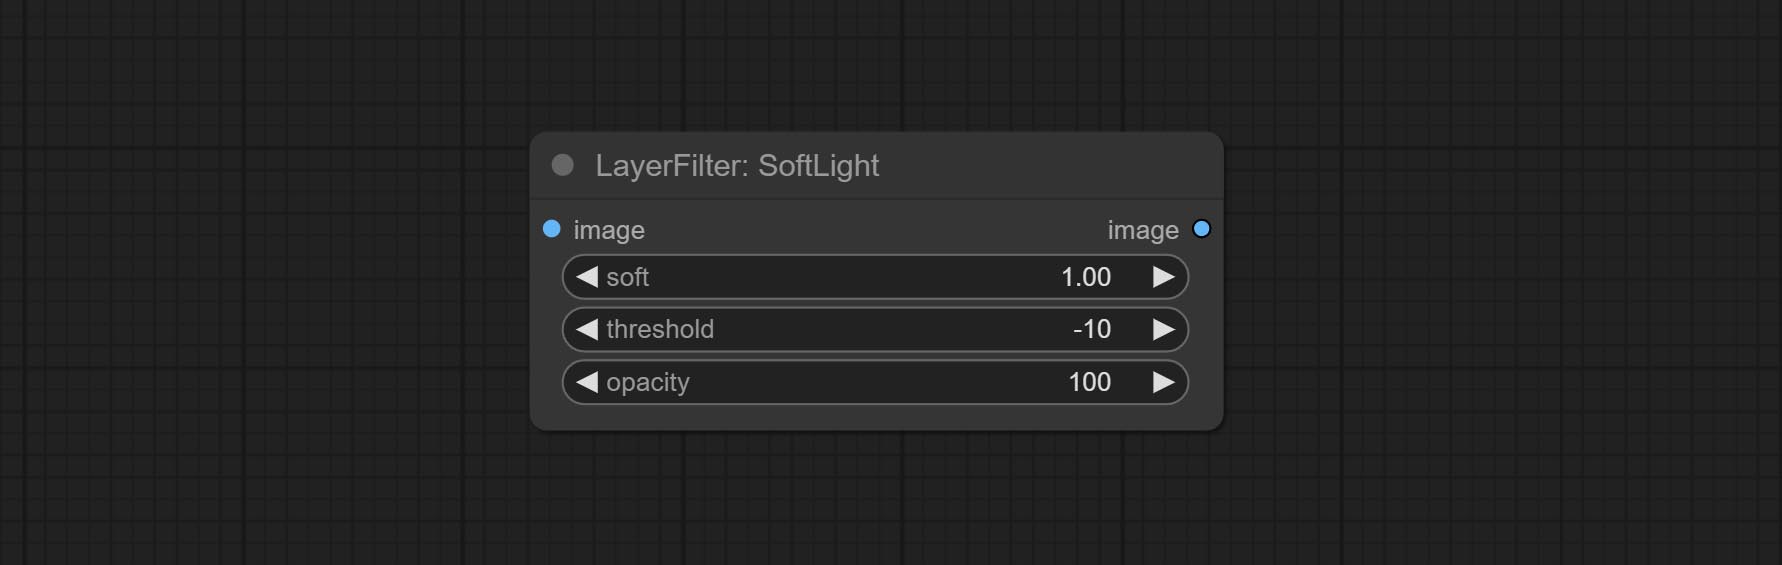
- soft: Size of soft light.
- threshold: Soft light range. the light appears from the brightest part of the picture. in lower value, the range will be larger, and in higher value, the range will be smaller.
- opacity: Opacity of the soft light.
ChannelShake
Channel misalignment. similar to the effect of Tiktok logo. 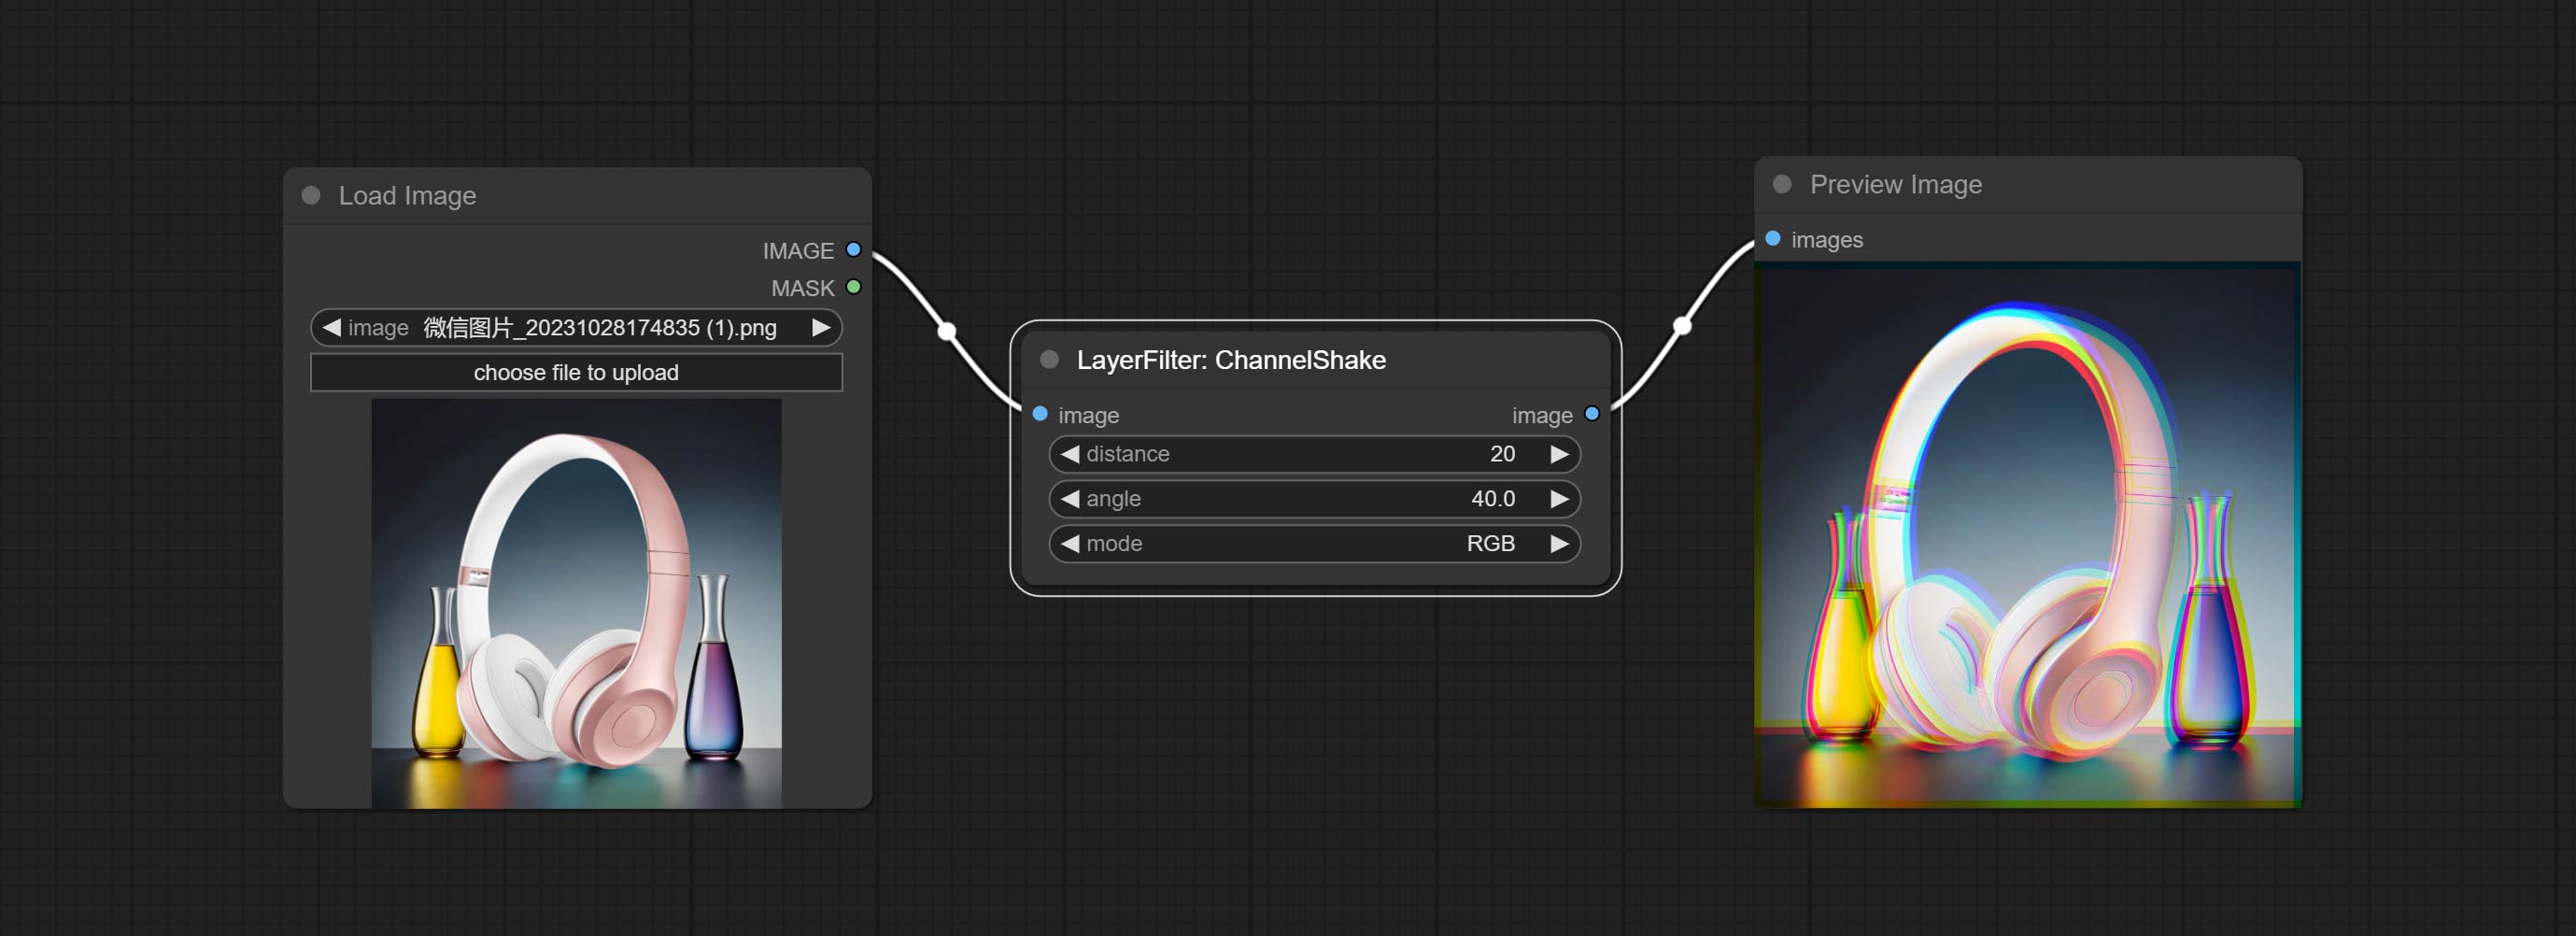
Node options: 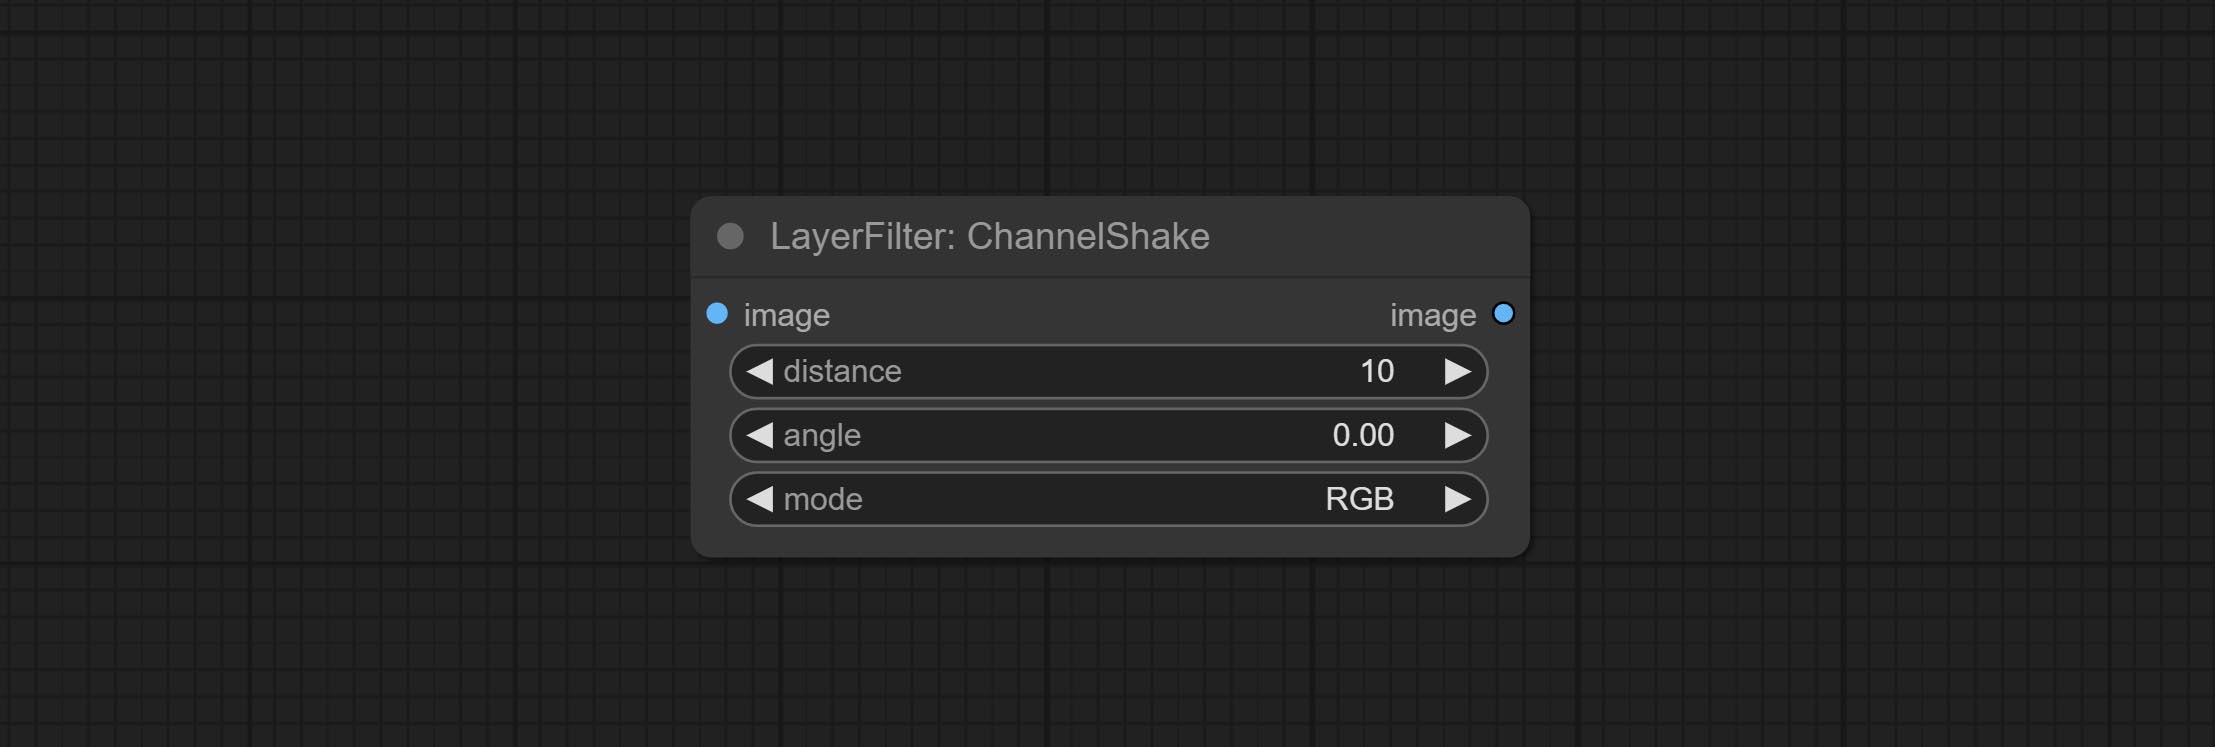
- distance: Distance of channel separation.
- angle: Angle of channel separation.
- mode: Channel shift arrangement order.
HDR Effects
enhances the dynamic range and visual appeal of input images. This node is reorganize and encapsulate of HDR Effects (SuperBeasts.AI), thanks to the original author. 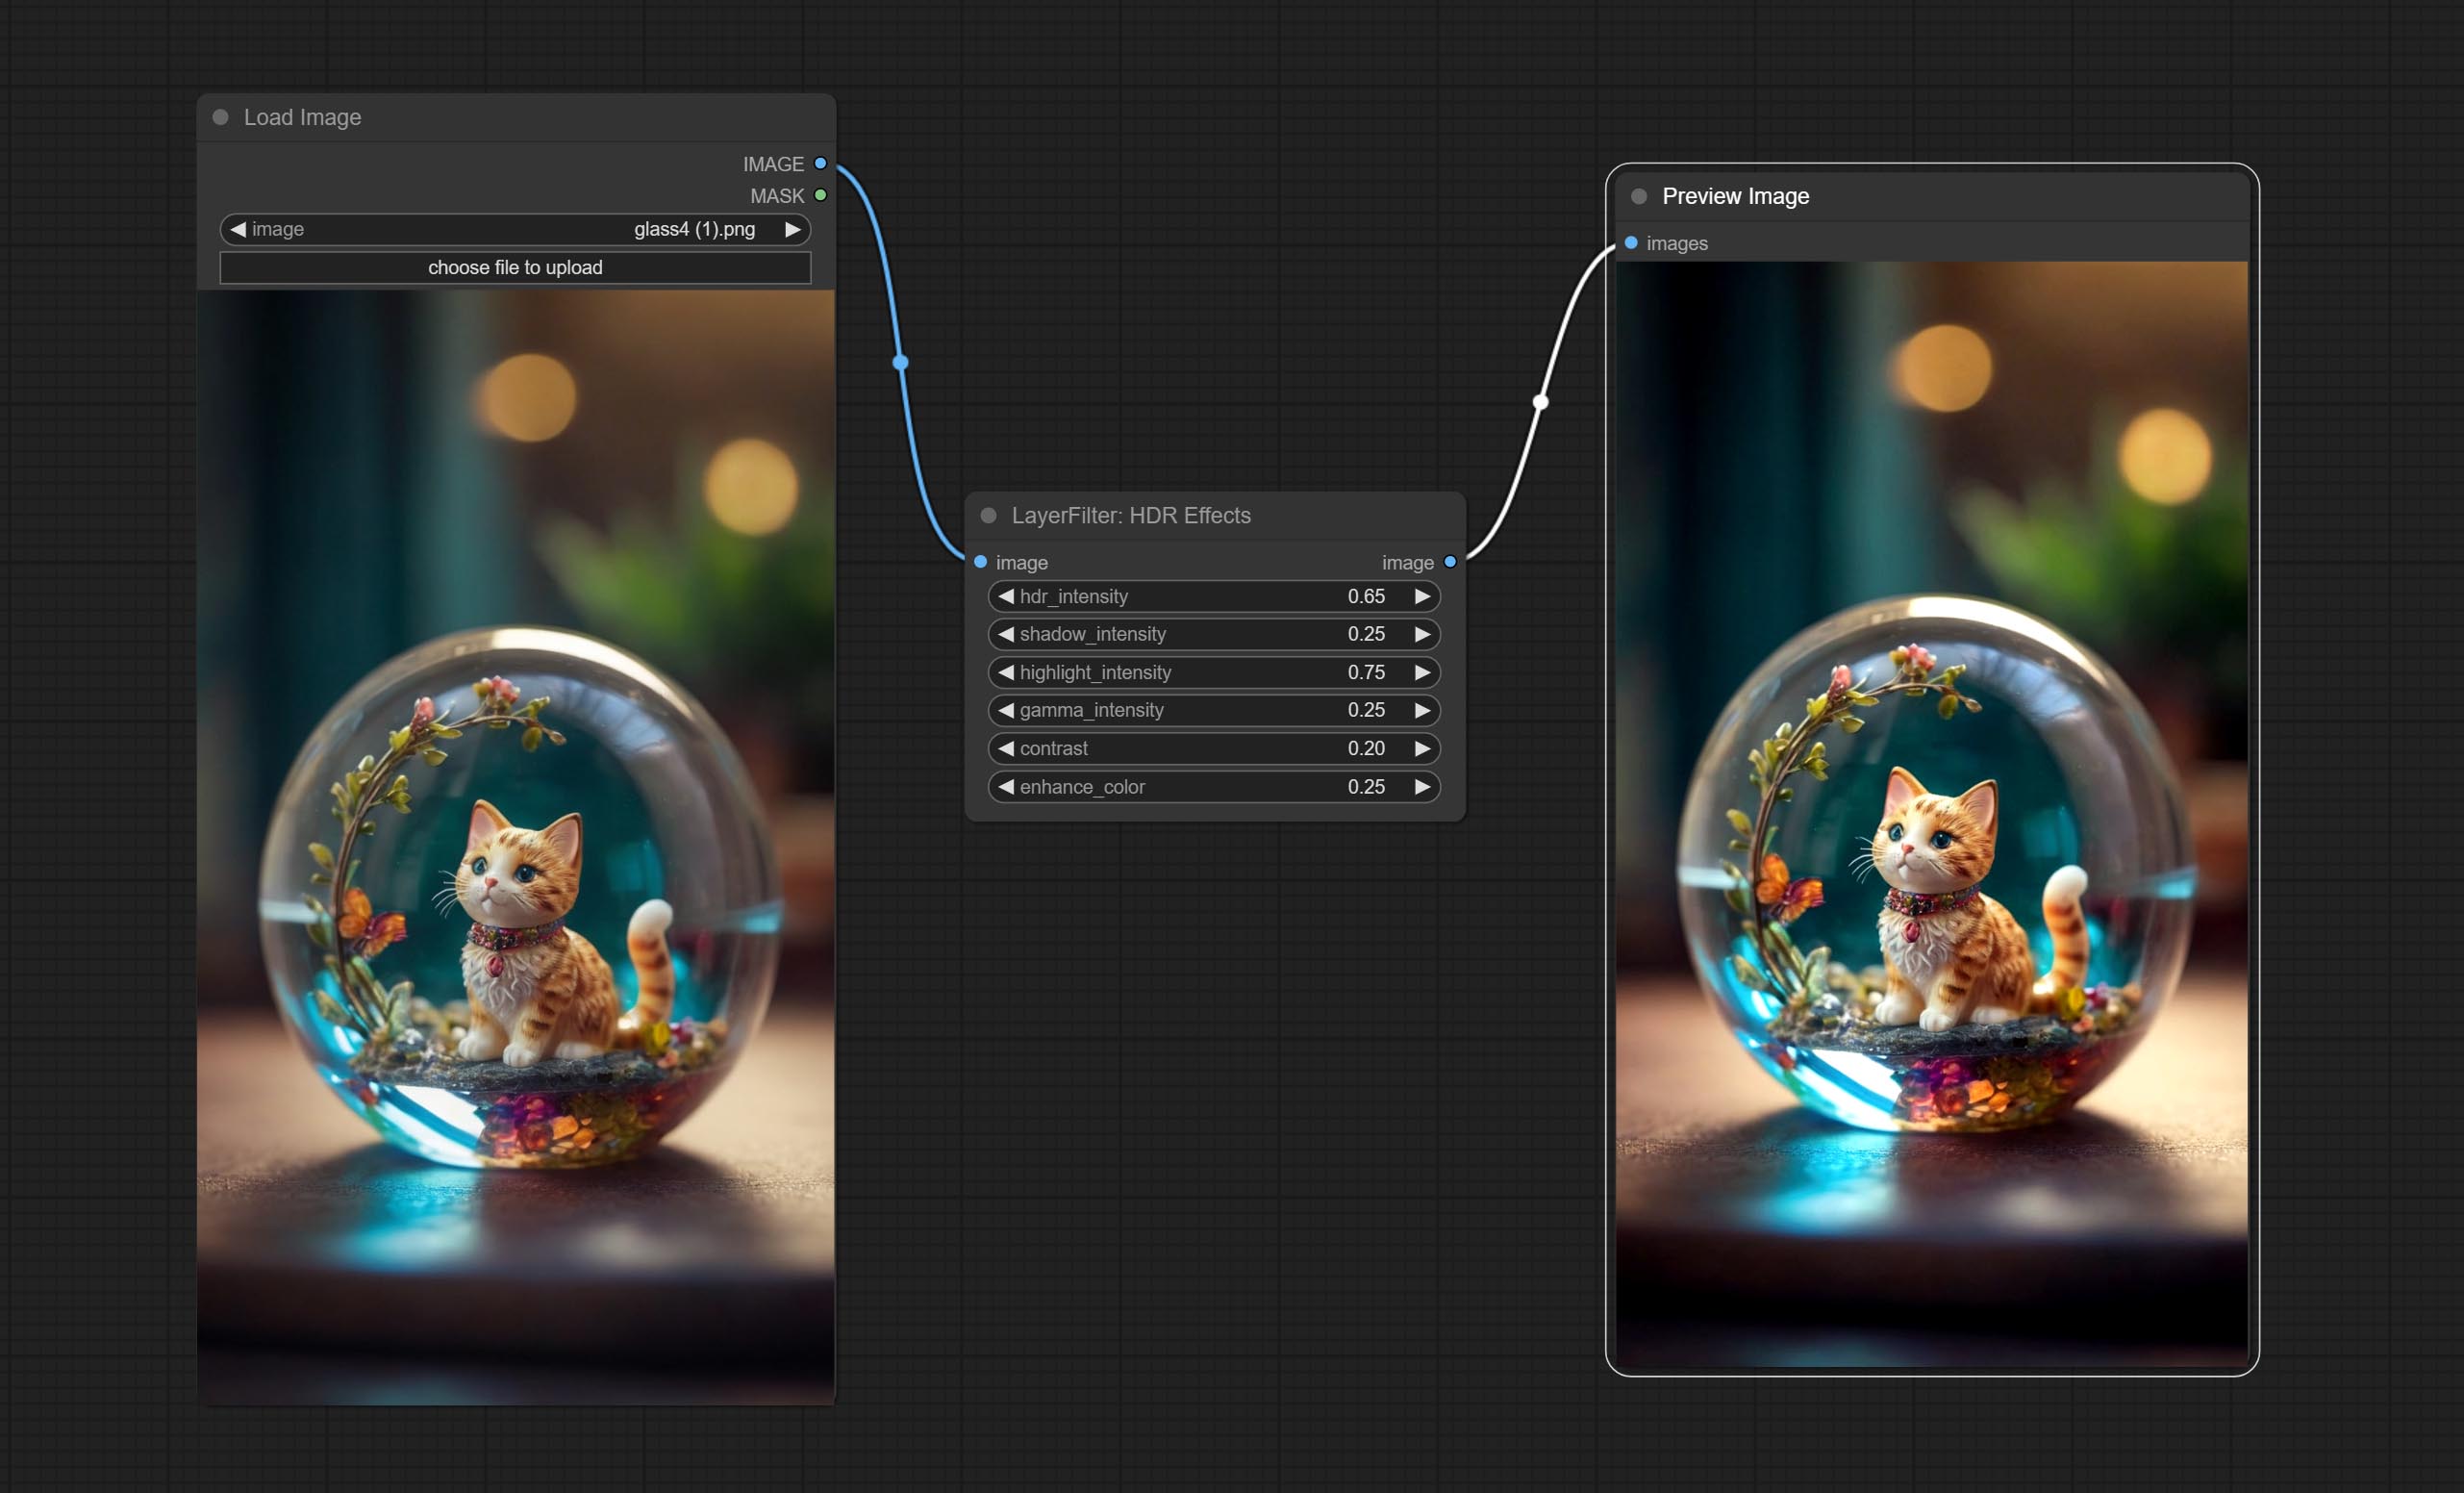
Node options: 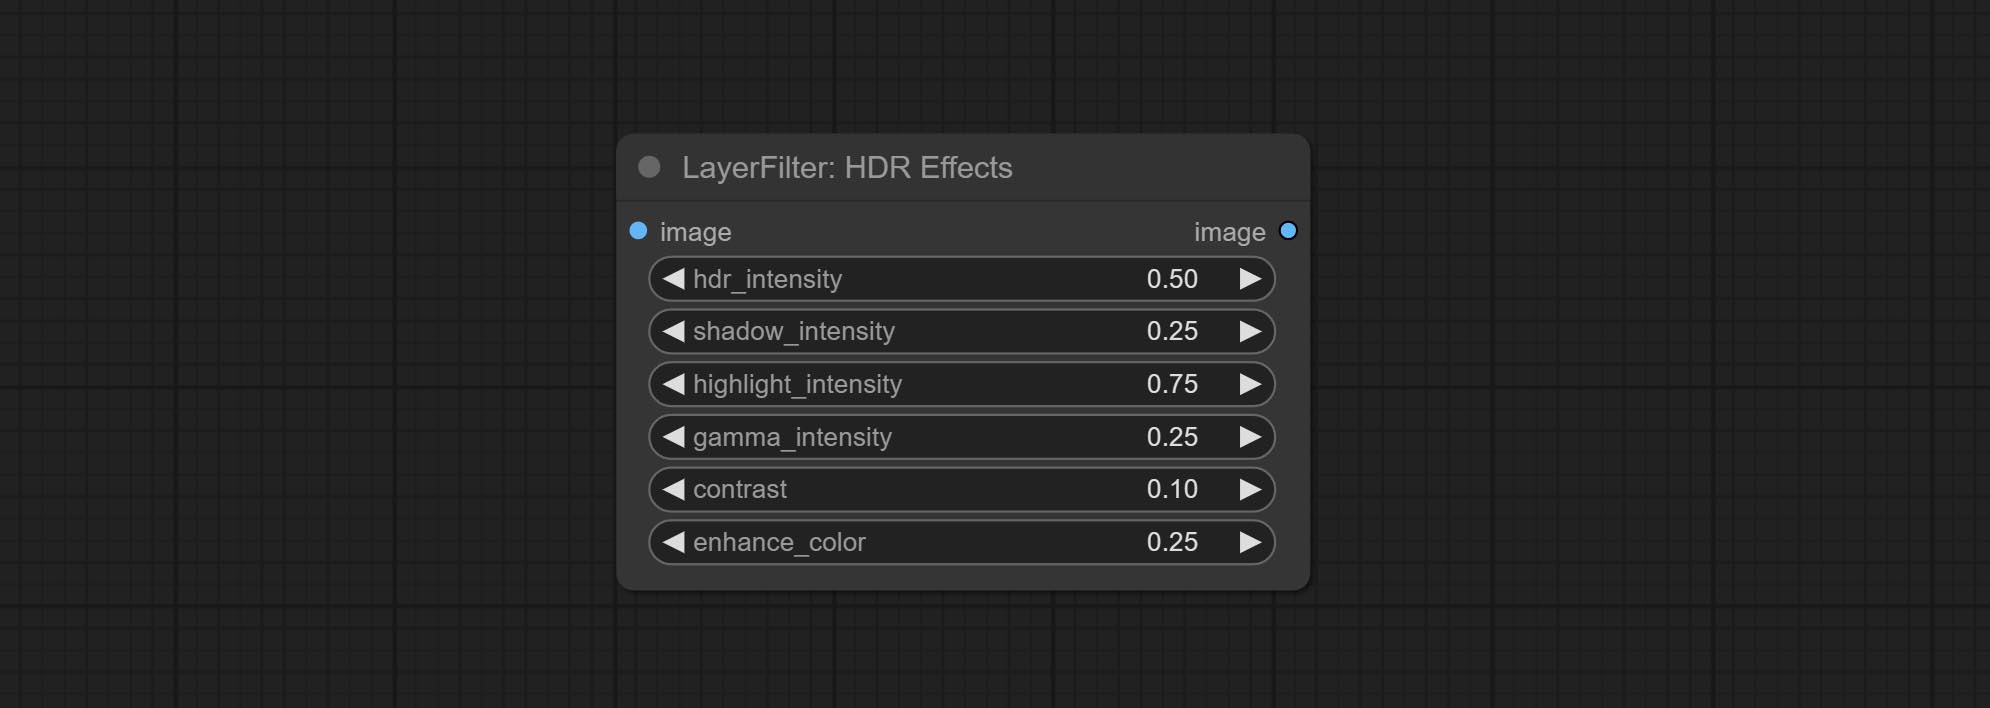
- hdr_intensity: Range: 0.0 to 5.0, Controls the overall intensity of the HDR effect, Higher values result in a more pronounced HDR effect.
- shadow_intensity: Range: 0.0 to 1.0,Adjusts the intensity of shadows in the image,Higher values darken the shadows and increase contrast.
- highlight_intensity: Range: 0.0 to 1.0,Adjusts the intensity of highlights in the image,Higher values brighten the highlights and increase contrast.
- gamma_intensity: Range: 0.0 to 1.0,Controls the gamma correction applied to the image,Higher values increase the overall brightness and contrast.
- contrast: Range: 0.0 to 1.0,Enhances the contrast of the image, Higher values result in more pronounced contrast.
- enhance_color: Range: 0.0 to 1.0,Enhances the color saturation of the image, Higher values result in more vibrant colors.
Filme
Simulate the grain, dark edge, and blurred edge of the film, support input depth map to simulate defocus.
This node is reorganize and encapsulate of digitaljohn/comfyui-propost, thanks to the original author. 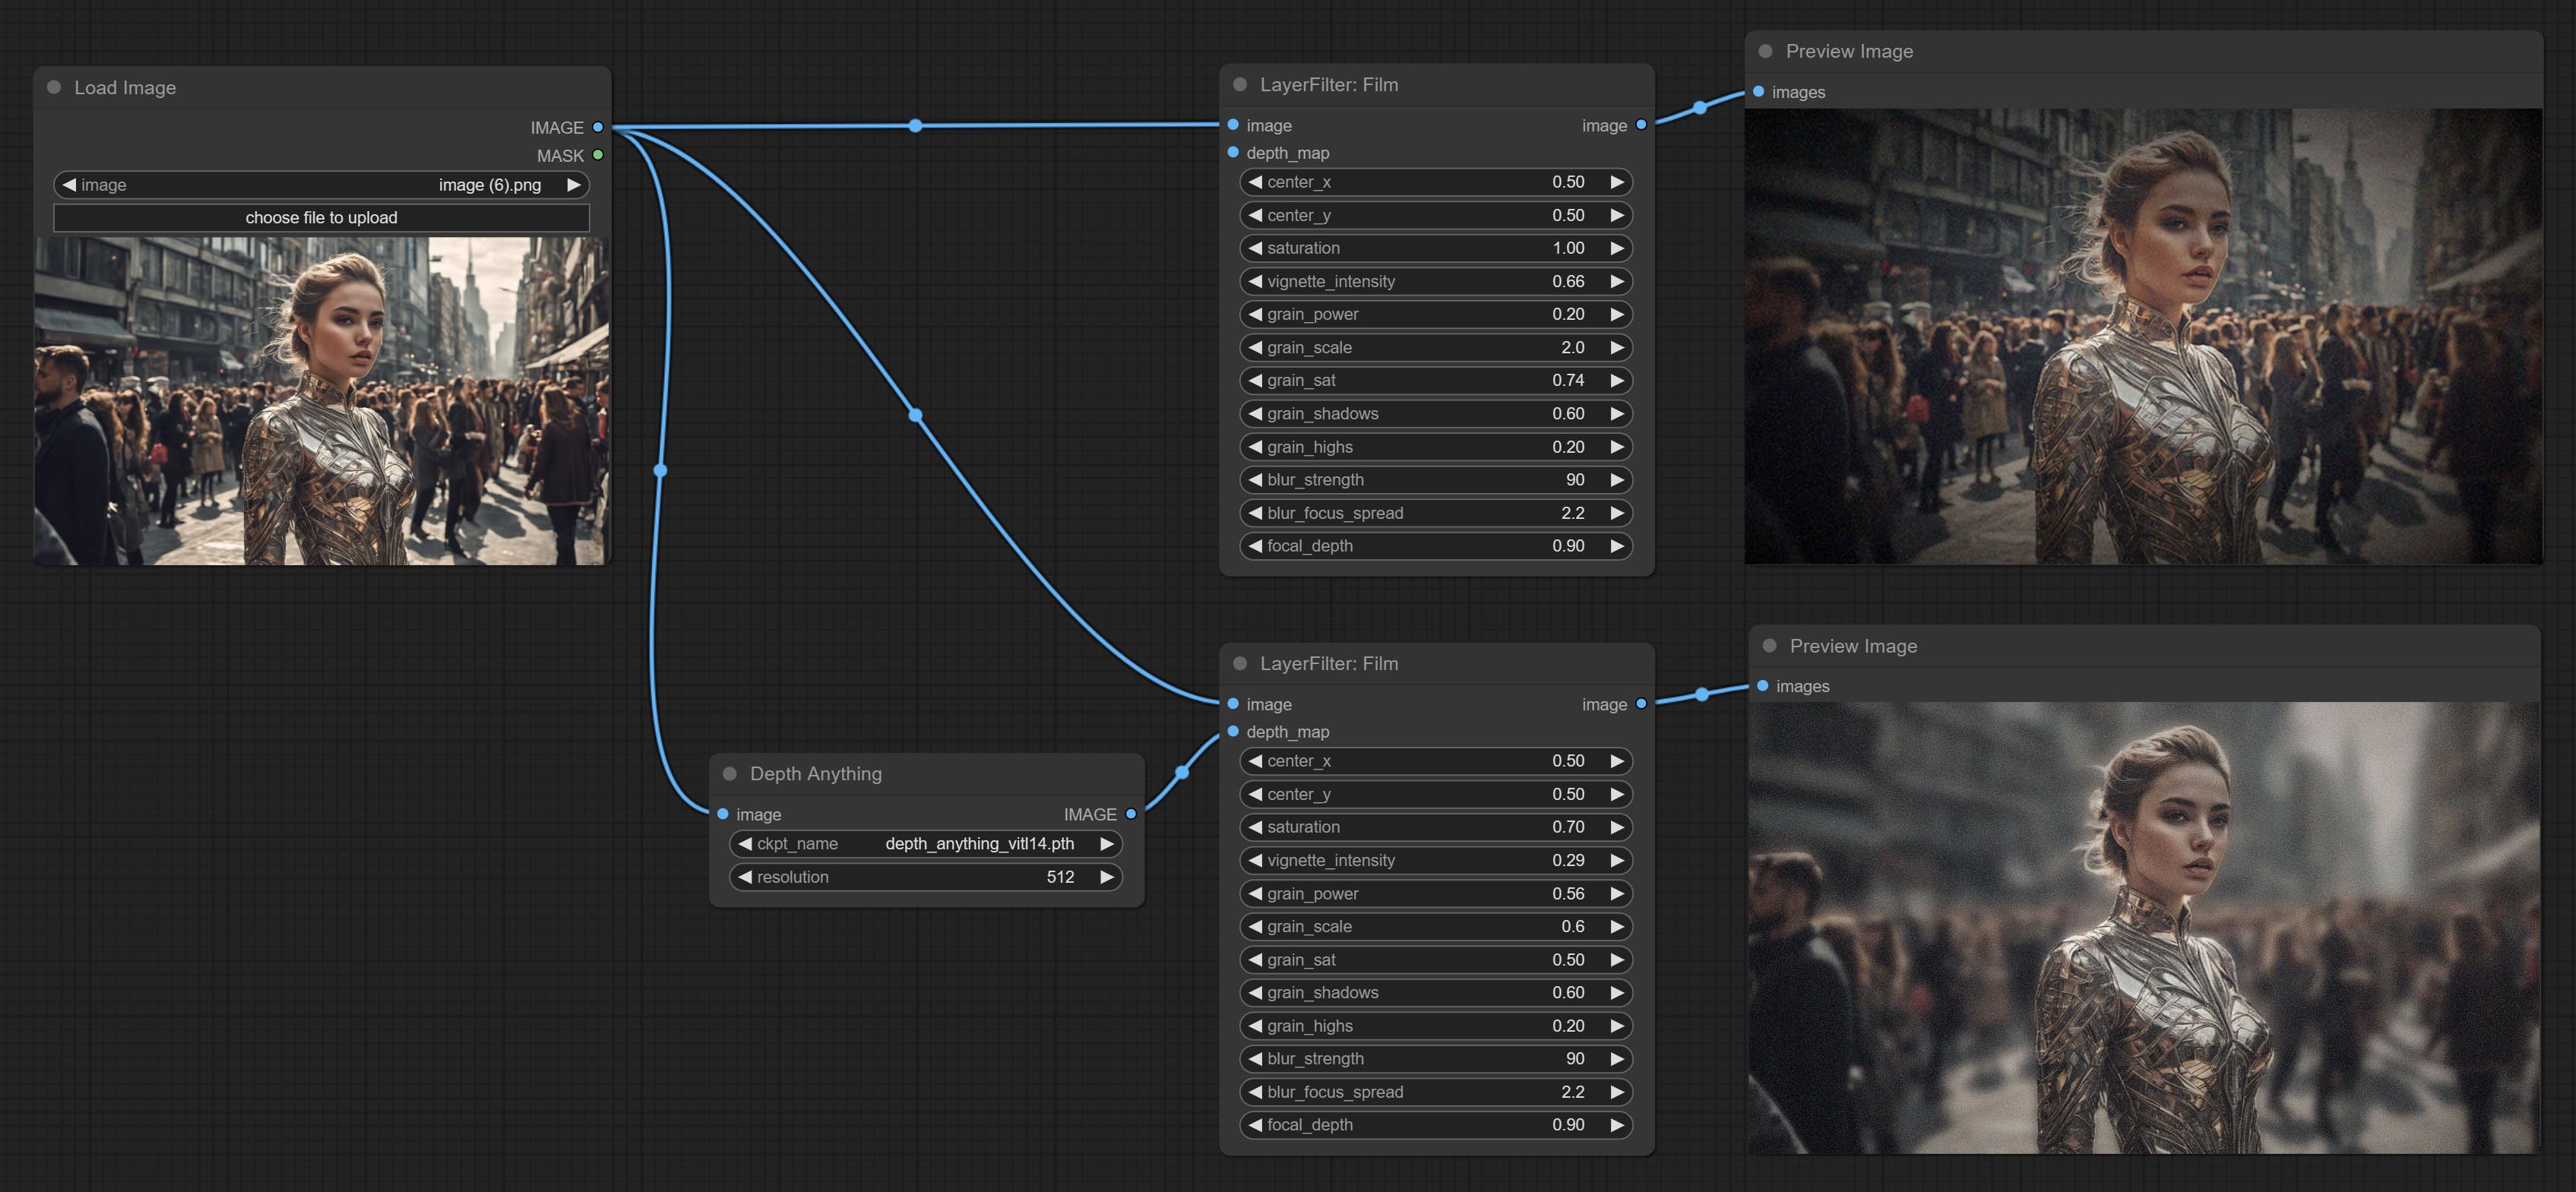
Node options: 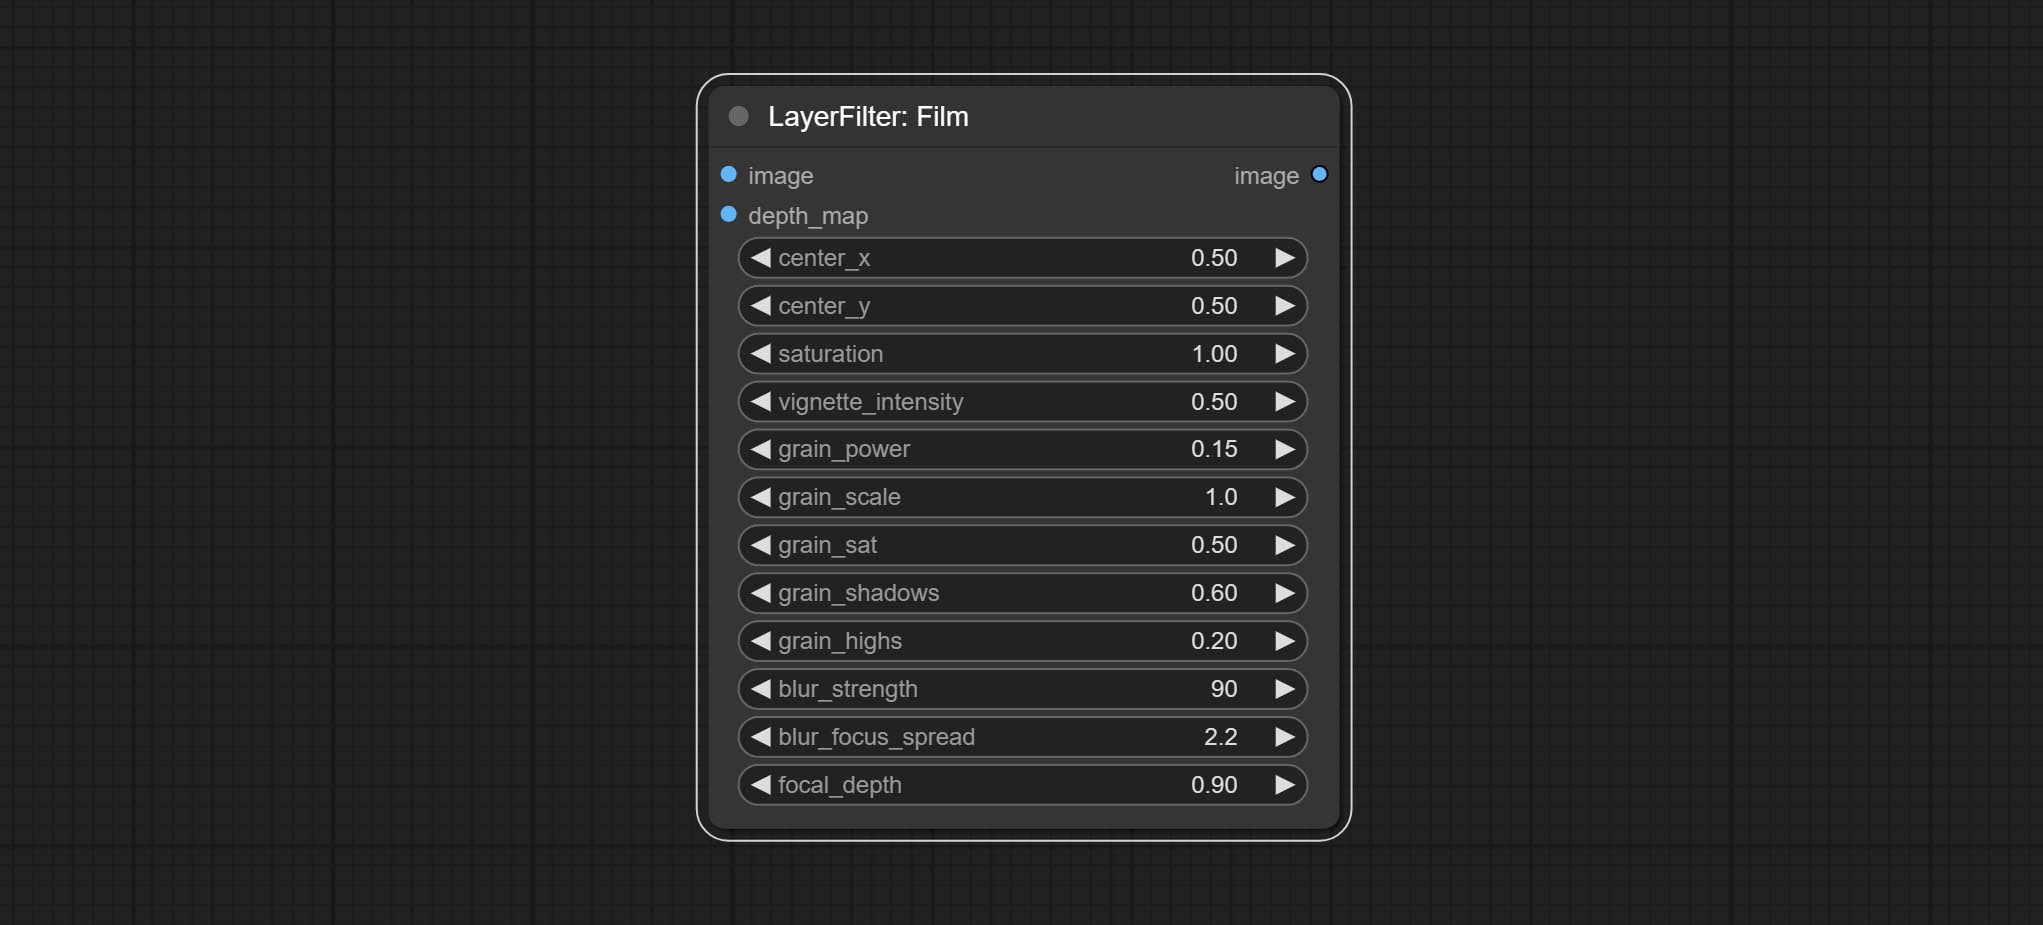
- image: The input image.
- depth_map: Input depth map to simulate defocus effect. it is an optional input. if there is no input, will simulates radial blur at the edges of the image.
- center_x: The horizontal axis of the center point position of the dark edge and radial blur, where 0 represents the leftmost side, 1 represents the rightmost side, and 0.5 represents at the center.
- center_y: The vertical axis of the center point position of the dark edge and radial blur, where 0 represents the leftmost side, 1 represents the rightmost side, and 0.5 represents at the center.
- saturation: Color saturation, 1 is the original value.
- grain_power: Grain intensity. larger value means more pronounced the noise.
- grain_scale: Grain size.
- grain_sat: The color saturation of grain. 0 represents mono noise, and the larger the value, the more prominent the color.
- grain_shadows: Grain intensity of dark part.
- grain_highs: Grain intensity of light part.
- blur_strength: The strength of blur. larger value means more blurry it becomes.
- blur_focus_spread: Focus diffusion range. larger value means larger clear range.
- focal_depth: Simulate the focal distance of defucus. 0 indicates that focus is farthest, and 1 indicates that is closest. this setting only valid when input the depth_map.
FilmV2
The upgraded version of the Film node adds the fastgrain method on the basis of the previous one, and the speed of generating noise is accelerated by 10 times. The code for fastgrain is from github.com/spacepxl/ComfyUI-Image-Filters BetterFilmGrain node, thanks to the original authors. 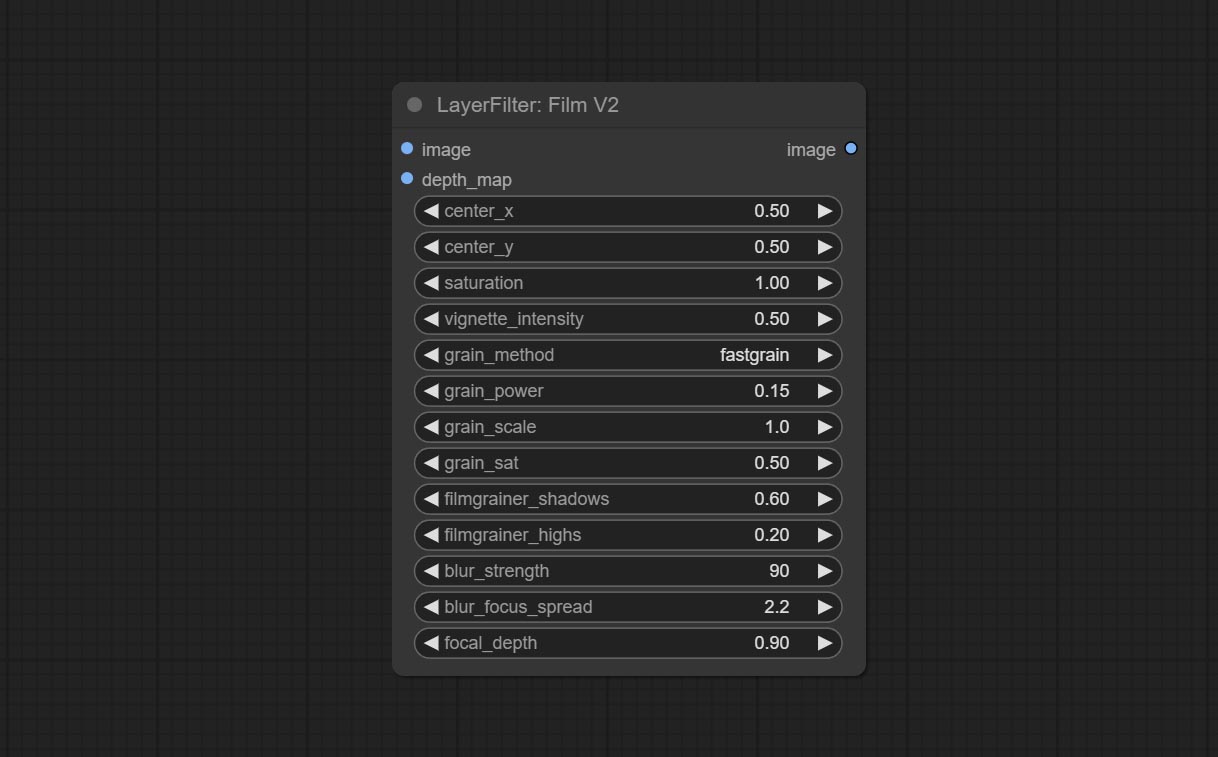
LightLeak
Simulate the light leakage effect of the film. please download model file from Baidu Netdisk or [Google Drive]([light_leak.pkl(Google Drive)(https://drive.google.com/file/d/1DcH2Zkyj7W3OiAeeGpJk1eaZpdJwdCL-/view?usp=sharing)) and copy to ComfyUI/models/layerstyle folder. 
Node options: 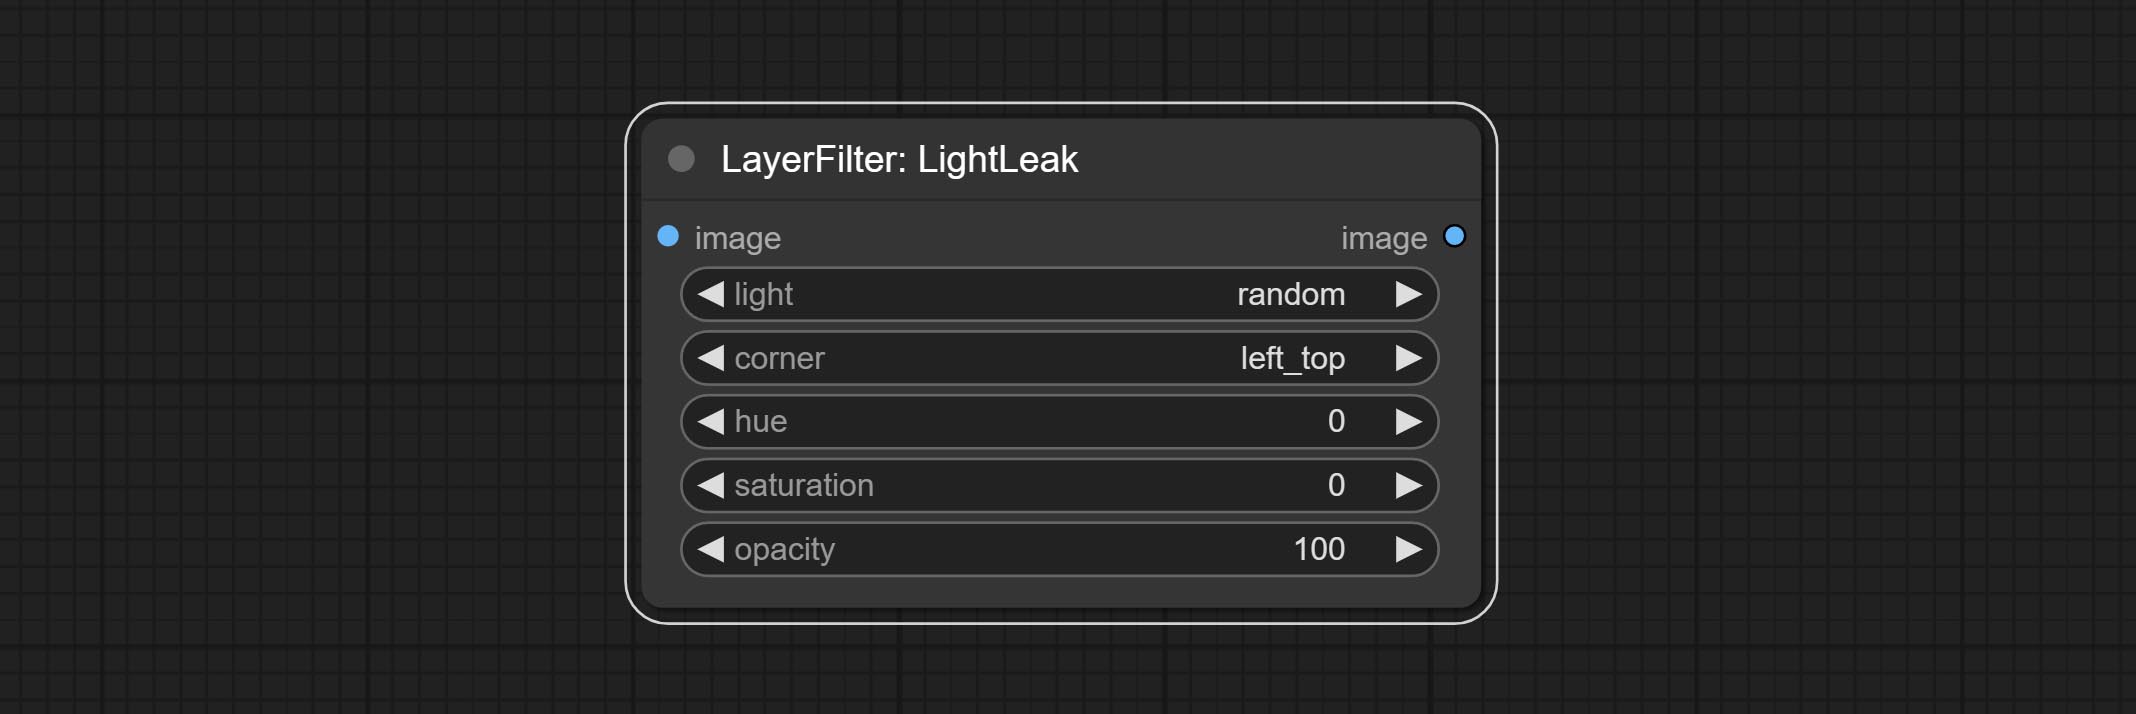
- light: 32 types of light spots are provided. random is a random selection.
- corner: There are four options for the corner where the light appears: top left, top right, bottom left, and bottom right.
- hue: The hue of the light.
- saturation: The color saturation of the light.
- opacity: The opacity of the light.
ColorMap
Pseudo color heat map effect. 
Node options: 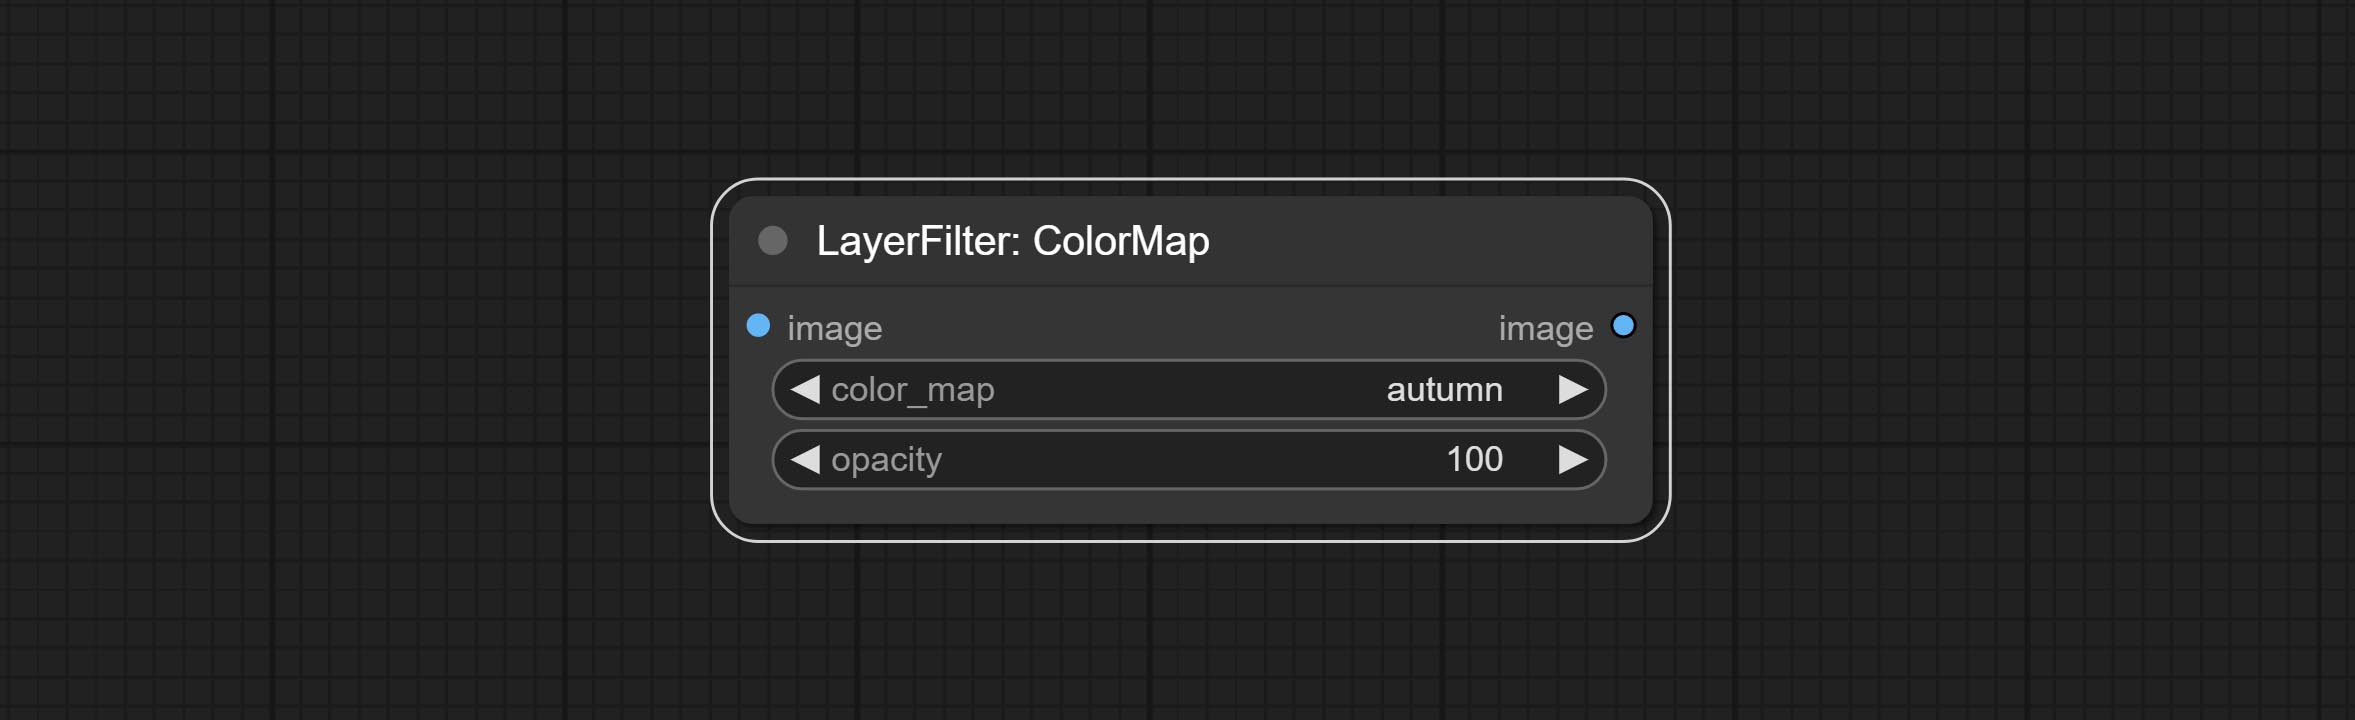
- color_map: Effect type. there are a total of 22 types of effects, as shown in the above figure.
- opacity: The opacity of the color map effect.
MotionBlur
Make the image motion blur 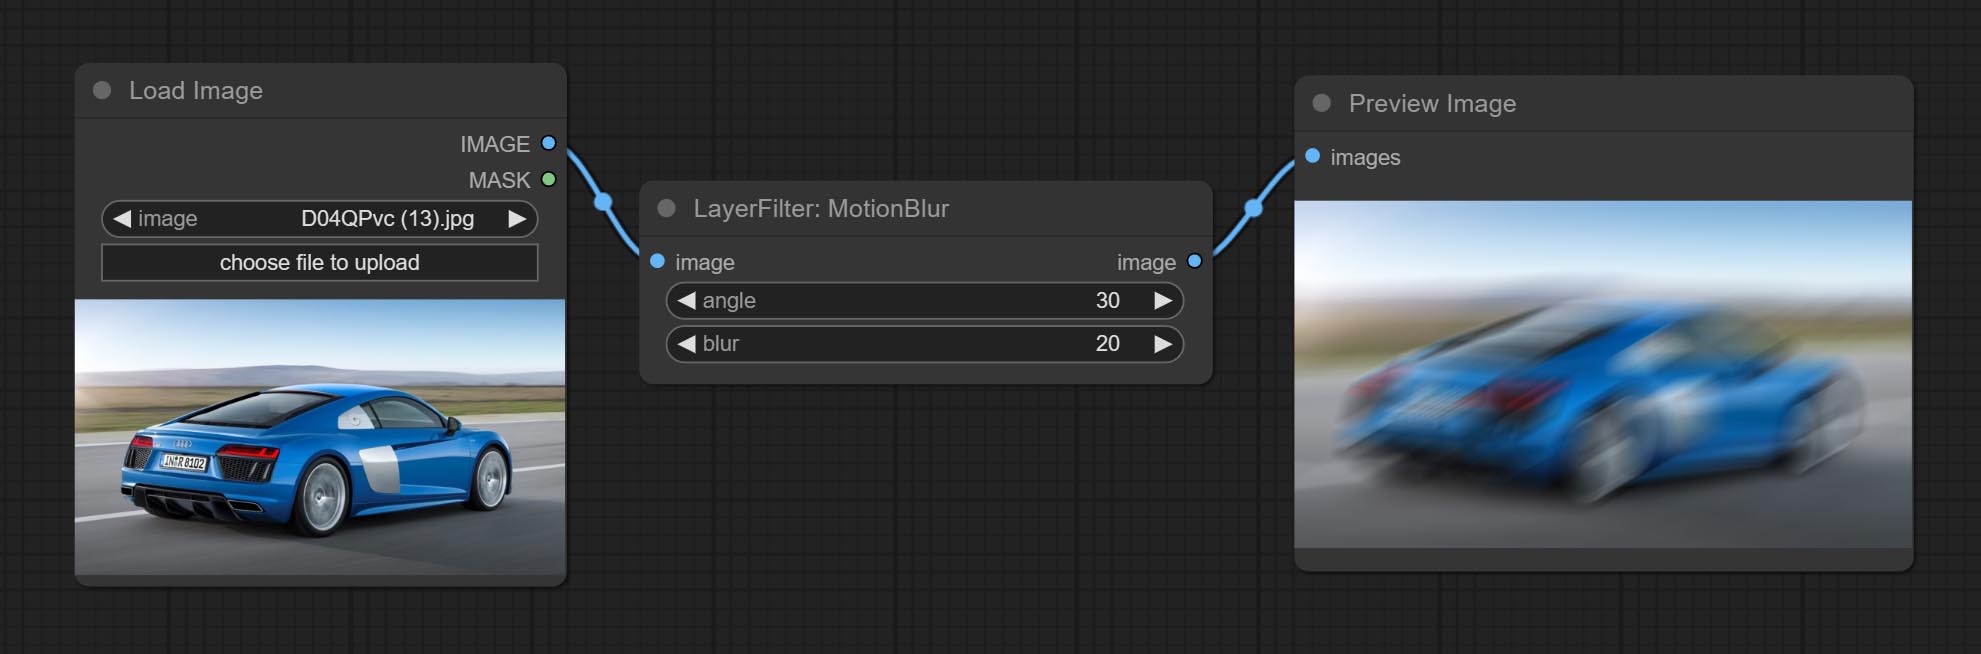
Node options:
- angle: The angle of blur.
- blur: The size of blur.
GaussianBlur
Make the image gaussian blur 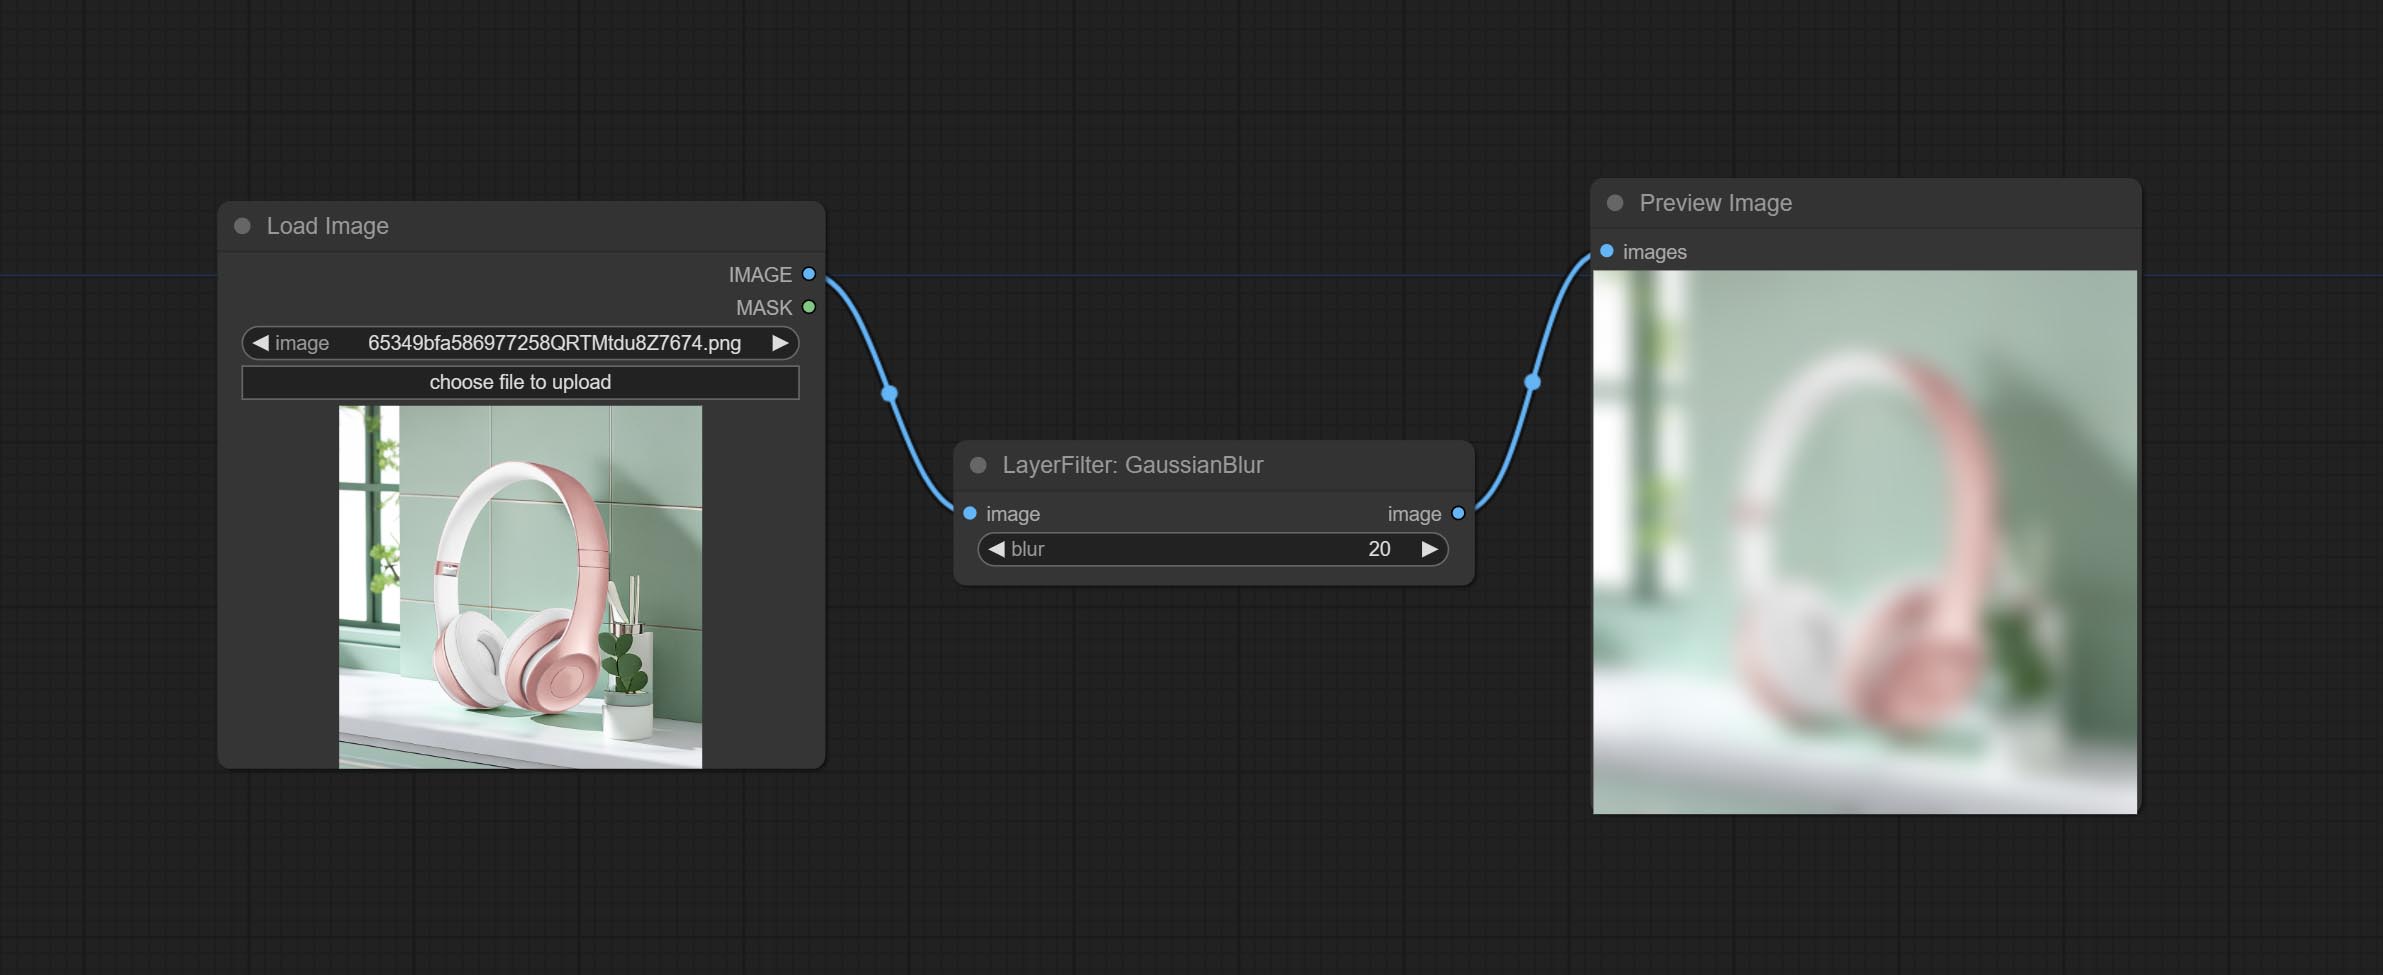
Node options:
- blur: The size of blur, integer, range 1-999.
GaussianBlurV2
Gaussian blur. Change the parameter precision to floating-point number, with a precision of 0.01
Node options: 
- blur: The size of blur, float, range 0 - 1000.
AddGrain
Add noise to the picture. 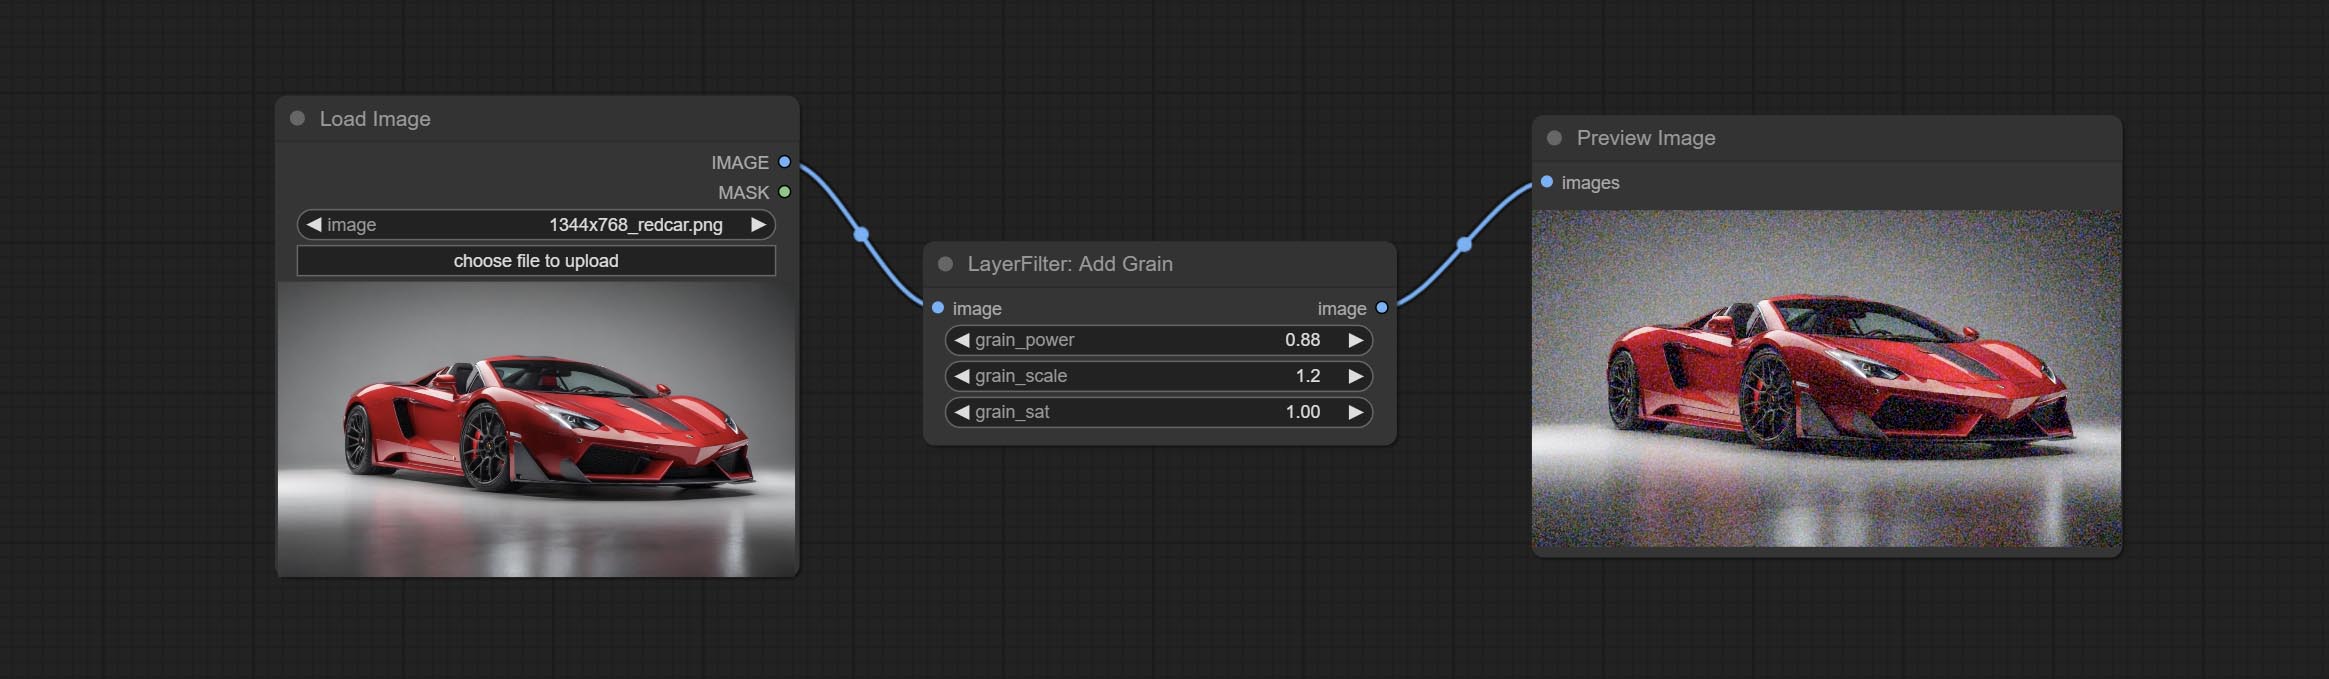
Node Options: 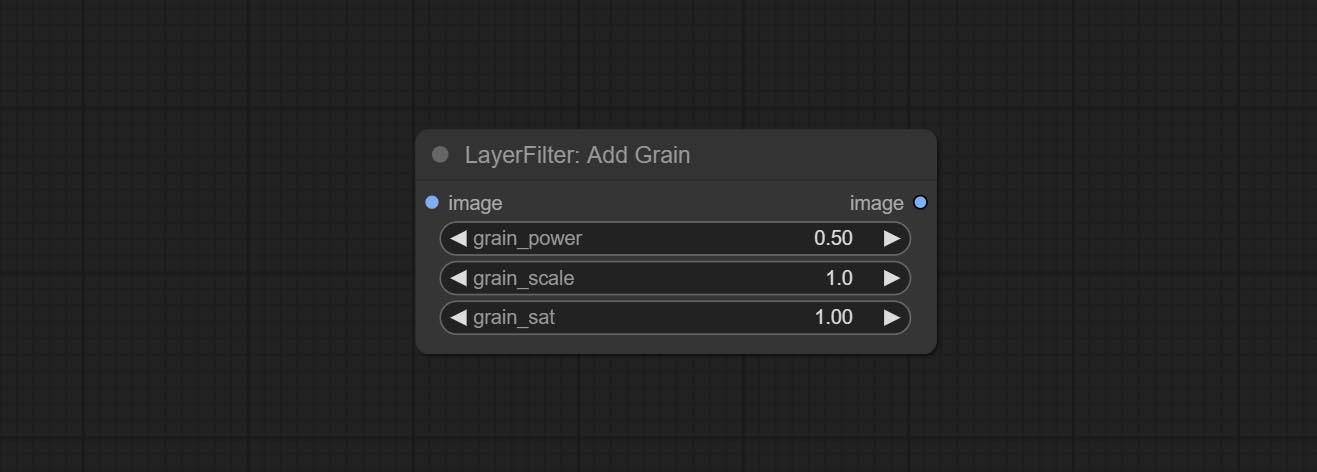
- grain_power: Noise intensity.
- grain_scale: Noise size.
- grain_sat: Color saturation of noise.
Annotation for notes
1 The layer_image, layer_mask and the background_image(if have input), These three items must be of the same size.
2 The mask not a mandatory input item. the alpha channel of the image is used by default. If the image input does not include an alpha channel, the entire image's alpha channel will be automatically created. if have masks input simultaneously, the alpha channel will be overwrite by the mask.
3 The Blend Mode include normal, multply, screen, add, subtract, difference, darker, color_burn, color_dodge, linear_burn, linear_dodge, overlay, soft_light, hard_light, vivid_light, pin_light, linear_light, and hard_mix. all of 19 blend modes in total.
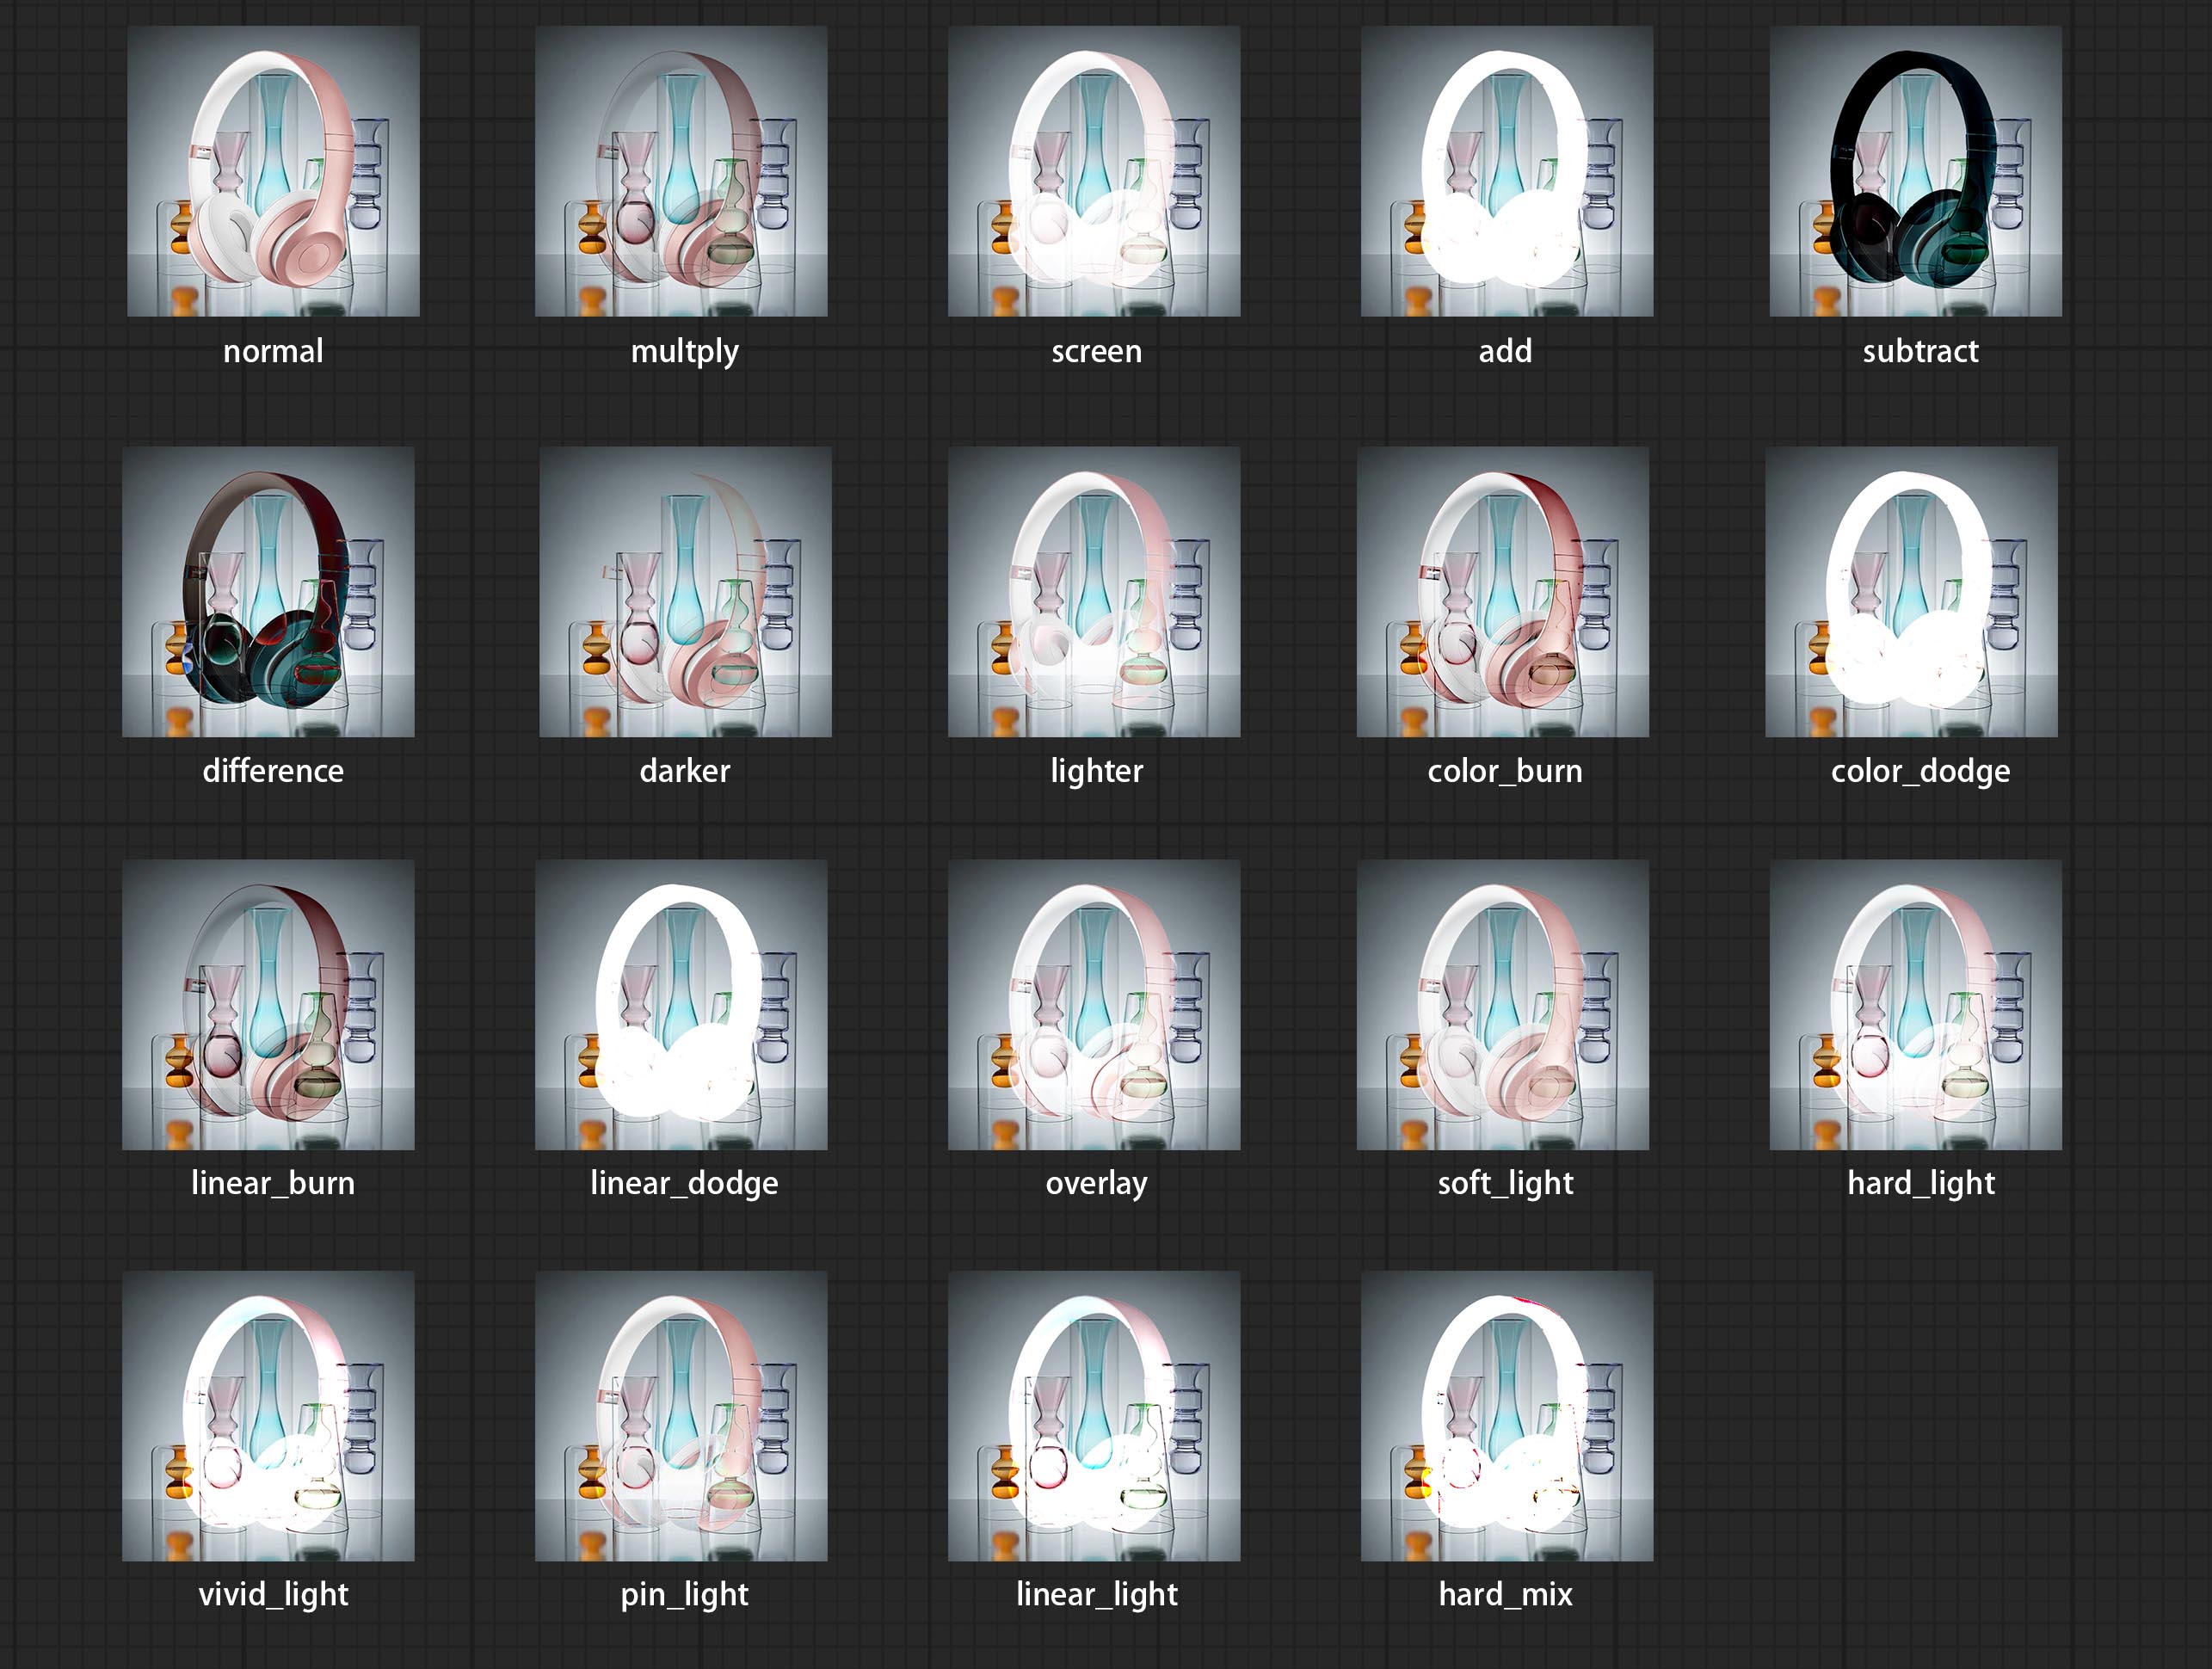
*Preview of the blend mode
3 The BlendModeV2 include normal, dissolve, darken, multiply, color burn, linear burn, darker color, lighten, screen, color dodge, linear dodge(add), lighter color, dodge, overlay, soft light, hard light, vivid light, linear light, pin light, hard mix, difference, exclusion, subtract, divide, hue, saturation, color, luminosity, grain extract, grain merge all of 30 blend modes in total.
Part of the code for BlendMode V2 is from Virtuoso Nodes for ComfyUI. Thanks to the original authors.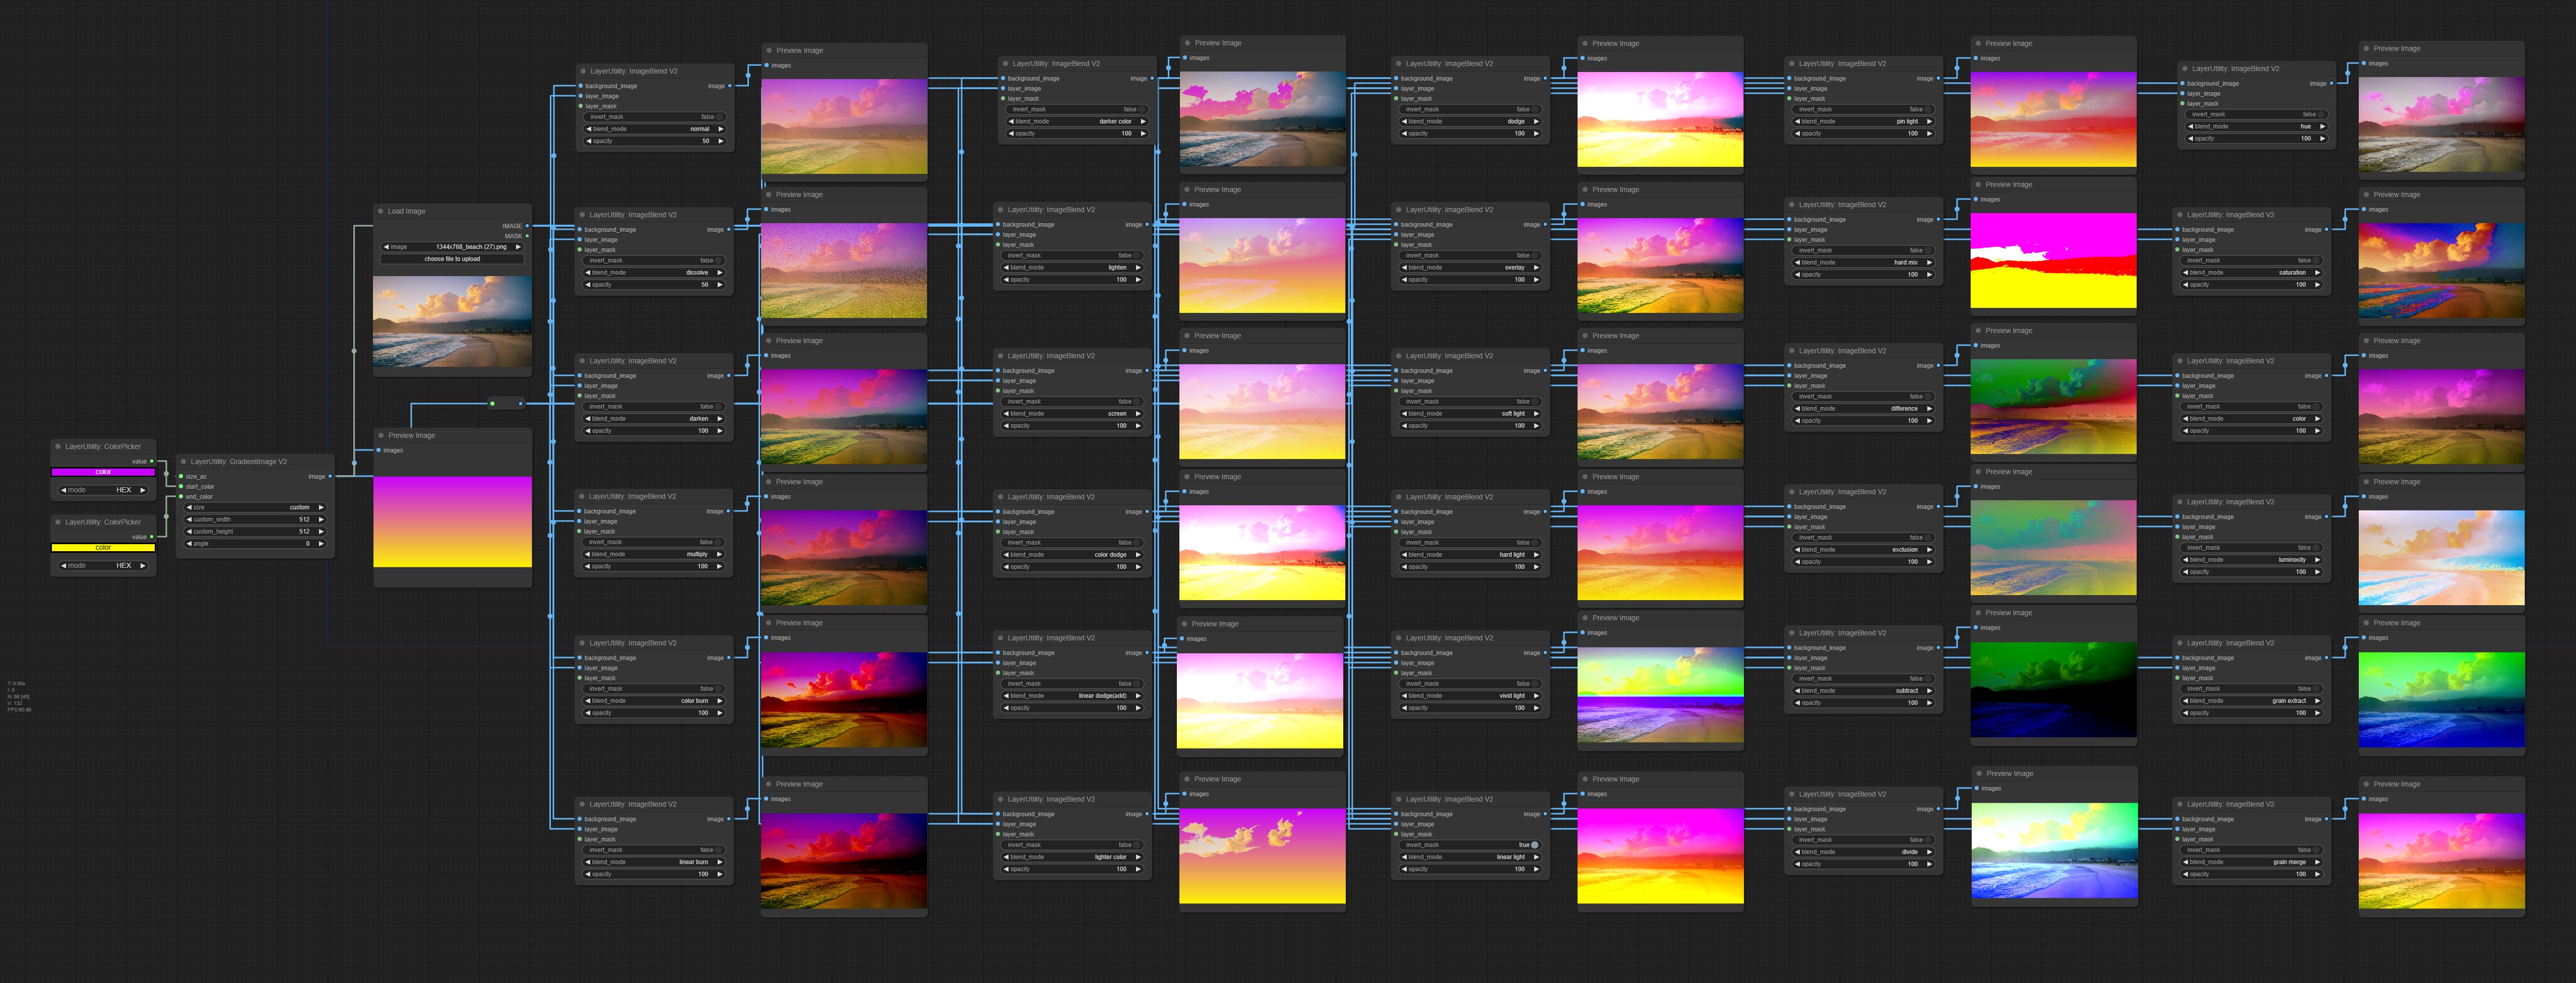
*Preview of the Blend Mode V2
4 The RGB color described by hexadecimal RGB format, like '#FA3D86'.
5 The layer_image and layer_mask must be of the same size.
Estrelas
declaração
LayerStyle nodes follows the MIT license, Some of its functional code comes from other open-source projects. Thanks to the original author. If used for commercial purposes, please refer to the original project license to authorization agreement.


