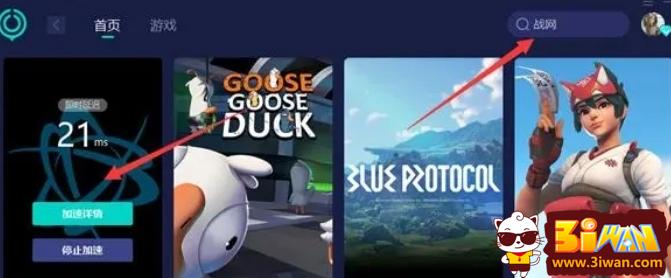
Overwatch is a multiplayer competitive game. Like other domestic games, the game is divided into multiple service areas. Many players who want to play the Asian server cannot experience the Asian server because they do not know how to enter the Overwatch Asian server. The following is The editor brings you an overview of how to enter the Asian server of Overwatch and tells you how to enter the Asian server.

1. Find on the acceleration page, switch the Battle.net region, and change the region to Asia. At the same time, the node needs to be linked to Hong Kong, because other servers require a mobile phone number in the corresponding region to register.
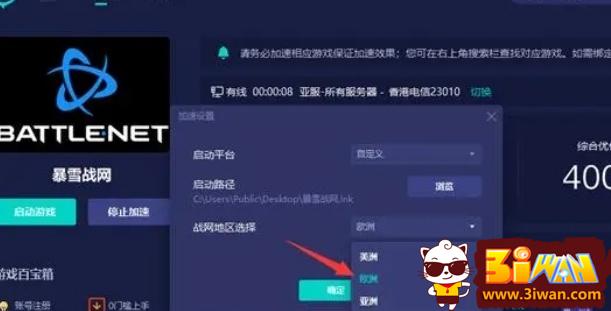
2. After opening Battle.net again, if the region is displayed as Hong Kong, it means the switch is successful. Click the registration button below and proceed step by step.
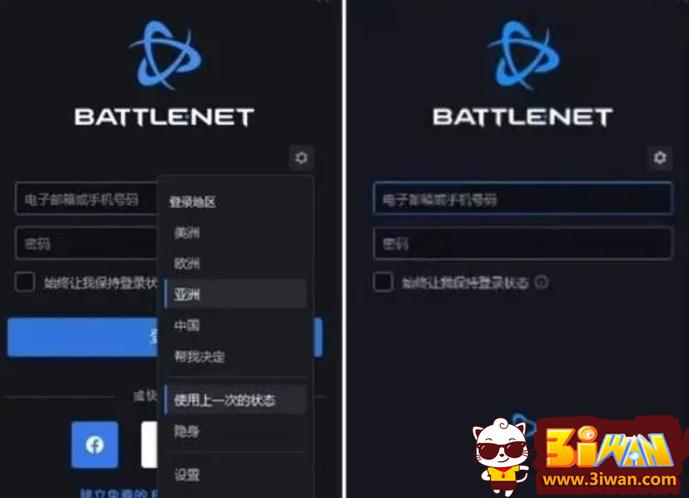
3. Log in to the registered account and you will find the Overwatch installation page.

Step 1: Open the C drive (system drive), then open the Users folder, then find your username folder and open it, then find the AppData folder and open it.
The AppData file is hidden by default, so you need to click View in the folder options and check Show hidden files and folders, so that you can see AppData!
Step 2: Open the Roaming folder, find the Battle.ney folder, and use Notepad to open the Battle.ney.config file.
Step 3: Modify the AllowedRegions area under the Client syntax and add the AllowedRegions area to CN;US;EU;KR