
Many people don't have much contact with open source projects, so when setting up certain projects, they can't find a way to deal with them. Here I recommend eclipse to everyone. As a very easy-to-use source code software, I think what everyone is most afraid of when building a project is that this part will go wrong. At the same time, it also has a very good effect on the web. Let's take a look at how to create a project in eclipse.
The operating environment of this tutorial: windows10 system, java10&&Eclipse IDE 2020 version, thinkpad t480 computer. This method is suitable for all brands of computers.
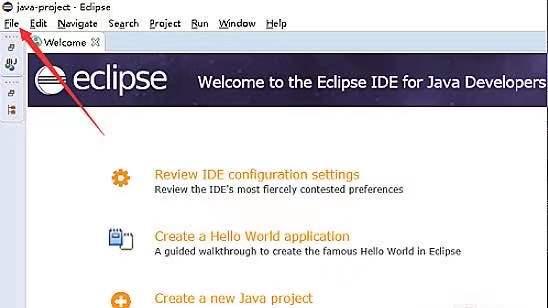
1. Open the eclipse software and click the file option pointed by the arrow in the menu bar.
2. In the drop-down option of the file option, click the new and JAVA PROJECT options pointed by the arrow.

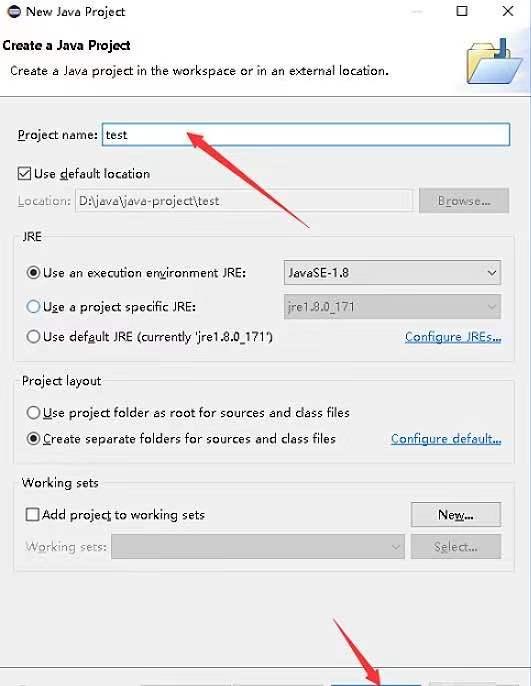
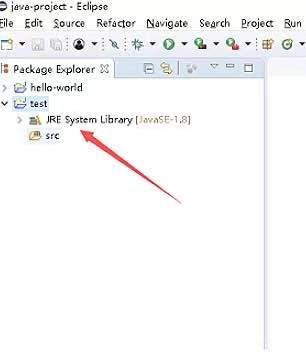
5. Right-click SEC, select new and CLASS pointed by the arrow, and enter the new page.
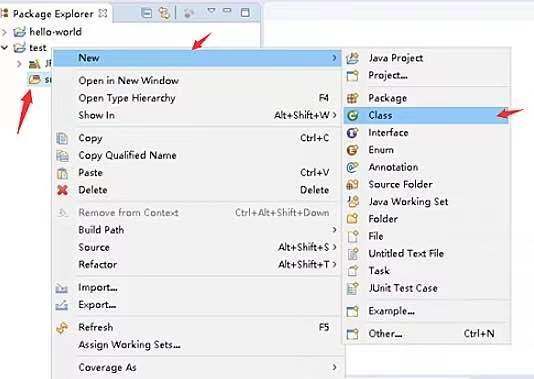
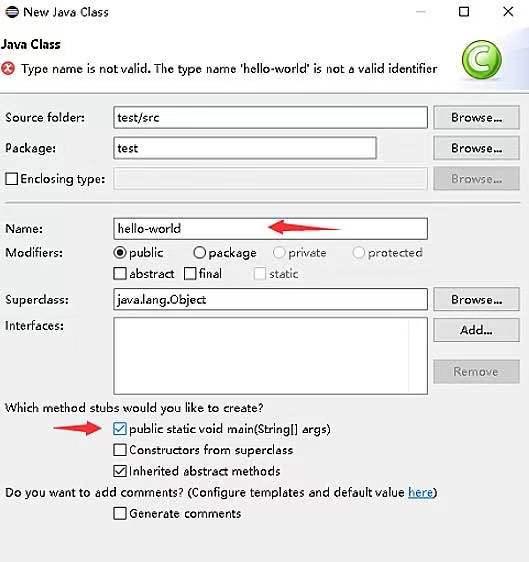
6. Enter the class name in the name input box pointed by the arrow, check the box pointed by the arrow, and click finish pointed by the arrow.
7. Finally we can see that the java file is created.