
During the project development process, different projects use different versions of nodejs. Sometimes errors are reported because the node version is too high or too low; how to install multiple versions of node in the same system, here There are two ways. Read on and choose the one that suits you.
NVM, the full name of Node Version Manager, is a tool for managing NodeJS versions.
NVM only supports Linux and OS X by default, and does not support Windows. There are 2 alternatives for Windows operating systems:
nvm-windows
nodist
Here we only introduce how to use nvm-windows to install and switch multiple versions of NodeJS.
nvm use <版本号> , it is still invalid (no "*" is selected in front of the node version), you need to reinstall.
1. Click the start menu, find the nodejs folder, click on the arrow to uninstall (note: you need to end the project using nodejs before doing this)
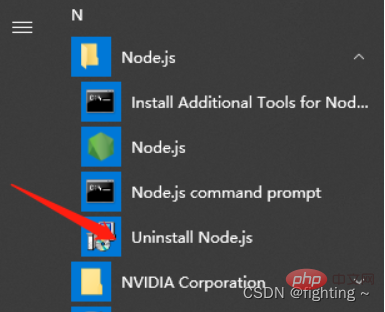
2. Check whether nodejs still exists in the system
(1) View in the start menu
node -v in the cmd window to view1. Download the nvm
installation package download address: https://github .com/coreybutler/nvm-windows/releases 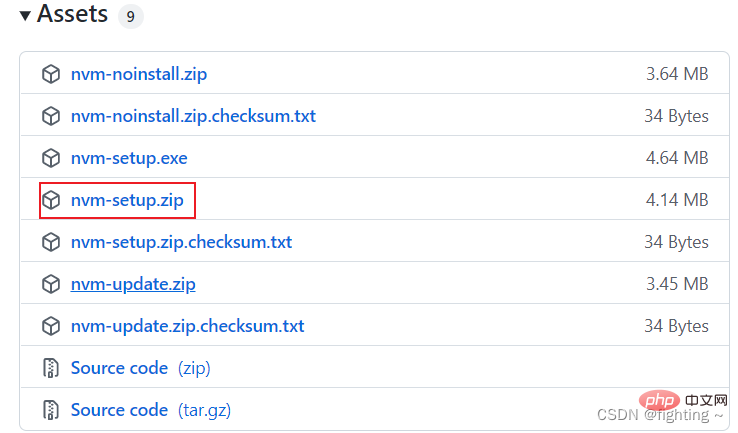
Note : The installation environment is win10 system, 64 -bit.
2. nvm installation (Note: It is best not to install on the C drive)
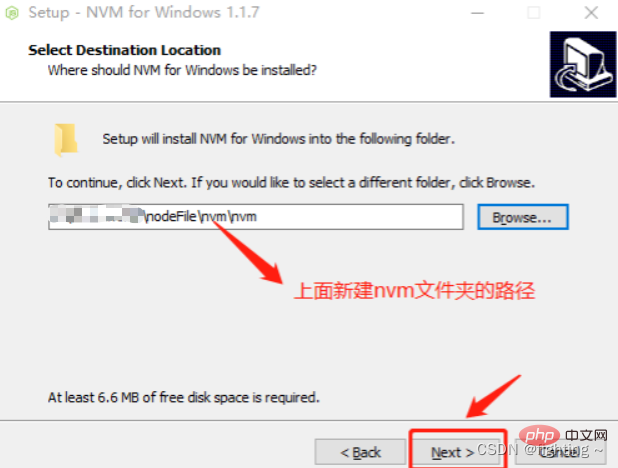
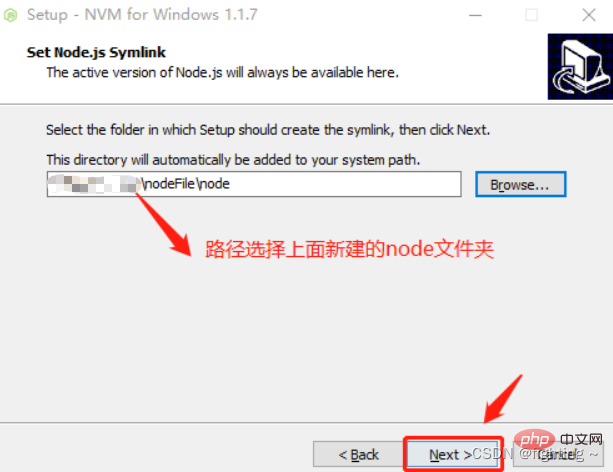
(1) Create two new folders under the specified file, one to store the nvm installation file, and the other to use To store node files

(2) Place the downloaded installation package into the nvm folder, unzip it, and install it.
Note: During installation, select the newly created folder as the designated installation directory.

(3) Select the nvm installation path and click Next
(4) Select nodejs path
(5) Click Install——>Click Finish to complete the installation.
(6) Confirm whether the installation is successful.
Open CMD and enter the nvm command. If the installation is successful, it will be displayed as follows.
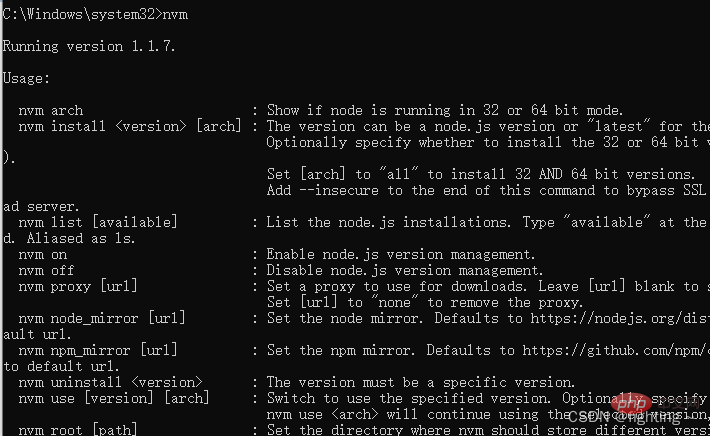
(7) nvm has been installed successfully.
If you have installed the Taobao image and need to complete the configuration of downloading the image, you can skip
opening the settings.txt file in the nvm folder and add the following code at the end (without changing it, downloading the node may error)
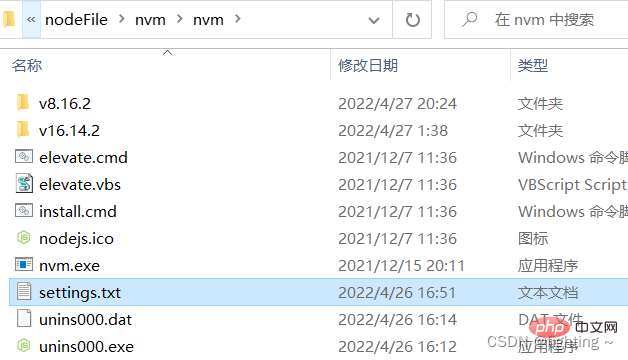
arch: 64proxy:
node_mirror: https://npm.taobao.org/mirrors/node/
npm_mirror: https://npm.taobao.org/mirrors/npm/Note
:
arch: Windows operating system bit number
proxy: proxy, Taobao NodeJS mirror and NPM mirror
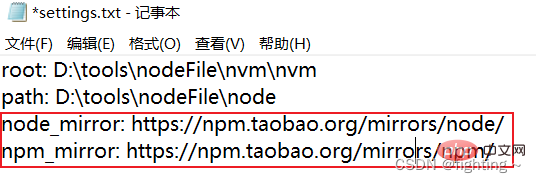
Note:
.root: NVM installation path
path: NodeJS shortcut path
1. After NVM is successfully installed, win + r and enter cmd to open a new cmd window. You can view all available commands through the nvm -v command.
C:>nvm -v

Running version 1.1.7.

Usage:

  nvm arch : Show if node is running in 32 or 64 bit mode.
  nvm install <version> [arch] : The version can be a node.js version or "latest" for the latest stable version.
                                 Optionally specify whether to install the 32 or 64 bit version (defaults to system arch).
                                 Set [arch] to "all" to install 32 AND 64 bit versions.
                                 Add --insecure to the end of this command to bypass SSL validation of the remote download server.
  nvm list [available] : List the node.js installations. Type "available" at the end to see what can be installed. Aliased as ls.
  nvm on : Enable node.js version management.
  nvm off : Disable node.js version management.
  nvm proxy [url] : Set a proxy to use for downloads. Leave [url] blank to see the current proxy.
                                 Set [url] to "none" to remove the proxy.
  nvm node_mirror [url] : Set the node mirror. Defaults to https://nodejs.org/dist/. Leave [url] blank to use default url.
  nvm npm_mirror [url] : Set the npm mirror. Defaults to https://github.com/npm/cli/archive/. Leave [url] blank to default url.
  nvm uninstall <version> : The version must be a specific version.
  nvm use [version] [arch] : Switch to use the specified version. Optionally specify 32/64bit architecture.
                                 nvm use <arch> will continue using the selected version, but switch to 32/64 bit mode.
  nvm root [path] : Set the directory where nvm should store different versions of node.js.
                                 If <path> is not set, the current root will be displayed.
  nvm version: Displays the current running version of nvm for Windows. Aliased as v.
2. Use nvm install <版本号> command to install the specified version of NodeJS
C:>nvm install v8.16.2
Downloading node.js version 8.16.2 (64-bit)...
Complete
Downloading npm version 6.4.1... Complete
Installing npm v6.4.1...

Installation complete. If you want to use this version, type

nvm use 8.16.2
3. After successful installation, a v8.16.2 folder will appear in the NVM installation directory. Use nvm list command to view the list of installed NodeJS.
C:>nvm list

     8.16.2
4. Use nvm install <版本号> command again to install another version of NodeJS
C:>nvm install v12.8.0
Downloading node.js version 12.8.0 (64-bit)...
Complete
Creating C:Devnvmtemp

Downloading npm version 6.10.2... Complete
Installing npm v6.10.2...

Installation complete. If you want to use this version, type

nvm use 12.8.0
5. Use nvm use <版本号> to switch the NodeJS version to be used. After the switch is successful, you can use node -v and npm -v commands to check whether the switch is successful.
C:>nvm use v8.16.2
Now using node v8.16.2 (64-bit)

C:>node -v
v8.16.2

C:>npm -v
6.4.1
Please note here that garbled characters may appear when using nvm use <版本号>
C:>nvm use v8.16.2
exit status 1: ��û���㹻��Ȩ��ִ�д˲�����
Don’t panic or get angry. At this time, you can re-open a cmd window running as administrator and there will be no garbled characters. In this case, use nvm use <版本号> to switch the NodeJS version to be used, and use nvm ls to view all installed node versions. The version number with an * in front of it indicates the currently used NodeJS version.
C:Windowssystem32>nvm use v8.16.2
Now using node v8.16.2 (64-bit)

C:Windowssystem32>nvm ls
    12.8.0
  * 8.16.2 (Currently using 64-bit executable)
6. Here is a summary of some commonly used commands:
nvm off // Disable node.js version management (without uninstalling anything)
nvm on // Enable node.js version management nvm install <version> // The named version when installing node.js is the version number. For example: nvm install 8.12.0
nvm uninstall <version> // Uninstall node.js is the command to uninstall the specified version of nodejs. When the installation fails, uninstall using nvm ls // Display all installed node.js versions nvm list available // Display all nodes that can be installed .js version nvm use <version> // Switch to use the specified nodejs version nvm v // Display the nvm version nvm install stable // Install the latest stable version
1. Similarly, if you have installed node before, in order to avoid unnecessary trouble, uninstall it first.
Note : When installing multiple versions of node, you must start from the lower version. If you If you install a higher version first, there will be many problems. If you have already installed it, uninstall it first and then proceed to the following steps.
2. Before installing node, I first select a node installation directory. I want to install it to the D drive, so I Create a new NODE directory in the D drive, and create a nodejs8 folder in it, because I will install the 8.16.2 version of node in this folder later.

3. To start installing
the node version, you can go to the node Chinese website or click here to download
https://nodejs.org/
Open the downloaded node8.16.2 installation package, click Next until the installation path appears, switch the installation path to the nodejs8 folder path we created above: D:toolsNODEnodejs8 , and then continue to the next step until Installation successful
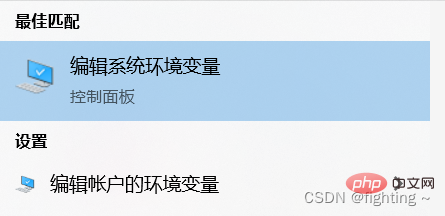
, search for environment variables in the start search box. Note that here you select Edit System Environment Variables— >Advanced—>Environment Variables.
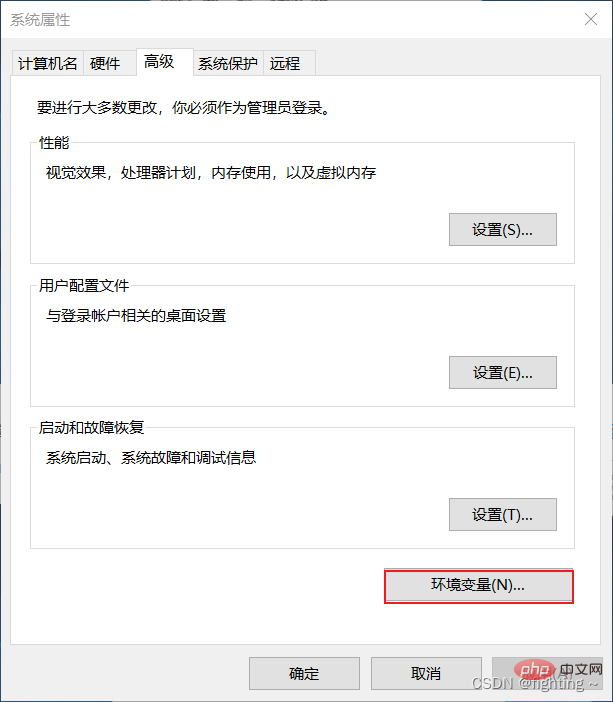
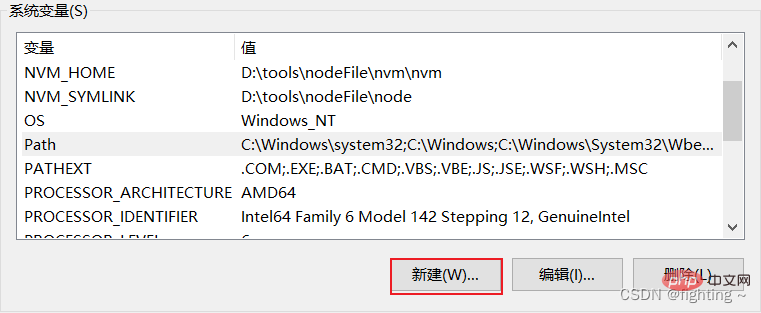
Click New in the system variables, variable name: nodejs, variable value: D:toolsNODEnodejs (that is, the folder where node is stored above, here first remove the 8 after nodejs8)

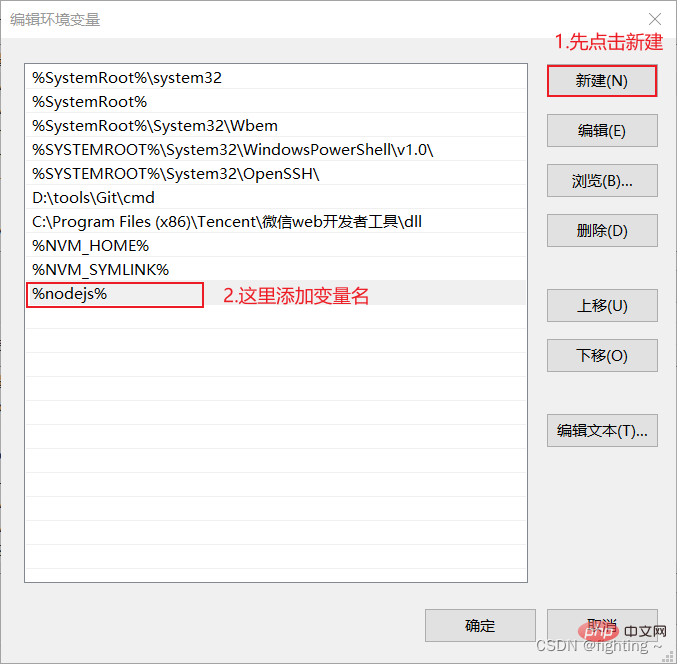
Click OK and then find the path variable in the system variables. After selecting it, click Edit, then click New. Add the variable name of the new system variable above in the form of %变量名% , and click OK.
It’s not enough at this time. The most critical point is: we need to rename the folder nodejs8 we created at the beginning to nodejs.
It is worth noting that : one aspect of renaming nodejs8 here is to match the variable name in the environment variable configured above. Matching (that is, using this version of node), on the other hand, it is to better install the next version (because if the file name is not modified after installing a node version, no matter what you install when you install other versions of node later place, the previous one will be overwritten)

1. After checking
the duplicate names, then win+R->cmd, enter node -v in the command window to check the node version. If the version number appears, it means that the first node version is installed successfully
C:>node -v
v8.16.2
2. Install the next version
Since the file name of the installed node8.16.2 version has been renamed above (to prevent overwriting), we only need to create a new folder nodejs12 in the same directory and install the node12.8.0 version of node (the method is the same as the above to install node8. 16.2)

. After installing multiple versions of node, when we need to switch versions, we only need to rename the folder of the corresponding version to nodejs.
For example: We installed the node8.16.2 version first. (Place it in the nodejs folder) and node12.8.0 version (Place it in the nodejs12 folder). The node currently used is 8.16.2. If you want to switch to the node12.8.0 version of node, just change the file name. , rename nodejs to nodejs8, and then rename nodejs12 to nodejs. In other words, rename the node folder of which version of node to nodejs.
At this time, open the command line window and enternode -vto check the node version
C:>node -v
v12.8.0
Friends, which method are you accustomed to using? Have you learned both ways? Let’s discuss it in the comment area!