Document Object Model , abbreviated DOM, Chinese:文档对象模型, is标准编程接口recommended by the W3C organization for processing extensible markup languages.
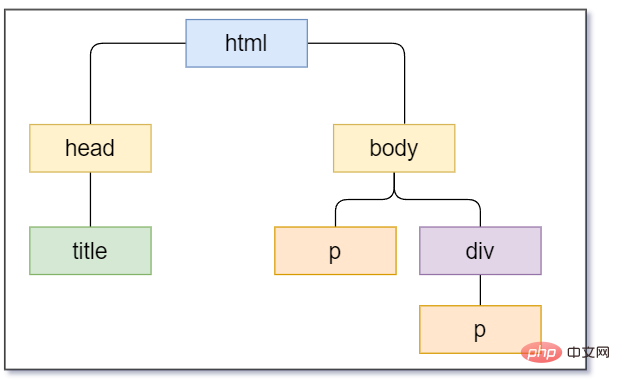
DOM Tree refers to解析the HTML page through DOM and生成the HTML tree树状结构and corresponding访问方法. With the help of DOM Tree, we can directly and简易operate each markup content on the HTML page, such as the following HTML code
< html><head>
    <title>Playing with dom</title></head><body>
    <p>I am a dom node</p>
    <p>
        <p>p p</p>
    </p></body></html>
Abstracted into DOM tree as follows: 
After understanding the above knowledge, the following is about learning the API. I will explain from four aspects: how to get DOM, how to create and add DOM, how to modify DOM and how to delete DOM. Follow up
There are many APIs to get DOM. , but they are all very simple, come on
:
document.getElementById("id name"); Example:
<body>
    <p id="p">I am p node</p>
    <script>
        var p = document.getElementById("p");
        console.log(p);
    </script></body>
Open the console and you can see that you successfully obtained
:
document.getElementsByTagName("tag name"); Example:
<body>
    <p>I am p node</p>
    <p>I am also a p node</p>
    <script>
        var p = document.getElementsByTagName("p");
        console.log(p);
        for (let i = 0; i < p.length; i++) {
            console.log(p[i]);
        }
    </script></body>
Note : Use the getElementsByTagName() method to return a collection of objects with specified tag names. Because what is obtained is a collection of objects, we need to traverse if we want to operate the elements inside. Note: The element objects obtained using this method are dynamic of
:
document.getElementsByClassName("class name"); Example:
<body>
    <p class="p">I am p node</p>
    <p class="p">I am p node</p>
    <script>
        var p = document.getElementsByClassName("p");
        console.log(p);
        for (let i = 0; i < p.length; i++) {
            console.log(p[i]);
        }
    </script></body>
This is also very simple, just remember it
syntax through HTML5 new api:
document.querySelector("See examples for details"); document.querySelectorAll("See examples for details"); Examples:
<body>
    <p class="p">I am p node</p>
    <p class="name">Pear Blossom</p>
    <p id="info">Information</p>
    <script>
        // Get var by tag name p = document.querySelector("p");
        // Obtain through class name, remember to add var qname = document.querySelector(".name");
        // Get by id, remember to add #
        var info = document.querySelector("#info");
        // Get all matched elements and return the array var all = document.querySelectorAll("p");
        console.log(p);
        console.log(qname);
        console.log(info);
        for (let i = 0; i < all.length; i++) {
            console.log(all[i]);
        }
    </script></body>
As you can see, using the new API of HTML5 is very flexible, so I like to use this very much and recommend you to use
. In addition, there are some special elements that have their own acquisition methods, such as body, html Element
syntax:
document.body;
Example:
<body>
    <script>
        var body = document.body;
        console.log(body);
</script></body> 
As you can see, all the contents of the body element have been successfully obtained.
syntax:
document.documentElement;
example:
<body>
    <script>
        var html = document.documentElement;
        console.log(html);
</script></body> 
As you can see, the entire webpage html has been obtained. OK, so far, the acquisition of DOM has come to an end. Now let’s start to dynamically create and add dom. Learn
To put it bluntly, operating dom is the same as playing with data, adding, deleting, modifying and checking. , and creating and adding is equivalent to adding. When we add data, we must first have the data, and then add it. The same is true for DOM operations. First, we must create the DOM, and then tell it where to add it. Finally, the operation is completed. Let’s learn below. How to create dom, and, how to add dom
is very simple, don’t be afraid, haha
Syntax:
document.createElement("Element Name"); Example:
If you want to dynamically create an element p , you can write it like this. The same goes for other things. Apply inferences
var p = document.createElement("p"); and add dom. There are two types here. Use them according to the situation. One is in the parent element. Append at the end of the child element, one is to append after the specified child element
. Thesyntax:
node.appendChild(child);
Example:
<body>
    <p>
        <a href="">Baidu</a>
    </p>

    <script>
        var p = document.createElement("p");
        p.innerText = "I am p"
        var p = document.querySelector("p");
        p.appendChild(p);
    </script></body>
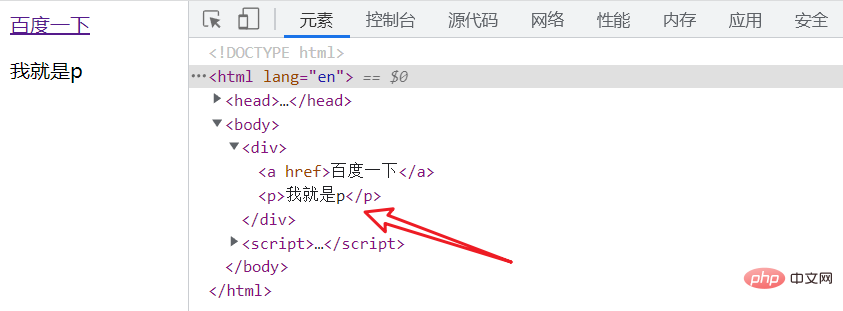
Dynamically create the element p paragraph tag and write the text "I am p". Finally, obtain the p element and append p as a child of p. This appending method is appended at the end, so the effect is as shown in the figure above.
Syntax:
node.insertBefore(child, specified element);
Example:
<body>
    <p>
        <a href="">Baidu</a>
        <span>I am younger brother span</span>
    </p>

    <script>
        var p = document.createElement("p");
        p.innerText = "I am p"
        var p = document.querySelector("p");
        var a = document.querySelector("a");
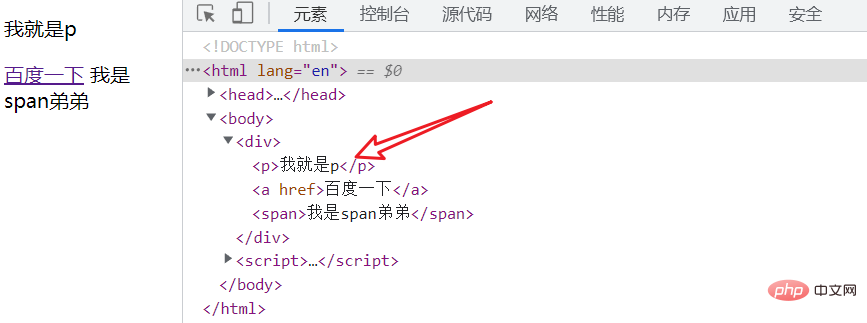
        //Create p under p, before the a element p.insertBefore(p, a);
    </script></body>
Is this the end? Yes, what do you think? Isn't it very simple? Simple is enough. All that's left is to practice more. OK, let's move on to the next step. How to modify the DOM?
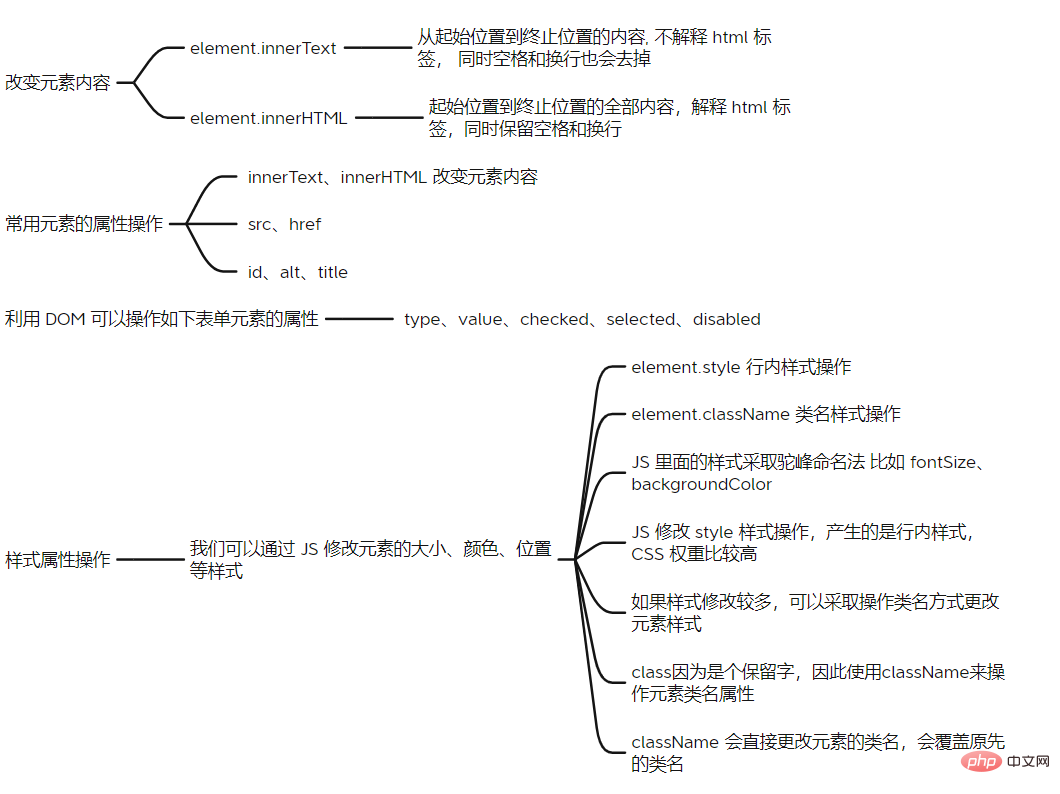
is summarized as follows:

Example 1: Get the p tag of the page and change the content to "Zhou Qiluo"
<body>
    <p>
        <p></p>
    </p>

    <script>
        var p = document.querySelector("p");
        p.innerText = "Zhou Qiluo";
    </script></body>
Example 2: Click the button to generate a Baidu hyperlink
<body>
    <p>
        <button onclick="createBaidu()">Click to generate Baidu hyperlink</button>
    </p>

    <script>
        function createBaidu() {
            var p = document.querySelector("p");
            var a = document.createElement("a");
            a.href = "https://www.baidu.com";
            a.innerText = "Just search Baidu and you will know";
            p.append(a);
        }
    </script></body>
Example 3: Click the button, the text color in the p tag turns green, and the dog head
<body>is manually changed.
    <p>
        <button onclick="changeColor()">Click to turn green</button>
        <p>I will turn green in a moment</p>
    </p>

    <script>
        function changeColor() {
            var p = document.querySelector("p");
            p.style.color = "green";
        }
    </script></body>
The node.removeChild() method deletes a child node from the DOM and returns the deleted node.
Syntax:
node.removeChild(child);
Case:
<body>
    <p>
        <button onclick="removeP()">Click to remove p</button>
        <p>I am p, the time will be up in a moment</p>
    </p>

    <script>
        function removeP() {
            var p = document.querySelector("p");
            var p = document.querySelector("p");
            p.removeChild(p);
        }
    </script></body>