Unlocked Room is an escape room game that focuses on solving puzzles. If players want to successfully solve the truth behind all the puzzles, they can only continue to solve the puzzles. However, the puzzles in the game are relatively complicated. It's a little difficult, but I believe everyone's IQ can still solve it perfectly. Here I bring you a related guide. Friends who don’t want to use their brains can take a look.

How to play in an unlocked room
Chapter 1
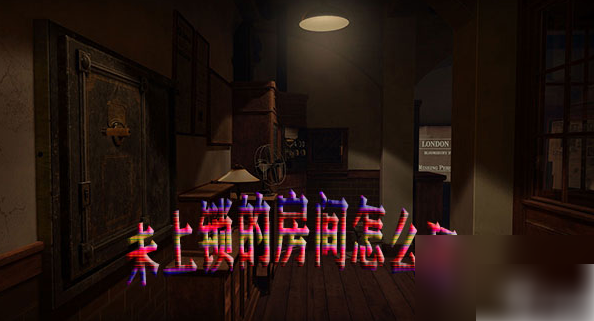
1. After entering the game, you first see a safe, then start the game. The game prompts "double-click the envelope".
2. After sliding out the letter according to the arrow, a letter comes into view.
3. After getting the key, we use the key to open the small box next to it.
4. After opening the box, you will find the eyepiece mentioned in the letter just now. It seems to be a key prop.
5. At this time, another letter came out, which was really troublesome, "Feed me and I will live. Give me something to drink and I will die." Although I don’t understand the general meaning, I still keep going.
6. At this time, the eyepiece does not have a lens, so there is no need to linger. When the letter is released, many players complain that they do not know how to exit the scene. They only need to pinch with two fingers opposite each other to shrink the photo.
7. When wood meets fire, fire survives; when water meets fire, fire dies. At this time, you can think of what the above two sentences mean. The word is fire, that is, fire. So the editor started looking around for signs of fire, and finally paid off and saw the word "fire" on the leg of the safe.
8. Follow the prompts, push it, and a new key will appear. Click to take it.
9. The next step is to check the key. The characteristic of the key is that it can change direction. With the key, it is obvious to find the key hole, but the key hole is very hidden. After searching around, I finally found it! Requires swiping left.
10. There is a panel on the top. Slide it open to reveal the key hole. Use the key you just got to open the hole. Remember that the key can adjust its direction. After opening the lock, the prototype panel in the middle will slide open.
11. The key can change direction, which means there must be another key hole. We go to find another key hole, and we also need to open it to the left. After adjusting the direction of the key and opening it, we get a carving knife, which seems to be used as a wrench.
12. Click this icon to try and see what secrets there are. I found a particularly prominent screw on the right side of the icon, prompting me to pry it open with a wrench.
13. The sign was opened and the lens was found behind it. Finally, the eyepiece has a lens. Don’t forget, as mentioned in the first letter, the eyepiece is a very important prop.
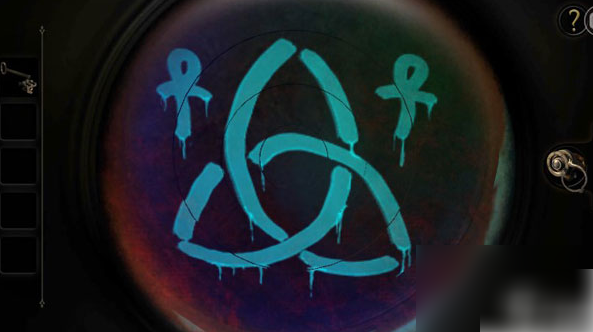
14. At this time, use the eyepiece to look at the safe. The effect is terrifying.
15. Go back to the prototype panel just now and look at it with the eyepiece. It might give you a headache looking at the messy picture... It's actually not difficult, because the center is fixed, and you just have to build it layer by layer. Remember that the safe will open automatically after you put it together using the eyepiece's perspective. There is another treasure box inside, but what is this treasure box used for?

Chapter 2
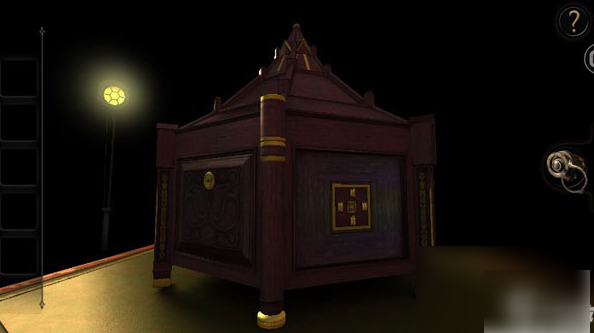
After the end of the first chapter, we saw a treasure box. Looking around the treasure box, it seemed that there was nothing to open. So we first used the eyepiece to observe the treasure box. We found that there was something strange in one corner. We clicked it with our hands and got a book.
1. The book is not difficult to open. Just slide the metal piece on the book. After opening the book, there is a diary and a key. The diary should have little to do with clearing the game. We take the key.
2. At this time, we return to the position of the numbers. We can easily see through the eyepiece that they are left: 5, right: 7, top: 2, and bottom: 6. The door is opened.
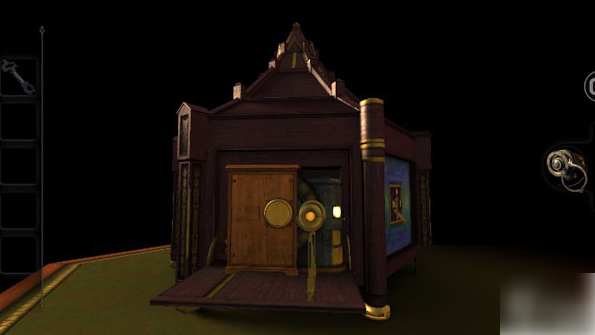
3. Then open the box on the back, insert the key, turn the key, and the machine will start turning immediately.
4. This is a fire-making device. What is missing is fire. After looking around, the table legs caught my attention.
5. Light the fire and move the handle next to it, and the stove will burn.
6. Everyone, please pay attention to why a symmetrical treasure chest only has this pillar that is special. There must be a mystery. Go and have a look. . . Sure enough, a telescope can be found.
7. Place the telescope on the stand, pay attention to adjusting the telescope, and align it with the pattern above to lengthen it and use the eyepiece for close observation. TRIAL This means a set of clues.
8. Another puzzle pops up at this time. The puzzle is a little difficult. Pay attention to the puzzle under the eyepiece, but you can still solve it if you are careful. After you finish it, a word pops up: L.
9. Put L in and the first lock will be opened. A box pops up, look at the diary first.
10. At this time, we found many doors with no symbols. Enter the symbols in the following order, and the door will open. Take away the key inside.
11. Pay attention to the upper end of the box, which is a trigger mechanism. After being touched, a new thing will appear.
12. Use the gravity system to light up the four lights, and a pattern will pop up.
13. The pattern is illuminated by the eyepiece. It is a three-dimensional figure. If the position is constantly adjusted to overlap, a drawer will pop up and the key will be taken away.
14. Open the drawer next to it and you will get a key.
15. Then insert it into another hole to get a five-pointed star compass.
16. Insert the five-pointed star at the top and you will get a leather case. The holster fits in the position shown in the picture below.
17. If you shake this switch, you will get a key.
18. Adjust the structure of the key to match the keyhole pattern, then insert it into the keyhole and open it. You will get a seal pattern.
19. Place the seal just now in this position. A new image will open.
20. Look at the side.
21. The exclamation mark in the picture can be drawn upward. Will get gear and holster.
22. Put what you get into the organization. Wave Gear will get a screwdriver.
23. Insert the compass into another slot and unlock the second lock. After the second lock is unlocked, a gear mechanism pops out. After unscrewing the screws, a set of gears and two buttons will pop up. Press the buttons to adjust the position of the gears and adjust them to a rectangle. and get a key.
24. After getting the key, open the lock at the top and get one large and one small gear. Go back to the gear device and install the gear. After combining, lift the second device. Then you will get another gear. Press the gear on the third lifting device. At this time, you will find that the distance is not enough. Put the belt on On top, the third device is cranked up.
25. The new device is activated. Press the button to get an iron rod. Twist the iron rod away to get a pointer and a photo. Shift perspective to this location
26. Use an iron needle to open the panel, and you will see a movable device. Use the eyepiece to observe it, move the slide and rotate the cylinder to make it look like a figure, and you will get a badge.
27. Switch the perspective to the villain above, put the badge on the golden villain, the villain will automatically turn around and get an emerald.
28. The position of gem inlay is as shown below:

29. Use the eyepiece to observe, and a clock indicator hand will appear. Adjust the long hand to the 12:30 position to open the third lock and clear Chapter 2.
Chapter 3
Entering the third chapter, a more sophisticated device appeared. It seems that it is really a game of big boxes within small boxes, and the difficulty is also increasing. Let us explore the secret of The Room together.
1. How should we start when faced with a complex device. For games like this, you should first use the eyepiece to look around and quickly find the entry point. Here we see the bright spot appearing below, where the breakthrough should be.
2. Deepen the perspective and find that it can be opened. After opening it, slide down the device and a small box and a letter will pop up on the right. At this time, a scary sound will appear.
3. Open this box, and a maze will appear. This maze is very simple, just let the ball on the left go to the right position, and the circular device in the middle can rotate. The order is to let the ball go to the top first, then to the bottom, and finally to the right. At this point the device opens and a key is obtained.
4. Turn the large device and find the key socket. This is not difficult to find. Insert the key and turn the prototype device. First turn 5 squares to the left, then 4 squares to the right, then finish turning the left square, and then turn the right square. When finished, a device pops up.
5. Get the small props in the picture above and click on the device. The device says there is a piece of paper missing. The device looks like a viewing device. We put the photo in and try it. Sure enough... here you need to open the eyepiece first and then watch. You can see I came across a video where the prompt was SIGIL.
6. Come to the position shown and open the eyepiece for observation.
7. Move the slider, take out the two iron pieces, and move them to a position with the bottom
8. Put in the props you just got, and a device will open below. The device is a combination of English letters. We immediately thought of the English word just shown, SIGIL. Enter SIGIL to pop up the drawer, which contains a crystal and a diary.
9. Then, go to the position shown and put the crystal in, and a beautiful light will appear.
10. The light is very thick at first. Turn the yellow wheel below to adjust the light to the thinnest level. At this time, a disk will pop up above.
11. Put the disk into the position, slide the two slide cards in the picture above to the right at the same time, the two wheels will spin, the drawer will be opened, and another device will be collected. Don't ignore that there is a hidden device in the device. , click once, and a small drawer will appear, and you will get a map fragment.
12. Turn the perspective to the light
13. Place the device in the upper right position, the light will be connected, and an instrument will pop up above. First click on one of the left and right ones, and then quickly turn the perspective because if you click on it left or right, the same device will appear in other places. You still need to click and pay attention to the time. Then click on each dial that pops up to get two devices respectively.
14. Turn the perspective to the position shown and adjust the shape of the key. The shape is not the one shown above. Players can easily adjust it according to the shape of the slot.
15. After opening the device, you get another refracted one, similar to the light refraction above. Put the refracting device into the left end of the light, and another device is opened: you need to use the eyepiece to watch here.
16. Continuously adjust the upper, left, and lower slides to adjust the angle of refraction, and then continue to pop up a device to get a fragment. At this time, you already have three fragments in your hand and come to the location of the globe.
17. Put the three fragments into the globe in sequence. When the third fragment is placed, you will get a wrench and adjust the perspective to the position shown:
18. Insert the wrench into the hole on the lower right, shake the wrench, and the circular pieces will spread out. At this time, a wooden board will appear. Use the eyepiece to observe a pattern similar to a puzzle. It is similar to Chapter 2. The picture cannot be given here. , players can spell out the graphics with a little exploration
19. After spelling out the graphics, you will get a small gift box. Examine the small box and turn the disk at the bottom of the small box.
20. Turn the perspective to the position shown:
21. Insert the device, and all the bottom positions should come to an end. At this time, a telescope will pop up above the coffee table. Click on the telescope to see the distribution of some small dots. We will then unlock the facilities under the coffee table based on the distribution of the small dots.

Chapter 4
After entering Chapter 4, the difficulty of decrypting the game continues to increase, and the storyline gradually emerges. Rather than the decryption process, I am more curious about what experiments the protagonist did and what kind of tragedy it ultimately led to. It is inexplicably eerie and terrifying. Coming. Let us uncover the final mystery together.
1. Use the gravity system to slide the two sliding parts in the picture to the middle position respectively. At this time, you will get a diary and a wrench.
2. Adjust the viewing angle to the position shown and insert the wrench.
3. Shake the wrench, and a meter and a panel will pop up. Click the button of the meter. You don’t know what it will be used for a short time. The gear starts to rotate. At this time, we come to the panel and observe with the eyepiece. It is the docking of graphics. There is not much to say about the game, it can only be put together by the players themselves, because the assembled graphics disappear immediately. After putting together the graphics, a sword immediately appeared.
4. The sword is more like a key. The perspective keeps switching to find the slot that fits the sword. The prototype panel in the middle of the coffee table meets the requirements, as shown.
5. Insert the sword, and a more complex device comes out. It seems that it is fun to play. At this time, we turn the perspective to the position of the eyepiece docking pattern, and then observe the wooden board and find a set of combinations. Turn the perspective to the position shown and enter according to the position of the graphic.
6. The device starts to rotate, and the gears on the dashboard also start to rotate. Then click the button on the gear dashboard to return to the position of the wooden board, and then perform graphic docking.
7. However, the ball kept turning at this time and it was impossible to piece together the docking. At this time, we found that another set of graphics appeared in the lower left corner. We wrote it down, then switched the perspective input, and then entered the graphics. After returning to the board, the star It stopped running, so we used the eyepiece to re-splice it. After splicing, you get a medal.
8. Then insert the obtained medal into the position.
9. The medal can control the rotation of the middle prototype panel. At this time, the wooden board becomes a mirror. Opening from the mirror is a hexagonal pillar. Constantly adjust the position of the medal so that the hexagonal pillar presents a pattern in the mirror. Watch The mirrors are counted from bottom to top. The first layer is 1 and 3; the second layer is 2; the third layer is 1 and 3; the fourth layer is 2, which is another set of graphics. Enter this set of graphics into the table. middle
10. After inputting, you get an energy source. Rotate the dashboard again, continue to click, and continue to connect pictures. This time it is relatively simple. Just rotate each layer of the column so that they are displayed on one side. At this time, the upper layer of the column is opened. , put the energy source in, and animation and text will pop out. End of Chapter 4.