When using CSS for web page layout, there is one thing that we cannot do without - the box model. Box model, as the name suggests, the box is used to hold things, and the things it holds are the contents of HTML elements. In other words, every visible HTML element is a box, and the boxes mentioned below are equivalent to HTML elements. The box here is a little different from the box in the box model. The box here is two-dimensional.
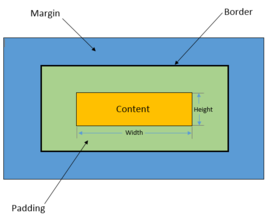
The composition of the box
The box model is a thinking model often used in web design. It consists of four parts. From inside to outside, they are content, padding, border and margin. , CSS provides a series of related properties for these four parts, and the performance of the box can be enriched by setting these properties.
box size
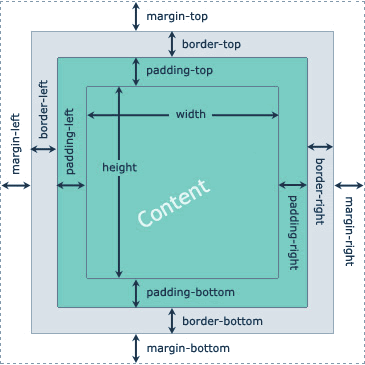
The size of the box refers to the width and height of the box. Most beginners easily misunderstand width and height as width and height properties. However, by default, the width and height properties only set the width and height of the content (content) part. The real width and height of the box are calculated according to the following formula:
The width of the box = content width + left padding + right padding + left border + right border + left margin + right margin
The height of the box = content height + top padding + bottom padding + top border + bottom border + top margin + bottom margin
Expressed as a formula with attributes:
The width of the box = width + padding-left + padding-right + border-left + border-right + margin-left + margin-right
The height of the box = height + padding-top + padding-bottom + border-top + border-bottom + margin-top + margin-bottom
1. Content area (content)
The content area is the center of the entire box model, where the main content of the box is stored, which can be text, images and other resources. The content area has three attributes: width, height, and overflow. The width and height attributes are used to specify the width and height of the box content area. When there is too much content information and exceeds the range set by the content area, you can use the overflow attribute to set the overflow. How content is processed, the overflow attribute has four optional values:
(1) hidden: indicates hiding the overflow part;
(2) visible: indicates that the overflow part is displayed (the overflow part will be displayed outside the box);
(3) scroll: means adding a scroll bar to the content area. You can view all the contents of the content area by sliding this scroll bar;
(4) auto: Indicates that the browser decides how to handle the overflow part.
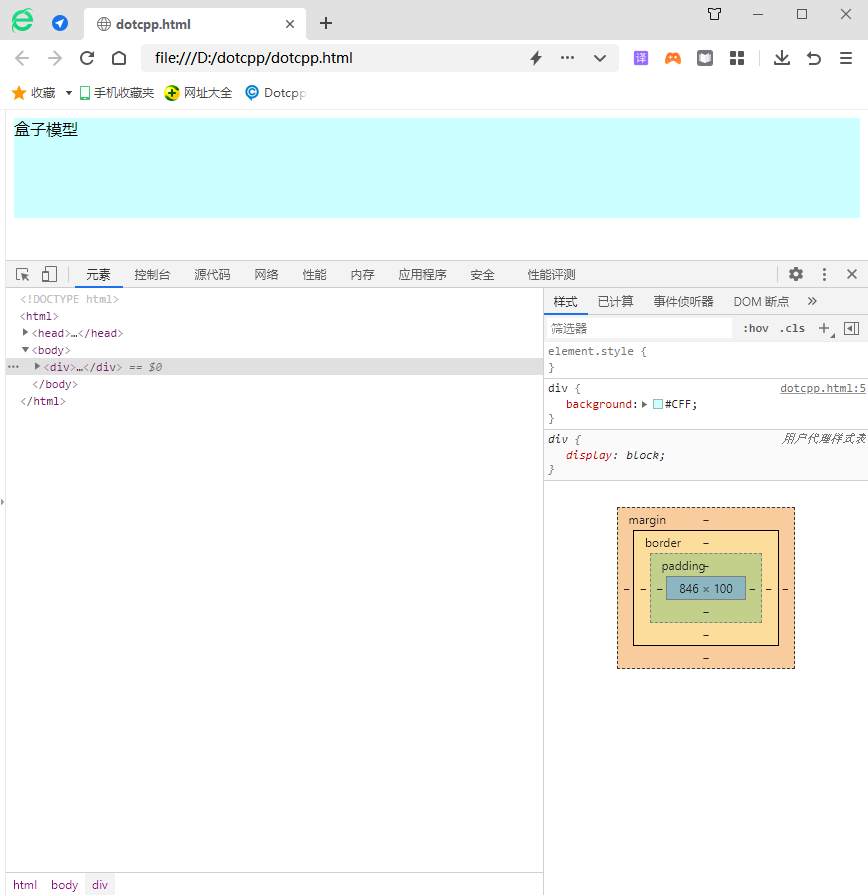
<!DOCTYPEhtml><html><head><style>div{background:#CFF;}div.box-one{width:100px;height:100px;}</style></head><body><div> <divclass=box-one>Box model</div></div></body></html>Running results: (Viewed through the browser's debugging tool, you can open it with the shortcut key F12, or right-click the mouse on the page and select the "Inspect" option in the pop-up menu.)
2. Padding
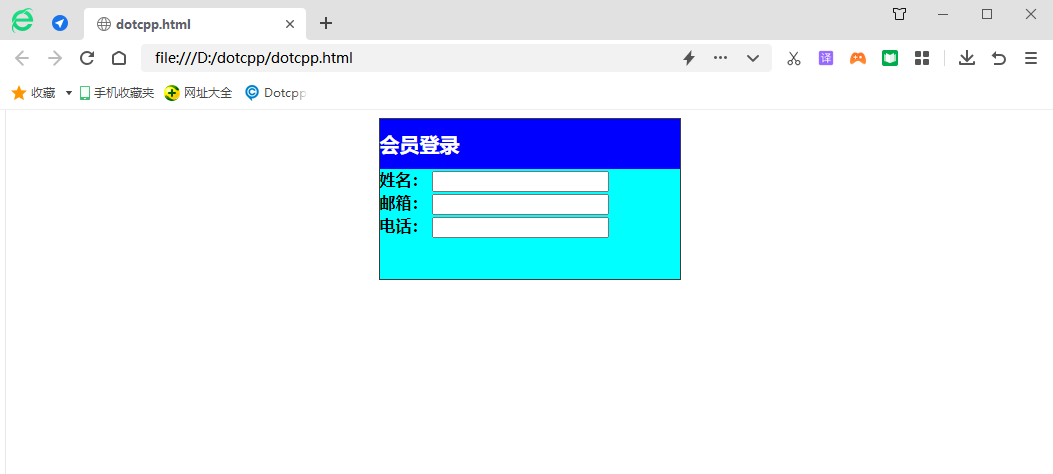
Padding is the space between the content area and the border. You can set the distance between the content area and the border in all directions through padding-top, padding-right, padding-bottom, padding-left and their abbreviated attribute padding. . When setting background properties for the box model, the background properties can cover the padding area.
Example:
<!DOCTYPEhtml><html><head><metacharset=utf-8><title></title><style>.a{border:1pxsolid#3C3C3C;width:300px;height:160px;margin:auto;}h2 {background-color:#0000FF;width:300px;height:50px;color:#FFFFFF;line-height:50px;font-size:20px;margin-top:0px;margin-bottom:0px;}form{width: 300px;height:110px;background-color:#00FFFF;}</style></head><body><divclass=a><h2>Member login</h2><formaction=#><div><strongclass= name>Name:</strong><inputtype=text/></div><div><strongclass=name>Email:</strong><inputtype=text/></div><div><strongclass=name> Phone:</strong><inputtype=text/></div></form></div></body></html>Running results:
3. border
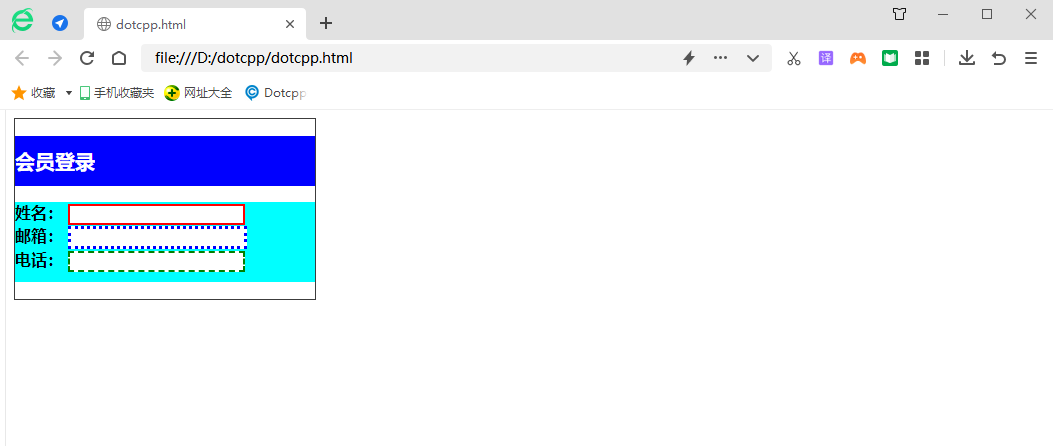
A border is the boundary surrounding the content area and padding. You can style the border using border-style, border-width, and border-color, as well as their shorthand property border. The border-style attribute is the most important attribute of the border. If this attribute is not set, other border attributes will be ignored.
Example:
<!DOCTYPEhtml><html><head><metacharset=utf-8><title></title><style>.a{border:1pxsolid#3C3C3C;width:300px;height:180px;}h2{background-color :#0000FF;width:300px;height:50px;color:#FFFFFF;line-height:50px;font-size:20px;}form{background-color:#00FFFF;width:300px;height:80px;}div: nth-of-type(1)input{border:2pxsolidred;}div:nth-of-type(2)input{border:3pxdottedblue;}div:nth-of-type(3)input{border:2pxdashedgreen;}< /style></head><body><divclass=a><h2>Member login</h2><formaction=#><div><strongclass=name>Name:</strong><inputtype=text/>< /div><div><strongclass=name>Email:</strong><inputtype=text/></div><div><strongclass=name>Phone:</strong><inputtype=text/></div ></form></div></body></html>Running results:
4. Margin
Example:
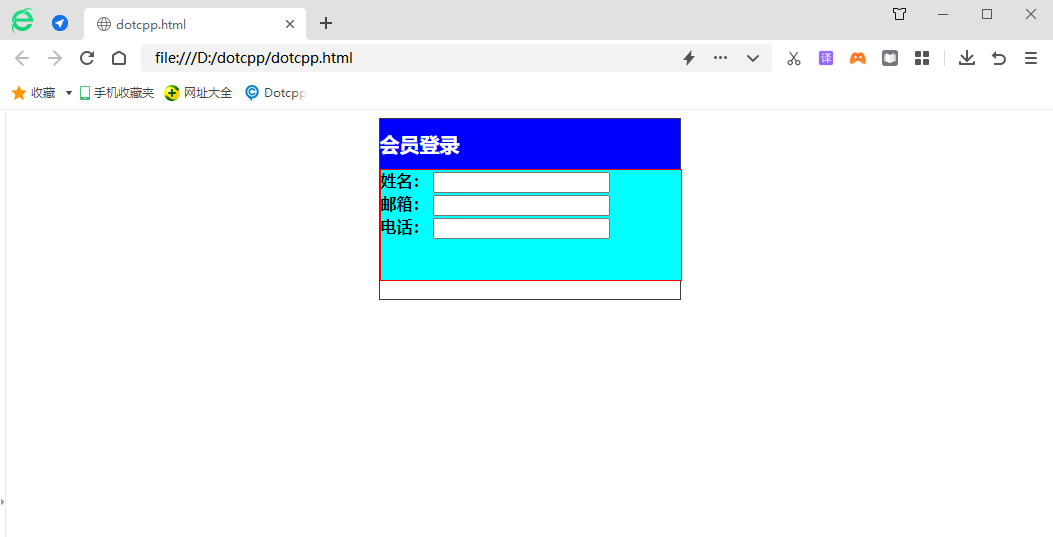
<!DOCTYPEhtml><html><head>metacharset=utf-8><title></title><style>.a{border:1pxsolid#3C3C3C;width:300px;height:180px;margin:auto;}h2{ background-color:#0000FF;width:300px;height:50px;color:#FFFFFF;line-height:50px;font-size:20px;margin-top:0px;margin-bottom:0px;}form{border:1pxsolidred ;width:300px;height:110px;background-color:#00FFFF;}</style></head><body><divclass=a><h2>Member login</h2><formaction=#><div> <strongclass=name>Name:</strong><inputtype=text/></div><div><strongclass=name>Email:</strong><inputtype=text/></div><div><strongclass =name>Phone:</strong><inputtype=text/></div></form></div></body></html>Running results:
Example:
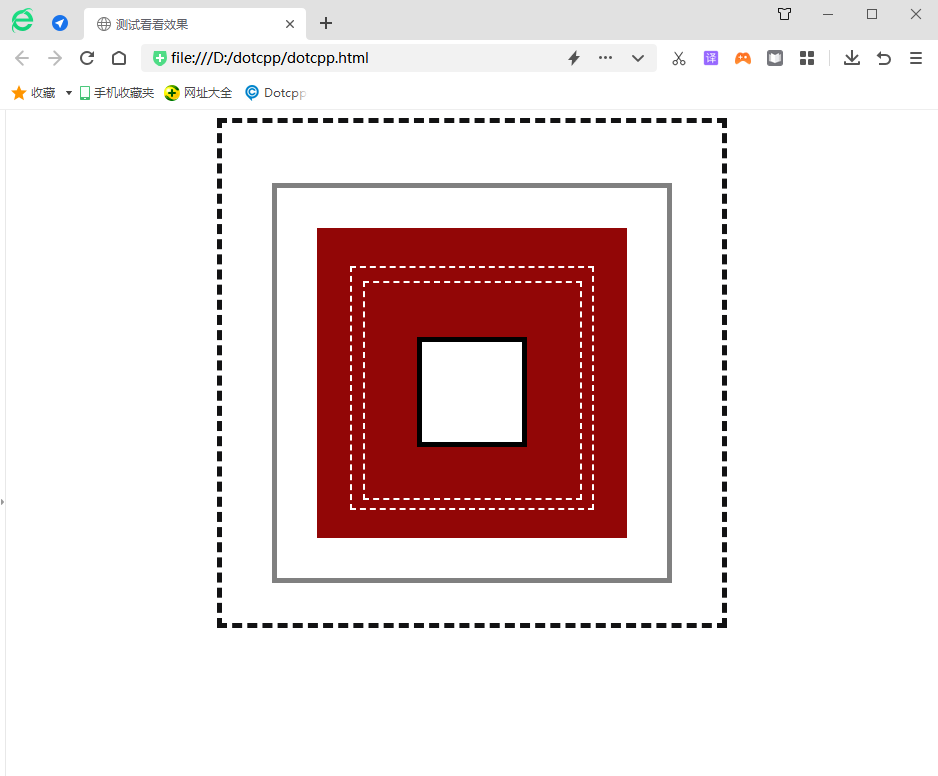
<!DOCTYPEhtml><html><head><metacharset=UTF-8><metahttp-equiv=X-UA-Compatiblecontent=IE=edge><metaname=viewportcontent=width=device-width,initial-scale=1.0>< title>Test to see the effect</title></head><style>#box1{width:400px;height:400px;background-color:white;/*Set the top, bottom, left and right padding*/padding:50px50px;border :5pxdashedrgb(18,18,19);margin:0auto;margin-top:5px;/*margin-left:200px;margin-right:200px;margin-bottom:5px;*/text-align:center;}# box2{width:350px;height:350px;background-color:white;/*Set the top, bottom, left and right padding*/padding:20px20px;border:5pxsolidgray;margin:0auto;margin-top:10px;/*margin-left :20px;margin-right:20px;margin-bottom:20px;*/text-align:center;}#box3{width:300px;height:300px;background-color:rgb(146,6,6);/* Set the top, bottom, left and right padding */border:5pxsolidrgb(146,6,6);margin:0auto;/*padding:5px5px;*/margin-top:20px;/*margin-left:45px;margin-right: 45px;margin-bottom:45px;*/text-align:center;}#box4{width:240px;height:240px;background-color:rgb(146,6,6);/*Set the top, bottom, left and right inner margins *//*padding:5px5px;*/border:2pxdashedwhite;margin:0auto;margin-top:33px;/*margin-left:33px;margin-right:33px;margin-bottom:33px;*//*and padding The effect is the same*/text-align:center;}#box5{width:215px;height:215px;background-color:rgb(146,6,6);/*Set the top, bottom, left and right padding*/border:2pxdashedwhite; margin:0auto;/*padding:2px2px;*/margin-top:12.5px;/*margin-left:12.5px;margin-right:12.5px;margin-bottom:12.5px;*//*The effect is the same as padding */text-align:center;}#box6{width:100px;height:100px;background-color:white;/*Set the top, bottom, left and right padding*/border:5pxsolidblack;margin:0auto;/*padding:20px20px ;*/margin-top:54.5px;/*margin-left:54.5px;margin-right:54.5px;margin-bottom:54.5px;*//*Same effect as padding*/text-align:center;} </style><body><divid=box1><divid=box2><divid=box3><divid=box4><divid=box5><divid=box6></div></div></div>< /div></div></div></body></html>Running results:
