The editor of Downcodes will take you to experience Face to sticker, an easy-to-use face to sticker AI tool! It can quickly turn your photos into stickers of various styles and supports custom parameter adjustments, allowing you to easily create personalized stickers for social sharing or personal creation. This article will introduce in detail the functions, usage methods and other AI sticker tools of Face to Sticker to help you enjoy the world of AI stickers!
Product introduction:
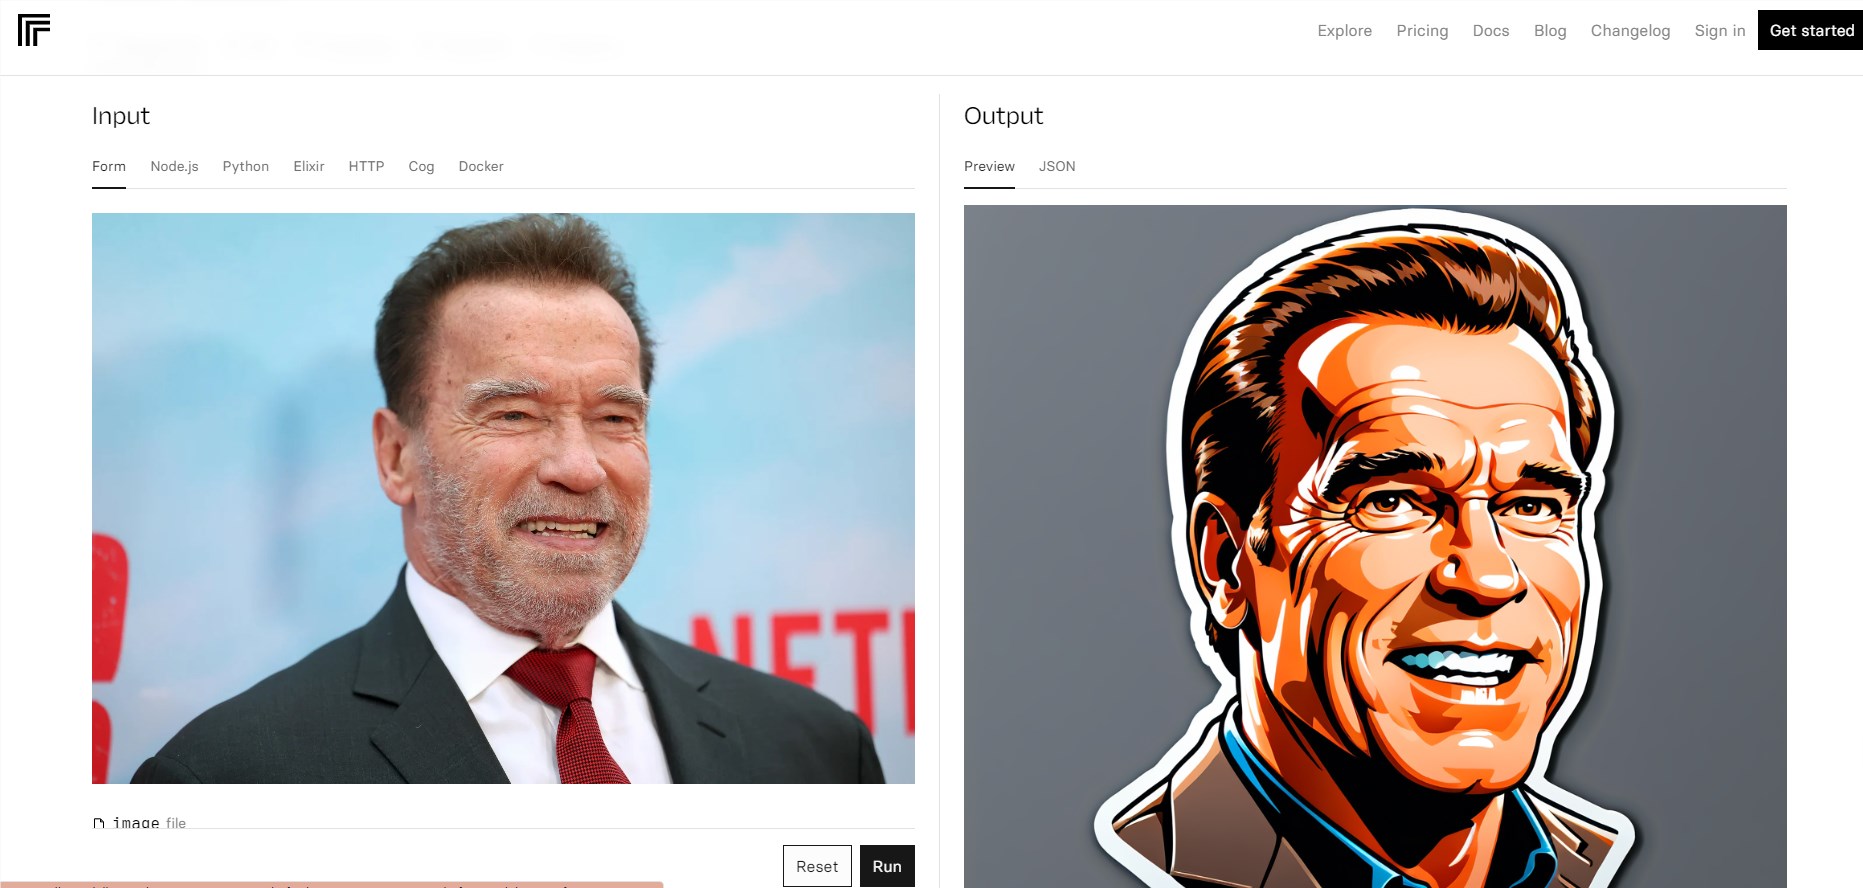
Face-to-sticker is a tool designed to convert human faces into stickers. Through this tool, users can upload an image containing a human face and then select a number of parameters to customize the resulting sticker. These parameters include instructive descriptions of the generated images, as well as some parameters that control the generation process, such as the size of the image, the number of generation steps, etc. This tool uses advanced artificial intelligence technology, including CFG (Context-Free Grammar) rules, InstantID, etc. Users can control the style and characteristics of the generated image by adjusting the intensity of the parameters to achieve customized effects.
Face-to-sticker uses Nvidia A40 (Large) GPU hardware support, so the sticker generation is faster, usually completed in about 38 seconds. Users can operate by uploading pictures on the web page or using the camera to take real-time photos, which is very convenient. Overall, Face-to-sticker is a convenient, fast and highly customizable tool that can convert face images into stickers with artistic effects, suitable for personal creation, social sharing and other scenarios.
In addition, StickerBaker is an open source sticker production tool based on AI technology. Users can quickly generate personalized stickers by entering keywords. The tool supports batch production, allowing users to easily create a variety of interesting stickers. Users can use StickerBaker to create unique stickers on social platforms, communication tools and other scenarios to increase expression and fun. FaceChain-FACT is a leading zero-cost portrait generation tool that does not require users to train LoRA models. It only requires users to provide a photo to generate customized portraits. Compared with other commercial applications, the generation speed is increased by 100 times, supporting image generation in seconds.
See the end of the article for product entrance
Usage tutorial:
1. Open the Face to Sticker trial address
Enter the following page
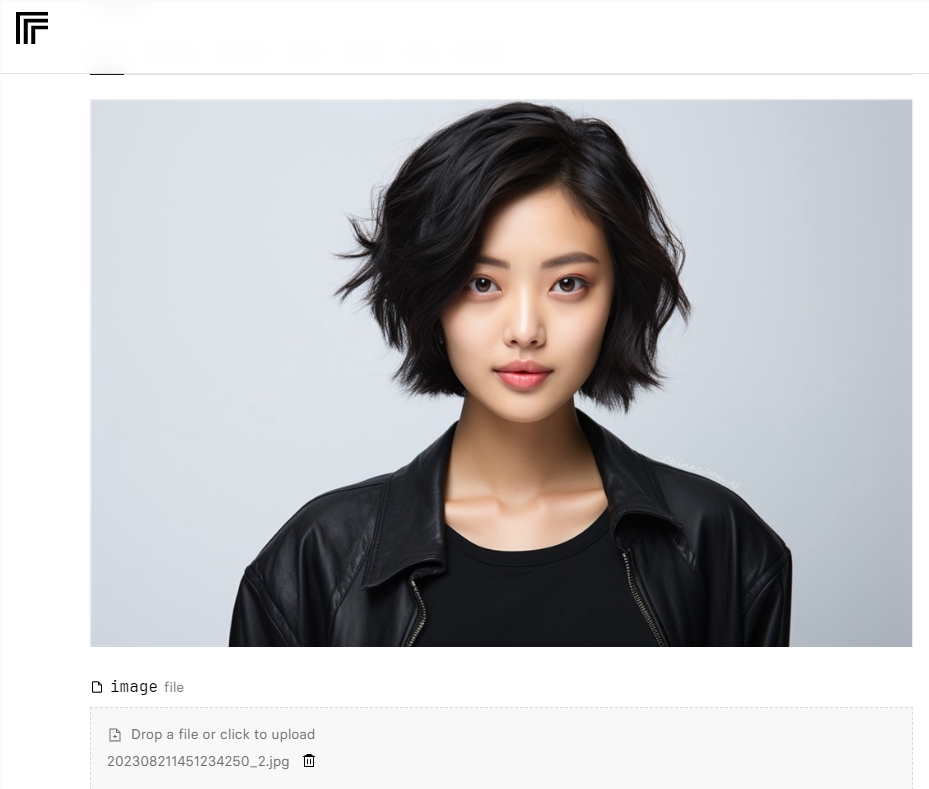
2. Upload the photos you want to convert
Scroll to the bottom of the image and click the trash can icon in the image option bar to delete the original case image.
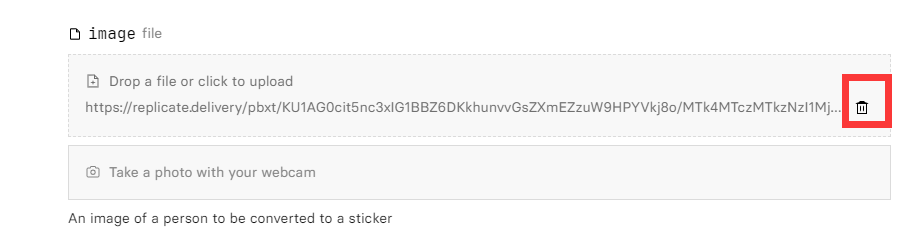
Then click the "Drop a file or click to upload" area below to upload your image.

After the upload is successful, you can see that your picture is already above
3. Enter the prompt word
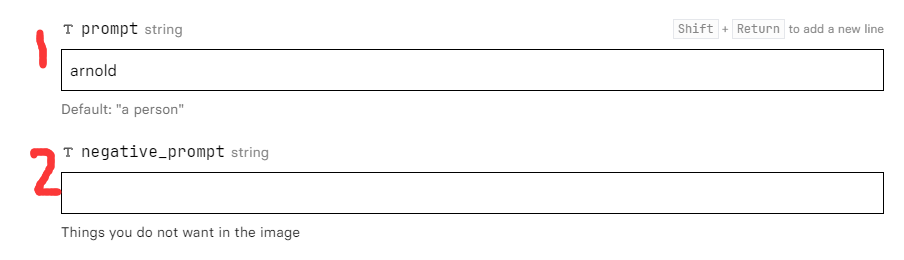
1. That part is the positive prompt word, which generally defaults to "one person". If you want to add other styles or something, you can change the prompt word yourself and customize it according to your personal needs. (It is recommended that novices do not change it and use the default one directly)
Part 2 is the negative prompt word. If the background of the picture you upload is complicated, or there are some elements that you don’t want to show in the sticker, just enter the elements you want to remove here. For example, if you don't want grass to appear in the sticker, you can enter "grass" in the negative_prompt part. (If you don’t want to do it, you can just leave it unset, the default is empty)
4. Parameter settings (can be left blank by default)
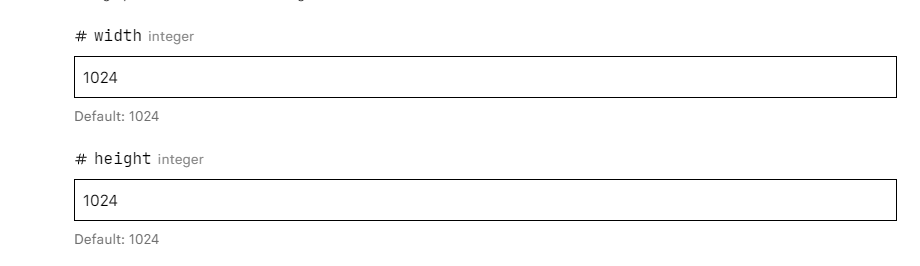
The default size of the system is 1024x1024. If you want to modify the size ratio, you can modify it yourself. The upper column is the width of the image, and the lower column is the height.

The number of steps does not need to be adjusted, the default is fine.

prompt_strength is the strength setting of the prompt word. If the number is larger, the prompt word will have a greater impact on the image. The smaller the number, the generated sticker will be closer to the original image.
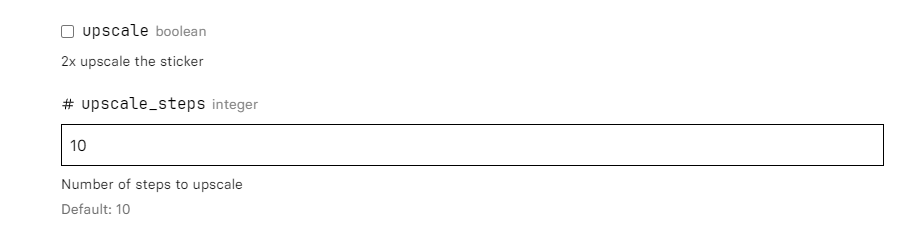
If you want a larger size sticker, you can check the upscale at the bottom to enlarge the generated image by 2 times. The following steps can be kept as default.
5. After setting the above parameters, click run to generate.
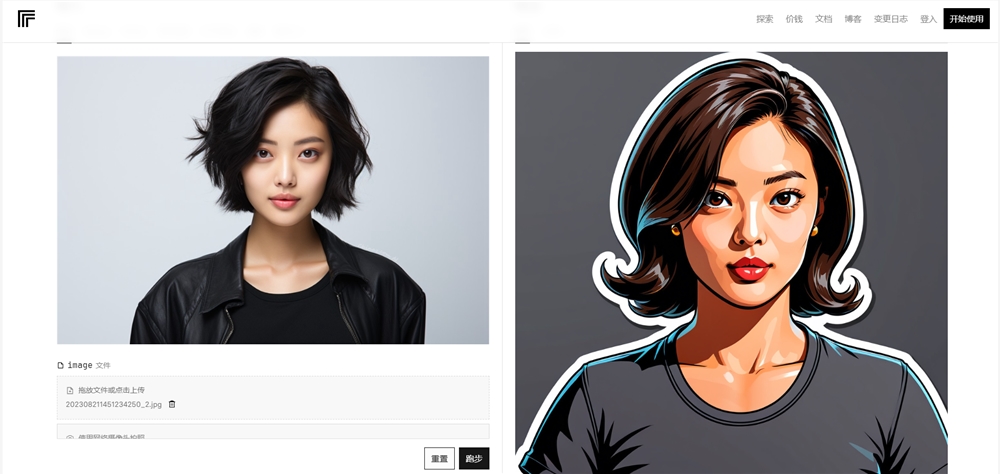
The test results are as shown above.
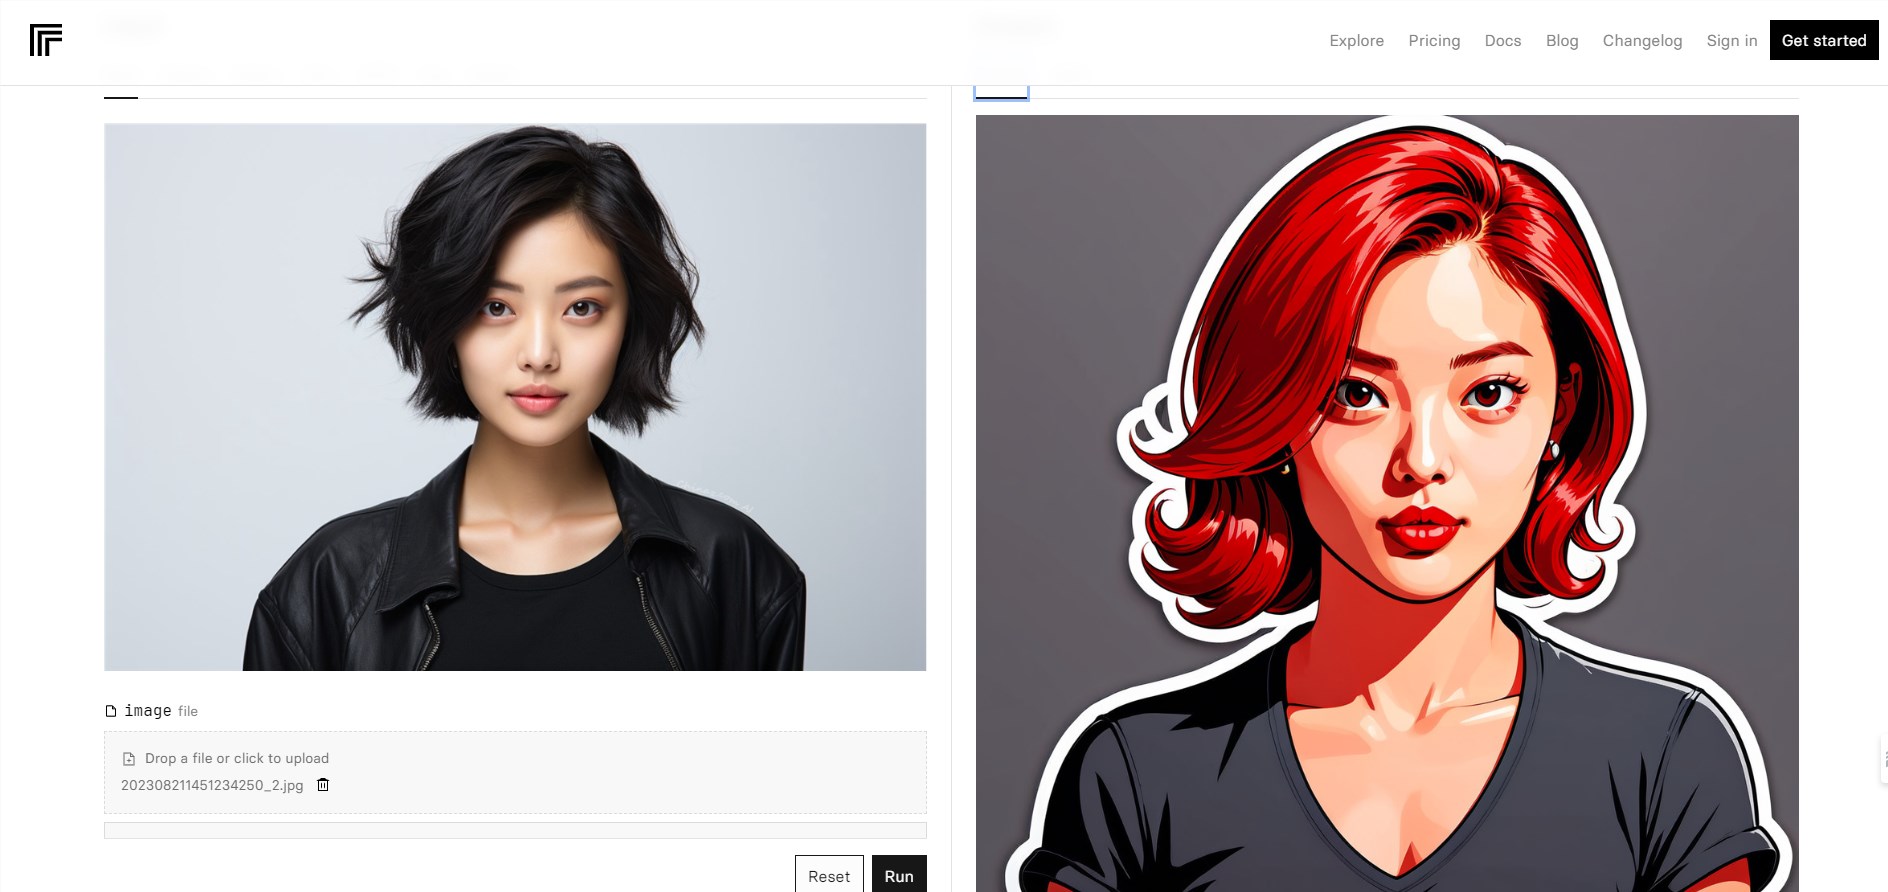
If you are satisfied with the effect after generating the image, but you want to change some details, then you can copy the seed of your image in the JSON position on the right side of the image.
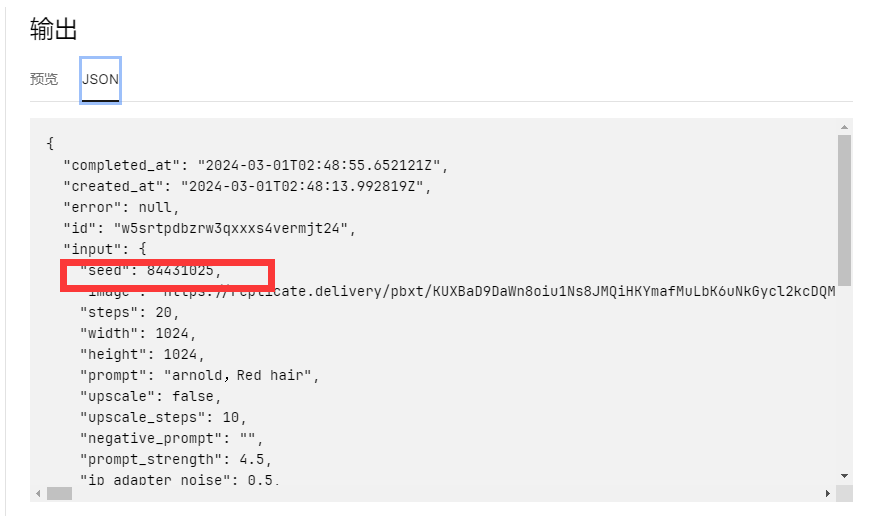
Then fill in the seed you just copied in the seed position, and you can fine-tune the picture.

For example, if I want to make my hair red, then I would add a red hair color to the prompt words and separate each prompt word with a comma.

Then click Generate, and you will get a cartoon sticker avatar with red hair. Adding a seed allows the rest of the image to remain unchanged, achieving a highly customized effect.
Product entrance: https://replicate.com/fofr/face-to-sticker
I hope this tutorial by the editor of Downcodes can help you quickly get started with Face to sticker and create your own unique stickers! For more tips on using AI tools, please stay tuned to Downcodes!