If I want to download, install and use the latest version of Dreamweaver2019, how to install and activate dw cc2019? Let’s take a look at the detailed tutorial below.
Summary of content covered in this tutorial:
1. Installation tutorial;
2. Create a desktop startup program;
3. Find the software installation location;
4. Activation tutorial;
5. Modify the software installation directory.
1. Installation tutorial
1. Unzip the downloaded software installation package, open it and click set-up to start the program;
2. You need to log in to Adobe ID when opening it for the first time. If you have not registered before, click to get Adobe ID and register one with your email address;
3. After logging in, the software will be installed automatically, no other operations are required, just wait patiently for a few minutes;
4. After the installation is completed, the software will automatically open;
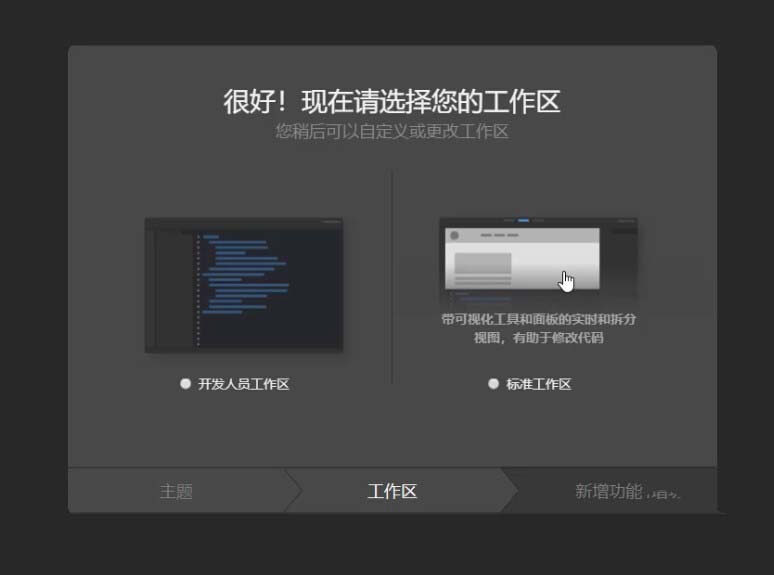
5. After opening the software, set up your accustomed workspace;

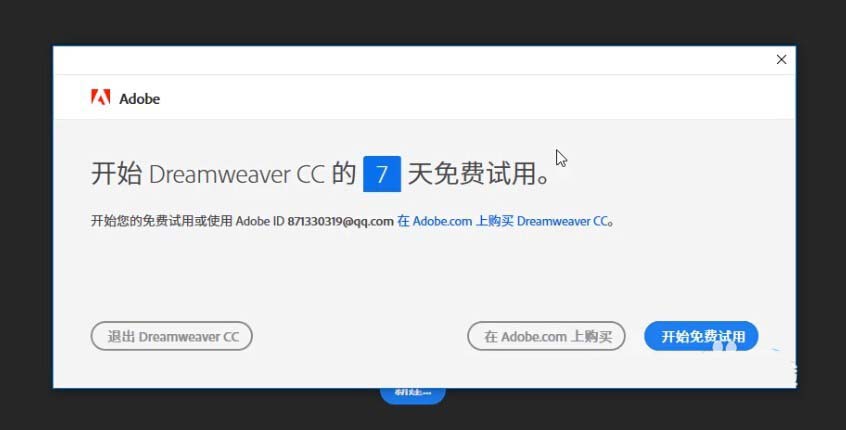
6. After the setting is completed, the software will have a 7-day trial prompt, indicating that the software has been successfully installed. Next, it will be activated. Before activation, two small problems must be solved. One is that there is no shortcut startup method on the desktop, and the other is that there is no shortcut startup method on the desktop. Where to find the software installation directory.
2. Create a desktop shortcut startup program
1. After the software installation is completed, there is often no startup program on the desktop, and it needs to be created manually. Click the start menu bar in the lower left corner to find the DW2019 software installed this time;
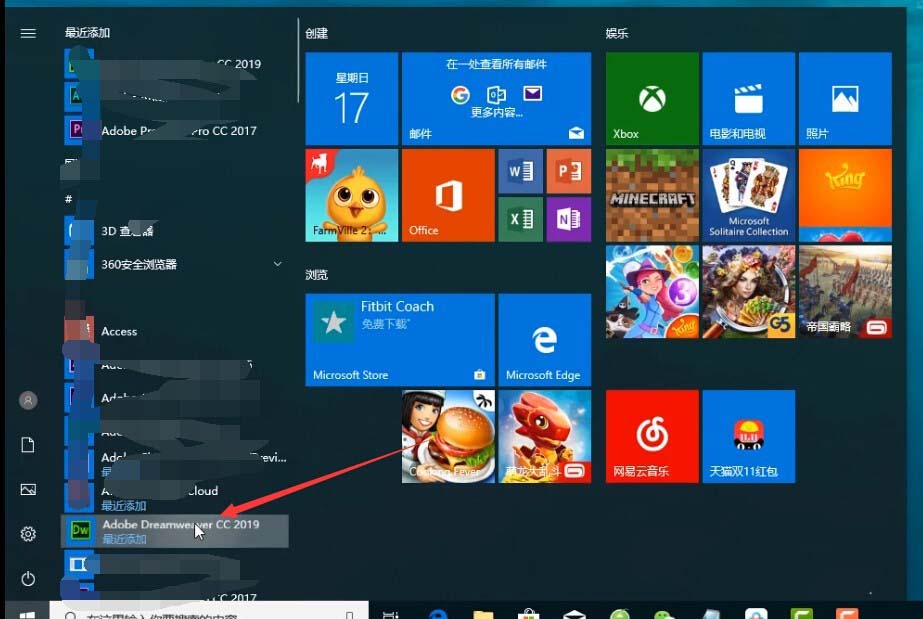
2. Right-click--More--Open file location;
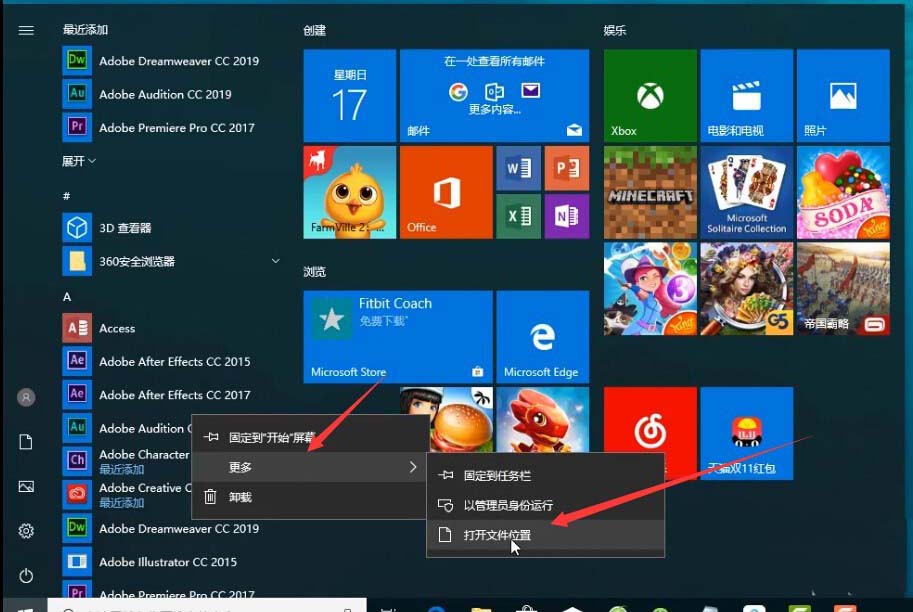
3. This file location is the startup method of the software. Find DW2019;
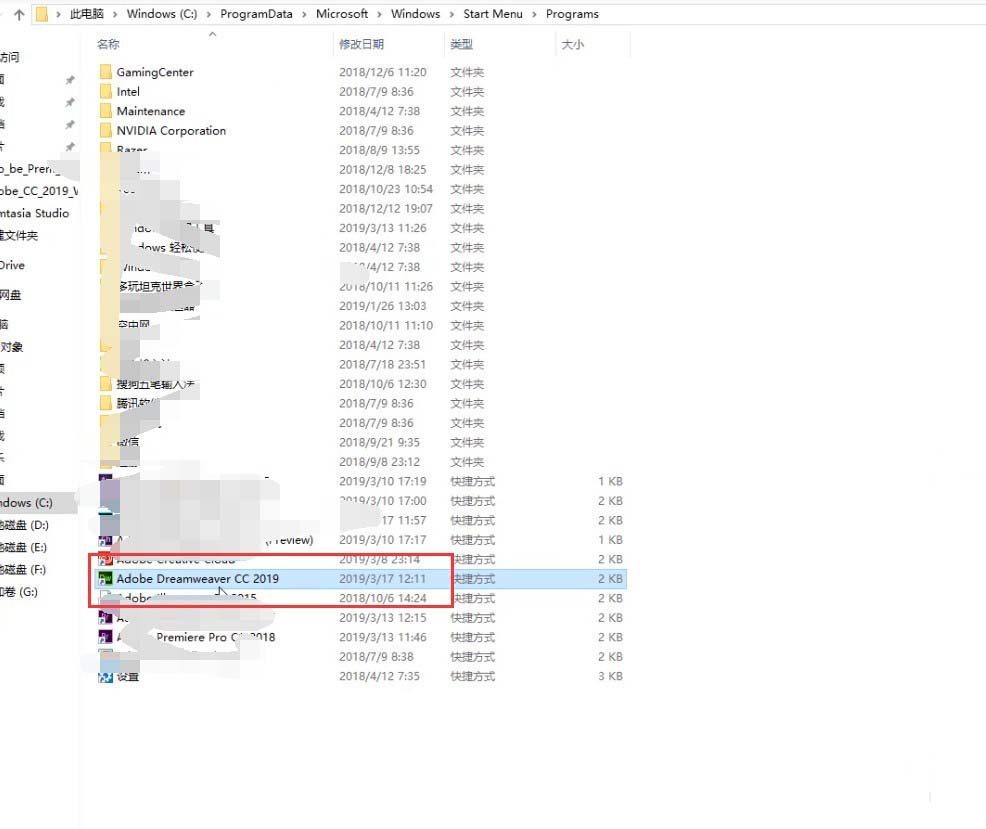
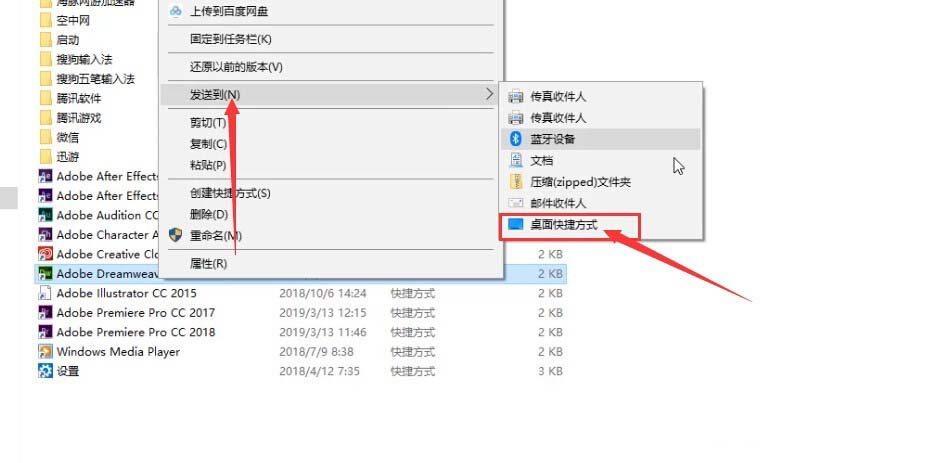
4. Then right-click and select Send to--Desktop shortcut , so that the software startup program will be on the desktop.
3. Where is the software installation directory?
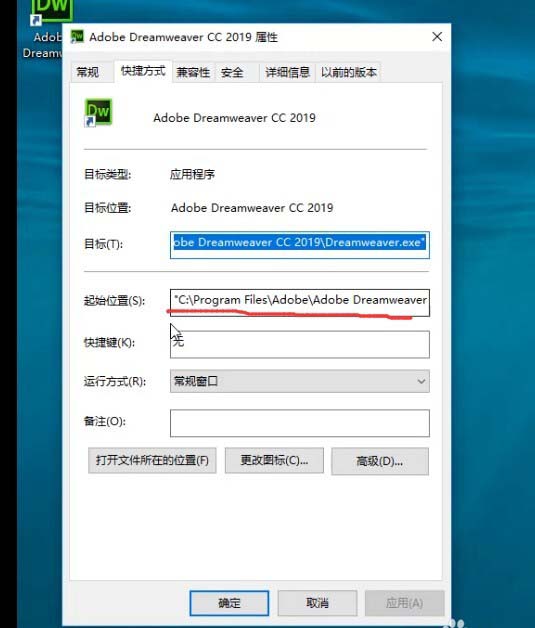
1. Right-click the software icon on the desktop and click Properties;
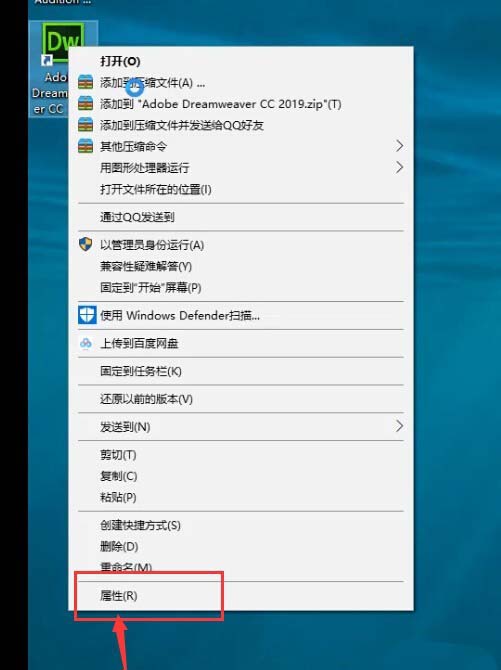
2. This starting location is the installation directory of the software.
4. Activation Tutorial
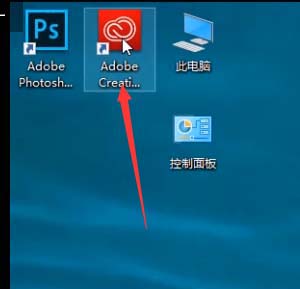
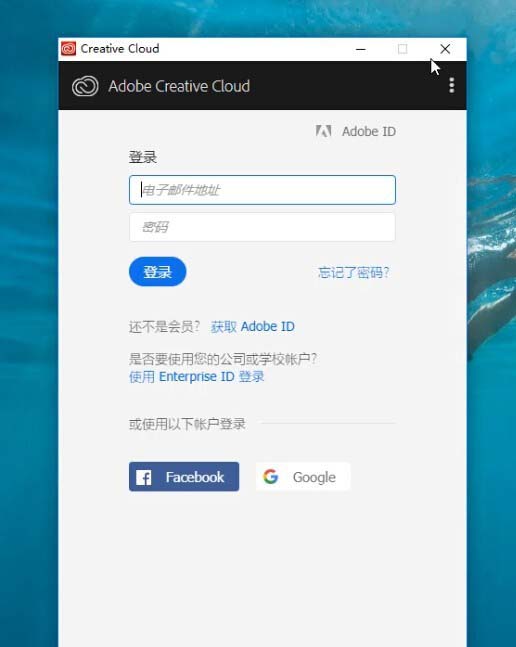
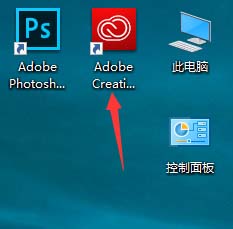
1. The 2019 version of the software is different from the previous version. Before activating the software, you need to log out of your Adobe ID and open the red Adobe Creative Cloud tool on the desktop;
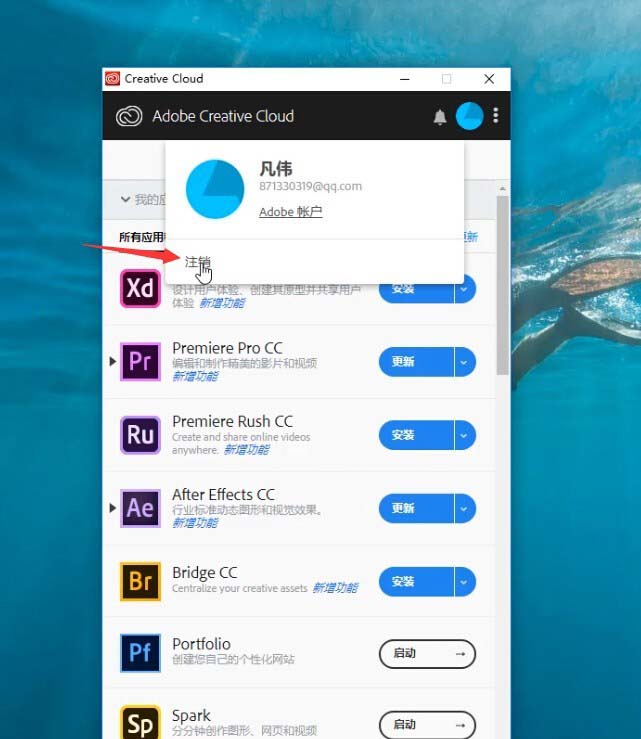
2. Click on the avatar, and then select logout. If the logout button is gray, then wait a moment, the refresh has not been completed yet;
3. A small window will pop up, choose to log out ;
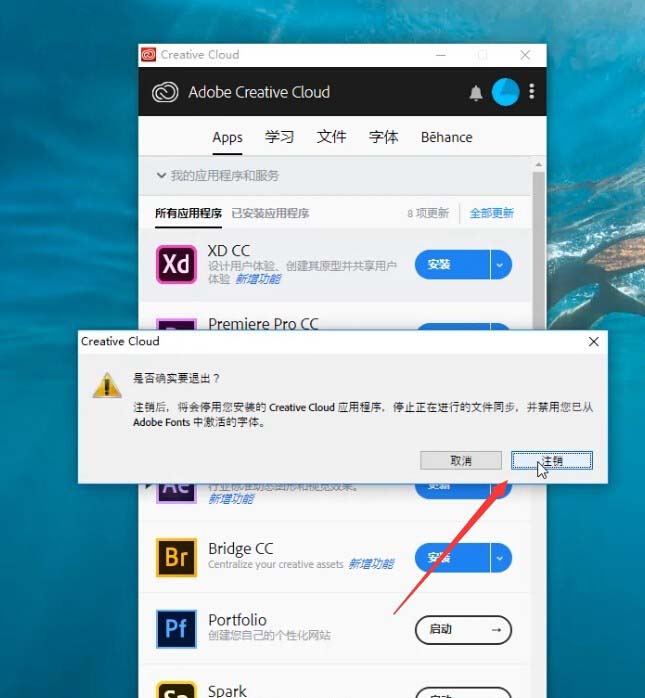
4. Then it will keep spinning until the login page appears, and then the logout will be successful;
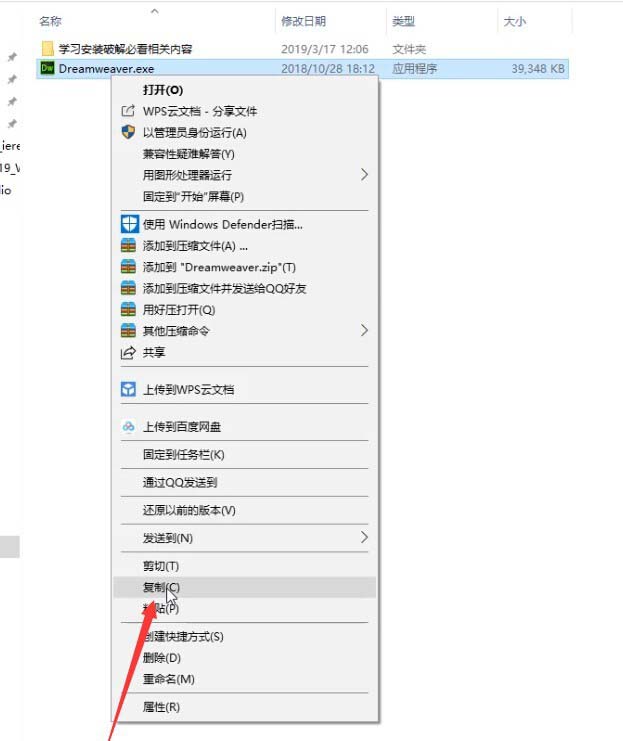
5. Open the downloaded software patch package, right-click the patch-Copy, or Ctrl+C to copy;
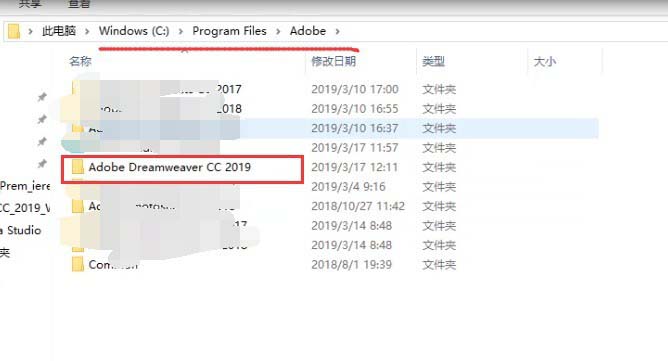
6. Open the software installation directory. Just now we saw that the installation is in the folder C/Program Files/Adobe;
7. Find it and open it, then right-click on the blank position to paste, or Ctrl+V to paste;
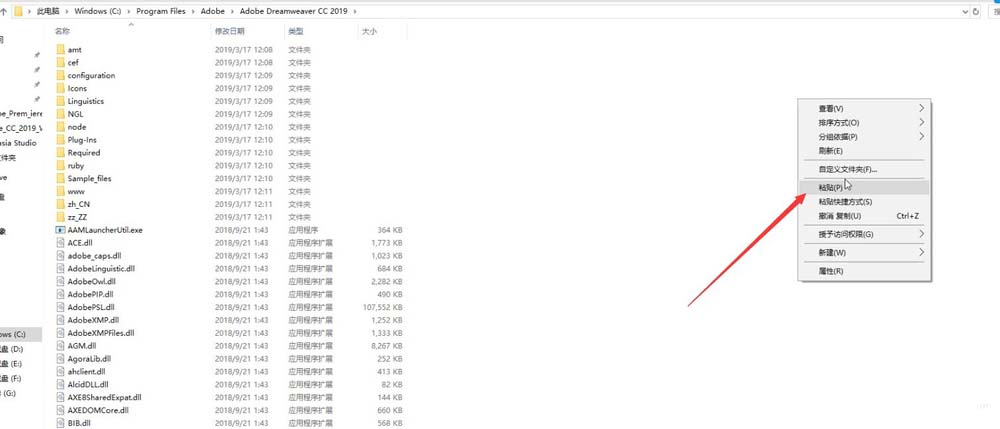
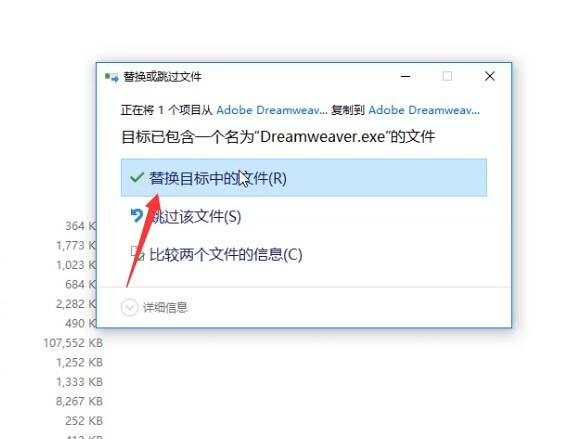
8. There will be identical files, select Replace ;
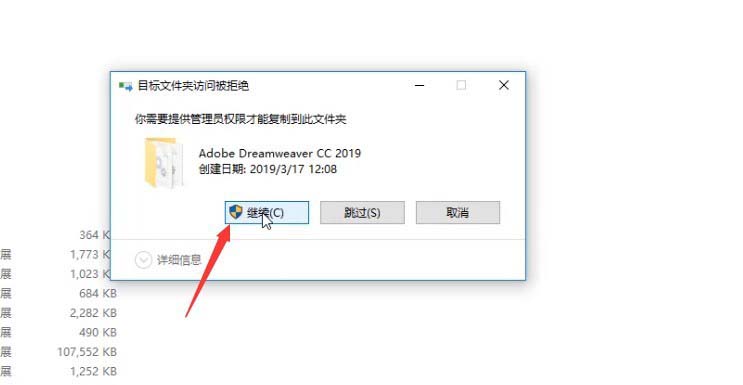
9. It prompts that access to the folder is denied and administrator rights are required. Click Yes;
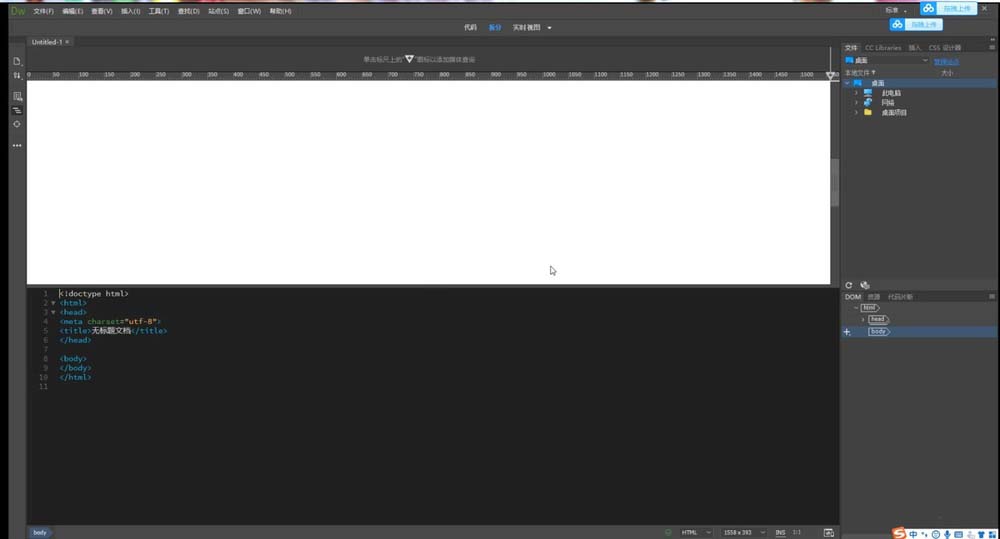
10. When you open the software again, there will be no trial prompt.
5. Modify the software installation location
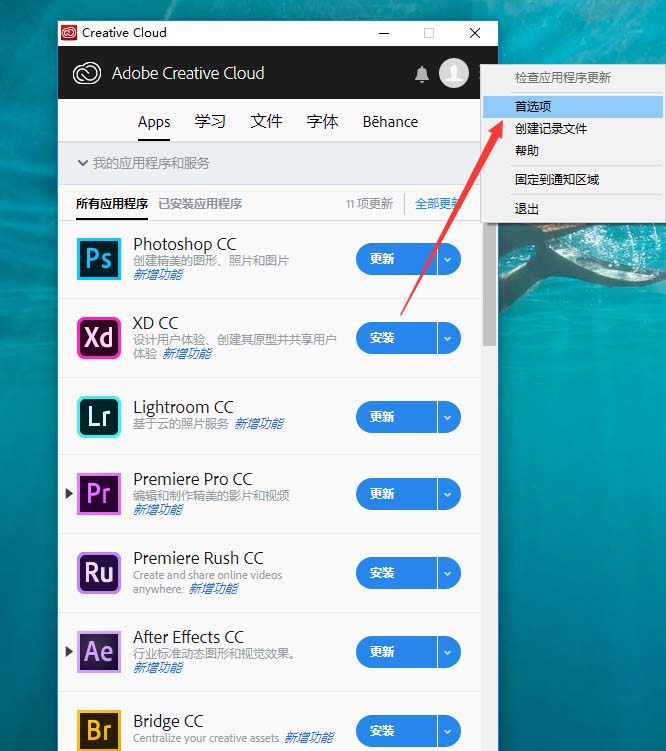
1. How to modify it if I don’t want to install it on the C drive? Open the red cloud tool on the desktop;
2. Click the three dots next to the avatar and select preferences;
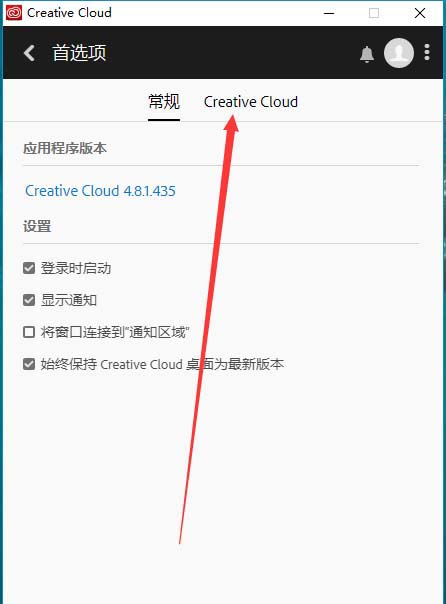
3. Click on the Creative Cloud option;
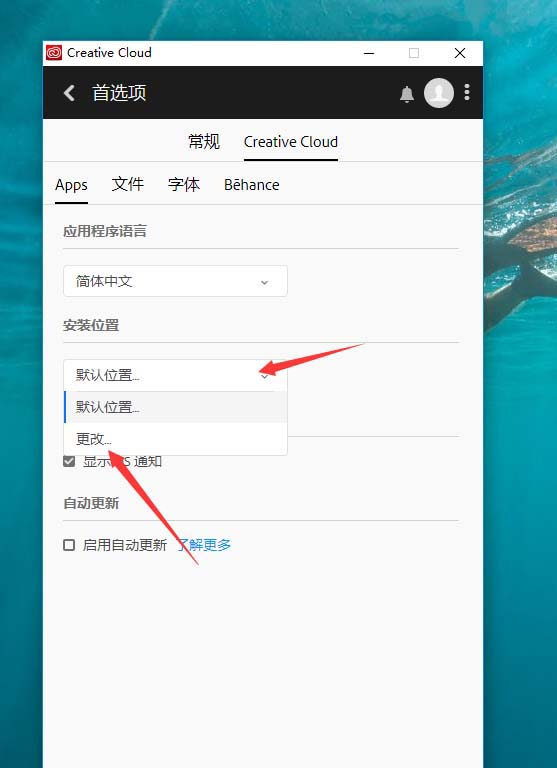
4. Here you can see the modification of the software installation location and the installation language. Choose a large disk, it is best to create a new folder separately, and then change the name of the folder to English, which can reduce the occurrence of problems.
The above is the dw2019 installation and activation tutorial. I hope you like it. Please continue to pay attention to downcodes.com.