تنفيذ نماذج مختلفة لتجزئة الصور العميقة في keras.
رابط إلى مشاركة المدونة الكاملة مع البرنامج التعليمي: https://divamgupta.com/image-segmentation/2019/06/06/deep-learning-semantic-segmentation-keras.html
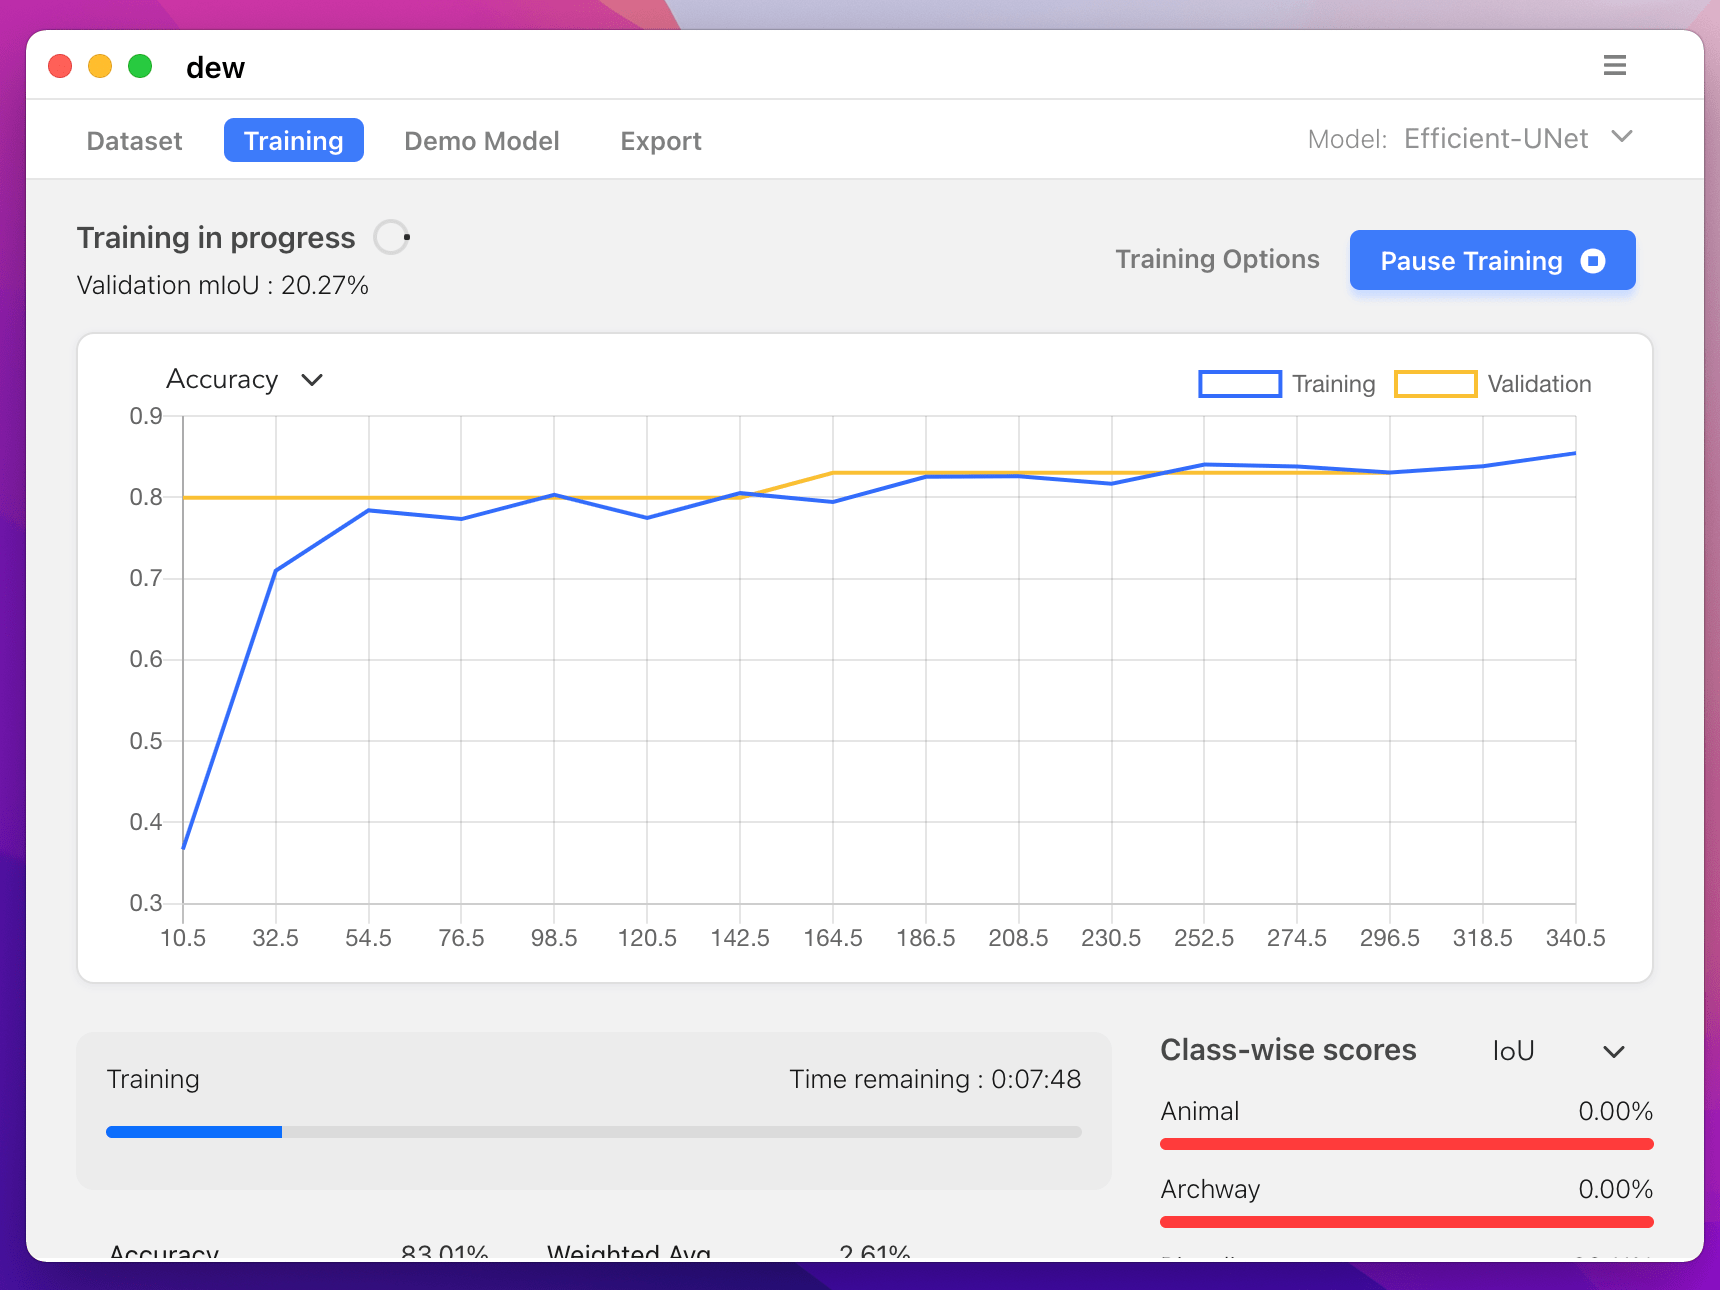
يمكنك أيضًا تدريب نماذج التجزئة على جهاز الكمبيوتر الخاص بك باستخدام https://liner.ai
| يدرب | الاستدلال / التصدير |
|---|---|
 | 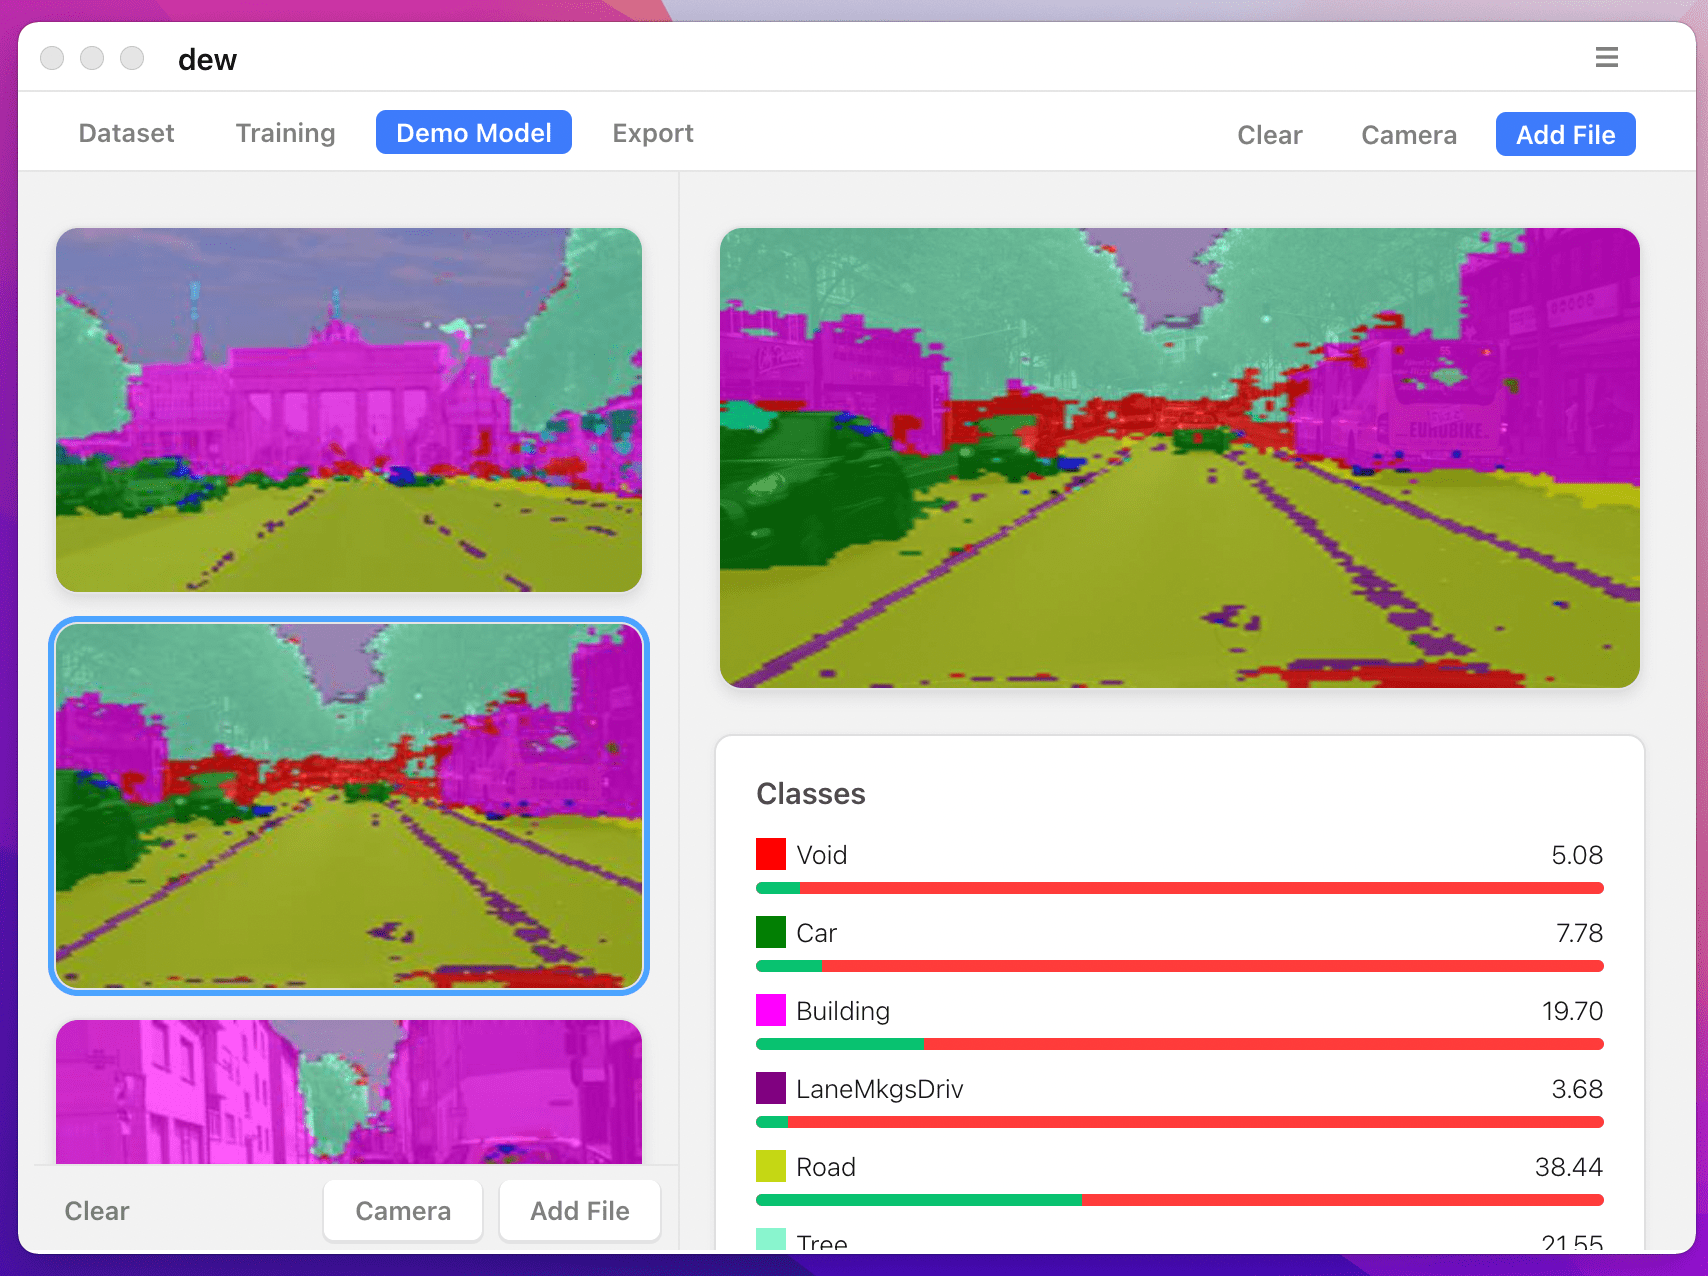 |
 | 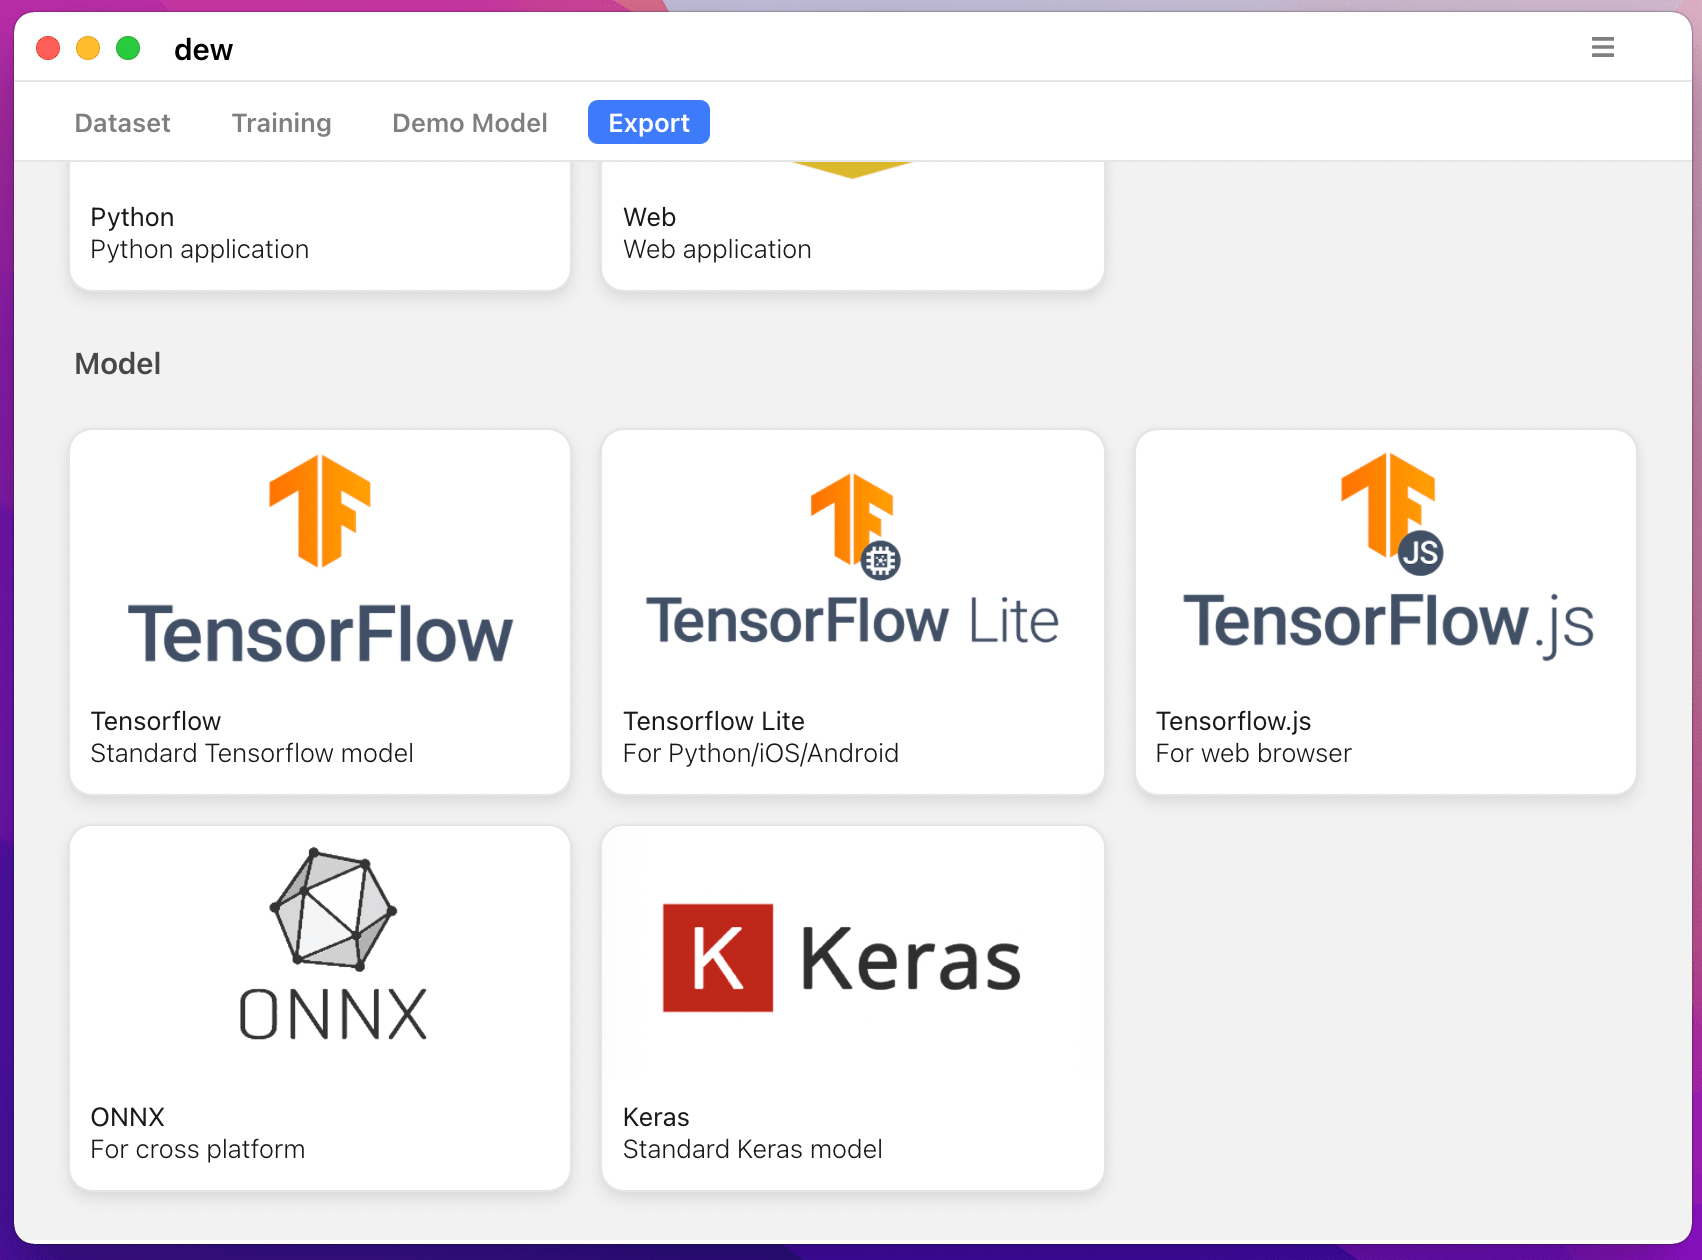 |
يتم دعم النماذج التالية:
| model_name | النموذج الأساسي | نموذج التقسيم |
|---|---|---|
| fcn_8 | فانيليا سي إن إن | FCN8 |
| fcn_32 | فانيليا سي إن إن | FCN8 |
| fcn_8_vgg | في جي جي 16 | FCN8 |
| fcn_32_vgg | في جي جي 16 | FCN32 |
| fcn_8_resnet50 | ريسنيت-50 | FCN32 |
| fcn_32_resnet50 | ريسنيت-50 | FCN32 |
| fcn_8_mobilenet | موبايل نت | FCN32 |
| fcn_32_mobilenet | موبايل نت | FCN32 |
| com.pspnet | فانيليا سي إن إن | بى اس بي نت |
| pspnet_50 | فانيليا سي إن إن | بى اس بي نت |
| pspnet_101 | فانيليا سي إن إن | بى اس بي نت |
| vgg_pspnet | في جي جي 16 | بى اس بي نت |
| resnet50_pspnet | ريسنيت-50 | بى اس بي نت |
| unet_mini | فانيليا ميني سي إن إن | يو نت |
| com.unet | فانيليا سي إن إن | يو نت |
| vgg_unet | في جي جي 16 | يو نت |
| resnet50_unet | ريسنيت-50 | يو نت |
| mobilenet_unet | موبايل نت | يو نت |
| سيجنيت | فانيليا سي إن إن | سيجنيت |
| vgg_segnet | في جي جي 16 | سيجنيت |
| resnet50_segnet | ريسنيت-50 | سيجنيت |
| mobilenet_segnet | موبايل نت | سيجنيت |
نتائج الأمثلة للنماذج المدربة مسبقًا المقدمة:
| صورة الإدخال | صورة تجزئة الإخراج |
|---|---|
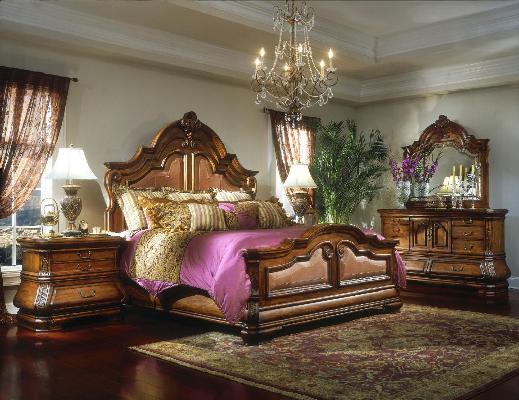 |  |
 |  |
إذا كنت تستخدم هذه المكتبة، يرجى الاستشهاد باستخدام:
 @article{gupta2023image,
  title={Image segmentation keras: Implementation of segnet, fcn, unet, pspnet and other models in keras},
  author={Gupta, Divam},
  journal={arXiv preprint arXiv:2307.13215},
  year={2023}
}
apt-get install -y libsm6 libxext6 libxrender-dev
pip install opencv-pythonقم بتثبيت الوحدة
الطريقة الموصى بها:
pip install --upgrade git+https://github.com/divamgupta/image-segmentation-keraspip install keras-segmentationgit clone https://github.com/divamgupta/image-segmentation-keras
cd image-segmentation-keras
python setup.py install from keras_segmentation . pretrained import pspnet_50_ADE_20K , pspnet_101_cityscapes , pspnet_101_voc12
model = pspnet_50_ADE_20K () # load the pretrained model trained on ADE20k dataset
model = pspnet_101_cityscapes () # load the pretrained model trained on Cityscapes dataset
model = pspnet_101_voc12 () # load the pretrained model trained on Pascal VOC 2012 dataset
# load any of the 3 pretrained models
out = model . predict_segmentation (
inp = "input_image.jpg" ,
out_fname = "out.png"
)تحتاج إلى إنشاء مجلدين
يجب أن تكون أسماء ملفات صور التعليقات التوضيحية مماثلة لأسماء ملفات صور RGB.
يجب أن يكون حجم صورة التعليق التوضيحي لصورة RGB المقابلة هو نفسه.
بالنسبة لكل بكسل في صورة RGB، ستكون تسمية فئة ذلك البكسل في صورة التعليق التوضيحي هي قيمة البكسل الأزرق.
رمز المثال لإنشاء صور التعليقات التوضيحية:
 import cv2
import numpy as np

ann_img = np . zeros (( 30 , 30 , 3 )). astype ( 'uint8' )
ann_img [ 3 , 4 ] = 1 # this would set the label of pixel 3,4 as 1

cv2 . imwrite ( "ann_1.png" , ann_img )
استخدم تنسيق bmp أو png فقط لصور التعليقات التوضيحية.
قم بتحميل واستخراج ما يلي:
https://drive.google.com/file/d/0B0d9ZiqAgFkiOHR1NTJhWVJMNEU/view?usp=sharing
سوف تحصل على مجلد اسمه dataset1/
يمكنك استيراد keras_segmentation في برنامج python النصي واستخدام واجهة برمجة التطبيقات
 from keras_segmentation . models . unet import vgg_unet

model = vgg_unet ( n_classes = 51 ,  input_height = 416 , input_width = 608  )

model . train (
    train_images =  "dataset1/images_prepped_train/" ,
    train_annotations = "dataset1/annotations_prepped_train/" ,
    checkpoints_path = "/tmp/vgg_unet_1" , epochs = 5
)

out = model . predict_segmentation (
    inp = "dataset1/images_prepped_test/0016E5_07965.png" ,
    out_fname = "/tmp/out.png"
)

import matplotlib . pyplot as plt
plt . imshow ( out )

# evaluating the model
print ( model . evaluate_segmentation ( inp_images_dir = "dataset1/images_prepped_test/" , annotations_dir = "dataset1/annotations_prepped_test/" ) )يمكنك أيضًا استخدام الأداة فقط باستخدام سطر الأوامر
يمكنك أيضًا تصور التعليقات التوضيحية المعدة للتحقق من البيانات المعدة.
python -m keras_segmentation verify_dataset
 --images_path= " dataset1/images_prepped_train/ "
 --segs_path= " dataset1/annotations_prepped_train/ "
 --n_classes=50
python -m keras_segmentation visualize_dataset
--images_path= " dataset1/images_prepped_train/ "
--segs_path= " dataset1/annotations_prepped_train/ "
--n_classes=50لتدريب النموذج قم بتشغيل الأمر التالي:
python -m keras_segmentation train
 --checkpoints_path= " path_to_checkpoints "
 --train_images= " dataset1/images_prepped_train/ "
 --train_annotations= " dataset1/annotations_prepped_train/ "
 --val_images= " dataset1/images_prepped_test/ "
 --val_annotations= " dataset1/annotations_prepped_test/ "
 --n_classes=50
 --input_height=320
 --input_width=640
 --model_name= " vgg_unet "
اختر model_name من الجدول أعلاه
للحصول على تنبؤات النموذج المدرب
python -m keras_segmentation predict
 --checkpoints_path= " path_to_checkpoints "
 --input_path= " dataset1/images_prepped_test/ "
 --output_path= " path_to_predictions "
للحصول على توقعات الفيديو
python -m keras_segmentation predict_video
 --checkpoints_path= " path_to_checkpoints "
 --input= " path_to_video "
 --output_file= " path_for_save_inferenced_video "
 --display
إذا كنت تريد إجراء تنبؤات على كاميرا الويب الخاصة بك، فلا تستخدم --input أو قم بتمرير رقم جهازك: --input 0
--display يفتح نافذة بالفيديو المتوقع. قم بإزالة هذه الوسيطة عند استخدام نظام بدون رأس.
للحصول على درجات IoU
python -m keras_segmentation evaluate_model
 --checkpoints_path= " path_to_checkpoints "
 --images_path= " dataset1/images_prepped_test/ "
--segs_path= " dataset1/annotations_prepped_test/ " يوضح المثال التالي كيفية ضبط نموذج يحتوي على 10 فئات.
 from keras_segmentation . models . model_utils import transfer_weights
from keras_segmentation . pretrained import pspnet_50_ADE_20K
from keras_segmentation . models . pspnet import pspnet_50

pretrained_model = pspnet_50_ADE_20K ()

new_model = pspnet_50 ( n_classes = 51 )

transfer_weights ( pretrained_model , new_model  ) # transfer weights from pre-trained model to your model

new_model . train (
    train_images =  "dataset1/images_prepped_train/" ,
    train_annotations = "dataset1/annotations_prepped_train/" ,
    checkpoints_path = "/tmp/vgg_unet_1" , epochs = 5
)
يوضح المثال التالي نقل المعرفة من نموذج أكبر (وأكثر دقة) إلى نموذج أصغر. في معظم الحالات، يكون النموذج الأصغر الذي يتم تدريبه عبر تقطير المعرفة أكثر دقة مقارنة بنفس النموذج الذي تم تدريبه باستخدام التعلم تحت إشراف الفانيليا.
 from keras_segmentation . predict import model_from_checkpoint_path
from keras_segmentation . models . unet import unet_mini
from keras_segmentation . model_compression import perform_distilation

model_large = model_from_checkpoint_path ( "/checkpoints/path/of/trained/model" )
model_small = unet_mini ( n_classes = 51 , input_height = 300 , input_width = 400  )

perform_distilation ( data_path = "/path/to/large_image_set/" , checkpoints_path = "path/to/save/checkpoints" ,
teacher_model = model_large , student_model = model_small , distilation_loss = 'kl' , feats_distilation_loss = 'pa' )يوضح المثال التالي كيفية تحديد وظيفة التعزيز المخصصة للتدريب.
 from keras_segmentation . models . unet import vgg_unet
from imgaug import augmenters as iaa

def custom_augmentation ():
    return  iaa . Sequential (
        [
            # apply the following augmenters to most images
            iaa . Fliplr ( 0.5 ),  # horizontally flip 50% of all images
            iaa . Flipud ( 0.5 ), # horizontally flip 50% of all images
        ])

model = vgg_unet ( n_classes = 51 ,  input_height = 416 , input_width = 608 )

model . train (
    train_images =  "dataset1/images_prepped_train/" ,
    train_annotations = "dataset1/annotations_prepped_train/" ,
    checkpoints_path = "/tmp/vgg_unet_1" , epochs = 5 ,
    do_augment = True , # enable augmentation
    custom_augmentation = custom_augmentation # sets the augmention function to use
)يوضح المثال التالي كيفية ضبط عدد قنوات الإدخال.
 from keras_segmentation . models . unet import vgg_unet

model = vgg_unet ( n_classes = 51 ,  input_height = 416 , input_width = 608 ,
                 channels = 1 # Sets the number of input channels
                 )

model . train (
    train_images =  "dataset1/images_prepped_train/" ,
    train_annotations = "dataset1/annotations_prepped_train/" ,
    checkpoints_path = "/tmp/vgg_unet_1" , epochs = 5 ,
    read_image_type = 0  # Sets how opencv will read the images
                       # cv2.IMREAD_COLOR = 1 (rgb),
                       # cv2.IMREAD_GRAYSCALE = 0,
                       # cv2.IMREAD_UNCHANGED = -1 (4 channels like RGBA)
)يوضح المثال التالي كيفية تعيين وظيفة معالجة مسبقة مخصصة للصورة.
 from keras_segmentation . models . unet import vgg_unet

def image_preprocessing ( image ):
    return image + 1

model = vgg_unet ( n_classes = 51 ,  input_height = 416 , input_width = 608 )

model . train (
    train_images =  "dataset1/images_prepped_train/" ,
    train_annotations = "dataset1/annotations_prepped_train/" ,
    checkpoints_path = "/tmp/vgg_unet_1" , epochs = 5 ,
    preprocessing = image_preprocessing # Sets the preprocessing function
)يوضح المثال التالي كيفية تعيين عمليات الاسترجاعات المخصصة للتدريب على النموذج.
 from keras_segmentation . models . unet import vgg_unet
from keras . callbacks import ModelCheckpoint , EarlyStopping

model = vgg_unet ( n_classes = 51 ,  input_height = 416 , input_width = 608 )

# When using custom callbacks, the default checkpoint saver is removed
callbacks = [
    ModelCheckpoint (
                filepath = "checkpoints/" + model . name + ".{epoch:05d}" ,
                save_weights_only = True ,
                verbose = True
            ),
    EarlyStopping ()
]

model . train (
    train_images =  "dataset1/images_prepped_train/" ,
    train_annotations = "dataset1/annotations_prepped_train/" ,
    checkpoints_path = "/tmp/vgg_unet_1" , epochs = 5 ,
    callbacks = callbacks
)يوضح المثال التالي كيفية إضافة مدخلات صور إضافية للنماذج.
 from keras_segmentation . models . unet import vgg_unet

model = vgg_unet ( n_classes = 51 ,  input_height = 416 , input_width = 608 )

model . train (
    train_images =  "dataset1/images_prepped_train/" ,
    train_annotations = "dataset1/annotations_prepped_train/" ,
    checkpoints_path = "/tmp/vgg_unet_1" , epochs = 5 ,
    other_inputs_paths = [
        "/path/to/other/directory"
    ],


#     Ability to add preprocessing
    preprocessing = [ lambda x : x + 1 , lambda x : x + 2 , lambda x : x + 3 ], # Different prepocessing for each input
#     OR
    preprocessing = lambda x : x + 1 , # Same preprocessing for each input
)فيما يلي بعض المشاريع التي تستخدم مكتبتنا:
إذا كنت تستخدم الكود الخاص بنا في مشروع متاح للعامة، فيرجى إضافة الرابط هنا (عن طريق نشر مشكلة أو إنشاء علاقات عامة)


