SuspensionEntrance
1.0.0
تقليد وظيفة إدخال النافذة العائمة للإصدار الجديد من WeChat
pod SuspensionExtrance ~> 0.1 . 0 // 使用podfile方式引入 @implementation BaseNavigationController
- ( void ) viewDidLoad {
[ super viewDidLoad ];
// 在自定义的navigationController中 设置代理, 如果已经使用了代理,
self. delegate = [SuspensionEntrance shared ];
// 关闭系统返回手势
self. interactivePopGestureRecognizer . enabled = NO ;
}
@end
// 对于可以作为入口界面的Controller,实现SEItem协议
@interface EntranceViewController : UIViewController <SEItem>
@property ( copy , nonatomic ) NSString *entranceTitle;
@property ( copy , nonatomic , nullable ) NSURL *entranceIconUrl;
@property ( copy , nonatomic , nullable ) NSDictionary *entranceUserInfo;
@end
// 并实现下列构造方法, !!! 如果不实现则无法进行序列化存储
+ ( instancetype )entranceWithItem:( id <SEItem>)item {
EntranceViewController *controller = [[EntranceViewController alloc ] initWithNibName: nil bundle: nil ];
controller. entranceTitle = item. entranceTitle ;
controller. entranceIconUrl = item. entranceIconUrl ;
controller. entranceUserInfo = item. entranceUserInfo ;
return controller;
}
 // 在对应的代理方法里面调用
- ( void )navigationController:(UINavigationController *)navigationController willShowViewController:(UIViewController *)viewController animated:( BOOL )animated {
    [[SuspensionEntrance shared ] navigationController: navigationController willShowViewController: viewController animated: animated];
}

- ( void )navigationController:(UINavigationController *)navigationController didShowViewController:(UIViewController *)viewController animated:( BOOL )animated {
    [[SuspensionEntrance shared ] navigationController: navigationController didShowViewController: viewController animated: animated];
}

- ( id <UIViewControllerInteractiveTransitioning>)navigationController:(UINavigationController *)navigationController interactionControllerForAnimationController:( id <UIViewControllerAnimatedTransitioning>)animationController {
    return [[SuspensionEntrance shared ] navigationController: navigationController interactionControllerForAnimationController: animationController];
}

- ( id <UIViewControllerAnimatedTransitioning>)navigationController:(UINavigationController *)navigationController animationControllerForOperation:(UINavigationControllerOperation)operation fromViewController:(UIViewController *)fromVC toViewController:(UIViewController *)toVC {
    return [[SuspensionEntrance shared ] navigationController: navigationController animationControllerForOperation: operation fromViewController: fromVC toViewController: toVC];
}

// 然后同上面一步, 一样实现SEItem协议, 需要注意的事, 需要手动关闭自定义返回手势, 以避免手势冲突
// 以集成了 forkingdog/FDFullscreenPopGesture(https://github.com/forkingdog/FDFullscreenPopGesture) 为例, 添加下列方法
- ( void )fd_interactivePopDisabled { return YES ; }push & pop في UINavigationController من أجل تنفيذ الرسوم المتحركة المخصصة push & pop ، نحتاج إلى استخدام واجهة برمجة التطبيقات التي توفرها Apple في iOS7: يمكن لـ UIViewControllerAnimatedTransitioning تحقيق تأثيرات محددة.
UIViewControllerAnimatedTransitioning // 实现协议方法, 用于创建自定义的push & pop手势
- ( NSTimeInterval )transitionDuration:( id <UIViewControllerContextTransitioning>)transitionContext {
// the duration for animation
}
// 在这里我们将此次使用到的动画效果大致分为三种
// 1. 从圆球----push----->到具体的viewController
// 2. 从viewController --pop--> 圆球效果
// 3. 交互式滑动, 并根据滑动距离更新界面UI,最后 ---pop---> 圆球效果
- ( void )animateTransition:( id <UIViewControllerContextTransitioning>)transitionContext {
// 自定义自己的动画效果, 利用CoreAnimations or [UIView animateWithDuration:0.25 animations:NULL] 都可以
}UIViewControllerInteractiveTransitioning بعد ذلك، نحتاج إلى تخصيص الإيماءة التفاعلية التي تم إرجاعها، ولحسن الحظ، أعدت Apple أيضًا واجهة API لنا فقط.
 // 1. 在对应的view上添加滑动手势, 这边我们直接借助于UIScreenEdgePanGestureRecognizer
{
    UIScreenEdgePanGestureRecognizer *pan = [[UIScreenEdgePanGestureRecognizer alloc ] initWithTarget: self action: @selector ( handleTransition: )];
    pan. edges = UIRectEdgeLeft;
    pan. delegate = self;
    [viewController.view addGestureRecognizer: pan];
}
// 2. 实现手势方法
- ( void )handleTransition:(UIScreenEdgePanGestureRecognizer *)pan {
    // ...
    switch (pan. state ) {
        case UIGestureRecognizerStateBegan:
            // 2.1 触发交互式返回, 创建UIPercentDrivenInteractiveTransition对象
            // 2.2 调用返回手势
            // 2.3 处理一些其他的初始化动作...
          	self. interactive = [[UIPercentDrivenInteractiveTransition alloc ] init ];
            [tempItem.navigationController popViewControllerAnimated: YES ];
            break ;
        case UIGestureRecognizerStateChanged:
            // 2.4 更新交互式动画进度, 注意因为我们的使用的是自定义动画, 并没有一个完整的动画过程,
            // 所以我们需要自己更新动画过程, 如果直接使用的系统自带返回, 那么我们只需要更新interactive即可
            [ self .animator updateContinousPopAnimationPercent: tPoint.x / SCREEN_WIDTH];
            [ self .interactive updateInteractiveTransition: tPoint.x / SCREEN_WIDTH];
            // 2.5 处理其他一些判断条件(例如是否拖动到浮窗检测区域)...
            break ;
        case UIGestureRecognizerStateEnded:     // fall through
        case UIGestureRecognizerStateCancelled:
            // 2.6 判断动画完成情况, 是否具体完成 or 取消
            // 2.7 处理一些完成后动作(例如是否添加浮窗等)...
			break ;
    }
}
في هذه المرحلة، أكملنا تقريبًا تأثير إرجاع مخصص تفاعلي بسيط، بالنسبة للكود المحدد، يمكنك عرض SuspensionEntrance و SETransitionAnimator .
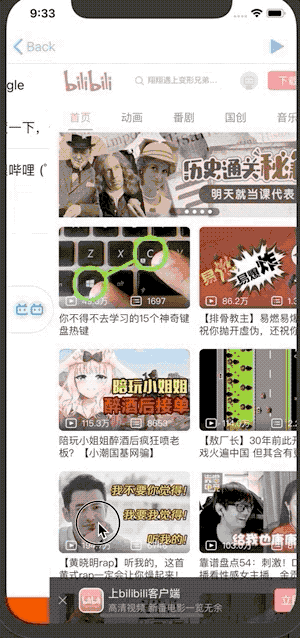
بعد ذلك، نحتاج إلى تأثير الكرة العائمة المقابل من تحليل WeChat، يمكننا أن نرى أن الكرة العائمة تتضمن بشكل أساسي عناصر التحكم المحددة التالية:
SEFloatingBallيتضمن المدخل الرئيسي النقر والسحب والضغط لفترة طويلة والإيماءات الأخرى، ويوفر وظيفة عرض الرموز للعناصر
touchBegan .- ( void )setupGestures {
// 添加长按手势
UILongPressGestureRecognizer *longPress = [[UILongPressGestureRecognizer alloc ] initWithTarget: self action: @selector ( handleLongPress: )];
longPress. minimumPressDuration = 0.5 ;
longPress. allowableMovement = 5 . f ;
// 关闭delays touches began功能, 因为我们在touchesBegan实现了点击方法, 并且动态高亮了点击背景, 所以我们需要实时呈现, 如果手势检测成功, 则会进入touchesCancelled
longPress. delaysTouchesBegan = NO ;
[ self addGestureRecognizer: longPress];
// 添加拖拽手势
UIPanGestureRecognizer *pan = [[UIPanGestureRecognizer alloc ] initWithTarget: self action: @selector ( handlePan: )];
// 原因同上
pan. delaysTouchesBegan = NO ;
[ self addGestureRecognizer: pan];
// 注意此处优先检测长按手势, 检测失败后才开始检测拖拽
[pan requireGestureRecognizerToFail: longPress];
} * items 的icon展示 -- 此处用了比较暴力的直接计算....
SEFloatingAreaيتم استخدامه بشكل أساسي لاكتشاف ما إذا كانت الكرة العائمة قد تم سحبها إلى هذه المنطقة وتحديد ما إذا كان يجب استخدام النافذة الحالية كمدخل للنافذة العائمة أم لا. لا يوجد شيء معقد بشكل خاص للمعالجة هنا. يمكنك عرض الكود لمزيد من التفاصيل .
SEFloatingListيُستخدم بشكل أساسي لعرض عناصر القائمة التي تم وضع علامة عليها كمدخلات نافذة عائمة، ويتم استخدام وضع الوكيل هنا، وتتضمن العناصر الأكثر تعقيدًا ما يلي
تجدر الإشارة إلى أنه لن يتم عرض جميع العناصر - فالعناصر التي تم فتحها سيتم إخفاء مداخلها لمنع دخولها بدفعة ثانية.
حساب موضع وترتيب العناصر
- ( void )showAtRect:( CGRect )rect animated:( BOOL )animated {

    UIEdgeInsets safeAreaInsets = UIEdgeInsetsZero;
    if (@ available (iOS 11.0 , *)) safeAreaInsets = UIApplication. sharedApplication . keyWindow . safeAreaInsets ;

    CGFloat const SCREEN_WIDTH = UIScreen. mainScreen . bounds . size . width ;
    CGFloat const SCREEN_HEIGHT = UIScreen. mainScreen . bounds . size . height - safeAreaInsets. top - safeAreaInsets. bottom ;

    // 获取可以被展示的item项
    NSArray <SEFloatingListItem *> *visibleListItems = [ self .visibleItems copy ];

    // 计算排列方式
    // inLeft: 是否在左侧   list主要显示位置
    // inBottom: 是否在底部 item在rect底部 or 顶部
    // isEnough: 是否有足够空间排列, 如果没有足够控件, 则采用自下而上(底部) or 自上而下的方式(顶部), 保证控件布局
    CGFloat const padding = 15 . f ;
    CGFloat const itemHeight = (padding + kSEFloatingListItemHeight );
    CGFloat height = visibleListItems. count * itemHeight;
    BOOL inLeft = rect. origin . x <= (SCREEN_WIDTH / 2 . f );
    BOOL inBottom = (rect. origin . y + height < SCREEN_HEIGHT);
    BOOL isEnough = inBottom ? ( CGRectGetMaxY (rect) + height + safeAreaInsets. bottom < SCREEN_HEIGHT ) : (rect. origin . y > (height + safeAreaInsets. top ));

    // 计算起始点位置
    CGFloat x = inLeft ? 0 . f : (SCREEN_WIDTH / 3 . f );
    CGFloat y = inBottom ? (rect. origin . y + rect. size . height + padding) : (rect. origin . y - itemHeight);
    if (!isEnough) { y = inBottom ? SCREEN_HEIGHT + safeAreaInsets. top - kSEFloatingListItemHeight - 5 . f : safeAreaInsets. top ; }

    // 如果控件不足, 我们布局采用逆序布局, 方便计算y轴起始点
    if (!isEnough) visibleListItems = [[[visibleListItems reverseObjectEnumerator ] allObjects ] mutableCopy ];

    // 最后进行对应的布局, 并添加动画
    NSUInteger idx = 0 ;
    for (SEFloatingListItem *itemView in self. listItems ) {

        itemView. alpha = . 0f ;
        itemView. selected = NO ;
        itemView. highlighted = NO ;
        itemView. frame = ( CGRect ) { CGPointMake (inLeft ? -itemView. frame . size . width : SCREEN_WIDTH, y), itemView. frame . size };
        itemView. corners = inLeft ? (UIRectCornerTopRight | UIRectCornerBottomRight) : (UIRectCornerTopLeft | UIRectCornerBottomLeft);

        if (![visibleListItems containsObject: itemView]) continue ;

        [UIView animateWithDuration: 0.15 delay: idx * 0.01 options: UIViewAnimationOptionCurveEaseInOut animations: ^{
            itemView. alpha = 1 . 0f ;
            itemView. frame = ( CGRect ){ CGPointMake (x, y), itemView. frame . size };
        } completion: NULL ];

        idx += 1 ;
        if (((inBottom && isEnough) || (!inBottom && !isEnough))) { y += itemHeight; }
        else { y-= itemHeight; }
    }

    self. alpha = 0 . 3f ;
    [UIView animateWithDuration: 0.25 animations: ^ { self. alpha = 1 . f ; }];

    if (self. delegate && [ self .delegate respondsToSelector: @selector ( floatingListWillShow: )])
        [ self .delegate floatingListWillShow: self ];
} يستخدم التخزين المتسلسل للعناصر NSKeyedArchiverNSKeyedUnarchiver لكتابة بيانات JSON الخاصة بالعناصر إلى ملف محلي
باستخدام طريقة البروتوكول SEItem ، يمكنك تخصيص أي إدخال - ولكن لا يوصى بإضافة إدخال اختصار لواجهة تستهلك قدرًا كبيرًا من الذاكرة، ولا تتم إضافة معالجة UIApplicationDidReceiveMemoryWarningNotification داخليًا - (قد تفكر في إضافة طريقة معالجة الإشعارات لاحقًا. ، وأعد استخدام إدخال الاختصار عندما لا تكون هناك ذاكرة كافية.)
باستخدام طريقة التسلسل، لن يستهلك إدخال الاختصار الذي تم إنشاؤه الكثير من الذاكرة بعد الإنشاء، لأن viewController لا يستدعي طريقة viewDidLoad .


