Looking back on the past learning process, the videos of teachers Ng Enda and Li Hongyi have provided me with great help in my journey of in-depth learning. Their humorous explanation methods and simple and intuitive explanations make boring theoretical learning lively and interesting.
However, in practice, many students will initially worry about how to obtain the API of large foreign models. Although they can eventually find a solution, the fear of difficulty for the first time will always delay the learning progress and gradually change. It’s a state of “just watching the video”. I often see similar discussions in the comment area, so I decided to use my free time to help students cross this threshold. This is also the original intention of the project.
This project will not provide tutorials on scientific Internet access, nor will it rely on platform-customized interfaces. Instead, it will use the more compatible OpenAI SDK to help everyone learn more general knowledge.
The project will start with simple API calls and take you gradually into the world of large models. In the process, you will master skills such as AI video summarization , LLM fine-tuning , and AI image generation .
It is strongly recommended to watch Teacher Li Hongyi’s course "Introduction to Generative Artificial Intelligence" for simultaneous learning: quick access to course-related links
Now, the project also offers CodePlayground. You can configure the environment according to the documentation, run the script with one line of code, and experience the charm of AI.
?Thesis essays are located in PaperNotes, and basic papers related to large models will be uploaded gradually.
The basic image is ready. If you haven't configured your own deep learning environment, you might as well try Docker.
Have a nice trip!
--- : Basic knowledge, watch it as needed, or skip it temporarily. The code file results will be shown in the article, but it is still recommended to run the code manually. There may be video memory requirements.API : The article only uses the API of large models, is not subject to device restrictions, and can be run without a GPU.LLM : Practice related to large language models, code files may have video memory requirements.SD : Stable Diffusion, a practice related to Vincentian diagrams, and code files have video memory requirements.File code and the learning effect will be the same.Setting -> Accelerator ->选择GPU .代码执行程序->更改运行时类型->选择GPU .| Guide | Tag | Describe | File | Online |
|---|---|---|---|---|
| 00. Alibaba Big Model API Obtaining Steps | API | We will take you step by step to obtain the API. If it is the first time to register, you need to perform an identity verification (face recognition). | ||
| 01. First introduction to LLM API: environment configuration and multi-round dialogue demonstration | API | This is an introductory configuration and demonstration. The conversation code is modified from Alibaba development documents. | Code | Kaggle Colab |
| 02. Easy to get started: Build AI applications through API and Gradio | API | Guide how to use Gradio to build a simple AI application. | Code | Colab |
| 03. Advanced guide: Customize Prompt to improve large model problem-solving capabilities | API | You will learn to customize a Prompt to improve the ability of large models to solve mathematical problems. Gradio and non-Gradio versions will also be provided, and code details will be shown. | Code | Kaggle Colab |
| 04. Understanding LoRA: from linear layer to attention mechanism | --- | Before officially entering practice, you need to know the basic concepts of LoRA. This article will take you from the linear layer LoRA implementation to the attention mechanism. | ||
05. Understand Hugging Face’s AutoModel series: automatic model loading classes for different tasks | --- | The module we are about to use is AutoModel in Hugging Face. This article is also prerequisite knowledge (of course you can skip it and read it later when you have doubts). | Code | Kaggle Colab |
| 06. Get started: deploy your first language model | LLM | Implementing a very basic language model deployment, the project does not have hard requirements for GPU so far, you can continue to learn. | Code app_fastapi.py app_flask.py | |
| 07. Explore the relationship between model parameters and video memory and the impact of different accuracy | --- | Understanding the correspondence between model parameters and video memory and mastering the import methods of different precisions will make your model selection more skillful. | ||
| 08. Try to fine-tune LLM: let it write Tang poetry | LLM | This article is the same as 03. Advanced Guide: Customizing Prompt to Improve Large Model Problem-Solving Abilities. It essentially focuses on "using" rather than "writing". You can have an understanding of the overall process as before. Try adjusting the hyperparameters section to see the impact on fine-tuning. | Code | Kaggle Colab |
| 09. In-depth understanding of Beam Search: principles, examples and code implementation | --- | Going from examples to code demonstrations, explaining the mathematics of Beam Search, this should clear up some confusion from the previous reading, and finally provide a simple example of using the Hugging Face Transformers library (you can try it if you skipped the previous article). | Code | Kaggle Colab |
| 10. Top-K vs Top-P: Sampling strategy and the influence of Temperature in generative models | --- | Further to show you other generation strategies. | Code | Kaggle Colab |
| 11. DPO fine-tuning example: Optimizing LLM large language model according to human preferences | LLM | An example of fine-tuning using DPO. | Code | Kaggle Colab |
| 12. Inseq feature attribution: visually interpret the output of LLM | LLM | Visual examples of translation and text generation (fill-in-the-blank) tasks. | Code | Kaggle Colab |
| 13. Understand possible biases in AI | LLM | No understanding of code is required, and it can be used as a fun exploration during leisure time. | Code | Kaggle Colab |
| 14. PEFT: Quickly apply LoRA to large models | --- | Learn how to add LoRA layers after importing the model. | Code | Kaggle Colab |
| 15. Use API to implement AI video summary: Make your own AI video assistant | API & LLM | You will learn the principles behind common AI video summary assistants and get started with implementing AI video summarization. | Code - full version Code - Lite version ?script | Kaggle Colab |
| 16. Use LoRA to fine-tune Stable Diffusion: disassemble the alchemy furnace and implement your first AI painting | SD | Use LoRA to fine-tune the Vincent diagram model, and now you can also provide your LoRA files to others. | Code Code - Lite version | Kaggle Colab |
| 17. A brief discussion on RTN model quantization: asymmetric vs symmetric.md | --- | To further understand the quantification behavior of RTN model, this article uses INT8 as an example to explain. | Code | Kaggle Colab |
| 18. Overview of model quantification technology and analysis of GGUF/GGML file format | --- | This is an overview article that may solve some of your doubts when using GGUF/GGML. | ||
| 19a. From loading to conversation: running quantized LLM large models (GPTQ & AWQ) locally using Transformers 19b. From loading to conversation: running quantized LLM large models (GGUF) locally using Llama-cpp-python | LLM | You will deploy a quantitative model with 7 billion (7B) parameters on your computer. Note that this article does not require a graphics card. 19 a Using Transformers, involving model loading in GPTQ and AWQ formats. 19 b Using Llama-cpp-python, involving model loading in GGUF format. In addition, you will also complete the local large model dialogue interaction function. | Code-Transformers Code-Llama-cpp-python ?script | |
| 20. RAG introductory practice: from document splitting to vector database and question and answer construction | LLM | RAG related practices. Learn how recursive text chunking works. | Code | |
| 21. BPE vs WordPiece: Understand the working principle of Tokenizer and sub-word segmentation method | --- | Basic operations of Tokenizer. Learn about common subword segmentation methods: BPE and WordPiece. Understand attention mask (Attention Mask) and token type IDs (Token Type IDs). | Code | Kaggle Colab |
| 22. Assignment - Bert fine-tuning extractive question answering | This is an assignment that uses BERT to fine-tune downstream question and answer tasks. You can try it and try to join Kaggle's "competition". A guide article with all the tips will be given after a week. You can choose to study now or leave it for later. The introductory article will not cover the assignment description, and two versions of the code will be uploaded for learning, so don't worry. There will be no deadline here. | Code - Assignment | Kaggle Colab |
Tip
If you prefer to pull the warehouse to read .md locally, then when a formula error occurs, please use Ctrl+F or Command+F , search for \_ and replace all with _ .
Further reading:
| Guide | Describe |
|---|---|
| a. Use HFD to speed up the download of Hugging Face models and data sets | If you feel that model downloading is too slow, you can refer to this article for configuration. If you encounter proxy-related 443 errors, you can also try to check this article. |
| b. Quick check of basic command line commands (applicable to Linux/Mac) | A command line command quick check basically contains all the commands involved in the current warehouse. Check it when you are confused. |
| c. Solutions to some problems | Here we will solve some problems that may be encountered during the operation of the project. - How to pull the remote warehouse to overwrite all local modifications? - How to view and delete files downloaded by Hugging Face, and how to modify the save path? |
| d. How to load the GGUF model (solution to Shared/Shared/Split/00001-of-0000...) | - Learn about the new features of Transformers about GGUF. - Use Transformers/Llama-cpp-python/Ollama to load model files in GGUF format. - Learn to merge fragmented GGUF files. - Solve the problem that LLama-cpp-python cannot be offloaded. |
| e. Data enhancement: analysis of common methods of torchvision.transforms | - Understand commonly used image data enhancement methods. Code | Kaggle | Colab |
| f. Cross-entropy loss function nn.CrossEntropyLoss() detailed explanation and key points reminder (PyTorch) | - Understand the mathematical principles of cross-entropy loss and PyTorch implementation. - Learn what to pay attention to when using it for the first time. |
| g. Embedding layer nn.Embedding() detailed explanation and key points reminder (PyTorch) | - Understand the concepts of embedding layers and word embeddings. - Visualize Embedding using pre-trained models. Code | Kaggle | Colab |
| h. Use Docker to quickly configure the deep learning environment (Linux) h. Introduction to Docker basic commands and common error resolution | - Use two lines of commands to configure the deep learning environment - Introduction to Docker basic commands - Solve three common errors during use |
Folder explanation:
Demos
All code files will be stored there.
data
There is no need to pay attention to this folder to store small data that may be used in the code.
GenAI_PDF
Here are the PDF files of the assignments for the course [Introduction to Generative Artificial Intelligence]. I uploaded them because they were originally saved in Google Drive.
Guide
All guidance documents will be housed there.
assets
Here are the images used in the .md file. There is no need to pay attention to this folder.
PaperNotes
Thesis Essay.
CodePlayground
Some interesting code script examples (Toy version).
README.md
summarizer.py ?script
AI video/audio/subtitle summarization.
chat.py ?script
AI conversation.
Introduction to Generative Artificial Intelligence Learning Resources
Course home page
Official | Authorized video: YouTube | Bilibili
The production and sharing of the Chinese mirror version has been authorized by teacher Li Hongyi. Thank you to the teacher for your selfless sharing of knowledge!
PS Chinese image will fully realize all functions of the job code (local operation). Kaggle is an online platform that can be directly connected in China. The content of Chinese Colab and Kaggle are consistent. The English Colab link corresponds to the original job. Just choose one of them to complete the study.
According to actual needs, select a method from below to prepare the learning environment, click ► or text to expand .
Kaggle (domestic direct connection, recommended): Read the article "Kaggle: Free GPU Usage Guide, an Ideal Alternative to Colab" to learn more.
Colab (requires scientific Internet access)
The code files in the project are synchronized on both platforms.
Linux (Ubuntu) :
sudo apt-get update
sudo apt-get install git
macOS :
Install Homebrew first:
/bin/bash -c " $( curl -fsSL https://raw.githubusercontent.com/Homebrew/install/HEAD/install.sh ) "Then run:
brew install gitWindows :
Download and install from Git for Windows.
Linux (Ubuntu) :
sudo apt-get update
sudo apt-get install wget curl
macOS :
brew install wget curlWindows :
Download and install from Wget for Windows and Curl official websites.
Visit the Anaconda official website, enter your email address and check your email. You should be able to see:
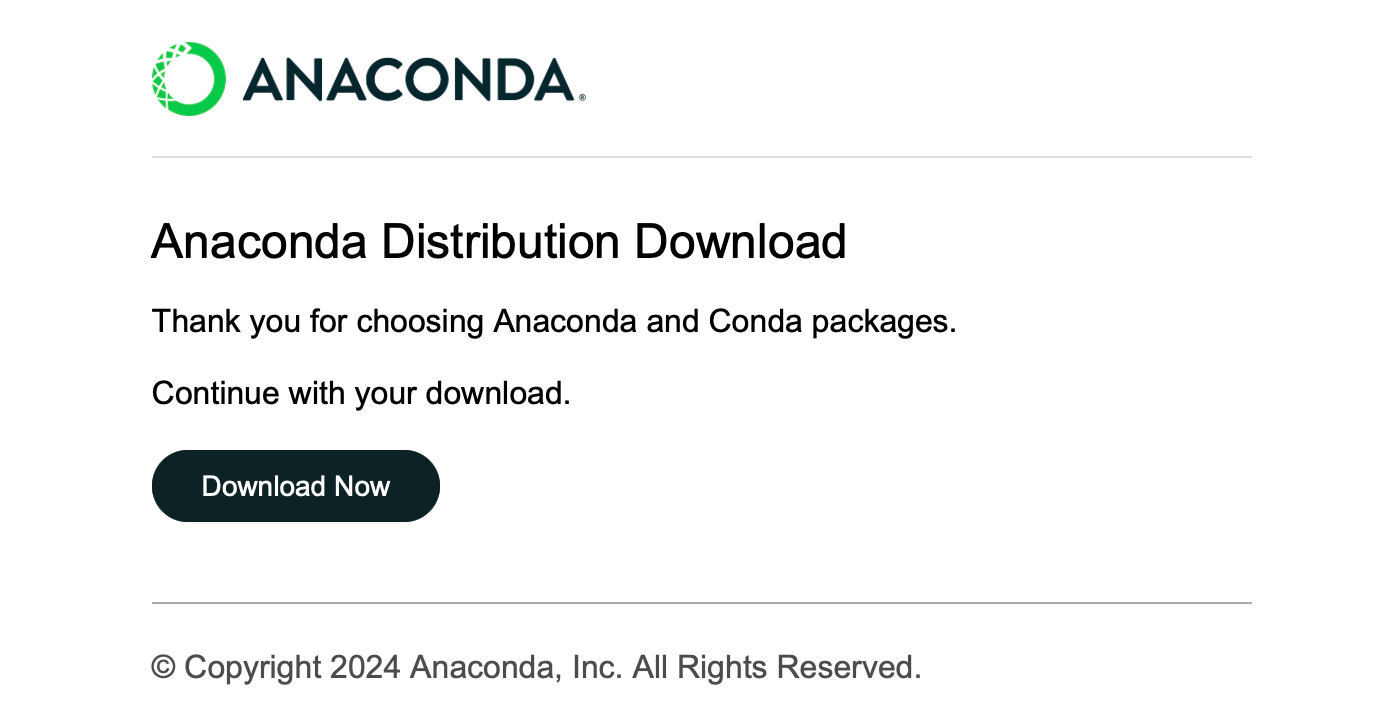
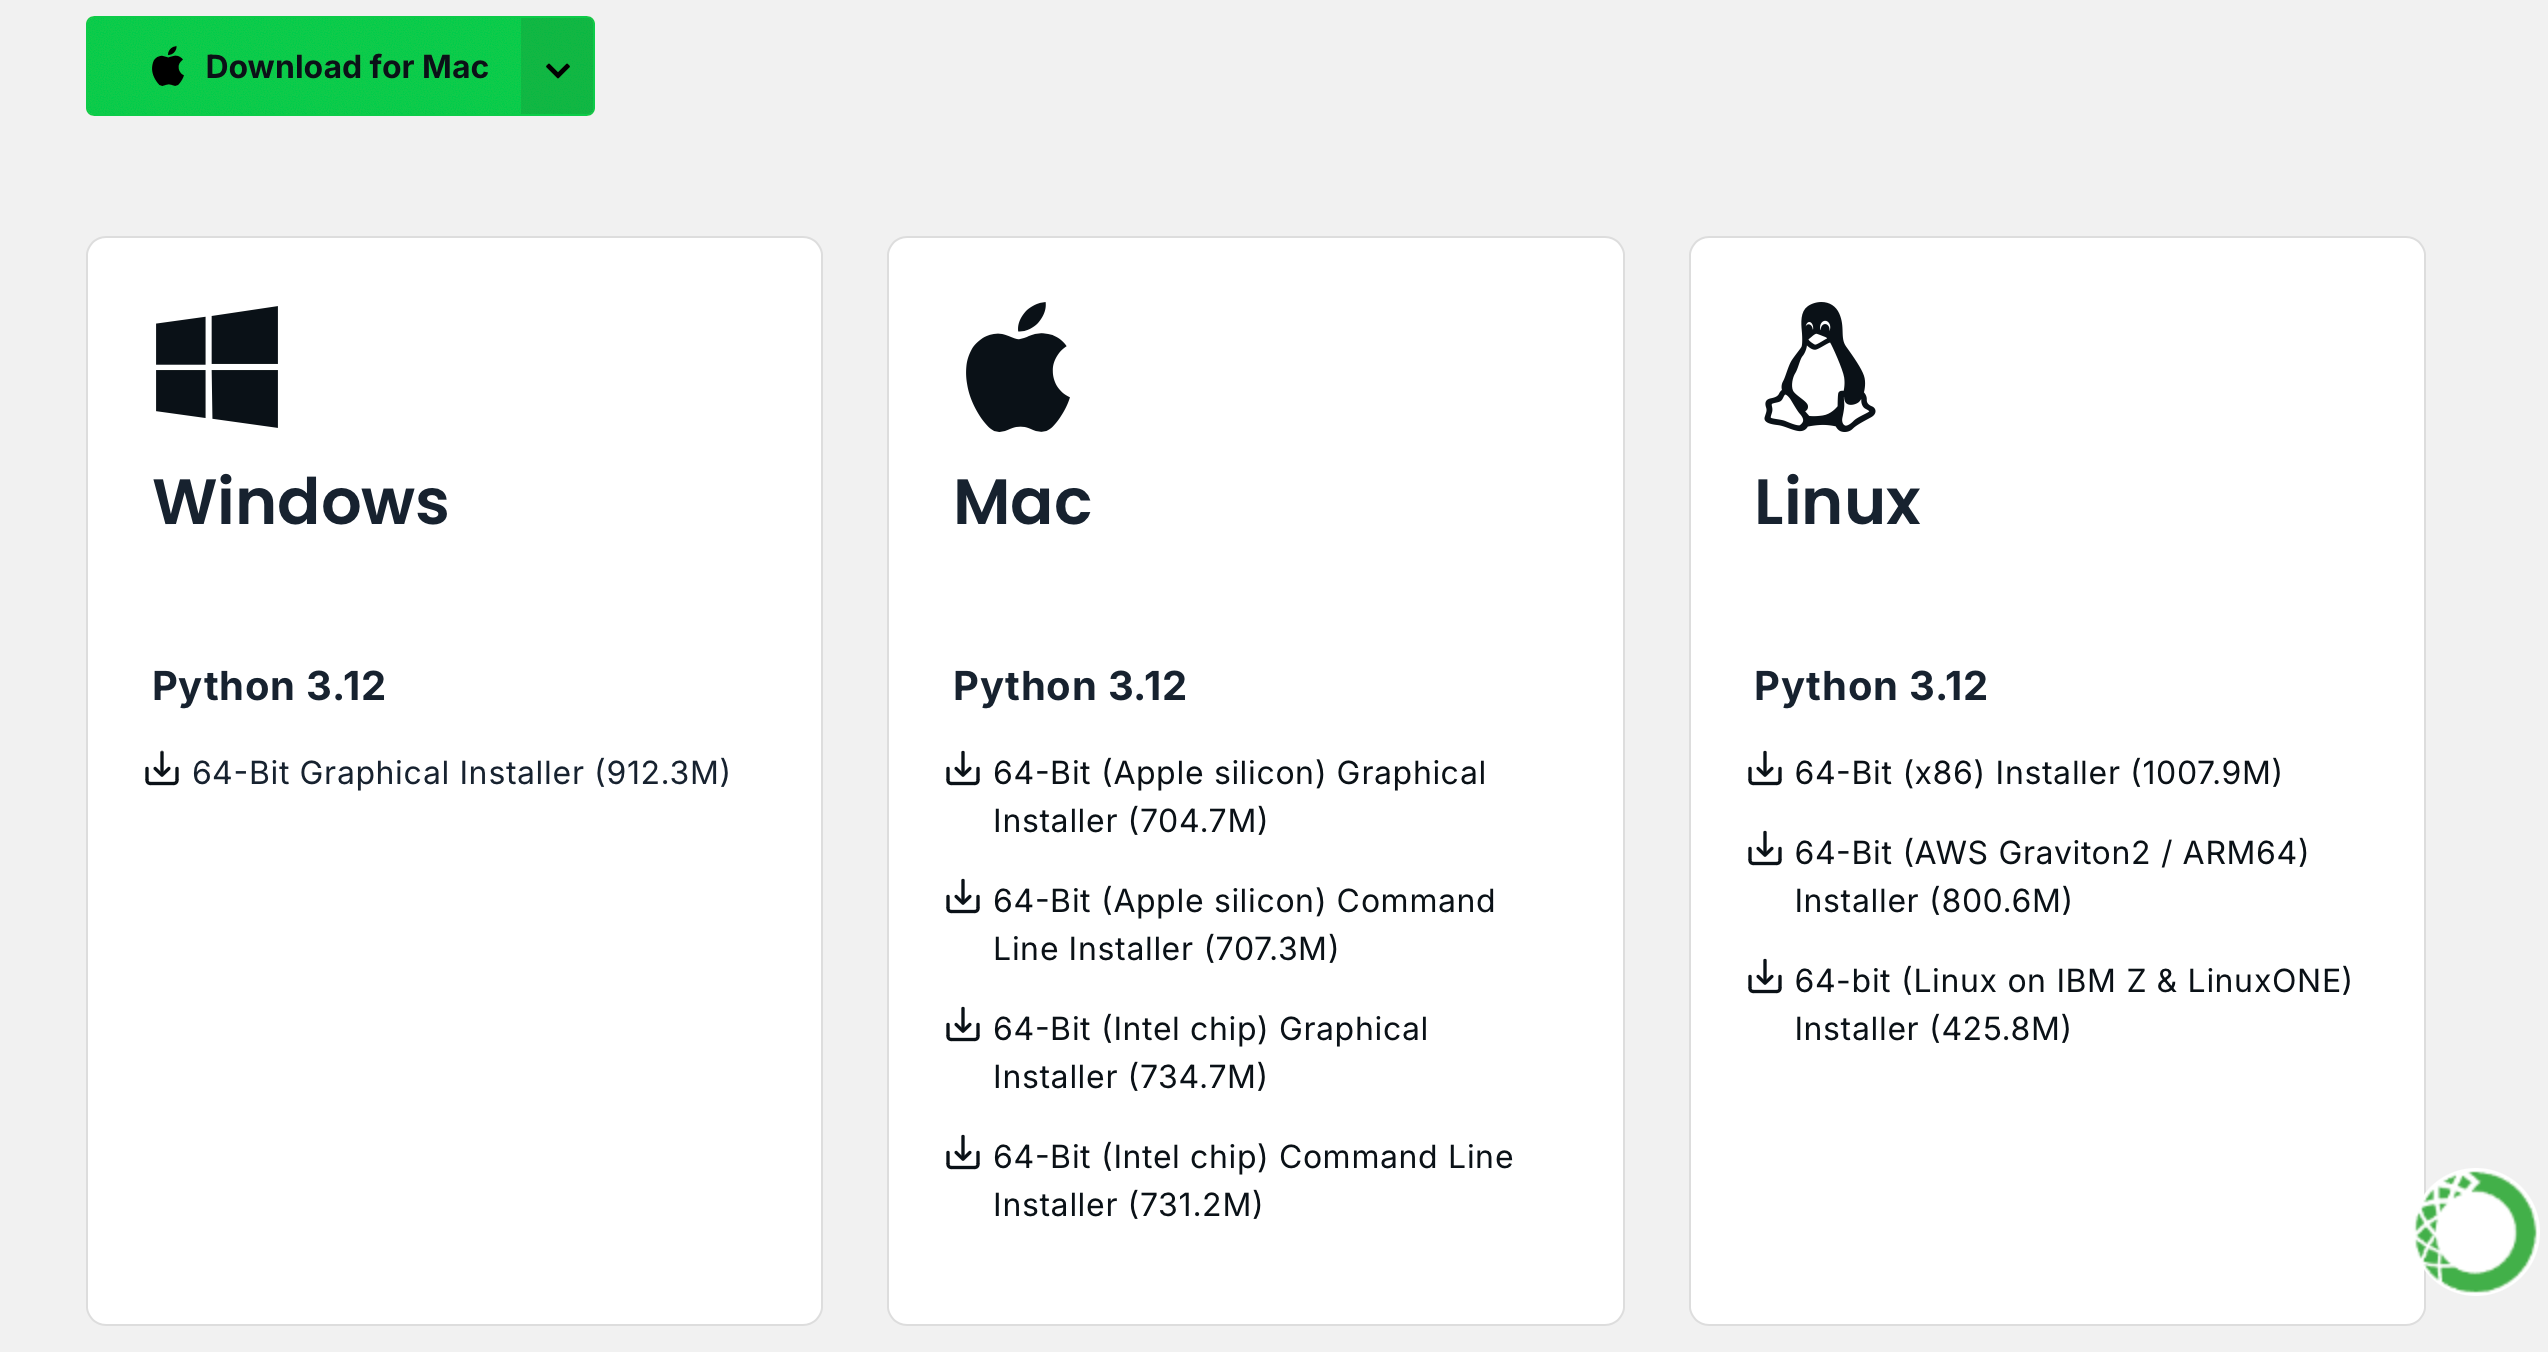
Click Download Now , select the appropriate version and download it (both Anaconda and Miniconda are available):
Linux (Ubuntu) :
Install Anaconda
Visit repo.anaconda.com for version selection.
 # 下载 Anaconda 安装脚本(以最新版本为例)
wget https://repo.anaconda.com/archive/Anaconda3-2024.10-1-Linux-x86_64.sh

# 运行安装脚本
bash Anaconda3-2024.10-1-Linux-x86_64.sh

# 按照提示完成安装(先回车,空格一直翻页,翻到最后输入 yes,回车)

# 安装完成后,刷新环境变量或者重新打开终端
source ~ /.bashrc
Install Miniconda (recommended)
Visit repo.anaconda.com/miniconda for version selection. Miniconda is a streamlined version of Anaconda, containing only Conda and Python.
 # 下载 Miniconda 安装脚本
wget https://repo.anaconda.com/miniconda/Miniconda3-latest-Linux-x86_64.sh

# 运行安装脚本
bash Miniconda3-latest-Linux-x86_64.sh

# 按照提示完成安装(先回车,空格一直翻页,翻到最后输入 yes,回车)

# 安装完成后,刷新环境变量或者重新打开终端
source ~ /.bashrc
macOS :
Correspondingly replace the URL in the Linux command.
Install Anaconda
Visit repo.anaconda.com for version selection.
Install Miniconda (recommended)
Visit repo.anaconda.com/miniconda for version selection.
Enter the following command in the terminal. If the version information is displayed, the installation is successful.
conda --versioncat << ' EOF ' > ~/.condarc
channels:
- defaults
show_channel_urls: true
default_channels:
- https://mirror.nju.edu.cn/anaconda/pkgs/main
- https://mirror.nju.edu.cn/anaconda/pkgs/r
- https://mirror.nju.edu.cn/anaconda/pkgs/msys2
custom_channels:
conda-forge: https://mirror.nju.edu.cn/anaconda/cloud
pytorch: https://mirror.nju.edu.cn/anaconda/cloud
EOF[!note]
Many mirror sources that were available last year are no longer available. For the current configuration of other mirror sites, you can refer to this very nice document from NTU: Mirror Usage Help.
Note : If Anaconda or Miniconda is already installed, pip will be included in the system and no additional installation is required.
Linux (Ubuntu) :
sudo apt-get update
sudo apt-get install python3-pip
macOS :
brew install python3Windows :
Download and install Python, making sure the "Add Python to PATH" option is checked.
Open a command prompt and enter:
python -m ensurepip --upgradeEnter the following command in the terminal. If the version information is displayed, the installation is successful.
pip --versionpip config set global.index-url https://mirrors.aliyun.com/pypi/simplePull the project with the following command:
git clone https://github.com/Hoper-J/AI-Guide-and-Demos-zh_CN.git
cd AI-Guide-and-Demos-zh_CNThere is no limit to the version, it can be higher:
conda create -n aigc python=3.9 Press y and enter to continue. After the creation is complete, activate the virtual environment:
conda activate aigcNext, you need to install basic dependencies. Refer to the PyTorch official website, taking CUDA 11.8 as an example (if the graphics card does not support 11.8, you need to change the command), choose one of the two to install:
 # pip
pip3 install torch torchvision torchaudio --index-url https://download.pytorch.org/whl/cu118

# conda
conda install pytorch torchvision torchaudio pytorch-cuda=11.8 -c pytorch -c nvidia
Now we have successfully configured all the required environments and are ready to start learning :) The remaining dependencies will be listed separately in each article.
[!note]
Docker images have pre-installed dependencies, so there is no need to reinstall them.
First install jupyter-lab , which is much easier to use than jupyter notebook .
pip install jupyterlabAfter the installation is complete, execute the following command:
jupyter-lab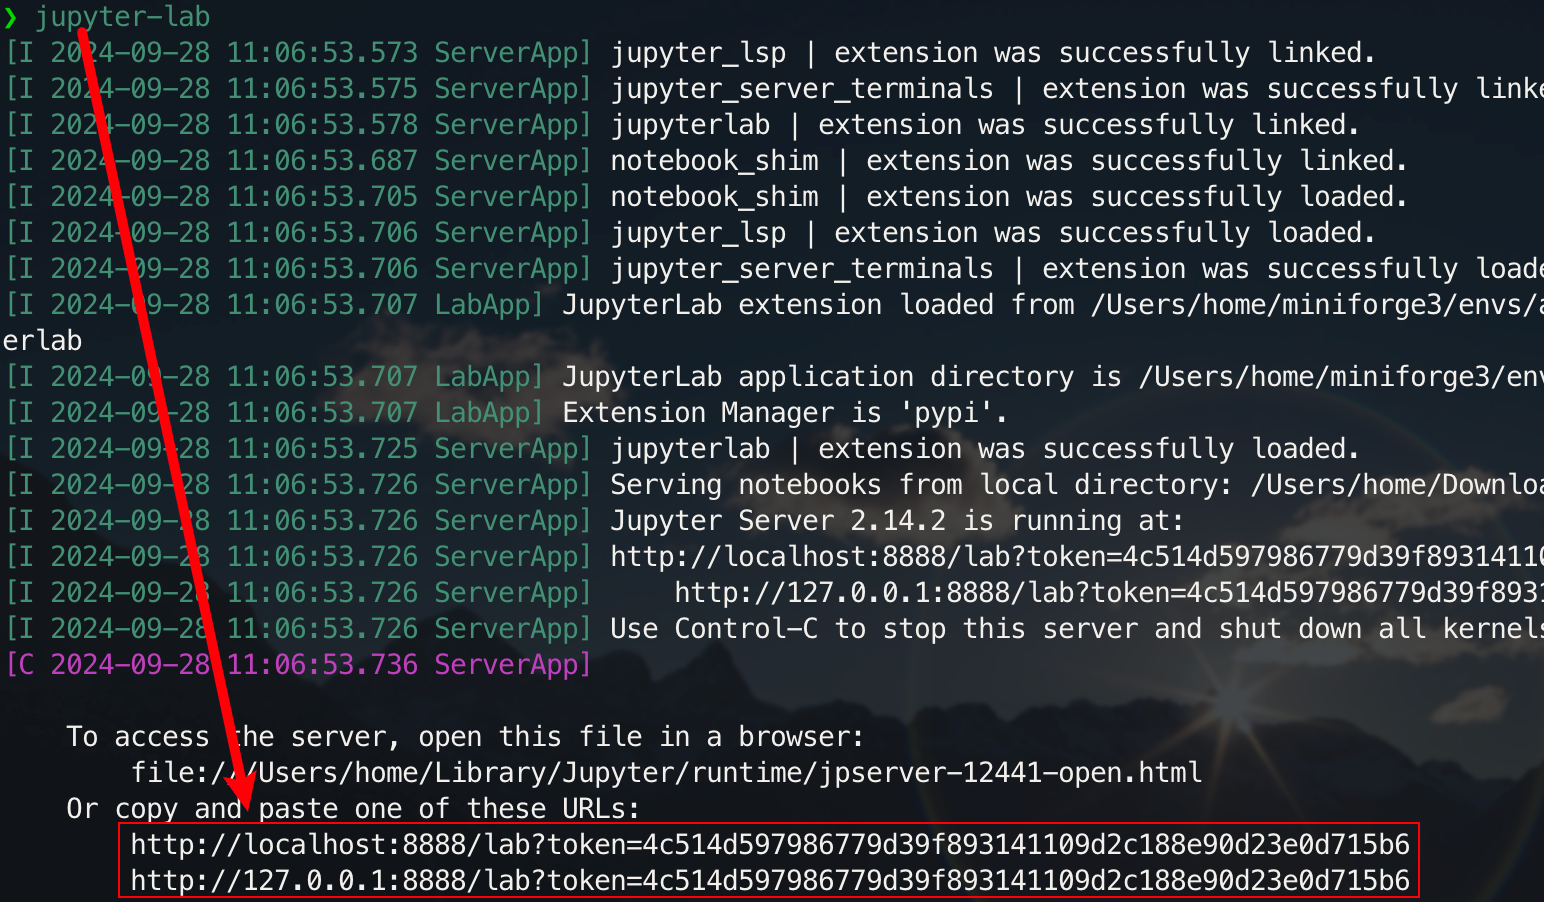
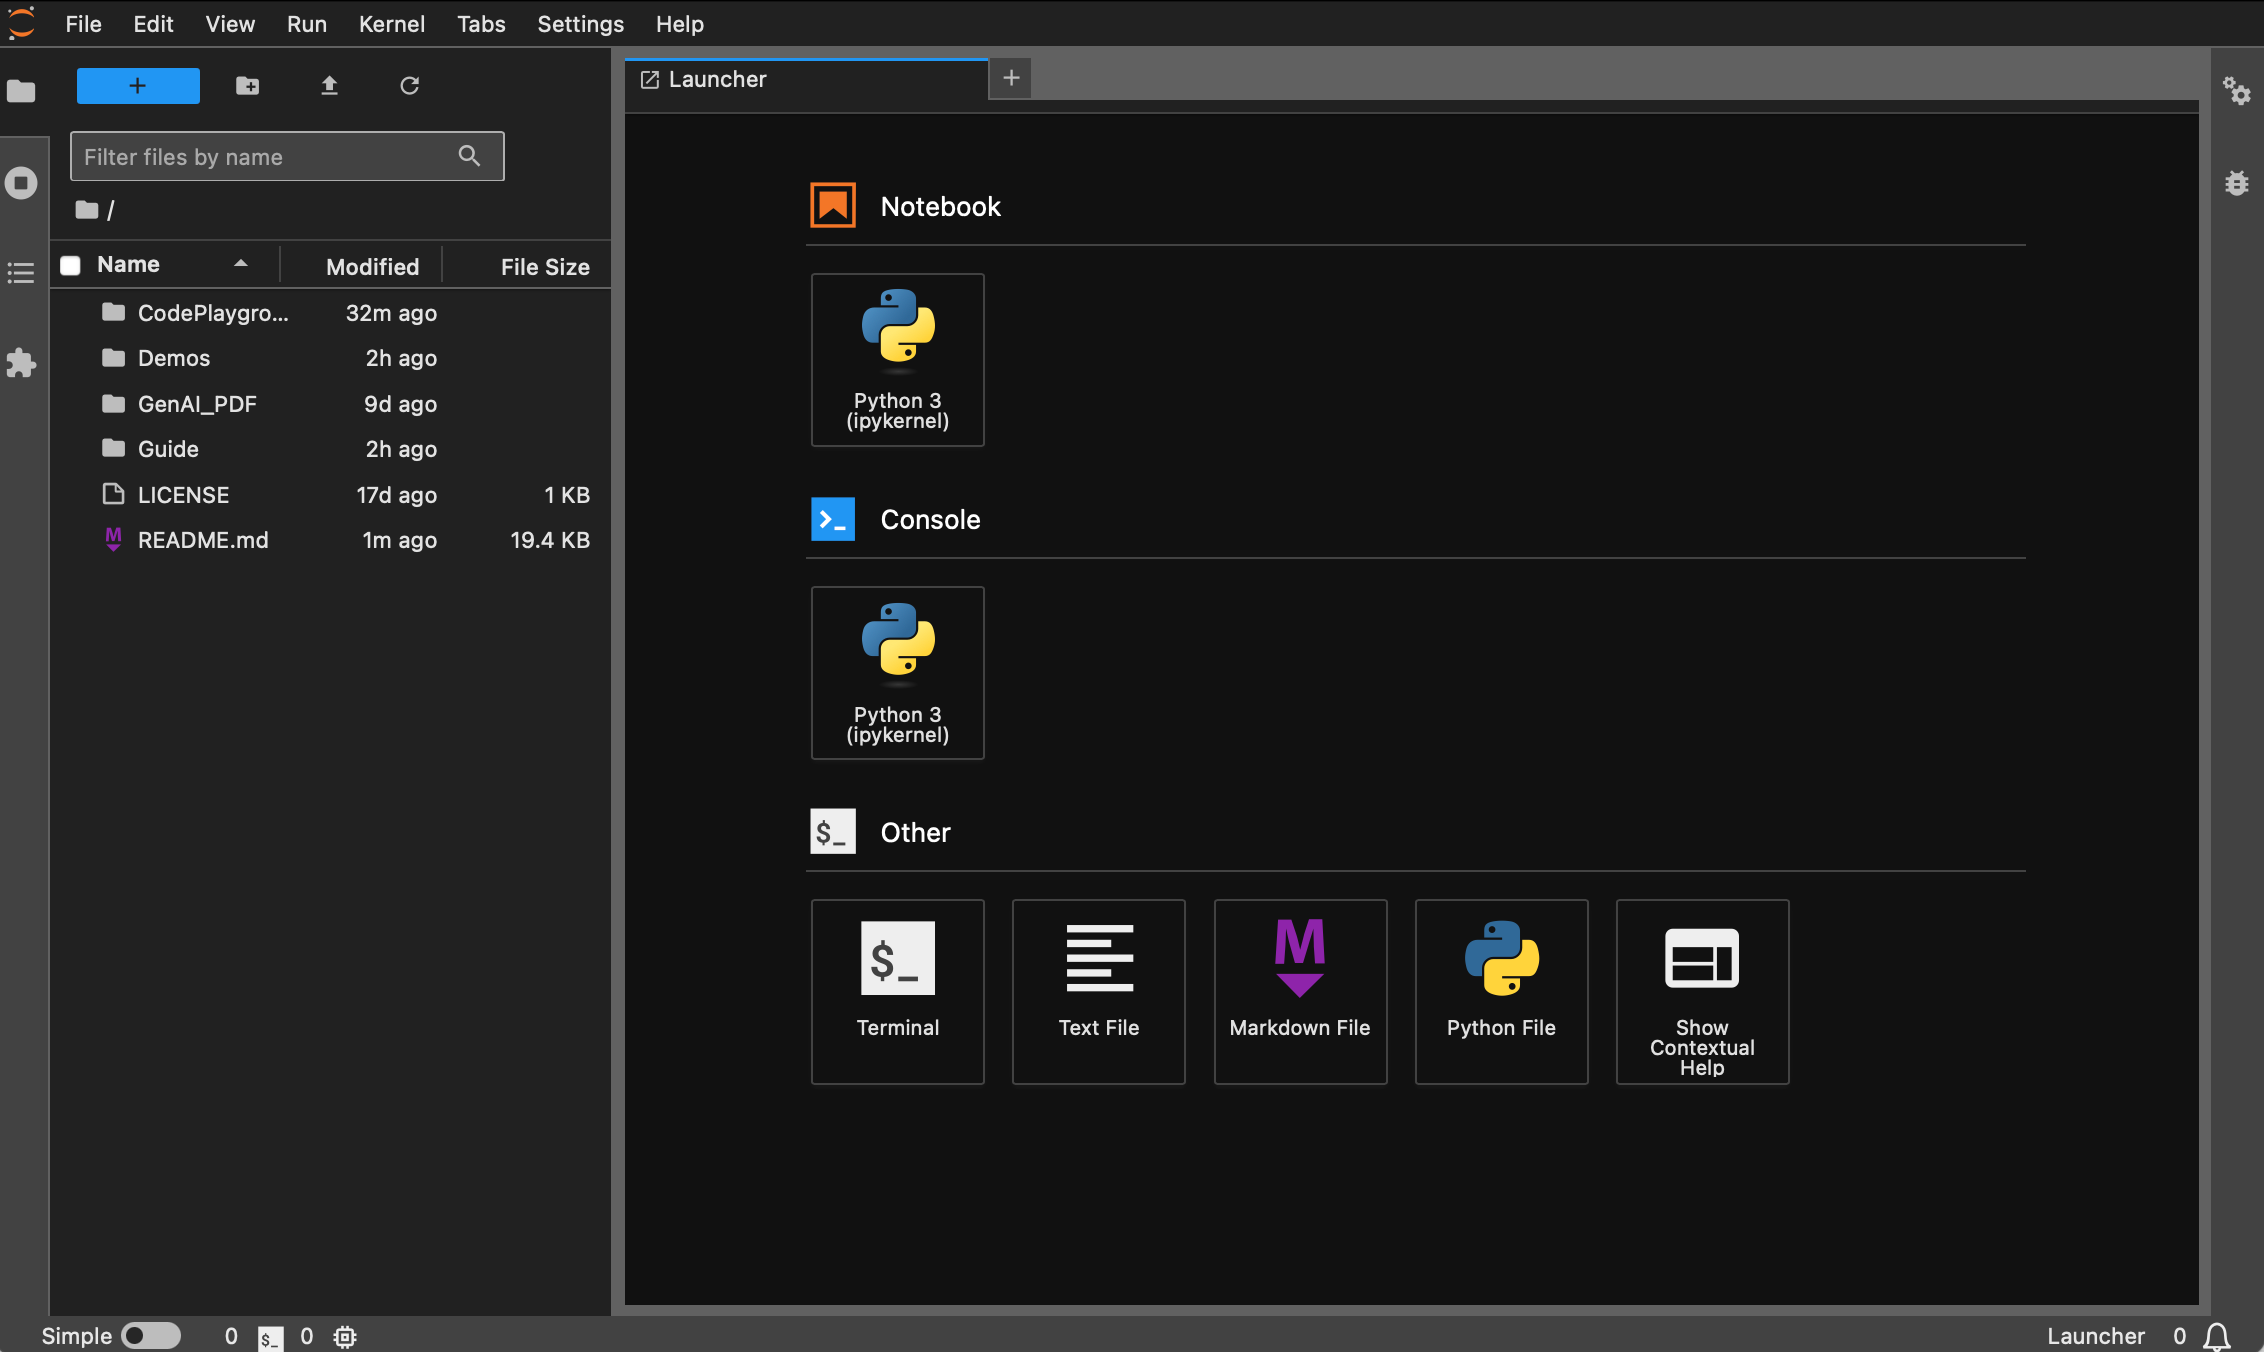
Now you will be able to access it through the pop-up link, usually located on port 8888. For the graphical interface, hold down Ctrl on Windows/Linux, hold down Command on mac, and then click on the link to jump directly. At this point, you will get the full picture of the project:
Students who have not installed Docker can read the article "Use Docker to quickly configure deep learning environment (Linux)". Beginners are recommended to read "Introduction to Docker basic commands and common error resolution".
All versions are pre-installed with common tools such as sudo , pip , conda , wget , curl and vim , and the domestic image sources of pip and conda have been configured. At the same time, it integrates zsh and some practical command line plug-ins (command auto-completion, syntax highlighting, and directory jump tool z ). In addition, jupyter notebook and jupyter lab have been pre-installed, and the default terminal is set to zsh to facilitate deep learning development. The Chinese display in the container has been optimized to avoid garbled characters. The domestic mirror address of Hugging Face is also pre-configured.
pytorch/pytorch:2.5.1-cuda11.8-cudnn9-devel . The default python version is 3.11.10. The version can be modified directly through conda install python==版本号.Apt installation :
wget , curl : command line download toolsvim , nano : text editorgit : version control toolgit-lfs : Git LFS (Large File Storage)zip , unzip : file compression and decompression toolshtop : system monitoring tooltmux , screen : session management toolsbuild-essential : compilation tools (such as gcc , g++ )iputils-ping , iproute2 , net-tools : network tools (providing commands such as ping , ip , ifconfig , netstat , etc.)ssh : remote connection toolrsync : file synchronization tooltree : Display file and directory treeslsof : View files currently open on the systemaria2 : multi-threaded download toollibssl-dev : OpenSSL development librarypip installation :
jupyter notebook , jupyter lab : interactive development environmentvirtualenv : Python virtual environment management tool, you can use conda directlytensorboard : deep learning training visualization toolipywidgets : Jupyter widget library to display progress bars correctlyPlugin :
zsh-autosuggestions : command auto-completionzsh-syntax-highlighting : syntax highlightingz : Quickly jump to directoryThe dl (Deep Learning) version is based on base and additionally installs basic tools and libraries that may be used in deep learning:
Apt installation :
ffmpeg : audio and video processing toollibgl1-mesa-glx : Graphics library dependency (solve some deep learning framework graphics-related issues)pip installation :
numpy , scipy : numerical calculations and scientific calculationspandas : data analysismatplotlib , seaborn : data visualizationscikit-learn : Machine learning toolstensorflow , tensorflow-addons : another popular deep learning frameworktf-keras : TensorFlow implementation of Keras interfacetransformers , datasets : NLP tools provided by Hugging Facenltk , spacy : natural language processing toolsIf additional libraries are needed, they can be installed manually with the following command:
pip install --timeout 120 <替换成库名> Here --timeout 120 sets a timeout of 120 seconds to ensure that there is still enough time for installation even if the network is poor. If you do not set it up, you may encounter a situation where the installation package fails due to download timeout in a domestic environment.
Note that all images will not pull the warehouse in advance.
Assuming that you have installed and configured Docker, you only need two lines of commands to complete the deep learning environment configuration. For the current project, you can make a selection after viewing the version description. The corresponding image_name:tag of the two is as follows:
hoperj/quickstart:base-torch2.5.1-cuda11.8-cudnn9-develhoperj/quickstart:dl-torch2.5.1-cuda11.8-cudnn9-develThe pull command is:
docker pull < image_name:tag >The following uses the dl version as an example to demonstrate the command. Choose one of the methods to complete.
docker pull dockerpull.org/hoperj/quickstart:dl-torch2.5.1-cuda11.8-cudnn9-develdocker pull hoperj/quickstart:dl-torch2.5.1-cuda11.8-cudnn9-develFiles can be downloaded through Baidu Cloud Disk (Alibaba Cloud Disk does not support sharing large compressed files).
The files with the same name have the same content.
.tar.gzis a compressed version. After downloading, decompress it with the following command:gzip -d dl.tar.gz
Assuming dl.tar is downloaded to ~/Downloads , then switch to the corresponding directory:
cd ~ /DownloadsThen load the image:
docker load -i dl.tarIn this mode, the container will directly use the host's network configuration, and all ports are equal to the host's ports without separate mapping. If you only need to map a specific port, replace
--network hostwith-p port:port.
docker run --gpus all -it --name ai --network host hoperj/quickstart:dl-torch2.5.1-cuda11.8-cudnn9-devel /bin/zsh For students who need to use a proxy, add -e to set environment variables. You can also refer to the extended article a:
Assume that the proxy's HTTP/HTTPS port number is 7890 and SOCKS5 is 7891:
-e http_proxy=http://127.0.0.1:7890-e https_proxy=http://127.0.0.1:7890-e all_proxy=socks5://127.0.0.1:7891Integrated into the previous command:
docker run --gpus all -it
  --name ai
  --network host
  -e http_proxy=http://127.0.0.1:7890
  -e https_proxy=http://127.0.0.1:7890
  -e all_proxy=socks5://127.0.0.1:7891
  hoperj/quickstart:dl-torch2.5.1-cuda11.8-cudnn9-devel
  /bin/zsh
[!tip]
Check out common operations in advance :
- Start the container :
docker start <容器名>- Run the container :
docker exec -it <容器名> /bin/zsh
- Exit within the container :
Ctrl + Dorexit.- Stop the container :
docker stop <容器名>- Delete a container :
docker rm <容器名>
git clone https://github.com/Hoper-J/AI-Guide-and-Demos-zh_CN.git
cd AI-Guide-and-Demos-zh_CNjupyter lab --ip=0.0.0.0 --port=8888 --no-browser --allow-root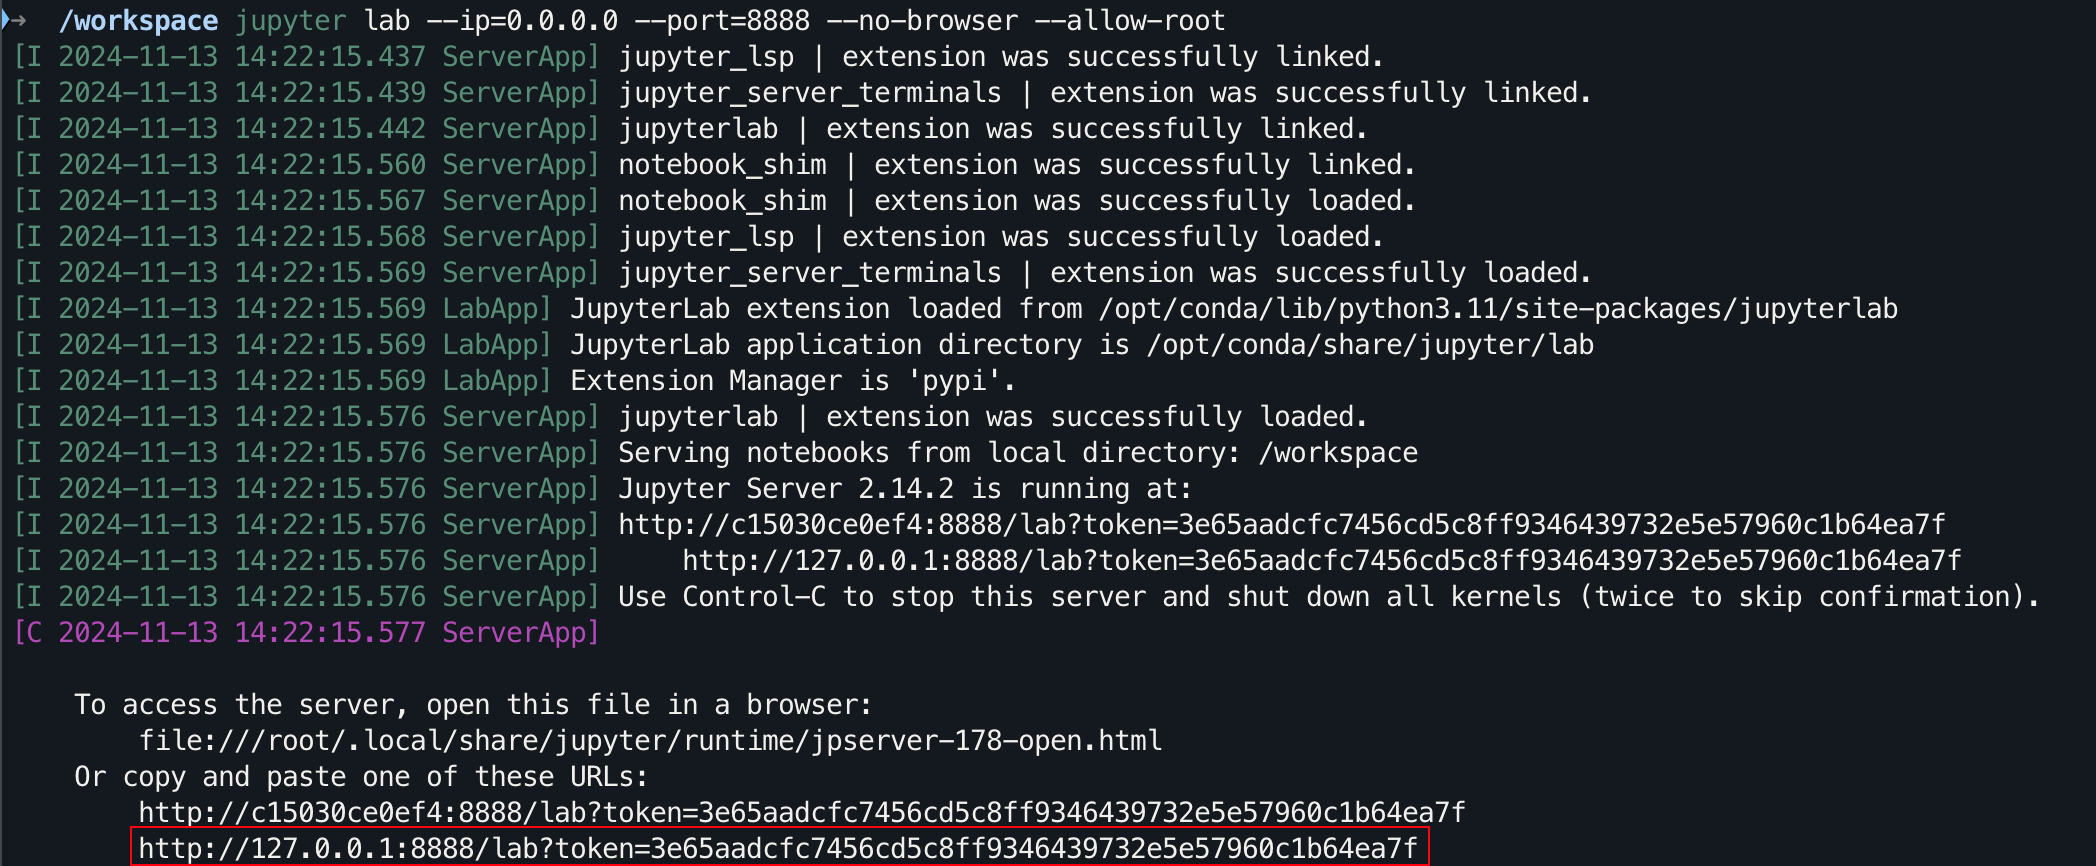
For the graphical interface, hold down Ctrl on Windows/Linux, hold down Command on mac, and then click on the link to jump directly.
Thanks for your STAR?, I hope this helps.