how wonderful the cain design
第一版模板工程
how-wonderful-the-cain-design is an upgraded version of the backend template after the v1 version, based on vue.js and element . Currently, the template project integrates login , authority verification , routing configuration , ajax request , mock , charts , 404 page , 401 page and several template pages . Solve the pain points of server-side personnel developing back-end management pages. Next, I will introduce the preparations before using this project and how to use it. I hope it can help some partners with weak front-end foundation~
This project refers to vue-admin-element
Note : This project uses [email protected]+ version and [email protected]+
To install node (8.0+) locally, you can download the installation version directly and follow the steps. After the installation is complete, verify whether the installation was successful.
 node -v
npm -v
Success occurs when the version number appears
The project mainly includes the following technical points:
For server-side development, you only need to pay attention to vue syntax, element-ui component library, axios request writing method, and eslint code specifications. If charts are useful, you should also pay attention to echarts.
**Important note:** The use of eslint is mandatory in the project to standardize the writing of code. It may feel disgusting when you first come into contact with it. You have to go to the official website to find out what problems there are in the grammar and how to modify it. But for later maintenance, it is an extremely valuable investment. So don’t think it’s cumbersome, just get used to it ^-^
 // 结构树
|- build/  ------------------- 组件webpack区
|- config/  ------------------ 组件启动配置区,开发人员可在index.js中配置动态代理(当运行npm run dev时,该动态代理会生效,即可调用服务端接口),也可以修改端口号,防止端口号冲突
|- src/  --------------------- 组件源代码
	|- api/  ----------------- 接口编码区
	|- assets/  -------------- 图片区
    |- components/  ---------- 组件编码区
    |- icons/  --------------- 菜单icon svg图标区
    |- mock/  ---------------- 模拟接口区
    |- permission/  ---------- 路由权限编码区(可以不用修改)
    |- router/ --------------- 配置路由区,开发完成的页面都要在这里挂路由,才能展现
    |- store/  --------------- 全局缓存注入区,目前登陆的入口从这进入,会缓存用户信息,token信息以及权限信息
    |- styles/  -------------- 公共样式区
    |- utils/ ---------------- 工具区,开发人员开发的工具集都放在该目录中
    |- views/ ---------------- 页面开发区,开发人员开发的页面放在该目录中
    |- App.vue --------------- 启动的vue文件
    |- index.js -------------- 启动js文件,element-ui是按需加载的,开发人员要根据引用了哪些element组件在该js文件中引入,引入格式参照模板
|- static/  ------------------ static放置一些静态文件,和assets的区别:assets会被编译替换名字,static中的不会被编译,原汁原味
|- .babelrc  ----------------- babel 配置文件
|- .eslintignore  ------------ eslint ignore配置文件
|- .eslintrc.js  ------------- eslint配置文件
|- .gitignore  --------------- git忽略提交文件配置
|- .postcssrc.js  ------------ postcss配置文件
|- index.html  --------------- HTML 模板
|- package-lock.json  -------- npm 版本锁定文件,每添加一个依赖都会变化这个,保证对依赖版本的控制
|- package.json  ------------- npm 配置文件
|- README.md  ---------------- 项目帮助文档
The directories that actual developers need to pay most attention to when developing pages are **/src/views and /src/router**. The former writes the page, and the latter writes the routing information of the corresponding page. The name in the routing is used as a permission judgment field in the template. , that is, the permission array returned by the server is actually compared with the name, and the matching result is the permission page owned by the user, otherwise a 401 page or a 404 page will be returned.
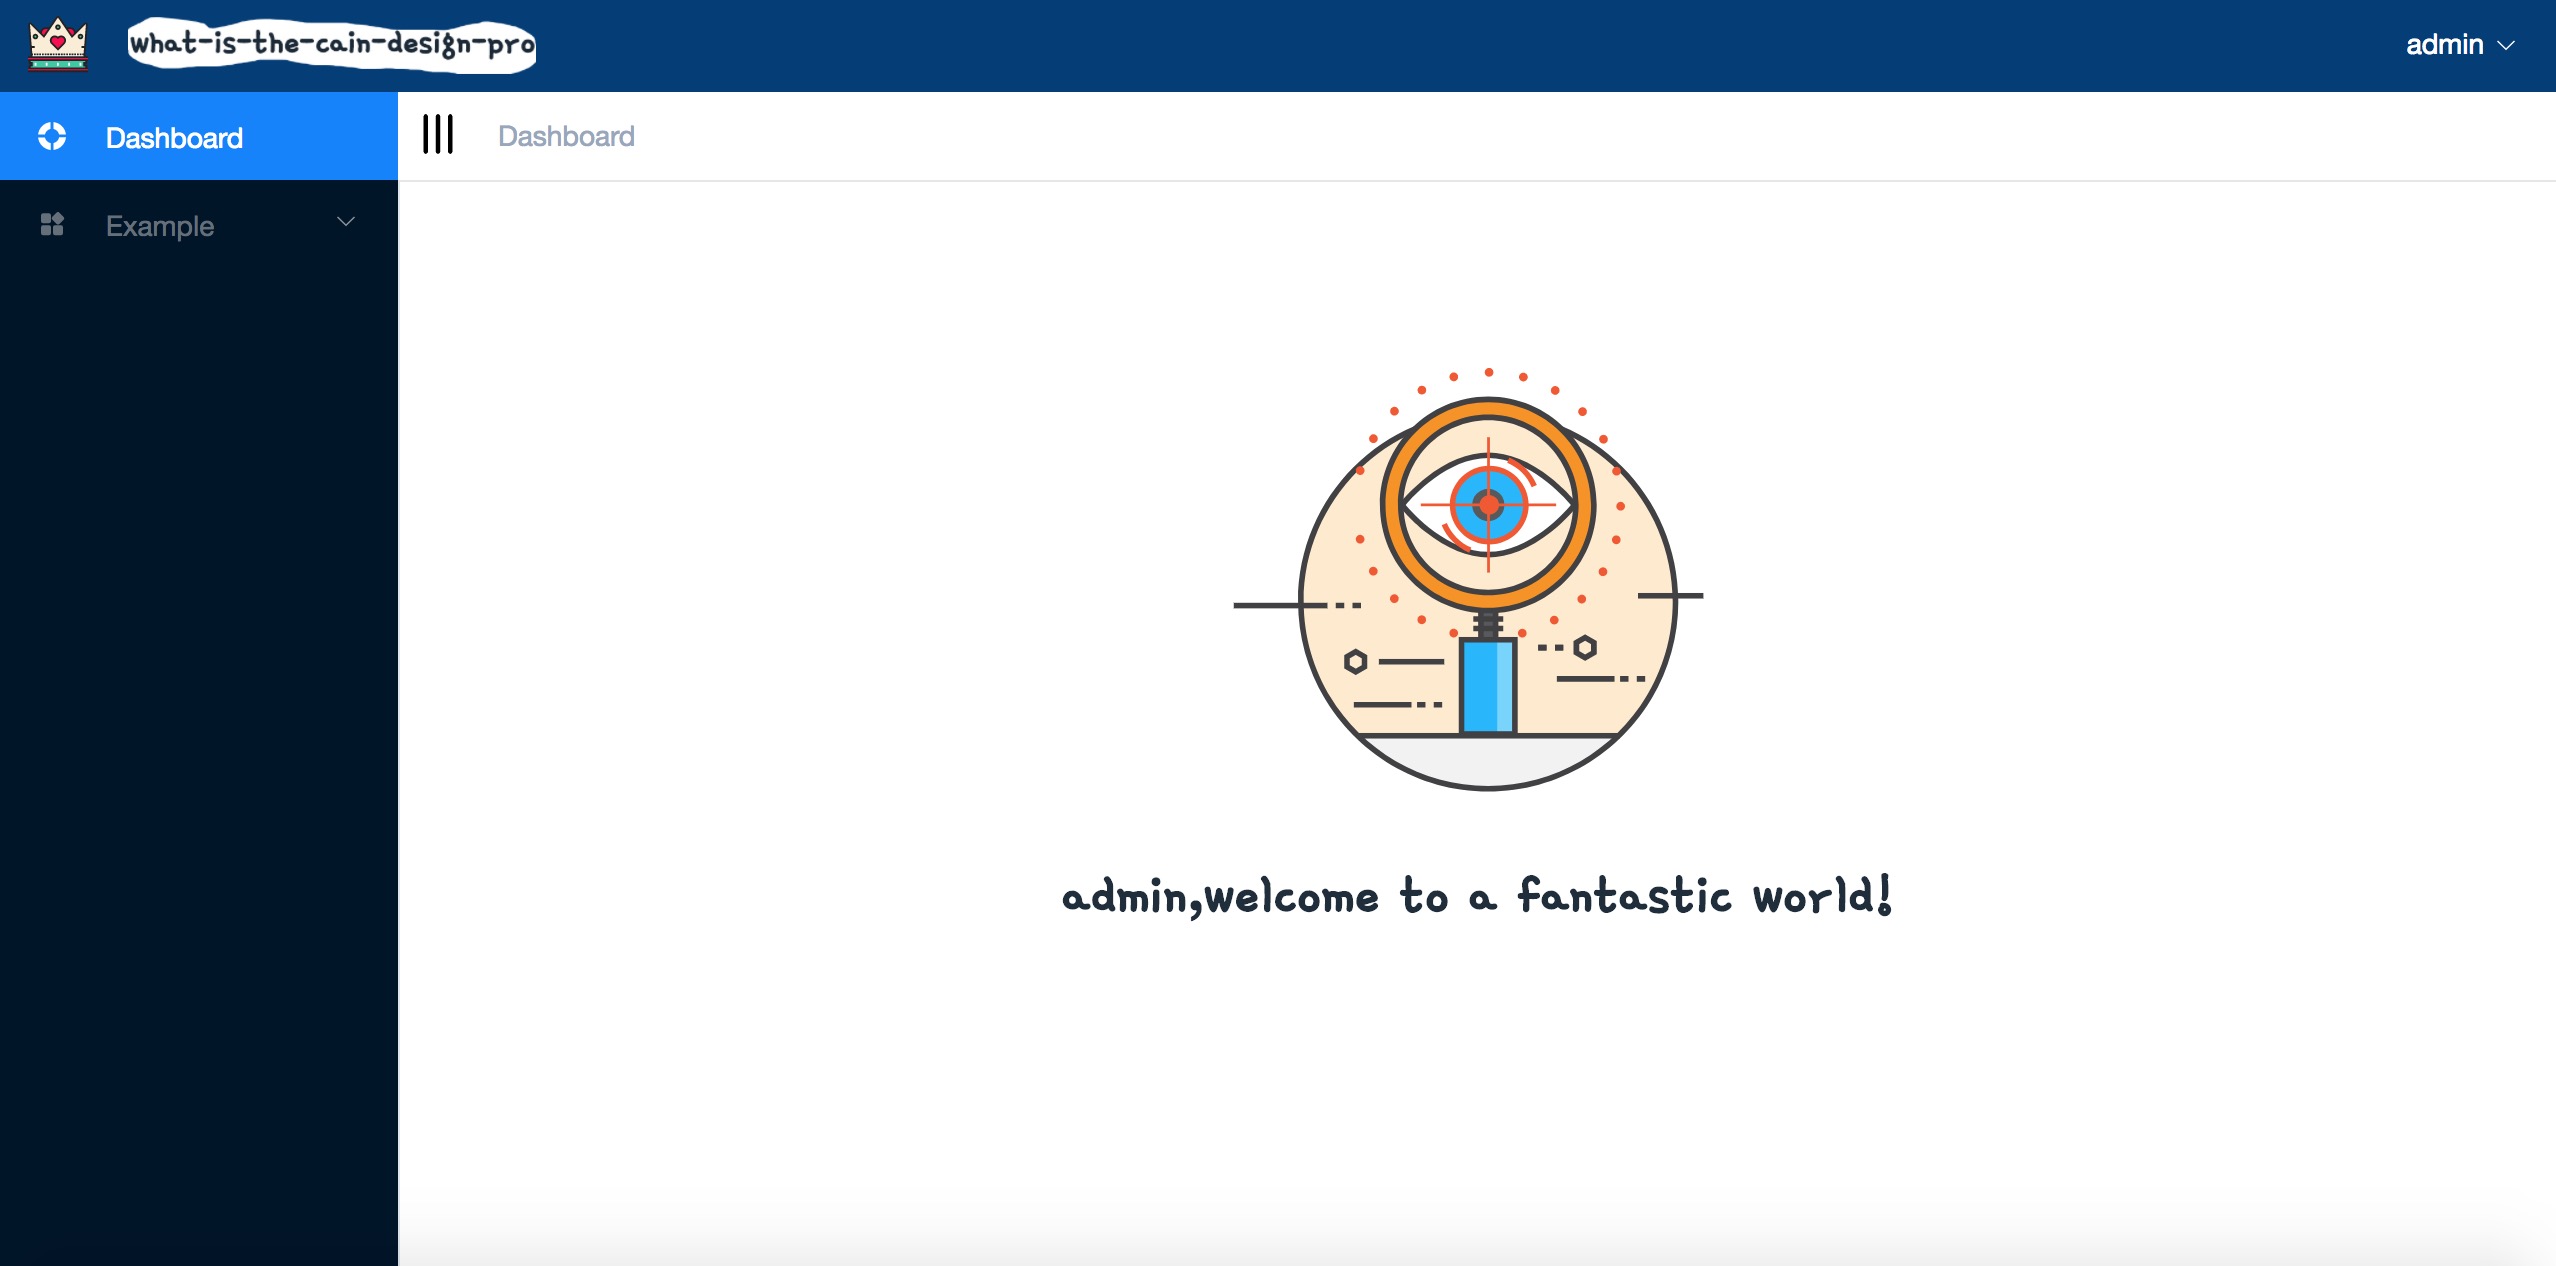
The project currently has two users set up: admin and ChartUser. The main purpose is to test permissions.
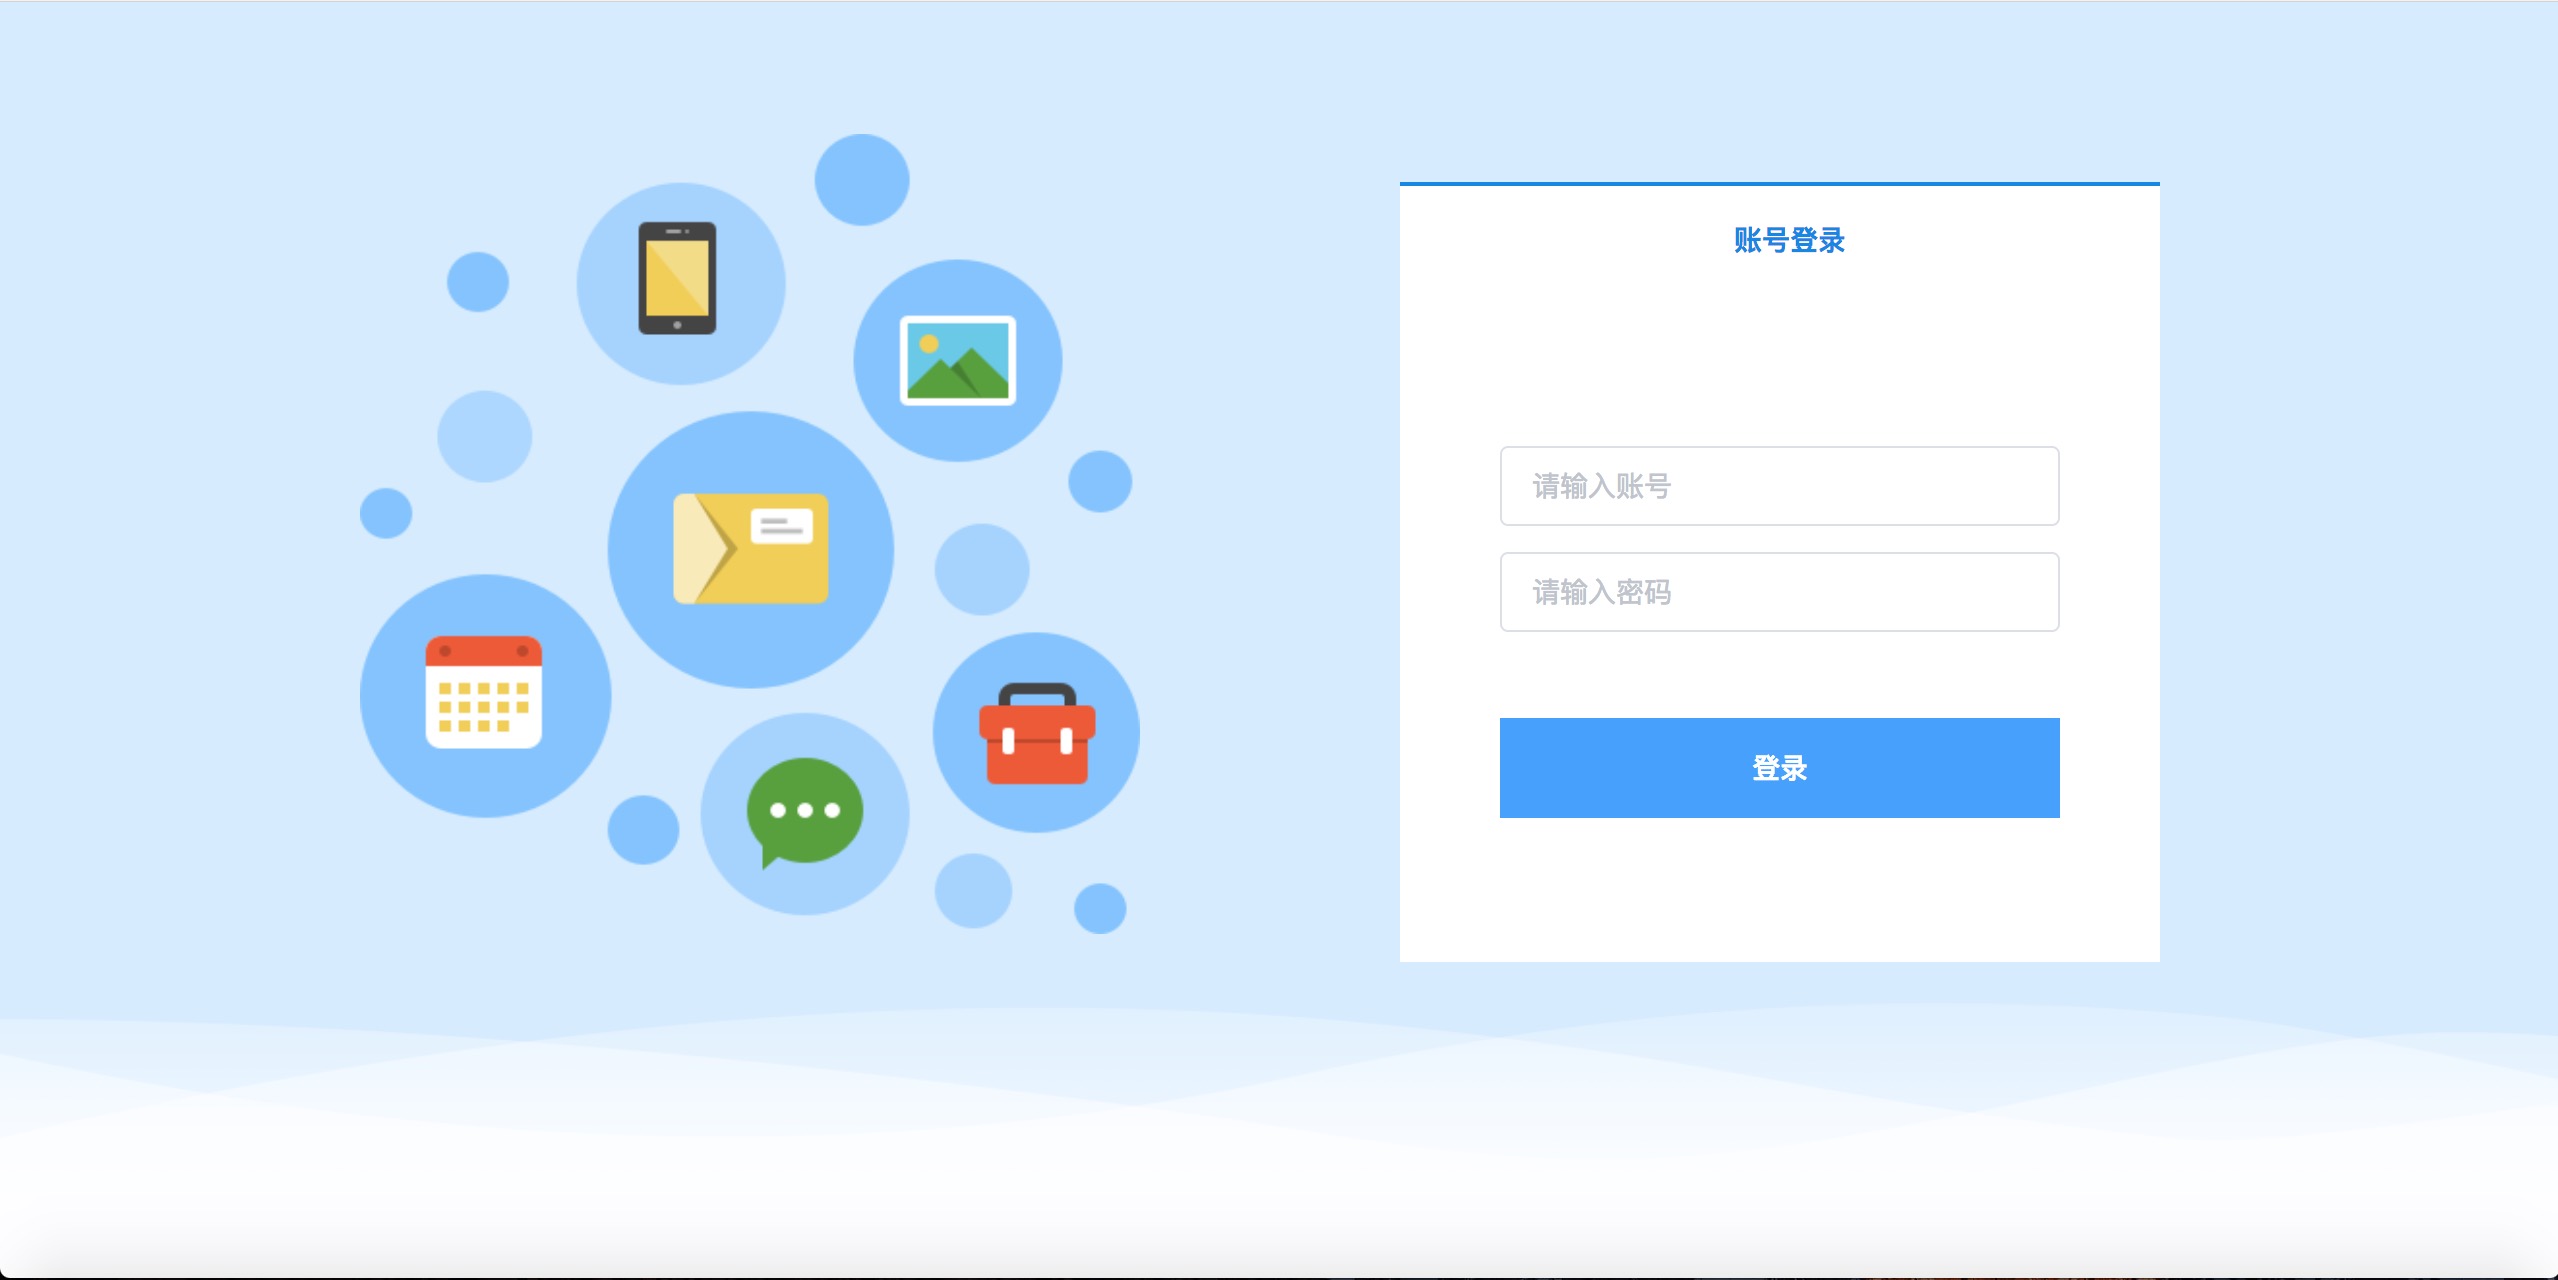
You can log in without entering a password, but you must enter your account number.
步骤一:
将本项目克隆到本地
git clone XXX
步骤二:
安装依赖
npm install
步骤三:
开发及预览
npm run dev
步骤四:
当运行上步控制台报了很多错误时,先运行
npm run lint
会自动帮你解决一些格式化的错误,若还有错误,就得自己找到错误的关键字,到官网中查找该如何修复,后面会介绍步骤
Taking the button component as an example, when you need to introduce the button component, you need to follow the following steps:
When the corresponding component is found on the official website, copy the corresponding code
<el-button>默认按钮</el-button>
Introduce the component into /src/index.js on demand. If you don’t know how to introduce it, you can refer to the on-demand introduction of all components and find the corresponding component to import.
Read carefully how to use this component, the official website documentation will explain it very clearly.
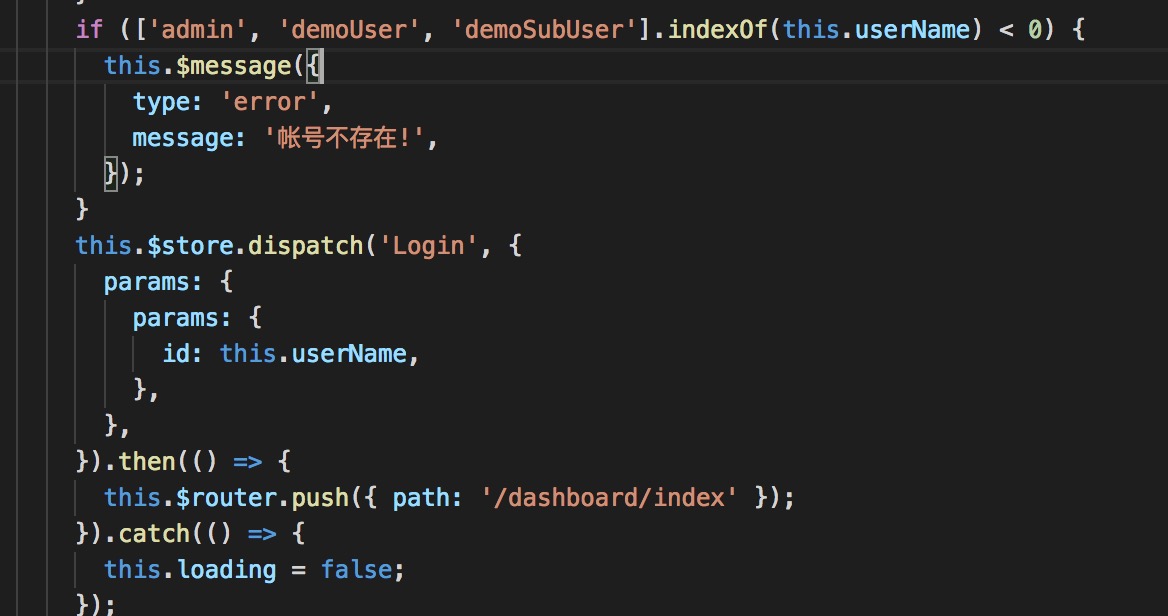
The login in the template project uses mockjs to simulate the login. The specific implementation steps of the login in the template are:
Notice:
- The account in the if judgment does not exist and needs to be modified. There are a total of three user names in the template, which correspond to three user permissions. In order to simplify the writing, I wrote it like this. It should actually be the return prompt of the interface after adjusting the interface.
- this.$store.dispatch('Login', ...) is the syntax of vuex. The purpose is to call the Login method in /src/store/modules/user.js to request the server interface and return the corresponding user data stored in In the global cache, it is convenient for global calls.
- Pay attention to the format of the parameters. The parameters in the object are fixed to params, and the value of params is an object. Various parameters allowed by axios can be placed in the object, because the get request is simulated here, so only the params parameter is needed. For more parameters, see axios config
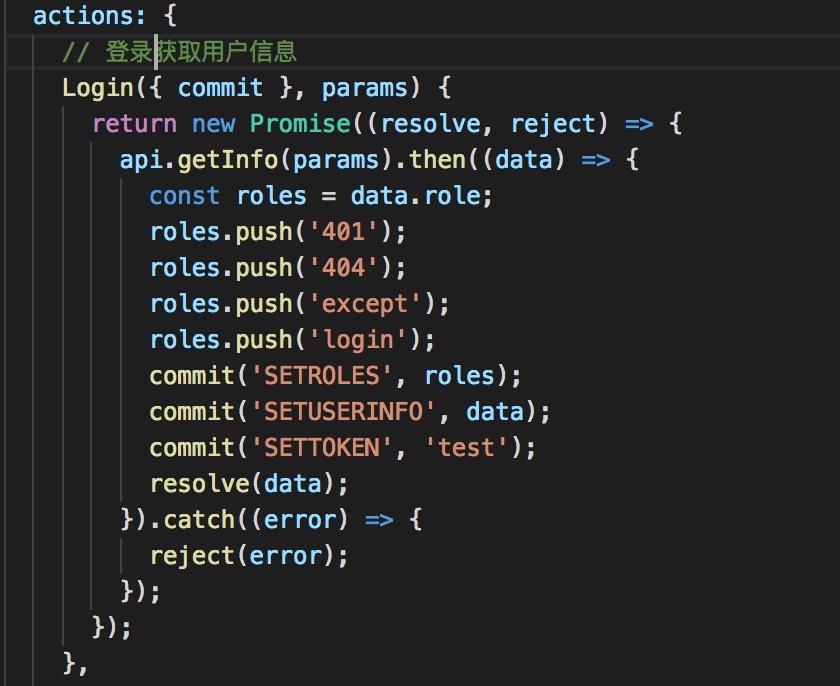
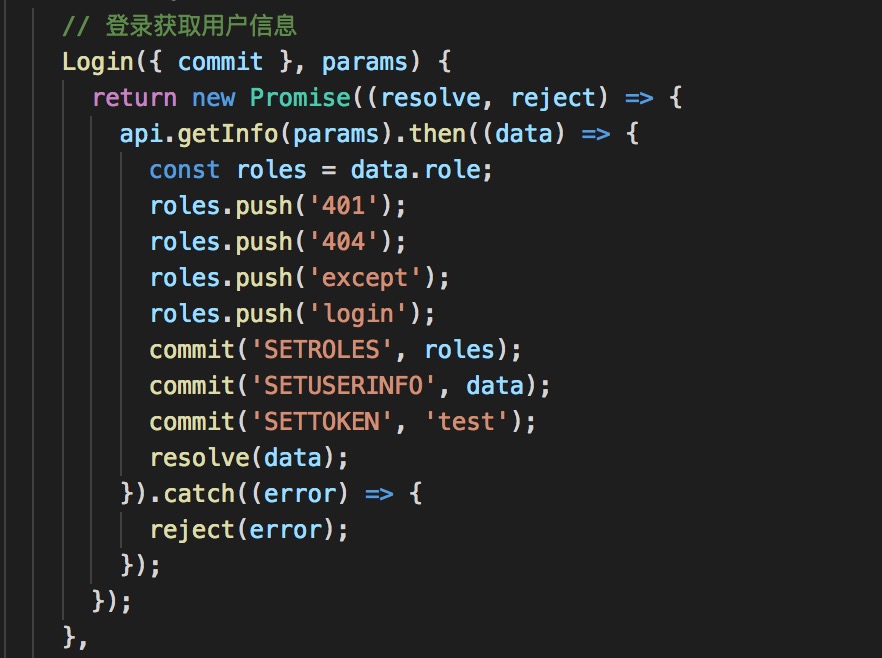
When you click to log in, the above method will be called. The method body actually calls the getInfo interface in /scr/api/api.js to obtain the corresponding user data. Among them, the four routes of push should be used by personnel regardless of authority. Accessible routes are first inserted into the route array, and then permissions, user information and token information are cached.
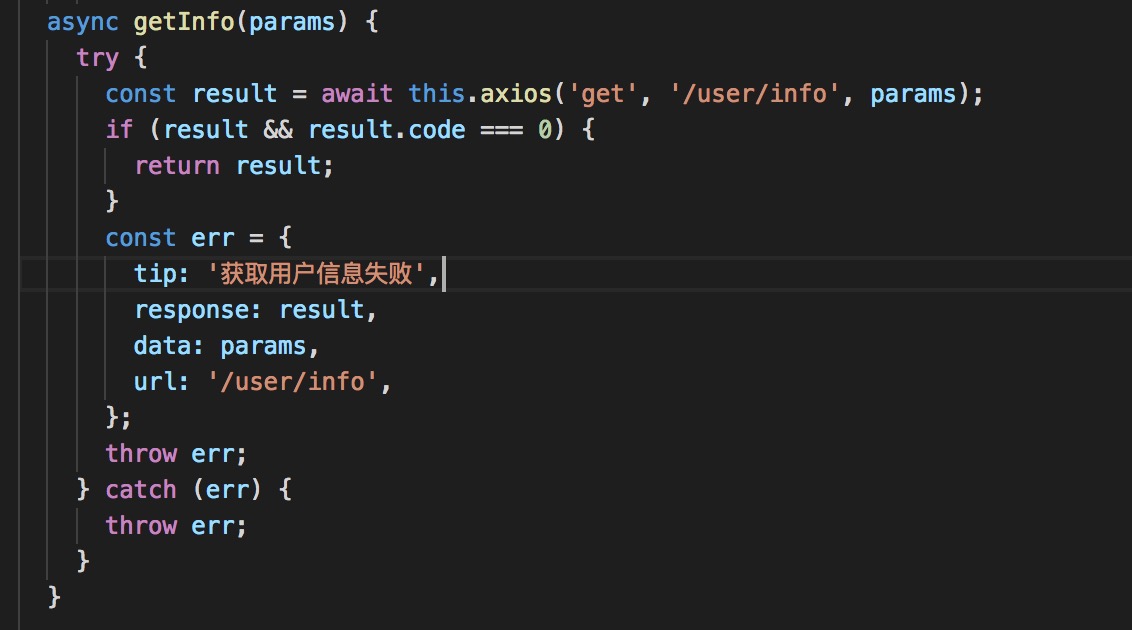
Then call the getInfo interface. Async (es6) is used here. Here you need to pay attention to result.code. It is set according to the format of the server interface setting. It may be state, status, or code, which varies from person to person.
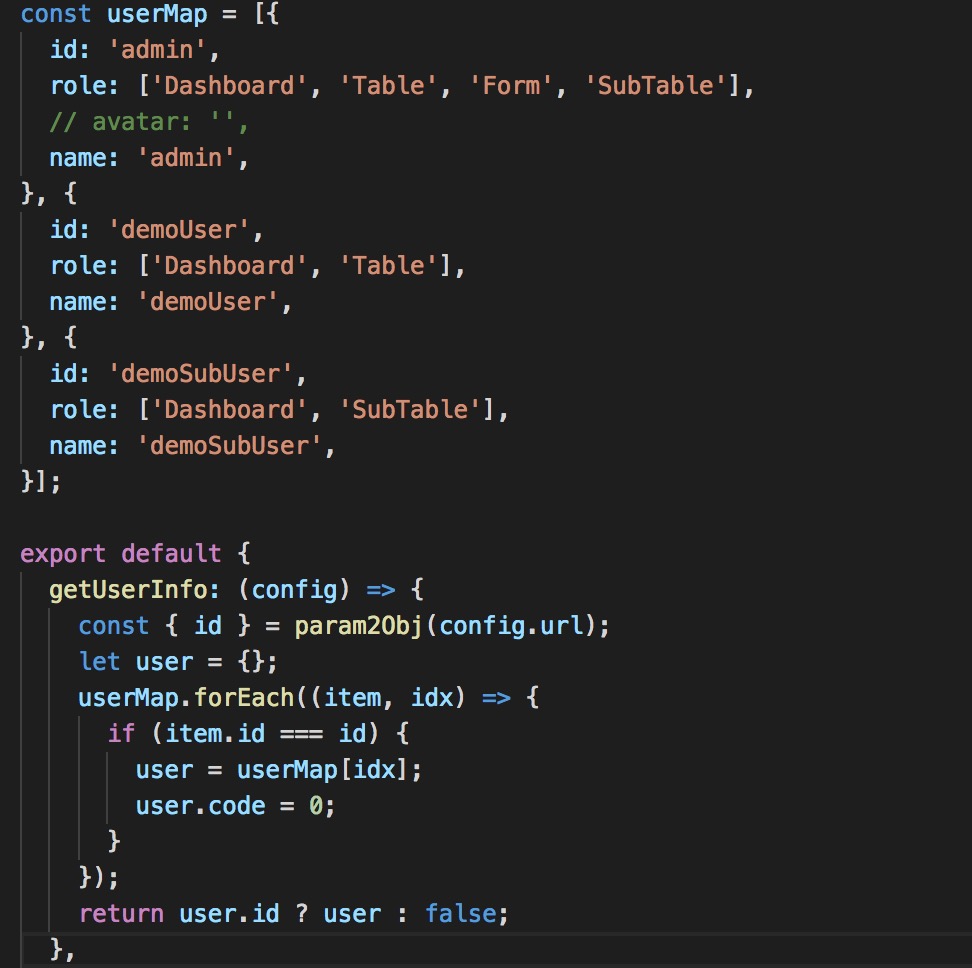
Note that the userMap object is the three users I simulated. The role field is the permission field. Compared with the name field in the routing configuration table, the menu in the permission field is the function page for which the user has permissions.
In actual development, when modifying the login interface, the role field must be present, and the format must be consistent with the above array, otherwise the permission system will be invalid.
After the above four steps, the entire login process is completed.
Before developing the template, we negotiated with the server personnel to use jwt for user information authentication.
The processing flow is that the token information will be saved in the global cache when logging in. Each time the interface data is requested, the framework will automatically save the token information in the header. If it fails, it will be transferred directly to the login page and the login information will be logged out.
It is also the login interface, in which **commit('SETTOKEN', 'test')** handles the token value. In actual project development, this test should be replaced with the real token obtained by login.
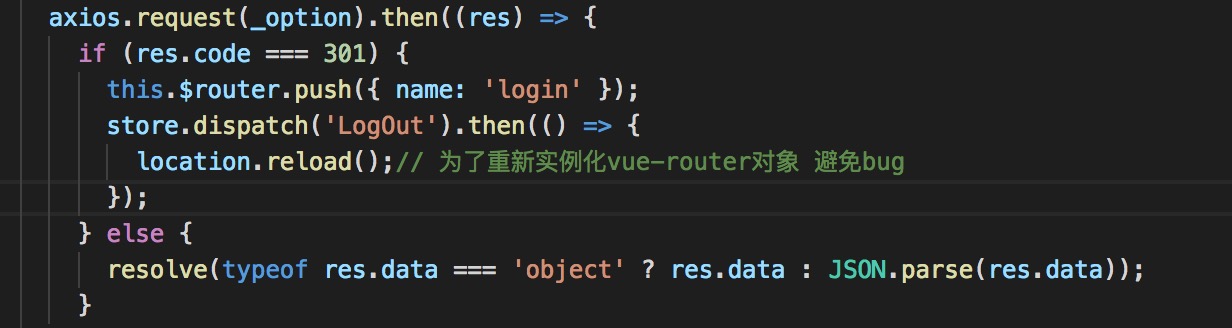
Path:/src/api/server.js
Pay attention to the res.code===301 judgment here. After previous negotiation with the server personnel, when the token expires, the returned code will be set to 301 for identification. Therefore, the judgment here is also based on the settings in your own project, which may be code, status, state, etc., which can be modified according to the project.
Path:/src/router/index.js
The menu and routing table in the template system are inseparable. In other words, the hierarchical structure of the menu and the routing table are consistent . Therefore, the routing table must be written according to the rules, otherwise it will affect the display of the menu!
You must first understand the setting rules. The menu cannot exceed three levels , so there are three formats in the routing configuration table. They are introduced below.

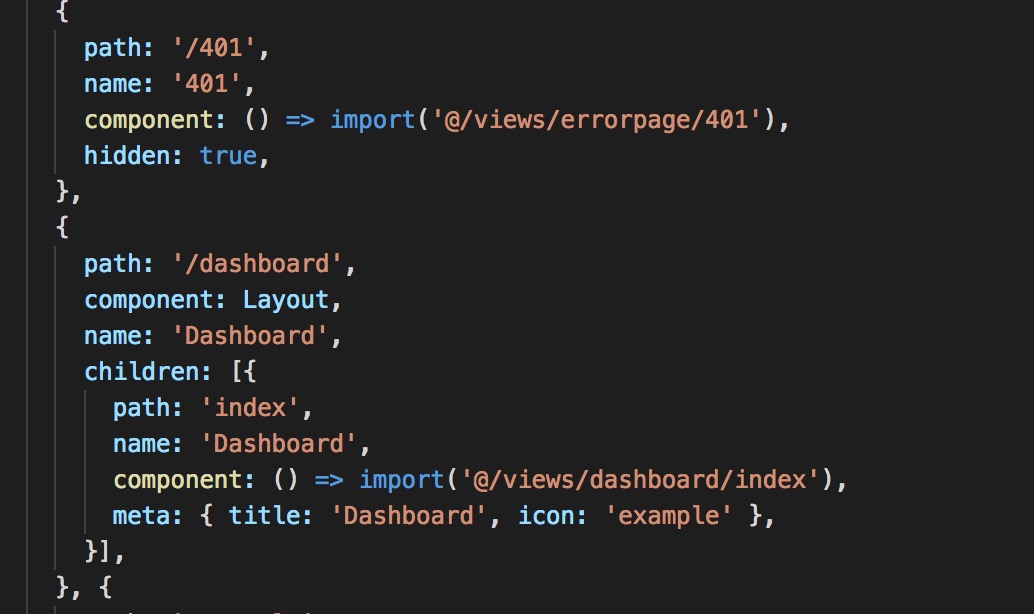
Note that the 401 routing parameter hidden, when set to true, means that the menu tree will filter out this route and not display it.
Dashboard routing is a first-level menu. The writing format of the first-level menu is as above. There is only one route in children.
The parameter title in meta represents the menu name displayed on the menu
icon is the menu icon, and what is read is the svg menu icon in the /src/icons/ directory. Therefore, when doing your own project, you have to ask the artist to produce the menu icon in svg format, and then place it in the icons directory. The parameter value of icon is the file name of icons
The permissions of the first-level menu match the name in children.

The only difference between the second-level menu and the first-level menu is that children is greater than one, and the others are the same.

The third-level menu format has children within children.
The configuration of the routing table must be configured according to the above instructions, otherwise the effect you want will not be what you want. Also pay attention to the pairing of name and menu permissions to control menu display.
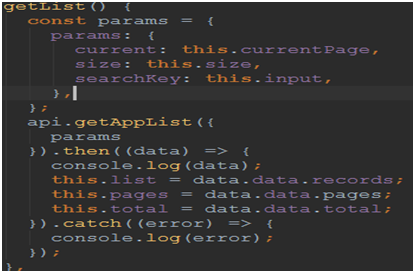
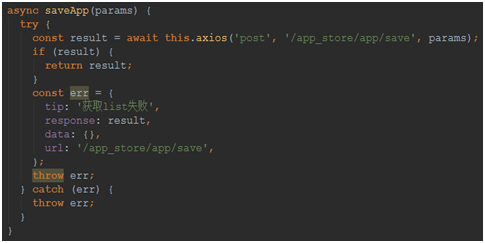
Path:/src/api/api.js
All interfaces used in the page must be defined in this file for unified management and easy modification.
The writing format is the writing method provided by the template.
However, in actual development, you will encounter multiple ways of transmitting parameters, such as get, post non-form form, post form form, and rest form. The following are corresponding writing templates for these formats.

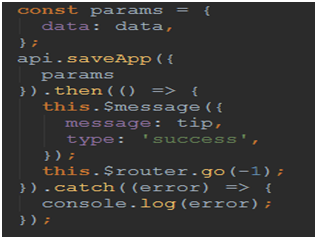
Note: If you need to pass the header parameter of application/x-www-form-urlenconded, the parameter should be written as
 const params = {
  data: {},
  headers: {
    'content-type': 'application/x-www-form-urlencoded'
  }
}
Non-form submission is basically the same as form submission. The difference is that the original assignment to data must be changed to the assignment to params.

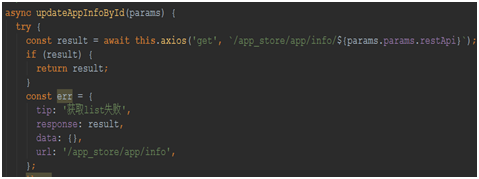
The template framework also uniformly encapsulates rest parameters, and the parameter transfer method is a screenshot.
The actual development is all local development. Use npm run dev to start the service locally. Then the question arises. How to deal with when an interface is requested?
It's actually very simple, it's just a configuration
Path:/config/index.js
 proxyTable: {
  '/cloudfs': {
    target: 'http://your_ip_address',
    changeOrigin: true,
    pathRewrite: {
  		'^/cloudfs': '/cloudfs'
	}
  },
  '/api': {
    target: 'http://your_ip_address',
    changeOrigin: true,
    pathRewrite: {
    	'^/api': '/api'
    }
  },
  '/plustek': {
    target: 'http://your_ip_address/plustek',
    changeOrigin: true,
    onProxyReq: function (proxyReq, req, res) {
      console.log('获取到', process.env.eimCookie)
      proxyReq.setHeader('Cookie', process.env.eimCookie) // 配置cookie方式
    },
    pathRewrite: {
    	'^/plustek': ''
    }
  }
}
Developers can configure the proxy themselves as needed
If the backend system has its own authentication mechanism, such as jwt. Then there is no need to consider cookie information authentication.
If you want to use cookies, directly add the onProxyReq configuration in the configuration proxy above, insert the cookie information into the header information, save it and run npm run dev again.
 import chartMaker from '@/components/charts/chartMaker';

components: {
	chartMaker,
},
 <chart-maker id="chart-small1" height="120px" width="100%" :option.sync="chartOption" :forceRefresh.sync="forceRefreshChart"></chart-maker>
id---不能重复
height---固定高度
width---宽度使用百分比,才能支持自适应,容器宽度由外层容器控制。
option---echarts参数,模板中已经集成了较为常用的图形使用
forceRefresh---强制刷新组件,传入为true时才会强制刷新
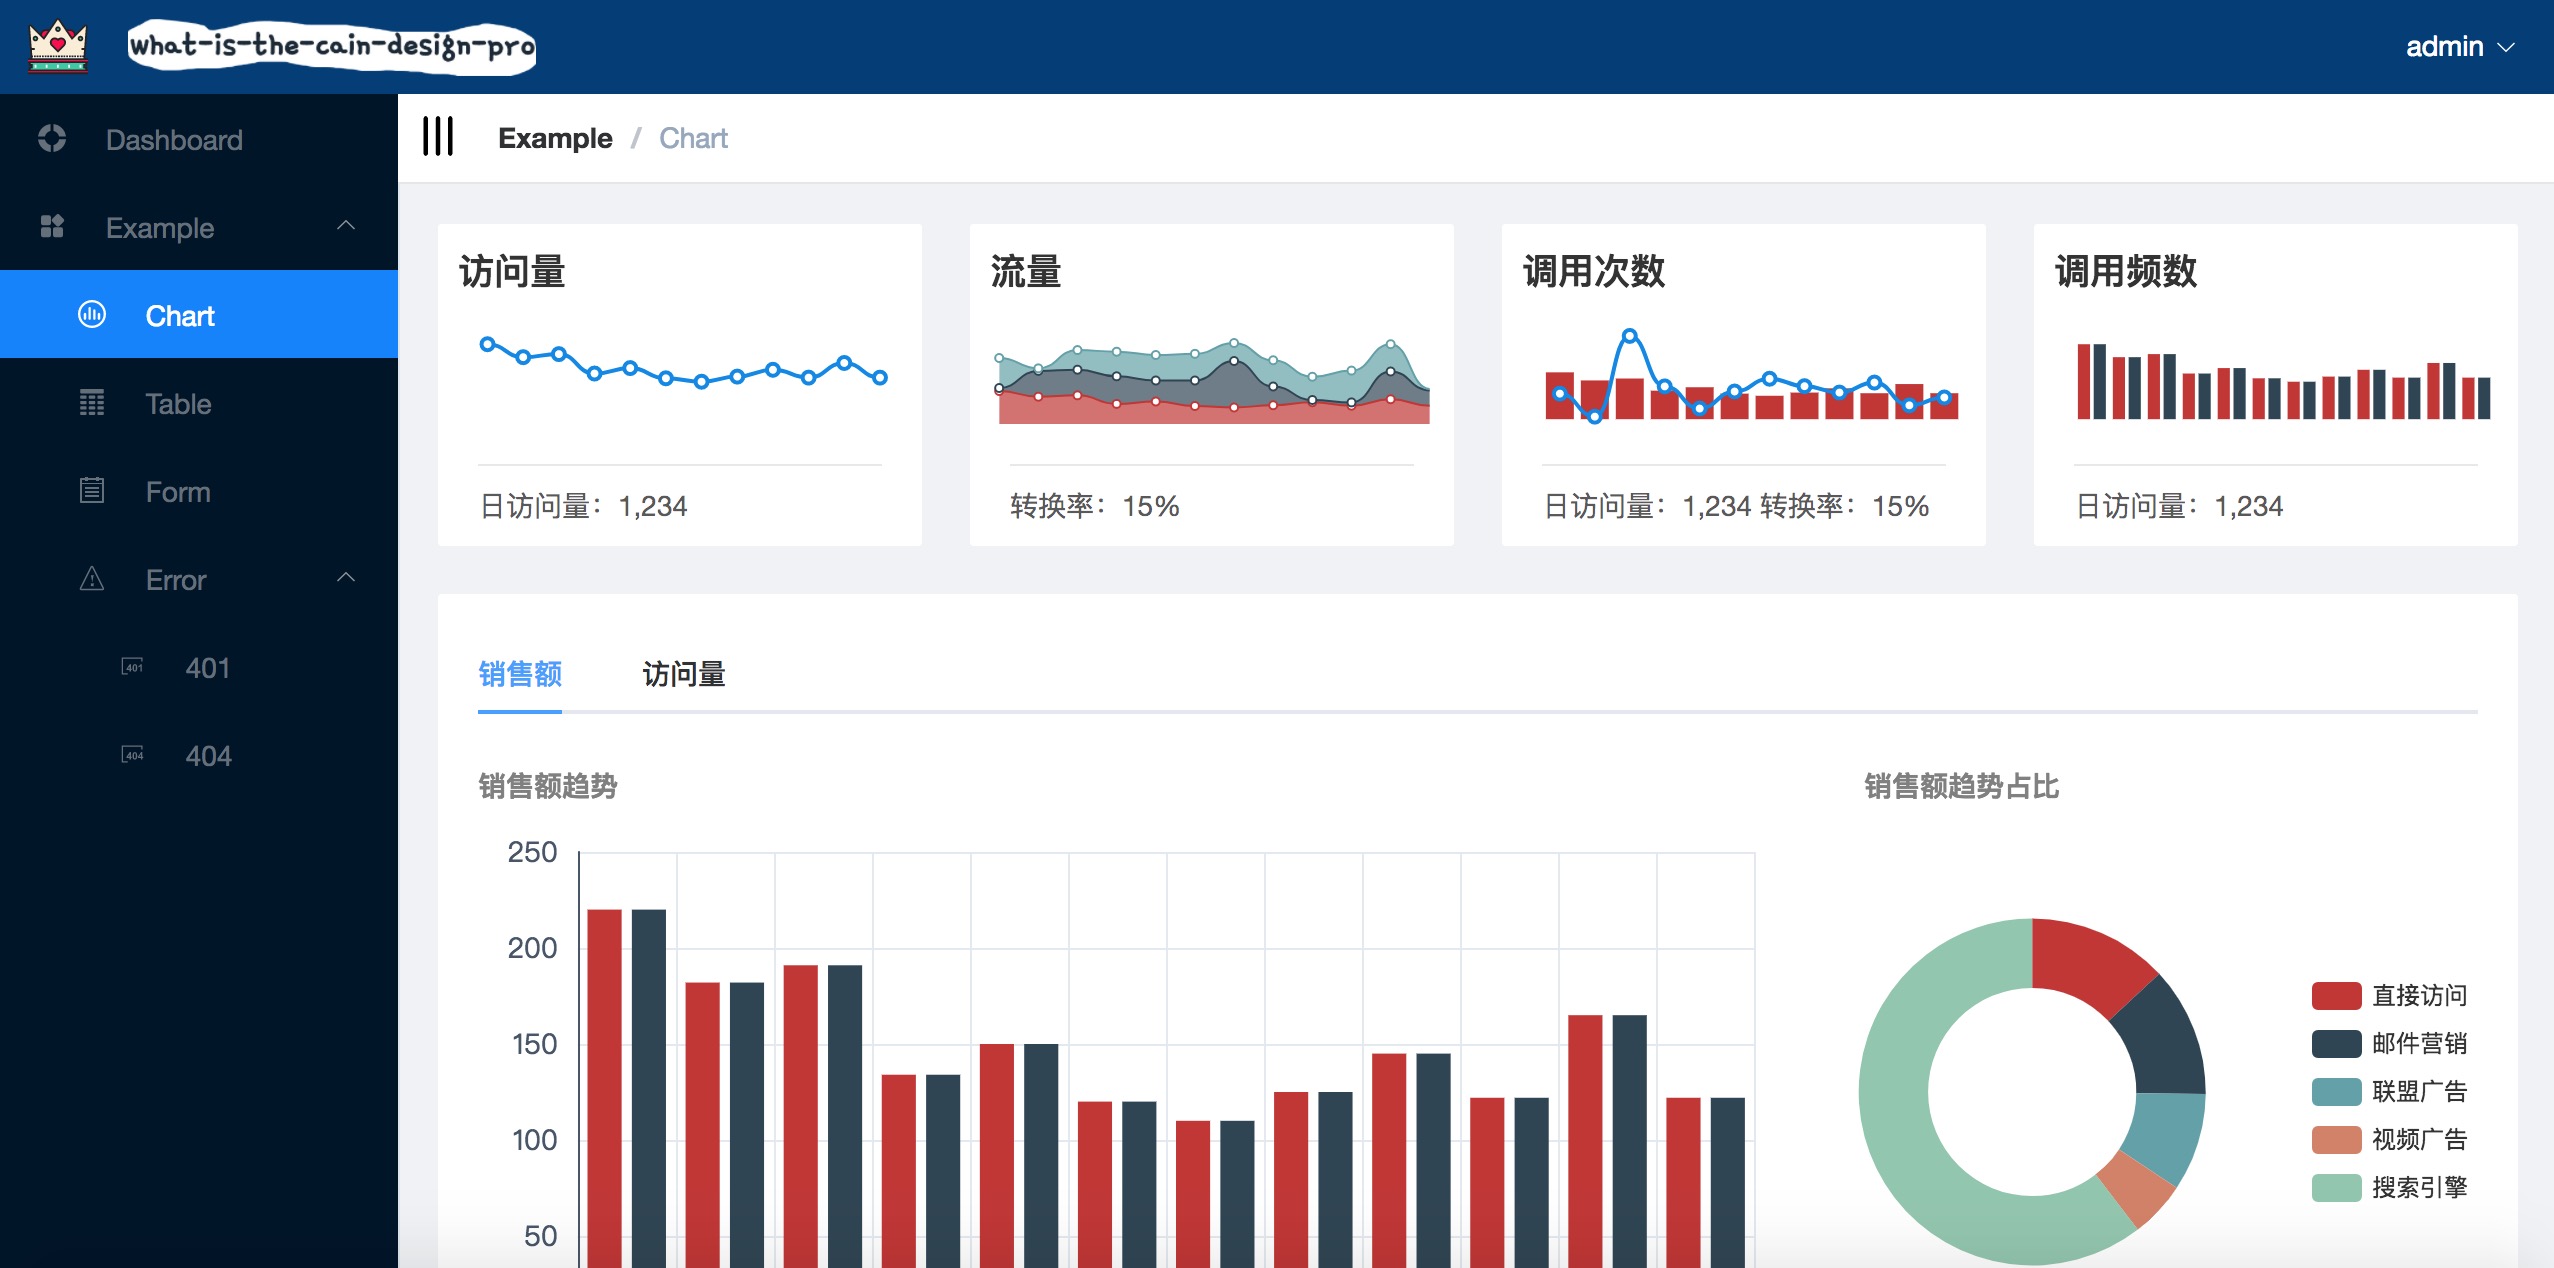
 getChart1Option() {
      const tmpOption = {};
      tmpOption.title = {
        text: '访问量',
        left: '5',
        top: '10',
      };
      tmpOption.tooltip = {
        axisPointer: {
          lineStyle: {
            color: '#57617B',
          },
        },
        position(point, params, dom, rect, size) {
          if (point[0] < 30) {
            return [0, '50%'];
          } else if (point[0] > (size.viewSize[0] - 80)) {
            return [size.viewSize[0] - 80, '50%'];
          }
          return [point[0] - 30, '50%'];
        },
        formatter: '{b}月: {c}',
      };
      tmpOption.grid = {
        top: 55,
        left: '-8%',
        right: '5%',
        bottom: '2%',
        containLabel: true,
      };
      tmpOption.xAxis = [{
        show: false,
        type: 'category',
        axisTick: {
          show: false,
        },
        axisLine: {
          lineStyle: {
            color: '#475669',
          },
        },
        splitLine: {
          show: true,
          lineStyle: {
            color: ['#E3E9EF'],
          },
        },
        data: ['1', '2', '3', '4', '5', '6', '7', '8', '9', '10', '11', '12'],
      }];
      tmpOption.yAxis = [{
        show: false,
        type: 'value',
        axisTick: {
          show: false,
        },
        axisLine: {
          lineStyle: {
            color: '#475669',
          },
        },
        axisLabel: {
          margin: 10,
          textStyle: {
            fontSize: 14,
          },
        },
        splitLine: {
          lineStyle: {
            color: ['#E3E9EF'],
          },
        },
      }];
      tmpOption.series = [{
        name: '日访问量',
        type: 'line',
        smooth: true,
        // symbol: 'circle',
        symbolSize: 6,
        showSymbol: true,
        lineStyle: {
          normal: {
            width: 2,
          },
        },
        itemStyle: {
          normal: {
            color: '#0086E6',
            borderColor: '#0086E6',
            borderWidth: 2,
          },
        },
        data: [220, 182, 191, 134, 150, 120, 110, 125, 145, 122, 165, 122],
      }];
      this.chartOption = Object.assign({}, this.option, tmpOption);
    },
注意:模板中使用的属性设置方法,用的是Object.assign,用方法中的tmpOption属性强制覆盖默认的option属性,传入到组件
 this.getChart1Option();
// 调用这个方法后,表格就能展现了
When you finish writing the code, you happily think it's done and want to publish it. It turned out that the press conference was rejected because when there are formatting problems in the code, it is not allowed to be submitted to the server.
So how to solve the code format problem?
First use npm run lint. No matter what, if you execute this first, you will quickly eliminate many formatting problems.
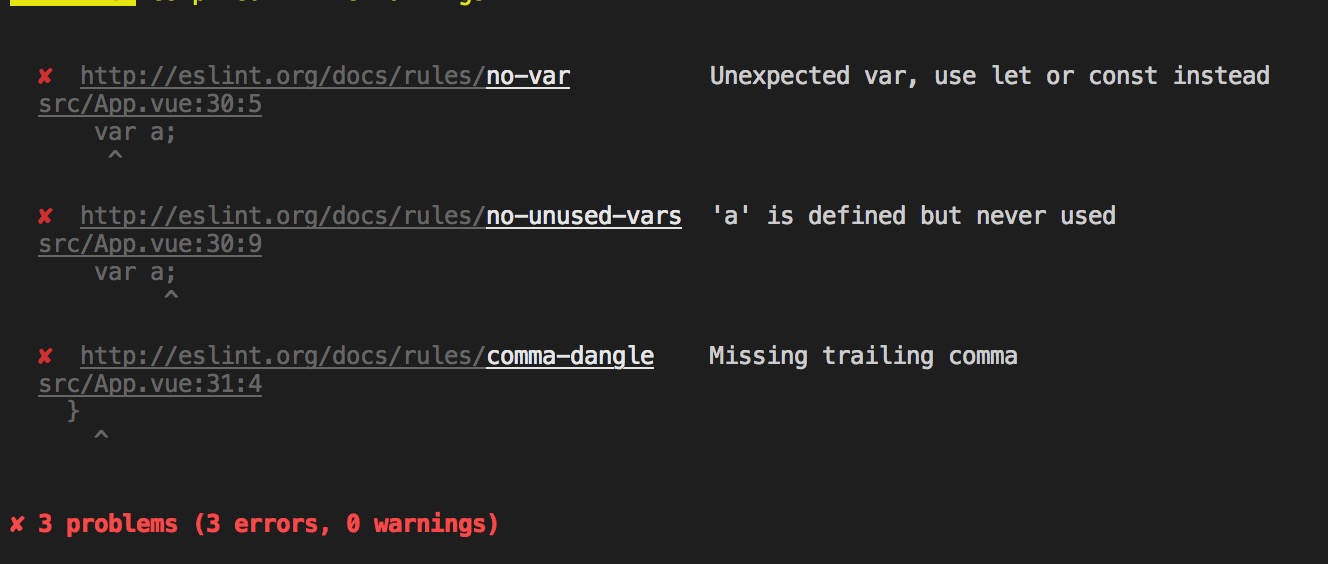
If you find that there are still many problems, you must solve them one by one. The solution is as follows
- There is a link in the error message, such as http://eslint.ort/docs/rules/no-var. Click this link to go to the eslint official website, find out the cause of the error, and modify it to the corresponding format.
- If this error is indeed difficult to correct, you can block this specification. Go to the .eslintrc.js file in the root directory and add the corresponding rule shielding to the rules object, such as the no-var rule above. Configure "no-var": 0 and this rule will be filtered.
####release
 npm run build
运行完这个步骤后,会在该目录下生成vue-template文件目录,里面就是打包好的生产代码,放到nginx或者服务端的static目录就可以访问了。
After the above tutorial, I believe you not only have the ability to use this template, but also have entered the front-end world. If the document is still unclear, or if you still want to know what relevant knowledge needs to be supplemented, you can contact me at any time~


