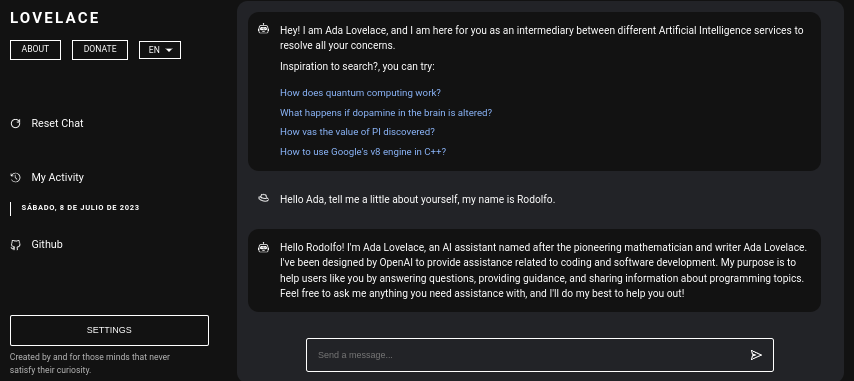
Lovelace
velace's first appearance in these alleys.
가서 Lovelace 문서를 읽어보세요.
Lovelace는 Python의 GPT4FREE 라이브러리를 사용하여 ChatGPT와 자유롭게 상호 작용할 수 있는 웹 애플리케이션입니다. 소프트웨어는 서버 측에서 NodeJS + Express + SocketIO를 사용하고 프런트엔드에서 Vite + ReactJS를 사용하여 JavaScript로 작성되었습니다.
백엔드를 사용하면 다양한 클라이언트가 ChatGPT와 통신할 수 있습니다. Lovelace를 사용하는 목적이 자신의 목적을 위해 사용하는 것이라면 네트워크에 백엔드 서버만 마운트하고 애플리케이션의 반대편, 즉 클라이언트는 무시할 수 있습니다. 백엔드는 API를 통해 상호 작용을 허용하거나 일부 SocketIO 클라이언트를 사용하여 WebSocket으로 연결을 사용할 수 있습니다.
목차:
컴퓨터나 서버에 Lovelace를 설치하는 것은 비교적 간단하며, 프로세스에 큰 문제가 있어서는 안 됩니다. 그러나 저장소 복제를 시작하기 전에 NodeJS v18.0.0 및 Python v3.10 이상이 있는지 확인하세요.
시스템에 필요한 NodeJS 버전이 설치되어 있지 않은 경우 버전 관리자 NVM (Node Version Manager) 사용할 수 있습니다.
 # Installing NVM on your system...
export NVM_DIR= " $HOME /.nvm " && (
  git clone https://github.com/nvm-sh/nvm.git " $NVM_DIR "
  cd " $NVM_DIR "
  git checkout ` git describe --abbrev=0 --tags --match " v[0-9]* " $( git rev-list --tags --max-count=1 ) `
) && . " $NVM_DIR /nvm.sh "

# Once NVM has been installed, we proceed to install the specified NodeJS version (> 18.0.0)
nvm install 18.0.0
시스템에 Python v3.10 없으면 다음을 고려할 수 있습니다.
 # (DEBIAN)
sudo add-apt-repository ppa:deadsnakes/ppa && sudo apt update && sudo apt install python3.10

# (MacOS)
brew install [email protected]
같은 방법으로 시스템에 pip를 설치하는 것을 고려하세요. 네트워크 내에 백엔드 서버를 마운트하는 데 필요한 모듈을 설치할 때 사용되기 때문입니다.
curl https://bootstrap.pypa.io/get-pip.py -o get-pip.py
python3 get-pip.py
이제 앞서 언급한 종속성이 시스템에 설치되어 있다고 가정하고 다음 단계로 진행할 수 있습니다.
백엔드 서버를 Lovelace 프런트엔드로 설치하고 구성하기 전에 애플리케이션 소스 코드가 있는 Github 저장소를 복제해야 합니다.
이 글을 읽는 시점에서는 이미 Python 버전 3.10 이상과 NodeJS 버전 18.0.0이 있다고 가정합니다. 이전 읽기에서는 설치를 진행하기 전에 각 항목을 설치하는 단계에 대해 설명했습니다.
 # Cloning the Github repository that contains the source code (I stole it from a cyber).
git clone https://github.com/CodeWithRodi/Lovelace/ && cd Lovelace

# Accessing the "Client" folder, which stores the source code of the
# Vite + ReactjS (Frontend) application, and then installing its required modules from NPM.
cd Server && npm install --force && pip install -r Requirements.txt

# Like the previous line, we access the "Server" folder that houses the source code
# for the Lovelace Backend, then we install the NPM packages required to mount on the network.
cd ../Client && npm install --force
모든 것을 한 줄로 실행하는 것이 더 나을 수도 있습니다...
git clone https://github.com/CodeWithRodi/Lovelace/ && cd Lovelace && cd Server && npm install --force && pip install -r Requirements.txt && cd ../Client && npm install --force && cd .. 서버를 실행하는 데 필요한 모듈을 설치할 때 GPT4FREE 라이브러리를 사용할 수 있도록 필요한 패키지를 설치하기 위해 pip install -r Requirements.txt 명령이 실행된다는 점을 명심하십시오. 파이썬에서. pip 설치되어 있지 않거나 Python 패키지를 설치하지 않으면 백엔드 서버와 클라이언트가 네트워크에 마운트되어 있어도 아무 것도 할 수 없습니다. WebSocket을 통해 또는 백엔드에서 NodeJS python-shell 라이브러리를 사용하는 API를 통해 응답 반환을 담당하는 해당 Python 파일과 통신이 이루어지며 필요한 요구 사항이 없으면 오류가 발생합니다.
Github 리포지토리를 복제한 후에는 프런트엔드와 백엔드 애플리케이션 모두를 구성하고 네트워크에 마운트할 수 있습니다. 하지만 리포지토리를 복제하여 생성된 폴더가 포함된 각 하위 폴더를 저장하는 항목에 대해 좀 더 자세히 살펴보겠습니다.
| 접는 사람 | 설명 |
|---|---|
| 고객 | "클라이언트" 폴더에는 Vite + React 애플리케이션의 소스 코드, 즉 Lovelace 프론트엔드가 저장되어 있습니다. 여기서 웹사이트를 네트워크에 마운트하여 백엔드와 통신하고 AI와 양질의 대화를 나눌 수 있습니다! |
| 선적 서류 비치 | "Documentation" 폴더에는 소프트웨어 문서의 소스 코드(https://lovelace-docs.codewithrodi.com/)가 들어 있습니다. |
| 섬기는 사람 | "Server" 폴더에는 Lovelace 백엔드의 소스 코드가 들어 있으며, WebSocket에서 응답 전송을 위한 API 및 SocketIO를 제공하기 위해 Express를 사용하여 NodeJS에 구축되었습니다. |
또한 폴더 외에도 아래 설명과 함께 동일한 방식으로 표시되는 일부 파일을 발견하게 됩니다.
| 파일 | 설명 |
|---|---|
| .clocignore | 이는 "cloc" 소프트웨어에서 사용되며, 이를 통해 소프트웨어 코드 줄을 계산하고 이를 기술과 사용된 프로그래밍 언어에 있는 설명으로 구분할 수 있습니다. "clocignore" 파일 내부에는 소프트웨어가 계산할 때 무시해야 하는 파일 및 디렉터리의 경로가 있습니다. |
| 특허 | 클라이언트와 서버의 소스 코드에 적용되는 Lovelace 라이선스가 포함되어 있습니다. 이 소프트웨어는 MIT 라이선스에 따라 라이선스가 부여됩니다. |
저장소가 복제되고 이후에 필요한 서버 및 클라이언트 NPM 모듈을 설치한 후에는 소프트웨어 사용을 시작하기 위해 백엔드를 설정할 차례입니다.
서버부터 시작하겠습니다. 여기서 마법이 일어날 것입니다. API 요청이나 WebSocket을 사용하여 AI와 통신할 수 있습니다. 다음으로, 네트워크 내에 서버를 마운트할 수 있는 일련의 명령이 제공됩니다.
 # Accessing the <Server> folder that houses the repository you cloned earlier
cd Server/

# Running the server...
npm run start
모든 작업을 올바르게 수행했다면 시스템에서 서버가 이미 실행되고 있어야 합니다. http://0.0.0.0:8000/api/v1/ 에 접속하시면 확인하실 수 있습니다!
스크립트( npm run <script_name> ) | 설명 |
|---|---|
| 시작 | 서버의 정상적인 실행이 시작됩니다. 프로덕션 환경에 마운트하려는 경우 이 옵션을 고려할 수 있습니다. |
| 개발자 | "nodemon" 패키지를 사용하여 개발 모드에서 서버 실행을 시작합니다. |
환경 변수는 자격 증명, 구성 등과 관련된 정보를 저장할 수 있는 동적 문자 값이라는 것을 알아야 합니다. 그러면 서버의 소스 코드 내에 있는 ".env" 파일이 표시됩니다. 사용 가능한 변수의 작동에 대한 설명이 제공됩니다.
 # Specifies the execution mode of the server, considers the value of <NODE_ENV>
# can be <development> and <production>.
NODE_ENV = production

# Address of the server where the client application is running.
CLIENT_HOST = https://lovelace.codewithrodi.com/

# Port where the server will
# start executing over the network.
SERVER_PORT = 8000

# Hostname where the server will be launched in
# complement with the previously established
# port on the network.
SERVER_HOST = 0.0.0.0

# If you have an SSL certificate, you must
# specify the certificate and then the key.
SSL_CERT =
SSL_KEY =

# Others...
CORS_ORIGIN = *
BODY_MAX_SIZE = 100kb
읽기의 이 시점에서 이미 네트워크에 백엔드 서버가 설정되어 있다고 가정하면 클라이언트 서버를 계속 설정할 수 있습니다. 이러한 방식으로 웹 사이트를 통해 AI와 상호 작용을 시작할 수 있습니다. 다음에 구성하겠습니다...
클라이언트 애플리케이션은 Vite를 개발 도구로 사용하여 ReactJS로 구축되었습니다. 몇 가지 터미널 명령만 사용하면 네트워크에서 애플리케이션을 신속하게 설정하고 배포할 수 있습니다! 지침을 따르고 ReactJS 및 Vite의 기능을 활용하면 원활하고 효율적인 설정 프로세스를 경험할 수 있습니다.
웹 애플리케이션을 올바르게 사용하려면 서버가 이미 네트워크에서 실행되고 있어야 합니다.
 # Accessing the existing <Client> folder within the cloned repository
cd Client/

# Assuming you have already installed the necessary npm packages <npm install --force>
# we will proceed to start the server in development mode
npm run dev
즐거운 해킹되세요!... 귀하의 서버는 http://0.0.0.0:5173/ 에서 실행되어야 합니다.
이전 읽기에서 수행된 것과 동일한 방식으로 클라이언트 애플리케이션의 ".env" 파일에 있는 환경 변수 목록이 이에 대한 설명과 함께 다음에 표시됩니다.
 # Address where the backend server was mounted, you must
# be sure to specify in the address if you have ridden
# the server under HTTPS, changing <http> to <https> ;)
VITE_SERVER = http://0.0.0.0:8000

# The server has a suffix to be able to access its respective API
# in this case we use v1
VITE_API_SUFFIX = /api/v1

# Others...
VITE_DONATE_LINK = https://ko-fi.com/codewithrodi
VITE_GPT4FREE_LINK = https://github.com/xtekky/gpt4free
VITE_SOFTWARE_REPOSITORY_LINK = https://github.com/codewithrodi/Lovelace 네트워크에서 Vite 서버를 시작할 때 사용되는 네트워크 주소나 포트를 수정하려는 경우 vite.config.js 파일 수정을 고려할 수 있습니다. 이 파일에는 Vite 서버에 대한 구성 설정이 포함되어 있습니다. 다음은 vite.config.js 파일의 내용입니다.
 export default defineConfig ( {
  plugins : [ react ( ) ] ,
  server : {
    // If you want to change the network address where the server will be mounted
    // you must change <0.0.0.0> to the desired one.
    host : '0.0.0.0' ,
    // Following the same line above, you must modify the port <5173>
    // for which you want to ride on the network.
    port : 5173
  } ,
  define : {
    global : { }
  }
} ) ;
이러한 설정을 수정하는 경우 서버 접근성에 영향을 미칠 수 있으므로 주의해서 수행해야 합니다. 적절한 네트워크 주소와 아직 사용하지 않는 포트를 선택하십시오.
Vite는 매우 효율적인 환경으로 인해 JavaScript로 작성된 웹 애플리케이션을 개발하는 데 널리 사용됩니다. 새로운 모듈을 로드하거나 개발 과정에서 소스 코드를 컴파일할 때 시작 시간을 대폭 줄이는 등 상당한 이점을 제공합니다. Vite를 활용함으로써 개발자는 생산성 향상과 개발 주기 단축을 경험할 수 있습니다. 속도와 성능 최적화로 인해 웹 개발 프로젝트에 유용한 도구가 되었습니다.
웹 애플리케이션에는 플랫폼에 액세스하는 웹 브라우저의 언어를 감지하는 기능이 있습니다. 이를 통해 요청된 언어로 제공되는 콘텐츠 번역이 있는지, 존재하지 않는지 나중에 감지할 수 있습니다. 번역이 반환됩니다. 기본적으로 영어에 해당합니다.
새 번역을 추가하려면 Client/src/Locale/ 액세스할 수 있습니다. 여기서 마지막 Locale/ 폴더에는 {LANGUAGE_IN_ISO_369}.json 형식의 일련의 JSON이 포함되어 있습니다. 새 번역을 추가하려는 경우 형식을 따르고 값이 생성하려는 원하는 언어로 업데이트되는 해당 키를 복사하기만 하면 됩니다.
현재 웹 애플리케이션에는 French - Arabic - Chinese - German - English - Spanish - Italian - Portuguese - Russian - Turkish 번역이 존재합니다.
개인적인 필요와 목적을 위해 Lovelace를 활용하려는 의도가 있다면 ReactJS에 구현된 클라이언트 애플리케이션을 무시할 수 있습니다. 대신 마법이 실제로 일어나는 곳인 서버 쪽으로 주의를 돌리세요.
API 또는 WebSocket을 사용하여 백엔드와 통신할 때 Model or Role 로 전송된 데이터는 대소문자를 구분하지 않습니다. 즉, Model 값이 gPT-3.5-TUrbO 인 경우 중요하지 않습니다. 백엔드에서 형식화되면 Prompt 도 중요하지 않지만 Provider 에 할당된 값은 나중에 읽을 때 AI와 상호 작용을 설정할 때 사용할 수 있는 사용 가능한 공급자를 얻는 방법을 배우게 됩니다. 각각의 모델이 무엇인지 알 수 있거나 이제 lovelace 백엔드 공개 인스턴스의 동일한 경로 /api/v1/chat/providers/ 에 액세스하여 정보를 볼 수 있습니다.
다음은 기본 Fetch 함수를 통해 API를 사용하는 예입니다.
const Data = {
// Select the model you want to use for the request.
// <GPT-3.5-Turbo> | <GPT-4>
Model : 'GPT-3.5-Turbo' , // Recommended Model
// Use a provider according to the model you used, consider
// that you can see the list of providers next to the models
// that have available in:
// [GET REQUEST]: http://lovelace-backend.codewithrodi.com/api/v1/chat/providers/
Provider : 'GetGpt' , // Recommended Provider, you can also use 'DeepAi'
// GPT Role
Role : 'User' ,
// Prompt that you will send to the model
Prompt : 'Hi Ada, Who are you?'
} ;
// Note that if you want to use your own instance replace
// <https://lovelace-backend.codewithrodi.com> for the address
// from your server, or <http://0.0.0.0:8000> in case it is
// is running locally.
const Endpoint = 'https://lovelace-backend.codewithrodi.com/api/v1/chat/completions' ;
// We will make the request with the Fetch API provided in a way
// native by JavaScript, specified in the first instance
// the endpoint where our request will be made, while as a second
// parameter we specify by means of an object the method, the header and the
// body that will have the request.
fetch ( Endpoint , {
// /api/v1/chat/completions/
method : 'POST' ,
// We are sending a JSON, we specify the format
// in the request header
headers : { 'Content-Type' : 'application/json' } ,
body : JSON . stringify ( Data )
} )
// We transform the response into JSON
. then ( ( Response ) => Response . json ( ) )
// Once the response has been transformed to the desired format, we proceed
// to display the response from the AI in the console.
. then ( ( Response ) => console . log ( Response . Data . Answer ) )
// Consider that <Response> has the following structure
// Response -> { Data: { Answer: String }, Status: String(Success | ClientError) }
. catch ( ( RequestError ) => console . error ( RequestError ) ) ;통신 시 Axios를 사용하려는 경우 다음을 고려할 수 있습니다.
 const Axios = require ( 'axios' ) ;

const Data = {
    Model : 'GPT-3.5-Turbo' , // Recommended Model
    Provider : 'GetGpt' , // Recommended Provider, you can also use 'DeepAi'
    // GPT Role
    Role : 'User' ,
    Prompt : 'Hi Ada, Who are you?'
} ;

const Endpoint = 'https://lovelace-backend.codewithrodi.com/api/v1/chat/completions' ;

( async function ( ) {
    const Response = ( await Axios . post ( Endpoint , Data , { headers : { 'Content-Type' : 'application/json' } } ) ) . data ;
    console . log ( Response . Data . Answer ) ;
} ) ( ) ;
마술이 일어나는 Client/src/Services/Chat/Context.jsx 및 Client/src/Services/Chat/Service.js 파일을 보면 클라이언트가 API를 통해 백엔드와 통신하는 방법을 확인할 수 있습니다.
백엔드 서버에서는 SocketIO의 도움으로 WebSocket의 서버를 제공하므로 NodeJS의 경우 npm i socket.io-client 와 같이 동일한 라이브러리에서 제공하는 클라이언트를 사용하는 것이 좋습니다. AI의 응답은 API를 통한 통신을 사용하는 것과 달리 AI가 응답 처리를 완료할 때까지 기다려 표시할 수 없기 때문에 "즉각적인" 응답을 원하는 경우 이러한 유형의 통신을 사용하는 것이 좋습니다. . . WebSocket을 사용하면 AI의 응답이 부분적으로 전송되어 즉시 클라이언트와의 상호 작용이 생성됩니다.
 const { io } = require ( 'socket.io-client' ) ;

// Using the NodeJS 'readline' module, like this
// allow <Prompts> to be created by the user
// to our console application.
const ReadLine = require ( 'readline' ) . createInterface ( {
    input : process . stdin ,
    output : process . stdout
} ) ;

// We store the address where the Lovelace backend is mounted.
// In case your instance is running locally
// you can change the value of <Endpoint> to something like <http://0.0.0.0:8000>.
const Endpoint = 'http://lovelace-backend.codewithrodi.com/' ;

( async function ( ) {
    const Socket = io ( Endpoint ) . connect ( ) ;
    console . log ( `Connecting to the server... [ ${ Endpoint } ]` ) ;

    Socket . on ( 'connect' , ( ) => {
        console . log ( 'Connected, happy hacking!' ) ;
        RunApplicationLoop ( ) ;
    } ) ;

    Socket . on ( 'disconnect' , ( ) => {
        console . log ( 'nDisconnected, bye bye...!' ) ;
        process . exit ( 0 ) ;
    } ) ;

    // We use <process.stdout.write(...)> instead of <console.log(...)> because
    // in this way we print directly to the console without each time
    // that a part of the response is received, a new line (n) is executed.
    Socket . on ( 'Response' , ( StreamedAnswer ) => process . stdout . write ( StreamedAnswer ) ) ;

    const BaseQuery = {
        // We indicate the model that we want to use to communicate with the AI
        // 'GPT-3.5-Turbo' - 'GPT-4'
        Model : 'GPT-3.5-Turbo' ,
        // Provider to use in the communication, keep in mind that not all
        // providers offer ChatGPT 3.5 or ChatGPT 4. You can make a request
        // [GET] to <https://lovelace-backend.codewithrodi.com/api/v1/chat/providers/>
        Provider : 'GetGpt' ,
        Role : 'User' ,
    } ;

    const HandleClientPrompt = ( ) => new Promise ( ( Resolve , Reject ) => {
        const HandleStreamedResponseEnd = ( MaybeError ) => {
            if ( MaybeError ) {
                return Reject ( MaybeError ) ;
            }
            Resolve ( ) ;
        } ;

        ReadLine . question ( 'Prompt > ' , ( Prompt ) => {
            // We issue <Prompt> to the server, where as the second parameter
            // send the Query to it, specifying the Model, Provider, Role and Prompt.
            // The last parameter corresponds to the Callback that will be called
            // once the transmission of the response is finished, consider that this
            // callback receives a parameter, which corresponds to whether there is an error
            // or not during transmission, its content is therefore the error.
            Socket . emit ( 'Prompt' , { Prompt , ... BaseQuery } , HandleStreamedResponseEnd ) ;
        } ) ;
    } ) ;

    const RunApplicationLoop = async ( ) => {
        while ( true ) {
            await HandleClientPrompt ( ) ;
            console . log ( 'n' ) ;
        }
    } ;
} ) ( ) ; 제시된 언어가 아닌 다른 언어로 WebSocket을 통해 Lovelace Backend와 통신을 설정하려는 경우 다음을 고려할 수 있습니다.
GPT4FREE Python 라이브러리가 백엔드 내에서 사용된다는 사실에도 불구하고 후자의 공급자는 Lovelace에서 제공하는 것과 다릅니다. API를 사용하여 사용 가능한 공급자 목록을 얻을 수 있으며, 여기서 사용을 허용하는 모델, 서비스가 호스팅되는 웹 주소 및 AI와 상호 작용할 때 지정해야 하는 이름과 같은 정보를 얻을 수 있습니다. 당신은 예제에서 본 적이 있습니다. 이전(API, WS).
https://lovelace-backend.codewithrodi.com/api/v1/chat/providers/ 에서 받아야 하는 응답은 다음과 같습니다.
{
   "Status" : " Success " ,
   "Data" :{
      "Providers" :{
        // List of providers available to use on WebSocket's
        "WS" :[
            {
                // Name to specify when making the query
                "Name" : " DeepAi " ,
                // Web address where the service is hosted
                "Website" : " https://deepai.org " ,
                // Available models
                "Models" :[ " gpt-3.5-turbo " ]

            },
            // ! Others WebSocket's providers...
            { "Name" : " Theb " , "Website" : " https://theb.ai " , "Models" :[ " gpt-3.5-turbo " ] },
            { "Name" : " Yqcloud " , "Website" : " https://chat9.yqcloud.top/ " , "Models" :[ " gpt-3.5-turbo " ] },
            { "Name" : " You " , "Website" : " https://you.com " , "Models" :[ " gpt-3.5-turbo " ] },
            { "Name" : " GetGpt " , "Website" : " https://chat.getgpt.world/ " , "Models" :[ " gpt-3.5-turbo " ] }
        ],
        // List of Providers available to be able to use through the API
        "API" :[
            {
                // Name to specify when making the query
                "Name" : " Aichat " ,
                // Web address where the service is hosted
                "Website" : " https://chat-gpt.org/chat " ,
                // Available models
                "Models" :[ " gpt-3.5-turbo " ]
            },
            // ! Others API providers...
            { "Name" : " ChatgptLogin " , "Website" : " https://chatgptlogin.ac " , "Models" :[ " gpt-3.5-turbo " ] },
            { "Name" : " DeepAi " , "Website" : " https://deepai.org " , "Models" :[ " gpt-3.5-turbo " ] },
            { "Name" : " Yqcloud " , "Website" : " https://chat9.yqcloud.top/ " , "Models" :[ " gpt-3.5-turbo " ] },
            { "Name" : " You " , "Website" : " https://you.com " , "Models" :[ " gpt-3.5-turbo " ] },
            { "Name" : " GetGpt " , "Website" : " https://chat.getgpt.world/ " , "Models" :[ " gpt-3.5-turbo " ] }
        ]
      }
   }
}
보시다시피 공급자 목록은 두 부분으로 나누어져 있는데, 하나는 API를 통해 만들어진 쿼리용이고 다른 하나는 WebSocket을 사용하는 쿼리용입니다.
Lovelace 백엔드 서버에 대한 요청이 포함된 다른 예와 달리 공급자 목록과 해당 사용 가능한 모델을 얻는 것은 매우 쉬운 작업입니다. /api/v1 /chat/providers/ 에 [GET] 요청만 보내면 되기 때문입니다. , 여기서 응답은 이전에 표시된 JSON이 됩니다.
다음 예에서는 npm i axios 명령을 사용하여 NPM 패키지 관리자를 사용하여 설치할 수 있는 NodeJS 내에서 Axios를 사용합니다.
 const Axios = require ( 'axios' ) ;

( async function ( ) {
    // Consider that, you can replace <https://lovelace-backend.codewithrodi.com> with
    // the address where your backend server is mounted. If t

