ChatGPT로 응답하도록 하여 Alexa를 강화하세요.
이 리포지토리에는 OpenAI API를 사용하여 ChatGPT 모델에서 응답을 생성하는 간단한 Alexa 스킬을 생성하는 방법에 대한 튜토리얼이 포함되어 있습니다.
Amazon 개발자 계정에 로그인하고 Alexa 개발자 콘솔로 이동합니다.
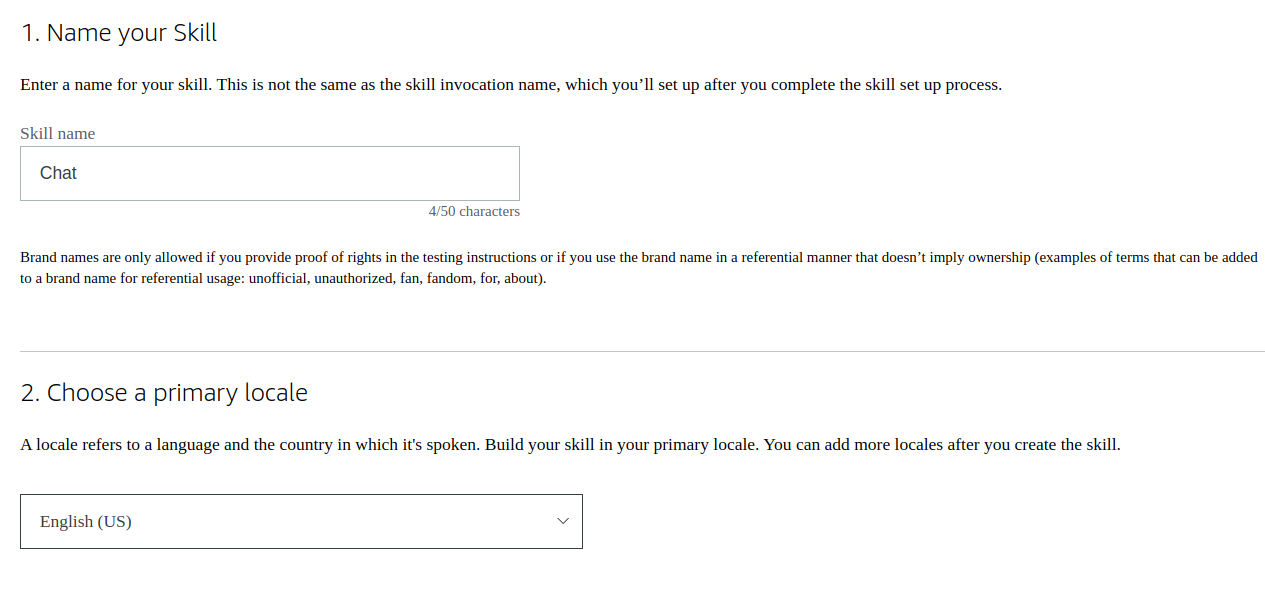
"Create Skill"을 클릭하고 스킬 이름을 "Chat"으로 지정합니다. 귀하의 언어에 따라 기본 로케일을 선택하십시오.
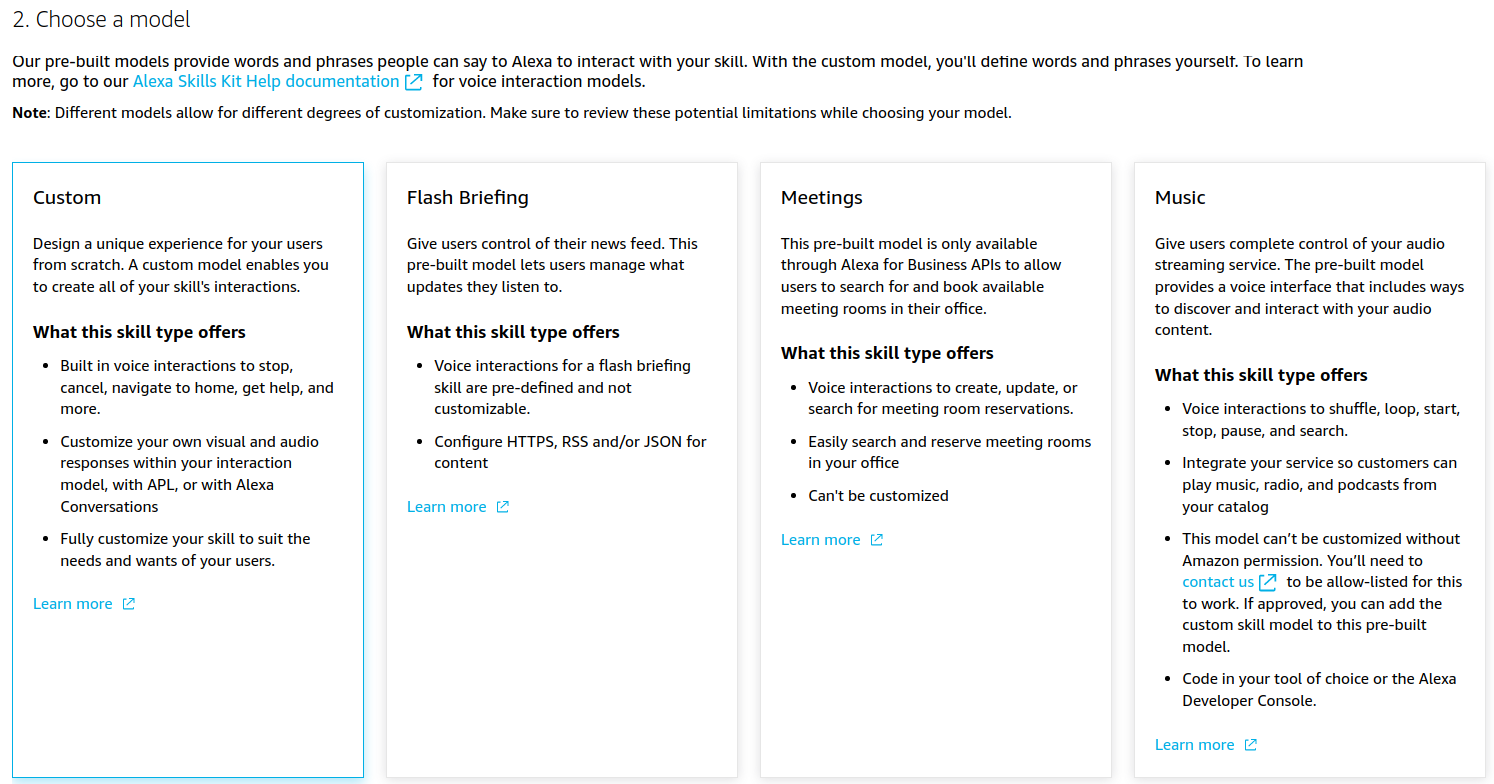
모델에 대해 "기타" 및 "사용자 정의"를 선택합니다.

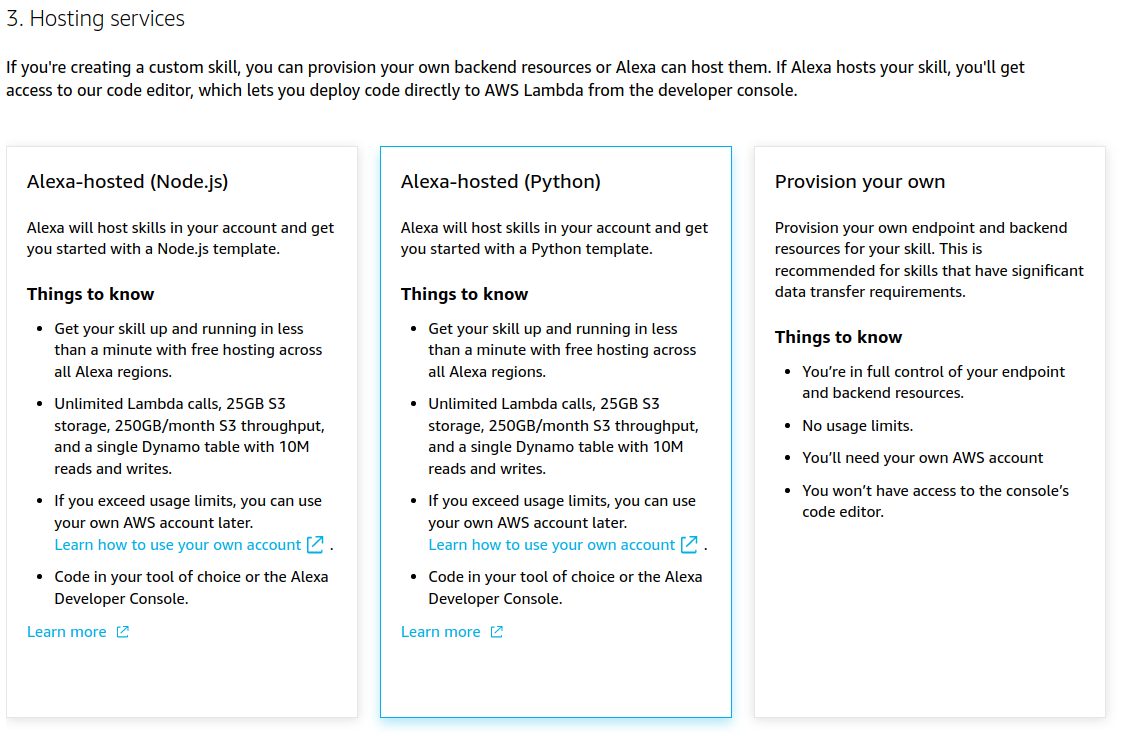
백엔드 리소스로 "Alexa 호스팅(Python)"을 선택합니다.
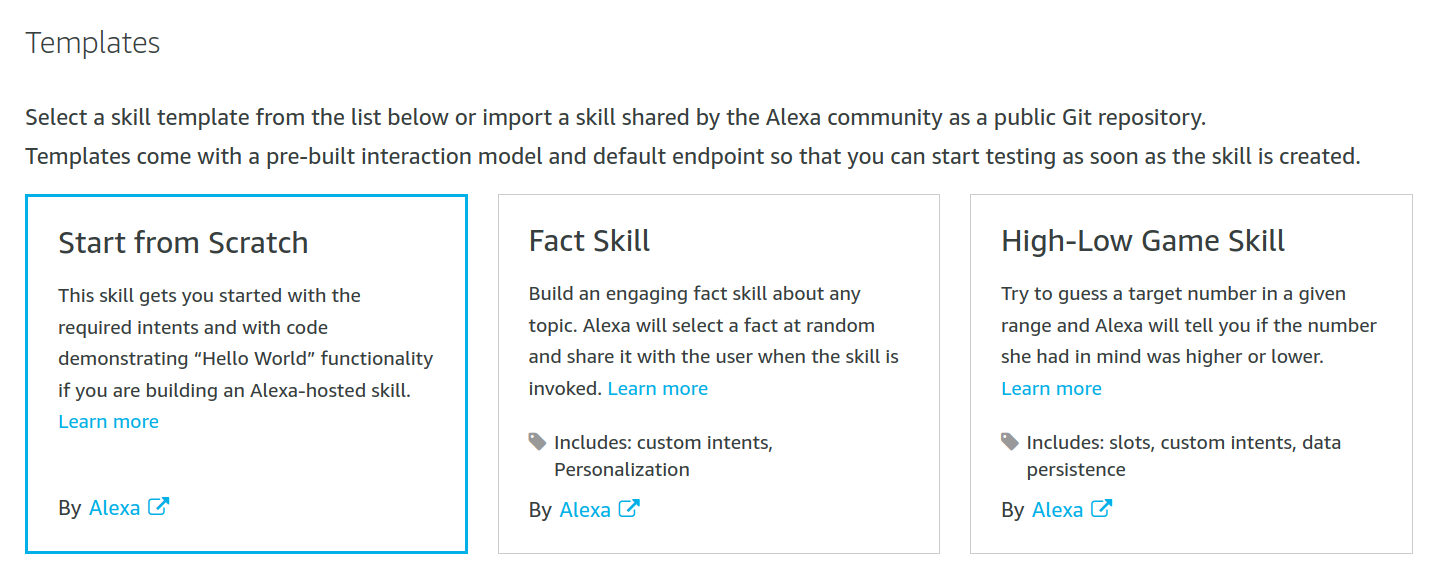
이제 두 가지 옵션이 있습니다.
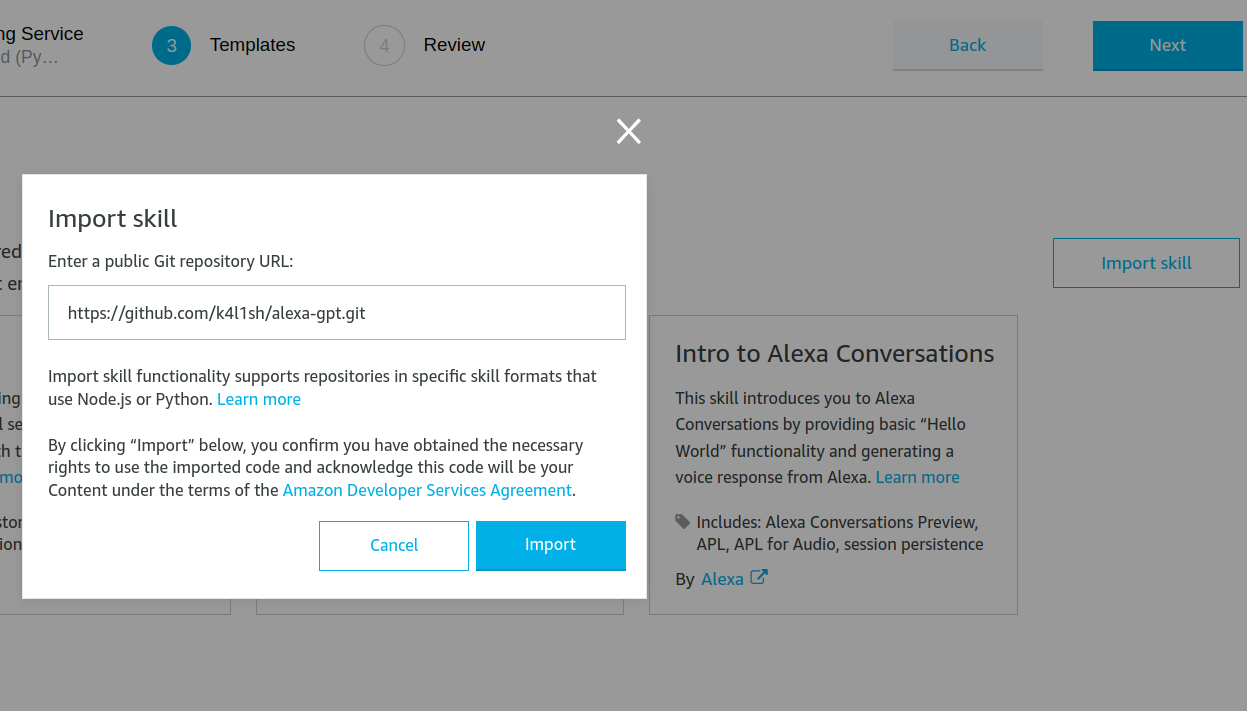
또는 스킬을 수동으로 생성하려는 경우
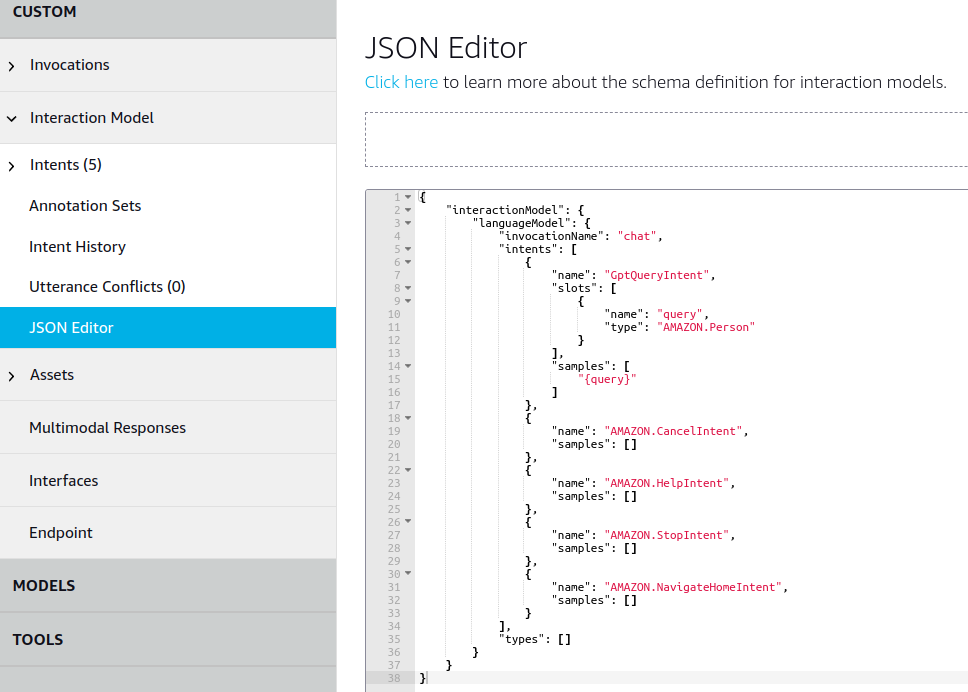
"빌드" 섹션에서 "JSON 편집기" 탭으로 이동합니다.
이 리포지토리에서 스킬을 직접 가져온 경우 "invocationName"을 "chat" 또는 활성화를 위한 다른 기본 단어로 변경하고 12단계로 진행하세요.
그러나 스킬을 수동으로 생성하기로 선택한 경우 기존 JSON 콘텐츠를 제공된 JSON 콘텐츠로 바꾸세요.
{
    "interactionModel" : {
        "languageModel" : {
            "invocationName" : " chat " ,
            "intents" : [
                {
                    "name" : " GptQueryIntent " ,
                    "slots" : [
                        {
                            "name" : " query " ,
                            "type" : " AMAZON.Person "
                        }
                    ],
                    "samples" : [
                        " {query} "
                    ]
                },
                {
                    "name" : " AMAZON.CancelIntent " ,
                    "samples" : []
                },
                {
                    "name" : " AMAZON.HelpIntent " ,
                    "samples" : []
                },
                {
                    "name" : " AMAZON.StopIntent " ,
                    "samples" : []
                },
                {
                    "name" : " AMAZON.NavigateHomeIntent " ,
                    "samples" : []
                }
            ],
            "types" : []
        }
    }
}
모델을 저장하고 "모델 빌드"를 클릭합니다.
"코드" 섹션으로 이동하여 요구사항.txt에 "openai"를 추가하세요. 요구사항.txt는 다음과 같아야 합니다.
ask-sdk-core==1.11.0
boto3==1.9.216
requests>=2.20.0API 키 페이지에서 "+ 새 비밀 키 생성"을 클릭하여 OpenAI API 키를 생성합니다.
Lambda_functions.py 파일을 제공된 Lambda_function.py로 바꾸세요.
 from ask_sdk_core . dispatch_components import AbstractExceptionHandler
from ask_sdk_core . dispatch_components import AbstractRequestHandler
from ask_sdk_core . skill_builder import SkillBuilder
from ask_sdk_core . handler_input import HandlerInput
from ask_sdk_model import Response
import ask_sdk_core . utils as ask_utils
import requests
import logging
import json

# Set your OpenAI API key
api_key = "YOUR_API_KEY"

logger = logging . getLogger ( __name__ )
logger . setLevel ( logging . INFO )

class LaunchRequestHandler ( AbstractRequestHandler ):
    """Handler for Skill Launch."""
    def can_handle ( self , handler_input ):
        # type: (HandlerInput) -> bool

        return ask_utils . is_request_type ( "LaunchRequest" )( handler_input )

    def handle ( self , handler_input ):
        # type: (HandlerInput) -> Response
        speak_output = "Chat G.P.T. mode activated"

        session_attr = handler_input . attributes_manager . session_attributes
        session_attr [ "chat_history" ] = []

        return (
            handler_input . response_builder
                . speak ( speak_output )
                . ask ( speak_output )
                . response
        )

class GptQueryIntentHandler ( AbstractRequestHandler ):
    """Handler for Gpt Query Intent."""
    def can_handle ( self , handler_input ):
        # type: (HandlerInput) -> bool
        return ask_utils . is_intent_name ( "GptQueryIntent" )( handler_input )

    def handle ( self , handler_input ):
        # type: (HandlerInput) -> Response
        query = handler_input . request_envelope . request . intent . slots [ "query" ]. value

        session_attr = handler_input . attributes_manager . session_attributes
        if "chat_history" not in session_attr :
            session_attr [ "chat_history" ] = []
        response = generate_gpt_response ( session_attr [ "chat_history" ], query )
        session_attr [ "chat_history" ]. append (( query , response ))

        return (
                handler_input . response_builder
                    . speak ( response )
                    . ask ( "Any other questions?" )
                    . response
            )

class CatchAllExceptionHandler ( AbstractExceptionHandler ):
    """Generic error handling to capture any syntax or routing errors."""
    def can_handle ( self , handler_input , exception ):
        # type: (HandlerInput, Exception) -> bool
        return True

    def handle ( self , handler_input , exception ):
        # type: (HandlerInput, Exception) -> Response
        logger . error ( exception , exc_info = True )

        speak_output = "Sorry, I had trouble doing what you asked. Please try again."

        return (
            handler_input . response_builder
                . speak ( speak_output )
                . ask ( speak_output )
                . response
        )

class CancelOrStopIntentHandler ( AbstractRequestHandler ):
    """Single handler for Cancel and Stop Intent."""
    def can_handle ( self , handler_input ):
        # type: (HandlerInput) -> bool
        return ( ask_utils . is_intent_name ( "AMAZON.CancelIntent" )( handler_input ) or
                ask_utils . is_intent_name ( "AMAZON.StopIntent" )( handler_input ))

    def handle ( self , handler_input ):
        # type: (HandlerInput) -> Response
        speak_output = "Leaving Chat G.P.T. mode"

        return (
            handler_input . response_builder
                . speak ( speak_output )
                . response
        )

def generate_gpt_response ( chat_history , new_question ):
    """Generates a GPT response to a new question"""
    headers = {
        "Authorization" : f"Bearer { api_key } " ,
        "Content-Type" : "application/json"
    }
    url = "https://api.openai.com/v1/chat/completions"
    messages = [{ "role" : "system" , "content" : "You are a helpful assistant. Answer in 50 words or less." }]
    for question , answer in chat_history [ - 10 :]:
        messages . append ({ "role" : "user" , "content" : question })
        messages . append ({ "role" : "assistant" , "content" : answer })
    messages . append ({ "role" : "user" , "content" : new_question })

    data = {
        "model" : "gpt-4o-mini" ,
        "messages" : messages ,
        "max_tokens" : 300 ,
        "temperature" : 0.5
    }
    try :
        response = requests . post ( url , headers = headers , data = json . dumps ( data ))
        response_data = response . json ()
        if response . ok :
            return response_data [ 'choices' ][ 0 ][ 'message' ][ 'content' ]
        else :
            return f"Error { response . status_code } : { response_data [ 'error' ][ 'message' ] } "
    except Exception as e :
        return f"Error generating response: { str ( e ) } "

sb = SkillBuilder ()

sb . add_request_handler ( LaunchRequestHandler ())
sb . add_request_handler ( GptQueryIntentHandler ())
sb . add_request_handler ( CancelOrStopIntentHandler ())
sb . add_exception_handler ( CatchAllExceptionHandler ())

lambda_handler = sb . lambda_handler ()OpenAI 계정에서 받은 OpenAI API 키를 입력하세요.
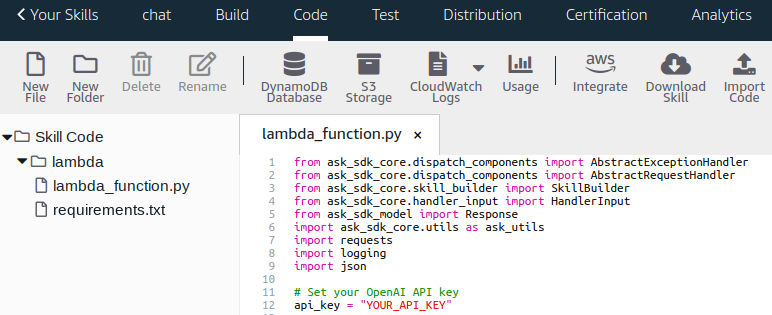
저장하고 배포하세요. "테스트" 섹션으로 이동하여 "개발"에서 "기술 테스트"를 활성화하세요.

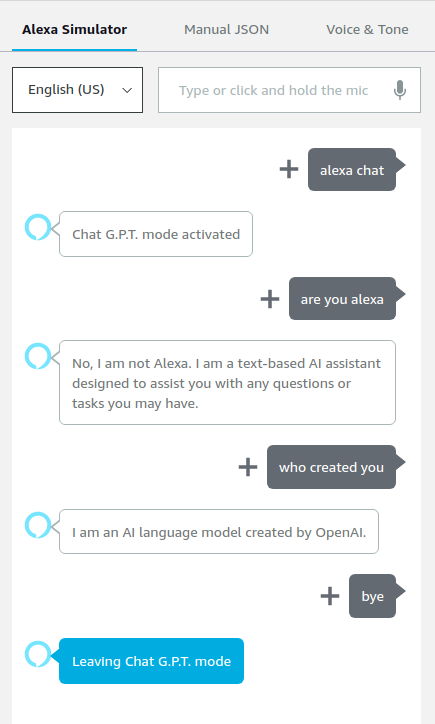
이제 ChatGPT 모드에서 Alexa를 사용할 준비가 되었습니다. 다음과 같은 결과가 표시됩니다.

이 기술을 실행하면 AWS Lambda와 OpenAI API를 모두 사용하는 데 드는 비용이 발생합니다. 예상치 못한 비용이 발생하지 않도록 가격 구조를 이해하고 사용량을 모니터링하세요.