web augmented generation
v1.2.1 - ? Semantic Chunk Matching
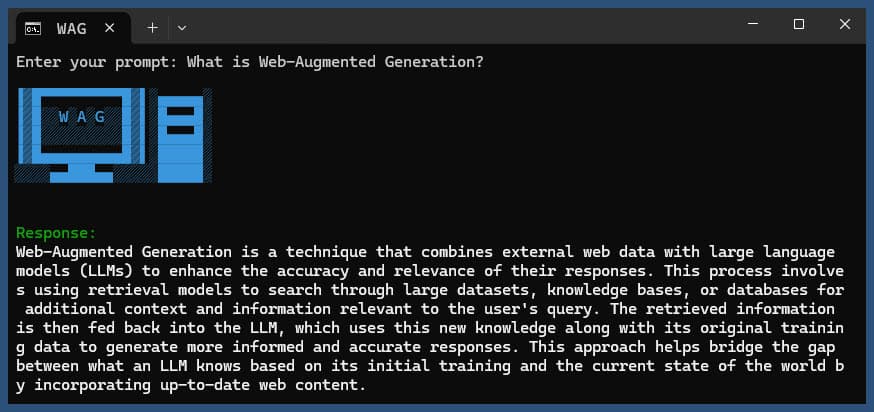
이 Node.js 애플리케이션은 다양한 LLM 공급자와 SearXNG의 웹 검색 결과를 사용하여 웹 확장 생성을 수행합니다.
저장소를 복제합니다.
 git clone https://github.com/jparkerweb/web-augmented-generation.git
cd web-augmented-generation
종속성을 설치합니다.
npm ci
.env.example 파일을 .env 에 복사합니다.
cp .env.example .env
.env 파일을 편집하고 필요에 따라 값을 업데이트합니다.
 # #####################
# # General Settings ##
# #####################
NUM_URLS = 10                                                           # Number of URLs to fetch
SEARXNG_URL = https://searx.be/                                         # URL of the SearXNG server
SEARXNG_URL_EXTRA_PARAMETER = "key=optional_auth_key_here&language=en"  # Extra parameter for SearXNG URL
SEARXNG_FORMAT = html                                                   # Format for SearXNG results (html or json)
FETCH_TIMEOUT_MS = 5000                                                 # Timeout for fetching URLs
DISABLE_SSL_VALIDATION = true                                           # Whether to disable SSL validation

# #################
# # LLM Settings ##
# #################
LLM_STREAM_RESPONSE = true                             # Whether to stream the LLM response

# Ollama Local Configuration
LLM_BASE_URL = http://localhost:11434/v1               # Base URL for the LLM API (OpenAI format)
LLM_API_KEY = ollama!!!                                # API key for the LLM (use 'ollama' for Ollama)
LLM_MODEL = llama3.2:1b                                # Model to use with the LLM API

# ###################################
# # Scraped Page Content Settings ##
# ###################################

# Semantic Chunking Settings
CHUNK_CONTENT = true                                   # Enable semantic chunking for better quality answers
CHUNK_CONTENT_USE_HYBRID_FALLBACK = true               # Enable hybrid mode to fallback to summarization if no chunks found
# # The following parameters are only used by the `chunk-match` library (if CHUNK_CONTENT is set to true)
CHUNK_CONTENT_MAX_RESULTS = 10
CHUNK_CONTENT_MIN_SIMILARITY = 0.375
CHUNK_CONTENT_MAX_TOKEN_SIZE = 500
CHUNK_CONTENT_SIMILARITY_THRESHOLD = 0.4
CHUNK_CONTENT_DYNAMIC_THRESHOLD_LOWER_BOUND = 0.3
CHUNK_CONTENT_DYNAMIC_THRESHOLD_UPPER_BOUND = 0.5
CHUNK_CONTENT_NUM_SIMILARITY_SENTENCES_LOOKAHEAD = 3
CHUNK_CONTENT_COMBINE_CHUNKS = true
CHUNK_CONTENT_COMBINE_CHUNKS_SIMILARITY_THRESHOLD = 0.5
CHUNK_CONTENT_ONNX_EMBEDDING_MODEL = " Xenova/all-MiniLM-L6-v2 "
CHUNK_CONTENT_DTYPE = " q8 "

# Raw Content Settings (used when CHUNK_CONTENT=false)
WEB_PAGE_CONTENT_MAX_LENGTH = 1000                     # Maximum length of raw page content to send to LLM
대체 LLM 제공자 구성:
 # together.ai Configuration
LLM_BASE_URL = https://api.together.xyz/v1
LLM_API_KEY = xxxxxxxxxxxxxxxxxxxxxxxxxxxxxxxxxxxxx
LLM_MODEL = meta-llama/Llama-3.2-3B-Instruct-Turbo

# llama.cpp Configuration
LLM_BASE_URL = http://localhost:8080/v1
LLM_API_KEY = not-needed
LLM_MODEL = not-needed

# OpenRouter Configuration
LLM_BASE_URL = https://openrouter.ai/api/v1
LLM_API_KEY = xxxxxxxxxxxxxxxxxxxxxxxxxxxxxxxxxxxxx
LLM_MODEL = google/gemini-pro-1.5-exp

# Google AI Studio Configuration
LLM_BASE_URL = https://generativelanguage.googleapis.com/v1beta/openai/
LLM_API_KEY = xxxxxxxxxxxxxxxxxxxxxxxxxxxxxxxxxxxxx
LLM_MODEL = gemini-exp-1121
구성에는 다음이 포함됩니다.
이 애플리케이션은 언어 모델 상호 작용을 위해 OpenAI API 형식을 사용합니다. Ollama 또는 기타 OpenAI 호환 API와 작동하도록 구성할 수 있습니다. 설정 방법은 다음과 같습니다.
.env 파일에 지정된 URL에서 실행되고 있는지 확인하세요..env 파일에서 다음 변수를 설정합니다. LLM_BASE_URL=http://localhost:11434/v1
LLM_API_KEY=ollama
LLM_MODEL=llama3.2:1b
llama3.2:1b Ollama에서 사용하려는 모델 이름으로 바꾸세요..env 파일에서 다음 변수를 설정합니다. LLM_BASE_URL=https://api.openai.com/v1
LLM_API_KEY=your_api_key_here
LLM_MODEL=gpt-3.5-turbo
your_api_key_here 실제 API 키로 바꾸고, gpt-3.5-turbo 사용하려는 모델로 바꾸세요.애플리케이션은 이러한 설정을 사용하여 쿼리 수정 및 응답 생성과 같은 작업을 위해 언어 모델에 대한 API 호출을 수행합니다.
쿼리를 사용하거나 사용하지 않고 애플리케이션을 실행합니다.
node main.js "Your question or prompt here"
또는 보다 상호작용적인 경험을 위해 질문 스크립트를 사용하십시오:
node ask.js
쿼리를 제공하지 않으면 응용 프로그램에서 쿼리를 입력하라는 메시지를 표시합니다.
애플리케이션은 다음을 수행합니다.
log.txt 에 프로세스 세부 정보를 기록합니다.생성된 응답은 콘솔에 표시되고 로그 파일에 추가됩니다.
실행 중 오류가 발생하면 프로젝트 디렉터리의 error_log.txt 에 기록됩니다.
main.js : 주요 애플리케이션 로직.env : 구성 파일( .env.example 에서 생성)log.txt : 각 실행에 대한 자세한 로그error_log.txt : 오류 로그(오류 발생 시 생성됨)completion_flag.txt : 프로세스가 성공적으로 완료되면 생성됩니다. 이 애플리케이션은 웹 스크래핑과 AI 생성 콘텐츠를 사용합니다. 귀하가 액세스하는 웹사이트와 사용 중인 AI 모델의 서비스 약관을 준수하는지 확인하세요.
Docker를 사용하여 SearXNG를 로컬로 실행하려면 다음 단계를 따르세요.
최신 SearXNG Docker 이미지를 가져옵니다.
docker pull searxng/searxng
SearXNG 구성을 위한 디렉터리를 만듭니다.
mkdir searxng-config
searxng-config 디렉터리에 settings.yml 파일을 만듭니다.
touch searxng-config/settings.yml
settings.yml 파일을 편집하여 'json'이 'formats' 목록에 포함되어 있는지 확인하세요.
nano searxng-config/settings.yml
다음 줄을 추가하거나 수정합니다.
 search :
  formats :
    - html
    - json
SearXNG Docker 컨테이너를 실행합니다.
 docker run -d
  -v $(pwd)/searxng-config:/etc/searxng
  -p 8787:8080
  -e BASE_URL=http://localhost:8787/
  -e INSTANCE_NAME=my-searxng
  searxng/searxng
http://localhost:8787 에서 로컬 SearXNG 인스턴스에 액세스하세요.
로컬 SearXNG 인스턴스를 사용하려면 .env 파일을 업데이트하세요.
SEARXNG_URL=http://localhost:8787
이제 이 애플리케이션에서 사용할 수 있는 JSON 출력이 활성화된 포트 8787에서 실행되는 로컬 SearXNG 인스턴스가 있습니다.
SEARXNG_URL_EXTRA_PARAMETER : 이 필드를 사용하면 SearXNG 검색 URL에 추가 매개변수를 추가할 수 있습니다. 다양한 목적으로 사용될 수 있습니다:
key=your_auth_key_herelanguage=en&time_range=year& 사용하여 여러 매개변수를 결합할 수 있습니다. 예: key=your_auth_key_here&language=en SEARXNG_FORMAT : 이 필드는 SearXNG 검색 결과의 형식을 결정합니다. 'html' 또는 'json'으로 설정할 수 있습니다.
.env 파일의 사용 예:
 SEARXNG_URL_EXTRA_PARAMETER="key=abcdef123456&language=en"
SEARXNG_FORMAT=json
이는 &key=abcdef123456&language=en SearXNG 검색 URL에 추가하고 애플리케이션은 SearXNG에서 JSON 응답을 예상하고 구문 분석합니다.
DISABLE_SSL_VALIDATION : SSL 인증서 유효성 검사를 비활성화하려면 'true'로 설정합니다. (기본값: false, 주의해서 사용하세요.)
LLM_STREAM_RESPONSE : 이 필드는 LLM 응답을 실시간으로 스트리밍해야 하는지 아니면 단일 응답으로 반환해야 하는지 결정합니다.
.env 파일의 사용 예:
LLM_STREAM_RESPONSE=true
이를 통해 LLM 응답 스트리밍이 가능해 더욱 상호작용적인 경험을 제공할 수 있습니다.
(포트 8787에서 SearXNG를 제공하는 예)
    server {
        listen       80 ;
        listen       443 ssl;
        server_name  searxng.acme.org;
        ssl_certificate         C:/some-path/fullchain.pem;
        ssl_certificate_key     C:/some-path/privkey.pem;

        # Define a variable to store the API key
        set $api_key "eXamPle__Key!!!" ;

        # Use a secure cookie to store the key
        set $key_cookie "searxng_key" ;

        # Add resolver directive
        resolver 127.0.0.1 ;

        # Debug logging
        error_log  logs/error.log debug ;

        # Check if the key is valid
        set $key_valid 0 ;
        if ( $arg_key = $api_key ) {
            set $key_valid 1 ;
        }
        if ( $cookie_searxng_key = $api_key ) {
            set $key_valid 1 ;
        }

        # Allow access to static files without key
        location /static/ {
            proxy_pass http://127.0.0.1:8787;
            proxy_buffering off ;
        }

        # Redirect all requests without a valid key to a default error page or login page
        location = / {
            if ( $key_valid = 0) {
                return 403 ;
            }
            proxy_pass http://127.0.0.1:8787;
            proxy_buffering off ;
        }

        location / {
            # Debug headers (always add these for debugging)
            add_header X-Debug-Key-Valid $key_valid always;
            add_header X-Debug-Arg-Key $arg_key always;
            add_header X-Debug-Cookie-Key $cookie_searxng_key always;

            # If the key is not valid, return 403
            if ( $key_valid = 0) {
                return 403 ;
            }

            # Set the cookie if the key is provided in the URL
            if ( $arg_key = $api_key ) {
                add_header Set-Cookie "${key_cookie}= $arg_key ; HttpOnly; Secure; SameSite=Strict; Path=/;" always;
            }

            # Proxy headers
            proxy_set_header Host $host ;
            proxy_set_header X-Real-IP $remote_addr ;
            proxy_set_header X-Forwarded-For $proxy_add_x_forwarded_for ;
            proxy_set_header X-Forwarded-Proto $scheme ;

            # Preserve the key parameter during redirects
            proxy_redirect ~^(https?://[^/]+)(.*)$ $1$2$is_args$args ;

            # Pass the request to the upstream server
            proxy_pass http://127.0.0.1:8787;
            proxy_buffering off ;
        }
} 이 프로젝트에는 명령줄에서 애플리케이션을 실행하는 데 편리한 스크립트가 포함되어 있습니다. 이러한 스크립트는 ask-scripts 디렉터리에 있습니다.
ask : Unix 계열 시스템 및 Windows용 범용 스크립트ask.sh : Unix 계열 시스템을 위한 Bash 스크립트ask.bat : Windows 명령 프롬프트용 배치 스크립트ask.ps1 : Windows PowerShell용 PowerShell 스크립트 이러한 스크립트를 전역적으로 사용하려면 시스템 PATH에 ask-scripts 디렉터리를 추가해야 합니다. 다양한 운영 체제에 대한 지침은 다음과 같습니다.
ask-scripts 디렉터리에 전체 경로를 추가하세요.~/.bashrc , ~/.zshrc 또는 ~/.bash_profile )을 엽니다./path/to/ask-scripts 실제 경로로 바꿉니다. export PATH="$PATH:/path/to/ask-scripts"
source ~/.bashrc (또는 편집한 해당 파일)를 실행하세요. ask-scripts 디렉터리가 PATH에 있으면 다음을 입력하여 어디에서나 응용 프로그램을 실행할 수 있습니다.
ask
그러면 스크립트에서 질문이나 프롬프트를 입력하라는 메시지를 표시합니다.
이 명령은 시스템에 적합한 스크립트를 자동으로 사용합니다.
질문이나 프롬프트를 명령줄 인수로 제공할 필요는 없습니다. 스크립트는 대화형으로 입력을 요청합니다.
이러한 스크립트는 프로젝트 디렉터리로 이동하거나 매번 node main.js 수동으로 실행할 필요 없이 애플리케이션과 상호 작용할 수 있는 편리한 방법을 제공합니다.
NGINX 역방향 프록시 뒤에서 Ollama를 호스팅하려는 경우 다음 구성을 시작점으로 사용할 수 있습니다. 이 설정에는 SSL 및 기본 API 키 인증이 포함됩니다.
 # -------------------------
# -- ollama.yourdomain.com --
# -------------------------
upstream ollama {
    server               127.0.0.1:11434;
}
server {
    listen 80 ;
    listen 443 ssl;
    server_name ollama.yourdomain.com;
    ssl_certificate         C:/Certbot/live/ollama.yourdomain.com/fullchain.pem;
    ssl_certificate_key     C:/Certbot/live/ollama.yourdomain.com/privkey.pem;

    location / {
        # Check if the Authorization header is present and has the correct Bearer token / API Key
        set $token "Bearer MY_PRIVATE_API_KEY" ;
        if ( $http_authorization != $token ) {
            return 401 "Unauthorized" ;
        }

        # The localhost headers are to simulate the forwarded request as coming from localhost
        # so we dont have to set the Ollama origins as *
        proxy_set_header  Host "127.0.0.1" ;
        proxy_set_header  X-Real-IP "127.0.0.1" ;
        proxy_set_header  X-Forwarded-For "127.0.0.1" ;
        proxy_set_header  X-Forwarded-Proto $scheme ;
        proxy_pass        http://ollama;  # Forward request to the actual web service
    }
}
이 구성은 다음을 수행합니다.
MY_PRIVATE_API_KEY 실제 API 키로 바꾸고 SSL 인증서 경로가 시스템에 맞는지 확인하세요.
이 구성을 사용할 때 NGINX 프록시 Ollama 인스턴스를 가리키도록 .env 파일을 업데이트하세요.
 LLM_BASE_URL=https://ollama.yourdomain.com/v1
LLM_API_KEY=MY_PRIVATE_API_KEY
LLM_MODEL=llama3.2:1b
이 설정을 사용하면 Ollama 인스턴스를 인터넷에 안전하게 노출하는 동시에 API 키 인증을 통해 액세스에 대한 제어를 유지할 수 있습니다.
이 프로젝트가 마음에 드신다면 제 작업을 지원하기 위한 팁을 보내주세요.


