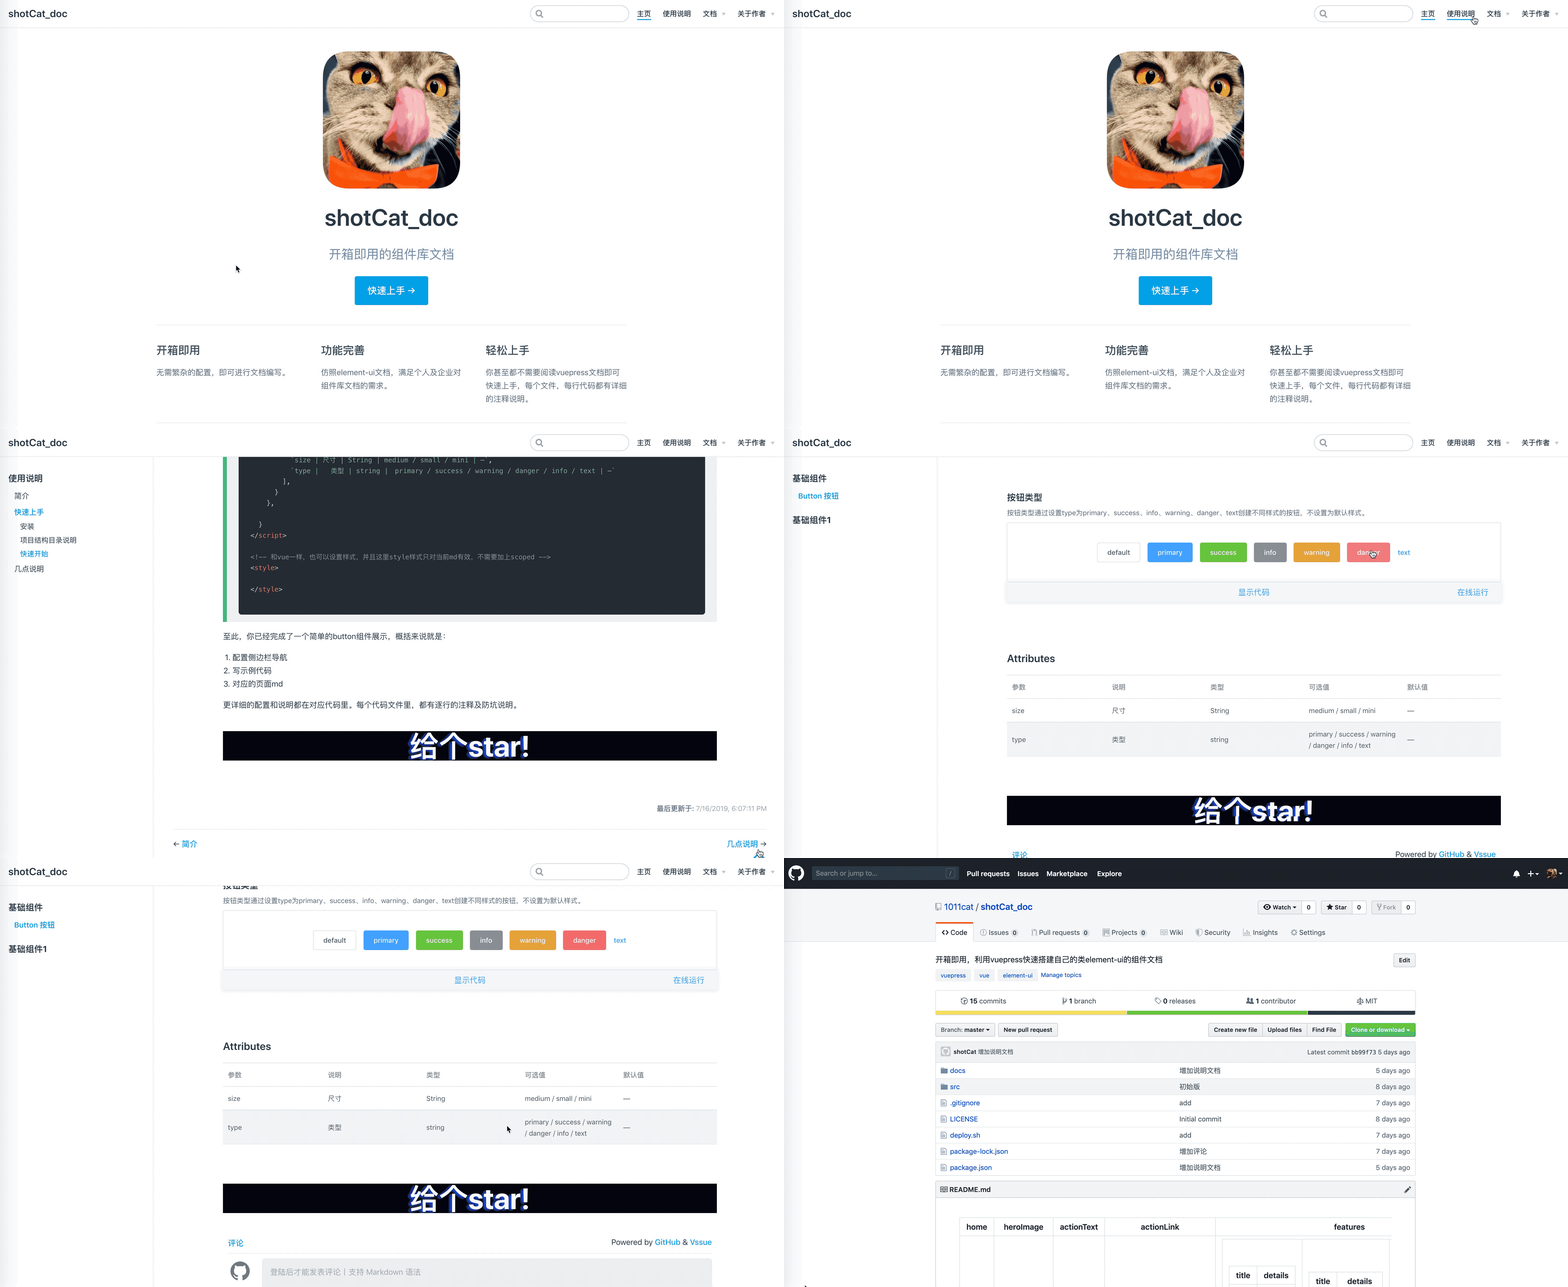
shotcat_doc을 사용하면 vuepress를 기반으로 구현되는 자체 구성 요소 라이브러리 문서를 신속하게 구축 할 수 있습니다. 요소 -UI 문서를 모방하고 구성 요소 디스플레이, 코드 디스플레이, 온라인 작동, API 양식 디스플레이, 문서 버전 스위칭, 지원 주석 등을 구현합니다. 0에서 구성 요소 문서 프로토 타입을 신속하게 구축하는 데 도움이 될 수 있습니다. 필요한 모든 구성 작업을 수행하여 실제 권투가 실제가되도록 기본값이 있습니다.

이 프로젝트가 마음에 들면 시작에 오신 것을 환영합니다.
클론 프로젝트
git clone https://github.com/1011cat/shotCat_doc.git
프로젝트 디렉토리를 입력하십시오
cd shotCat_doc
설치 의존성
npm install
CNPM을 사용하여 종속성을 설치하지 않는 것이 좋습니다. 다양한 이상한 버그가 있습니다. 다음 작업을 통해 느린 NPM 다운로드 문제를 해결할 수 있습니다.
npm install --registry=https://registry.npm.taobao.org
서비스를 시작하십시오
npm run dev
브라우저 액세스 http : // localhost : 6868
 |-- shotCat_doc
    |-- LICENSE
    |-- deploy.sh   //用于自动部署
    |-- package-lock.json
    |-- package.json
    |-- docs
    |   |-- README.md   //文档首页配置
    |   |-- .vuepress   //用于存放全局的配置、组件、静态资源等。
    |   |   |-- config.js   //文档配置文件
    |   |   |-- enhanceApp.js   //应用级别的配置 其实就是引入文档需要用到的第三方插件
    |   |   |-- components  //该目录中的 Vue 组件将会被自动注册为全局组件
    |   |   |   |-- baseComponent   //文档会用到的全局公共组件
    |   |   |   |   |-- apiTable.vue    //组件的参数表格
    |   |   |   |   |-- codeBox.vue     //包裹示例的组件
    |   |   |   |   |-- star.vue    //底部彩蛋组件
    |   |   |   |-- demo   //组件示例
    |   |   |       |-- catButton   //存放button组件相关示例
    |   |   |           |-- type_catButton.vue
    |   |   |-- dist    //存放打包后的文件
    |   |   |
    |   |   |-- public  //静态资源目录
    |   |   |   |-- favicon.jpeg
    |   |   |   |-- name.png
    |   |   |-- styles  //用于存放样式相关的文件
    |   |       |-- index.styl  //将会被自动应用的全局样式文件,会生成在最终的 CSS 文件结尾,具有比默认样式更高的优先级
    |   |       |-- palette.styl    //用于重写默认颜色常量,或者设置新的 stylus 颜色常量
    |   |-- components  //存放组件文档要用到的markdown
    |   |   |-- README.md
    |   |   |-- 1.0 //1.0 版本的文档 如果不需要版本管理,直接删除1.0这层文件夹即可
    |   |   |   |-- README.md
    |   |   |   |-- catButton.md
    |   |   |-- 2.0 //2.0 版本的文档
    |   |       |-- README.md
    |   |       |-- catButton.md
    |   |-- guide   //使用说明的文件夹
    |       |-- introduction.md
    |       |-- quickStart.md
    |-- src //存放你自己的ui组件库
        |-- index.js
        |-- components
            |-- catButton
                |-- catButton.vue
루트 디렉토리에서 자신의 구성 요소를 빼고 구성을 구성하십시오.
 //docs/.vuepress/enhanceApp.js

//引入你的组件库 确保你的组件库index文件有install方法
//如果不会,没关系,src目录里自带一个简单组件库示例,可供参考
import Cat from '../../src/index'

export default ( {
    Vue , // VuePress 正在使用的 Vue 构造函数
    options , // 附加到根实例的一些选项
    router , // 当前应用的路由实例
    siteData // 站点元数据
  } ) => {
    Vue . use ( Cat )
  }
그런 다음 사이드 바 경로를 구성하면 DOCS/.VUEPRESS/Components/Config.js에서 주석을 직접 확인할 수 있습니다.
 // docs/.vuepress/components/config.js

//这里配置的是button组件页面的路径
sidebar : {
    '/components/2.0/' : [
        {
            title : '基础组件' ,   // 必要的 配置侧边栏名称
            path : '' ,
            collapsable : false , // 可选的, 右侧侧边栏是否展开,默认值是 true
            // 如果组件很多时,建议将children配置单独放到一个js文件中,然后进行引入
            children : [
                {
                    title : 'Button 按钮' ,
                    path : 'catButton' , //在项目中对应的路径是 docs/components/2.0/catButton.md
                } ]
        }
    ]
} ,이제 자신의 구성 요소 문서 작성을 시작할 수 있습니다.
// docs/.vuepress/components/demo/catButton.vue

< template >
    <!-- 注意这段代码会放入slot里,所以必须再包裹一层div,否则会解析报错 -->
    < div >
        < cat-button text =" default " > </ cat-button >
        < cat-button text =" primary " type =" primary " > </ cat-button >
        < cat-button text =" success " type =" success " > </ cat-button >
        < cat-button text =" info " type =" info " > </ cat-button >
        < cat-button text =" warning " type =" warning " > </ cat-button >
        < cat-button text =" danger " type =" danger " > </ cat-button >
        < cat-button text =" text " type =" text " > </ cat-button >
    </ div >
</ template >

< script >
    export default {
    }
</ script >위의 경로에서 문서/구성 요소/2.0/catbutton.md와 마크 다운 파일을 만듭니다. 그런 다음 버튼 구성 요소 페이지를 행복하게 쓸 수 있습니다!
// docs/components/2.0/catButton.md

---
title: 2.0 Button 按钮
---

<!-- baseComponent-codeBox 组件即为.vuepress/components/baseComponent/codeBox文件,vuepress会默认把它解析为`baseComponent-codeBox`组件,这里我们如下对代码进行包裹,具体功能可以查看codeBox注释和页面效果 -->
< baseComponent-codeBox title ="按钮类型" description ="按钮类型通过设置type为primary、success、info、warning、danger、text创建不同样式的按钮,不设置为默认样式。 " onlineLink =" https://codepen.io/1011cat/pen/KjEOWO " >

    <!-- 同理demo-catButton-type_catButton即为我们step2编写的示例组件 -->
  < demo-catButton-type _catButton > </ demo-catButton-type _catButton >

    <!-- 这里highlight-code为引入的第三方代码高亮组件,里面包裹的就是上面示例组件的代码 -->
  < highlight-code slot =" codeText " lang =" vue " >
    < template >
      < div >
        < cat-button text =" default " > </ cat-button >
        < cat-button text =" primary " type =" primary " > </ cat-button >
        < cat-button text =" success " type =" success " > </ cat-button >
        < cat-button text =" info " type =" info " > </ cat-button >
        < cat-button text =" warning " type =" warning " > </ cat-button >
        < cat-button text =" danger " type =" danger " > </ cat-button >
        < cat-button text =" text " type =" text " > </ cat-button >
      </ div >
    </ template >
    < script >
        export default {
        }
    </ script >
  </ highlight-code >
</ baseComponent-codeBox >

<!-- 组件的参数表格,这里我没有使用自带的markdown表格,因为太丑,样式不好修改,有时参数描述较少时,不能自动撑满一行,所以自己写了一个组件;titile为表格标题,tableHead为表头,tableBody为具体参数设置,并且支持el-table的table参数 -->
< baseComponent-apiTable
  title =" Table Attributes "
  :tableHead = " tableHead "
  :tableBody = " tableBody " >
</ baseComponent-apiTable >

<!-- Vssue为引入的评论插件 -->
< Vssue title =" Vssue Demo " />

<!-- 其实在vuepress里的每个.md其实和.vue很像的,你基本可以按照vue组件模式来写 -->
< script >
    // 基本上和写vue一样
  export default {
    data ( ) {
      return {
          //表头为字符串,写法和md一样,中间以`|`间隔就行
        tableHead : `参数 | 说明 | 类型 | 可选值 | 默认值` ,
            //表格为数组,其中每一项为字符串,代表每一行要展示的数据,写法也和md一样,中间以`|`间隔就行
        tableBody : [
          `size | 尺寸 | String | medium / small / mini | —` ,
          `type |	类型 | string |	primary / success / warning / danger / info / text | —`
        ] ,
      }
    } ,

  }
</ script >

<!-- 和vue一样,也可以设置样式,并且这里style样式只对当前md有效,不需要加上scoped -->
< style >

</ style >
이 시점에서 간단한 버튼 구성 요소 디스플레이를 완료했습니다.
보다 자세한 구성 및 지침은 해당 코드에 있습니다. 각 코드 파일에는 하나의 시간 주석과 반 결합 설명이 있습니다.