face rec tools
v1.0.0
미디어 라이브러리 얼굴 인식 도구
DLIB 및 기타 건물
sudo apt-get install build-essential cmake python3-pipsudo apt-get install python3-opencvCUDA와 함께 라이브러리를 설치하는 것은 쉽지 않으며 OS 버전에 따라 다를 수 있습니다. CUDA 설정을위한 유용한 링크
https://developer.nvidia.com/cuda-downloads
https://medium.com/@sb.jaduniv/how-to-install-opencv-4-2-0-with-cuda-10-1-on-ubuntu-20-04-lts-focal-possa-bdc034109df3
https://www.pyimagesearch.com/2019/12/09/how-to-install-tensorflow-2-0-on-ubuntu/
pip3 install deepface내 face_recognition 클론 설치 (Exteranal 일치하는 얼굴을 지원하기위한 수정이 있습니다)
git clone https://github.com/sashacmc/face_recognition.git ; cd face_recognition ; pip3 install . ; cd ..git clone https://github.com/sashacmc/face-rec-tools.git ; cd face-rec-tools ; pip3 install . ; cd ..사전 정의 된 구성 파일에서 하나를 사용하거나 자신의 준비를 준비하십시오.
패키지의 CFG 폴더에 위치한 사전 정의 된 구성 파일 (예 : ~/.local/lib/python3.6/site-packages/face_rec_tools/cfg/)
기본 구성 위치 (~/.face-rec.cfg)로 복사하거나 명령 줄 스위치 "-c"로 지정하십시오.
cp ~ /.local/lib/python3. ? /site-packages/face_rec_tools/cfg/frontal.cfg ~ /.face-rec.cfg # recognize single image and print output (useful for debug)
face-rec-cli -a recognize_image -i imagefile.jpg
# recognize single video and print summary output (useful for debug)
face-rec-cli -a recognize_video -i videofile.mp4
# recognize folder and store the result in the database
face-rec-cli -a recognize_folder -i /folder/with/images
# remove folder recognition the result from the database
face-rec-cli -a remove_folder -i /folder/with/images
# match/rematch unmatched faces in database
face-rec-cli -a match_unmatched
# match/rematch all faces in database
face-rec-cli -a match_all
# match/rematch faces from folder in database
face-rec-cli -a match_folder -i /folder/with/images
# save faces from folder (must be previously recognized)
# cachedb must be disabled (otherwise they will saved inside cachedb)
face-rec-cli -a save_faces -i /folder/with/images -o /folder/for/faces
# find face from image in database and save them in folder
# cachedb must be disabled (otherwise they will saved inside cachedb)
face-rec-cli -a get_faces_by_face -i image_with_one_face.jpg -o /folder/for/faces명령 줄에서 서버를 실행하십시오
face-rec-server 호스트 이름/ip_adress 및 포트 8081로 브라우저를 엽니 다
새 폴더를 인식하려면 "인식"-> "새 파일 추가 ..."로 클릭하십시오. 인식하려는 폴더를 지정하십시오. 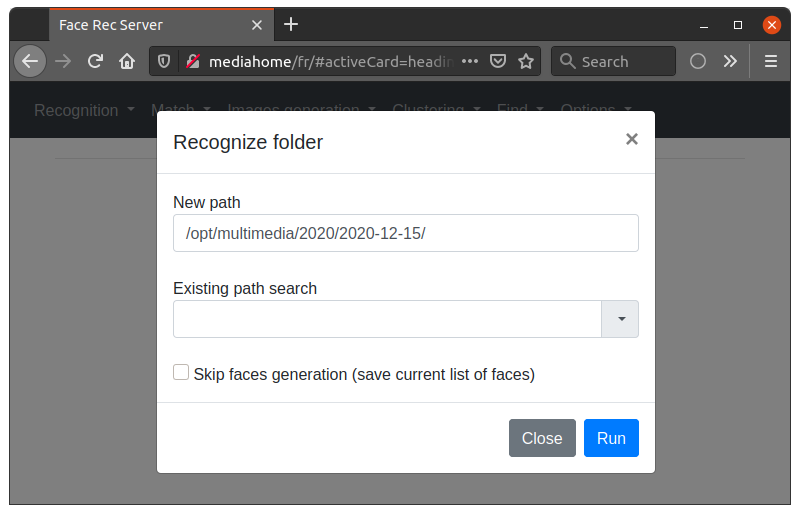
필요한 모델을로드하기 때문에 처음으로 인식하는 데 시간이 걸립니다.
첫 번째 인식 후에는 모든 얼굴을 알 수없는 것으로 얻게됩니다. 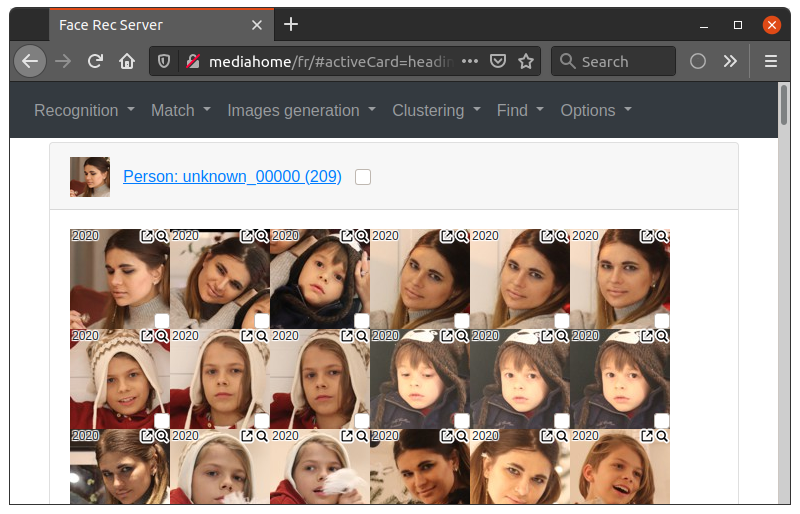
얼굴을 클릭하거나 (또는 Shift/Ctrl이 포함 된 여러 선택) 패턴으로 추가하십시오. 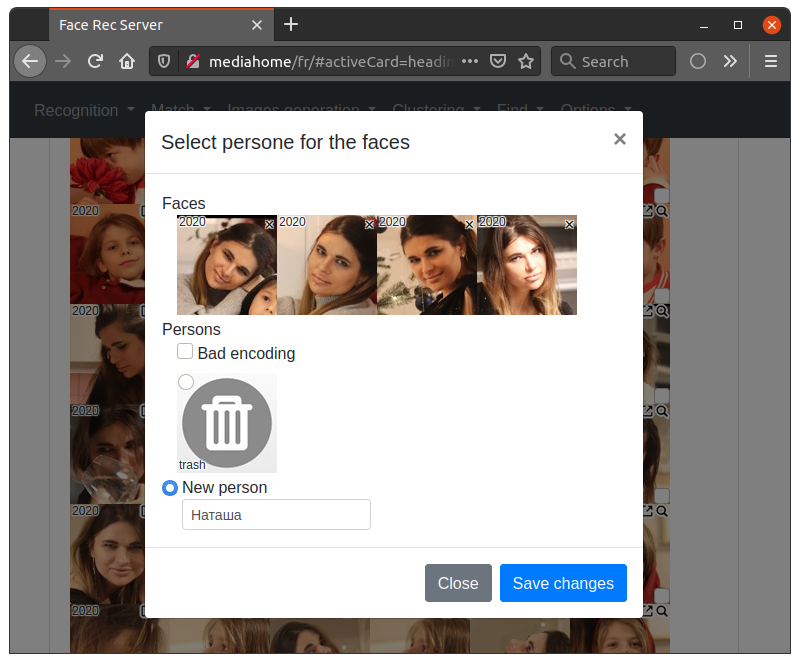
이전에 추가 된 이름이 저장되며 다시 입력 할 필요가 없습니다. 기본 페이스 로고를 변경하려면 각 사람 하위 폴더에 대해 0_face.jpg로 추가 할 수 있습니다. 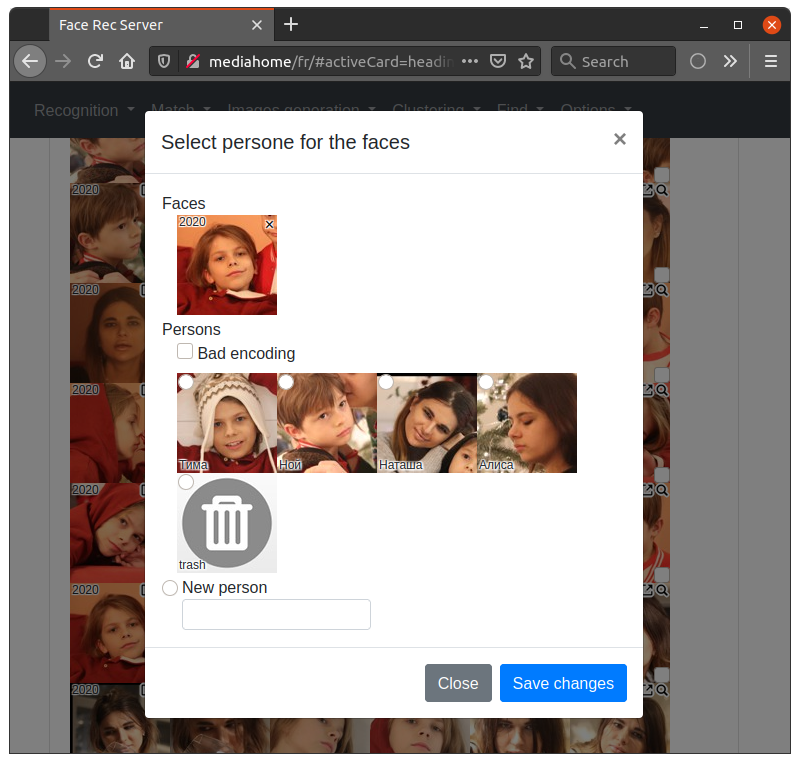
패턴을 추가 한 후 매치를 다시 시작합니다 (예 : "매치"-> "재 대결 폴더 ...") 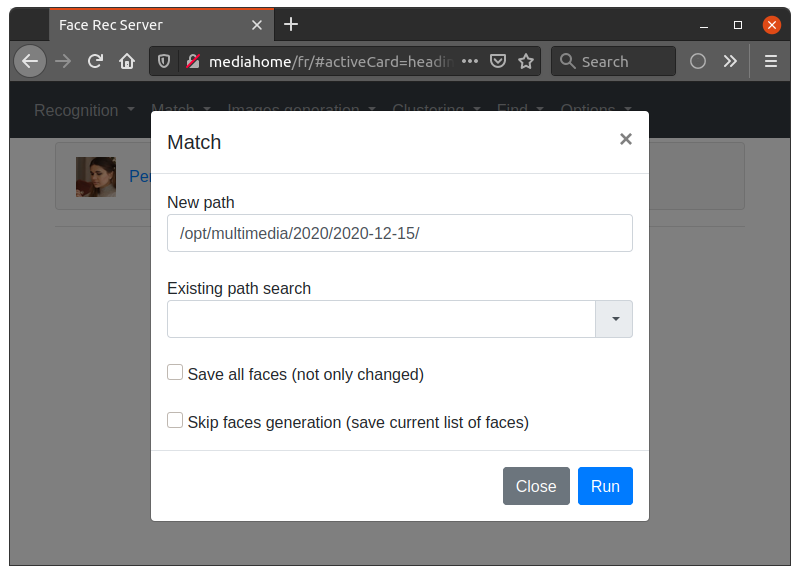
패턴과 일치 한 후에는 사람과 "약한"사람과 일치하는 사람과 일치하게되며, 완전히 일치하지 않으며 동기화 또는 검색에 사용되지 않습니다. 확인하고 패턴을 추가해야합니다. 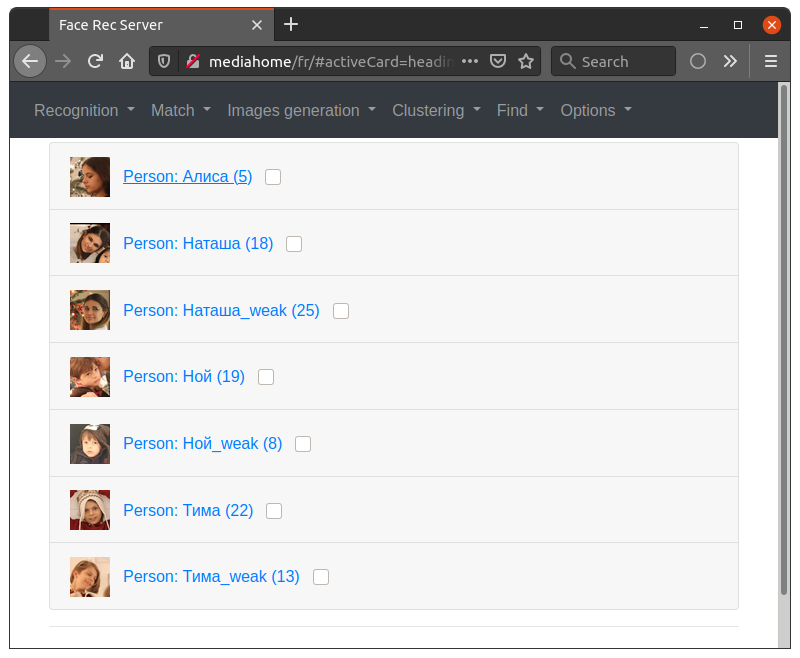
얼굴에 대한 추가 정보가 필요한 경우 클릭 할 수 있습니다. 소스 파일 또는
 일치 한 패턴을보기 위해.
많은 양의 얼굴이있는 경우 메뉴 클러스터링에서 클러스터링의 평균으로 패턴 분리를 단순화 할 수 있습니다.면 근처를 그룹과 분리하여 패턴에 함께 추가 할 수 있습니다.
얼굴 인식 도구를 사용하면 태그를 통해 Plex 미디어 서버와 인식 결과를 동기화 할 수 있습니다. 인식 된 파일은 "Person : [person_name]"태그로 태그됩니다.
 # set all tags to the Plex database
face-rec-plexsync -a set_tags

# clear all tags from the Plex database
face-rec-plexsync -a remove_tags

# recognize all files which present in the Plex database
# but not recognized yet and store the result in the database
face-rec-plexsync -a sync_new

# delete from database all files which not present in the Plex database
face-rec-plexsync -a sync_deletedPlex가 없거나 더 복잡한 검색을 사용하려면 Follow Command를 사용할 수 있습니다.
(Persons Name1 및 Name2의 얼굴이 포함 된 폴더 2020의 모든 파일을 검색합니다.
face-rec-db -a find_files_by_names -f 2020 -n Name1,Name2테스트하고 조언을 한 모든 분들께 감사드립니다.
버그 보고서, 제안 및 풀 요청을 환영합니다!


