คำเตือน
ขอแนะนำอย่างยิ่งให้อัปเกรดเป็น CodeIgniter4
วิธีที่ง่ายกว่าในการใช้ PHPUnit กับ CodeIgniter 3.x
คุณไม่จำเป็นต้องแก้ไขไฟล์หลักของ CodeIgniter เลย
คุณสามารถเขียนการทดสอบคอนโทรลเลอร์ได้อย่างง่ายดาย
ไม่มีอะไรที่พิสูจน์ไม่ได้หรอกบางที
มีเอกสารอย่างดี

PHP 7.3 หรือใหม่กว่า
หากคุณใช้ Monkey Patching คุณต้องใช้ PHP-Parser 4.2 หรือใหม่กว่าเป็นการพึ่งพา Composer
CodeIgniter 3.x
หากคุณต้องการอัปเกรดเป็น CodeIgniter4 โปรดดูที่ #361
PHPUnit 9.3 หรือใหม่กว่า
หากคุณต้องการใช้ PHPUnit 9.2 หรือเก่ากว่า โปรดใช้ ci-phpunit-test 2.x
เน็ตบีนส์
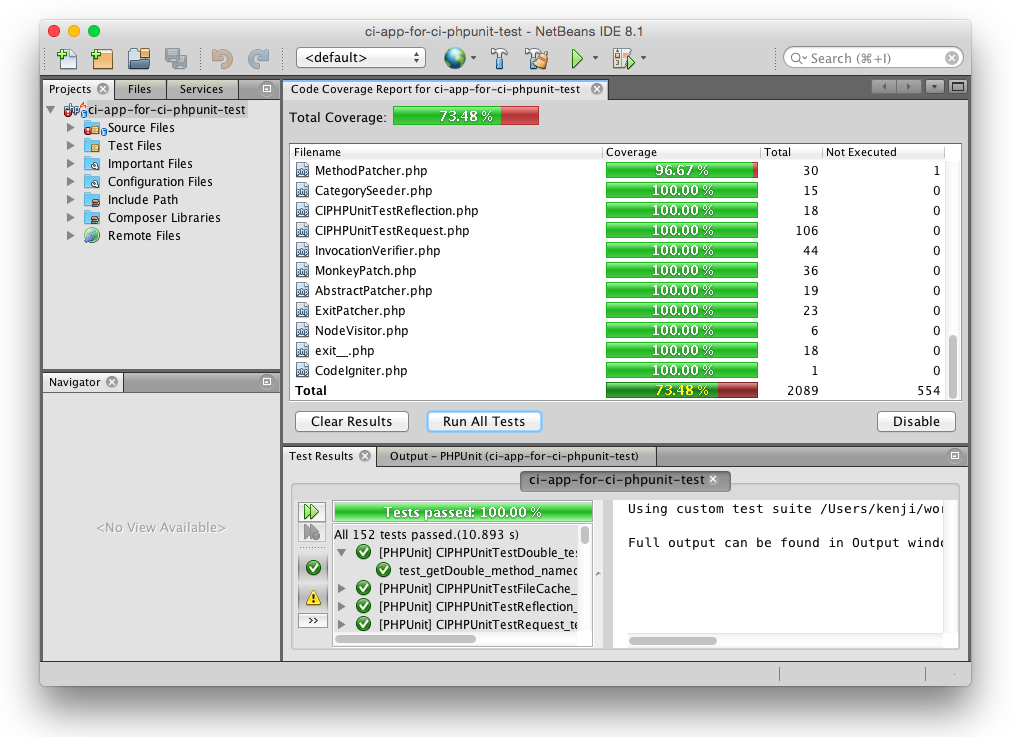
ไปที่ คุณสมบัติของโปรเจ็กต์ > การทดสอบ > PHPUnit ทำเครื่องหมายที่ช่อง ใช้ชุดการทดสอบที่กำหนดเอง และเลือก application/tests/_ci_phpunit_test/TestSuiteProvider.php
ดูบันทึกการเปลี่ยนแปลง
codeigniter/
├── application/
│   └── tests/
│        ├── _ci_phpunit_test/ ... don't touch! files ci-phpunit-test uses
│        ├── Bootstrap.php     ... bootstrap file for PHPUnit
│        ├── DbTestCase.php    ... DbTestCase class
│        ├── TestCase.php      ... TestCase class
│        ├── controllers/      ... put your controller tests
│        ├── libraries/        ... put your library tests
│        ├── mocks/
│        │   └── libraries/    ... mock libraries
│        ├── models/           ... put your model tests
│        └── phpunit.xml       ... config file for PHPUnit
└── vendor/
ดาวน์โหลด ci-phpunit-test ล่าสุดจาก https://github.com/kenjis/ci-phpunit-test/releases
แตกไฟล์และคัดลอกโฟลเดอร์ application/tests ลงในโฟลเดอร์ application ของคุณในโครงการ CodeIgniter
แค่นั้นแหละ.
$ cd /path/to/codeigniter/$ ผู้แต่งต้องการ kenjis/ci-phpunit-test:^3.0 --dev
และรัน install.php :
$ php vendor/kenjis/ci-phpunit-test/install.php --from-composer
คำสั่งดังกล่าวจะเขียนทับไฟล์ที่มีอยู่เสมอ
คุณต้องรันที่โฟลเดอร์รูทของโปรเจ็กต์ CodeIgniter
คุณสามารถระบุ application และโฟลเดอร์ public ของคุณด้วยอาร์กิวเมนต์ตัวเลือก หากคุณใช้เส้นทางโฟลเดอร์แบบกำหนดเอง
$ php ผู้ขาย/kenjis/ci-phpunit-test/install.php -a <application_dir> -p <public_dir> -t <unittest_dir>
ดังนั้นค่าเริ่มต้นจะเป็น:
$ php vendor/kenjis/ci-phpunit-test/install.php -a application -p public -t application/tests
แต่บางเส้นทางอาจไม่ถูกต้อง ในกรณีนี้ โปรดแก้ไขใน tests/Bootstrap.php
ดาวน์โหลด ci-phpunit-test ล่าสุดจาก https://github.com/kenjis/ci-phpunit-test/releases
แตกไฟล์และแทนที่โฟลเดอร์ application/tests/_ci_phpunit_test
อ่านบันทึกการเปลี่ยนแปลง
$ cd /path/to/codeigniter/$ ผู้แต่งอัพเดต kenjis/ci-phpunit-test
อ่านบันทึกการเปลี่ยนแปลง
หากคุณกำลังอัพเกรดจาก ci-phpunit-test เวอร์ชันก่อนหน้าที่สร้างไดเร็กทอรี application/test/_ci_phpunit_test และตอนนี้ต้องการใช้ ci-phpunit-test จาก Composer โดยตรง คุณมีขั้นตอนเพิ่มเติม 2-3 ขั้นตอน:
ลบไดเร็กทอรีไลบรารีทดสอบเก่า:
$ rm -rf /path/to/codeigniter/application/tests/_ci_phpunit_test
แก้ไขไฟล์ application/tests/Bootstrap.php ที่ด้านล่างของส่วน "ตั้งค่าคงที่เส้นทางหลัก" ให้เพิ่มข้อมูลต่อไปนี้:
 กำหนด ('CI_PHPUNIT_TESTPATH', ระเบิด (DIRECTORY_SEPARATOR,
    [dirname (APPPATH), 'ผู้ขาย', 'kenjis', 'ci-phpunit-test', 'application', 'tests', '_ci_phpunit_test']
).DIRECTORY_SEPARATOR);
และแทนที่การอ้างอิงใด ๆ ไปที่ __DIR__ . '/_ci_phpunit_test/ หรือ TESTPATH . '_ci_phpunit_test ด้วย CI_PHPUNIT_TESTPATH . ' . (เช่น __DIR__ . '/_ci_phpunit_test/CIPHPUnitTest.php' จะกลายเป็น CI_PHPUNIT_TESTPATH . '/CIPHPUnitTest.php' .)
คุณต้องติดตั้ง PHPUnit ก่อนที่จะรันการทดสอบ
หากคุณใช้ผู้แต่ง:
$ ผู้แต่งต้องการ phpunit/phpunit --dev
$ cd /path/to/codeigniter/$ vendor/bin/phpunit -c application/tests/PHPUnit 9.5.4 โดย Sebastian Bergmann และผู้มีส่วนร่วม.... 3/3 (100%) เวลา: 00:00.102, หน่วยความจำ: 12.00 MBOK (3 การทดสอบ 3 การยืนยัน) การสร้างรายงานการครอบคลุมโค้ดในรูปแบบ Clover XML ... เสร็จสิ้น [00:00.002]การสร้างรายงานการครอบคลุมโค้ดในรูปแบบ HTML ... เสร็จสิ้น [00:00.012]
ในการสร้างรายงานความครอบคลุม จำเป็นต้องมี Xdebug
หากคุณต้องการรันไฟล์กรณีทดสอบไฟล์เดียว:
$ ผู้ขาย / bin / phpunit -c แอปพลิเคชัน / การทดสอบ / แอปพลิเคชัน / การทดสอบ / โมเดล / หมวดหมู่_model_test.php
ตามตัวอย่าง คลาสกรณีทดสอบสำหรับ Inventory_model จะเป็นดังนี้:
 <?phpclass Inventory_model_test ขยาย TestCase
{ฟังก์ชั่นสาธารณะ setUp(): เป็นโมฆะ{$this->resetInstance();$this->CI->load->model('Inventory_model');$this->obj = $this->CI->Inventory_model;
    }ฟังก์ชันสาธารณะ test_get_category_list()
    {$expected = [1 => 'หนังสือ',2 => 'ซีดี',3 => 'ดีวีดี',
        ];$list = $this->obj->get_category_list();foreach ($list as $category) {$this->assertEquals($expected[$category->id], $category->name);
        -
    }ฟังก์ชันสาธารณะ test_get_category_name()
    {$actual = $this->obj->get_category_name(1);$expected = 'Book';$this->assertEquals($expected, $actual);
    -
-
ตามตัวอย่าง คลาสกรณีทดสอบสำหรับคอนโทรลเลอร์ยินดีต้อนรับจะเป็นดังนี้:
 <?phpclass Welcome_test ขยาย TestCase
{ฟังก์ชั่นสาธารณะ test_index()
    {$output = $this->request('GET', 'welcome/index');$this->assertStringContainsString('<title>ยินดีต้อนรับสู่ CodeIgniter</title>', $output);
    -
-
ดูวิธีเขียนแบบทดสอบเพื่อดูรายละเอียด
ดูฟังก์ชันและการอ้างอิงคลาส
ดูเคล็ดลับ
คุณสมบัติบางอย่างของ ci-phpunit-test มีอยู่ในแพ็คเกจแบบสแตนด์อโลนต่อไปนี้
https://github.com/kenjis/phpunit-helper
https://github.com/kenjis/monkey-patch
แอปพลิเคชันทดสอบ CodeIgniter สำหรับ ci-phpunit-test
โปรแกรมติดตั้งนักแต่งเพลง CodeIgniter
Cli สำหรับ CodeIgniter 3.0
CodeIgniter Twig ที่ง่ายและปลอดภัย
หลักคำสอนของ CodeIgniter
โปรแกรมติดตั้ง CodeIgniter
โปรแกรมตรวจสอบชื่อไฟล์ CodeIgniter3
ตัวอย่างวิดเจ็ต CodeIgniter (ดูบางส่วน)
ตัวควบคุมเนมสเปซ CodeIgniter3