The most common thing we do when processing pictures on a daily basis is to crop pictures, but cropping one by one is very troublesome. Here is a tutorial on how to batch crop pictures with ACDSee . Friends who need it, come and take a look.

1. First click the shortcut of ACDSee Pro 6 from Start-Programs-ACD Systems to open ACDSee Pro 6.

2. Find the location where the image file you want to edit is stored.

3. Press Ctrl+A to select all these image files.

4. After selecting all, right-click on any file, select Batch in the right-click menu, and then click Batch Edit in the submenu.

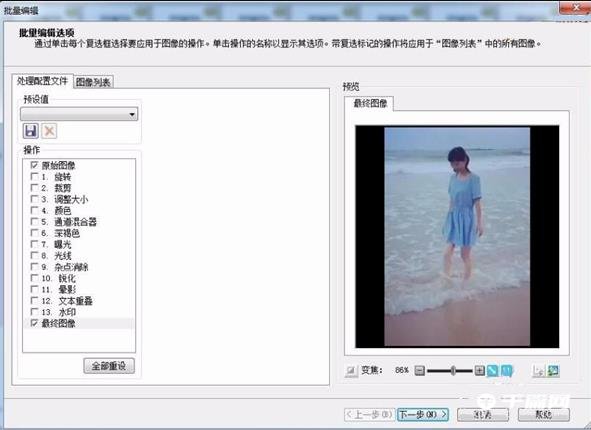
5. In the opened batch editing dialog box, you can see many operation methods in the list on the left.

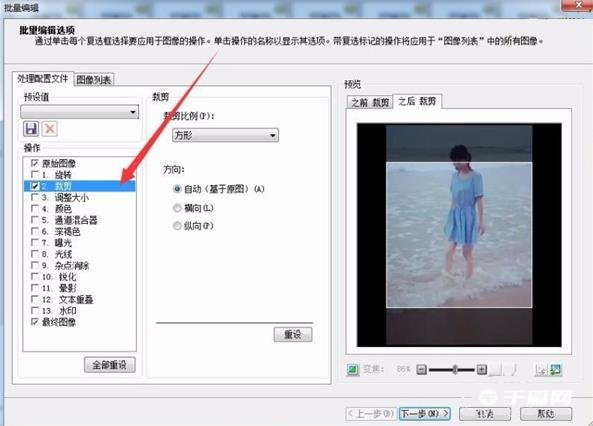
6. Select crop and you will see changes in the preview on the right. The crop ratio is the default square.

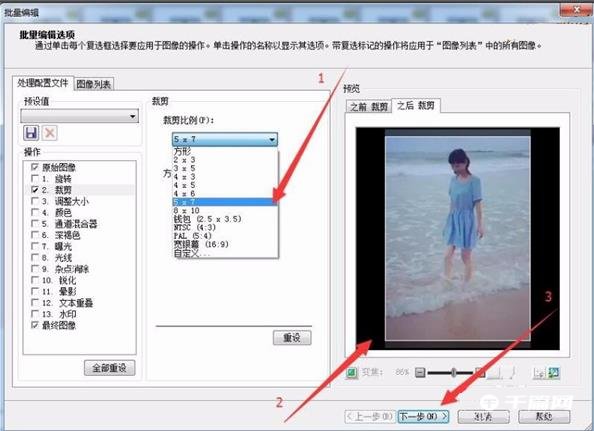
7. The default cropping method cannot meet your needs. You can select one by one from the cropping ratio drop-down menu. If you are not satisfied, you can select the custom ratio of 5x7 to meet the requirements. After selecting, click Next.

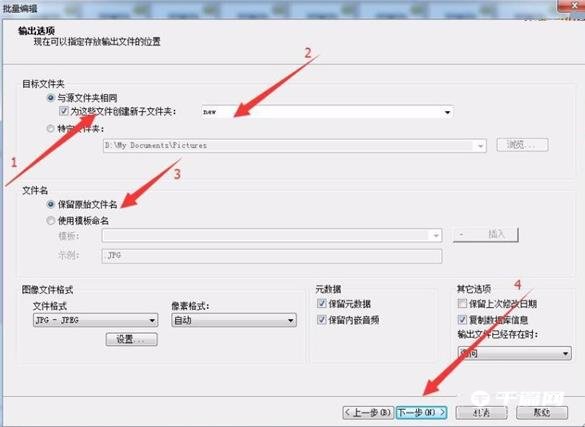
8. In the settings of input options, it is recommended to check the target folder and source file album to create a new subfolder for these files, which makes it easier to manage and compare file names. Otherwise, keep the original file name and click Next to continue.

9. At this time, you can see the progress of batch editing.

10. After completion, it is recommended to use ACDSee Pro to browse the output folder and click Finish.

11. At this time, ACDSee will automatically open the generated folder, and you can see the cut files.

12. View the previous file size.

13. Check the size after cutting to confirm that the cutting was successful.
