you must first ensure that there is a node.js environment on the computer
and execute the following code on the command line to initialize a package.json file
npm init -y
. At this time, an error will definitely be reported when executing mycli on the command line.

Configure the custom command
package.json to add the bin field, and associate mycli command.
"bin": {
    "mycli": "./test.js"
}, /test.js fileconsole.log ("mycli command executed successfully"); install command is required, but the project has not been published to npm, so for the time being, use the npm link command to associate mycli command to the global world.At this time, if you execute mycli from the command line, the error will no longer be reported.

Script configuration
test.js file:
console.log("mycli command execution successful"); Then execute mycli , and an error pop-up window will appear.
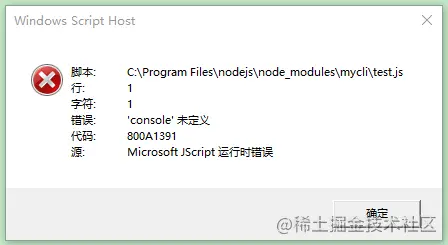
This is because when executing the mycli command, it is equivalent to letting the computer execute the file, and the computer system cannot directly execute the js file . This requires us to add a configuration to the first line of the script code to specify node.js on the computer. program to execute this js script file.
#!/usr/bin/env node
Because the execution environment has been changed, you need to delete the previously linked files. The file location may be C:Program Filesnodejsnode_modules . Find mycli and delete it, and then execute npm link again.
Now execute mycli on the console again, and you can see that the console prints correctly.
Chalk command line to output colorful fontsOra loading effect, similar to the progress librarycommander design commandinquirer interactive function (such as: ask questions...)Chalk
npm install [email protected] -S
const chalk = require("chalk");

// chalk
// const hello = chalk.red("hello");
// const hello = chalk.blue.bgRed("hello");
// const hello = chalk.blue.bgYellow("hello");
const hello = chalk.rgb(200, 200, 200).bgRgb(0, 200, 3)("hello");
console.log(hello); 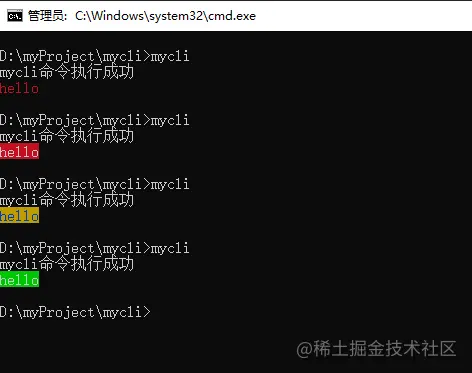
Ora
npm install [email protected] -S
const ora = require("ora");

// ora
const spinner = ora({
  text: "Installing..."
});
spinner.start();
setTimeout(() => {
  // spinner.stop();
  spinner.succeed("Installation successful");
  // console.log("Installation successful");
}, 2000) start starts loadingstop stops loadingsucceed ends loading with successful style
commander
development, such as vue -V git --version vue create and other commands, need to use the commander library to implement such commands.
-V --help , etc. after the command used can be understood as the parameters of the command. Then we need to obtain these parameters and handle different events by judging the differences in parameters.
In the node environment, this parameter can be obtained through process.argv . The commander library helps us encapsulate some methods without us having to judge the instructions carried by the user's input.
npm install [email protected] -S
const commander = require("commander");
// ...
commander.parse(process.argv); // After
the installation is completed, commander will automatically provide us with some commands, such as --help . Let's test it below:
mycli --help
commander. version("1.0.0"); Execute mycli -V and you can see that the console prints the 1.0.0 version number.
The custom command method
commander.option(指令名, 描述, 回调函数)
--init command:commander.option("--init", "this is init", () => {
// chalk
// const hello = chalk.red("hello");
// const hello = chalk.blue.bgRed("hello");
// const hello = chalk.blue.bgYellow("hello");
const hello = chalk.rgb(200, 200, 200).bgRgb(0, 200, 3)("hello");
console.log(hello);
// ora
const spinner = ora({
text: "Installing..."
});
spinner.start();
setTimeout(() => {
// spinner.stop();
spinner.succeed("Installation successful");
// console.log("Installation successful");
}, 1000)
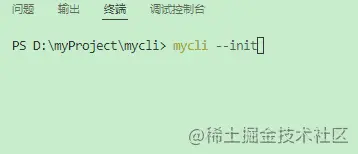
}) Now execute mycli --init test:
is commander.option("--number <num>", "log a number", (num) => {
  console.log(num);
})
<参数名> indicates the parameters that must be passed, and [参数名] indicates the parameters that are not required to be passed. Enter mycli --number 100 on the console and press Enter. You can see 100 will be output.
Custom command method
commander.command("create <projectName>").action((projectName)=>{
  console.log(projectName);
})
Execute mycli create xx and press Enter. You can see xx is output on the console.
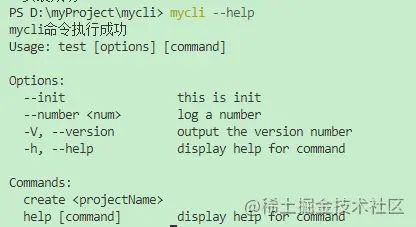
View the help
by executing mycli --help . You can see that the instructions and commands we just configured appear in the help list.
inquirer
npm install inquirer -S
prompt method to askinquirer.prompt([
{
type: "input",
name: "username",
message: "Please enter username:"
}
]).then((answer)=>{
}) type indicates the type of question, and the value may be: input , number , password , editor , etc.
answer is {username: 输入的值}
input of input typeconst inquirer = require("inquirer");
commander.command("add user").action(() => {
inquirer.prompt([
{
type: "input",
name: "username",
message: "Please enter username:"
}
]).then((answer) => {
console.log(answer);
})
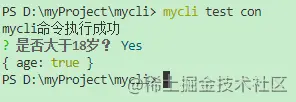
}) confirmcommander.command("testcon").action(() => {
inquirer.prompt([
{
type: "confirm",
name: "age",
message: "Are you over 18 years old?"
}
]).then((answer) => {
console.log(answer);
})
}) Enter y or n to make a judgment.
listcommander.command("testlist").action(() => {
inquirer.prompt([
{
type: "list",
name: "lib",
message: "Select the framework to use:",
choices: [
"vue2",
"vue3",
"react",
"svelte",
]
}
]).then((answer) => {
console.log(answer);
})
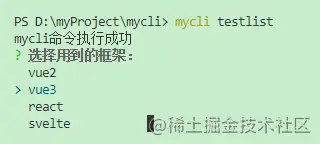
}) Execute the mycli testlist command:
download-git-repo is a tool for pulling code.
Install
npm install [email protected] -S
const downgit = require("download-git-repo");
downgit("github:kongcodes/vue3-vant", downUrl, { clone: false }, function (err) {
console.log(err)
}) The first parameter in the downgit method is understood to be downloading the kongcodes user's vue3-vant project template from github. The second parameter downUrl is the directory to which the template should be downloaded. The third parameter clone is whether to use git clone to download. The fourth parameter is some things to be executed when the download is completed.
commandcommander.command("create <projectName>").action((projectName) => { in conjunction with the command method
const spinner = ora({
text: "Downloading https://github.com/kongcodes/vue3-vant..."
});
spinner.start();
fs.mkdirSync(`./${projectName}`);
const downUrl = `${process.cwd()}\${projectName}`;
downgit("github:kongcodes/vue3-vant", downUrl, { clone: false }, function (err) {
if (err) throw err;
spinner.stop();
console.log(chalk.green("downgit success"));
})
}) Execute mycli create pro and press Enter. The pro directory will be created in the current directory and vue3-vant template will be downloaded to this directory.
https://github.com/kongcodes/mycli