There may be many God of War users who still don’t know where the legendary treasure chest is in Svartalfheim in God of War 5. Let the editor edit "Where is the legendary treasure chest in Svartalfheim in God of War 5" for those who have these questions. Let's take a look, it might help you.
svartalfheim
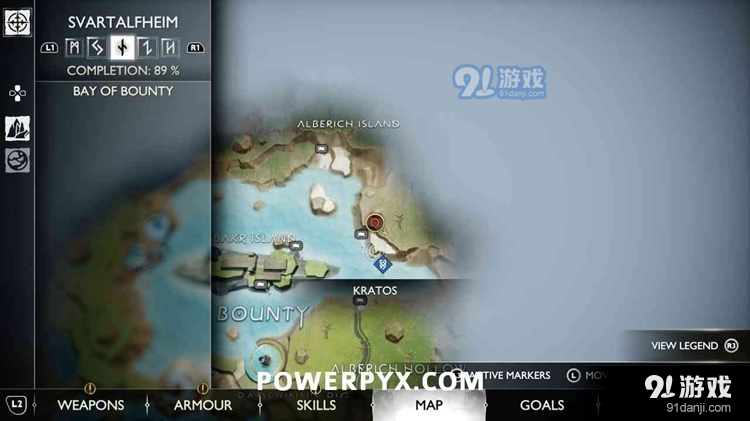
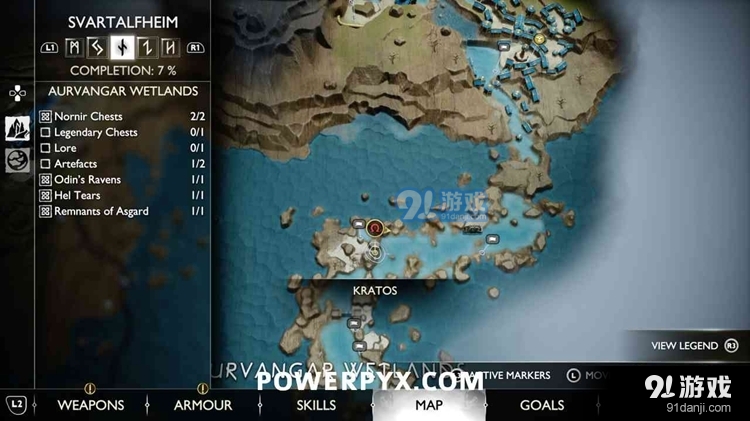
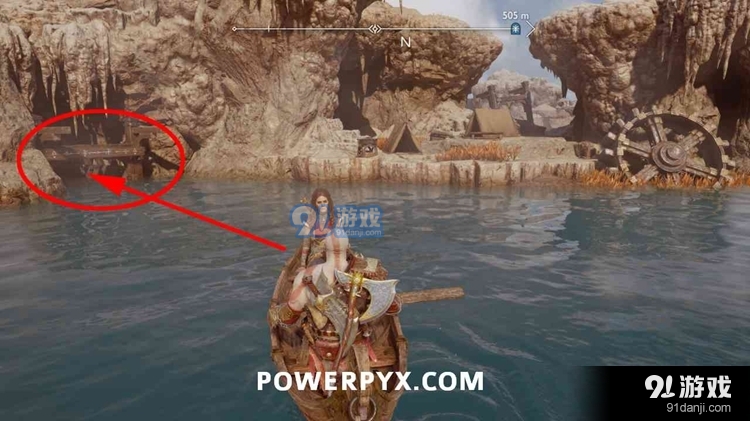
#1 – Owanga Wetlands (Deadly Obsidian Handle – Blade Attachment) Continue north by boat,
Until you reach the point shown in the location map below. There is an opening on the left side of the river that you can press: Circle: to drive under it, which leads to a hidden side area. After docking the boat on the beach, grab a grab on the left side of the area (where the second glyph of Nornier's chest is). Turn left to see the Legendary Chest on the cliff overlooking the river.
#2 – Apple Core (Enhanced Frost Knob – Ax Attachment)
In the same room there is the Digging Waterhole mini-boss, it's on the right side, open it after clearing the room.


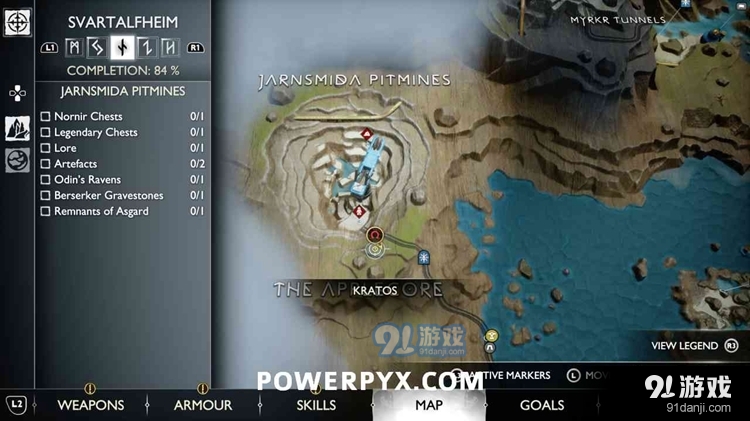
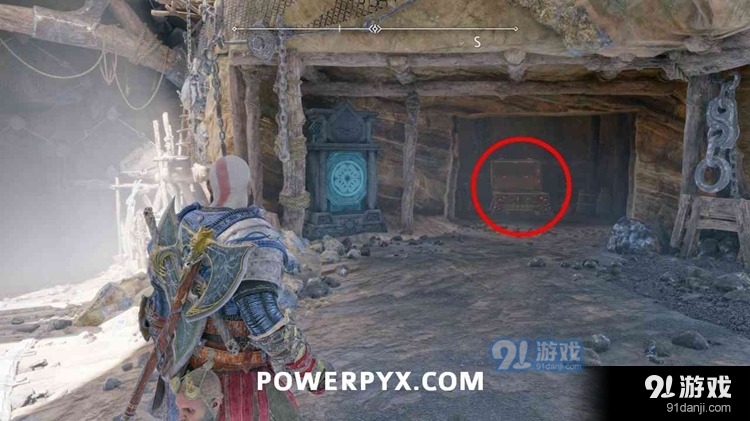
#3 – Applecore(Banahogg Knob – Ax Attachment)
This one is actually in the Jarnsmida Pitmines area, but it counts towards Applecore. There is a blue altar at the exit of Jarnsmida Pitmines, on the way to the Applecore entrance. Interact with it to open the ledge, behind which is the legendary treasure chest. Interacting with the altar requires the Chisel (automatic story unlock).
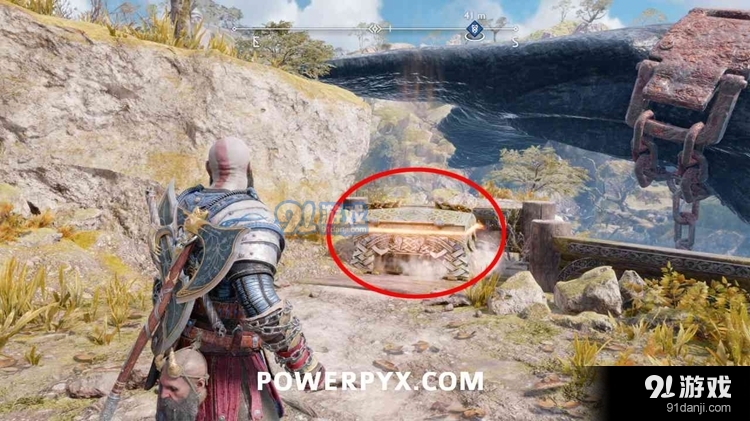
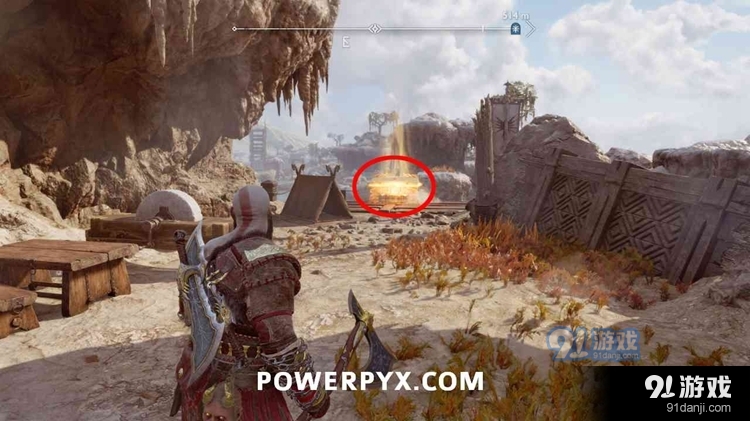
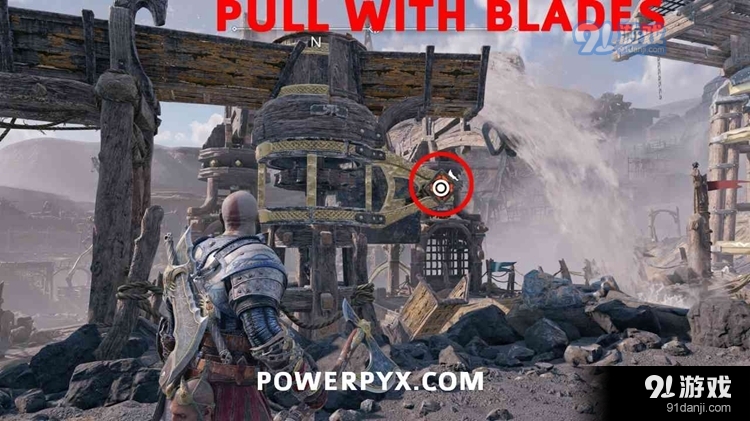
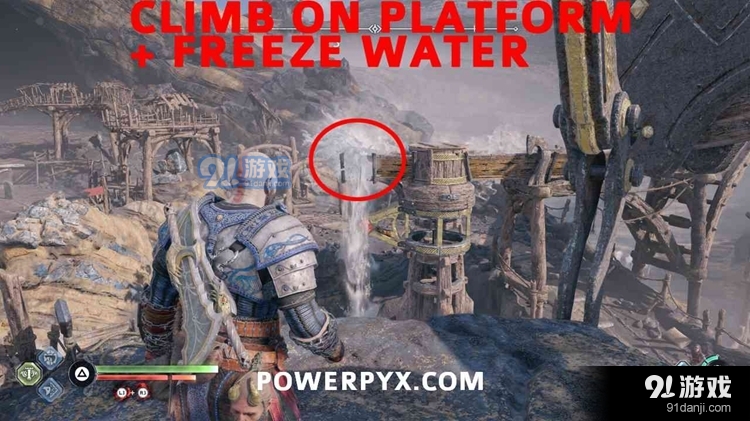
#4 – Jansmida Pit (Sheath of the Immortal Spark – Blade Attachment)
Near the Berserker Tombstone, use your blade to pull the water channel towards you (see second image below). This will redirect the water to power the crane, wait a few seconds for the crane to lift a large boulder towards you. Climb up the rocks and throw the ax to the end of the water channel to freeze the water (third picture below). This closes the crane and it rotates backwards, leaving it on top of the stone block. Finally you can hang off the rocks and jump to the hill behind the crane. Artifacts and legendary chests are here.

#5 – Nidavellir (Glowing Recovery Handle – Blade Attachment)
At the top of the town of Nidavellir, there is some gas/wind coming out of the wooden pillars. You need the Spear weapon (unlocked during Main Mission 10: Forging Destiny). Throw the spear into the wind in the pillar, which creates a path to climb up. Once you climb up, you'll find a Legendary Chest up there.


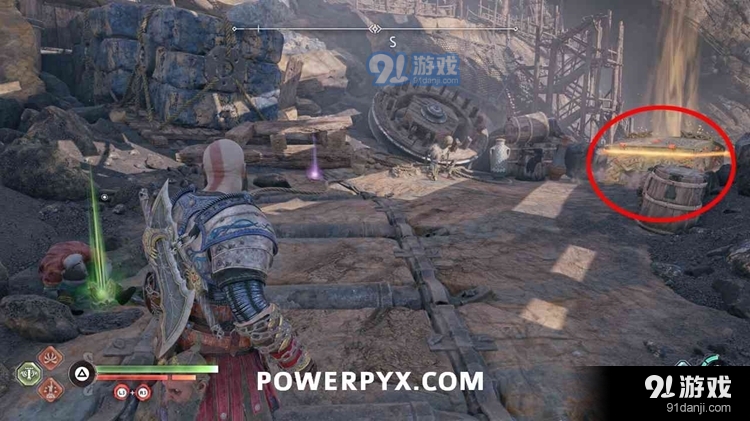
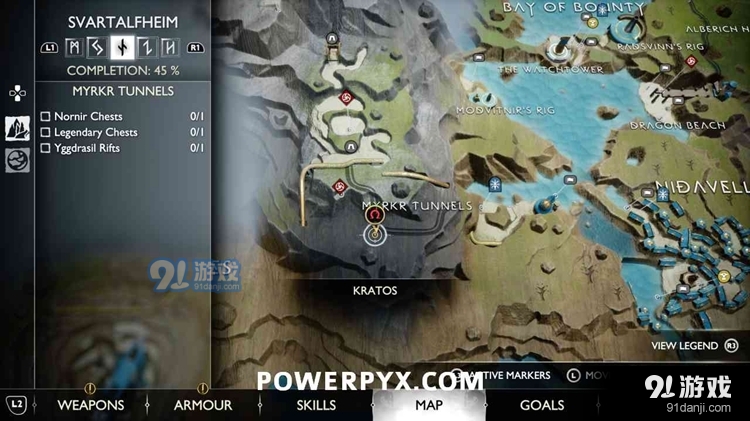
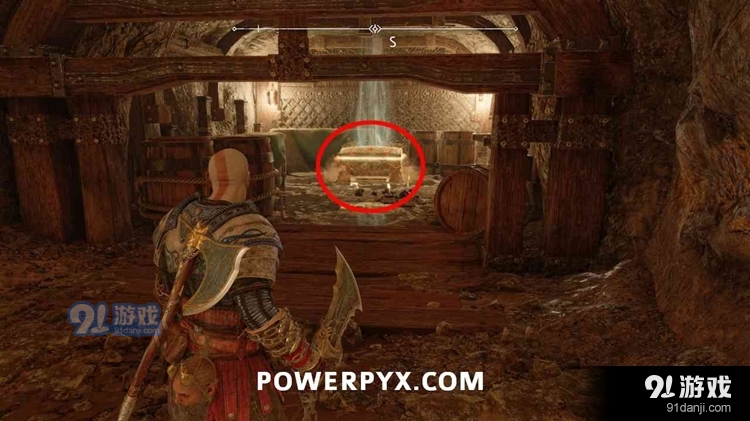
#6 – Millkill Tunnels (Fimbulwinter’s Mists – Heavy Rune Attack)
You go to Mirkel Tunnel later in the story. To return here after the story ends, fast travel to the mysterious portal Svartalfheim > Nidavellir Beach (automatic story unlock). From there, take a small train up the mountain to the Forge area. After taking the train, follow the wooden ramp all the way to the end and then you can see a black hole that you can climb down and back into the tunnel. Enter a room where a water puzzle occurs in the story. Take the exit on the left and continue straight until you reach a dead end with red vines. Burn the vines by firing purple arrows at them, and use the Blades of Chaos to ignite them. Behind the vines is the legendary chest.
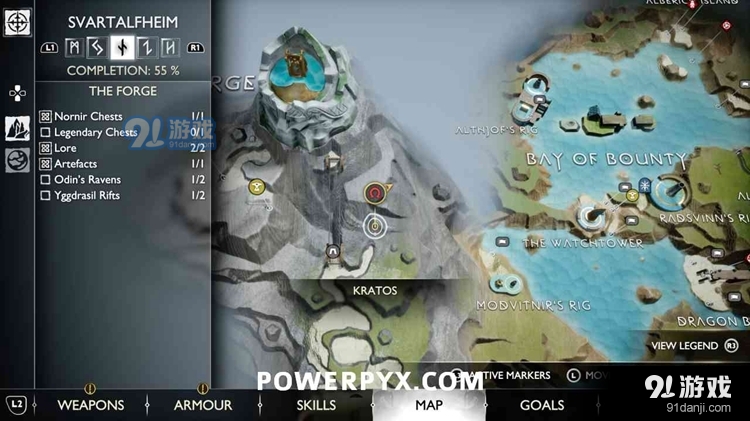
#7 – The Forge (Atlas Eruption – Heavy Rune Attack)
Follow the path you took in the story to unlock the giant elevator, go through the door, and you'll reach an area where a geyser puzzle occurs. Throw the ax at the geyser on the hill to the right to freeze it, lowering the elevator. Enter the elevator and recall your axe. The legendary treasure chest is behind a locked gate, and if you come here after the story ends, you can simply climb the left wall and enter behind the gate. If this is your first time accessing the story, you must climb the right wall, freeze the first geyser again, and tell your companions to turn the lever to turn off the second geyser.
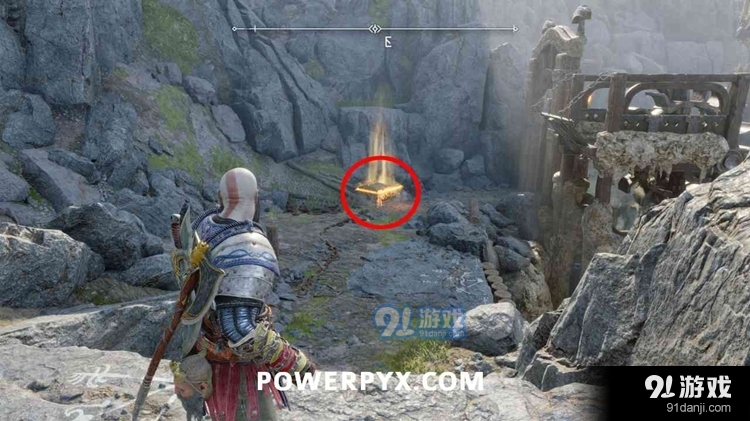
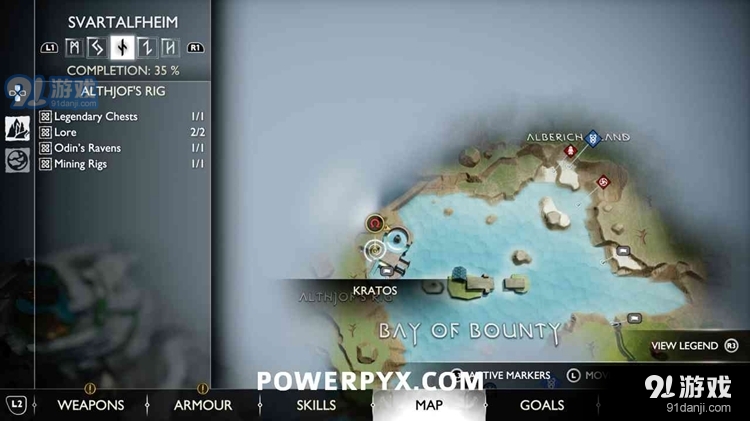
#8 – Artejov’s Rig (Njod’s Tempest – Light Rune Attack)
Turn away from the mining machine and look to the left. You can use +:square:to shoot the green arrow at:l2:vase. You can then go around the wall behind the vase (there are white icons on the wall indicating climbing paths). Jump onto the golden chain, slide off the chain, and use the wheels again to raise the grapple point to the very top. Climb back up to the same golden chain, now you can jump over it using the grappling hook, and while in mid-air press: Circle: to smash through the wall. Find the Legendary Chest around the corner.
#9 – Maude Witnier’s Rig (Muspelheim seeding half)
Climb the wall from the shore and throw the ax at the sign on the right to spin it, which will open the gate. Jump over and climb up the tower and you'll find the chest up there.


#10 – Alberich Valley (Muspelheim seeding half) Going into Alberich Valley,
You first need the Spear (unlocked in Main Mission 10: The Story of Forging Destiny). Go to the "Dragon Beach" area and climb up the gold chain on the left side of the beach. You then have to throw the spear into the wind coming out of the wooden pole, which creates a path to climb up. Continue along the left path. There is a legendary chest stuck in some golden ore. Press: Circle: The flaming vase on the left grabs an explosive pellet and throws it towards the gold ore to explode. Now you can open the treasure chest.
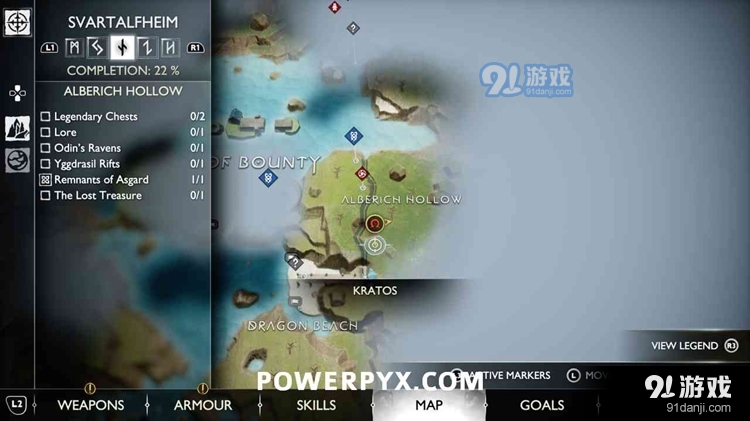

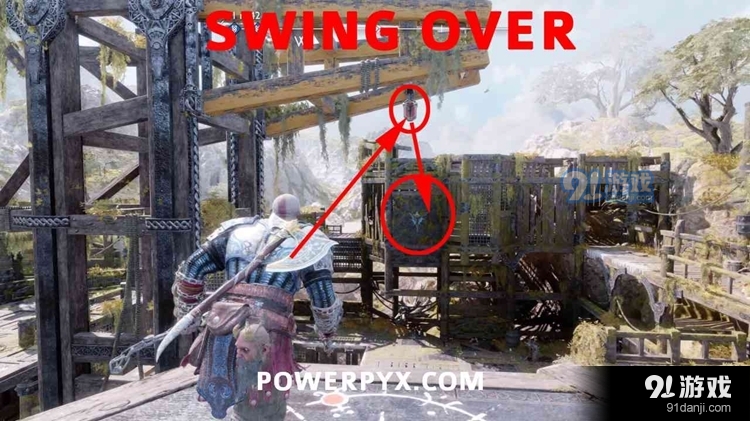
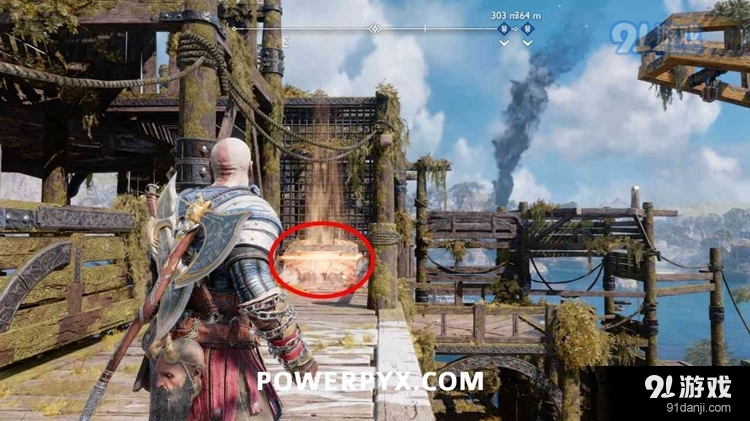
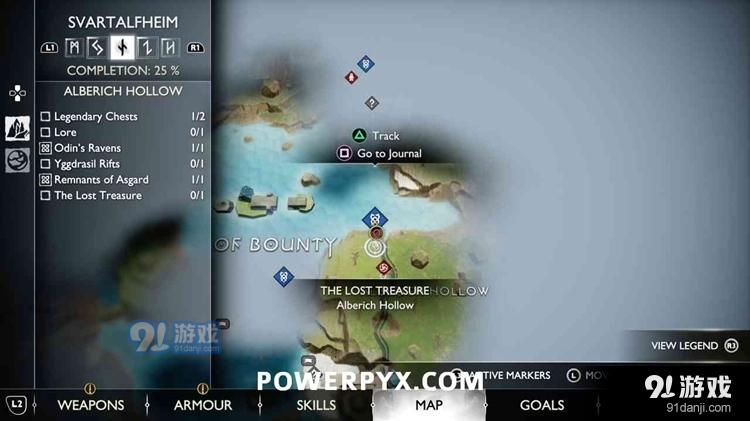
#11 – Alberich Hollow
Take the explosive projectile from one of the vases. Then stand next to the chasm and throw it towards the golden ore blocking the path, behind a large boulder at the end of Alberich Valley. Now lift up the rock and follow the path. The legendary chest is on the left. Opening it also completes the "Lost Treasure" favor.
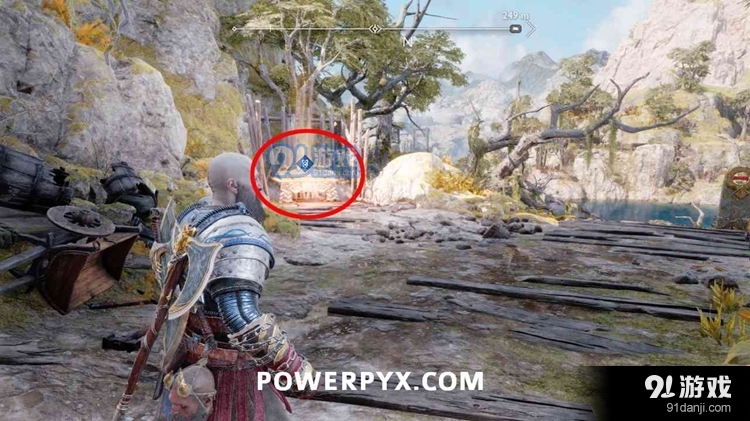
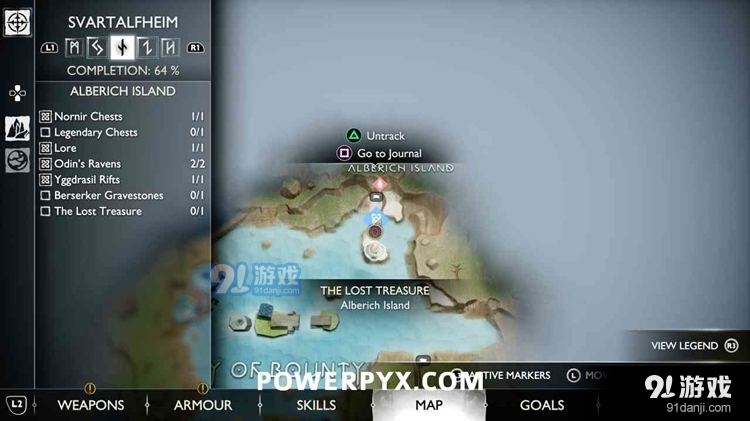
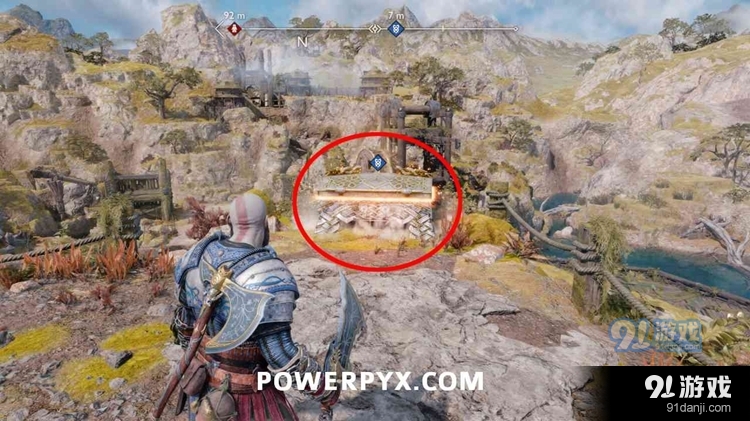
#12 – Alberich Island (Gem of Yggdrasil)
From the platform in the middle of Alberich Island (requires the spear weapon from the story), jump over and throw your spear at the glowing rock to blow it up. Pull the chain on the left, and once you've pulled it all the way, throw an ax at the blue gear on the right to freeze it. Use the grappling hook to jump back to the middle platform, throw a spear at the glowing rock near the Freeze Gear and blow it up. This reveals a geyser that powers the elevator. Go back to the chains and pull them all the way up again, but this time shoot the purple arrow at the gears, then the ax to keep them frozen. Now you can retrieve the axe, the gear should remain frozen due to the purple arrow planted on it. Jump back to the middle platform and throw your ax at the geyser to freeze it. Now grab the elevator next to the water wheel, unfreeze the geyser and let the elevator go up. Then just climb to the very top of the area and the Legendary Chest will appear in front of you. Opening it also completes the Lost Treasure objective in the area.
#13 – Limback Island (Weightened Lund – Shield Attachment)
Near the end of "Favor: The Weight of Chains." You have to go back to the vase with the dynamite, pick up the dynamite and throw it onto the rubble to the right, pick up another dynamite and follow the path you just cleared, then aim towards the water to see a boat dock with more of rubble. Throw the explosives onto the rubble of that dock. Then get back on your boat and drive to the dock you just cleared. From there you can climb up, defeat the enemies, and cut the third chain. You then have to slide down the rope to break the third lock, and once the rope slides down, the Legendary Chest will appear in front of you. When you break the third lock, it's in plain sight and it's impossible not to see it.