This is a guide for completing all bounty tasks in the Resident Evil 4 Remake. It shares with players how to complete all the bounty tasks in the Resident Evil 4 Remake and the whole process. Come and take a look if you need it.
Chapter 1
Bounty #1: Destroy the Blue Badge
Investigate the blue flyer on the wall in front of the closed gate at the end of the farm area to receive the bounty task. This task requires breaking 5 blue badges in the farm area. Badge locations are described below.


badge location
① Located in the farm area, in the corner of the house with the save point (typewriter).

②In the farm area, in the barn where the cows are. Can be shot from a window or inside a barn.


③On the cabin on the left side of the farm.


④In the farm area, hang in the window above the barn on the right.


⑤In the right corner of the farm area, stand on the right side of the shrine and shoot through the fence.

Chapter 2
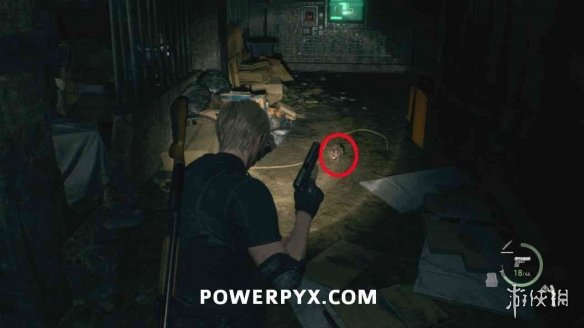
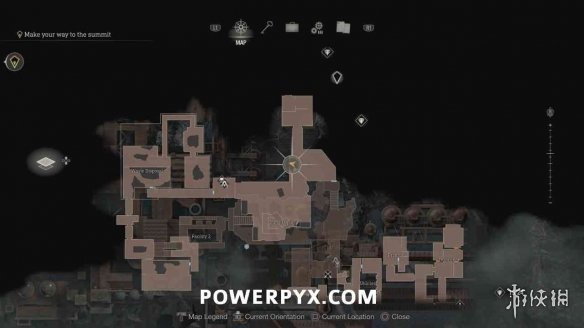
Bounty #2: Rat Control
Located next to the first merchant. Return to the abandoned factory and kill 3 rats, the first in the ruined corridor on the right, the second and third in the room that triggers the parry tutorial. After cleaning up the rats, return to the merchant.

Chapter 3
Bounty #3: Viper Hunter
After leaving the assembly hall, you encounter the next merchant. The blue flyer is on the wall next to the merchant. Find three vipers and sell them to the merchant to complete the quest. Vipers can be picked up in chests or discovered while exploring. The locations where Vipers can be found are listed below in each chapter.


Bounty #4: Grave Destroyer
When you arrive at the church, don't go into the archive room yet. Walk around the church to the alley behind and you can see the blue flyers. After accepting the mission, return to the cemetery in front of the church, find the two tombstones next to each other with the V" mark, and shoot them.


Viper 1 (Viper Hunter)
After going to the church archive room, jump down the gap and you will encounter some enemies. There will be a viper in the yellow box in the first house on the left. Kill it, pick it up, and then sell it to the next merchant you encounter.


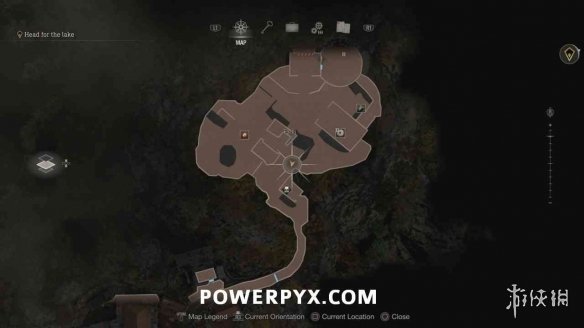
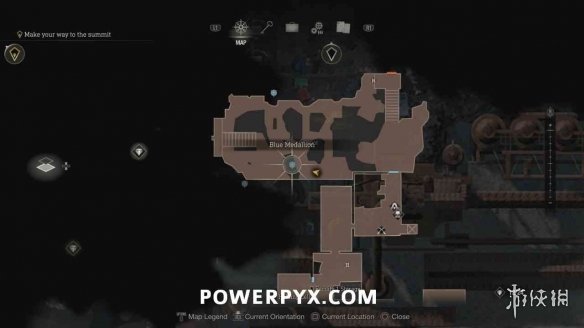
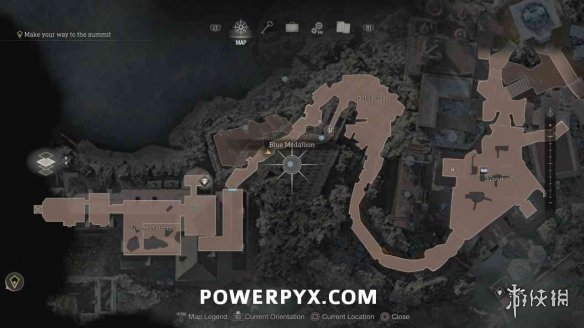
Bounty #5: Destroy the Blue Badge
Blue leaflets can be seen on the wall at the quarry entrance. After receiving it, you need to destroy 5 blue badges (all in Chapter 3). See below for badge location.

badge location
① From where you got the treasure, look at the shelf above to find the blue badge.

②After arriving outside, jump down to the lower area and shoot the badge hanging under the trestle.


③ Located in the first hut at the starting point of the fishing ground.

④On the left side of the fishing ground, you can shoot through the gap in the wooden wall.


⑤On the right side of the end of the fishing ground, enter the submerged area and walk under the plank road to see it.


Viper 2-3 (Viper Hunter)
A total of 3 vipers can be found from the starting point of the fishery, usually on the road in front of the hut. You can hear the sound of vipers spitting messages while walking on the road, shoot and pick them up, and then sell them to the next merchant you meet to complete the previous bounty mission. The number of vipers that can be collected is more than the number required for the bounty mission.


Complete [Viper Hunter]
Sell the viper to the merchant to complete the bounty mission [Viper Hunter].
Chapter 4
Bounty #6: Egg Hunt Revelation
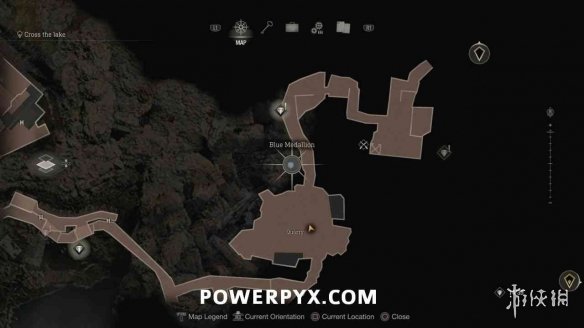
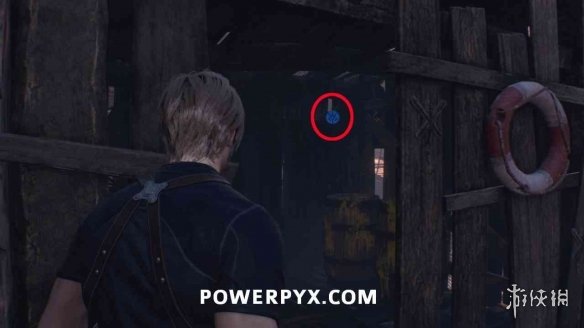
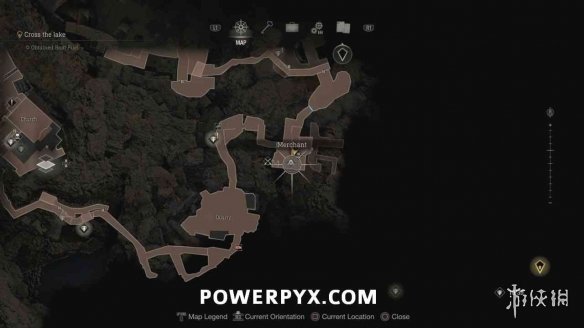
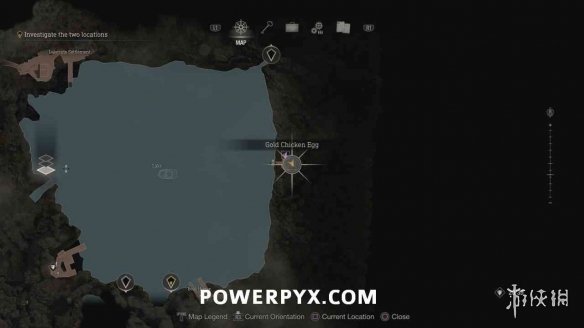
After arriving at the lake area, before boarding the boat, you can see a blue flyer on the wall on the left, asking you to find and sell a gold-shelled egg. There is a chicken farm on the island on the east side of the lake. The golden eggs are in the chicken farm. Once you get them, you can buy them from the merchants in the southwest of the lake area.


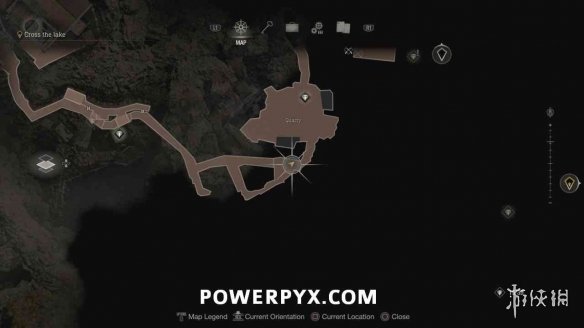
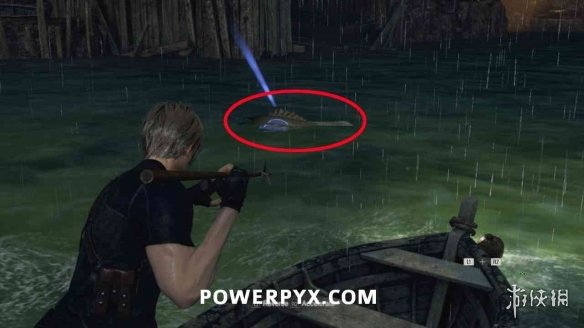
Bounty #7: Catch the Big Fish
Use the key to open the locked door in Lakeside Settlement and find this blue flyer behind the tunnel door. You need to sell a large bass to the merchant to complete the task. Big bass fishing can be found near the boathouse in the southeast corner of the lake.
Sometimes the big bass may not spawn at that location, try taking a boat around the lake and back and you should be able to see them.
There are also some smaller fish nearby. The task requires the largest fish. When facing the boat house, it will usually appear on the left side in front of the boat house. After obtaining the big bass, sell it to the merchant (southwest of the lake area) to complete the task. Task.


Chapter 5
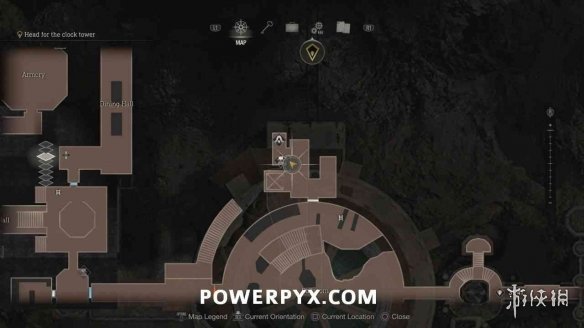
Bounty #8: Mad Dog
The blue flyer is located on the wall next to the Merchant in the Assembly Hall. After picking it up, you need to go to the village square and kill a big dog. It will only appear after walking south to the village chief's house and exploring the attic with the help of Ashley. It can be seen after returning to the village square.


Chapter 7
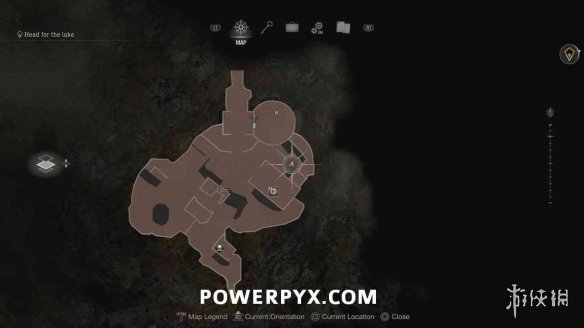
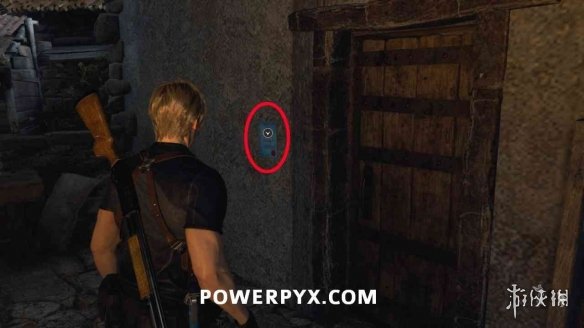
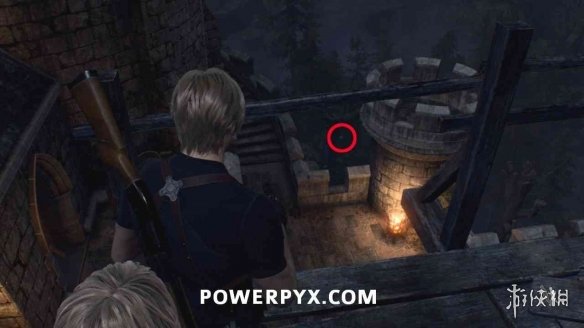
Bounty #9: Destroy the Blue Badge
Go through the cannoned door and find the Blue Flyer on the wall behind it. After accepting the mission, you need to destroy 6 blue badges. See below for badge location.


①In the pavilion behind the cannon.

②In the window of the damaged wall opposite the cannon, stand where the cannon is and look north.

③Hung on the wall above the second badge, you can also hit it at the cannon.


④ Jump from the cannon to the room below. You can see it on the roof.


⑤Climb up the ladder from where the fifth badge is and look to the lower left.
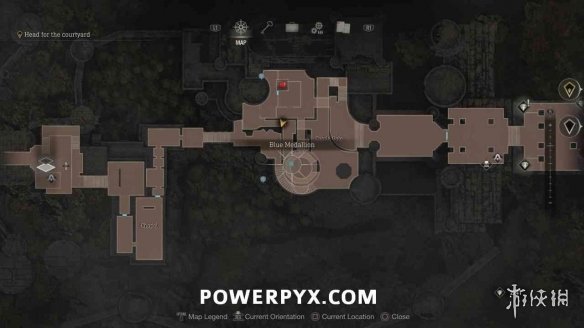
⑥Can be seen on the left before entering the next door.

Chapter 9
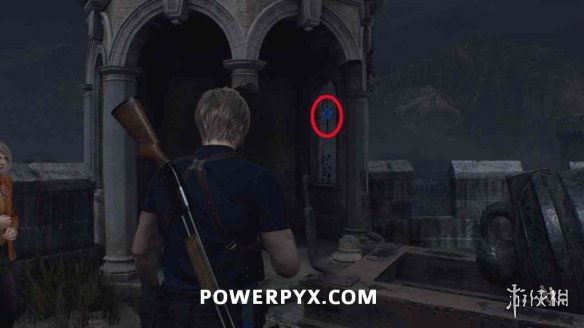
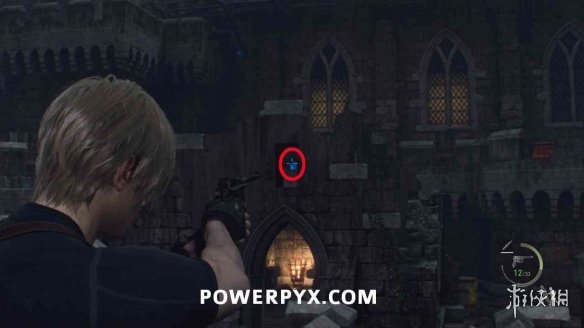
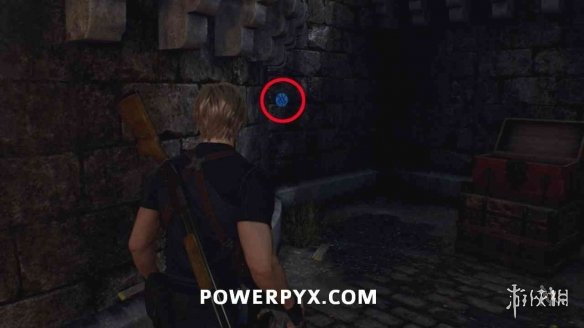
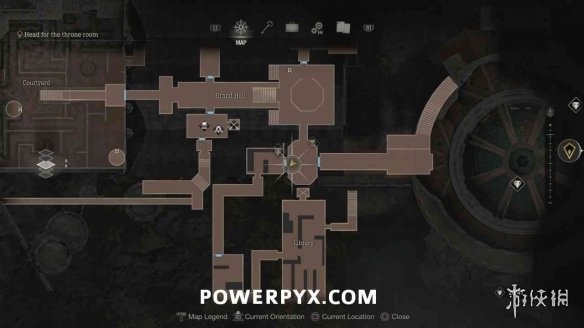
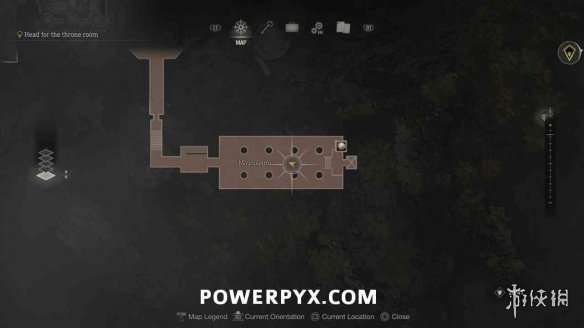
Bounty #10: Destroy the Blue Badge
The blue flyer is located in the filing room where the merchant is, on the table where the typewriter is. After receiving it, you need to break 6 blue badges. See below for badge location.


① Return to the maze gate. Before entering the maze, you can see the badge on the wall on one side.


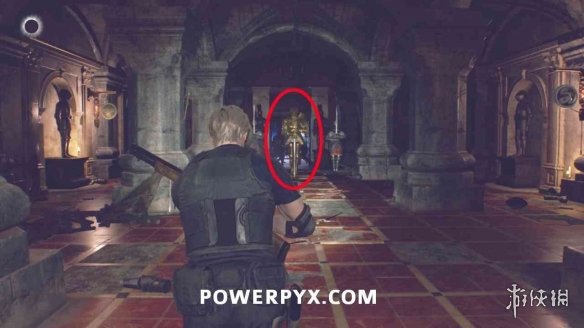
②Behind the headless statue in the hall.


③In the restaurant, on the window with curtains.

④Go back to the hall and go upstairs to the chandelier.


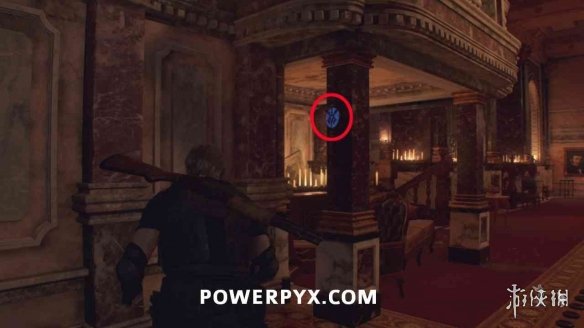
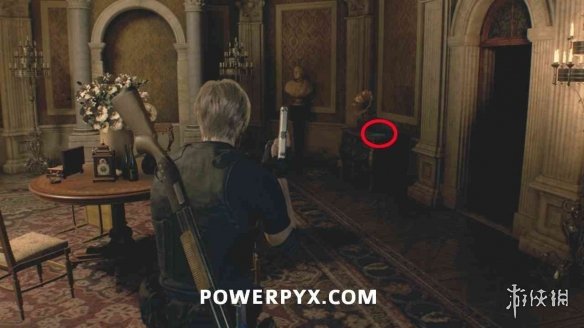
⑤On the upper floor of the weapons depot, hanging above the throne.
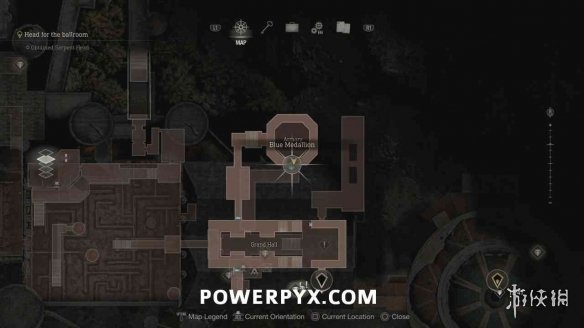

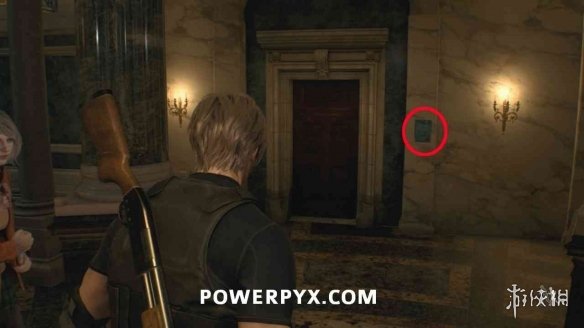
⑥ Enter the last room upstairs to reach the gallery, behind the pillar at the end of the passage in the gallery.

Bounty #11: Rat Control
A blue flyer can be seen on the wall to the left of the headless statue. After receiving it, you need to defeat three large rats, the locations of which are listed below.

The first mouse ran back and forth in the restaurant.


The second rat can be seen in the corridor leaving the weapons depot.
(※The third mouse is in Chapter 10)


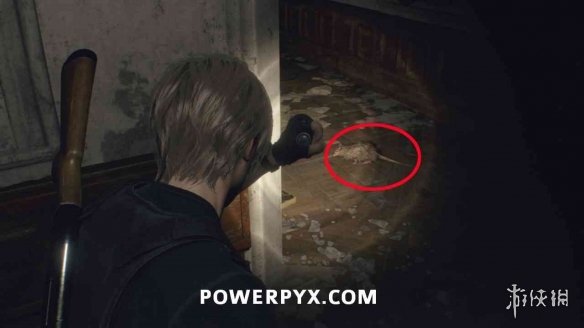
Chapter 10
The third mouse can be found at the beginning of this chapter by entering the room to the right of the three-headed statue and then entering the dark corridor (library) on the right. This mouse cannot be found in Chapter 9, but you can visit it from Leon's perspective after entering Chapter 10.

Bounty #12: Merciless Knight
Enter the room to the right of the three-headed statue at the beginning of the chapter to see a blue flyer on a cupboard. After receiving it, you need to return to the cemetery as Leon and defeat the knight there.
It is recommended to complete this bounty before proceeding with other activities in this chapter. The battle with the knights may be difficult. If you have flash bombs, try to stun 3 knights with flash bombs, and then shoot at the weak points until the tentacles are exposed.
Chapter 11
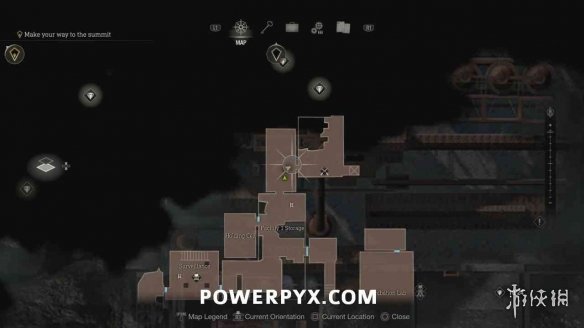
Bounty #13: The Hive
This blue flyer can be found on a wooden plank behind the blast tunnel in the eastern part of the lair area. After receiving it, you need to destroy the 4 entrances to the lair, which are the glowing yellow bags on the roof in the middle of the area. Please see below for location.


① For the first nest, turn left from the blue flyer and look up to see it (it takes about 5-6 pistol bullets to break it).
②Go up the path behind the blue flyer, enter the tunnel and look to the upper left to see the second nest.


③ and ④ can be seen after leaving the tunnel on the west side of the lair area.


Chapter 12
Bounty #14: Jewel Thief
On the wall of the room where the merchant is. After receiving it, you need to find the emerald gem from the crow's nest and sell it to the merchant. The location is referenced below and appears in subsequent chapters.


Bounty #15: The Shame of the Salazar Family
Also appears on the wall near the merchant. After receiving it, you need to destroy the portrait. Please refer to the location below. Next we will return to the main hall, where the portrait is located.

Portrait of Raymond (a disgrace to the Salazar family)
First, open the shrine in the right corner of the main hall to get the golden egg. Then there is a portrait of Raymond in the left corner of the main hall. Click on the golden egg to select equipment (do not click Use), and then throw the golden egg onto the portrait. If you throw in the wrong position, pause the game, choose to exit and then continue the game to re-operate.


Stolen Jewelry (Jewelry Robbery)
Return to the courtyard, exit through the west door and look north to find the merchant/save room. Shoot down the crow's nest, then find the stolen jewelry and sell it to the merchant (note that the location is outside the courtyard, not inside the courtyard).

Chapter 14
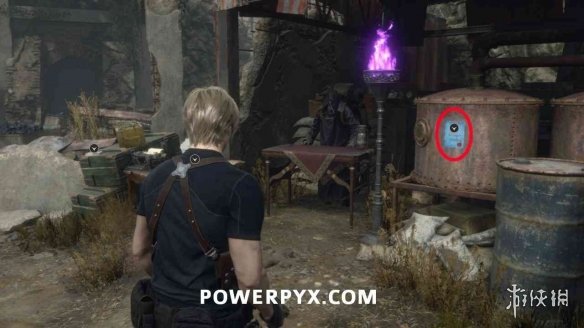
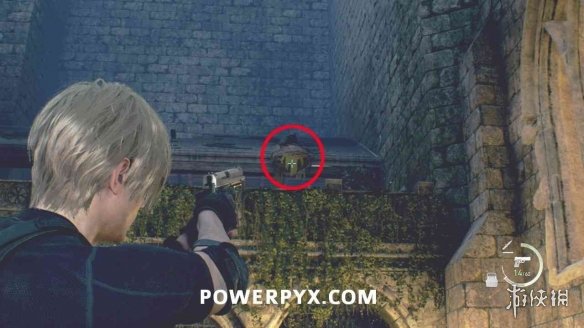
Bounty #16: Destroy the Blue Badge
Go through the door on the left side of the cell and you can find a blue flyer at the entrance to the merchant's location. After receiving it, you need to destroy 5 blue badges. Please see below for the location of the badge.

①After leaving the merchant's room, look up, directly above the door.


②After leaving the merchant's room, look to the right.


③On the red container in the next area (cargo bay, after jumping off the ladder).

④On the north side of the cargo hold.


⑤In the southwest corner of the cargo hold, look above the tower.


Bounty #17: Rat Control
Leave the scrap station and enter the next merchant's room to pick it up. After receiving it, you need to defeat 4 big rats at the scrap station. Please see below for specific locations. Make sure to return to the previous room before entering the next area.


①The first mouse is at the entrance of the scrap station and enters the initial position of this area.


②Ask Ashley to raise the bridge, and the second mouse will be behind the bridge.


③ and ④ are at the end of the scrap station. You can encounter them after pressing the power switch. Pay attention to the monsters patrolling here. After defeating the four rats, talk to the merchant to continue the story.

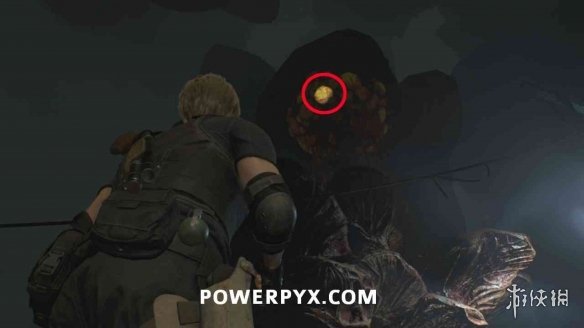
Bounty #18: The Walking Dead
After Ashley smashes through the wall, go through the cracked wall and immediately turn left to see a blue flyer on a box. After receiving it, you need to defeat a powerful enemy in the incubation laboratory (a mark will be displayed on the map).
This is the content of Chapter 13, go back before continuing the main story. See below for enemy locations. It is recommended to spend 50,000 from the merchant to buy a rocket launcher, which can defeat the enemy with one blow.


Chapter 15
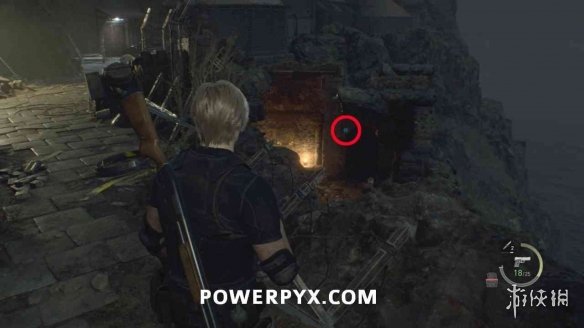
Bounty #19: Destroy the Blue Badge
It can be picked up at the exit of the cliff area. After picking it up, you need to destroy 5 badges. Please see below for location.


① It is located on the top of the tower where the blue flyer is. It is far away, but can be hit by shotguns and sniper rifles.


②You can see it on the southwest side of the cliff area before entering the door, hanging on a shelf on the side of the ruins.

③ Opposite the second badge, hang at the ruins near the water.

④Behind the ladder behind the wall in the ruins, where you got the treasure before (before climbing down the ladder).


⑤Climb down the ladder where the fourth badge is, and then look out the window on the right, you are on the cliff.

