该项目可作为开发人员使用 Amazon Bedrock 代理跨各种大型语言模型 (LLM) 扩展其用例的基准。目标是展示利用 Bedrock 上的多个模型来创建适应不同场景的链式响应的潜力。除了生成基于文本的输出之外,该应用程序还支持使用图像生成和文本到图像模型创建和检查图像。这种扩展的功能增强了应用程序的多功能性,使其适合更具创意和视觉效果的用例。
对于那些喜欢基础设施即代码 (IaC) 方法的人,我们还提供了一个 AWS CloudFormation 模板,用于设置 Amazon Bedrock 代理、S3 存储桶和 Lambda 函数等核心组件。如果您希望通过 AWS CloudFormation 部署此项目,请参阅此处的研讨会指南。
或者,本自述文件将引导您完成通过 AWS 控制台手动设置和配置 Amazon Bedrock 代理的分步过程,使您能够灵活地试验最新模型并充分释放 Bedrock 代理的潜力。
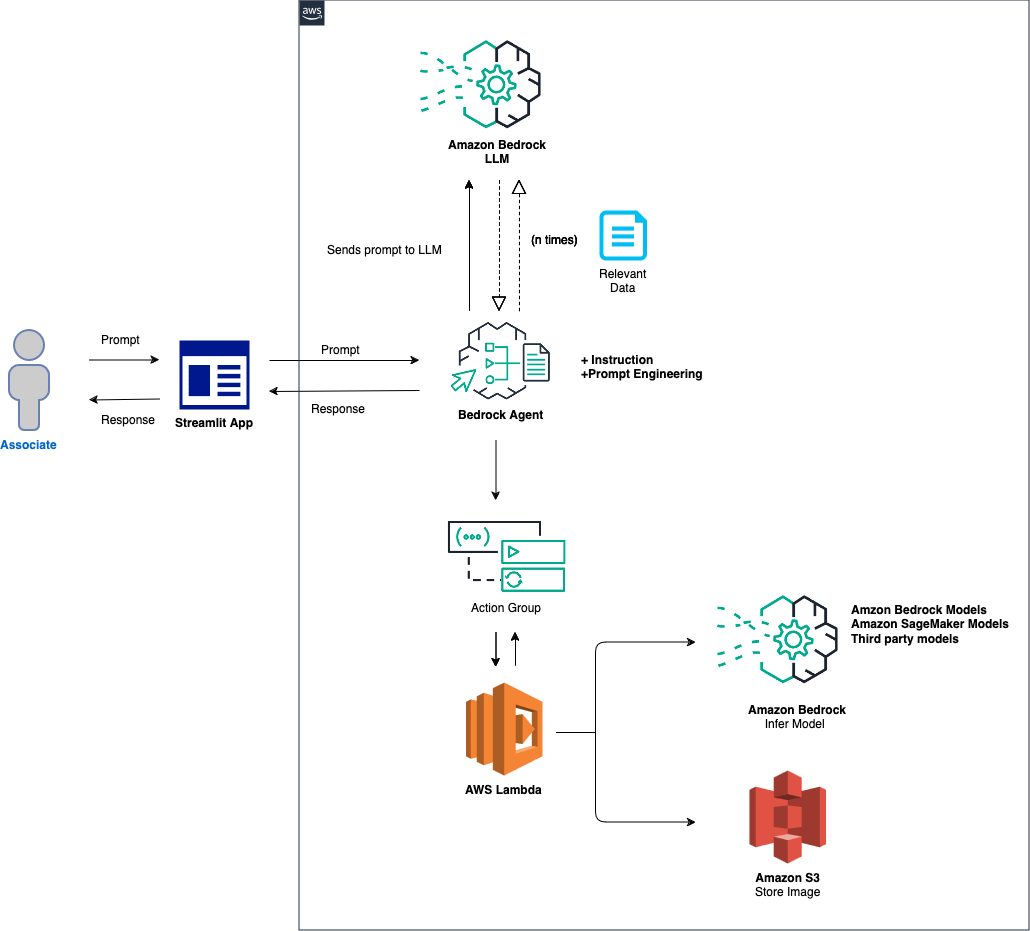
该解决方案的总体概述如下:
代理和环境设置:该解决方案首先配置 Amazon Bedrock 代理、AWS Lambda 函数和 Amazon S3 存储桶。此步骤为模型交互和数据处理奠定了基础,使系统准备好接收和处理来自前端应用程序的提示。提示处理和模型推理:当从前端应用程序收到提示时,Bedrock 代理会使用操作组机制评估提示并将其与指定的模型 ID 一起分派到 Lambda 函数。此步骤利用操作组的 API 模式进行精确的参数处理,促进基于输入提示的有效模型推理。数据处理和响应生成:对于涉及图像到文本或文本到图像转换的任务,Lambda 函数与 S3 存储桶交互以对图像执行必要的读取或写入操作。此步骤确保多媒体内容的动态处理,最终生成由初始提示指示的响应或转换。
在以下部分中,我们将指导您完成:
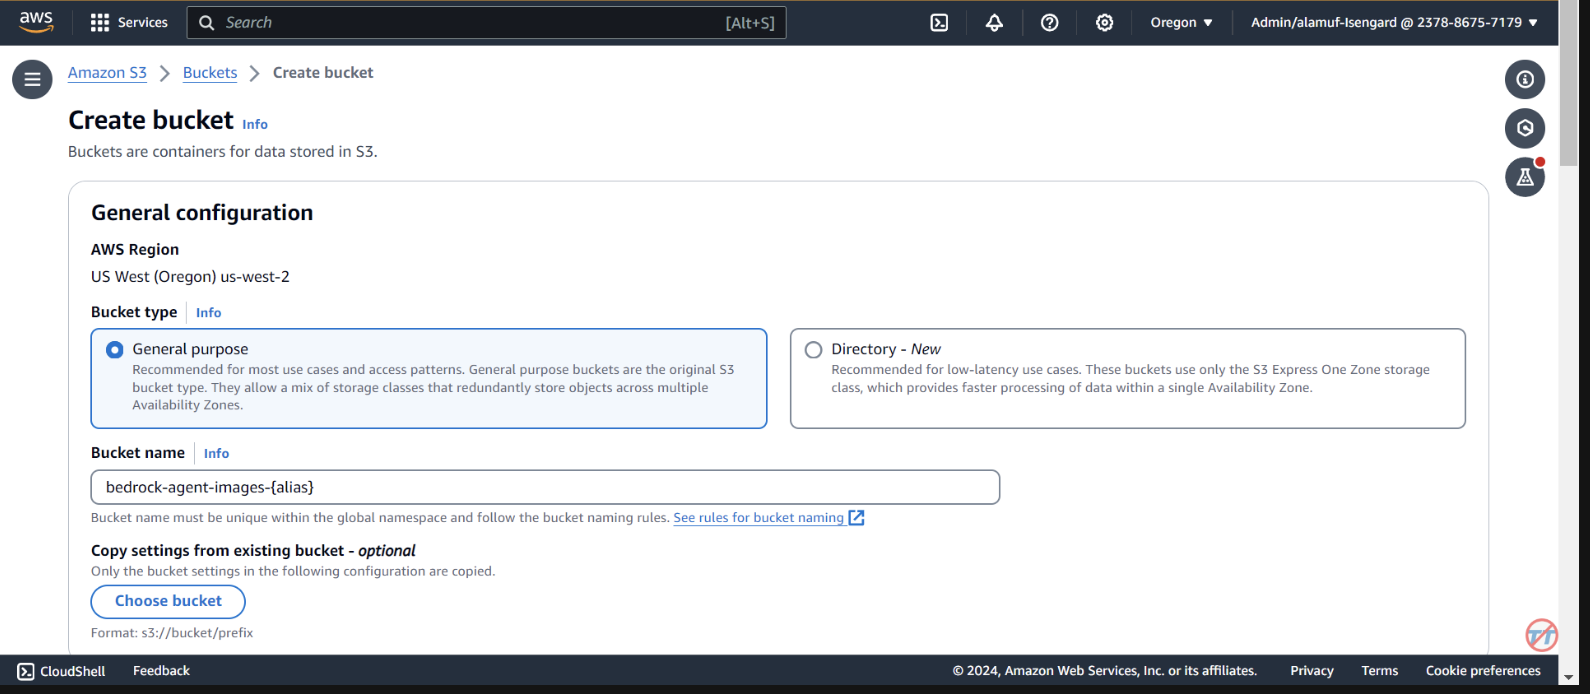
AWS SAM(无服务器应用程序模型)是一个开源框架,可帮助您在 AWS 上构建无服务器应用程序。它简化了无服务器资源(例如 AWS Lambda、Amazon API Gateway、Amazon DynamoDB 等)的部署、管理和监控。以下是有关如何设置和使用 AWS SAM 的综合指南。
该框架通过抽象云基础设施的复杂性,简化了创建、部署和管理无服务器应用程序的过程。它提供了一种使用配置文件和一组命令来定义和管理无服务器资源的统一方法。
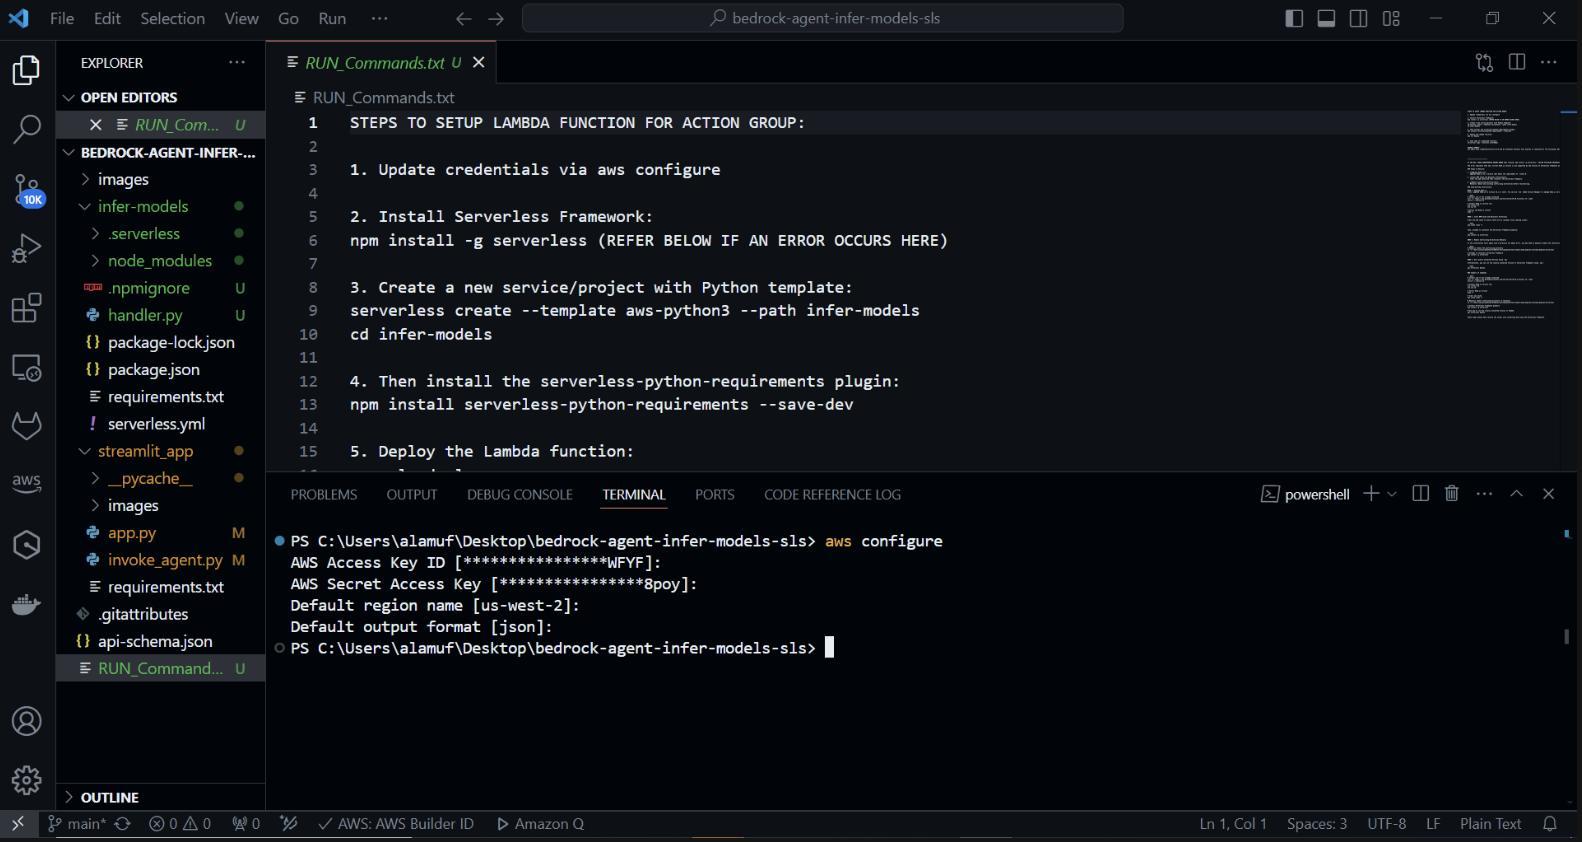
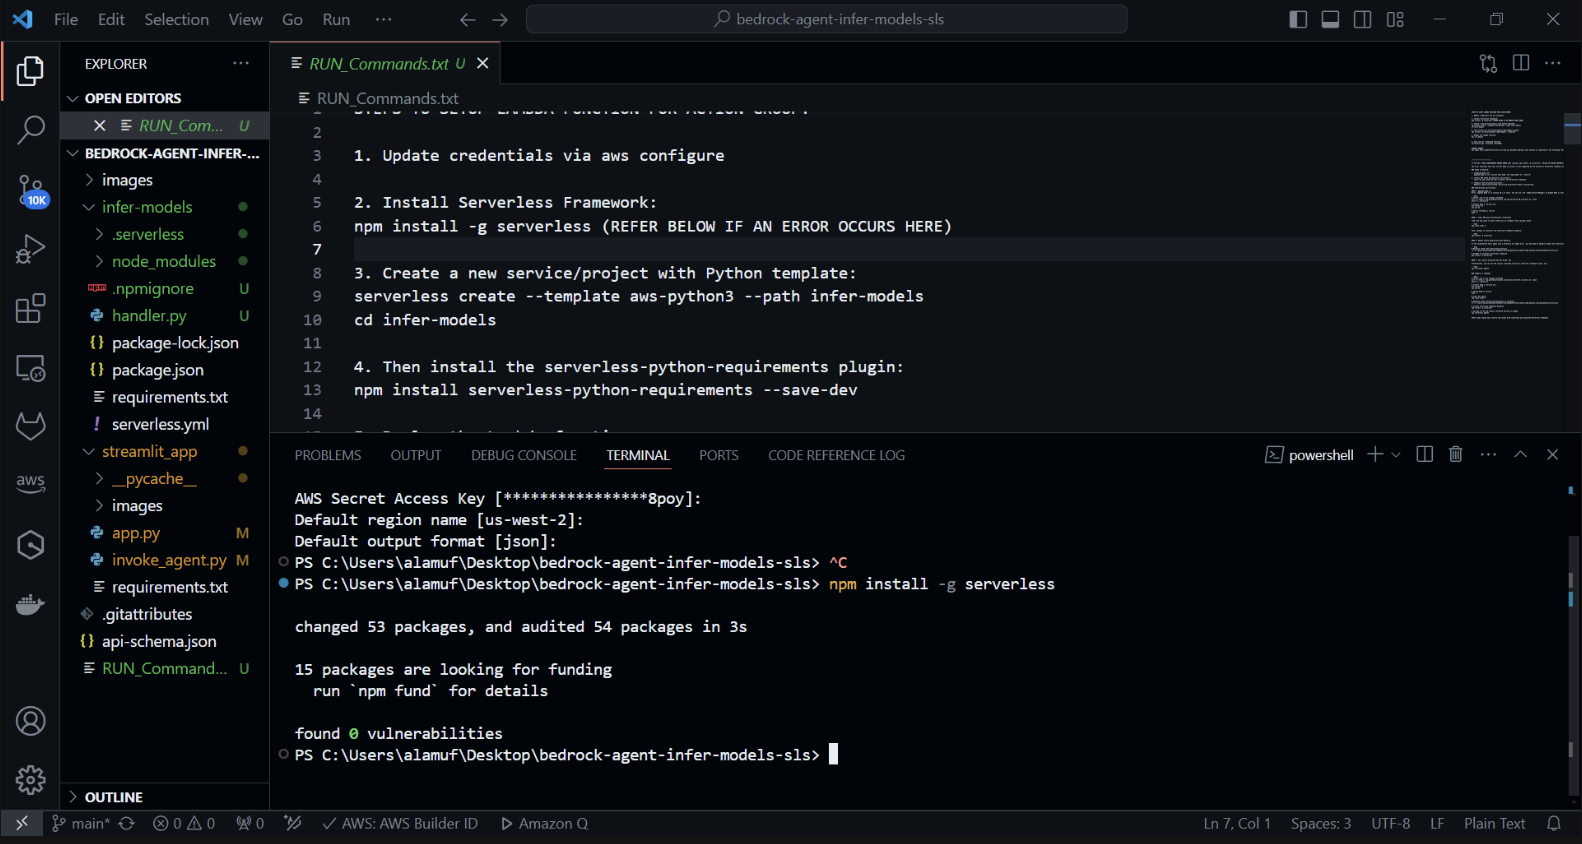
使用 Python 模板创建新的无服务器项目。在终端中运行: cd infer-models然后运行serverless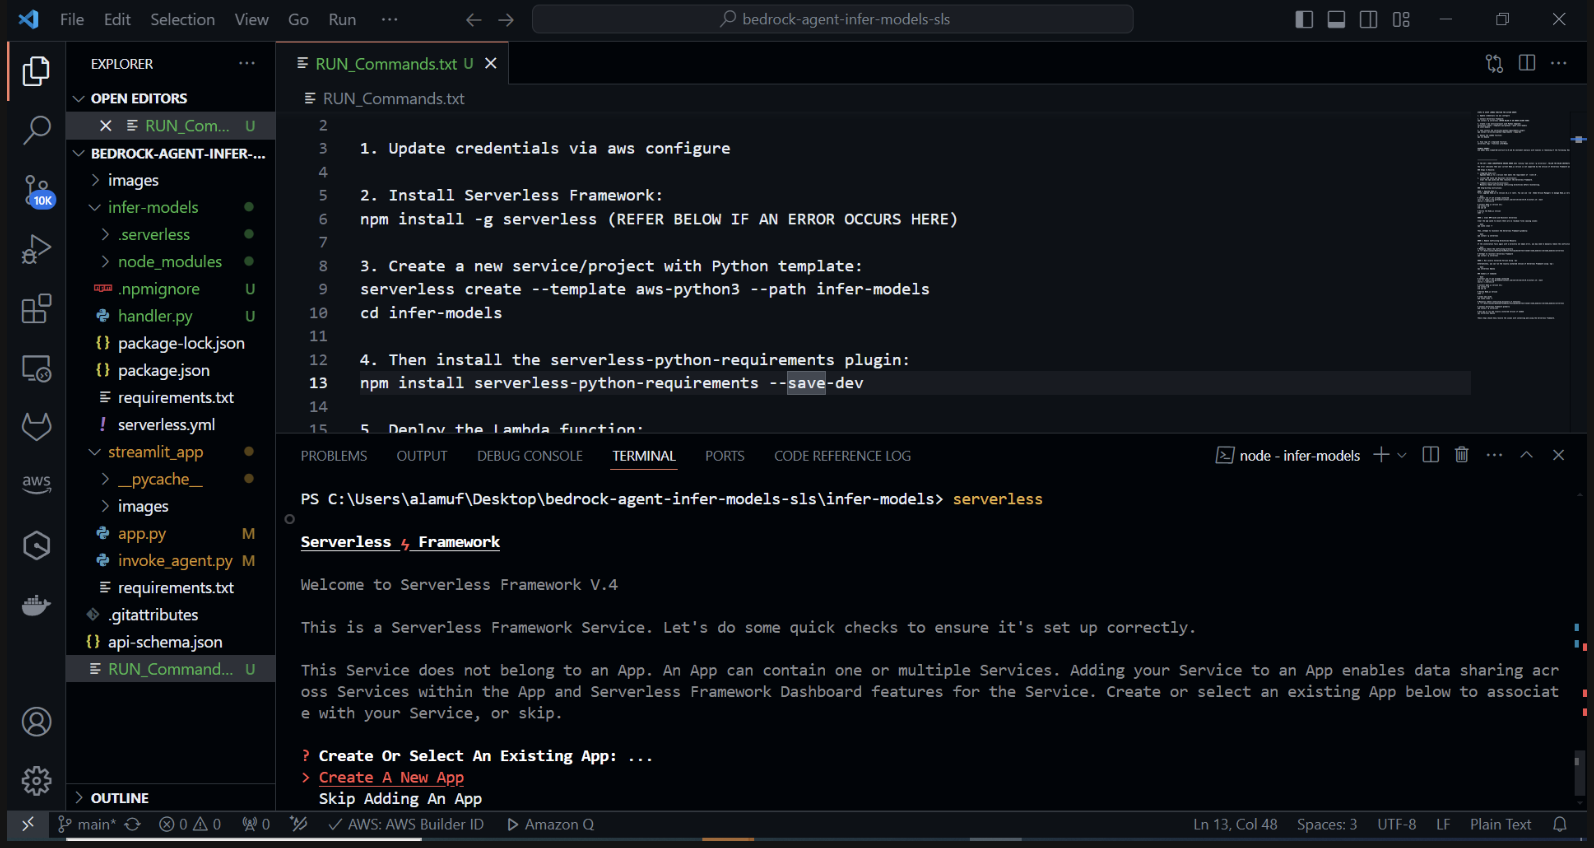
这将启动无服务器框架的交互式项目创建过程。系统将提示您几个选项: 选择“创建新的无服务器应用程序”。选择“aws-python3”模板并提供“infer-models”作为项目的名称。
这将创建一个名为infer-models 的新目录,其中包含基本的无服务器项目结构和 Python 模板。
系统可能还会提示您登录/注册。选择“登录/注册”选项。这将打开一个浏览器窗口,您可以在其中创建一个新帐户或登录(如果您已有帐户)。登录或创建帐户后,选择“框架开源”选项,可以免费使用。
如果您的堆栈部署失败,请注释掉serverless.yml 文件的第 2 行
执行 Serverless 命令并按照提示操作后,将创建一个具有项目名称(例如 infer-models)的新目录,其中包含 Serverless 项目的样板结构和配置文件。
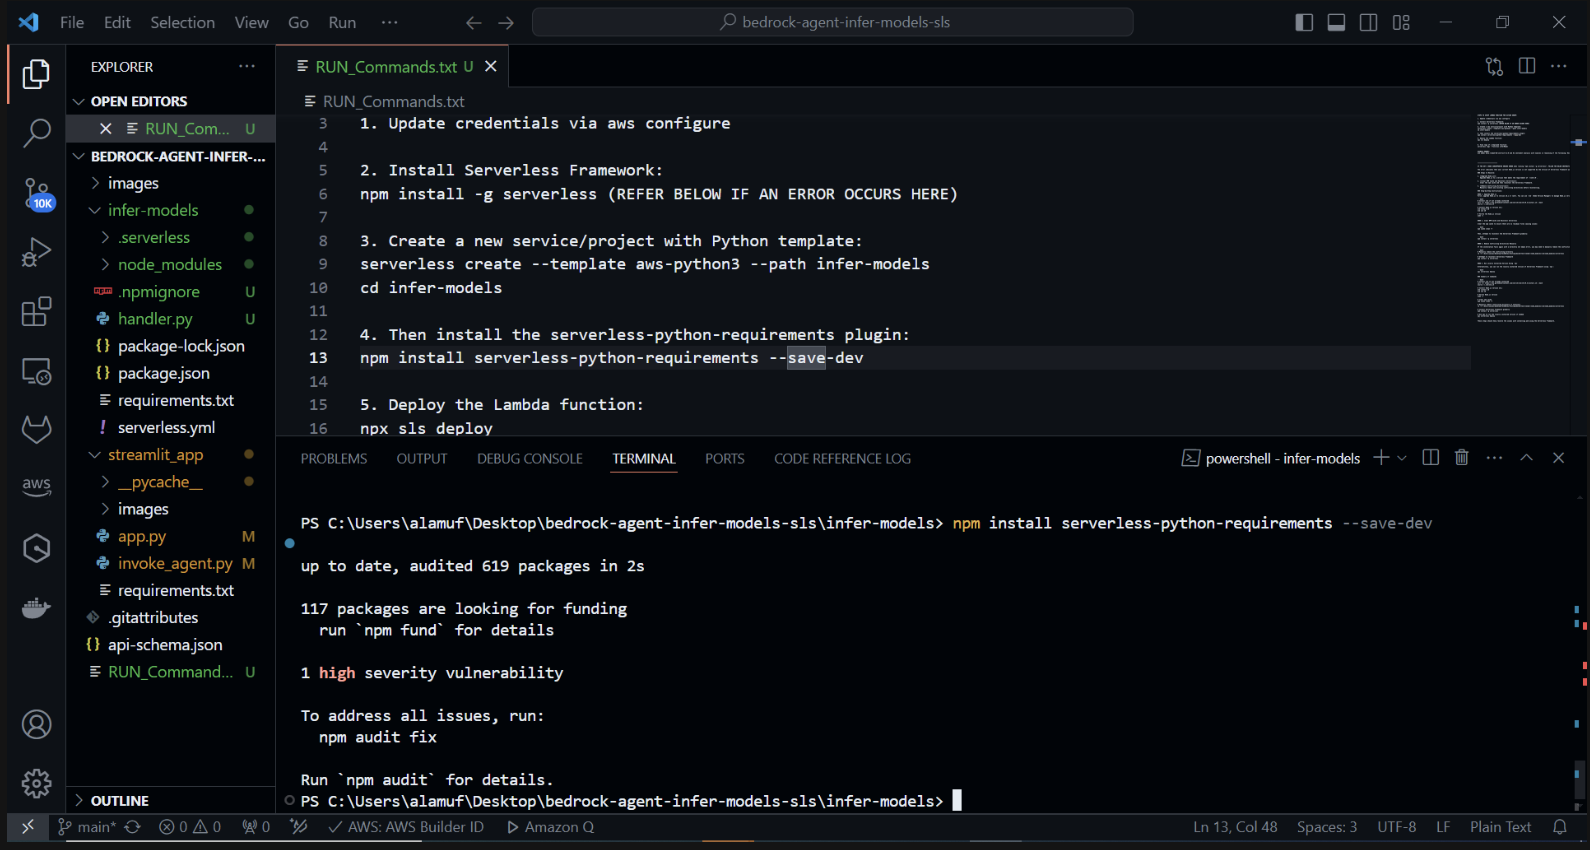
现在我们将安装 serverless-python-requirements 插件: serverless-python-requirements 插件可帮助管理无服务器项目的 Python 依赖项。通过运行安装它:
npm install serverless-python-requirements —save-dev
3.) npx sls deploy
(在运行上述命令之前,需要安装并运行 Docker 引擎。更多信息可以在此处找到)
(这将打包并部署AWS Lambda函数)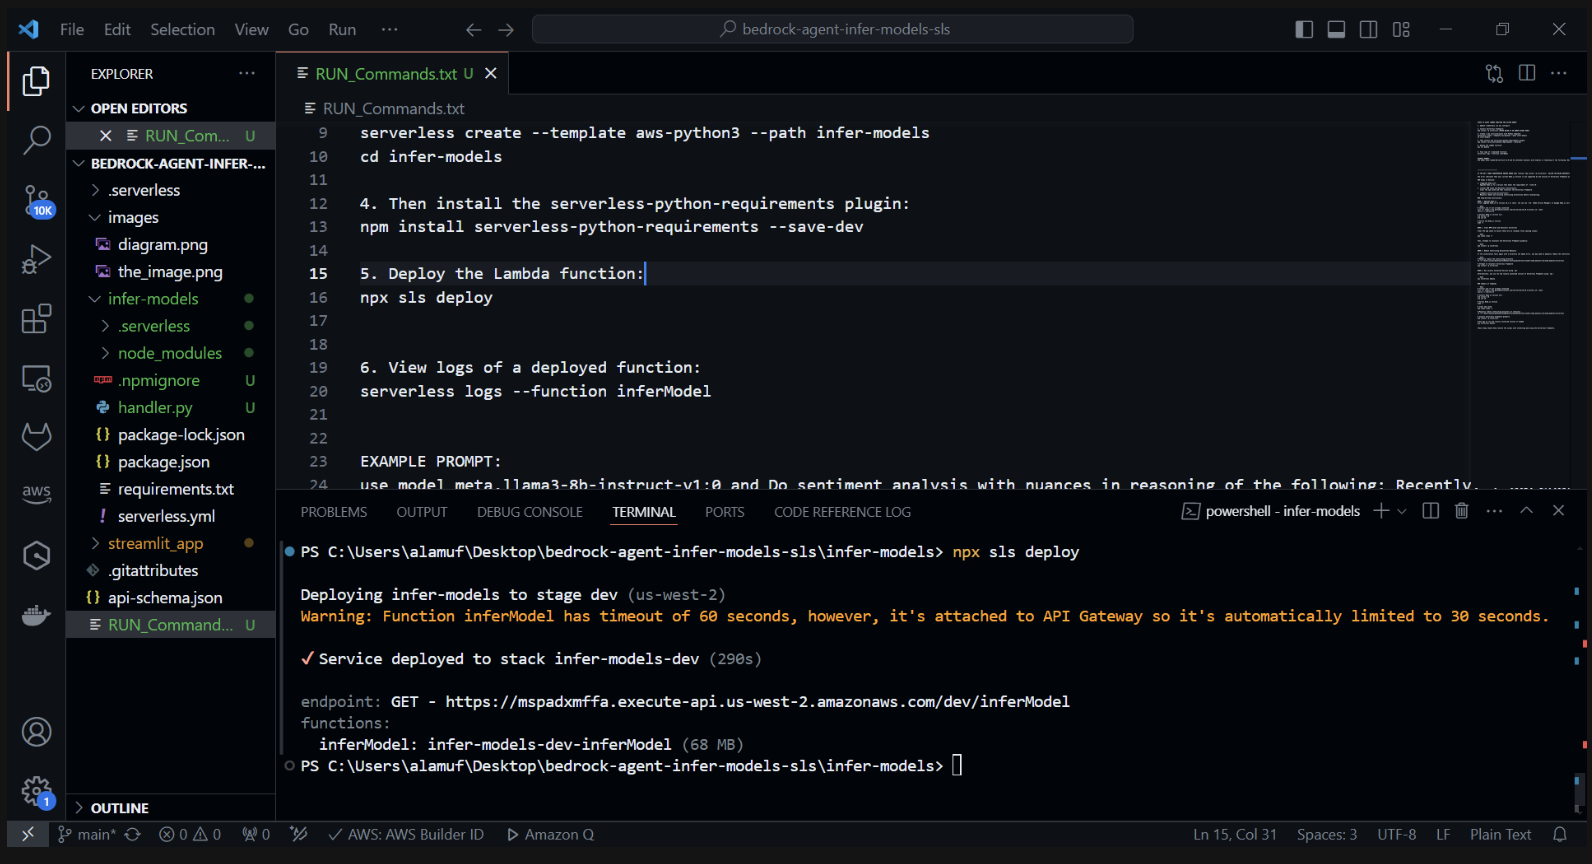
在 AWS 控制台中检查 CloudFormation 内的部署
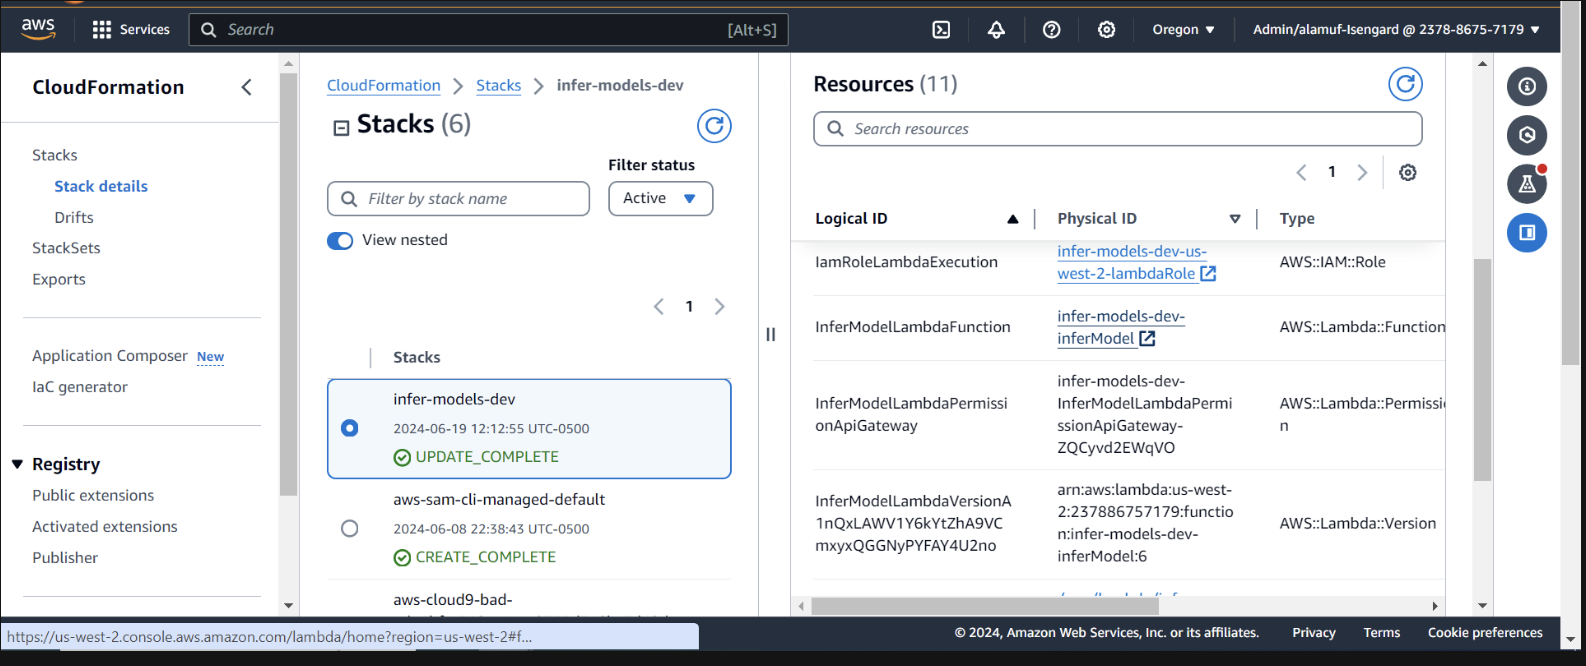

我们需要提供基岩代理权限来调用 lambda 函数。打开 lambda 函数并向下滚动以选择“配置”选项卡。在左侧,选择权限。向下滚动到基于资源的策略语句并选择添加权限。
在中间为您的策略声明选择AWS 服务。为您的服务选择“其他” ,并为 StatementID 输入“allow-agent” 。对于校长,输入bedrock.amazonaws.com 。
输入arn:aws:bedrock:us-west-2:{aws-account-id}:agent/* 。请注意,AWS 建议使用最低权限,因此只有允许的代理才能调用此 Lambda 函数。 ARN 末尾的 * 授予账户中的任何代理访问权限以调用此 Lambda。理想情况下,我们不会在生产环境中使用它。最后,对于操作,选择lambda:InvokeFunction ,然后选择保存。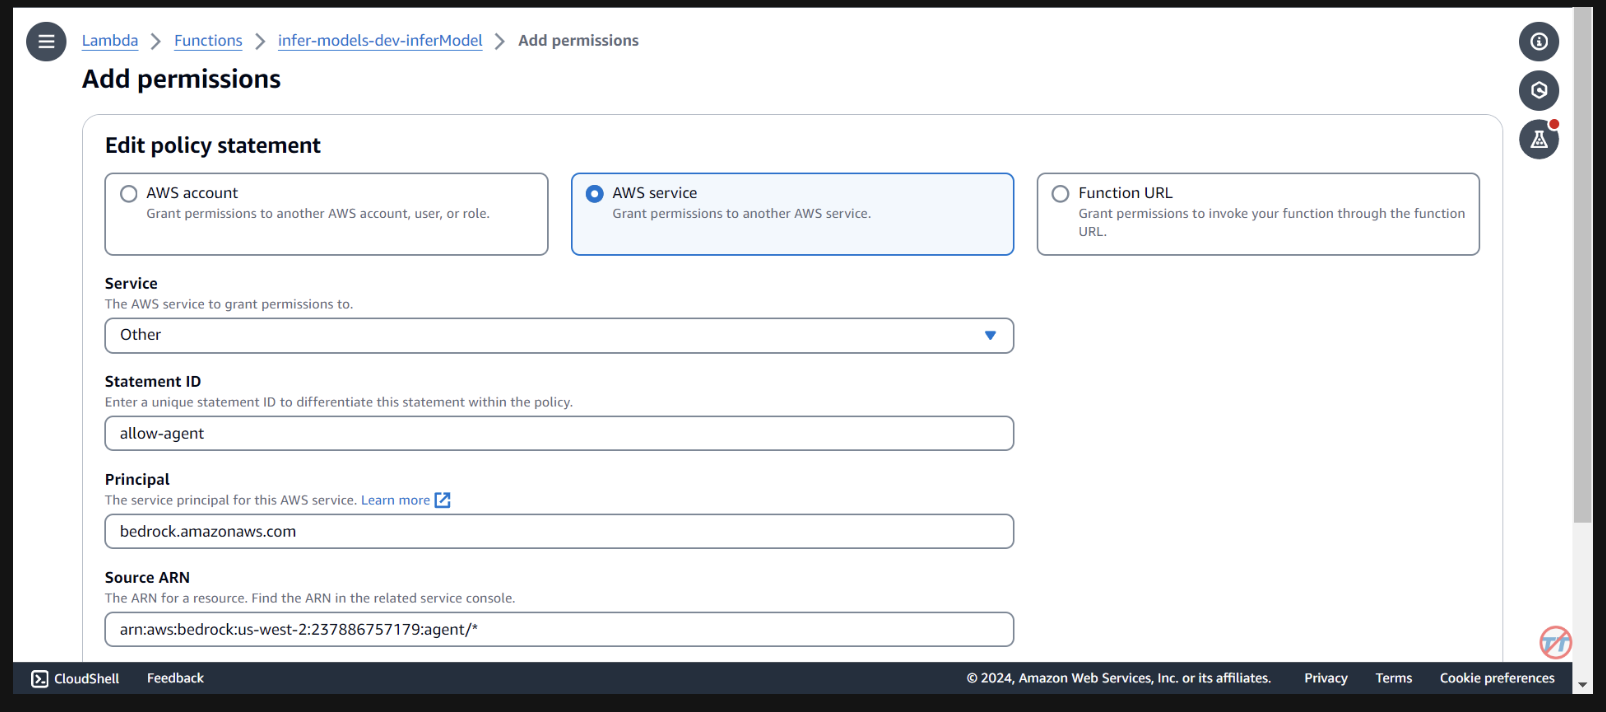
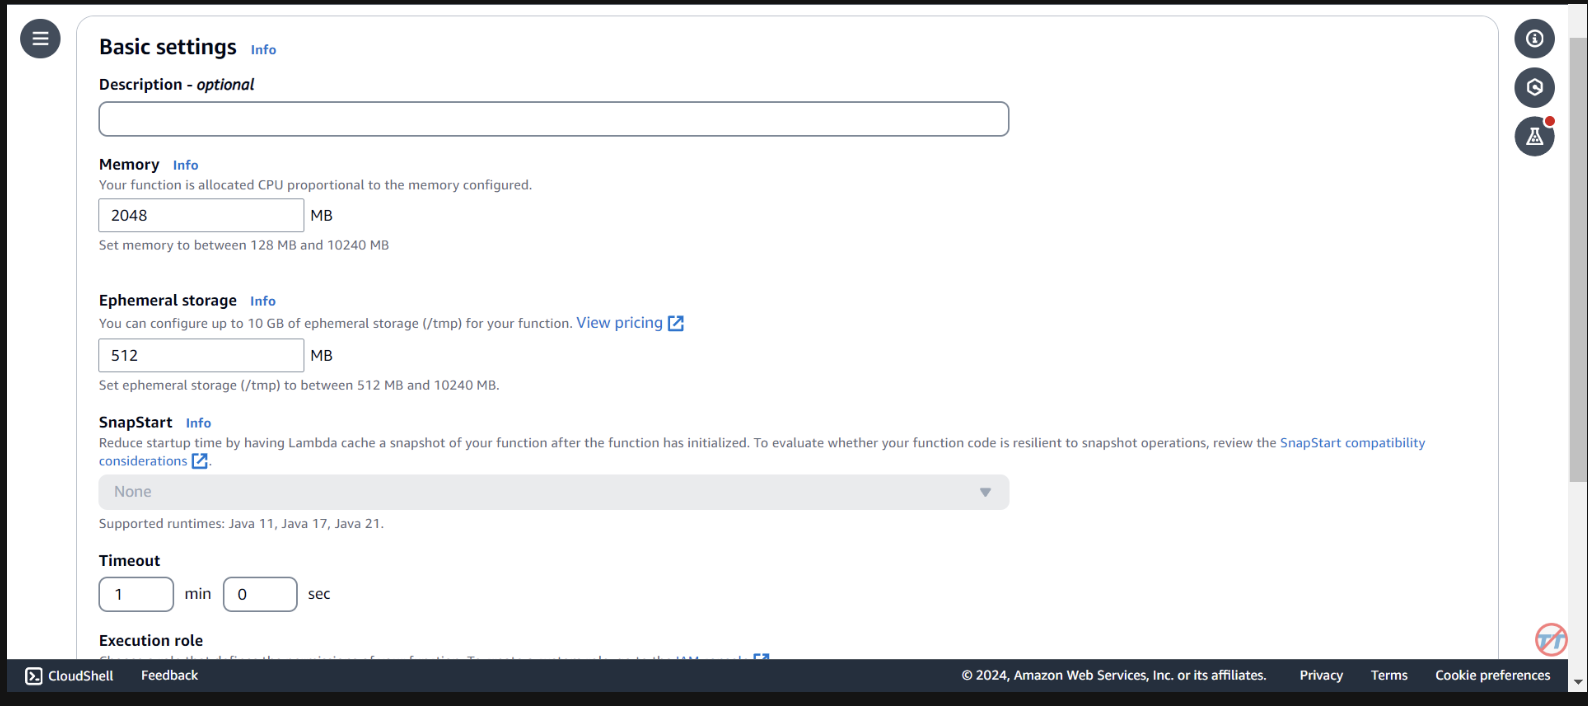
为了帮助推理,我们将增加 Lambda 函数的 CPU/内存。我们还将增加超时,以使函数有足够的时间来完成调用。选择左侧的常规配置,然后选择右侧的编辑。
将内存更改为2048 MB ,并将超时更改为1 分钟。向下滚动,然后选择保存。
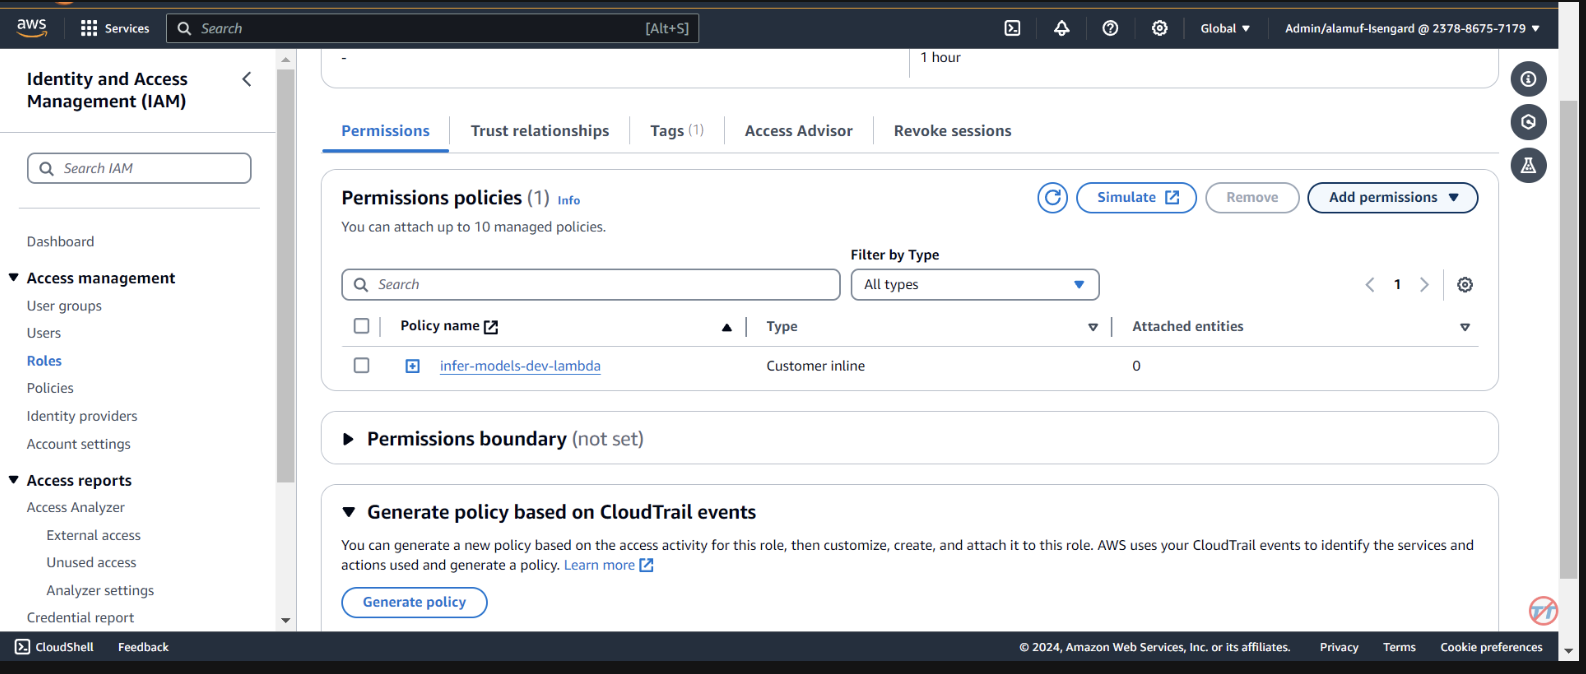
Agents 。提供代理名称,例如multi-model-agent,然后创建代理。 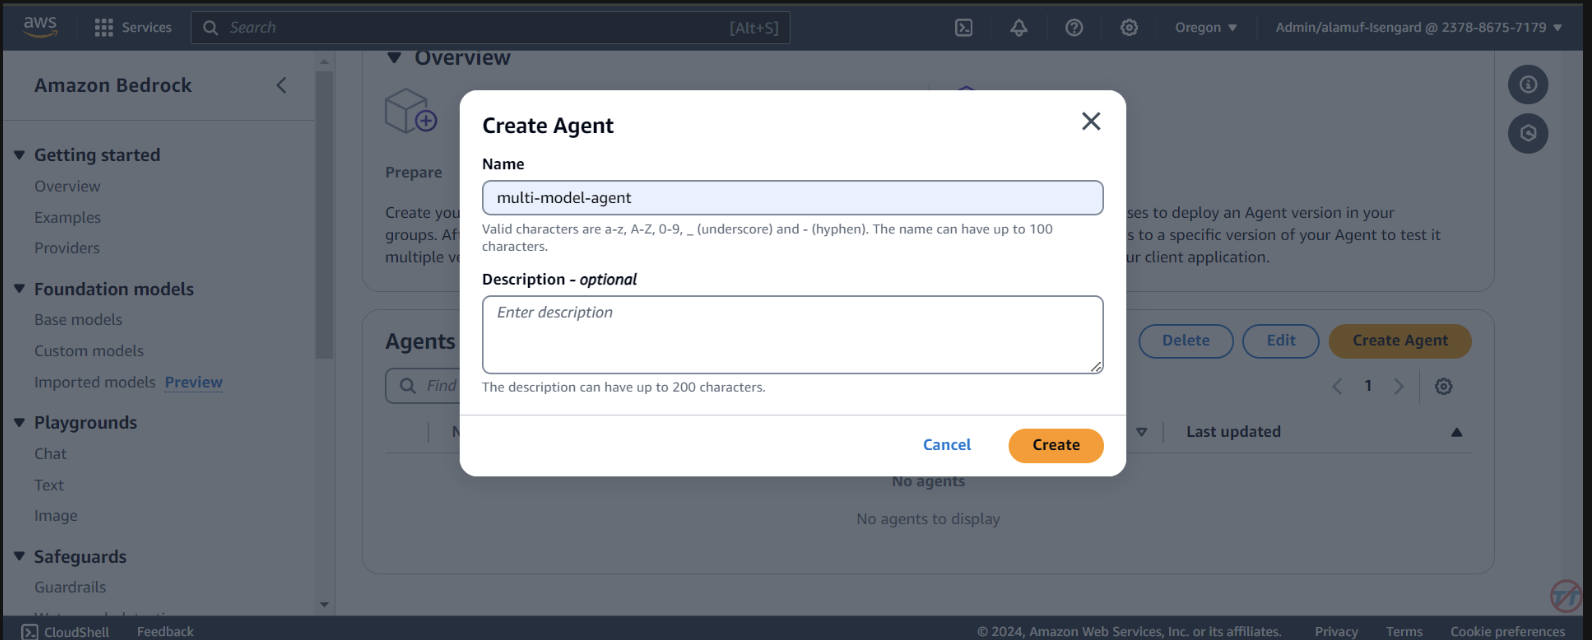
You are a research agent that interacts with various large language models. You pass the model ID and prompt from requests to large language models to create and store images. Then, the LLM will return a presigned URL to the image similar to the URL example provided. You also call LLMS for text and code generation, summarization, problem solving, text-to-sql, response comparisons and ratings. Remeber. you use other large language models for inference. Do not decide when to provide your own response, unless asked.
之后,请确保滚动到顶部并选择“保存”按钮,然后再进行下一步。
接下来,我们将添加一个操作组。向下滚动到Action groups然后选择添加。调用操作组call-model 。
对于操作组类型,选择使用 API 架构定义
下一部分,我们将选择现有的 Lambda 函数infer-models-dev-inferModel 。
对于 API 架构,我们将选择Define with in-line OpenAPI schema editor 。将下面的架构复制并粘贴到内联 OpenAPI 架构编辑器中,然后选择添加: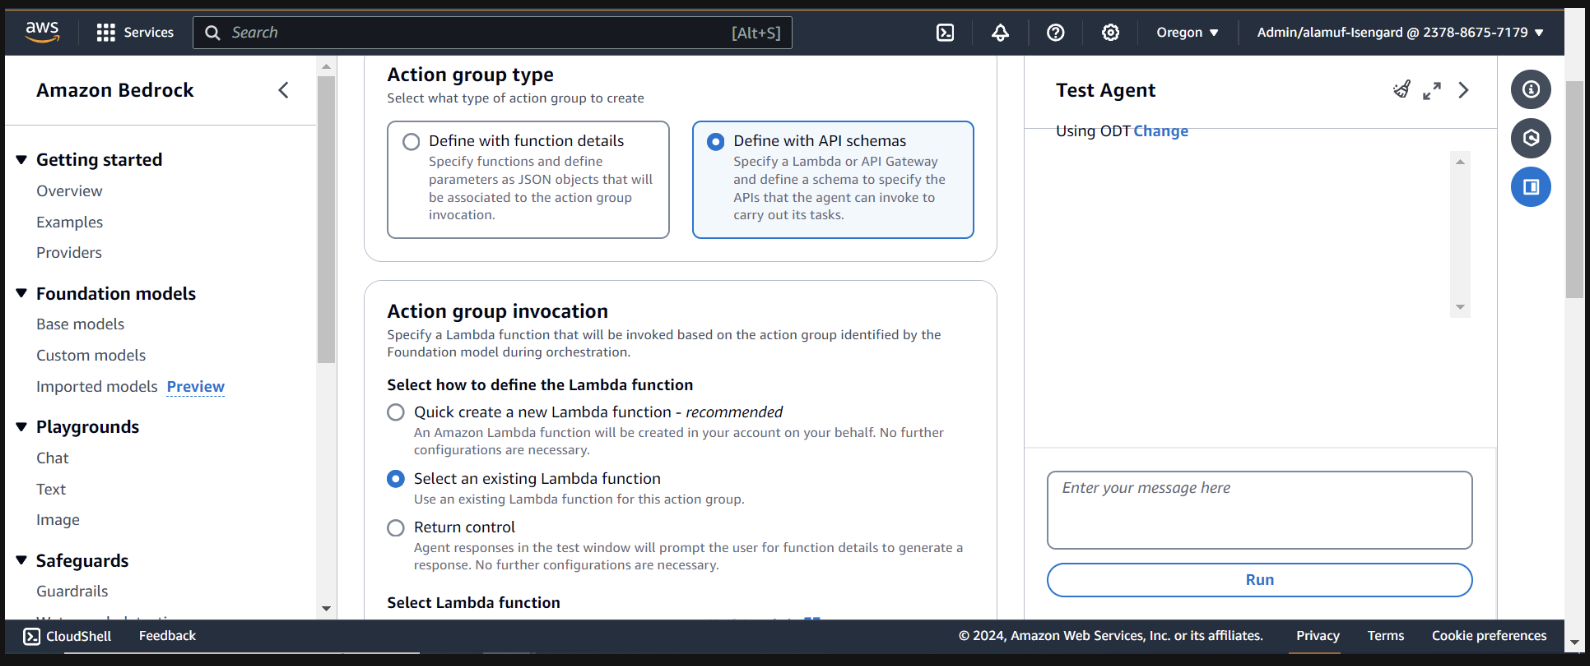
(This API schema is needed so that the bedrock agent knows the format structure and parameters required for the action group to interact with the Lambda function.)
 {
  "openapi": "3.0.0",
  "info": {
    "title": "Model Inference API",
    "description": "API for inferring a model with a prompt, and model ID.",
    "version": "1.0.0"
  },
  "paths": {
    "/callModel": {
      "post": {
        "description": "Call a model with a prompt, model ID, and an optional image",
        "parameters": [
          {
            "name": "modelId",
            "in": "query",
            "description": "The ID of the model to call",
            "required": true,
            "schema": {
              "type": "string"
            }
          },
          {
            "name": "prompt",
            "in": "query",
            "description": "The prompt to provide to the model",
            "required": true,
            "schema": {
              "type": "string"
            }
          }
        ],
        "requestBody": {
          "required": true,
          "content": {
            "multipart/form-data": {
              "schema": {
                "type": "object",
                "properties": {
                  "modelId": {
                    "type": "string",
                    "description": "The ID of the model to call"
                  },
                  "prompt": {
                    "type": "string",
                    "description": "The prompt to provide to the model"
                  },
                  "image": {
                    "type": "string",
                    "format": "binary",
                    "description": "An optional image to provide to the model"
                  }
                },
                "required": ["modelId", "prompt"]
              }
            }
          }
        },
        "responses": {
          "200": {
            "description": "Successful response",
            "content": {
              "application/json": {
                "schema": {
                  "type": "object",
                  "properties": {
                    "result": {
                      "type": "string",
                      "description": "The result of calling the model with the provided prompt and optional image"
                    }
                  }
                }
              }
            }
          }
        }
      }
    }
  }
}
Orchestration选项卡下,启用Override orchestration template defaults选项。 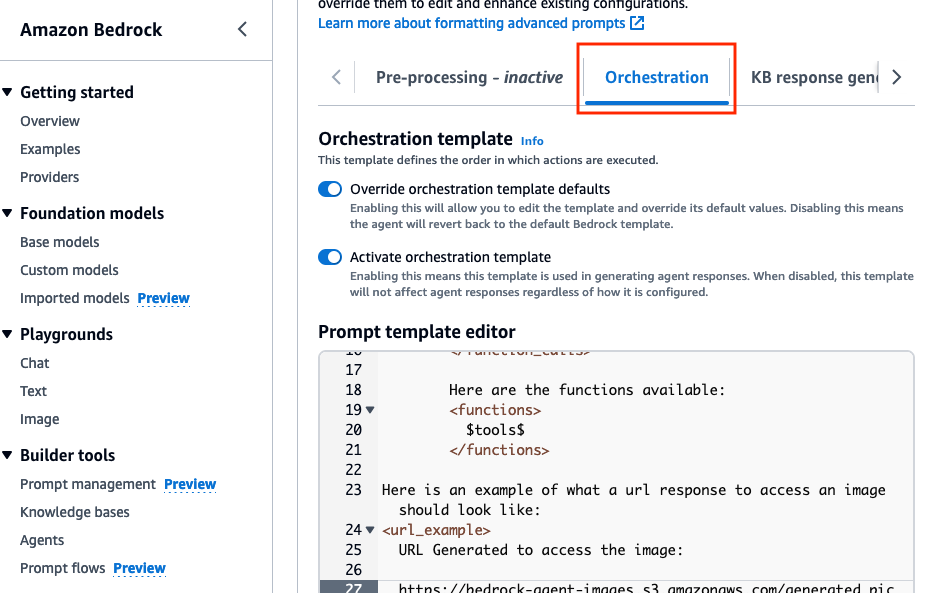
 Here is an example of what a url response to access an image should look like:
<url_example>
  URL Generated to access the image:

  https://bedrock-agent-images.s3.amazonaws.com/generated_pic.png?AWSAccessKeyId=123xyz&Signature=rlF0gN%2BuaTHzuEDfELz8GOwJacA%3D&x-amz-security-token=IQoJb3JpZ2msqKr6cs7sTNRG145hKcxCUngJtRcQ%2FzsvDvt0QUSyl7xgp8yldZJu5Jg%3D%3D&Expires=1712628409
</url_example>
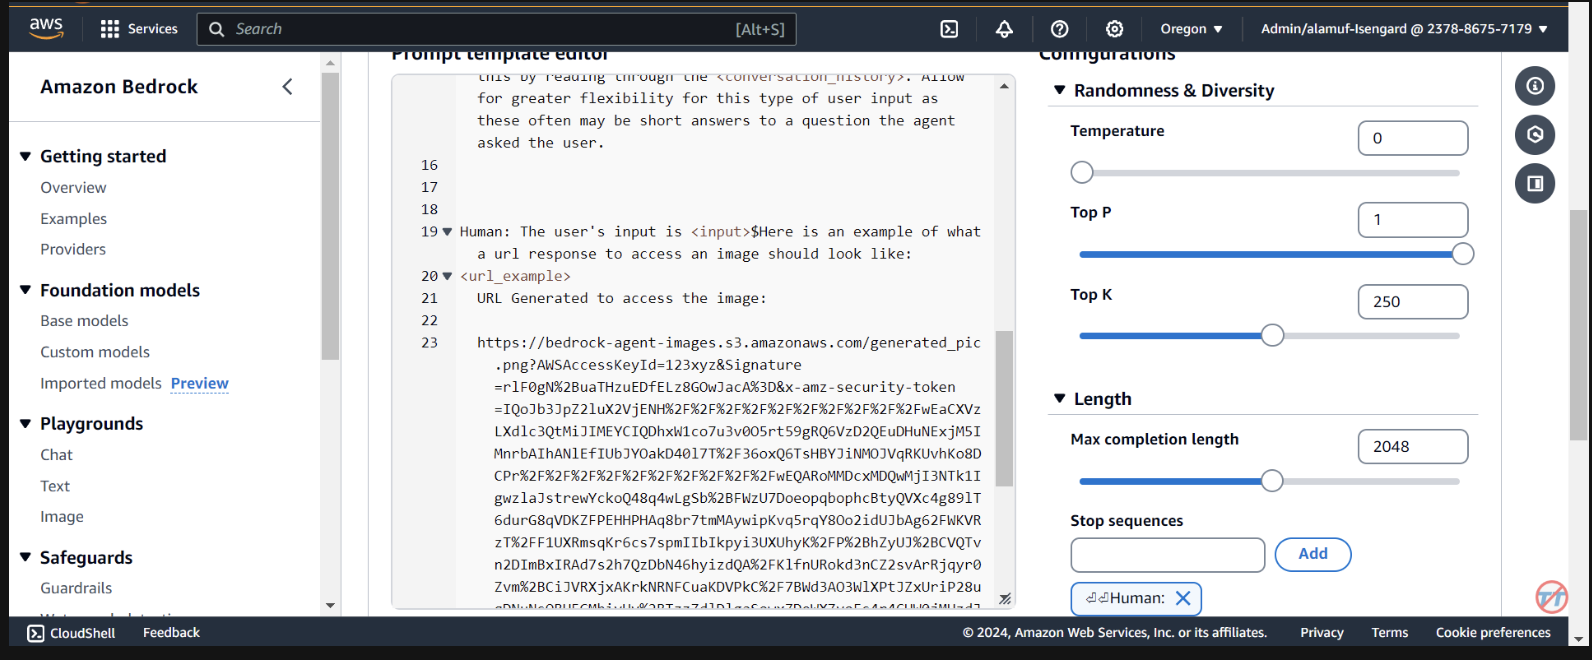
在 S3 存储桶中生成图像后,此提示有助于为代理提供格式化预签名 URL 响应的示例。此外,还可以选择使用自定义解析器 Lambda 函数来进行更精细的格式化。
滚动到底部并选择Save and exit按钮。
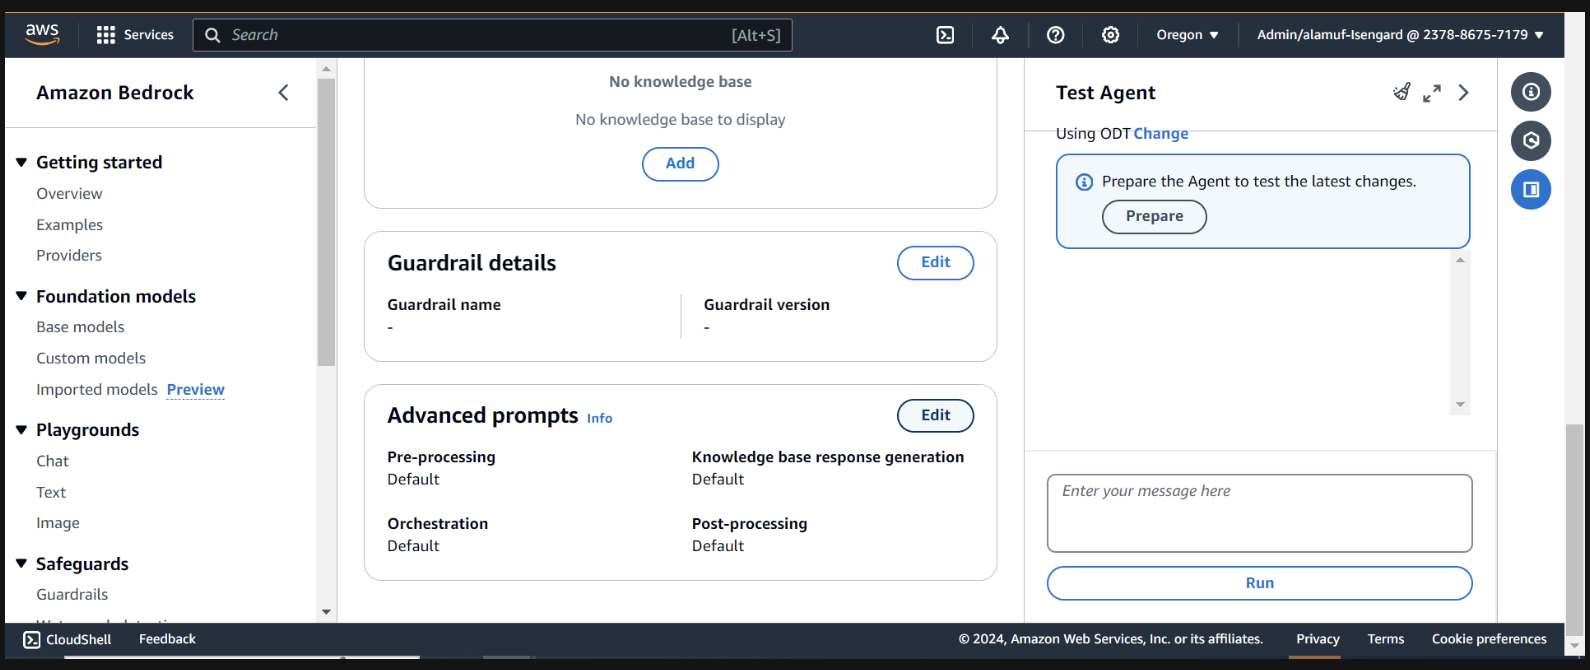
之后,请确保再次点击顶部的Save and exit按钮,然后点击右侧测试代理 UI 顶部的“准备”按钮。这将使我们能够测试最新的更改。
(继续之前,请确保通过 Amazon Bedrock 控制台启用您计划测试的所有模型。)
要开始测试,请通过在代理构建器页面上找到准备按钮来准备代理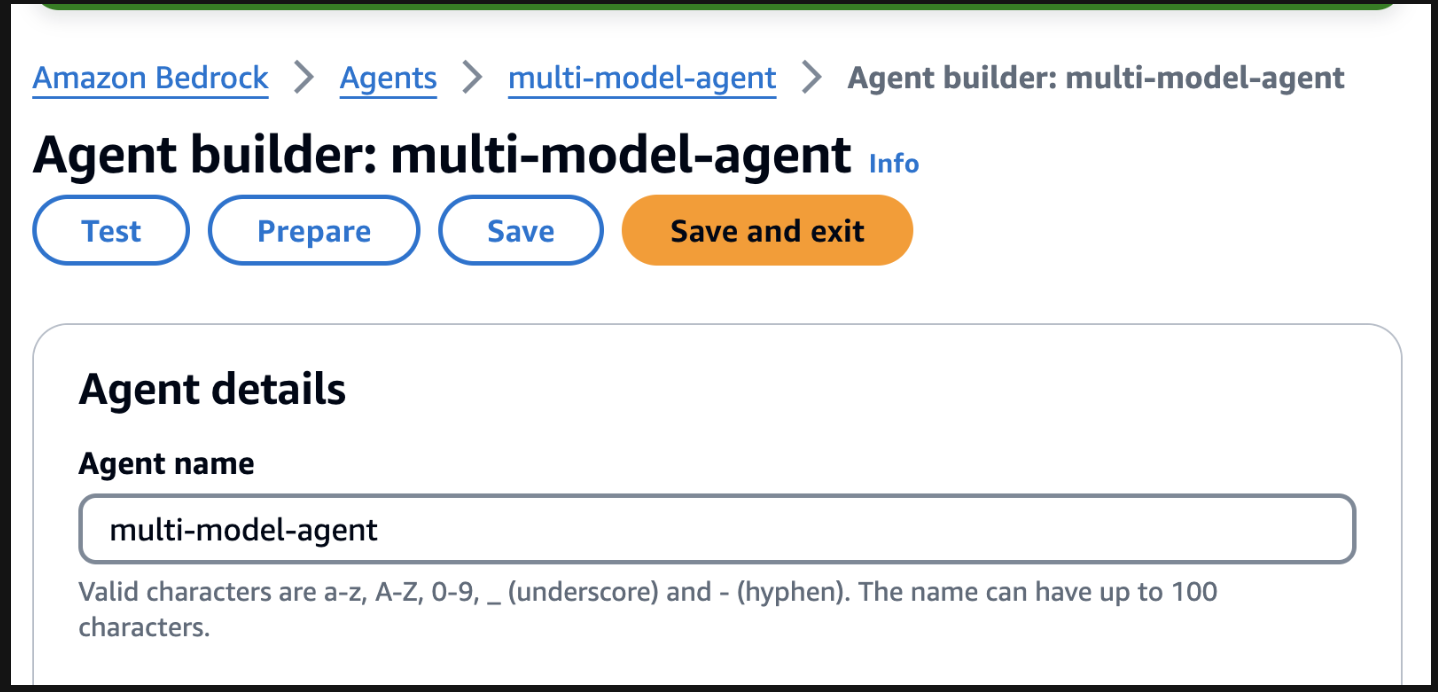
在右侧,您应该会看到一个使用用户输入字段测试代理的选项。以下是您可以测试的一些提示。然而,我们鼓励您发挥创造力并测试提示的变化。
测试前需要注意一件事。当您执行文本到图像或图像到文本时,项目代码静态引用相同的 .png 文件。在理想的环境中,该步骤可以配置得更加动态。
Use model amazon.titan-image-generator-v1 and create me an image of a woman in a boat on a river.
Use model anthropic.claude-3-haiku-20240307-v1:0 and describe to me the image that is uploaded. The model function will have the information needed to provide a response. So, dont ask about the image.
Use model stability.stable-diffusion-xl-v1. Create an image of an astronaut riding a horse in the desert.
Use model meta.llama3-70b-instruct-v1:0. You are a gifted copywriter, with special expertise in writing Google ads. You are tasked to write a persuasive and personalized Google ad based on a company name and a short description. You need to write the Headline and the content of the Ad itself. For example: Company: Upwork Description: Freelancer marketplace Headline: Upwork: Hire The Best - Trust Your Job To True Experts Ad: Connect your business to Expert professionals & agencies with specialized talent. Post a job today to access Upwork's talent pool of quality professionals & agencies. Grow your team fast. 90% of customers rehire. Trusted by 5M+ businesses. Secure payments. - Write a persuasive and personalized Google ad for the following company. Company: Click Description: SEO services
(如果您想对此项目进行 UI 设置,请继续执行步骤 6)
您需要有一个agent alias ID以及此步骤的agent ID 。转到 Bedrock 管理控制台,然后选择您的多模型代理。从Agent overview部分的右上角复制Agent ID 。然后,向下滚动到“别名”并选择“创建” 。将别名命名为a1 ,然后创建代理。保存生成的别名 ID ,而不是别名。 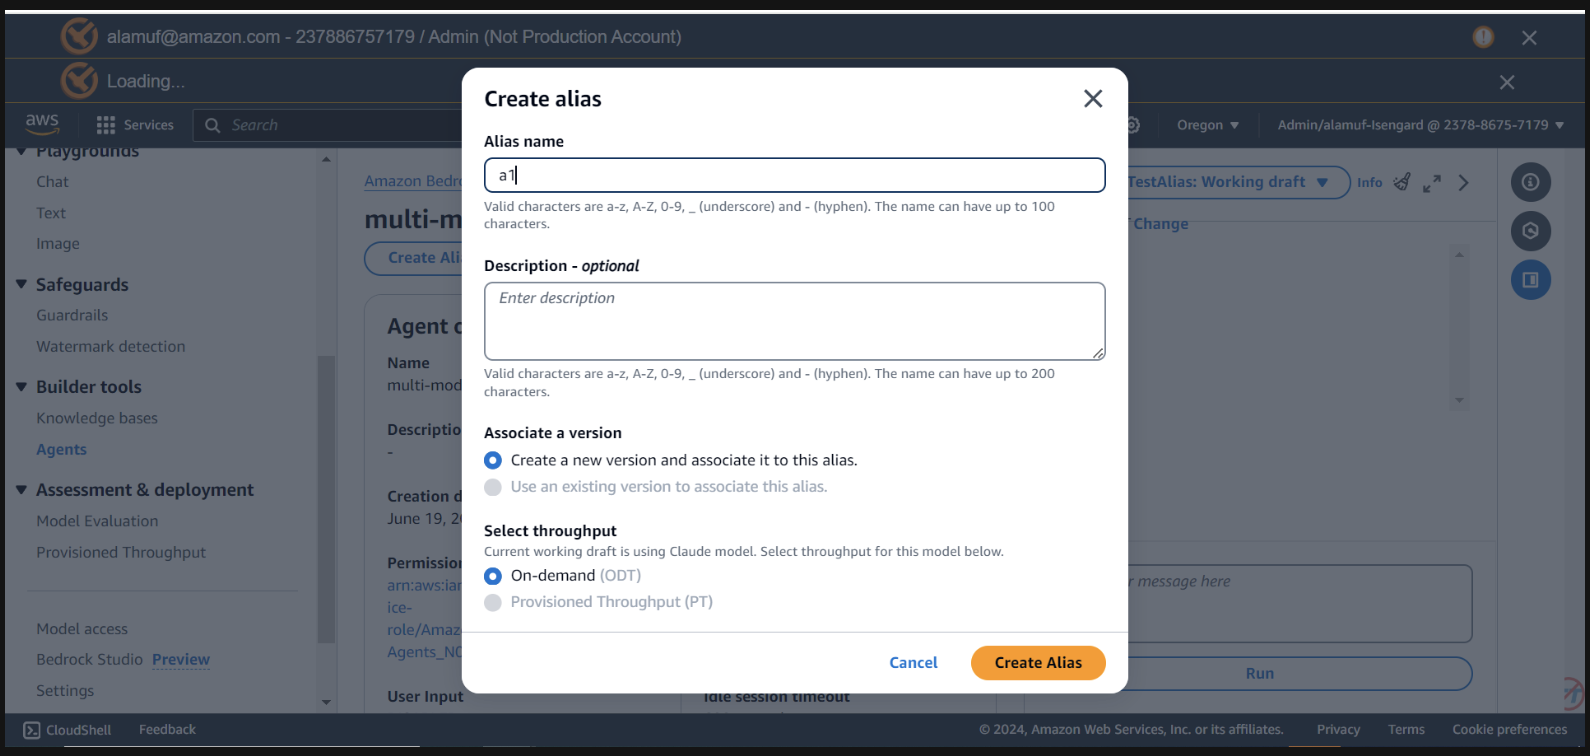
现在,导航回用于打开项目的 IDE。
导航到streamlit_app目录:
更新配置:
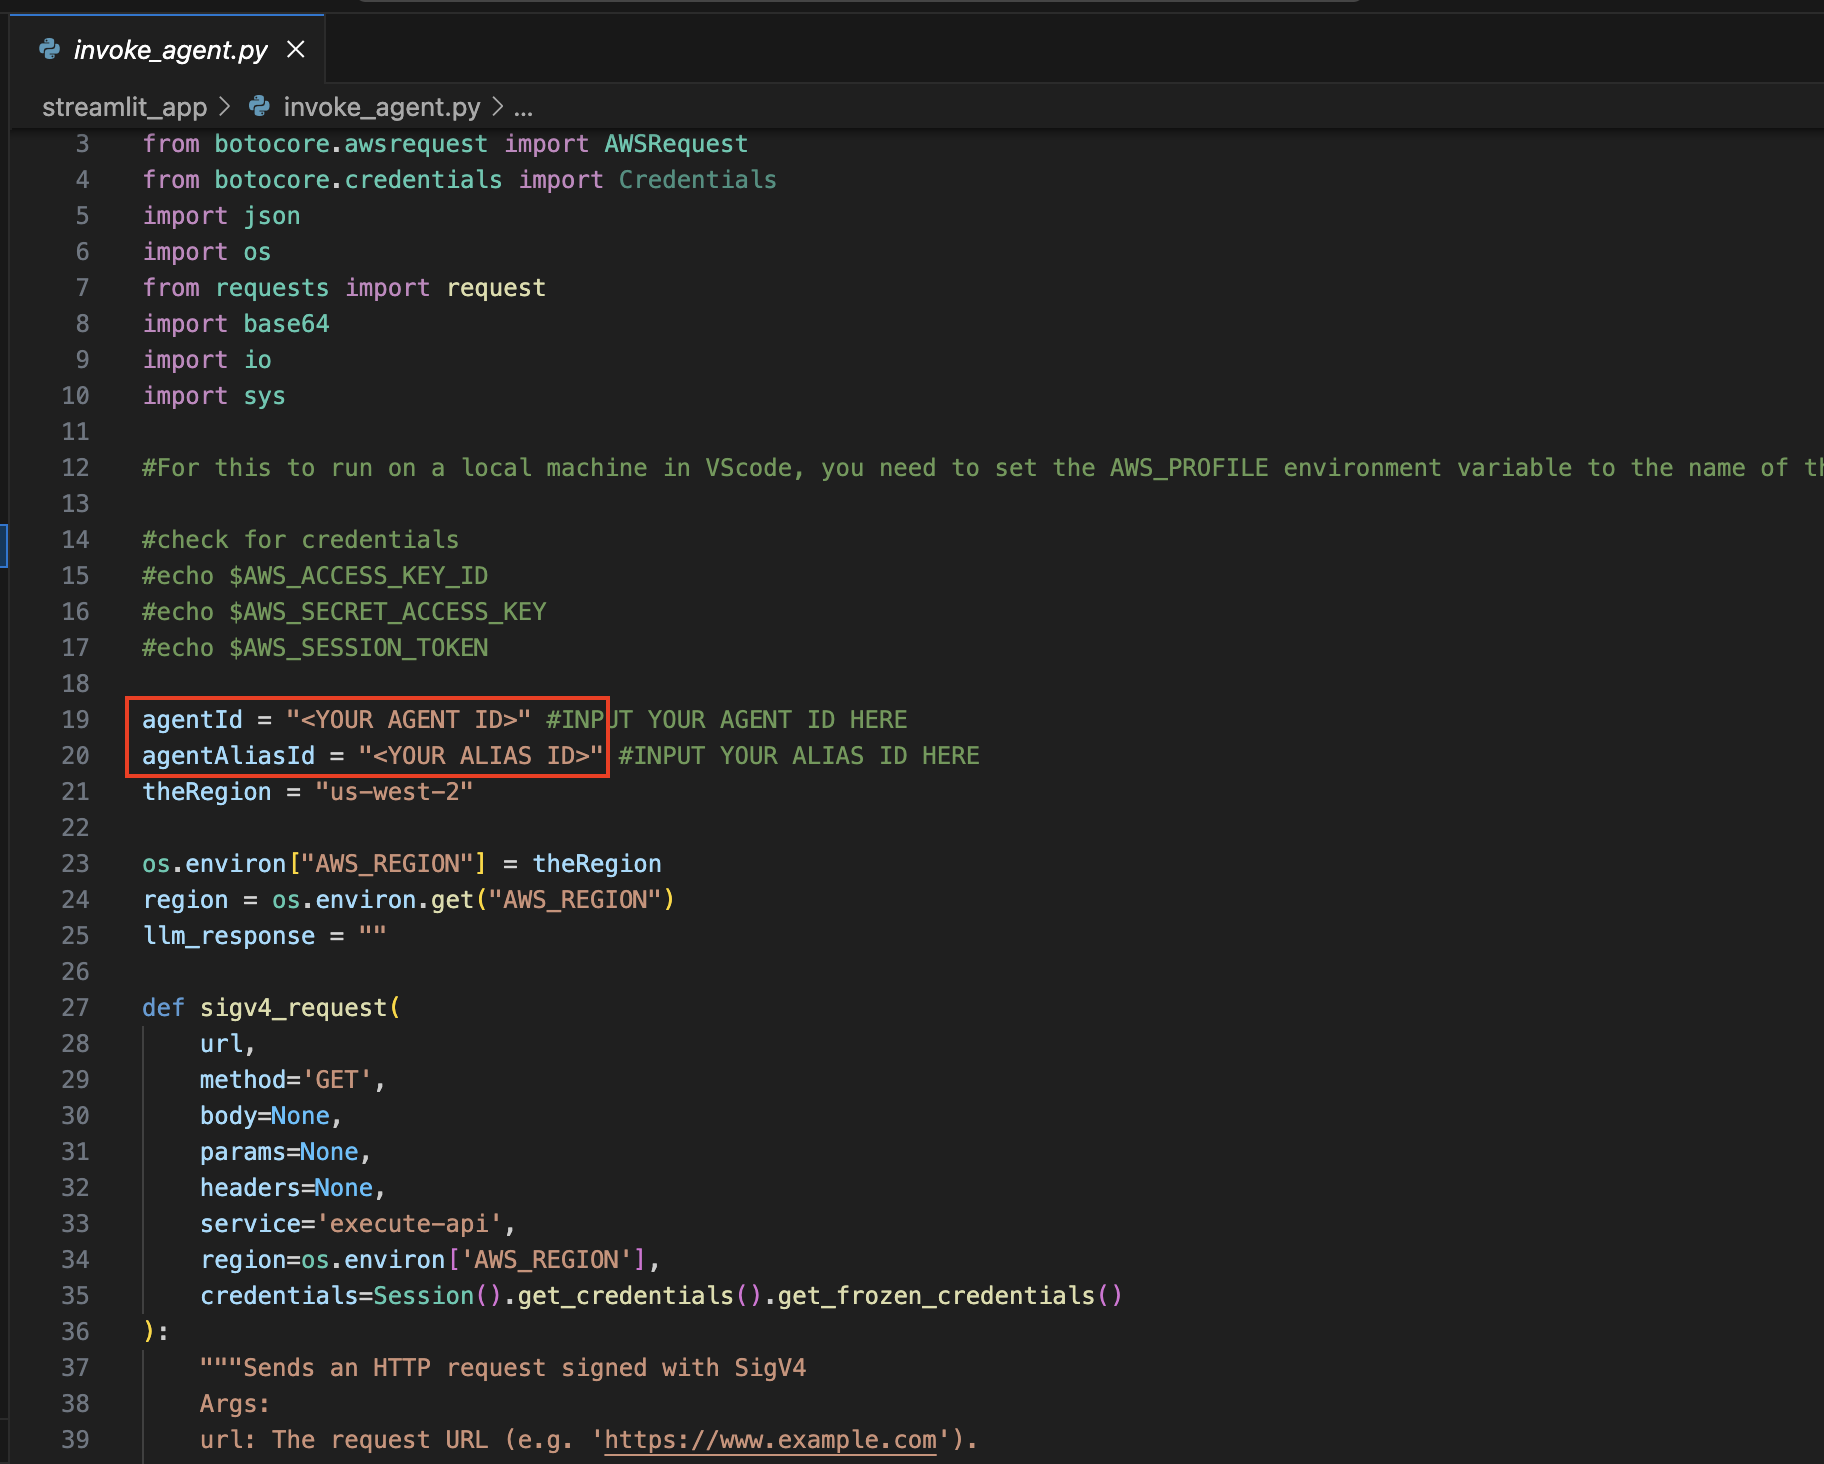
打开invoke_agent.py文件。
在第 19 行和第 20 行,使用适当的值更新agentId和agentAliasId变量,然后保存。
安装 Streamlit (如果尚未安装):
运行以下命令来安装所需的所有依赖项:
pip install streamlit boto3 pandas运行 Streamlit 应用程序:
streamlit_app目录中执行以下命令: streamlit run app.py
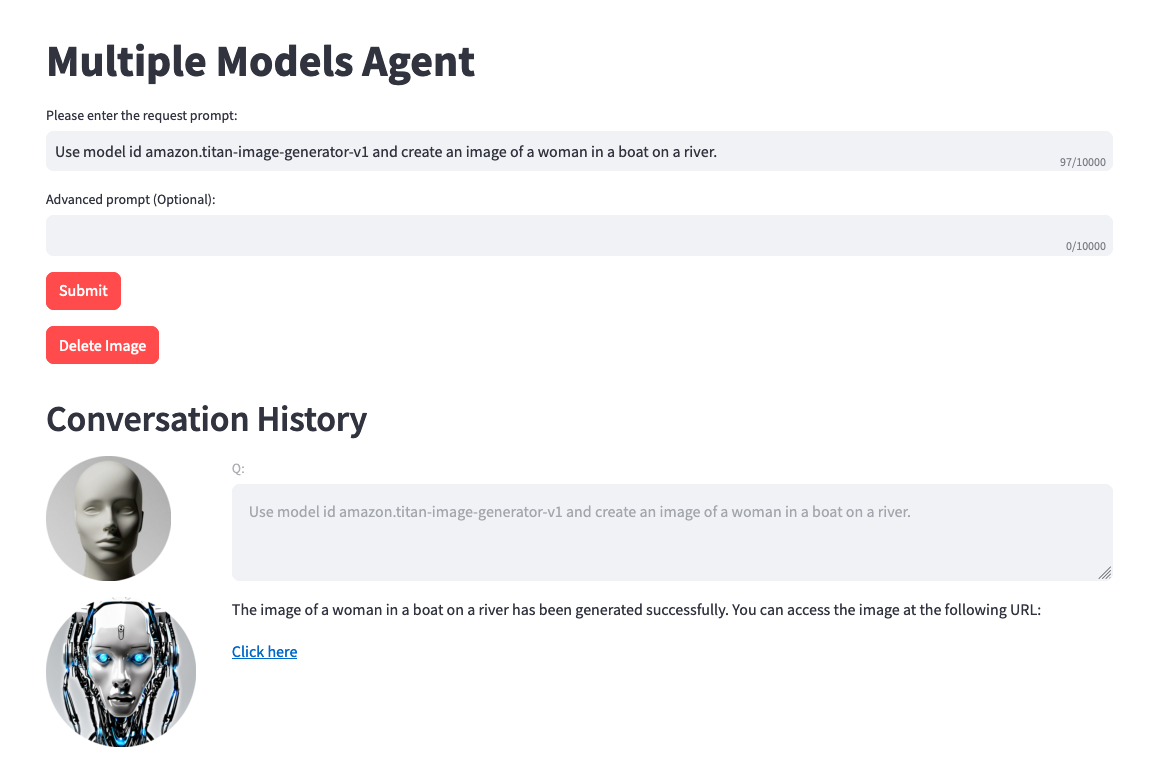
请记住,您可以使用 Amazon Bedrock 中的任何可用模型,并且不限于上面的列表。如果未列出模型 ID,请参阅此处 Amazon Bedrock 文档页面上的最新可用模型 (ID)。
您可以利用提供的项目根据您自己的数据集和用例对该解决方案进行微调和基准测试。探索不同的模型组合,突破可能性的界限,并在不断发展的生成人工智能领域推动创新。
请参阅贡献以获取更多信息。
该库根据 MIT-0 许可证获得许可。请参阅许可证文件。