poster editor
v5.15
此类是 Intervention Image 包的替代方案,可以更灵活地处理图像上的文本。如果您需要使文本适合给定区域、自动计算字体大小并更改行高,请使用它。文本绘制方法还知道如何返回铭文的实际大小,例如,这将允许将块放置在彼此下面。
除了灵活地处理文本之外,该类还提供了类似于 Intervention 包的图像 API。包括智能海报调整大小、滤镜、绘制形状以及叠加其他图像。
如果您在工作中没有使用 Composer,您可能还会对类的简单性和没有任何依赖项感兴趣。请注意,此类仅支持 PHP-GD 驱动程序。您还可以轻松继承您的类 - 父级的所有方法都可以被覆盖。
安装poster editor的最佳方法是使用 Composer 快速轻松地安装。
但是,您可以直接请求该类,而不使用加载程序 - 这不会以任何方式影响性能。
php composer.phar require antonlukin/poster-editor
如果发生错误,类方法将返回异常。
因此,最好在try..catch块内调用它们。
 // Using composer
require_once __DIR__ . ' /vendor/autoload.php ' ;

// Or directly
// require_once __DIR__ . '/PosterEditor.php';

try {
    $ image = new PosterEditor  PosterEditor ();
    $ image -> make ( ' images/bridge.jpg ' )-> fit ( 600 , 600 );
    $ image -> show ();

} catch ( Exception $ e ) {
    echo $ e -> getMessage ();
} $image->get()
获取图像资源以使用原始 gd 命令。
$image->set(instance $resourse)
使用原始 gd 命令后设置图像资源。
$image->make(mixed $data)
从文件或二进制数据创建新的图像实例。
$image->insert(mixed $data, array $options = array())
将给定的图像源粘贴到当前图像上,位置可选。第一个参数可以是二进制数据或文件路径或另一个类实例。 Options 是从左上角开始的 x/y 相对偏移坐标和从 0 到 100 的不透明度的数组,其中 0 表示不透明度。默认情况下图像将居中。
$image->canvas(int $width, int $height, array $options = array())
按宽度和高度初始化画布。背景颜色选项位于颜色/不透明度设置数组中。默认情况下,黑色画布不透明。
$image->show(string $format = null, int $quality = 90)
以给定的格式和质量发送当前图像的 HTTP 响应。格式是文件图像扩展名。默认情况下,响应数据将以当前图像的类型进行编码。如果尚未定义图像类型,方法将返回 jpeg 编码数据。所有文件类型的质量均标准化为从 0(质量差,小文件)到 100(质量最好,大文件)的范围。默认值为 90。PNG 格式是无损的,质量仅影响图像大小和压缩速度。
$image->save(string $path, int $quality = 90, string $format = null)
将图像对象的当前状态保存在文件系统中。可以选择定义保存图像的特定路径。图像类型将由文件扩展名定义。如果没有可用的扩展名,则响应数据将以当前图像的类型进行编码。如果尚未定义图像类型,方法将返回 jpeg 编码数据。您可以选择使用格式参数覆盖它。所有文件类型的质量均标准化为从 0(质量差,小文件)到 100(质量最好,大文件)的范围。默认值为 90。PNG 格式是无损的,质量仅影响图像大小和压缩速度。
$image->destroy()
在 PHP 脚本结束之前释放与当前图像实例关联的内存。通常资源在脚本完成后会自动销毁。
$image->width()
返回当前图像的高度(以像素为单位)。
$image->height()
返回当前图像的高度(以像素为单位)。
$image->resize(int $width, int $height)
根据给定的宽度和高度调整当前图像的大小。不注意长宽比。为了按比例调整大小,请使用upsize和downsize方法。
$image->upsize(int $width = null, int $height = null)
放大最大一侧的图像。按空宽度或高度的比率计算。
$image->downsize(int $width = null, int $height = null)
缩小最大一侧的图像。按空宽度或高度的比率计算。
$image->crop(int $width, int $height, array $options = array())
以给定的宽度和高度剪切当前图像的矩形部分。定义可选的 x,y 坐标以将切口的左上角移动到特定位置。
$image->fit(int $width, int $height, string $position = 'center')
结合裁剪和调整大小以智能方式格式化图像。该方法会自动找到当前图像上最适合的长宽比,将其剪切出来并将其调整为给定的尺寸。默认情况下,可能的位置为top-left 、 top 、 top-right 、 bottom-left center bottom 、 bottom-right 、 right和left 。
$image->line(int $x1, int $y1, int $x2, int $y2, array $options = array())
在当前图像上从 x,y 点 1 到 x,y 点 2 绘制一条线。使用选项参数设置颜色、不透明度和宽度值。
$image->rectangle(int $x, int $y, int $width, int $height, array $options = array())
在当前图像上绘制一个彩色矩形。使用选项参数设置颜色、不透明度、厚度和轮廓值。
$image->ellipse(int $x, int $y, int $width, int $height, array $options = array())
画一个椭圆。使用选项参数设置颜色、不透明度和轮廓值。
$image->brightness(int $level = 0)
按给定级别更改当前图像的亮度。使用 -100 之间的值表示最小亮度,0 表示无变化,+100 表示最大亮度。
$image->contrast(int $level = 0)
按给定级别更改当前图像的对比度。使用 -100 之间的值表示最小对比度,0 表示无变化,+100 表示最大对比度。
$image->grayscale()
将图像转换为灰度版本。
$image->blur()
应用模糊图像效果。
$image->invert()
反转图像的颜色。
$image->blackout()
在图像上绘制黑色不透明矩形。
$image->rotate(int $angle, array $options = array())
旋转图像。设置旋转后未覆盖区域的角度(以度为单位)和可选颜色。
$image->text(string $text, array $options = array(), array &$boundary = array())
在图像上绘制文本。可能的选项:
使用边界获取绘制文本框的实际尺寸。请参阅下面的详细示例。
 $ image = new PosterEditor  PosterEditor ();
$ image -> make ( ' images/bridge.jpg ' )-> fit ( 1200 , 630 , ' bottom ' )-> blackout ( 50 );

$ logo = new PosterEditor  PosterEditor ();
$ logo -> make ( ' images/logo.png ' )-> downsize ( 150 , null );

$ image -> insert ( $ logo , array ( ' x ' => 50 , ' y ' => 50 ))-> show ();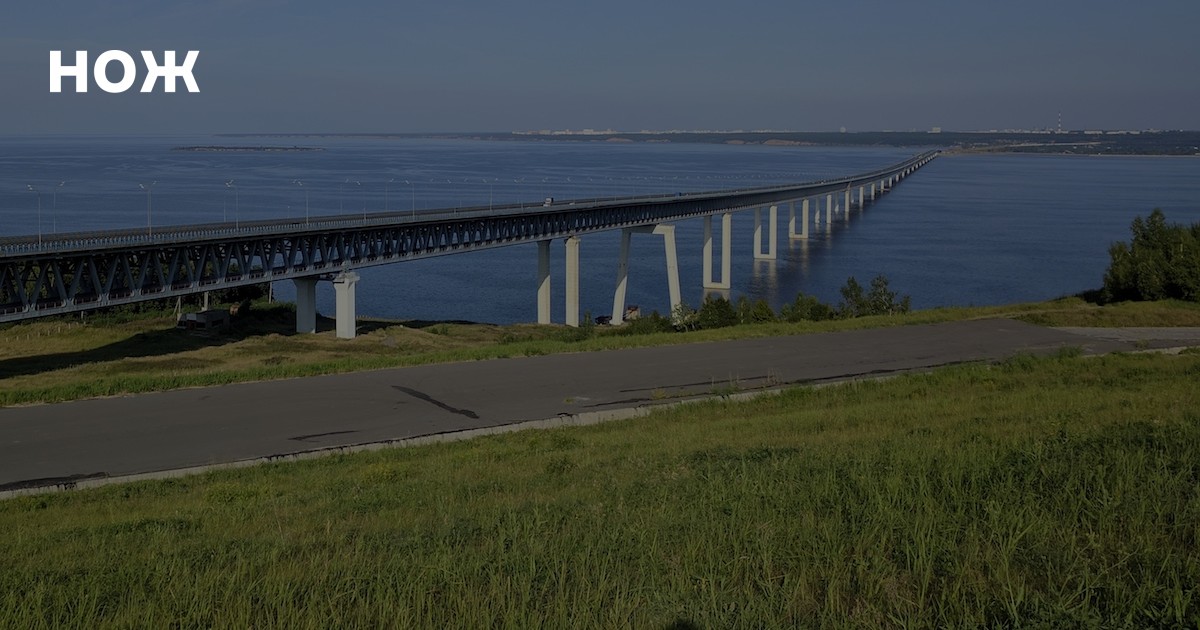
 $ image = new PosterEditor  PosterEditor ();
$ image -> make ( ' images/bridge.jpg ' )-> fit ( 1200 , 630 );
$ image -> grayscale ()-> brightness (- 40 );

$ image -> text (
    ' Lorem ipsum dolor sit amet, consectetur adipiscing elit, sed do eiusmod tempor incididunt ut labore et dolore magna aliqua. Ut enim ad minim veniam, quis nostrud exercitation ullamco laboris nisi ut aliquip ex ea commodo consequat Lorem ipsum dolor sit amet ' , // phpcs:ignore
    array (
        ' x '          => 100 ,
        ' y '          => 100 ,
        ' width '      => 1000 ,
        ' height '     => 400 ,
        ' horizontal ' => ' center ' ,
        ' vertical '   => ' center ' ,
        ' fontpath '   => ' fonts/opensans.ttf ' ,
        ' fontsize '   => 24 ,
        ' lineheight ' => 1.75 ,
        ' color '      => ' #ffffff ' ,
        ' opacity '    => 0 ,
        ' debug '      => true ,
    )
);

$ image -> show ( ' jpg ' , 70 );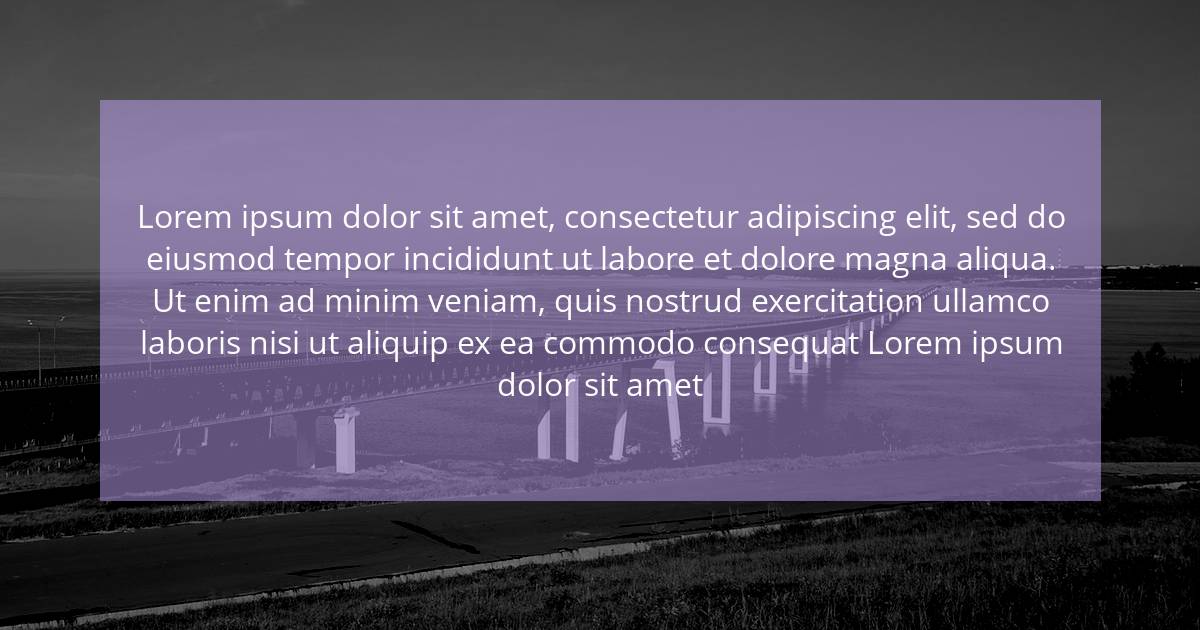
 $ image = new PosterEditor  PosterEditor ();
$ image -> make ( ' images/bridge.jpg ' )-> fit ( 900 , 600 );
$ image -> blackout ( 70 );

$ image -> text (
    ' Lorem ipsum dolor d d 4 g sit amet, consectetur adipiscing et, sed do eiusmod tempor incididunt ut labore et dolore magna aliqua. Ut enim ad minim veniam, quis nostrud exercitation ullamco laboris nisi ut aliquip ex eas commodo consequat sdfsdfl ' , // phpcs:ignore
    array (
        ' x '          => 100 ,
        ' y '          => 100 ,
        ' width '      => 600 ,
        ' height '     => 400 ,
        ' horizontal ' => ' justify ' ,
        ' vertical '   => ' justify ' ,
        ' fontpath '   => ' fonts/opensans.ttf ' ,
        ' fontsize '   => 20 ,
        ' lineheight ' => 1.5 ,
        ' color '      => ' #ffffff ' ,
        ' opacity '    => 0 ,
        ' debug '      => true ,
    )
);

$ image -> show ( ' png ' );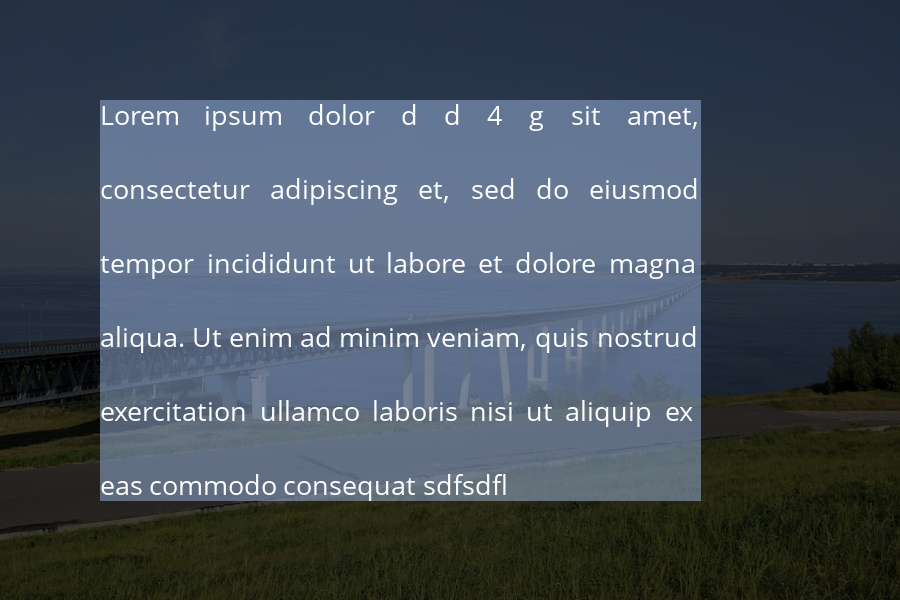
 $ image = new PosterEditor  PosterEditor ();
$ image -> make ( ' images/bridge.jpg ' )-> crop (
    900 , 600 ,
    array (
        ' x ' => ' 0 ' ,
        ' y ' => ' 100 '
    )
);

$ image -> grayscale ()-> brightness (- 40 );

$ image -> text (
    ' Large title with unknown height. Can be multi-line ' ,
    array (
        ' x '          => 50 ,
        ' y '          => 100 ,
        ' width '      => 800 ,
        ' fontpath '   => ' /fonts/merriweather.ttf ' ,
        ' fontsize '   => 48 ,
        ' lineheight ' => 1.5 ,
        ' color '      => ' #9999ff ' ,
    ),
    $ boundary
);

$ image -> text (
    ' This text appears right after title using smart boundaries ' ,
    array (
        ' x '          => 50 ,
        ' y '          => $ boundary [ ' y ' ] + $ boundary [ ' height ' ],
        ' width '      => 800 ,
        ' fontpath '   => ' /fonts/opensans.ttf ' ,
        ' fontsize '   => 20 ,
        ' lineheight ' => 1.5 ,
        ' color '      => ' #ff9999 ' ,
    ),
    $ boundary
);

$ image -> show ();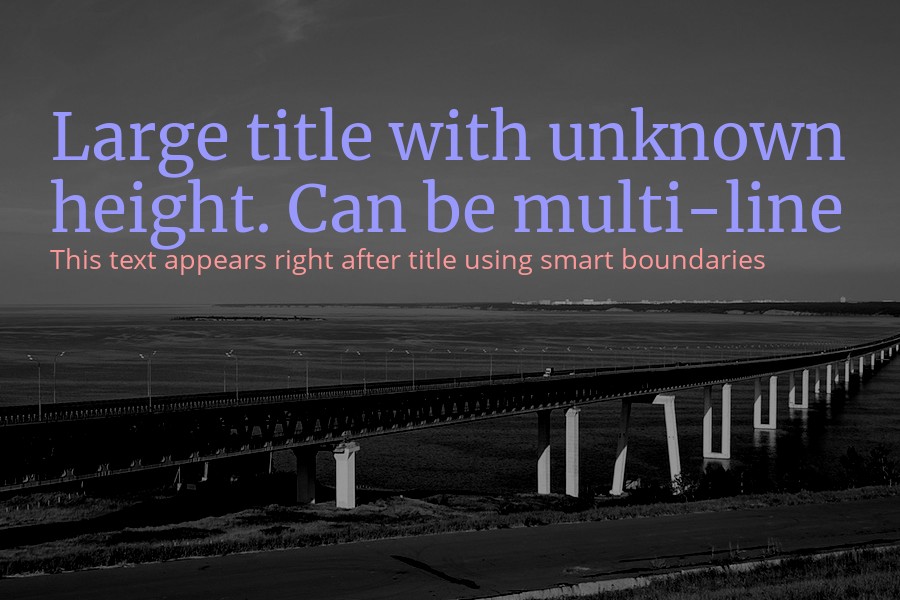
 $ image = new PosterEditor  PosterEditor ();
$ image -> make ( ' images/bridge.jpg ' )-> fit ( 1000 , 630 , ' bottom ' );
$ image -> contrast ( 5 )-> brightness (- 30 )-> blur ();

$ image -> rectangle (
    20 , 20 , 960 , 590 ,
    array (
        ' color '   => ' #ffffff ' ,
        ' outline ' => true ,
        ' width '   => 4 ,
    )
);

$ image -> ellipse (
    200 , 200 , 200 , 200 ,
    array (
        ' color '   => ' #00ff00 ' ,
        ' opacity ' => 50 ,
    )
);

$ image -> ellipse (
    800 , 200 , 200 , 200 ,
    array (
        ' color '   => ' #ff0000 ' ,
        ' opacity ' => 50 ,
    )
);

$ image -> rectangle (
    480 , 280 , 80 , 140 ,
    array (
        ' color '   => ' #0000ff ' ,
    )
);

$ image -> line (
    200 , 500 , 800 , 500 ,
    array (
        ' color '   => array ( 255 , 255 , 0 ),
        ' opacity ' => 10 ,
        ' width '   => 4 ,
    )
);

$ image -> show ( ' png ' );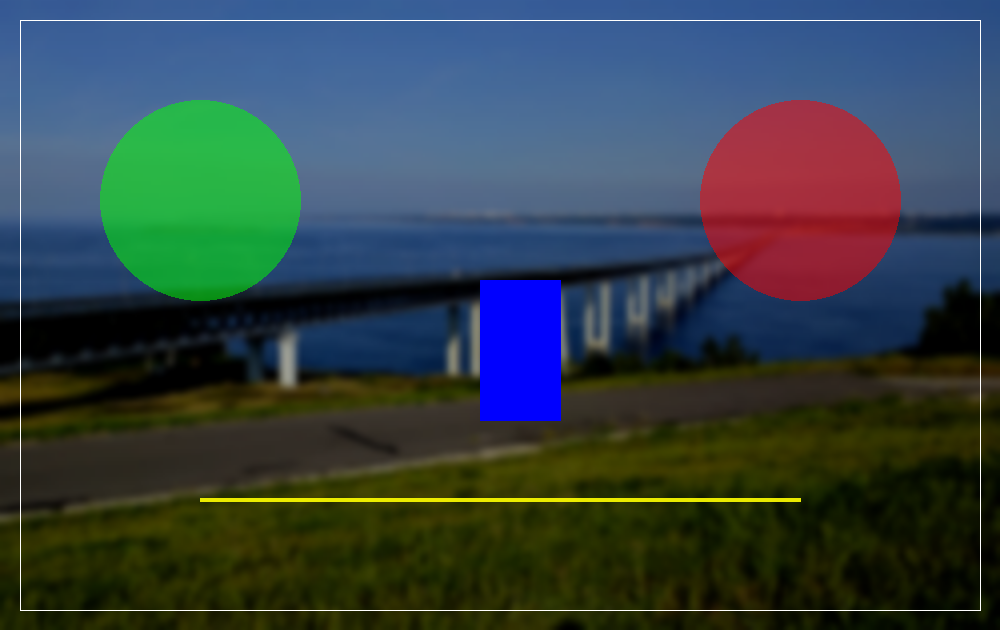
所有项目代码都存储在Github上。帮助项目的最好方法是报告错误或添加一些新功能。您还可以在此处打开问题或发送请求请求。


