poemkit
PoemKit Stable
 诗集“宽度=“180”样式=“最大宽度:100%;”>
带有 React 的免费 Web 工具包,可通过 SSR 进行快速网页设计和开发。它也是一种微前端架构。使用react、redux、router、axios 和express。该项目是使用 Nodejs 库启动的。项目支持通过 pm2 从许多存储库托管服务进行自动部署。 poemkit提供了超过50 个内置 UI 组件,用于构建现代 Web 应用程序。
poemkit可以通过命令来工作和部署,但仍然需要在命令后面编写真正的代码。这些套件用作 UI 组件和一些逻辑模块,可以将它们组合到真实的网站或应用程序原型中,但仍需要编程功能才能使其在现实世界中工作。 poemkit满足完全可定制的 Webpack 要求。
?您还可以使用独立的 React UI 组件库(基于 BootStrap 5)Funda UI。
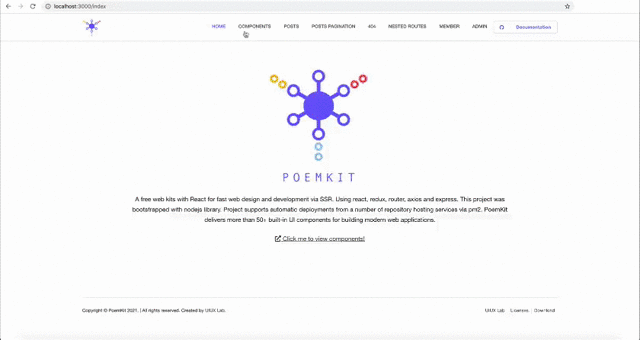
如需在线演示,请查看 https://uiux.cc/poemkit
服务器运行在http://localhost:3000
 poemkit /
├── README.md
├── CHANGELOG.md
├── CONTRIBUTING.md
├── LICENSE
├── ecosystem.config.js ------------------------- # for pm2
├── babel.config.js
├── tsconfig.json
├── webpack.config.js
├── package-lock.json
├── package.json
├── test/            --------------------------- # Unit Testing scripts
├── public/          --------------------------- # HTML template of Homepage
│   ├── index.html
│   ├── manifest.json
│   └── server/  ------------------------------- # PHP scripts used to the server for testing
│   └── assets/
├── dist/        ------------------------------- # Files compiled, used in the production environment
│   ├── css/
│   │   ├── poemkit .css
│   │   └── poemkit .min.css
│   └── js/
│   │   ├── poemkit .js
│   │   └── poemkit .min.js
├── src/
│   ├── client/
│   │   ├── client.js
│   │   ├── actions/
│   │   ├── reducers/
│   │   ├── helpers/
│   │   ├── services/
│   │   ├── router/
│   │   ├── components/ -------------------------  # Independent React components
│   │   │     ├── * /
│   │   │     ├── _utils/ -----------------------  # General utilities & snippets(js & css)
│   │   │     └── _plugins/ ---------------------  # Third-party plugins
│   │   ├── views/ ------------------------------  # Website pages
│   │   │     ├── _pages/
│   │   │     └── _html/
│   └── server/
│   │   ├── app.js
│   │   ├── server.js
│   │   └── renderer.js
│   └── store/
│   │   └── createStore.js
│   └── config/
│   │   ├── tmpl-manifest.json  -----------------  # `manifest.json` file template
│   │   └── websiteConfig.js  -------------------  # website config
└──webpack.config.js以使用内存挂载) 您需要在计算机上设置节点。这会将构建的可分发文件输出到./dist/*和./public/*.html 。
步骤1.使用NPM(找到您当前的项目目录,然后输入以下命令。)或从Github下载最新版本。对于nodejs,你必须安装一些依赖项。
$ npm install poemkit或者克隆存储库以获取所有源文件,包括构建脚本:
$ git clone git://github.com/xizon/ poemkit .git步骤 2.首先,使用绝对路径进入" poemkit /"文件夹目录。
$ cd /{your_directory}/ poemkit步骤 3.在进行所有开发工作之前,请确保已安装Node 10+ 。之后,在主目录中运行以下代码来安装节点模块依赖项。
$ npm install当前测试环境是`Node 18+`、`npm 9+`。如果依赖安装失败(通常是因为你升级了Nodejs版本,目前测试为Node 18+),可能是新版本的npm与旧版本的npm冲突,请使用以下命令安装依赖:$ npm install --legacy-peer-deps如果安装仍然失败,请使用以下方法:删除
package.json中的devDependency 、依赖项和peerDependency ,删除文件package-lock.json并重新安装依赖项:$ npm install --save-dev @testing-library/jest-dom @testing-library/[email protected] @types/react @typescript-eslint/eslint-plugin @typescript-eslint/parser babel-loader clean-webpack-plugin cross-env css-loader css-minimizer-webpack-plugin eslint eslint-config-prettier eslint-plugin-prettier eslint-plugin-react file-loader glslify-loader html-loader html-webpack-plugin identity-obj-proxy include-file-webpack-plugin jest jsdom jest-environment-jsdom json-loader log-timestamp mime-types mini-css-extract-plugin sass nodemon postcss prettier prettier-loader random-string raw-loader [email protected] safe-buffer sass-loader style-loader tar terser-webpack-plugin ts-jest ts-node tsconfig-paths typescript webpack webpack-cli webpack-dev-middleware webpack-dev-server $ npm install @babel/core @babel/node @babel/plugin-proposal-class-properties @babel/plugin-transform-runtime @babel/polyfill @babel/preset-env @babel/preset-flow @babel/preset-react @babel/preset-typescript @babel/register axios babel-plugin-module-resolver compression cors express ignore-styles moment [email protected] [email protected] [email protected] [email protected] [email protected] [email protected] [email protected] [email protected] [email protected]
步骤4.常用命令:
调试应用程序。它可以作为 TypeScript 单独检查,无需编译和打包行为。
$ npm run check使用 webpack 打包文件。
$ npm run build运行以下命令进行本地测试和代码检查。可以看到服务器正在运行。 (仅运行 Express 服务器。)。使用Ctrl + C来停止它。
$ npm run dev步骤 5.完成后,这将启动一个可以通过以下地址访问的服务器:
http://localhost:3000建议在调试之前捆绑新代码。
步骤 6(可选)。在托管服务器上部署节点服务器
请在部署之前运行构建命令。 (如果由于Node权限的原因不起作用,请使用以下命令)
$ npm run deploy 停止现有部署
$ npm run destroy步骤 7(可选)。单元测试
$ npm run test笔记:
a) 错误:npm 更新检查失败。
解决方案:
$ sudo chown -R $USER : $( id -gn $USER ) /Users/{username}/.configb) 错误:Node sass 版本 6.xx 与 ^ 4.xx 不兼容
解决方案:
$ npm install [email protected]c) 如果升级Node版本,请执行以下代码:
$ npm install
$ npm rebuild node-sass
使用 PM2 作为服务启动 Reactjs 应用程序(仅当您使用 Node v13.9.0 或更高版本时才有效。)
这里将安装Node14+版本
$ curl -sL https://rpm.nodesource.com/setup_14.x | sudo bash -
$ sudo yum install nodejs
$ node --version  # v14.16.1
$ npm --version   # 6.14.12
$ which node babel-node # check the location of node and babel-node $ sudo npm install pm2@latest -g$ sudo npm install -g babel-cli
$ sudo npm install -g @babel/core @babel/cli @babel/preset-env $ sudo npm install -g typescript ts-node$ sudo pm2 install typescript # into your `" poemkit /"` folder directory.
$ cd /{your_directory}/ poemkit
# run app
$ pm2 start ecosystem.config.js
# Detect available init system, generate configuration and enable startup system, and you can check the status of the same using
$ pm2 startup
$ systemctl status pm2-root
$ pm2 start /{your_directory}/ poemkit /ecosystem.config.js --restart-delay=3000
$ pm2 save
# other commands
$ pm2 restart ecosystem.config.js
$ pm2 stop ecosystem.config.js
$ pm2 delete ecosystem.config.js
$ pm2 list
$ pm2 logs在云服务器上使用NPM或PM2部署应用程序时可能出现的问题的一些解决方案:
a)错误:权限被拒绝,访问'/usr/lib/node_modules'
解决方案:
chmod -R a+x node_modulesb)错误:JavaScript 堆内存不足
V8 中的内存使用有严格的标准限制,如果您不手动增加内存使用量,则最大为 ~1GB(32 位)和 ~1.7GB(64 位)。
解决方案:
export NODE_OPTIONS=--max_old_space_size=4096c) 错误:EACCES:权限被拒绝,mkdir '/root/.pm2/xxxx'
解决方案:
一般来说,只要避免使用
NPM运行 PM2 命令即可。您仍然可以尝试以下操作:
确保在以无守护程序模式启动 PM2 之前杀死任何 PM2 实例 (pm2 Kill)。
 # re-install PM2 (optional)
sudo npm i -g pm2

# if pm2 was reinstalled, ts-node must be reinstalled (optional)
sudo npm install -g ts-node@latest

# clear all pm2 instances
pm2 kill

# then restart it
pm2 start xxxxxx
您已经从这里创建了一个基本的 React 应用程序,然后您需要在 Apache 或 Nginx Web 服务器上部署一个 React 应用程序。设置代理的教程请参考网络。
现在应用程序已准备好部署,我们应该准备 Nginx 端。如果没有安装 Nginx,可以通过运行以下两个命令使用 apt 打包系统轻松安装 Nginx:
$ sudo apt update
$ sudo apt install nginx
或者
$ sudo yum install nginx -y启动 Nginx:
$ systemctl start nginx开机启动:
$ systemctl enable nginx在 CentOS 8 上使用 FirewallD 设置防火墙:
$ firewall-cmd --permanent --zone=public --add-service=http
$ firewall-cmd --permanent --zone=public --add-service=https
$ firewall-cmd --permanent --zone=public --add-port=3000/tcp
$ firewall-cmd --reload
$ systemctl restart nginx
我们可以检查 Nginx 是否正在系统上运行:
$ systemctl status nginx好了,现在 Nginx 服务已经成功开始运行了,我们可以继续修改/etc/nginx/conf.d/default.conf中的配置文件了。我们将在此处指向域以启动正确的 React 应用程序:
$ vi /etc/nginx/conf.d/default.conf在文件末尾添加:
server {
        listen      443 ssl ;
        server_name backend1.example.com ;

        ...
        location / {
            proxy_set_header Host $http_host ;
            proxy_pass http://{YOUR_IP}:3000 ;
        }

}
将这些行添加到文件后,我们需要重新启动 Nginx 服务:
$ systemctl restart nginx如果服务重新启动成功,可能不会有任何消息。否则,它会吐出几行错误消息。
修改文件./src/server/app.js ,使用 https.createServer([options][, requestListener]) 包装 Express 服务,请查看以下示例代码:
 import path from 'path' ;
import https from 'https' ;
const cert = fs . readFileSync ( path . join ( __dirname , '../../path/bundle.crt' ) ) ;
const key = fs . readFileSync ( path . join ( __dirname , '../../path/ca.key' ) ) ;
const server = https . createServer ( { key : key , cert : cert } , app ) ;

...
app . get ( '/' , ( req , res ) => { res . send ( 'this is an secure server' ) } ) ;
...

server . listen ( port , ( ) => console . log ( `Frontend service listening on port: ${ port } , access https://localhost: ${ port } in the web browser` ) ) ;要在webpack.config.js中消除开发和生产版本之间的歧义,您可以使用环境变量。
如果你想同时考虑OS X和Windows,可以使用第三方工具cross-env
步骤1.运行命令安装cross-env
$ npm install --save-dev cross-env步骤2.在脚本中的package.json文件中,我们将指示生产版本中组装webpack的现成命令
 "scripts" : {
	"dev" : " cross-env NODE_ENV=development nodemon --require ignore-styles --exec ts-node -r tsconfig-paths/register ./src/server/server.js " ,
    "build" : " cross-env NODE_ENV=production webpack --progress --mode production "
}通过cross-env设置变量和值NODE_ENV=xxx ,然后我们在执行webpack时得到这个变量
步骤 3.进一步进入配置文件webpack.config.js让我们从对象进程和进一步的属性 env 中应用此检查到我们的变量NODE_ENV :
 if ( process . env . NODE_ENV === 'production' ) {
    // .. тwe apply (or add) some kind of plugin
}修改默认模板./src/client/views/_html/index.html 。它将自动生成为./public/index.html 。它包含React Helmet需要使用的HTML标签,例如:
 <!DOCTYPE html >
< html {{helmetHtmlAttributes}} >
	< head >
		< meta charset =" utf-8 " />
		{{helmetTitle}}

		<!-- manifest.json provides metadata used when your web app is added to the
             homescreen on Android. See https://developers.google.com/web/fundamentals/engage-and-retain/web-app-manifest/
		============================================= -->
		< link rel =" manifest " href =" @@{website_root_directory}/manifest.json " />

		<!-- Mobile Settings
		============================================= -->
        < meta name =" viewport " content =" width=device-width, initial-scale=1, maximum-scale=1 " />
        <!-- Mobile Settings end -->

		<!-- Compatibility
		============================================= -->
        < meta http-equiv =" X-UA-Compatible " content =" IE=edge " />
        <!-- Compatibility  end -->

		<!-- Core & Theme CSS
		============================================= -->
        < link rel =" stylesheet " href =" @@{website_root_directory}/dist/css/ poemkit .min.css?ver=@@{website_hash} " />
        <!-- Core & Theme CSS  end -->


        <!-- Overwrite Font Files
           *
           * The fonts extracted with `mini-css-extract-plugin` may not load correctly
           * Font files in `dist/fonts/` are fetched automatically by `file-loader`, you can configure webpack.config.js to name them.
        ============================================= -->
        < style >
        @font-face {
            font-family: 'Font Awesome 5 Free';
            font-style: normal;
            font-weight: 900;
            font-display: $fa-font-display;
            src: url('@@{website_root_directory}/dist/fonts/fa-solid-900.eot');
            src: url('@@{website_root_directory}/dist/fonts/fa-solid-900.eot?#iefix') format('embedded-opentype'),
            url('@@{website_root_directory}/dist/fonts/fa-solid-900.woff2') format('woff2'),
            url('@@{website_root_directory}/dist/fonts/fa-solid-900.woff') format('woff'),
            url('@@{website_root_directory}/dist/fonts/fa-solid-900.ttf') format('truetype'),
            url('@@{website_root_directory}/dist/fonts/fa-solid-900.svg#fontawesome') format('svg');
          }

          .fa,
          .fas {
            font-family: 'Font Awesome 5 Free';
            font-weight: 900;
          }

          @font-face {
            font-family: 'Font Awesome 5 Brands';
            font-style: normal;
            font-weight: 400;
            font-display: $fa-font-display;
            src: url('@@{website_root_directory}/dist/fonts/fa-brands-400.eot');
            src: url('@@{website_root_directory}/dist/fonts/fa-brands-400.eot?#iefix') format('embedded-opentype'),
            url('@@{website_root_directory}/dist/fonts/fa-brands-400.woff2') format('woff2'),
            url('@@{website_root_directory}/dist/fonts/fa-brands-400.woff') format('woff'),
            url('@@{website_root_directory}/dist/fonts/fa-brands-400.ttf') format('truetype'),
            url('@@{website_root_directory}/dist/fonts/fa-brands-400.svg#fontawesome') format('svg');
            }

            .fab {
                font-family: 'Font Awesome 5 Brands';
                font-weight: 400;
            }
            @font-face {
                font-family: 'Font Awesome 5 Free';
                font-style: normal;
                font-weight: 400;
                font-display: $fa-font-display;
                src: url('@@{website_root_directory}/dist/fonts/fa-regular-400.eot');
                src: url('@@{website_root_directory}/dist/fonts/fa-regular-400.eot?#iefix') format('embedded-opentype'),
                url('@@{website_root_directory}/dist/fonts/fa-regular-400.woff2') format('woff2'),
                url('@@{website_root_directory}/dist/fonts/fa-regular-400.woff') format('woff'),
                url('@@{website_root_directory}/dist/fonts/fa-regular-400.ttf') format('truetype'),
                url('@@{website_root_directory}/dist/fonts/fa-regular-400.svg#fontawesome') format('svg');
            }

            .far {
                font-family: 'Font Awesome 5 Free';
                font-weight: 400;
            }
        </ style >
         <!-- Overwrite Font Files   end -->


		<!-- SEO
		============================================= -->
		{{helmetMeta}}
		{{helmetLink}}
        < meta name =" generator " content =" @@{website_generator} " />
        < meta name =" author " content =" @@{website_author} " />
        <!-- SEO  end -->


		<!-- Favicons
		============================================= -->
		< link rel =" icon " href =" @@{website_root_directory}/assets/images/favicon/favicon-32x32.png " type =" image/x-icon " />
		< link rel =" shortcut icon " href =" @@{website_root_directory}/assets/images/favicon/favicon-32x32.png " sizes =" 32x32 " />
		< link rel =" apple-touch-icon " href =" @@{website_root_directory}/assets/images/favicon/apple-touch-icon-57x57.png " />
		< link rel =" apple-touch-icon " sizes =" 72x72 " href =" @@{website_root_directory}/assets/images/favicon/apple-touch-icon-72x72.png " />
		< link rel =" apple-touch-icon " sizes =" 114x114 " href =" @@{website_root_directory}/assets/images/favicon/apple-touch-icon-114x114.png " />
		<!-- Favicons  end -->

  </ head >

  < body {{helmetBodyAttributes}} >

	  < noscript >
	      You need to enable JavaScript to run this app.
	  </ noscript >

	  < div id =" app " > {{reactApp}} </ div >

	<!-- Your Plugins & Theme Scripts
	============================================= -->
	< script >
		var REVISION     = "@@{website_version}" ,
			APP_ROOTPATH = {
				"templateUrl" : "@@{website_root_directory}" , //If the file is in the root directory, you can leave it empty. If in another directory, you can write: "/blog"  (but no trailing slash)
				"homeUrl"     : "" ,  //Eg. https://uiux.cc
				"ajaxUrl"     : ""   //Eg. https://uiux.cc/wp-admin/admin-ajax.php
			} ;
    </ script >
    < script > window . __PRELOADED_STATE__ = { { preloadedState } } ; </ script >
    < script src =" @@{website_root_directory}/dist/js/ poemkit .min.js?ver=@@{website_hash} " > </ script >
	<!-- Your Plugins & Theme Scripts  end -->

  </ body >
</ html > ./public/manifest.json文件是根据./src/config/tmpl-manifest.json自动生成的
您可以通过将resolve添加到webpack.config.js来配置模块分辨率。如果在导入另一个模块时使用相对路径,就会很麻烦,因为你必须弄清楚所有的相对路径。因此,您可以添加别名以方便自己。
webpack.config.js :
...
const alias = {
	pathConfig            : './src/config' ,
	pathComponents        : './src/client/components' ,
	pathRouter            : './src/client/router' ,
	pathHelpers            : './src/client/helpers' ,
	pathServices          : './src/client/services' ,
	pathReducers          : './src/client/reducers' ,
	pathPages             : './src/client/views/_pages' ,
	pathActions           : './src/client/actions' ,
	pathServer            : './src/server' ,
	pathStore             : './src/store'
} ;

...
resolve : {
	extensions : [ '.js' , '.jsx' , '.ts' , '.tsx' , '.scss' , '.sass' ] ,
	alias : {

		// specific mappings.
		// Supports directories and custom aliases for specific files when the express server is running,
		// you need to configure the `babel.config.js` and `tsconfig.json` at the same time
		'@/config' : path . resolve ( __dirname , alias . pathConfig ) ,
		'@/components' : path . resolve ( __dirname , alias . pathComponents ) ,
		'@/router' : path . resolve ( __dirname , alias . pathRouter ) ,
		'@/helpers' : path . resolve ( __dirname , alias . pathHelpers ) ,
		'@/services' : path . resolve ( __dirname , alias . pathServices ) ,
		'@/reducers' : path . resolve ( __dirname , alias . pathReducers ) ,
		'@/pages' : path . resolve ( __dirname , alias . pathPages ) ,
		'@/actions' : path . resolve ( __dirname , alias . pathActions ) ,
		'@/server' : path . resolve ( __dirname , alias . pathServer ) ,
		'@/store' : path . resolve ( __dirname , alias . pathStore ) ,

	}
} ,
...
babel.config.js :
...
  "plugins" : [
	[ "module-resolver" , {
	  "root" : [ "./src" ] ,
	  "alias" : {
		"@/config" : "./src/config" ,
		"@/components" : "./src/client/components" ,
		"@/router" : "./src/client/router" ,
		"@/helpers" : "./src/client/helpers" ,
		"@/services" : "./src/client/services" ,
		"@/reducers" : "./src/client/reducers" ,
		"@/pages" : "./src/client/views/_pages" ,
		"@/actions" : "./src/client/actions" ,
		"@/server" : "./src/server" ,
		"@/store" : "./src/store"
	  }
	} ]
  ]
. . .
tsconfig.json :
{
  "compilerOptions" : {
    "baseUrl" : " ./src " ,
    "paths" : {
        "@/config/*" : [ " config/* " ],
        "@/components/*" : [ " client/components/* " ],
        "@/router/*" : [ " client/router/* " ],
        "@/helpers/*" : [ " client/helpers/* " ],
        "@/services/*" : [ " client/services/* " ],
        "@/reducers/*" : [ " client/reducers/* " ],
        "@/pages/*" : [ " client/views/_pages/* " ],
        "@/actions/*" : [ " client/actions/* " ],
        "@/server/*" : [ " server/* " ],
        "@/store/*" : [ " store/* " ]
    }
  }
}
package.json :
{
  "jest" : {
    "testEnvironment" : " jsdom " ,
    "moduleNameMapper" : {
      " \ .(css|less|scss|sass)$" : " identity-obj-proxy " ,
      "^@/config/(.*)" : " <rootDir>/src/config/$1 " ,
      "^@/components/(.*)" : " <rootDir>/src/client/components/$1 " ,
      "^@/router/(.*)" : " <rootDir>/src/client/router/$1 " ,
      "^@/helpers/(.*)" : " <rootDir>/src/client/helpers/$1 " ,
      "^@/services/(.*)" : " <rootDir>/src/client/services/$1 " ,
      "^@/reducers/(.*)" : " <rootDir>/src/client/reducers/$1 " ,
      "^@/pages/(.*)" : " <rootDir>/src/client/views/_pages/$1 " ,
      "^@/actions/(.*)" : " <rootDir>/src/client/actions/$1 " ,
      "^@/server/(.*)" : " <rootDir>/src/server/$1 " ,
      "^@/store/(.*)" : " <rootDir>/src/store/$1 "
    },
    "transform" : {
      "^.+ \ .(js|jsx)$" : " babel-jest " ,
      "^.+ \ .(ts|tsx)?$" : " ts-jest "
    }
  }
}使用webpack.config.js中的输出来配置与库相关的设置,例如模块类型和命名空间。
...
const globs = {
	port                  : 8080 ,
	examples              : 'public' ,
	build                 : 'src/client' ,
	dist                  : 'dist'
} ;

...
output : {
	path : path . resolve ( __dirname , './' + globs . dist + '/js' ) ,
	filename : '[name].js'
} ,
...您可以通过修改package.json的站点信息配置来更新模板中的占位符。像这样:
{
  "author" : " UIUX Lab " ,
  "name" : " poemkit " ,
  "email" : " [email protected] " ,
  "version" : " 1.0.0 " ,
  "projectName" : " poemkit " ,
  "createdInfo" : " UIUX Lab (https://uiux.cc) " ,
  "projectURL" : " https://uiux.cc " ,
  "description" : " React toolkit for building a full website that also is a Micro-Frontend Architecture " ,
  ...
}路由的配置,也是网站的主导航(不包括主导航中页面配置的嵌套路由的配置)。访问./src/client/router/RoutesConfig.js 。
路由器的一些脚本可以在文件./src/client/router/App.js中修改。
服务器端的一些脚本可以在文件./src/server/renderer.js中修改。
要同时运行服务器和 React 应用程序,我们需要将proxy密钥添加到package.json 。我们已经将服务器设置为在端口 3000 上运行,因此将代理指向localhost:3000 。
{
  "proxy" : " http://localhost:3000 " ,
  ...
}PropTypes检查类型: $ npm run dev然后,您可以使用以下 JavaScript 代码对其进行调试。在终端中显示错误和警告消息。
 import PropTypes from "prop-types" ;
import React , { Component } from 'react' ;

export default class YourComponentName extends Component {
	public static propTypes = { } ;
	constructor ( props ) {
		super ( props ) ;
	}
	render ( ) { ... }
}

if ( process . env . NODE_ENV === 'development' ) {

	YourComponentName . propTypes = {
	    displayEnable : PropTypes . bool . isRequired ,
		htmlString : PropTypes . oneOfType ( [ PropTypes . string , PropTypes . object ] )
	}

}应用程序默认加载一些第三方库(图标、动画、3D引擎等),您可以根据需要加载它们,或者修改配置文件。访问./src/client/components/_plugins/
第三方插件默认与自定义组件一起使用,您也可以将其移除。
更改网站根目录,以便将项目上传到其他目录时可以使用。修改./src/config/websiteConfig.js的关键rootDirectory 。
如果该文件位于根目录中,则可以将其留空。如果在其他目录,可以写:“/blog”。 (没有尾部斜杠)
{
  "rootDirectory" : " "
}站点地址(URL)通常用于 SEO 优化。修改./src/config/websiteConfig.js的关键siteUrl 。 URL 将命名为https://domain-name.com (无尾部斜杠和子目录)
{
  "siteUrl" : " "
}更改网站的 API URL。修改./src/config/websiteConfig.js的关键API ,如下所示:
{
  "API" : {
	  "RECEIVE_DEMO_LIST" : " https://apiurl1.com " ,
	  "RECEIVE_DEMO_LISTDETAIL" : " https://apiurl2.com "
  }
}查找错误、发送拉取请求或改进我们的文档 - 欢迎并高度赞赏任何贡献。首先,请参阅我们的贡献指南。谢谢!
发布
| 铬合金 | 火狐浏览器 | 边缘 | IE | 狩猎之旅 | 歌剧 | iOS系统 | 安卓 |
|---|---|---|---|---|---|---|---|
| >= 49 | >= 45 | >=14 | >=11 | >= 9 | >= 30 | >=10 | >=4.4 |
获得麻省理工学院许可。


