face rec tools
v1.0.0
媒体库面部识别工具
用于建造Dlib和其他
sudo apt-get install build-essential cmake python3-pipsudo apt-get install python3-opencv使用CUDA的库安装并不容易,并且对于不同的OS版本可能会有所不同。 CUDA设置的一些有用链接
https://developer.nvidia.com/cuda-downloads
https://medium.com/@sb.jaduniv/how-to-install-opencv-4-2-0-with-cuda-10-1-1-1-on-ubuntu-20-04-lts-focal-focal-foscal-fossa-bdc034109df3
https://www.pyimagesearch.com/2019/12/09/how-to-now-to-install-tensorflow-2-0-on-on-ubuntu/
pip3 install deepface安装我的face_recognition克隆(有一些修改以支持外部匹配的面孔)
git clone https://github.com/sashacmc/face_recognition.git ; cd face_recognition ; pip3 install . ; cd ..git clone https://github.com/sashacmc/face-rec-tools.git ; cd face-rec-tools ; pip3 install . ; cd ..使用预定义的配置文件中的一个或准备自己的配置文件。
预定义的配置文件位于Package的CFG文件夹(例如〜/.local/lib/python3.6/site-packages/face_rec_tools/cfg/)
将其复制到默认配置位置(〜/.face-rec.cfg)或使用命令行开关“ -c”指定
cp ~ /.local/lib/python3. ? /site-packages/face_rec_tools/cfg/frontal.cfg ~ /.face-rec.cfg # recognize single image and print output (useful for debug)
face-rec-cli -a recognize_image -i imagefile.jpg
# recognize single video and print summary output (useful for debug)
face-rec-cli -a recognize_video -i videofile.mp4
# recognize folder and store the result in the database
face-rec-cli -a recognize_folder -i /folder/with/images
# remove folder recognition the result from the database
face-rec-cli -a remove_folder -i /folder/with/images
# match/rematch unmatched faces in database
face-rec-cli -a match_unmatched
# match/rematch all faces in database
face-rec-cli -a match_all
# match/rematch faces from folder in database
face-rec-cli -a match_folder -i /folder/with/images
# save faces from folder (must be previously recognized)
# cachedb must be disabled (otherwise they will saved inside cachedb)
face-rec-cli -a save_faces -i /folder/with/images -o /folder/for/faces
# find face from image in database and save them in folder
# cachedb must be disabled (otherwise they will saved inside cachedb)
face-rec-cli -a get_faces_by_face -i image_with_one_face.jpg -o /folder/for/faces从命令行运行服务器
face-rec-server 使用主机名/ip_adress和端口8081打开浏览器
要识别新文件夹,单击“识别” - >“添加新文件...”。并指定要识别的文件夹。 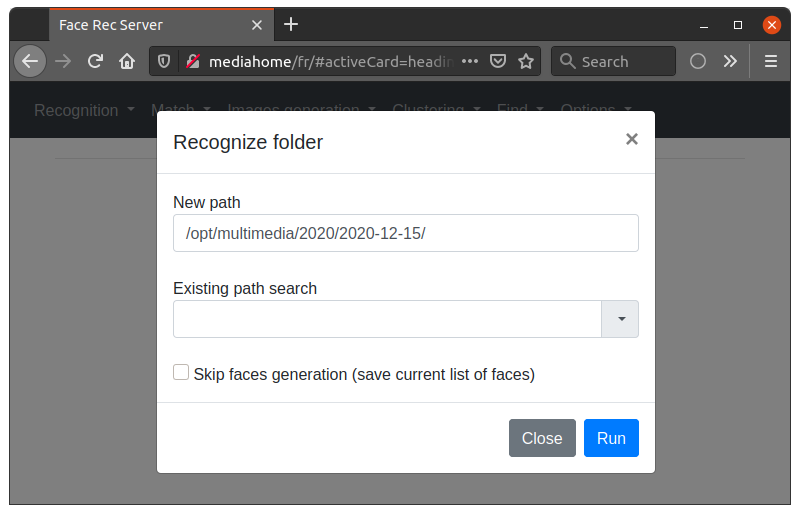
由于加载必要的模型,首次识别将需要一段时间。
首次识别后,您将使所有面孔都视为未知。 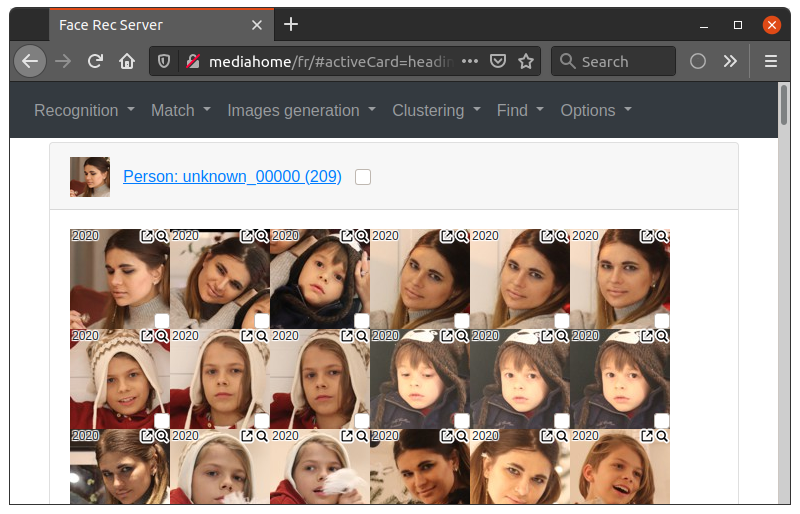
单击面对面(或选择几个使用Shift/Ctrl)将其添加为模式。 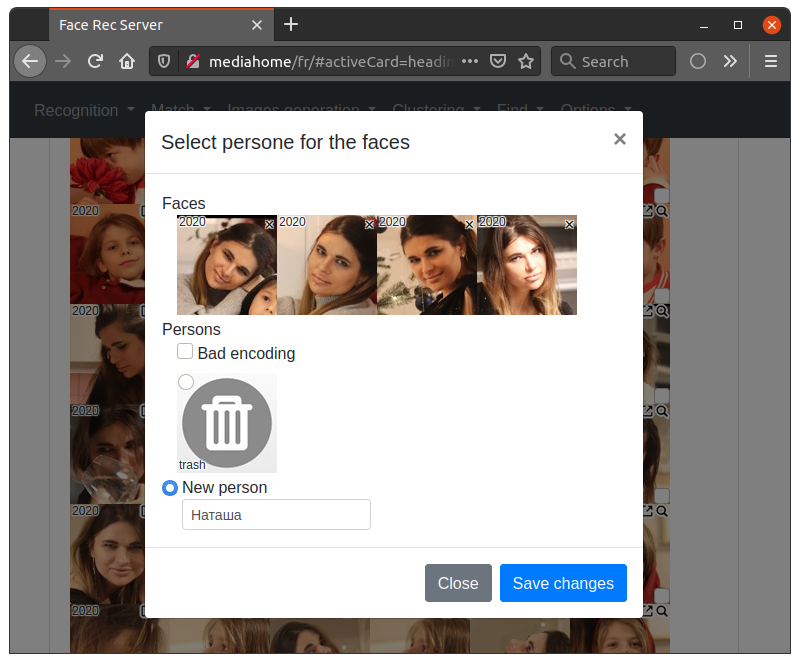
以前添加的名称将被保存,您无需再次输入它。如果要更改默认的face徽标,则可以为每个人子文件夹添加为0_face.jpg。 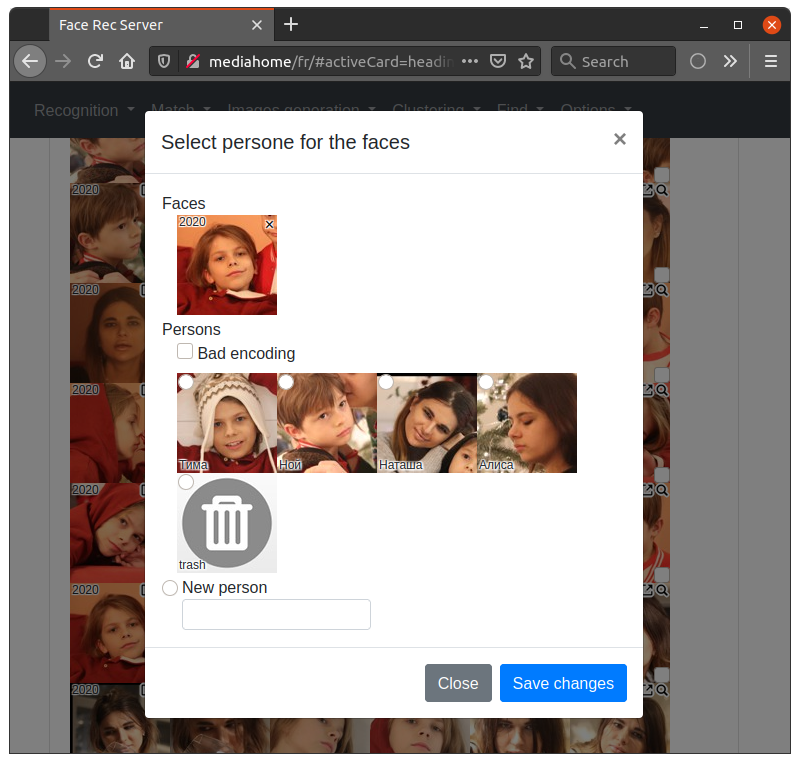
添加模式后,再次开始匹配(例如“匹配” - >“ rembatch文件夹...”) 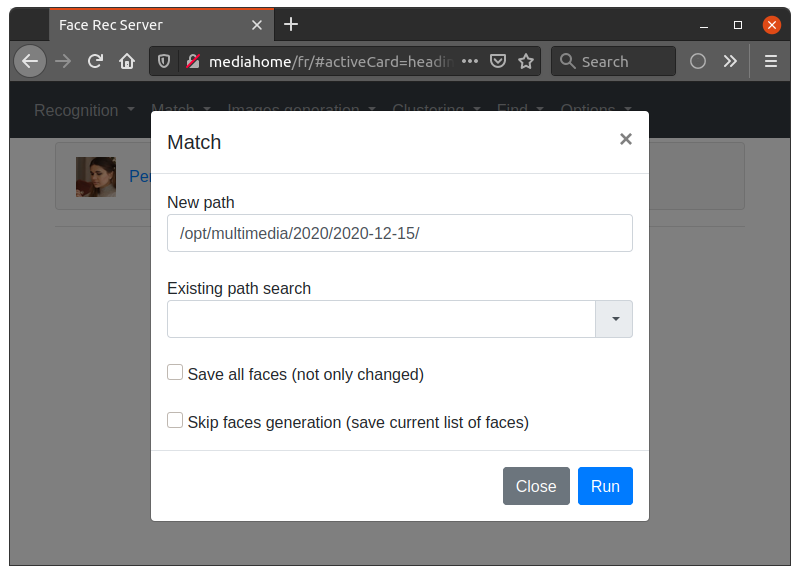
与模式匹配后,您将拥有匹配的人和“弱”匹配的人,这意味着它不完全匹配,也不会用于同步或搜索。您需要检查它们并添加到图案中。 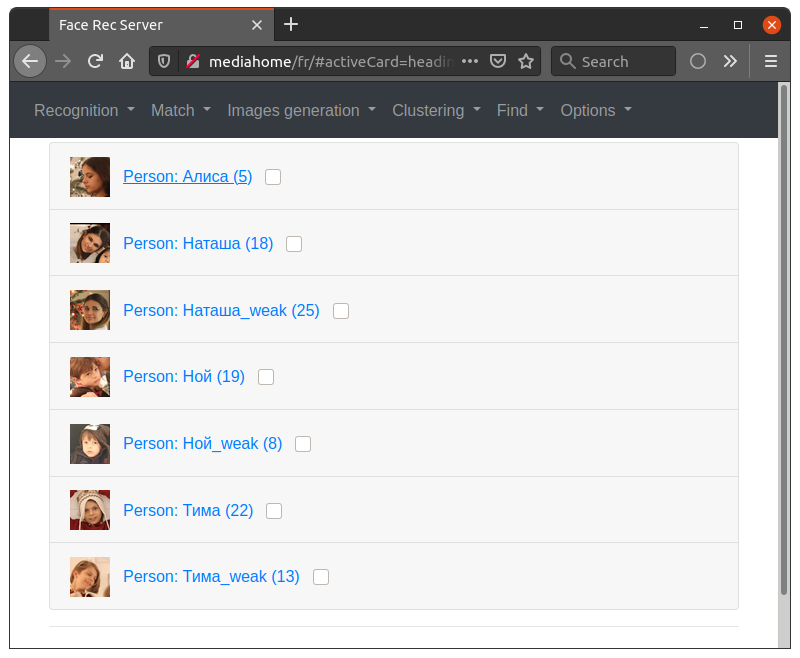
如果您需要一些有关面部的其他信息,则可以单击 图标查看源文件或
 查看与之匹配的模式。
如果您有大量的面孔,则可以通过菜单聚类中的平均聚类来简化模式分开,它将在面孔附近与组分开,并允许将其添加到模式中。
面部识别工具允许通过标签与Plex Media Server同步识别结果。识别文件将标记为“人:[person_name]”的标签
 # set all tags to the Plex database
face-rec-plexsync -a set_tags

# clear all tags from the Plex database
face-rec-plexsync -a remove_tags

# recognize all files which present in the Plex database
# but not recognized yet and store the result in the database
face-rec-plexsync -a sync_new

# delete from database all files which not present in the Plex database
face-rec-plexsync -a sync_deleted如果您没有plex,或者想使用一些更复杂的搜索,则可以使用colless command
(它将在2020年文件夹中搜索所有文件,其中包含人名称和名称2的面孔)
face-rec-db -a find_files_by_names -f 2020 -n Name1,Name2感谢所有经过测试并提供建议的人。
欢迎错误报告,建议和拉动请求!


