mflux
v.0.4.1
 基于拥抱面扩散器实现的MLX通量端口。
从Mac上本地的Black Forest Labs运行强大的通量模型!
MFLUX是在拥抱面扩散器库中逐行实现的逐线端口。 MFLUX有目的地保持最小和显式 - 网络架构是硬编码,除了令牌外,没有使用配置文件。目的是拥有一个微小的代码库,其目的是表达这些模型(从而避免了太多的抽象)。尽管MFLUX优先级在一般性和性能上可读性,但它仍然可以非常快,甚至更快地量化。
所有模型均在MLX中从头开始实现,并且仅通过HuggingFace Transformers库使用了标记器。除此之外,只有最小的依赖性(例如Numpy和枕头)可用于简单的图像后处理。
对于用户,安装MFLUX的最简单方法是使用uv tool :如果您已经安装了uv ,则简单地:
uv tool install --upgrade mflux获取mflux-generate和相关的命令行可执行文件。您可以跳过下面的使用指南。
T5编码器取决于句子,截至2024年11月,python 3.13都没有可安装的轮饰。直到Google出版3.13轮毂,您需要使用官方构建指令或方便.whl来构建自己的轮子由撰稿人@anthonywu预先建造。尽管您的系统可能会有所不同,但以下步骤应适用于大多数开发人员。
uv venv --python 3.13
python -V  # e.g. Python 3.13.0rc2
source .venv/bin/activate

# for your convenience, you can use the contributor wheel
uv pip install https://github.com/anthonywu/sentencepiece/releases/download/0.2.1-py13dev/sentencepiece-0.2.1-cp313-cp313-macosx_11_0_arm64.whl

# enable the pytorch nightly
uv pip install --pre --extra-index-url https://download.pytorch.org/whl/nightly -e . mkdir -p mflux && cd mflux && python3 -m venv .venv && source .venv/bin/activate
这会在mflux文件夹中创建并激活虚拟环境。之后,通过PIP安装MFLUX:
pip install -U mflux
git clone [email protected]:filipstrand/mflux.git make install make testmake lint并make format安装并使用ruff 。您可以将编辑器/IDE设置为棉布/格式,或使用我们提供的make :make format - 格式化您的代码make lint - 显示您的棉绒错误和警告,但没有自动修复make check - 通过pre-commit挂钩,格式化您的代码,并尝试自动修复棉绒错误ruff文档通过指定提示和模型以及一些可选参数来运行命令mflux-generate 。例如,在这里,我们使用2个步骤的schnell模型的量化版本:
mflux-generate --model schnell --prompt " Luxury food photograph " --steps 2 --seed 2 -q 8此示例使用25个时间步骤的更强大的dev模型:
mflux-generate --model dev --prompt " Luxury food photograph " --steps 25 --seed 2 -q 8默认情况下,模型文件将下载到主目录中的.cache文件夹。例如,在我的设置中,路径看起来像这样:
/Users/filipstrand/.cache/huggingface/hub/models--black-forest-labs--FLUX.1-dev
要更改此默认行为,您可以通过修改HF_HOME环境变量来做到这一点。有关如何调整此设置的更多详细信息,请参考拥抱面部文档。
Flux.1-DEV当前需要授予其对拥抱面回购的访问。有关故障排除,请参阅问题跟踪器
--prompt (必需, str ):要生成的图像的文本描述。
--model或-m (必需, str ):用于生成的模型( "schnell"或"dev" )。
--output (可选, str ,默认值: "image.png" ):输出图像文件名。
--seed (可选, int ,默认值: None ):随机数生成的种子。默认值是基于时间的。
--height (可选, int ,默认值: 1024 ):以像素为单位的输出图像的高度。
--width (可选, int ,默认值: 1024 ):以像素为单位的输出图像的宽度。
--steps (可选, int ,默认值: 4 ):推理步骤的数量。
--guidance (可选, float ,默认值: 3.5 ):指导量表(仅用于"dev"模型)。
--path (可选, str ,默认值: None ):磁盘上本地模型的路径。
--quantize或-q (可选, int ,默认值: None ):量化(在4或8之间选择)。
--lora-paths (可选, [str] ,默认值: None ):通往洛拉重量的路径。
--lora-scales (可选, [float] ,默认值: None ):每个相应的lora的比例(如果未指定,将默认为1.0 ,并且只加载了一个lora重量。)
--metadata (可选):导出一个.json文件,其中包含具有相同名称的图像的元数据。 (即使没有此标志,也可以保存图像元数据,并可以使用exiftool image.png查看)
--controlnet-image-path (必需, str ):控制网络使用的局部图像的路径,用于引导输出生成。
--controlnet-strength (可选, float ,默认值: 0.4 ):控制图像对输出的影响程度。范围从0.0 (无影响)到1.0 (完全影响)。
--controlnet-save-canny (可选,布尔,默认值:false):如果设置,则保存ControlNet使用的Canny Edge检测参考图像。
--init-image-path (可选, str ,默认值: None ):图像到图像生成的初始图像的本地路径。
--init-image-strength (可选, float ,默认值: 0.4 ):控制初始图像对输出图像的影响程度。值为0.0表示没有影响。 (默认为0.4 )
--config-from-metadata或-C (可选, str ):[实验]通往通过--metadata保存的先验文件或兼容的手工制作的配置文件,这些文件贴在预期的args架构上。
{
  "$schema" : " http://json-schema.org/draft-07/schema# " ,
  "type" : " object " ,
  "properties" : {
    "seed" : {
      "type" : [ " integer " , " null " ]
    },
    "steps" : {
      "type" : [ " integer " , " null " ]
    },
    "guidance" : {
      "type" : [ " number " , " null " ]
    },
    "quantize" : {
      "type" : [ " null " , " string " ]
    },
    "lora_paths" : {
      "type" : [ " array " , " null " ],
      "items" : {
        "type" : " string "
      }
    },
    "lora_scales" : {
      "type" : [ " array " , " null " ],
      "items" : {
        "type" : " number "
      }
    },
    "prompt" : {
      "type" : [ " string " , " null " ]
    }
  }
}{
"model" : " dev " ,
"seed" : 42 ,
"steps" : 8 ,
"guidance" : 3.0 ,
"quantize" : 4 ,
"lora_paths" : [
" /some/path1/to/subject.safetensors " ,
" /some/path2/to/style.safetensors "
],
"lora_scales" : [
0.8 ,
0.4
],
"prompt" : " award winning modern art, MOMA "
}或者,使用正确的Python环境,创建并运行单独的脚本如下:
 from mflux import Flux1 , Config

# Load the model
flux = Flux1 . from_alias (
   alias = "schnell" ,  # "schnell" or "dev"
   quantize = 8 ,       # 4 or 8
)

# Generate an image
image = flux . generate_image (
   seed = 2 ,
   prompt = "Luxury food photograph" ,
   config = Config (
      num_inference_steps = 2 ,  # "schnell" works well with 2-4 steps, "dev" works well with 20-25 steps
      height = 1024 ,
      width = 1024 ,
   )
)

image . save ( path = "image.png" )
有关如何配置MFLUX的更多选项,请参见Generate.py。
这些数字基于非量化的schnell模型,并在下面的代码段中提供了配置。为了计算机计时,请运行以下内容:
 time mflux-generate
--prompt " Luxury food photograph "
--model schnell
--steps 2
--seed 2
--height 1024
--width 1024
要找出计算机的规格(包括CPU核心,GPU内核和内存的数量,请运行以下命令:
system_profiler SPHardwareDataType SPDisplaysDataType| 设备 | M系列 | 用户 | 报告的时间 | 笔记 |
|---|---|---|---|---|
| Mac Studio | 2023 m2 Ultra | @Awni | <15s | |
| MacBook Pro | 2024 M4 Max(128GB) | @ivanfioravanti | 〜19S | |
| MacBook Pro | 2023 M3 Max | @karpathy | 〜20s | |
| - | 2023 m2 max(96GB) | @explorigin | 〜25s | |
| Mac mini | 2024 M4 Pro(64GB) | @stoobs | 〜34 | |
| Mac mini | 2023 M2 Pro(32GB) | @leekichko | 〜54 | |
| - | 2022 M1 max(64GB) | @bosseparra | 〜55s | |
| MacBook Pro | 2023 m2 max(32GB) | @FilipStrand | 〜70年代 | |
| - | 2023 M3 Pro(36GB) | @Kush-Gupt | 〜80年代 | |
| MacBook Pro | 2021 M1 Pro(32GB) | @FilipStrand | 〜160年代 | |
| - | 2021 M1 Pro(16GB) | @qw-in | 〜175s | 可能会冻结您的Mac |
| MacBook Air | 2020 M1(8GB) | @mbvillaverde | 〜335s | 分辨率512 x 512 |
请注意,这些数字包括从头开始启动应用程序,这意味着执行模型I/O,设置/量化权重等。如果我们假设模型已经加载,则可以使用exiftool image.png检查图像元数据,并查看Total denoising循环的持续时间(不包括文本嵌入)。
这些基准不是很科学的,只旨在给出球场数字。它们是在不同的时间与不同的MFLUX和MLX反面等。其他硬件信息(例如GPU内核,Mac设备等)的其他硬件。
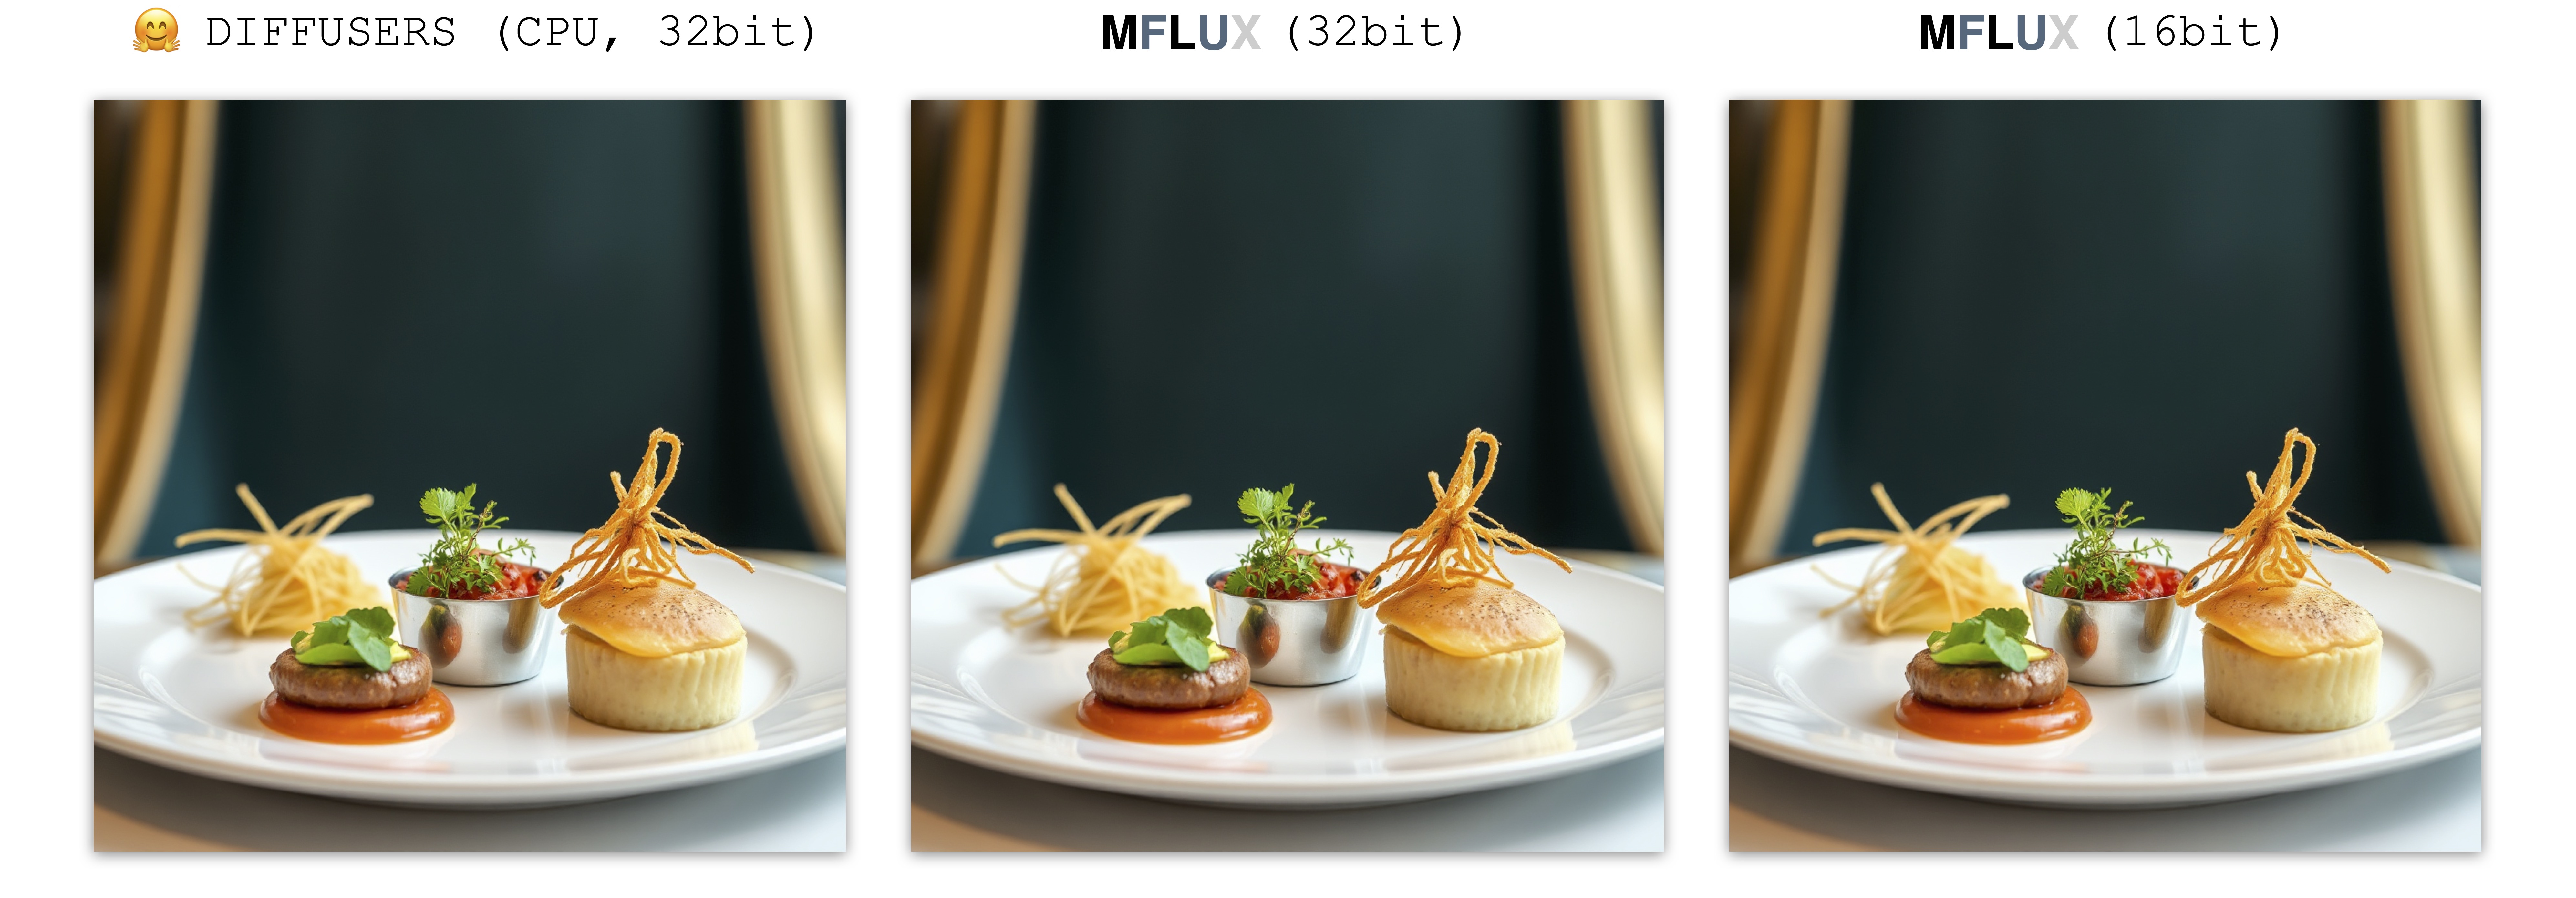
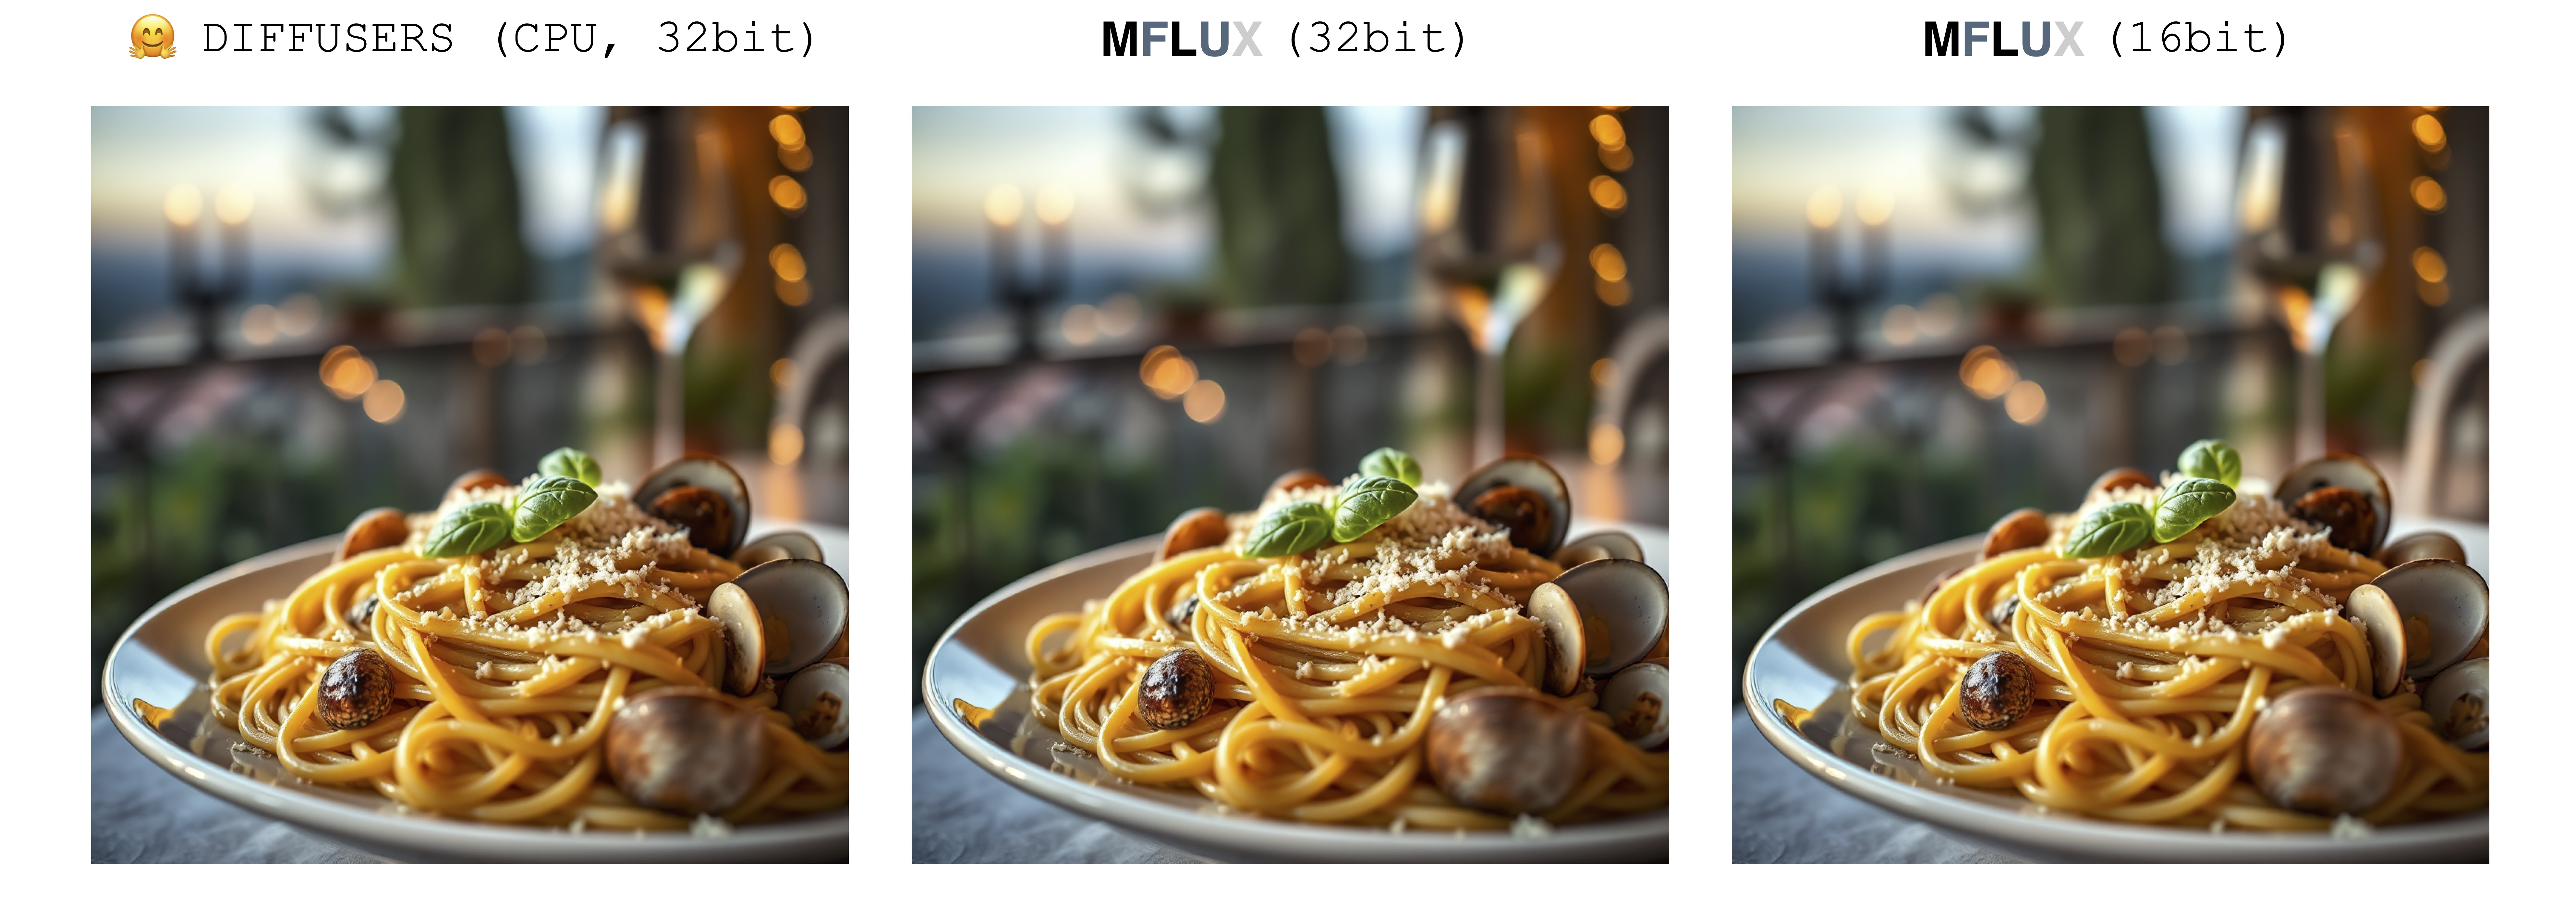
生成图像时只有一个随机性的来源:初始潜在数组。在此实现中,该初始潜在由输入seed参数完全决定性地控制。但是,如果我们要从扩散器实现中得出此潜在数组的固定实例,则MFLUX将与扩散器实现产生相同的图像(假设固定提示并使用扩散器设置中的默认参数设置)。
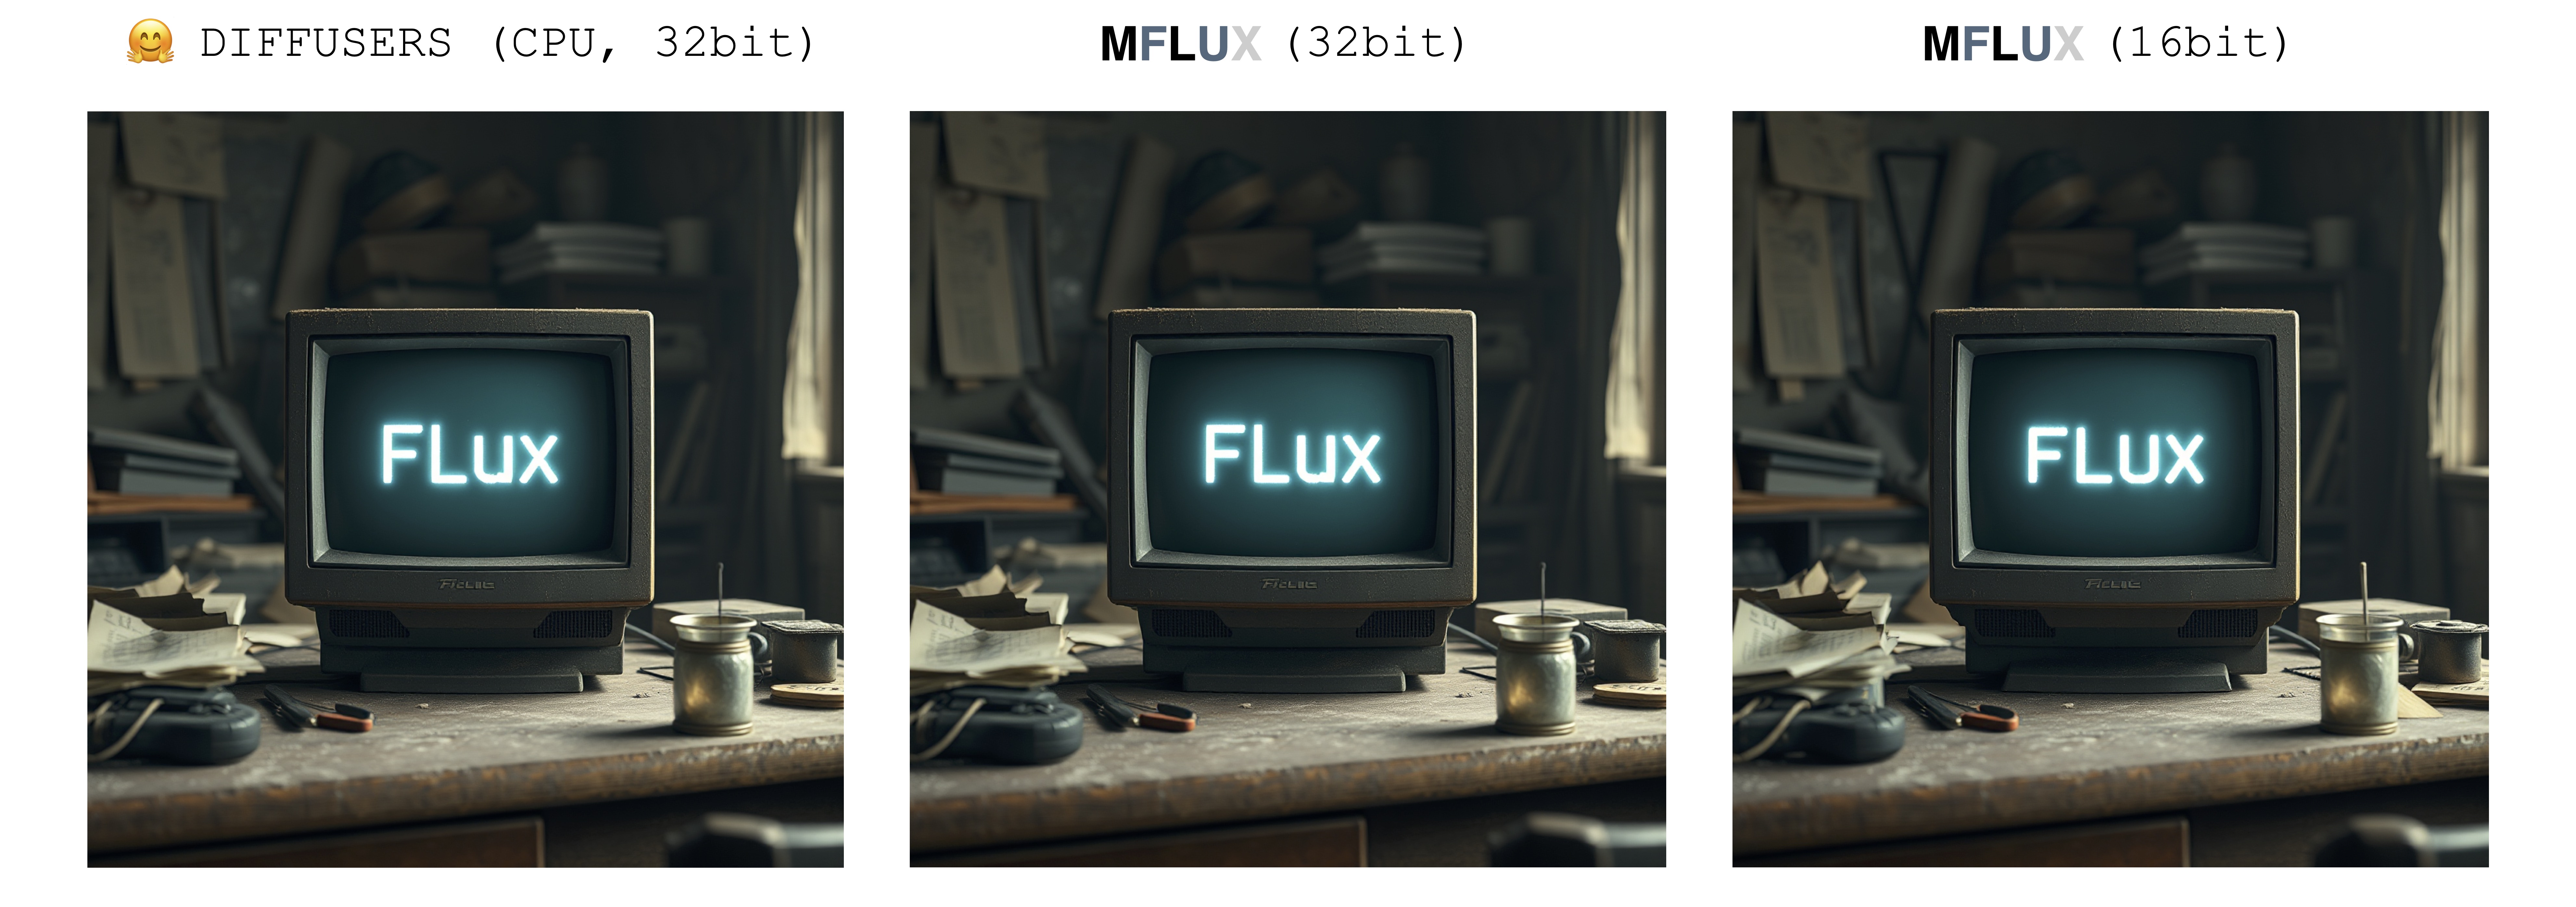
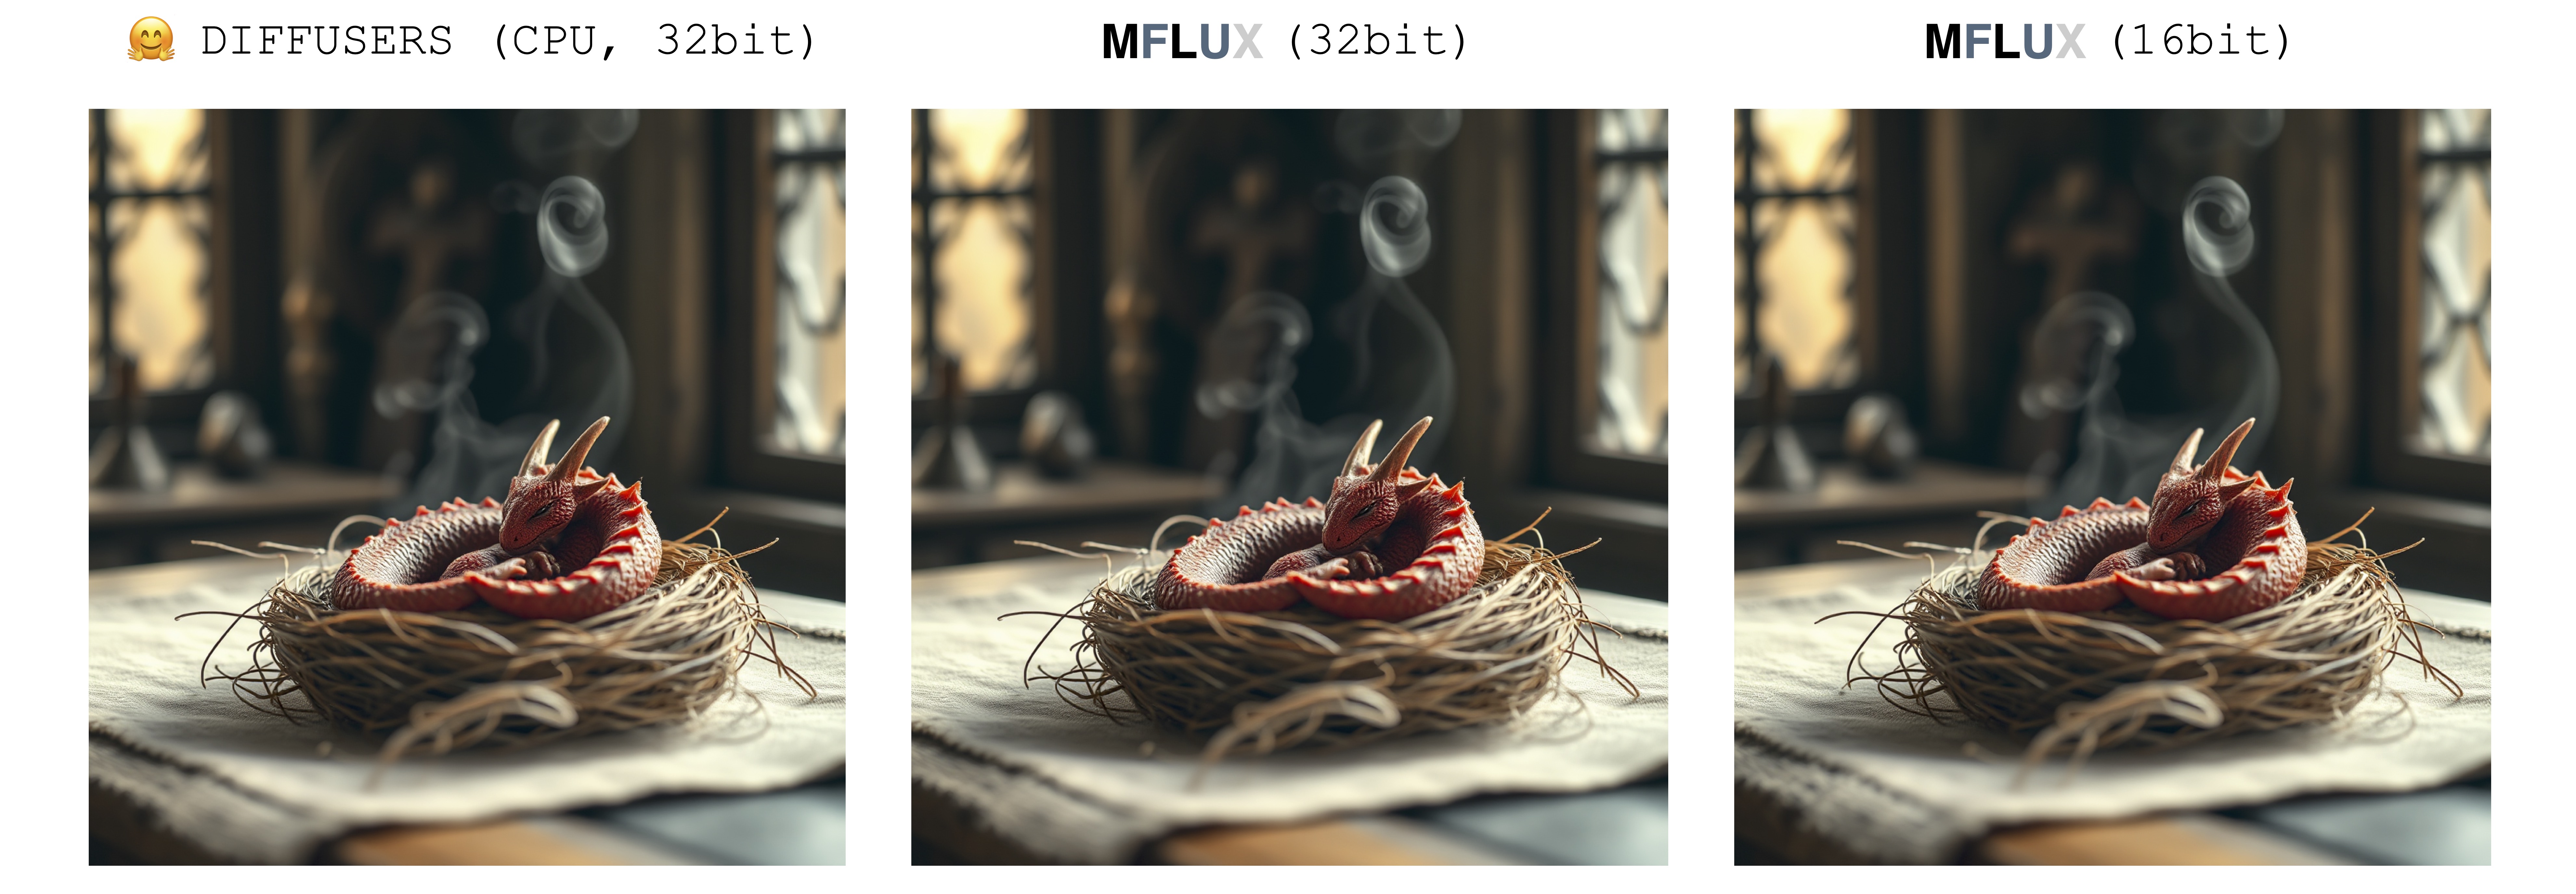
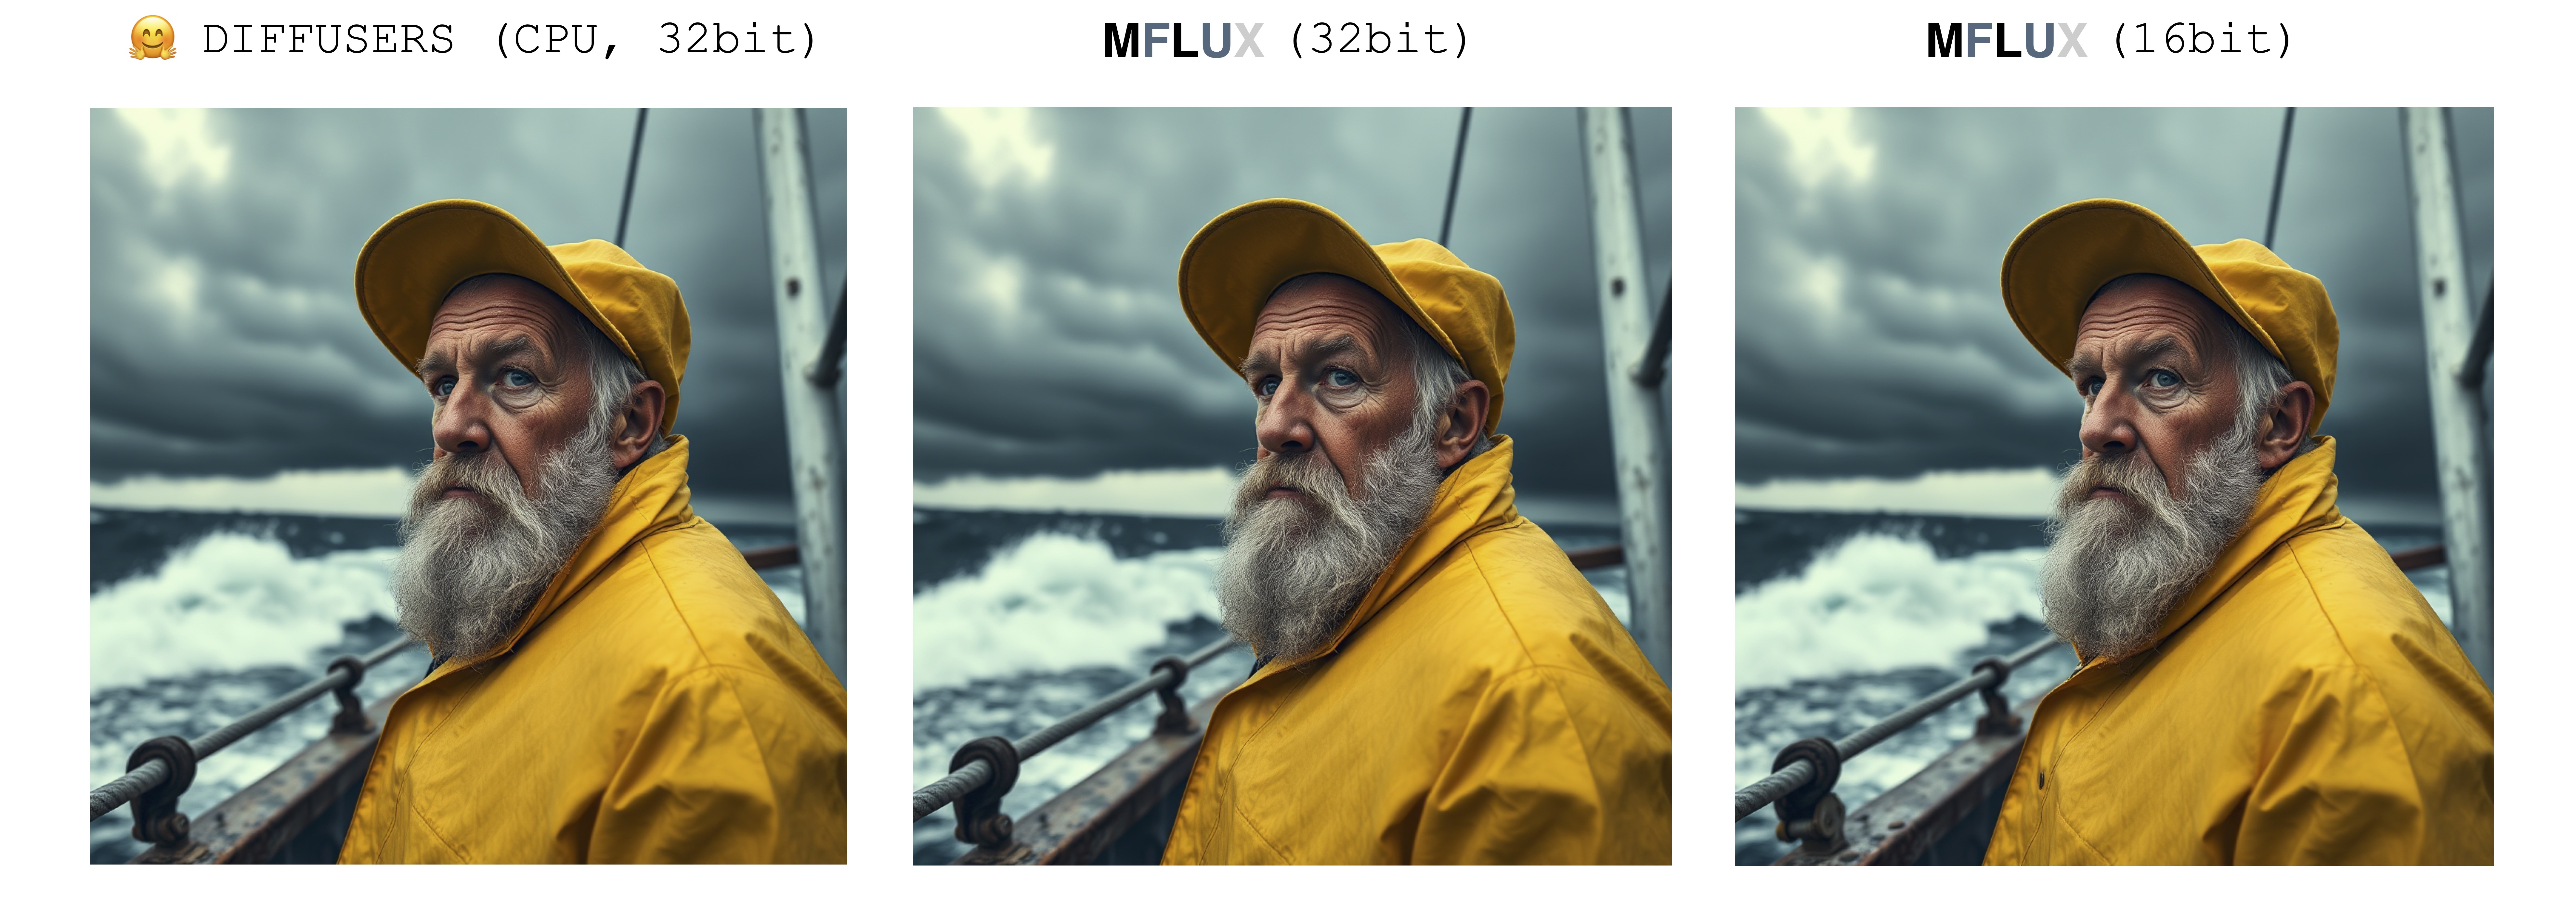
下图说明了这种对等。在所有情况下,Schnell模型均可进行2个时间步骤。扩散器实现以CPU模式运行。可以在配置类中设置MFLUX的精度。在16位和32位精度之间切换时,最终图像通常会有明显但很小的差异。
Luxury food photograph
detailed cinematic dof render of an old dusty detailed CRT monitor on a wooden desk in a dim room with items around, messy dirty room. On the screen are the letters "FLUX" glowing softly. High detail hard surface render
photorealistic, lotr, A tiny red dragon curled up asleep inside a nest, (Soft Focus) , (f_stop 2.8) , (focal_length 50mm) macro lens f/2. 8, medieval wizard table, (pastel) colors, (cozy) morning light filtering through a nearby window, (whimsical) steam shapes, captured with a (Canon EOS R5) , highlighting (serene) comfort, medieval, dnd, rpg, 3d, 16K, 8K
A weathered fisherman in his early 60s stands on the deck of his boat, gazing out at a stormy sea. He has a thick, salt-and-pepper beard, deep-set blue eyes, and skin tanned and creased from years of sun exposure. He's wearing a yellow raincoat and hat, with water droplets clinging to the fabric. Behind him, dark clouds loom ominously, and waves crash against the side of the boat. The overall atmosphere is one of tension and respect for the power of nature.
Luxury food photograph of an italian Linguine pasta alle vongole dish with lots of clams. It has perfect lighting and a cozy background with big bokeh and shallow depth of field. The mood is a sunset balcony in tuscany. The photo is taken from the side of the plate. The pasta is shiny with sprinkled parmesan cheese and basil leaves on top. The scene is complemented by a warm, inviting light that highlights the textures and colors of the ingredients, giving it an appetizing and elegant look.
Mflux支持以4位或8位量化模式运行通量。运行量化版本可以大大加快生成过程,并减少几GB。量化模型还占用磁盘空间较少。
mflux-generate
    --model schnell
    --steps 2
    --seed 2
    --quantize 8
    --height 1920
    --width 1024
--prompt " Tranquil pond in a bamboo forest at dawn, the sun is barely starting to peak over the horizon, panda practices Tai Chi near the edge of the pond, atmospheric perspective through the mist of morning dew, sunbeams, its movements are graceful and fluid — creating a sense of harmony and balance, the pond’s calm waters reflecting the scene, inviting a sense of meditation and connection with nature, style of Howard Terpning and Jessica Rossier " 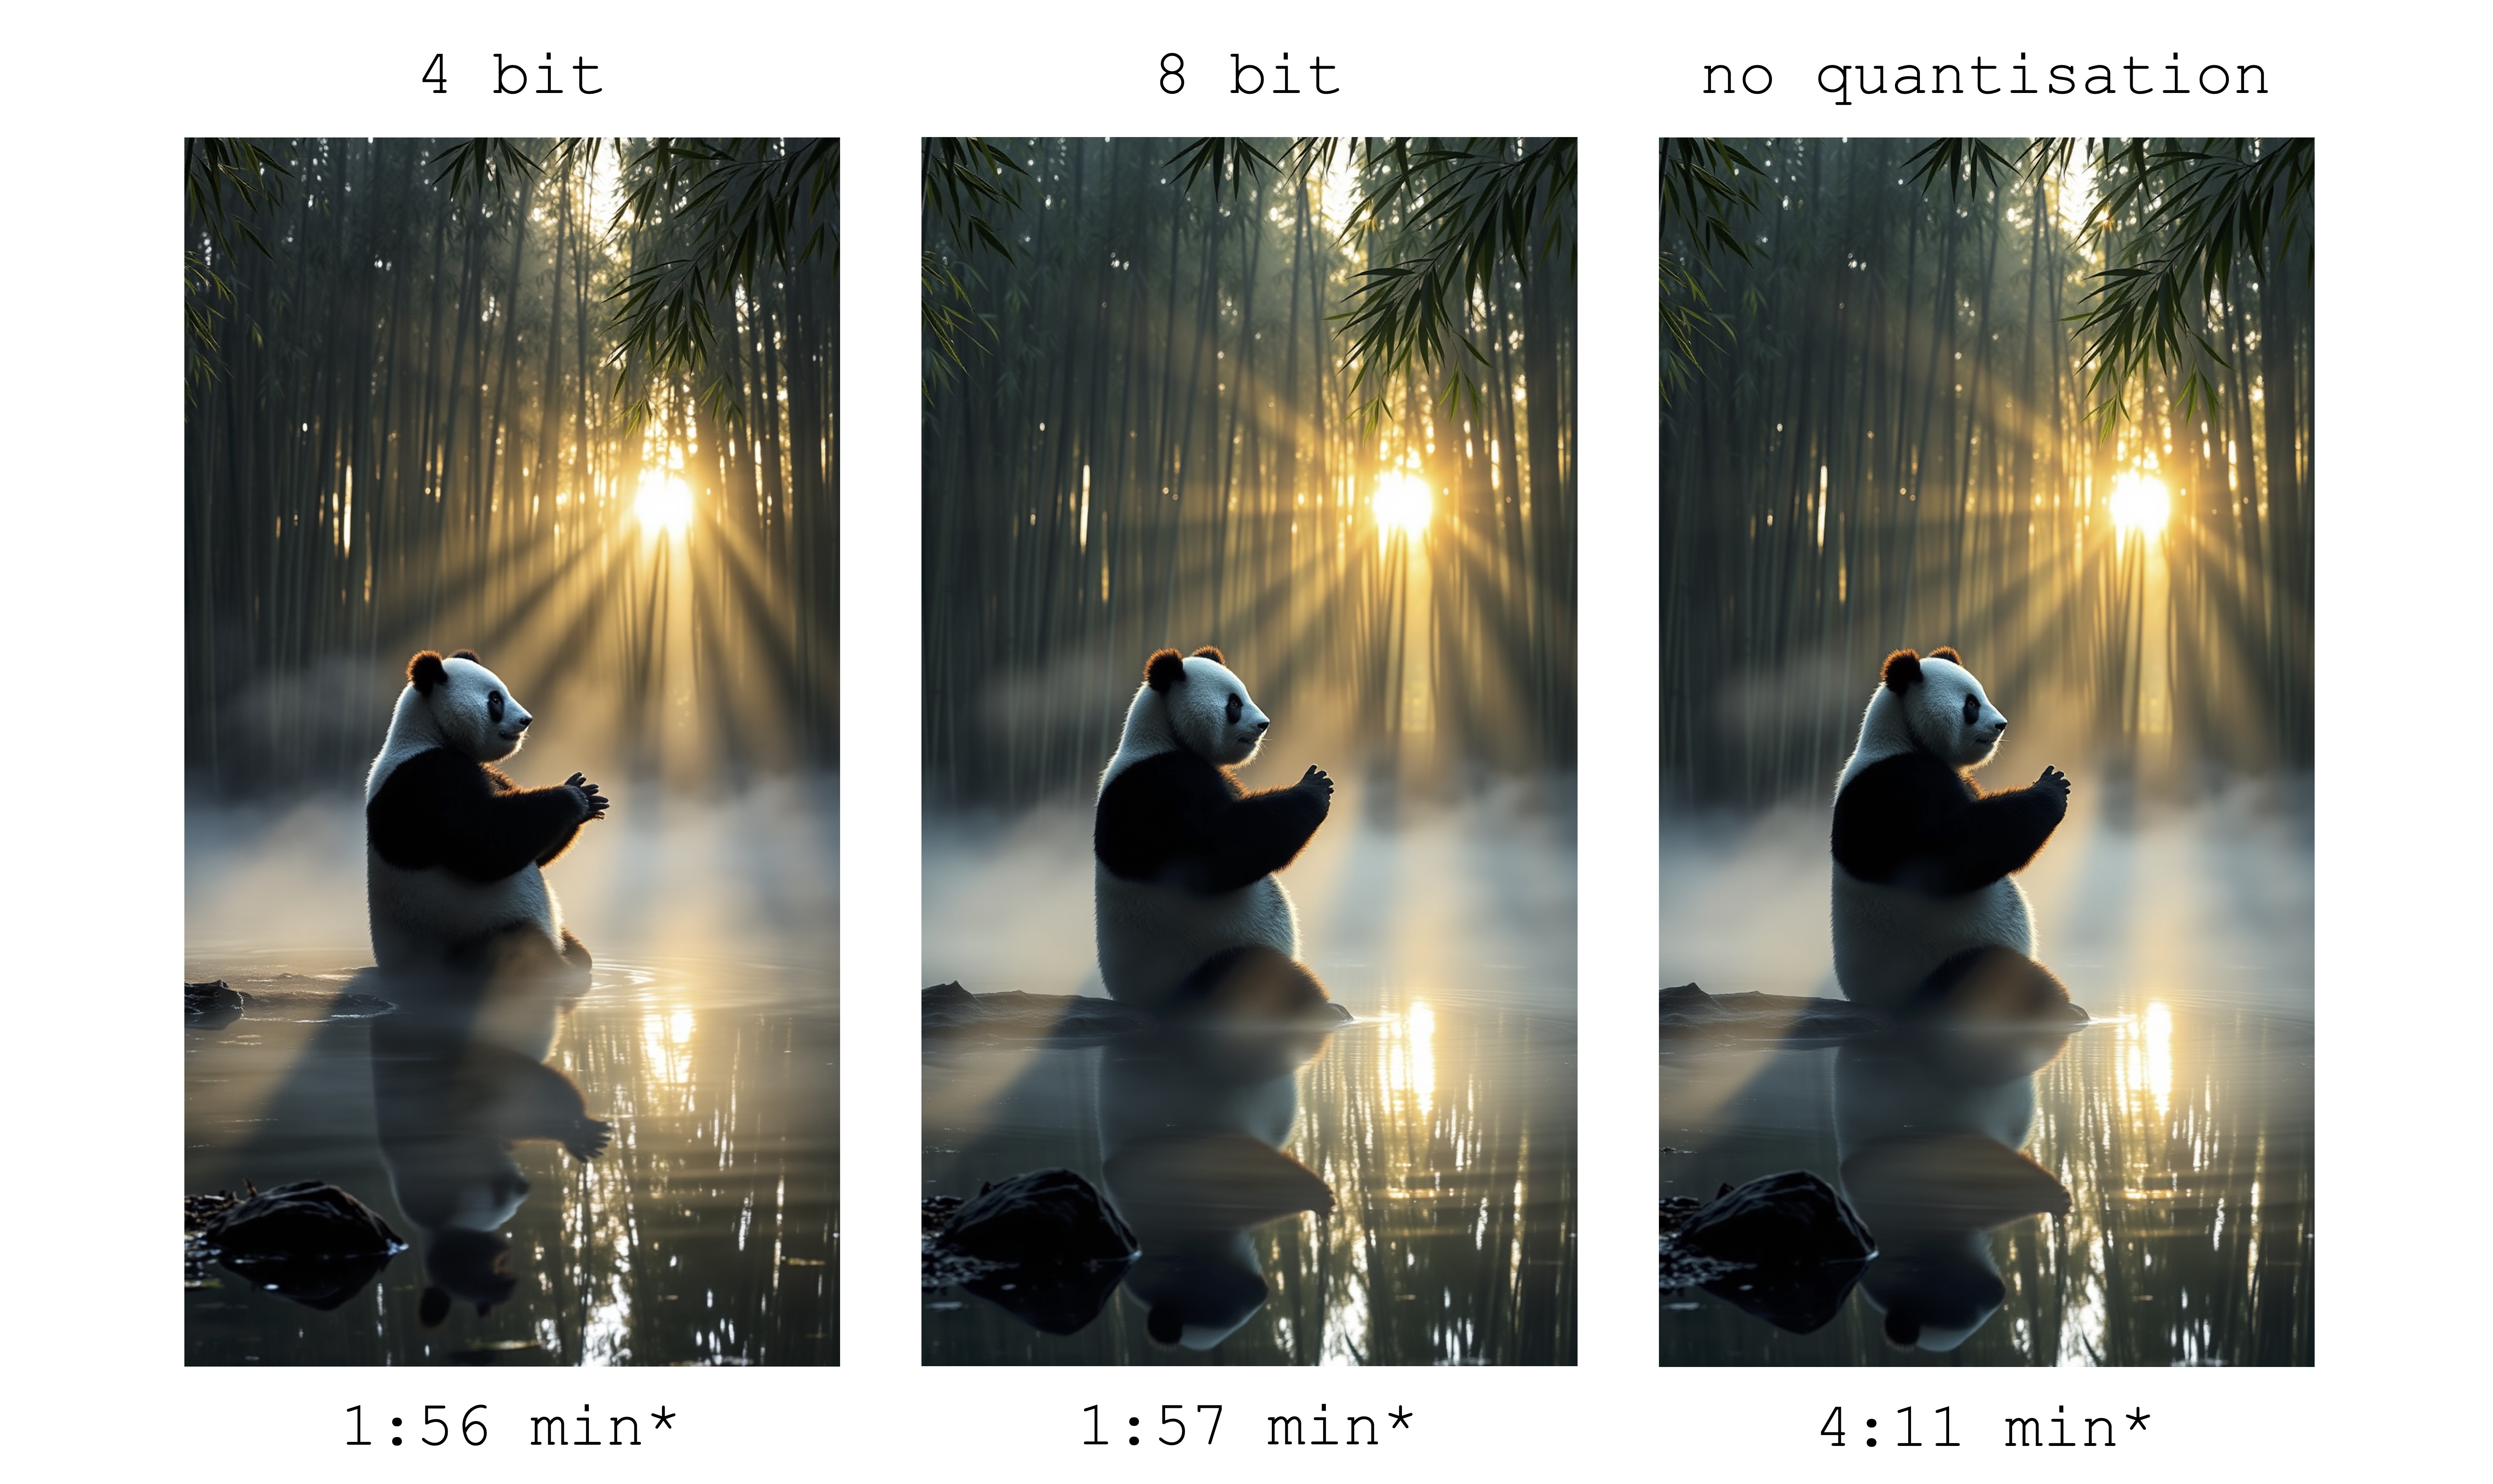
在此示例中,重量在运行时进行量化 - 如果您不想将权重量化为磁盘,这很方便,但仍然希望从潜在的速度和减少量的量化量化中受益。
通过选择--quantize或-q标志为4或完全删除8 ,我们可以在上面获取所有3张图像。可以看出,图像之间几乎没有差异(尤其是在8位和非量化结果之间)。此示例中的图像生成时间基于2021 M1 Pro(32GB)机器。即使图像几乎相同,也通过在该特定计算机上运行8位量化版本的速度约为2倍。与非量化版本不同,对于8位版本,交换内存使用量大大降低,并且在整个一代中,GPU利用率接近100%。此处的结果可能在不同的机器上有所不同。
schnell和dev在各种量化水平上的模型大小如下:
| 4位 | 8位 | 原始(16位) |
|---|---|---|
| 9.85GB | 18.16GB | 33.73GB |
重量大小未完全切成两半的原因是,少量的重量未被量化并保持完全精确。
要保存量化权重的本地副本,请这样运行mflux-save命令:
mflux-save
    --path " /Users/filipstrand/Desktop/schnell_8bit "
    --model schnell
    --quantize 8
请注意,保存量化版本时,您将需要原始的HuggingFace权重。
保存模型时,也可以指定Lora适配器
mflux-save
    --path " /Users/filipstrand/Desktop/schnell_8bit "
    --model schnell
    --quantize 8
    --lora-paths " /path/to/lora.safetensors "
    --lora-scales 0.7
当使用这样的模型生成图像时,由于已经烘烤到已保存的量化权重中,因此不需要指定Lora适配器。
要从量化模型中生成新图像,只需提供一个--path将其保存的位置提供:
mflux-generate
    --path " /Users/filipstrand/Desktop/schnell_8bit "
    --model schnell
    --steps 2
    --seed 2
    --height 1920
    --width 1024
--prompt " Tranquil pond in a bamboo forest at dawn, the sun is barely starting to peak over the horizon, panda practices Tai Chi near the edge of the pond, atmospheric perspective through the mist of morning dew, sunbeams, its movements are graceful and fluid — creating a sense of harmony and balance, the pond’s calm waters reflecting the scene, inviting a sense of meditation and connection with nature, style of Howard Terpning and Jessica Rossier "注意:从磁盘加载量化的模型时,无需传递-q标志,因为我们可以从重量元数据中推断出来。
另请注意:一旦我们通过--path参数指定了本地模型(是否量化),则不需要huggingface缓存模型来启动模型。换句话说,您可以通过从拥抱面缓存中删除完整的16位模型来回收34GB磁盘(每个模型)。
如果您不想下载完整的型号并自己量化它们,则可以在此处提供4位权重以供直接下载:
Mflux还直接从自定义位置运行非量化模型。在下面的示例中,将模型放置在/Users/filipstrand/Desktop/schnell中:
mflux-generate
    --path " /Users/filipstrand/Desktop/schnell "
    --model schnell
    --steps 2
    --seed 2
--prompt " Luxury food photograph "请注意,从磁盘加载模型时,必须设置--model标志。
另请注意,与使用典型的alias初始化模型(内部处理所需资源的下载)不同,当直接从磁盘加载模型时,我们要求下载的模型看起来如下:
 .
├── text_encoder
│   └── model.safetensors
├── text_encoder_2
│   ├── model-00001-of-00002.safetensors
│   └── model-00002-of-00002.safetensors
├── tokenizer
│   ├── merges.txt
│   ├── special_tokens_map.json
│   ├── tokenizer_config.json
│   └── vocab.json
├── tokenizer_2
│   ├── special_tokens_map.json
│   ├── spiece.model
│   ├── tokenizer.json
│   └── tokenizer_config.json
├── transformer
│   ├── diffusion_pytorch_model-00001-of-00003.safetensors
│   ├── diffusion_pytorch_model-00002-of-00003.safetensors
│   └── diffusion_pytorch_model-00003-of-00003.safetensors
└── vae
    └── diffusion_pytorch_model.safetensors
这反映了如何将资源放置在Flux.1的HuggingFace Repo中。与直接从该项目导出的量化量子不同的拥抱面权重必须以不同的方式处理,这就是为什么我们需要上面的结构。
调节图像生成的一种方法是从现有图像开始,让MFLUX产生新的变体。使用--init-image-path标志指定参考图像,以及--init-image-strength以控制参考图像应指导生成多少。例如,给定下面的参考图像,以下命令使用草图Lora产生了第一个图像:
mflux-generate
--prompt " sketching of an Eiffel architecture, masterpiece, best quality. The site is lit by lighting professionals, creating a subtle illumination effect. Ink on paper with very fine touches with colored markers, (shadings:1.1), loose lines, Schematic, Conceptual, Abstract, Gestural. Quick sketches to explore ideas and concepts. "
--init-image-path " reference.png "
--init-image-strength 0.3
--lora-paths Architectural_Sketching.safetensors
--lora-scales 1.0
--model dev
--steps 20
--seed 43
--guidance 4.0
--quantize 8
--height 1024
--width 1024
与ControlNet一样,此技术与Lora适配器很好地结合在一起:
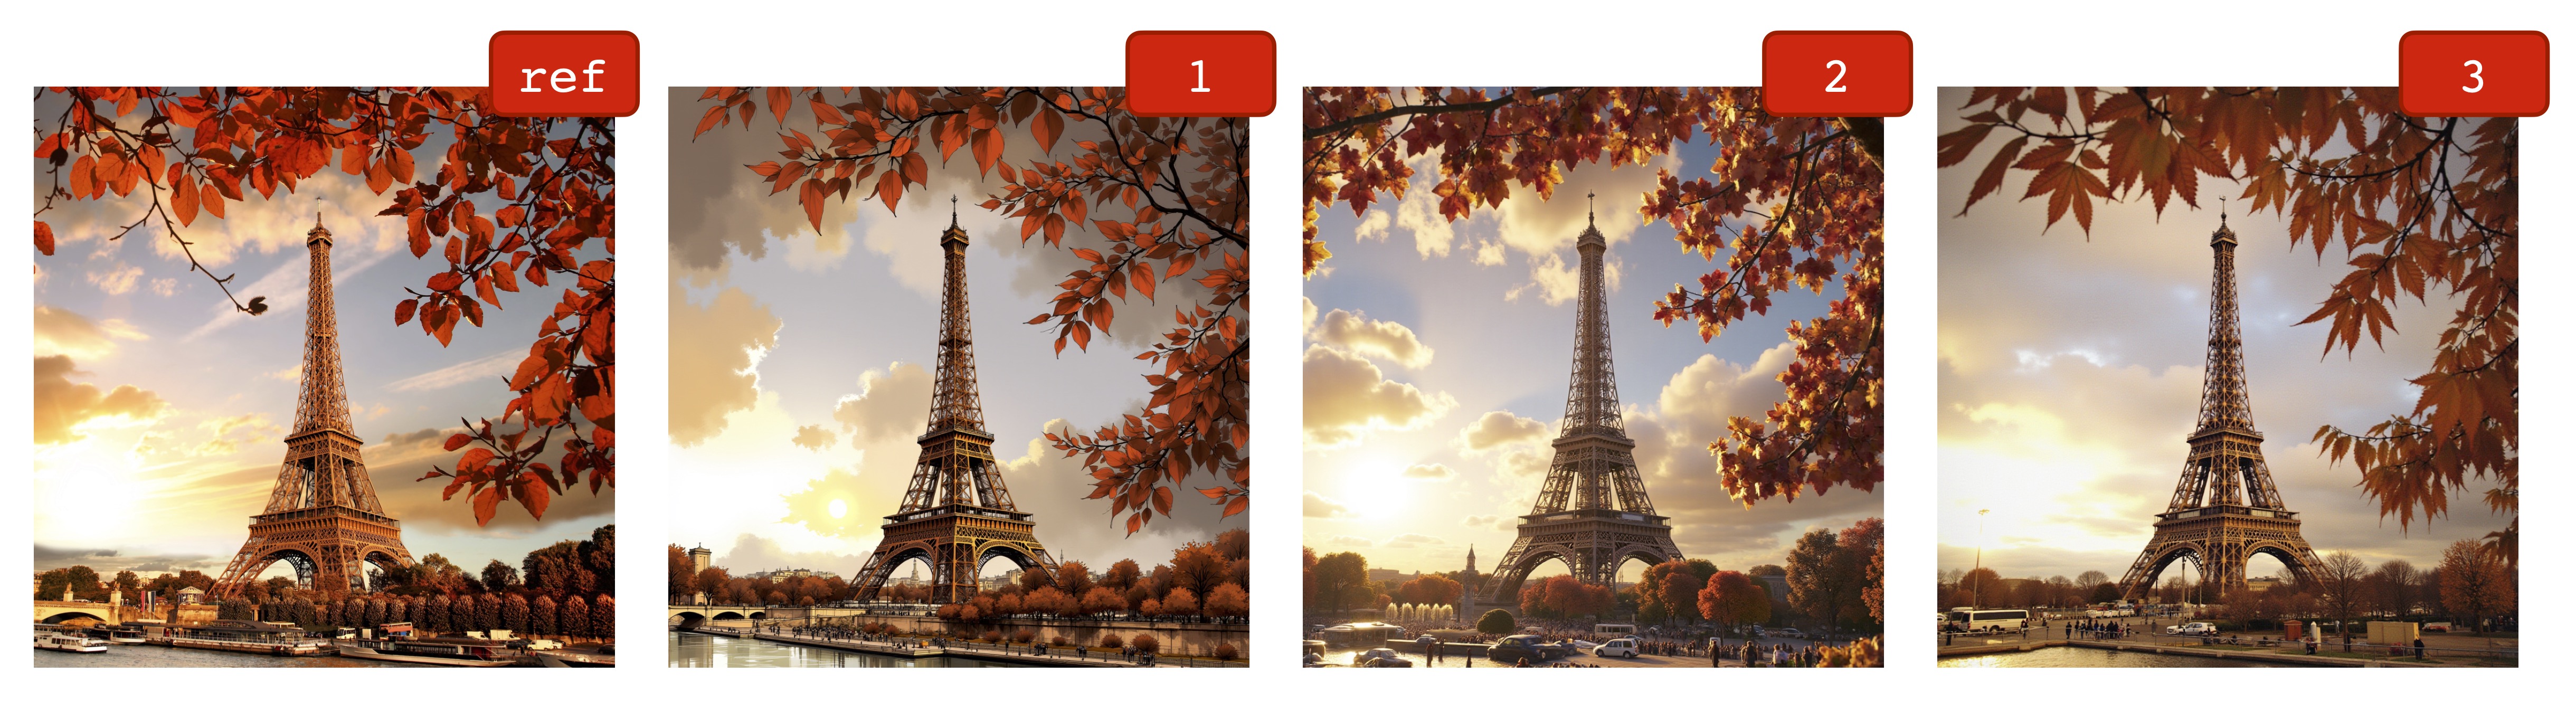
在上面的示例中,使用了素描,使用动画镜头和磁带 - 胶卷相机。
MFLUX支持装载训练有素的LORA适配器(即将到来的实际培训支持)。
以下示例the_hound lora来自@thelastben:
mflux-generate --prompt " sandor clegane " --model dev --steps 20 --seed 43 -q 8 --lora-paths " sandor_clegane_single_layer.safetensors " 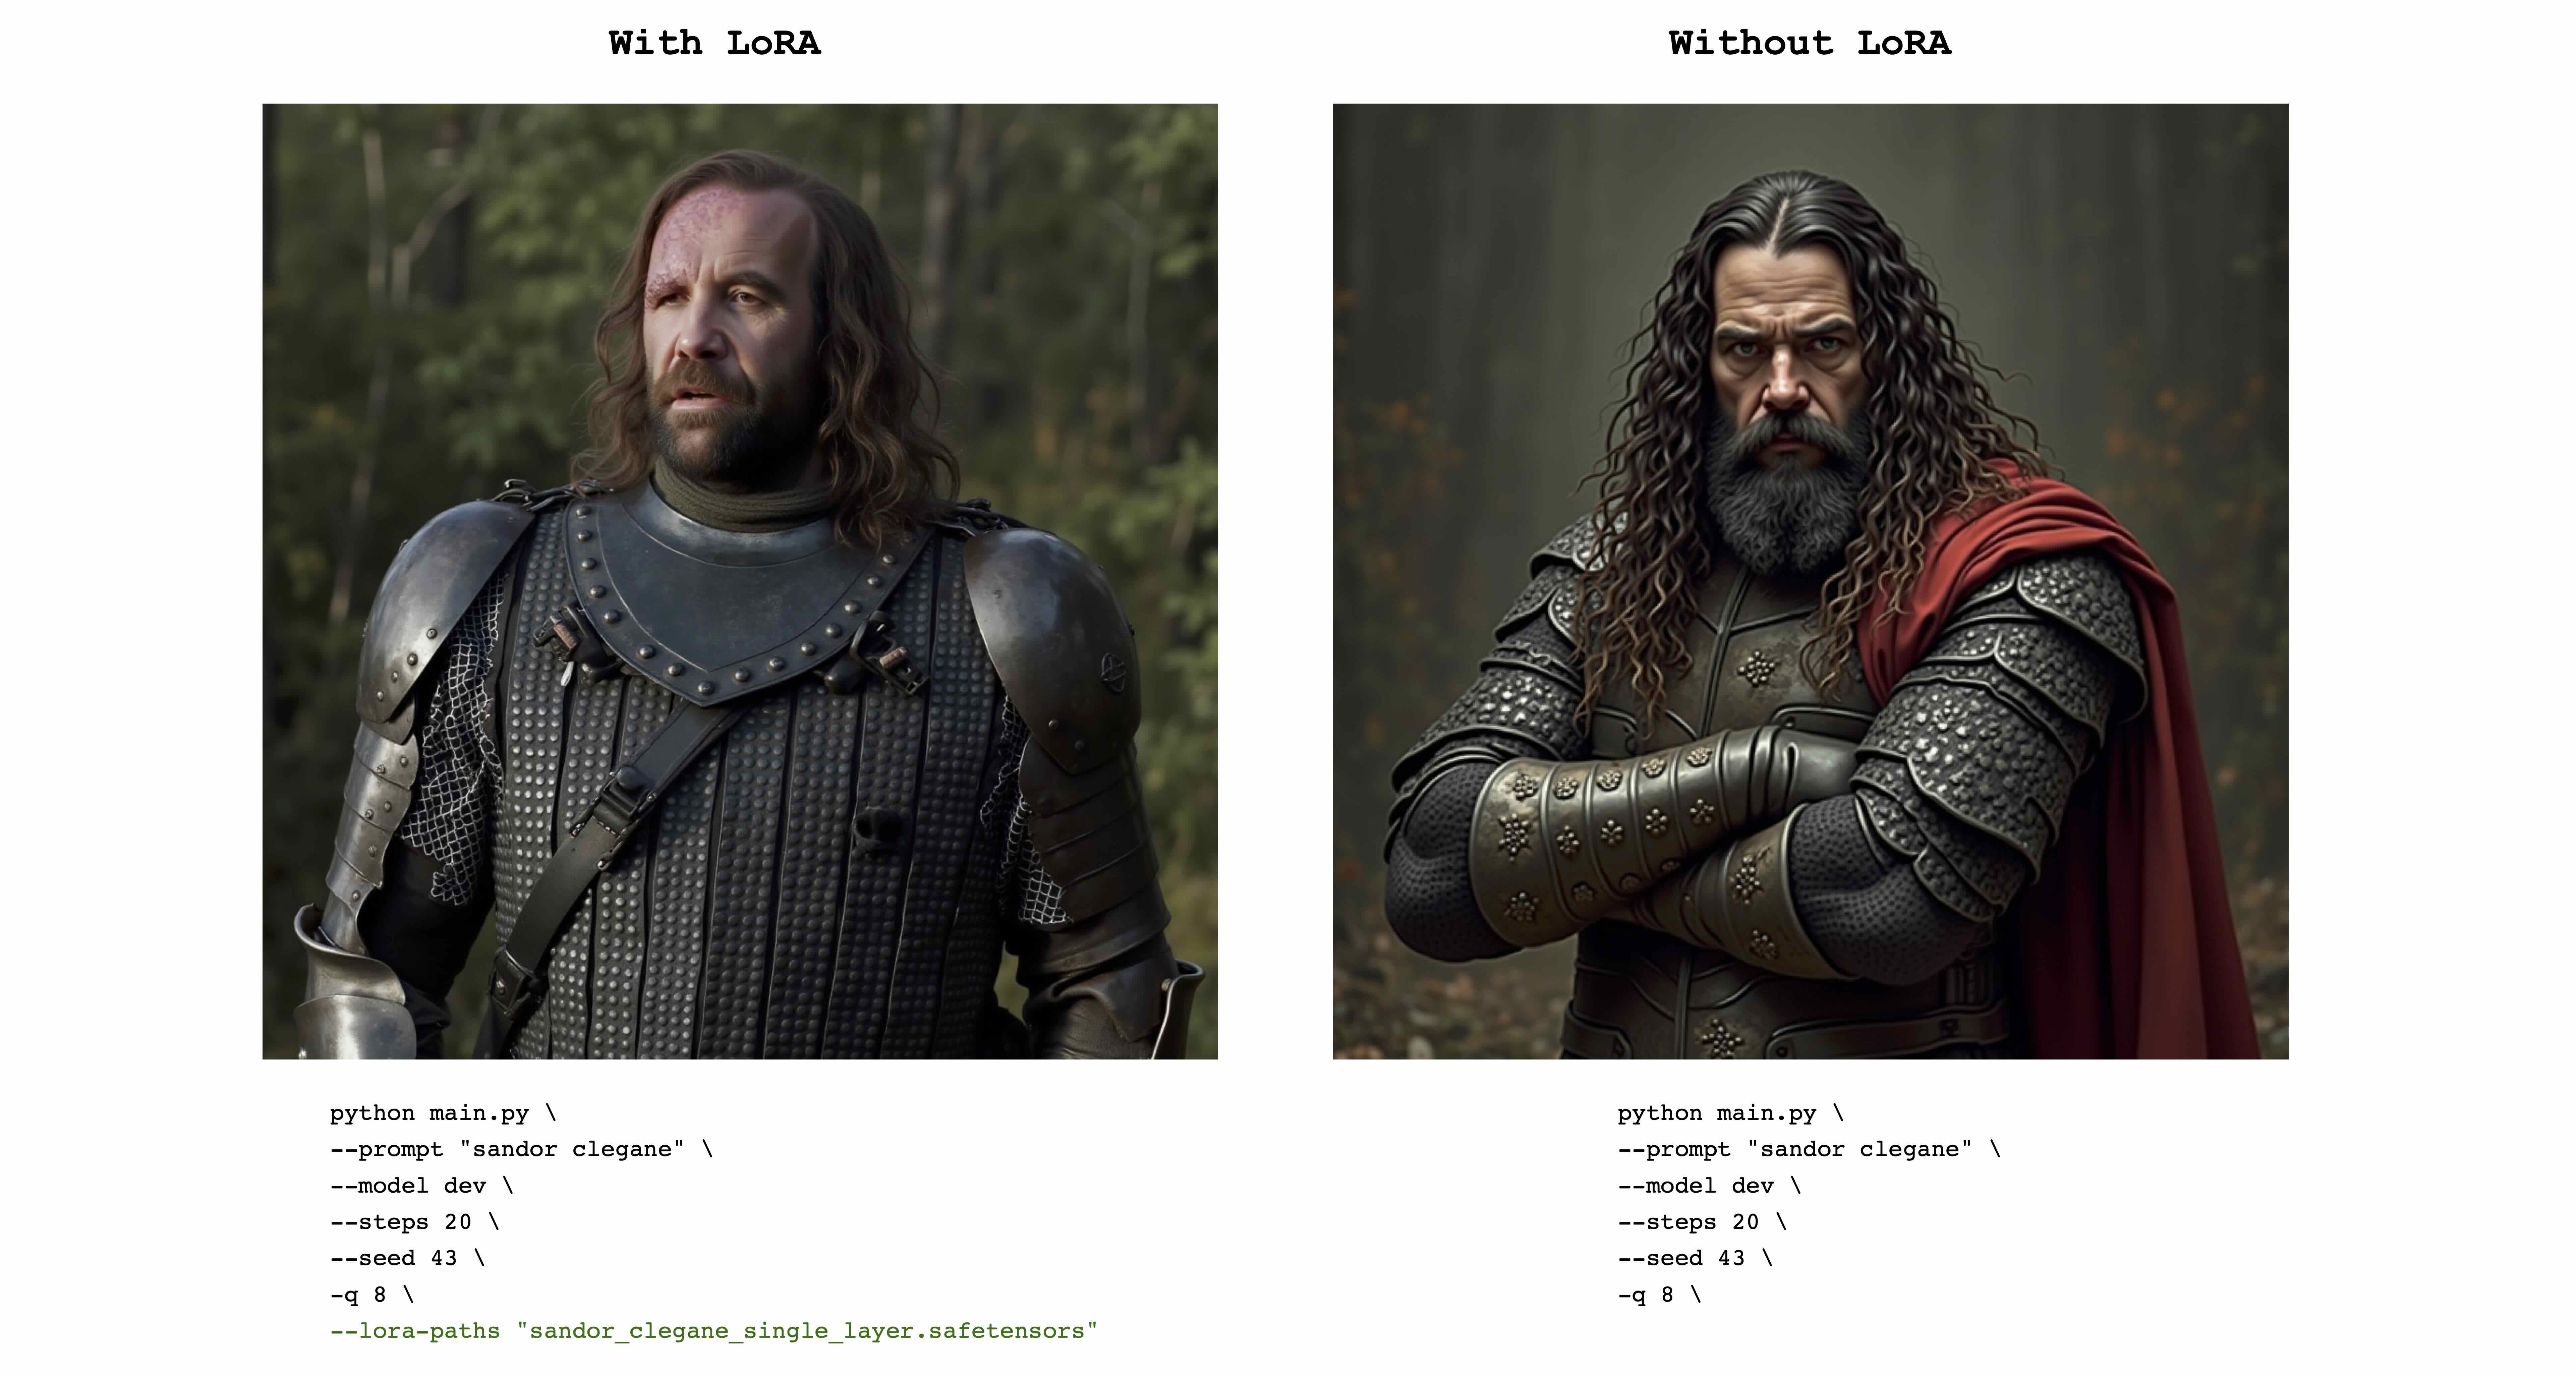
以下示例是 @norod78的flux_1_dev_lora_paper-cutout-cutout-style lora:
mflux-generate --prompt " pikachu, Paper Cutout Style " --model schnell --steps 4 --seed 43 -q 8 --lora-paths " Flux_1_Dev_LoRA_Paper-Cutout-Style.safetensors " 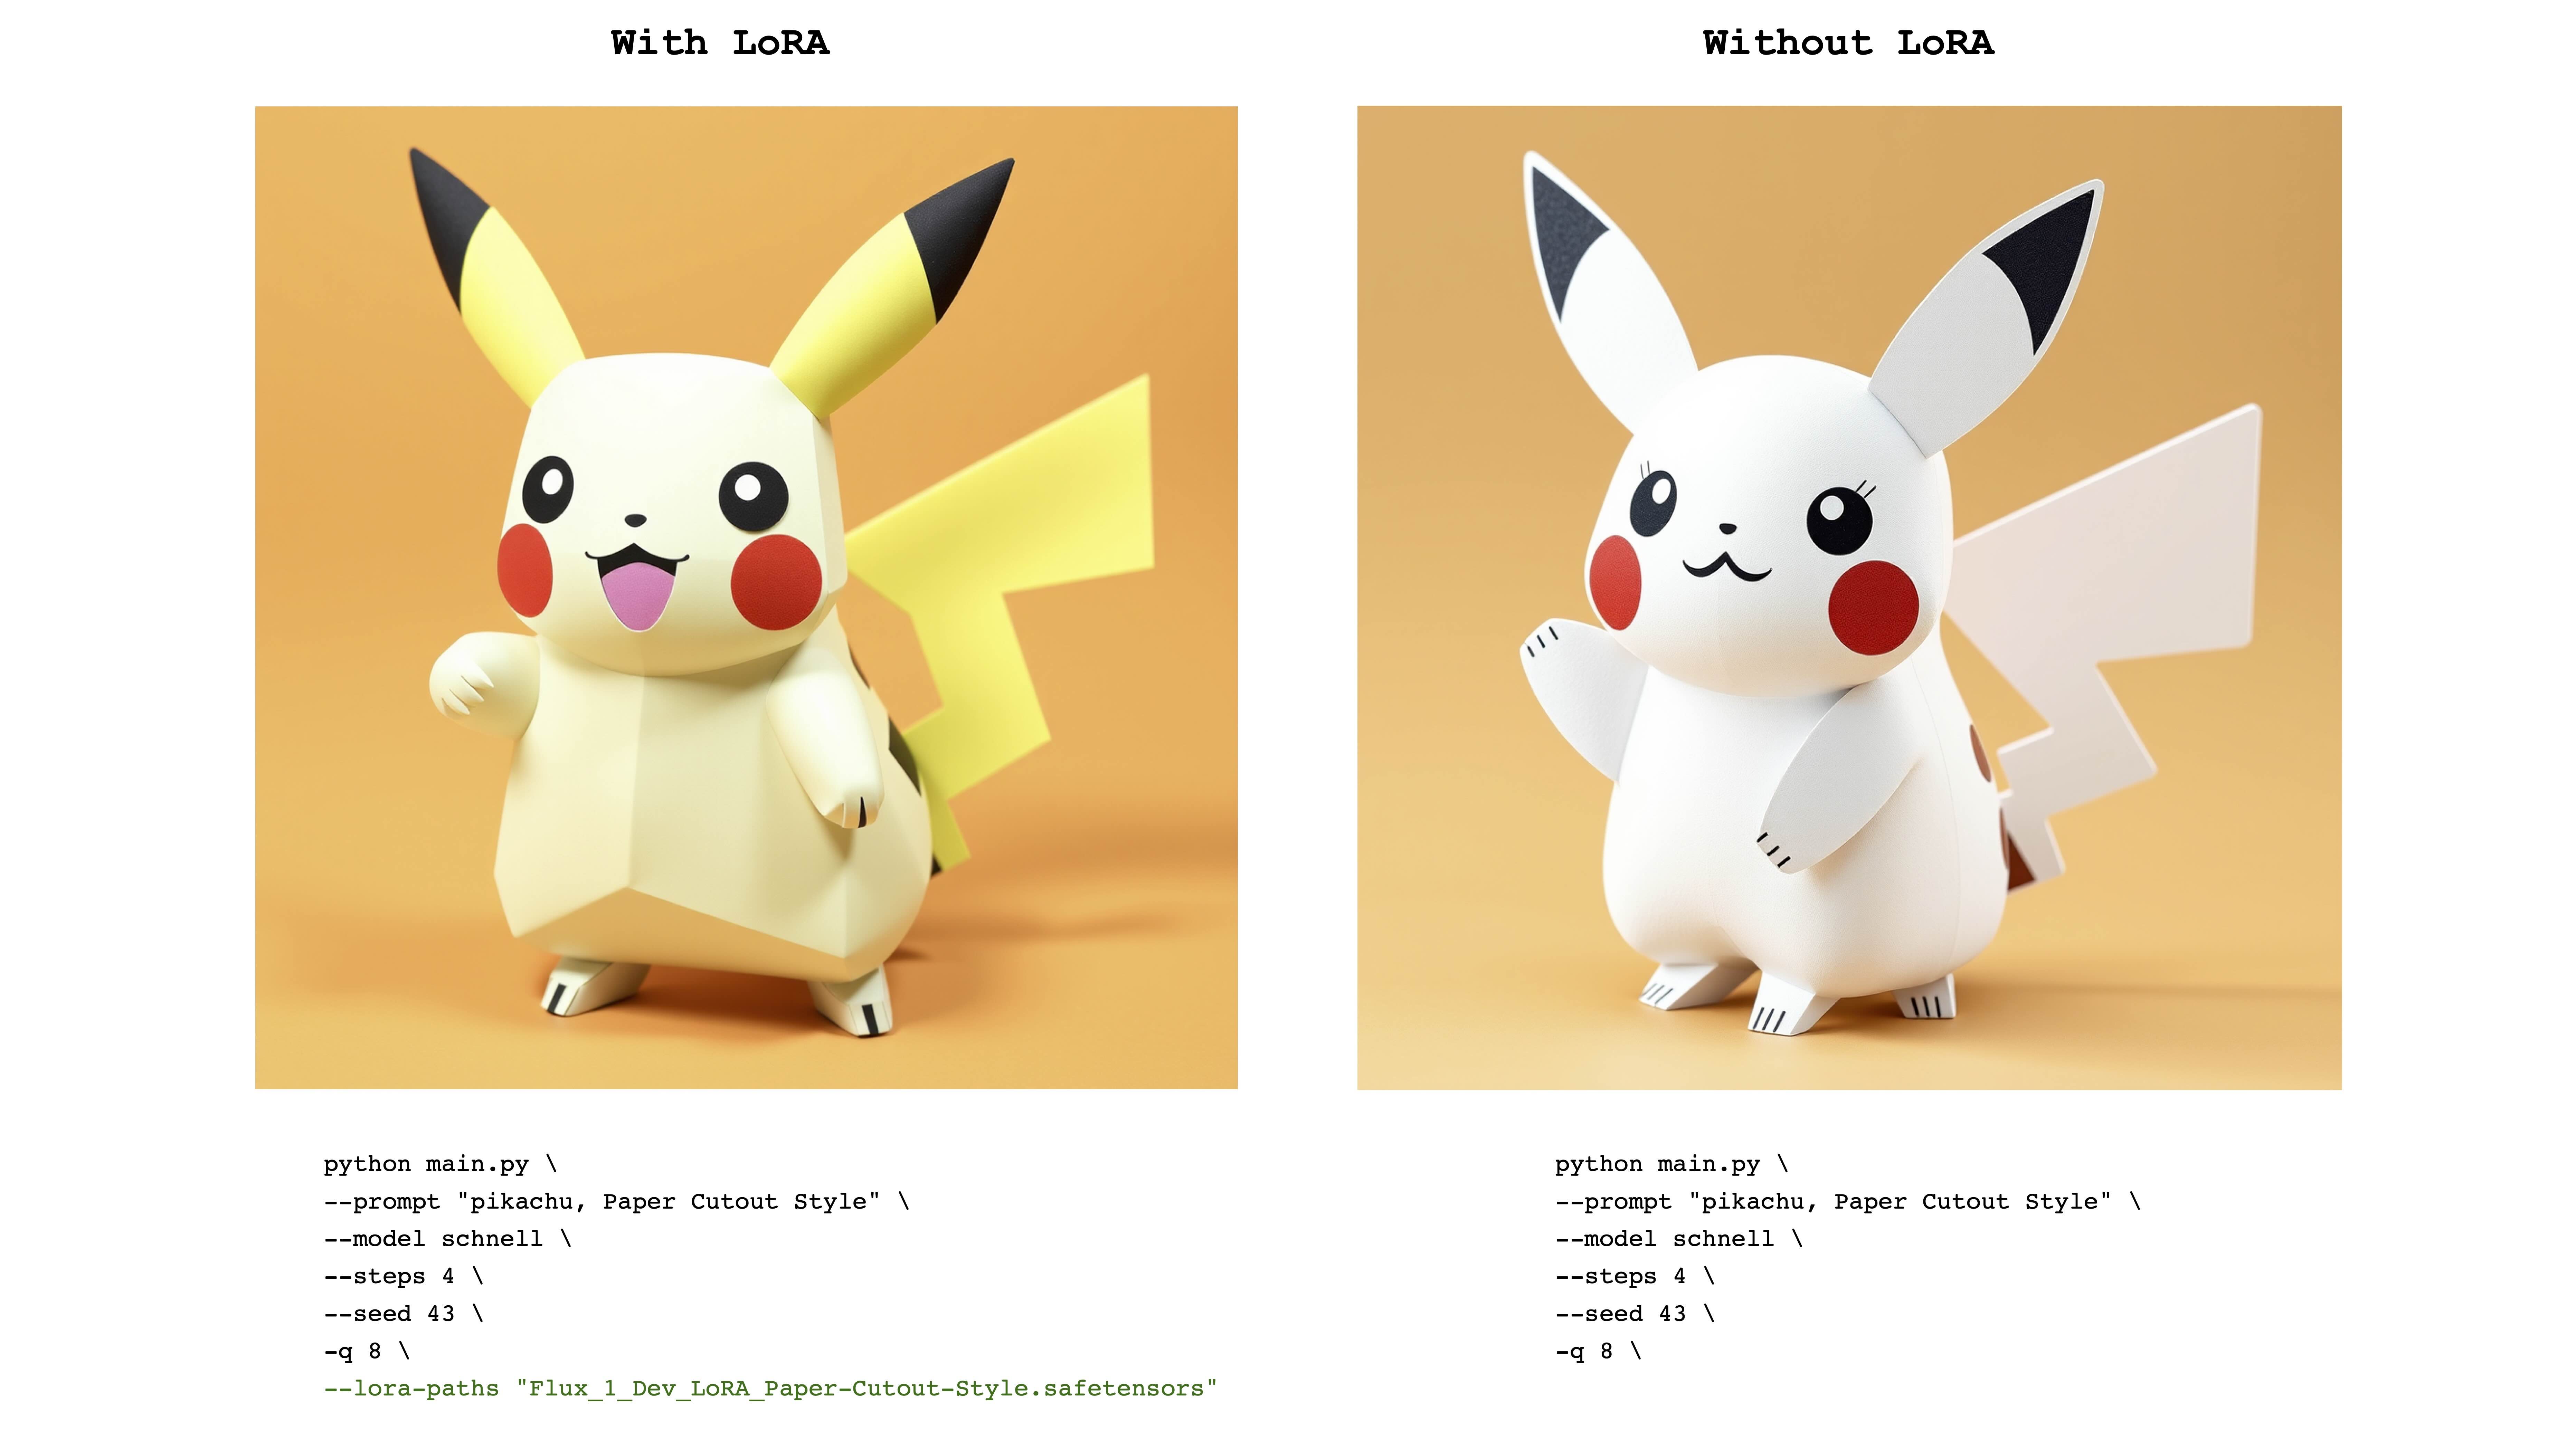
请注意,洛拉训练的权重通常是用触发单词或短语训练的。例如,在后一种情况下,该句子应包括“纸张切割样式”一词。
另请注意,相同的洛拉(Lora)权重可以与schnell和dev型号都很好地工作。请参阅原始的Lora存储库,以查看训练哪种模式。
可以发送多个Loras来结合各个适配器的效果。以下示例结合了上述两个洛拉斯:
mflux-generate
   --prompt " sandor clegane in a forest, Paper Cutout Style "
   --model dev
   --steps 20
   --seed 43
   --lora-paths sandor_clegane_single_layer.safetensors Flux_1_Dev_LoRA_Paper-Cutout-Style.safetensors
   --lora-scales 1.0 1.0
   -q 8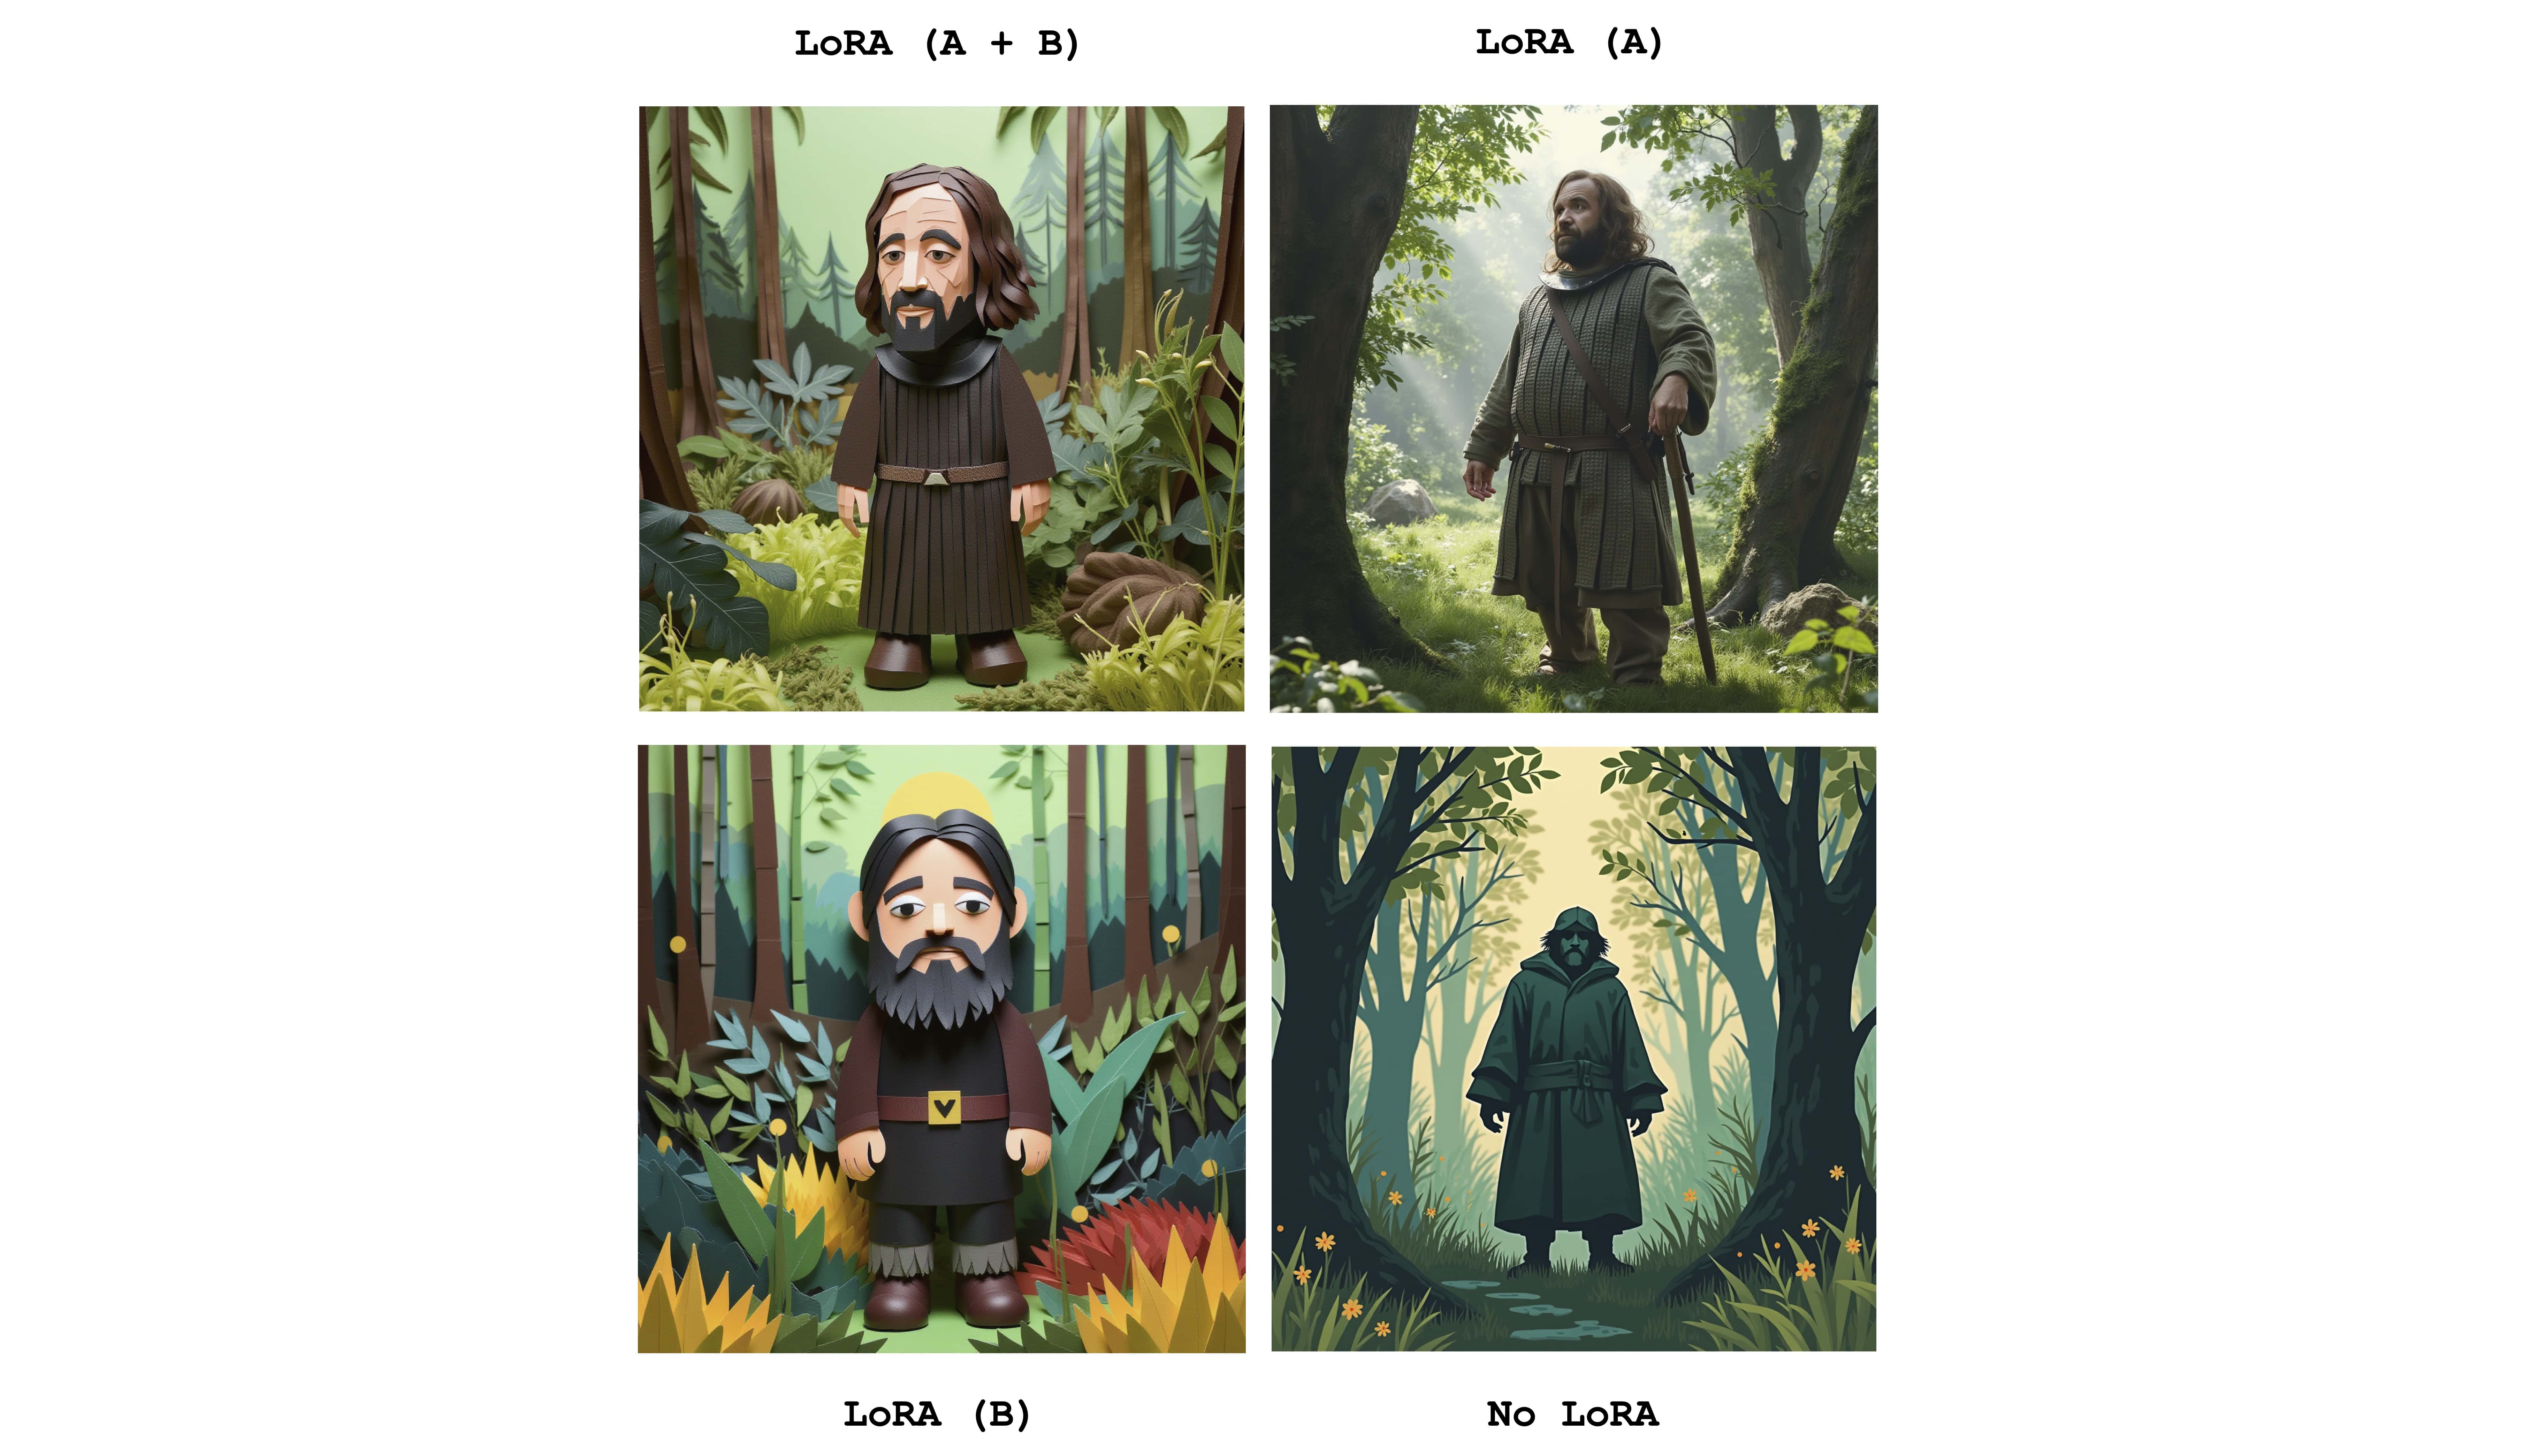
只是为了查看差异,此图像显示了四种情况:一种使两个适配器完全活跃,部分活跃并且根本没有Lora。上面的示例还显示了--lora-scales标志的用法。
由于不同的微调服务可以使用不同的通量实现,因此在这些服务上训练的相应的LORA权重可以彼此不同。 Mflux的目的是支持最常见的。下表显示了当前受支持格式:
| 支持 | 姓名 | 例子 | 笔记 |
|---|---|---|---|
| ✅ | BFL | Civitai-印象派 | Civitai上的许多事情似乎有效 |
| ✅ | 扩散器 | flux_1_dev_lora_paper-cutout风格 | |
| XLABS-AI | 通量现实的洛拉 |
要报告其他格式,示例或其他与LORA格式支持有关的建议,请参见第47期。
Mflux具有控制网络的支持,以对图像生成进行更细粒度的控制。通过通过--controlnet-image-path提供参考图像和通过--controlnet-strength强度参数,您可以将生成引导到参考图像。
mflux-generate-controlnet
  --prompt " A comic strip with a joker in a purple suit "
  --model dev
  --steps 20
  --seed 1727047657
  --height 1066
  --width 692
  -q 8
  --lora-paths " Dark Comic - s0_8 g4.safetensors "
  --controlnet-image-path " reference.png "
  --controlnet-strength 0.5
  --controlnet-save-canny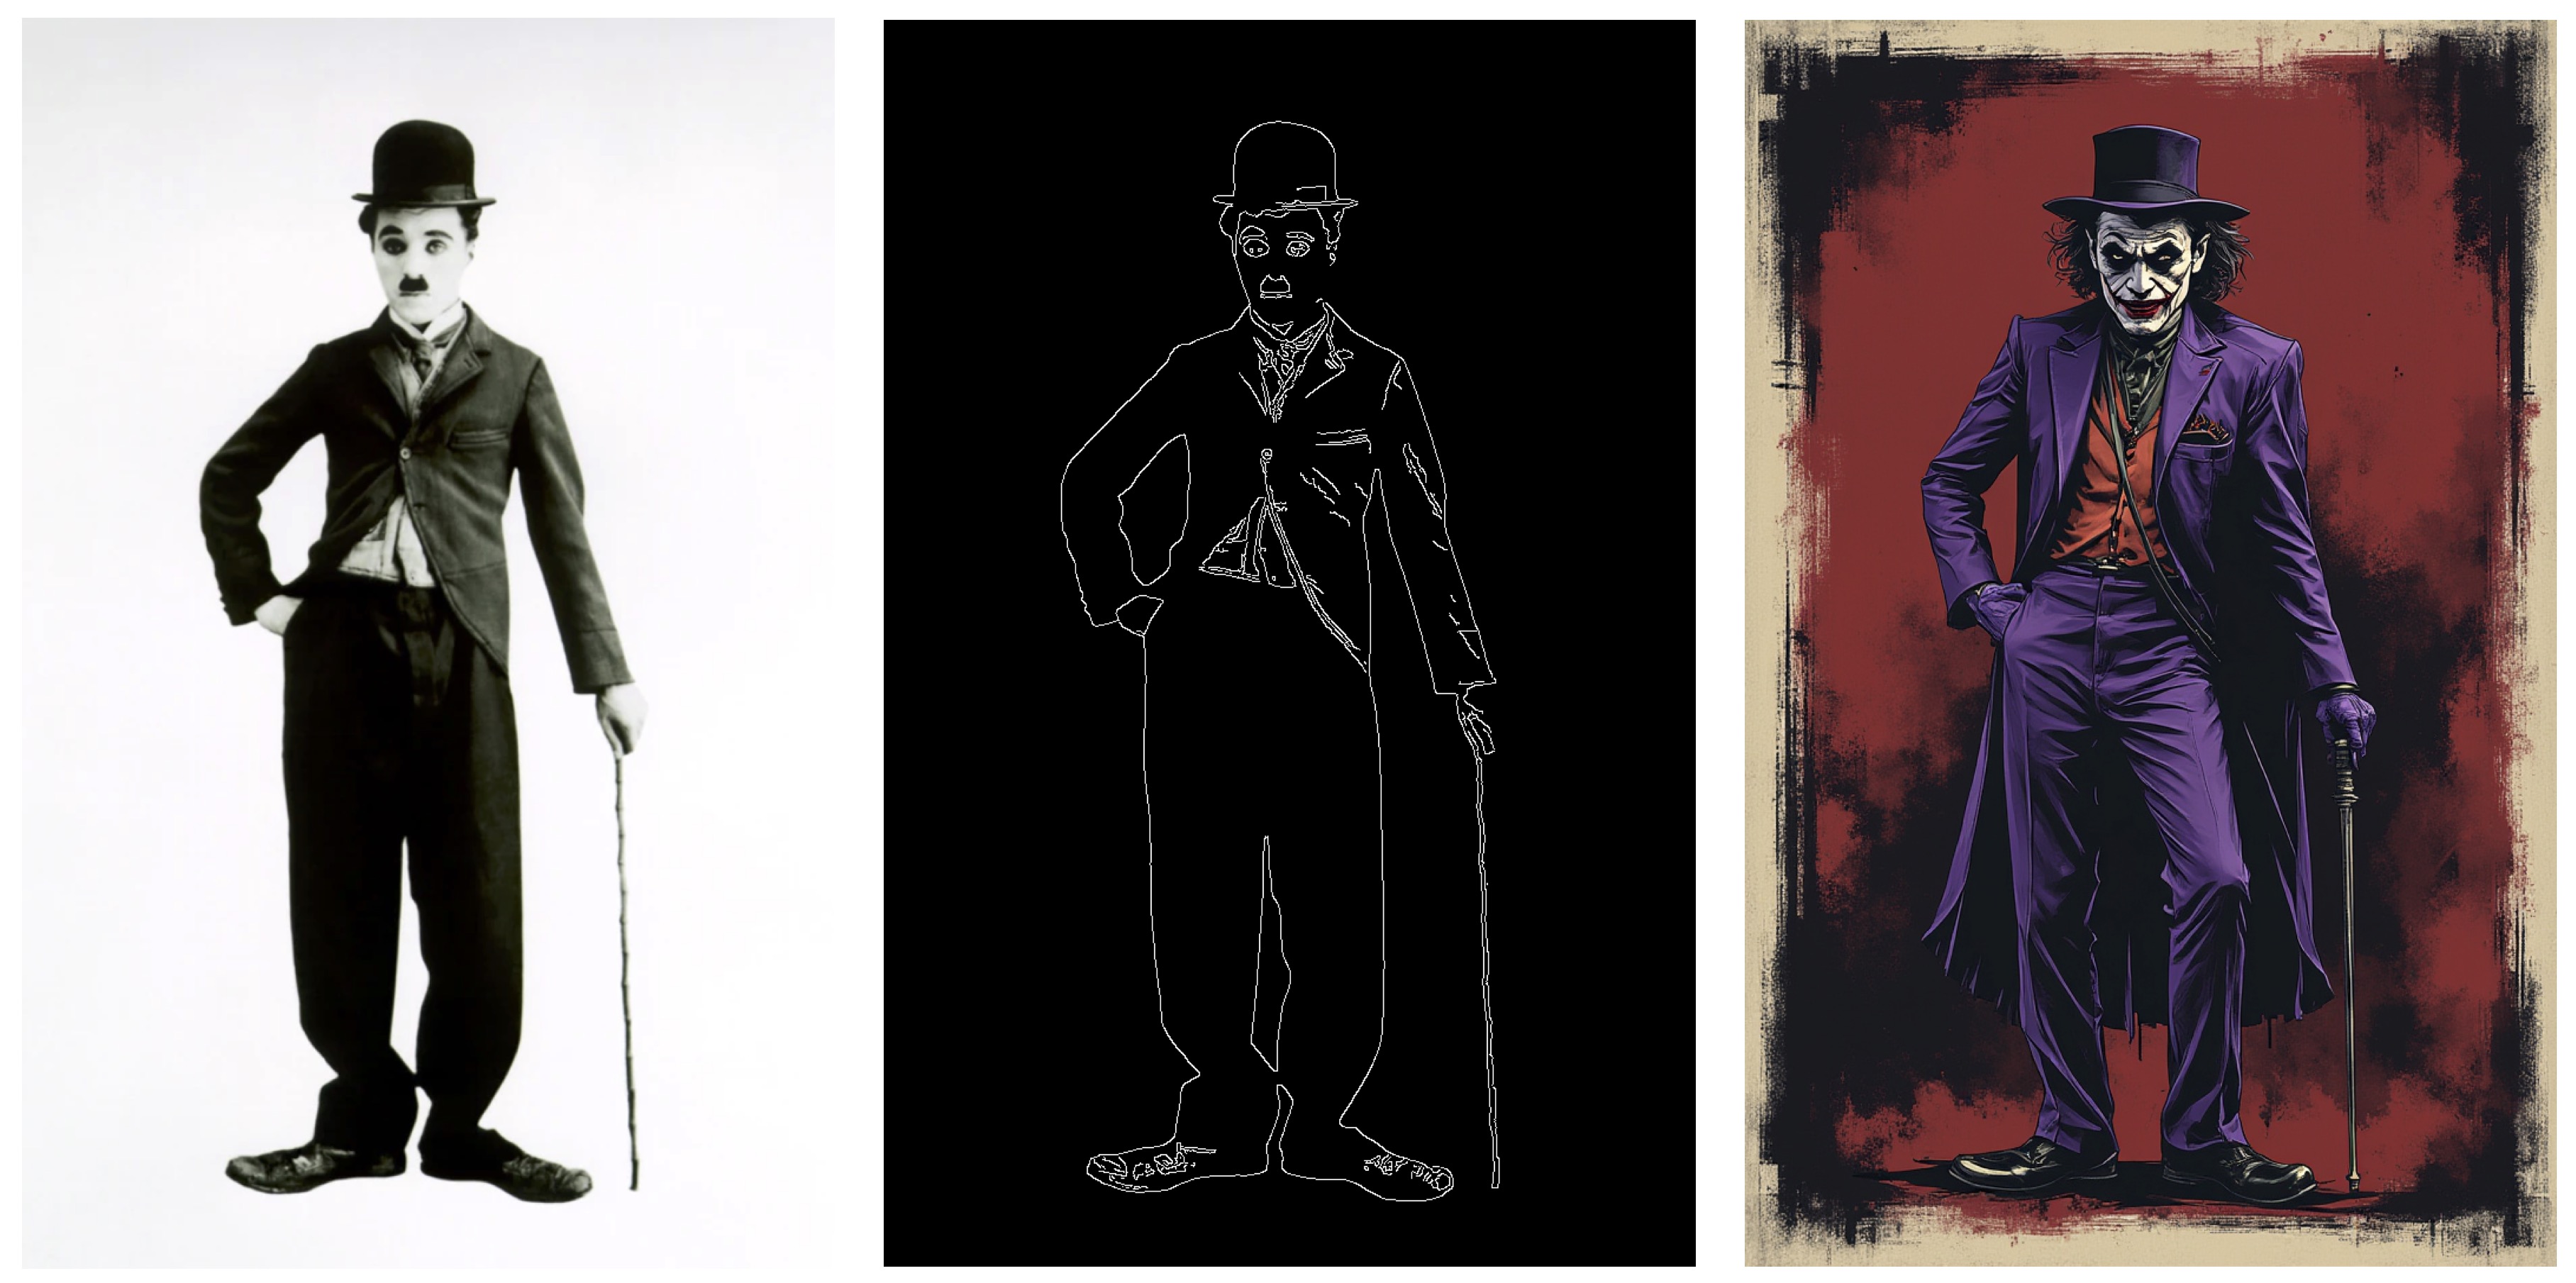
此示例将ControlNet参考图像与Lora Dark Comic Flux结合在一起。
generate-controlnet命令自动发生。目前,使用的控制网是Instantx/flux.1-dev-controlnet-canne,该canne是dev模型的训练。它可以与schnell合作,但不能保证性能。
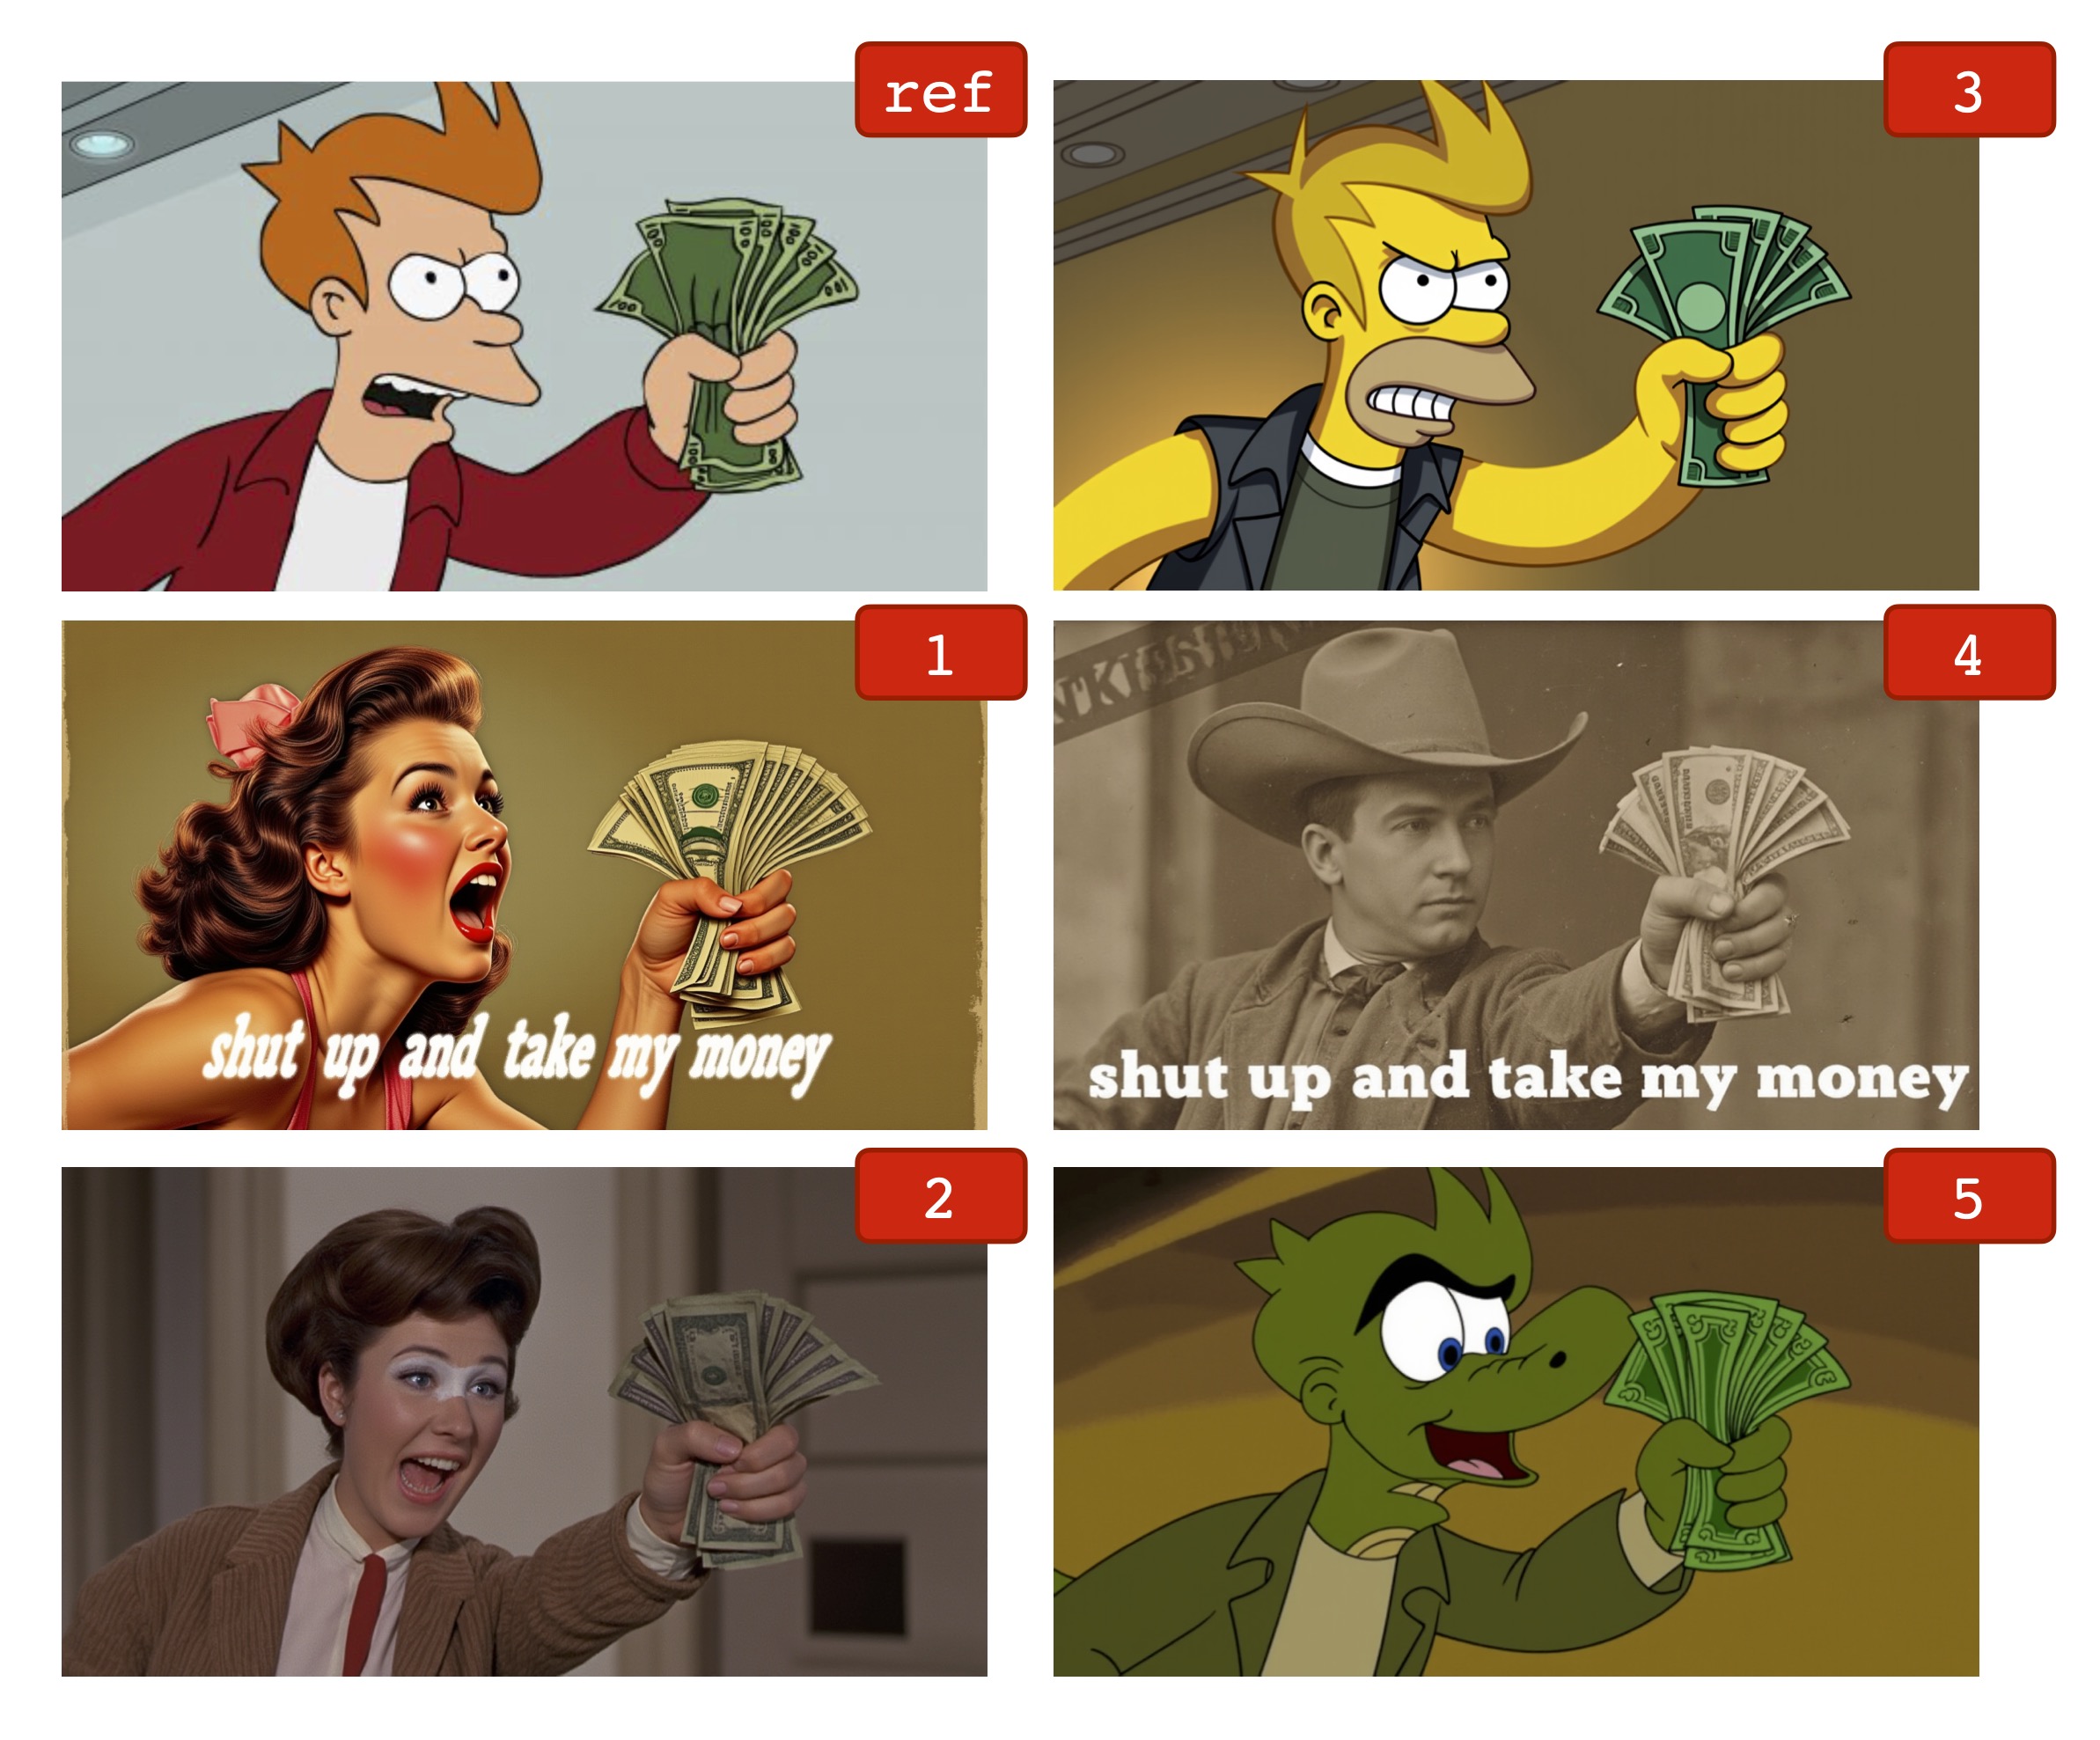
ControlNet也可以与Lora适配器一起工作。在下面的示例中,相同的参考图像用作具有不同提示和洛拉适配器的控制网络输入。
export HF_HUB_DISABLE_PROGRESS_BARS=1--argsalias mflux-dev='mflux-generate --model dev'alias mflux-schnell='mflux-generate --model schnell --metadata'该项目已根据MIT许可获得许可。


